
Leaderboard


Popular Content
Showing content with the highest reputation on 12/23/23 in all areas
-
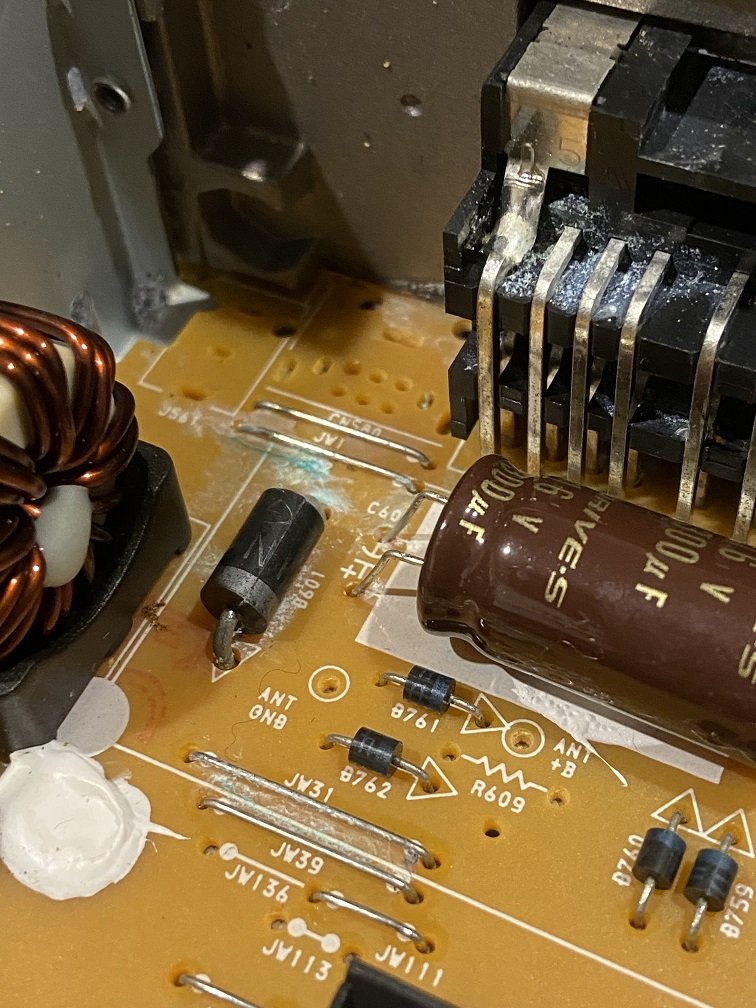
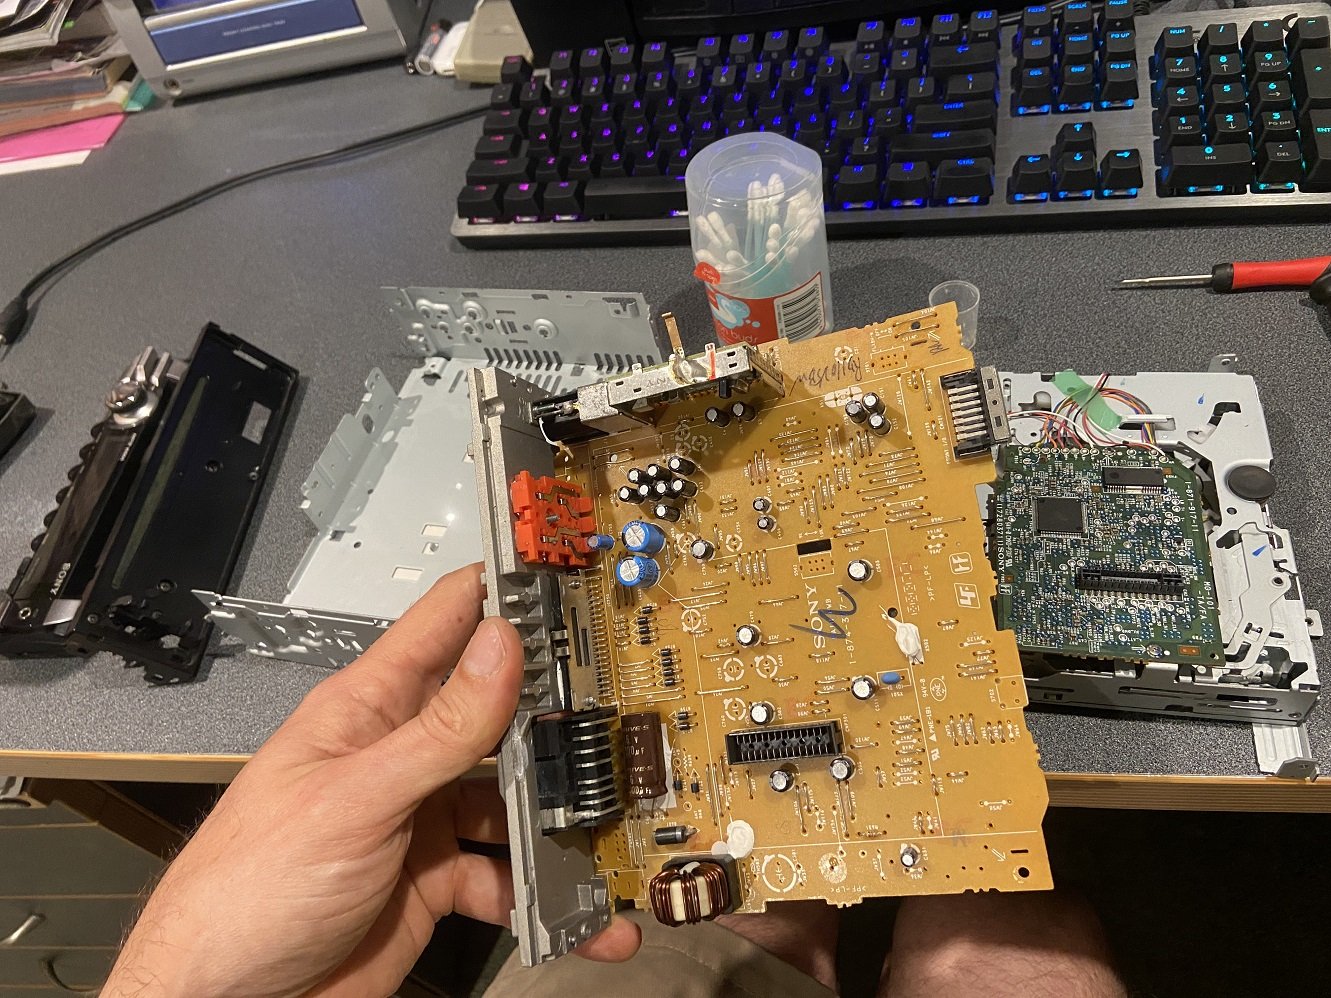
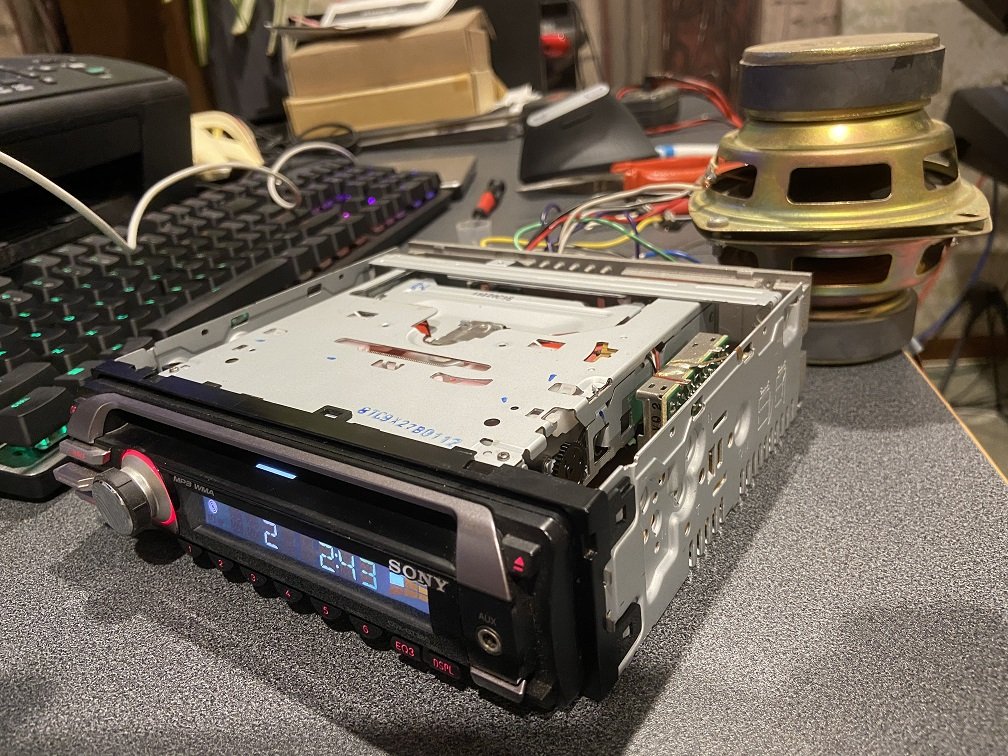
Headlining: The Toy Shop here in Auckland created their own fibreglass mould specially for XJS headlinings, and their price is....... $1,800.00 plus GST. It's slightly cheaper to ship a new headlining from the other side of the world. Auto: I went to see an automatic transmission place, and regrettably I've booked the Jag in with them to give its ZF 4HP22 auto a birthday. The auto has always been a bit noisy and a bit rough during my ownership, and I guess I tempted fate by having the fluid changed and occasionally driving like I just borrowed some oil paintings. It kinda sucks to be spending money on an automatic transmission, but manual parts cars don't exist, and manual conversion kits only exist for the V12. Tell me I should spend more money on a Chevy LS swap and end up missing Nats here. I did manage to improve the drivers window operation by flipping the rubber guide seal around, and I lubricated the passenger side central locking so much that it might actually work reliably for once. For the radio, I wasn't lucky enough for the problem to have been caused by speaker wiring. It was caused by water leaks. This quote from the XJ-S Barry Bible will explain: Can you believe the official fix for various disastrous design decisions in the A/C system is to fit a condensation deflector shield? Guess whose car is prior to VIN 163790 but isn't fitted with one. As part of diagnosing this, I dug out an older head unit which I originally bought for my Alfa ~15 years ago, and as an extra bonus I discovered my missing Iron Maiden greatest hits CD was still in it. I strategically taped over some of this head unit's vent holes to keep any water from getting in, and I figured I'd run it in the Jag for a while. Then I took apart the faulty head unit and cleaned the corrosion.... I reassembled it and set it up on a test bench running off an AC adaptor... It makes noise again! Jolly good show. Now I must build a condensation deflector shield.
 14 points
 -
Popped into work, grabbed some Mazda Premacy pads (same as the genuine Jaguar ATE ones but for a fraction the price) and tried to remove the old pad material. After a few minutes with a chisel, I wasn't happy with the surface finish and they had a decent wear lip so bought some $80 rotors on clearance at Repco.7 points
-
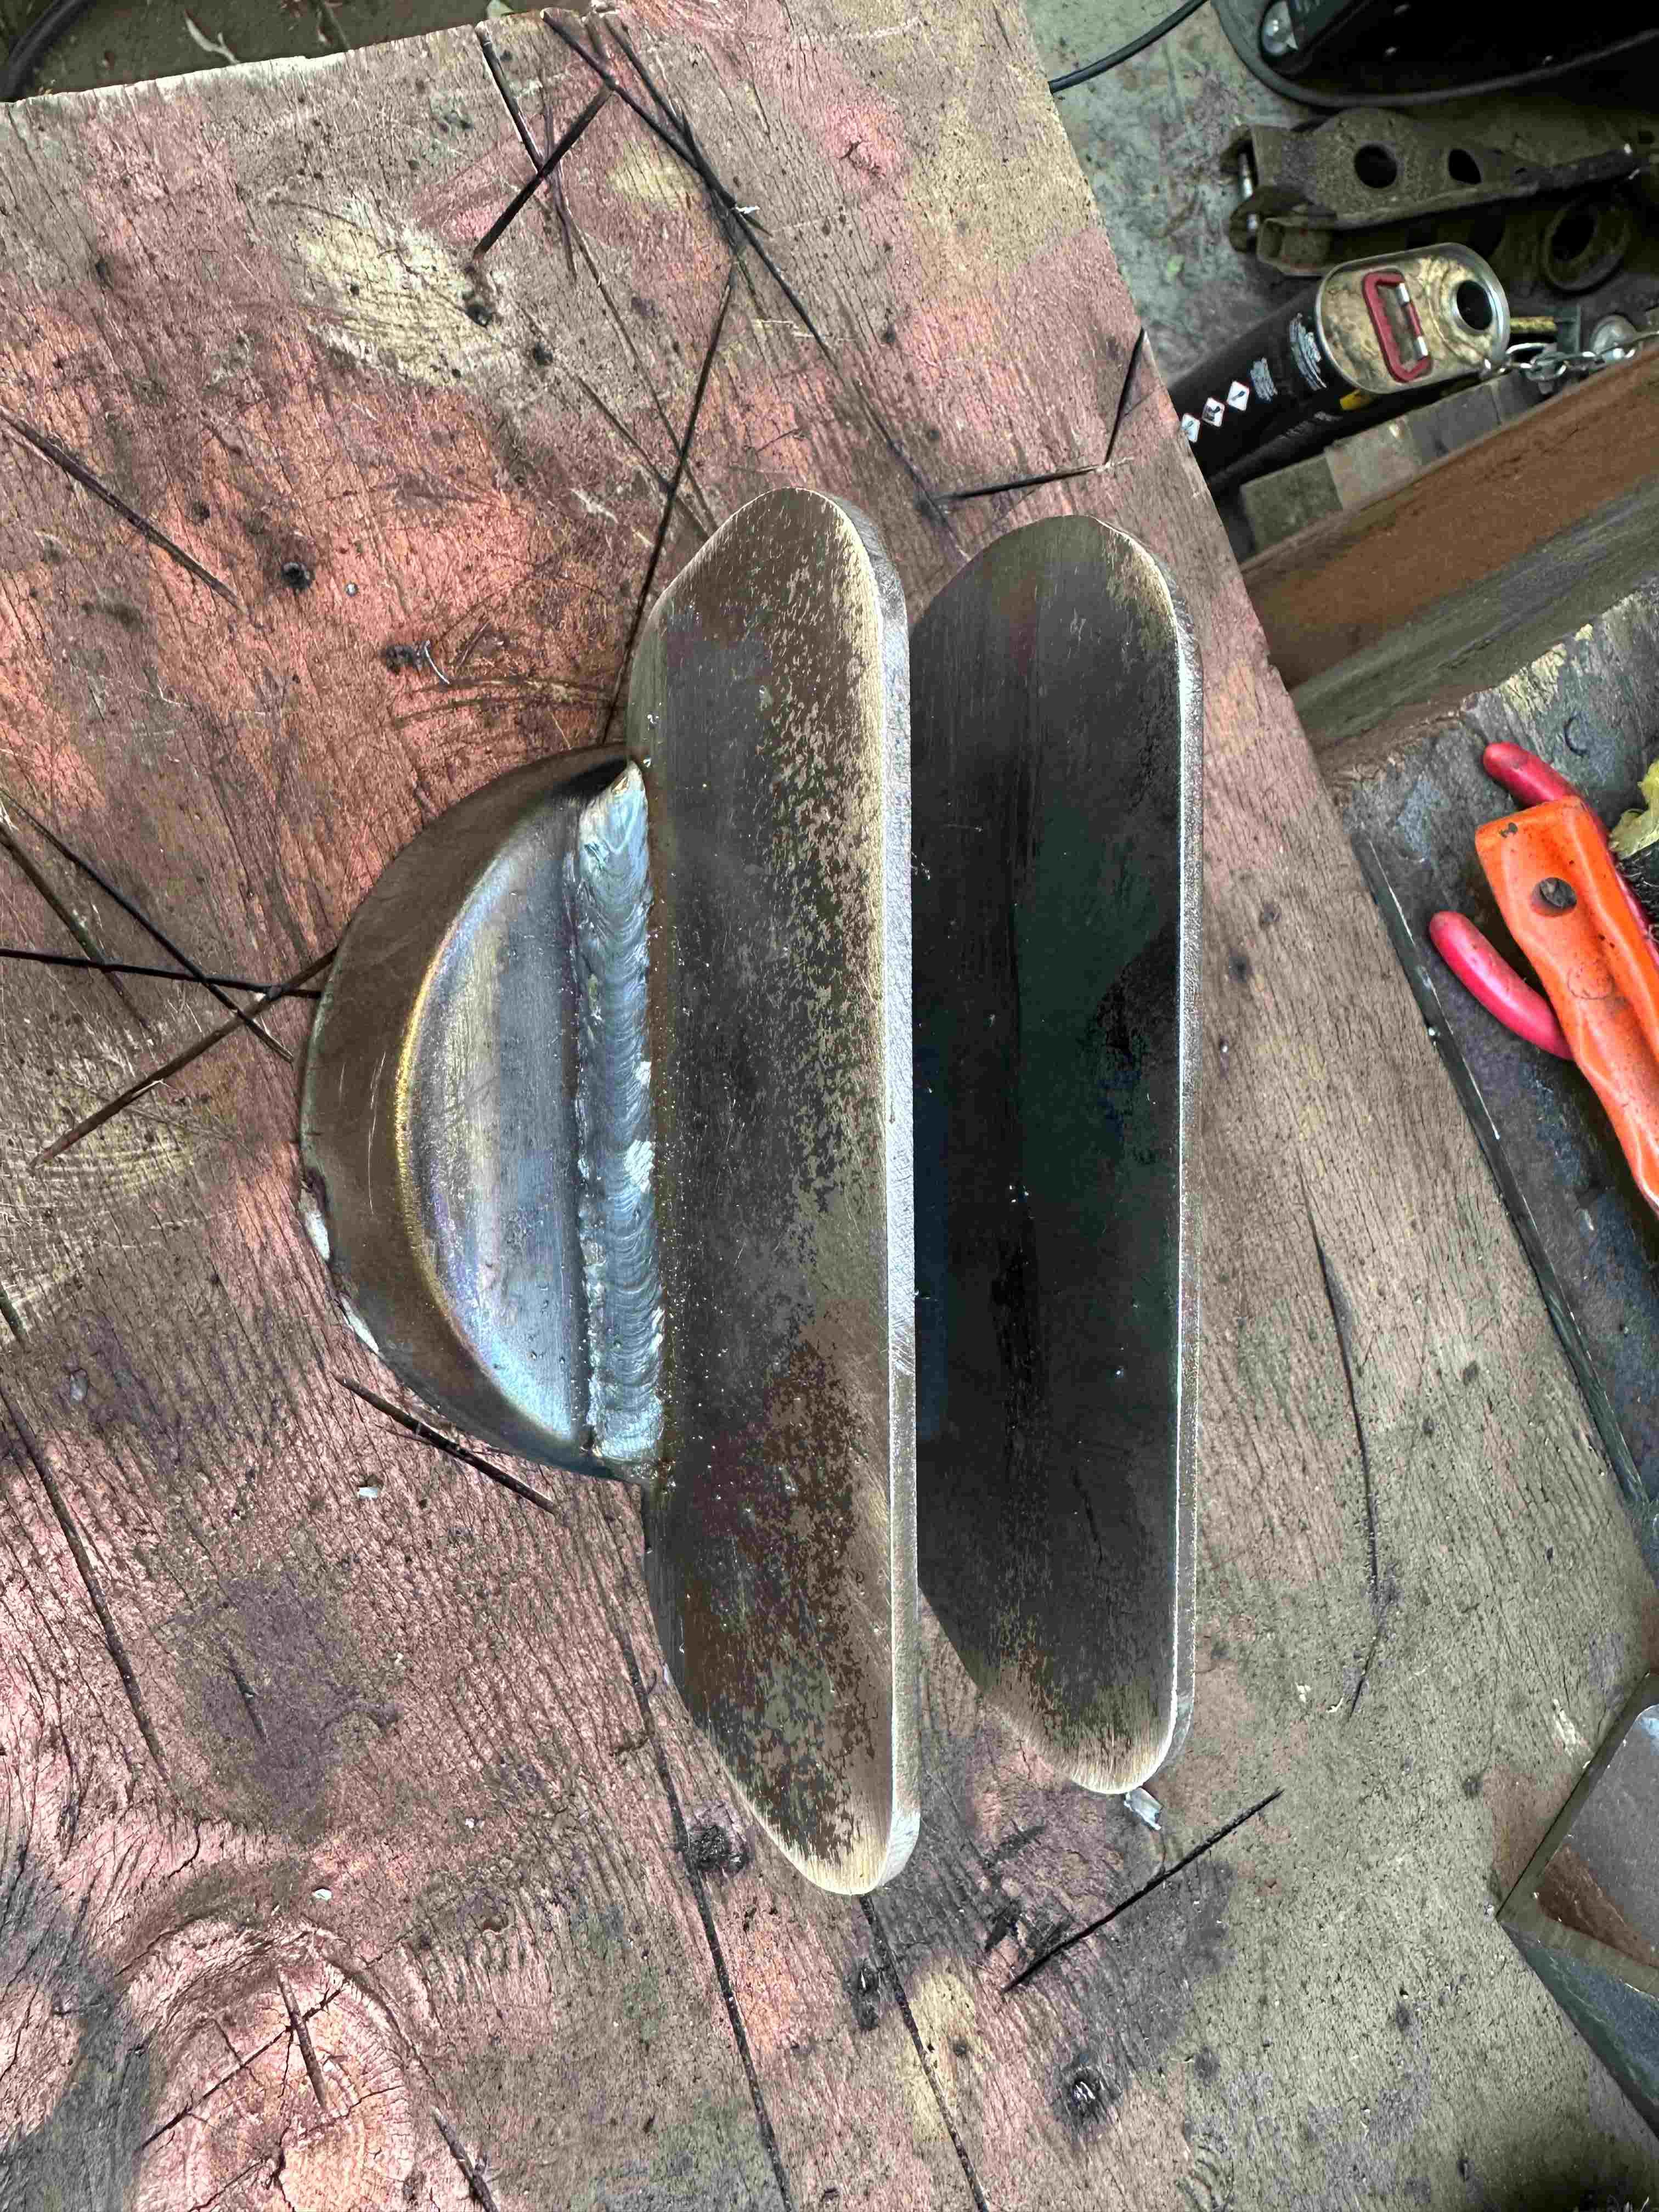
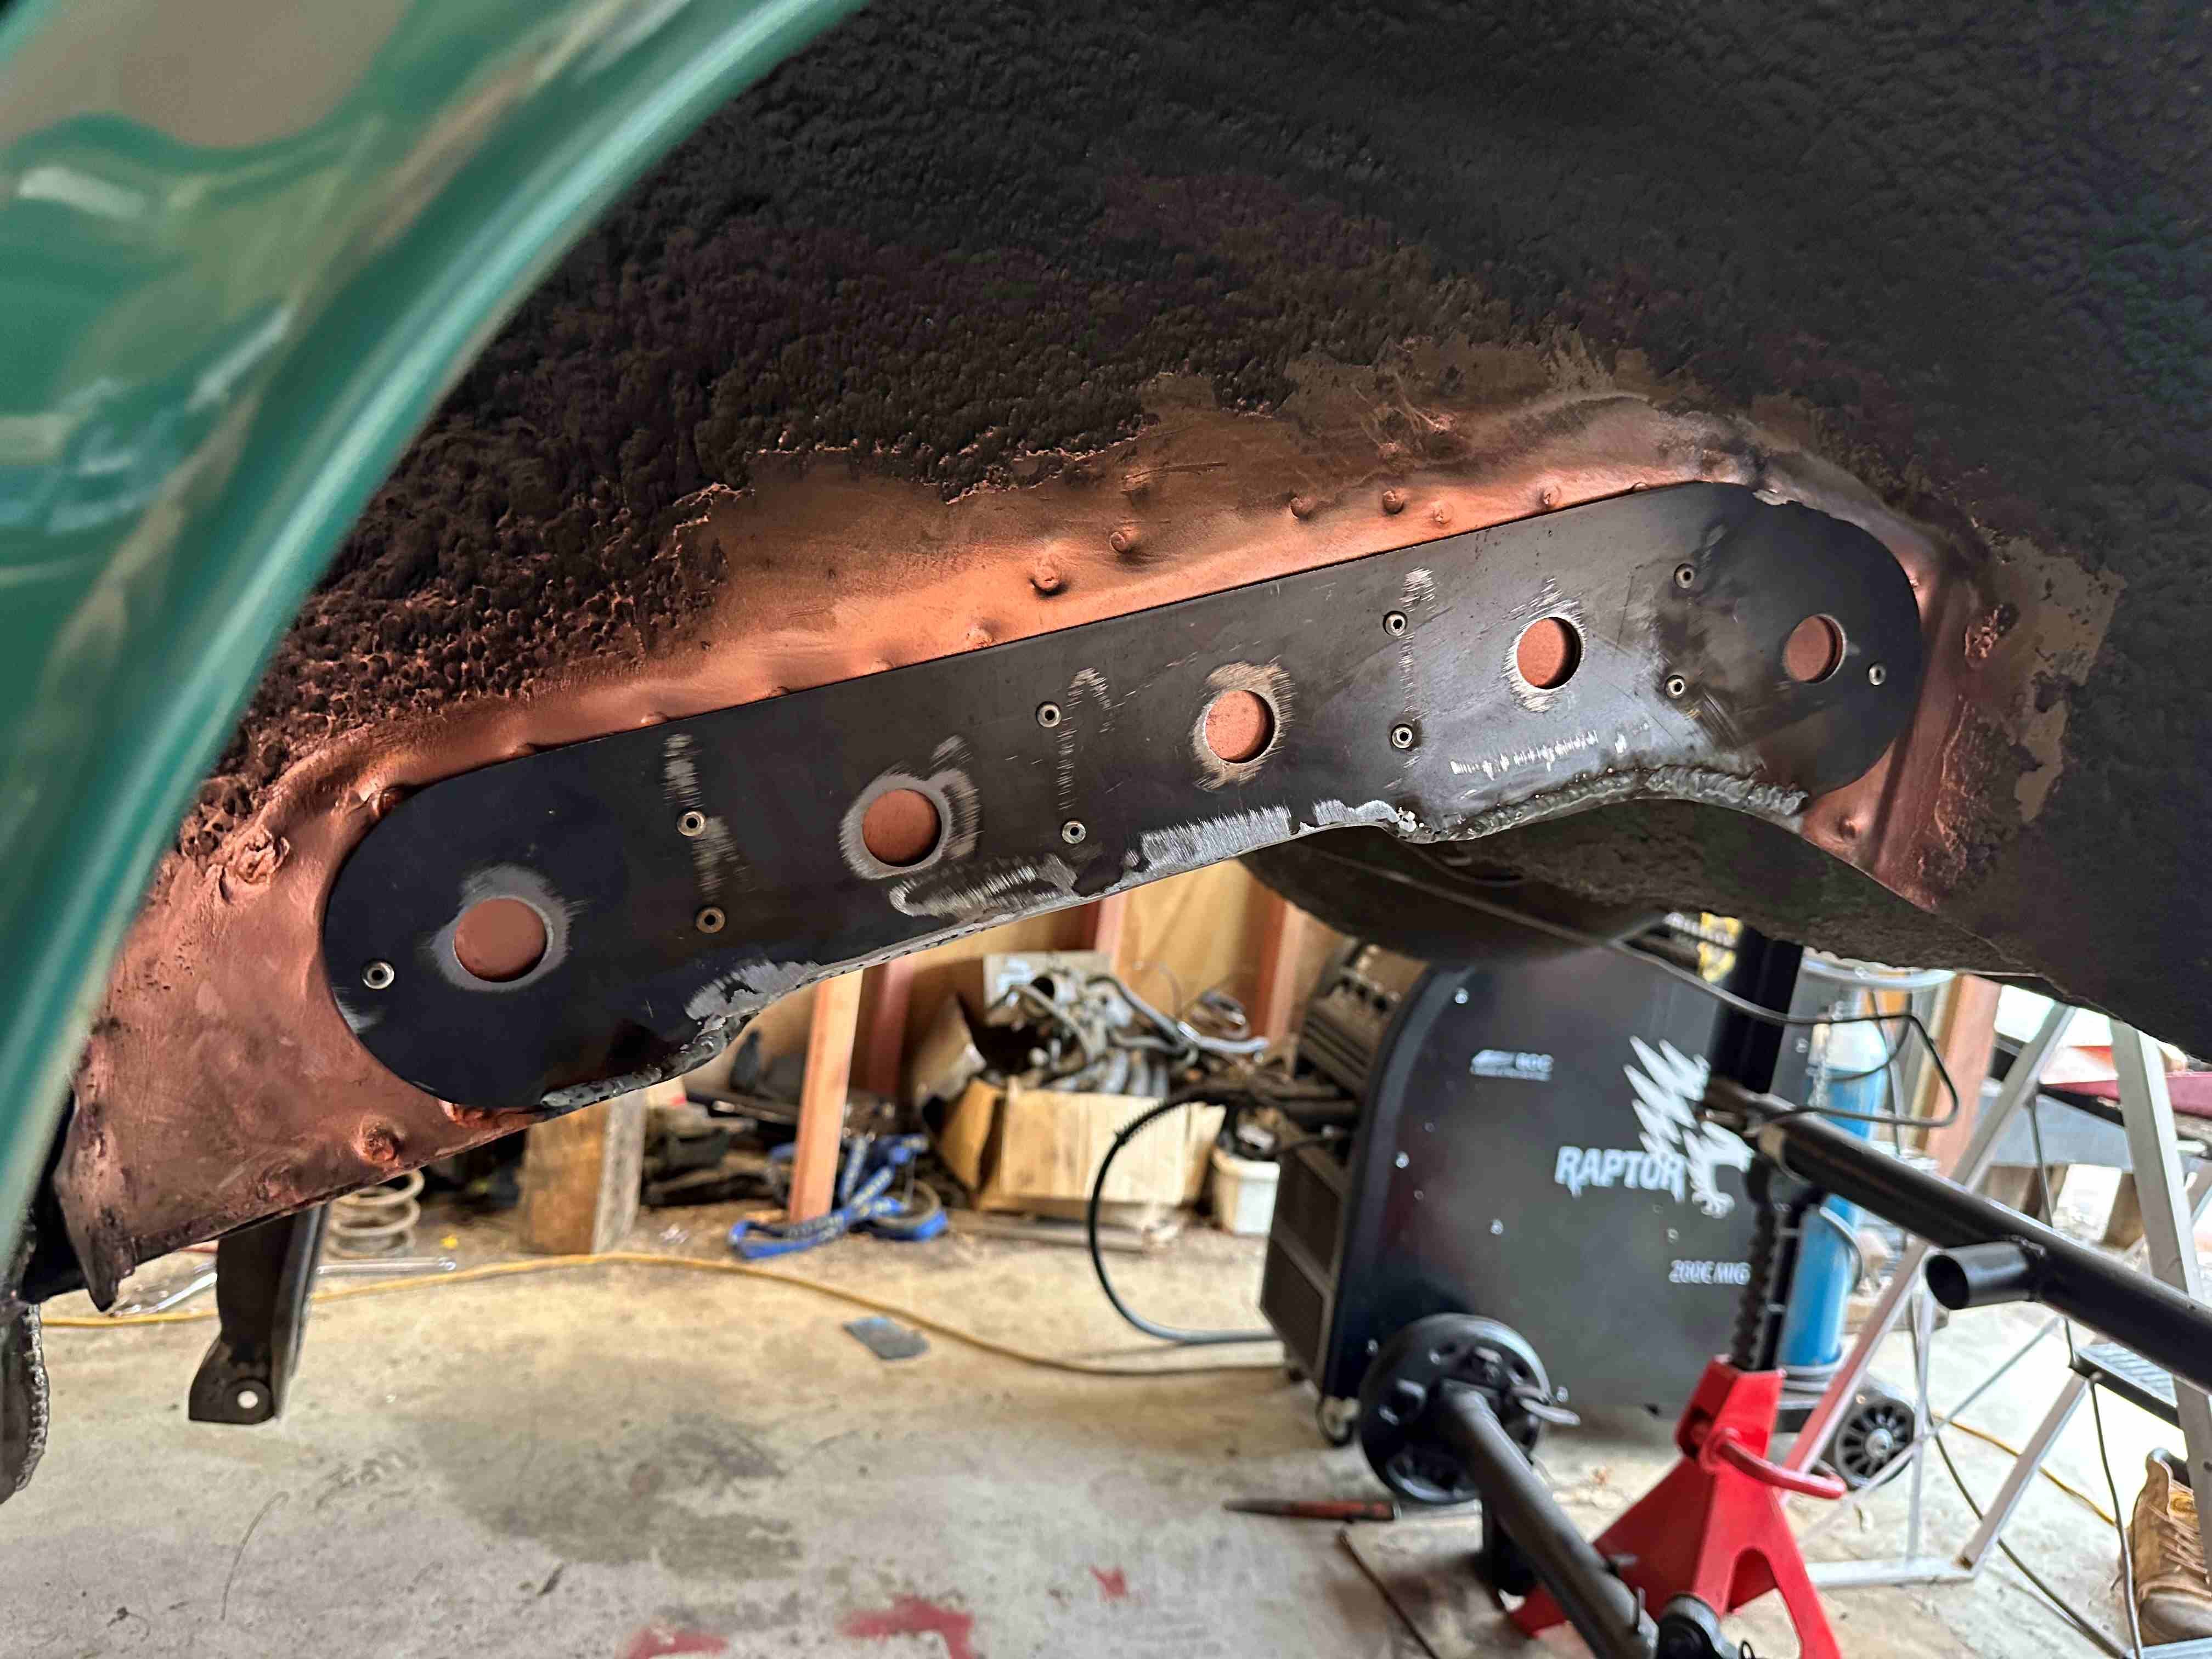
Cracking on I tried the thing where you weld little patches at a time all over the place and hose it down with air to keep the distortion down, however my enthusiasm got the better of me in that vertical run. Good enough though and way better than what was/wasnt there.7 points
-
Lesson learned. Don't wash the car and put it away without a quick drive to dry off the brakes. On the bright side, dealing with the electronic park brake was easy. Just hold the switch down as you turn off the key and it stays disengaged. Then pump the brakes and pull the switch a couple times to adjust it for the new pads. Way easier than the triangle circle square L2 R2 up down sequence needed on some other vehicles I won't name. And if you get it wrong the calipers grenade themselves internally the first time you use the handbrake.6 points
-
Haven't put many ks on this thing since I've been busy buying yachts and otherwise bankrupting myself. I thought it would be nice to drive over the Christmas new year's period so moved the Mazda to get to the Corolla to get the Isuzu in to pull the boat out of the driveway to get the Jag out of the shed. It took a little throttle to unstick the brakes, moved about 1 metre then stopped. Rolled it back into the shed where the brake pedal went to the floor. Ah, there's your problem6 points
-
Also I am hoping to troll this tedious imgur fucker for a bit longer
5 points
-
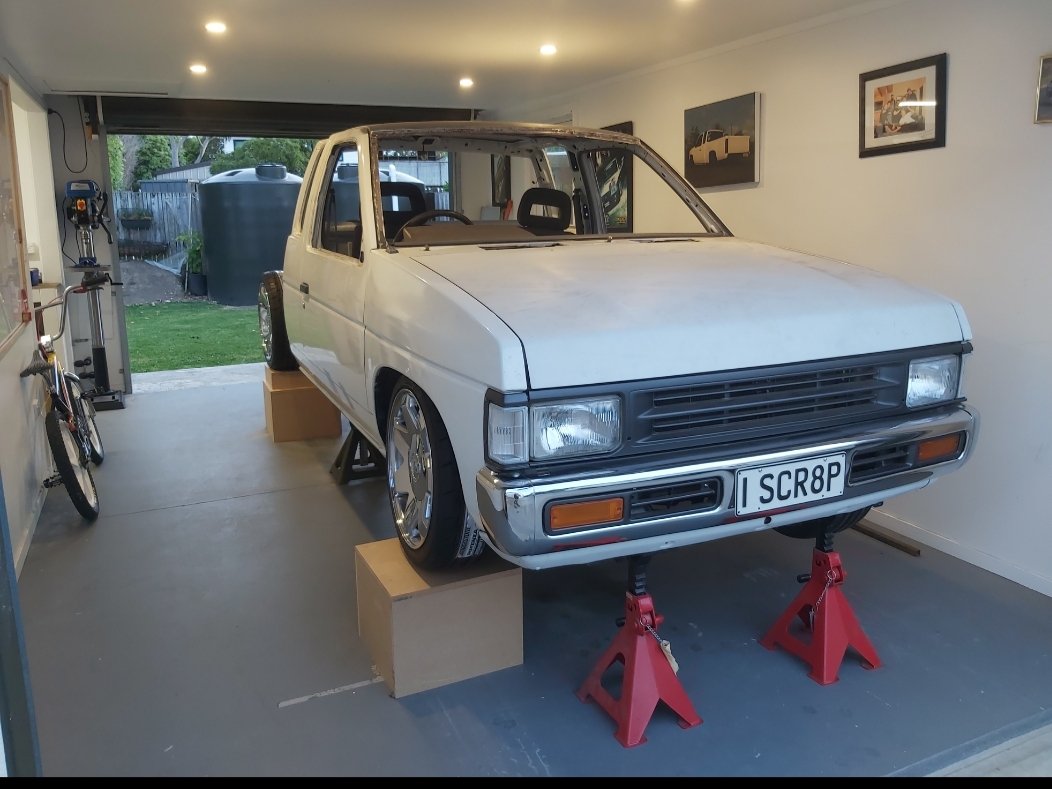
Got some use out of my stupidly big and chunky ramps, its not a bad working height. Fixed this little bit of ugly in the frunk. Apart from the windscreen area thats all the hard stuff done.4 points
-
Damn son, I thought the Jag and yachts was pretty cash, then you whip out the knippex pliers. You have arrived me old china, you have arrived.4 points
-
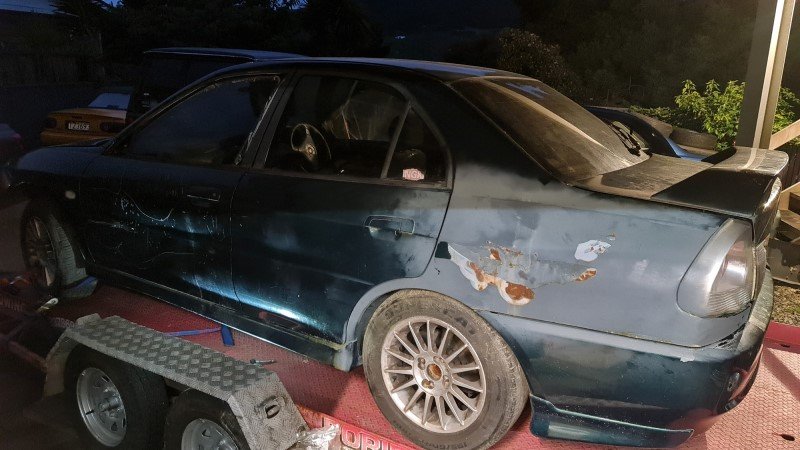
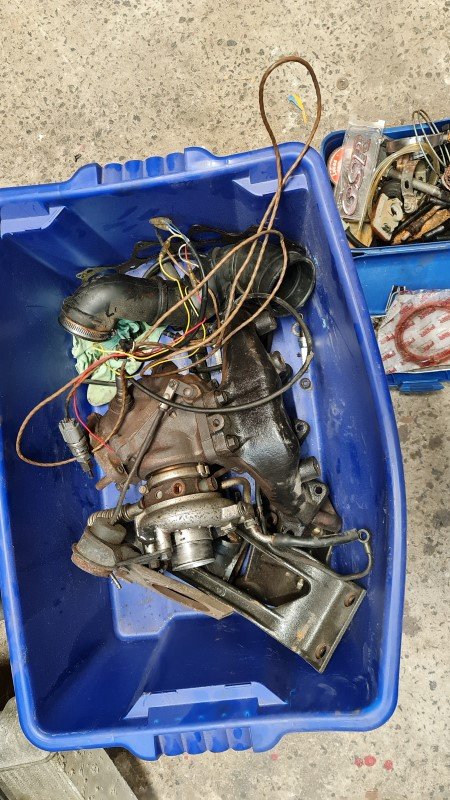
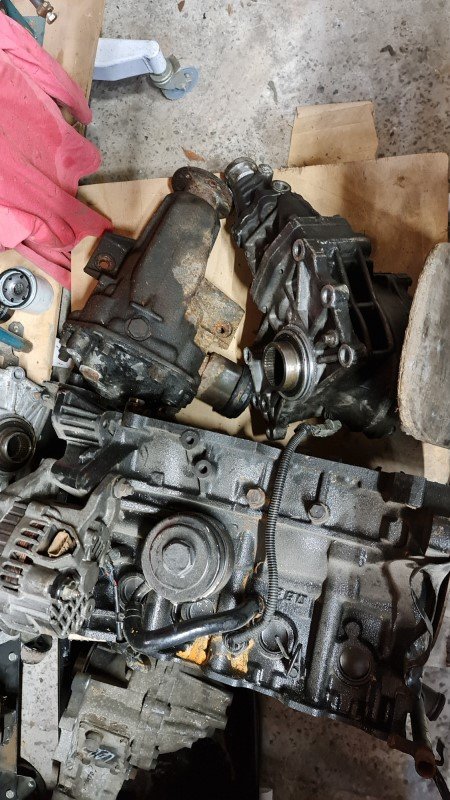
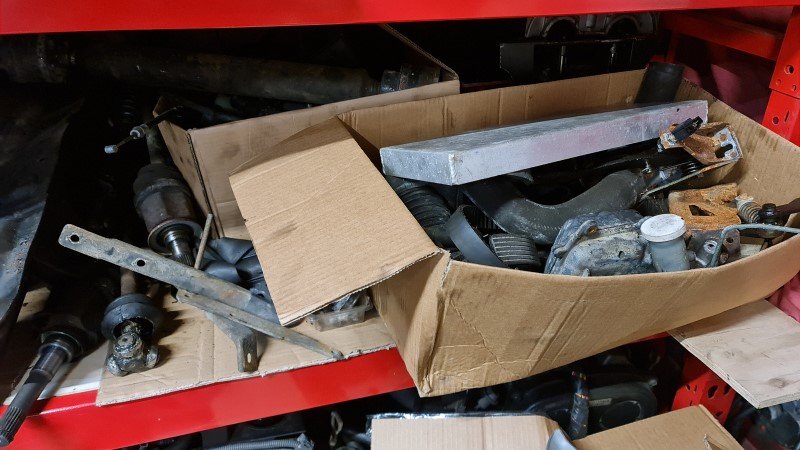
This project is quite far down the list to work on but I came across a parts car for a good price so drove 1hr 45min to go get it, visited Adoom and drove 1hr 45min back, over took a food truck on the Remutaka's towing 1.5 tons uphill, the Safari does good. Would do gooder with more fuel pump. Its a dereg GSR in rough shape (1.8 turbo 4g93), mostly disassembled had a bent conrod and engine is in bits. Guy was going to use it for his mirage race car to make it awd and turbo etc but decided to keep it fwd and put a Legnum v6 in it which looked pretty cool. It came with lots and lots of useful parts. Main useful stuff is 4g93t pistons, because I don't want to blow out the non-existent budget with forged pistons. Definitely going to use some kind of forge rods since its the main weakness in these engines. Maybe use the block, but the GDI engine I have is probably in better condition. I'll use the whole rear end, same as Evo3 apparently. Has sway bar unlike mine, and has disc brakes (4x100) while mine is weirdly drums. Spare gearbox, transfercase, driveshafts, propshaft, rear diff etc etc. All unknown condition but it was working when it bent a rod so probably all ok. Will be testing the strength of all of this stuff so spares are good. Has the GSR body kit which I'll probably use too. Decided I don't want to make it look like an Evo 5, because its not an evo 5. It'll be a subtle thing instead. Will also used the engine loom to see about getting it working with a Speeduino. Poor thing is rough as guts. Unfortunately doesn't have the Recaro interior. Good towing weather on Transmission Gully, over in the Wairarapa where I pick it up it was sunny and hot as usual. . Safari towed great, needs a fuel pump upgrade though. Plan is to remove everything I need then it'll go to scrap. It's dereg and the body is pretty stuffed.
4 points
-
I knew you'd say that when I got your comment notification. Not sure why anyone would willingly convert their weekend classic TO diesel so that it can sound like a truck, smoke like a train and not go any faster.4 points
-
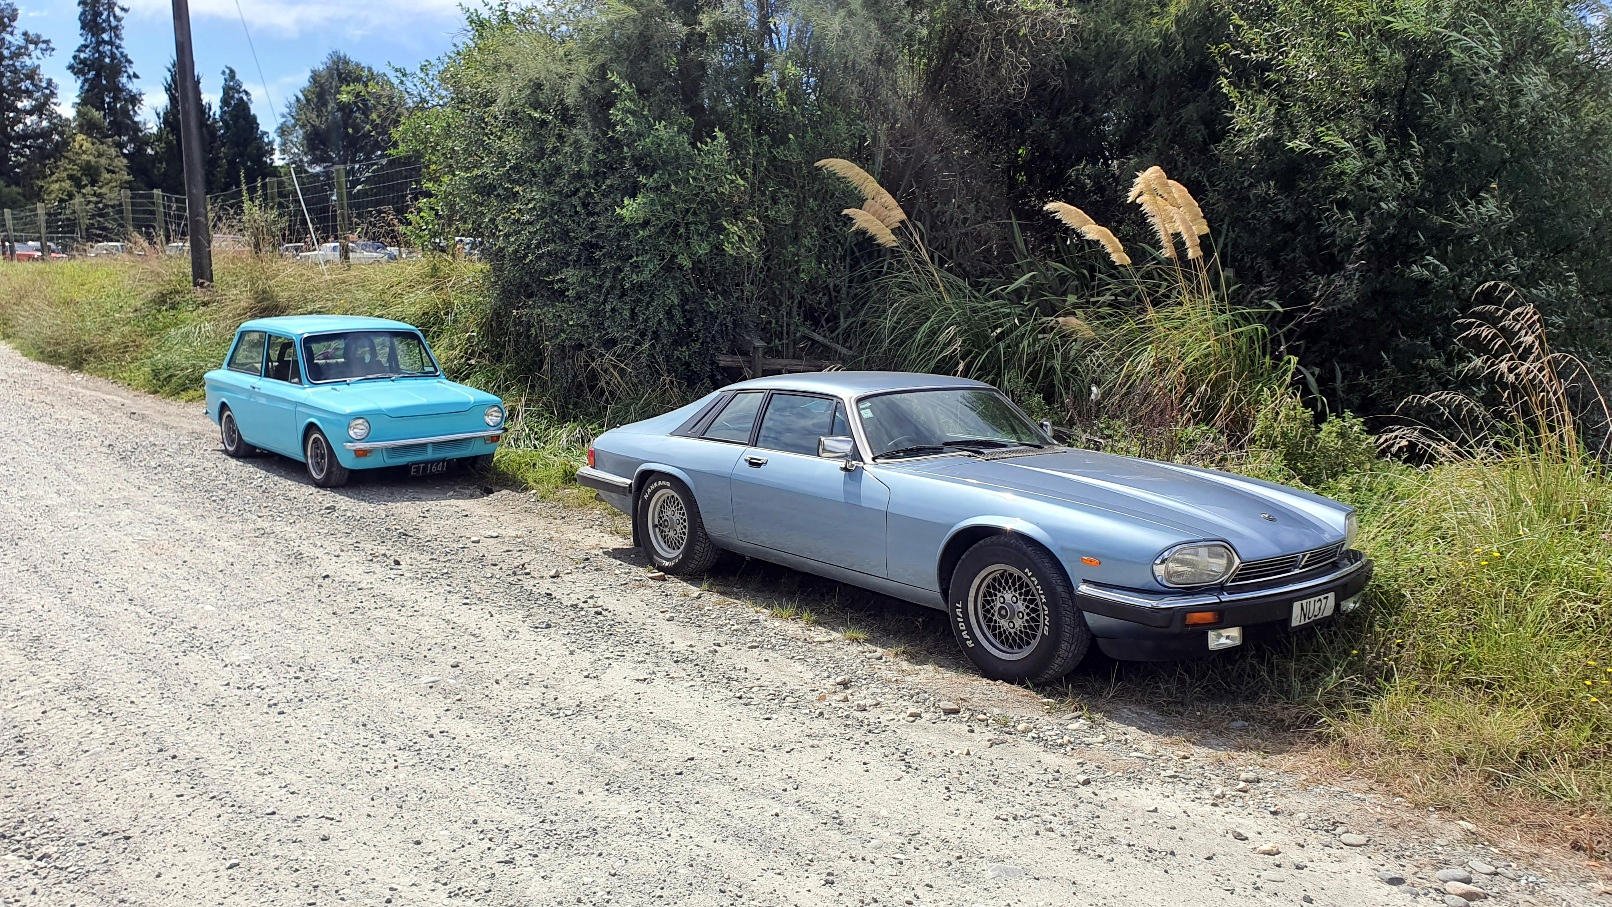
A comparison pic. Not the same angle but you can see the difference.
3 points
-
Today I mounted the hand brake cable back onto the Avenger diff and brought it around to the Minx hand brake lever. I needed to make up a bracket to connect it but all else fitted up well. So that worked out well and now I have a working handbrake. I also put the rear springs in and bolted the front X member back in with the springs but without any shocks yet. I wanted to see how it sat with the stock Avenger rear springs and 50mm cut from the Minx front springs. I threw in the seats a full fuel container a battery the intake, alternator etc to try and get it as close as I could to the weight it will be. Still needs fluids, bumpers and a few other smaller items. So this is how it sits at the moment which is quite promising. I might drag it outside tomorrow and give it a bath and have a decent look. If I want it lower it would not be by much. Once I have decided I will get new front springs made and rear if I want it lower. Back on it's wheels for the first time must call for a small celebratory refreshment I would think. Sort of like a roof shout.
3 points
-
Spent an hour with the wire brush on the front of it, this was like an archeological dig to uncover a special world of poor decisions and welding fuckery. Further digging on this spot tells me the windscreen will need to come out, this area and the same on the other side was there when I first had it, but the new layer of bog hadn't really solved the issue; This had bog all over it for no real reason, there is a dent but no attempt had been made to pull it out; Im going to cut out all those patches and do them again, but this time with feeling.3 points
-
Even a non-turbo Barra makes more power than my 3.6 AJ6, and it looks like you can get the engines for under $2k. Barra engine in Jaguar XJC: https://www.streetmachine.com.au/features/hamish-davidson-barra-jaguar-xjc But look, a $5000 parts car: https://www.trademe.co.nz/a/motors/cars/jaguar/xjs/listing/4471498047 If only it was manual, and blue rather than grey, and for sale before Covid when I'd crashed mine, and someone hadn't bent the headlining, etc. I wonder if it idles smoothly and if the auto is good.2 points
-
LD28T + manual swap sounds like a grand idea, so leaving some money aside for nats. Get to it now they say!2 points
-
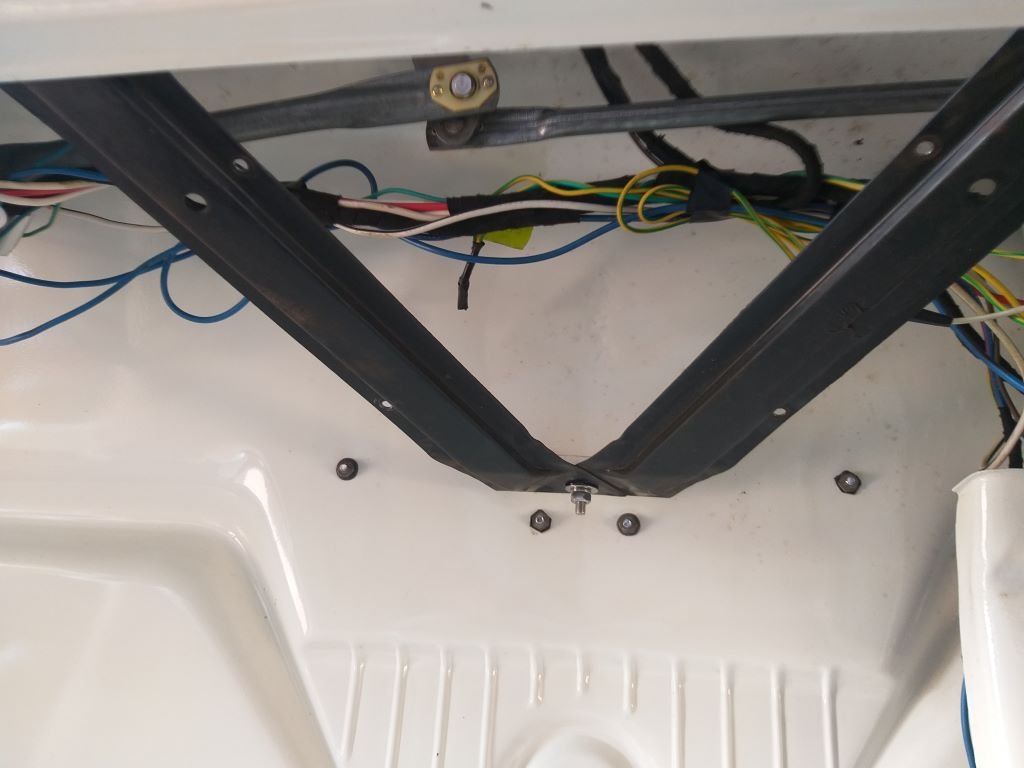
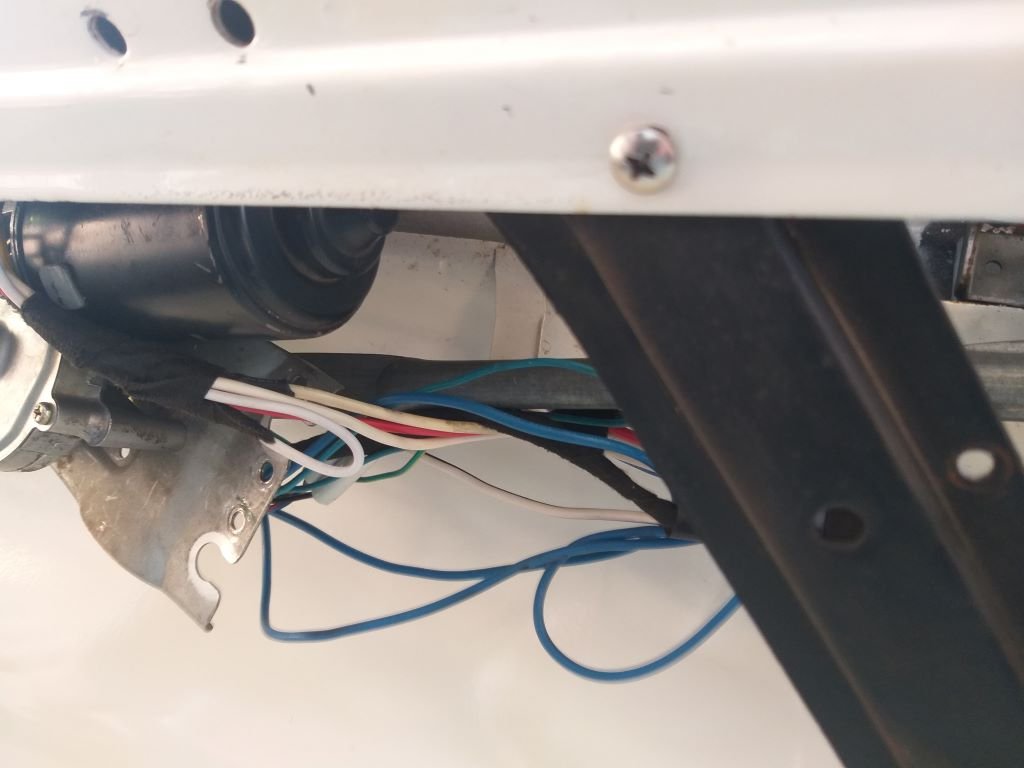
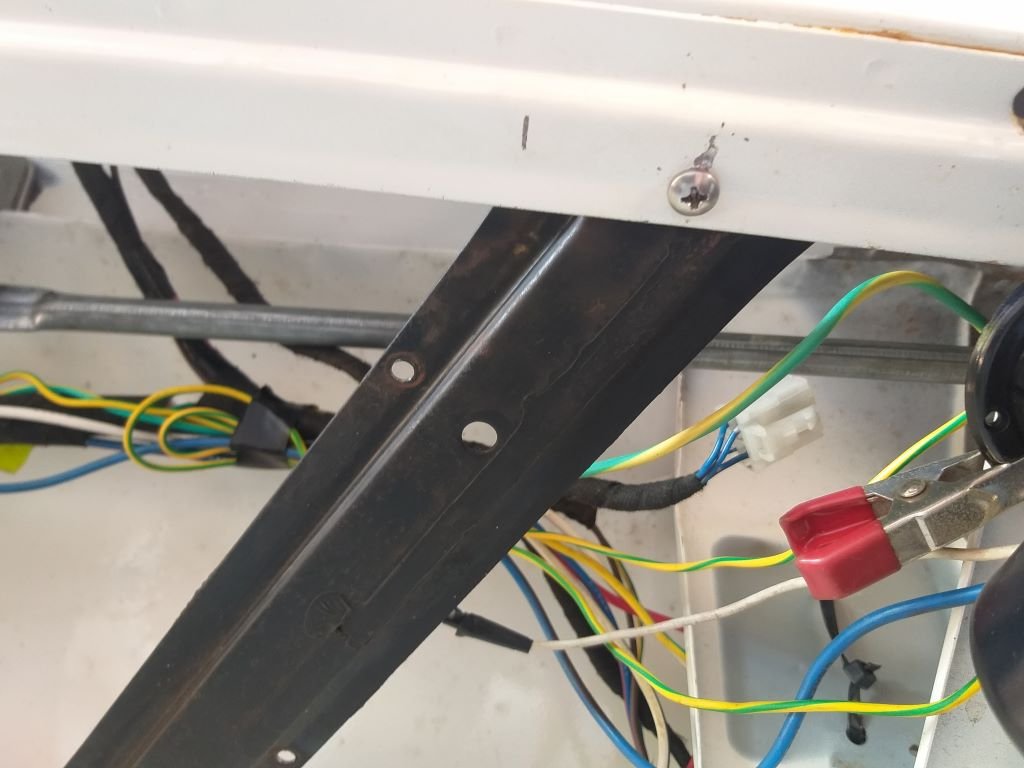
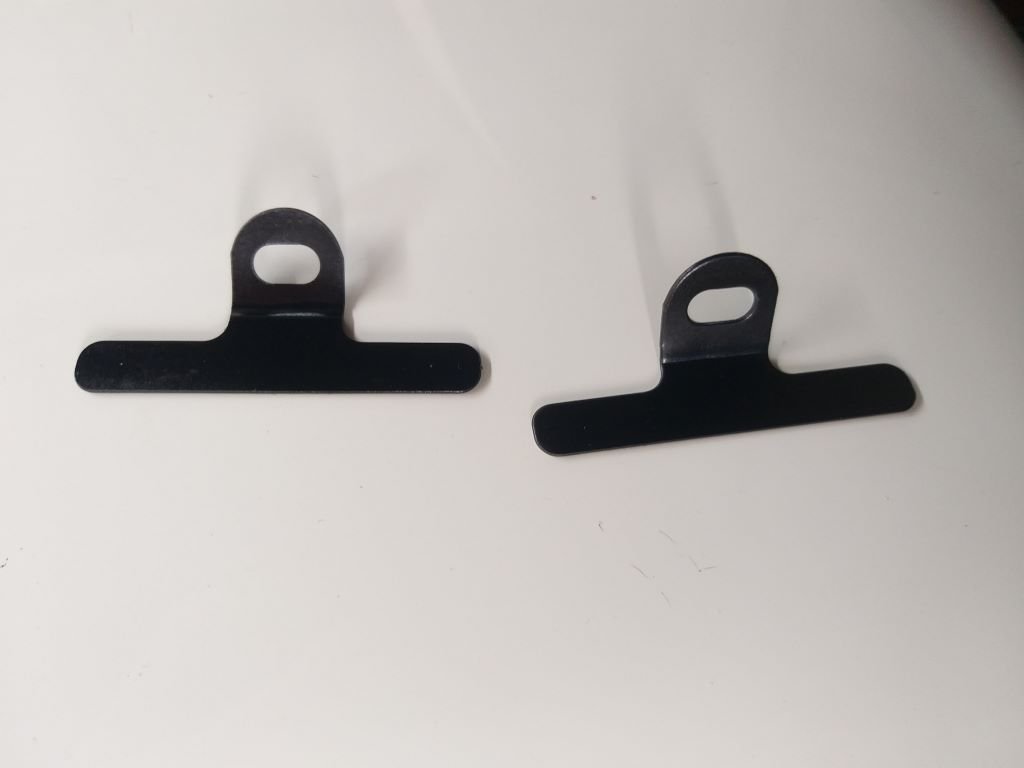
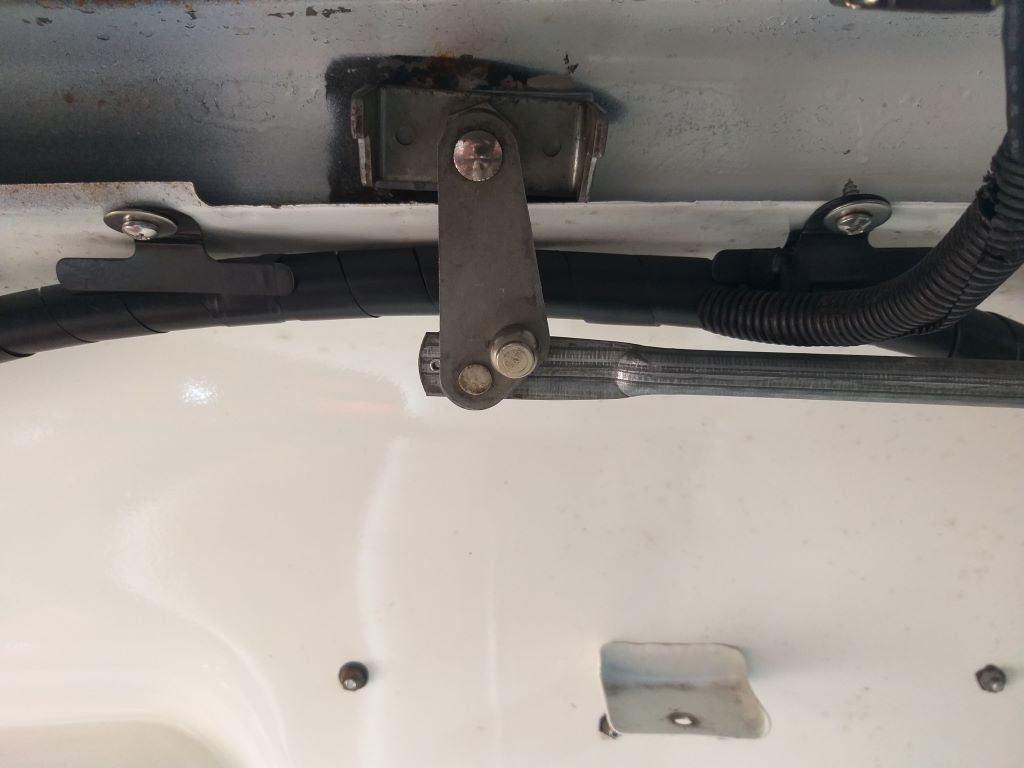
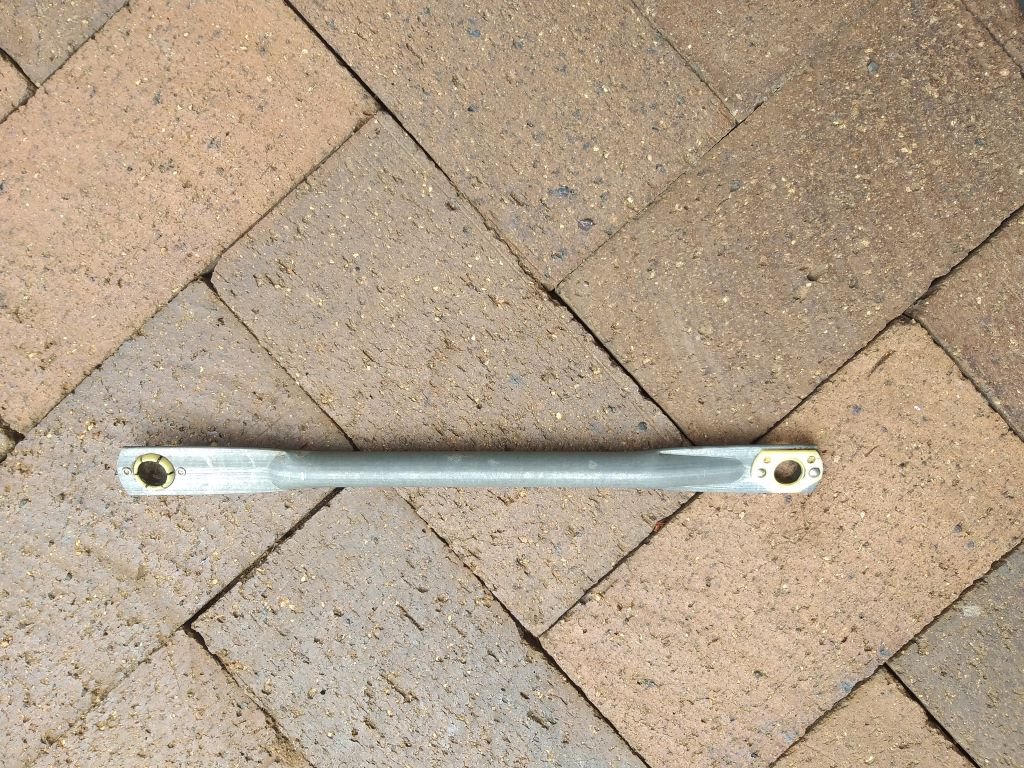
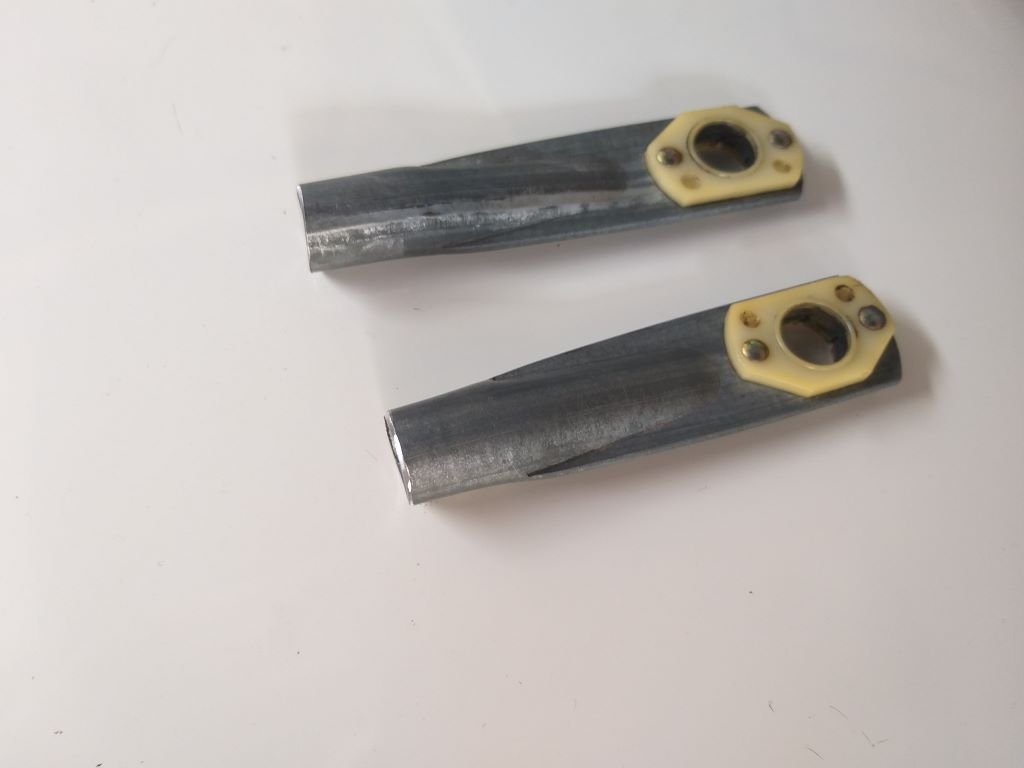
Now "fun me" wanted to crack straight into the a/c hoses, but "serious me" decided that since we are now deep in our rainy season getting the wipers working again should be top priority - not to mention getting the windscreen sealed properly.... but that is another story. So those of you playing along at home would have likely spotted the shocking condition of my under-dash wiring: Yep, not pretty at all. The plan has always been to get all of the additional wiring for the mod cons in and then do a final tidy up, but with just the two a/c related wires left to run there is no time like the present to tackle the rat's nest. First order of business was to get everything out of the way of the new wiper mechanism, so I scratched around in my parts bin and came up with two little metal brackets that came from one of my donor vans. Gave them a quick clean and a spritz of satin black and they now look like so: I then grovelled under the dash one more time and managed to poke two more holes in the front panel lip. Threw two self tappers at the brackets and wrapped a bit of spiral bind around the wires and she looks much better now: Once I've added the two a/c wires into the spiral bind I'll use some cable ties to secure the loom to the holding brackets. Anyway, with the wiring loom now safely out of reach of the wiper mechanism I was finally able to mount the wiper motor in position. The last wiper related mechanical step was to shorten the length of this drive shaft to suit the new motor position: So out came my grinder of angles and I ended up with this pair: Scratching around in my pipe stash yielded a piece of aluminium tube that slips over each of the cut ends perfectly. I spent a bit of time fine tuning the length of the aluminium joiner till I got the movement spot on. Gave everything a test run and it works brilliantly. Unlike the Thames mechanism which was quite jerky the L300 setup is silky smooth. Flushed with success I'm now attempting to get the park function working as up to now I've had to time my switching to get the wipers to stop in the correct position. The wiring for the park function is currently doing my head in so I've shouted out for help on the General Car Chat page and I've already received some good info from a number of old schoolers. So hopefully I can get this sorted too. Some more work on the wiring tomorrow and with a bit of luck I can get on to the a/c hoses later in the weekend. Thanks for looking.
2 points
-
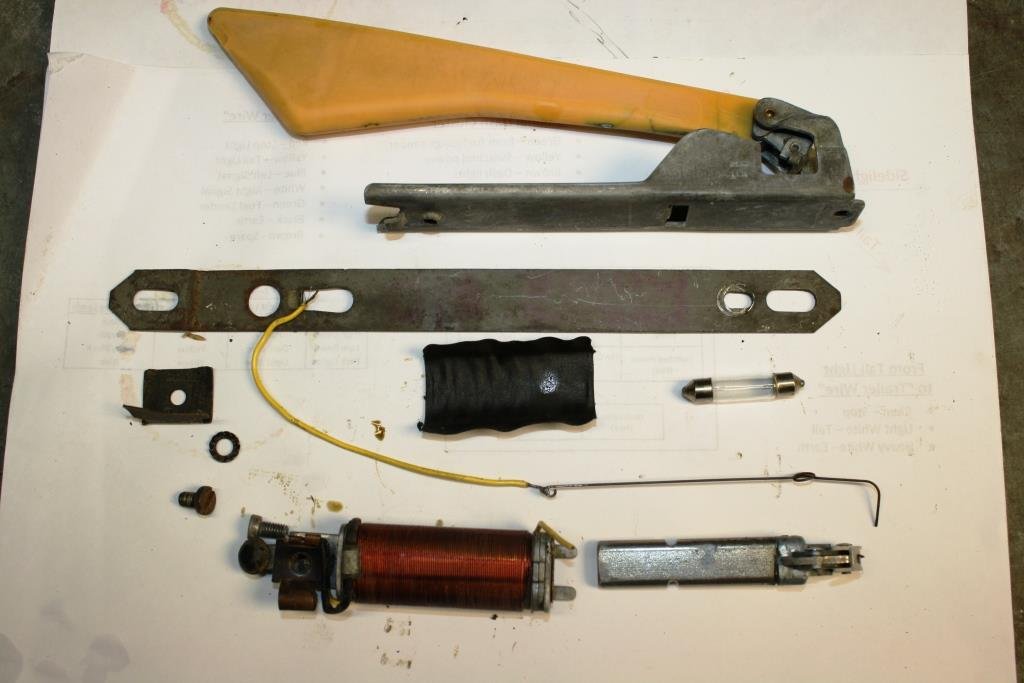
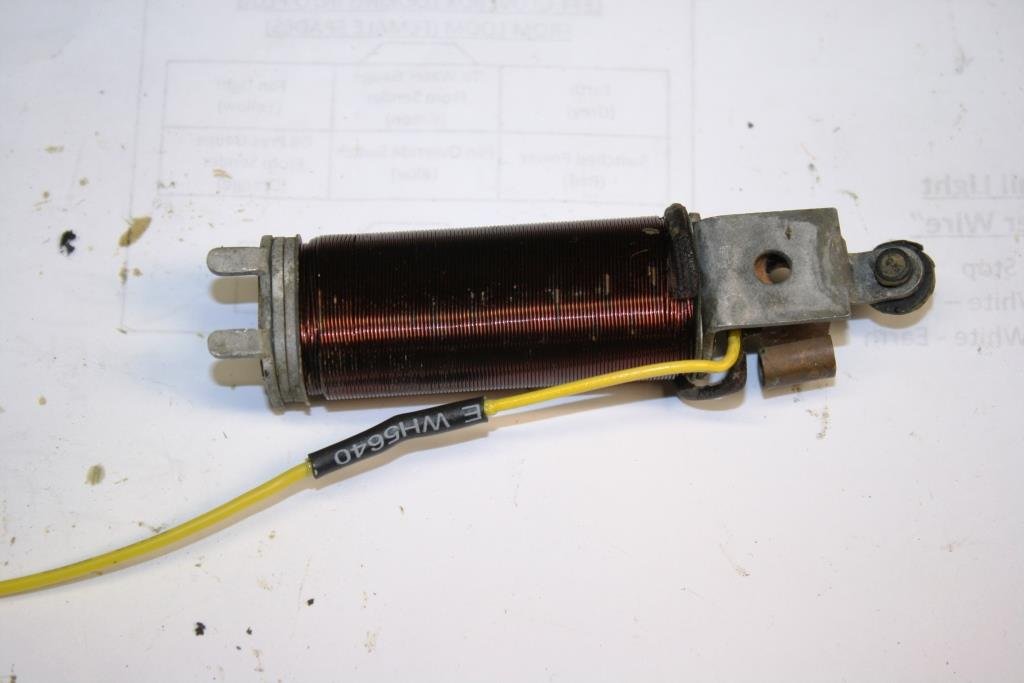
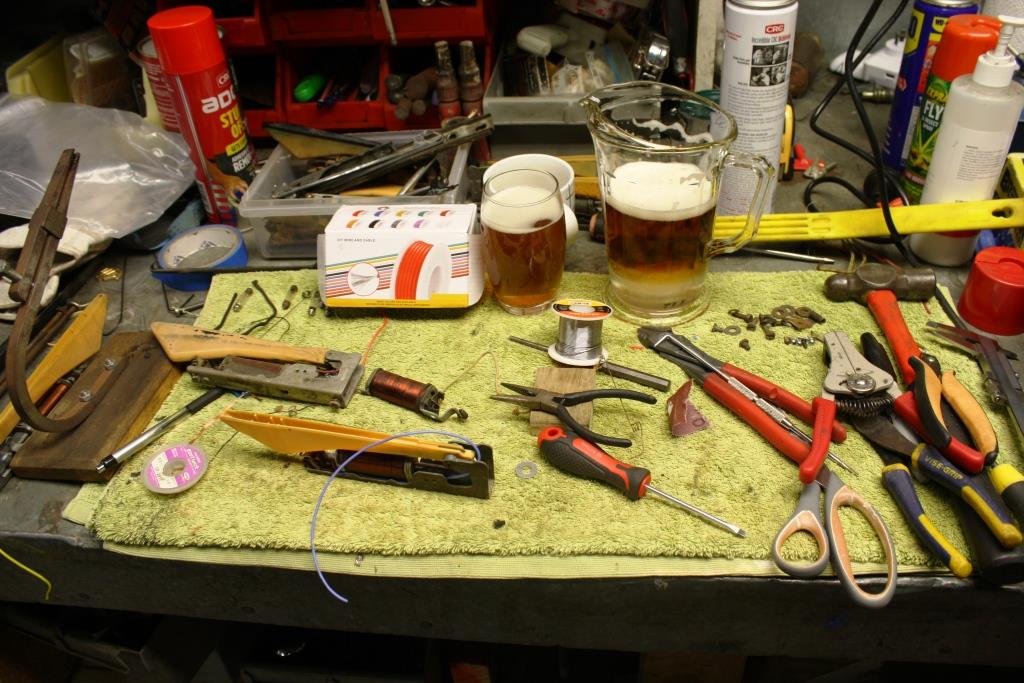
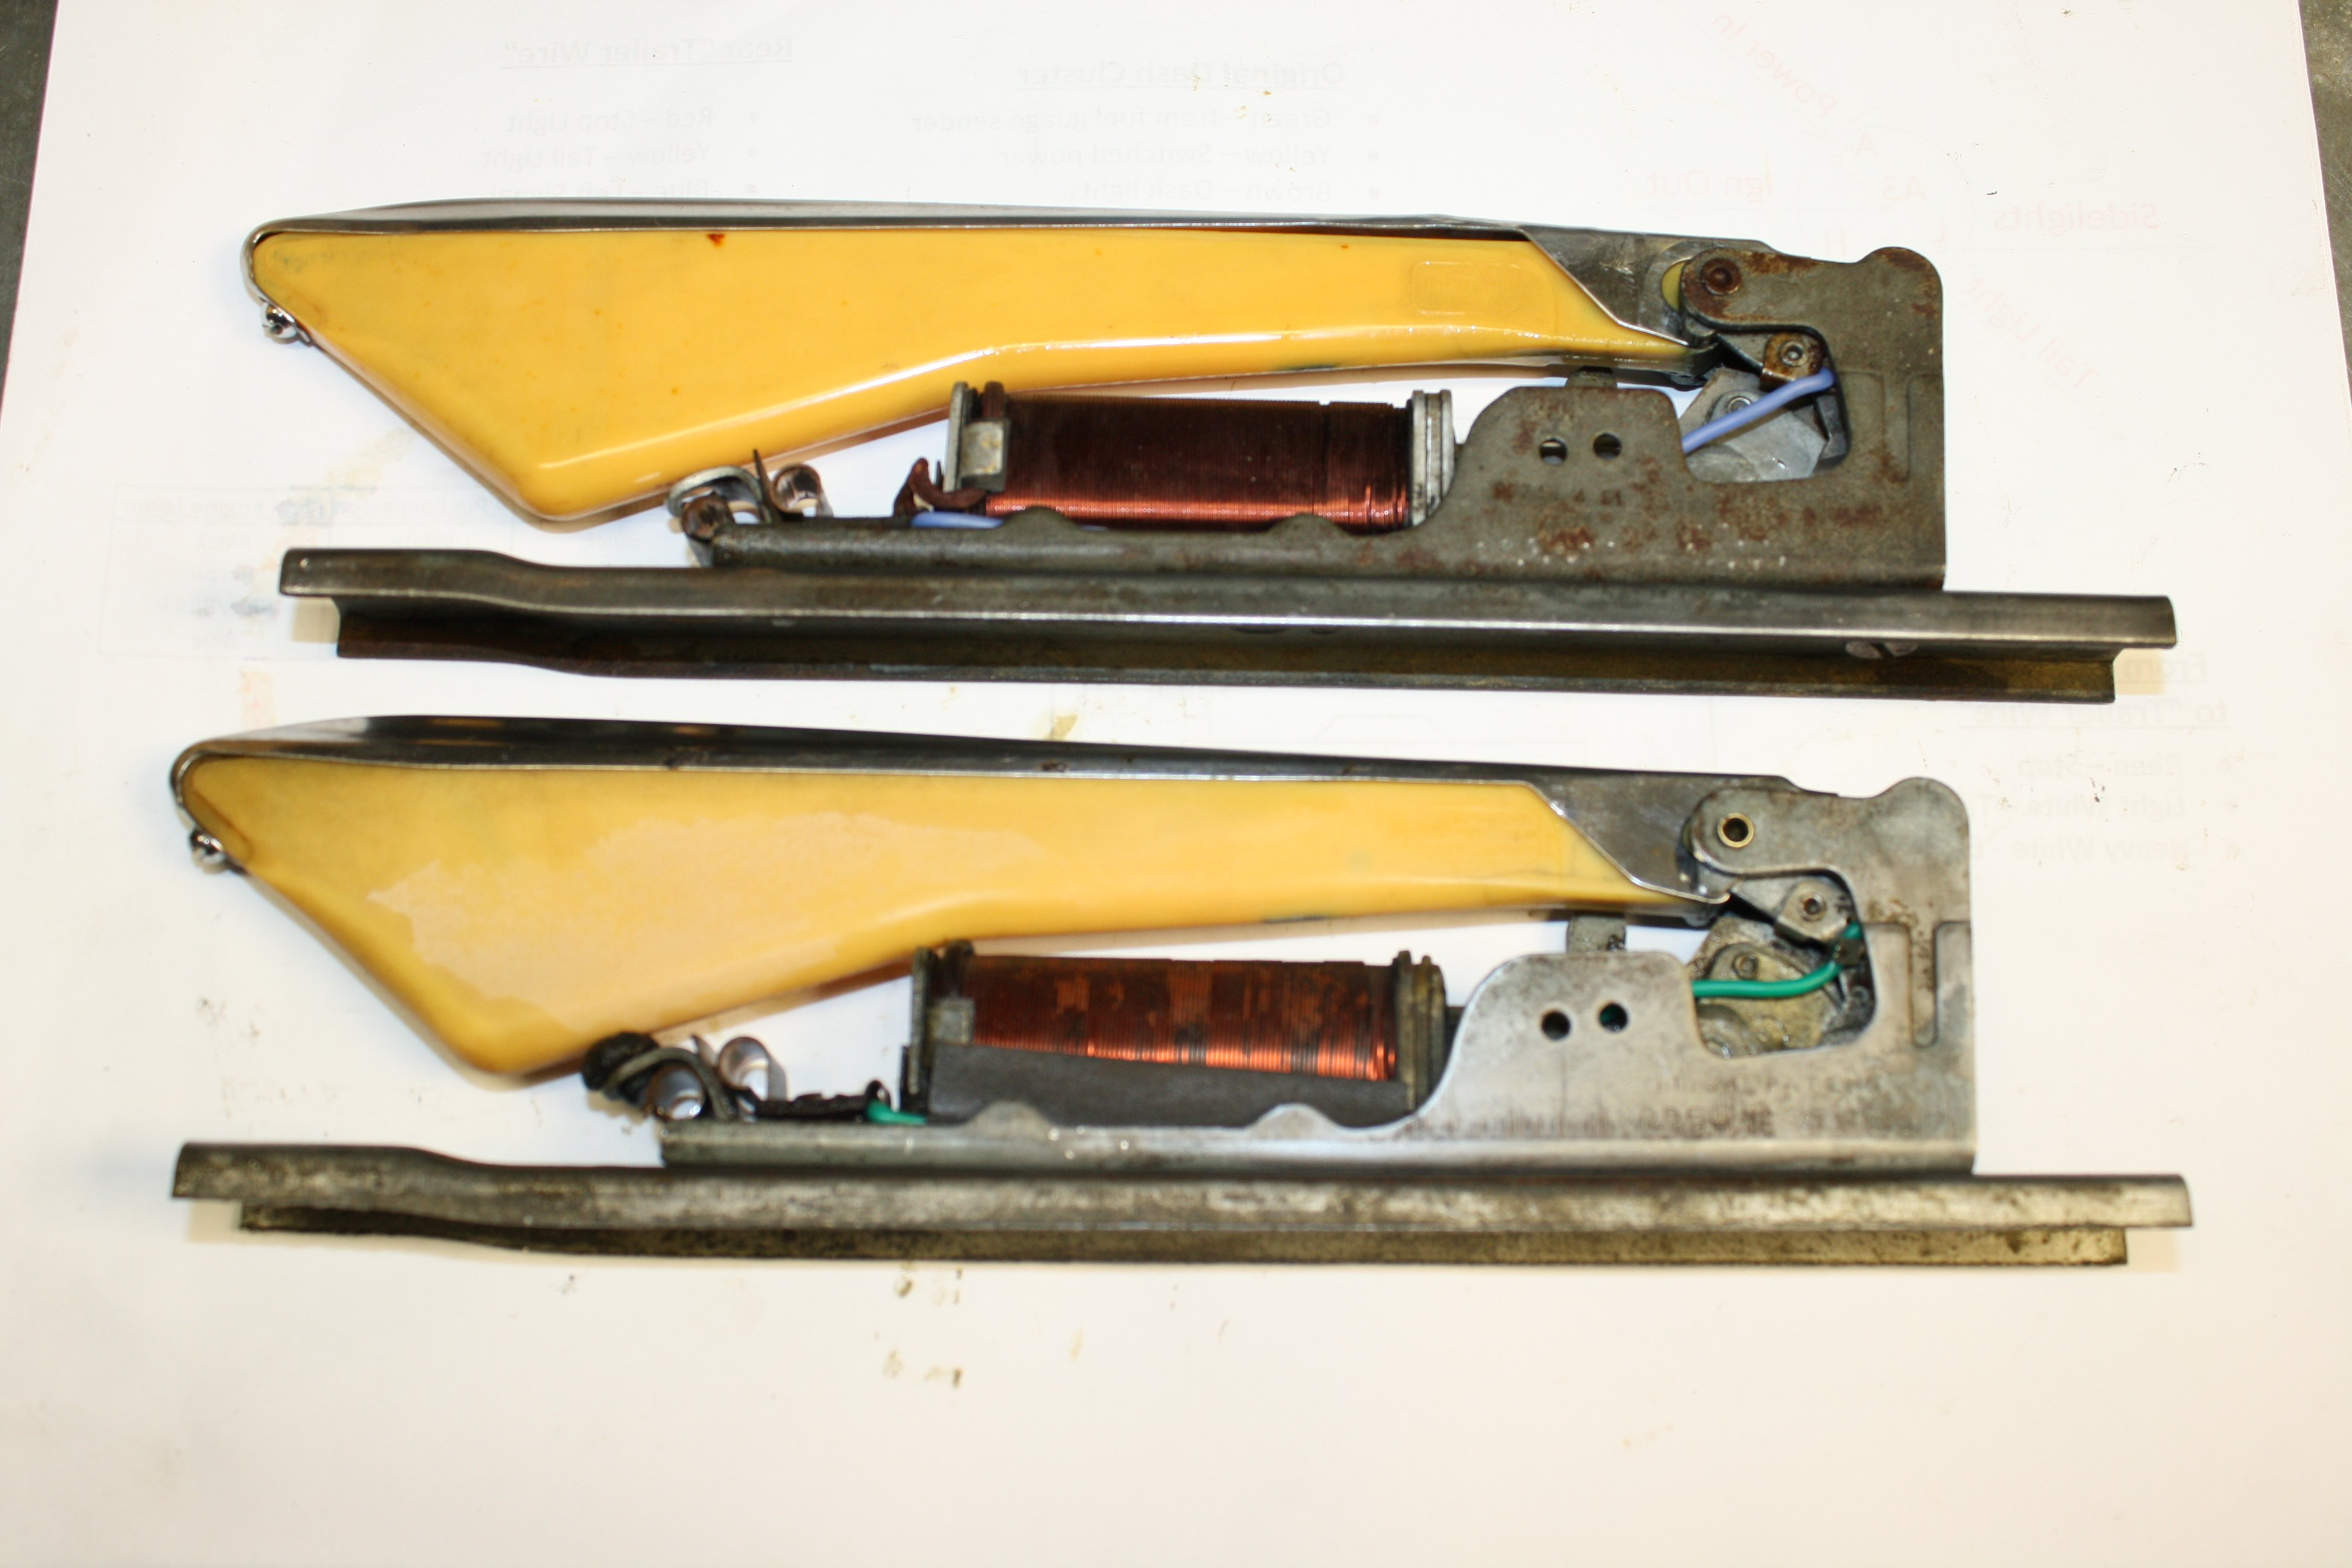
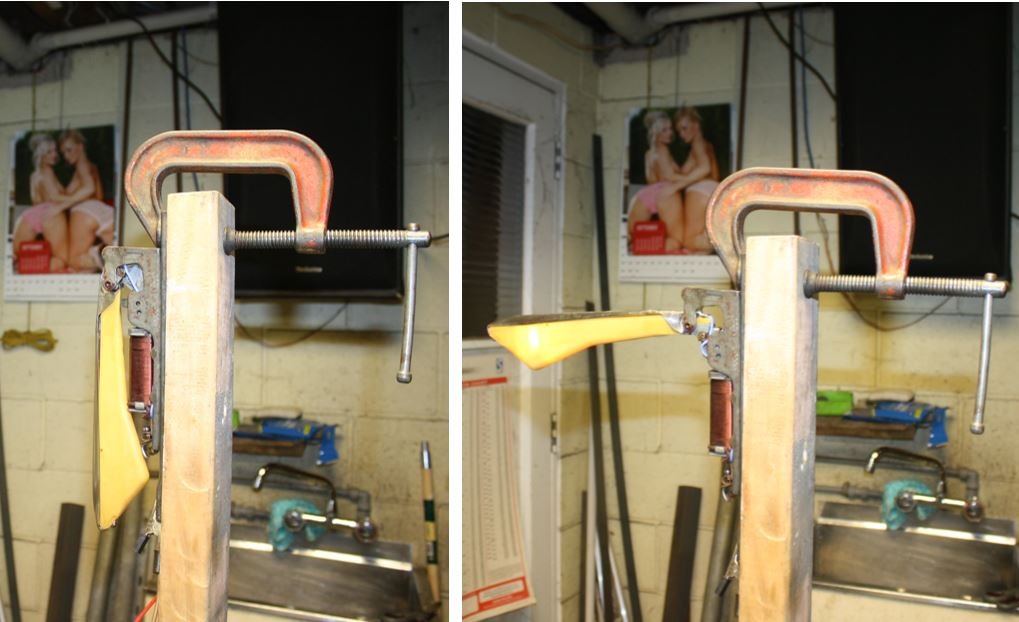
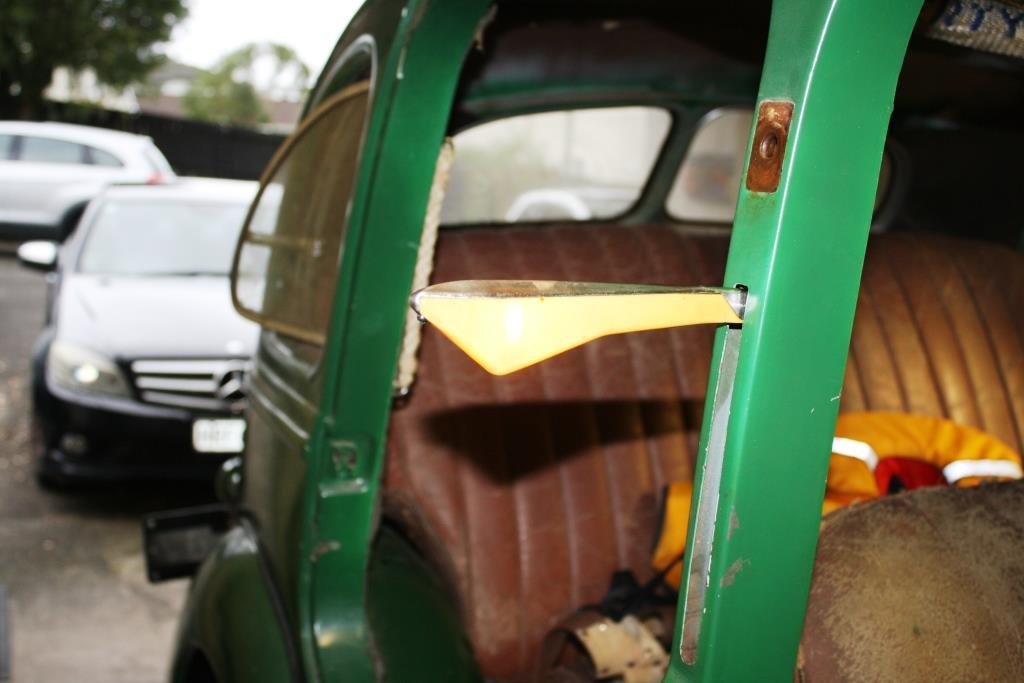
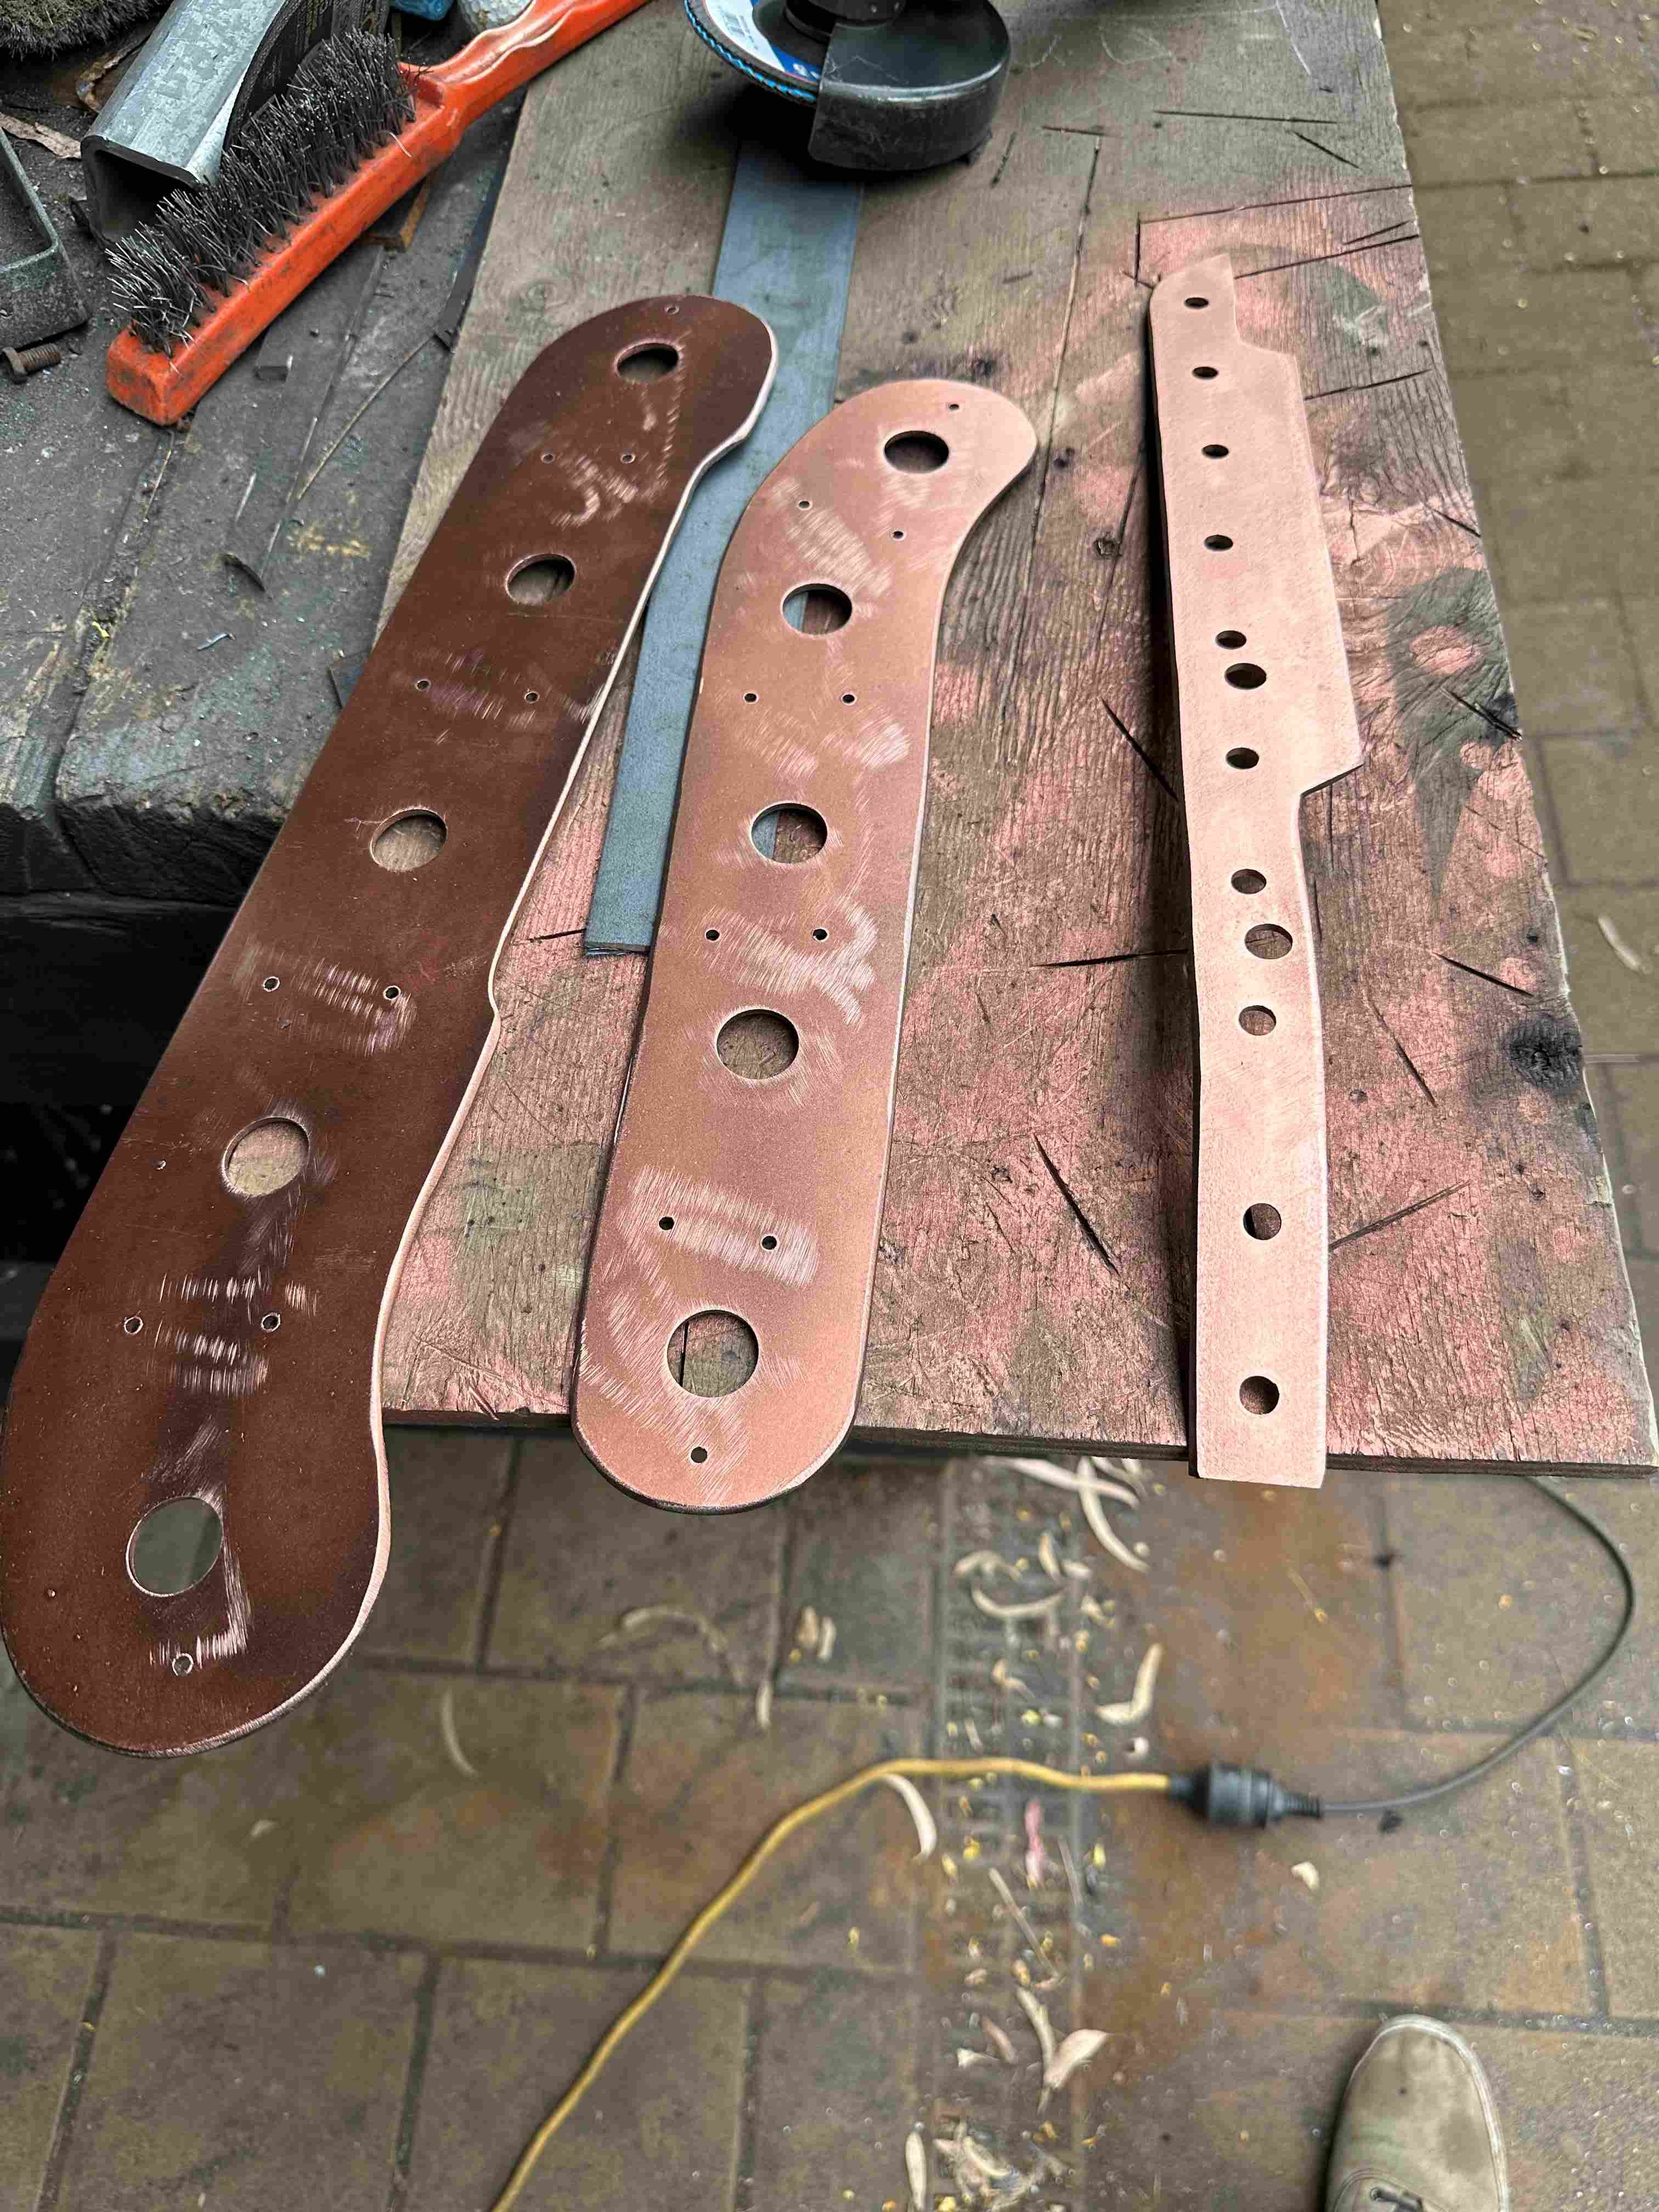
Now for the fun part, I’ve been looking forward to this…….. I’ve been collecting old (and mostly broken) Lucas Trafficators for a few years now. I gave them all a quick test, the results weren’t promising. I cannibalised a number to get enough parts to build a working pair. Started rewiring and assembling the good bits, learning as I go. Have to say they were a lot fiddlier than I first thought. I just love diving into this old shit; it feels like you’re bridging the knowledge gap - if we guys don’t keep it alive who the hell will? It was also very thirsty work! After more failures than I’ll admit to I eventually ended up being a self-appointed Trafficator expert and more importantly - I ended up with a working pair. So much fun to play with………yes it’s a blokes thing. I left one set up on the home made test bench for a few days in the ‘universally esteemed & revered sr2 man-cave’ for visitors to play with…..and to think the “ever lovely” Mrs sr2 had the audacity to describe Rigamortice, me and my mates as being shallow? https://www.youtube.com/watch?v=xQ67aWH4v4U Fitted up and wired up - if that’s not old school I don’t know what is!
2 points
-
Rage quit. I could NOT make them fit properly, plus I wound up with a pinhole inaccessible by welder. Also my ocd can’t cope with the franken-look bits and pieces all welded together so I’m going to start again. Will have to be after new year at this rate. How annoying is it to spend hours on something which then becomes scrap metal? Maybe I can chop it up and use a couple of bends to fix up the old one…. Oh well, off to the beach.2 points
-
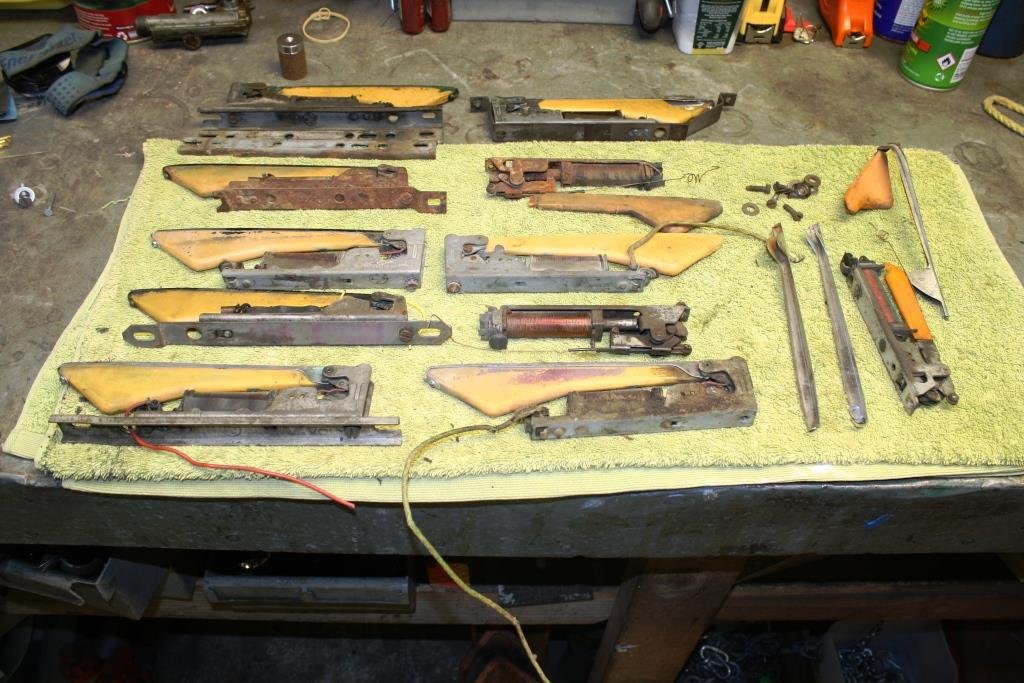
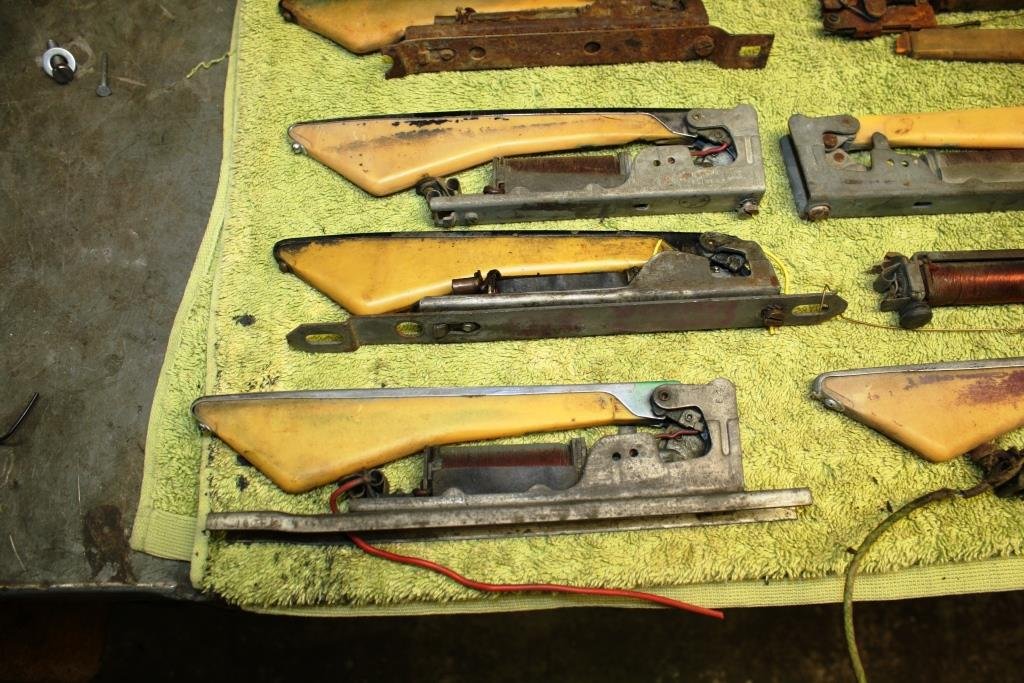
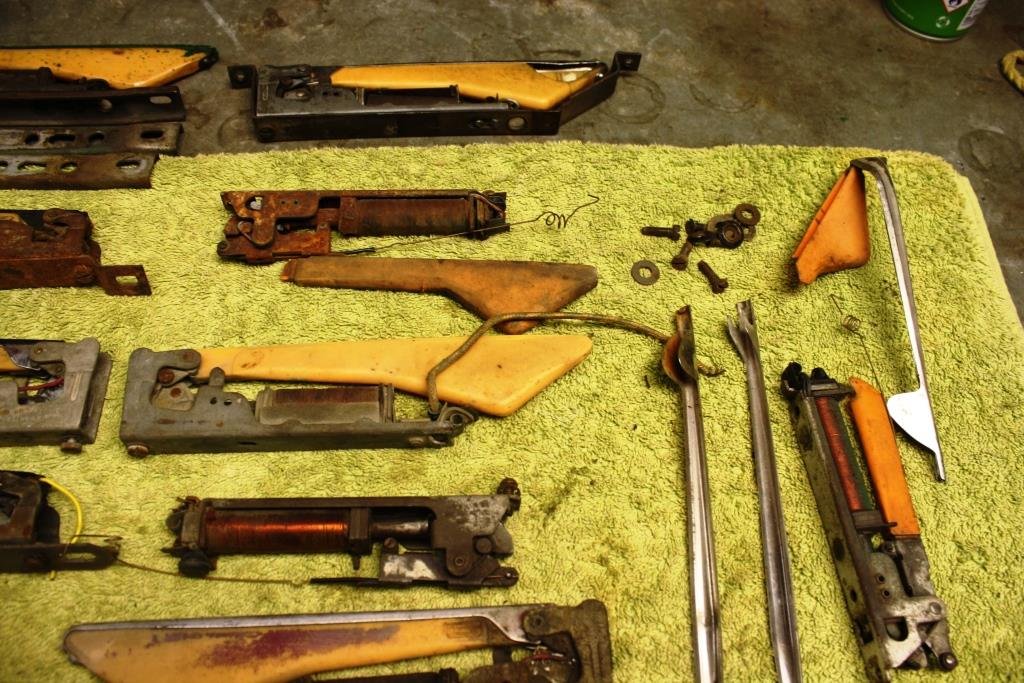
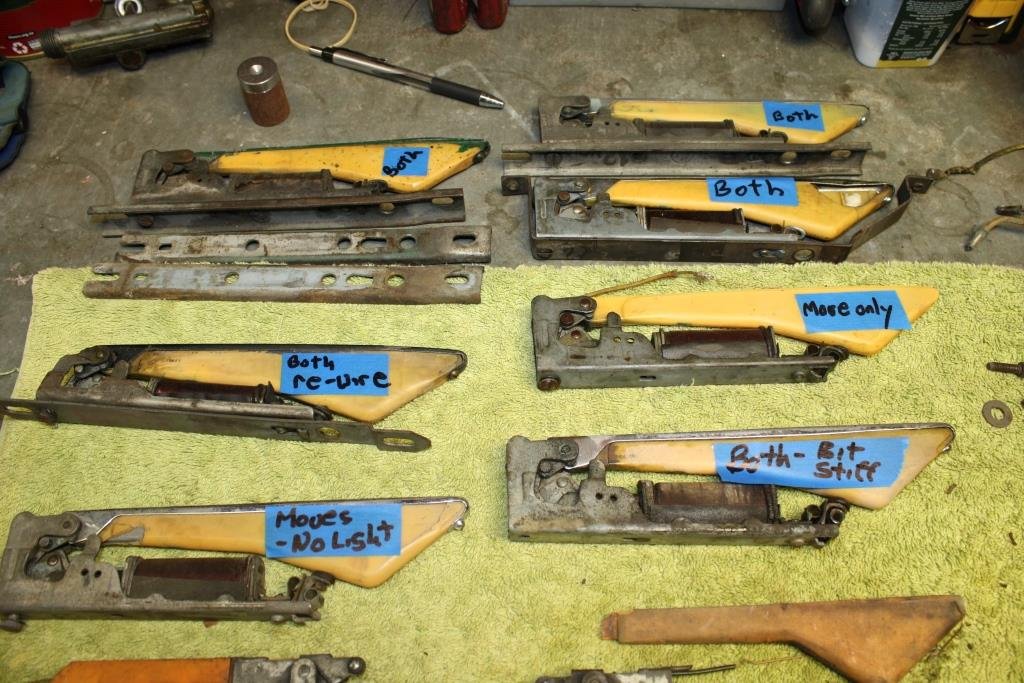
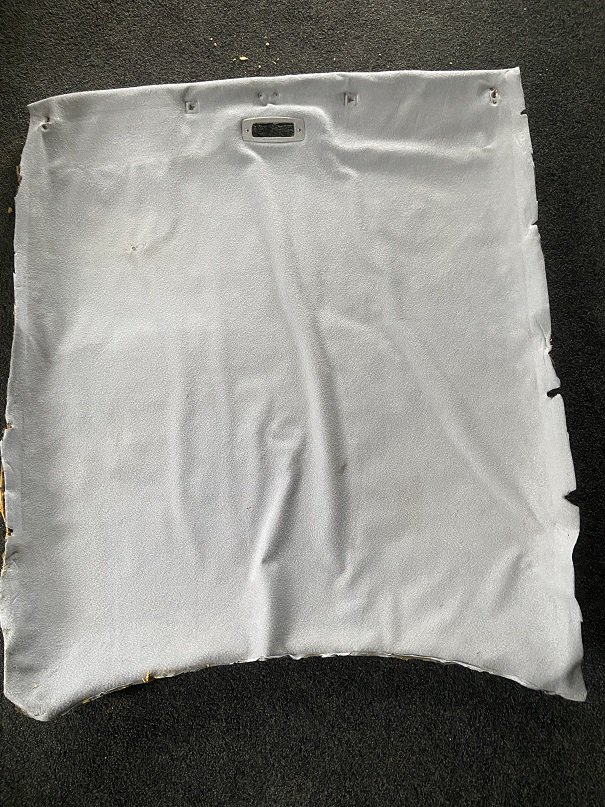
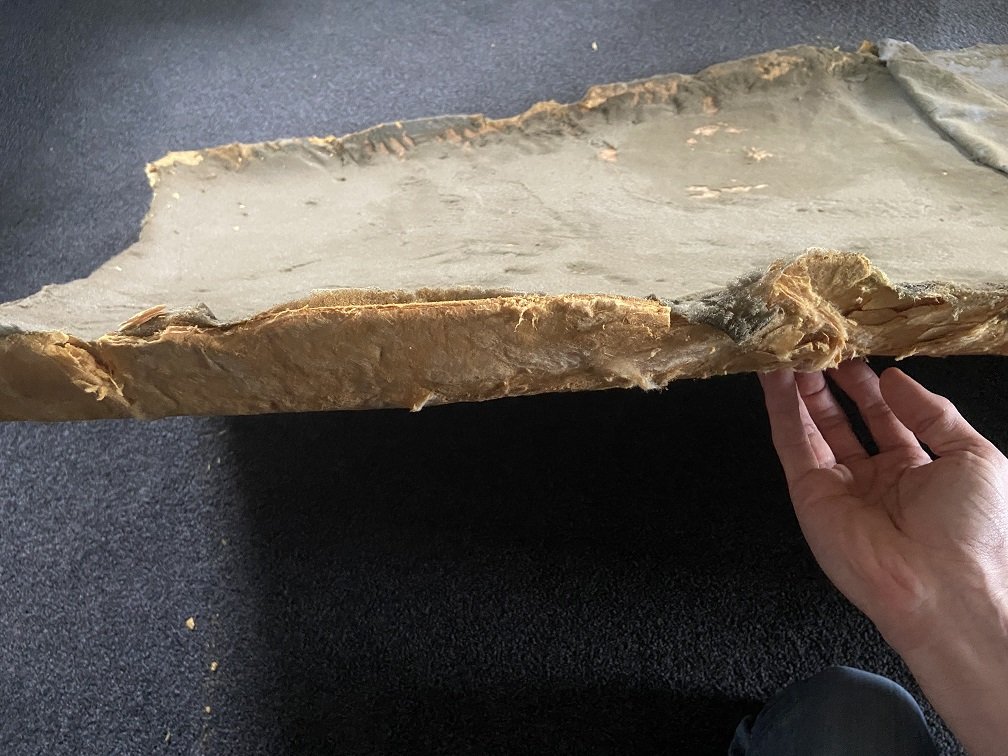
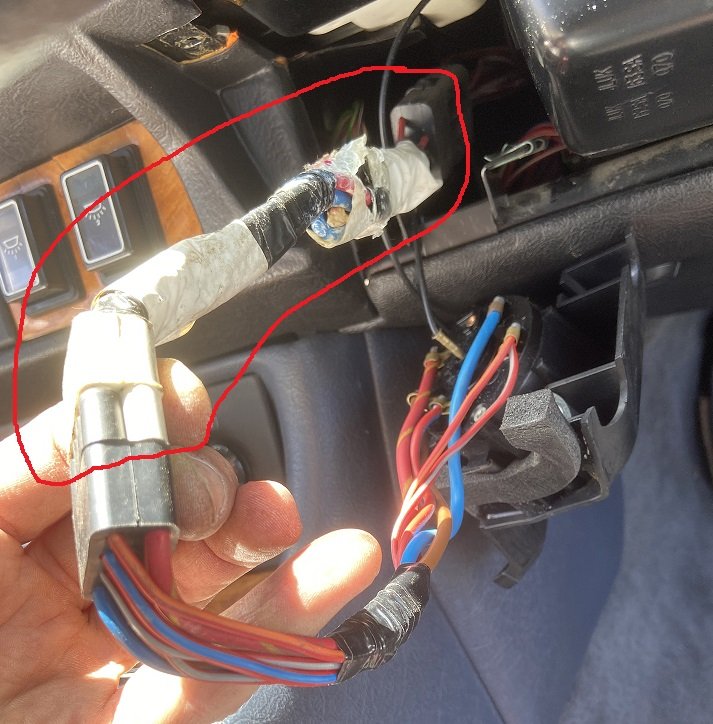
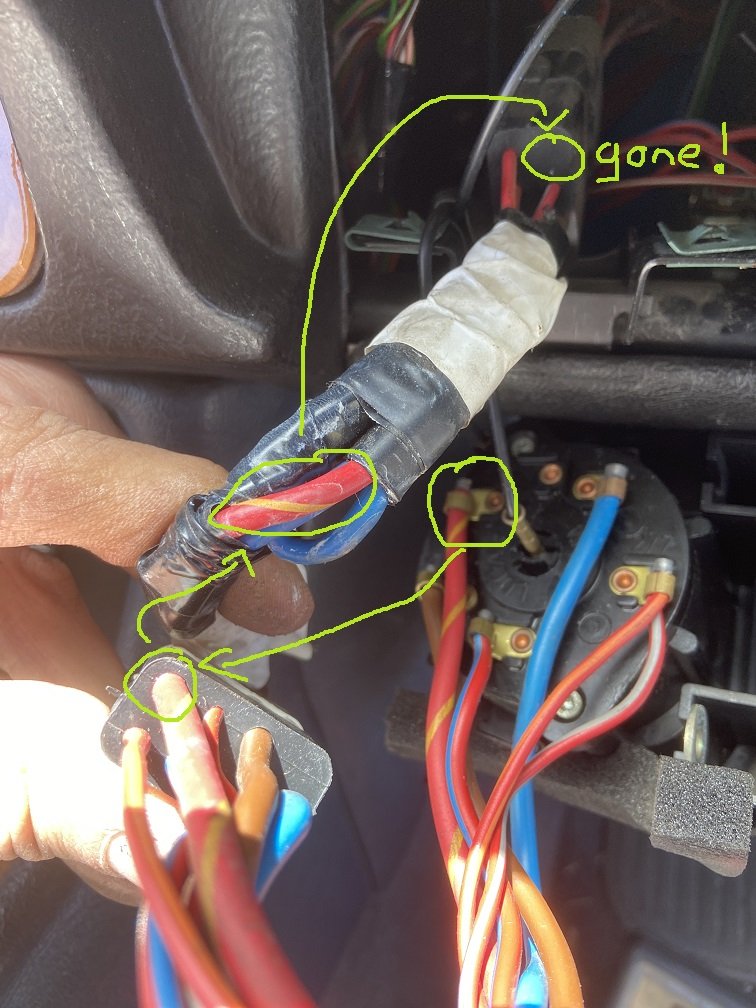
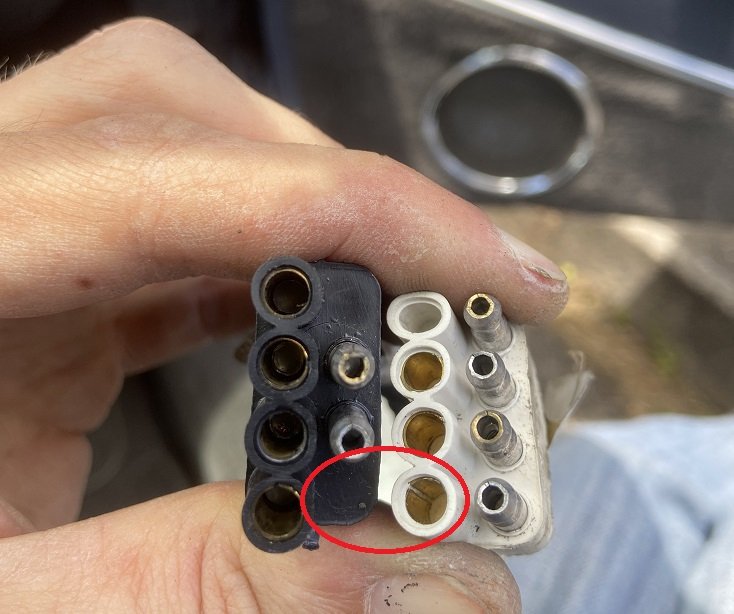
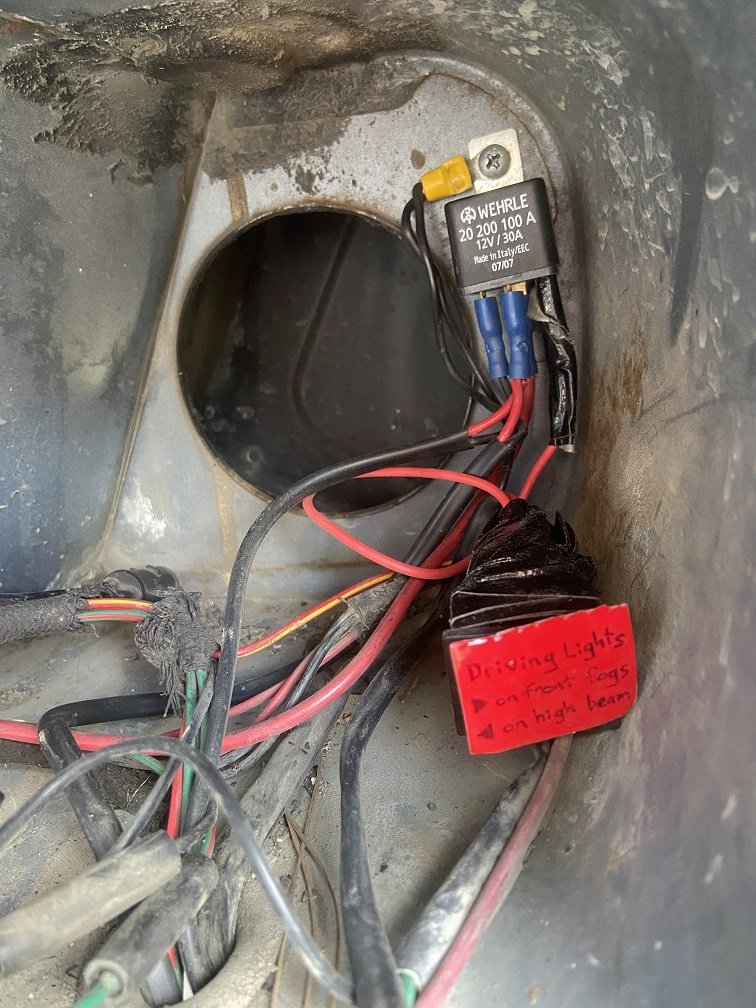
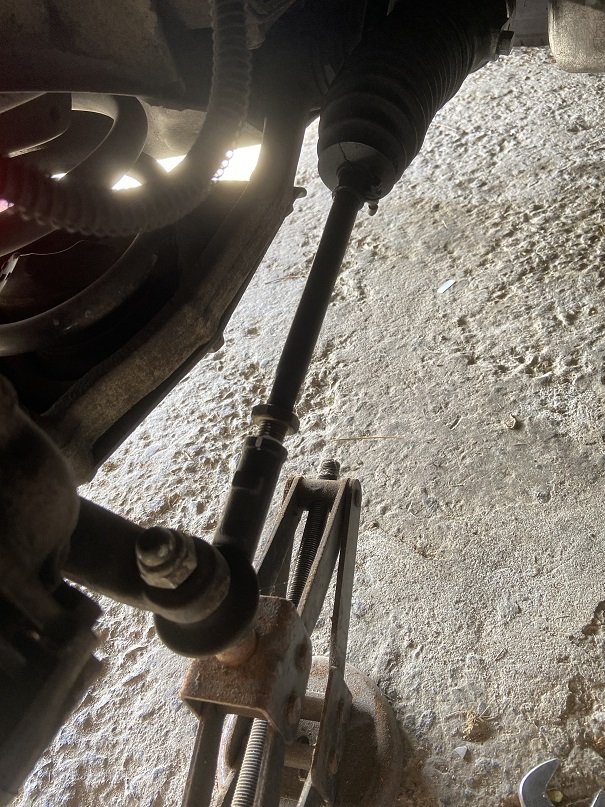
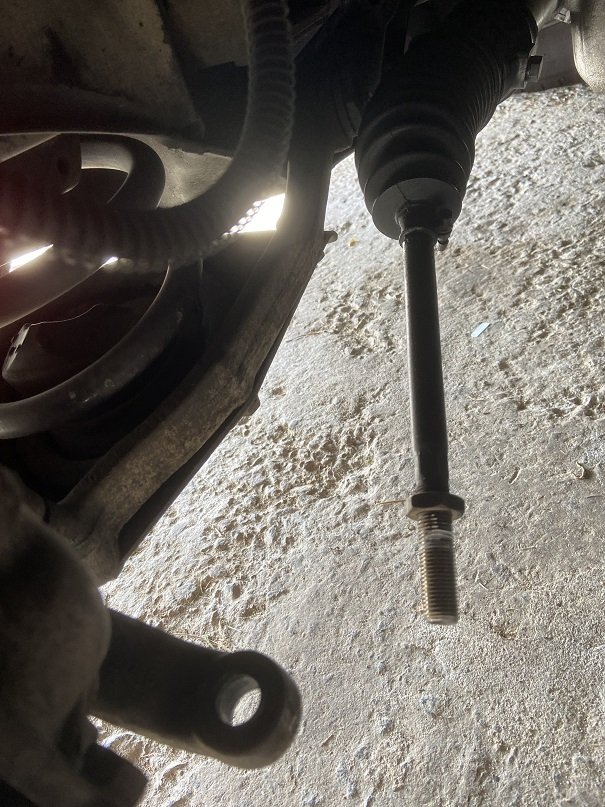
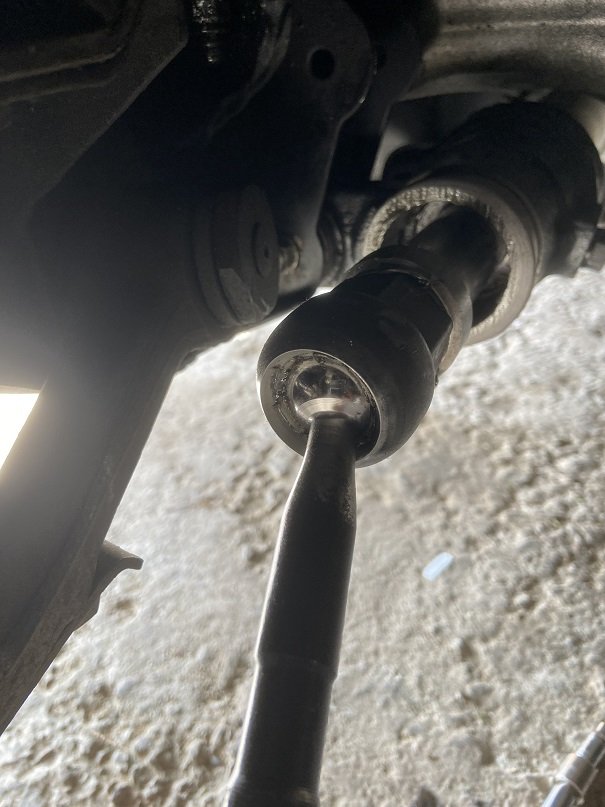
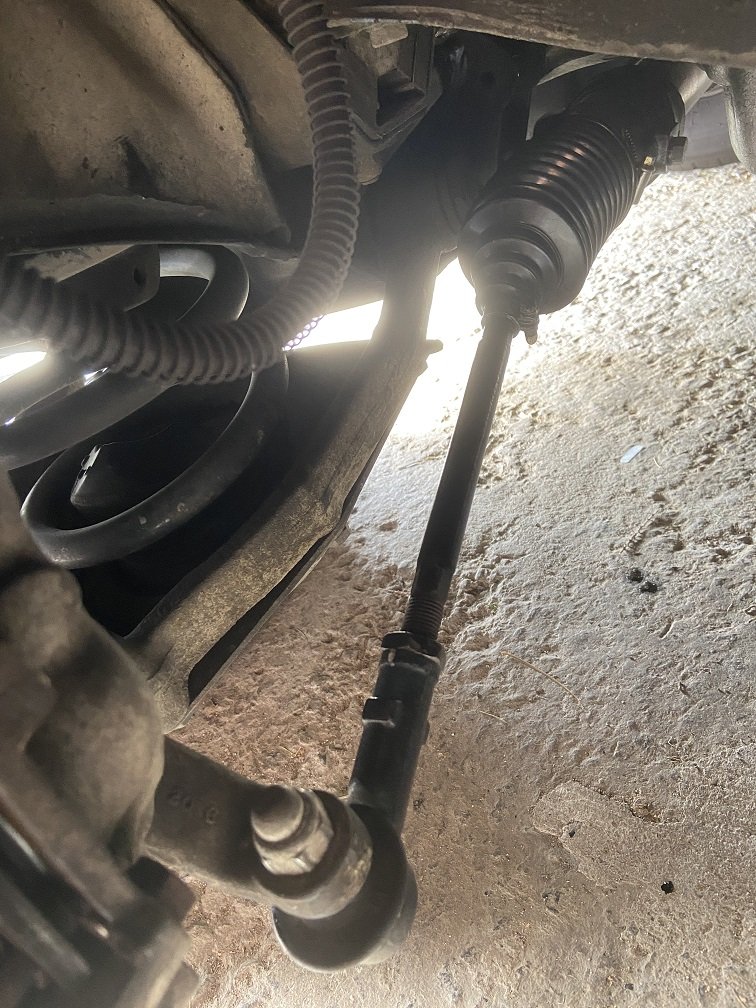
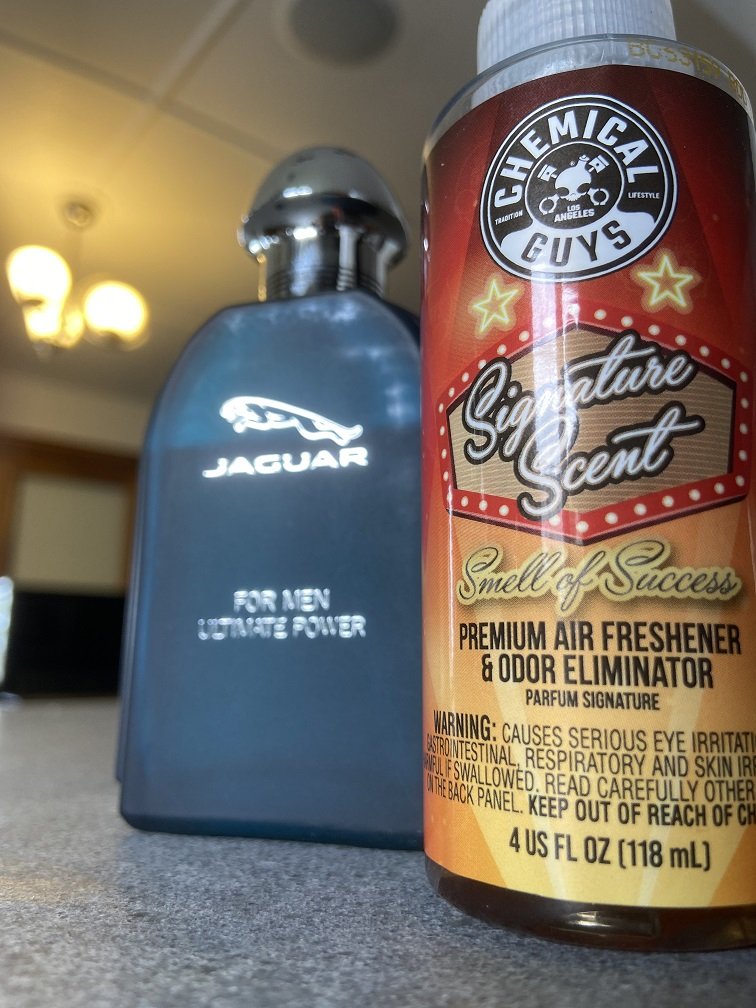
The headlining in the Jag started to sag badly, so I took the whole thing out. The backing is made of Weetbix covered in crumbling foam, and it's impossible to reuse at this point. The previous owner of my car was an upholsterer and his repair didn't last, cos nothing will stick to this flimsy mess. So now I have no headlining and no interior lights. You can get replacement headlinings which have the Weetbix backing shell replaced by fibreglass or something, but the shipping from the UK is crazy. On the Jag's last WOF inspection, they gave me a warning that they didn't like my aftermarket driving lights coming on with my high beams. Having the lights work that way made sense to me, but whatever, I figured I'd change them around to run off the front fog light circuit to keep the WOF man happy. Although my car didn't come with front fog lights from factory, it still has the dedicated fuse for them, and the dedicated SPARE fuse for them , and the headlight switch still has positions to activate them. So I figured I could just find the fog light plugs behind the bumper and they would already be functional / already be live when the headlight switch was set to the correct position. Right? Nope. After an hour or two of poking around, I found this stuffed in behind the headlight switch: It's an adapter for cars without fog lights, and its purpose is to stop the headlights from turning off when you turn the headlight switch to the fogs-only position. The adapter also prevents the fog light plugs from becoming live, because it breaks the connection to the fog light circuit. You know, that same circuit which is nevertheless fitted with a fuse and a spare fuse. You can see that the fog light circuit is discontinued in the photos below. So I just removed the adapter completely. Now my fog light circuit is live. The aftermarket driving lights in my car were conveniently run off a relay rather than directly off the high beam circuit. I added a switch to toggle that relay's coil supply between the high beam circuit and the fog light circuit, in case a different WOF man takes a different view of how my driving lights should work in future. The relay and switch are sitting inside of one of the headlight recesses: So now I have a way to drive around with just my driving lights on during the day, like a plonker. Then I actually went for the WOF, and failed because of a split steering rack boot. I replaced it all by myself, because I am a totally legit home mechanic. Currently on the Jag's to-do list: Find another solution for the headlining Get the auto looked at (I'm pretty sure it's slipping and getting worse, so I'm afraid to use full throttle now) Stop the drivers window sticking Fix the radio (some speaker wiring must be shorting somewhere, cos no sound comes out) Install the new rear subframe mounts Install the new rear trailing radius arm bushes I'm becoming more of a Jag man as time goes on. Check out my Jaaag fragrance collection, which lives in the car: "Jaguar: Ultimate Power" (a couple of sprays on the car makes it go faster), and of course the Smell of Success. Apparently, success smells like creme brulee / vanilla / caramelised sugar, whereas the Jaguar fragrance ironically smells like lemons.
2 points
-
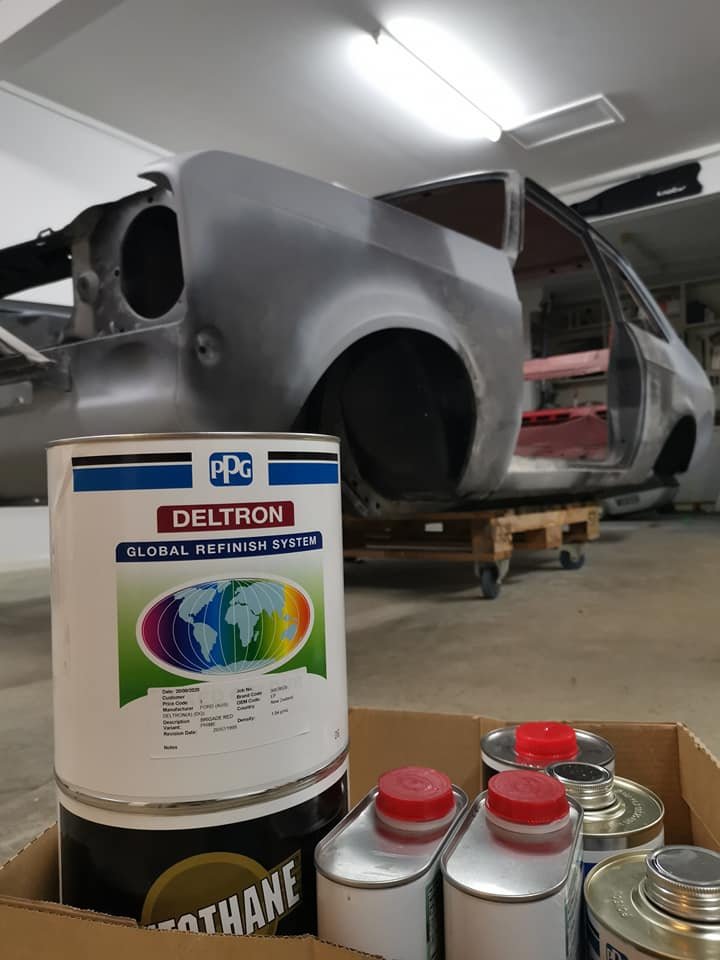
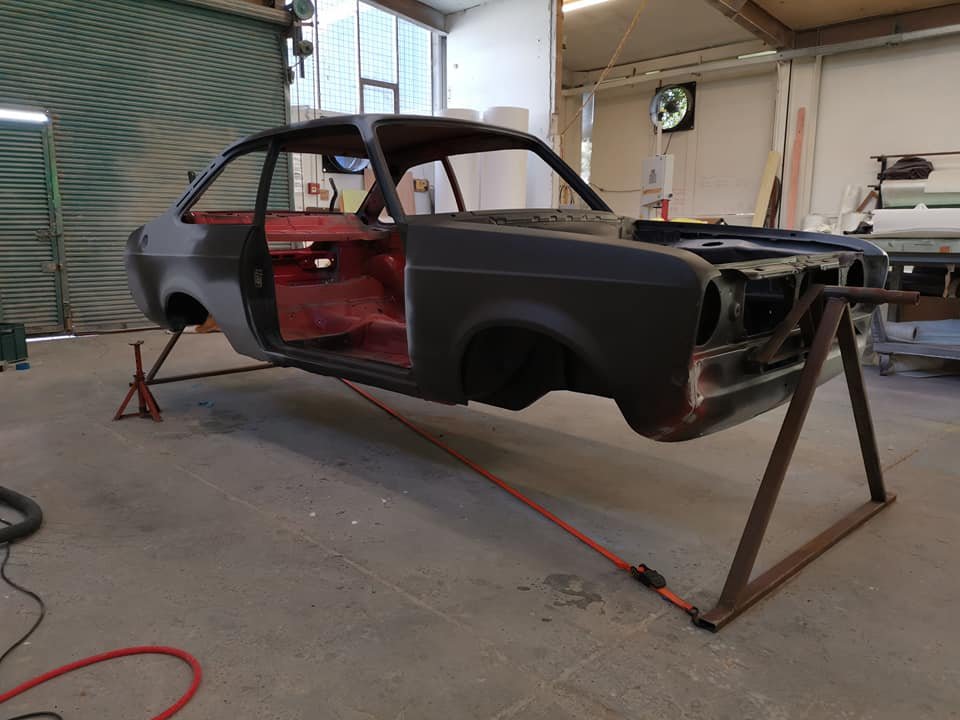
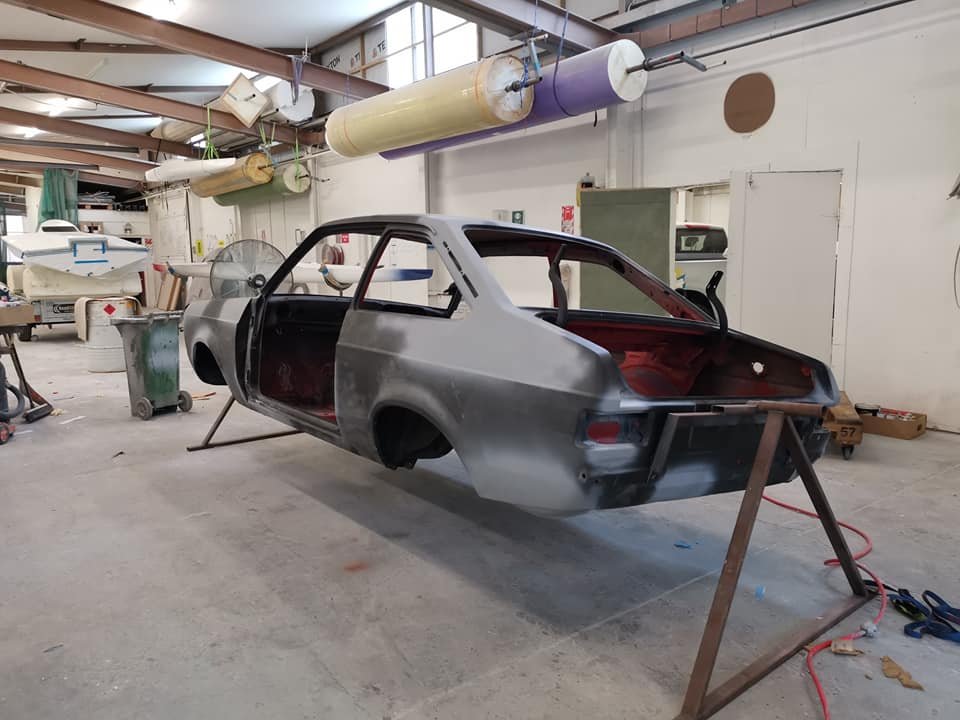
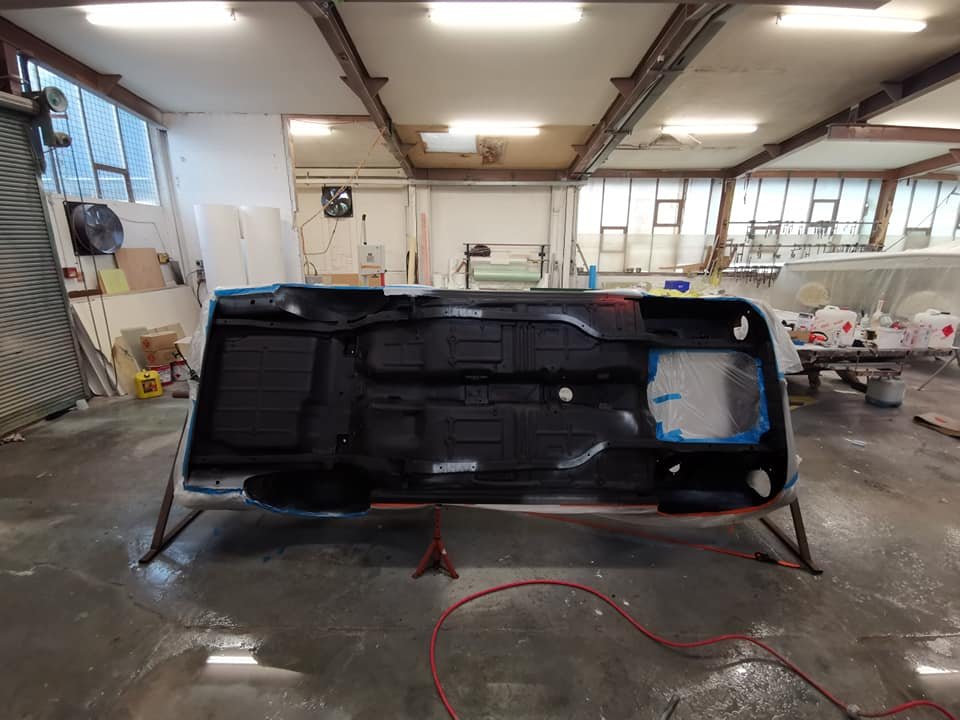
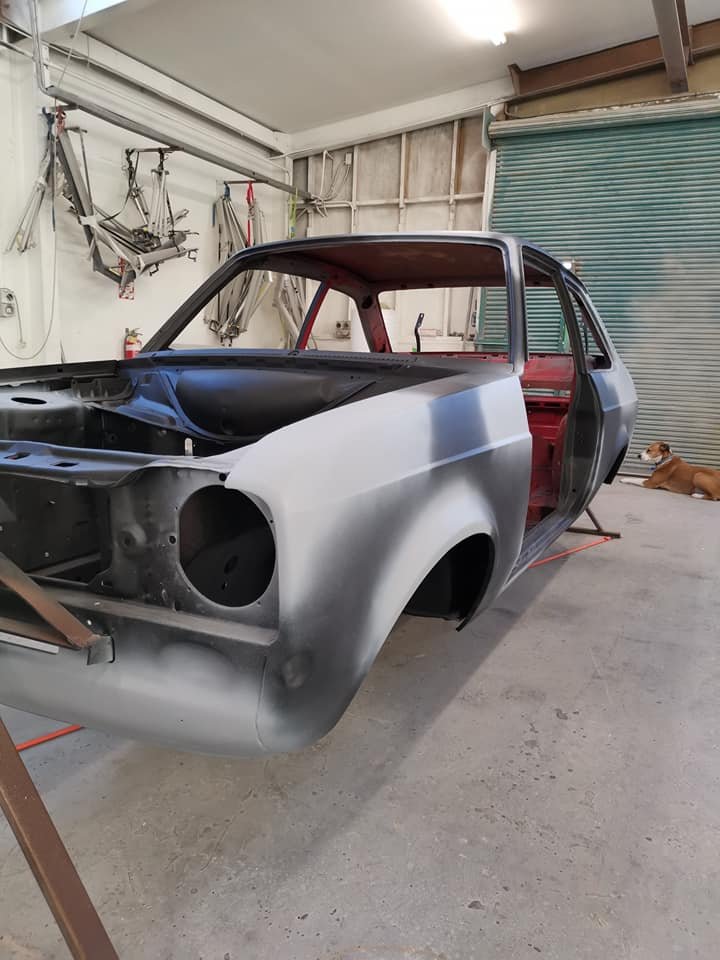
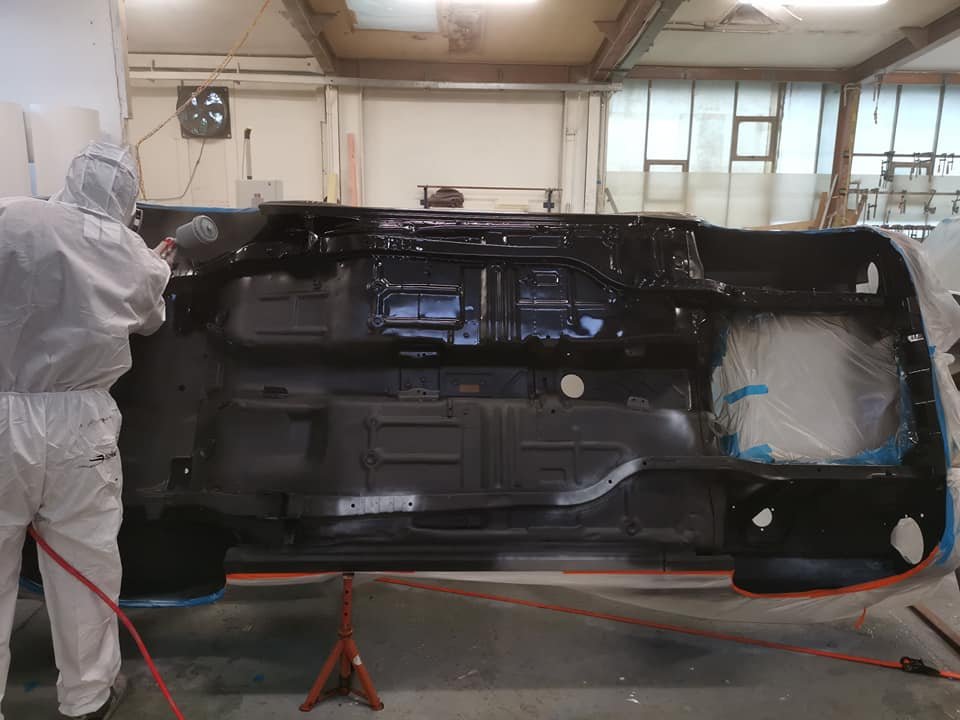
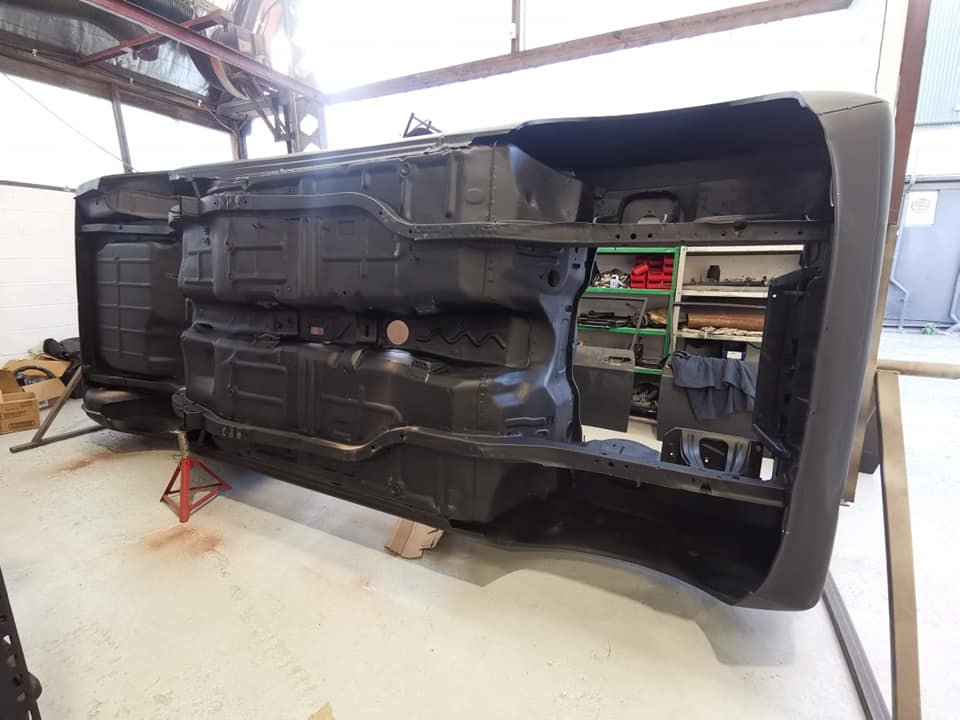
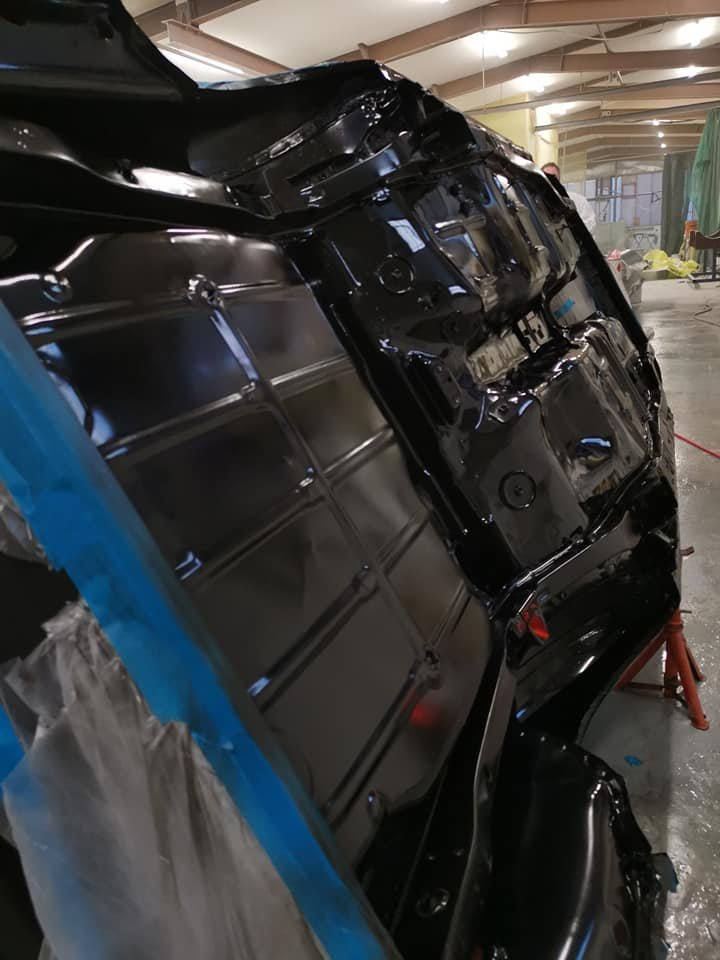
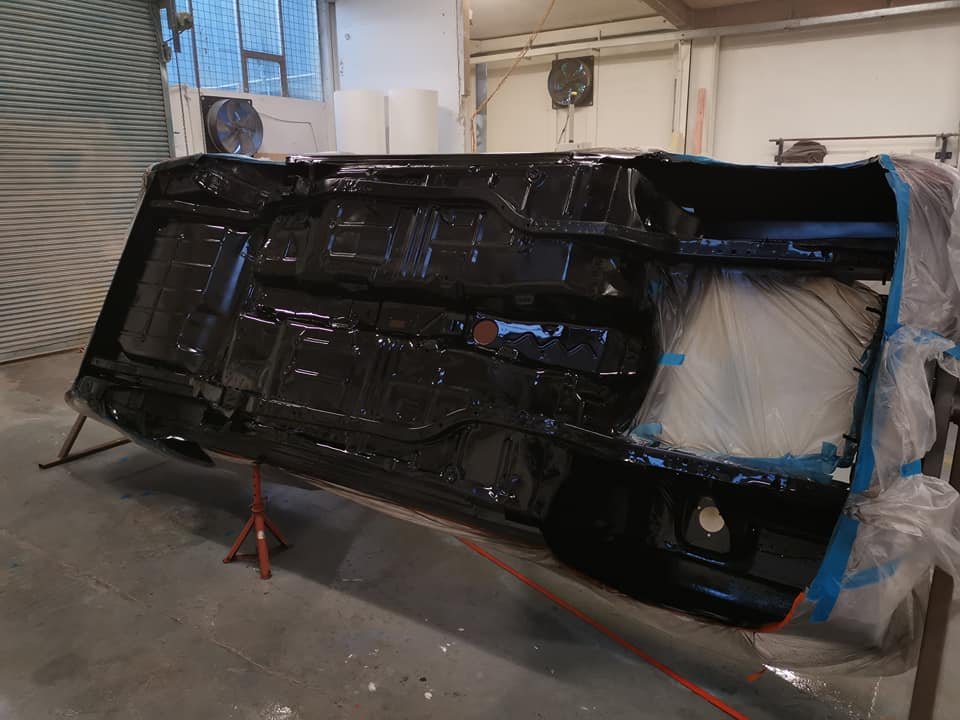
The next bit was sorting the paint and dealing to the underside. Good ol Brigade Red was actually a pain to get correct but well worth the effort. Thanks to the budget rotisserie it made life much easier. We managed to prime and paint the underside over a long weekend. Once this was done the car came back home where it sat for some time. As we went into lock downs, I got busy on the panel beating. With only the bonnet and boot lid under my belt previously, I did what I thought was right and it came up pretty bloody well.
2 points
-
1 point
-
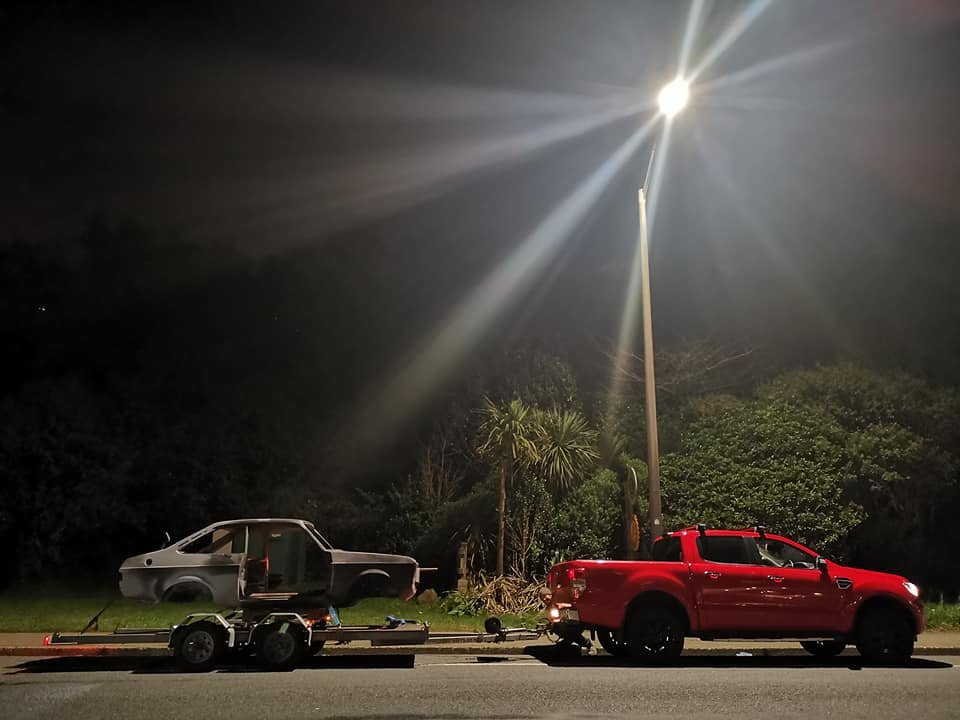
The eagle has landed
1 point
-
Dobi springs are usually that colour1 point
-
@fuel yep just measure it at 114.3! Wtf mitsi? So cm5a AWD is 4x114.3 disc rear And cm2a AWD is 4x100 drum rear ....huh? EDIT: but wait...does that mean... not everything I read on the internet is true?1 point
-
Winding back the caliper pistons was a bit of a shit job. Couldn't get enough pressure onto the piston with my home made wind back tool (angle grinder nut wrench) so had to use a C clamp and the trusty Knippex grips1 point
-
Obviously the correct answer is turbo barra. That would make a jag than runs.1 point
-
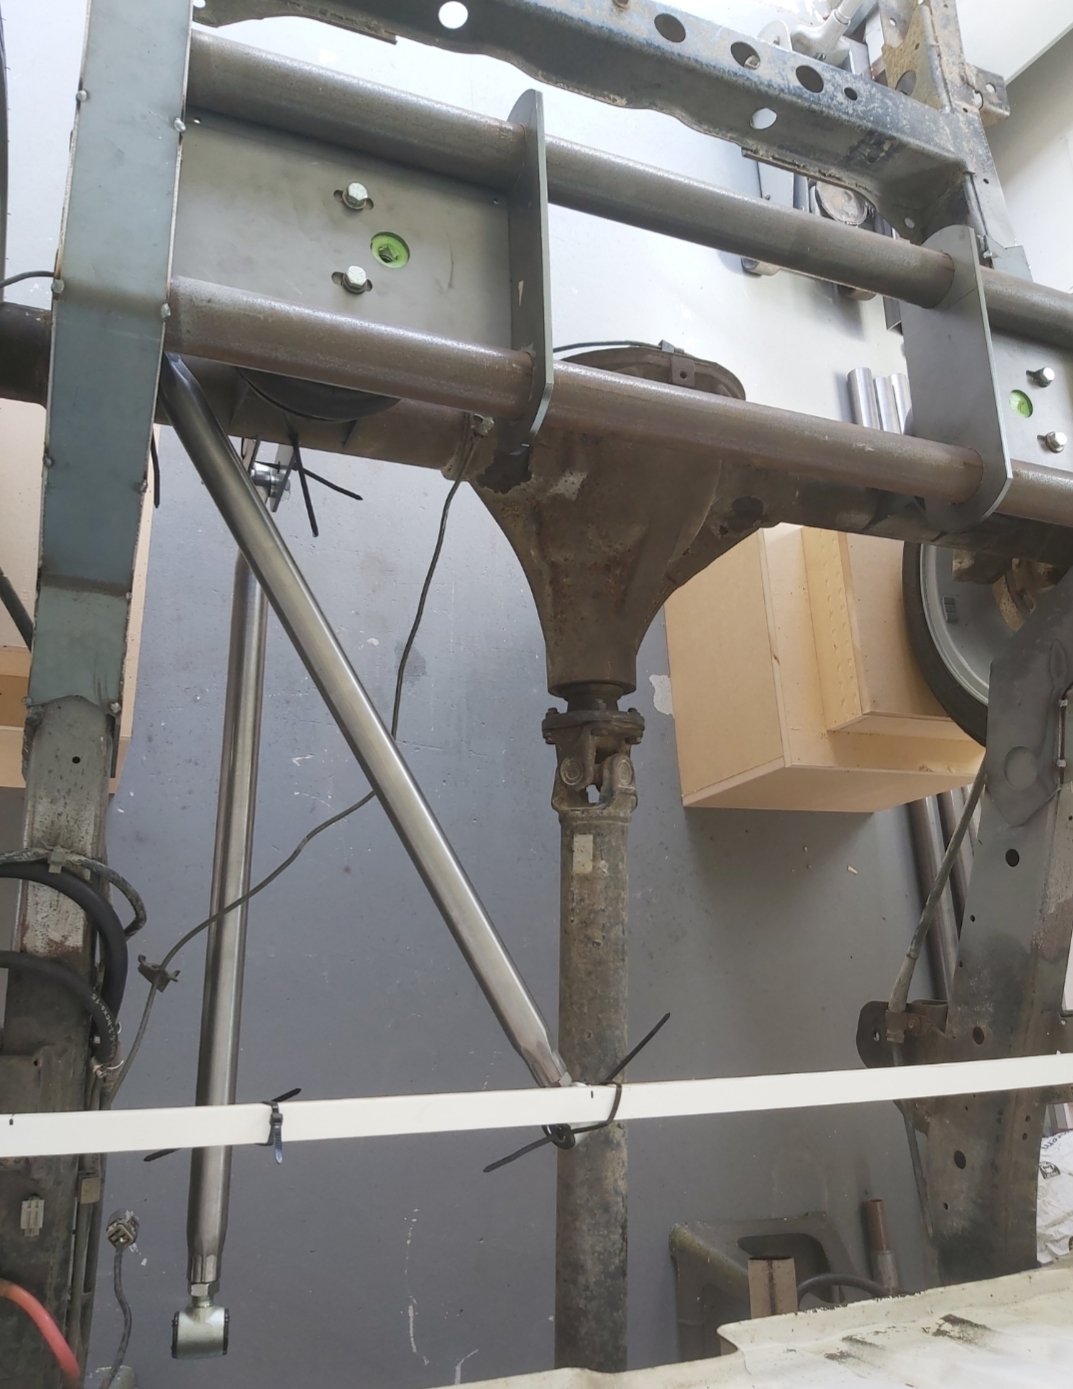
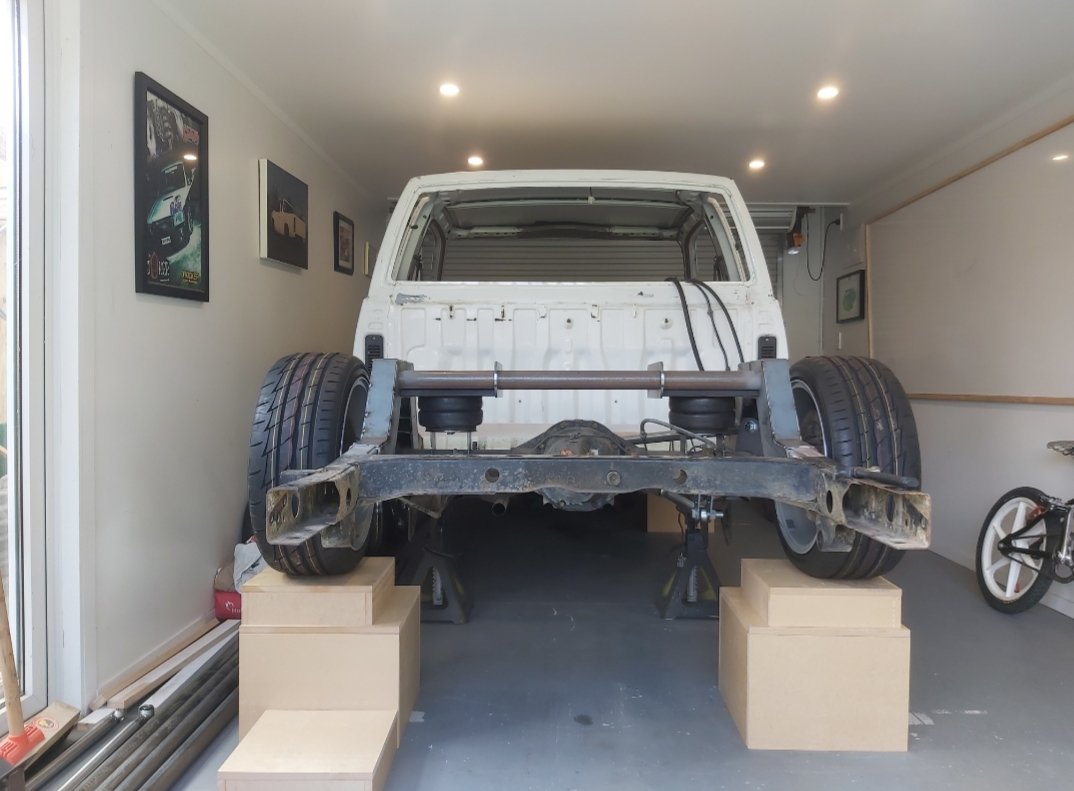
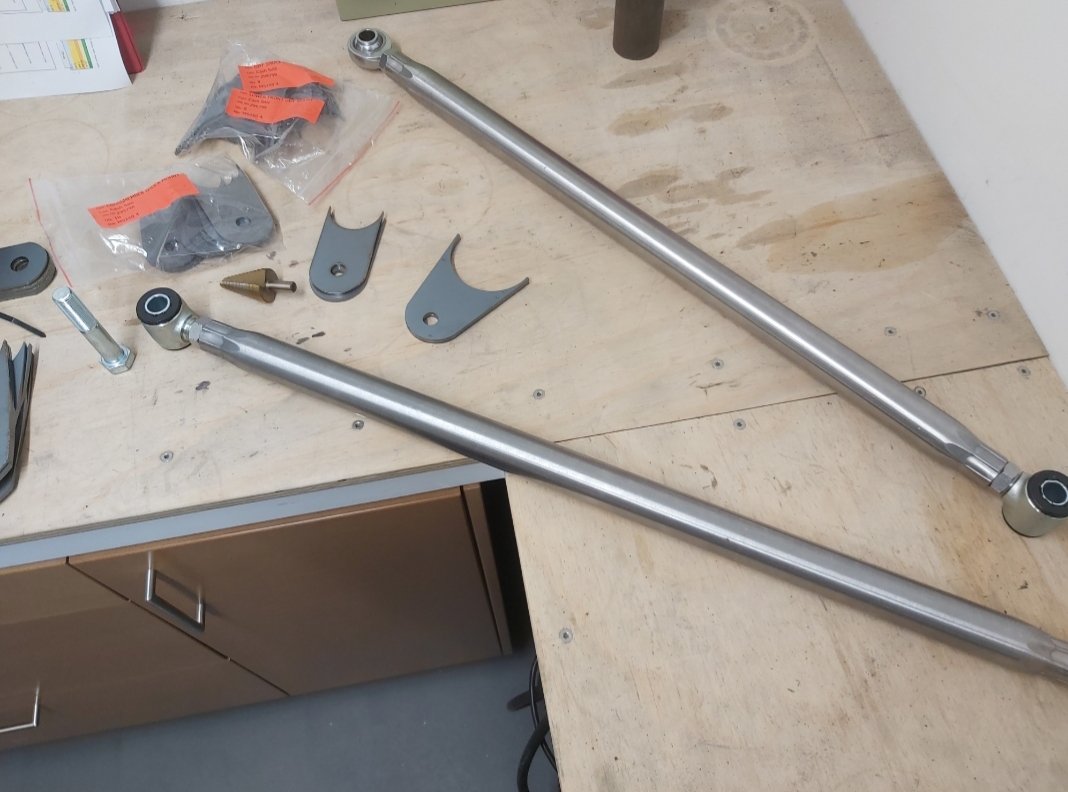
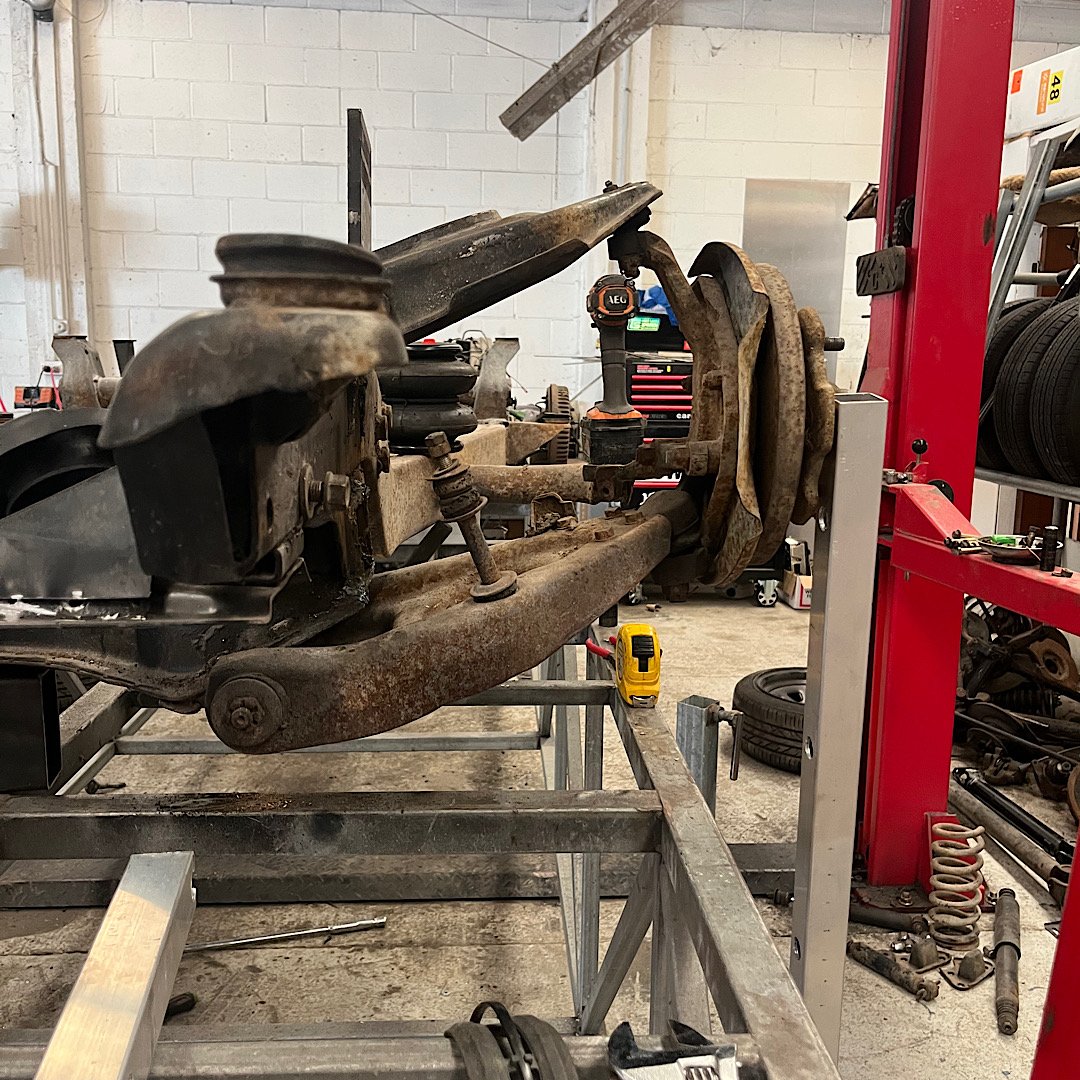
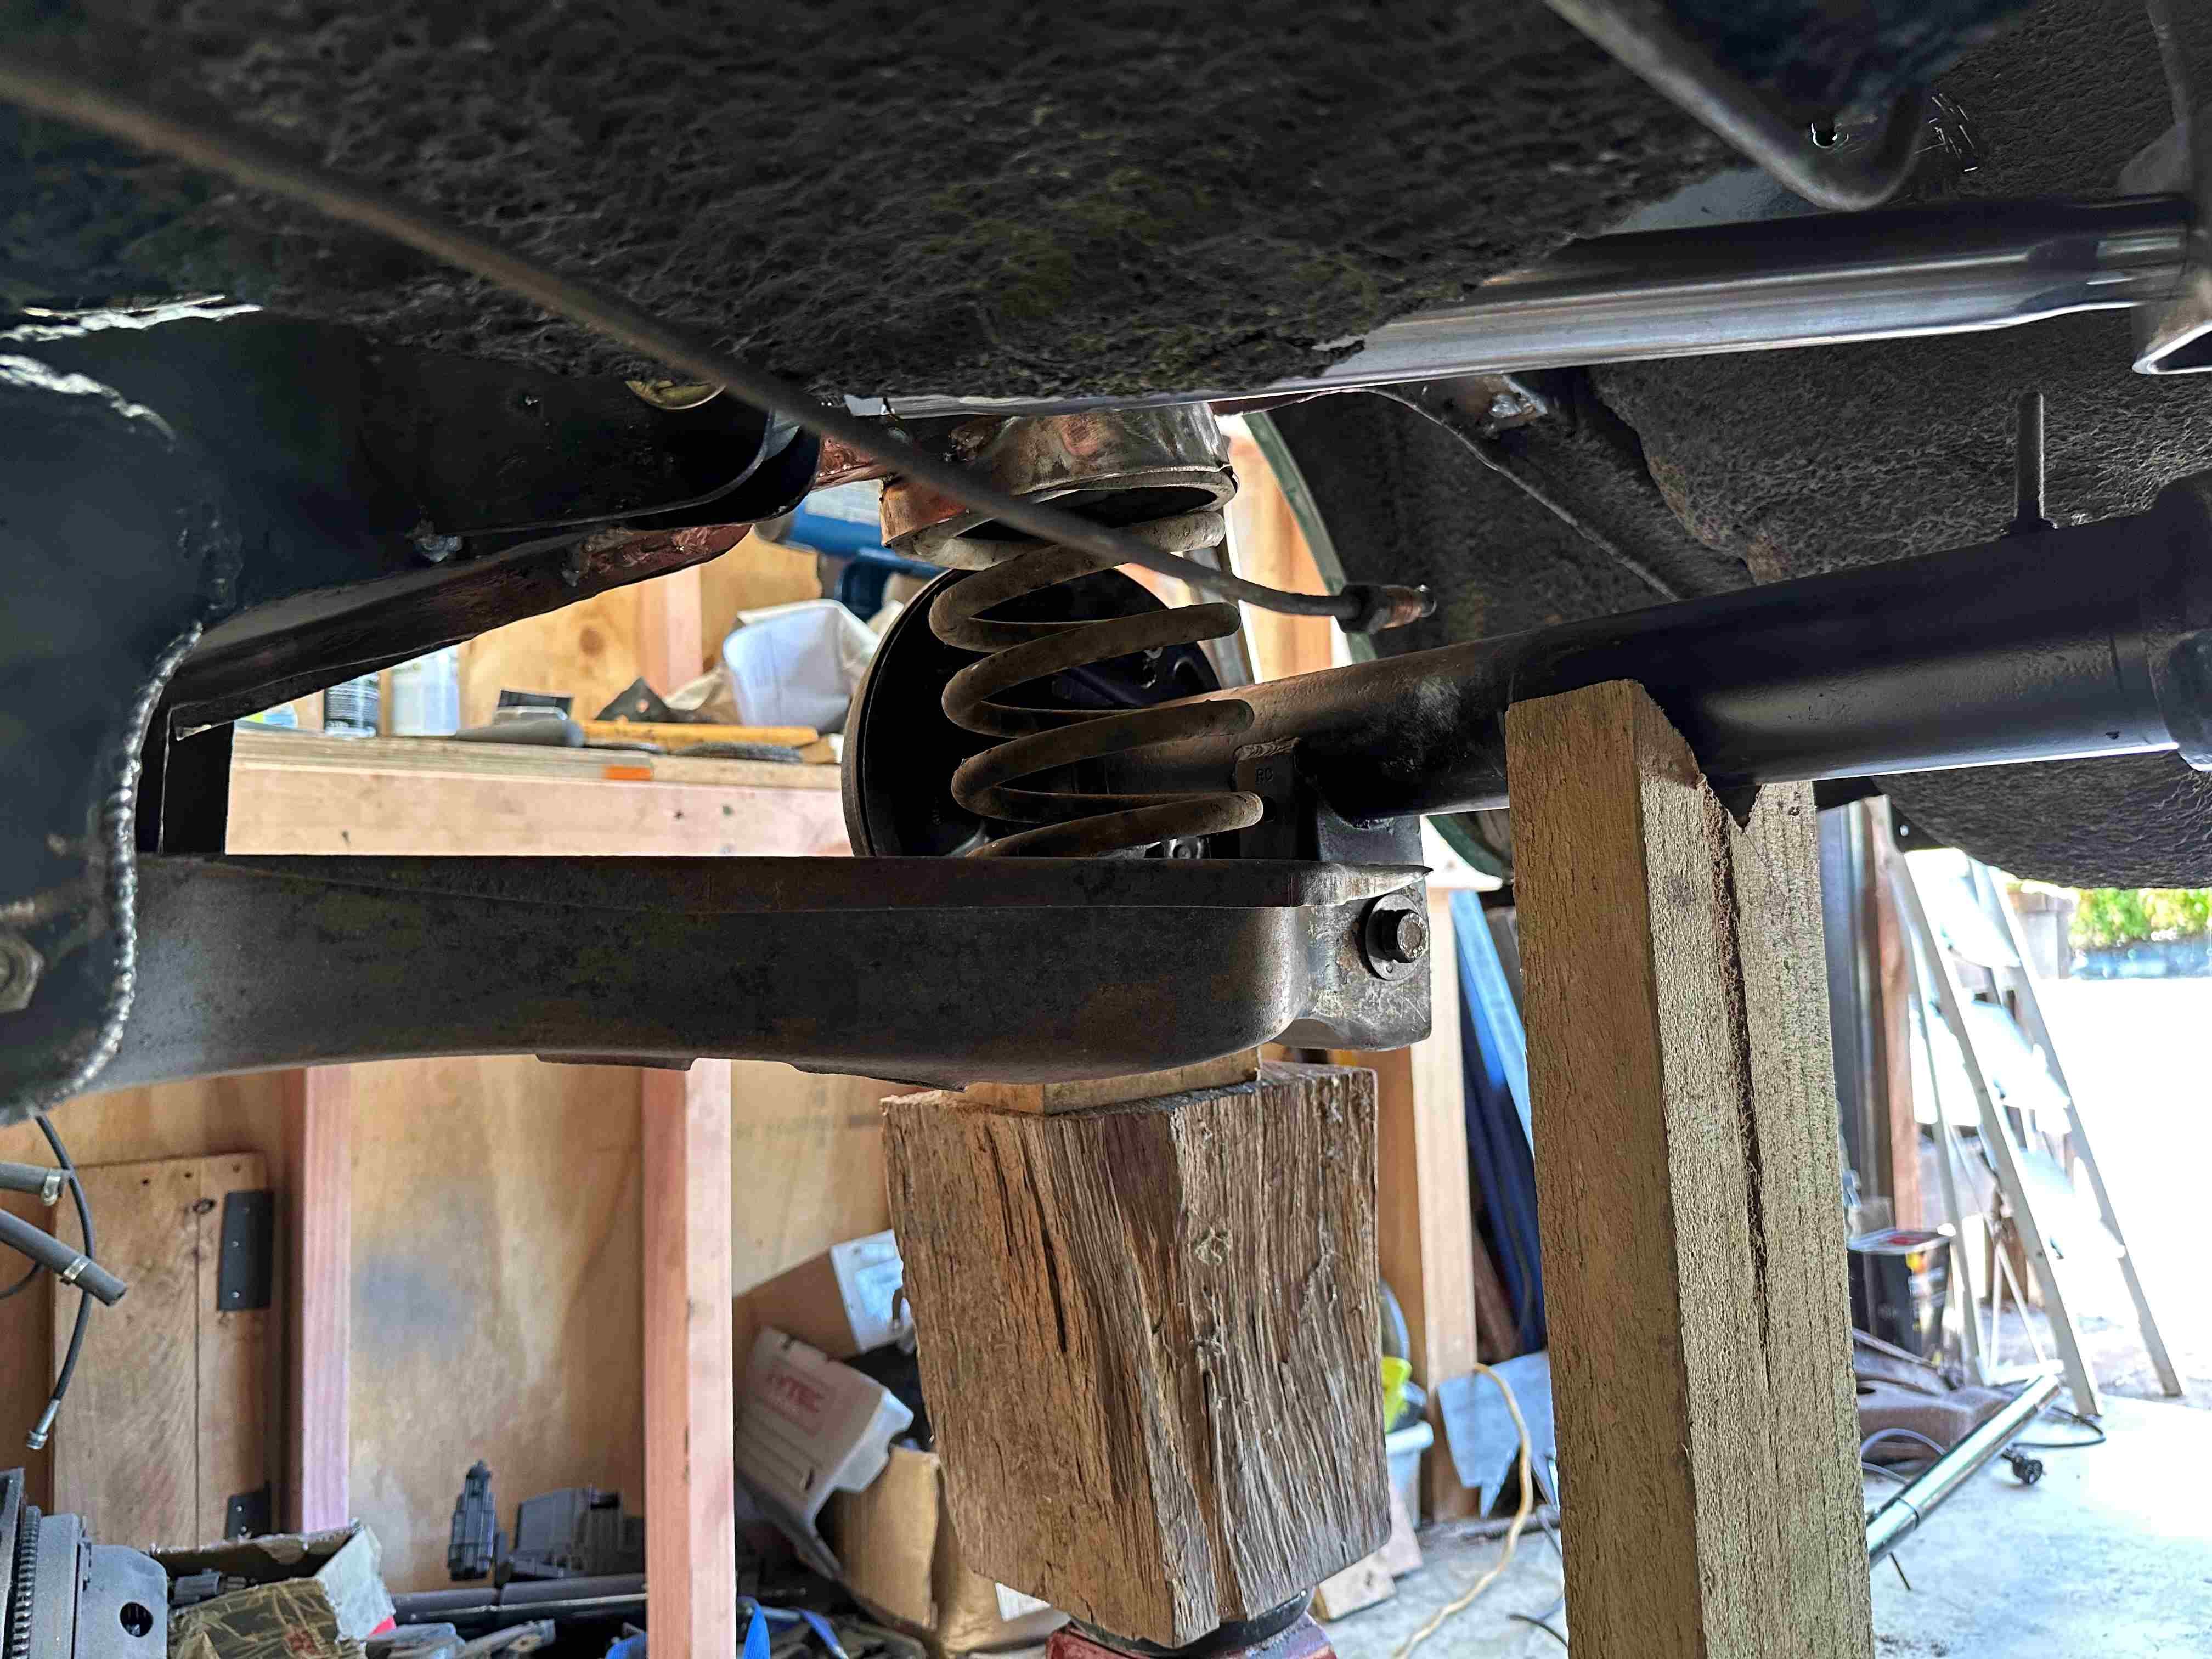
Finally picked up my balls! C notch is welded (sort of) chassis is cut, 4 link arms, brackets, bag plates, more tube for crossmembers and 4 weeks off work have all been acquired. Time to smash all that together and see what I can create. I purchased my 4 link arms from rod ends nz. I Was very happy with their service. At my door the next day. Thanks for looking Nick
1 point
-
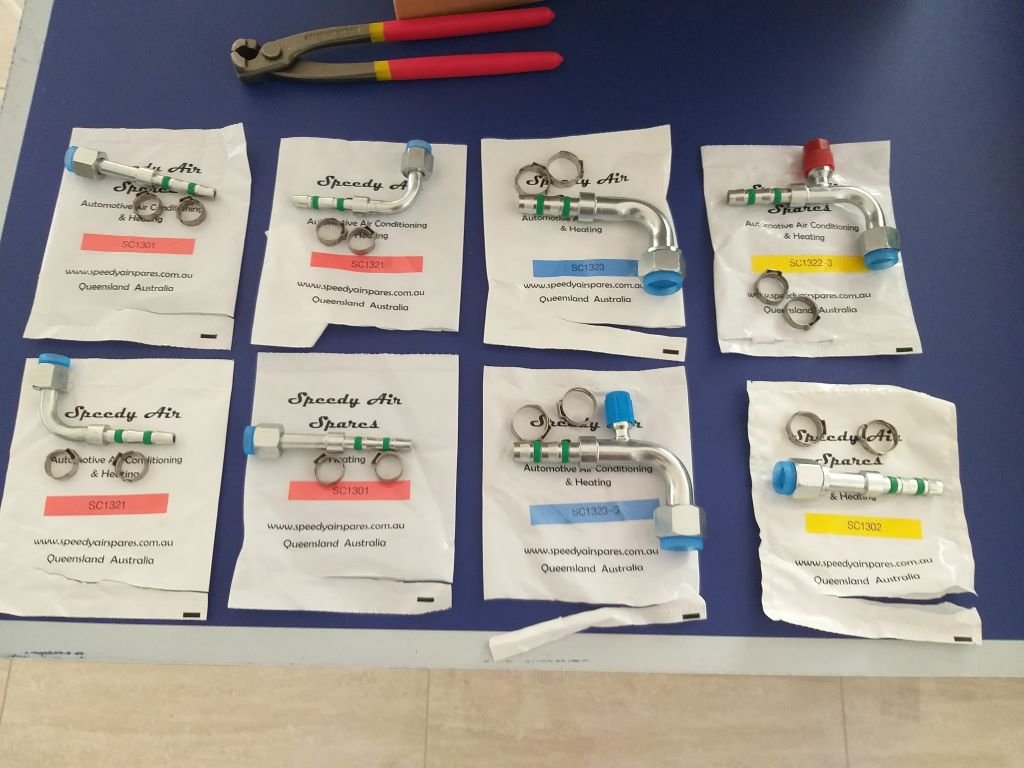
Couldn't wait to unpack my a/c hose fittings. I've gone for the DIY Air-O-Crimp option. It's the first time that I'm going to be making up my own a/c hoses, so I reckon I'm in for an interesting time.
1 point
-
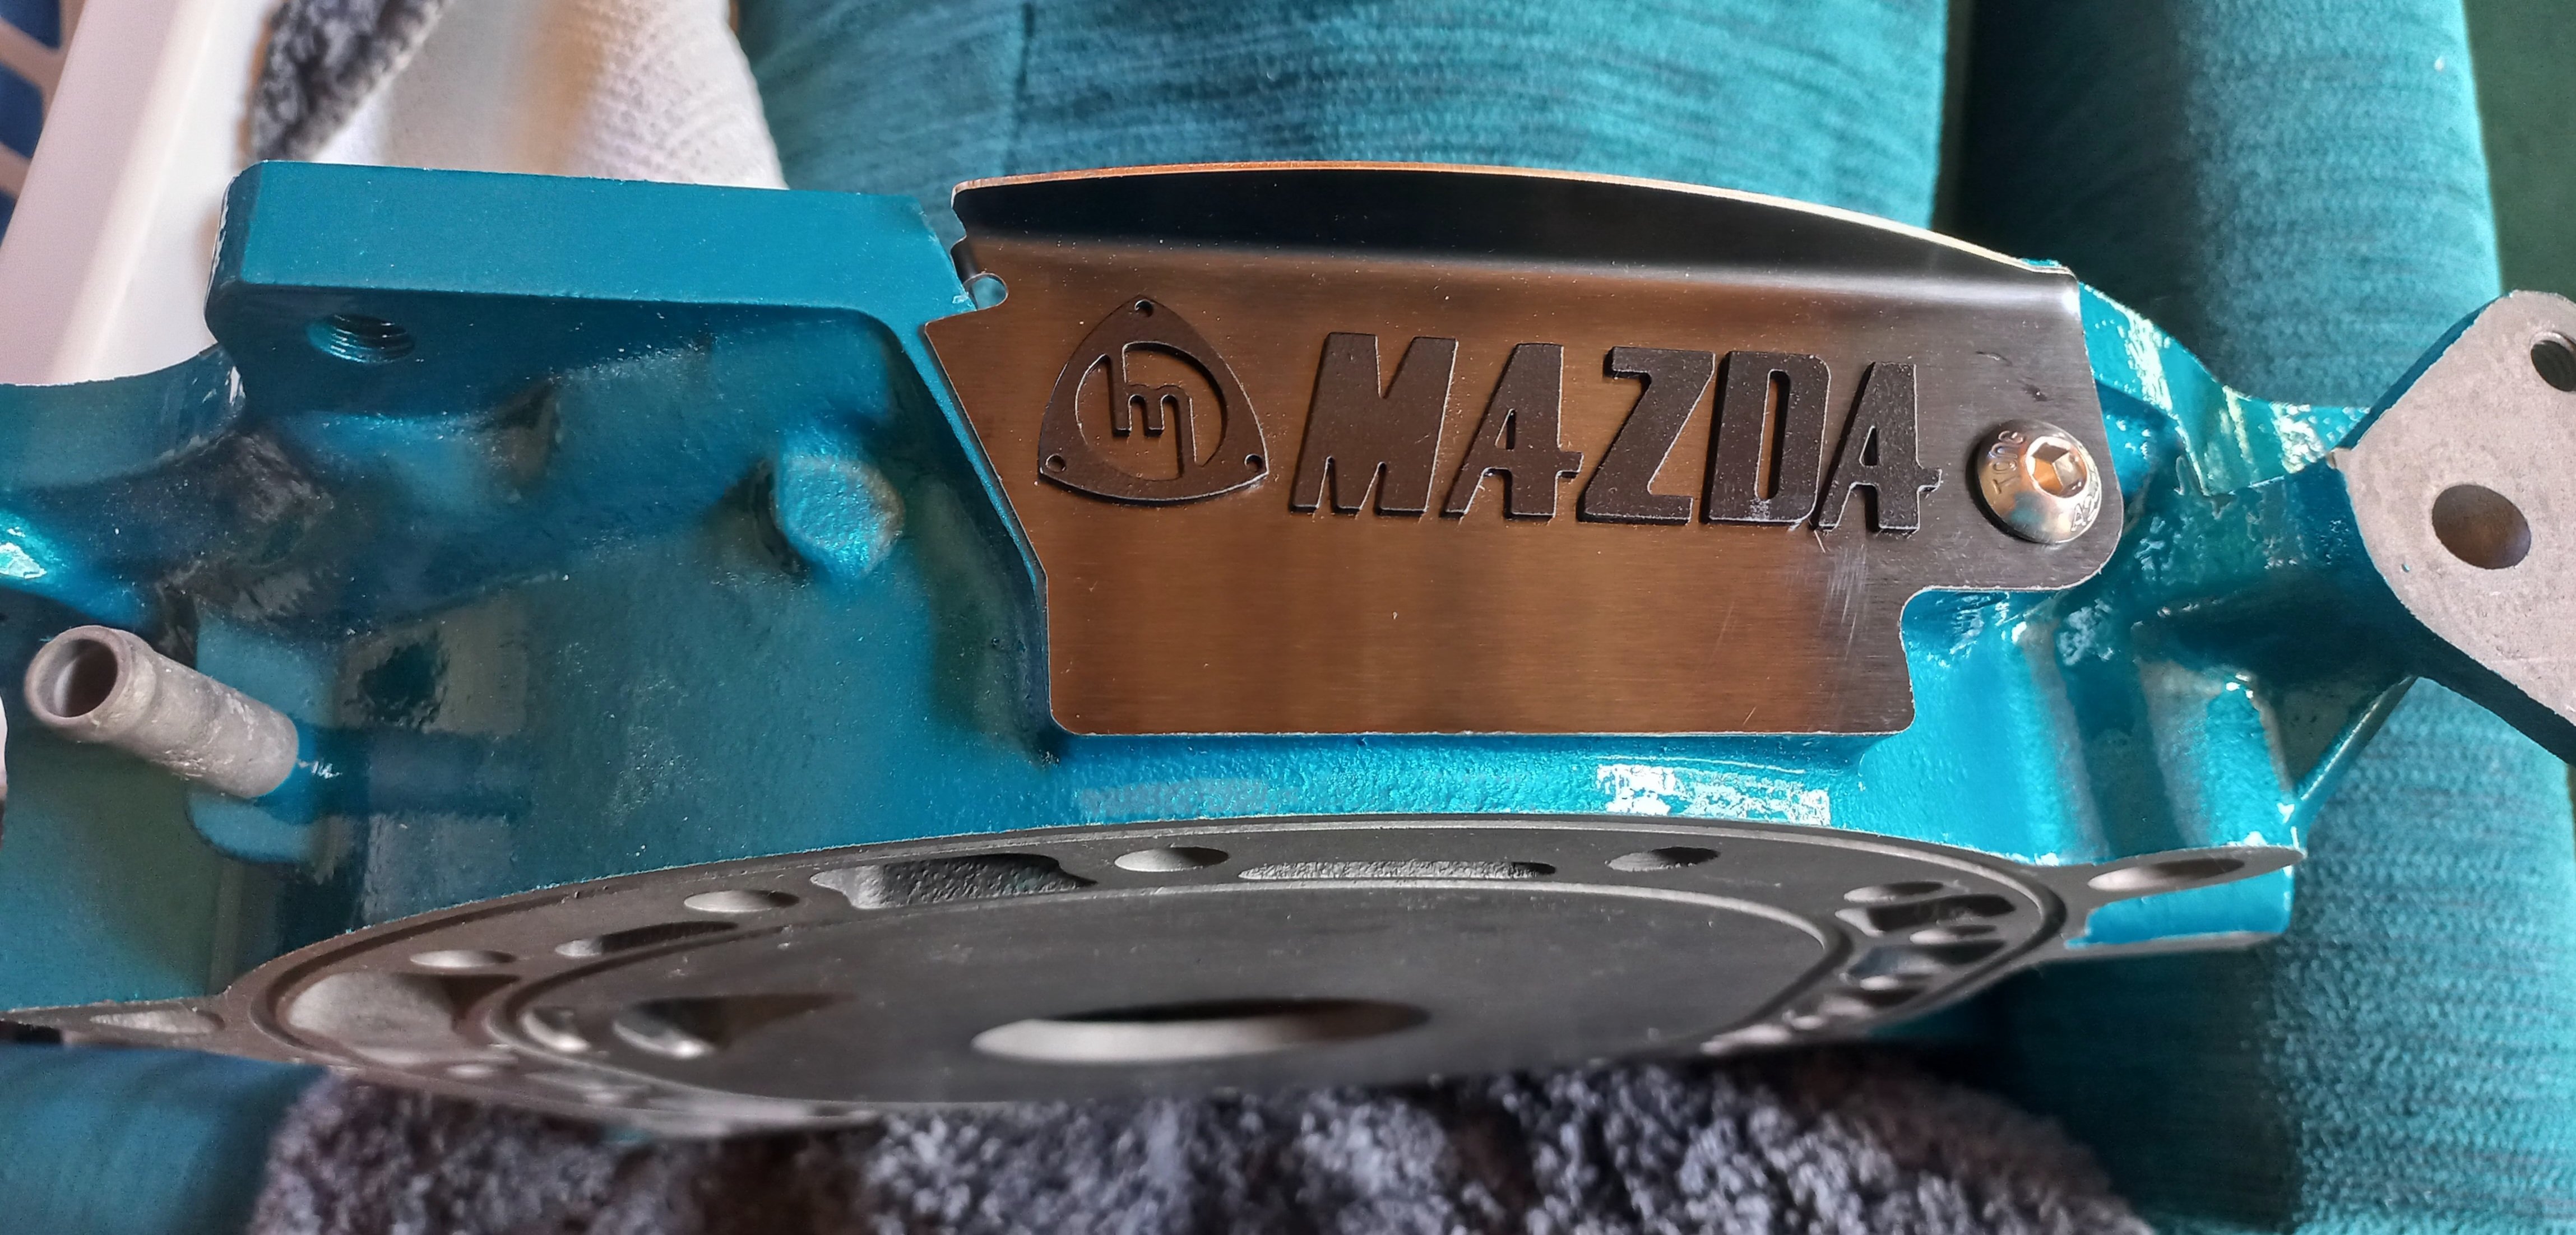
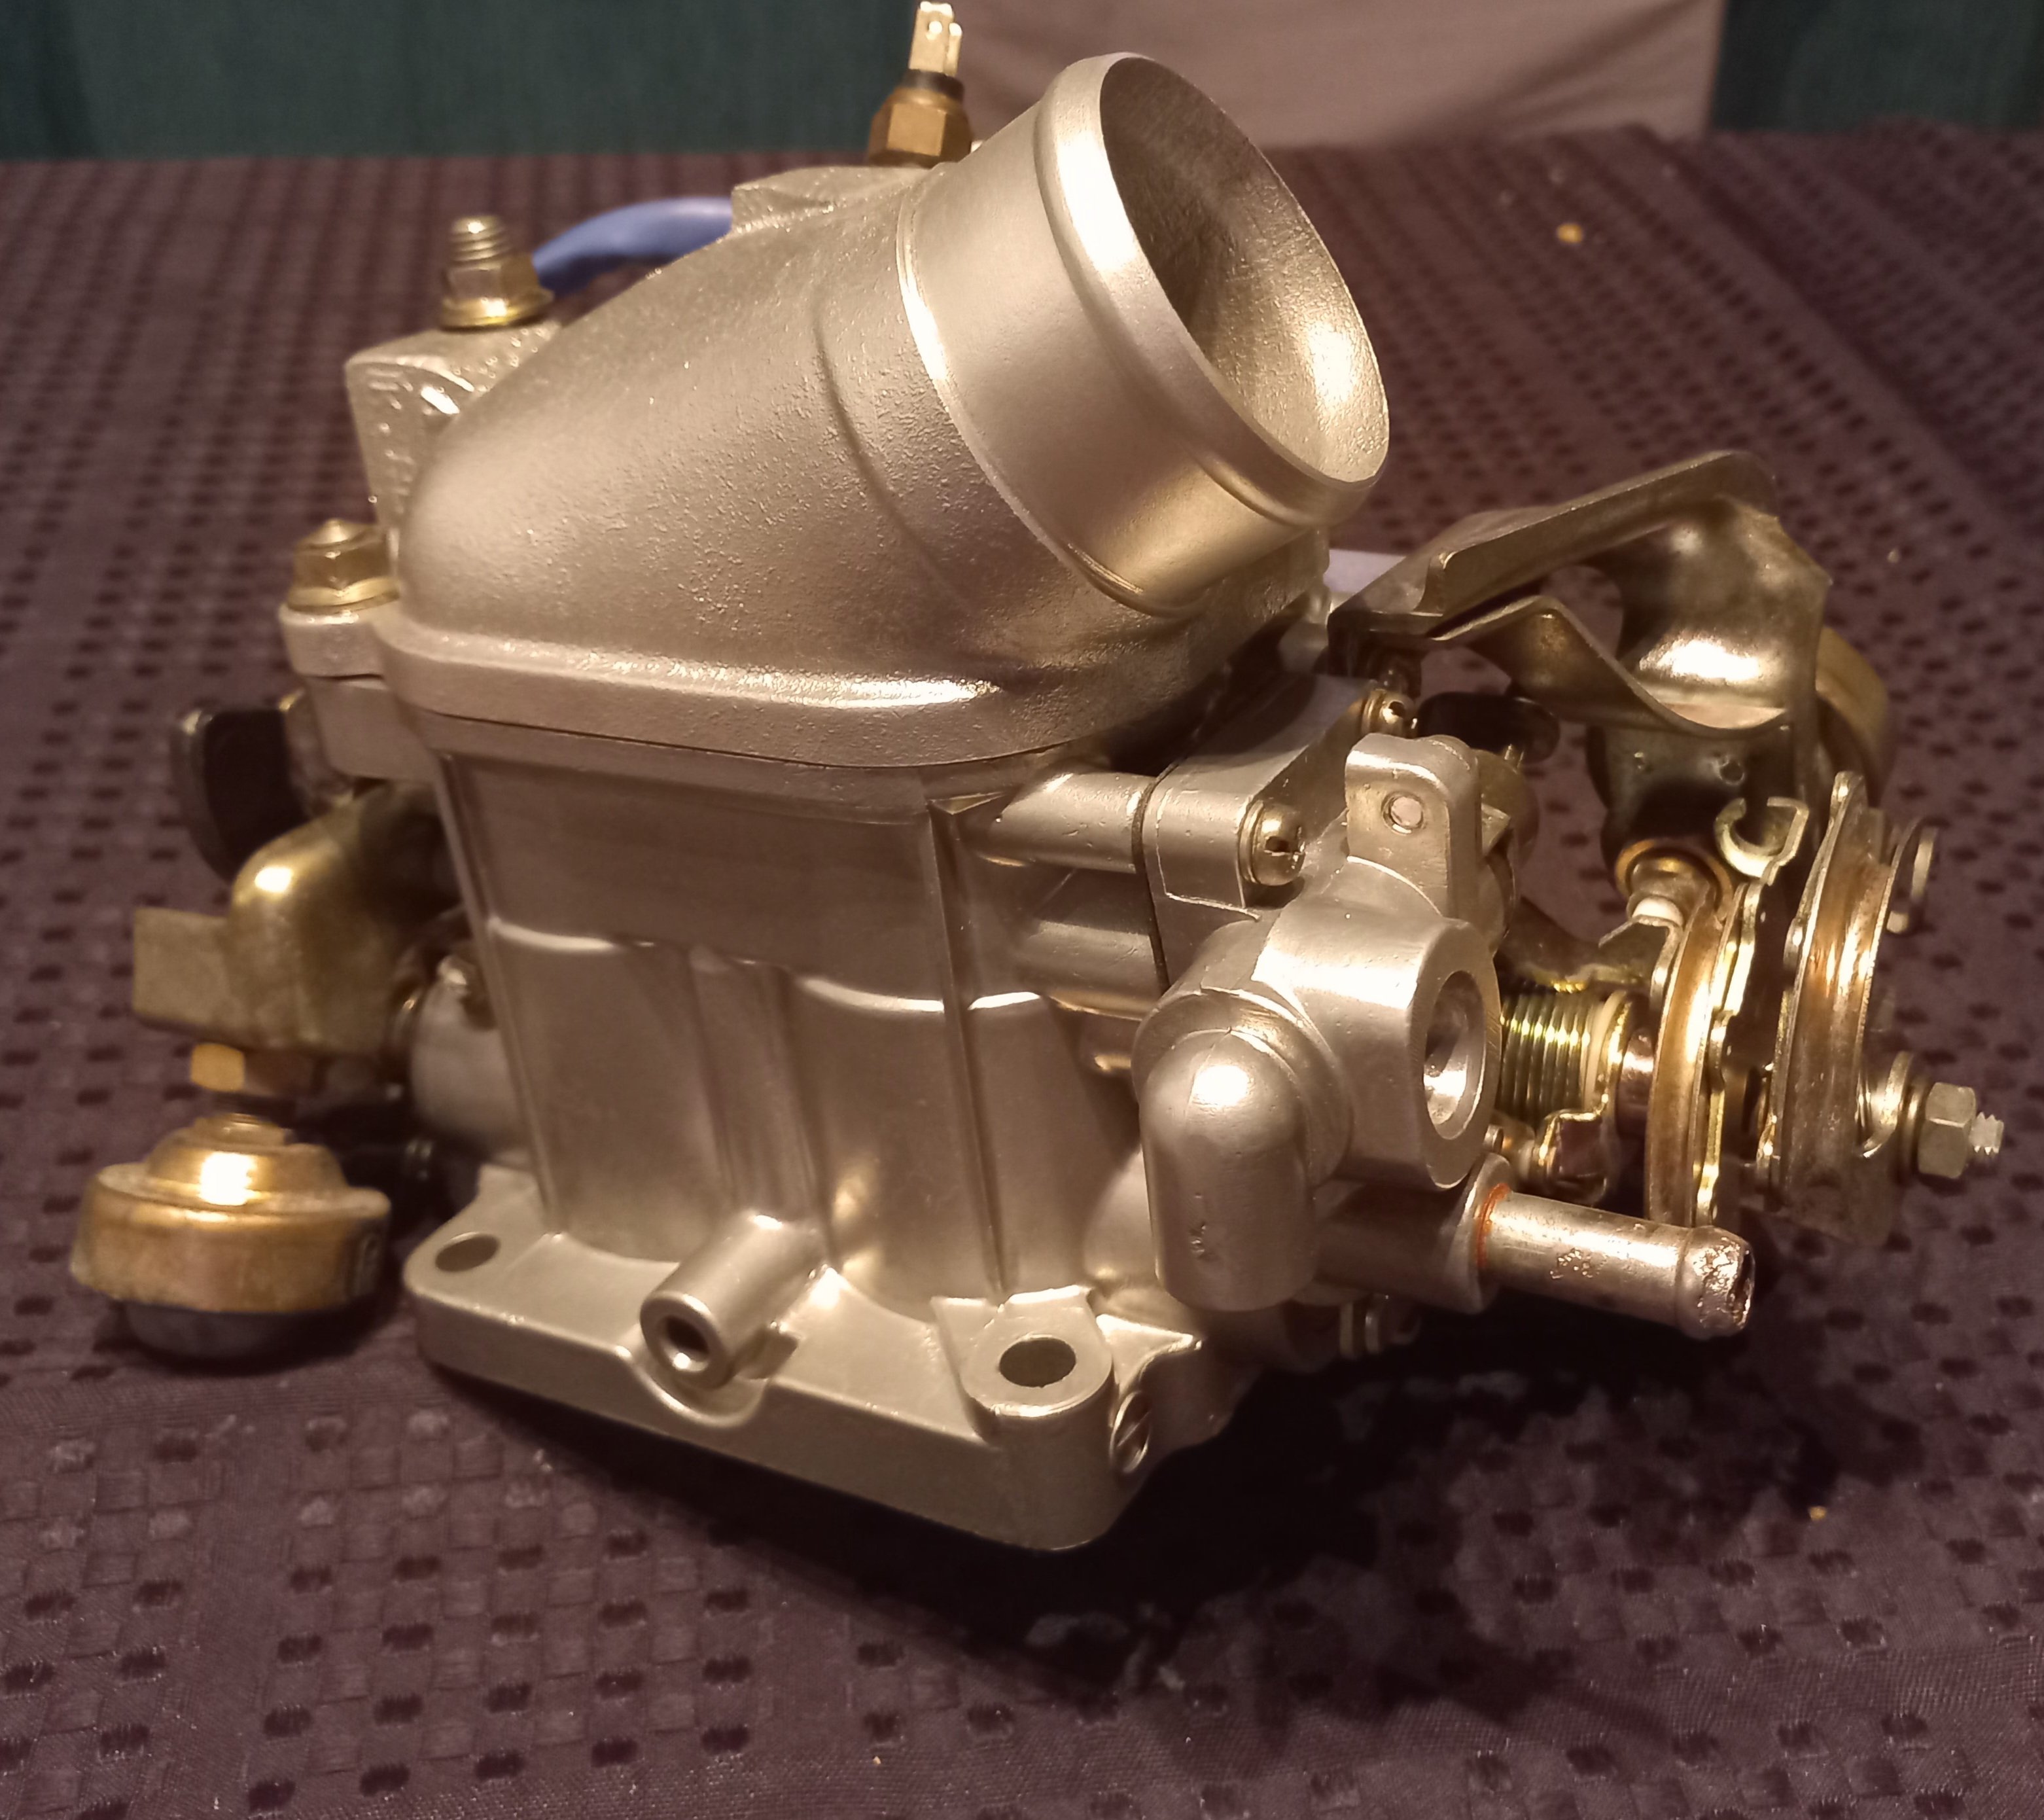
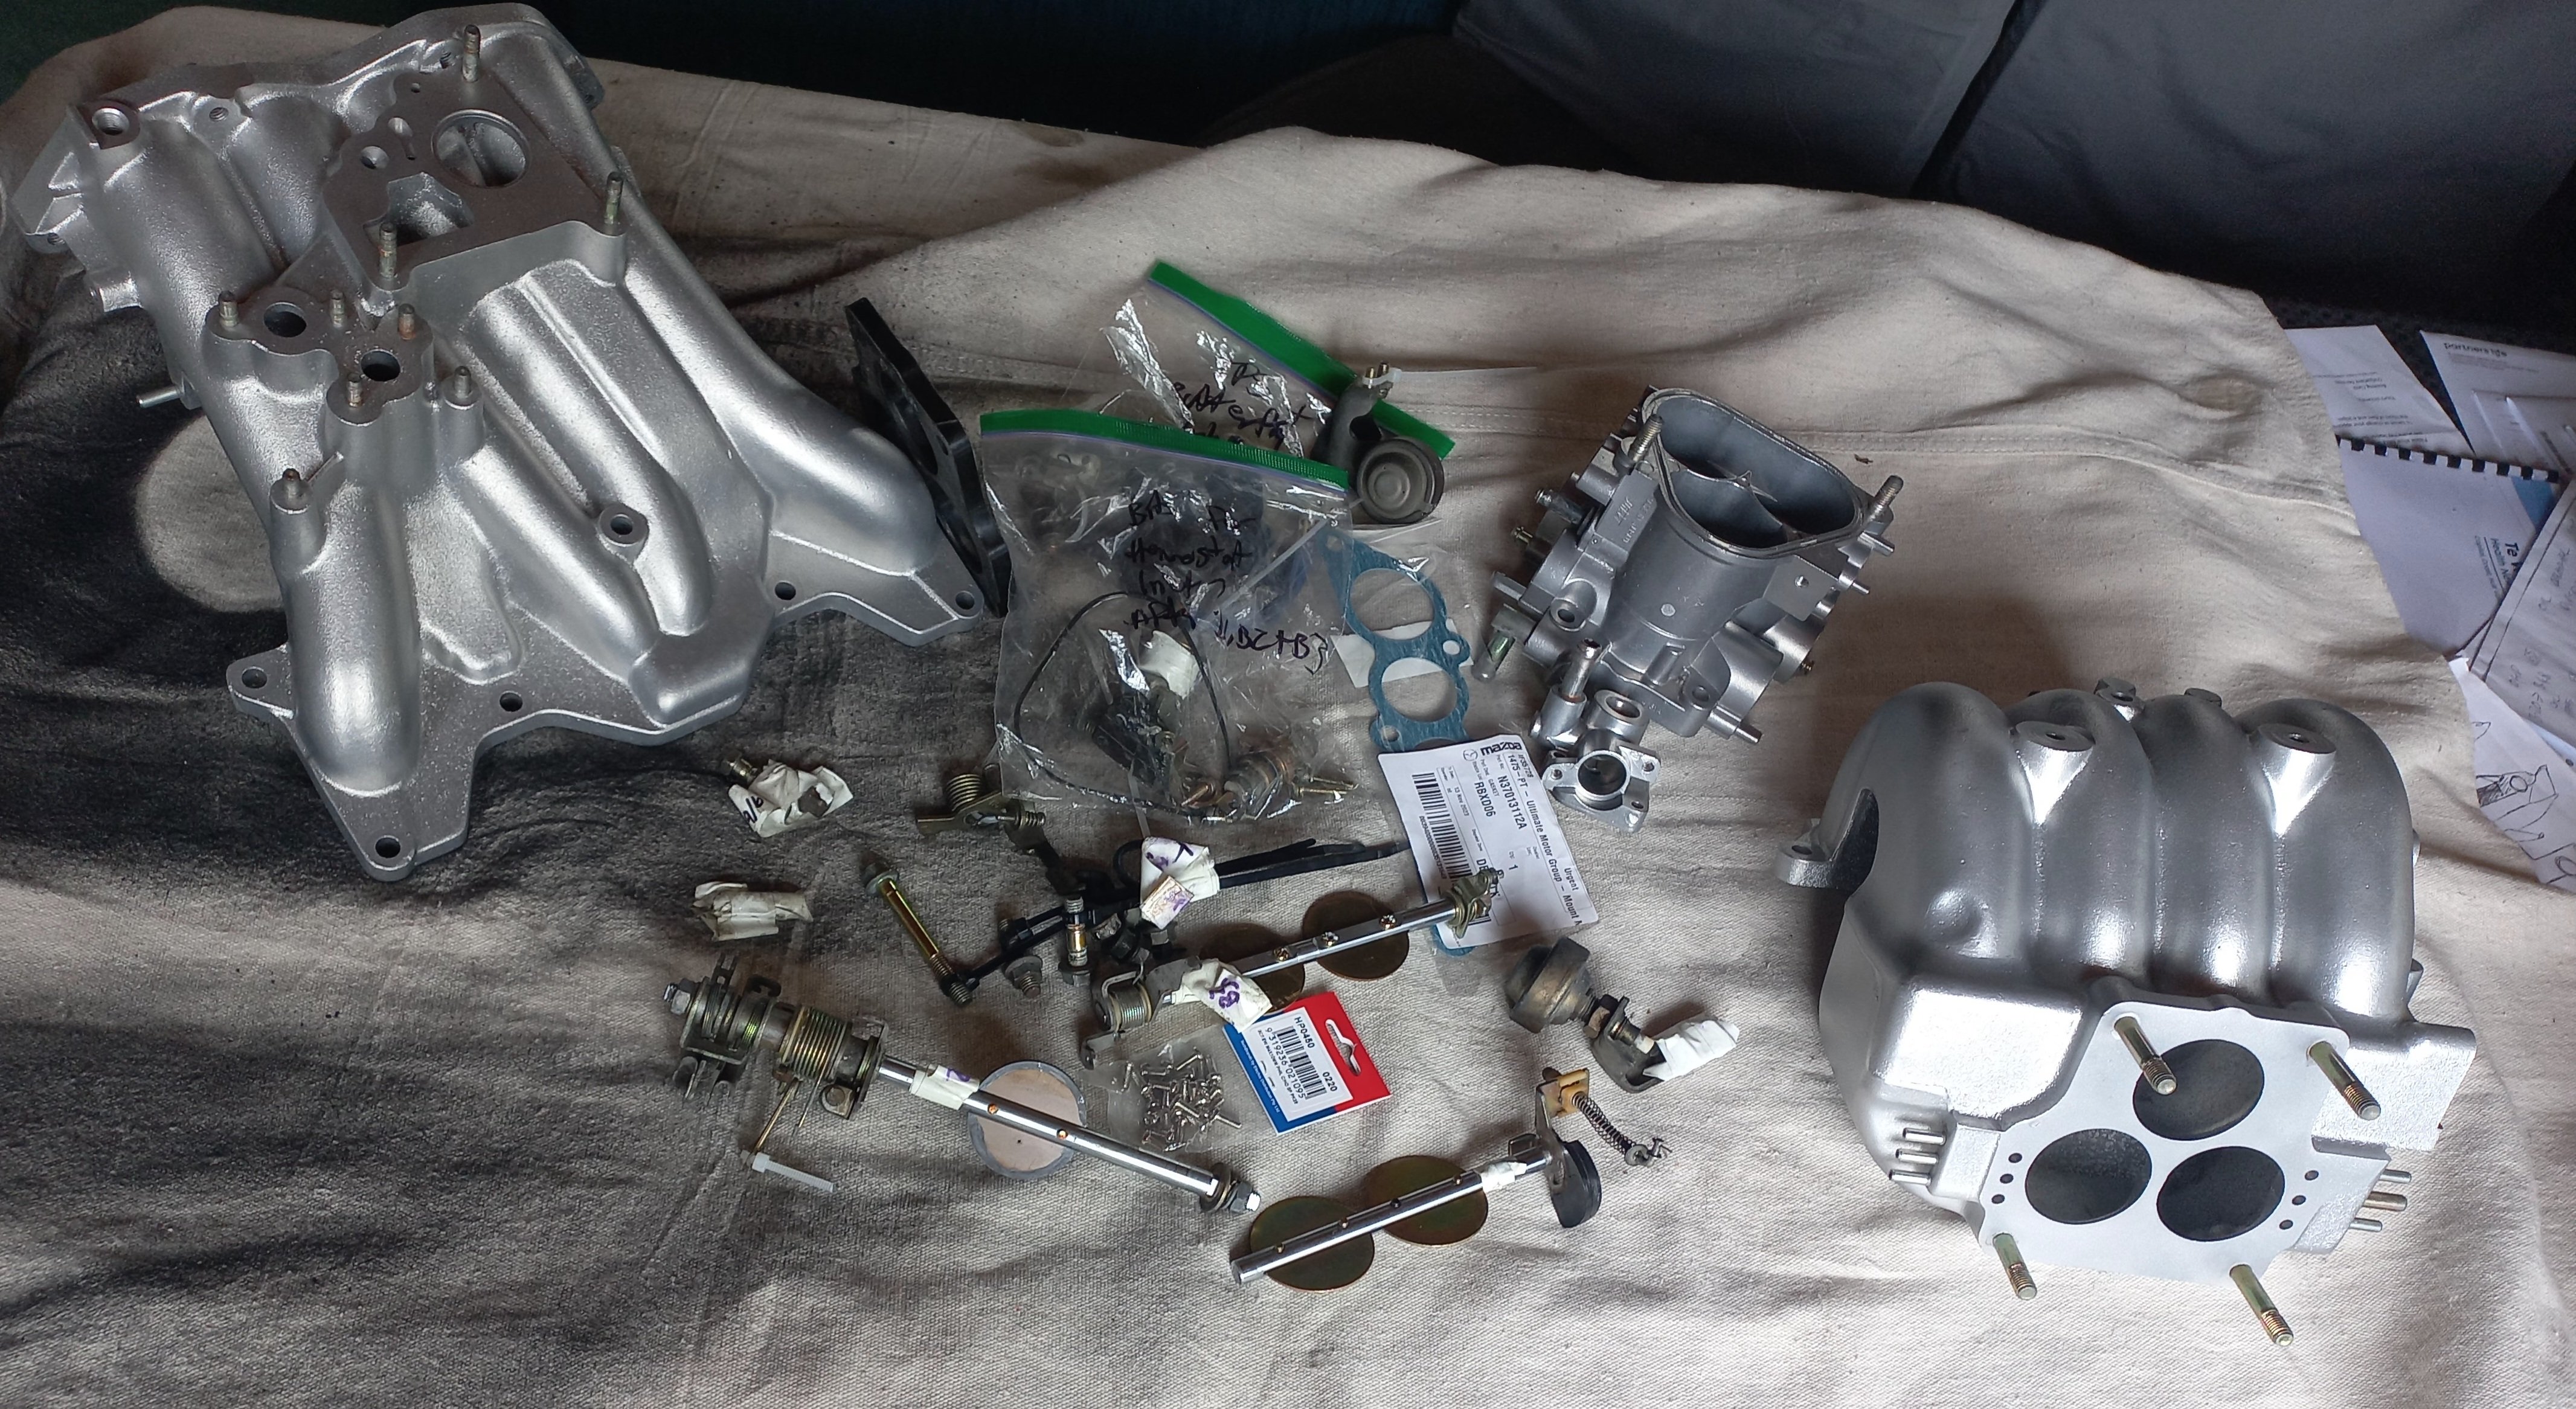
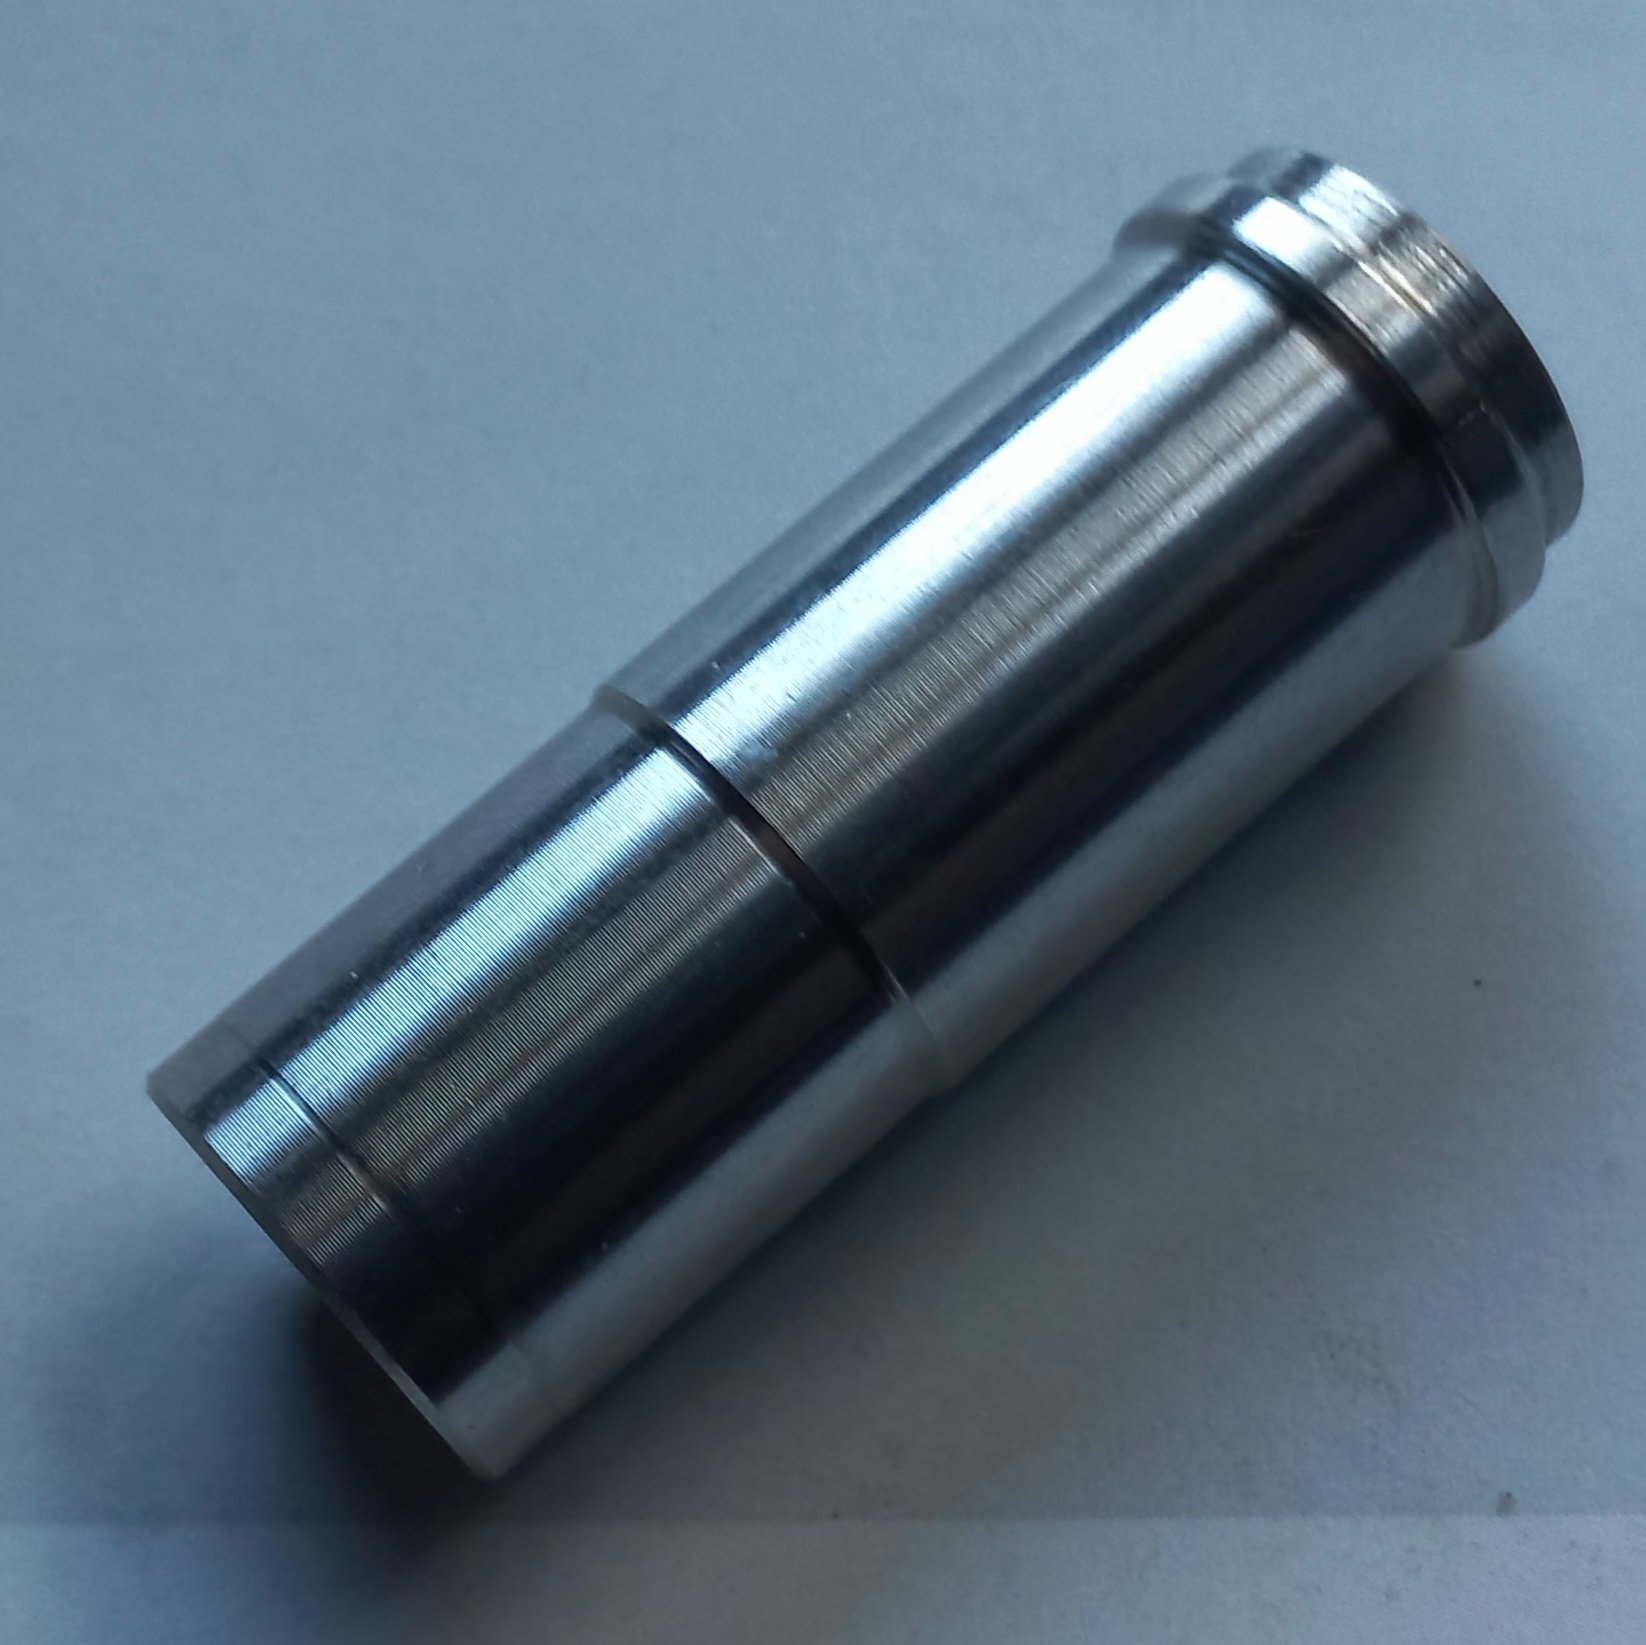
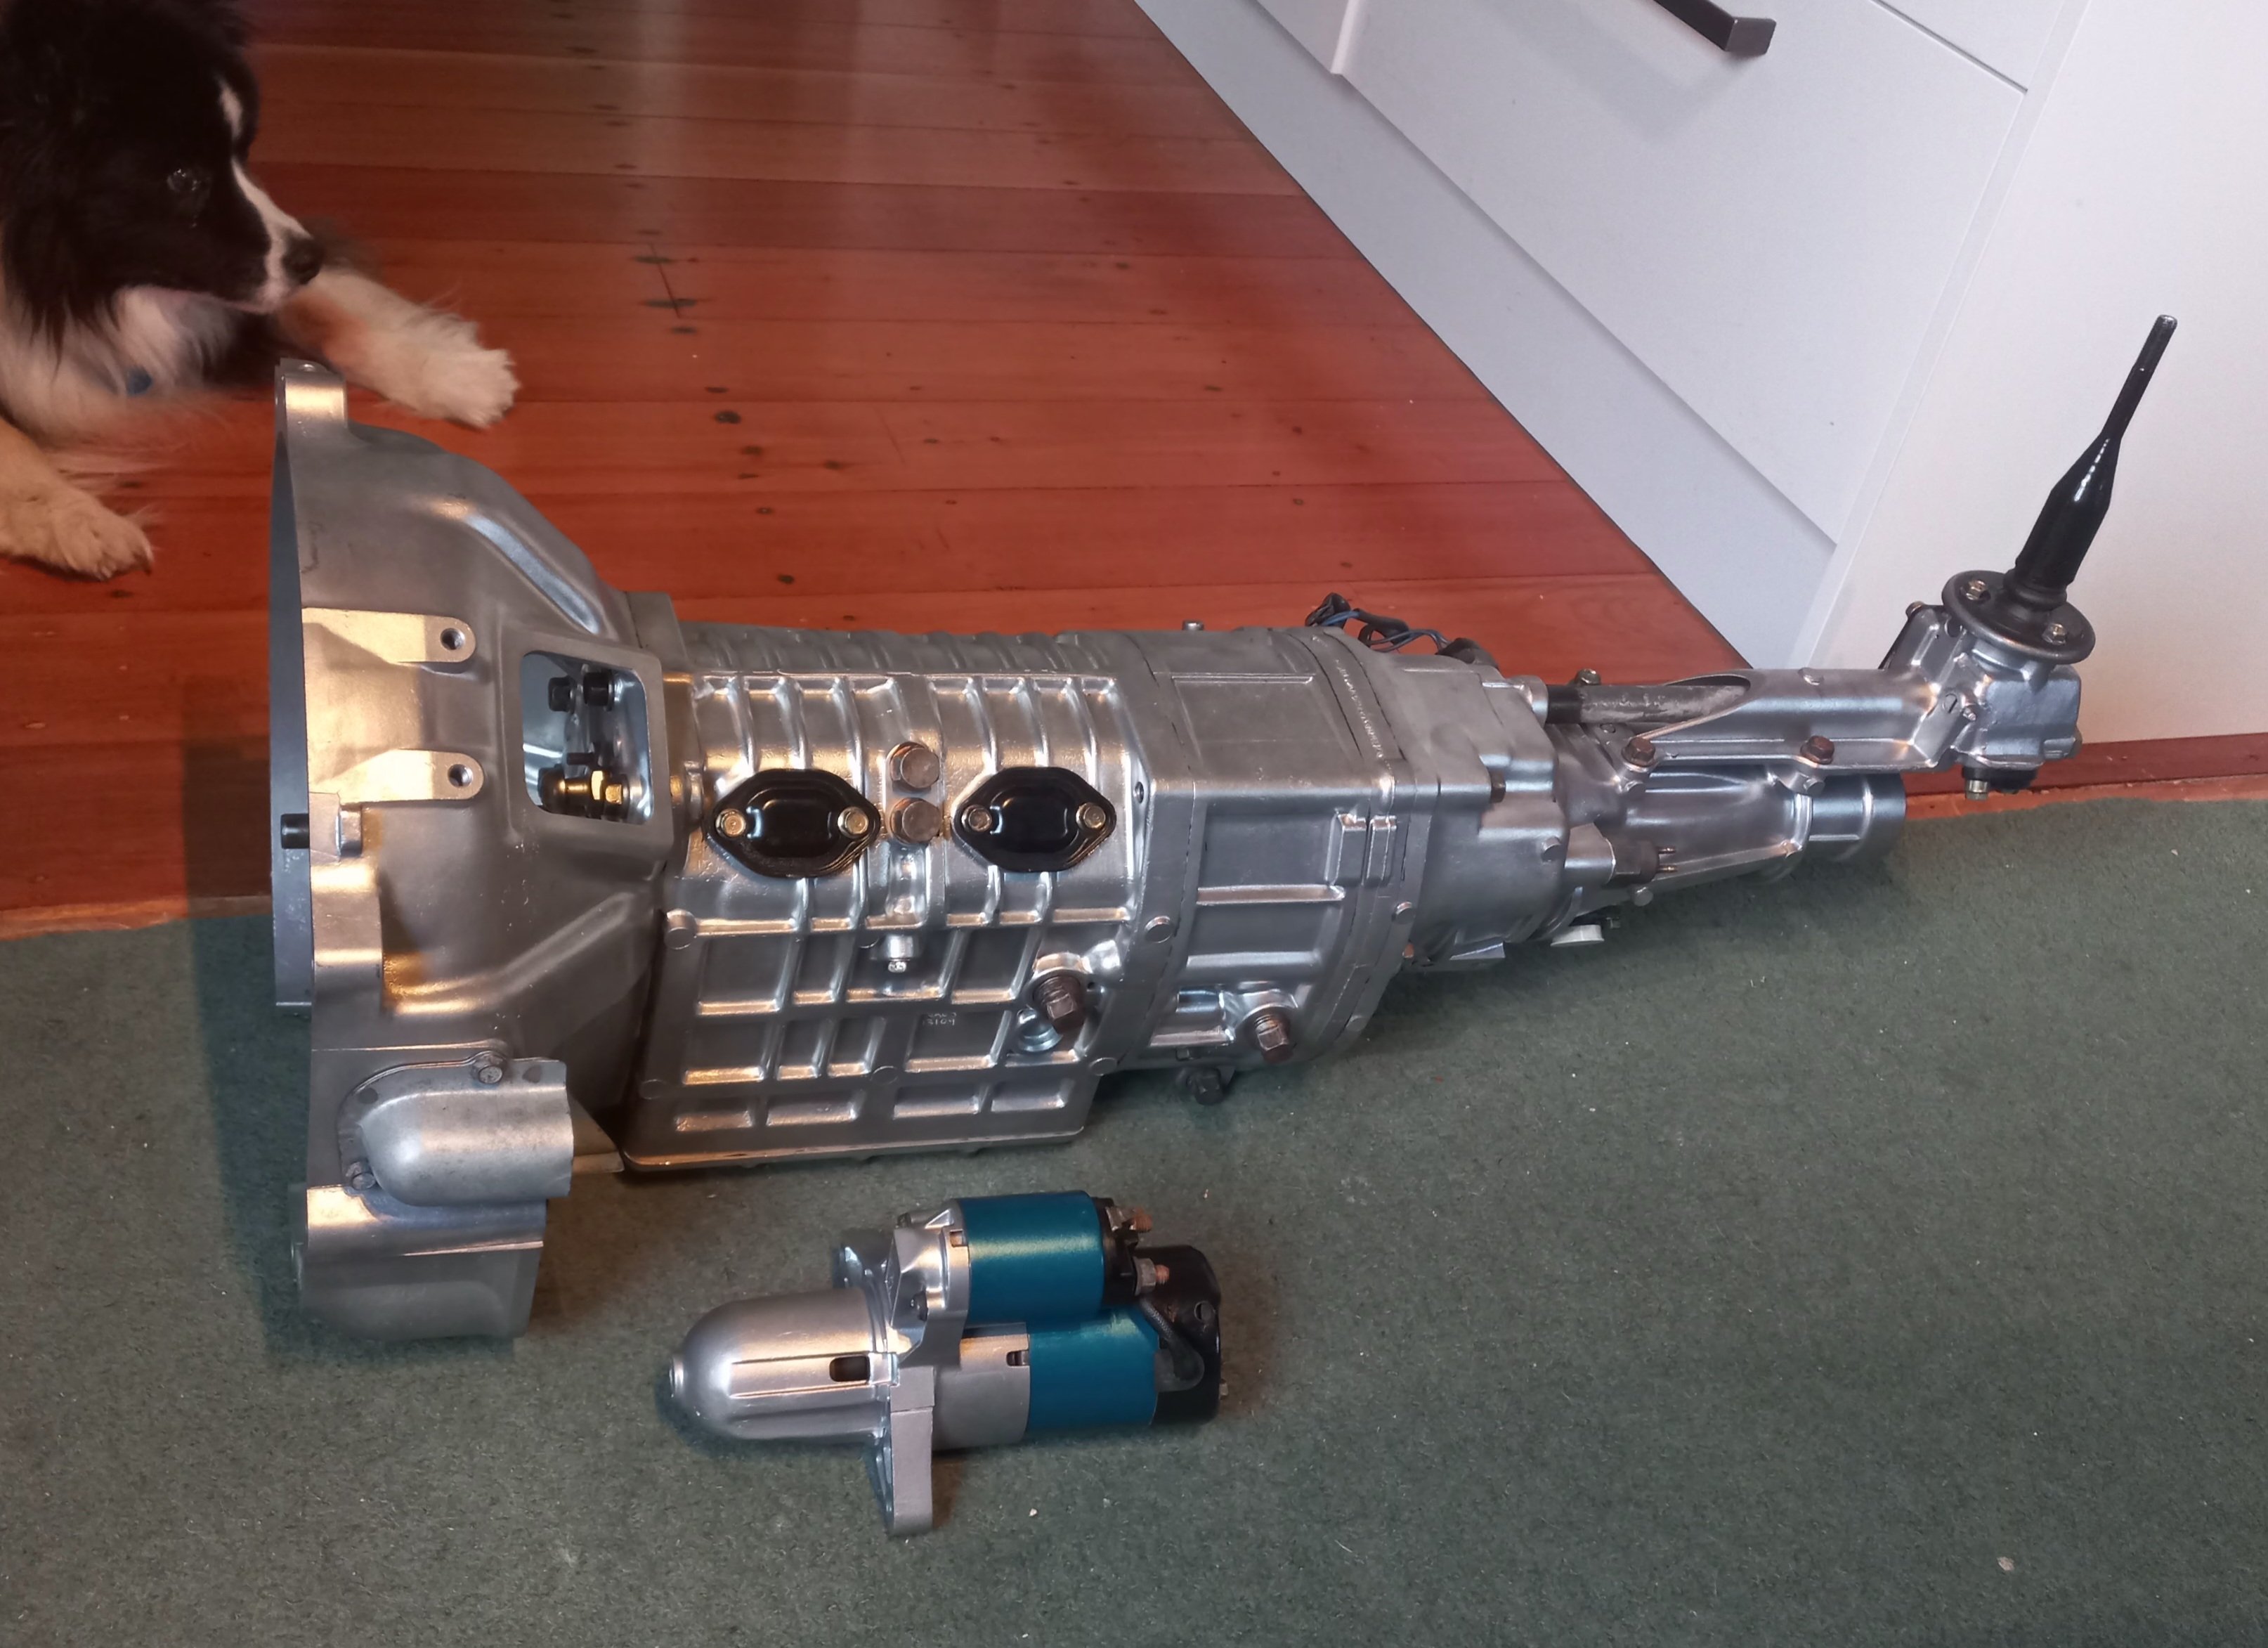
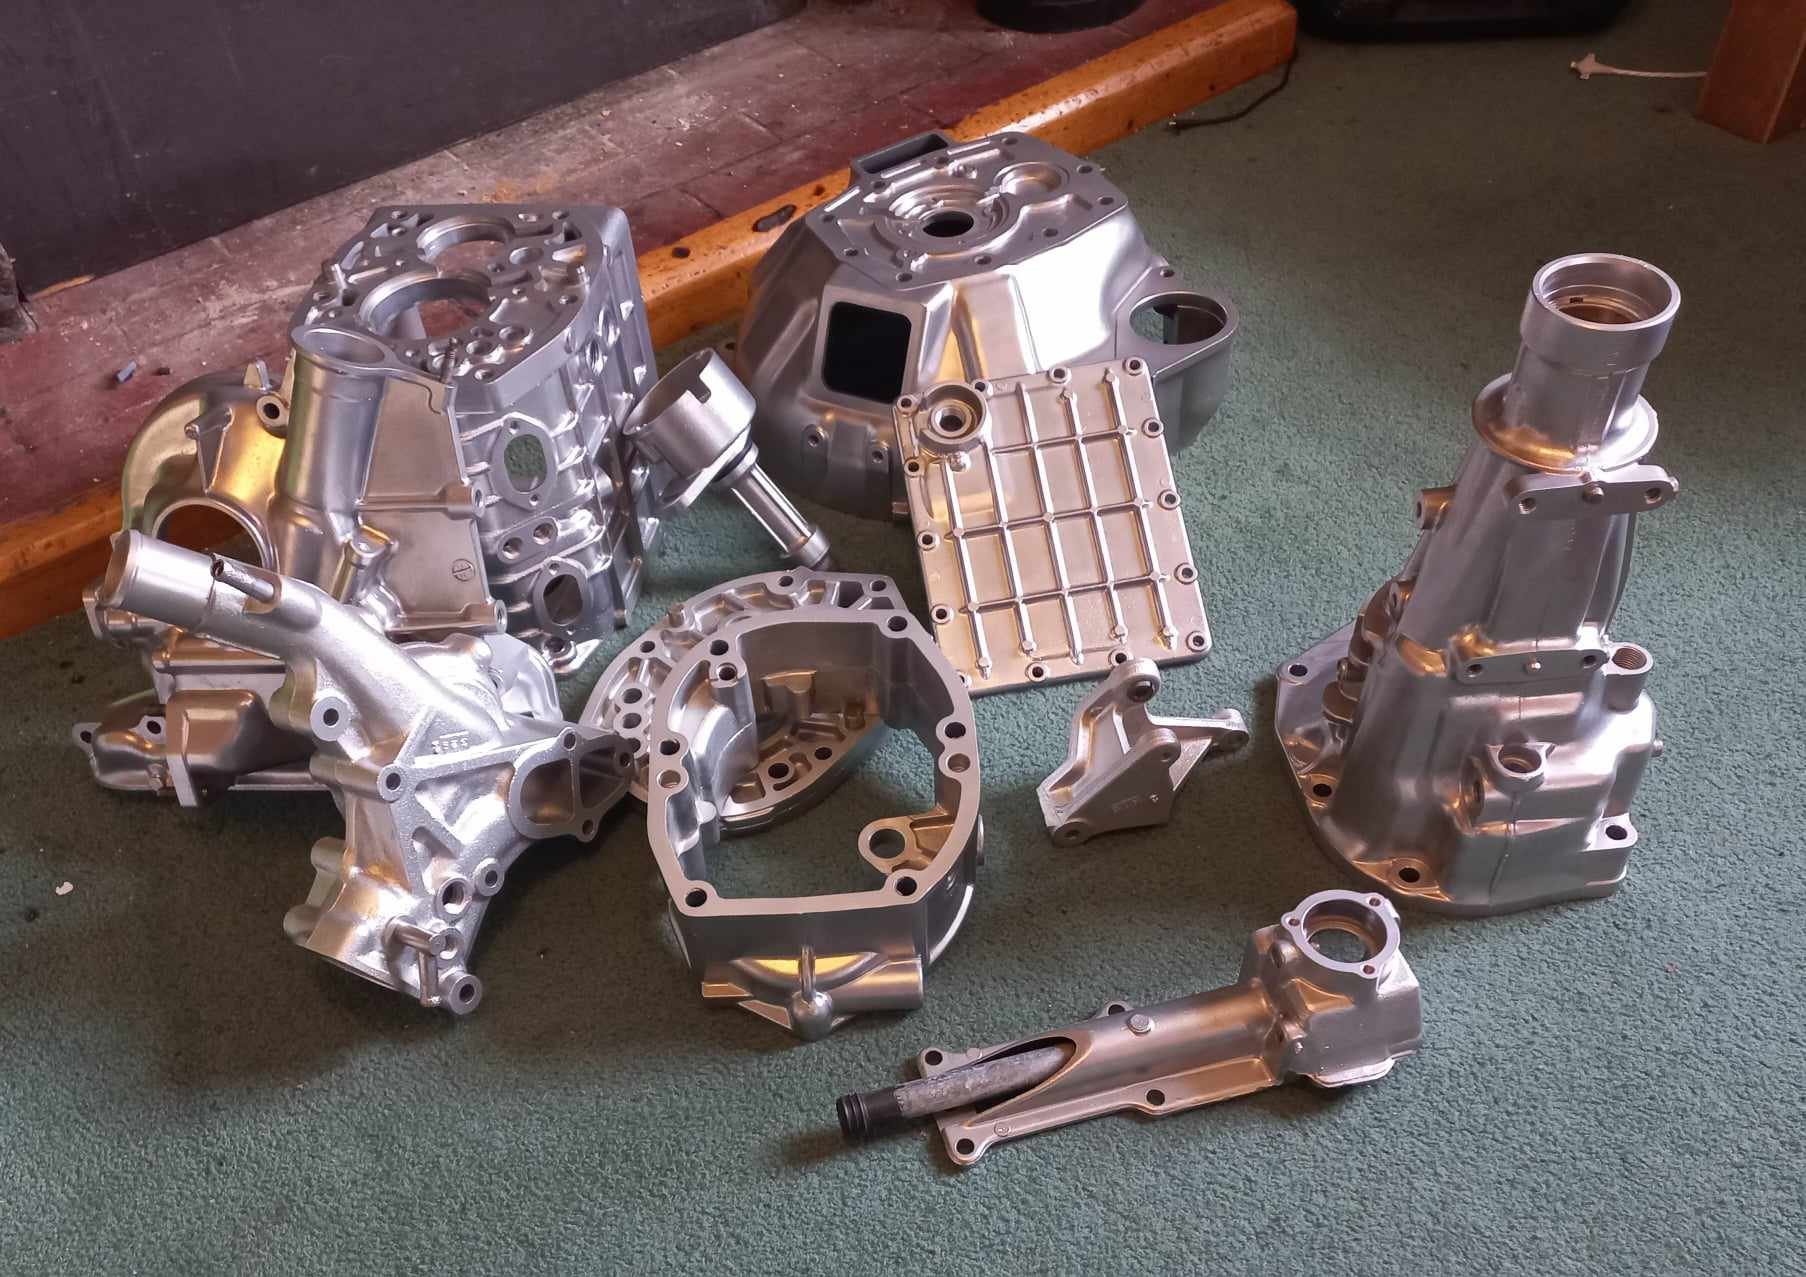
Have been toiling away on things as time permits last few weeks..engineer decided cut a thread in iron means odd ball thread size so lathed up a stainless insert instead. Gearbox back from rebuilder (new bearings, synchros) but gears were all fine to deglaze and refit...box been well looked after and not thrashed. Starter & alternator back reassembled after vapour cleaning and I repainted couple bits to match the block as you do. Ordered a few pretty/mod up bits from kustom cuts in oz and franklin performance in nz. Got my new housings and emission plates back from vapour guy...pretty much just to match the rest of the cast parts done...can't recommend vapour blasting enough. Last week, rebuilt the throttle body, but now likely remove the cold assist start and the pair of secondary butterflies & rod/thermowax/tap rod holes etc for bit better flow.(interested to hear of anyone who has done the throttle body mod) Looking at the greddy compression tube for future FMIC, builder said SCR Throttle body it complete..but as nice it be, $1.5K au a lill out of my budget currently...one day perhaps. Irons,water pump & CAS stem I masked up for paint to the painter (prob guess the colour from pics) Oil sump been powder coated. So lounge still a bunch of bits in bins. 'If' the irons get back this week ...builder will stack between Xmas & NY..He still doing physio so I'm picking yeah/nah. Anyways, pictime.
1 point
-
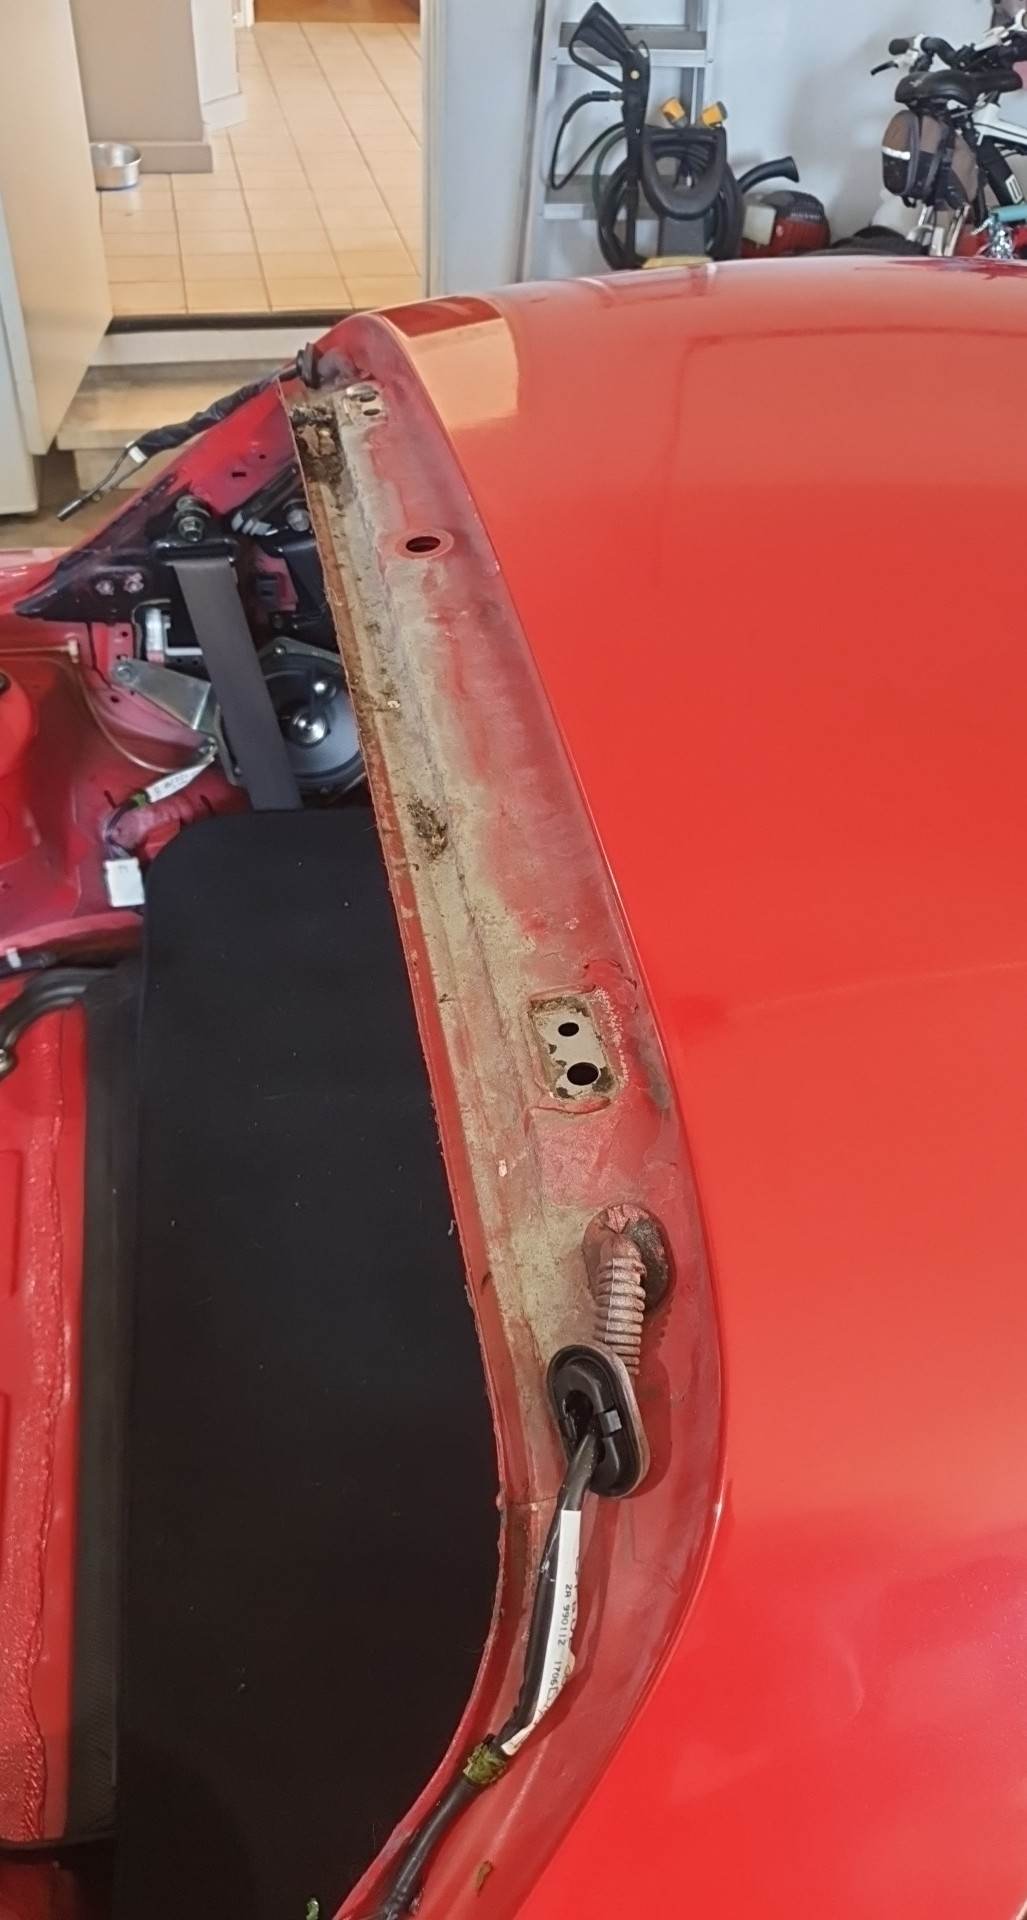
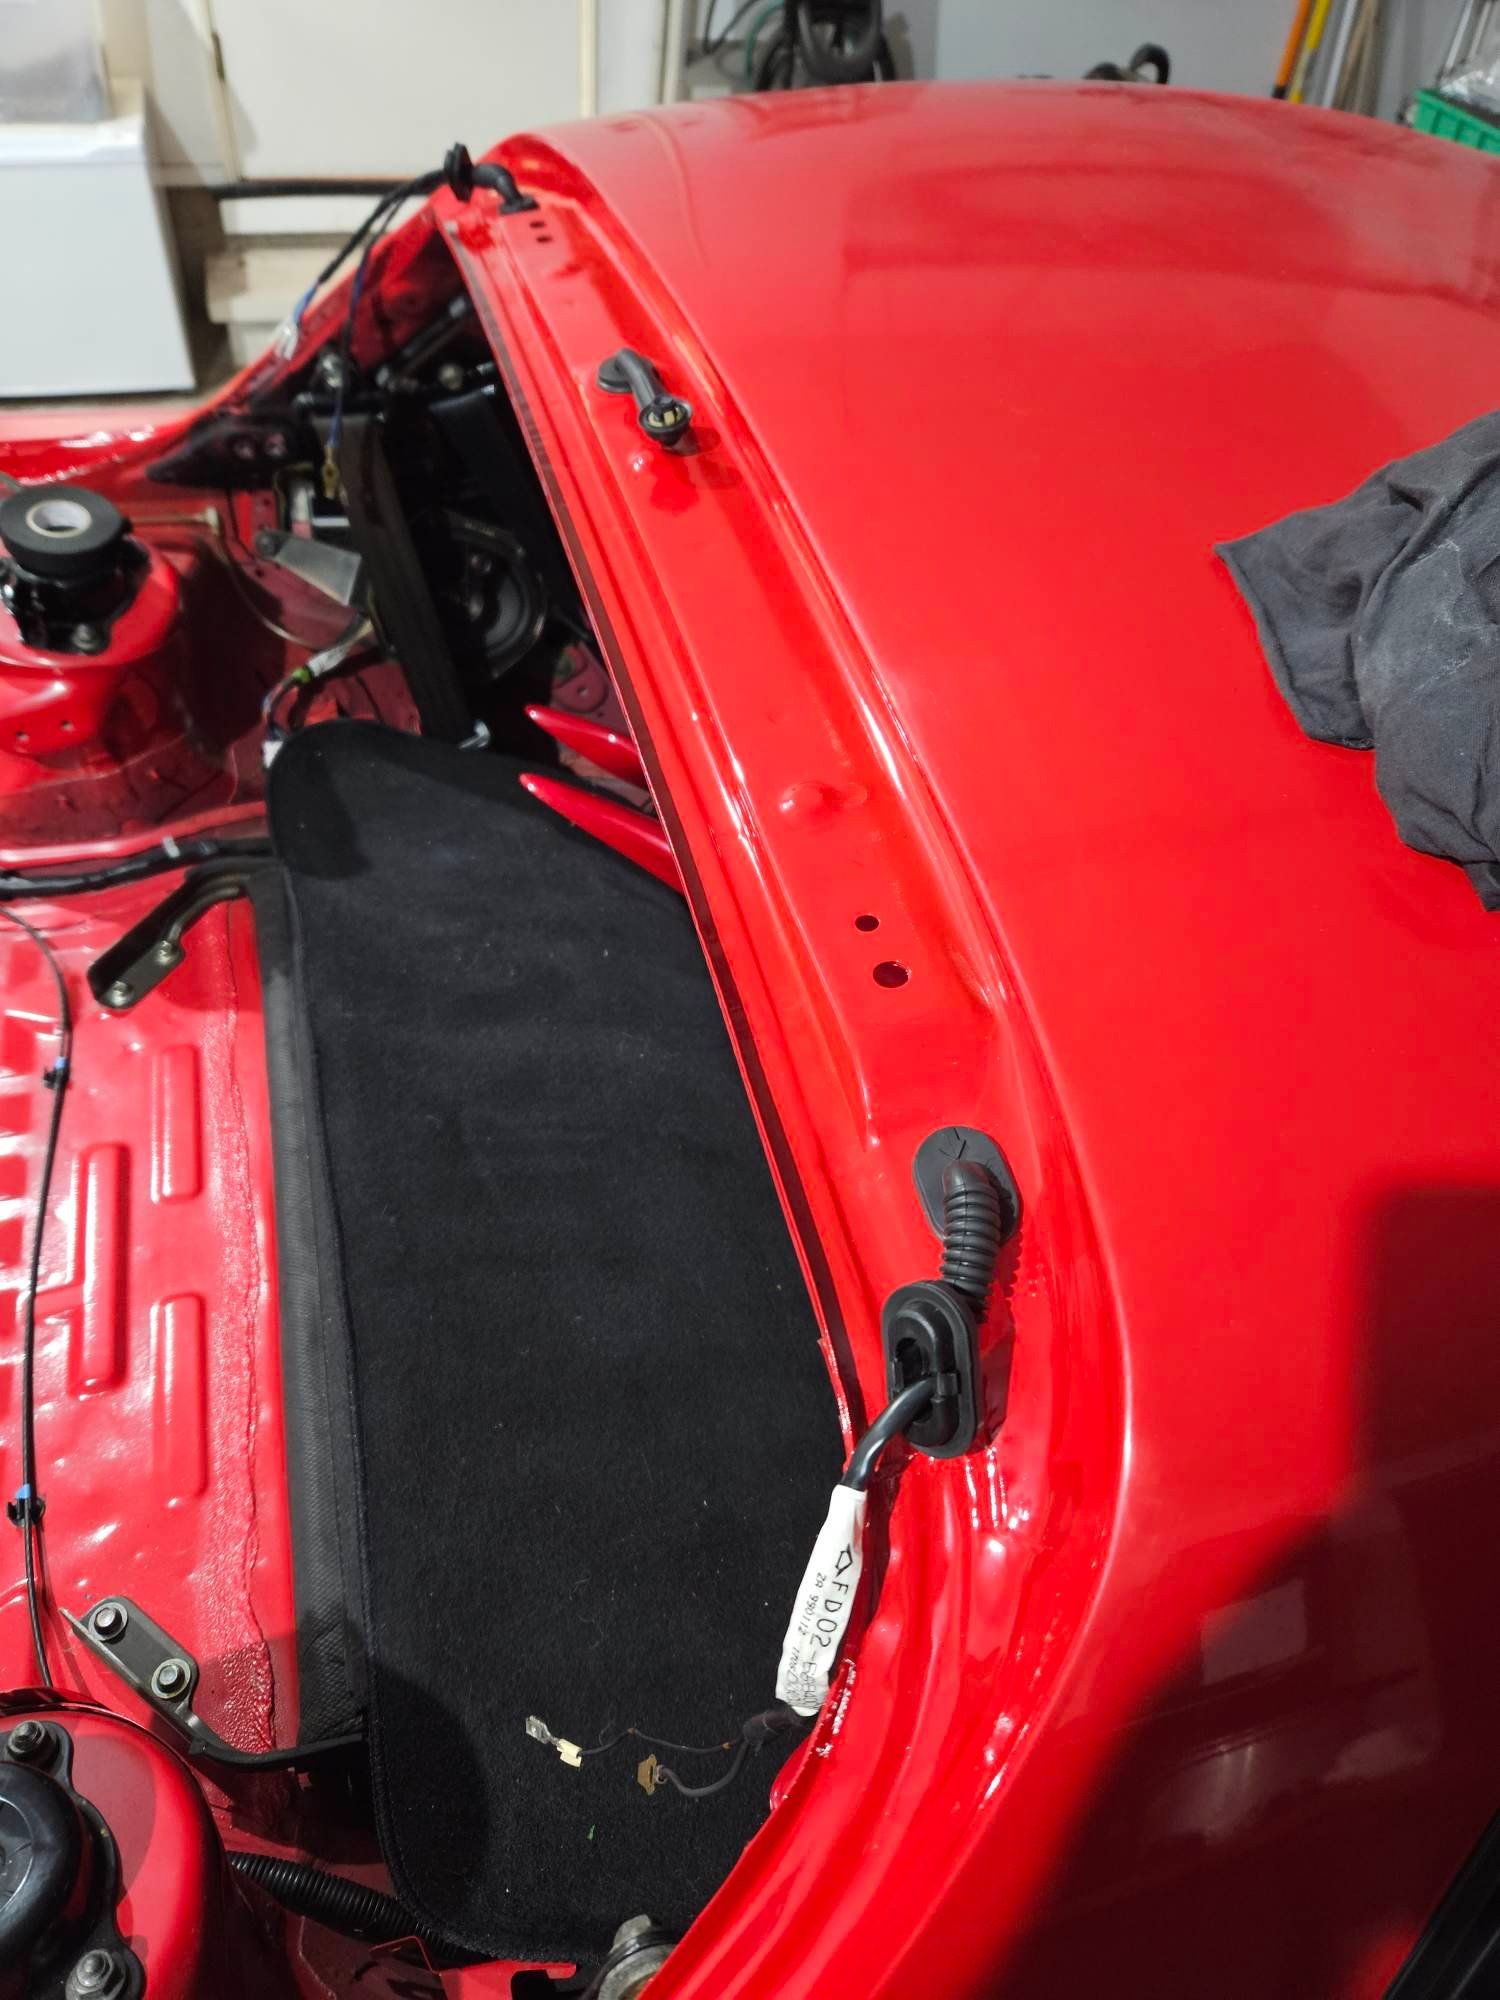
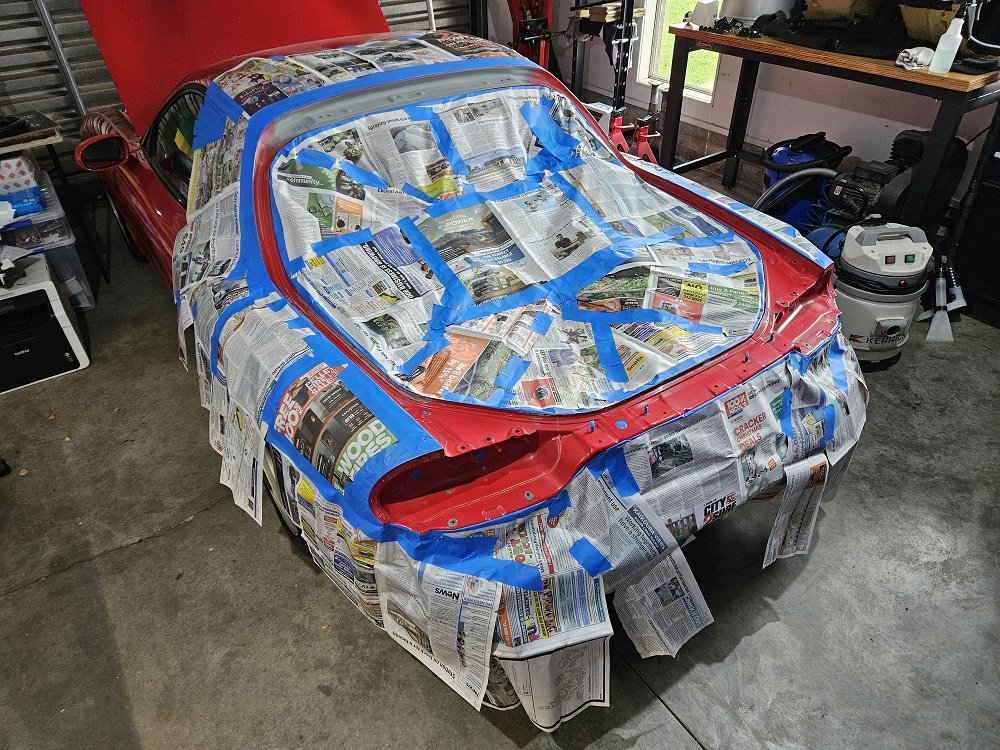
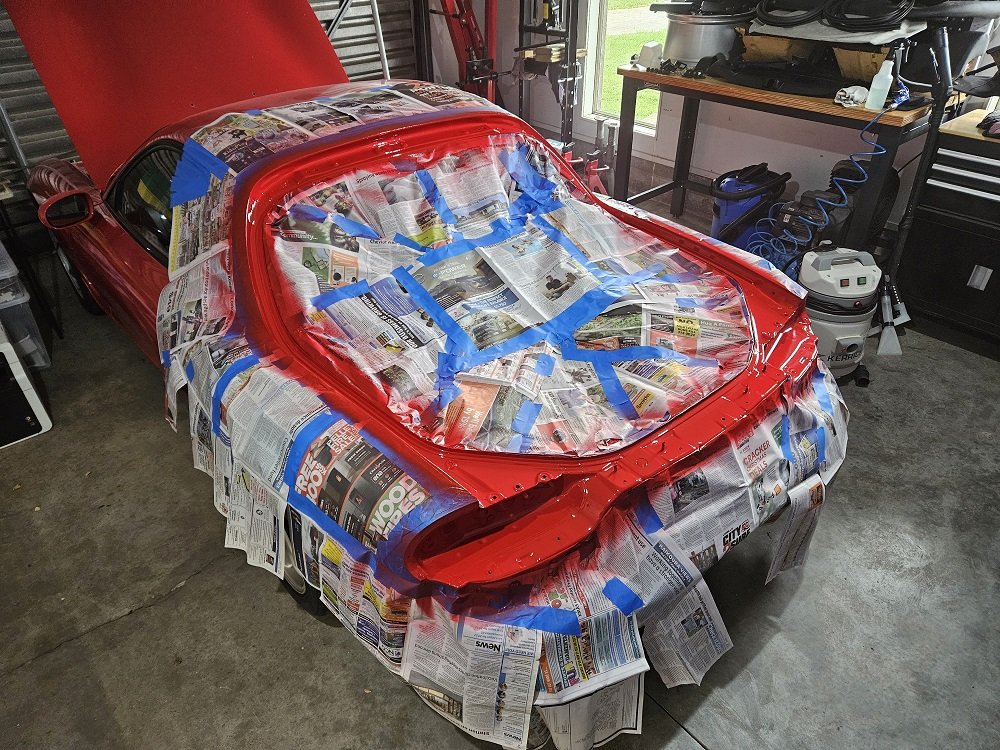
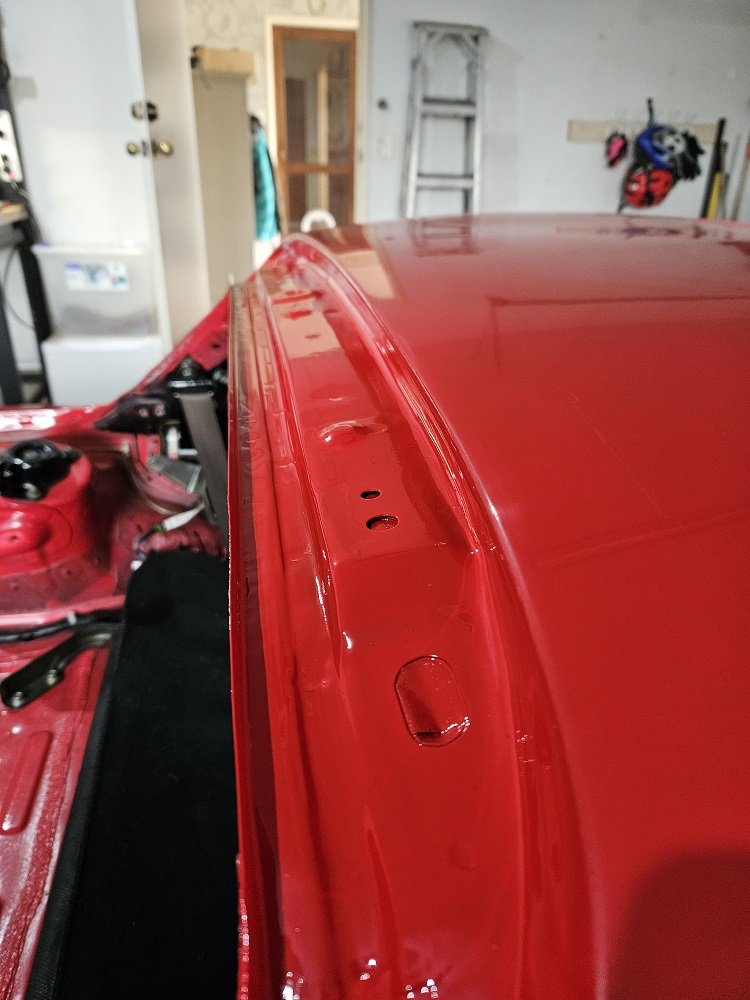
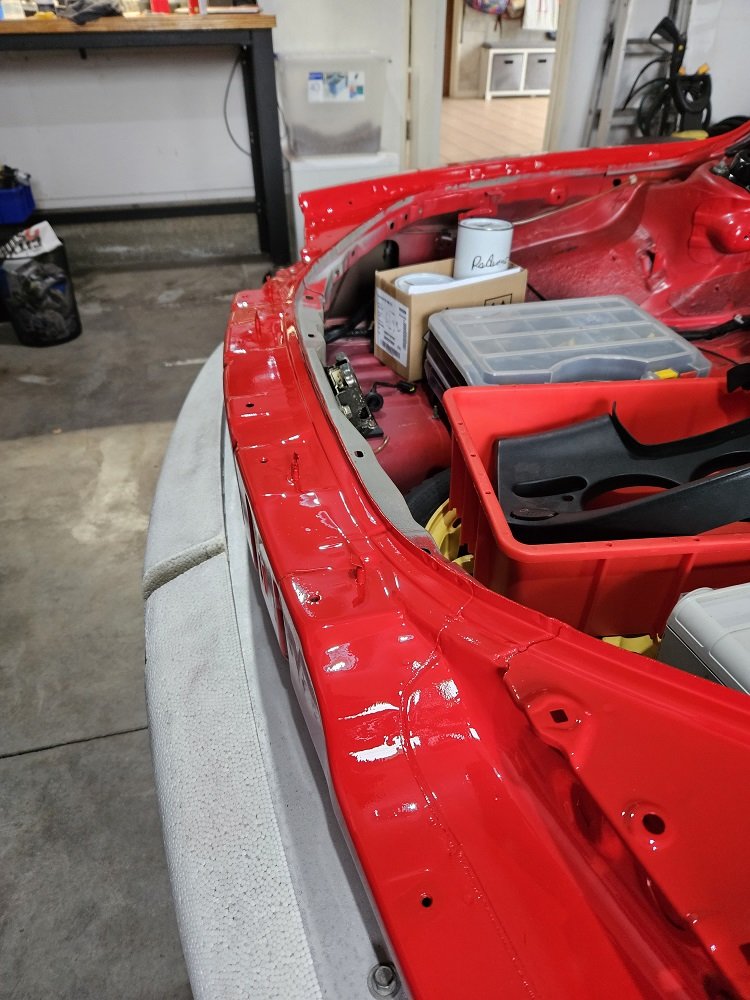
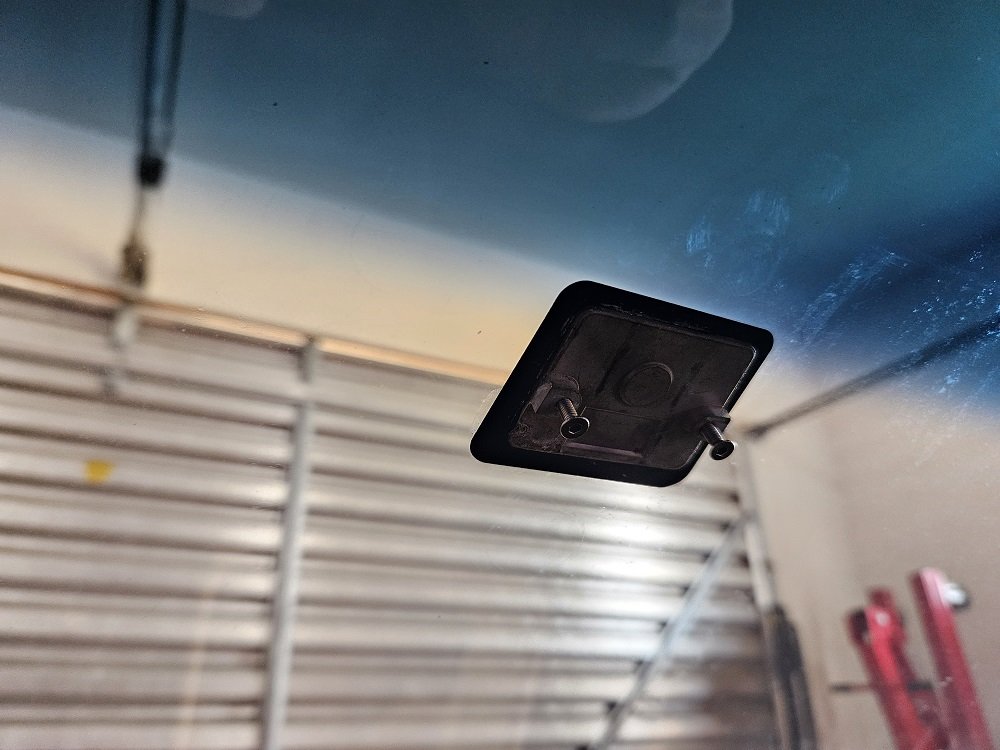
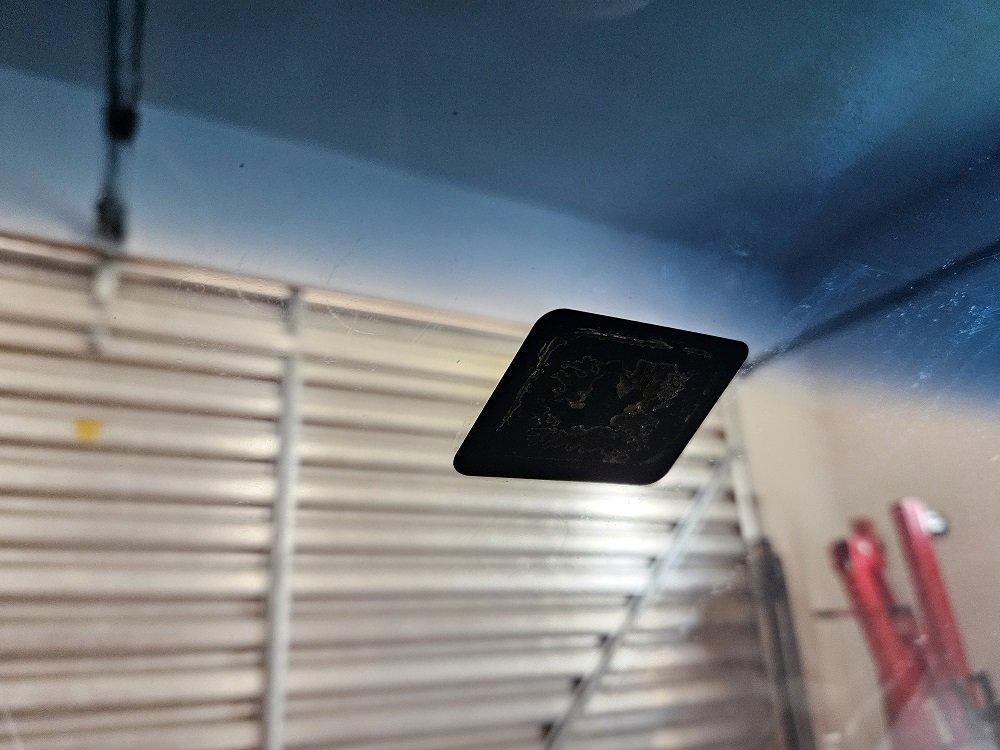
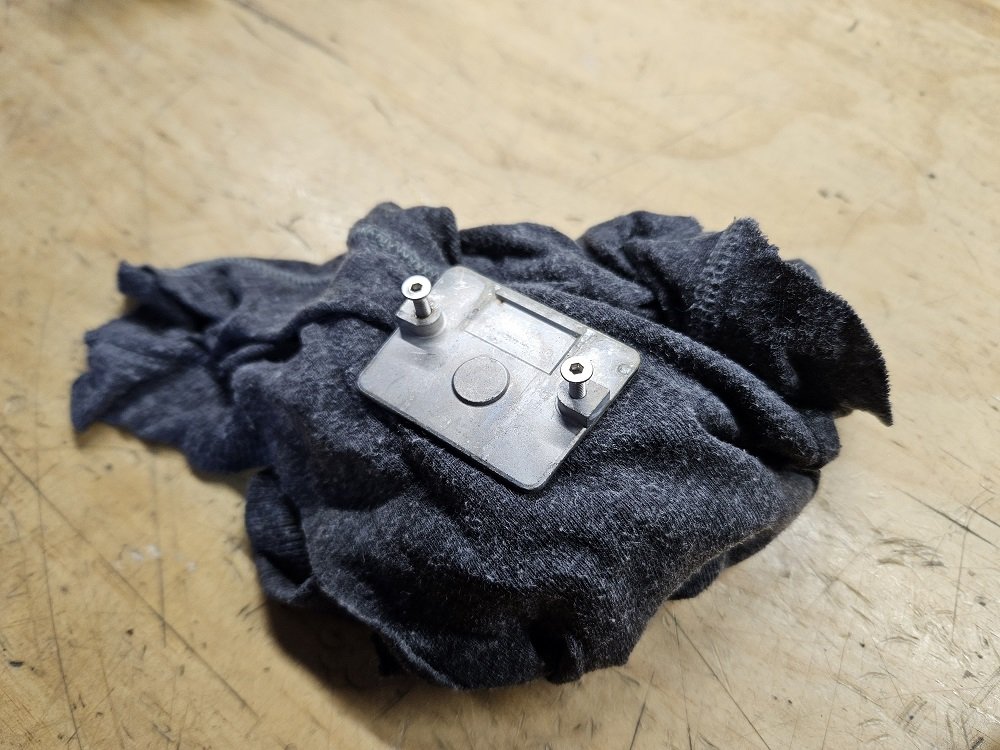
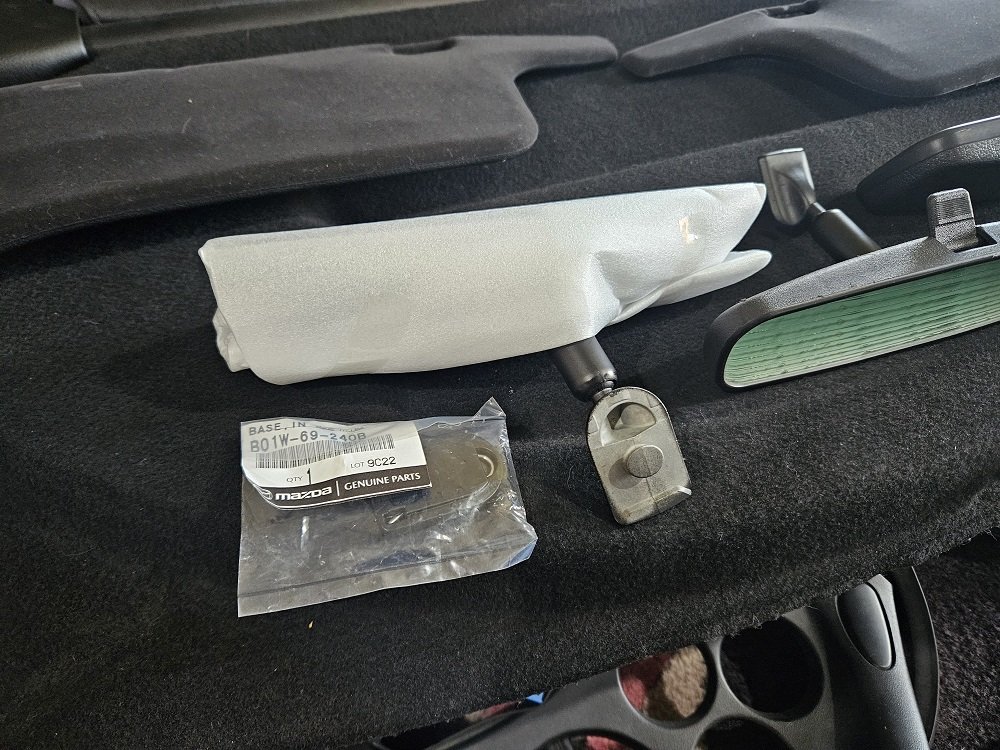
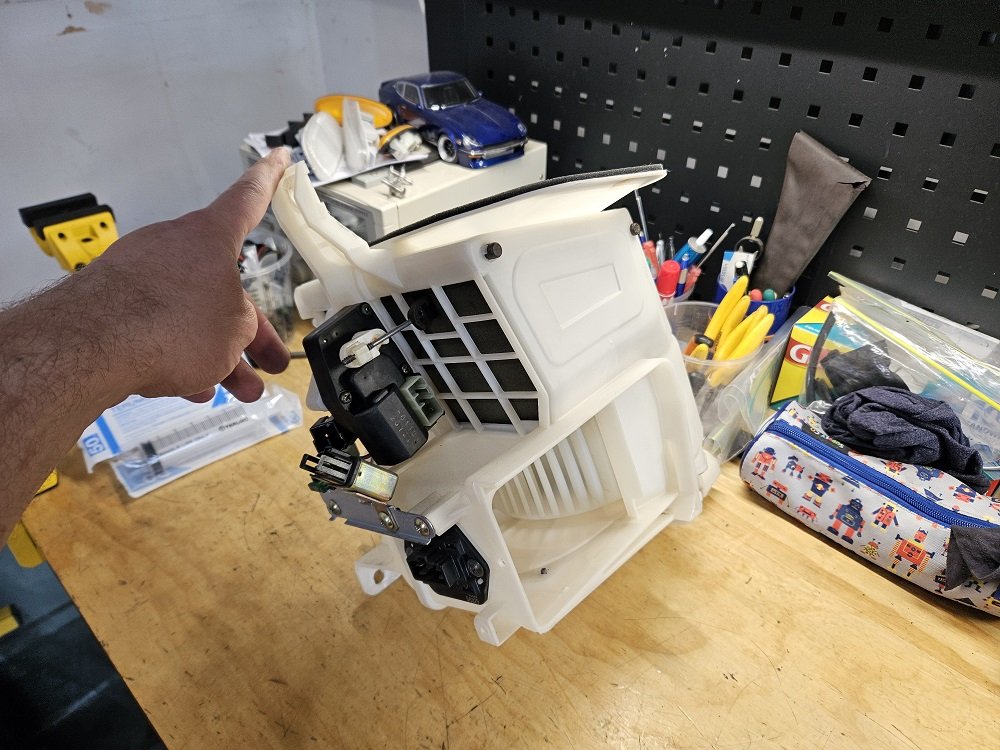
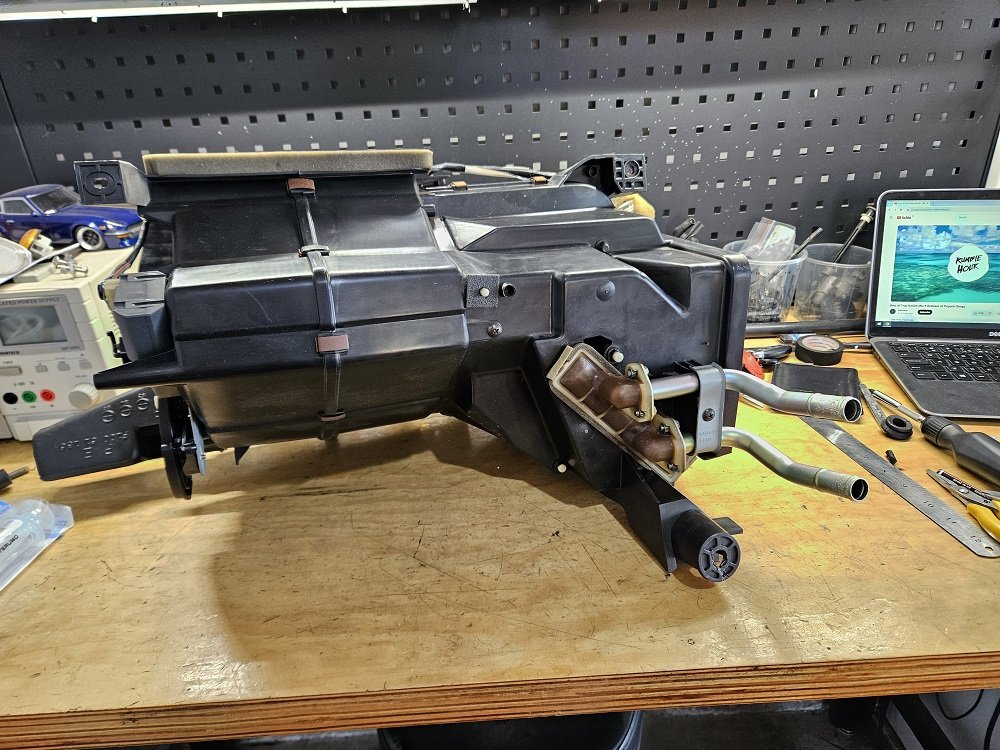
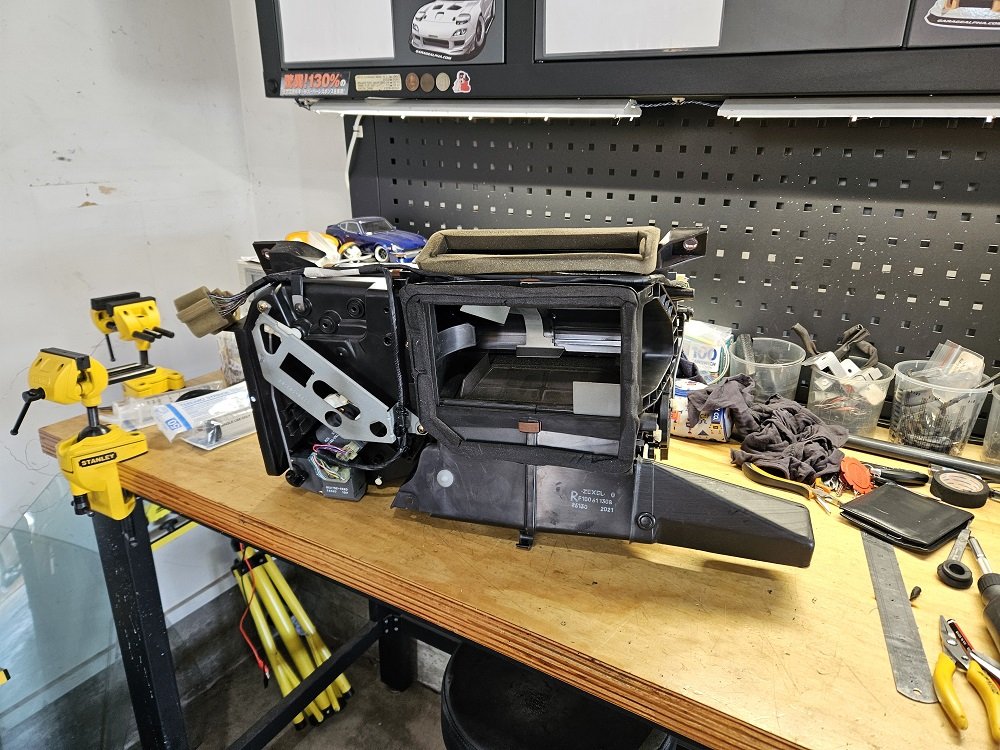
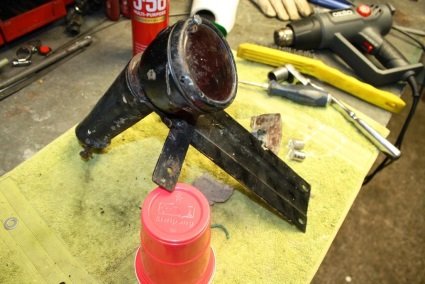
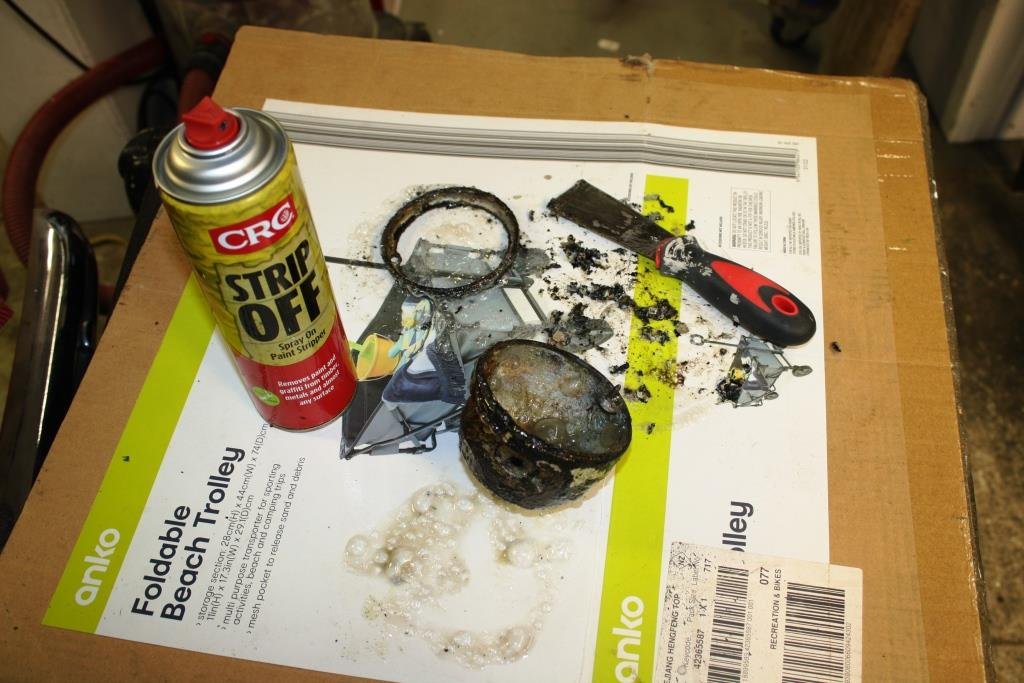
Its been a... year. And I mean that it is both surprising that a whole year has passed, but also not, because it passed in the blink of an eye, because it was a _year_. Lots of things non car-related happened, less things car related happened. I still tinkered in the garage though, as it was excellent therapy time :-). No, it still doesn't run. No its not any closer. Yes, I worked on things that get it no closer to running and driving. Yes, I enjoyed it. No, I don't have a timeframe, not what its about :-). Some highlights: I took the boot lid off because I couldn't get up in there to clean with it on. Overspray all over the wiring boots, grimy, all caked up with the clearcoat, some surface rust here and there, nothing that some scotchbright and etch primer wouldn't fix. Back to back I think the contrast is quite satisfying... Yes, I painted the jam. Removed the rubber boots / washer hose and vaporblasted all the overspray off them, they look brand new now :-). Have cut some rubber gaskets to go around the hatch hinge studs to do the job of the seam sealer that was used from factory. It's not like I'll be driving the thing in the rain much. Process photos: Cleaned the jam thoroughly, then roughed up with grey scotchbright. Sprayed etch primer on the parts that were missing paint up under the top of the hatch. Ordered some 2k paint from a place in NZ. They pre-mix a slow hardener in, put it in a spray can and courier it. Has about a week of pot-life apparently. Worked excellently, no reactions, good coverage. Did 3 coats, then sprayed some into the lid to go around and do touch-ups on various chips and stuff. I'll end up doing all the jams, and probably the bay like this myself, then one day It'll get a door shut respray by someone a little more into body work than I. Made it look a heap tidier in the mean time. Back into the interior, the rear-view mirror was all delaminating / corroding around the edge like they do. As this is a super early car it has the early style mirror... I didn't realise there were different types when I bought a new replacement mirror from Mazda.... Well... I figured I should swap to the newer style, as if I ever need a replacement windscreen they are way, way more common. This meant I had to remove the mirror mount that was glued to the screen... This puppy: I popped a couple of screws in there to give me something to grab, but it was on there solid (which is a good thing). I read about removing them, and it seems that heat is the key. I went gently gently with the heatgun... heating from the outside.... This was wrong and got me nowhere. After turning my heatgun from 'kitten breath' to 'dragon flame' (the only two settings is has), I heated the ever loving crap out of it from the inside... I mean got it properly hot... I gave it a tweak with the pliers and it fell right off, into the wet rag I had right below it... where it sizzled and steamed. I read horror stories of people dropping them, where they then melted the dash and carpet.... No thanks. I got most of the residue glue off with solvents and careful scraping. Its some sort of bonded on ceramic pad on the windscreen I'm pretty sure, I was scared I'd scratch it and you'd be able to see the scratch from the outside. No chance of that, the black portion is very, very hard. Have got the later style button and the correct Loctite adhesive to bond it on, but haven't done it yet as I need to come up with a plan to get it perfectly in the right place, or it'll drive me nuts every time I look at it. During my experiments with powering up the electronics in the car, I played with the HVAC system a bit. It all seemed to work as it should, but it was kind of noisy, and the blower motor sounded terrible.. I'm sure you can see where this is going.. Rejuvenation time! Turns out you can remove the A/C evaporator and blower motor without pulling the dash, its not even that hard... but the distribution / mixer / heatercore box is right in the middle... So I pulled the dash. I was expecting a headache, but genuinely the easiest dash I've pulled out of any car, was pleasantly surprised! I'm super lucky that the dash in this car is in very good condition (see the original interior photo, its the only part that IS), so its stored safely inside on the spare bed :-). Will need one repair to a plastic mount where the glovebox screws in, but basically all FD dashes are broken there. Will glue the cracked bit up, and come up with some sort of 3d-printed reinforcement I reckon, to stop it happening again. Pulled this completely apart.. The DC motors that drive the blowers are pretty grunty.. The original one from the car was particularly nasty too. Brushes still looked okay, but the casing was a bit corroded, and it was packed full of leaves, dust, feathers, grime, your mothers underwear, shells, nuts... everything. I had a spare blower motor, so yanked the motor from that as it was a much cleaner unit. Still pulled it apart, tickled up the commutator and brushes, re-lubed everything... the usual. The plastic impeller and casings all got a low pressure vaporblast to bring them back to new. Took the recirculation door actuator apart, cleaned tested and re-lubed as well, tested the relay... all the things. Should be good to go :-). Gave the distribution box the same treatment. Although I cleaned this one in the sink, as the foam was actually still in really good condition so I didn't want to blast it off. The heater core pipes were in a really sorry state though. So pitted. Removed all the corrosion, made sure they were still nice and strong, blasted and had them plated. Reinstalled with new o-rings. Hope like hell they don't leak at the interface to the core, as that's a dash-out job to fix, but I reckon they'll be alright :-). Dummy fitted this with the pipes loose so I could adjust them to be right in the middle of the holes in the firewall, have new pass through grommets on the way from Amayama.
1 point
-
Righto, time to thread dredge I decided it was time to smash this out. Some things were unbolted and I got to seeing if it was possible to replicate 40 year old italian paint with some cans of brunox, custom colour and matt clear coat. 'Kinda' is the answer. This is what it looked like, although I did wire brush it and wiped it with prepsol. One coat of Brunox Two coats of Brunox Some colour; No clear on that yet but I kindof sorted the boot as a test, this went well apart from I needed to scuff up the clear to get it looking shitty enough, it might need a bit more loving. So yea roast the fuck out of my sad efforts in the discussion, even though you and I both know I am a massive useless dickhead when it comes to paint. It least it will be mostly the same shade of blue at the end.1 point
-
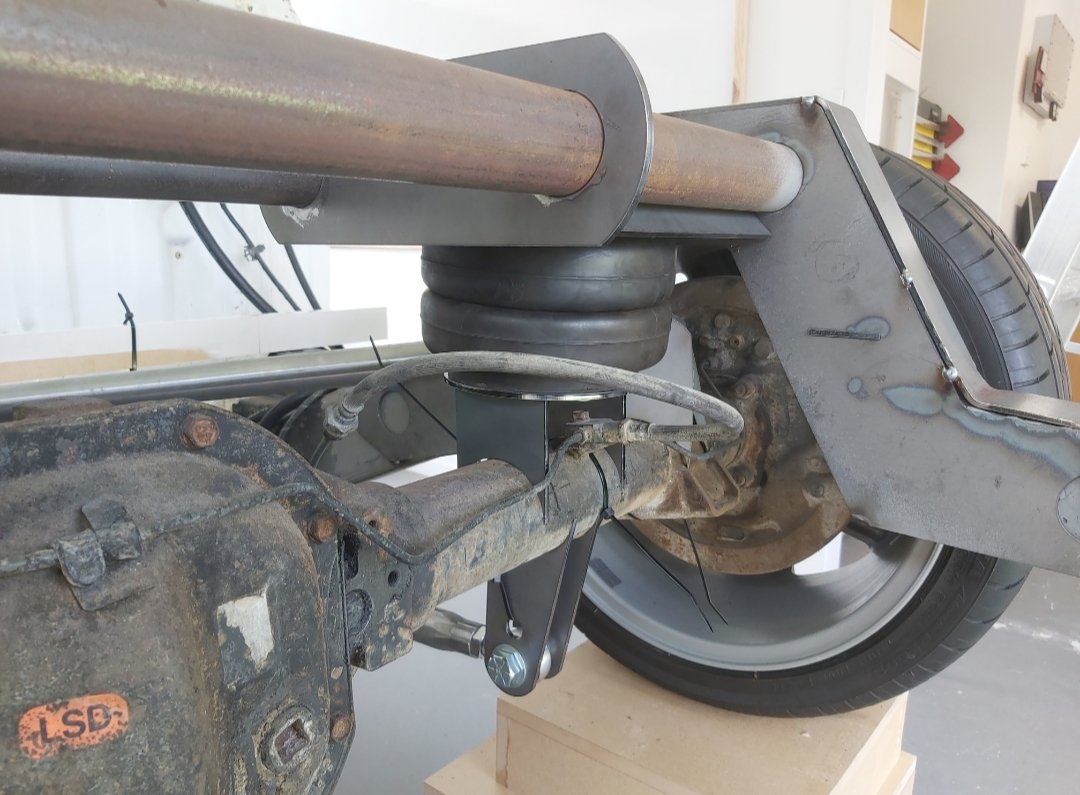
Put the chassis up on the table today. then fired up the lightning scissors and whipped off the spring/shock pockets. them found that the ball joint angle maxes out pretty quickly. any ideas on legal ways to ease up on the ball joint? by my calculations this limit only gets the frame 80mm off the ground. Weak as pic is at the ball joints limit. flipping and swapping upper arms doesn’t solve anything, thought about it, tried it, it failed.
1 point
-
Package from Japan! Hehe Hehehe Hehehehehe1 point
-
I cleaned up the other Avenger spring top spring perch and welded on the plates to attach it to the chassis. I tacked it in place and lifted the diff back up into position and fitted the upper track arms and offered up the springs. I got one side in but trying to fit the other side the car became very unstable being only a shell and being up high. I decided to abandon that side before I wore the car, which is still quite heavy. I think I will wait until the car is down a lot lower.
1 point
-
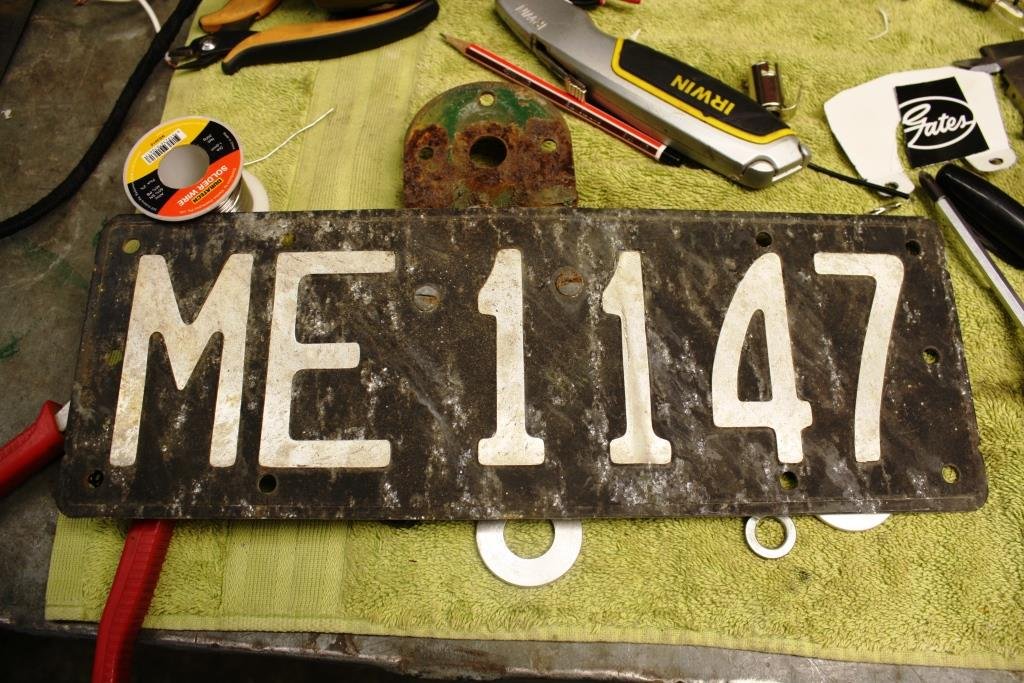
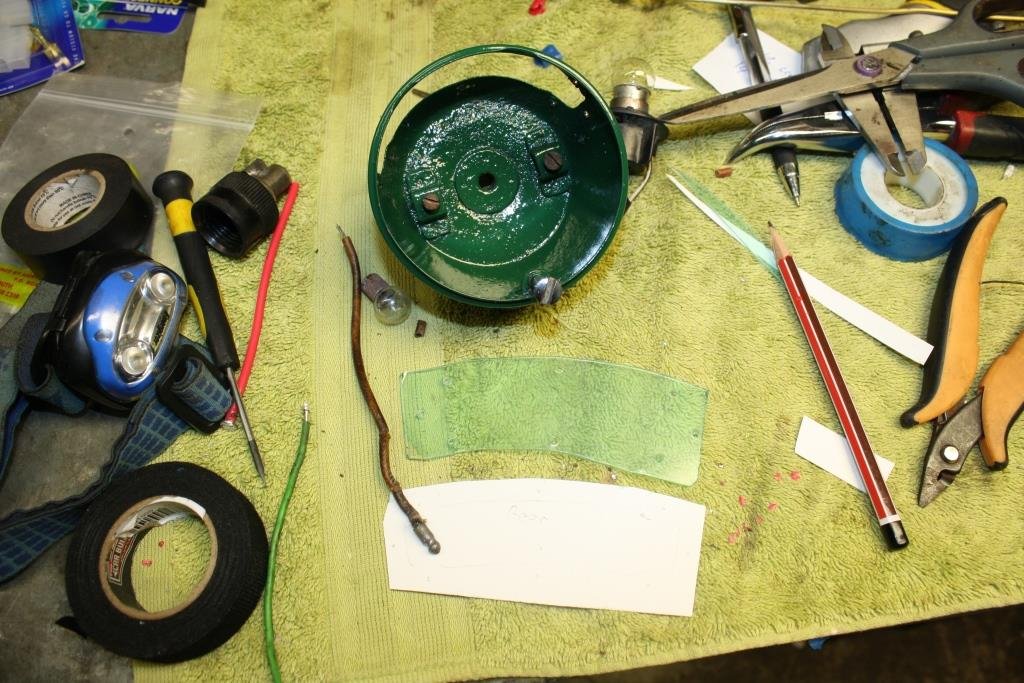
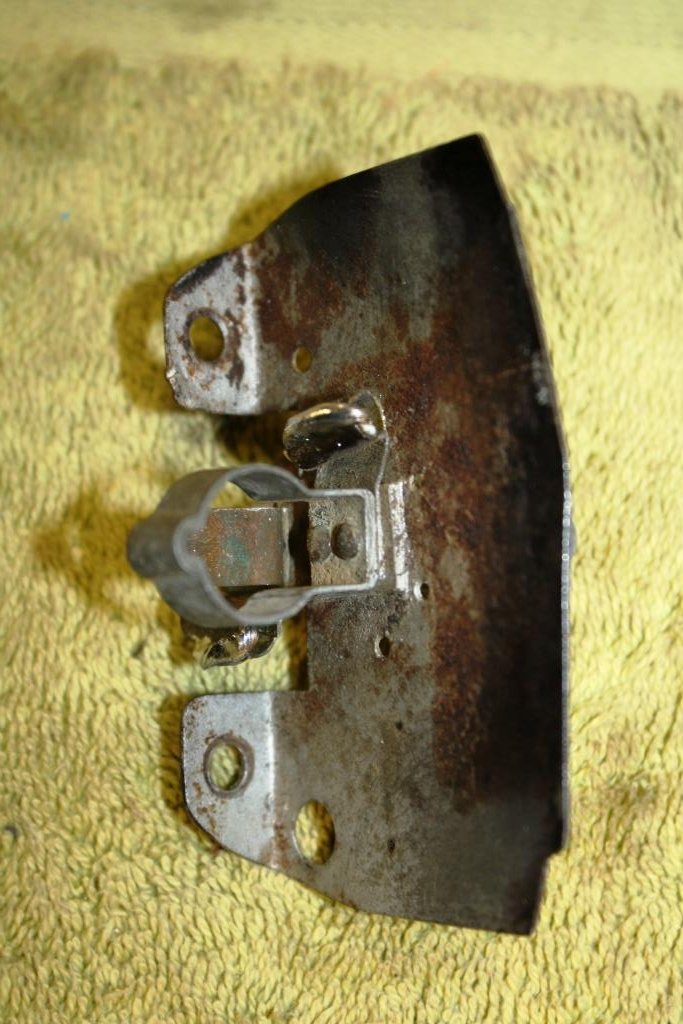
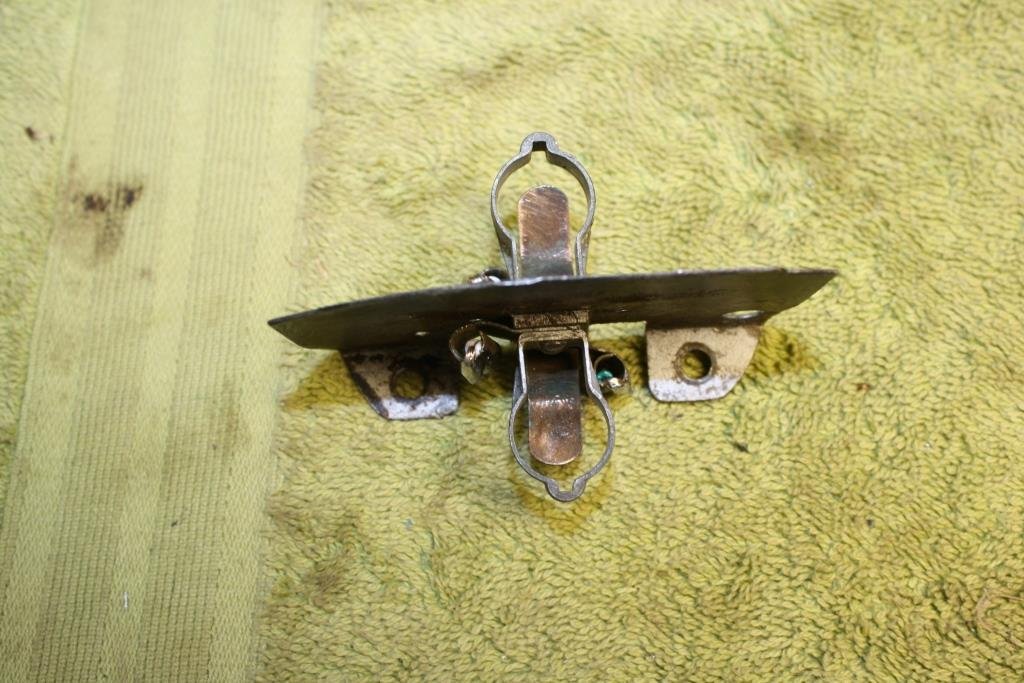
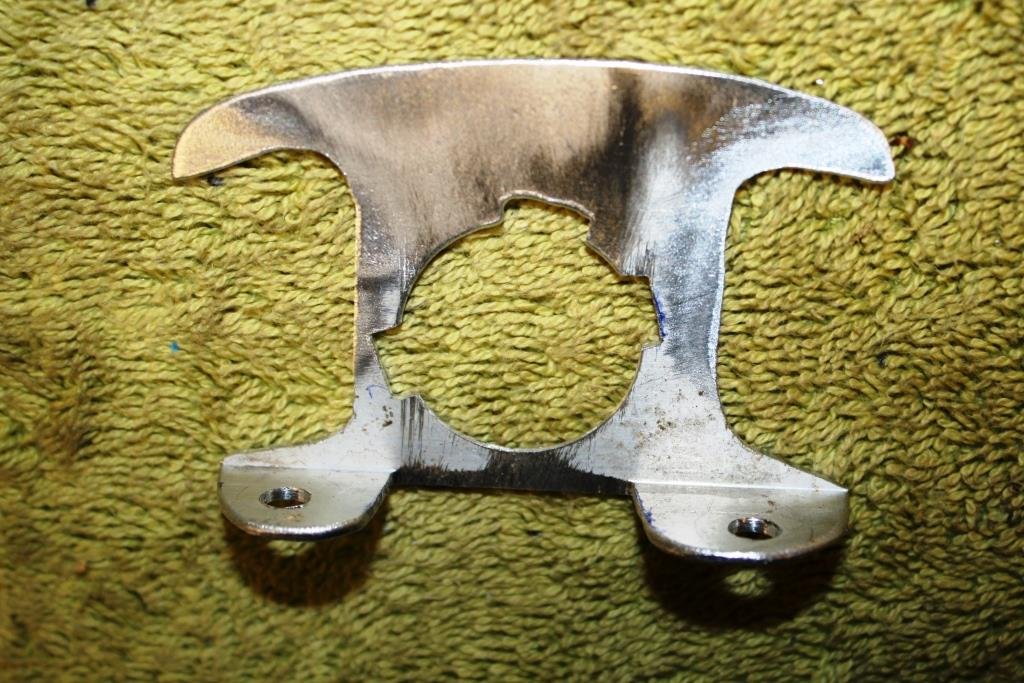
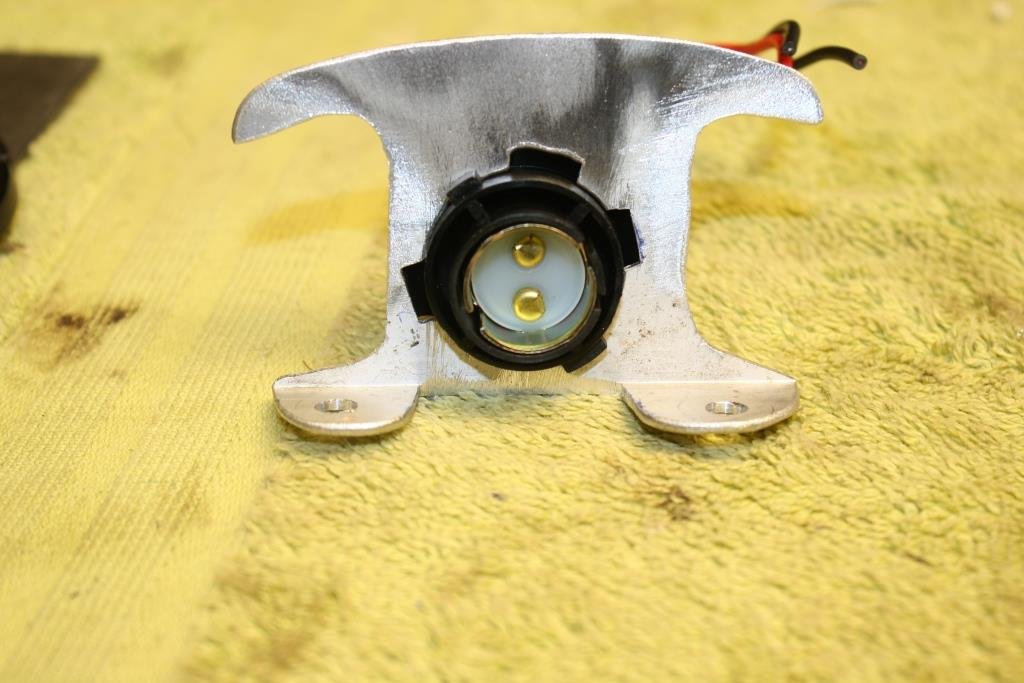
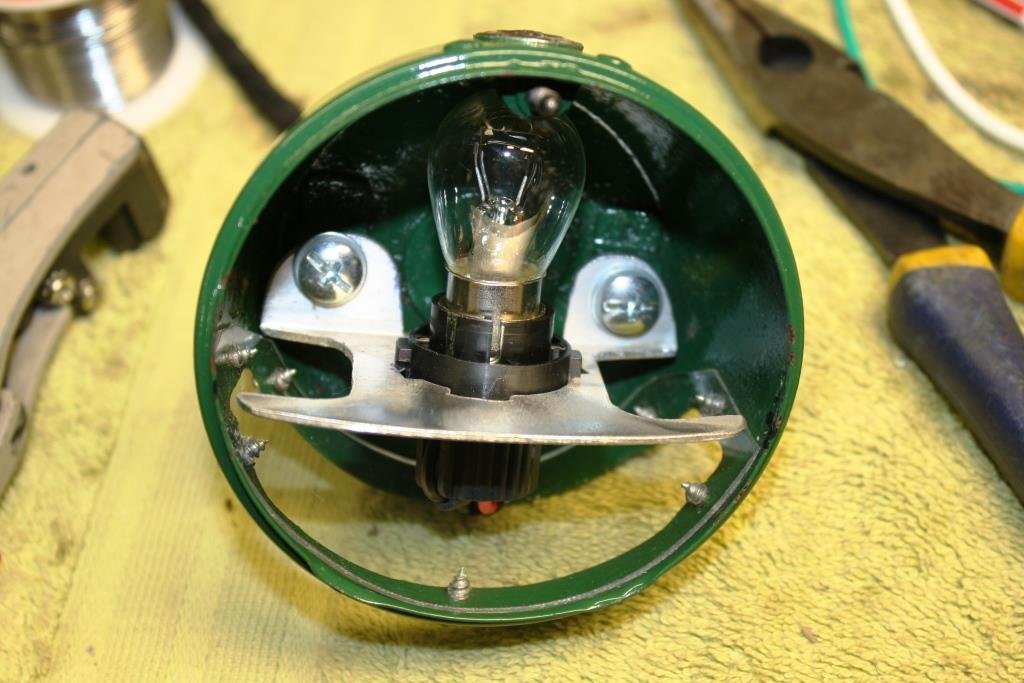
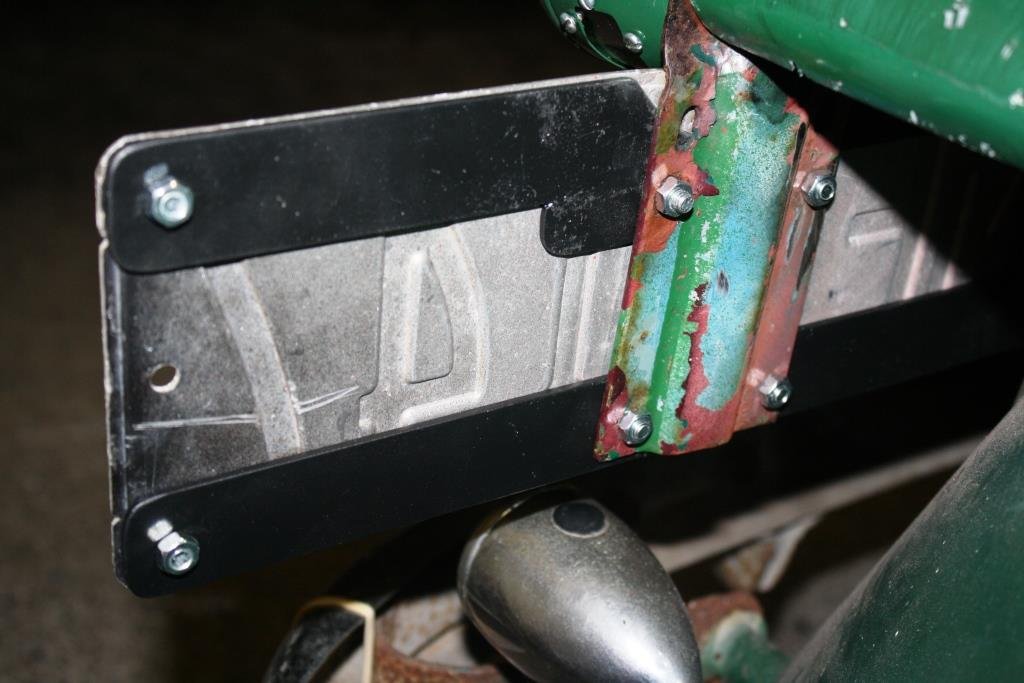
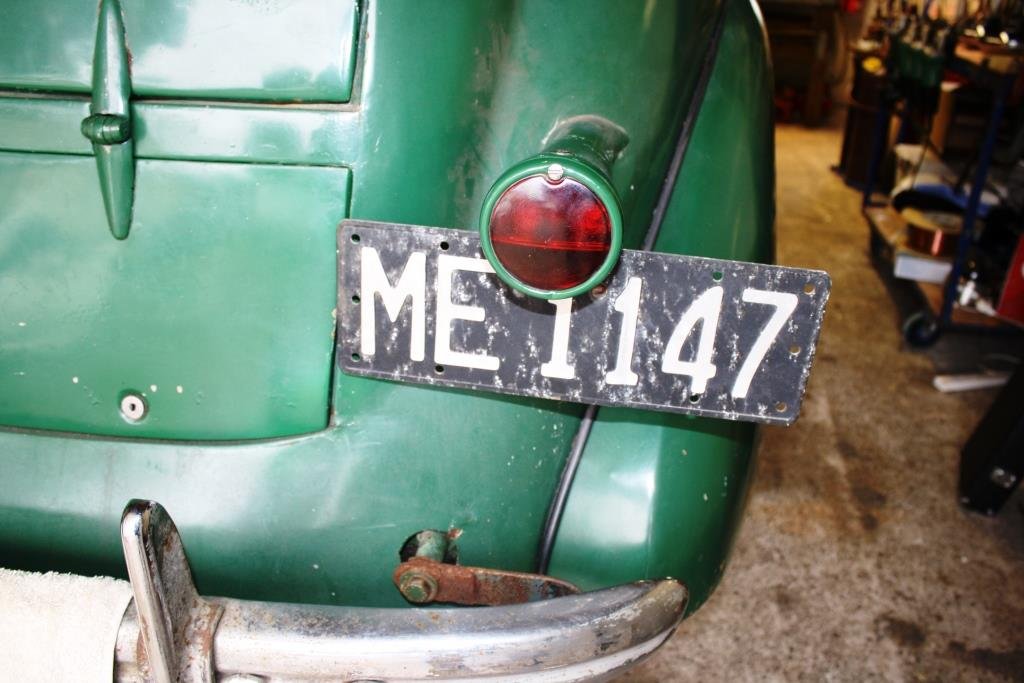
Working my way through the electrics….. This is all that was left of the original tail light, (i.e. the bloody thing fell off!). I started stripping down the tail light I’d got from the Vauxhall Car Club. Paint stripper, rust kill and paint……… I replaced the clear number plate lens with plastic cut from a welding helmet lens cover. The bulb holders were badly corroded and shorting out. I made the call to upgrade it and made one of these out of a piece of scrap alloy. It fits a modern bulb holder……… And just fits inside the housing. The number plate was a little bashed and battered so I reinforced it a bit. Still looking suitably bashed & battered but it all works!
1 point
-
I made up the plates for the passenger side today and took some pic's. I made a start on welding in one of the plates. I will leave it there for today. It will be interesting to see how it sits with the Avenger springs in. The minx is about 100kg heavier. I think I will need to get some shorter springs made to get it sitting where I want it.
1 point
-
Have put a single mass flywheel from Uk on mine.Clutch was always high, now soooooo much better. Hate dual mass! Have you had problems with your cluster. Had cluster checked, OK, replaced sensor, checked fuses. All the recommended things, still works when it wants. You seem to have fixed all the same things as me, IMRC, throttle control. Temperamental child it is but lovable.1 point
-
A small update. I have been working away getting the trailing arm mounts and fish plates welded in. Awkward work but getting there. Anyway, I needed to get the spring perches for the rear springs from a Donar Avenger. There is not a lot of difference between the chassis angle and room for the spring between the Minx and Avenger, only about 20mm. So I headed off up to Putaruru to cut them out of the Donar car. On the way there I stopped for lunch out at Arapuni and bravely managed to walk the first 15m of the swing bridge and suddenly realized the time and I had to get to where I needed to go and didn't have time to complete the crossing . Never mind another day.1 point
-
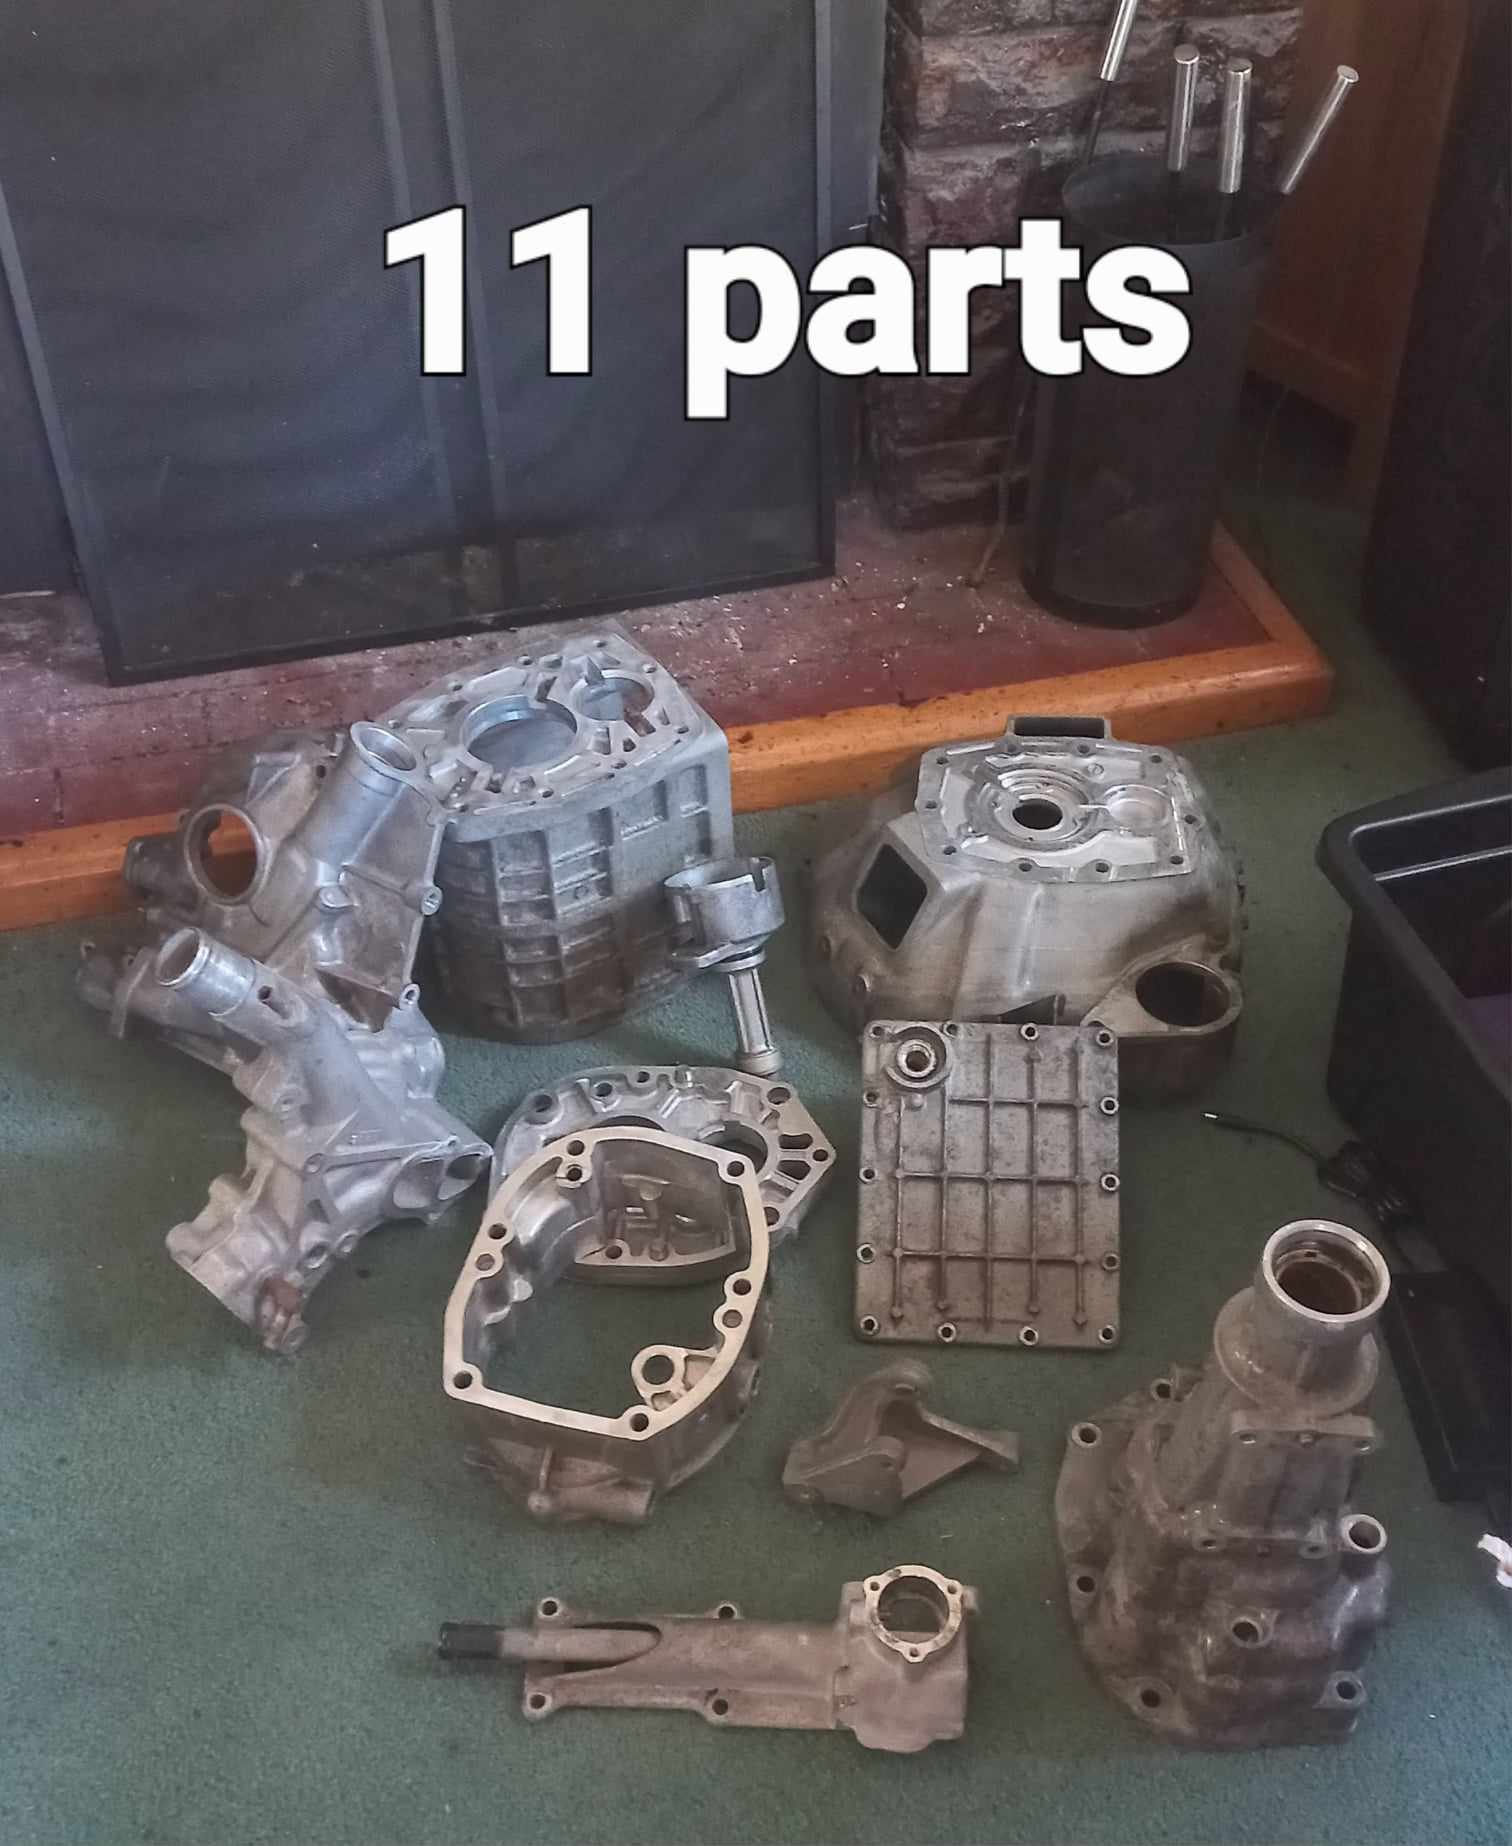
Page turn Slow progress just buying/ordering bits and scoping out future parts needed. FMIC kit very spendy and all seem to need deleting of my factory fog lights dammit. Picked up the 11 vapoured parts and dropped off 9 more. Few hours alone just pulling apart the inlet manifold and releasing the butterflies..all 5 of them. Gearbox bearing rebuilt kit arrived with emission blank plates and OMP housing blank bungs. Synchros are on order at Mazda..need 5th and reverse but replacing all 6 cos its open and never be opened again in my lifetime. To my eye they look satin silver painted...snazzy
1 point
-
Pretty much done, the Fiat fusebox is mounted on a handy drop down tray, I managed to mount everything on without too much bother. 'Finished' that is apart from the things like the headlamp and pod motor wires that I will run once I have it in the car so I dont waste wire. And the brake circuit. And indicator wires. And the running lights. And all the shit in the engine bay; starter/fuel pump/coil pack/sensors/etc. So probably not all done in the slightest.
1 point
-
I bought another container to improve my storage situation, this meant I could move the X to the new one to give me a bit of room to move around it. Things were a bit tight on the other one with that shelving. I took the opportunity to take a few pics and analyse the state of play; Mmm crusty. There is evidence some welding has taken place but I'll strip that POR15 off to see what shenanigans are going on. All tucked up again1 point
-
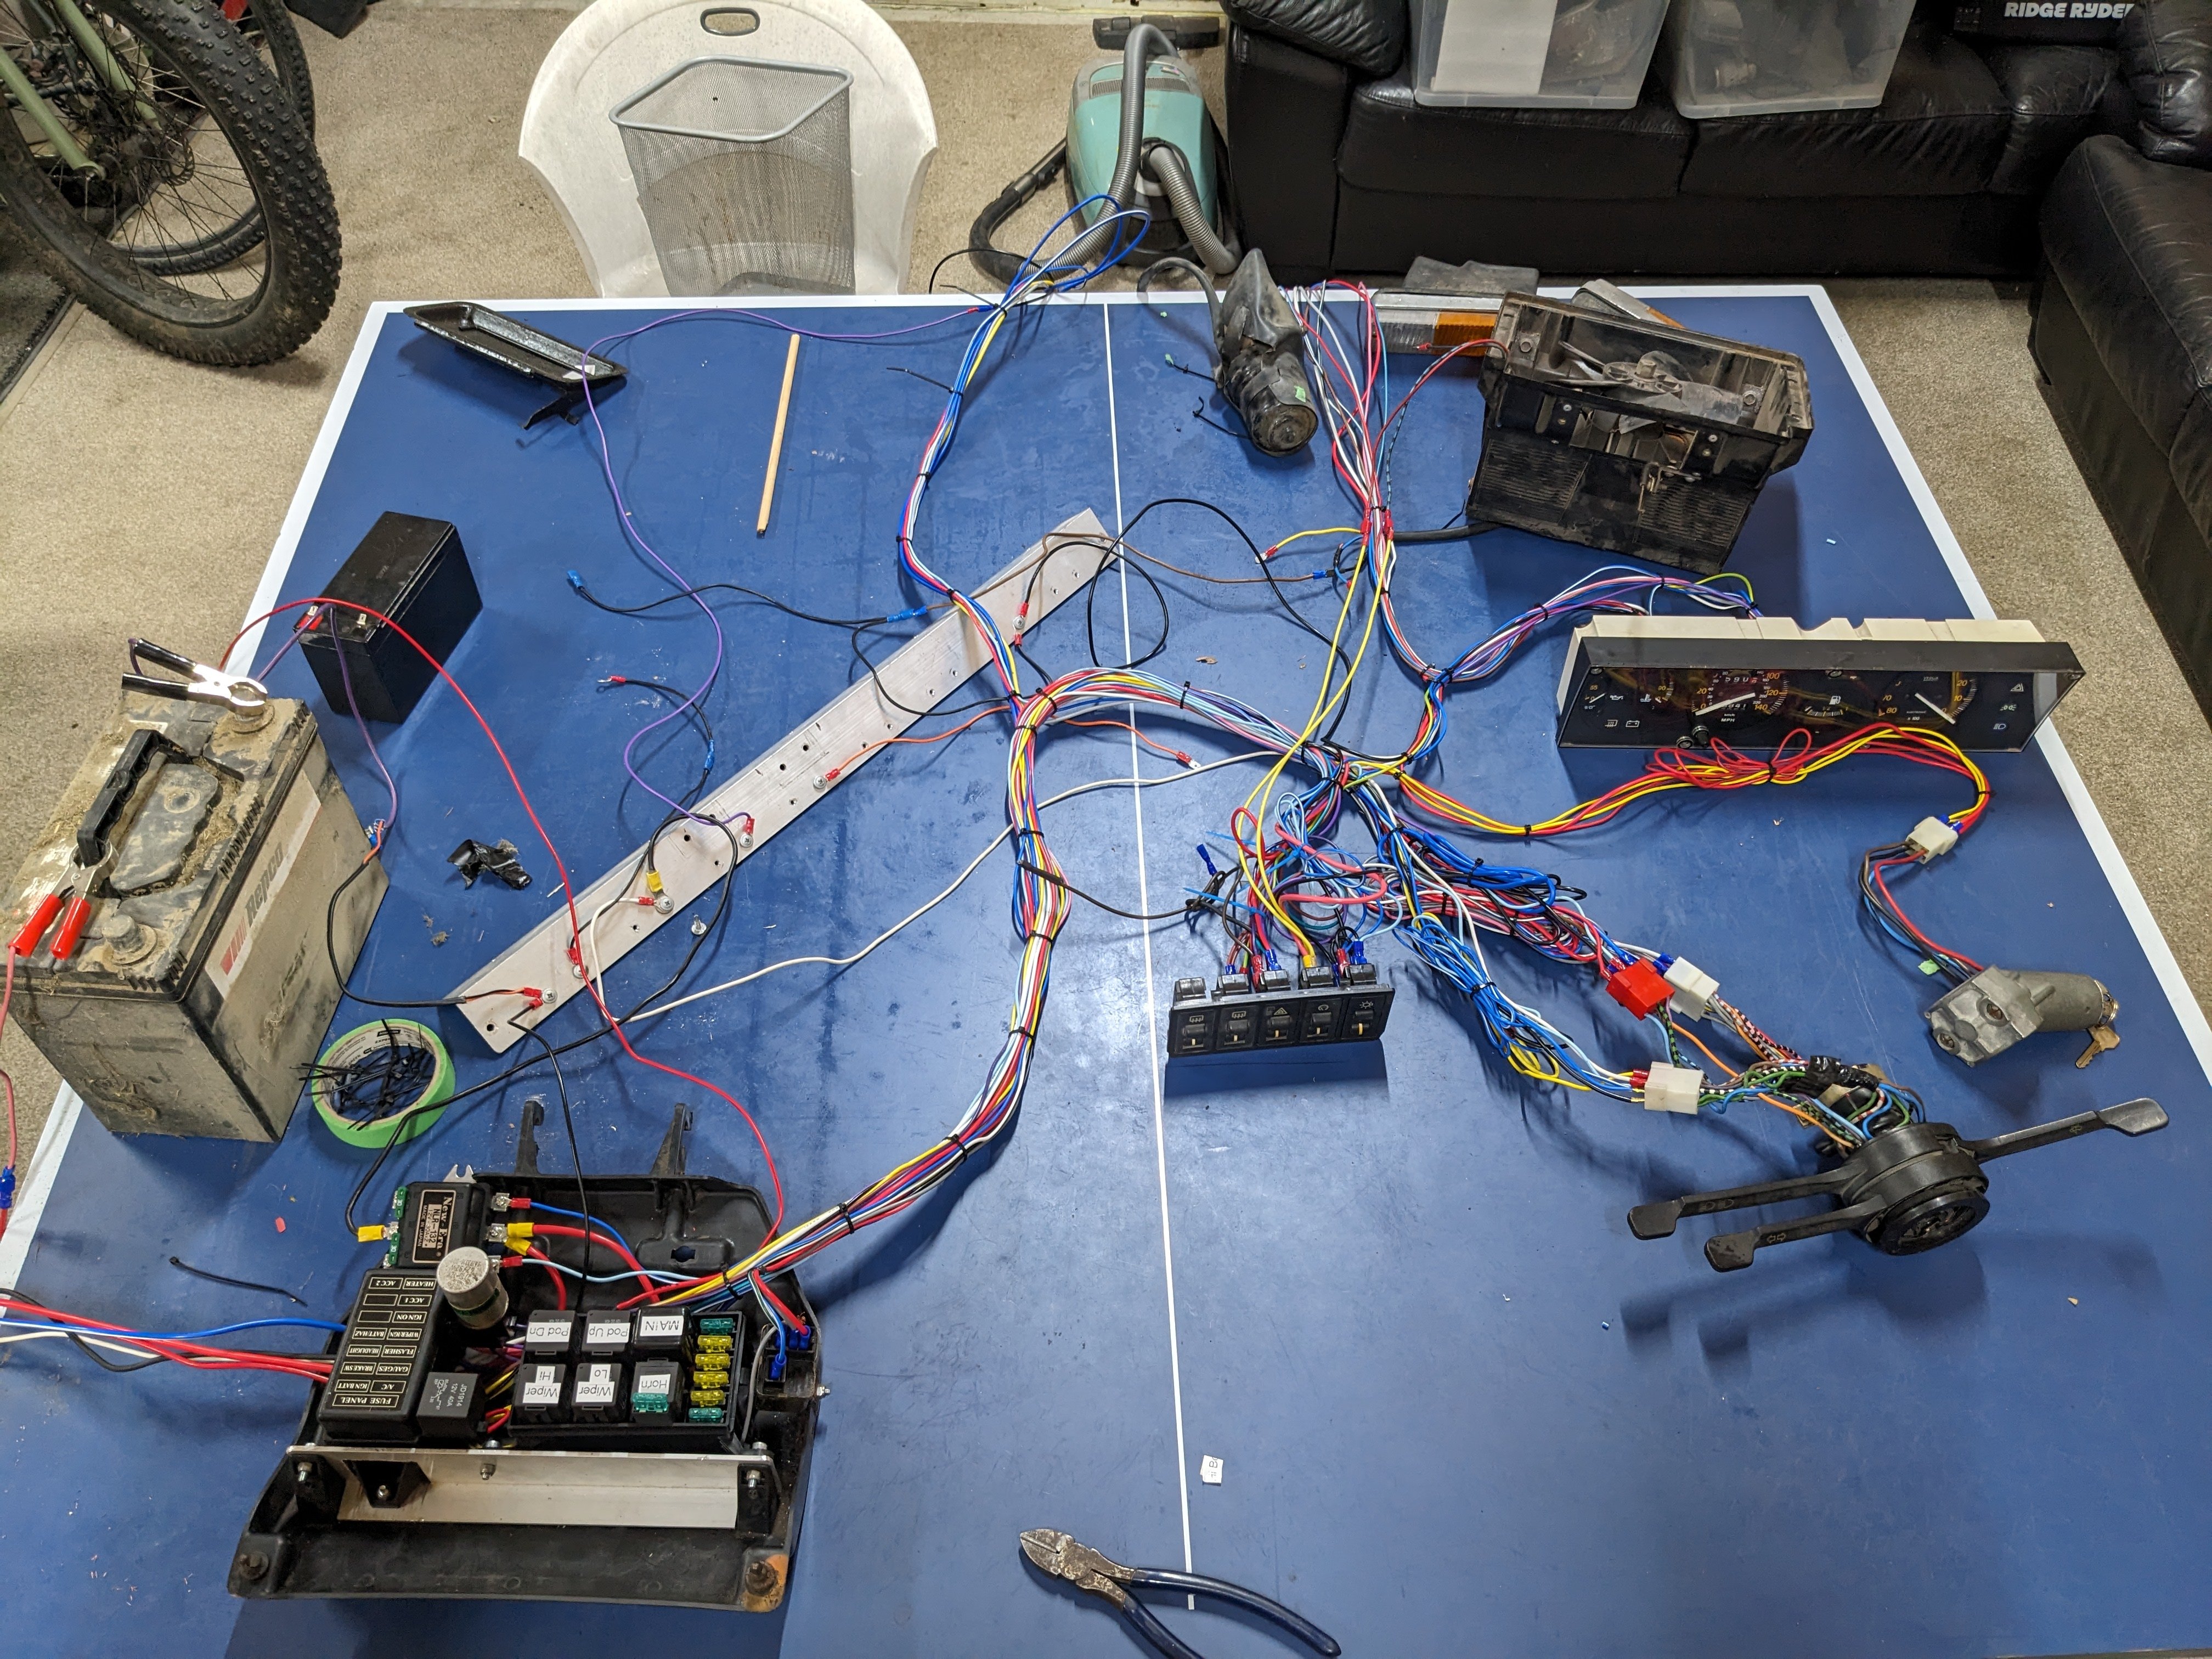
Well it's started, I spent a couple of evenings mapping what the various switch and plug connectors do. I was helped pretty significantly by the laminated wiring diagrams that came with the car. Doing this bit is so satisfying, I like how it gives a shape to what is needed and actually makes interpreting the wiring diagrams so much easier. Then a couple of night later; I need more coloured wire and a shitload of Deutsch connectors. The headlight and hazard switches have some truly funky shit going on. I ended up having to swap out and repin the new loom flasher relay for the old X one, the new one was a two pin and the old one was a 3 pin. With the switch madness I had to replicate the original flasher/hazard circuit otherwise I couldnt get the indicator lights to work properly, mostly because there is only one instrument cluster light for either direction. Anyway I have since moved all that to a bigger table and cranked into it. I currently have the key working and switching a main relay to power on the other relay circuits, the indicator stuff working and the heater fan. Next is the wipers, then the lights. I'll need to get it in the car to check lengths then I can actually terminate everything properly. Fun fun fun...1 point
-
Wife has been all 1984 about this, the thought police etc. cos she found my copy of the Haynes manual under my chair. I told her she cannot control what i think and it turns out waterboarding isnt so bad. To be subversive i have not only been thinking about it but also buying things like this collection of wiring components. The extra relays are to replace the dogshit ones that came with that relay box. The big one is a dedicated headlight type.; And thanks to @ynot I have a heater box now. My heater tap was seized and I broke it trying to free it up so I have ordered a generic replacement. So that is possibly the last missing item, but probably not. Tony also gave/lent me a spare gearbox as well altho it isn't a 1500 5 speed. It is either out of a Fiat Ritmo or it is a 4 speed with 5 speed internals grafted in. If it is a Ritmo the ratios might be better suited according to the internet. I can't use it as is because the output is the tripode type not the CV type on my car, but the internals should swap over ok. This is just in case my gearbox 3rd gear crunch has gotten worse, we will see in due course.1 point
-
Reposting this because i like it.1 point
-
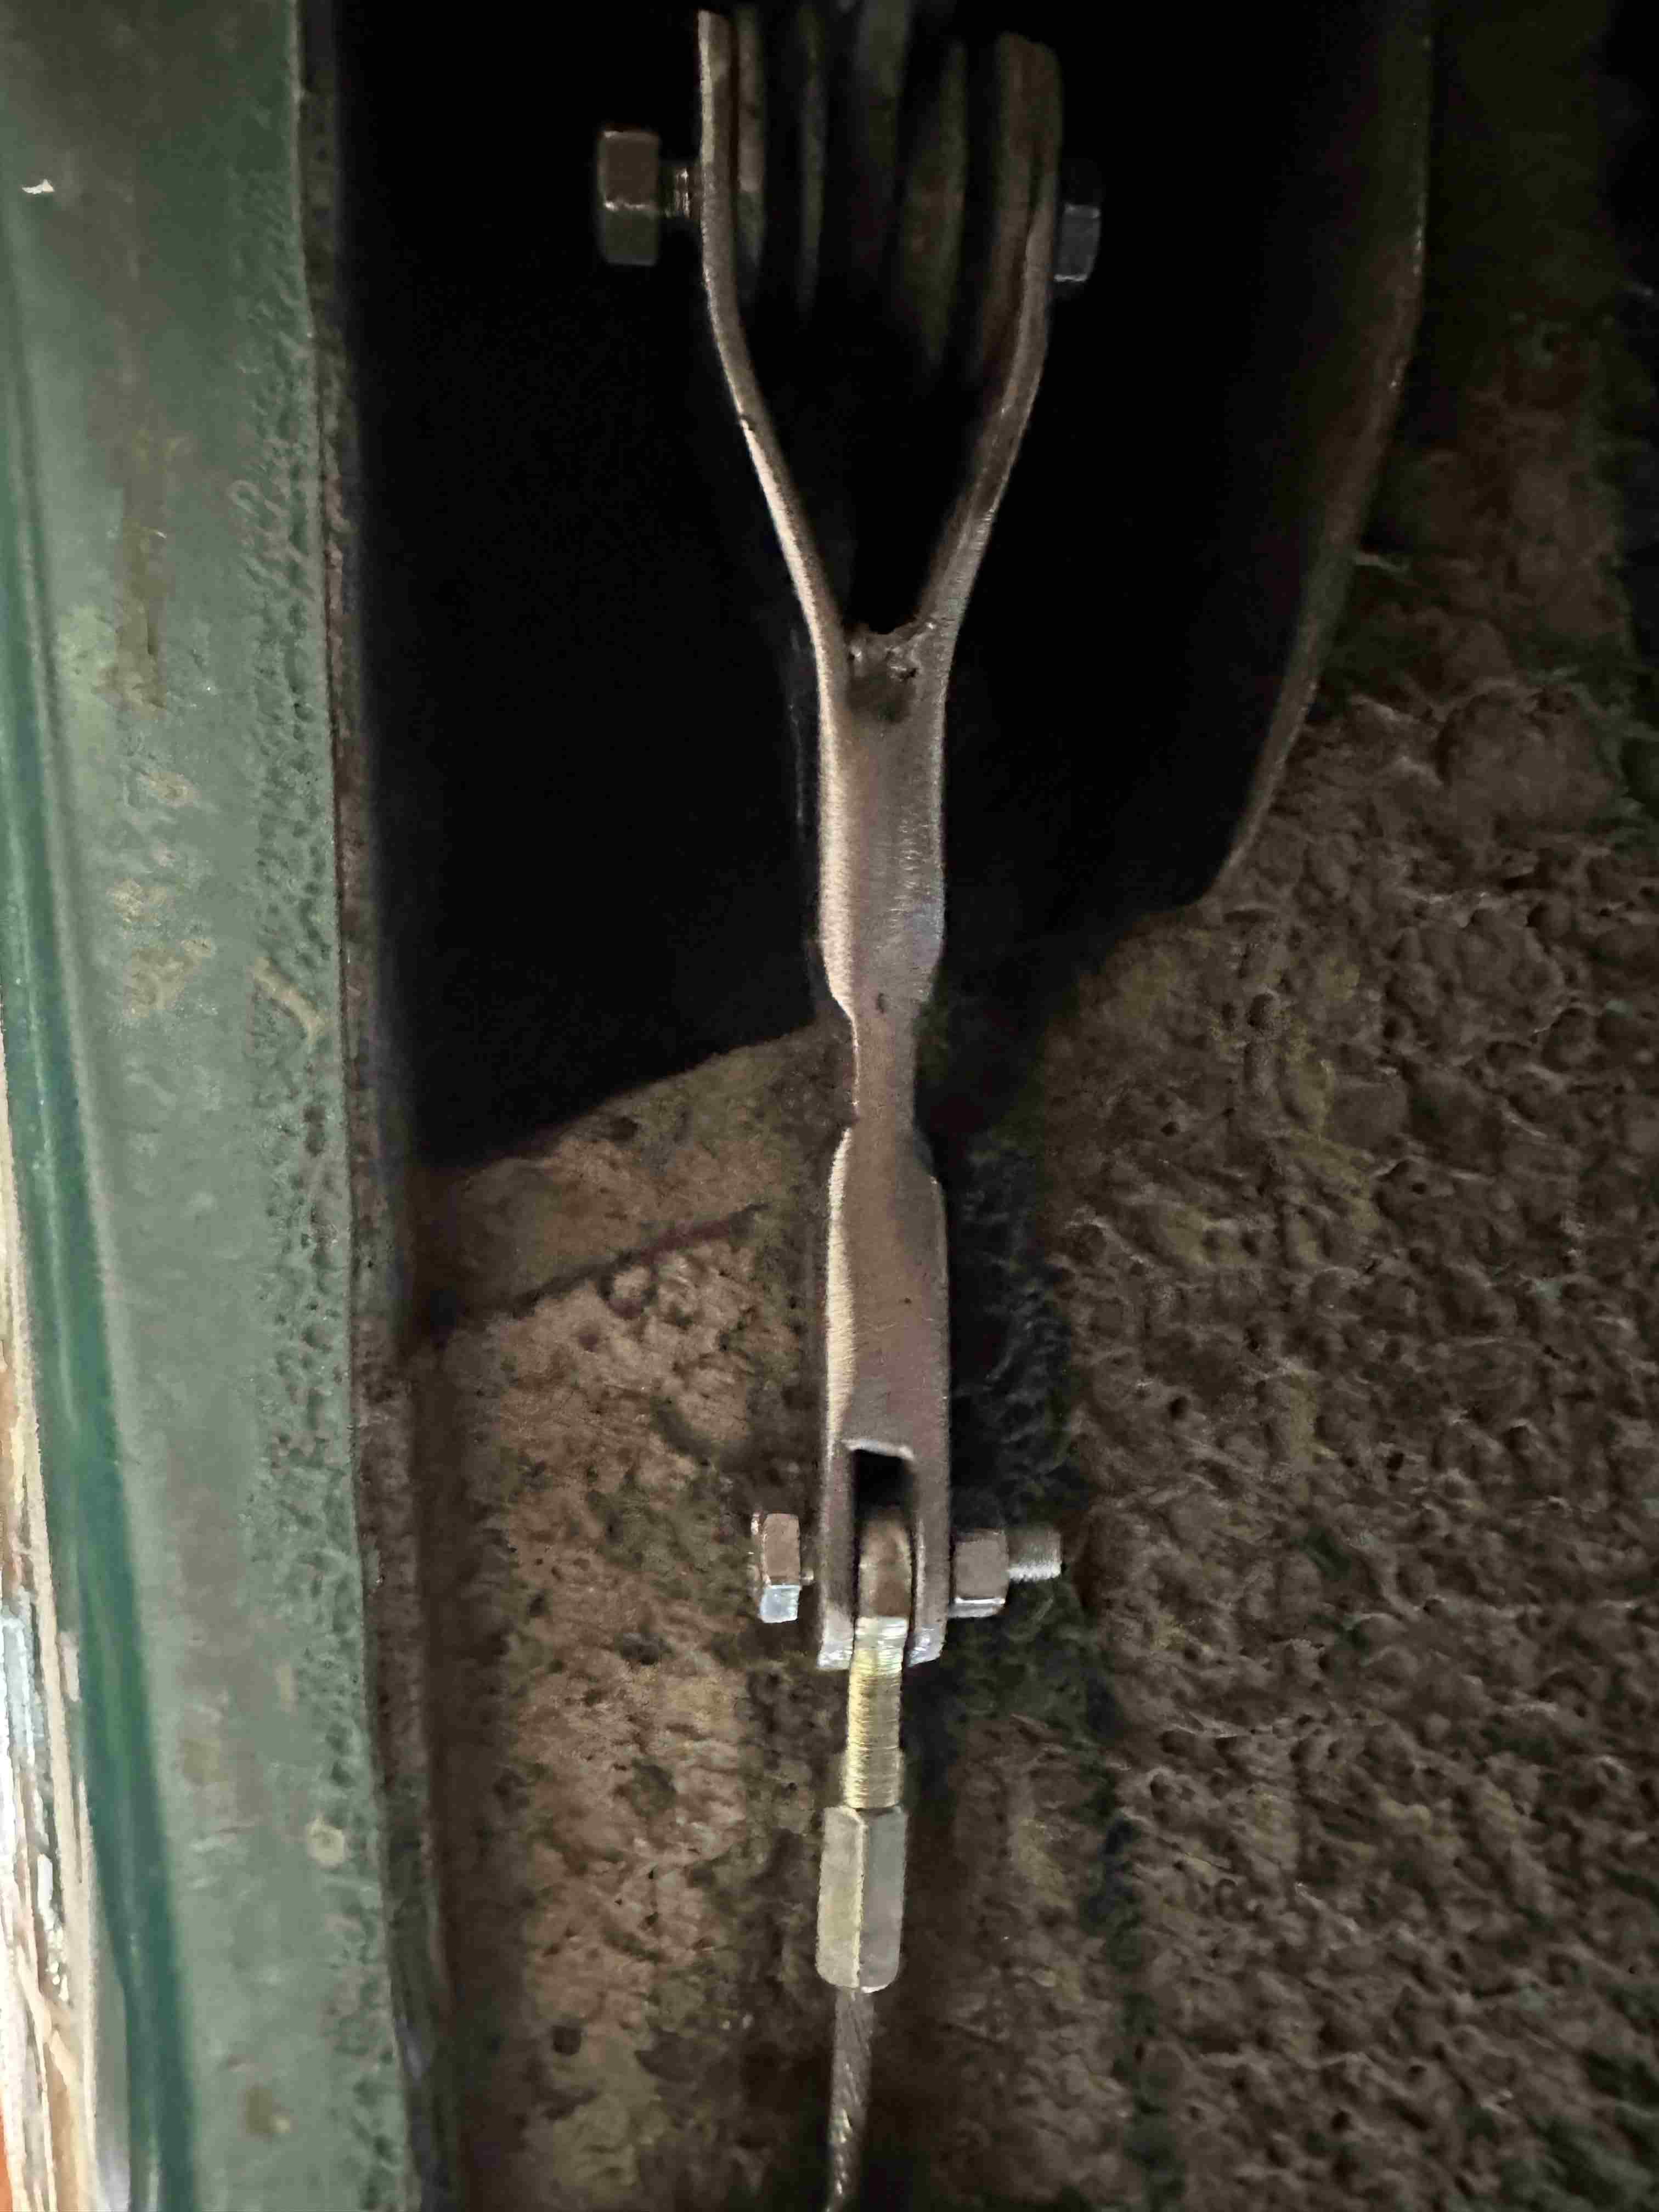
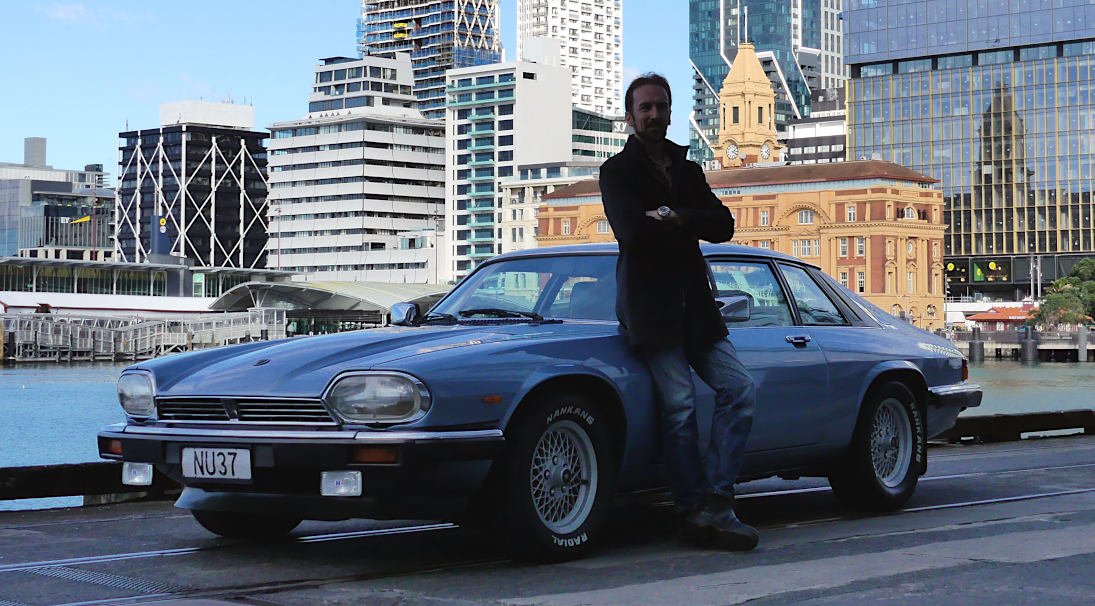
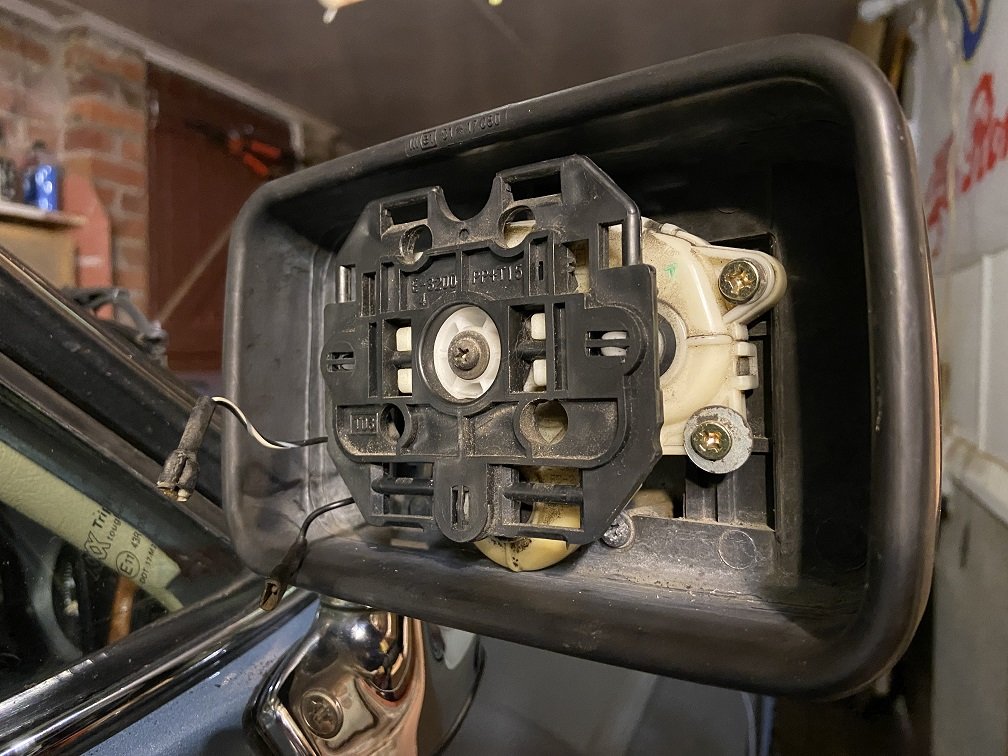
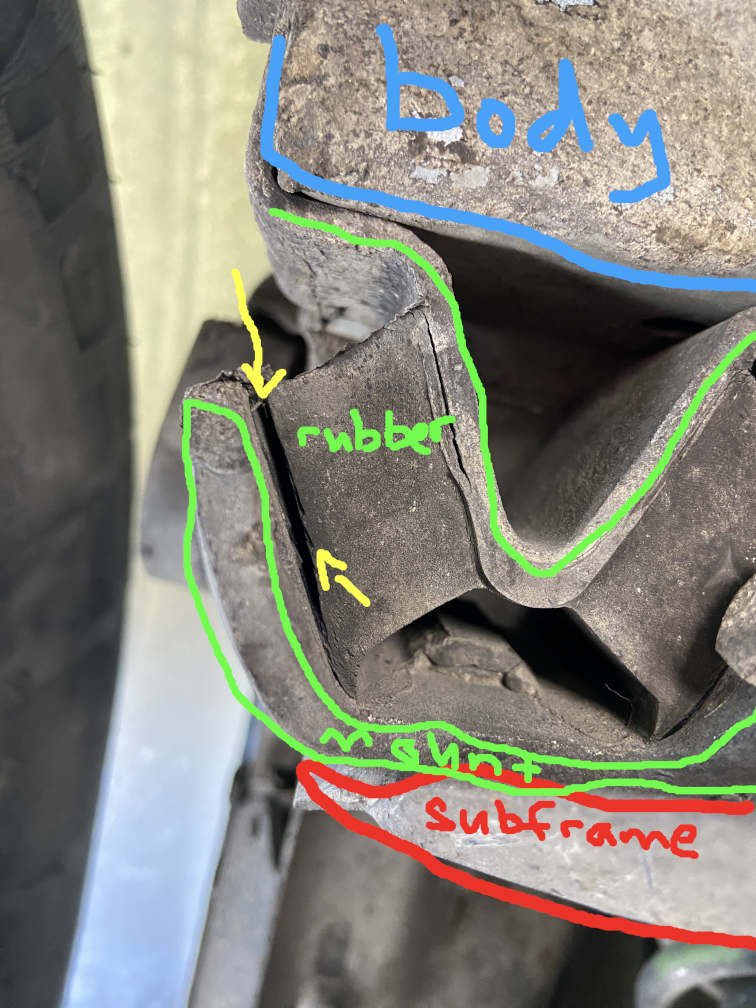
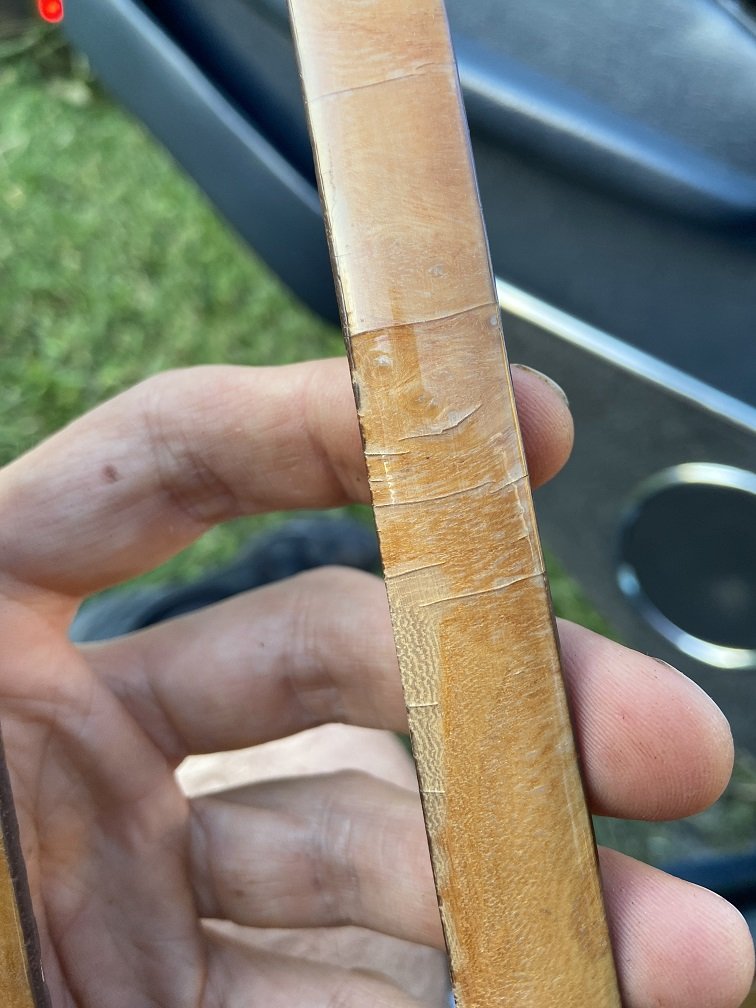
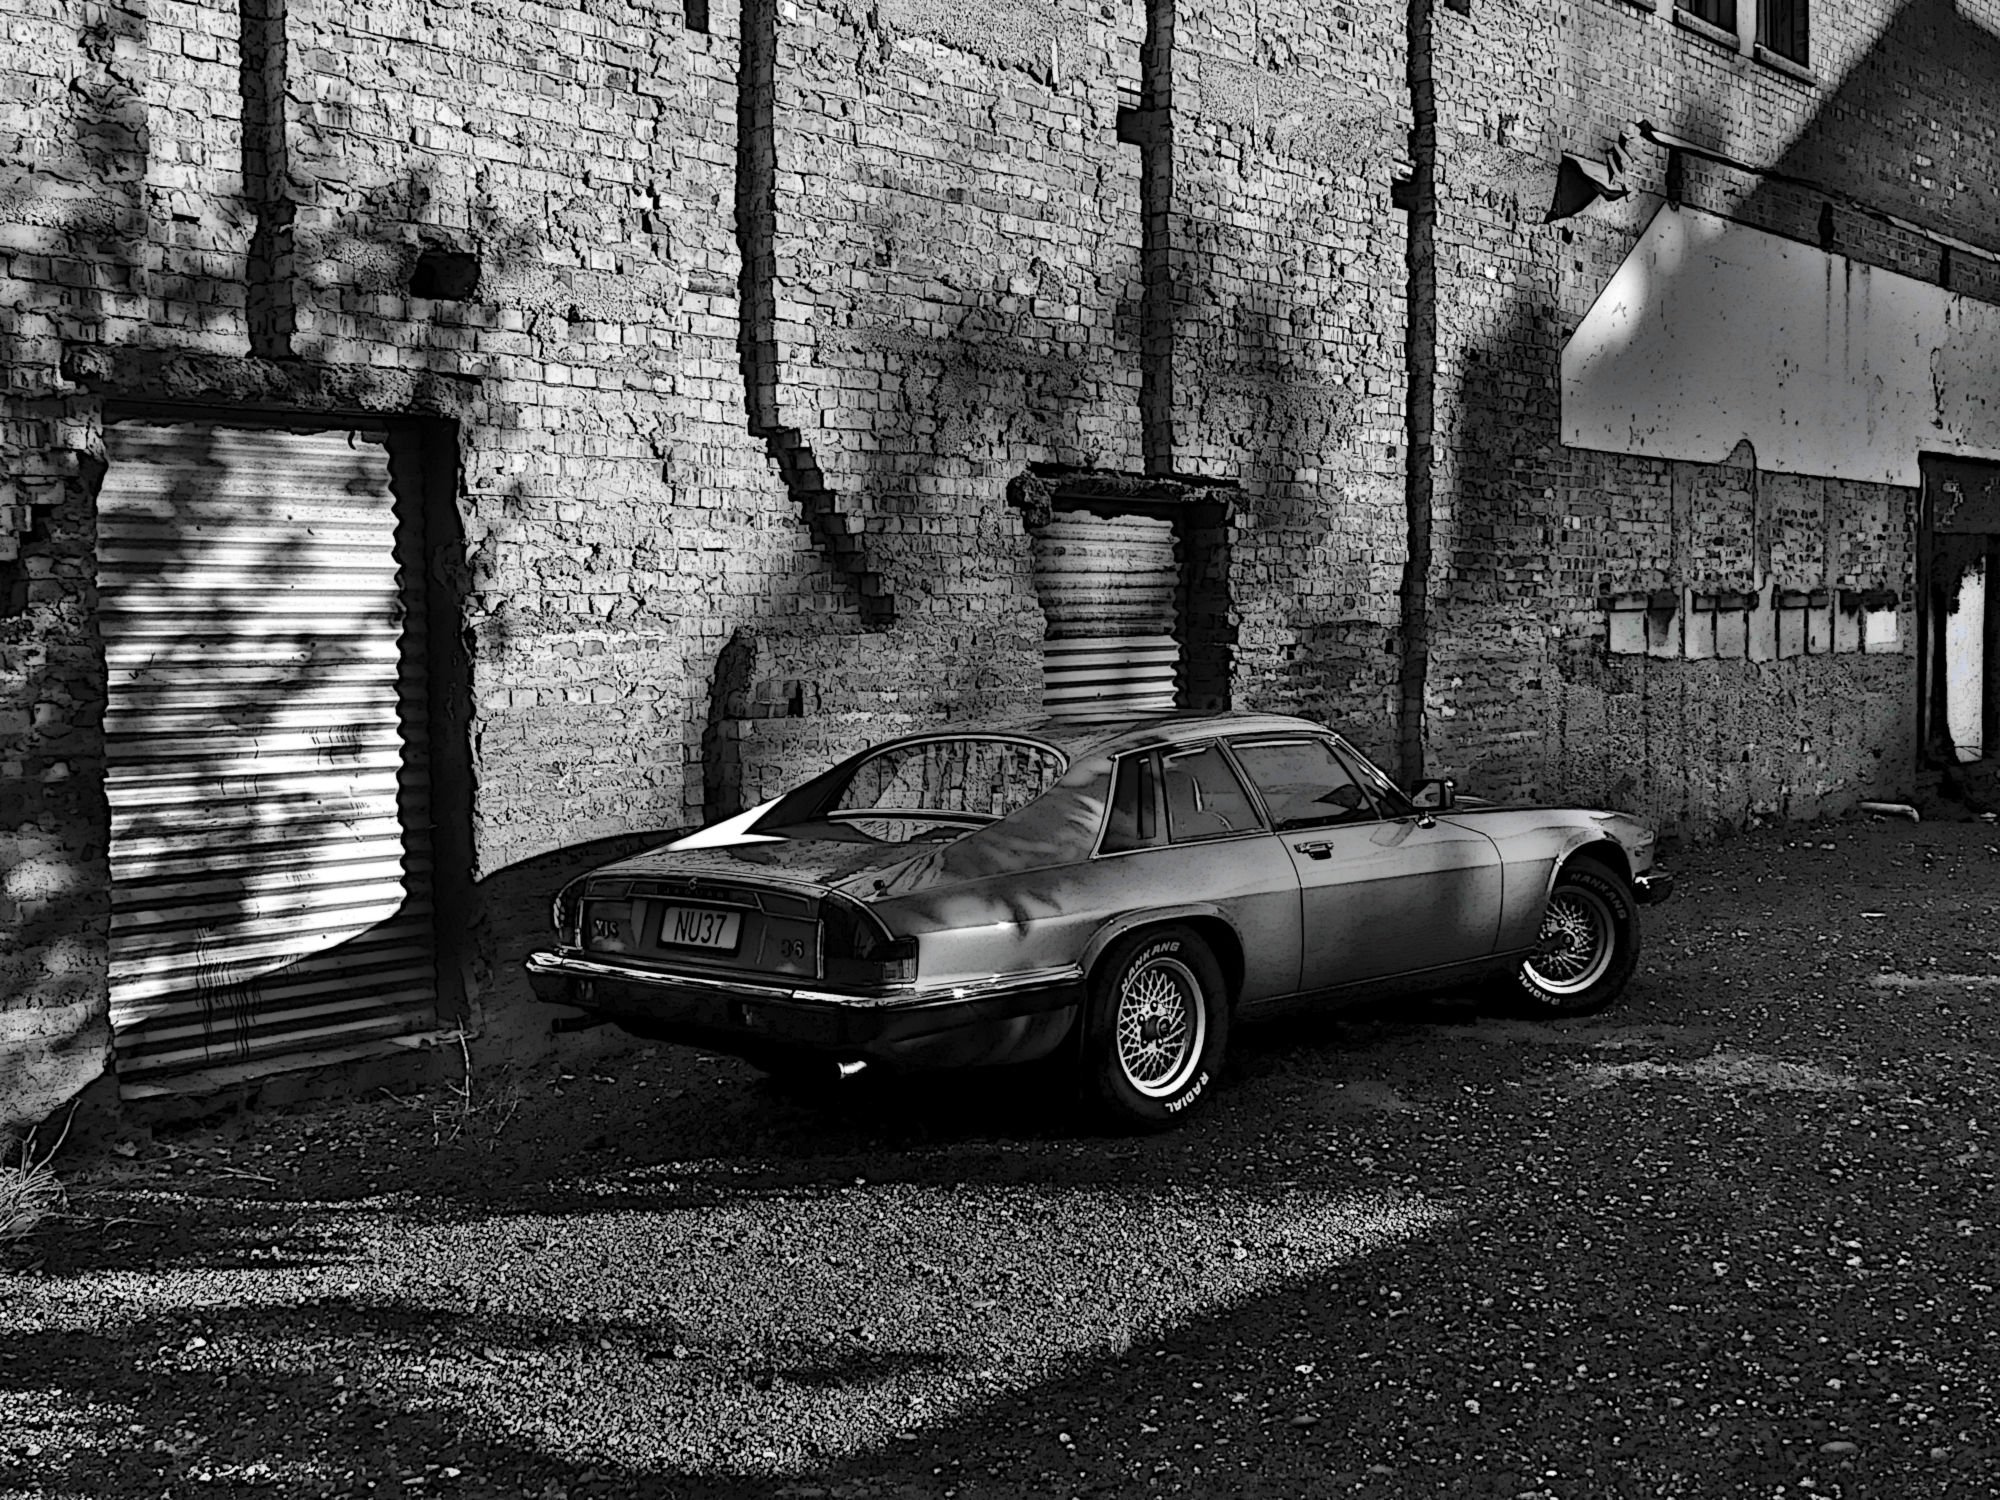
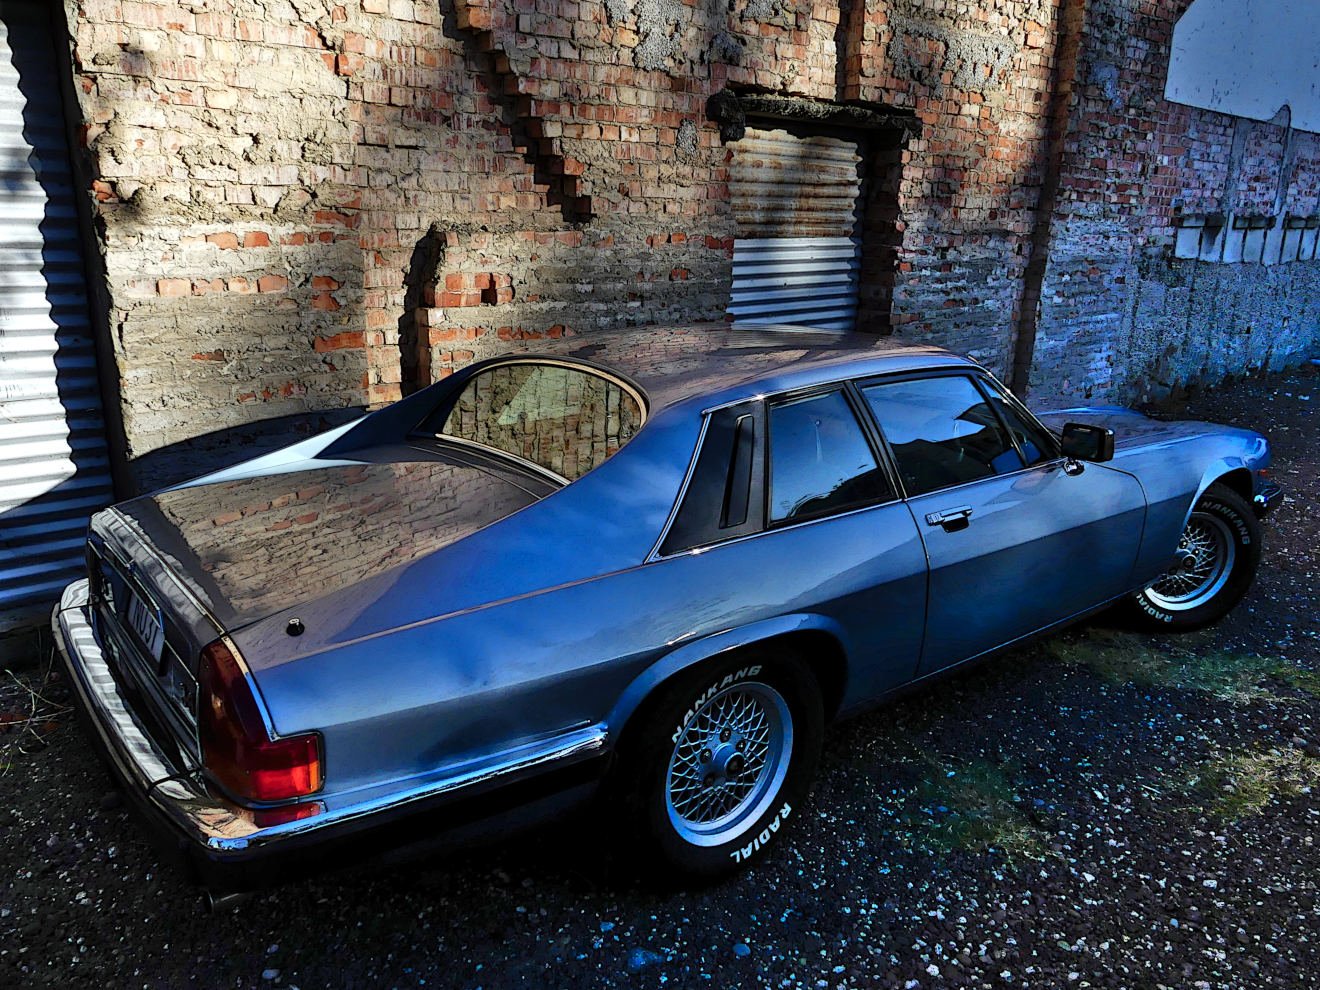
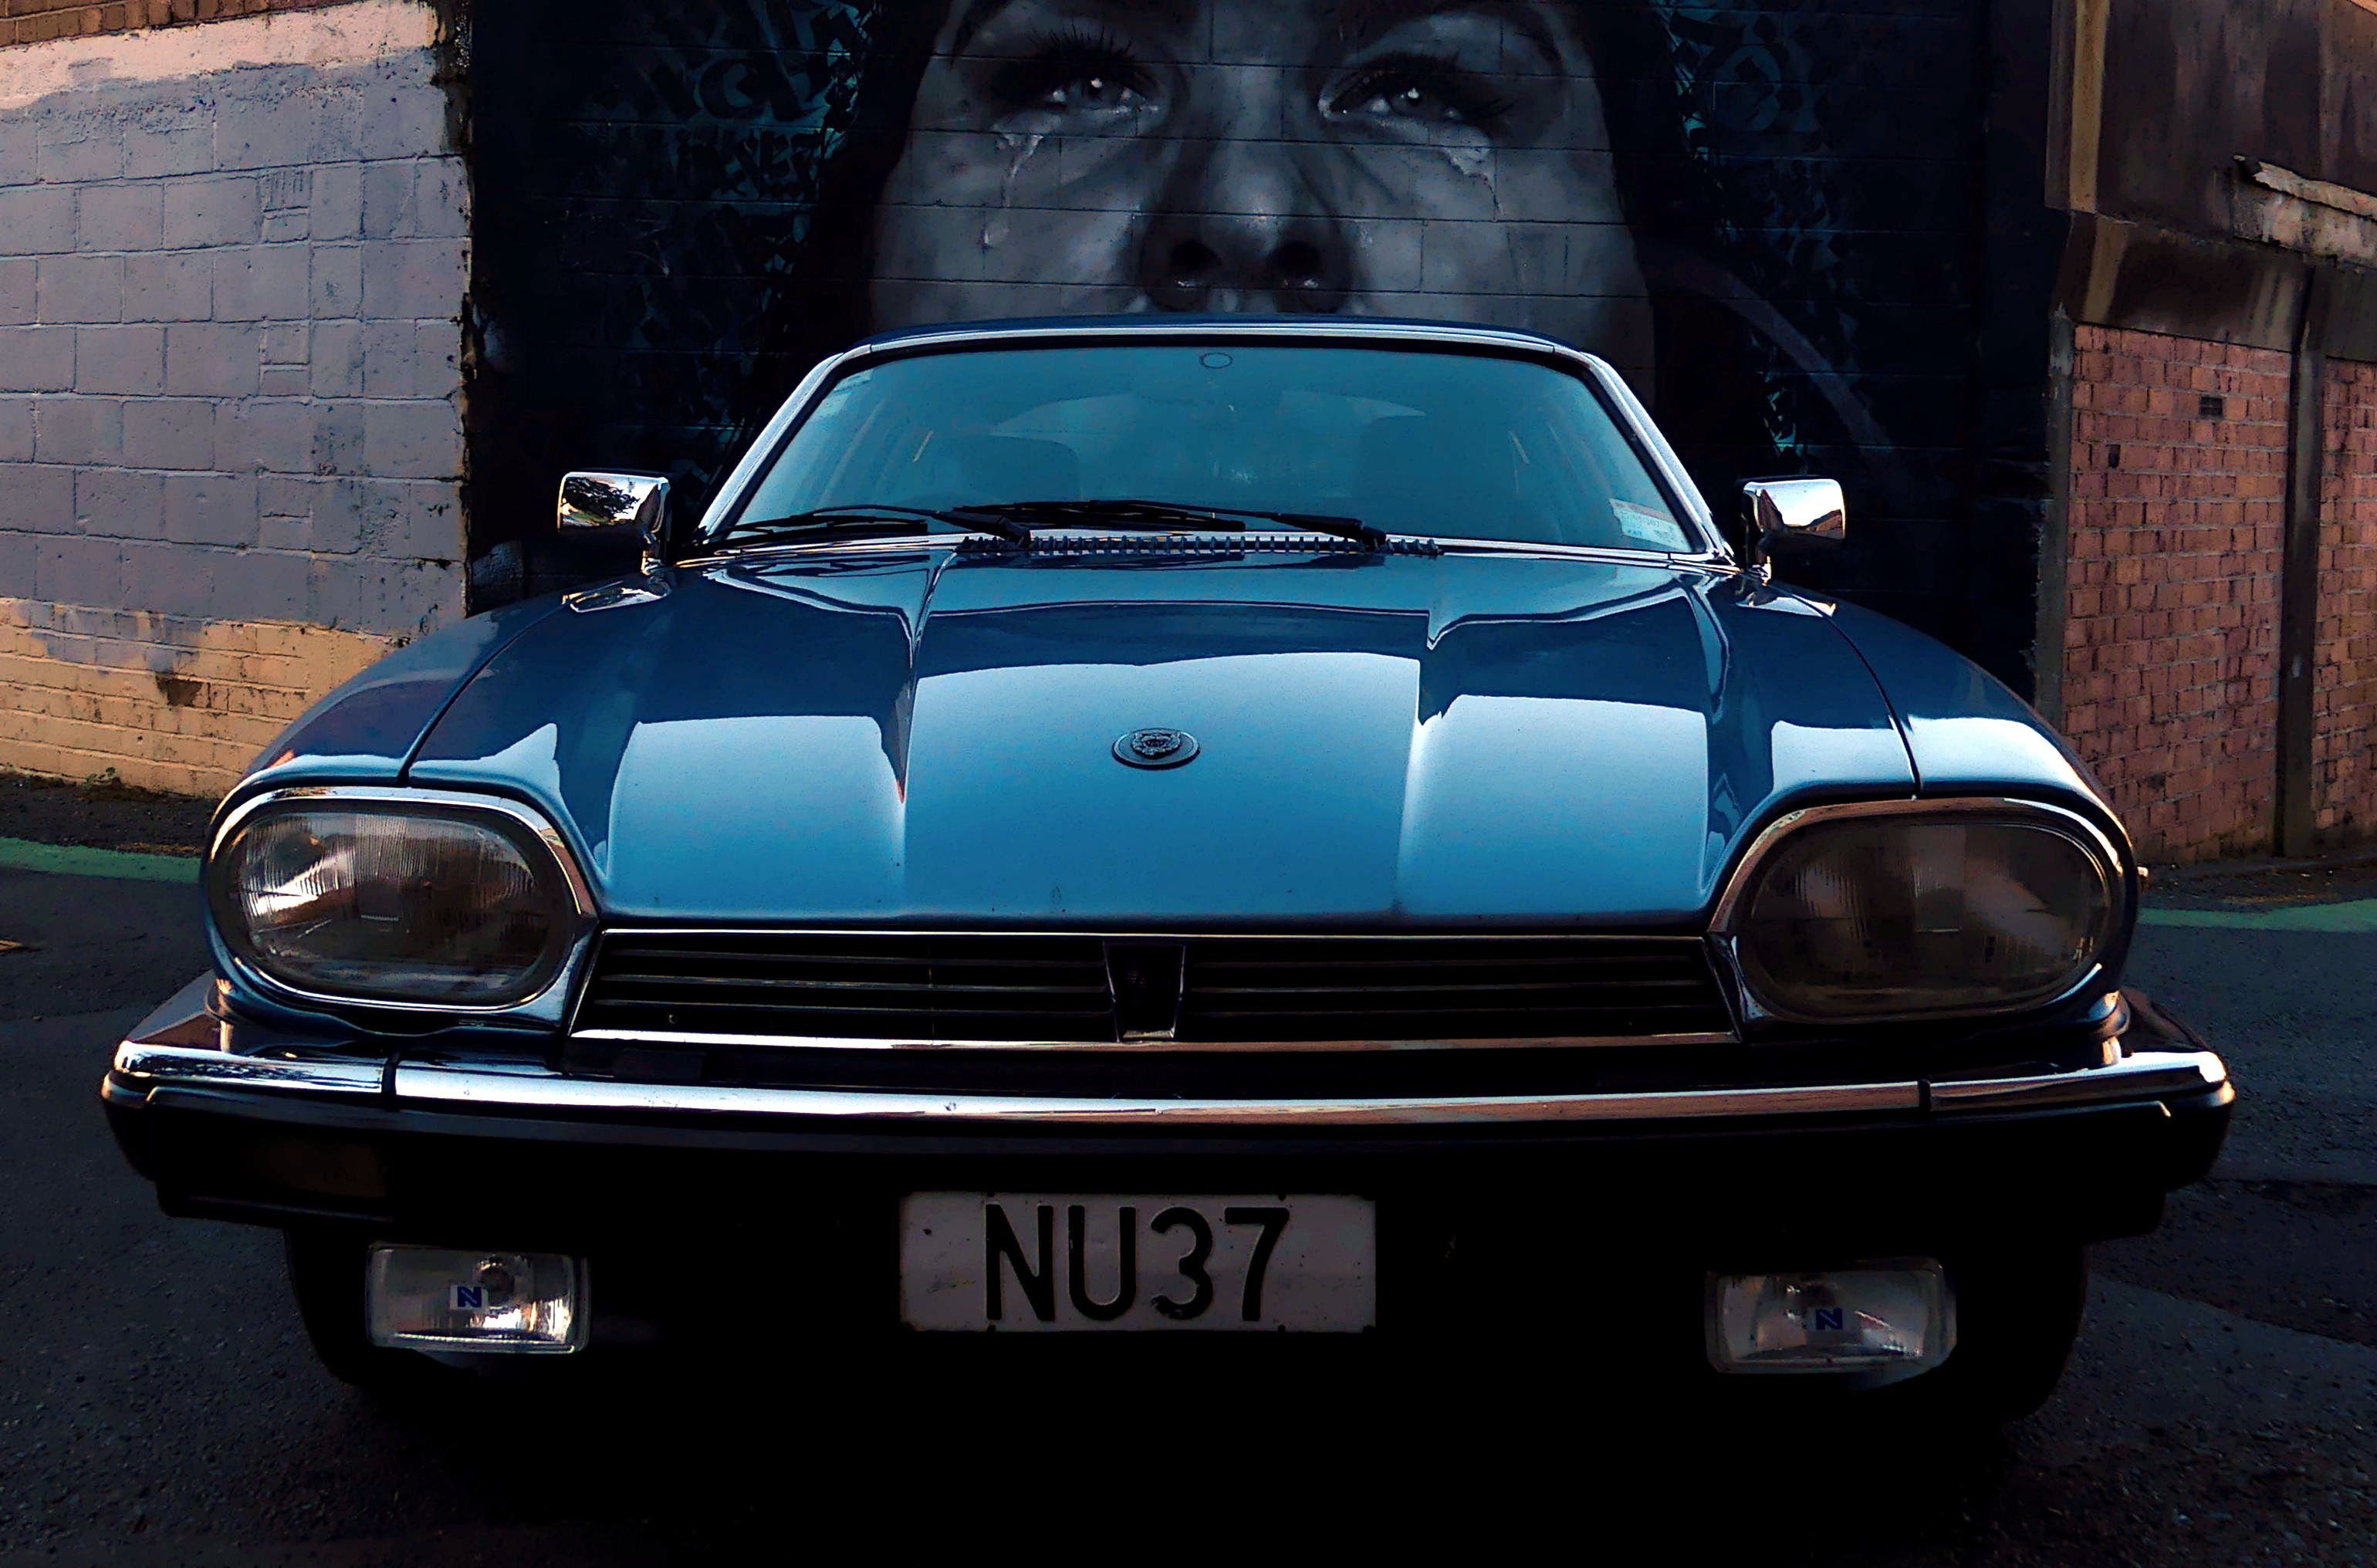
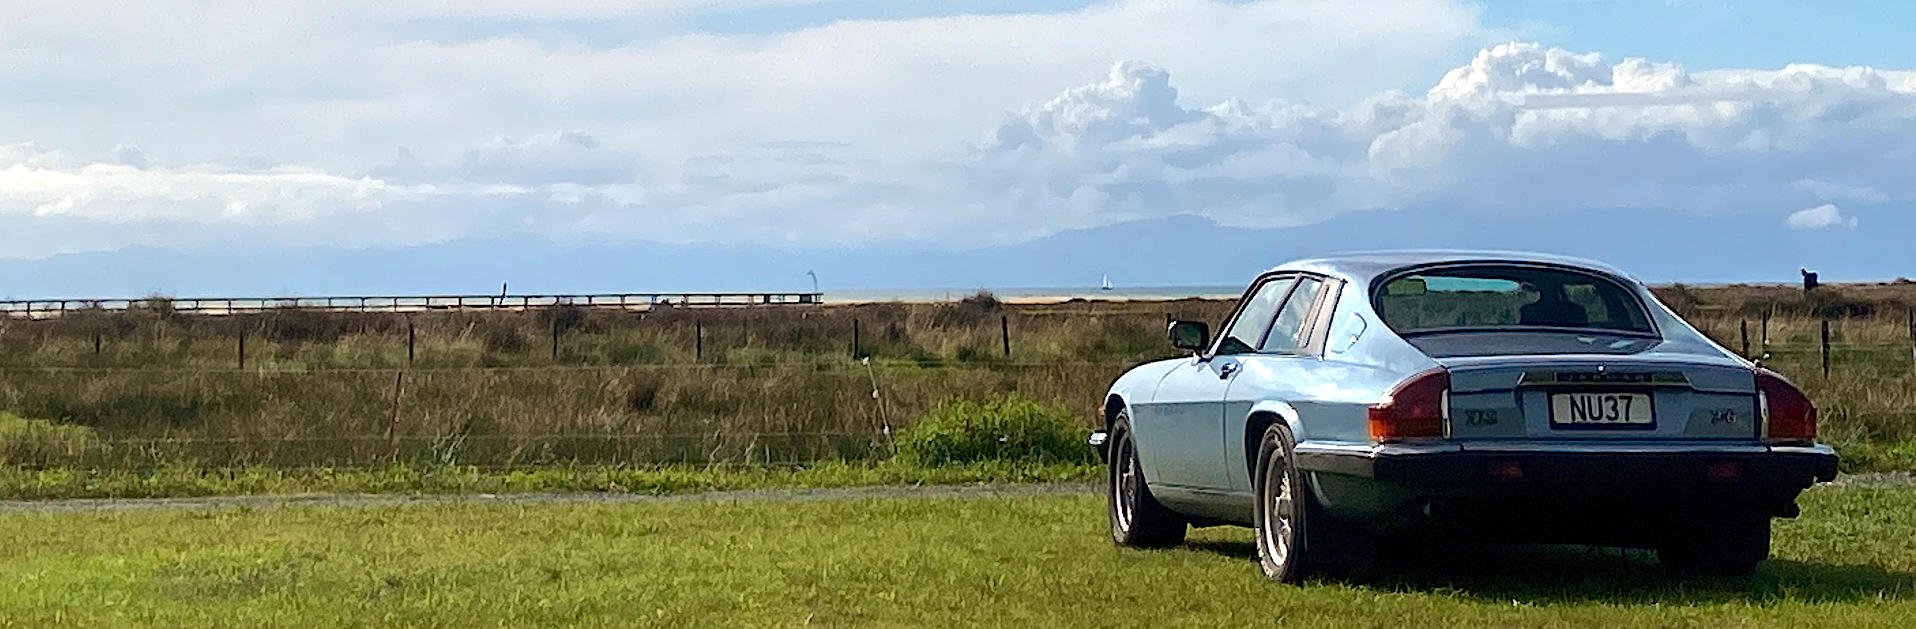
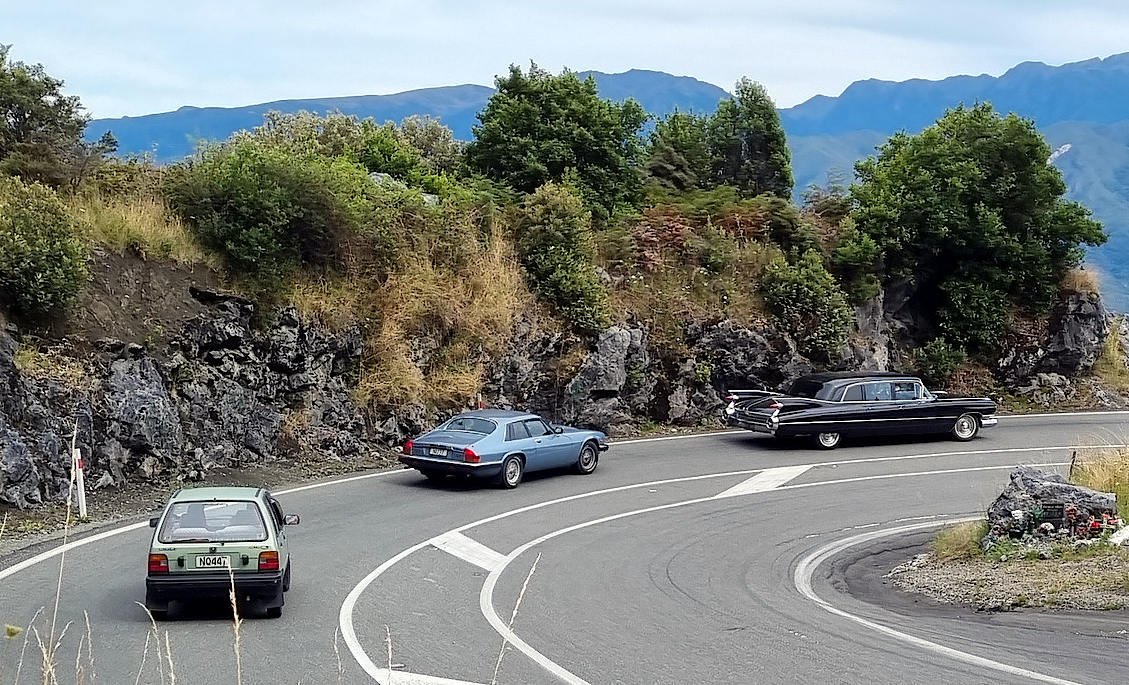
^ Some shady character.... Nats '23 in the South Island was approaching. I sent the Jag to get the wheel bearing races changed and the front brakes seen to as well. Apparently the calipers were seizing, which might explain why I felt the brakes had been easy to lock and slightly slow to unlock. Now I have new discs and pads and rebuilt calipers. While the Jag was at the shop for this work, Auckland got flooded, but fortunately the Jag escaped. I was running out of time till Nats but still had more 'grand touring' issues to address. The driver's wing mirror glass was still too wobbly despite my best attempts, so I gave up and screwed the mechanism from a modern Japanese car into the Jaguar wing mirror housing. Shhh. The mirror glass now protrudes slightly rather than being recessed, but it no longer shakes around. I'll have another shot at this problem at some point. The passenger side windscreen washer jet was only producing a useless dribble. Upon investigation I noticed that the factory washer nozzles are heated to prevent them icing up! This doesn't matter if they're corroded and useless. I temporarily substituted the nozzle from a garden sprayer and it's far superior. I topped up the diff, and while under there, I noticed this rear subframe mount is starting to come apart (yellow arrows): This is the left rear one of four mounts which hold the rear subframe to the chassis. After Nats, I ordered a new set which have since arrived but I haven't fitted them yet. I decided I needed to make some visible modification to the car for Nats, to make it appear that I'm a legit car guy and not a chequebook racer / Sunday driver. I figured I could have a go at the dashboard veneer - grind off the lacquer then put Danish oil on it, same as I did for the centre console. Before: Unfortunately the 'after' photos (not included) don't look so good. I was in too much of a hurry and I burned the veneer with the stripping disc, ground through it in spots and tried to hurry the drying process too much. So now my dash looks a bit funky. I Reassembled it anyway and drove from Auckland to Marahau and back. On the way down from the ferry to Marahau, I rambled to my poor passenger Johnnyfive that the XJS could have done without IRS, RWS, LSD, inboard rear discs etc.. Then my favourite part of Nats turned out to be racing back over the hill in the above photo, chasing Yoeddynz's Imp and a bunch of motorbikes and making good use of those technical features. I was glad for my new brakes that didn't lock or fade, new tyres that let go progressively, diff that allowed me to plant the boot mid corner, handling that often seemed to allow me to turn harder than the limit at the cost of having the rear break away.. On that last point, I kept imagining I had more oversteer in one direction than in the other, due to that rear subframe mount which was surely tearing itself further to bits.. I got back home with no exploded coolant hoses, no exploded diff from oil starvation, not even that much engine oil consumption. Fuel economy never got better than 10l/100km on the trip, and I discovered the car would stumble and misfire more after several hours of driving. Add that to the list along with a sagging headlining. One more fun fact - I weighed my wheel/tyre combos, because who doesn't enjoy a bit of Dave Science(tm). 'Performance' 17x7.5 wheel only: 11.1kg plus 10.2kg 235/45R17 Bridgestone Potenza tyre: total 21.3kg Jaguar OEM 15x6.5 wheel: 8.4kg plus 12kg 235/60R15 Linglong tyre: total 20.4kg plus 10.9kg 235/60R15 Nankang tyre: total 19.3kg So I save 2kg per corner by reverting to the combo with the best road manners.
1 point
-
Ended up deciding to bankrupt myself and get OEM Bilsteins. Should be about 4 grand landed. They finally came back into stock at the start of February but In the meantime I spent all my savings on bits for the yacht. So now I'm just patiently waiting for the jet boat to sell.1 point
-
A guy on one of the FB evo groups used cobalt SS brembos on his early evo. May also be an option and I think rockauto sell them as well.1 point


.thumb.jpeg.384ff72c8d2b0ee0d34a7bdedb55bdcf.jpeg)


.thumb.jpg.570970b401ac8d26ce9af7c1bf2bd8cd.jpg)


This leaderboard is set to Auckland/GMT+12:00