
Leaderboard


Popular Content
Showing content with the highest reputation on 08/10/23 in all areas
-
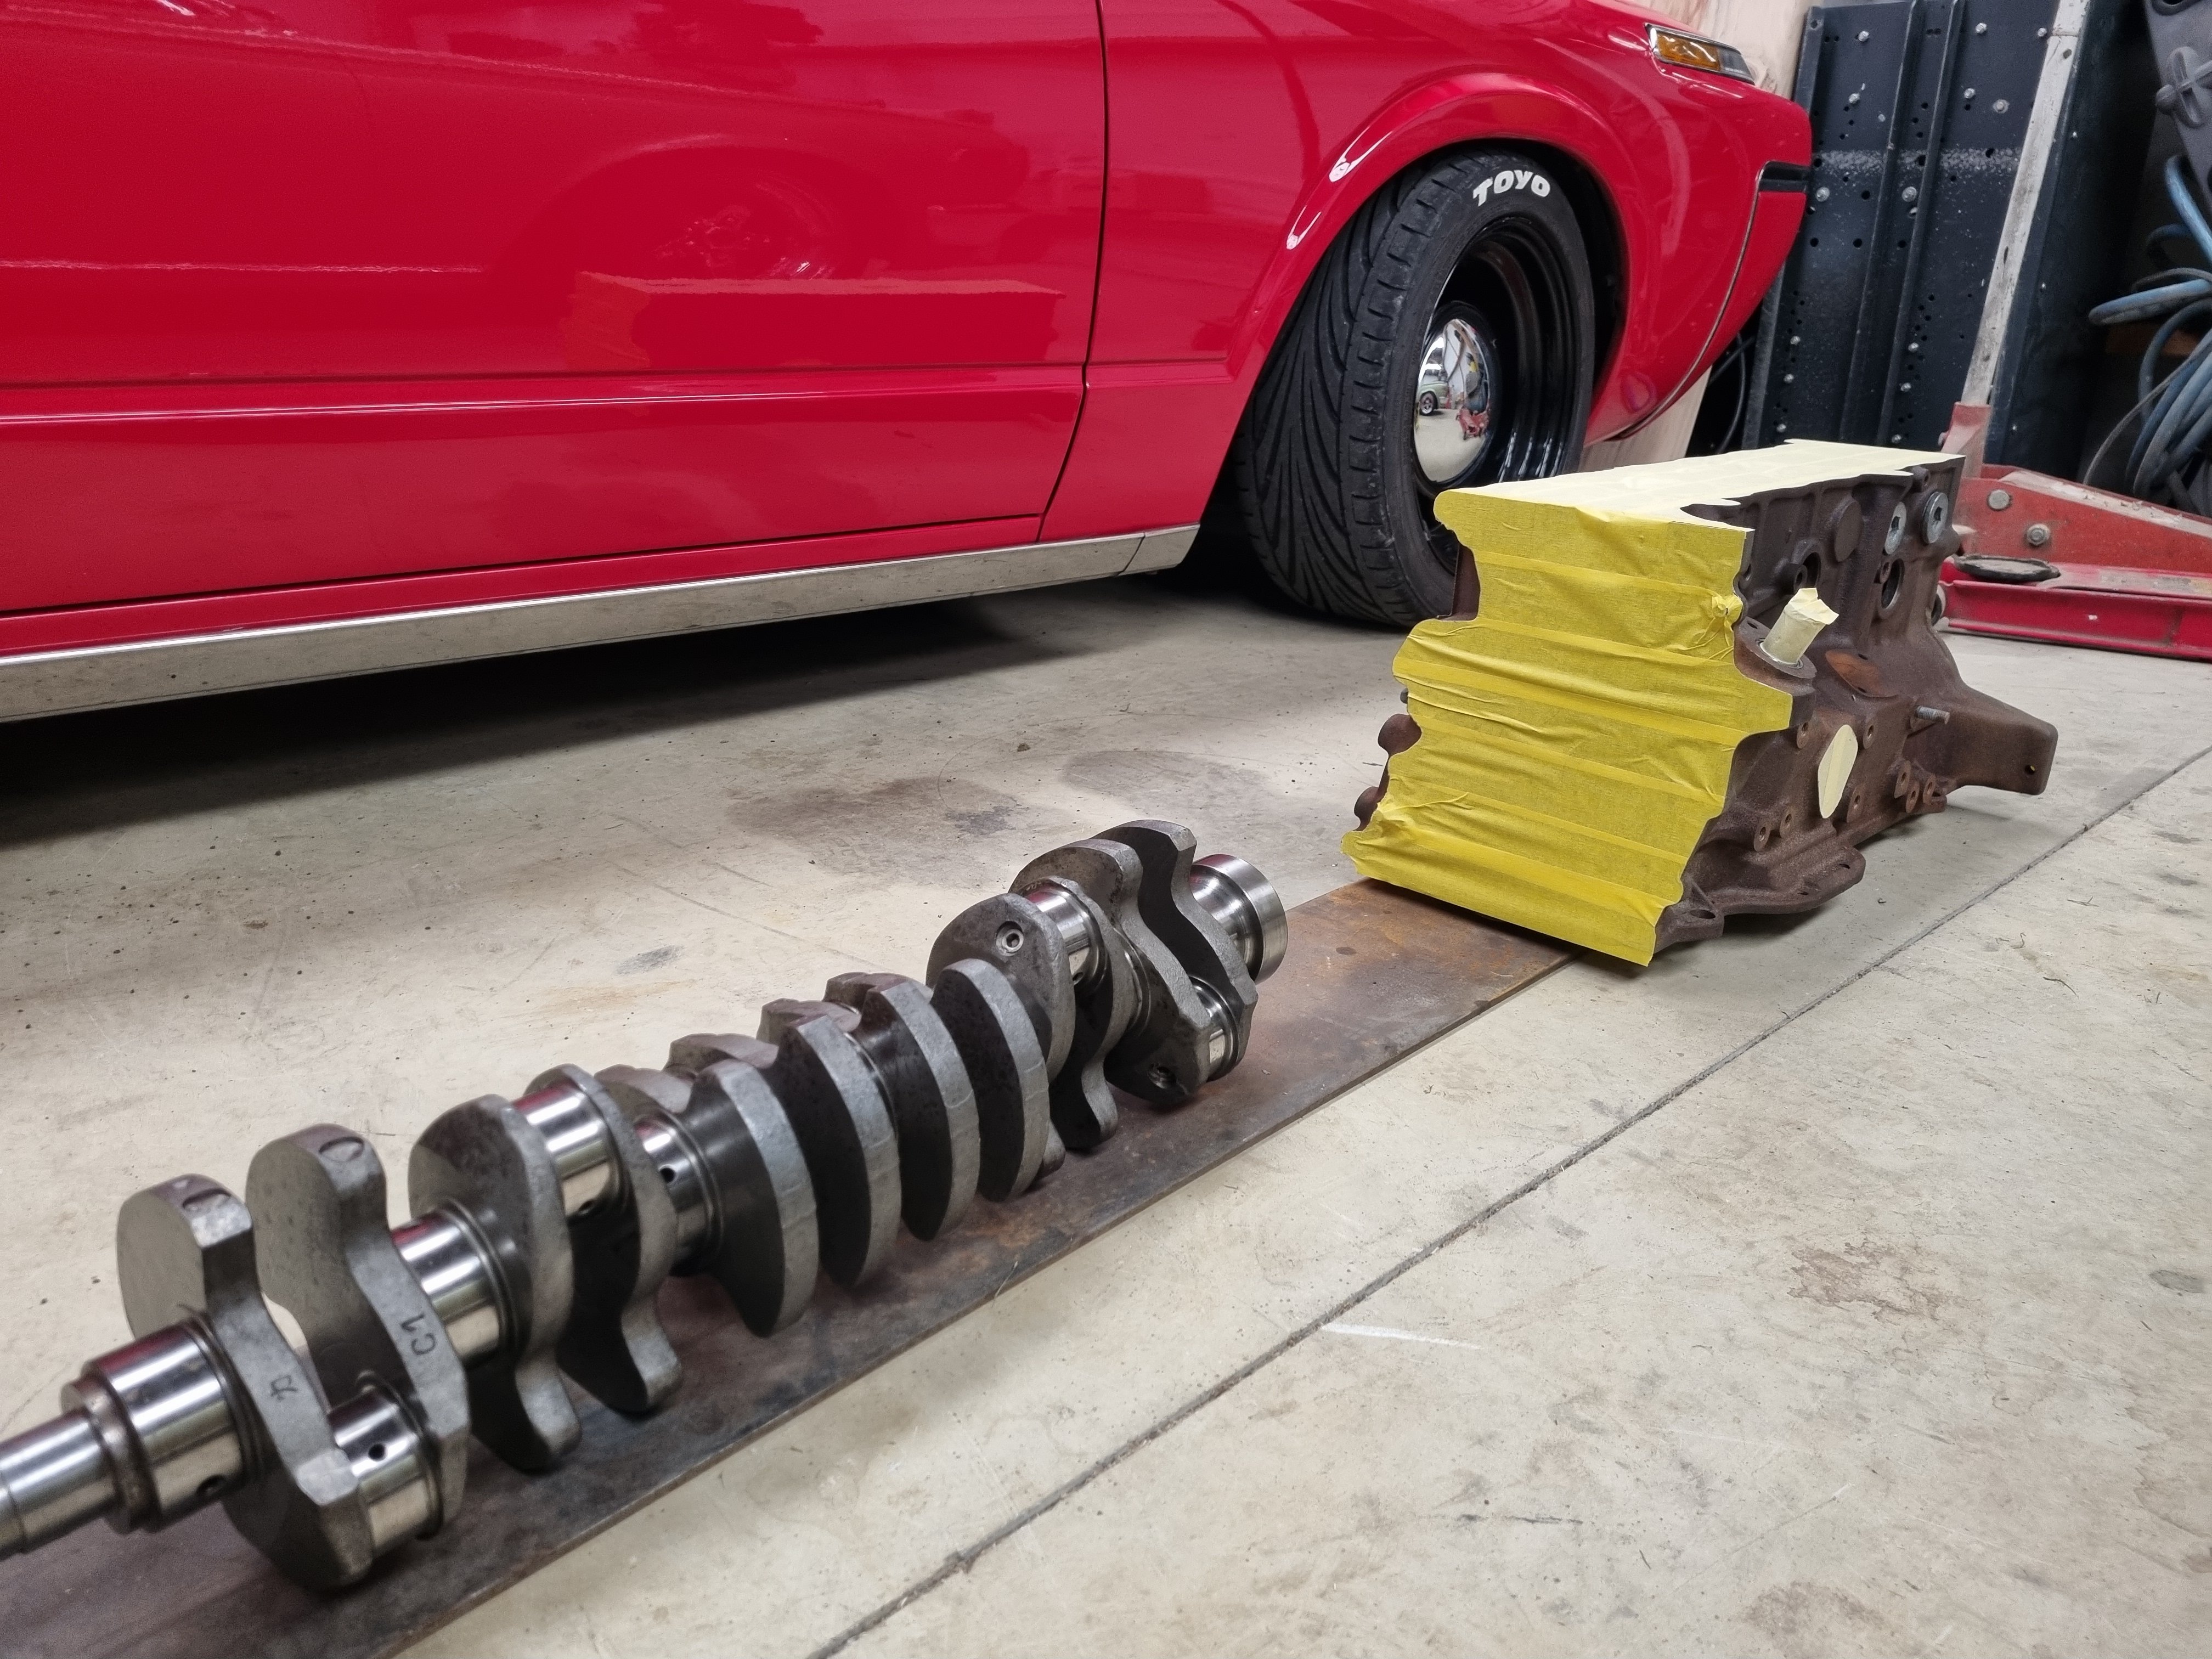
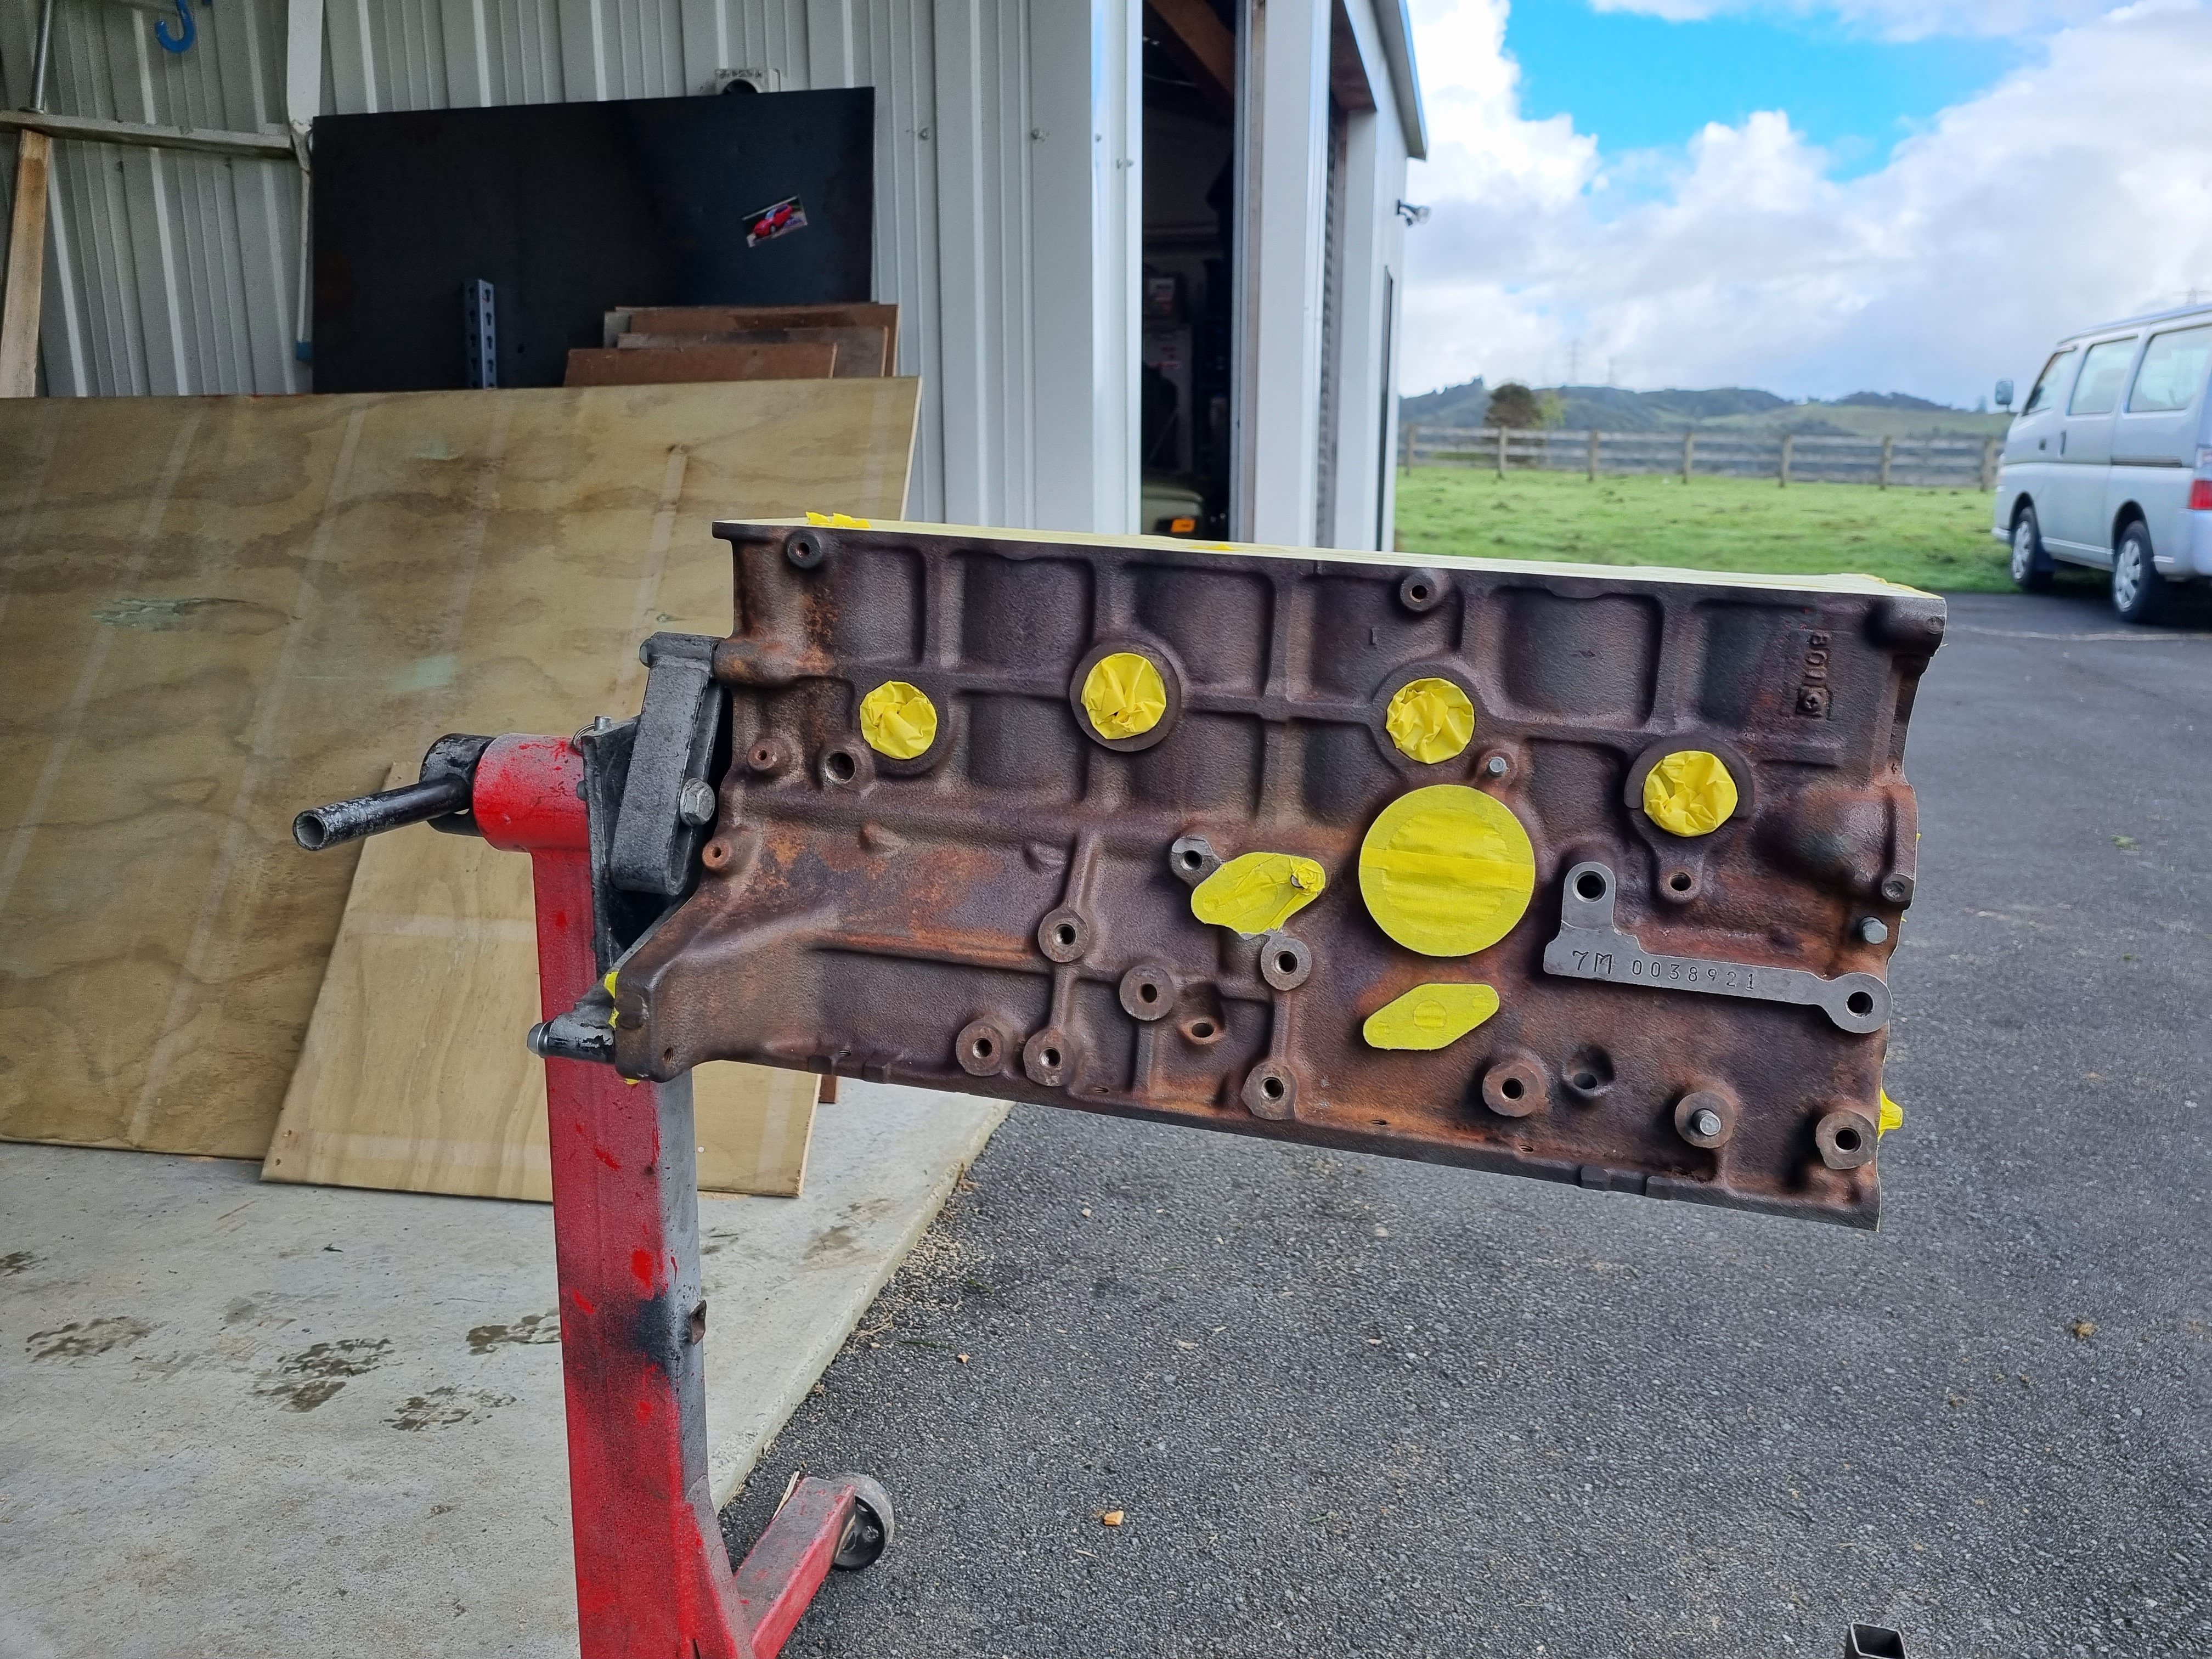
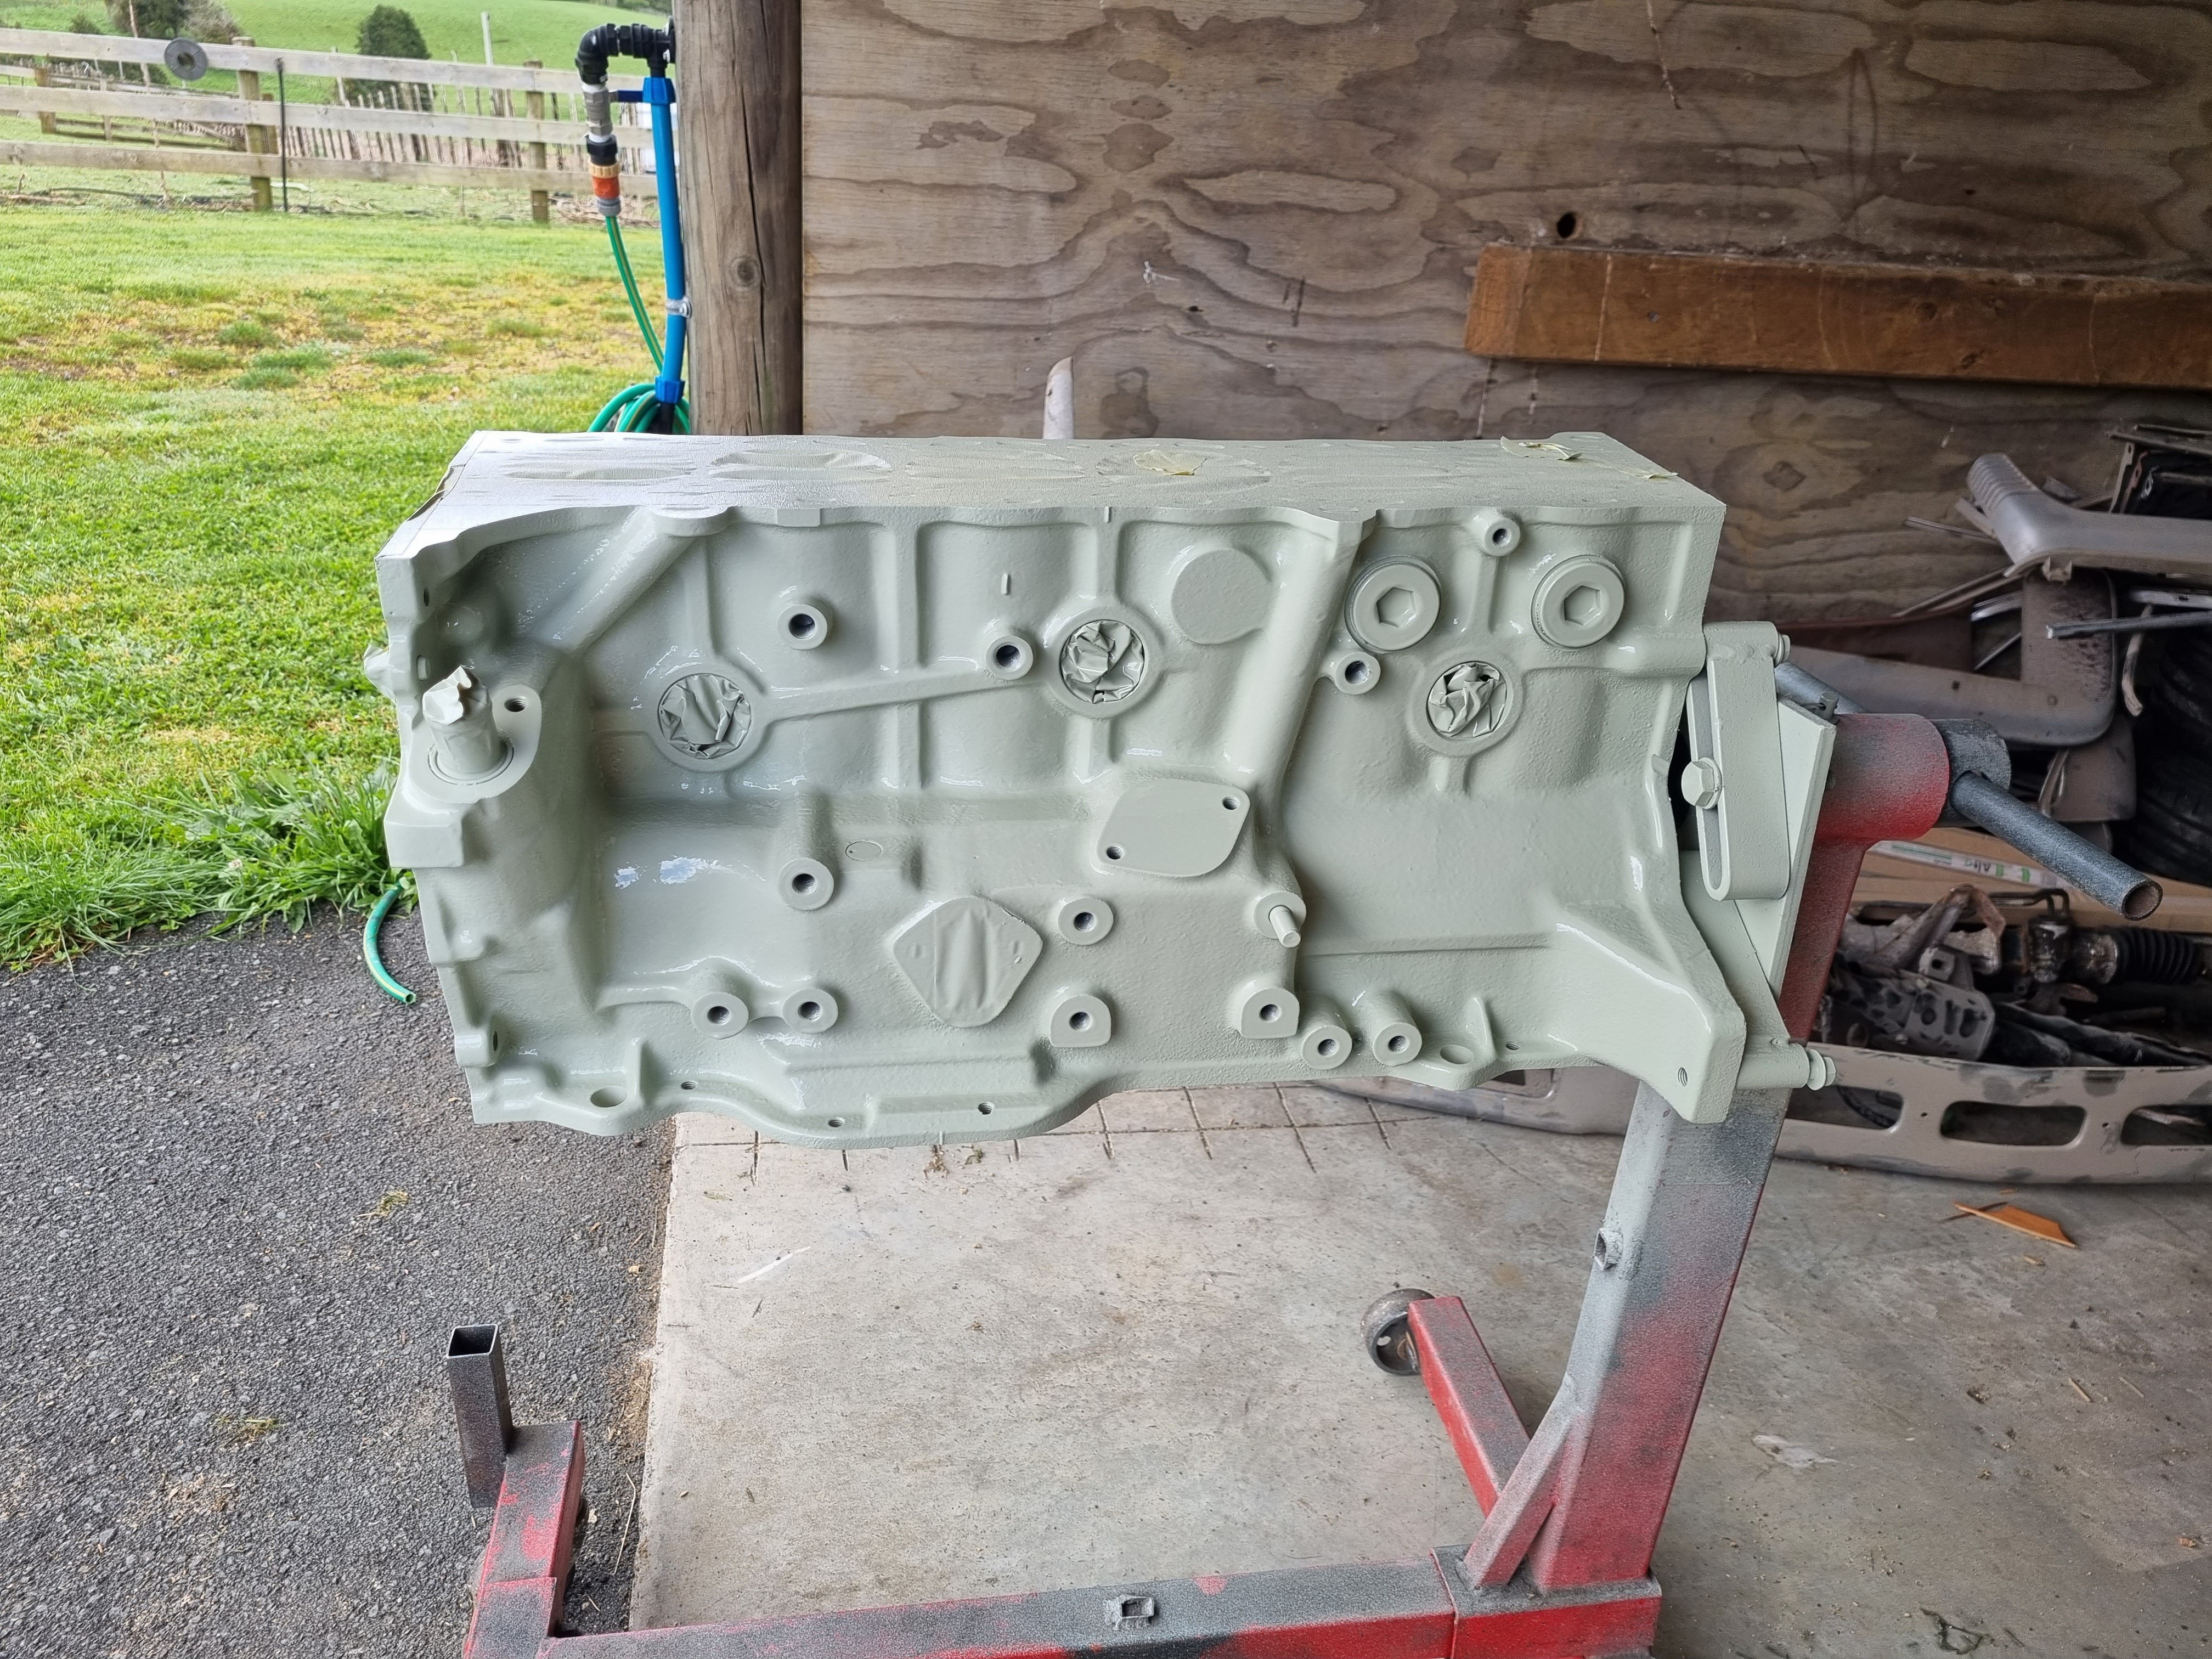
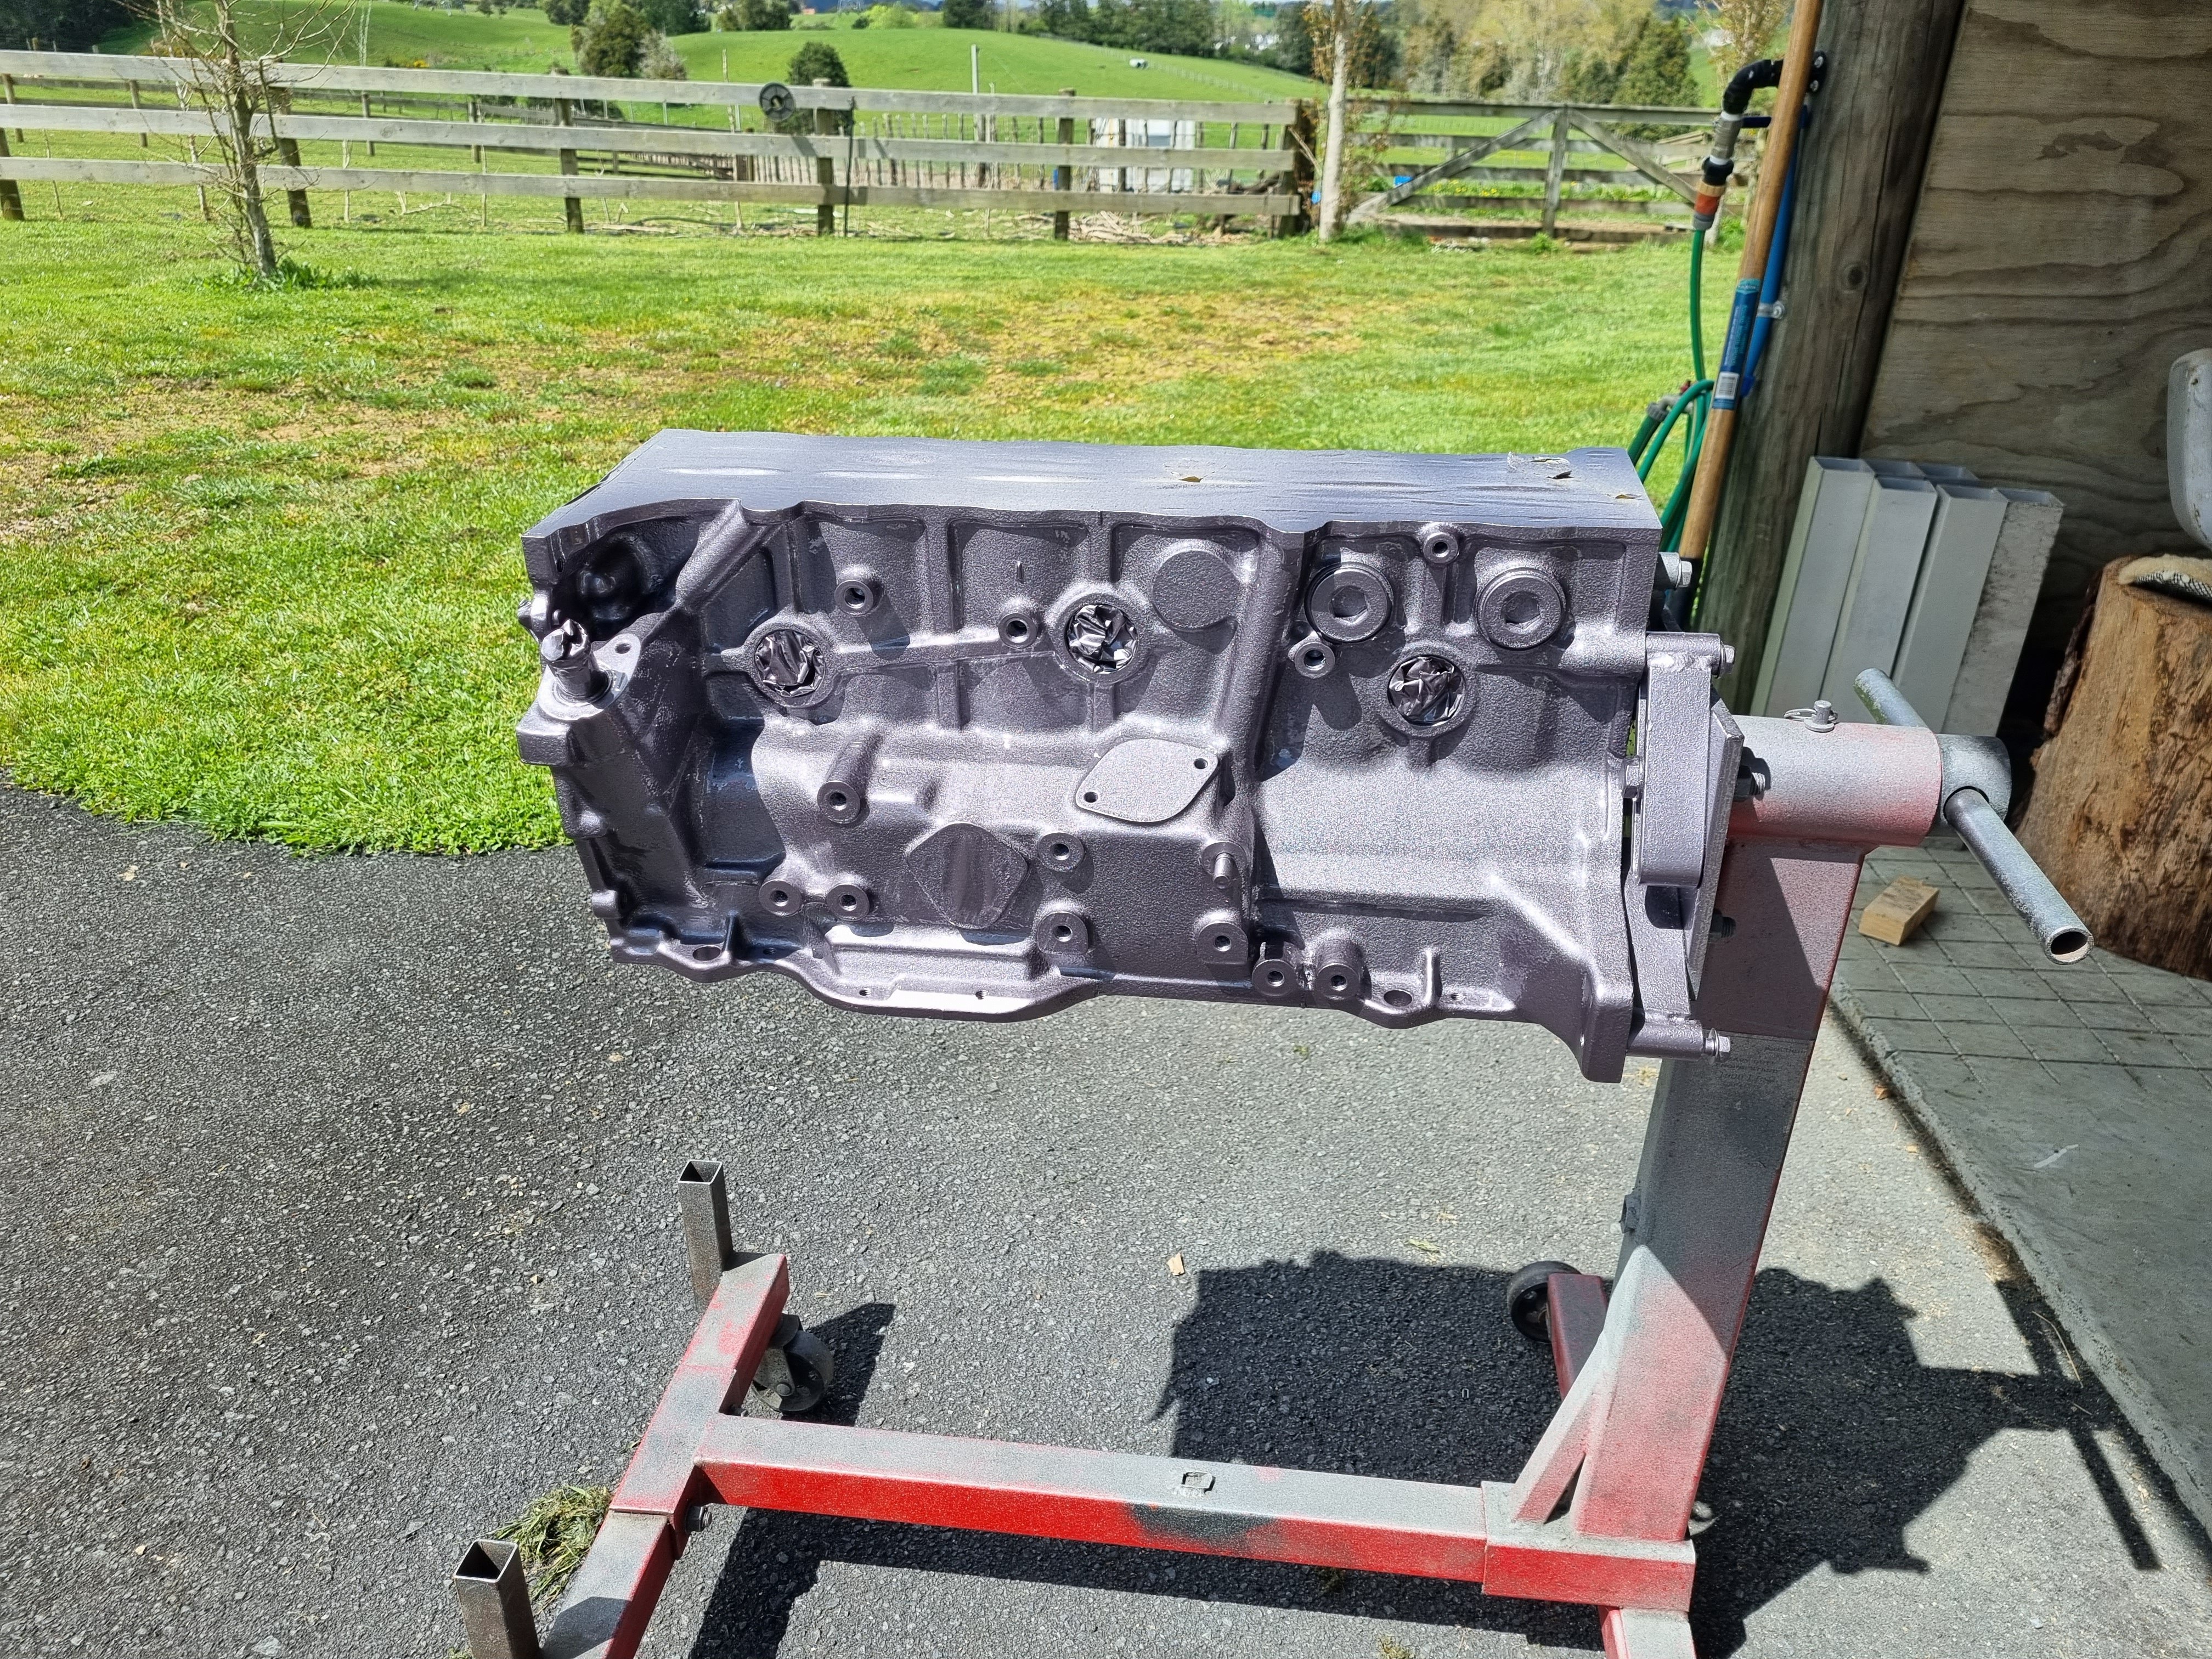
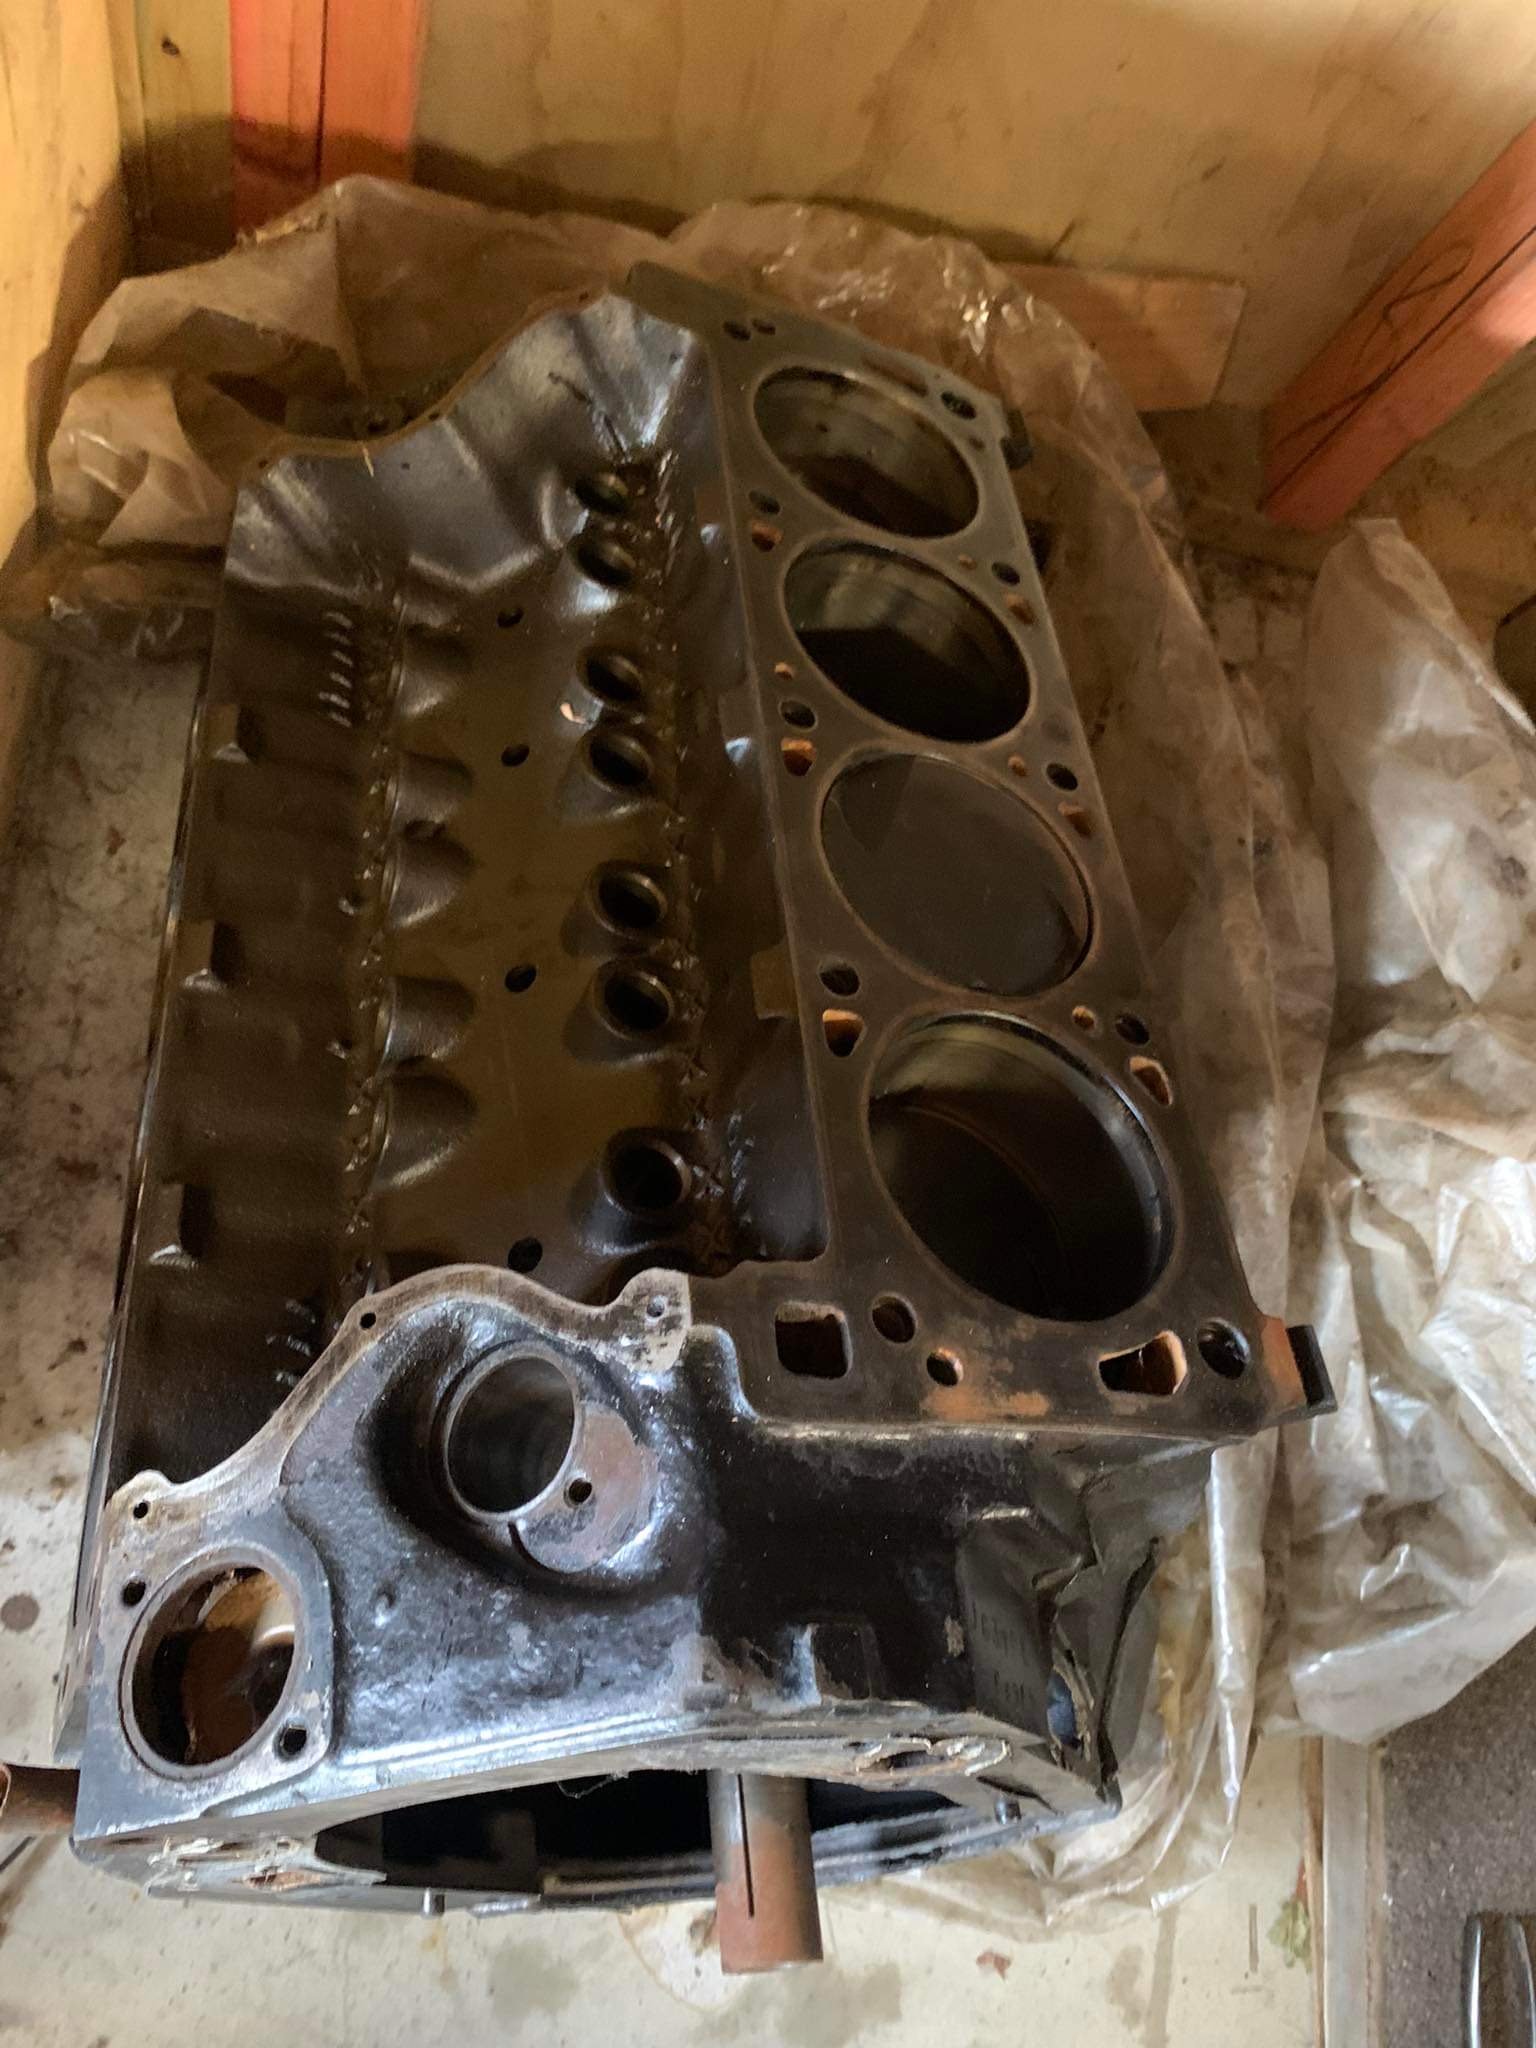
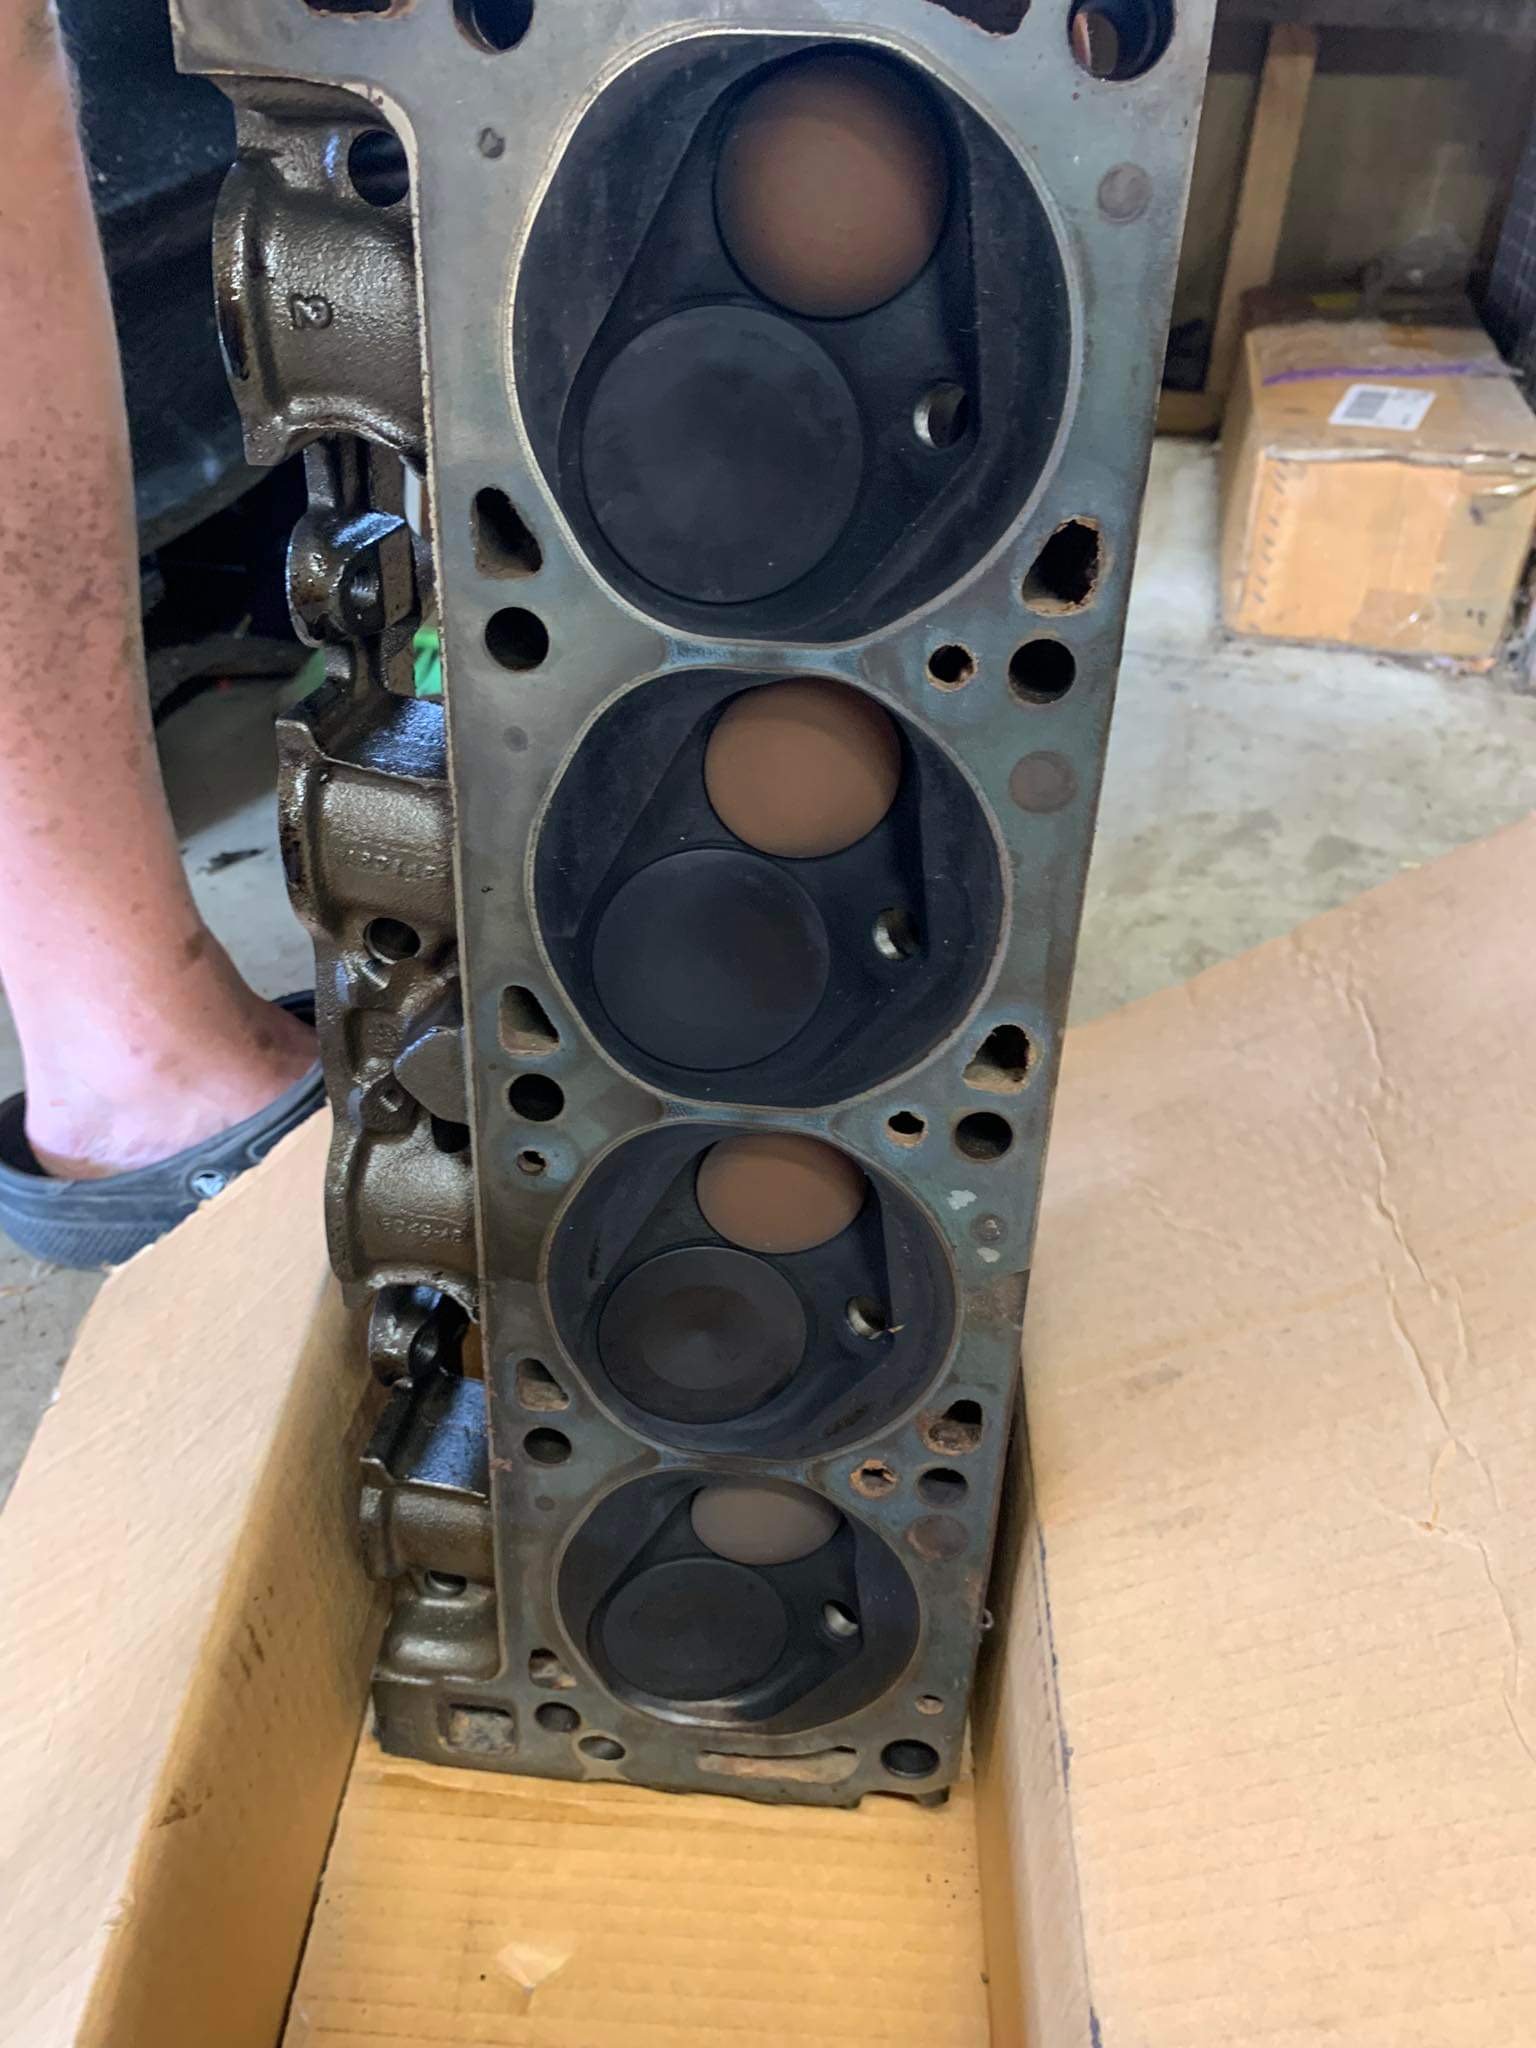
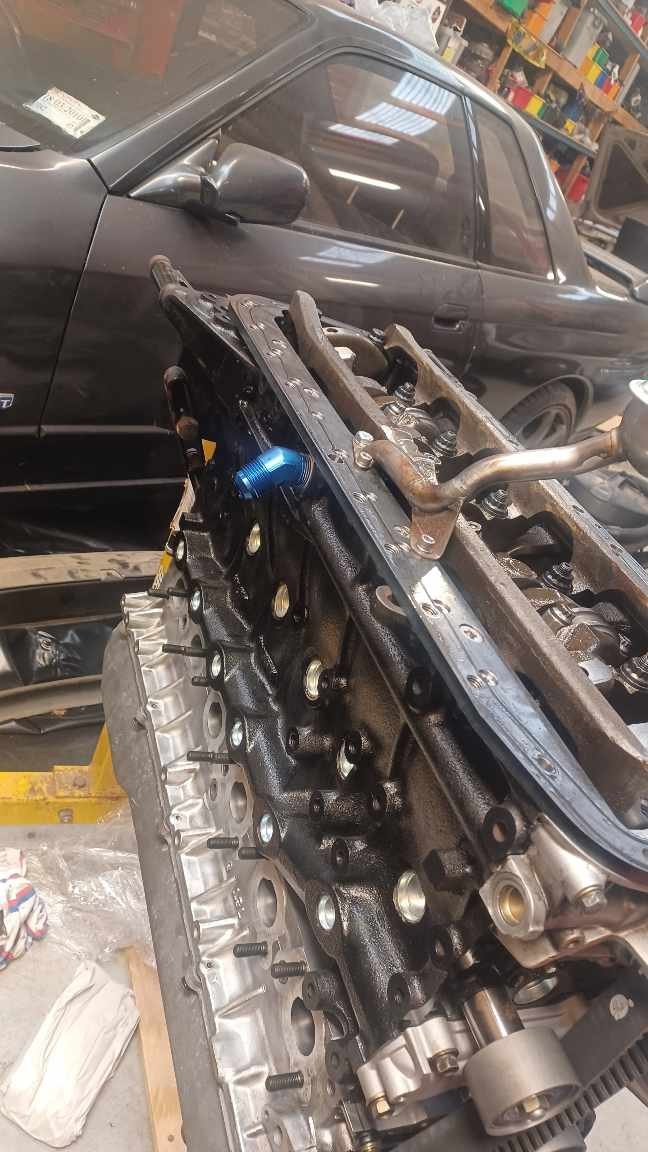
I bet you'd forgotten about this. I certainly did. Literally. The machine shop rang me up and asked me if I was going to come and pick up this block. I didn't know what they were talking about. in amongst building room on the old house, selling house, buying new house and moving house I actually forgot about this engine. But here it is, like a bad smell it just keeps hanging around. So the block has been cleaned, main journals line bored, cylinders bored 0.50 over and decked. I've got a new everything for the bottom end and I'll put all that together. Cylinder head is being worked on. Is getting 1mm over size valves, shortend valve guides and the valve seal spigot is being machined to accommodate the bigger cam lift. New cams as mentioned new springs and all that. but that's to come.
 27 points
 -
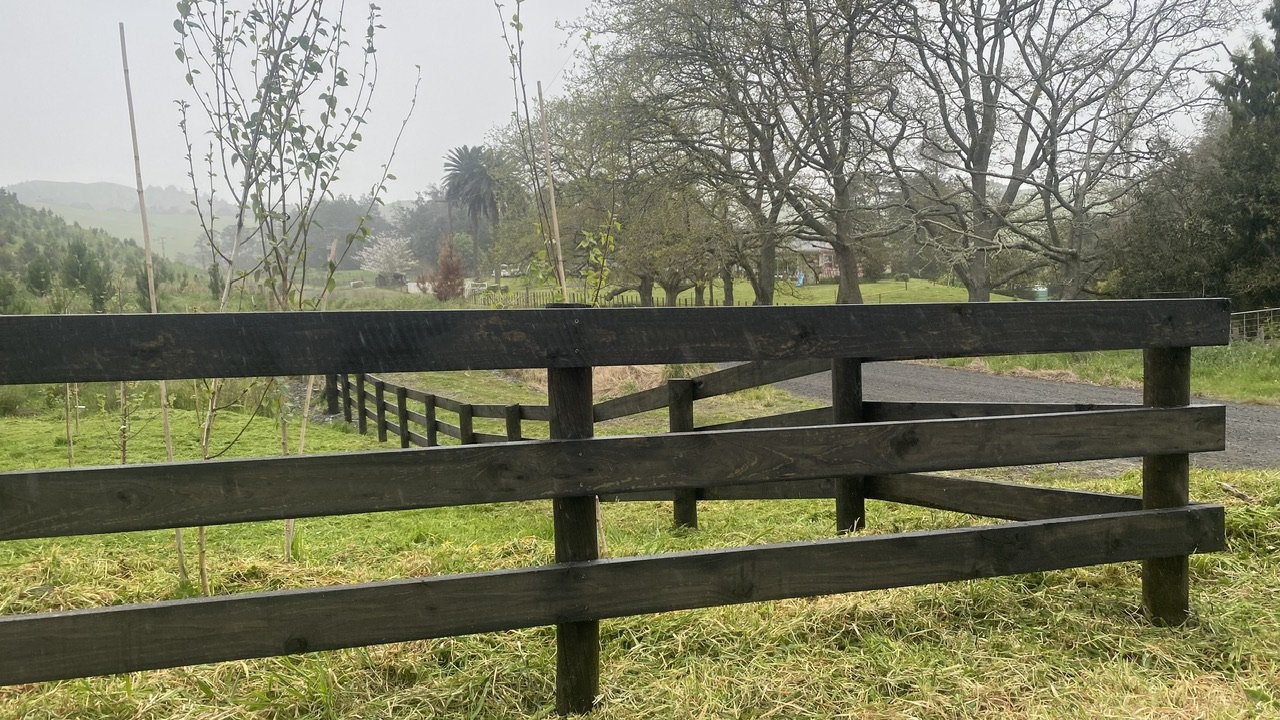
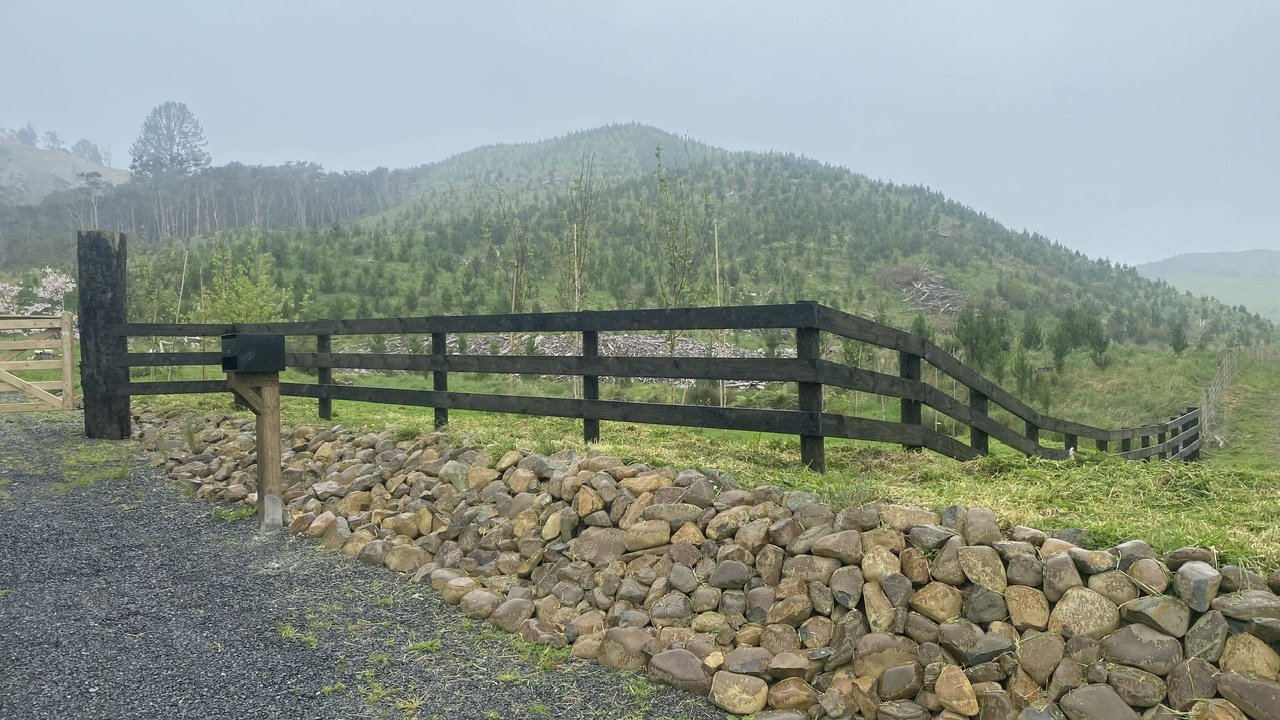
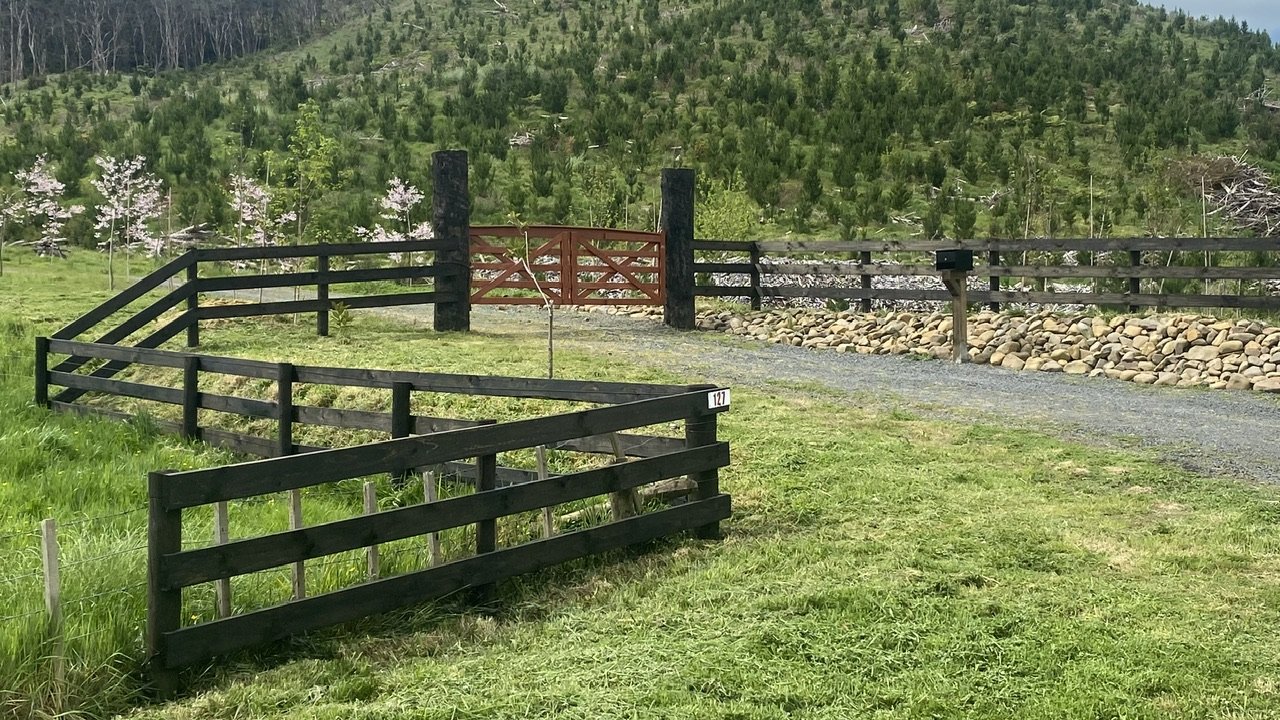
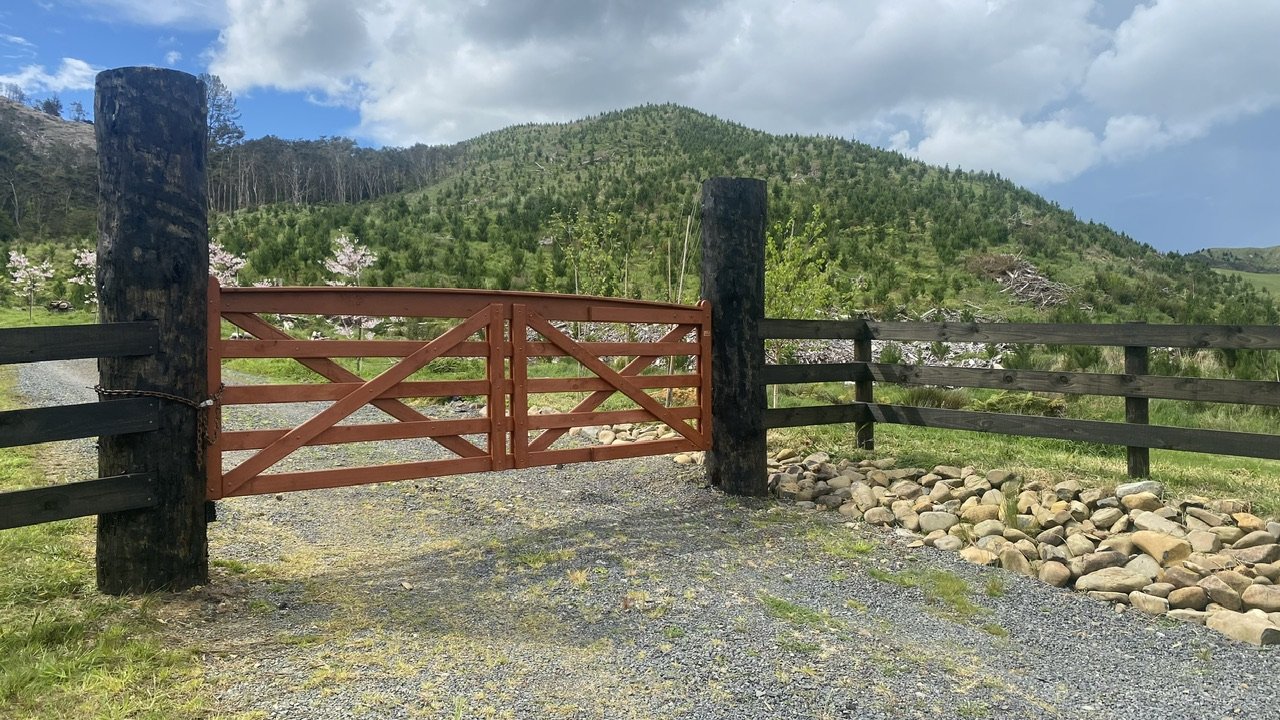
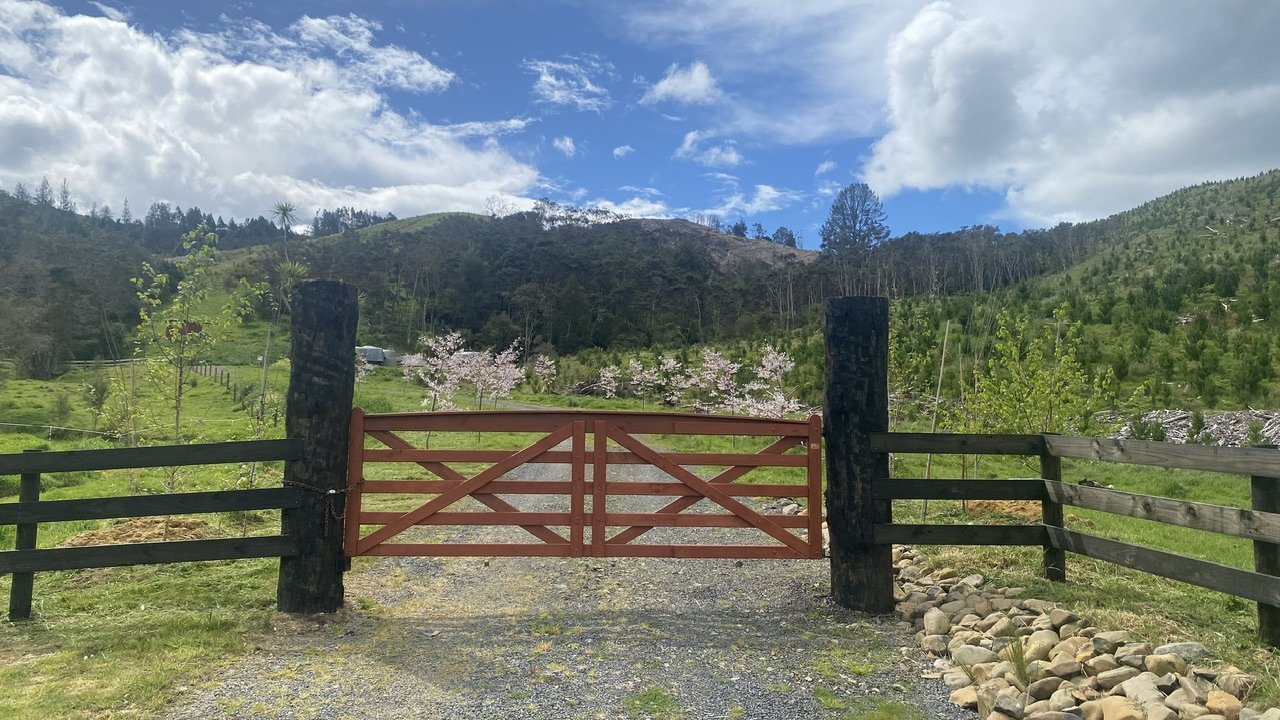
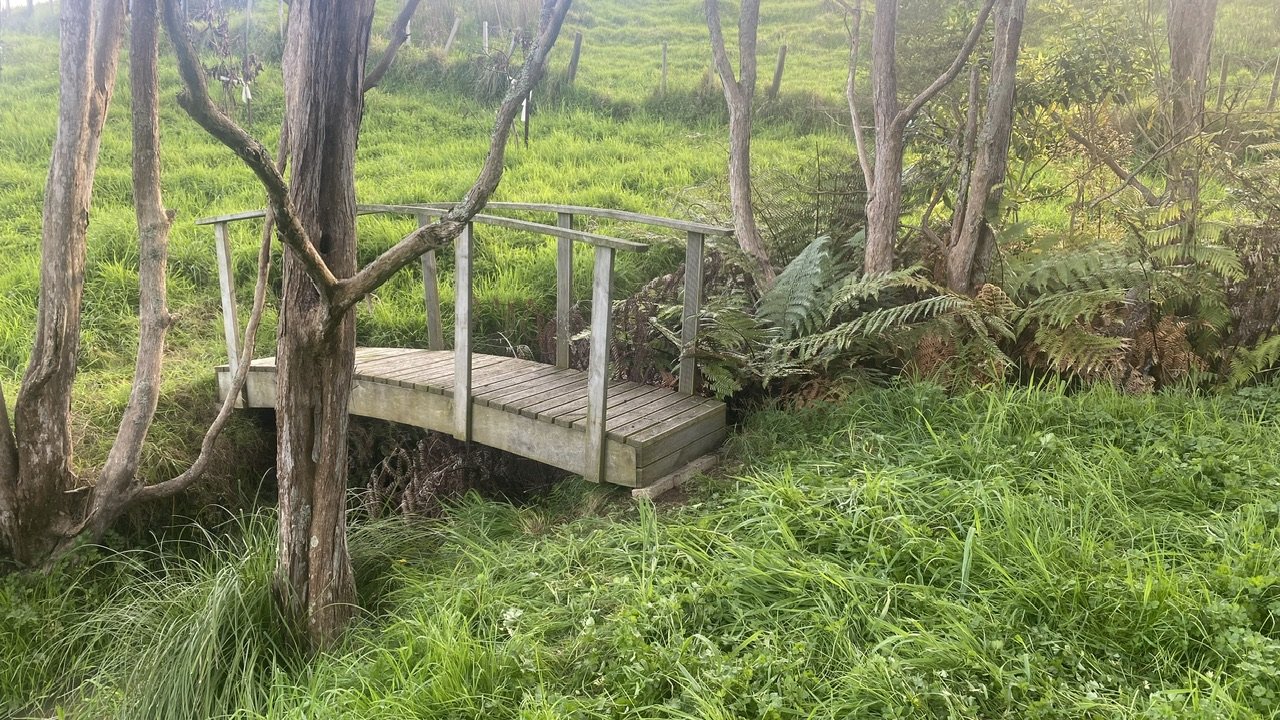
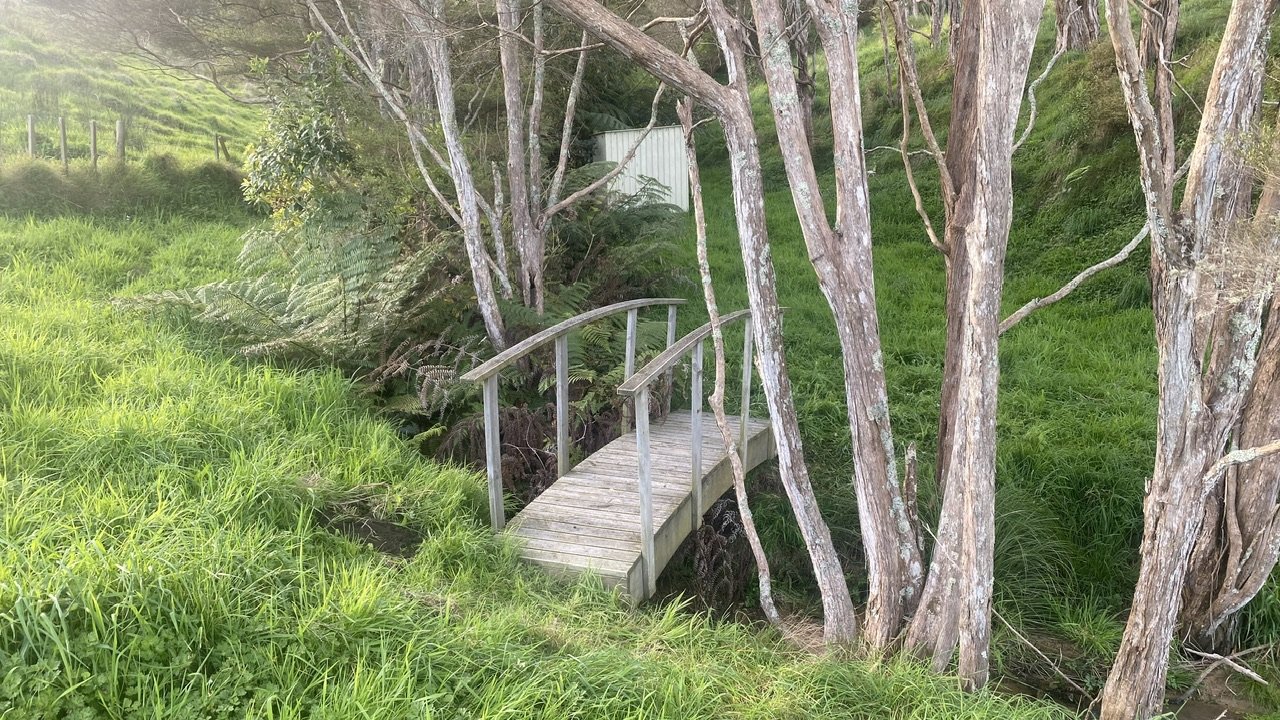
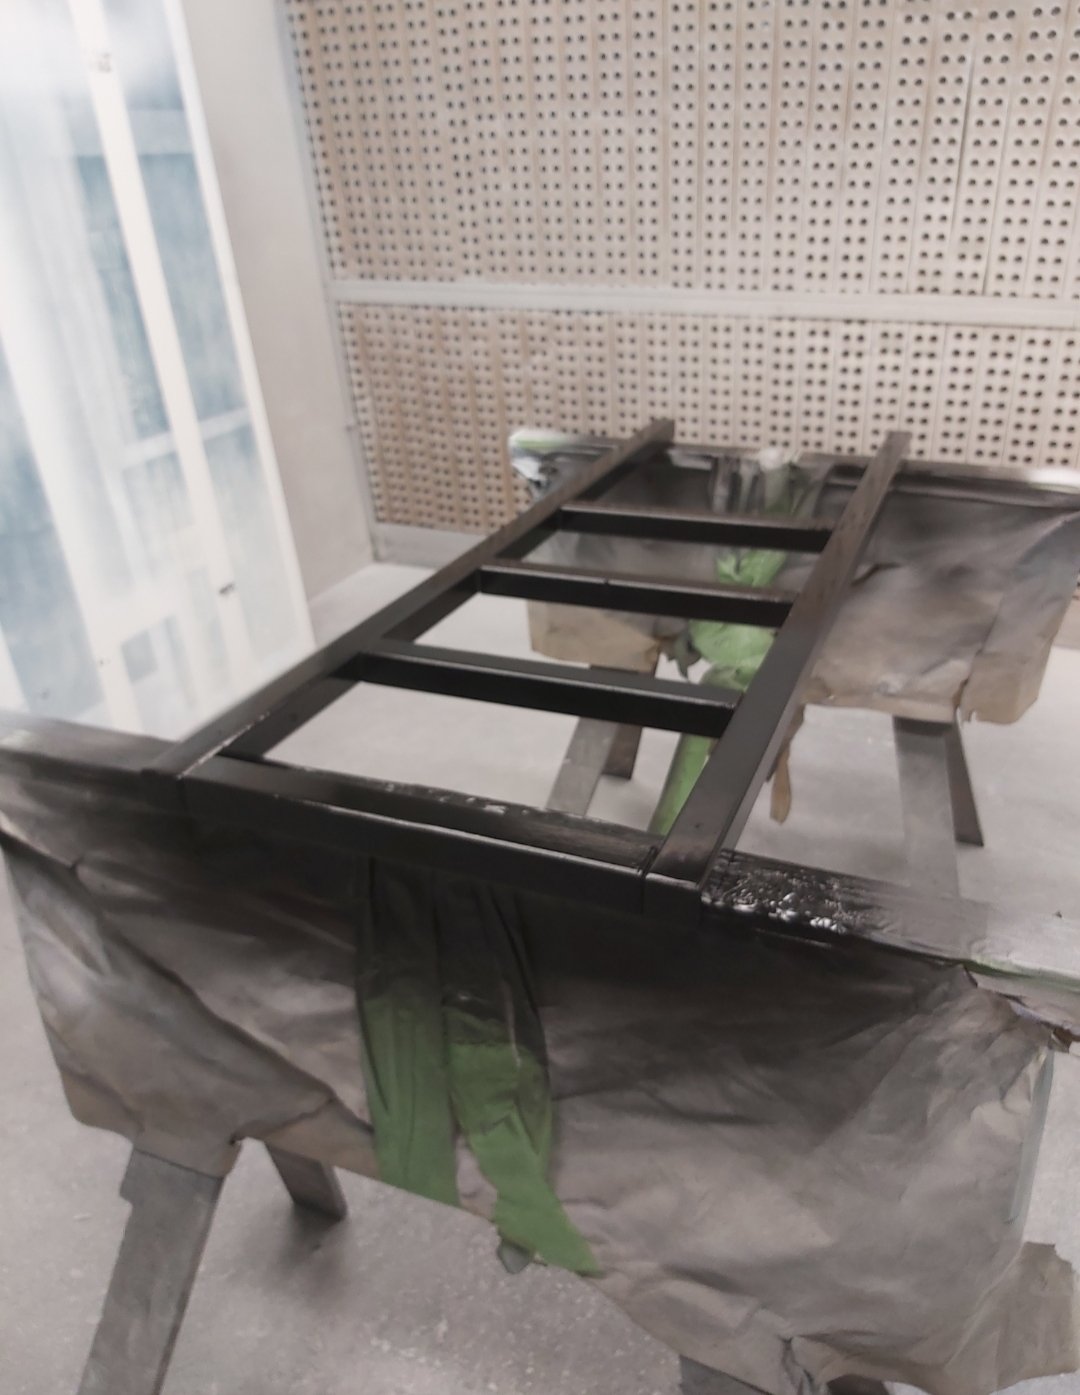
Painting.. hmm, don’t enjoy it.. that and digging holes, so finishing off this front fence is a pretty good achievement.. may need to add a couple of posts on the left but I’m calling it job done, tick that off the list. I always wanted to paint the fence black (using old diesel oil.. read: tight arse), and also always wanted to paint the gate a different colour that accents the black and will carry through to the shed and house.. I had a colour in my mind but didn’t really know until I looked at samples what would actually eventuate. Funnily enough this is not what I was thinking of as I originally was thinking a honey colour, but I’m super stoked how it turned out.. Couldn’t be happier. Saturdays effort just before the rain set in.. And todays result.. super happy to get this done. The other day I picked up a bridge. I was gonna build a bridge to access the orchard from one end, but I couldn’t build one for the price I picked this up for. Still gotta smash some steel rods into the ground to anchor it permanently, but it’s where it’s gonna be.
11 points
-
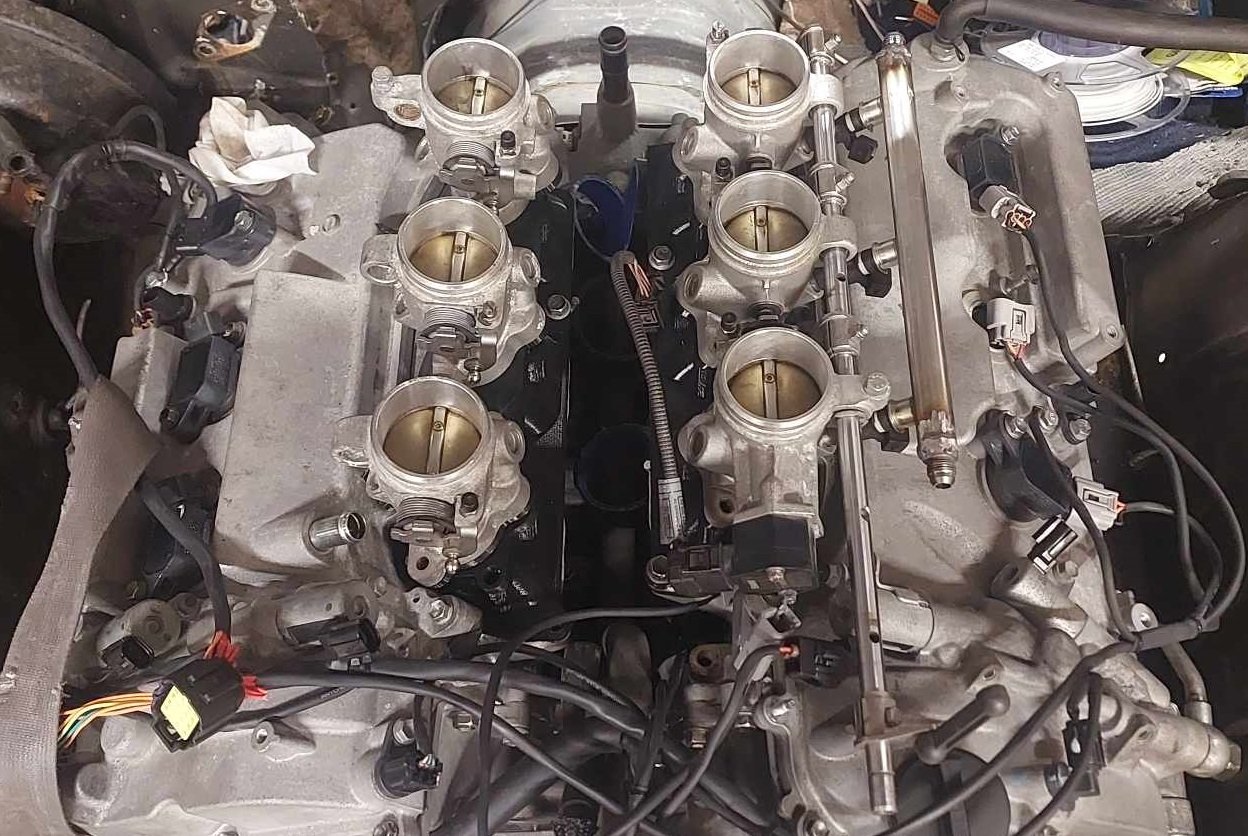
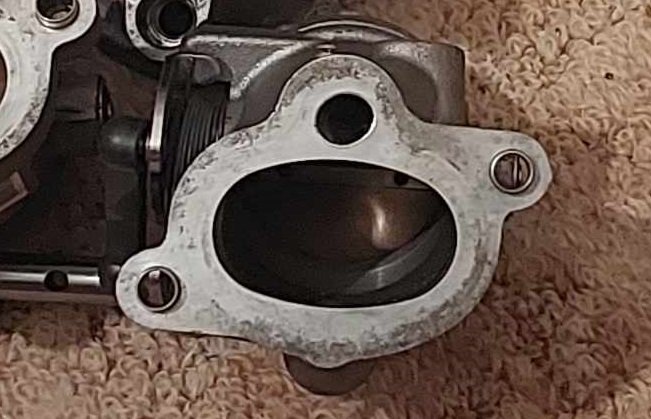
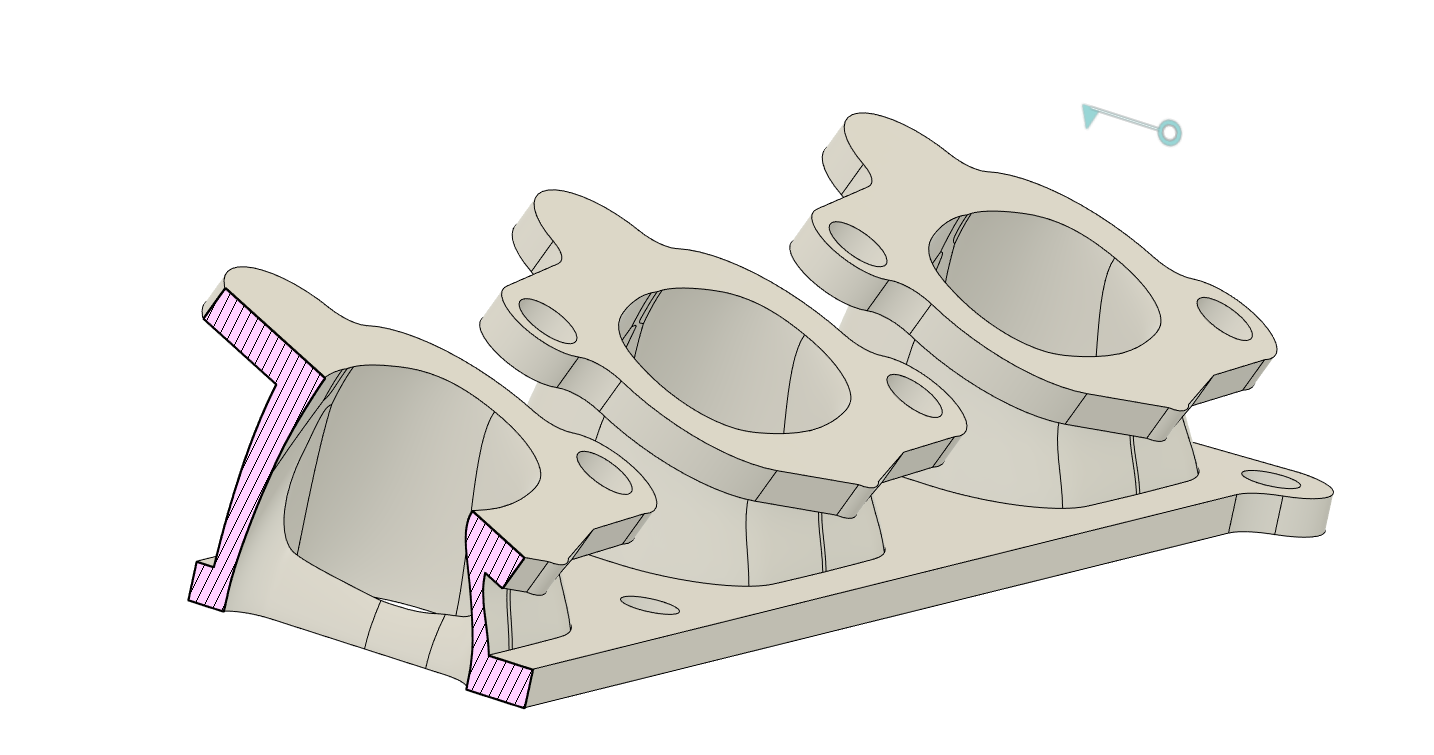
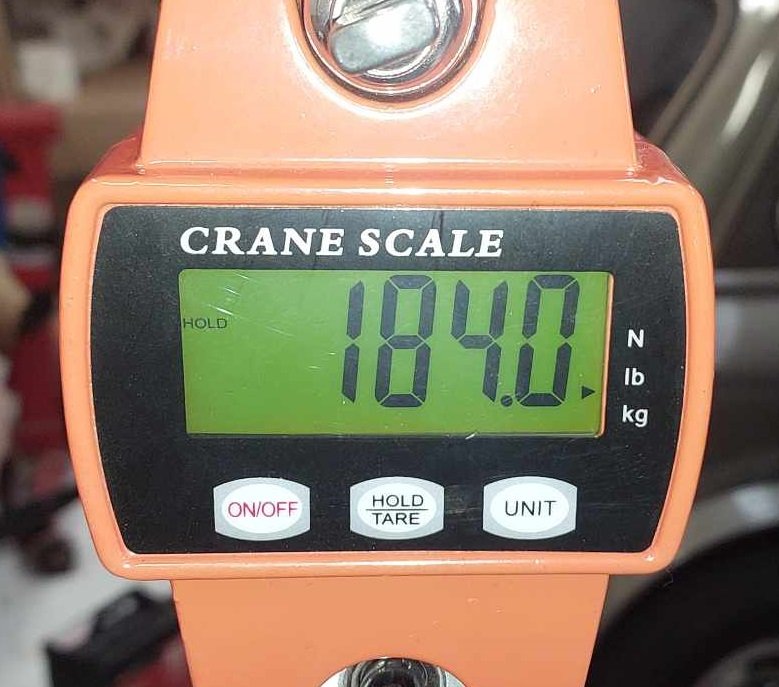
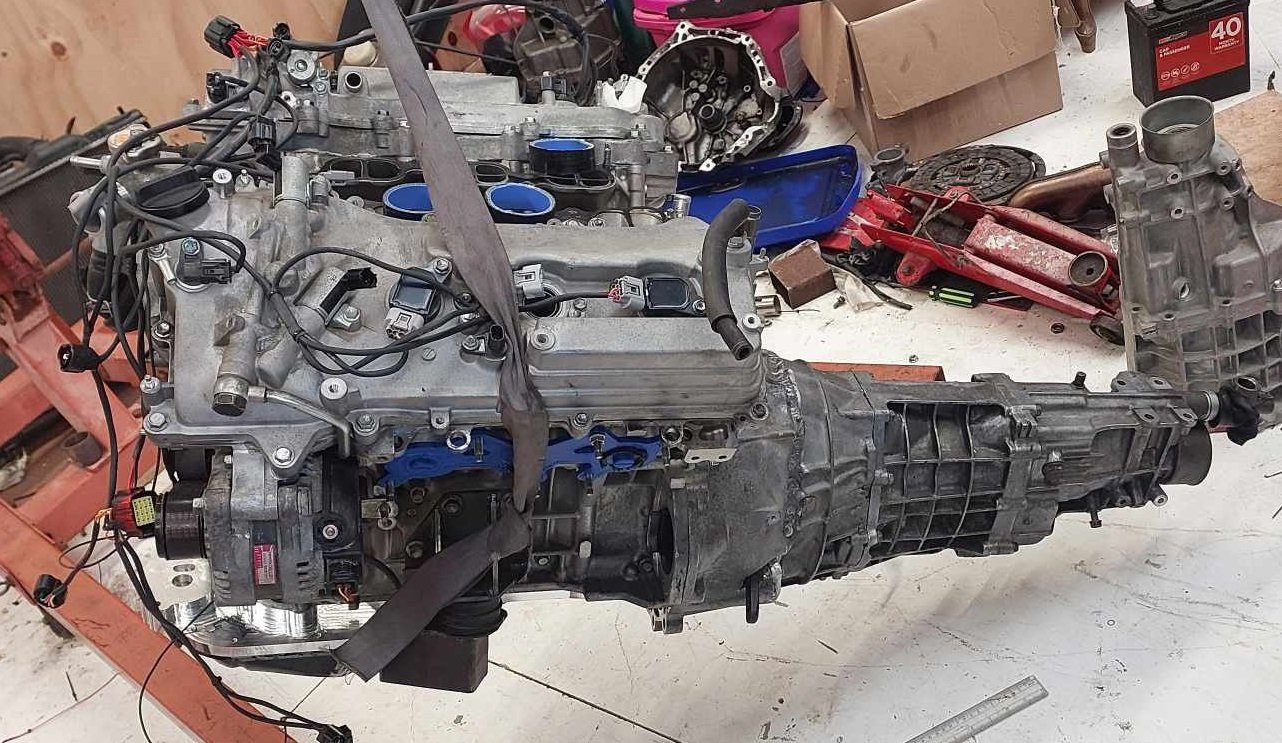
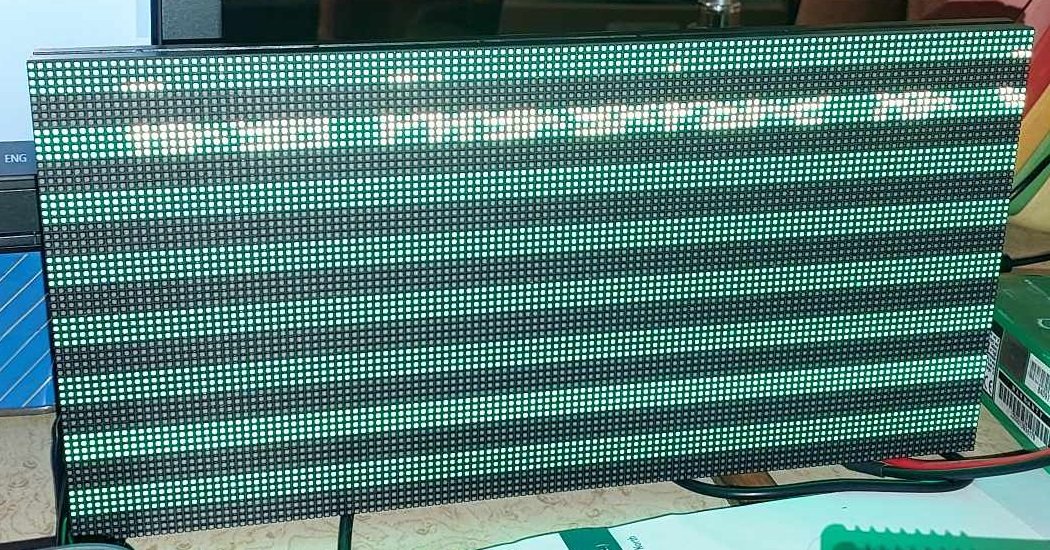
Sump Stuff I managed to get the sump finished off, in place and gooed up. Since I am not exactly sure about how much oil it can hold, and it's probably a good idea to iteratively mark the dipstick as I add 1 litre at a time. I just poured 5 litres straight in, because, fuck it. This worked out reasonably well, the high tide mark is just below top cover of the pan. The oil pump and filter will hold a bit more oil when it's turned over, and the external oil tubes that run up to the cam covers for VVTI and oil spraying the cams. Actually have non return valves in them, so hold a bit of oil up there too. Then, some amount of oil stays in constant circulation while the motor runs, more so at high rpm. So hopefully that's around a good amount. It's not weed its oil all over the floor, it's still good. Exciting! Digidash Fuckery So my replacement LED screen turned up, aannnndddd... I just cant get it to work properly. It only displays the top 4 lines, then skips 4 lines, then next 4 lines, etc. The way these work is actually really complex. I think this particular screen is incompatible with the only available library for controlling these screens, which is a real pity. This doesnt photograph well, but this looks absolutely AMAZING in person. It would be absolutely incredibly awesome as a dash. So I think I might need to buy some of the smaller screens that are supported, and daisy chain them together. As they have different chips controlling the LEDs, or some crap like that. Dunno. But it's way over my head to try and troubleshoot what's going wrong here. However, In the meantime I can still figure out how it works, and draw some graphics on it. So long as I dont mind everything can only be 4 pixels high, haha. Flywheel Stuff Dad got the ring gear machined to the right dimensions for shrinking onto the flywheel. However when skimming down the back of the flywheel, the tool ugga dugga-d itself into the part. or something. Nothing catastrophic for the part or the machine, but bloody scary apparently! Luckily he's smarter than me, and this happened only a few mm from the top, we wasnt trying to cut the whole 10mm out at once. He said once he found better tool speed and feed rate that suits the chromoly, it cut amazingly nicely. So hopefully this isnt far off, anyway. I'm excited that his mill is running. It's damn cool. Intake Stuff I swapped intake setups with @Hurmeez so now I've got the V10 throttles. This solves some problems, but adds some new ones. Firstly, it solves all of my height and fuel rail issues which is a big win. I'll now have some space up top for a nicer shape trumpet, and a sweet looking airbox. Which will also help give some rigidity to each bank of throttles by tying them together at the top. Unfortunately the factory throttle spacing is a little closer together than expected - But, these are a lot easier to space apart. I was considering just leaving it at current spacing, so I can use the fuel rails etc - But nah. It would just nag at me that I'd half assed it. So to space them out I just need to redrill some holes on the rails, to rebolt the linkages in a new position. Otherwise, if it's close enough I might be able to slot or extend the linkages to just push them across a bit. Then I'll need some new fuel rail extrusion, and drill them. But this is all easy drilling stuff that can be done no prob on a manual mill. The center to center on these throttles is 98mm, not the 107mm I was expecting. (Could old forum information be wrong?! shock horror etc) Also they have a highly oval outlet, and the throttles have a 24 degree curve. Despite have a big entry size and quite big throttle, somewhere around 50mm. They taper down to the cross sectional area of a 42mm circle at the exit. However there's enough meat around the perimeter that they could easily be ported out to the area equivilent of at least a 48mm circle no problem at all. In order to get the top of the throttles standing vertically, I need a manifold that cancels out the 24 degree angle. Here's where I am currently at for prototype shape: Since can align each throttle central over each port, all of the port shapes are now identical which is nice. The engine they are from (S65 V10) makes 500hp from 5 litres, so around 50hp per throttle. So that's equivalent to 300hp using 6 throttles. So hopefully injector size, airflow etc all plenty suitable for the application. I'll also have 4x throttles left over, so it might be interesting to see how these look against the port shape of 1NZ or something. Engine Weight @flyingbrick loaned me his scales (thanks) so I could get a ballpark weight for motor. I've not gone quite to the level of @Hyperblade's awesome post about engine weights at this stage - as I still dont have some parts to put on. However, with the motor and box put together. Engine mounts on. No starter/flywheel/manifolds. Like so: Total weight came to: 184 kg. A J160 is 38kg, putting the 4GR around 146kg. A little lighter than expected, given the service weight was listed as 165kg for engine. So this puts it at slightly heavier than a beams motor once it's fully dressed. Much heavier than a K20, and the weight of almost 2 1NZs. Ha! So I'm not gonna win any awards for worlds lightest engine, unfortunately. (Did I ever mention how great a 1NZ is? Cant remember) However I'm also relieved that it's not going to be massively different to the beams setup. The fact that the weight is further back and lower down will hopefully help offset the extra podge. For some less discouraging context - comparing to a previous generation Toyota NA 2500cc six cyl engine, the 1JZGE. This was 207kg for the engine alone. So my motor and gearbox weighs 25kg less than just an NA 1JZ. ha! Before @xsspeed mentions RB in my thread again, an RB20DET is supposedly around 245kg which I assume is with turbos etc mounted. So lots of different things going on, the most exciting thing on the to-do will be getting the flywheel in place. As once that's done, I can crank the motor over and get some oil circulating through everything. I need to assess if my tiny lithium battery is going to have enough grunt to turn the motor over, before I waste a bunch of time building my wiring etc around a battery that might not be suitable. Hopefully it's good though, as it cranked the 1NZ way faster than the regular battery did.
9 points
-
Back on the ground today and yeah the boat anchor does a perfect job of making it the right amount of low Got one of the bucket seats mounted too but forgot to take a photo of that9 points
-
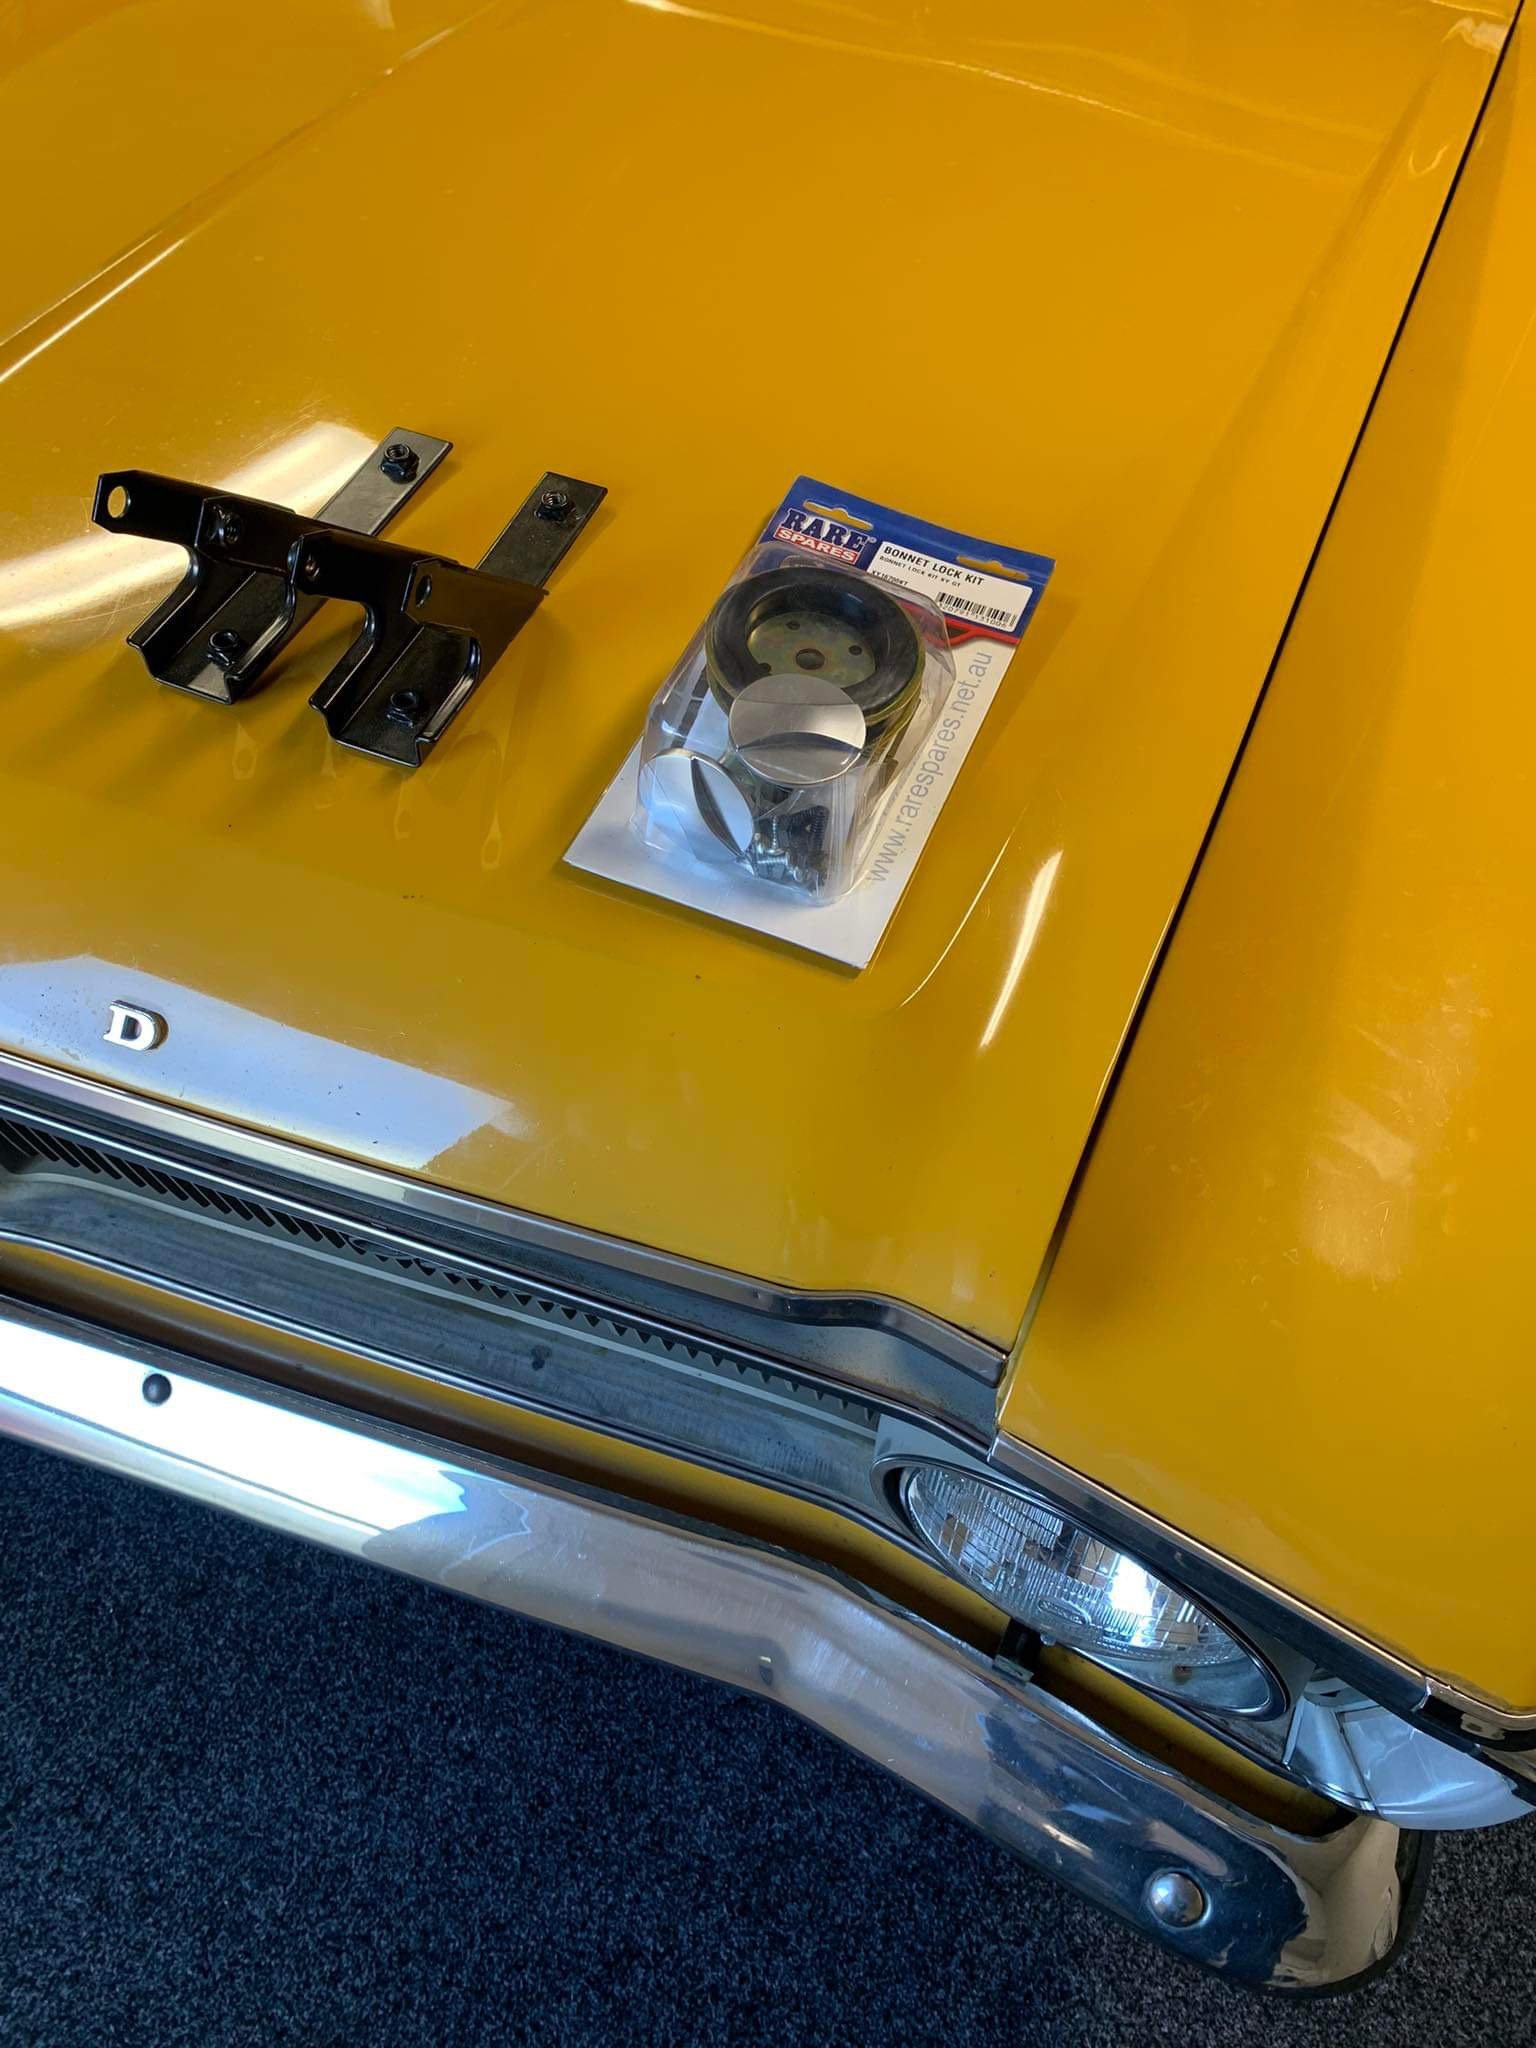
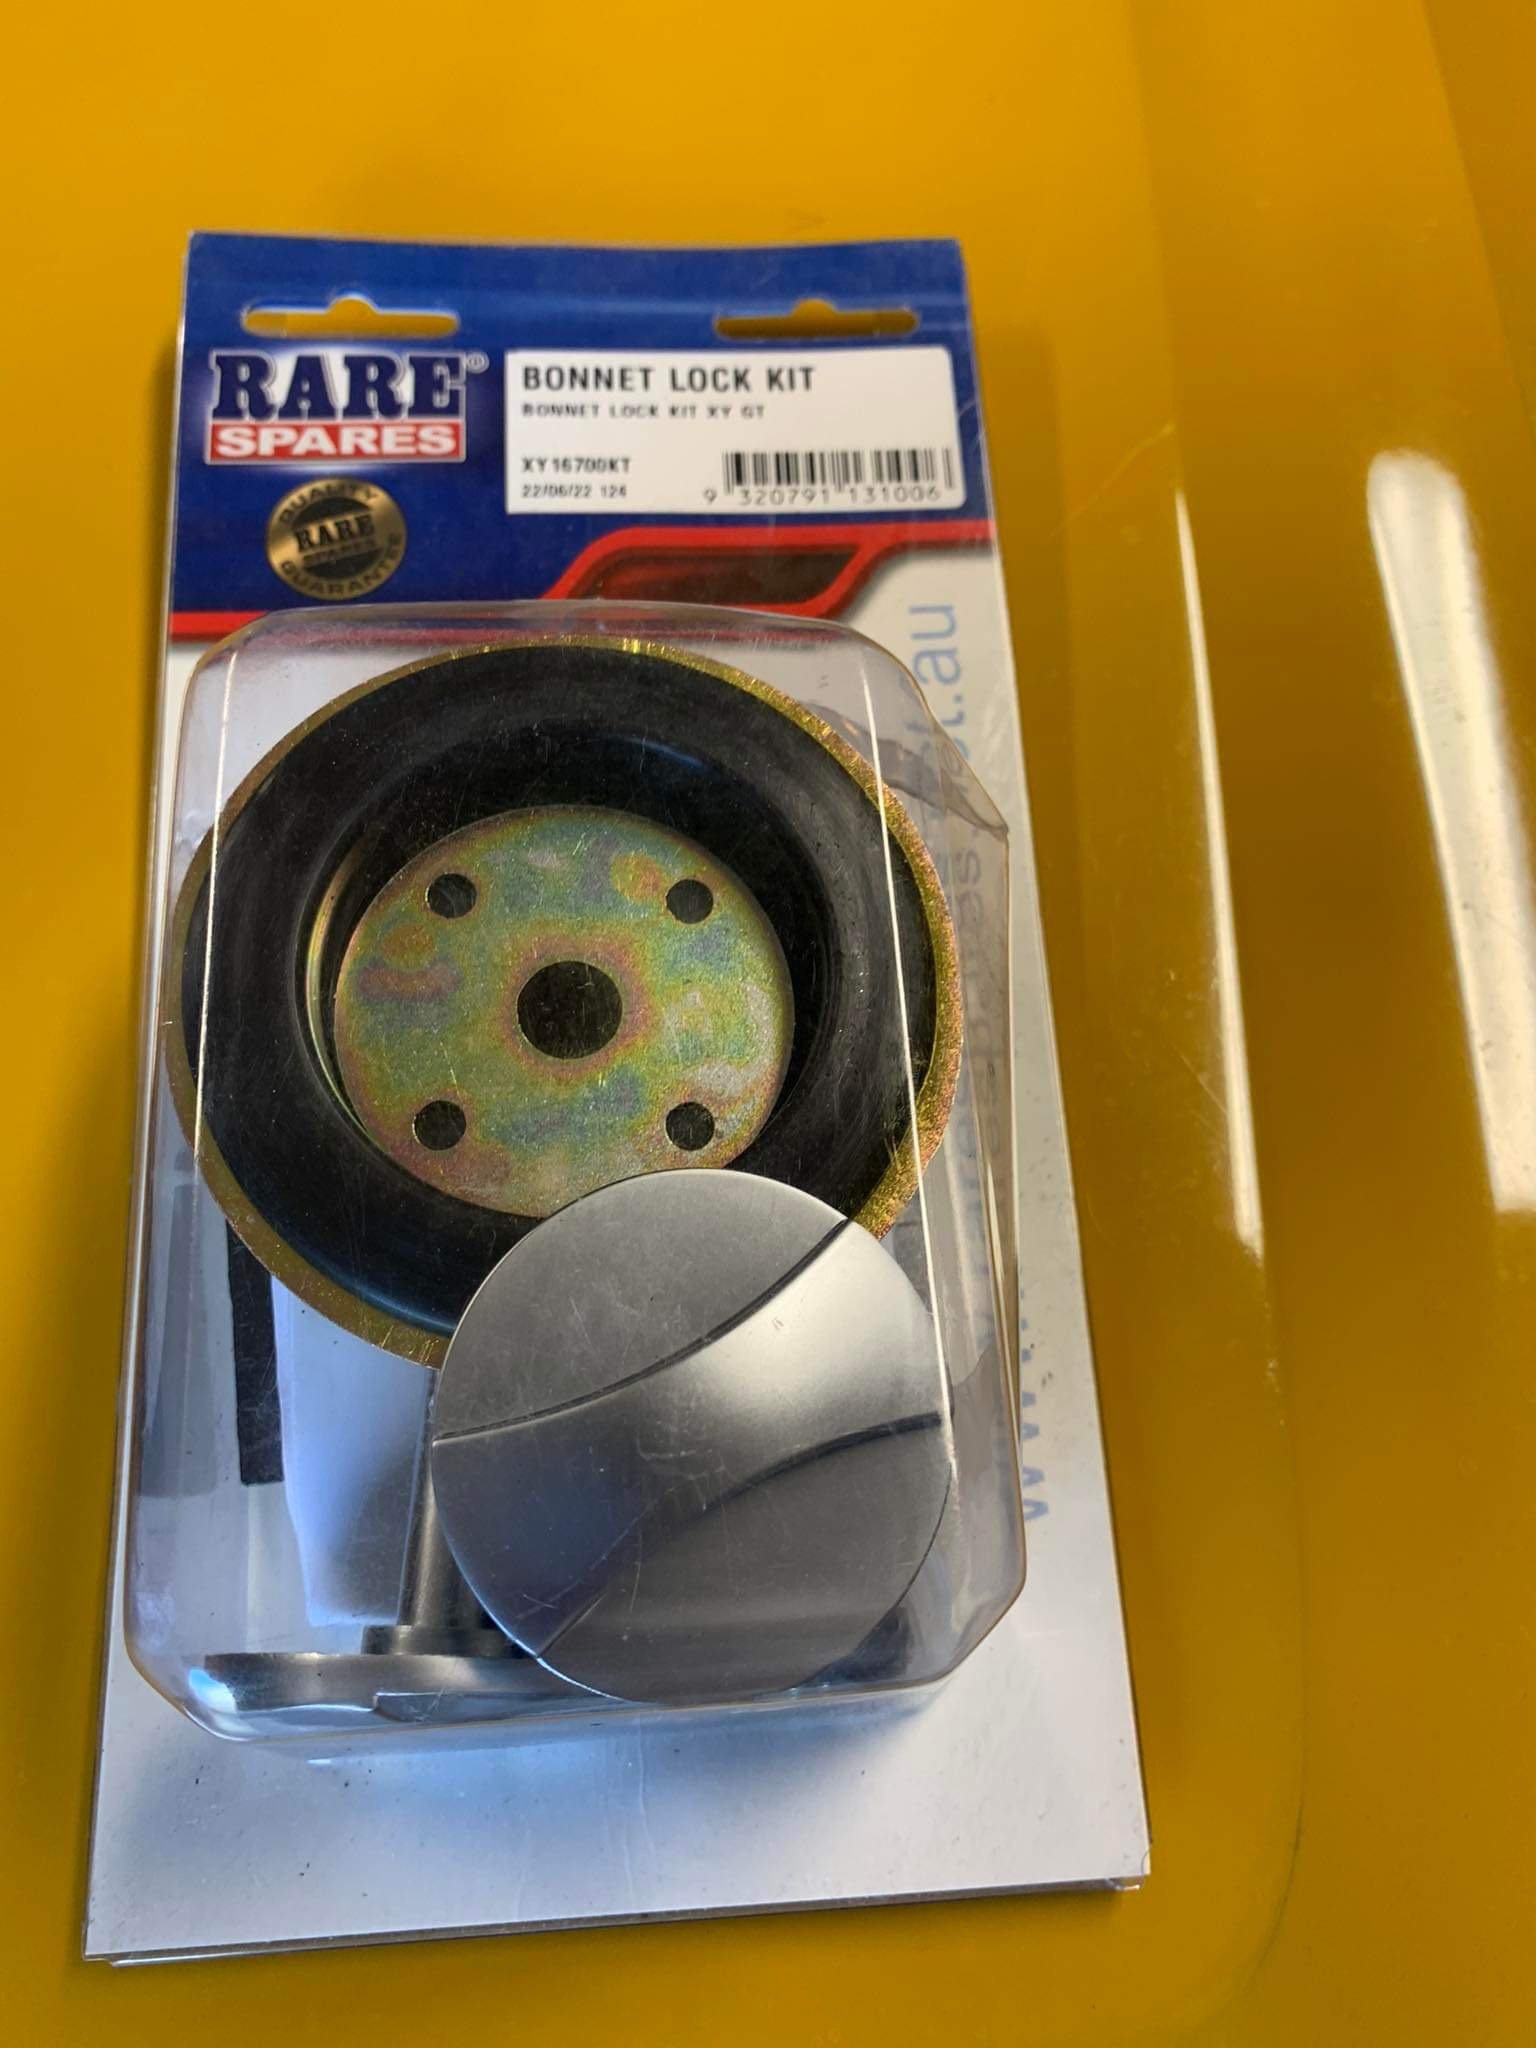
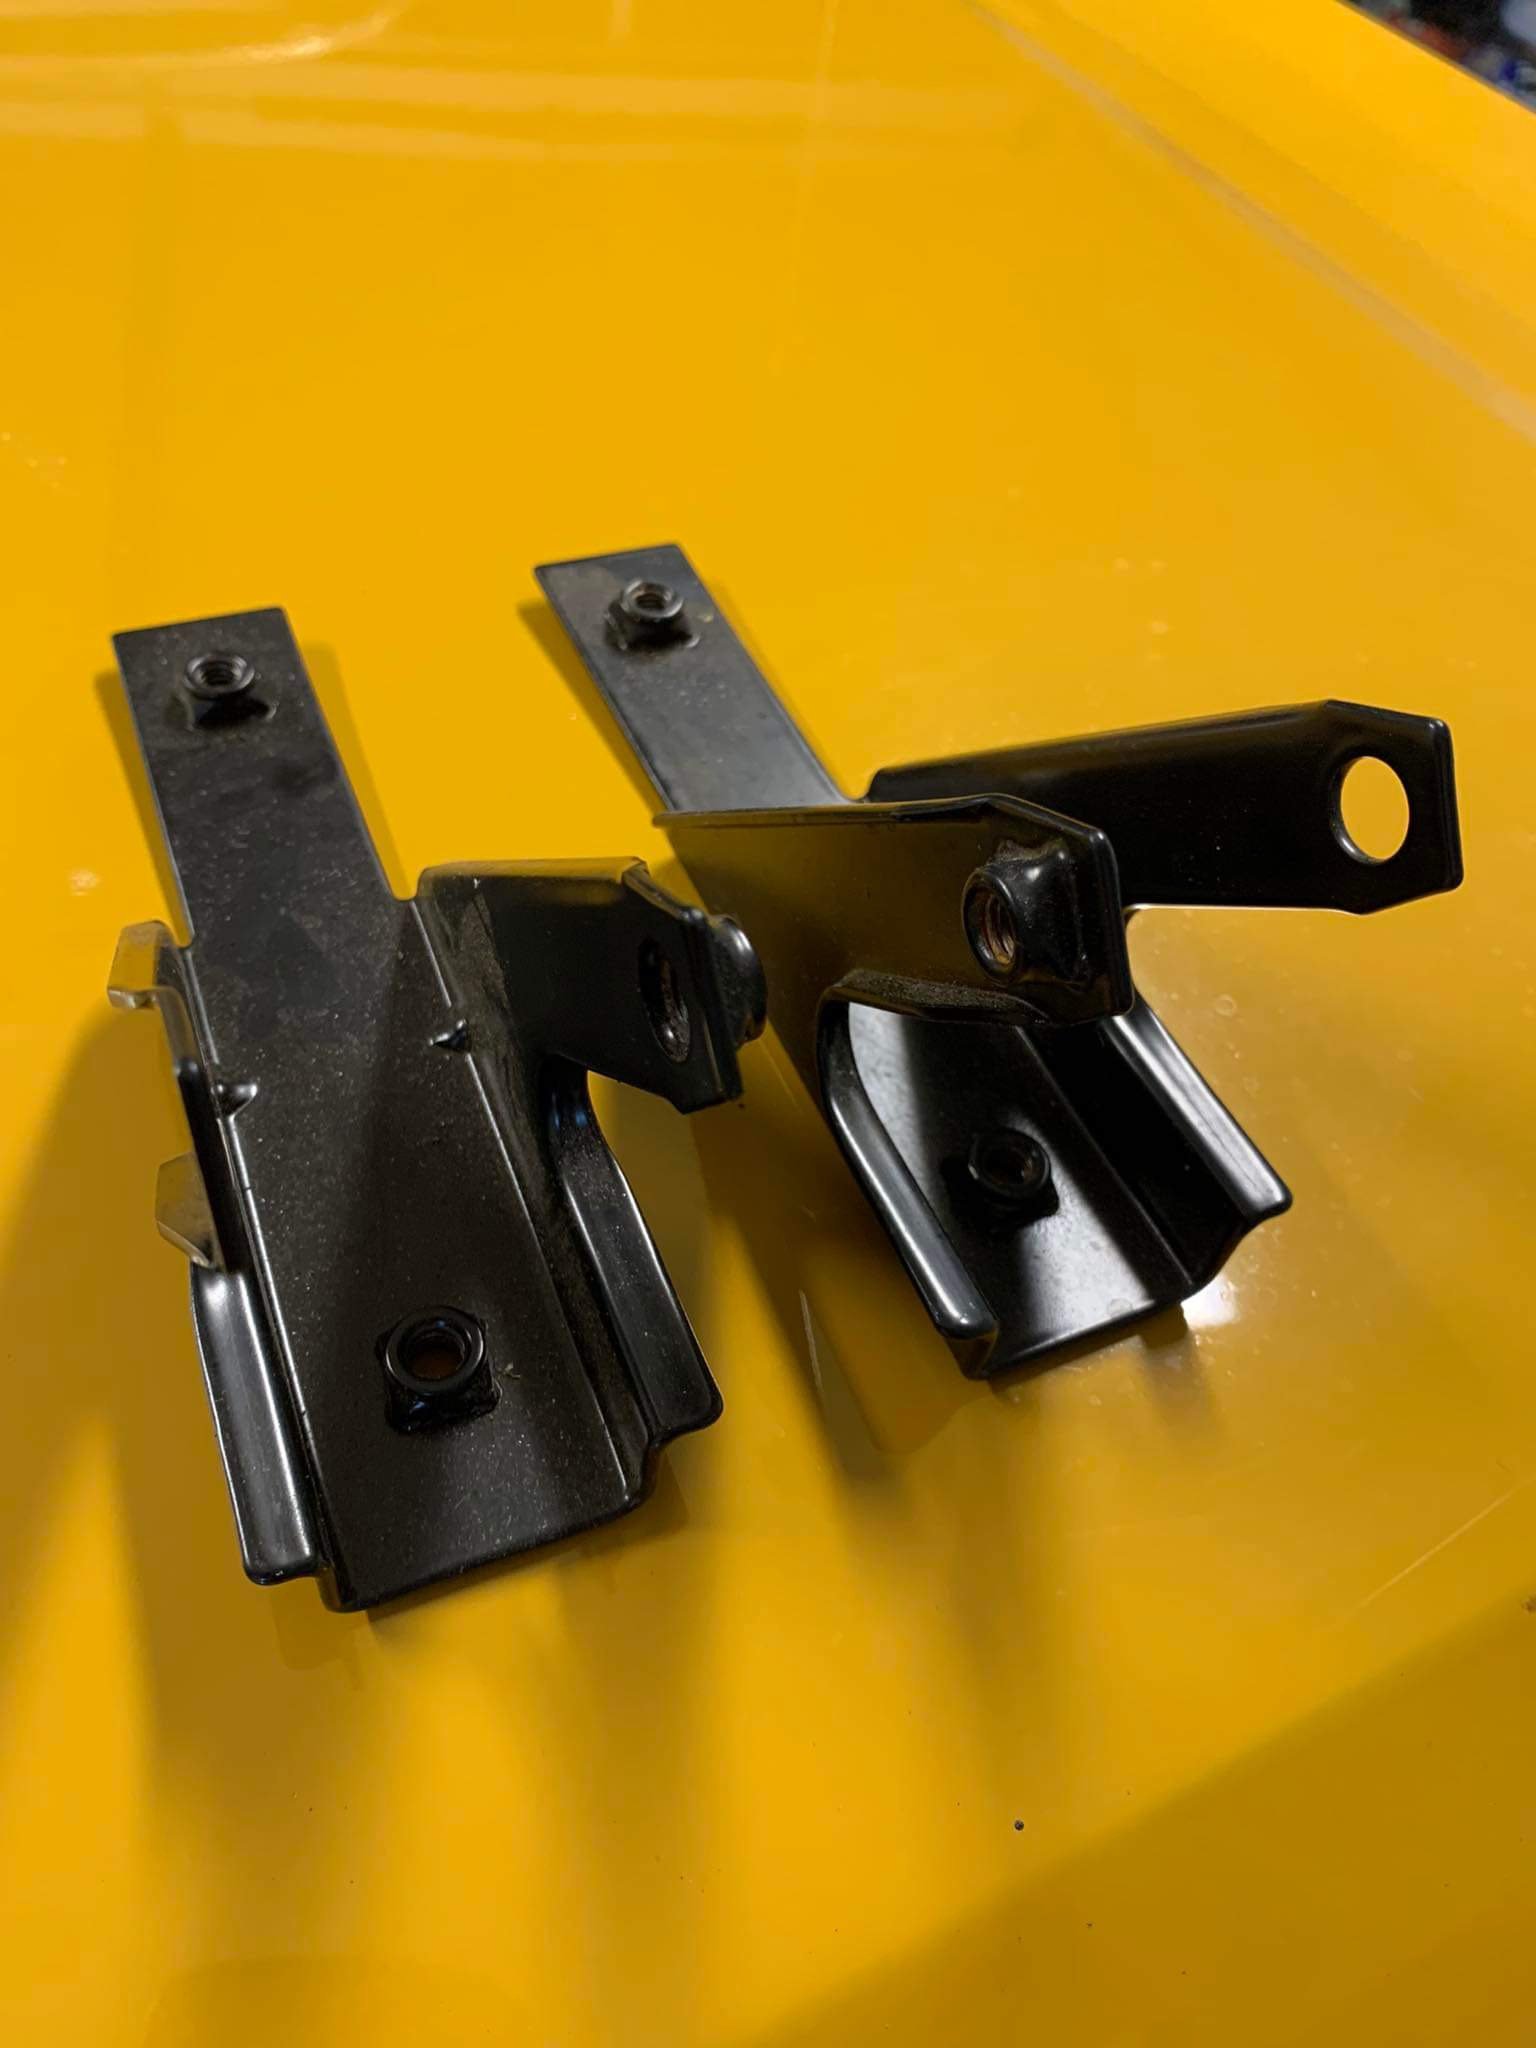
Bonnet pins XY GT XY GT GS fog light brackets XY GT GS lower spoiler I’d more than likely be buying a new XY GT bonnet Rare Spares $1250 rather than slicing up the mint bonnet. Almost time for the 6cyl to be yoinked
7 points
-
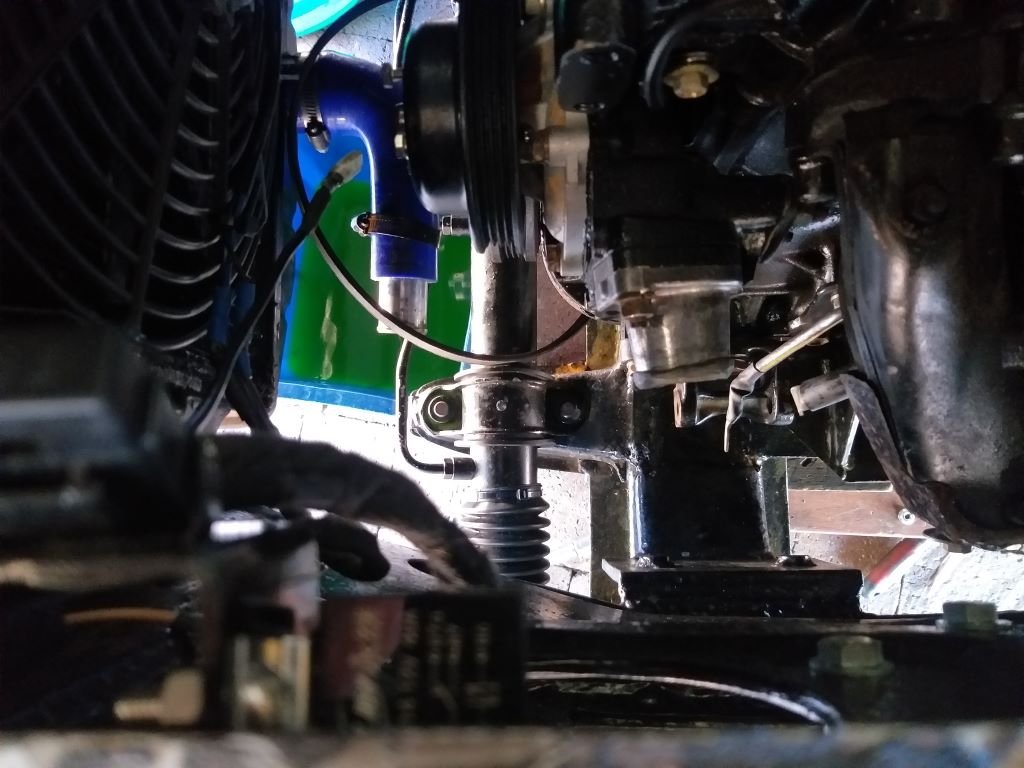
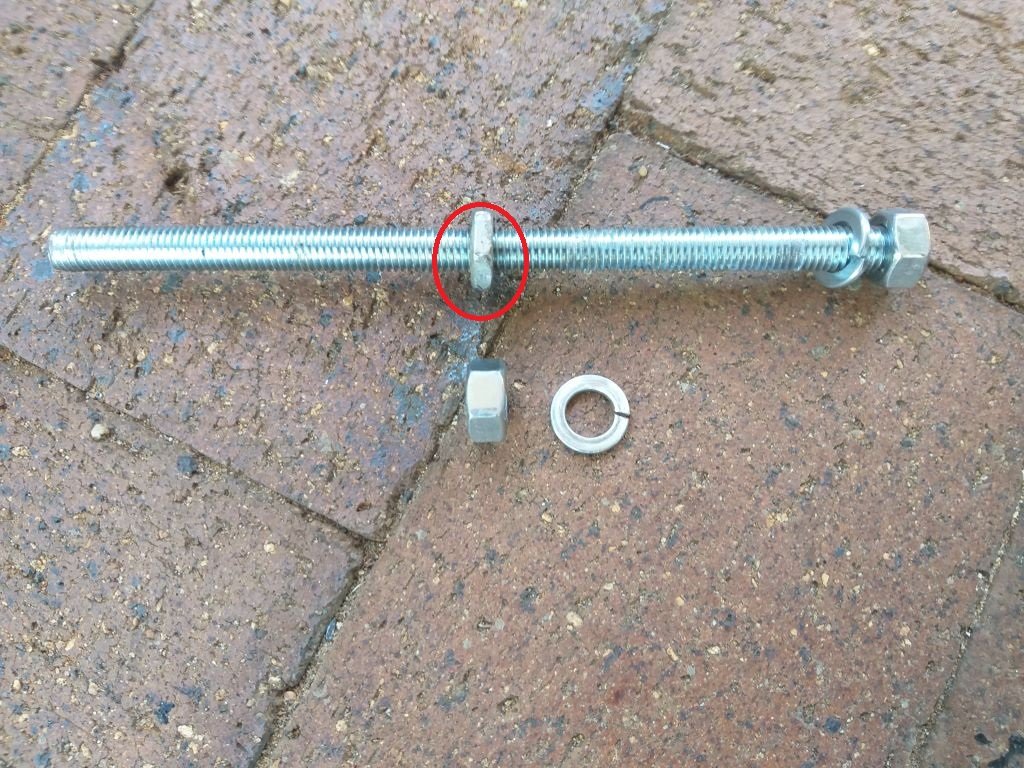
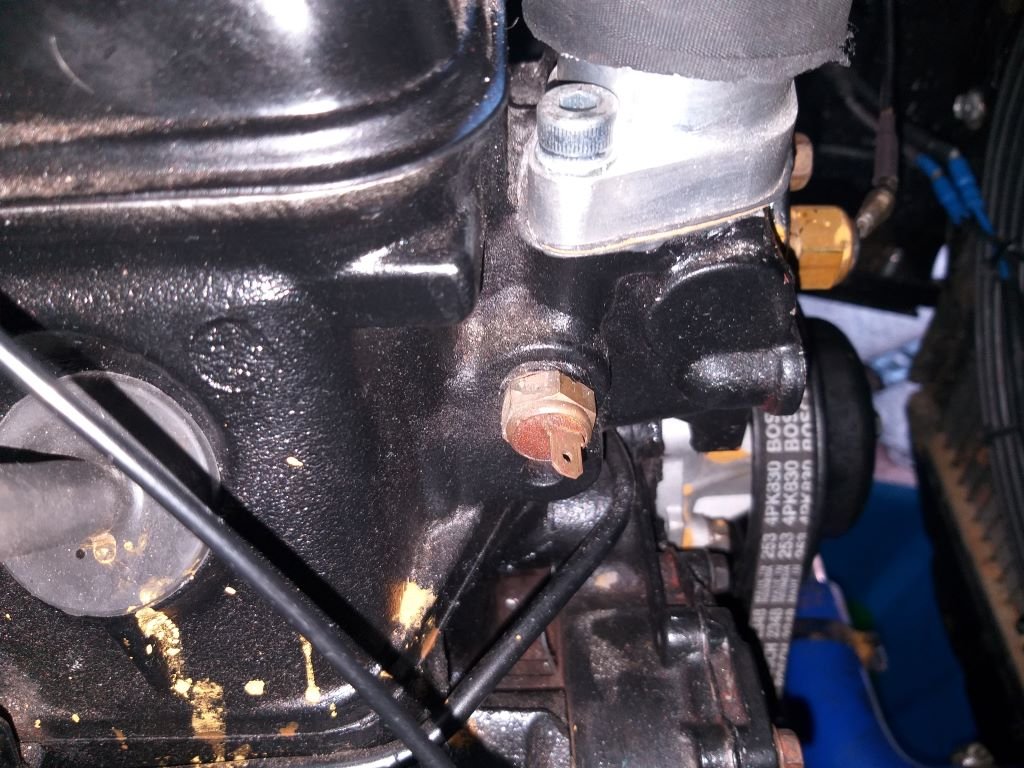
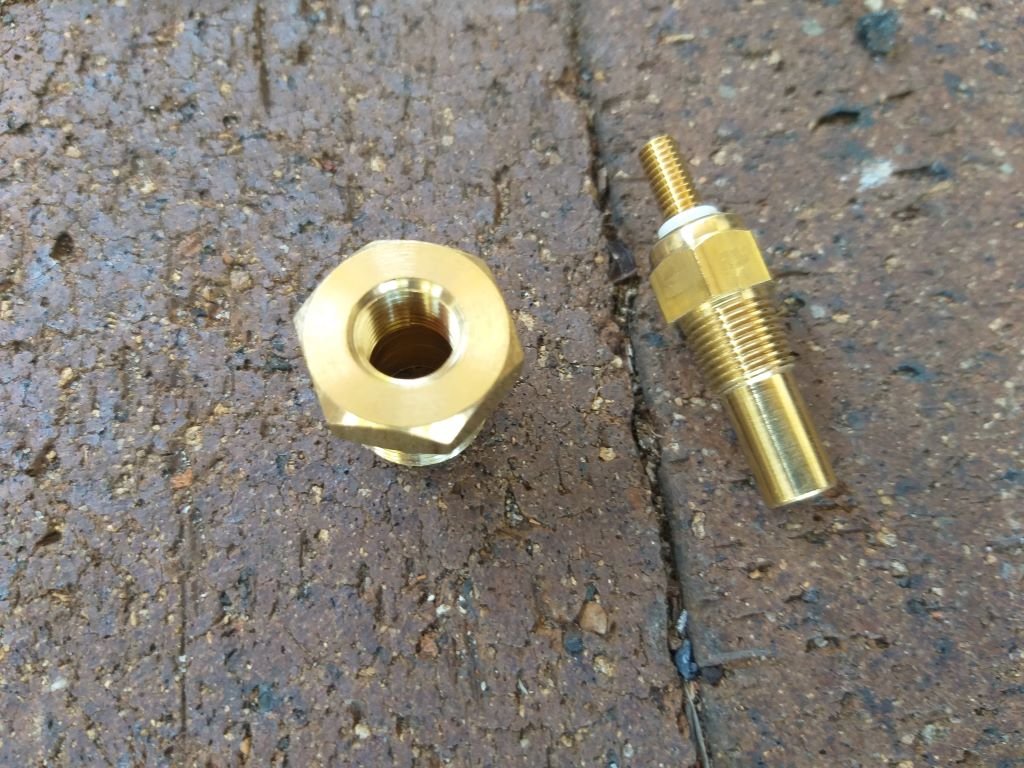
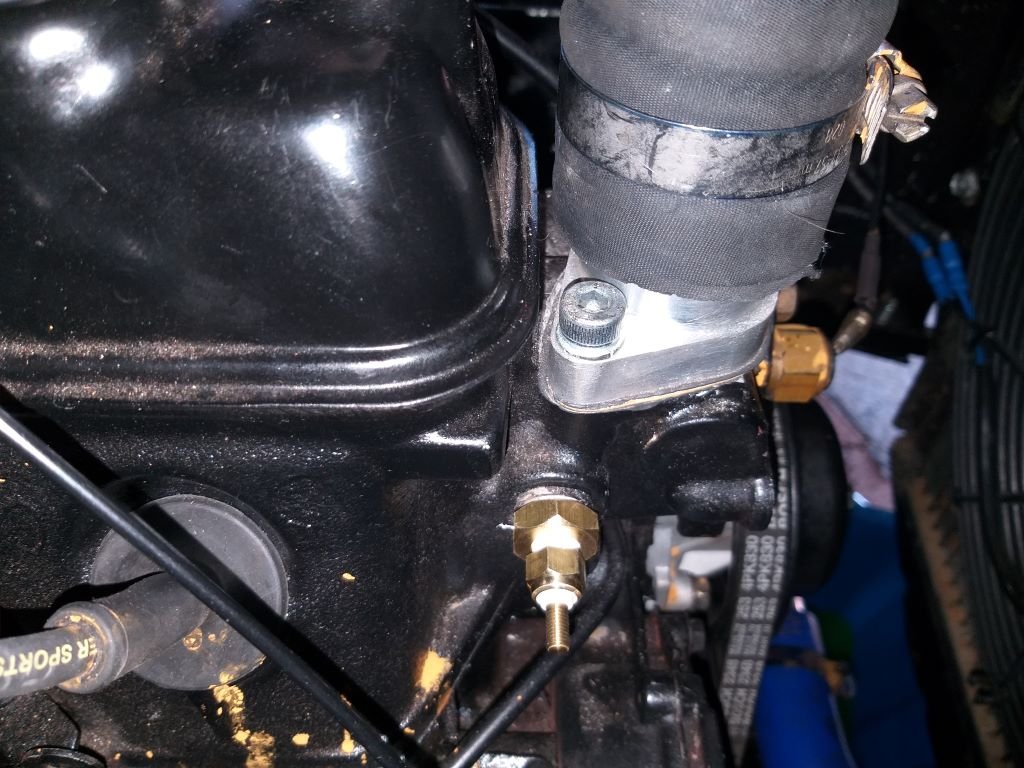
Finally finished off the wiring yesterday and took the van for its first drive with the new Astra power steering pump. I'm chuffed to report that it works really well. We ended up taking the van for our usual Friday night burger cruise which highlighted a few extra items that needed adding to the snag list. The most urgent one being an intermittent belt squeal. To be honest this has been lurking around since day one and up to now I've just been masking the issue with liberal applications of soap. I was hoping that the belt driving my original power steering pump was the culprit, but now that this is no longer, the squeal persists, so must be the alternator belt. So, first thing this morning I took a closer look. Belt tension looked good, but focusing closer on the belt alignment I noticed that the alternator was sitting a smidge too far forward. Things are so tight in the engine box that to get the alternator out you need to drain the radiator and remove the lower radiator hose, which leaves just enough room to turn the alternator on its head and wrestle the bloody thing out. I'm using a reverse mounted 3Y alternator bracket with a piece of threaded rod that acts as the through bolt. A standard nut and spring washer on either end fix the threaded rod in place, so the simplest way to sit the alternator further back without modifying the bracket is to reduce the thickness of the front nut. Scratched around in my box of spare nuts and was lucky enough to find a narrower nut with the correct thread. Chucked the alternator back in, but it was still a fraction too far forward so I ended up ditching the front spring washer, which made things perfect. Should be okay as I still have a spring washer on the rear nut. Before re-filling the coolant, I took the opportunity to replace the factory temp gauge sender unit with the new sender for my aftermarket gauge. Old: New one with correct adapter: All sorted and ready for the fitting of the gauge. Thanks for looking.
5 points
-
One thing to keep in mind While all these things are good, on an average street car, it can be pretty far off 'ideal' and still function acceptably for 95% of the driving you will do. If you look at angles on standard vehicles you will see what I mean. Lifted 4wds of all flavours are a good example of everything being completely wrong but they still drive acceptably I'd get it close as you can for what works and not get too hung up on it being perfect. The only thing I'd pay attention to, is the angles of the top arms so it locates the axle in both directions properly2 points
-
I need to do something about the depth sounder. Occasionally it would miss a few pings and report the depth as deeper than it was. The only thing worse than a broken gauge is an unreliable one. Now I could have sent this one back to Midas, replaced the transducer and got them to service and recalibrate it... But a Raymarine ST60 came up on trademe and it has some nice new features along with massive numbers I can actually read. This one will also network with my autopilot and display course errors, waypoints n stuff. Also has auto gain control and a much better backlight. Had to upgrade the transducer. Rather than remove the original one, I decided to install the new one slightly further back in a flatter part of the hull that's less likely to get turbulent water over it. Plus the original one had a lot of glue around it so was probably going to be a mission to remove. Now I'll keep my eyes open for the matching Raymarine speed and wind gauges.2 points
-
In today's episode of "5 minute jobs that took multiple hours" we have some upgrades. Repaired the deck underneath the keel hoist sheaves. Moved the jib sheet to the cabin top self tailing winch. This will make it much easier to trim the sail from a comfortable position. And attached this little placard in the cabin. Hopefully I'll get another one to go with it next winter.2 points
-
Spent some time this afternoon attacking the rear cv shaft It didn't want to play nicely Remembered I had that nice press thing which did the trick Replacement pick a part cv shaft with non split boots2 points
-
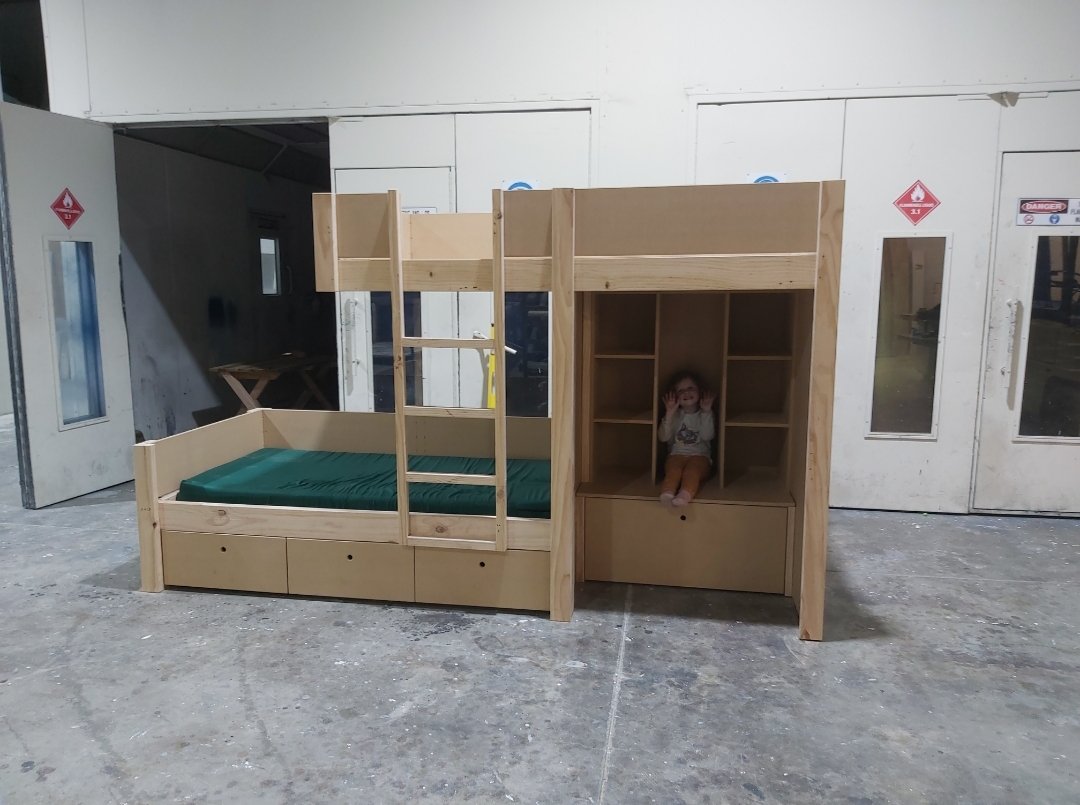
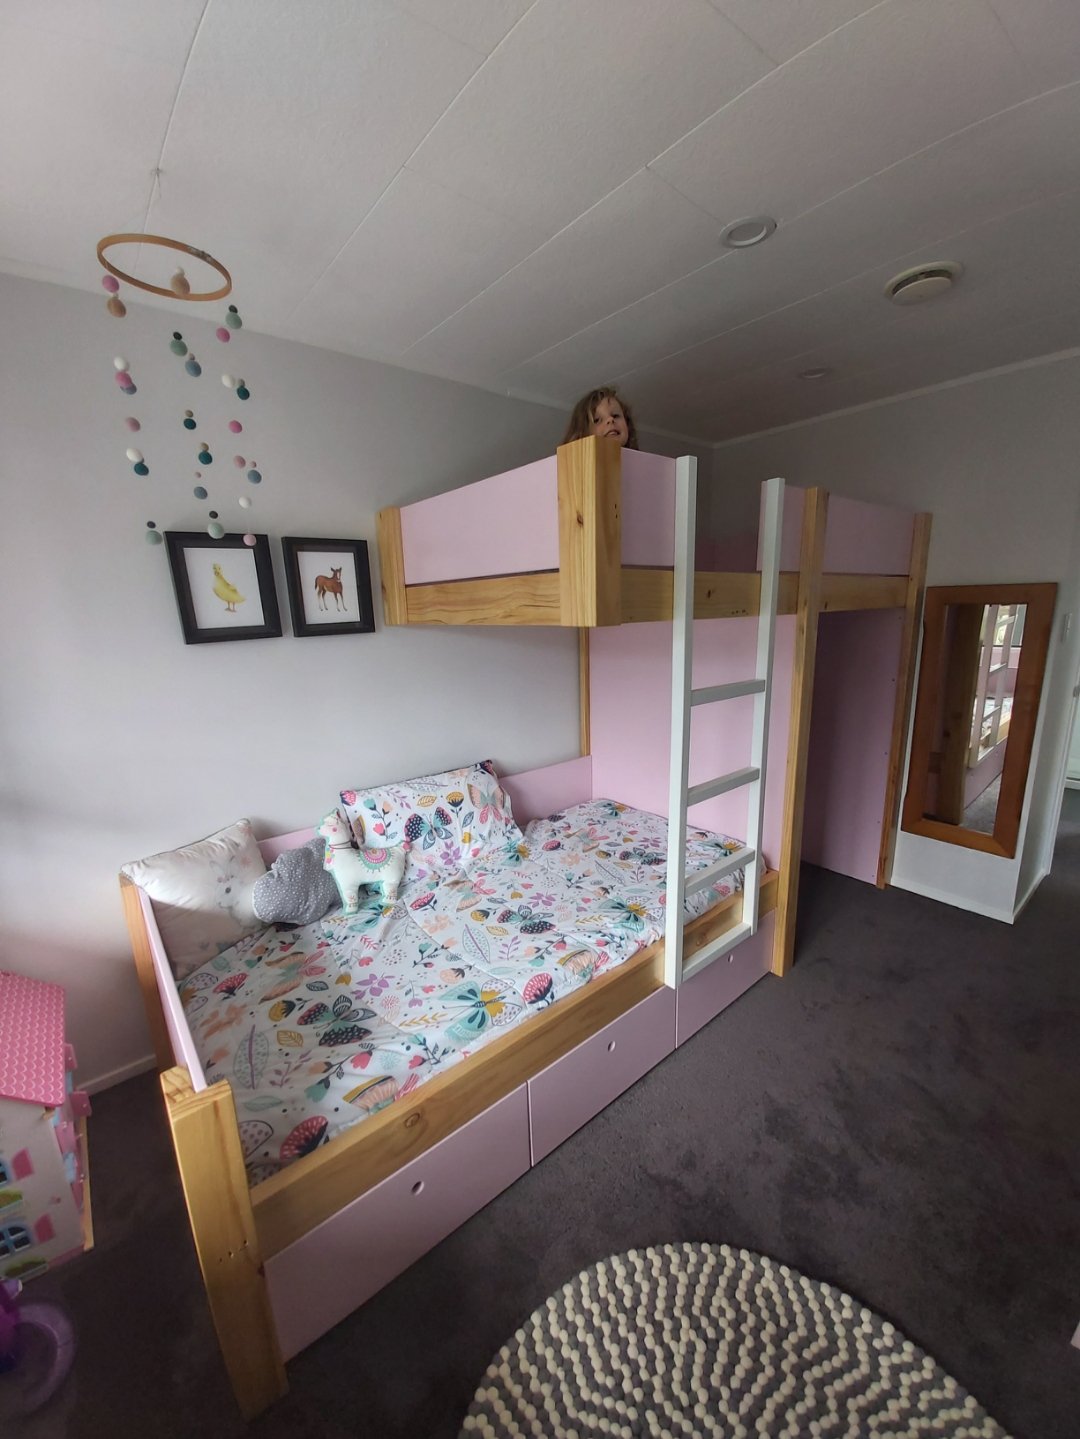
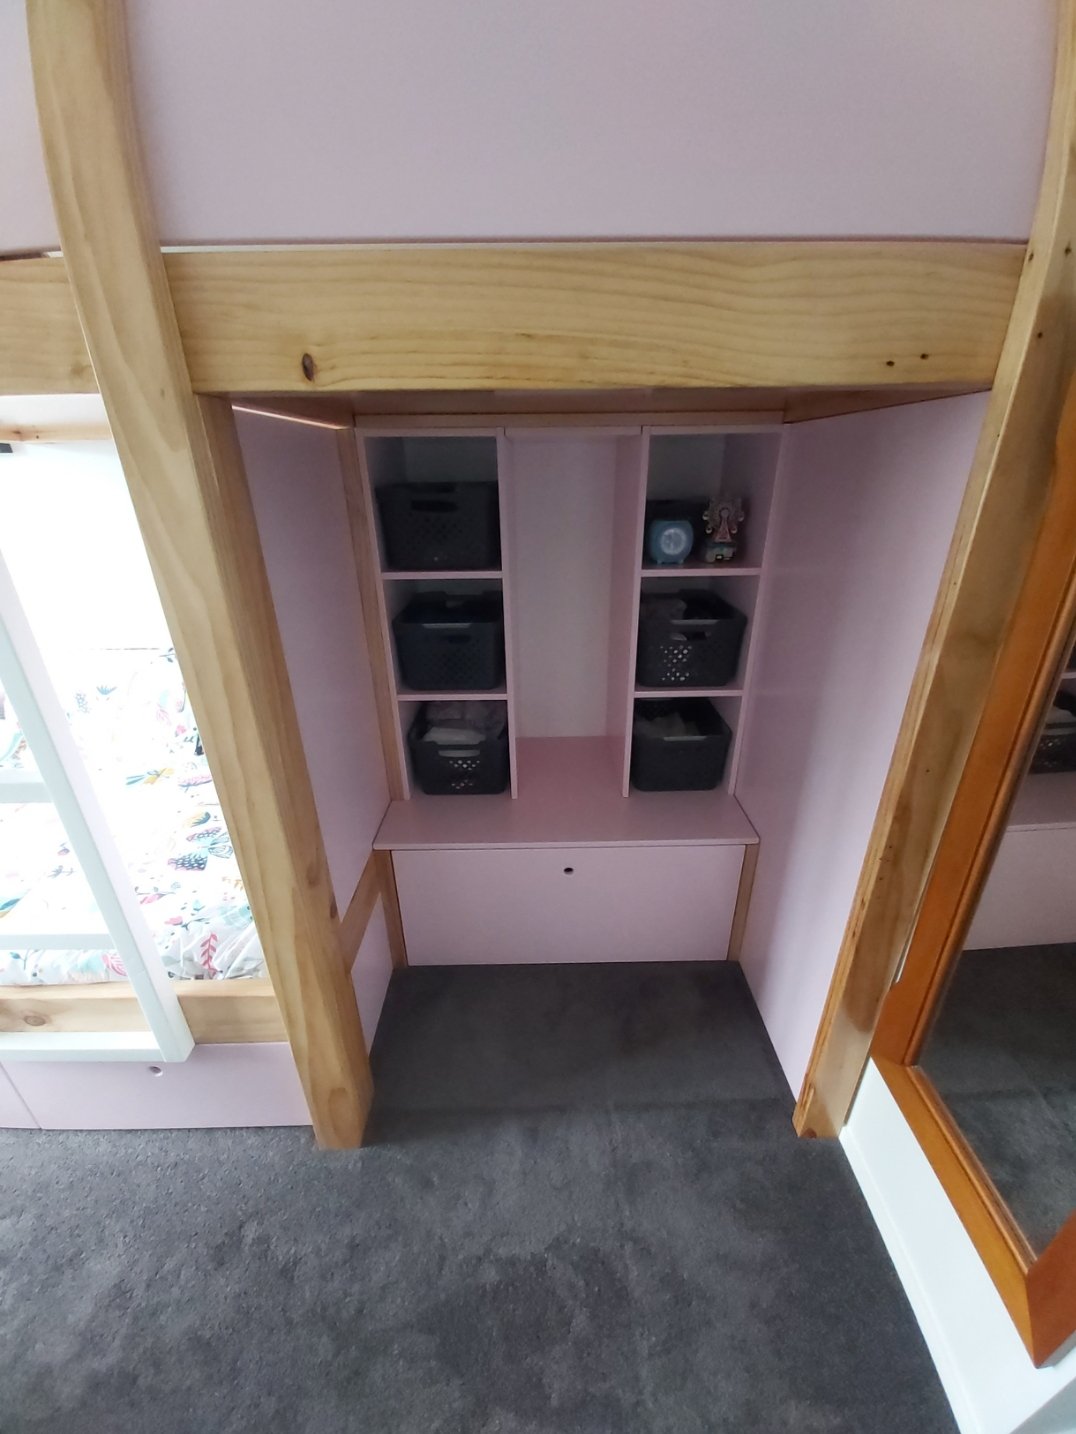
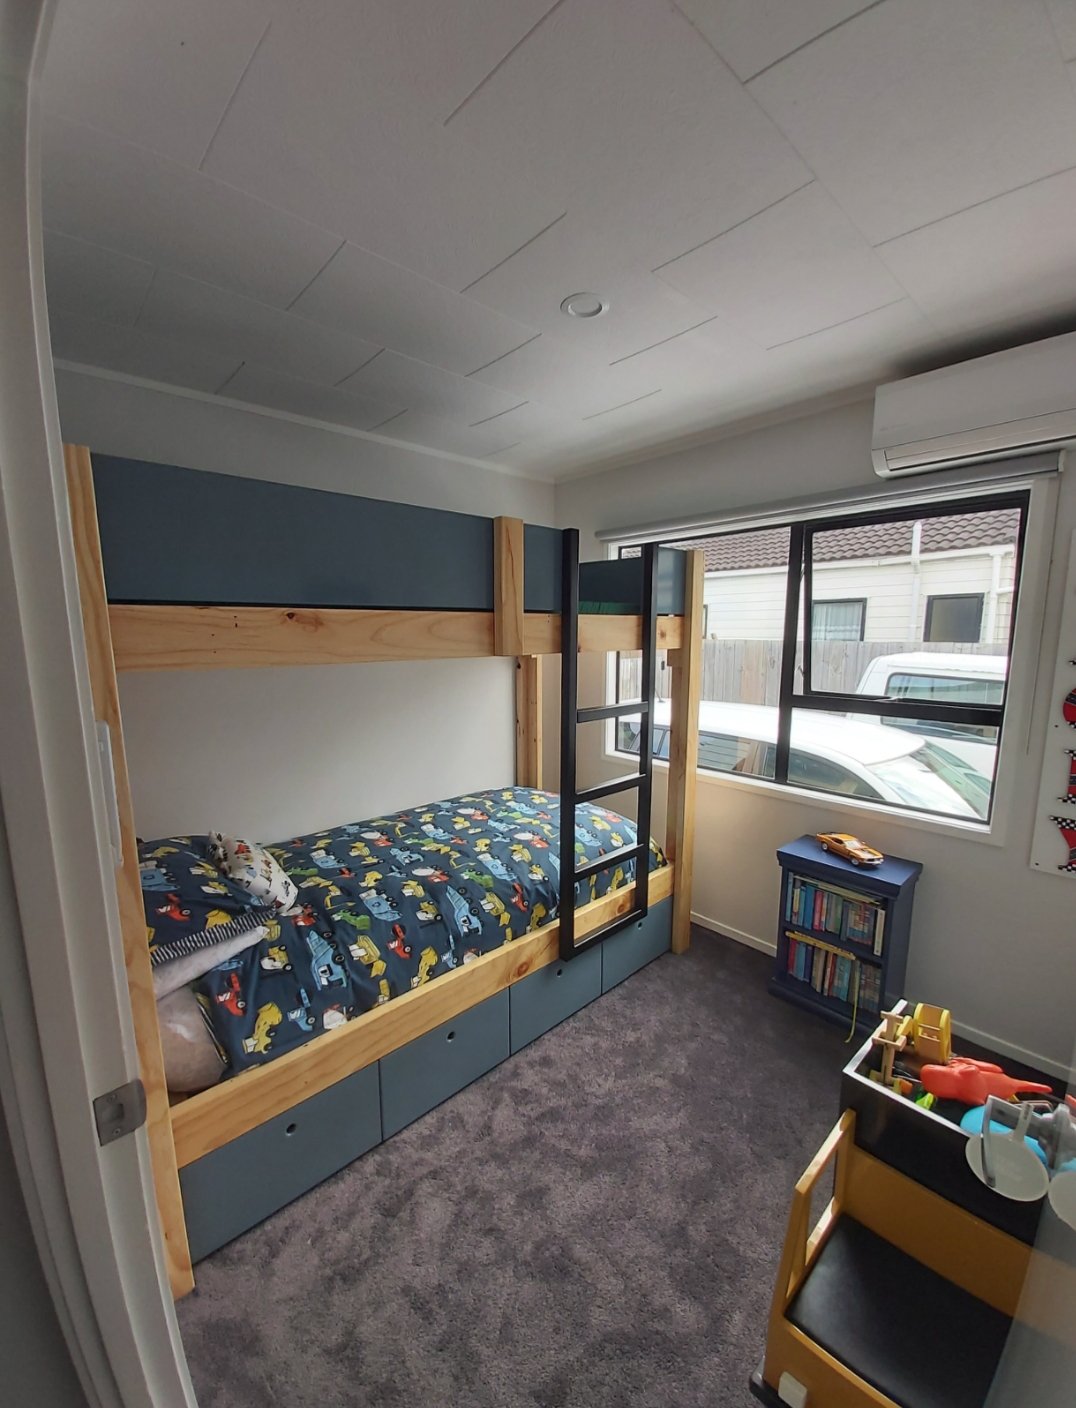
Of course we had make one for each kid. This one slightly different as we removed her wardrobe when we did the renovations to fit the fridge in the new kitchen so we incorporated the wardrobe into the bunk bed.
2 points
-
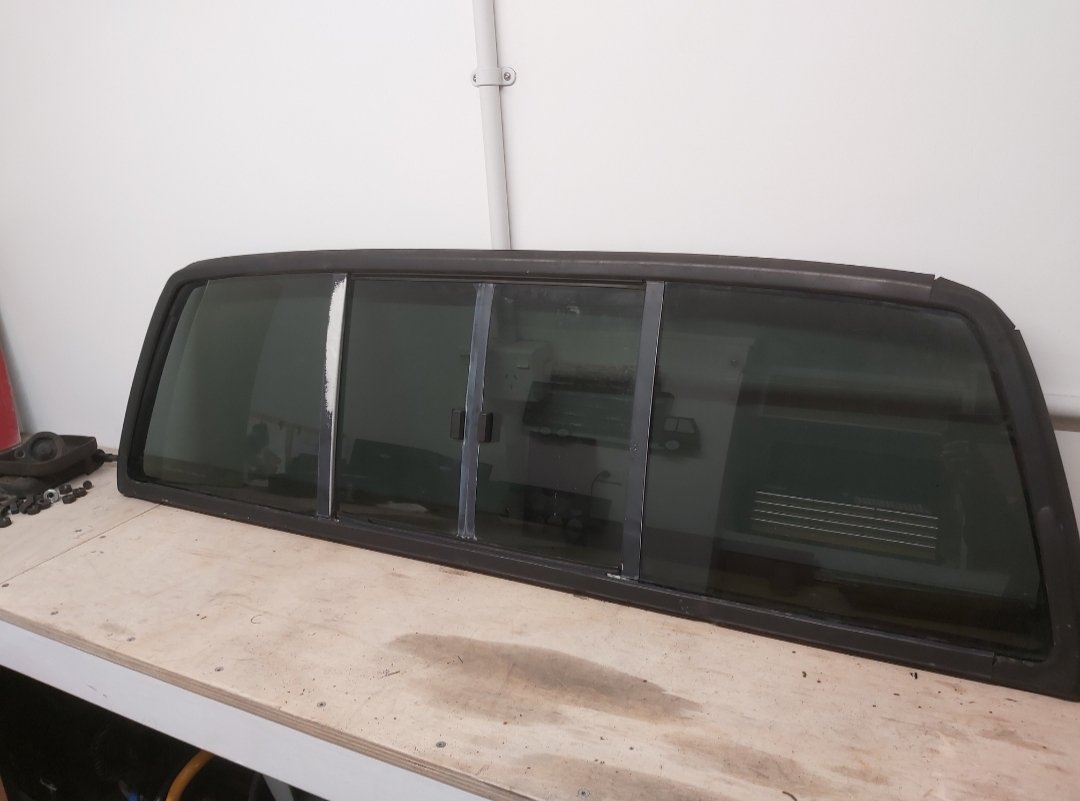
This was also a purchase I made over the weekend. The are very rare for a d21 so I was very happy to get my hands on it. Factory tinted glass too. This means i will probably need to tint the two rear side windows to suit.
2 points
-
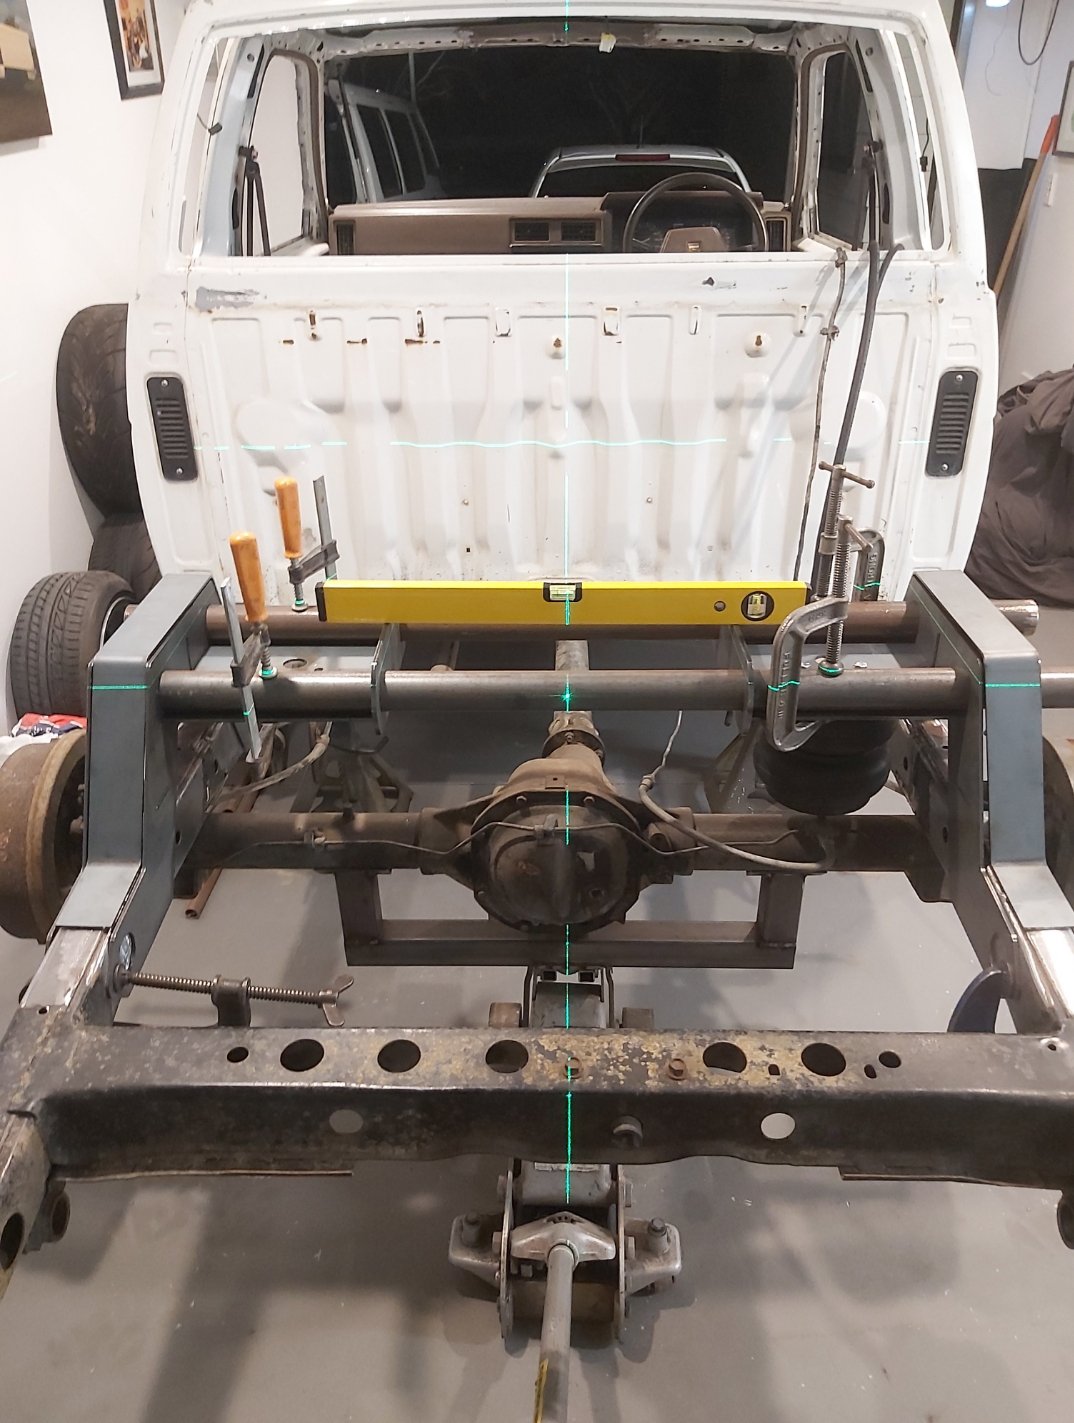
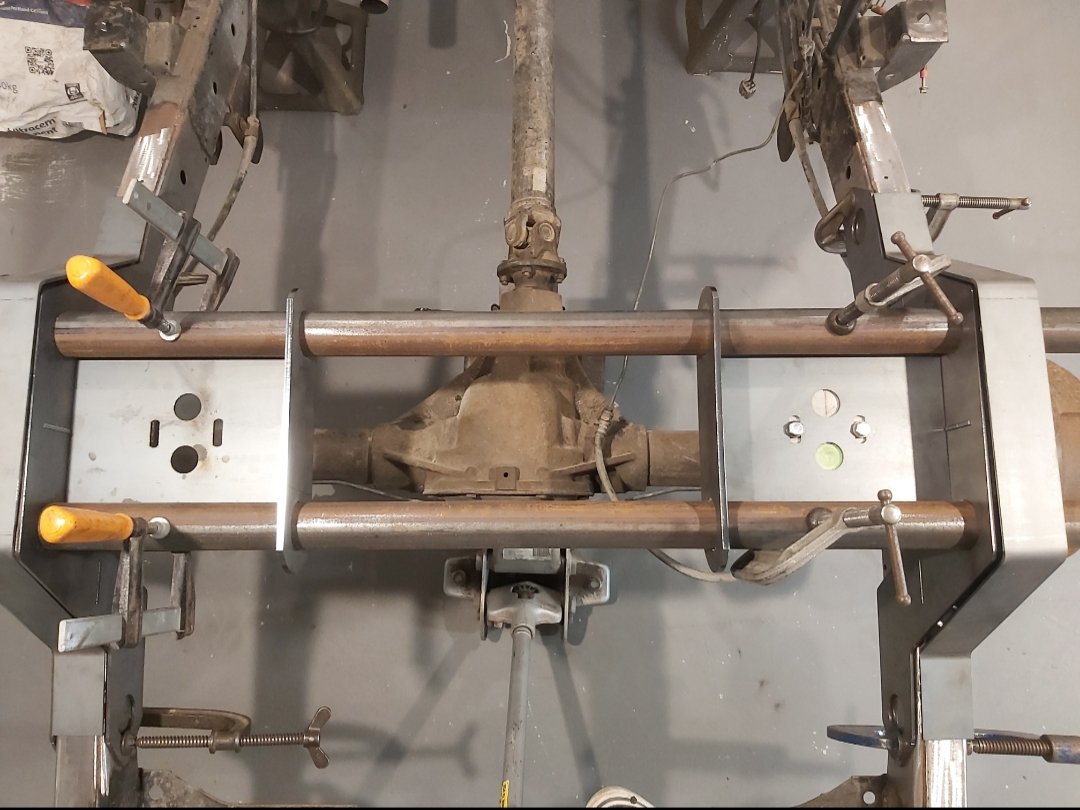
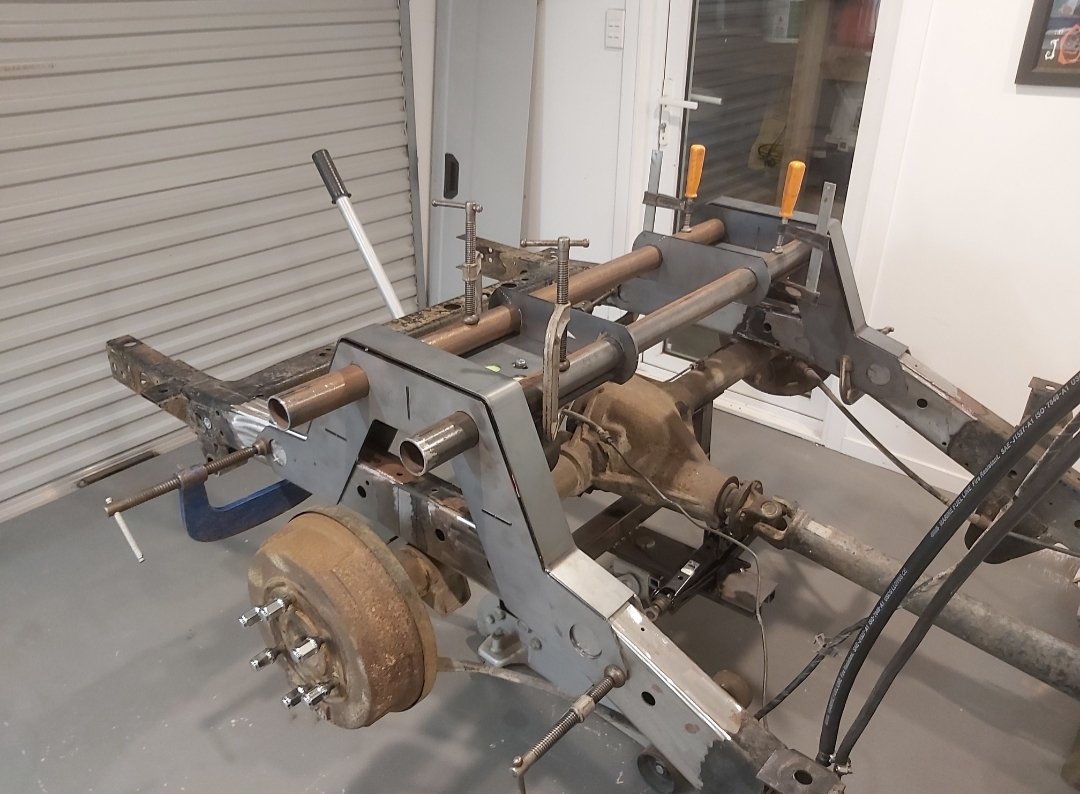
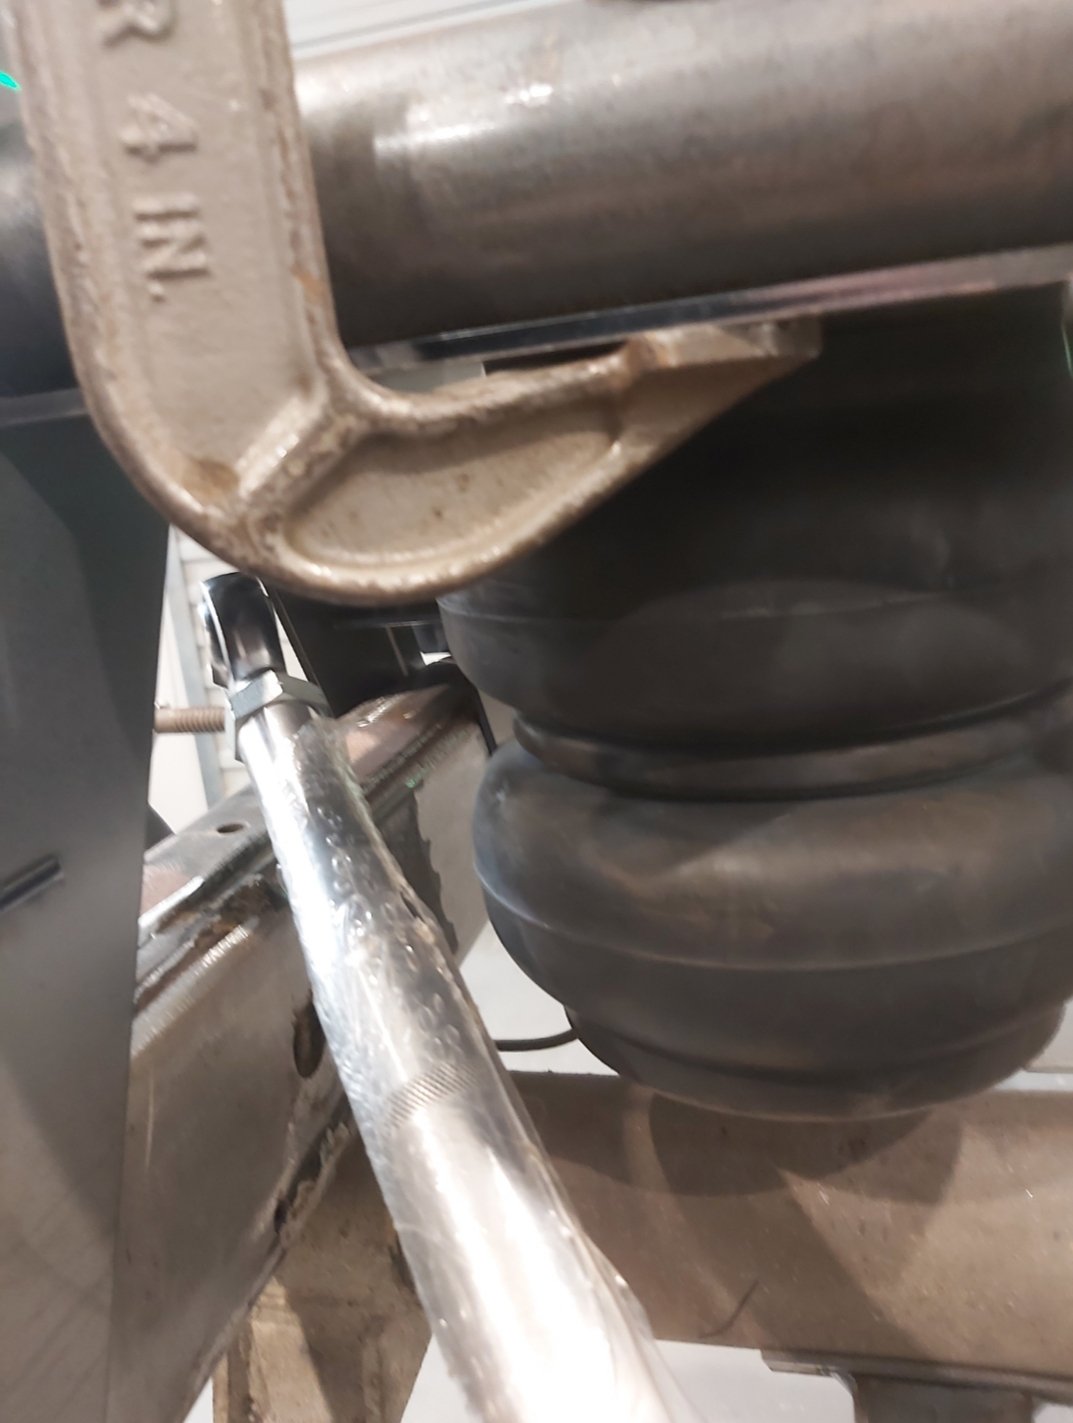
So you guys must be sick of c notch updates but for something that seems fairly simple. I wanted to make sure I do it right. So here (thanks to my neighbor Danny) the notch is hopefully set in the final place. I've been waiting for the two 6mm plates that slide on the bar and finish off the bag plate. I will be cutting the crossmember tubes shorter. =) Ive been waiting for everything to come together to check this space between chassis rail and top link. Thank god it seems to have ample clearance.
2 points
-
Haven’t done a heap, still waiting on structural repair report then we’ll be very swiftly into compliance. My warrant guy has a Val and a Charger street stock so had lots of parts, he hooked me up with a sway bar to test fit. (A sway bar was a tick-the-box option for these) The main mount brackets suit the K member profile great but the length wasn’t quite there. I work at Mount Shop, so had endless possibilities. I ended up with a Mitsi Challenger drop-link that I used a universal whiteline saddle clamp and D bush to clamp on the Radius rods.. they are bushed at the front and rigid at rear so plenty of support. Will drill holes and attach after compliance. Has since been blasted and painted, ignore my bundy long mock-up bolts. The seat upholstery kit finally arrived from Canada on Tuesday so got straight into that this weekend. Everywhere in the states is backorder only and could be years, one place had a front set but no promise of me finding a matching rear so I found PG classics in Canada..they were the k my company to list a SET and only in one style. I just had to jump on it and I’m glad I did. It’s very well made with heavy vinyl and foam padded ‘inserts’. The rear seat base was real legit,the only one.. but green. Easy strip down.. dad was going to send his hog ring pliers up but hasnt so far, so I pulled all the originals out, straightened and re-used with a series of different pliers. Was a tiny bit baggy but I’ll live with it, can always re-visit down the line.. I also used up all my padding so.. The back was wasted, filled with vermin nests and wasn’t going to cut it. Ended up binning all the padding and making my own from foam sheet and a douvet cover folded in 3rds. The front covers slipped on great but the edges were baggy and the whole feel was off so I dug out a big chunk of Auto carpet underlay I was saving and went to it. Worked so well! The foam wasn’t too bad but I added material to some low spots, made some 80’s ‘shoulder pads’ and glued underlay over the whole surface. Then today the sun came out so reversed out the shed and wound the windows up and let ‘er cook so it can ease out creases and such, worked well but needs more time. I’m super stoked, they are comfy AF and look so much better as-is and I know it will improve after a few heat cycles and some use!2 points
-
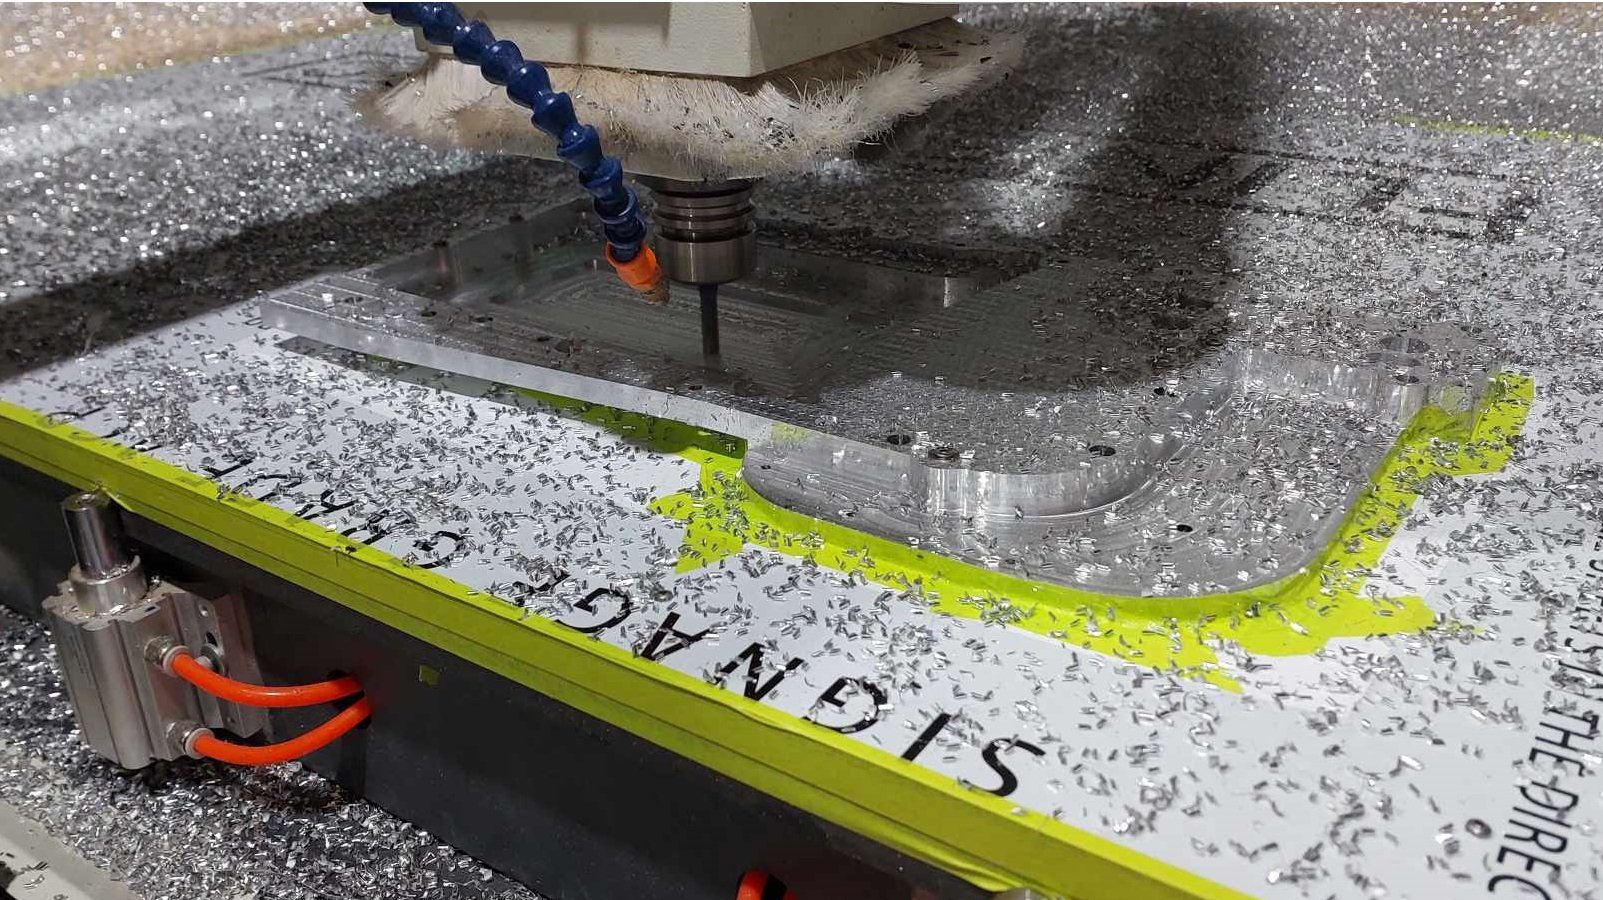
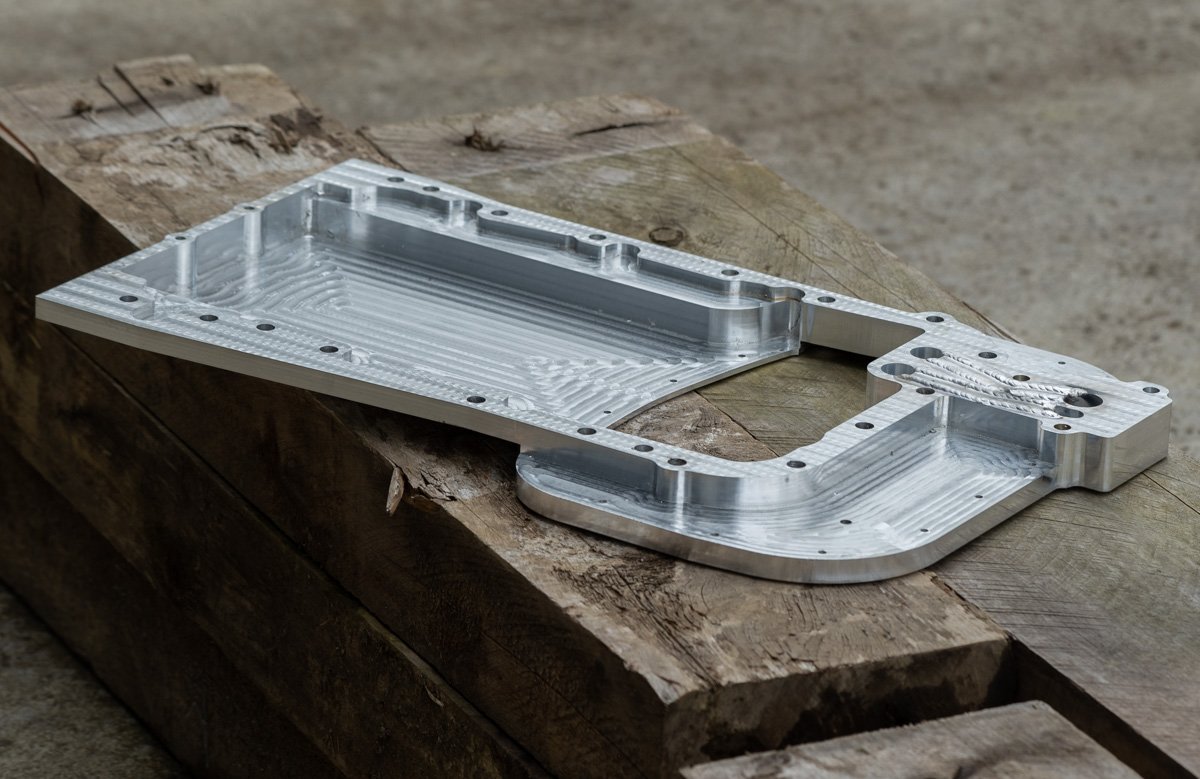
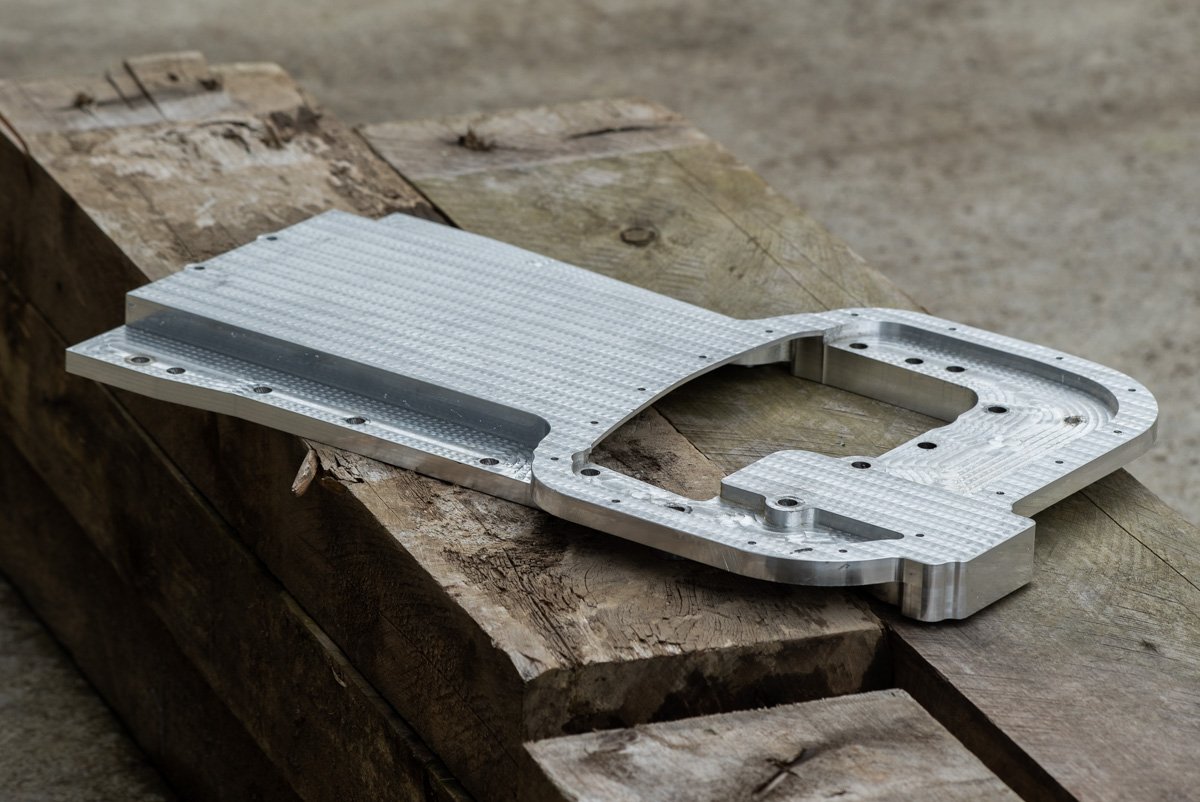
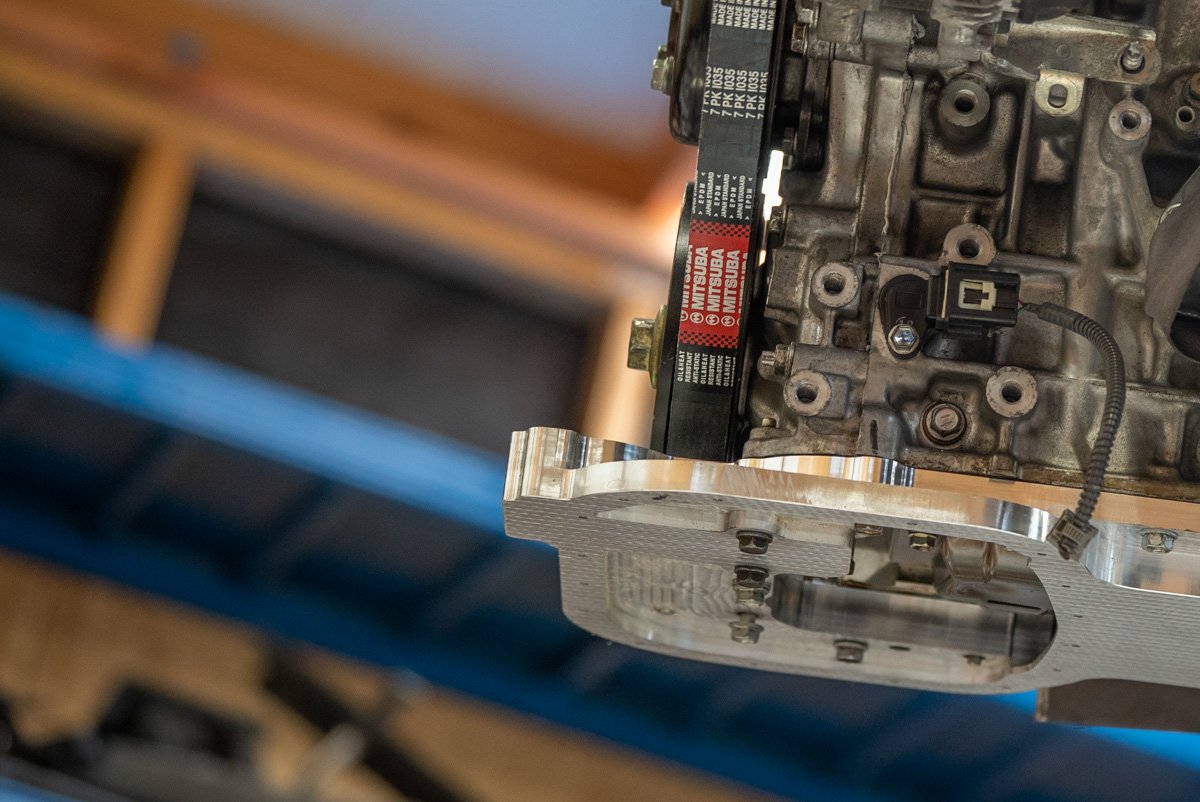
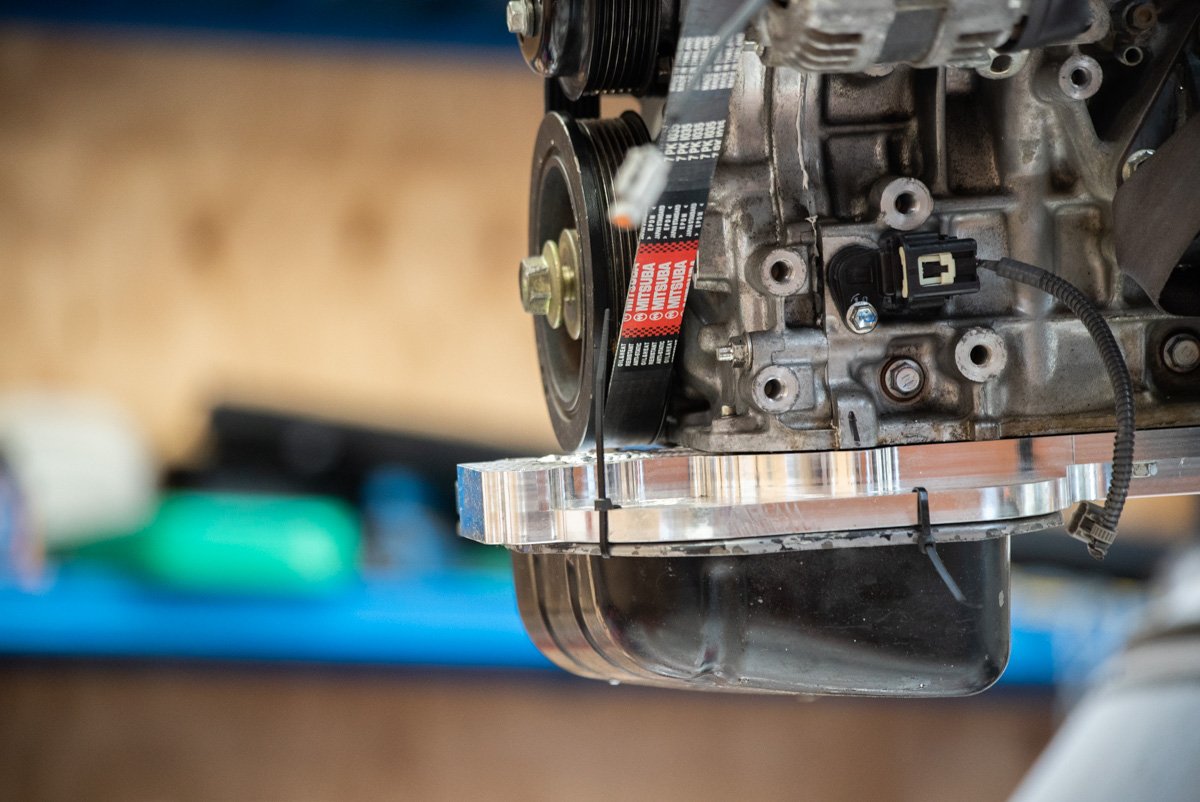
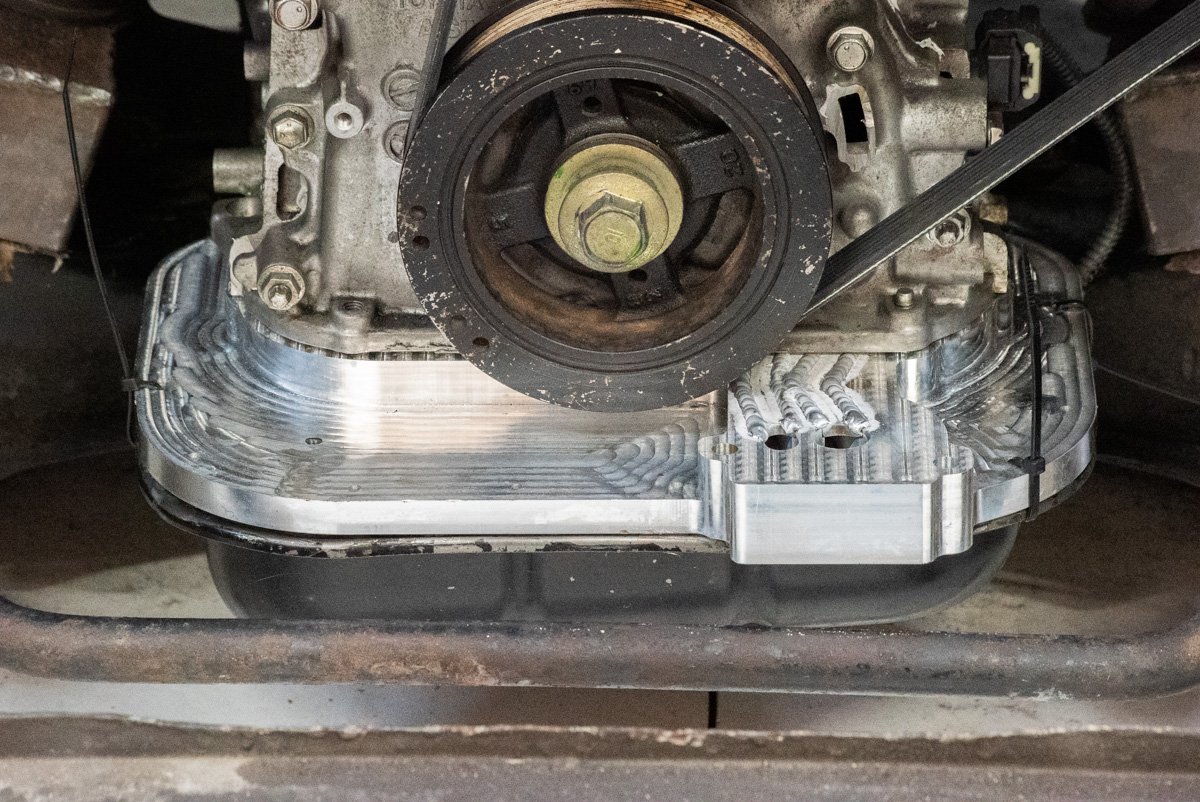
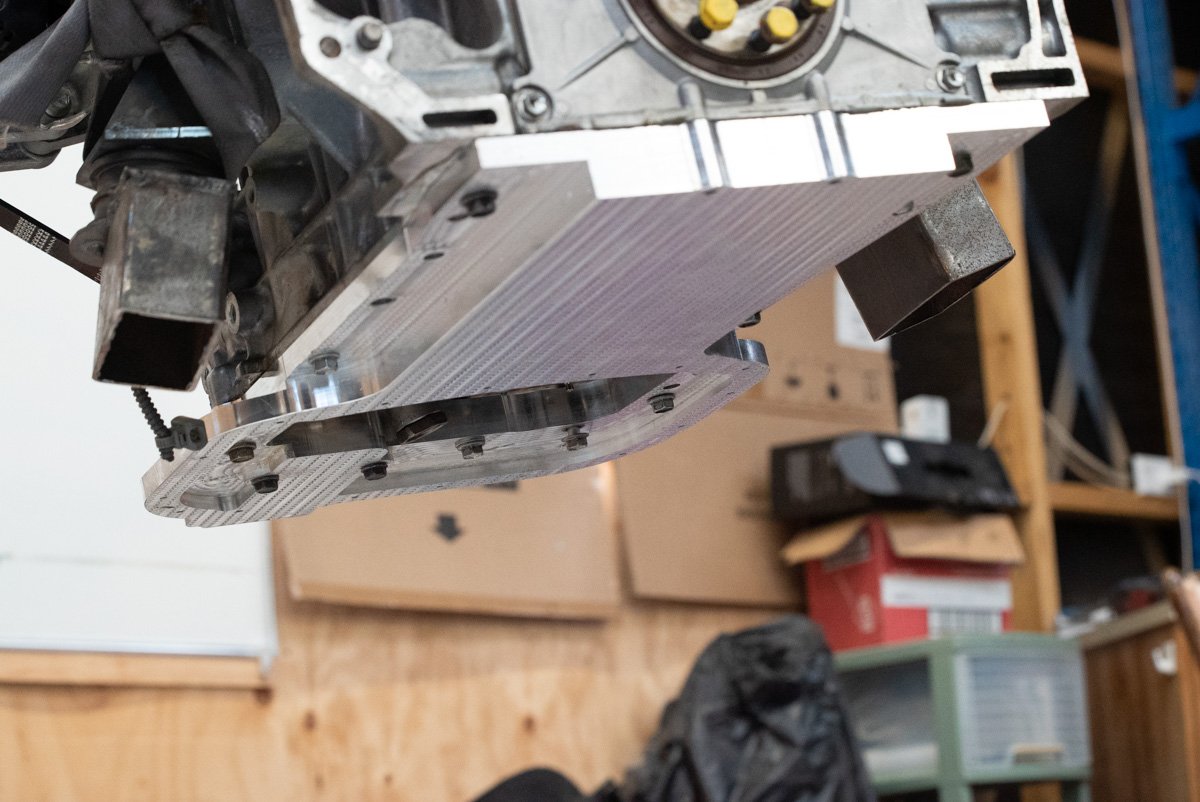
Oil pan activities! Absolute GCs @Stu and his workmate Sam found some time in their incredibly busy schedule. To spend a night programming some cutting paths and cutting a big slab of alloy down into an oil pan. I went along to watch and learn some things and it was awesome. Firstly, start out with a 22kg block of 32mm thick alloy plate. Then align this onto the bed of the router, and the it gets sorta vacuum sealed against the bed. Then one side was machined, making an absolutely hectic amount of mess. Then it was flipped over, and a a template was cut to align it onto the bed again. Making zillions of glitter carving out the other side. Then once it was all cut, we are down to around 1.8kg from 22. So there were plenty of chips for me to sweep up, haha. we needed to look at drilling the oil galleries for the filter, that I mentioned a few posts ago. Problem - the depth needed was too long for any available tooling and the height of the machines etc. So we decided to mill two slots in, and then weld a cover plate over the top. We made the slots do a bit of a zig zag, so that they would avoid one of the threaded holes for the oil filter housing. Which previously penetrated through into the oil gallery as there was no other way. Then Stu on the tig to zip it all back up: Then ready for a test fit. How good! (It still needs the welds flattened off and some threads tapped, havent done this yet) Much to my relief, it fits up great. Just zip tieing the oil pan on for now, until I can tap the holes. and back in the car... everything good! So that's one of the last remaining big tasks mostly sorted. And a big relief that it looks like everything is going to work as expected. Hugely grateful for the time spent by Stu and Sam to help get this done. I think its the most complex and coolest car related thing I've ever drawn up. Next steps are to thread a few holes for the oil pan and oil filter, flatten off the welds, and make an oil pickup. then I can fit it on for good, and fill the motor up with oil. Getting closer! Exciting.
2 points
-
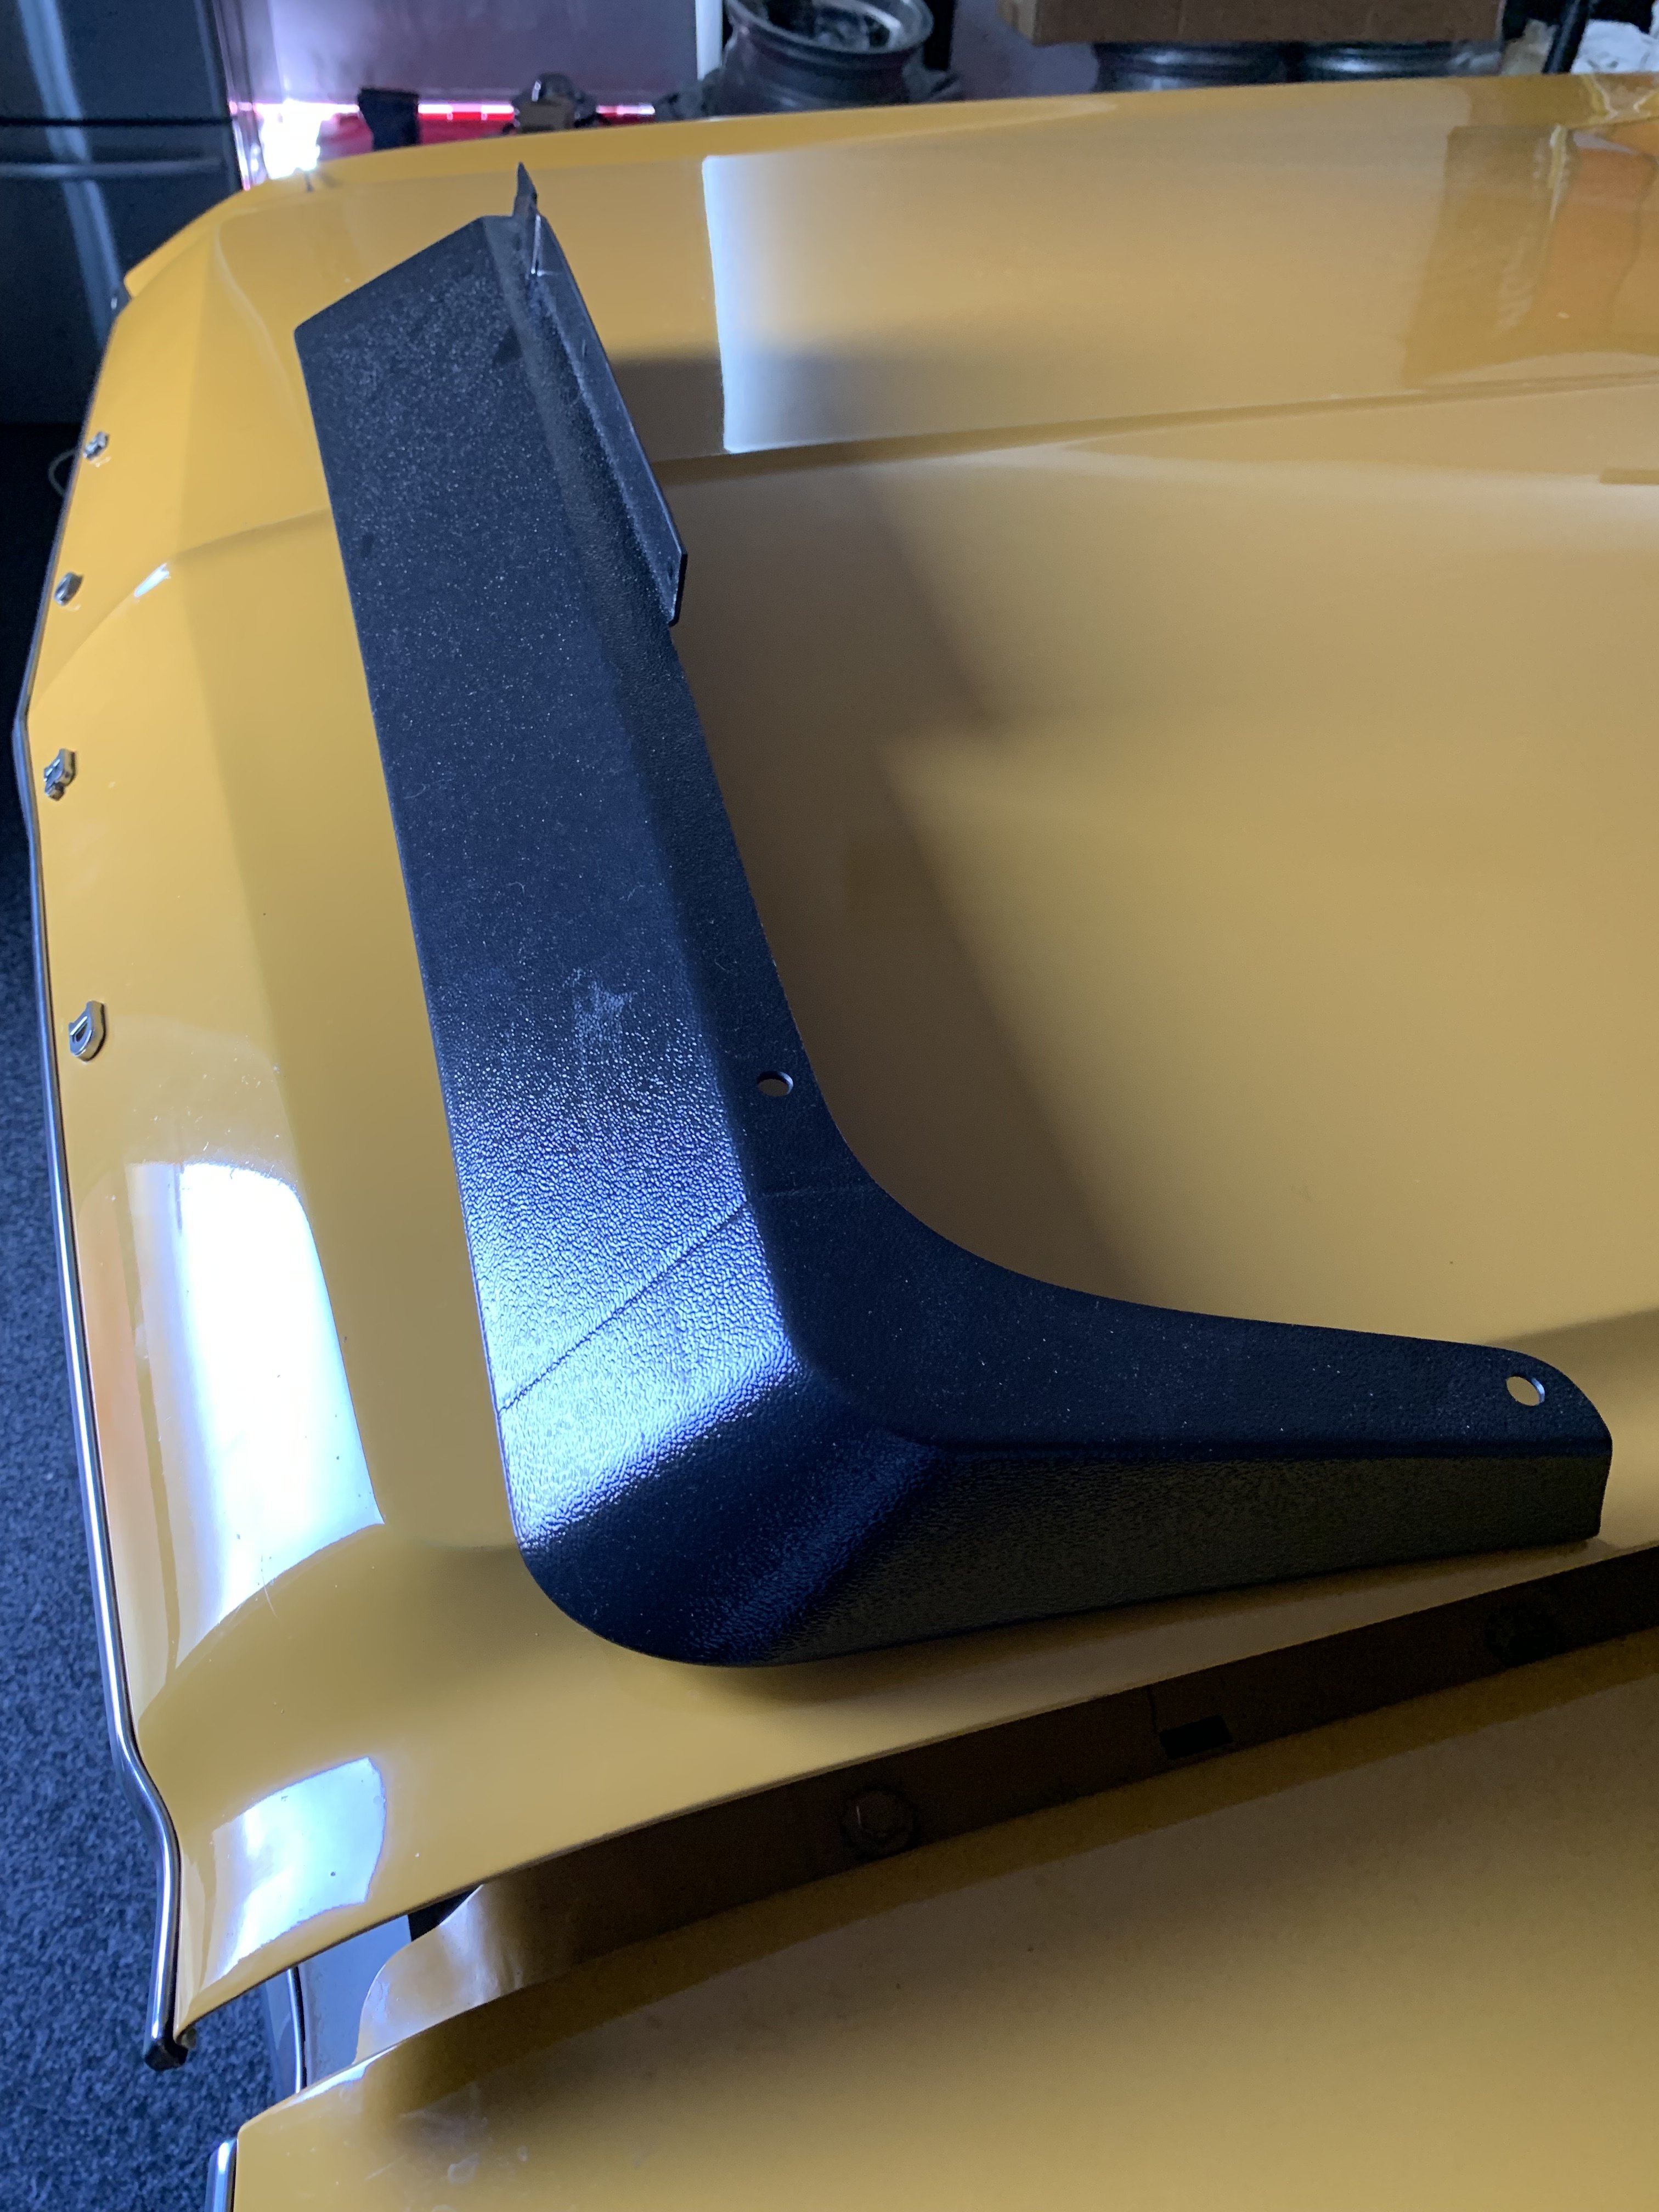
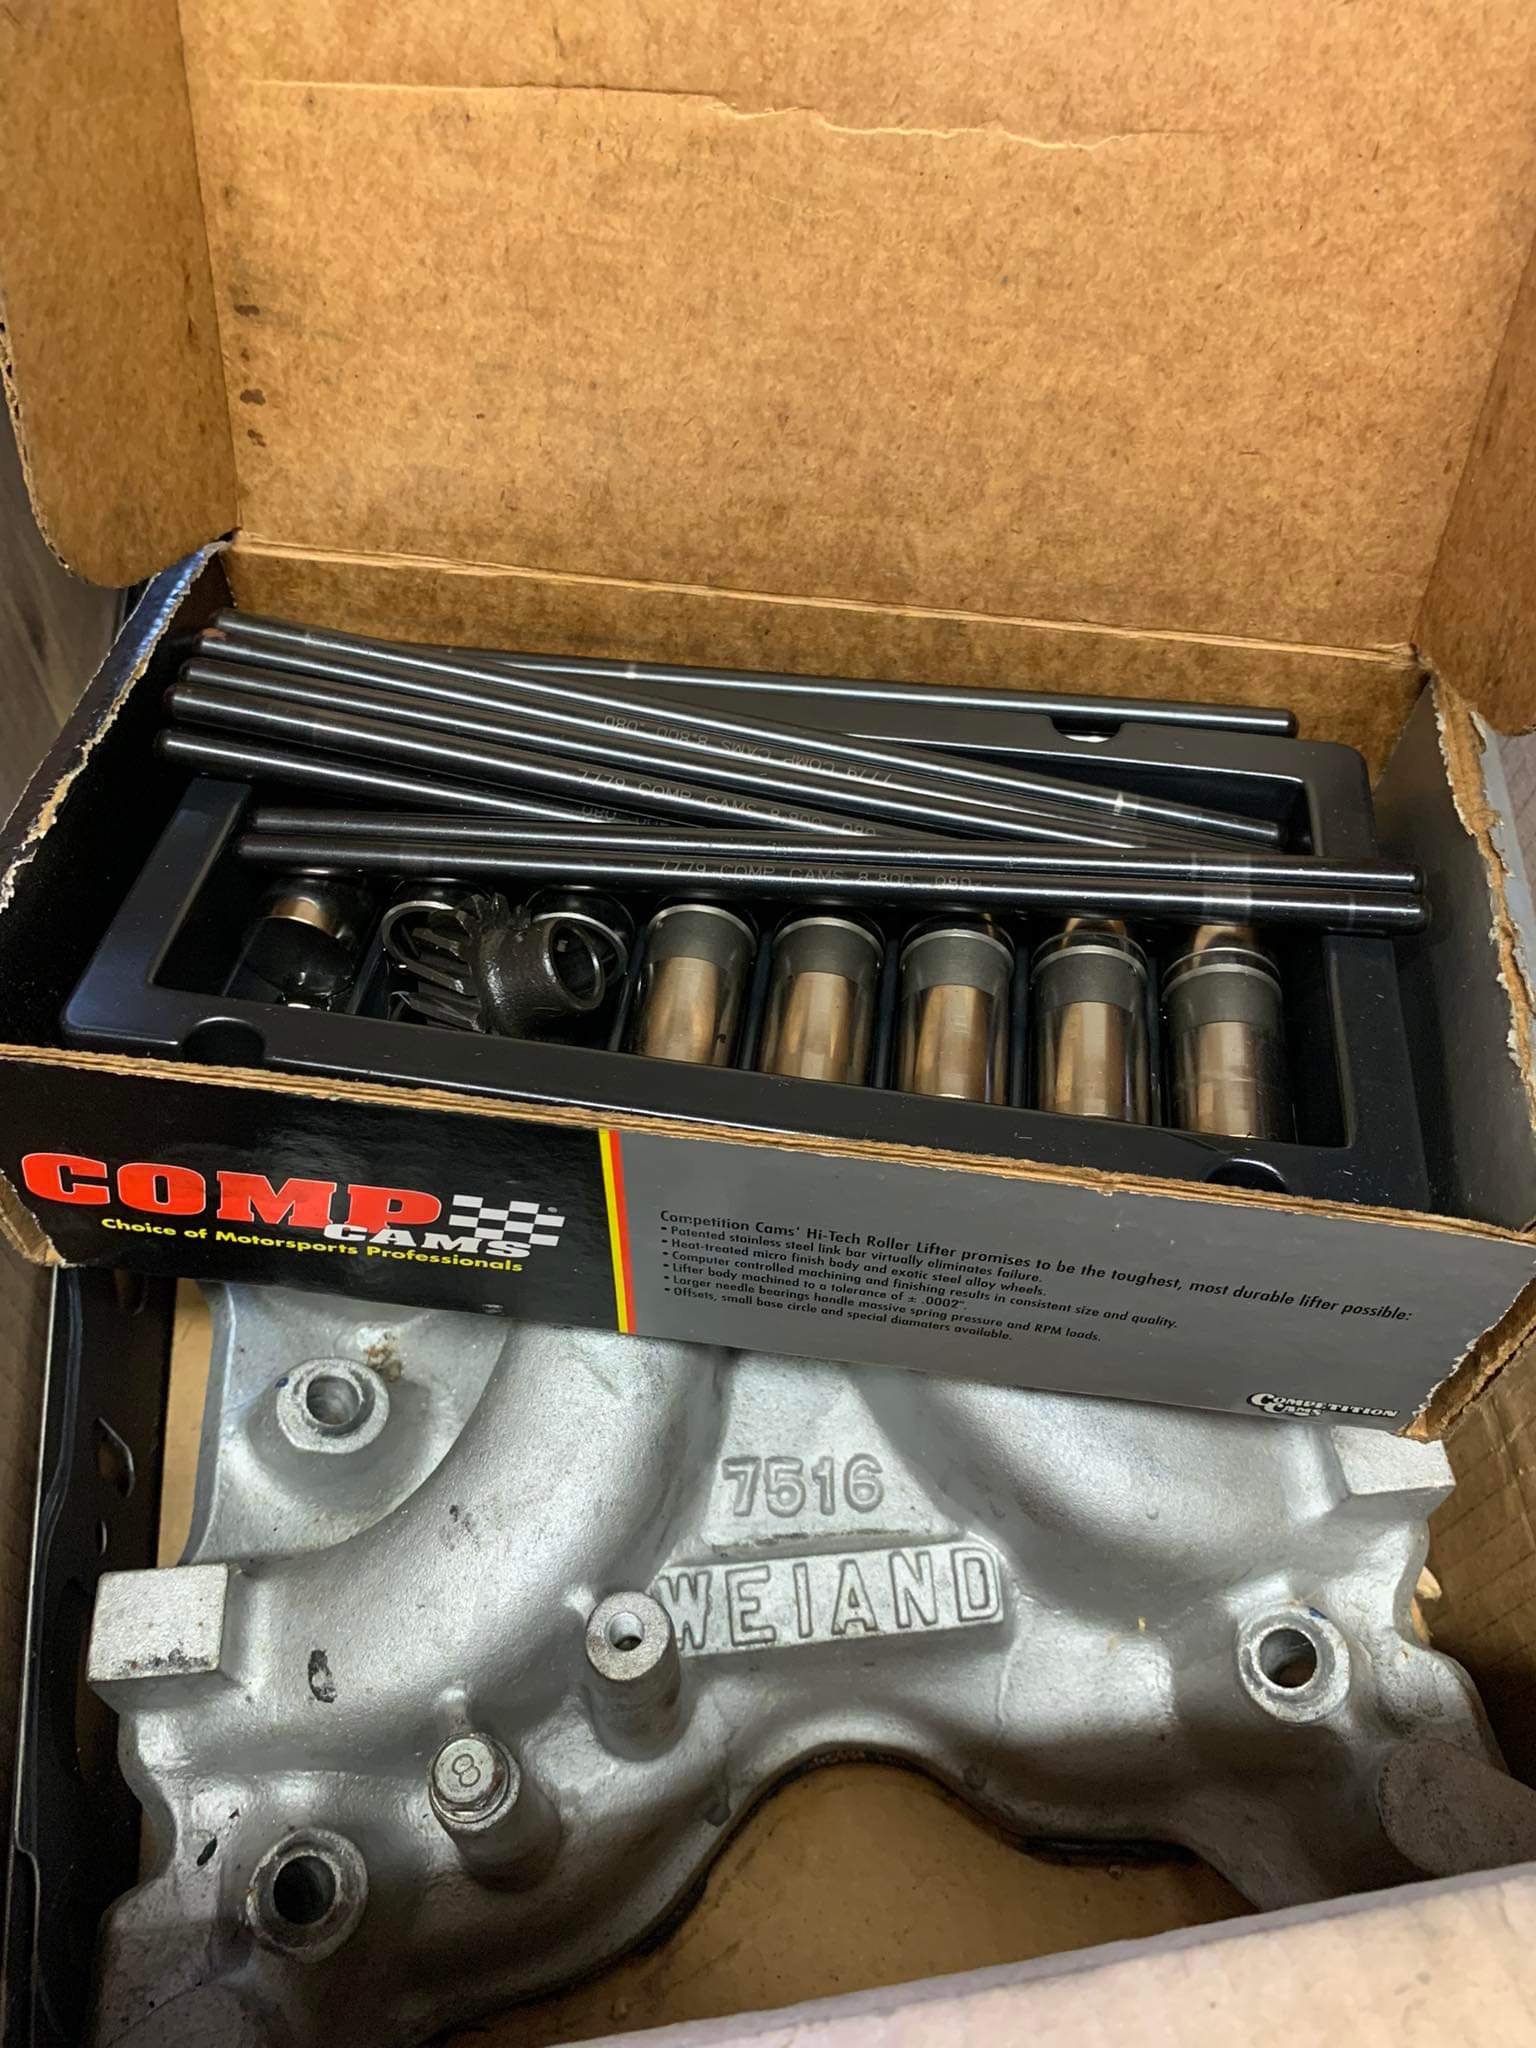
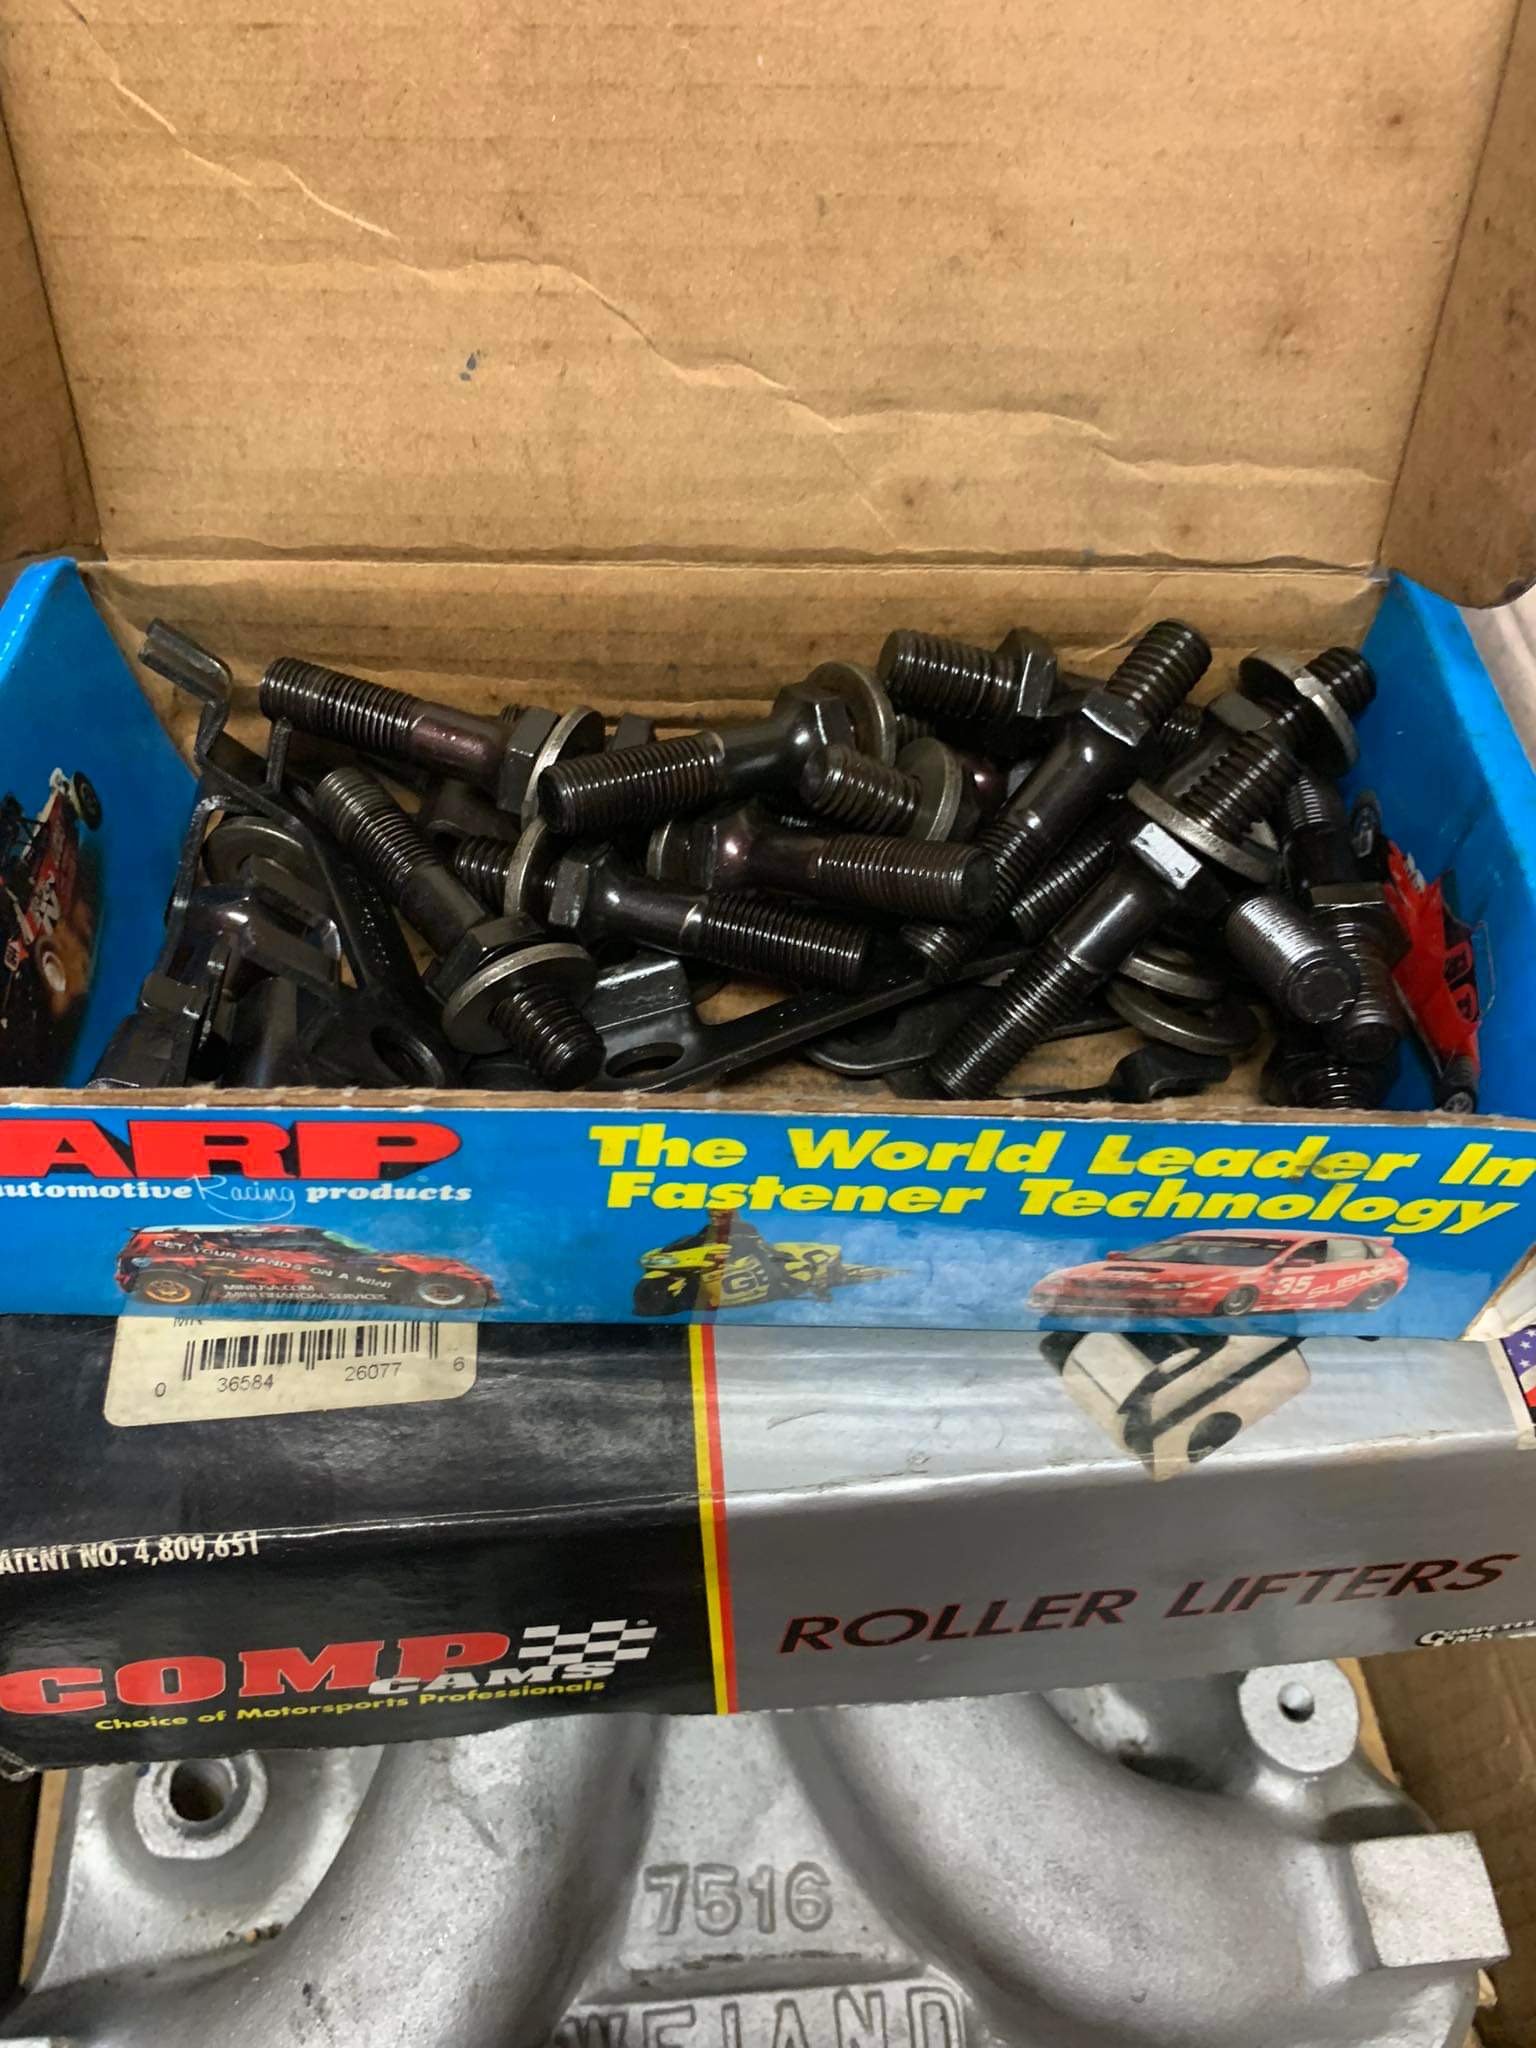
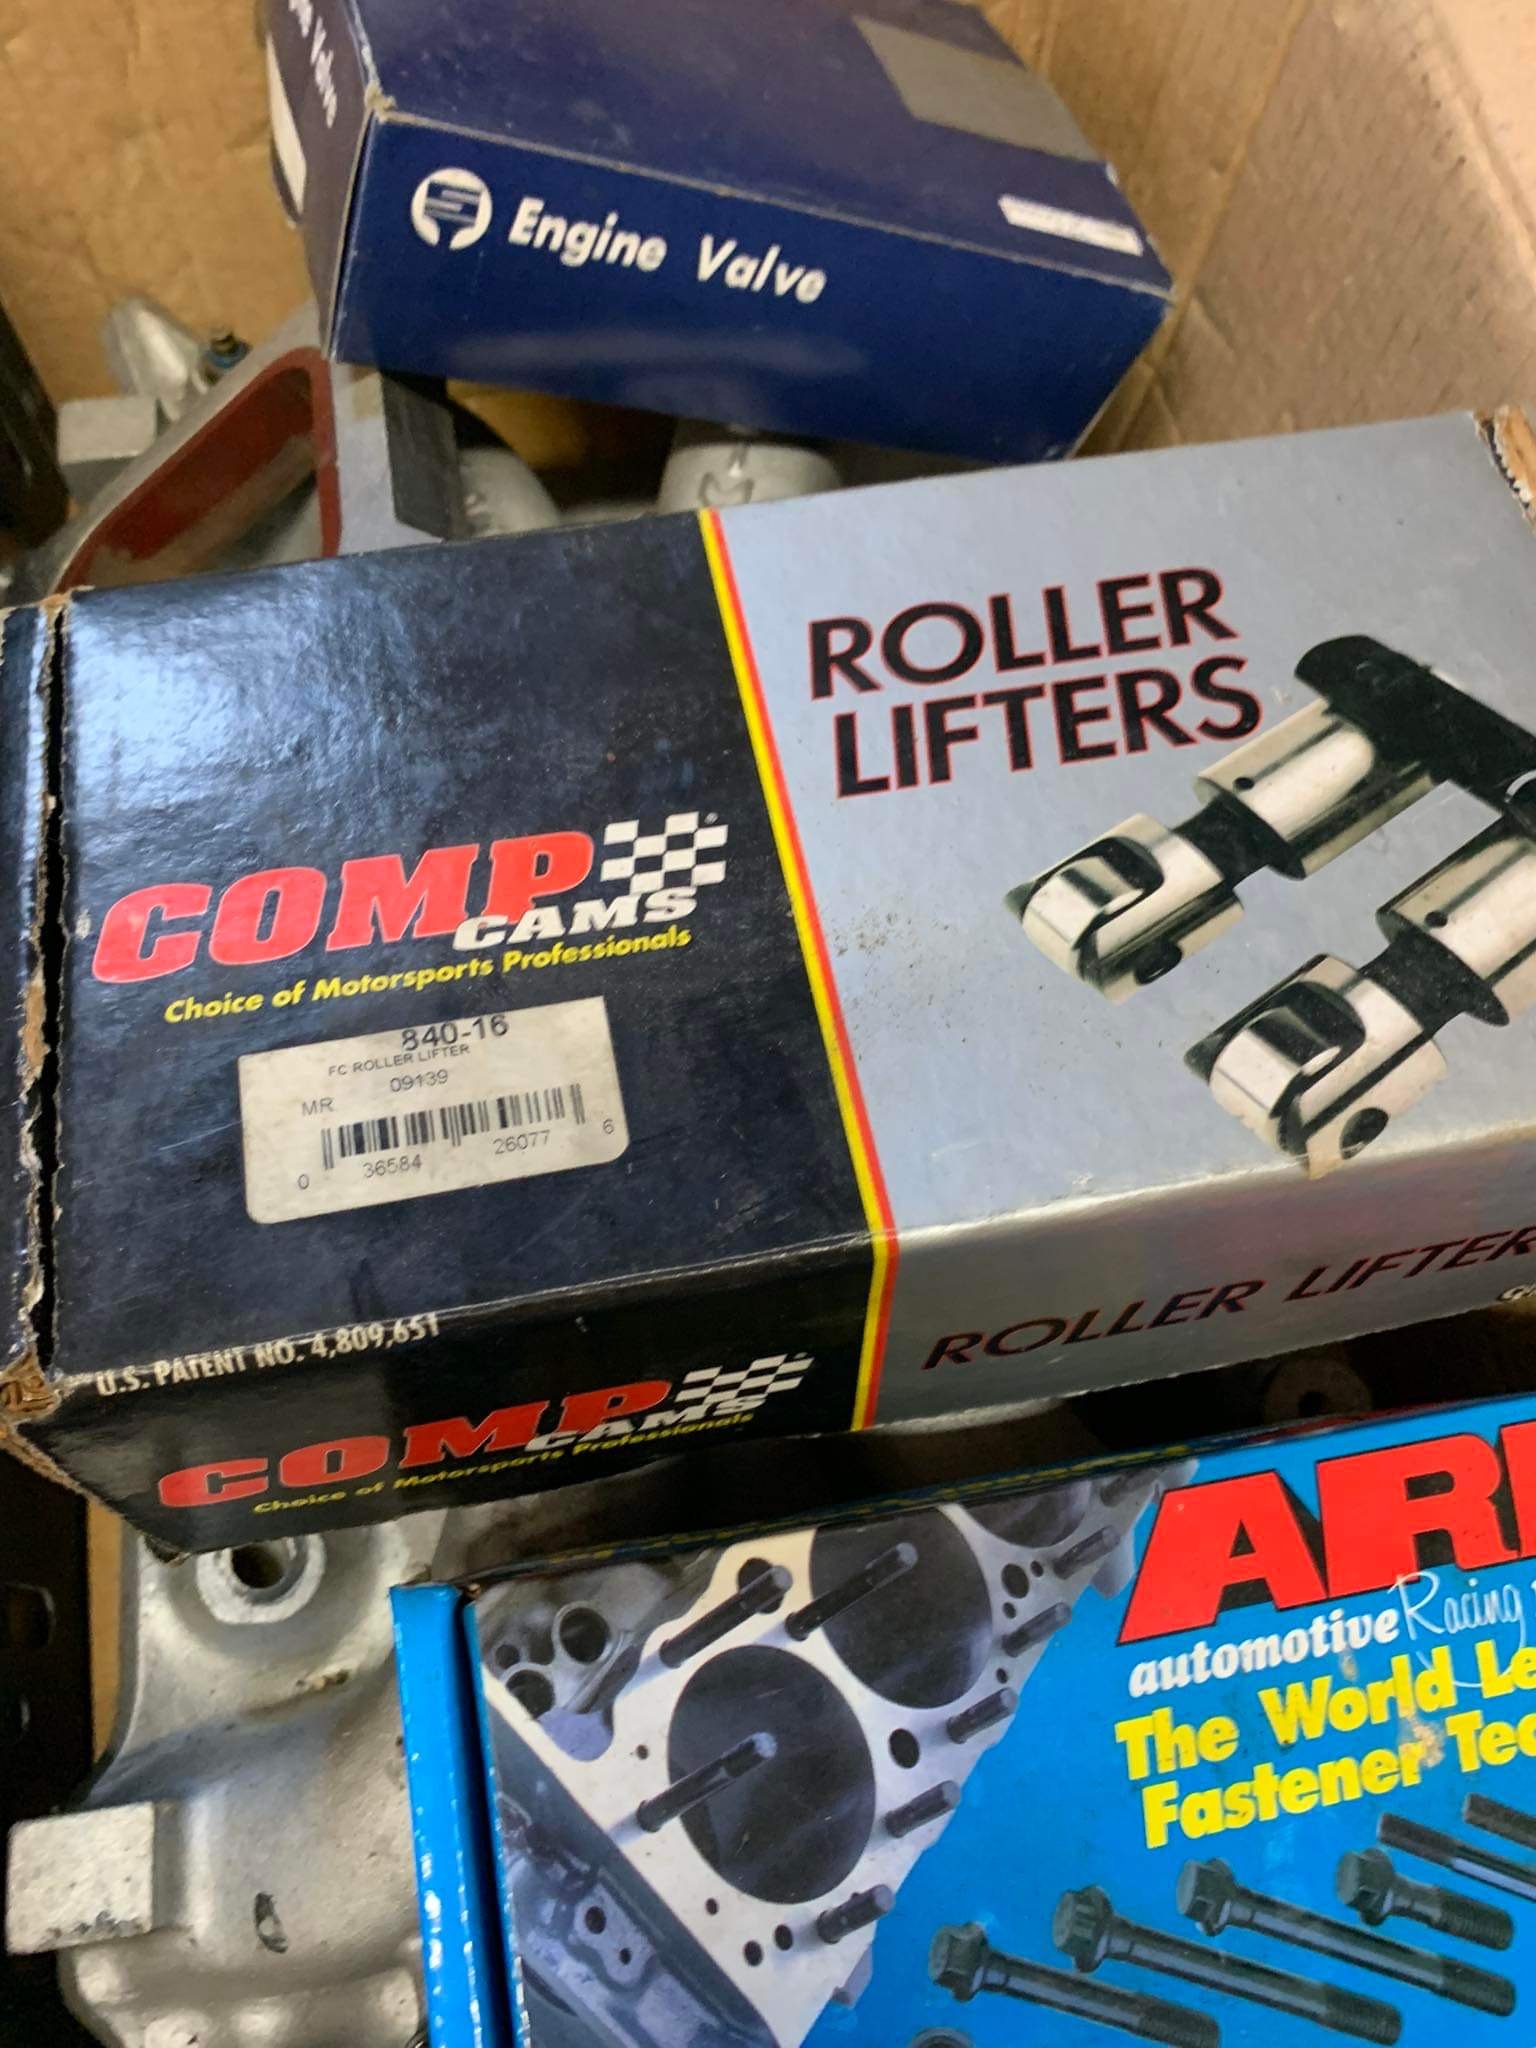
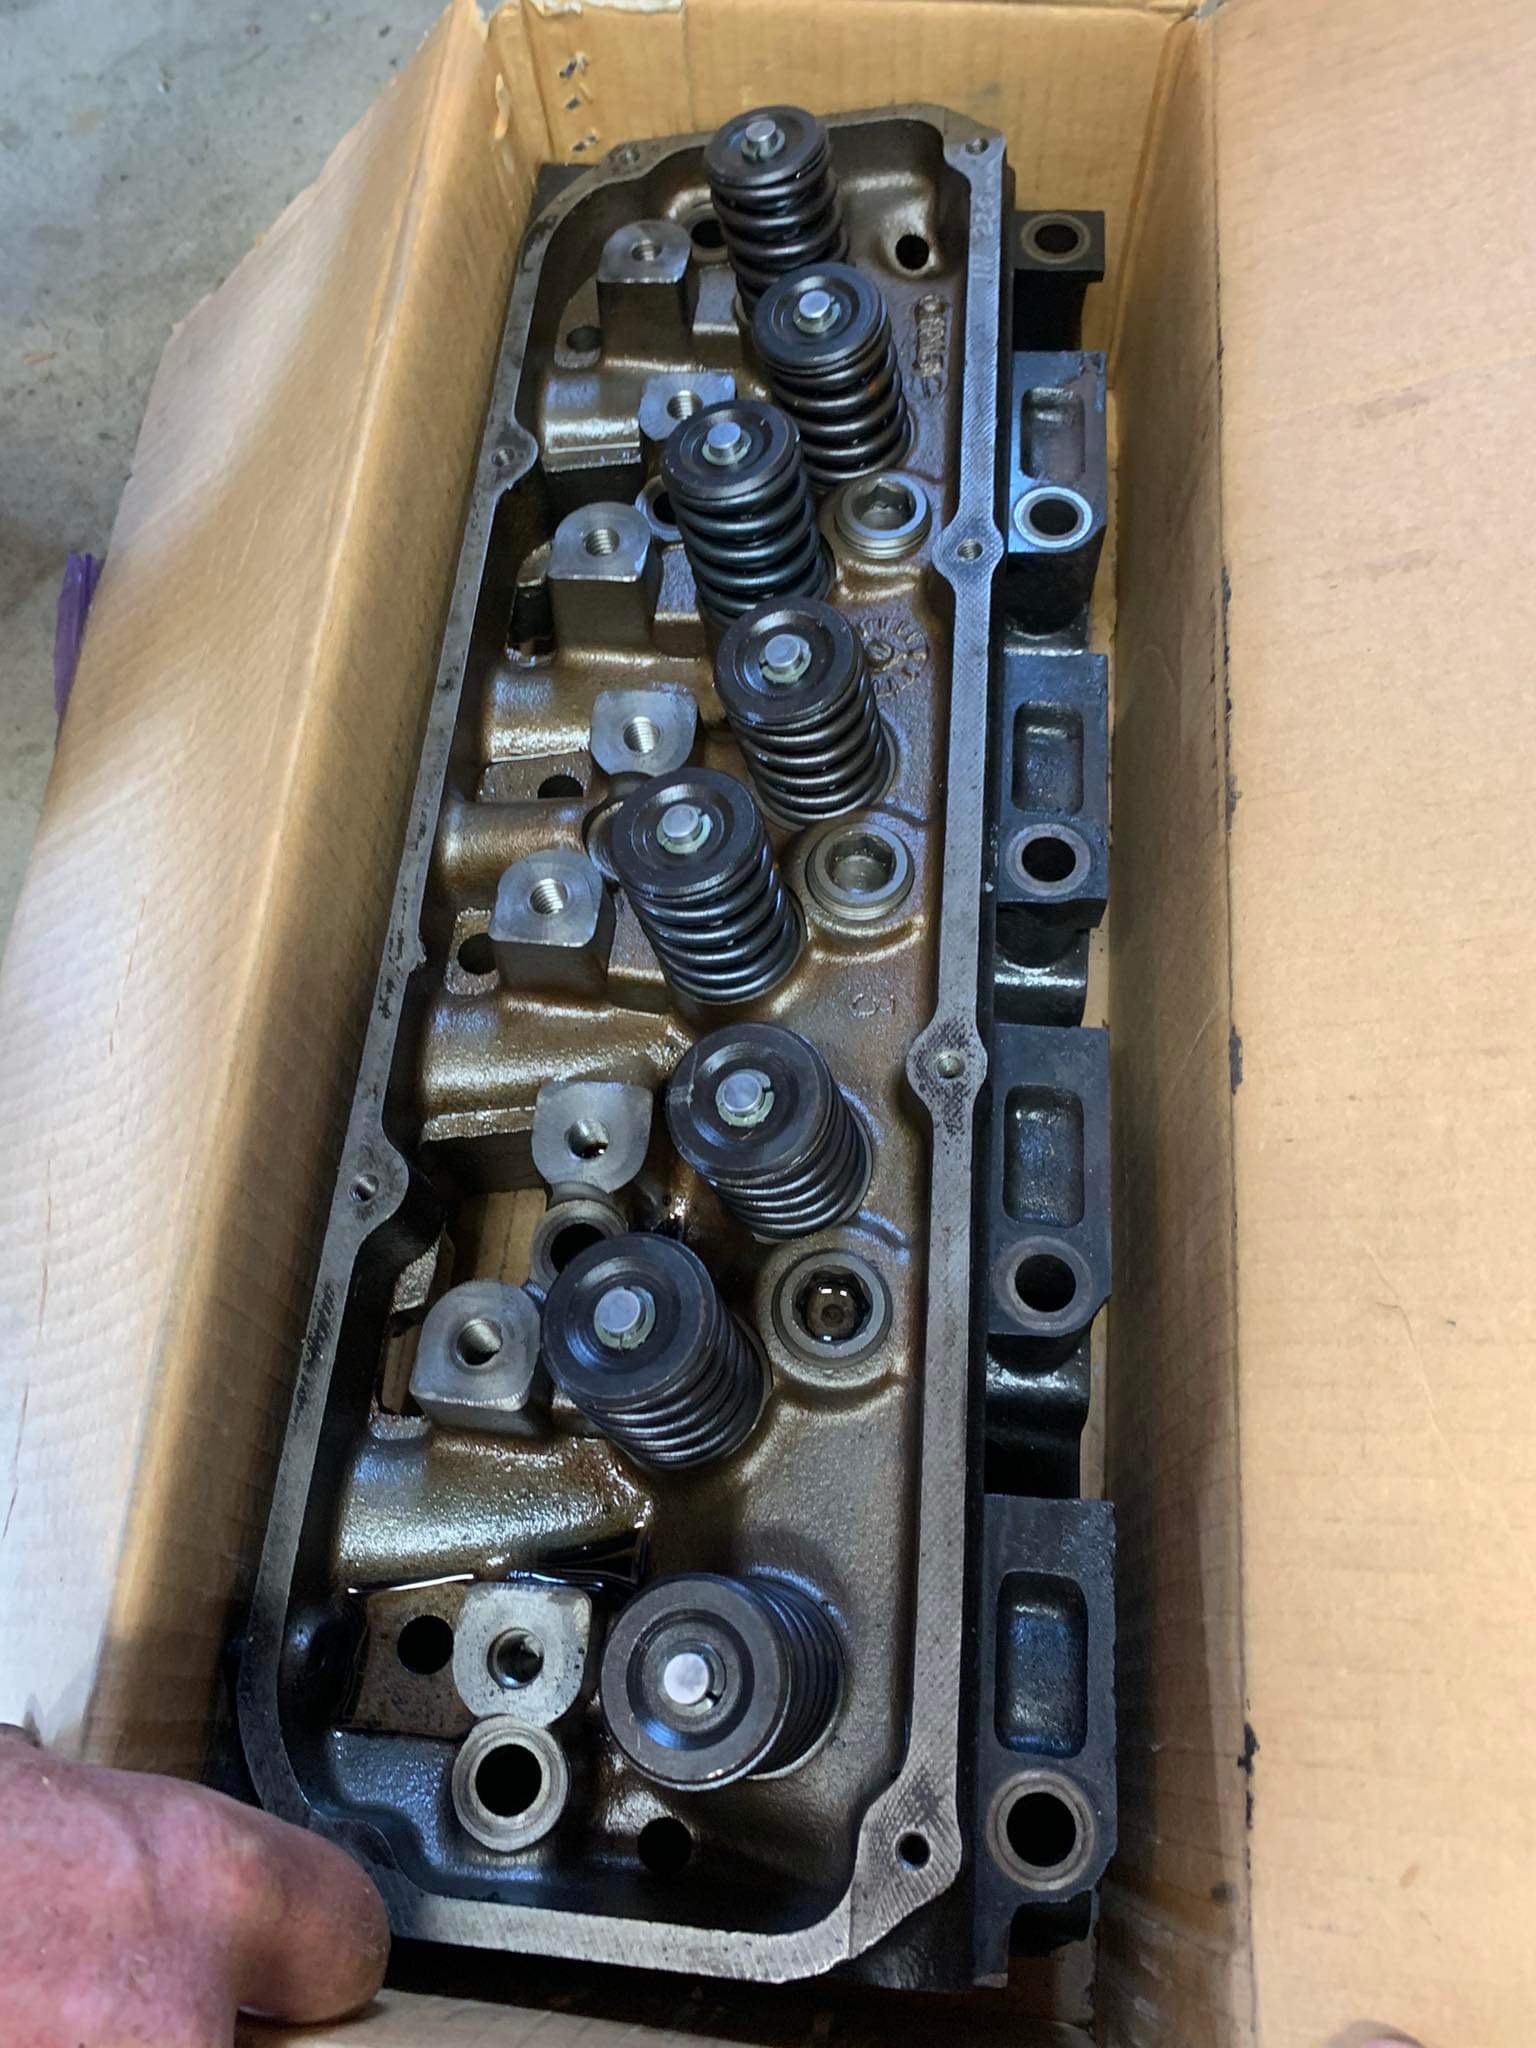
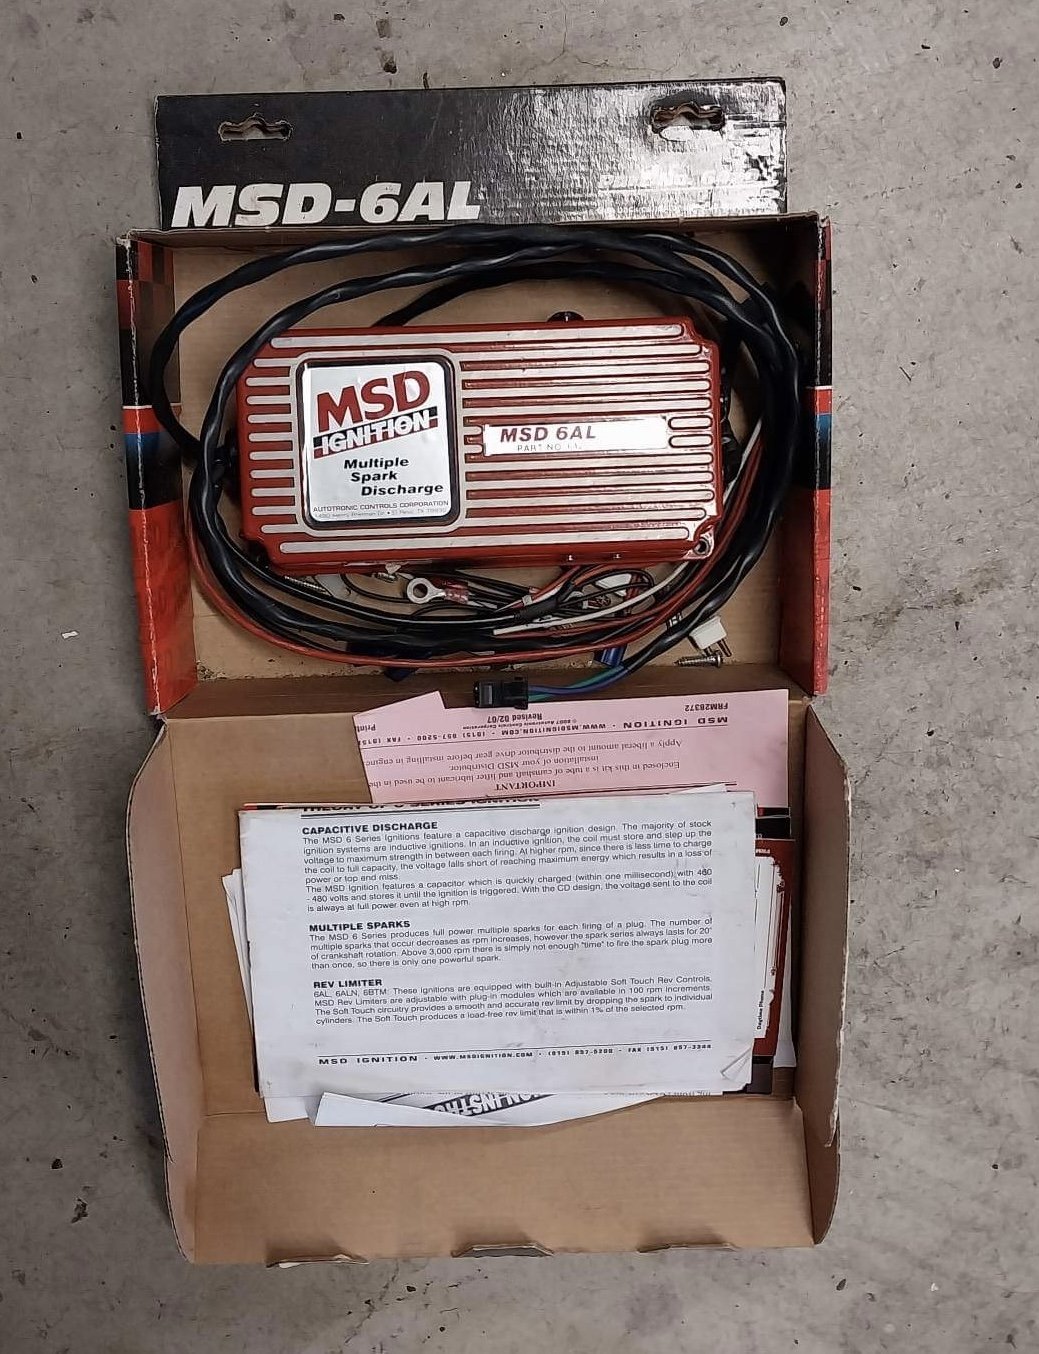
It's official - motor, trans, rad and exhaust has been now sold with pick up in Sept. I have put a deposit on a 351c in parts, so bring on the next phase (excuse the distant pun). This set up comes with $5K plus of receipts for parts and engine work and was removed due to a 393 crate motor. 351c block 2v closed chamber heads with 4v 220m intake valves, upgraded springs etc Weiand 7516 intake mani port-matched to the heads ARP bolts Comp fuel pump New MSD ignition Plus loads of other cool bits as he is having a clear out. I'm hoping to buy his 2 x 9" LSD heads and axles too. I also just ordered a new lower lip as seen in the last pic on that cool Falcon (not mine) Did I mention that it's now 4 speed top loader time...well, when I can afford one that is haha.
2 points
-
So let's give this story a real good shot with some context. Otherwise we look like a couple idiots.... Which isn't inaccurate, but not the whole story. A million years ago, Mr Keltik Snr decided he needed a hobby to melt away the stresses of the working week and chose sailing. He did all the appropriate study, got his dayskipper, yacht master and ocean master certificates. Bought a 28ft 1970s boat and made all the mistakes on it over a few years of sailing the shit cold brown waters of the Bristol Channel/Irish sea around Wales. Before eventually slamming down the credit card at the 1999 London boat show and buying a brand new Beneteau 31.7 Damn that was a nice boat. Anyways, a few years later we sold everything and moved to NZ. Naturally the old boy was going to need another boat so ordered something a bit bigger, a Bavaria 38. Selling your business, house and cars then moving to a country where the exchange rate triples your money allows such luxuries. We lived in Ohope at the time, dad specifically picked that house so he could park his new boat in the harbour 50 meters away. He bought a mooring and spent a few days with a fish finder in a dinghy charting the entrance to Ohiwa harbour as there are no channel marks or leading lights to follow. The yacht got delivered to the viaduct basin from Germany, final installation of all the electrical accessories and engine etc were done and we all went out on the sea trials. One week after it was signed off, we started the delivery trip. The first leg from Westhaven to Whitianga went pretty well. Second leg to Tauranga was easy and the third leg to Whakatane was a bit stressful crossing the river bar but went ok. We had planned to do the final trip over to Ohiwa the next day but the wind had picked up and there was a bit of a storm due to come through so we postponed for a week. The following weekend, we did the short trip over to Ohiwa. There was still a bit of a swell but it seemed manageable. Coming in through the entrance we had the dinghy towed behind in case we wanted to take it to scout ahead. Half way into the entrance, it was getting a bit shallow. There wasn't deep water where it was supposed to be. So while maneuvering about trying to find the channel, the keel touched the bottom. Before we could do much about it, a wave picked up the boat and gently dropped it down a bit further into the shallows. As dad tried to free the boat, a medium sized wave came through, picked us up and dropped the boat a little further into the sand. Having a thin lead fin style keel, it just speared itself into the sand and we were stuck. Whilst trying to figure out the next move, a few more rollers came in and knocked the boat sideways. In the trough of each wave, the propeller was getting out of the water. Then on the crest of the next wave - with full power to the engine, we were free! The bilge pump clicked on... Not usually a good sign. "Take the wheel son, give it full power back out to sea". I pointed the boat back out the entrance as dad went below to check for damage. I will never forget the look on his face as he lifted the floorboards in the cabin and stared through the multiple 6x18inch holes where the keel bolts used to be at the sea floor going past. He attempted to block the holes with the seat squabs or anything to hand but it all got sucked out into the sea as the boat rolled around. He made a mayday call then shouted at me to keep the engine at full power. The throttle was pinned... But now the water level in the engine bay was up to the air filter. The diesel slowly died. We all sat there in silence. Put on lifejackets. Grabbed some floaty stuff to hang onto and prepared to get into the dinghy... Which was gone. All that was left was a frayed piece of rope. I guess the propeller ate it and the dinghy noped itself out of there. So we stayed with the boat untill we just swam away from the cockpit. Some nice chap in a fishing boat heard the mayday and picked us up within 10 mins of being in the water. He dropped us off at the Ohope wharf and we walked the couple hundred meters home. Later that day, we hopped in the car and drove around to Ohiwa to find the yacht washed up onto the beach. The deck was split off from the hull, splintered fiberglass and damage everywhere. Dad called the insurance company and they were going to send some people to start the salvage operation. While we waited, we climbed into the boat and made a start on taking the mast and rigging down. The insurance assessor turned up just as we were unloading the fridge full of beer. A slightly suspicious look. A few hours later, 2 excavators arrived on the beach and set up a sling between their booms then carried the hull off the beach and loaded it onto a lowboy. Once the dust had settled, dad had to pay his $500 insurance excess and got paid out as a total loss. Not even 2 weeks from delivery to write off. Then after a respectful mourning period he bought another one and we all lived happily ever after.2 points
-
Thanks for the advice. I'm just pissed off i was reassured before bidding that it would be fine with a sandblast and underseal, and then once i won it they started coming back saying its $$$$$++++ instead, without anyone actually looking at it and me having to take their word for it. Regardless, from what I'm hearing it sounds like NZTA is being a nightmare with rust, especially if its been flagged (which it has), so have rejected the car and sending it back to auction in japan. Absolutely gutted, but it is what it is.1 point
-
Yeah im running 9psi on the wastegate, so cant drop boost. Ideally with diesel you can run no WG, and just control boost with fuel. I can turn the fuel down and keep the egts lower, but it makes it loose its punch in mid range and coming onto boost. I love the way the turbo deez pump works, its a work of art, even with my limited understanding, but the fuel pin and the way it kinda works like a cam and can be both rotated and, and the response spring can be adjusted is pretty cool. Im running an Innovate EGT gauge, which is set to flash at 630 deg, but to be fair from testing the engine doesnt make much power over 550 to 580 deg C preturbo. Im running a water to air ic under the drivers seat, tried a front mount but there was zero way to get pipes forward and back, i did have some temp sensors but never set them up properly to monitor the efficiency of the ic, with regards to intake air temp, and water temps in and out. Had someone try tell me i was running it too lean a while ago, and adding heat, which is the opposite with a turbo diesel. Turning down fuel with high egt is the best option, leave as much air going through as required to keep the combustion cooler. The engine is very inefficient, its a non cross flow R2 2.2, based off a petrol engine originally and only 10 bolt head, so cant take any serious boost. Ive killed a head gasket by freeboosting to 15psi, it didnt like it at all. The GFB one is fine, but the egt looks like its only a gauge function, and doesnt affect the solenoid control of the boost? Ulitmately, its a poor choice of engine, but its what i got, and its 4wd, which id like to keep, so changing engine would prob mean a new GB, and other issues. Kia makes a 2900crdi engine in a small truck based off the Bongo chassis, this would be a good option if could find one in good enough condition, but would mean loosing 4wd. Its independant front axle tho, so just a matter of removing front diff and alxes from CV's.1 point
-
Shhhhh don't look at it It will be leaking from the rusted out seam in the cowl. V.lame to weld up1 point
-
Wow. Your brother brought an old car, it needs repairs. Who knew?1 point
-
Since ive been digging around the hell hole that is entry certification, here's the acid wash deets https://www.repaircert.nz/media/2022/10/Technical-Bulletin_02-2022_Acid-Wash.pdf1 point
-
1 point
-
That's looking epic. Love the sheetmetal work.1 point
-
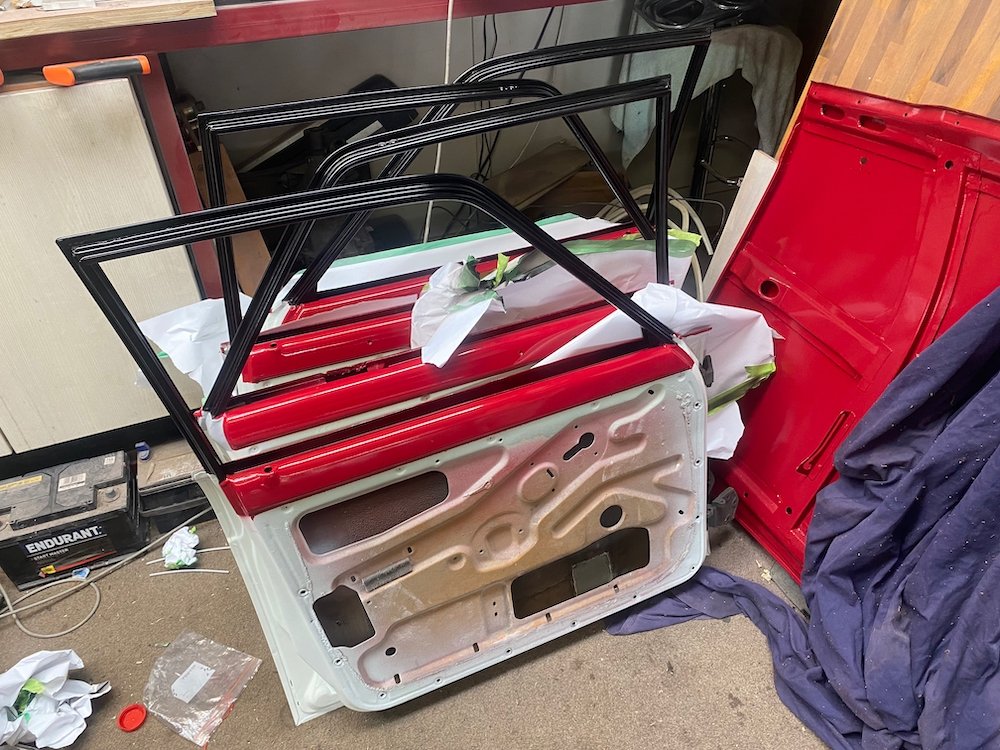
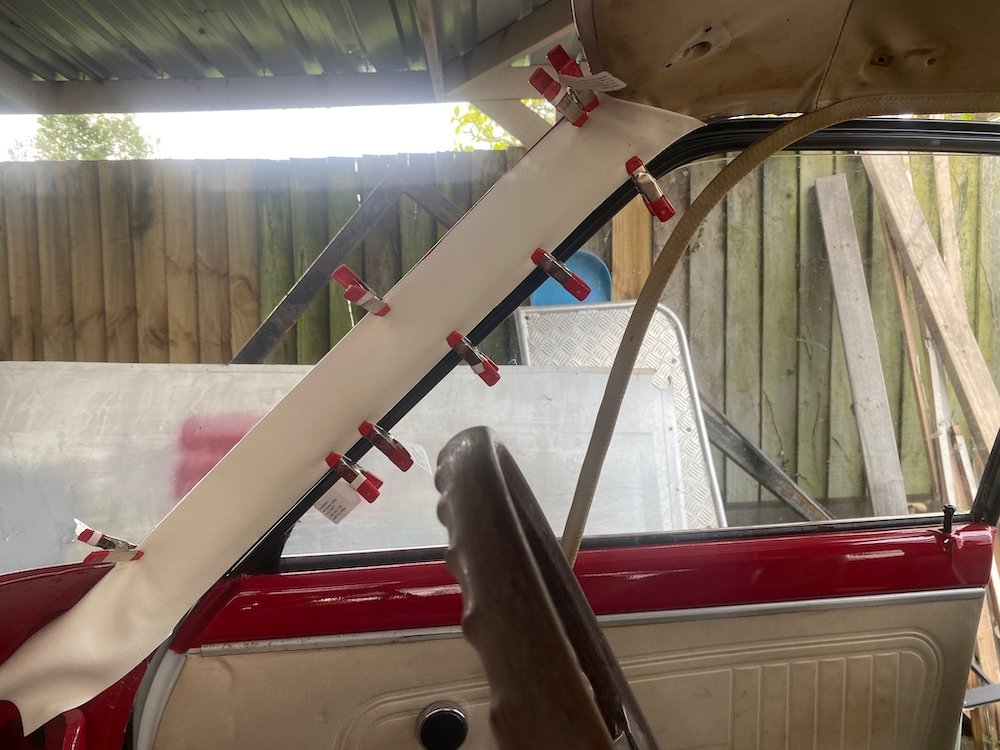
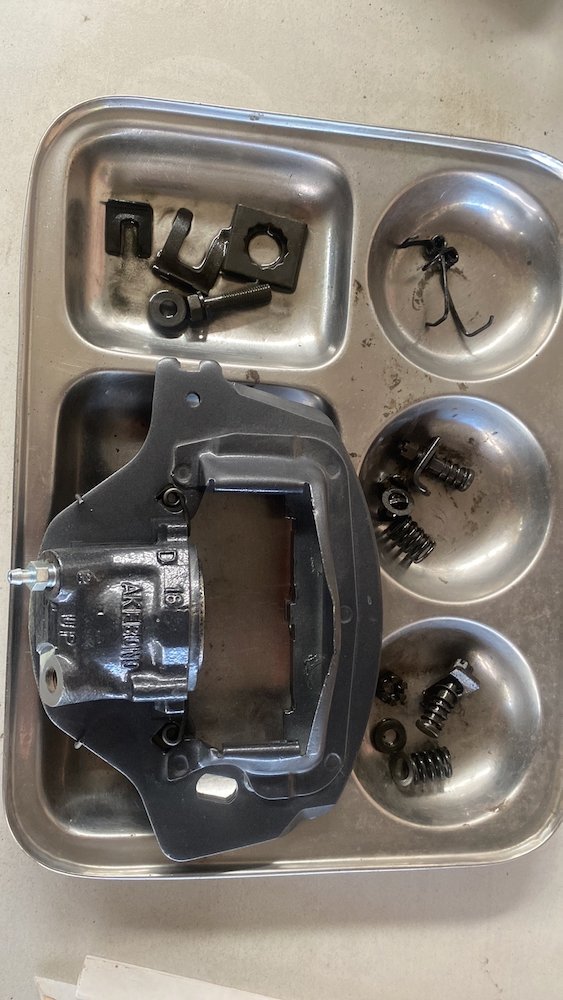
Still at it, progress is steady with visual changes becoming more obvious. Finished off paint around the window frames and fitted the doors, still need to fine tune the door gaps Finished off all the brake lines including the left rear that I wasn't too happy with. Managed to find new seals for the front calipers, they are ready to bolt back on Had a go at the interior too, while i'd really like to drop it off and have someone do the whole lot super nice, there is not much cash left in the tank, sourcing some nice fabric I repaired all the pillar trims that were ripped so that the windscreens could be fitted, the roof lining looks even worse up against fresh cloth! Few more weekends at this rate should get the engine in the hole before Christmas
1 point
-
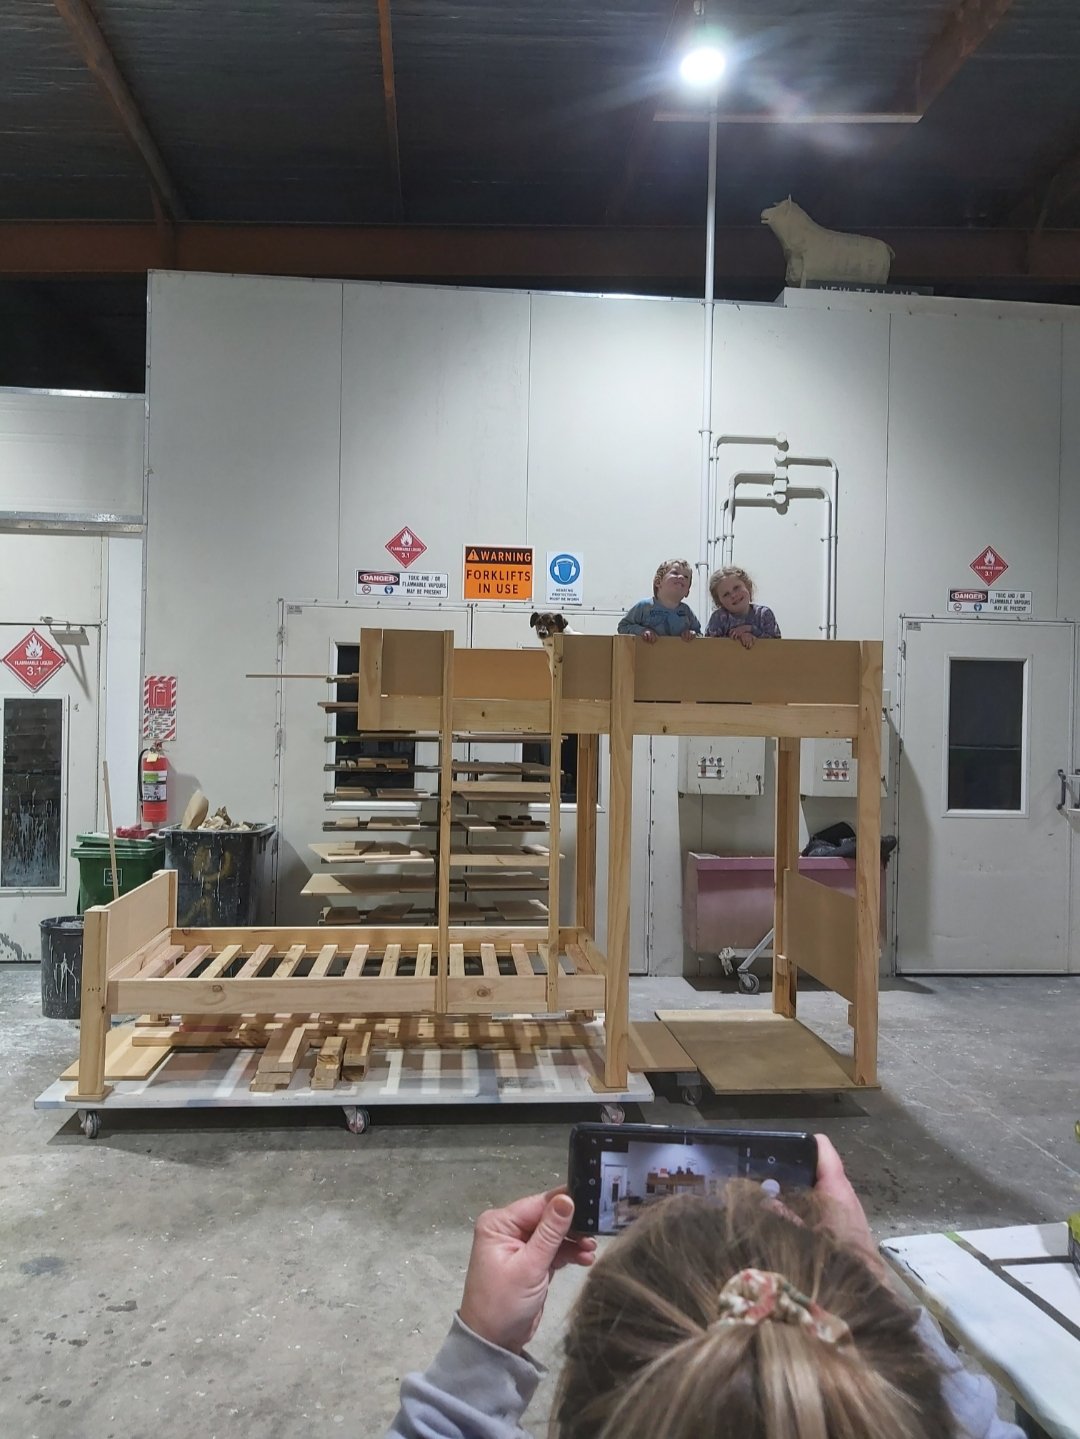
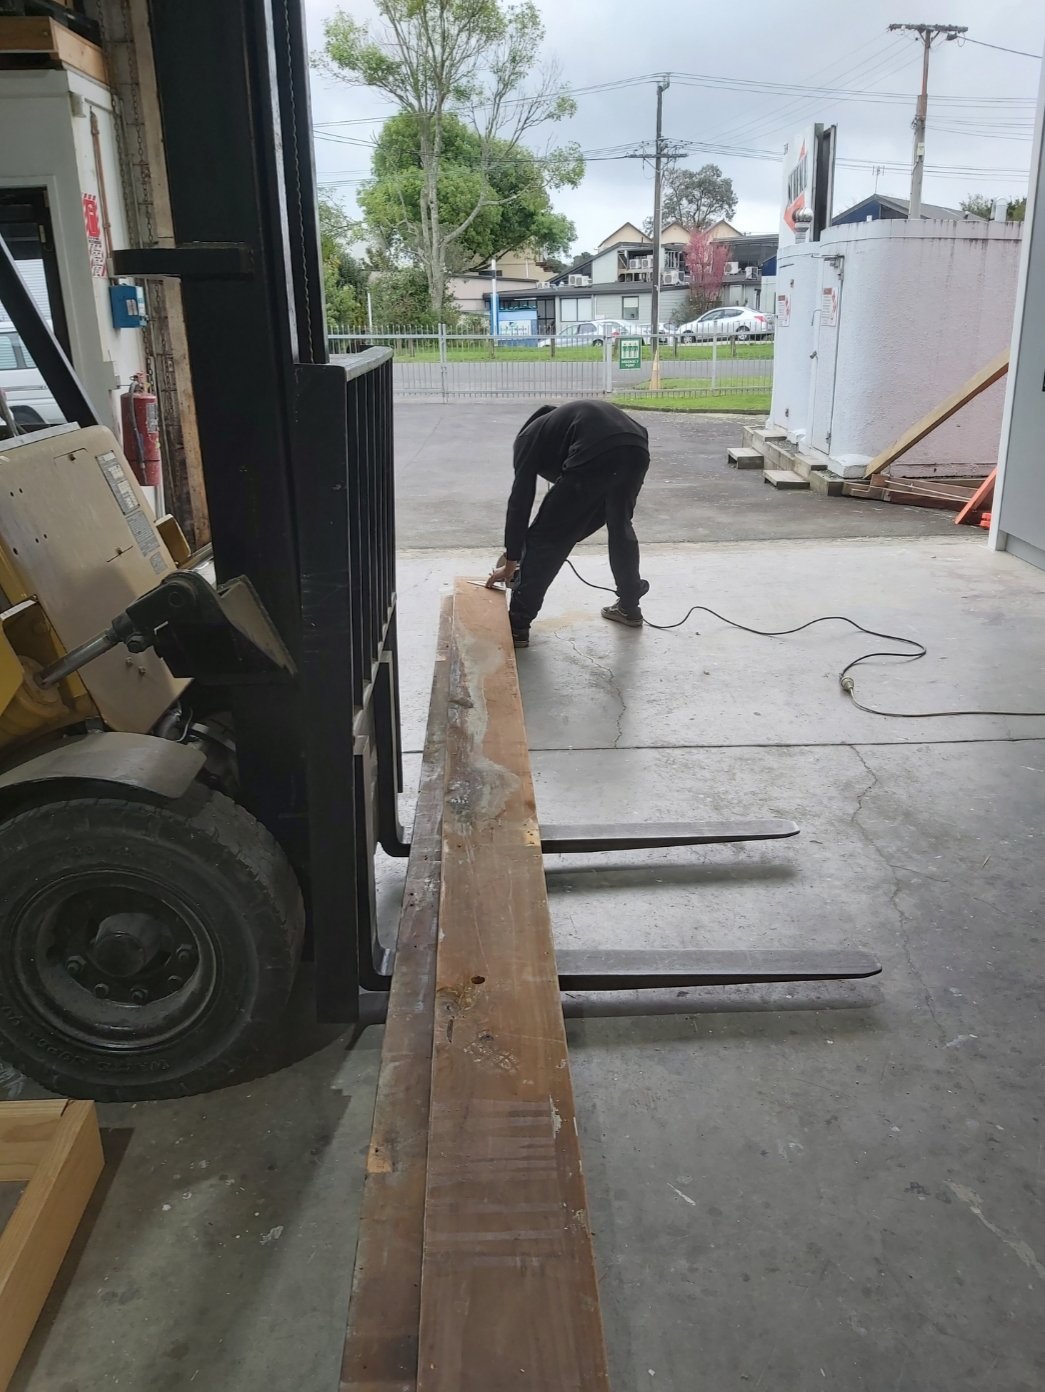
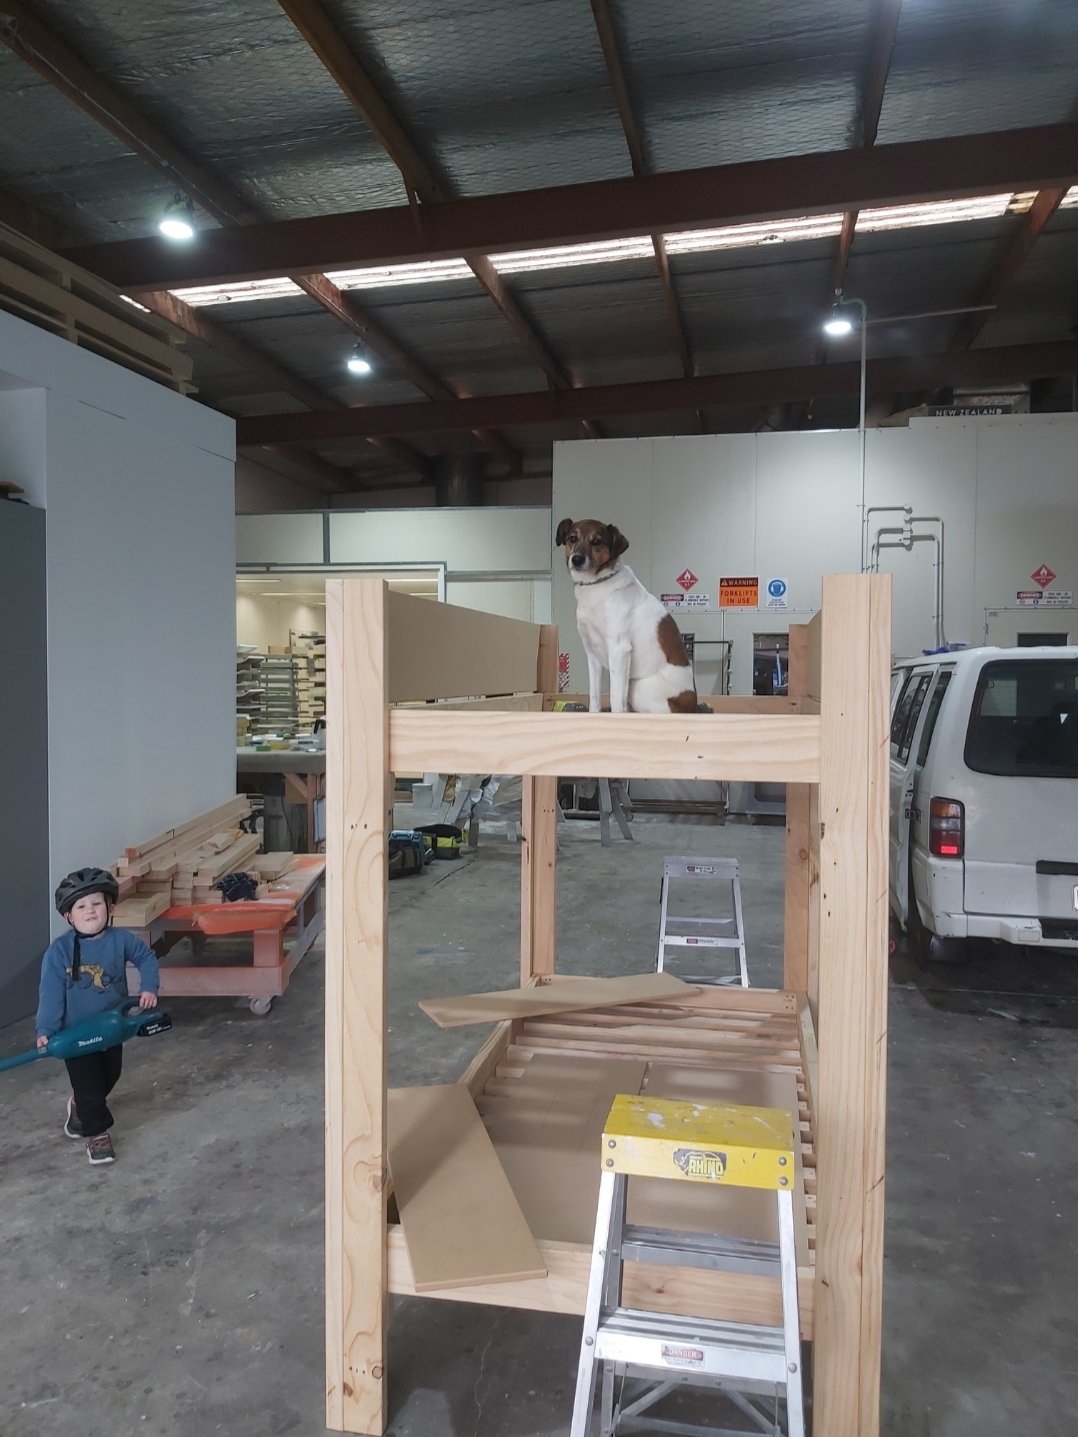
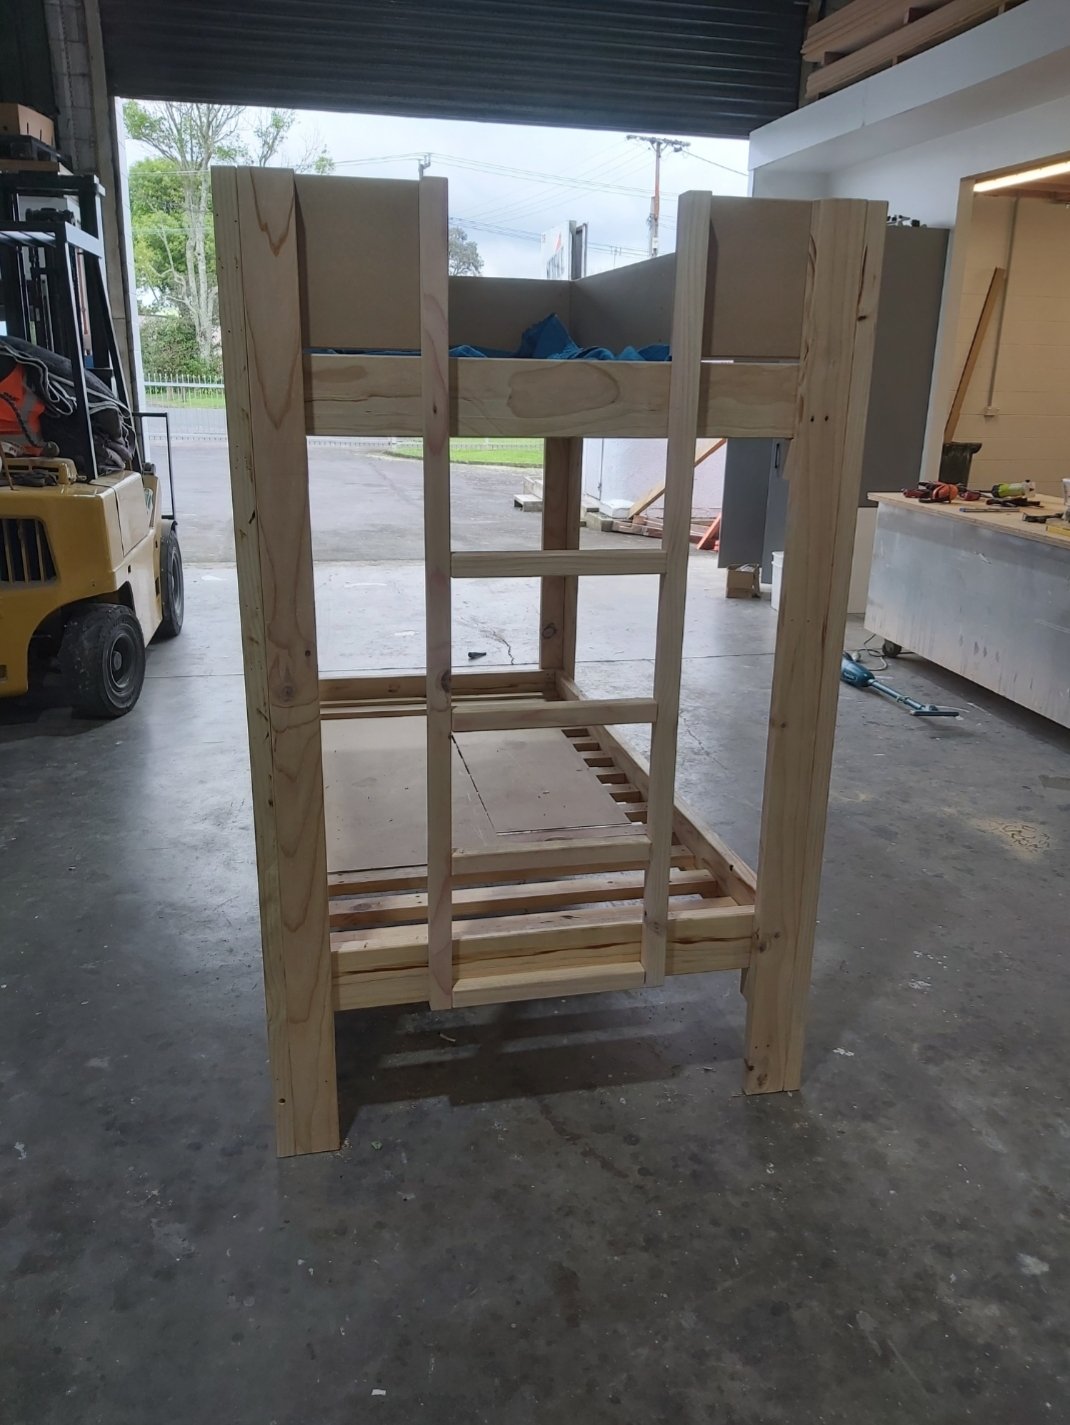
The wife and I wanted to make the kids bunk beds for their birthdays this year. Didnt really have to much of a plan on how to make them watched one youtube video got the general idea and got to work. Middle of last year we removed an old spray booth from our factory but kept the timber. Which worked out perfectly. I ripped it down to size put it through the thicknesser and it came out better than expected. It was a great project for the family got the kids involved and learnt heaps. First photo is timber before going through the thicknesser. we ended up moving the ladder. not enough space to climb up. I painted all the parts in polyurethane as thats what I do for a job. The gap between the beds is a 1m but we wanted to future proof ourselves hopefully get more than 10 years out of them.
1 point
-
Get him to watch his training video, kia kaha road to zero 4.38 is the bit Rust is not corrosion damage. Corrosion damage is pitting, heave, bleed, a hole. Minor surface rust like a stone chip is just rust. Best to send his inspector number off to ensure he is up to date with his training1 point
-
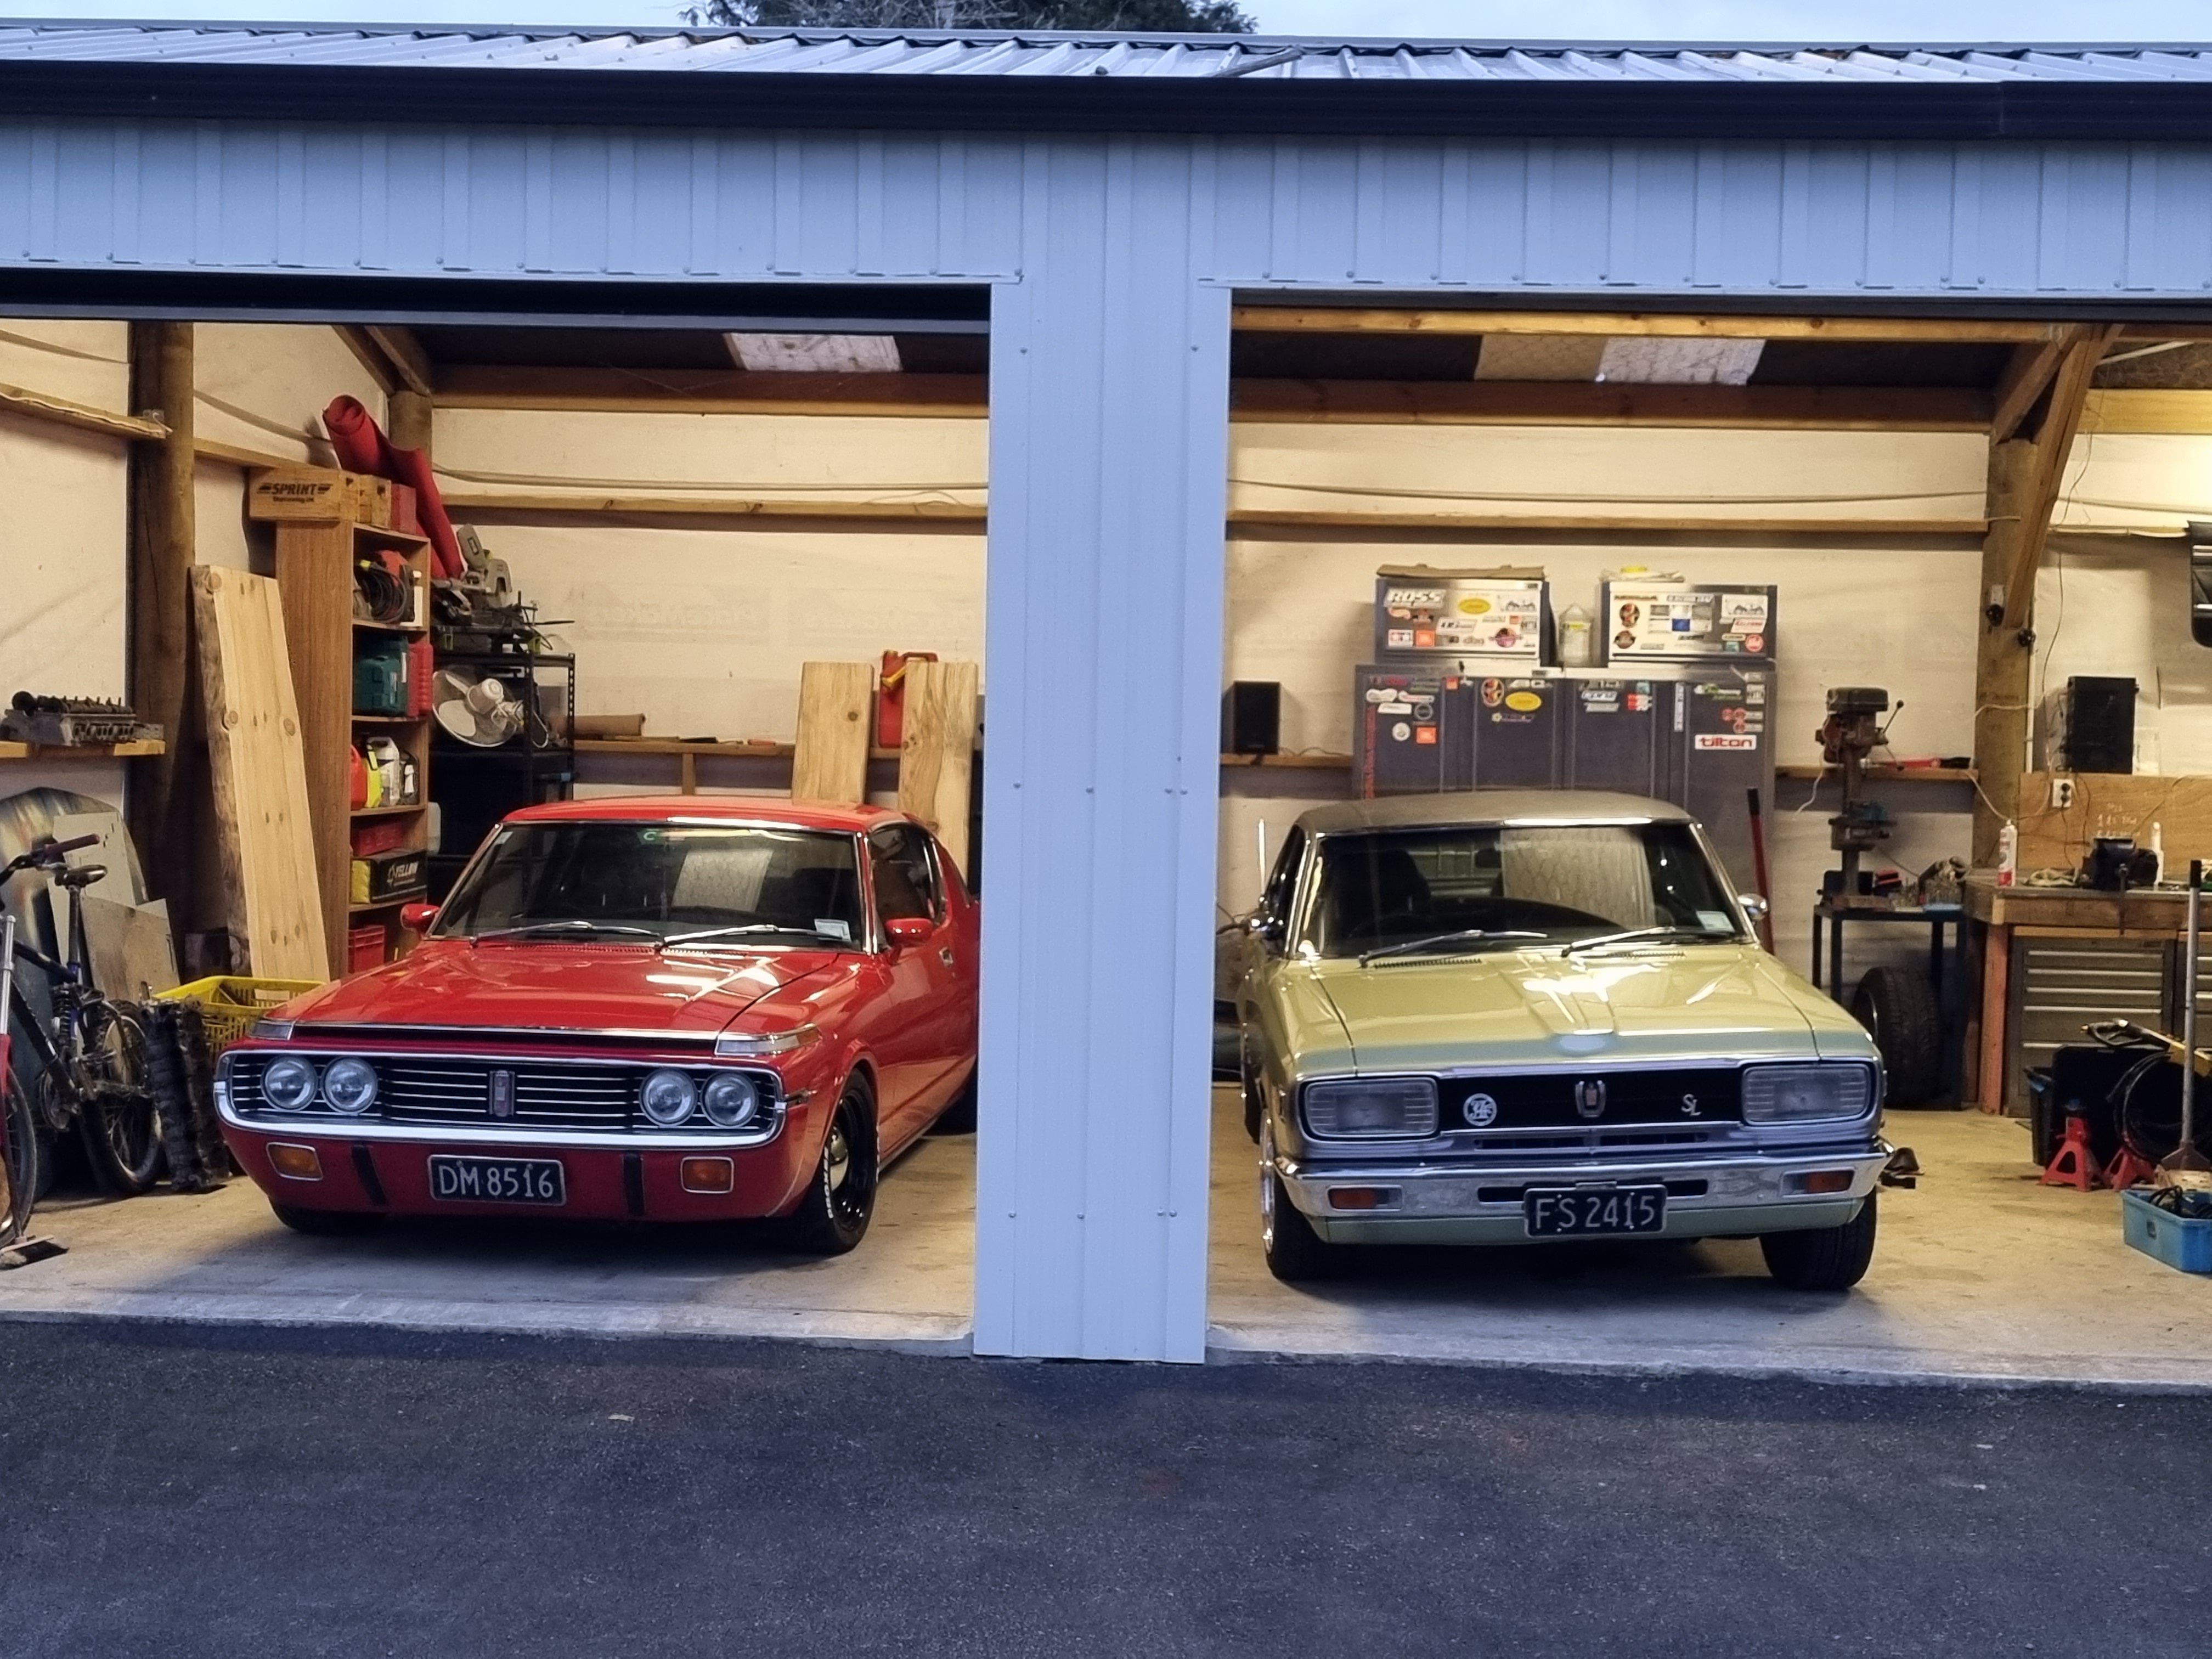
Well after both crowns being in storage for a year and a half I finally have them back. Couple of maintenance jobs to do. New clutch slave and replace a leaking axel seal. Pretty easy stuff really. Then it's warrant and drive. This car is still ace just fyi.
1 point
-
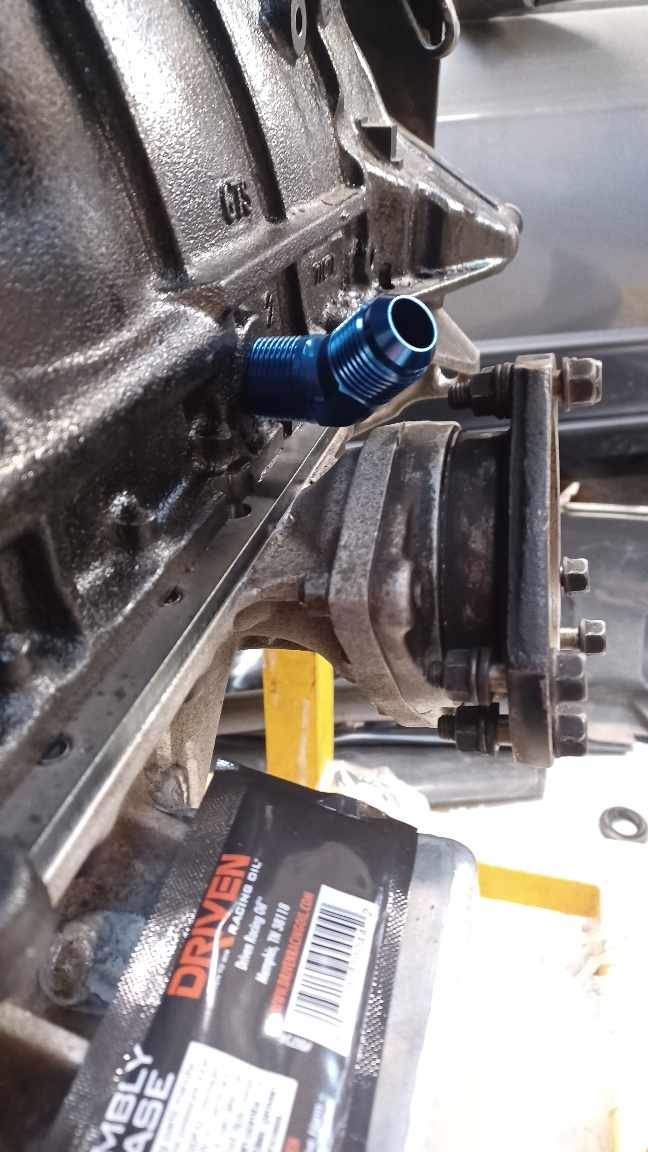
Here's a 45deg fitting not screwed in. A "short" time later Purchasing the rips sump adapter vs using my own original one just about paid for itself in not having to remove and clean up all the rtv, then reapply it in the correct rfb manner. Red, and about 5x more than necessary so it can squeeze out everywhere incl the oil pickup. So that's all back together. Maybe tomorrow I'll make up the turbo drain line and vct drain.
1 point
-
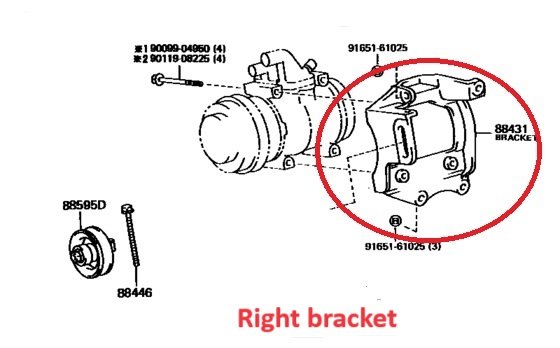
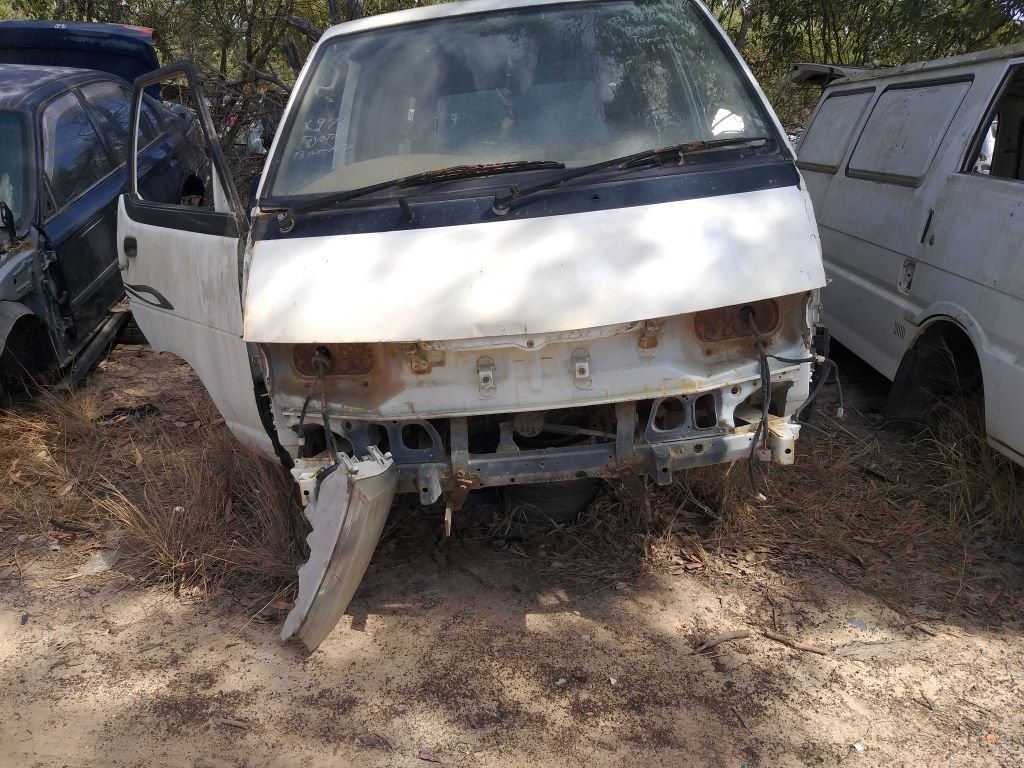
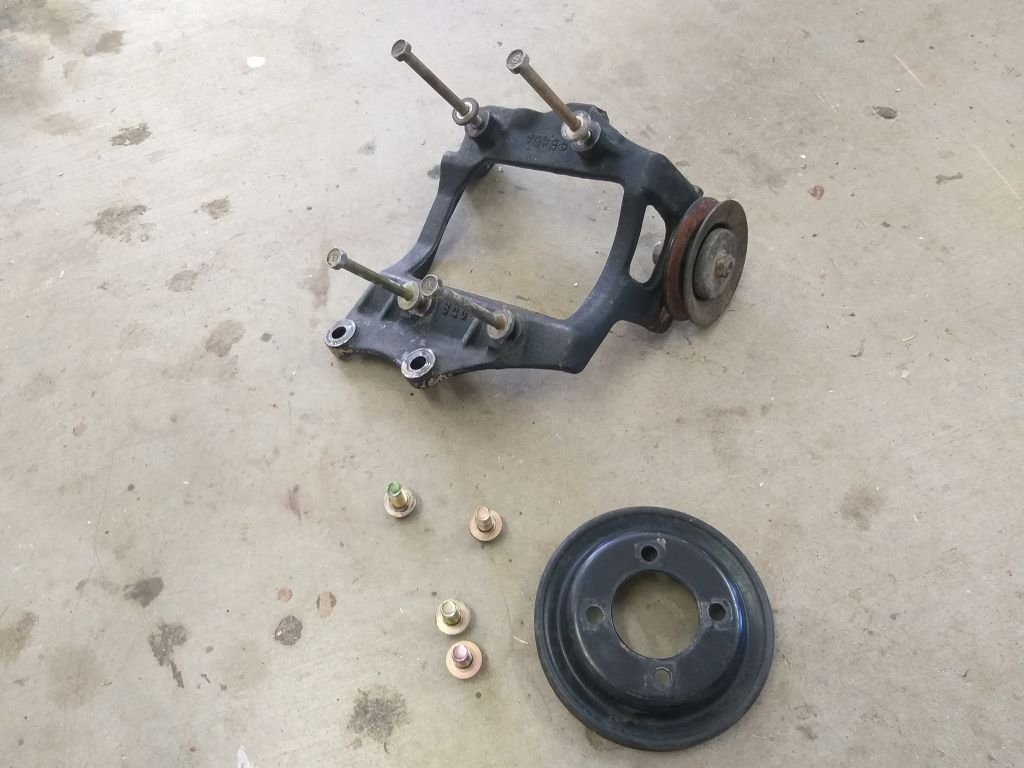
WARNING - I'M ABOUT TO BARRY ON ABOUT A/C COMPRESSORS .... you have been warned. After hours and hours of research I now know far more than anyone should about mounting an a/c compressor to a Toyota 3Y engine. The first thing that I learnt thanks to some info shared by @Jeffs_Emporium is that Toyota used two options of factory a/c compressor brackets. The next thing that I learnt after getting someone on the Book of Faces to chuck a tape measure on the mounting bracket featured in the image below is that using this bracket the a/c compressor will not clear the chassis rail on my Thames van: However, the second more compact option shown in the image below might just allow the compressor to clear my chassis rail with literally millimetres to spare : So armed with this info I began searching for just such a bracket. Now one would think that here in sunny old Queensland there would be heaps of a/c equipped old Toyotas sitting in wrecking yards. But checking in with my two local wreckers and about half a dozen others spread through Queensland proved fruitless. I then spent every day watching FB Marketplace and pinged everyone who was stripping a Y powered Toyota with no luck. Eventually about two weeks ago a guy located about an hour from me listed an early 90s YR20 Torago that he was parting out, so I flicked off the usual query. Turned out his van was equipped with a/c and he sent a few photos which revealed it was the correct bracket. FB message trail went like this: Me - Hey mate, how much for the bracket and second crankshaft pulley? Him - $250 if you come through and strip it yourself or $395 if I have to strip it. Me - Yikes, mate I don't want to buy the whole van, just the a/c bracket. Him - Oh if you want the whole van I'll let it go for $1000. Me - Foxtrot Oscar mate. Him - silence. Then yesterday I had to head into town to pick up my new power steering hose and I thought I'd wheel by the two wrecker yards to see if anything fresh had come in. It just so happened that Luke was behind the counter at the second wreckers and he is a lot more chatty than his monosyllabic mates. Was sharing my tales of fruitless searches with him and he mentioned an old LiteAce wreck that was languishing in the bush in a part of the yard that I hadn't noticed before. "Watch out for snakes up there matey" was his parting shot as I headed up the hill .... yikes Ozzie is not for the feint hearted. Anyhoo sitting in the bush was this pretty: Scuffed the ground a bit to scare way any monsters then timidly peered inside and eureka! Scampered back down the hill. "Luke matey, how much for the bracket and the second crank pulley ?" "$35 if you strip it yourself mate" Jeez, I couldn't get the folding out my pocket quick enough. Back up the hill armed with a 12mm and 14mm spanner and then there was this: Got back home, gave them a bath and chucked them onto my mock up engine: Looks promising. Called my mate Jeremy who is the local a/c parts supplier, and the good news is that he stocks the appropriate compressor. The bad news is that his one comes without the manifold for the a/c lines, so looks like I'll need to source the shagged compressor out of Luke's wreck just to get the manifold. So I'll wheel by Luke's place when I'm next in town. If you have made it this far thanks for reading.
1 point
-
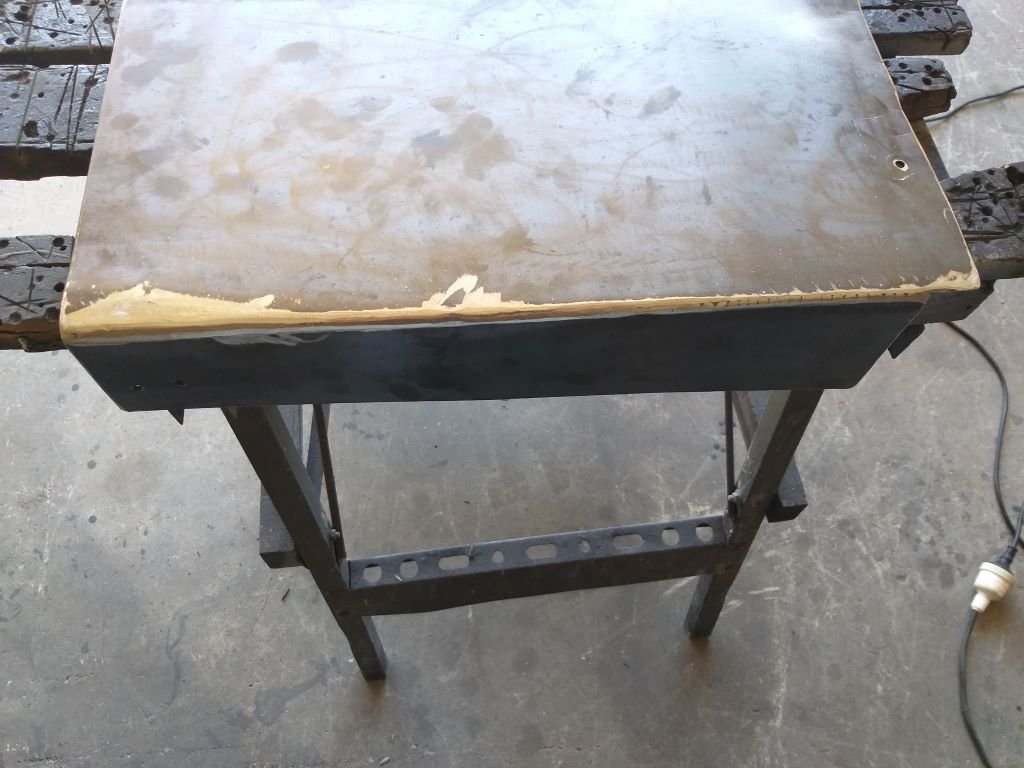
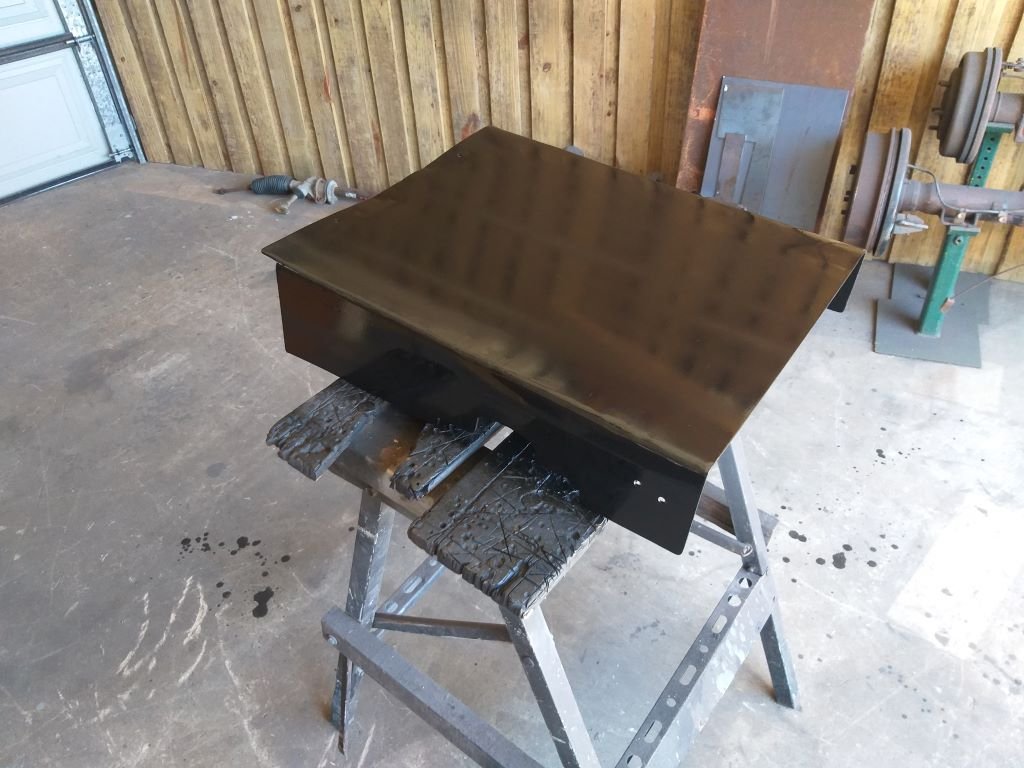
Started off the day by chucking a bit of weld to strengthen up the folds. Hit it with a flapper disk to mask my ugliness. Then a quick spritz of satin black. Looks half decent.
1 point
-
Derp Heater hoses looked good but forgot the tap so got that in today with some more parts bin heater hose Front half of the exhaust done just need a pair of 2.5in flanges to join it to the back half Gotta get the wellside off next to fit new fuel lines and the EFI tank then its only finding a radiator to fit and get the engine wiring done and I can attempt firing the engine up1 point
-
Since the last update she’s been for a few mile drive to the Sergio to fuel up and test fuel gauge which went well, the oil pressure sender changed from the gauge type can that was on the motor, to factory idiot light type - which works. Dropped it down the road for a wheel alignment as per the structural repair and compliance process - paperwork squires and dropped off to the guy in charge. Painted the exhaust manifolds - had planned for them to be only temporary and get some headers in the near future but the more I looked the harder it got. Wanted hooker headers but they dont suit P/S models, others run a pipe down under the drag link and compromise ground clearance etc etc. Rigged up a spare wheel and a wee tool kit, will pick up a scissor Jack too. And a thing I didn’t know I needed until I saw it last week1 point
-
3 days after the last update I whipped the screen out and trims off ready for the vinyl roof install. Yesterday I got the call to drop it off and just collected it. Looks awesome, can’t wait to button it up again!1 point
-
Not much drama tbh. From where I was sitting down in the cockpit, I couldn't see shit. Just sitting there trimming the main sail waiting for instructions. Skipper called everyone to be ready for a tack, told the helmsman to make the turn when ready. We were nearing the edge of the channel and trying to get every bit of distance before tacking. Guy on the helm left it a few seconds too late and the boat stopped pretty quickly when the daggerboards hit the bottom. As its a soft silt bottom - it wouldn't have damaged anything. We just dumped the wind out of the sails, fired up both diesels and gave them full beans in reverse. Soon as we were free - engines off, sails tightened up and away we went. Probably the 3rd time I've run aground in the last 9 months on 3 different boats. The only time you start to pucker is when the tide is going out and the engine isn't able to pull the boat off the bottom. Then you need to get creative. Running aground at sea or during a bar crossing is a whole different thing. I've got a great story about that from 18 years ago.1 point
-
Did a sailing New Honda outboard is a peach. Had enough grunt to start bending the mounting bracket in half so will get a tig magician to lightning glue a strengthening backing plate onto it. Mrs didn't freak out this time. Put it in the boat park for a few weeks so I don't have to dick around setting it up each weekend. Next event is taking the workshop lads out for a drink/sail/fish on Saturday if the weather holds up. Then going to do the plate island race the week after.1 point
-
Update time. Got the hole fixed. Sent it to Mr Jones Snr who has the luxury of being retired so had plenty of time to spend on it. Towed it into work to paint the bottom so I could have a nice warm dry space. Lifted the boat off the trailer with a jack under the front. Found a screw had backed out of one of the bunks and ripped a hole in the hull. So quickly bogged that up. Got 3 coats of epoxy barrier paint on the bottom. Learned that the fumes from that paint are pretty grunty! Then threw a couple coats of antifouling paint on there. Last paint job is to add a silver pinstripe along the waterline. Got the signwriter to throw a name on the side. The star is some kinda hi-vis stuff used on road signs. Looks mint with some light on it. Tempted to hire a berth at Tauranga for the rest of April so I can do a few long weekends without having to set up the boat and tow it around each weekend.1 point
-
Took dad sailing for his birthday. Absolutely perfect day for it The missus had a bit of a freakout. She's never been on a boat in the sea before and never been sailing with any wind. Heeling over going to windward was a bit much for her. She had the death grip on the bulkhead and wouldn't move or speak. Anchored off matakana for a bit then dropped her off at the ramp and went for a quick blast with the old man to push it a bit harder. It's quick! Sails like a much bigger boat. I'm thoroughly impressed. Doesn't point as close to the wind as I'd like and there are some other handling quirks to get used to. On the whole, I feel a lot better now I know it works.1 point
-
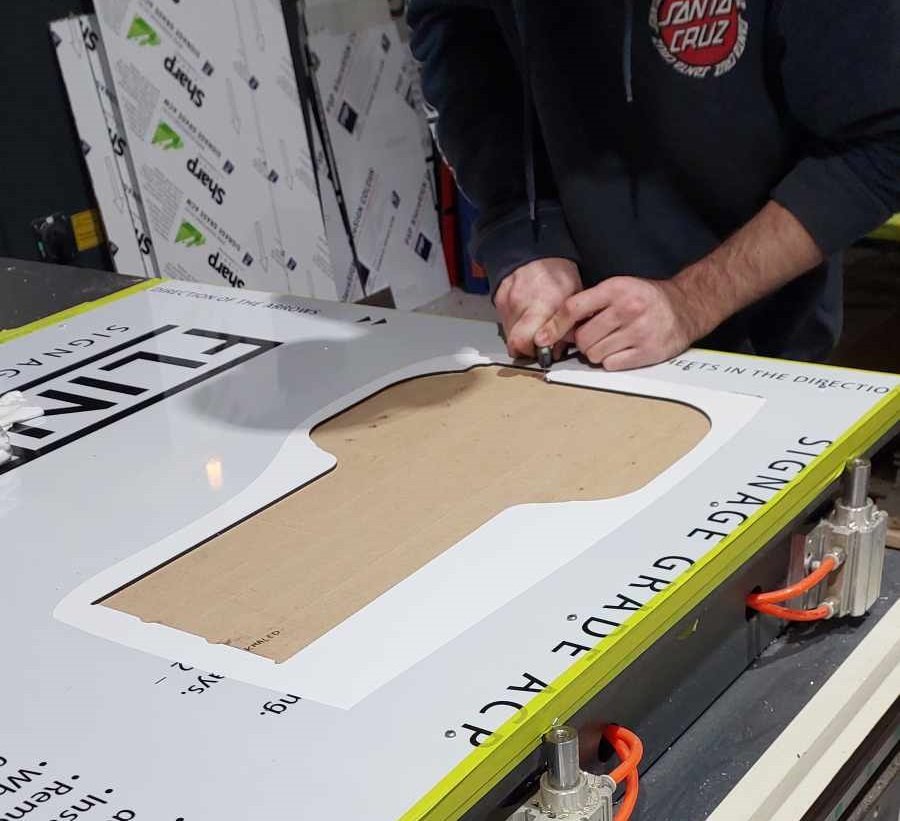
Better fill in a gap I didn’t have spare time to post earlier.. The package from USA with the vinyl top arrived on Wednesday! Bit hilarious the day after doing screens but just no time to slap it on nicely. That package had the glovebox liner and rear C pillar trims too. Now the billboard bit. These are not standard in any way. It’s my home-brew concoction with inspiration from Plymouth cuda. I’ve never attempted anything that permanent and with bugger all time left it was too high risk to get it looking perfect and paint in 2K. I decided to rip down to the warehouse and get a few rolls of 2000x45 black duraseal. unfortunately the space needed was like 2600x47 so a join and a compromise was in the pipelines. Baking paper taped to the car and a marker pen roughed out using a finger as an anchor point running down the swages. Slap some cellotape around the perimeter for added stiffness and cut it out. I then laid it backwards into the backing of the duraseal and traced around it carefully, then cut that out too. Happy with the fit, and after sliding cardboard down behind it to trace and cut the bee circle, I started taking backing paper off in sections and smooshing it down in an arch motion to get rid of bubbles. It went to tits when I got to the side scoop as it wouldn’t heat and conform so I made some wee slits and pushed it down. Then it was onto the 440 call-outs. I faffed around on the work computer printing and editing them in block style In the different sizes and cut tapers into the top and bottom edges to accentuate the angle and sorta match the door part. I considered using the templates to mask it up and paint pink, or getting pink duraseal and hoping it stuck onto the wrinkly area already durasealed.. so both those weren’t going to look good. I went the danger route and traced it all out and cut the film with a razorblade. End of the day any wee scratches I can puff clear over them again and polish out, it I get this sign-written properly, their design will cover the scratches too. They came up mint, bare in mind it was a bold number, had to measure 14mm in and outboard of all lines and slice those too, to give the outline/doubled effect. For the wrinkled portion in the crease of the scoop, I managed to cut much of the wrinkle out, or replaced the whole part so it worked out well. onto the other side, flip the template and do it all again. polisher finished up so I could dig into the front paint now + hood. Once that paint hardened I attempted the screen. High stress! These are pretty whack and it was a first doing this style + short stock and mad expense if it cracked. Took it slow with plastic trim removal tools + aerosol glass cleaner for lube and it bloody went in! I didn’t seal it as it was a trial and it has to come out again for the vinyl roof application. The rear screen sits on a sausage strip of non-setting butyl so I cleaned everything up, stuck it to the screen the dropped the screen into the car.. was pretty straight forward and it sealed all the way around. Picture a 10mm bead of the sticky shit that holds the plastic sheet to the inside of your door panel1 point
-
Well, I made the fucking deadline! I didn’t have time to tune it properly, the rear tyres rub and the brakes need bedded in but those arefuture problems1 point
-
The clear came right the other day so wet sanded it in 1200 and the polisher started on Sunday! Dash in and all hooked up. Found the interior light base! <3 Strapped the seat covers on and slapped the rear seat in. Ive given it a very partial one-man brake bleed and only one fitting weeped/could have dripped fluid from above too as it was right under the master..I’ll keep a tab on that. GC Damon at Let’s get graphic made me some new super bee decals.. had to use my sample then flip for the opposite side so the bee flys forward on both sides. Look awesome and very very reasonable price! since I need the body colour to show through the decal, I had to come up with a way to mask it. I had a stroke of genius instead of just a stroke like usual lay out 2 layers of masking tape onto clean glass. Put it on the revolving wheelie piece from the microwave. Find a plate the right diameter and run around it with a new razor while spinning on the wheelie doofer then pick off the edges and peel the disc. Worked awesome! Also printed this period Dodge decal, traced it to some cheap satin black vinyl/duraseal type shit I had and cut out. Loosely planning on placing them on the front guards or something like nascar, but will see how it looks once the blackouts are done. I was going to start masking the side panel tonight but I need a roll of 16mm tape to make my life easier for a pretty daunting task. I’d been trying to get the bastard to start for a week. So many factors against me such as it’s been apart for 2 years, everything’s been painted so earths could be shit, bent dizzy, timing, sad battery. Was getting a bit paranoid I’d run a bearing as it wasn’t getting a chance to oil properly before I had to give up and swap/ charge batteries.. it seemed to be getting tighter. Well whatever combination I tried tonight fucking worked and it fired into a reasonable fast idle!!! Huge relief, the car show I’m trying to get it complete for is 10 days away. I was kinda keen to bail if I had to push it in but now I’ve got a second wind!1 point
-
Another few hours in the garage today, doors are assembled and hung properly. Almost forgot to spray underbody deadener in the guards! Smashed some more cavity wax in the doors and guard structure and my face. The guts of the fittings for the tail lights and rear panel are a bit flogged out so I’ll have to get a kit, half of them holding for now.1 point
-
Roll steer is caused by the link arms shortening or lengthening the wheelbase on one side, kind of like how a skateboard works This pic is exaggerated (maybe not if you have a jeep or safari haha)
1 point


.thumb.jpeg.b39a639a8ff8a614681c3c9dca730a70.jpeg)


.thumb.png.b2aee08688778d18bdc7b3e3c1852d9c.png)


This leaderboard is set to Auckland/GMT+12:00