
Leaderboard


Popular Content
Showing content with the highest reputation on 10/06/22 in all areas
-
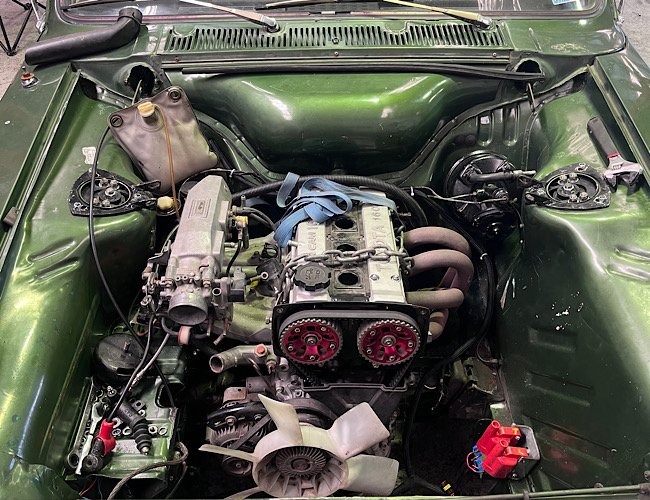
12a be gone, 4age be in. getting this fully mounted is simple work with a little bit of fizzinometry aided by the welder. driveshaft is in. Exhaust will be a short link pipe from the headers to the main zorst. Headers are 2” out, zorst is 2.5” with 2 resonators and dumpy. gearstick lines right up with where the 12a poked up, mint. parts I know I need for this now is: clutch slave and rod, fuel pump and surge tank, sandwhich plate- I have the wrong one with the fork and starter on the same side, then sorted the wiring side of it yay not. @Stu has made my loom super tidy, but I’ll get the sparky 2 doors down from my shop to wire it all in correctly. 12a is queued up to go into the Ute. It can wait till I figure what is causing the clutch issue. looked over the Ute briefly, only one small patch of rust to do in the passengers foot well. Tidy up a couple of pieces on the deck and it’s ready to paint haha. even had the MA 1600 running.
 10 points
 -
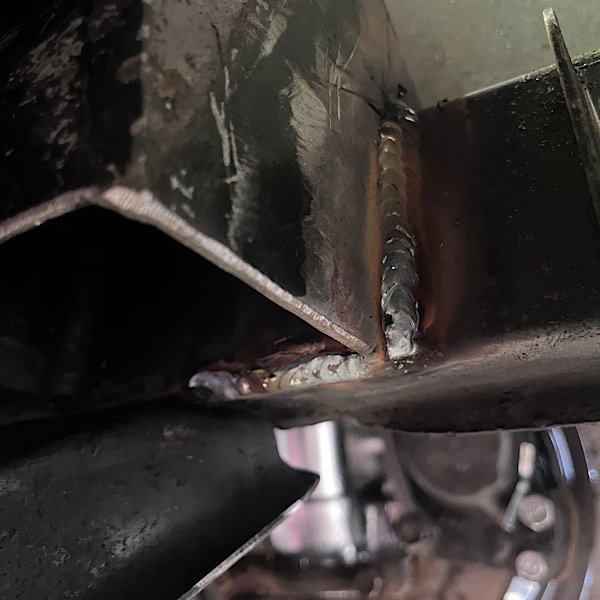
The hunter is now a dedicated 4age homie.. mounts are finished. Gearbox mount is a bit meh looking. May upgrade that prior to cert. It’s definitely strong enough and functional, just not overly good looking like myself haha. now that the mounts are done, I can rip the motor back out, remove the battery tray as it’s too close to the intake. then I can prep the motor for refitting (fit the water rail, clutch, put the engine on a stand so I can pull the sump and prime the oil pump etc, refit intake with injection etc). not too sure how these things go cooling wise, so I’ll be running a mint (near new) hunter radiator for now with a thermo fan and thermostatic switch. surprisingly the rx7 speedo cable fits right into the T50 box, so that’s already sorted.
7 points
-
They are a right pain to get off. A very sturdy puller is required and shock NOT HEAT. At my old job we had a unit like this which worked wonders. The middle bit is hydraulic. The puller we use at work for doing that job is a big hefty cast unit which you can pull up with a 50 40 inch breaker bar without worrying about bending it. Its got solid striking face to hit with a decent sized hammer. Squirt CRC up the keyway. load it up hard with a bigger puller then solidly strike the centre of the puller with a decent sized hammer. make sure you have the nut loosely screwed on the end of the axle to prevent the puller shooting across the workshop.4 points
-
Ok so I'm going split this next update up into a couple of posts spread apart because there's just too much to put up. First off - the project and general life stuff was sort of put on hold for a while because sadly my Dad died about 3 weeks ago. I've been a bit over the place dealing with stuff and family things. I have not said anything about it except to a few friends but I wanted to mention it here now, not because I'm looking for sympathy but just to say what a cool old fella Dad was and in his memory I could pop up a few things I have learned over time more recently about the engineering history that's in my blood. Some of it is pretty neat I reckon and I thought I'd pop it up here. My great grandfather, Alex Davidson and my grandfather, James Davidson, both worked at Argyll works in Scotland. Dad had written a letter to the NZ vintage car magazine, Beaded wheels, a few years ago about this along with some letters from Alex about his time at Argyll. I won't post it all up but here's the letter from my dad. My great uncle Alexander Davidson was also an apprentice at Argyll but left after qualifying in his trade to join the Royal airforce. He went on to become Air vice marshell, served in both wars and eventually became director general of organisation. This was a pretty cool thing to find out. I have done some digging and found out more about him here.. https://www.rafweb.org/Biographies/Davidson_AP.htm So in the last 2 months, going back and forth to see dad, finding out a few more bits of info about his past and dealing with his eventual downturn in health I have to say that other things like work, social outings, this project etc have been last on my mind. But I'm back into it. I had always wished that Dad might have got to go for a drive in the imp with the flat six but that just wasn't to be. Such is life. But at least he knew I was doing the project and he had knew full well that one of his sons was following in the Davidson footsteps of being a total engineer/petrol head Dad was a good dude. I miss him and its a case of the the often heard thing - I wish I had spent more time with him and gained more insight into his past. He was also very athletic. Must be where I got it from.. Its also neat that I have fallen for a wee Scottish car after all those years (although Dads last cars, and those of his Brother Jim who was a motor engineer, have mainly been Datsuns - but hey, there's a connection there too) Here's dad in the last imp outing he had.. Yeah. So that happened. Back into it now, along with catching up on a huge list of (very patient) customers jobs. Now where was I ? Inlet stuff. I had some nice runners set up with some injectors. They looked like this when on the engine.. Now a while ago the very kind Chris @chris r sent me this package of delights. I'd only asked for an old Honda throttle body but look what I got... Wow. The random framed cat picture was really the icing on the cake! As for the super charger pulley, well I'm not sure what he might have been hinting at there. Anyway- now I had a 55mm throttle body that was just a bit more in butterfly surface area than the original twin honda items and was pretty compact. It would possibly sit about here, where I had roughly planned (because I was sort of making this up as I went along, with a few sketches that you might get to see later)... inlet pointing this way? maybe? not sure... Now I had to start building the inlet runners towards the centre and make some flanges to join to a plenum. I welded some bits of 3mm alloy plate cut roughly to size. On the inside too. Awkward getting in there at the right angle. Guess where I touched the tungsten.. Now this plate was some random plate we got from a friend who imports all sorts of engineering stuff and timber, old caravan bases etc from Germany. Much of it comes from scrap a scrap metal dealer there because its amazing what they scrap there that is still of good value here. I have used some of it for a few jobs here and there but shouldn't really have used it on this because its a very very hard alloy and it cracks quite easily. I welded the bits in and even though I had pre-heated the inlets to reduce localised stress one of the weld zones still cracked. Suspect the wrong filler used too. Mostly I weld 5000 series and use appropriate rods but this is probably 7000. Silly me. You'll see that this created a bit of extra work later on for me. Anyway- I sorted the crack out and continued on. Cut the bit down.. Milled it square in the jig I still had left set up on the mill so everything with the inlet runners/plenum build that has to be will be square and parallel.. then I cut some flanges out (6mm thick normal, not poncy, alloy) Drilled them in pairs, spot facing and tapping bits as I went.. I'd bought a load of shiny stainless dome head socket screws and it was playtime assembling things at the bench.. Nice place to be for me at this time. Focus on something and enjoy the ambience. Fire going, music playing and many cups of coffee etc... So now I had some flanges that matched I welded one half of each onto the runners... Great!!! I'm getting somewhere. Bolted the runners up and had a look. Oh curse word!!!! What have I done here? Some things not right. I'd gone and forgotten that the runners are offset to each other by about 15mm or thereabouts. I could try and work around it when I make the plenum but it'll just get messy and not look right. So I had to cut some little bits of alloy up... welded them in place.. ...and accepted the fact that the bolts are not symmetrical at each end any more. But they are still pretty shiny s/s bolts so there. Then I cut some alloy up in the table saw and milled them out like this... The reason why will become known next time I post. So that throttle body. Well it turns out that facing it sideways wasn't the neatest way I do it. I was going to have to use a very tight alloy bend to make it work and the TB would have sat at a really awkward angle in two planes. Also, a big also... the engine would not have been symmetrical ! I sussed out a neater way to place it that will also allow for a nicer path of flexible pipe to feed it from the remote filter. Now I had a plan I could make more things. I cut a out a bit of that aforementioned 3mm plate and made a rectangular hole in it, a bit larger in surface area than the 55mm TB. I then cut some lobster sections from some 60mm tube and pieced together a transitional bit of tubework that would connect the round hole to the rectangle hole from underneath. This is to allow the runners to draw their required air from the centre, evenly like with no favouritism. Well it works like this in my brain so I'm running with it. I put the 4 jaw chuck onto the lathe and I threw a chunky bit of 8mm plate into it. Drilled a big hole and bored it out to suit the TB.. Drilled and tapped some holes and cut it closer to the shape of the TB flange. It will eventually be welded onto the pipe.. Then I had a sleepless night thinking about that 3mm plate. Will it crack down the line?.. as yet, until the engine is run up to temp over a few cycles I won't no how much it might expand and will there be enough heat soak and flexibility with what I am building to allow for expansion. Phew ! Yep - some thinking gets done about this as I try to sleep. It played on my mind. So in order to sleep easier I bought some bog standard softer 3mm plate and this happened.. Cleaned up and re-welded onto the new bit of plate.. And that is about where I am up to with the inlet so far. I'm pretty happy with the progress given some mistakes etc. In other Imp news.. I finally got my new screen in place! Its been 5 months since I last drove the car, which was when a stone had decided to leave someone's tyre and make a bid for my cars interior. 5 months is the longest I've not driven the car since getting it on the road. But hey, it was safely stashed away in a very dry garage over a wet winter and I've had plenty of other things to do. Screen fitted , a quick test drive to the beach. Its so fun to drive. I'd forgotten how nice it was. Time for a warrant of fitness test. But I first had to sort out a number plate light. One that was hidden away and reliable. I made use of a couple of neat little sealed leds, 10mm in diameter, and placed them in some alloy. This was bolted to a stainless mount that I glued to the inside of the fibreglass engine cover. I ran the wires up the edge of the lid to hide them as best I could. Pics.. Finished the wiring yesterday morning in the comfort of the new garage. Very handy.. Took it for a wof and its now legal again Hopefully back soon with more updates. Alex3 points
-
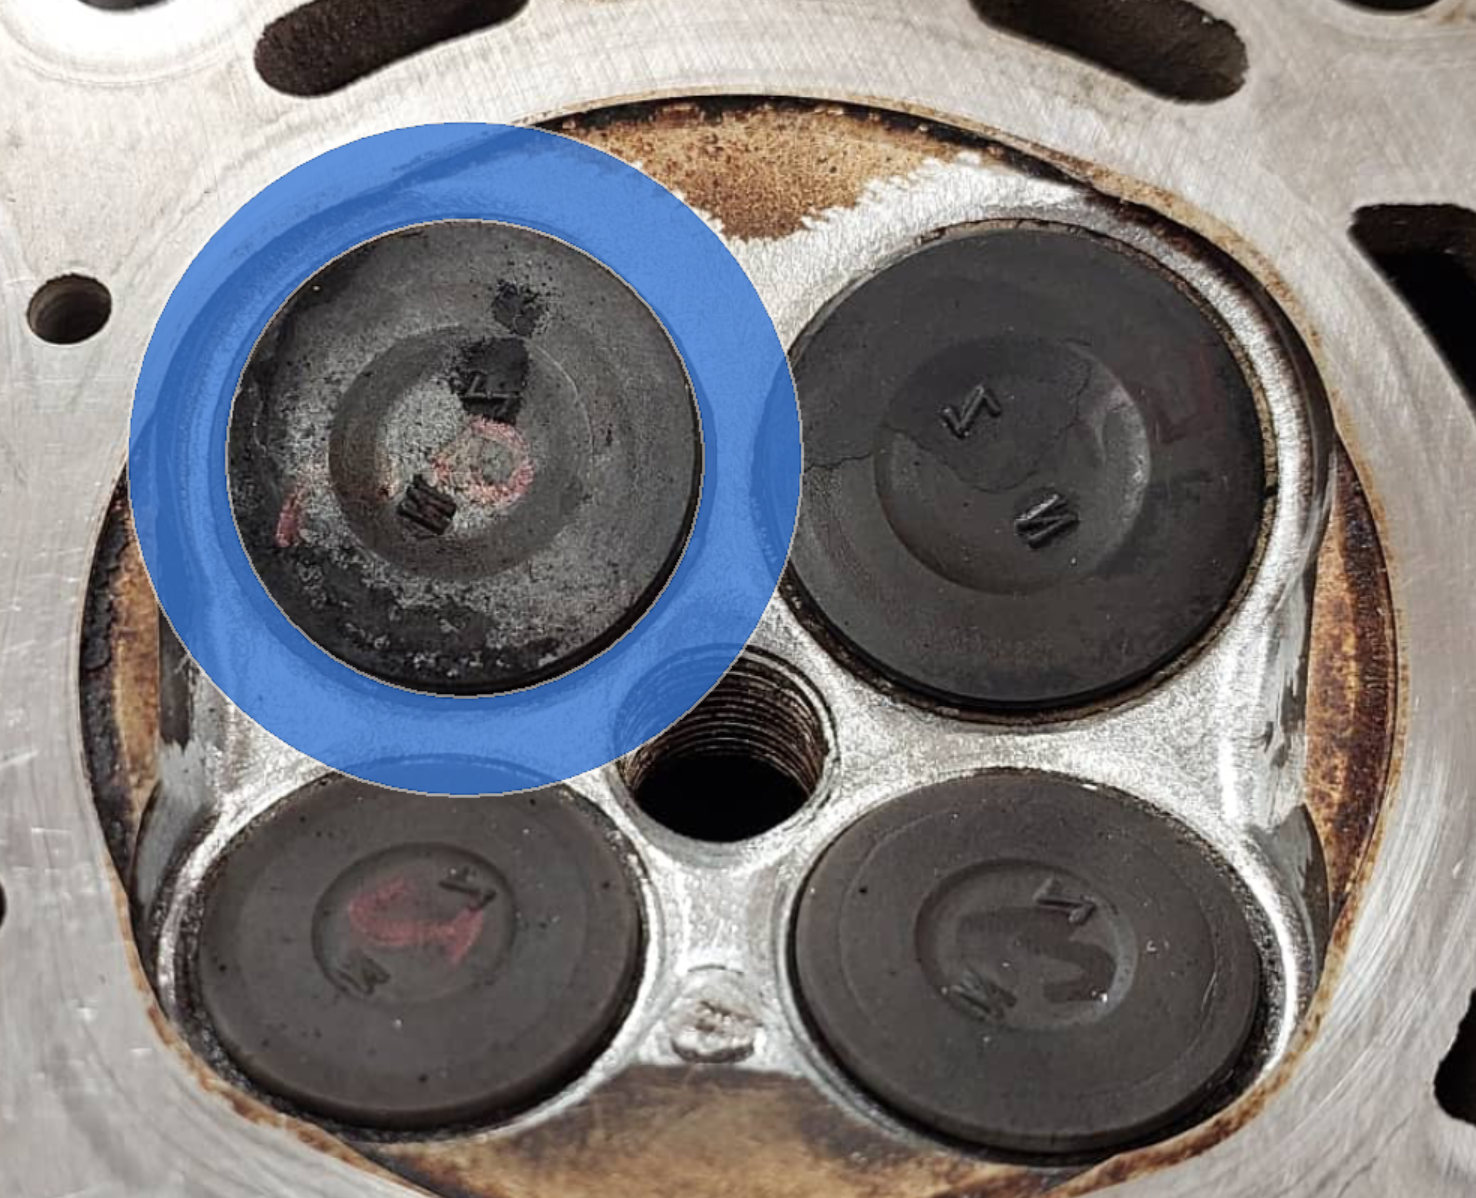
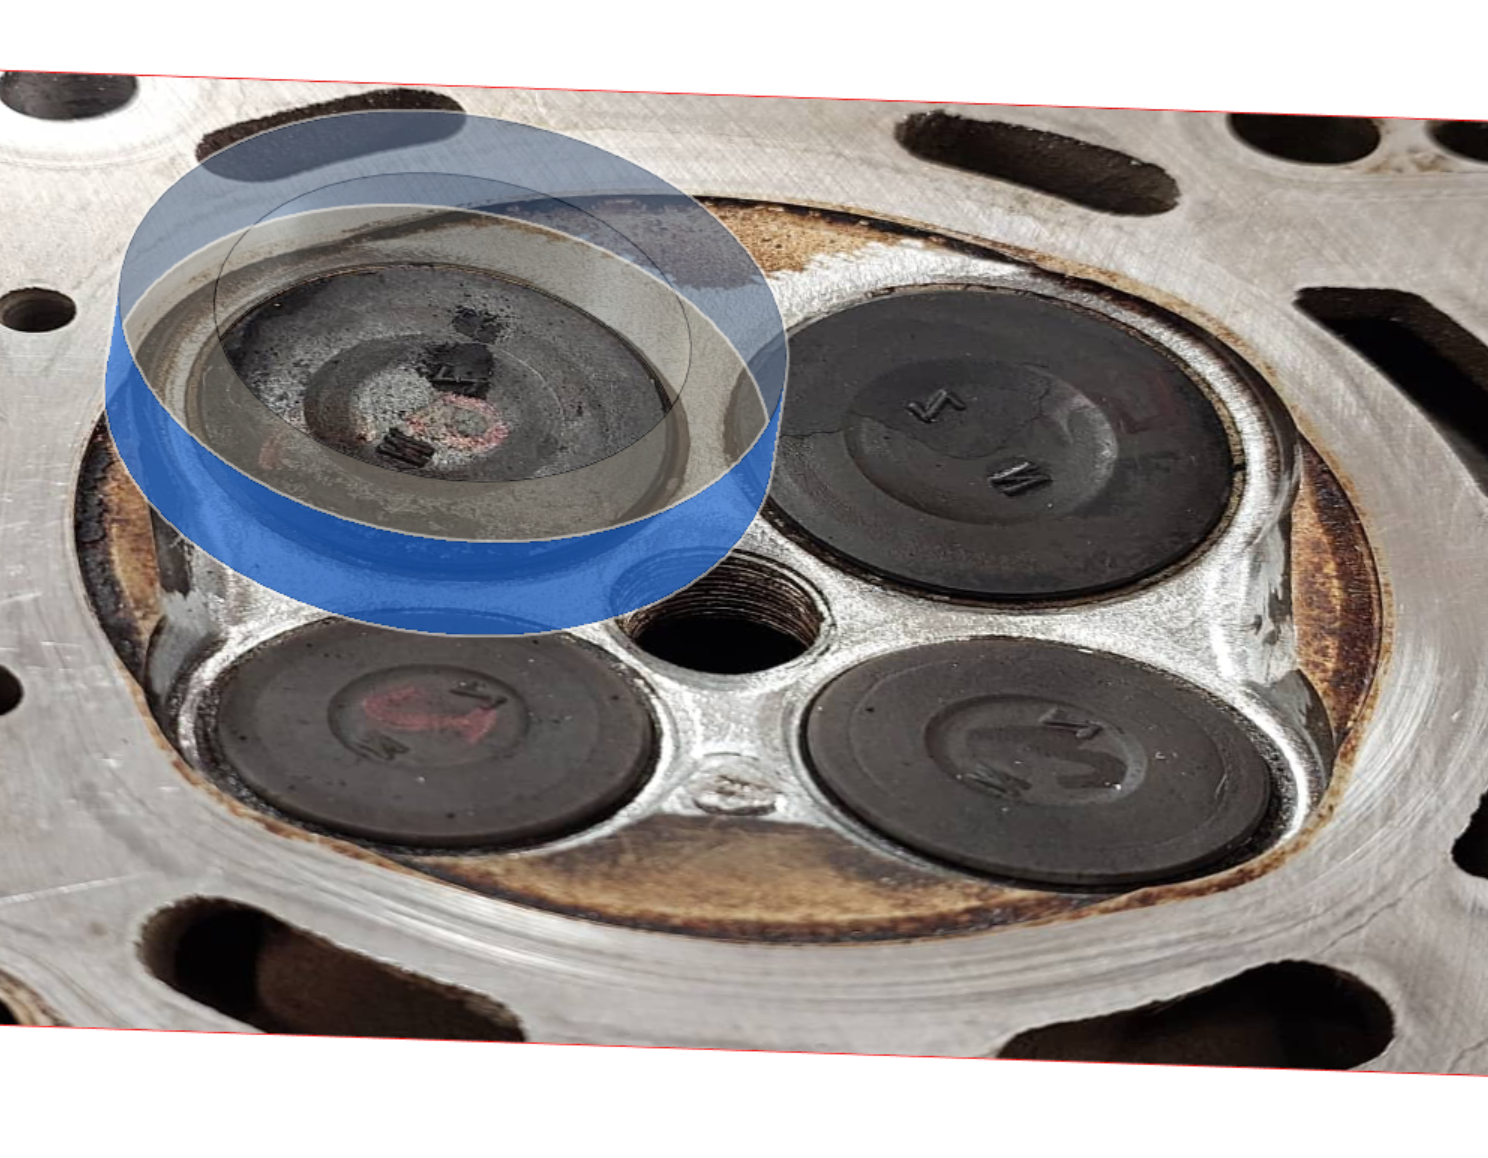
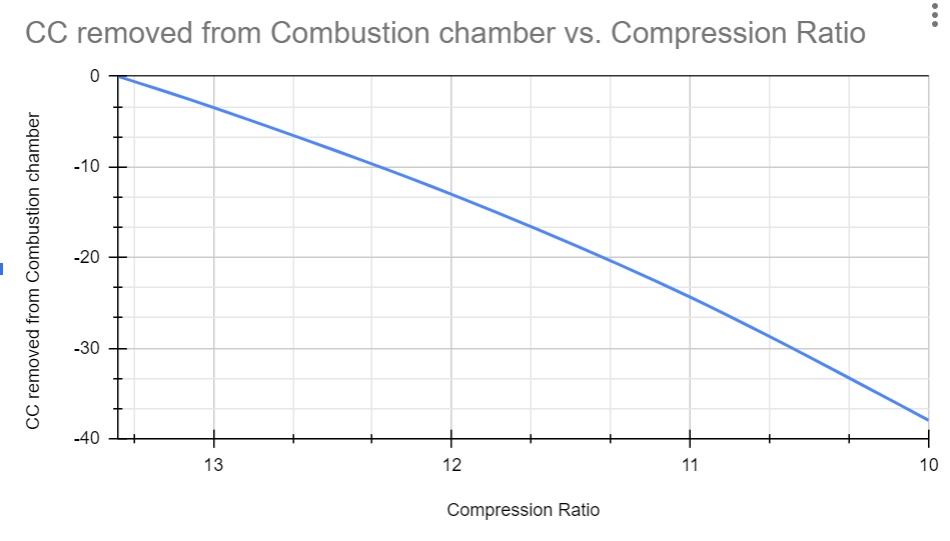
I found there is an online book/audio book app called Scribd, where the first months subscription is free - and David Vizard's book "How to flow test and port cylinder heads" is on it. So you can sign up and if you unsign in first month read it for free, might have some other interesting tech stuff on there. Will just have to try remember to unsubscribe before a month's up. Hah. So, I read through most of this and unfortunately very little of it contained information which feels relevant to a 4 valve head. As there's not really any testing done on things like port dividers, because, its mostly just 2 valve motors. Bummer. However one interesting thing was that it said a valve is fully deshrouded, when the valve has reached 0.25x its diameter in lift, and has 0.2x the valves diameter in clearance from the walls. So scaling against a photo (which isnt even straight, meh) but can get an idea of the fully deshrouded area of the valve "" So theoretically there's value in cutting back the squish pad thingies on the sides, or at least smoothing them out a bit more. Also looks like anything around the far side of the valve towards the cylinder wall, up to edge of the cylinder is fair game. Just to reassure myself, looking at some calcs again of compression ratio drop, I dont think I'll make any meaningful drops. with what I'm planning to do it might drop to 13:1 or something like that, definitely not down to 10:1 or anything. I'd have to carve out absolute shitloads to drop it by that much. Might end up at 13:1 or maybe 12.5:1 worst case scenario. Actually thinking about it some more, 1 cubic centimeter is fucking heaps haha. Dad's CNC machine has turned up, he's slowly troubleshooting issues and getting things fixed. I'm thinking it would be cool to be able to get a CNC profile setup for some combustion chamber mods and smoothing out the intake bump. As they are fairly simple mostly circular paths with a ball nosed cutter. (Simple, says person who knows nothing about it) This way I could be sure everything is exactly the same between cylinders. Also, have signed up for a Pukekohe trackday this Friday, exciting! Looking forward to it.
3 points
-
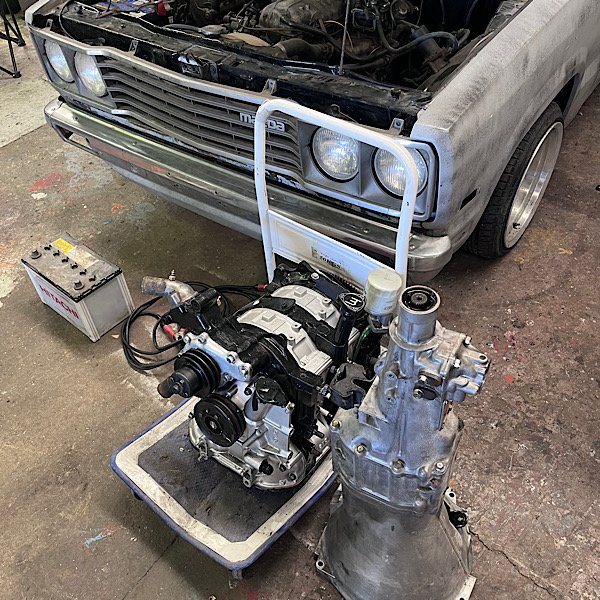
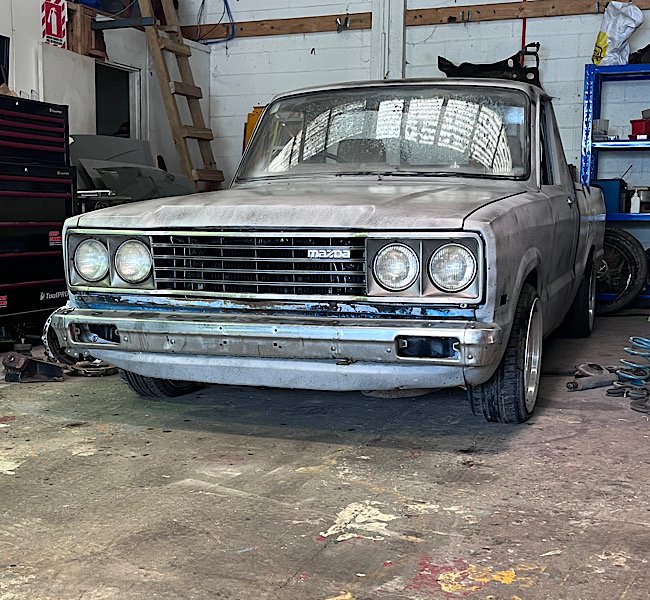
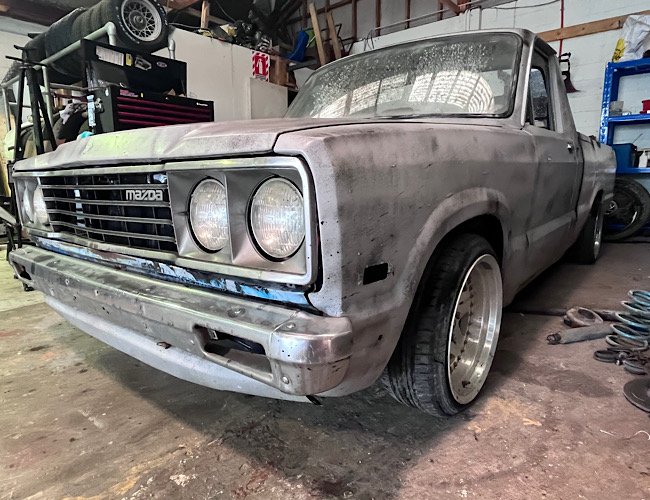
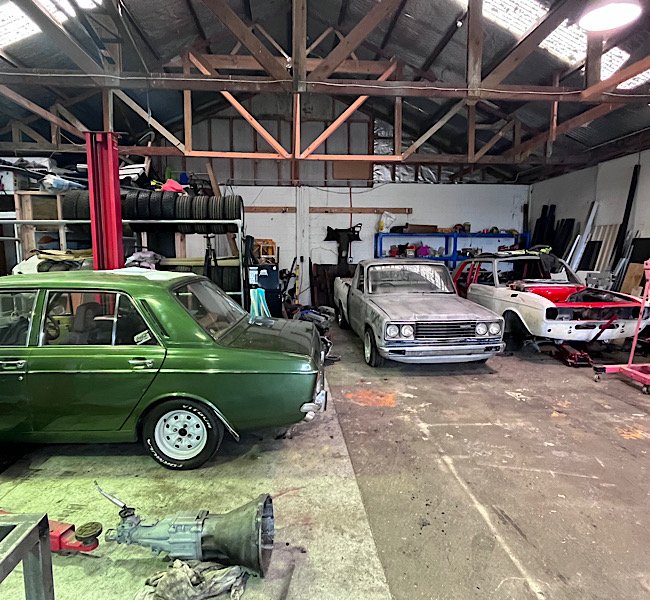
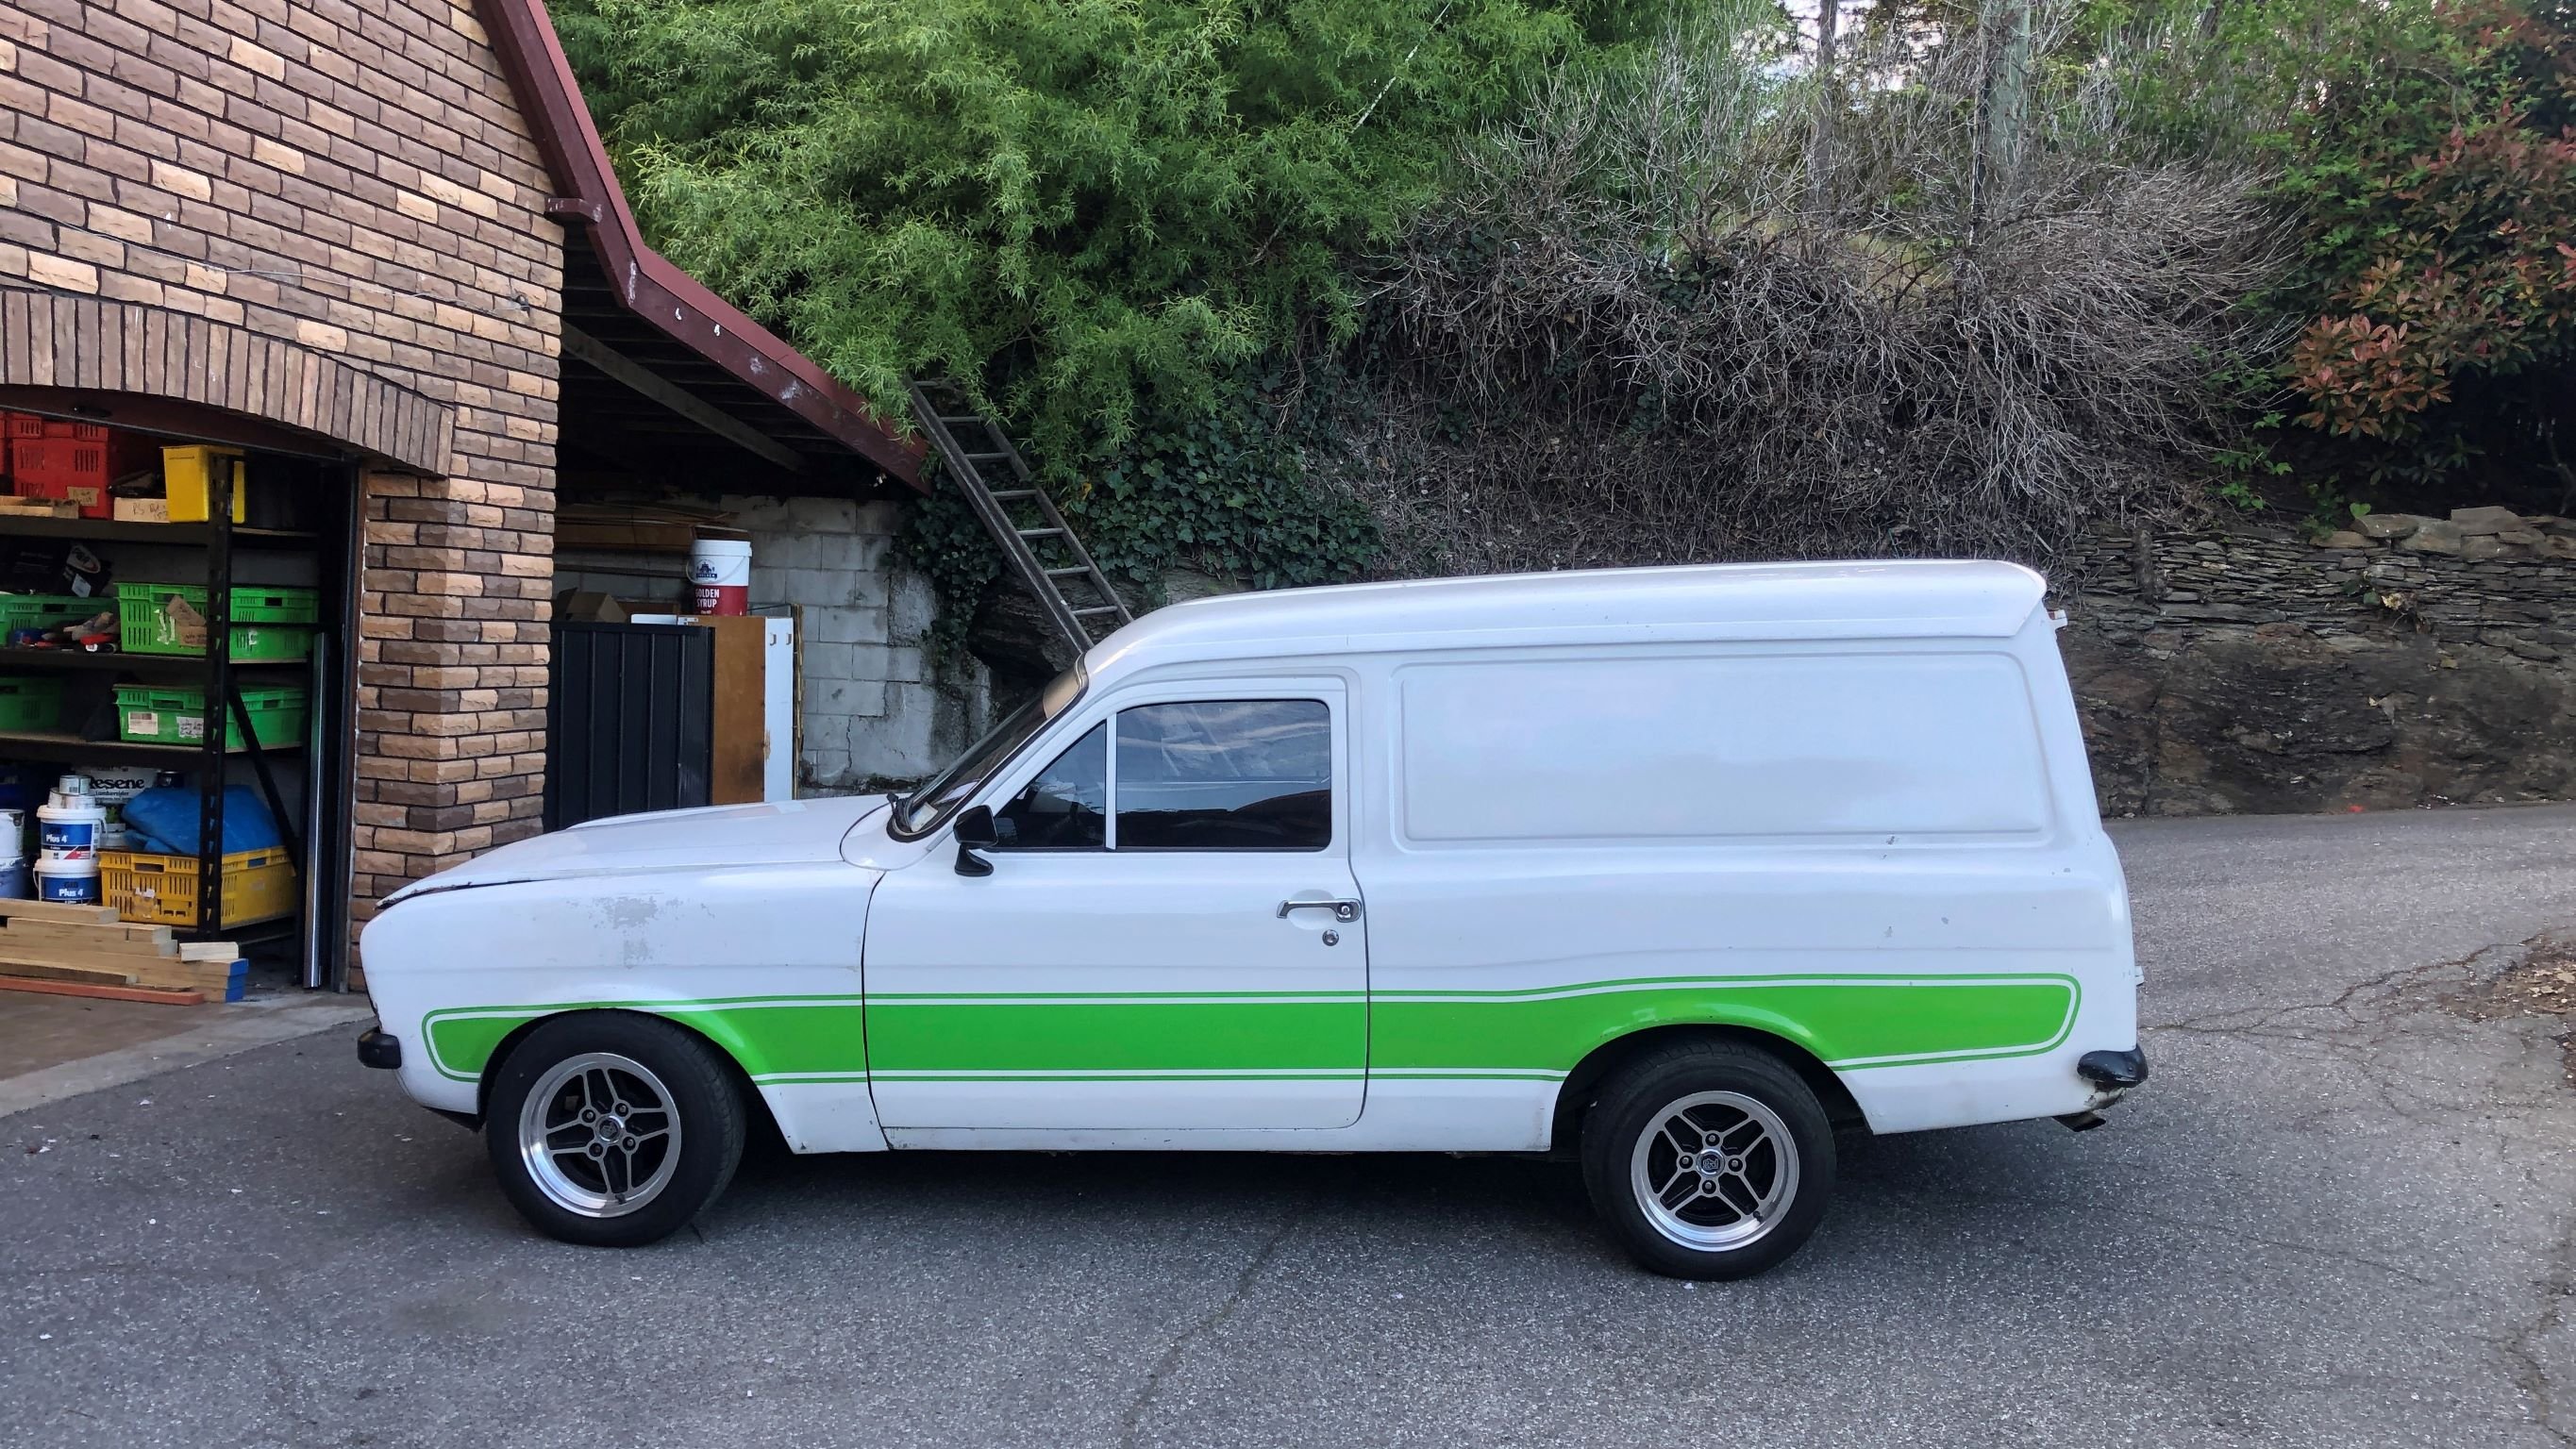
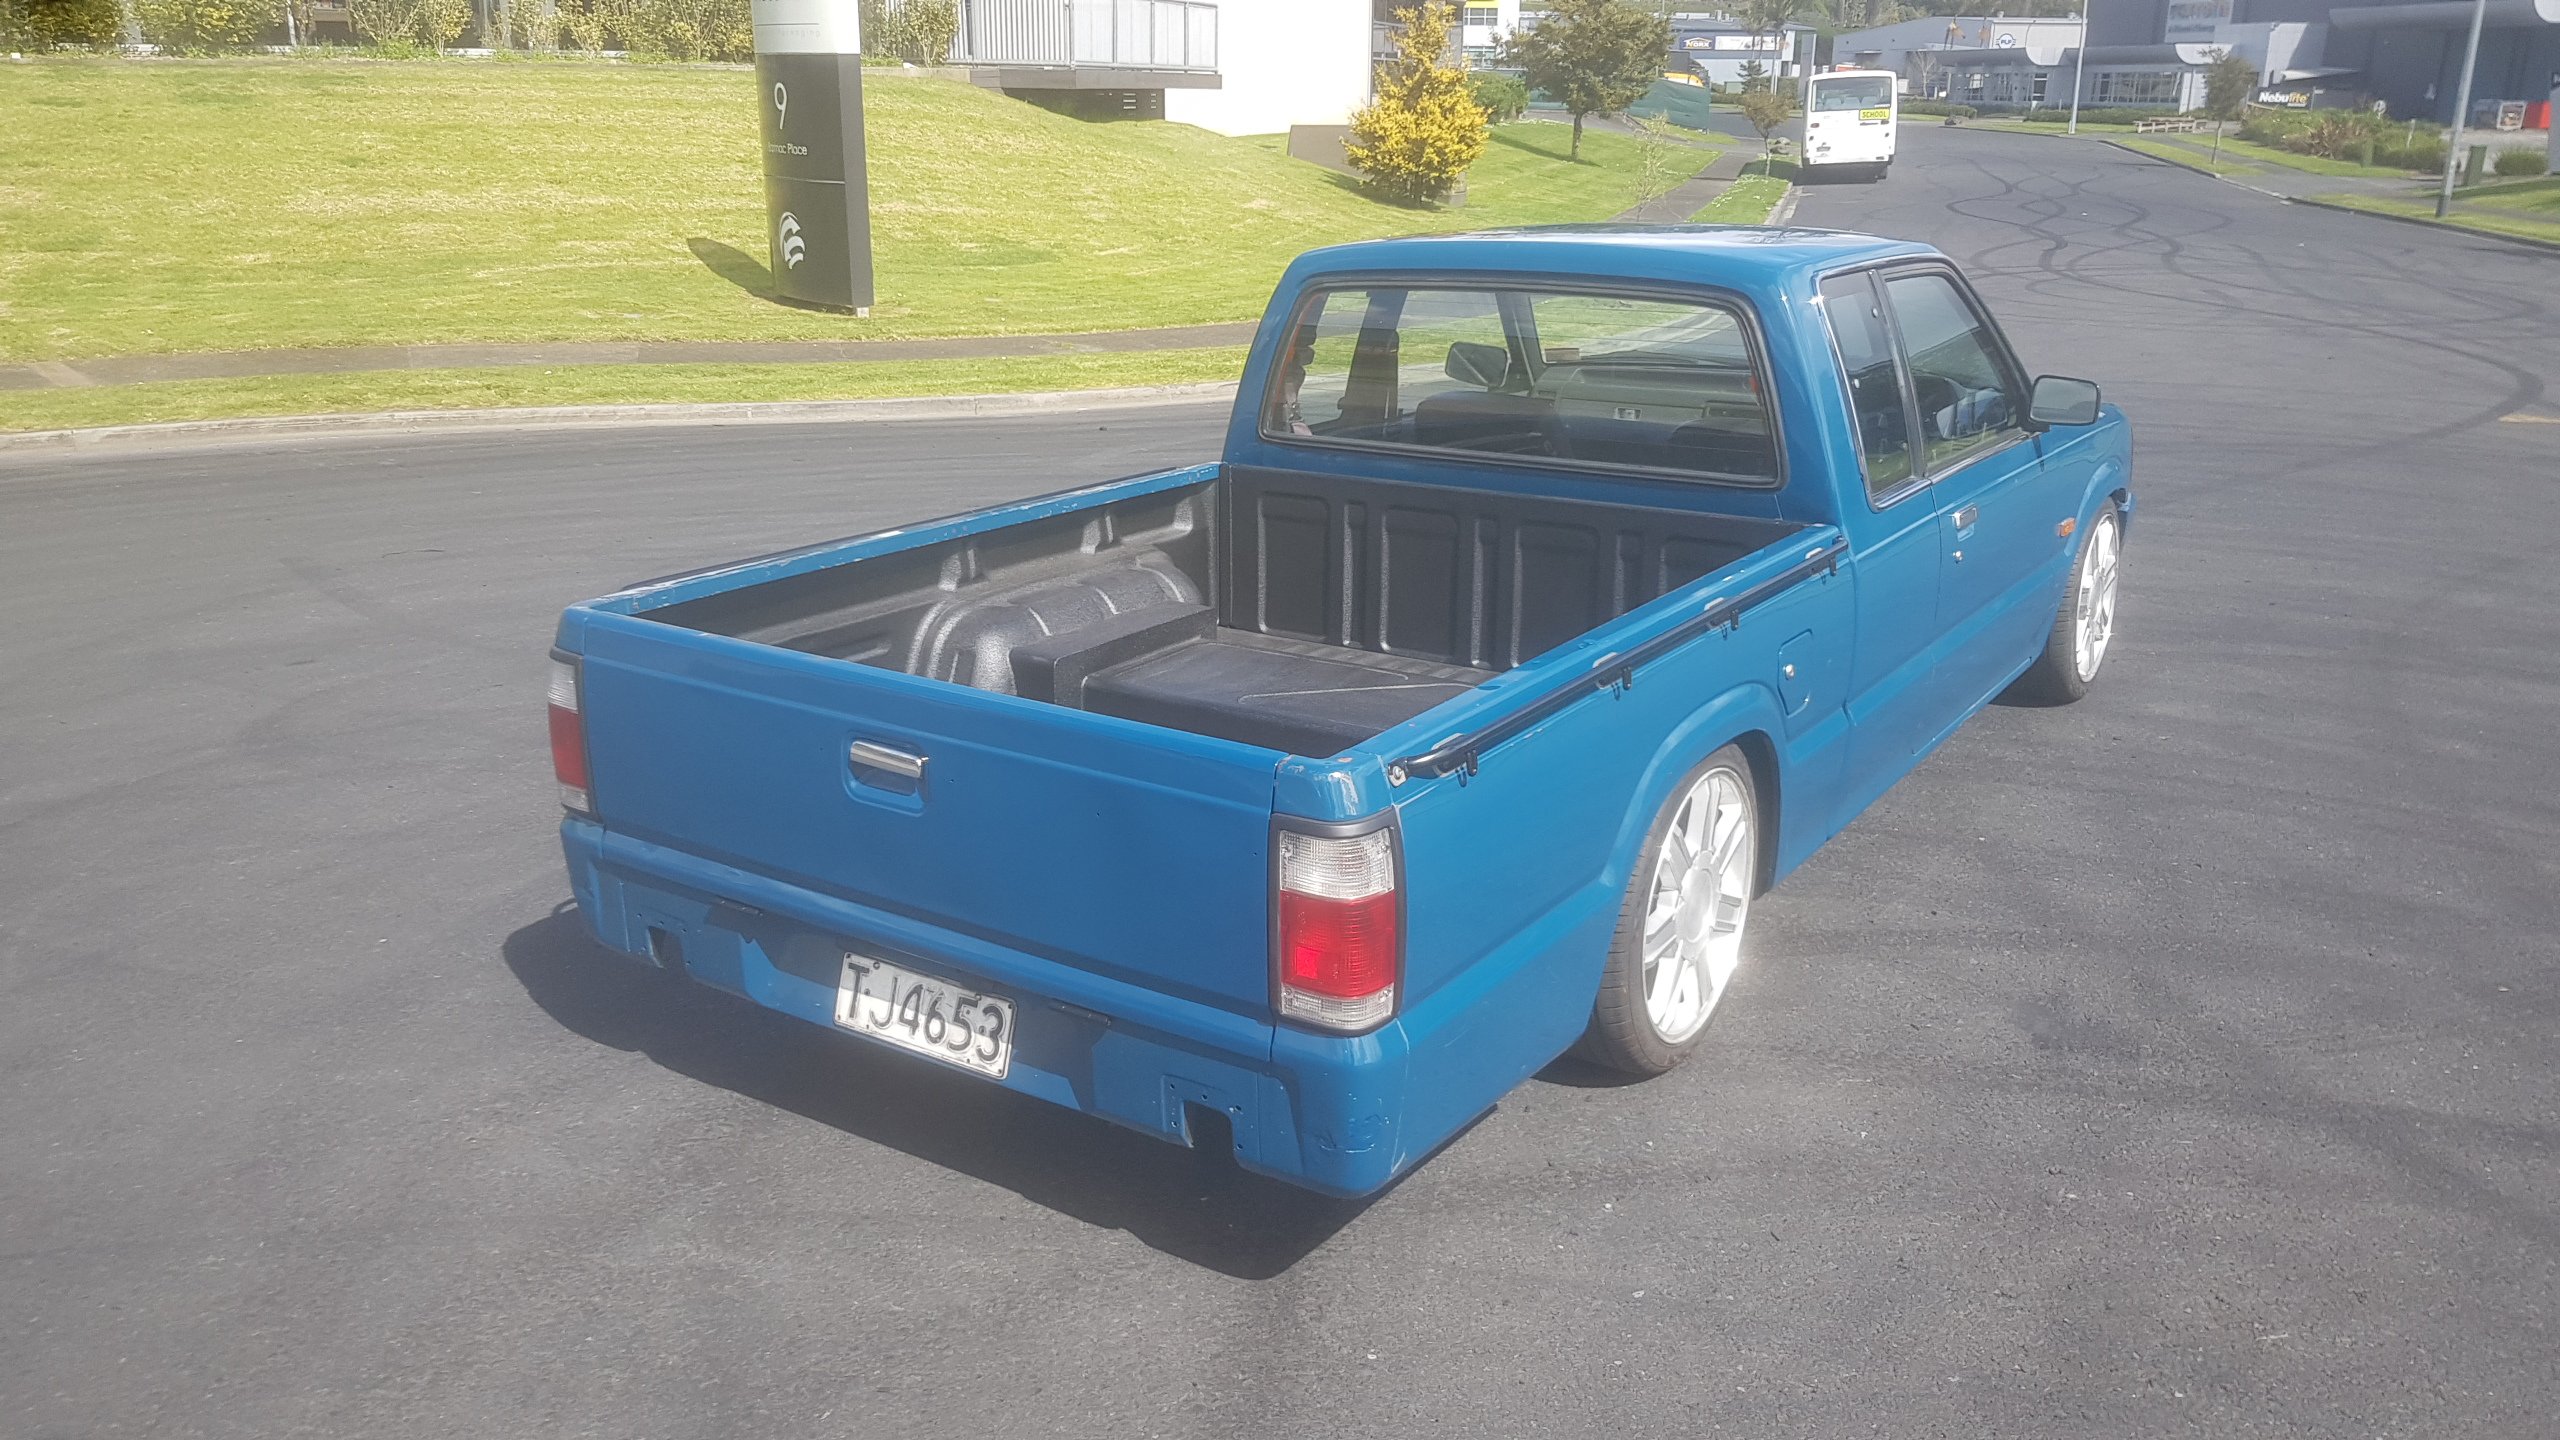
Ye old girl got another stable mate today. aka the new home of the 12a j the guy who delivered it from chch was a mx5 guru, and has schooled me in the ways of biffing the gtx motor into the race hunter.. he also put bad thoughts of a whole mx5 subframe in the front, maybe in the back too??? ute- 12a j port green hunter- 4age race hunter- gtx 1800 turbo, 6 speed box. I’ll start a build thread on the Ute once I start on it. Focus on greeny first of all
3 points
-
This post is well over due for an update. I still own it on around the 4th engine many stories to tell but not ones of good news. Its been getting a new engine and a few other bits done over the last little while. So much has been done so many photos so much work will slowly try to update no longer a work van just a toy now.
2 points
-
ive been proactive and prepped too far in advance and now there is enough time to break both bikes.1 point
-
When the hubs were removed off the Mk2 Jag we then had - in order to put wires on it. The Jag factory puller was left on a rear hub overnight at max tension up on the hoist. When the workshop warmed up the following morning there was a loud bang and the hub/puller lump knocked a concrete block out of the workshop wall. Luckily I knew the workshop owner well..... These things can do damage coming off. Be careful1 point
-
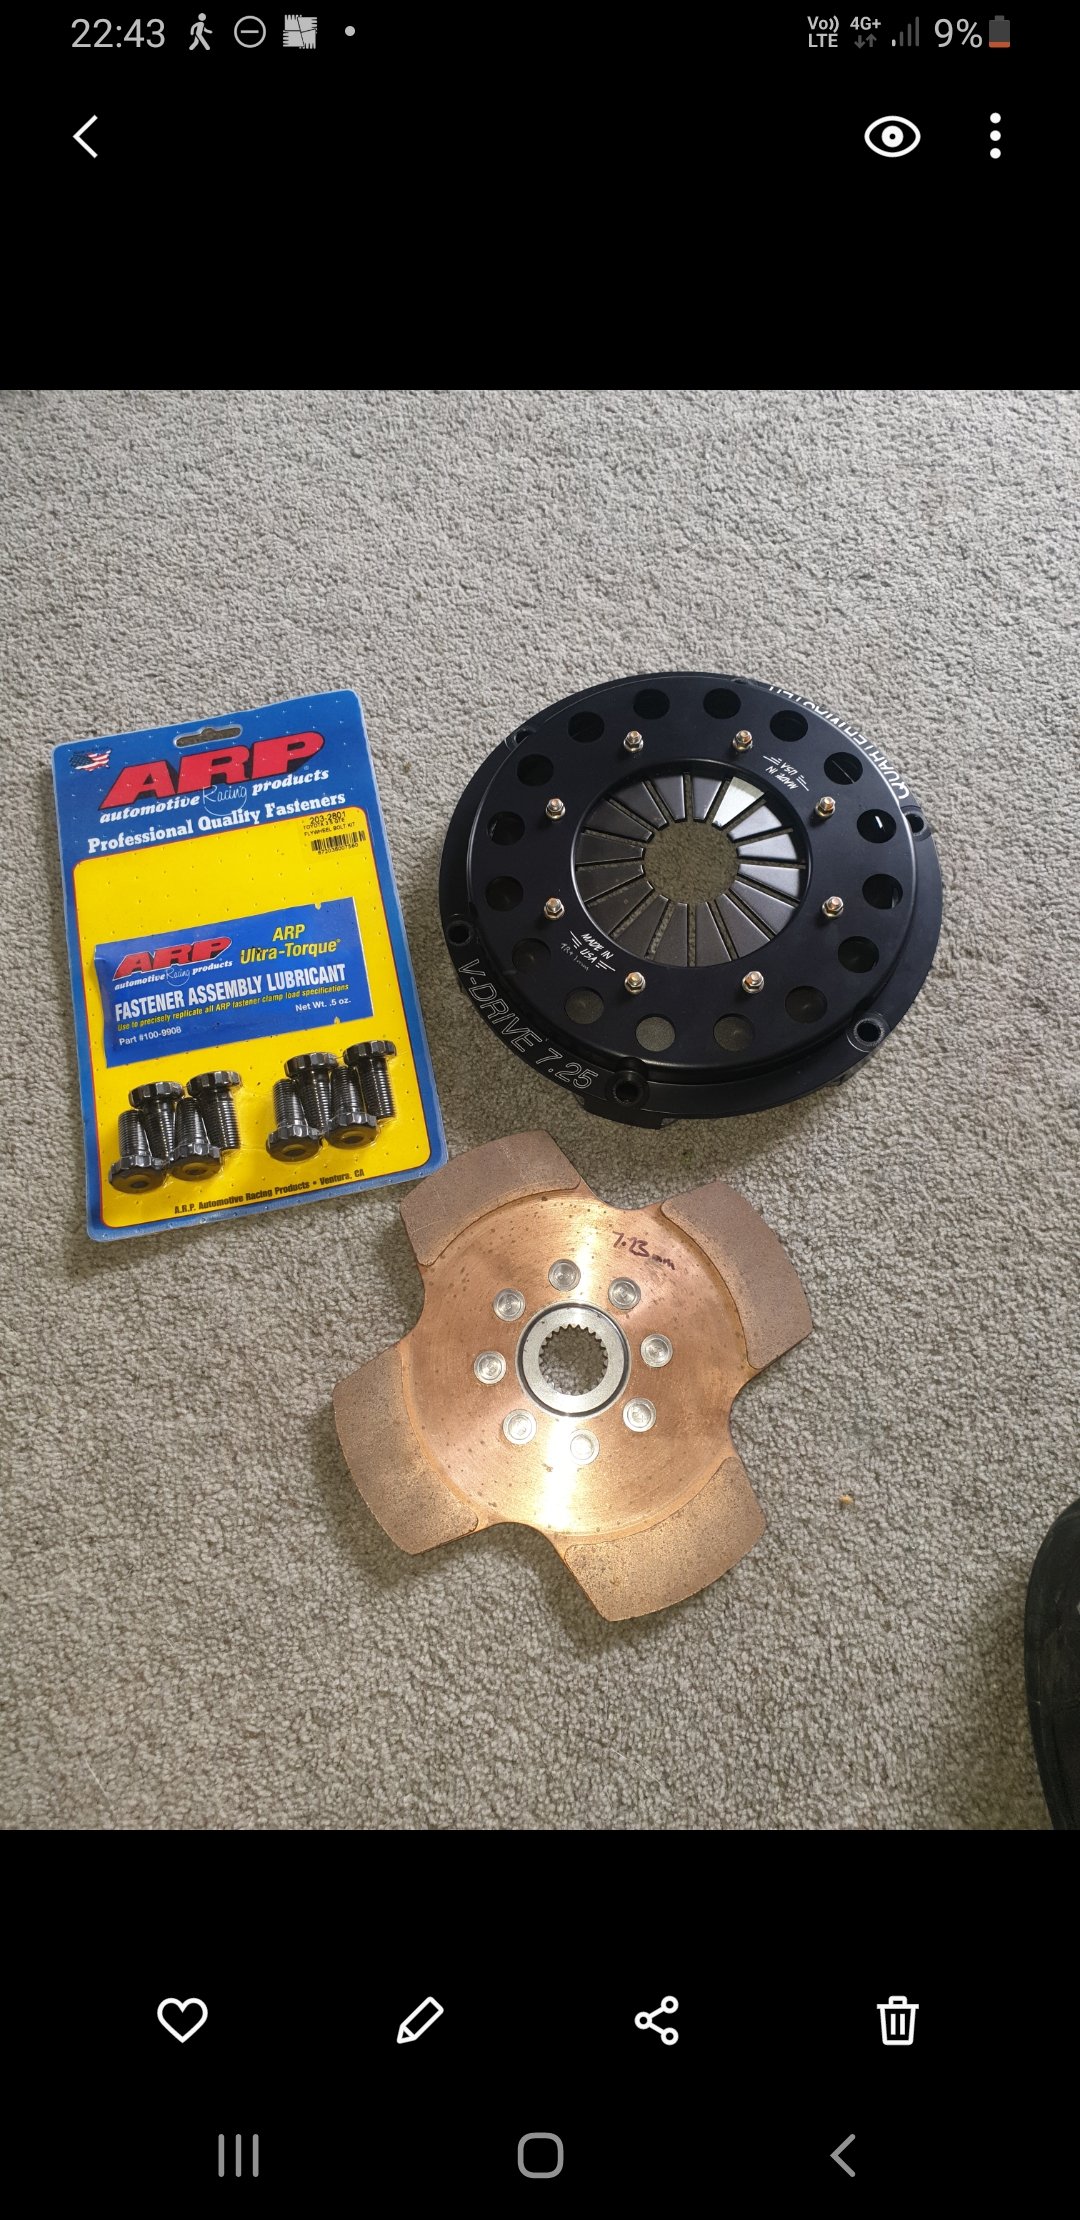
if the piston weights are different between what was in there and new ones. like a decent amount the motor will need balancing if not done can cause issues like engine vibrations and unwanted wear on components. plus the engine will be used hard too its not much money in the scheme of what your spending in parts and what it will cost if you had to do it twice. if your not sure on weights or getting it done get your motor machinist to check and tell you1 point
-
From my research the series 3 oxford Ute is 5x5 stud pattern I am not to sure what year the rustier Ute is but came with a series 2 bonnet and is three on the tree rather than four/floor so I'm guessing it is earlier. Can someone link the discussion in to this thanks Here's some patches on my patches for content
1 point
-
More goodies arrived yesterday from the UK. Started fitting them last night.
1 point
-
Hiding down in Central Otago now days. Some fun to be had down here with the COMC
1 point
-
1 point
-
Did some ghetto paint chip touchups and took for a quick drive round the road to get some pics whilst the sun was out.
1 point
-
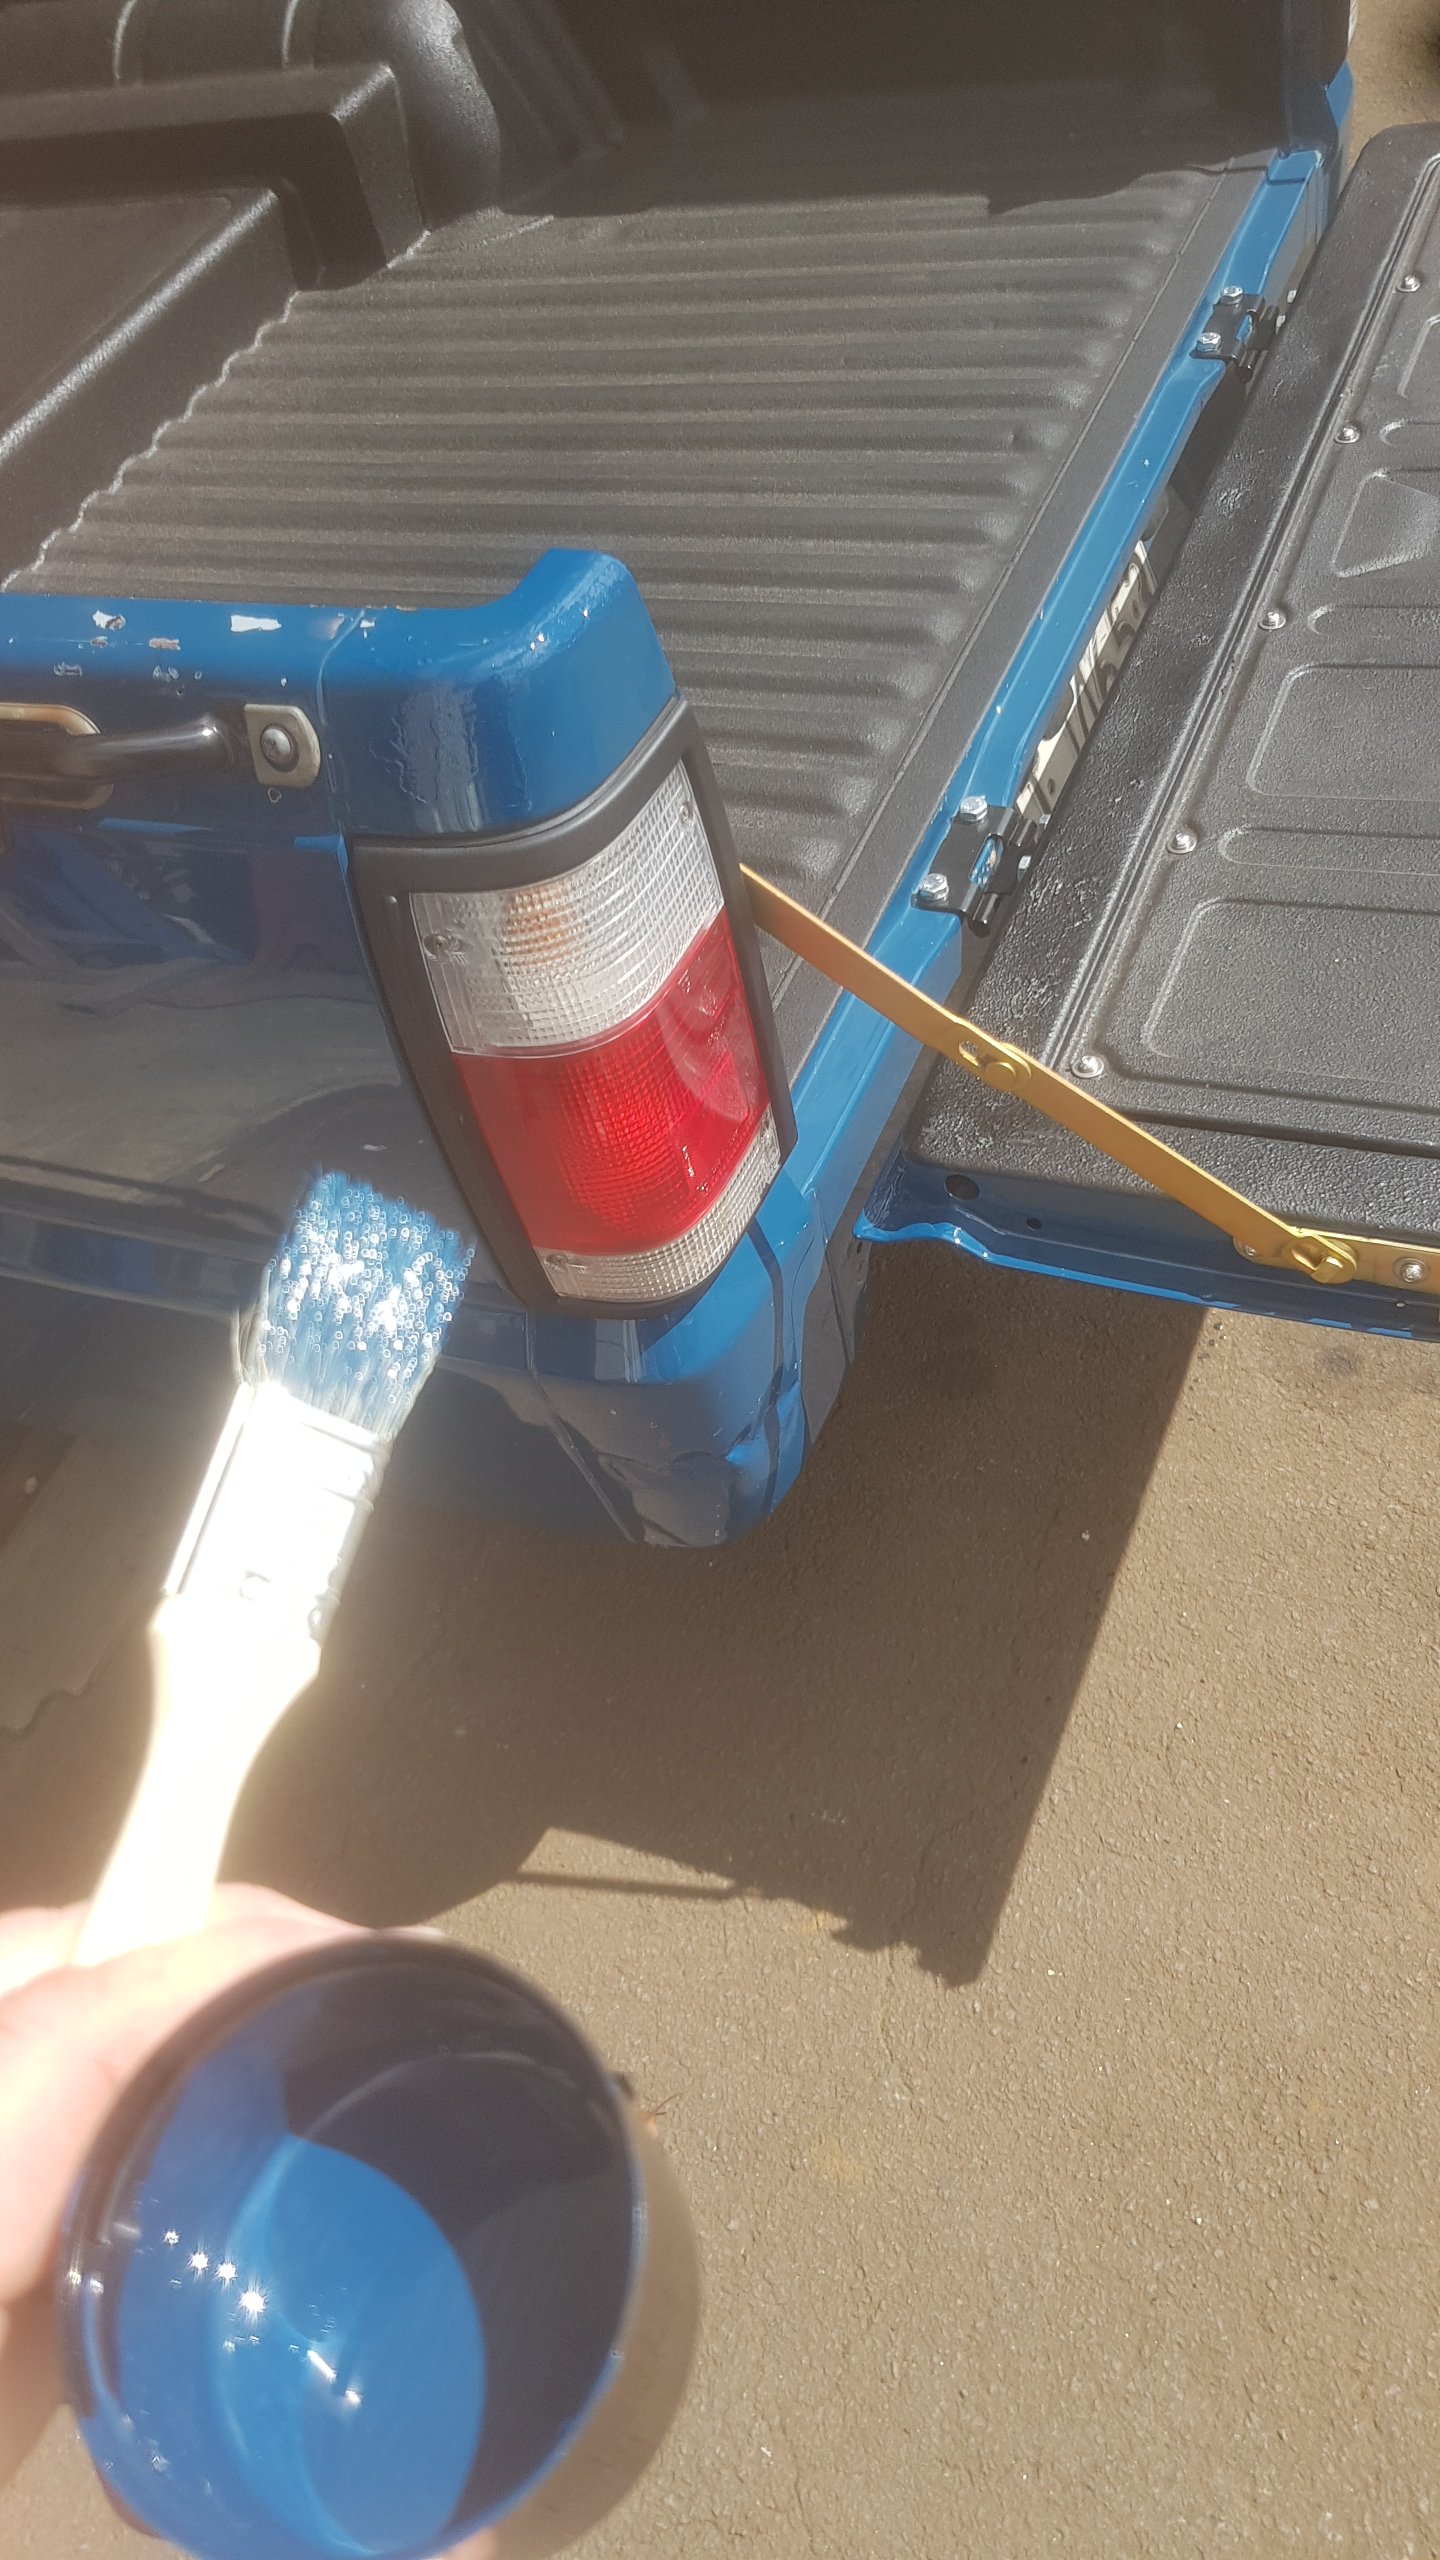
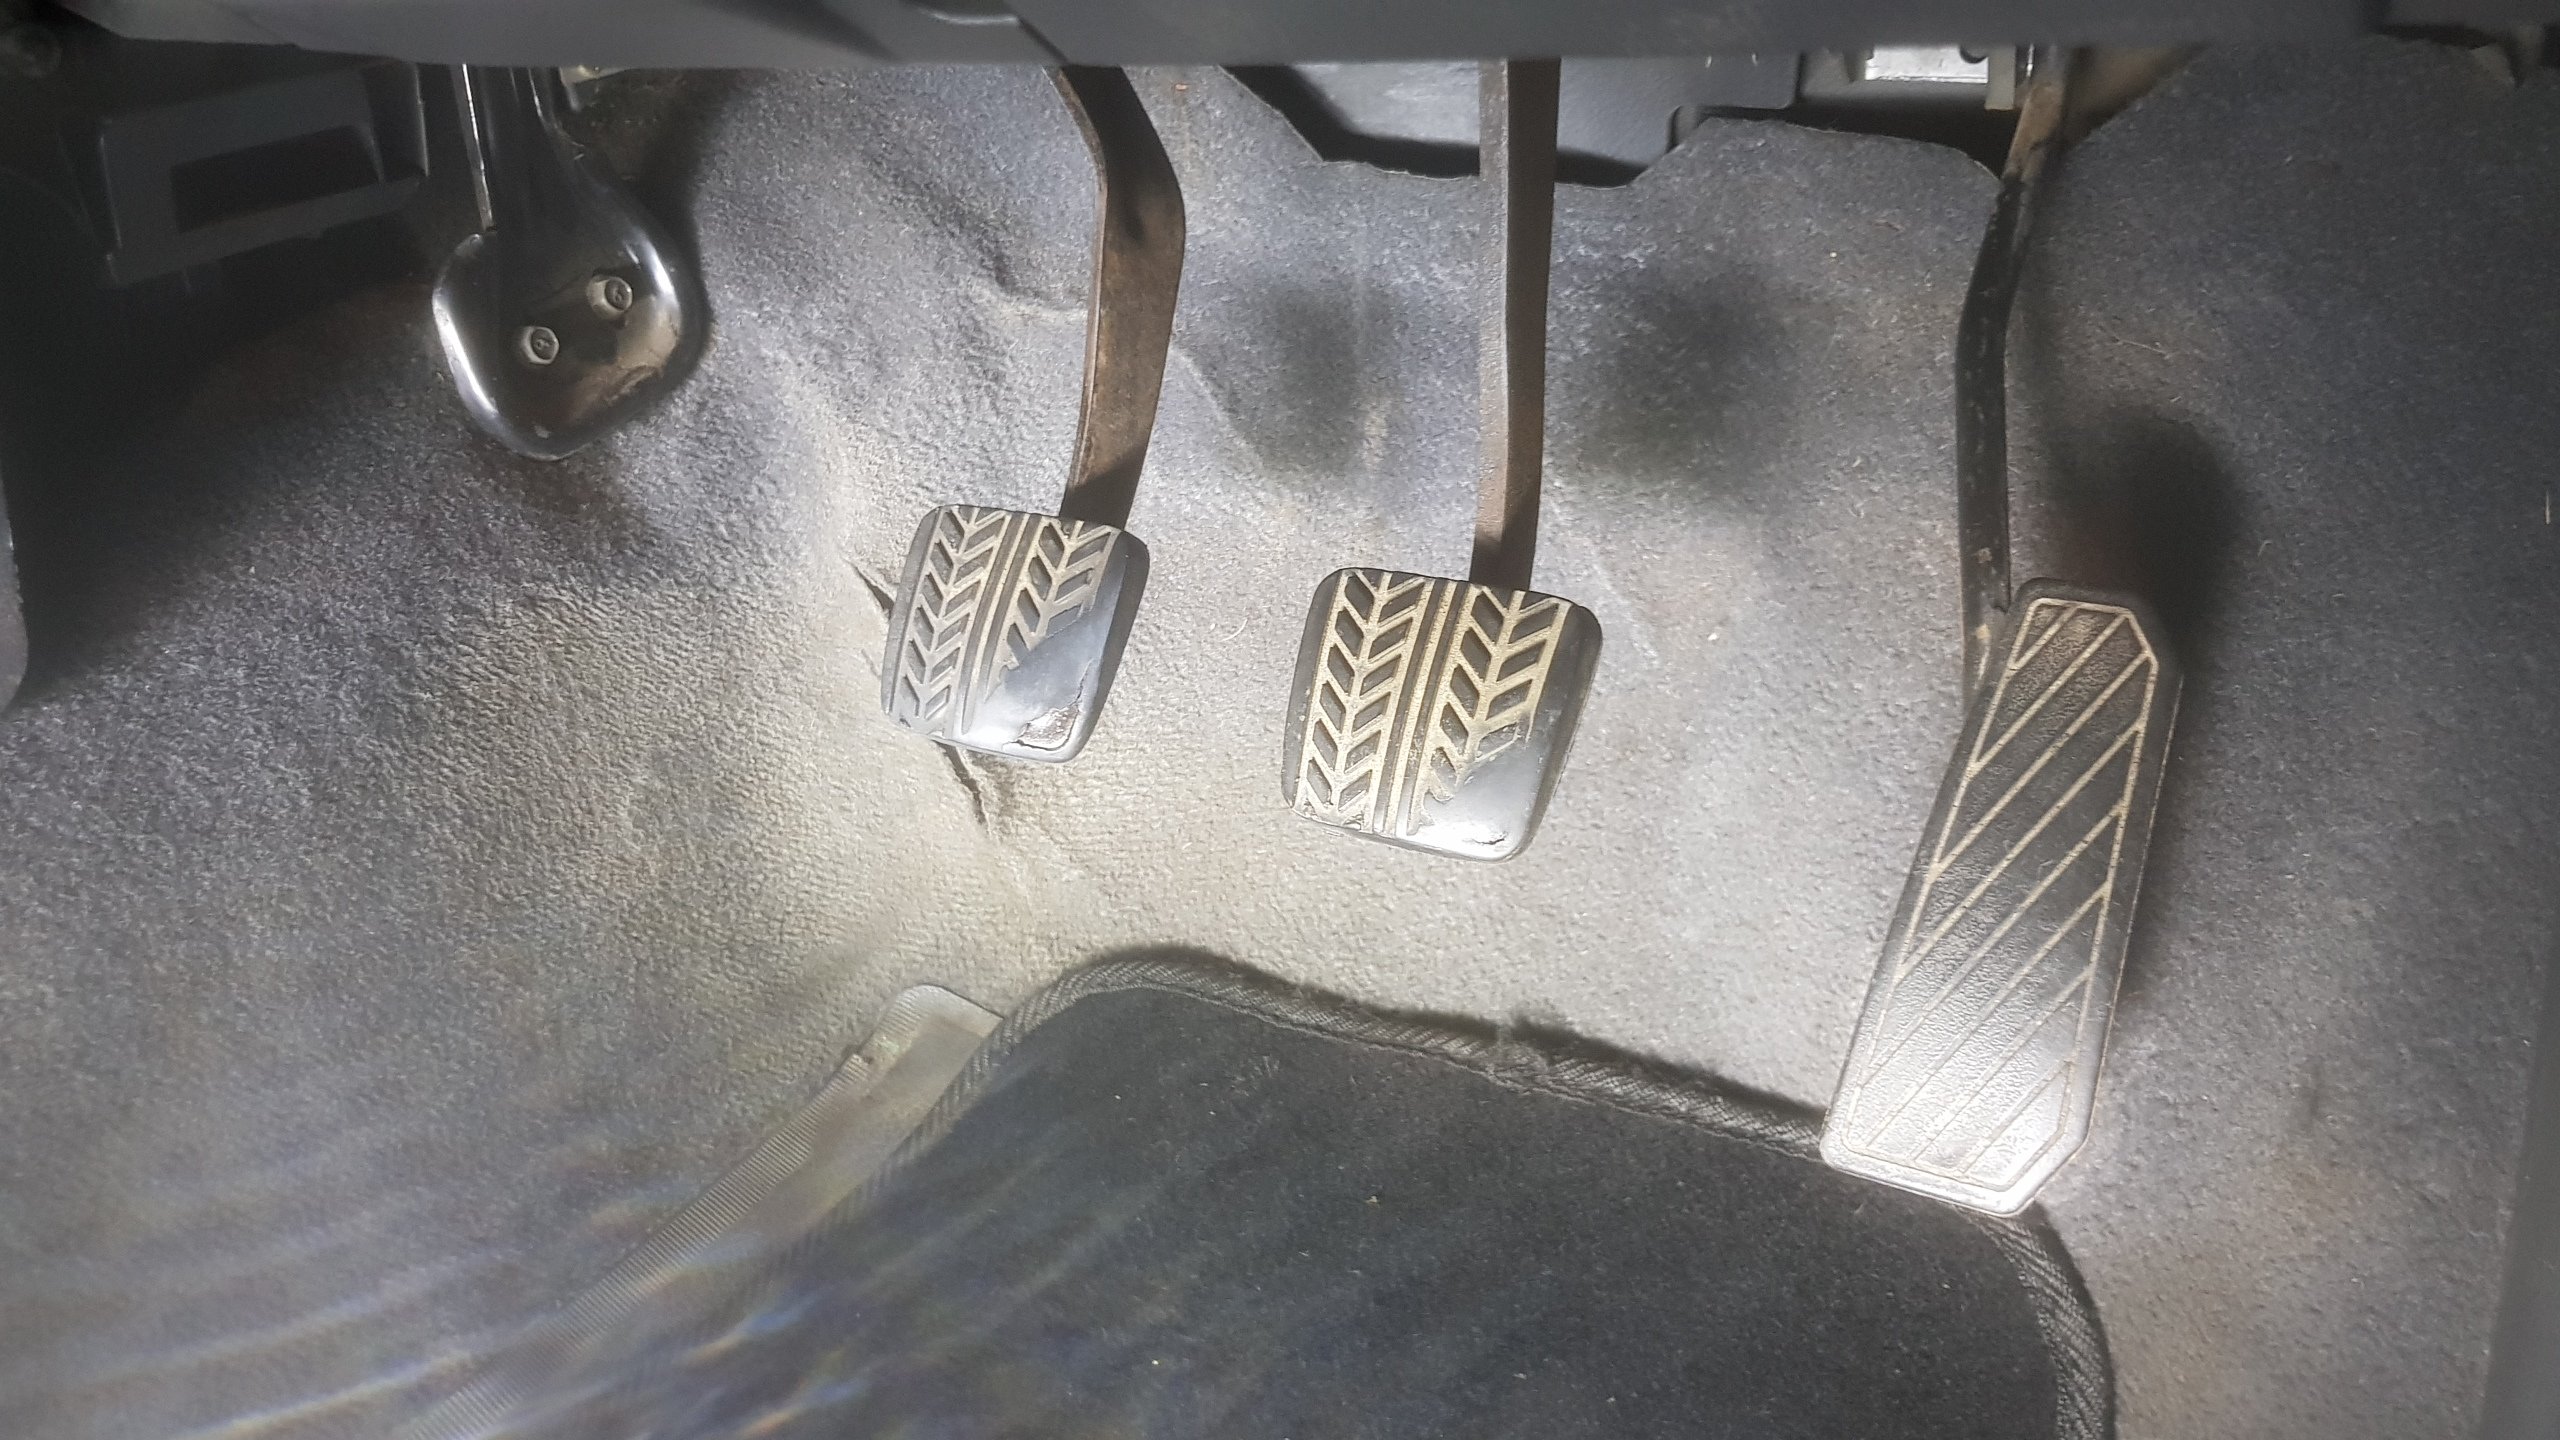
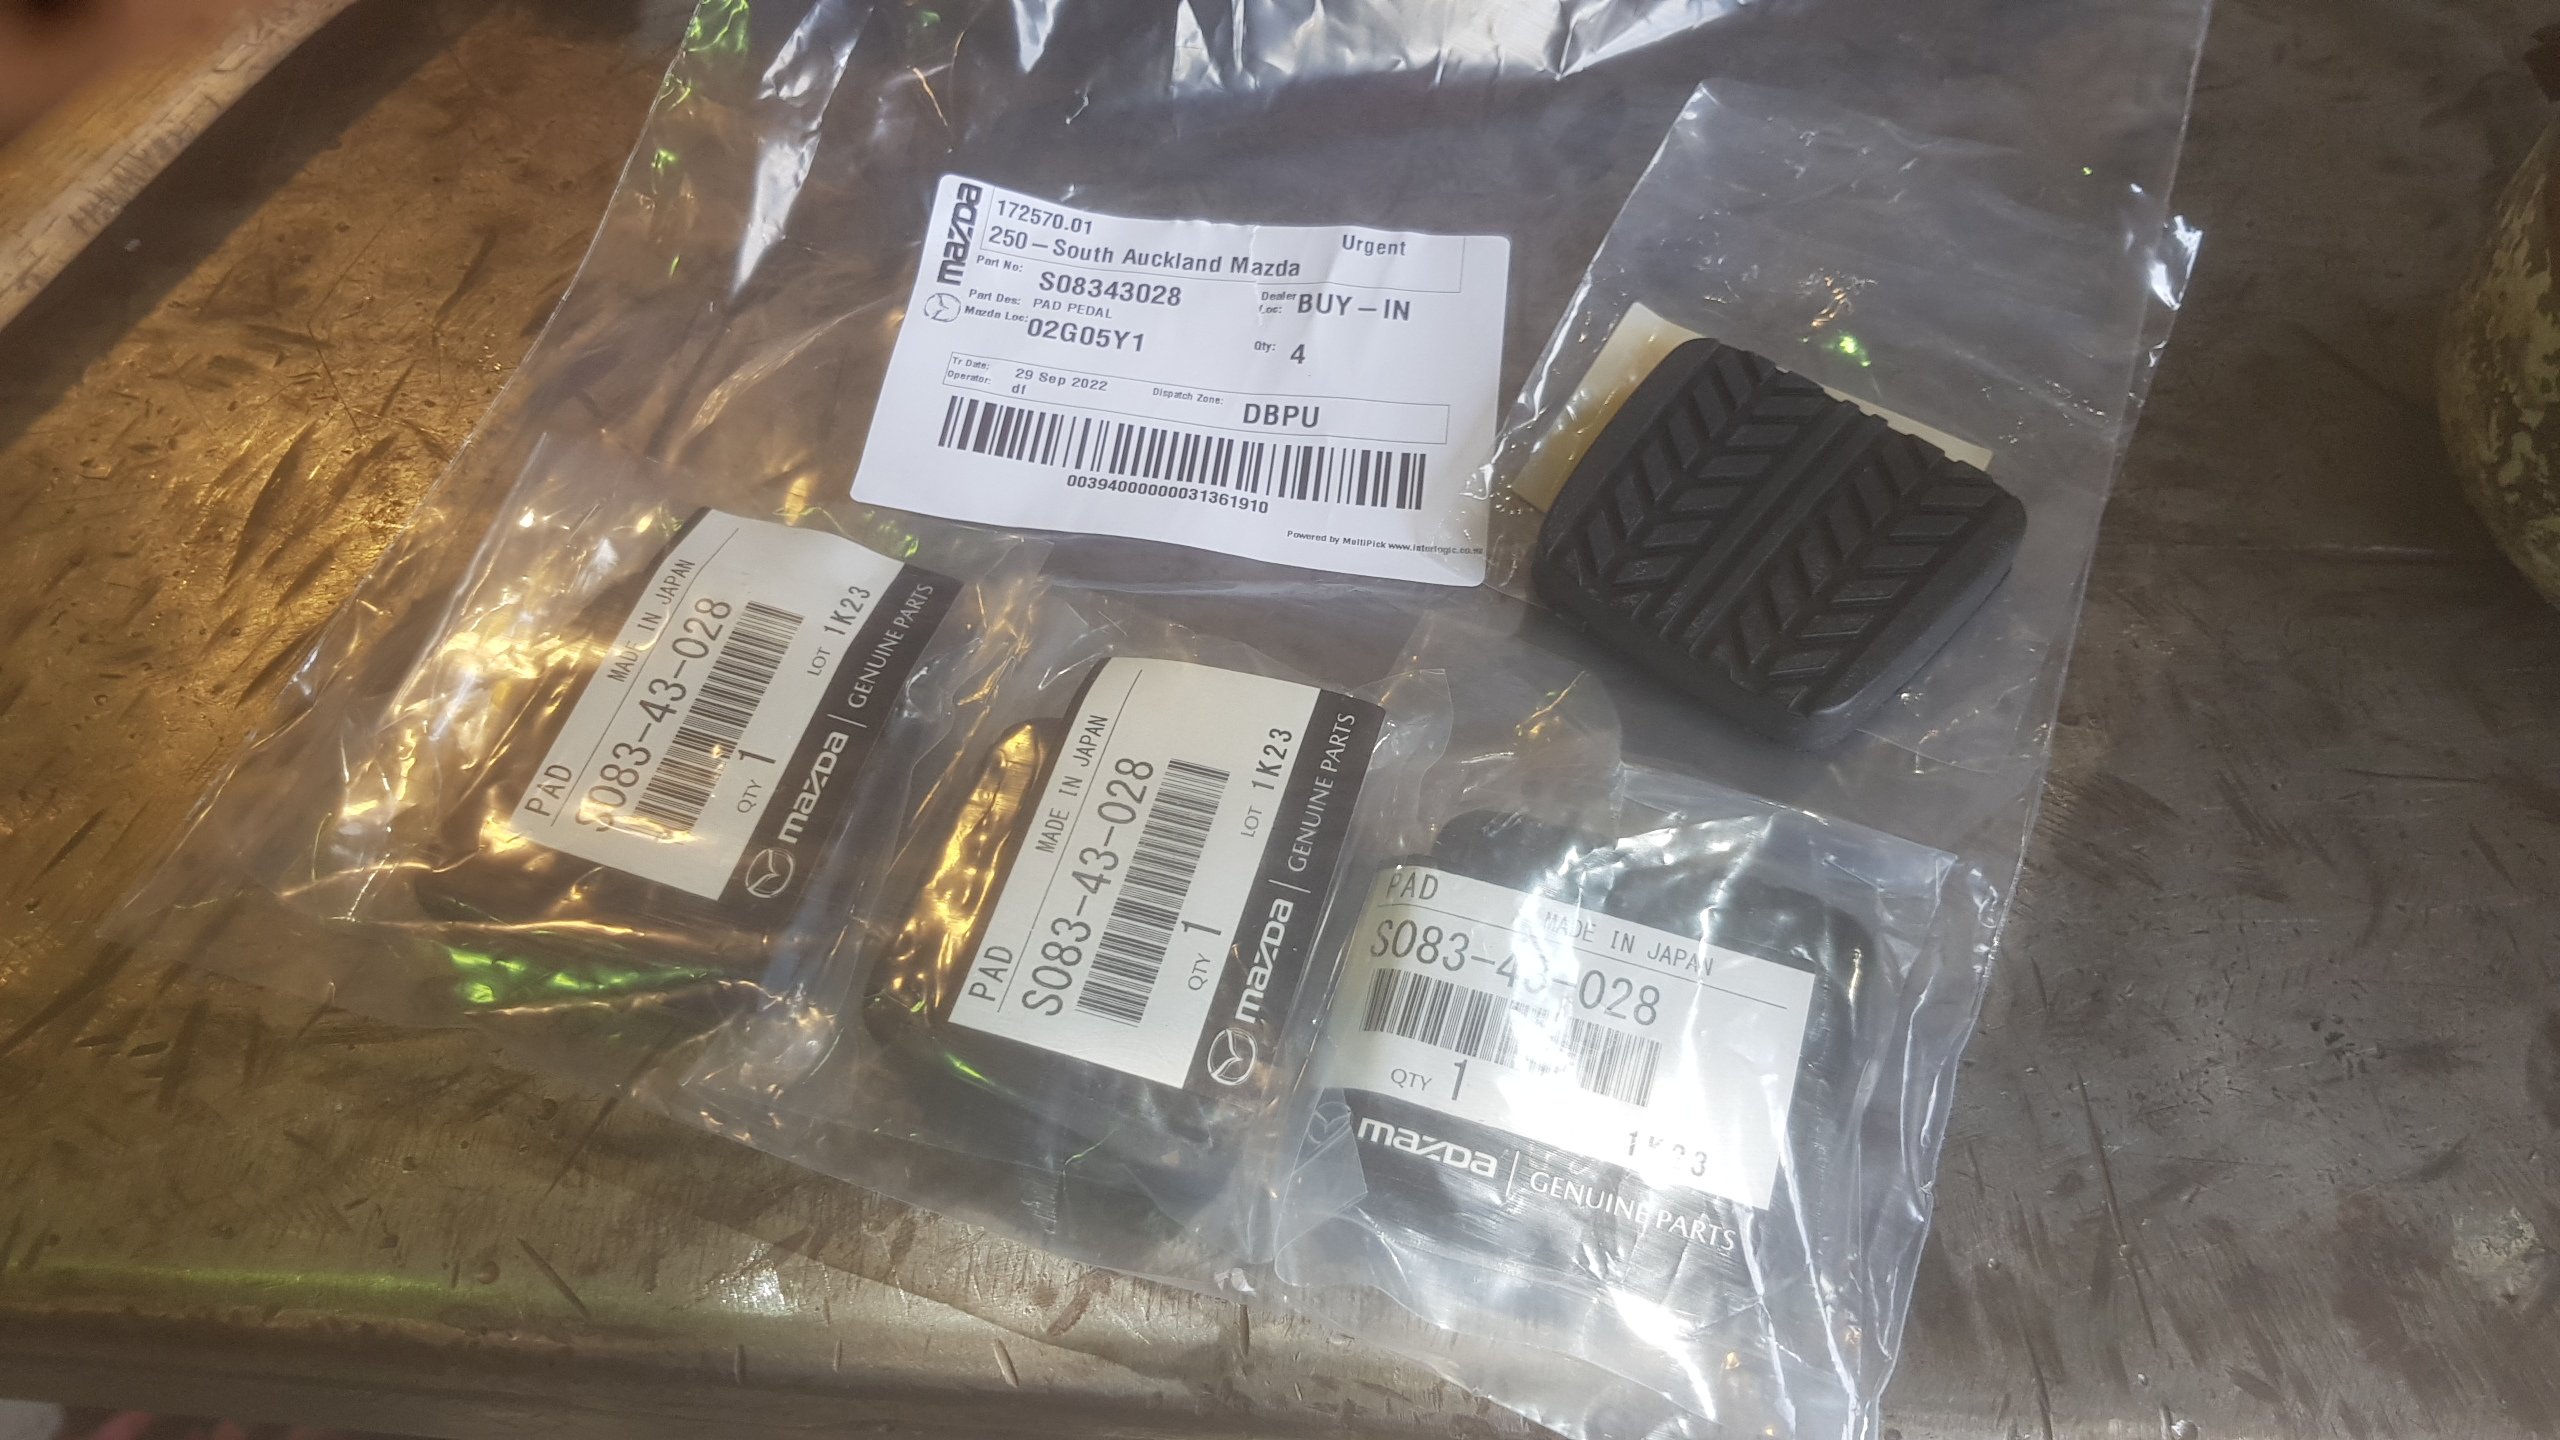
Whilst waiting for the cert to go live I managed to find a part number for genuine pedal pads as my brake/clutch pads were pretty shit, and metal showing on the brake pedal is a wof fail. Almost ordered from overseas, but figured I would check locally first. South Auckland Ford/Mazda had stock and are cheap as chips. Also FYI, the same as FC Rx7... so ordered a couple pairs and had them turn up the next day.
1 point
-
Started this old girl up for the first time since Feb. Took a lot of cranking to fill the carb with fuel, but after a couple of coughs it fired straight up and ran great. Took it up the drive and spun it around so I have better access to the passengers side, so i can finally tackle the rusty outer sill. It'll sound stupid, but god i love this car, it just makes me happy, even if its just firing it up to go up the drive and back. The current fleet of toys (excluding the daily Honda)1 point
-
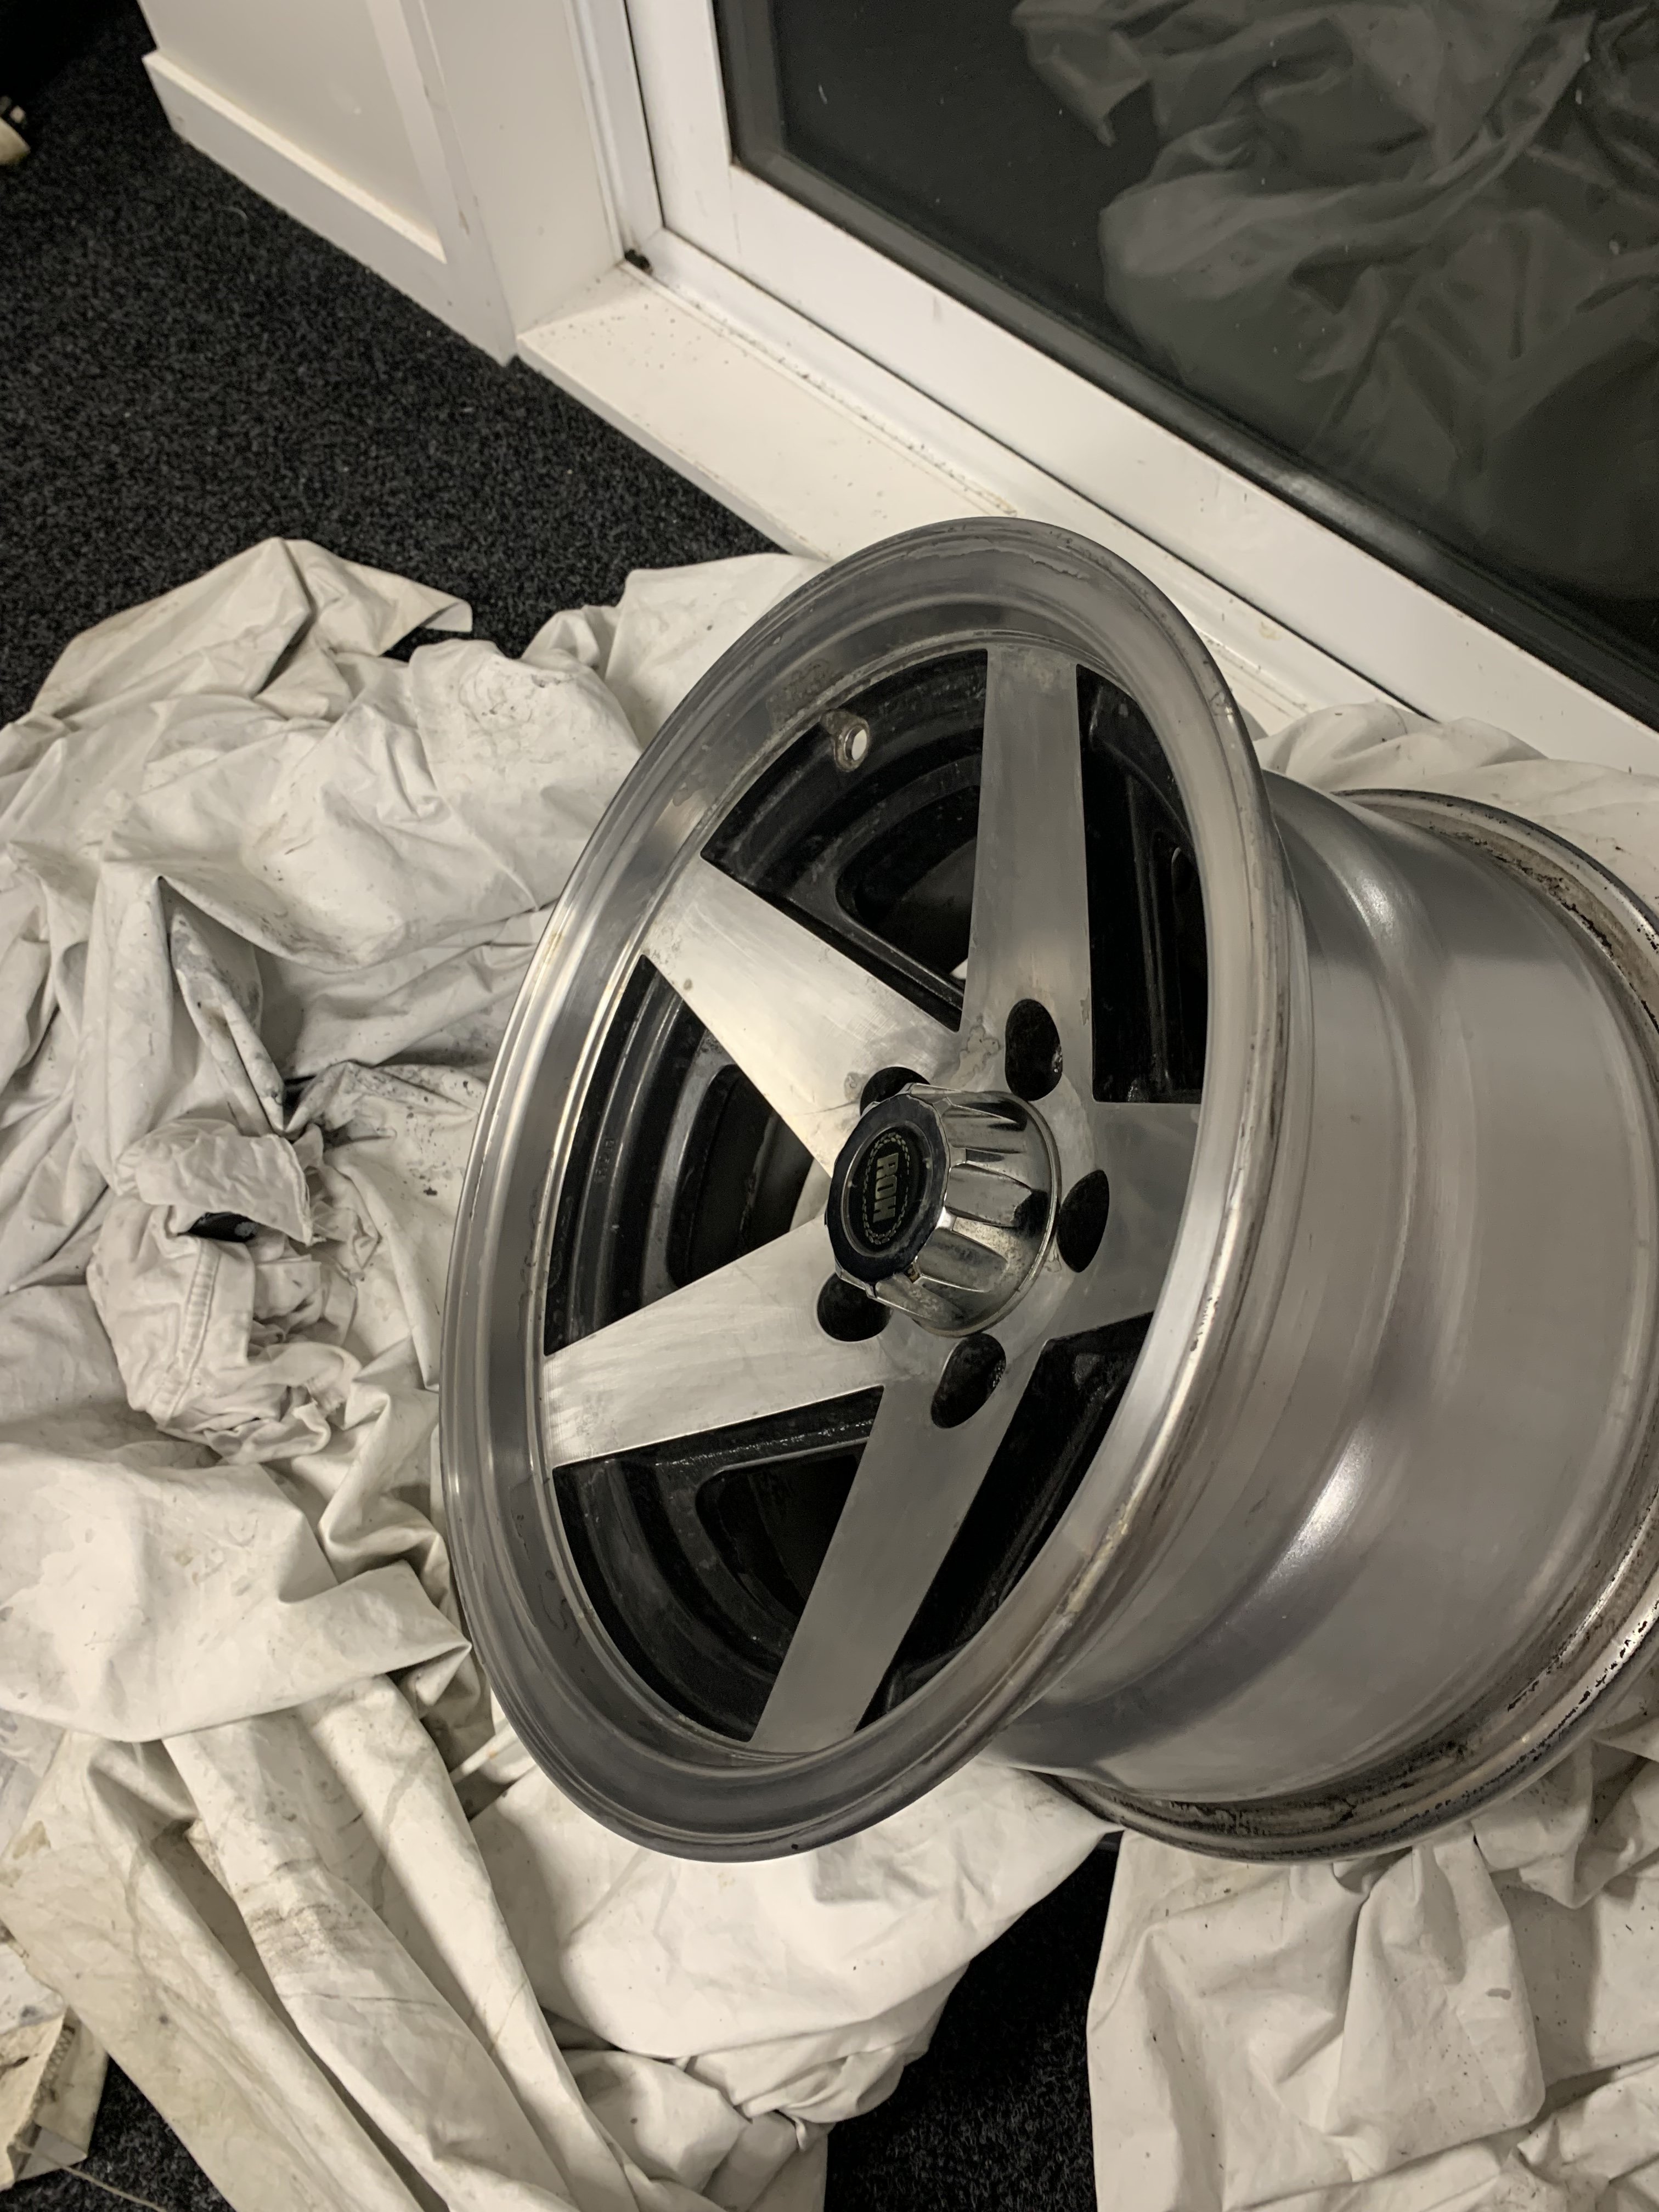
800 grit wet and dry then 1000 and the prostars are looking a lot better. There is nothing like a bit of the old elbow grease to really make them pop
1 point
-
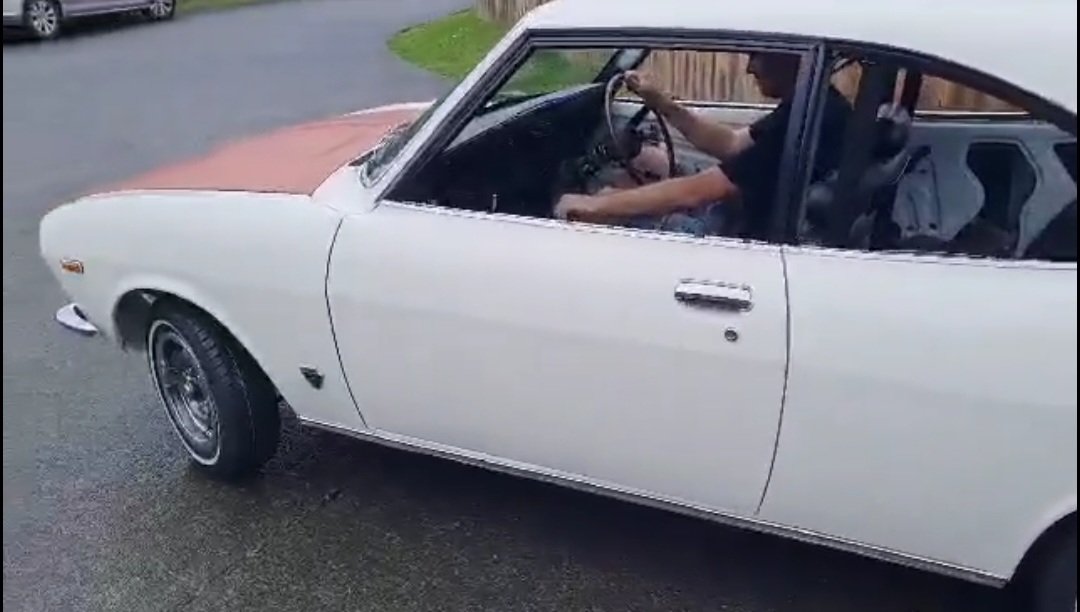
It goes!!!!!!, had a mate drop in to help fire it up on the weekend, (I dont know how to put vids up here without making a YouTube vid), I've even even driven it around the block a few times, so stoked!! Got a few issues to sort, brakes still not good enough need to lock the dizzys, and the carb isn't performing quite right and strangely I have no third gear, will have to figure that one out. But overall, very happy, it pulls really well on the road, goes better than I expected tbh
1 point
-
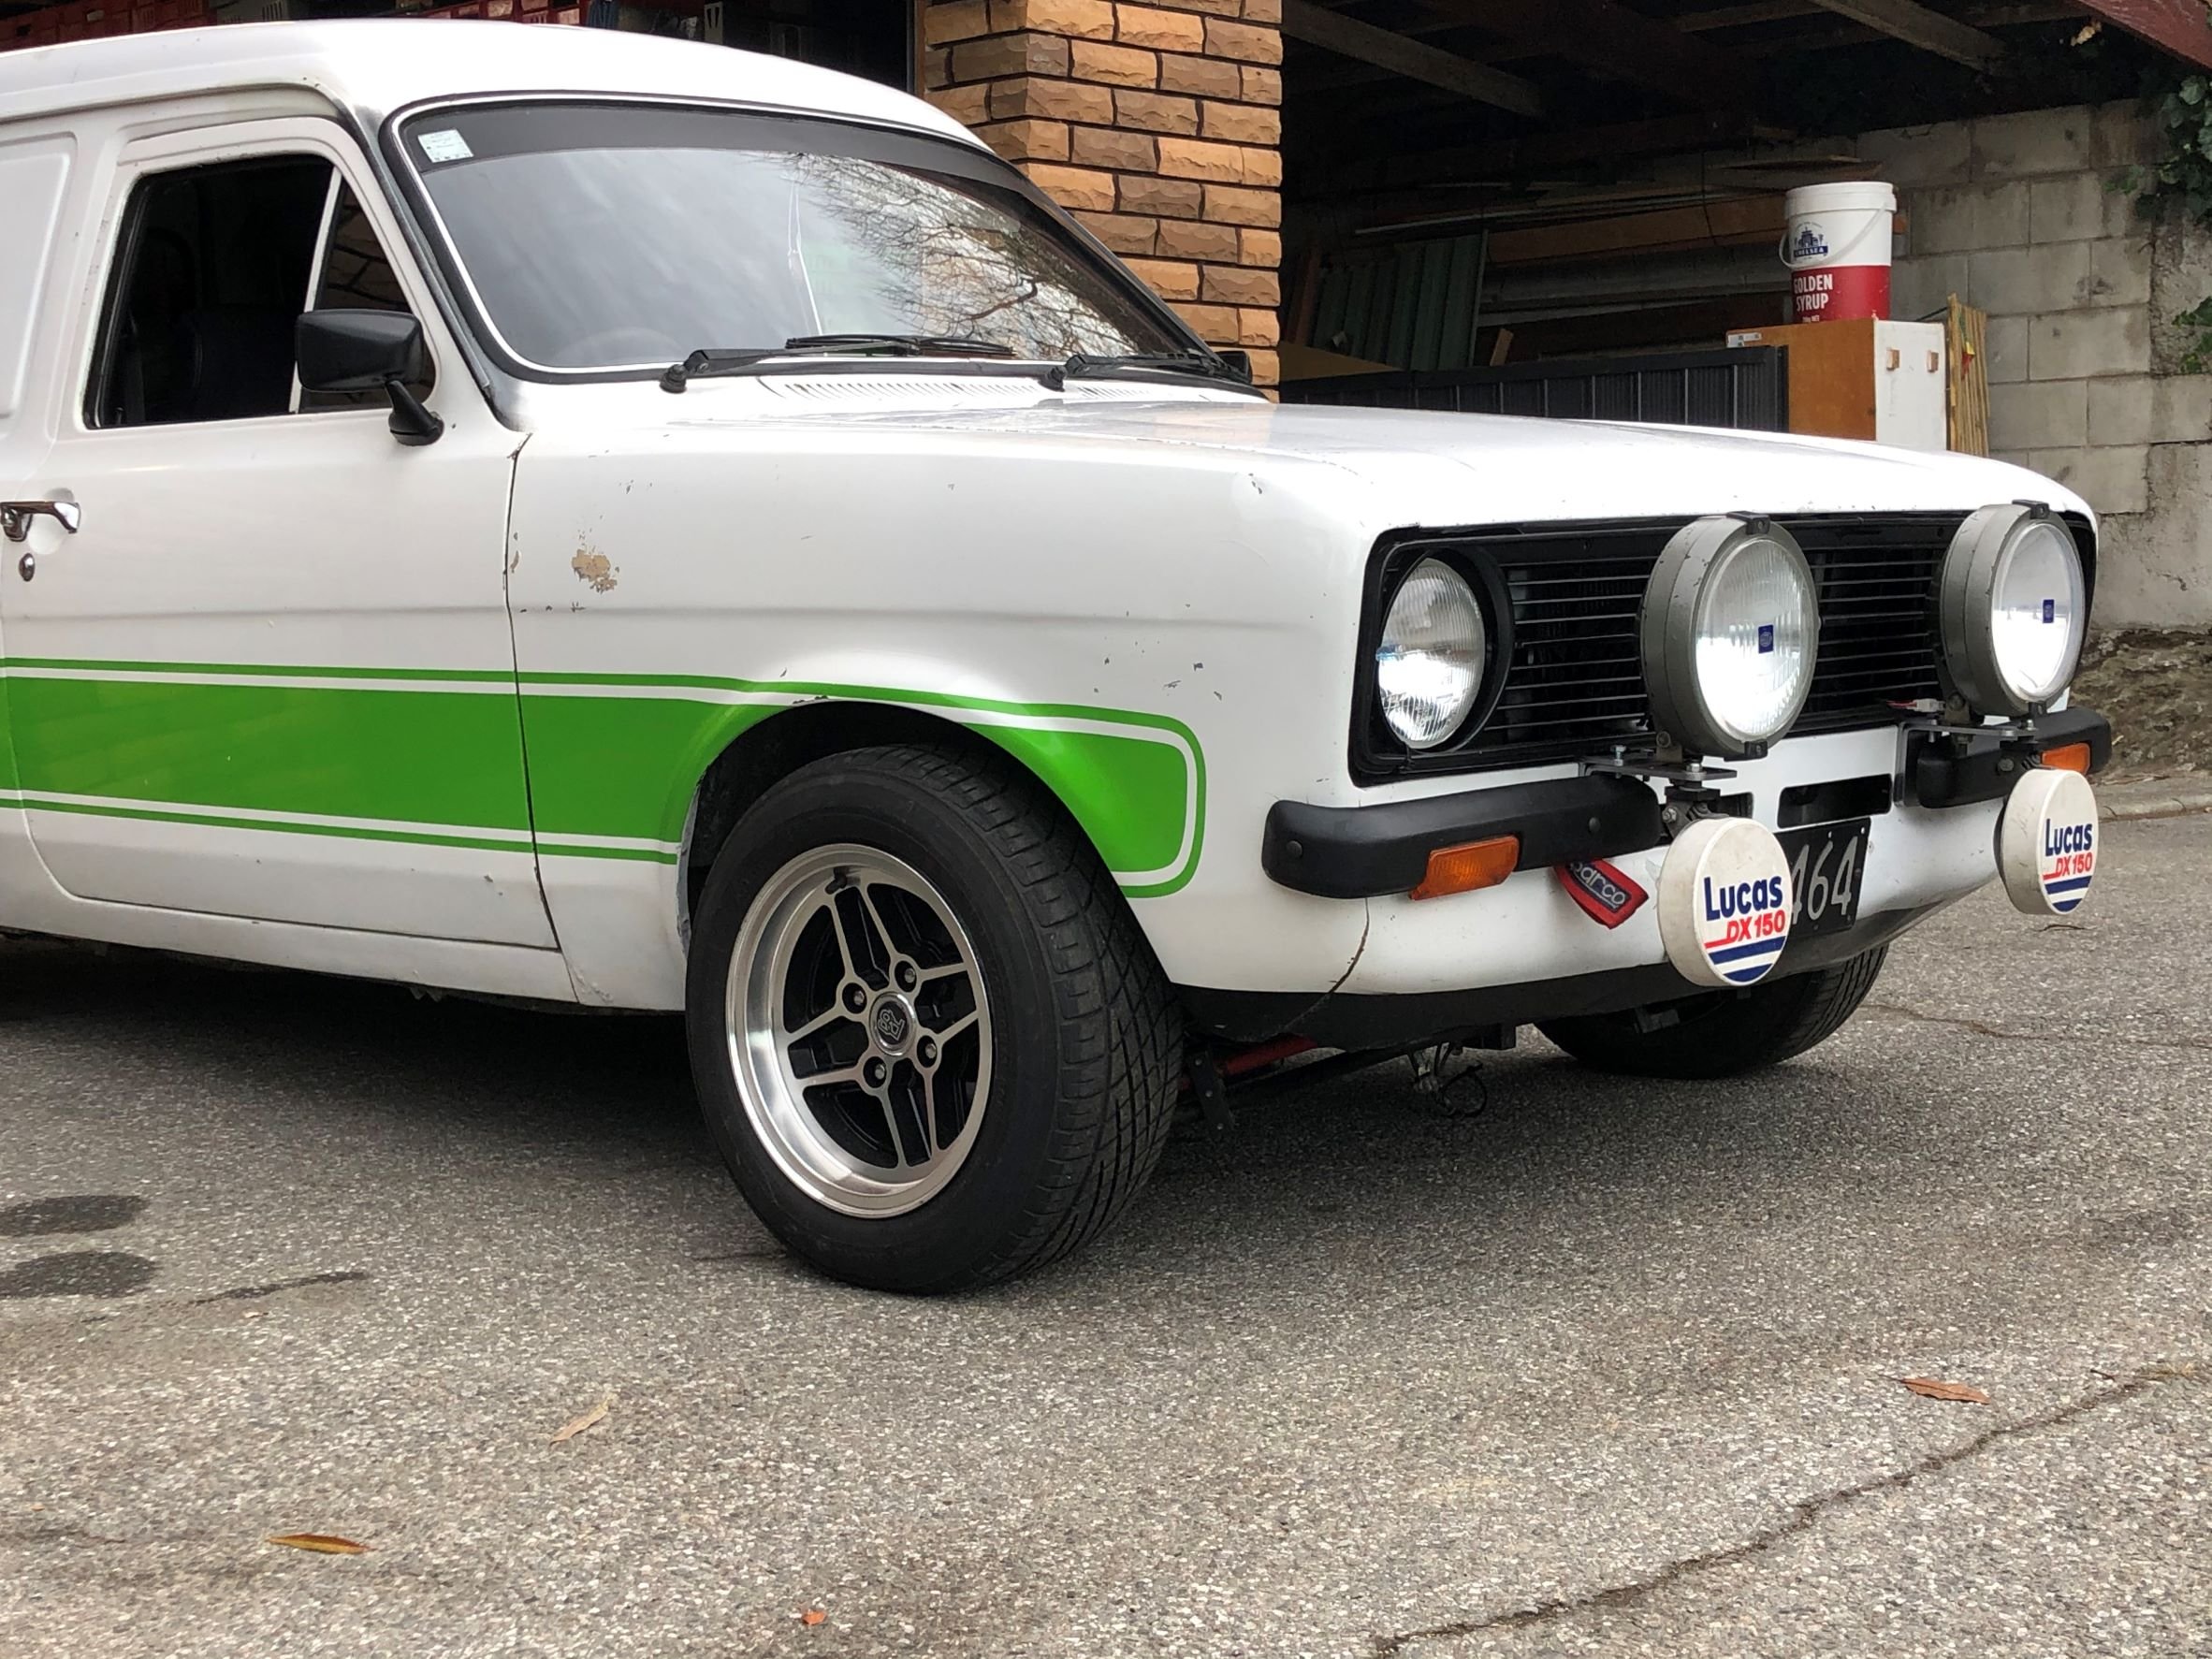
I've had a persistent cold starting issue with Lucas, where it could crank for AGES cough a few times and when it finally catches it would be lumpy and run on less than all 8 cylinders for a minute or so. I had my suspicions that because the car is parked on a steep incline, nose down, with the low fuel in the tank (about 10 litres) it was sloshing to the front of the tank and starving the pump of fuel until it returned enough from the lines to suck back up again and start. I had to start Lucas today and move him off the drive for a bit, and sure enough, with another 25 litres in the tank, after a couple of turns to build fuel pressure he fired straight up and settled in a nice stable idle on all cylinders. Good to know it was a simple fix, and not the first time I have been caught overlooking something as simple as making sure there was fuel in the tank.1 point
-
After much faffing about trying to figure out this drive issue, I have made an executive decision to pull the 12a out, and put the 4age into this car. for a couple of reasons: 1:) my new neighbours will appreciate the 4age over the 12a 2:) should be happier on the standard diff 3:) the 12a is going into a revival vehicle worthy of such rowdiness 4:) I’m over the bloody thing at the moment so yeah, that’s the go I think1 point
-
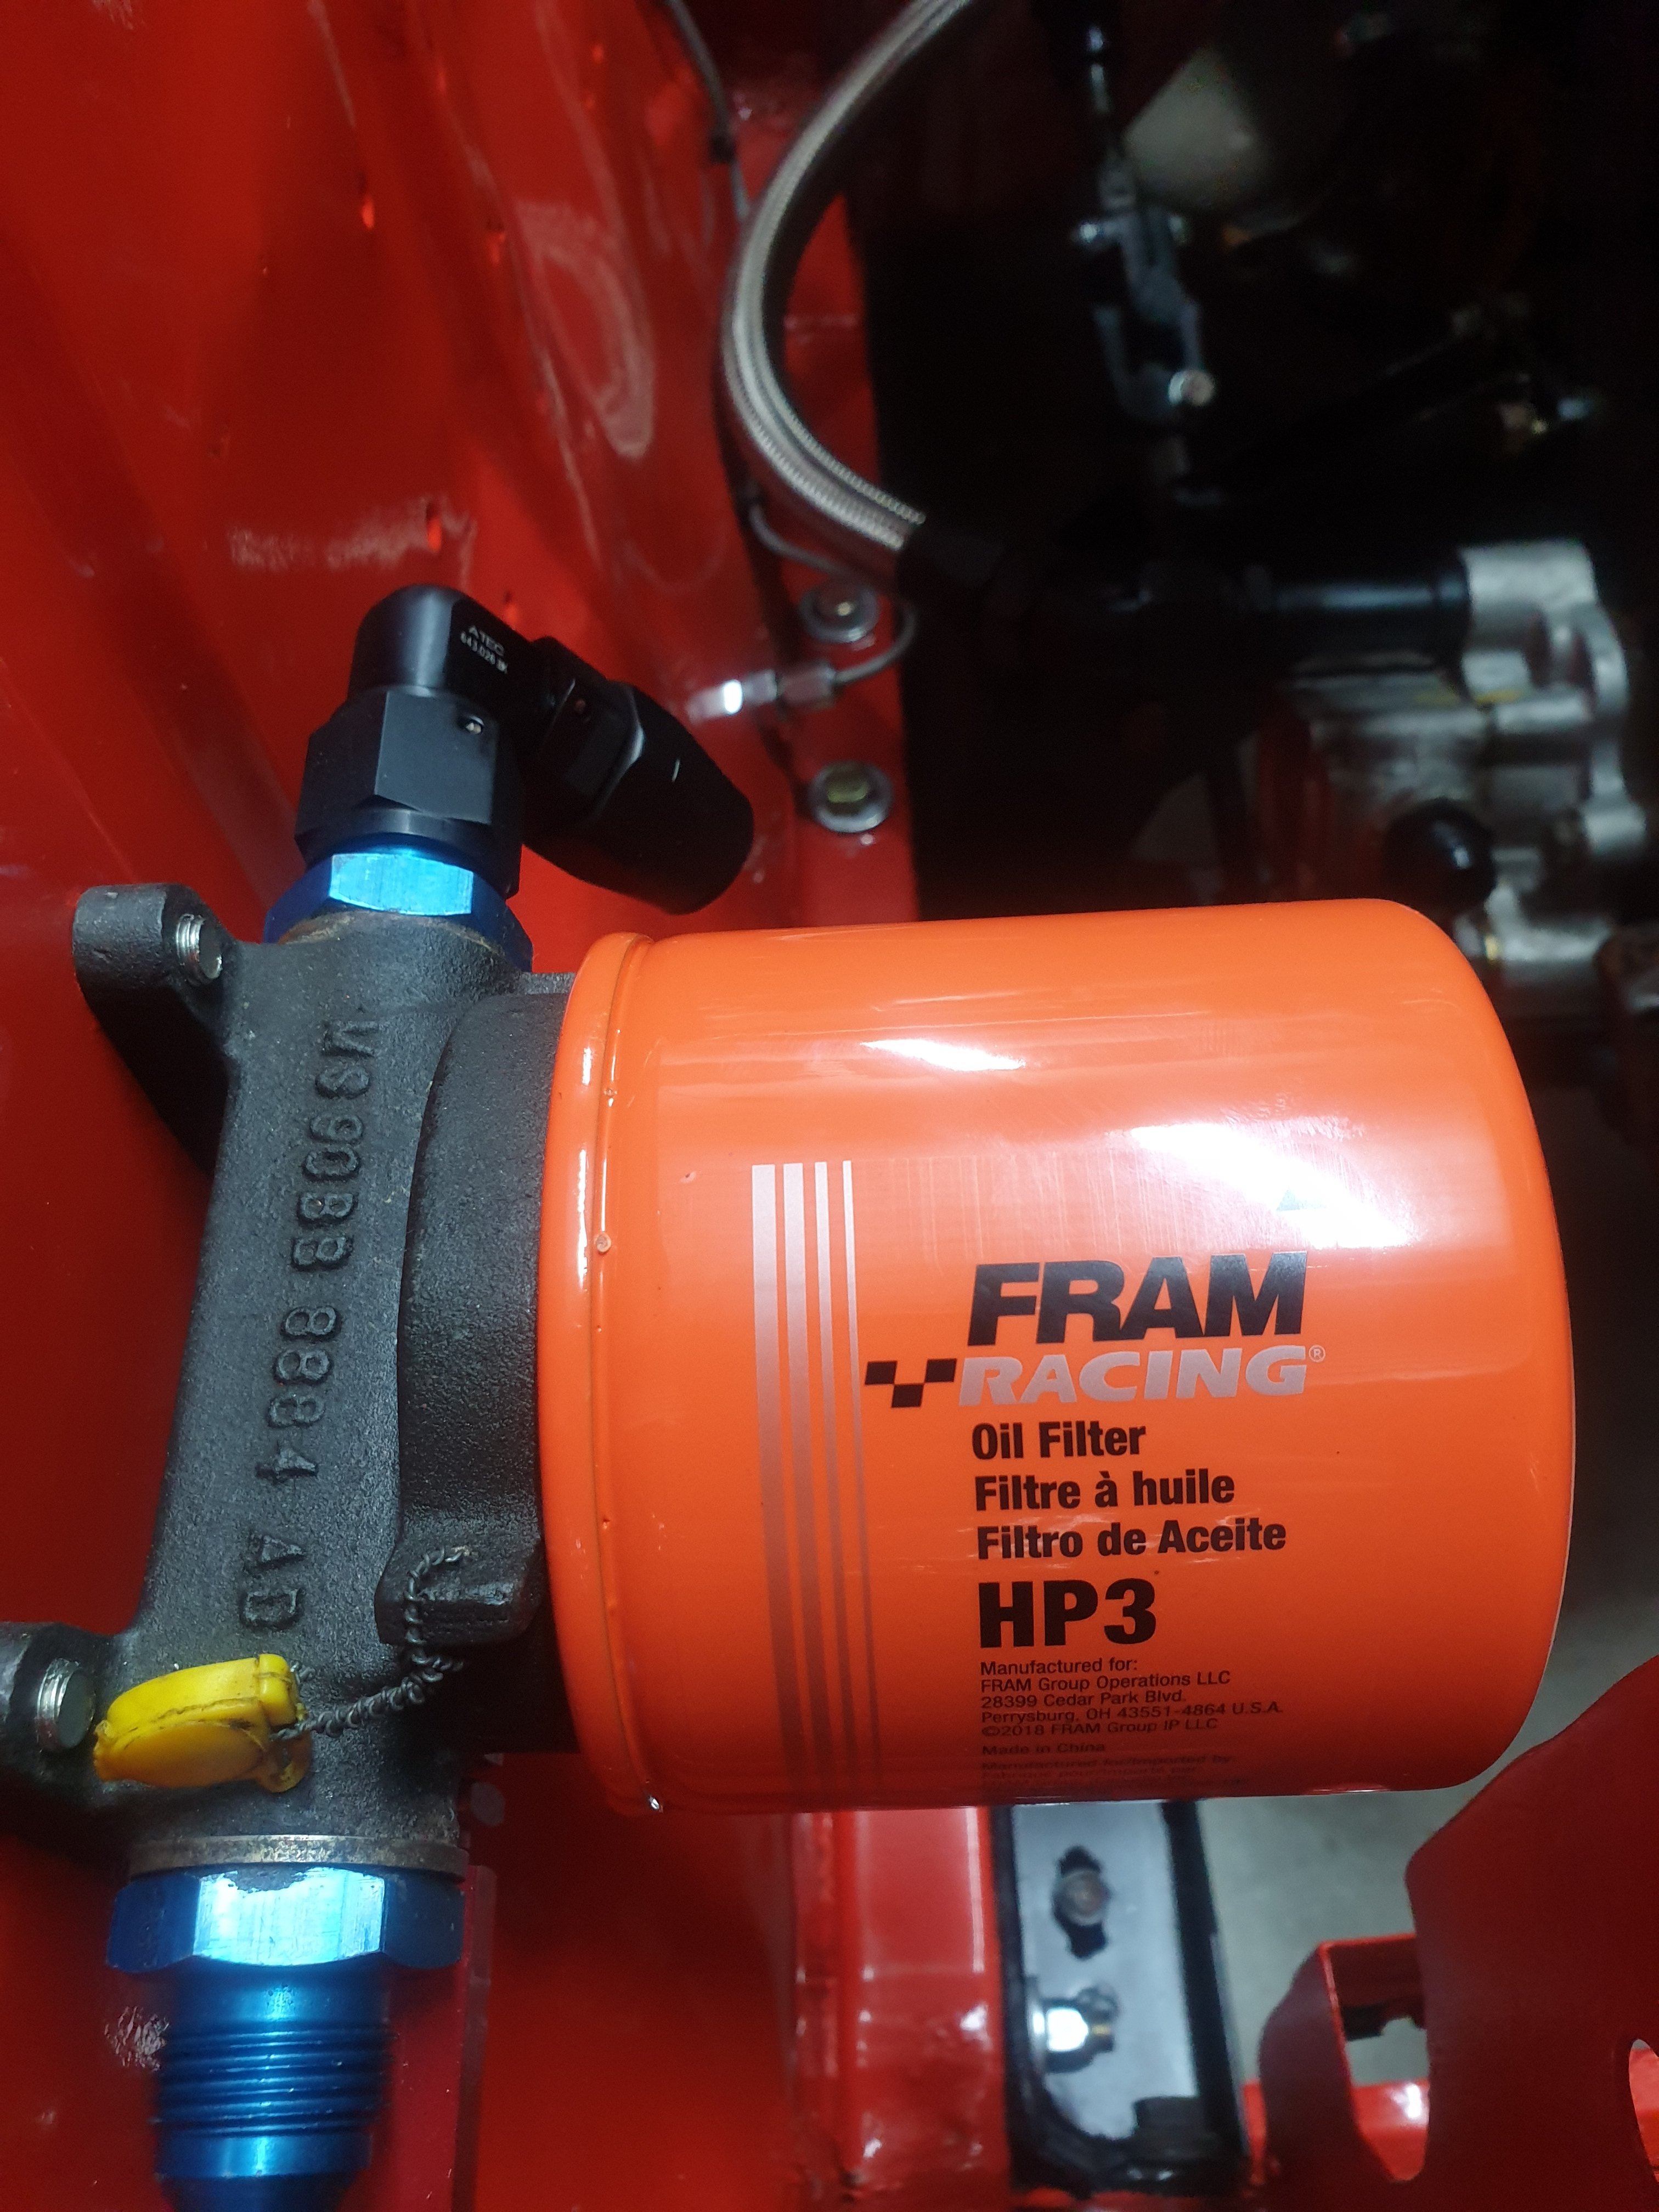
XxxxHad to find another oil filter as the Ford Motorsport one was showing its age.... It's destiny is now in my model cabinet...
1 point
-
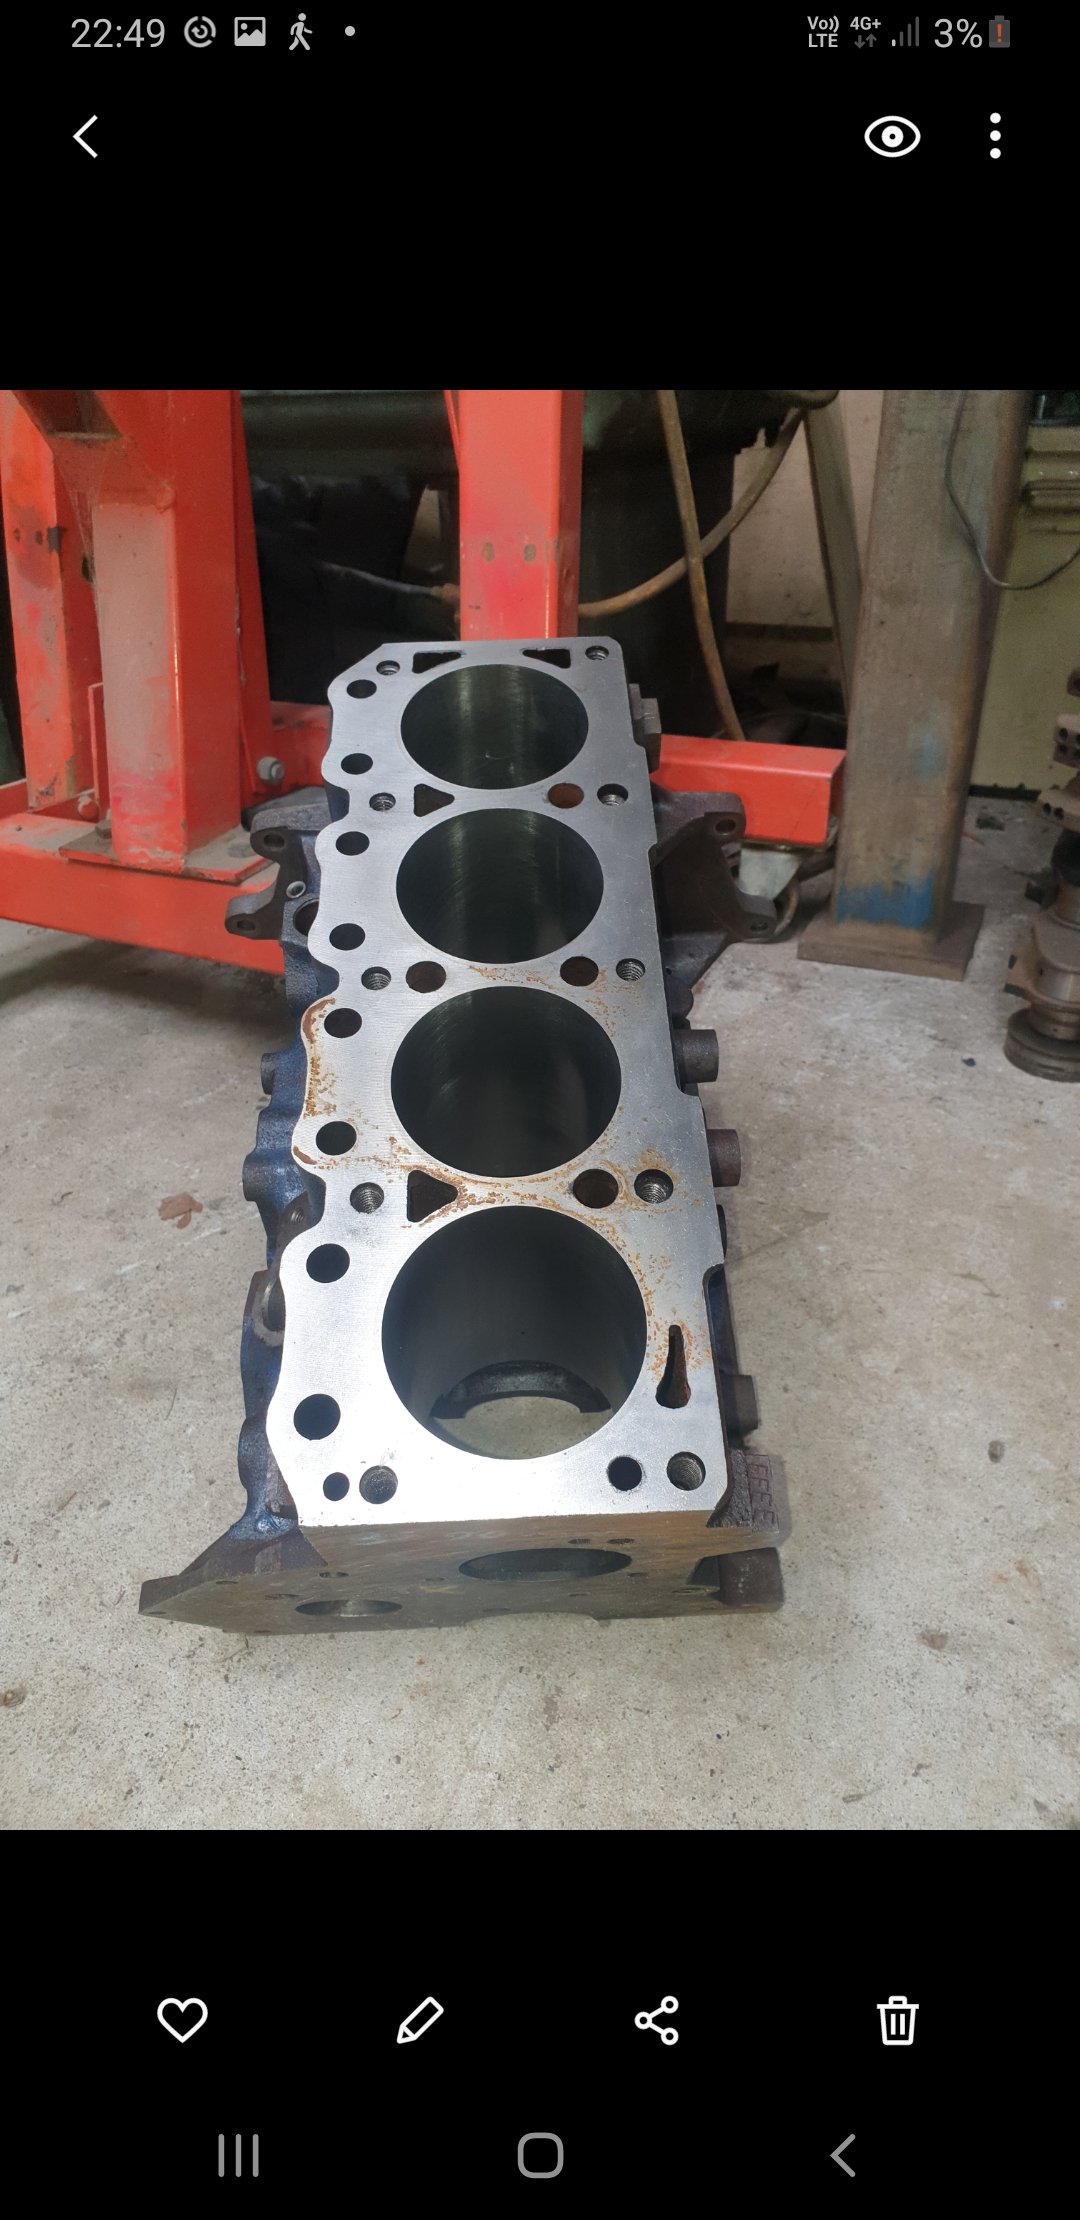
With all the new liners fitted. Next step is to Devcon fill to just below the frost plugs.1 point
-
As I have had a few more parts turn up for the engine I thought I'd pay the engine builder a visit... here are a few more offerings to the good of speed...1 point
-
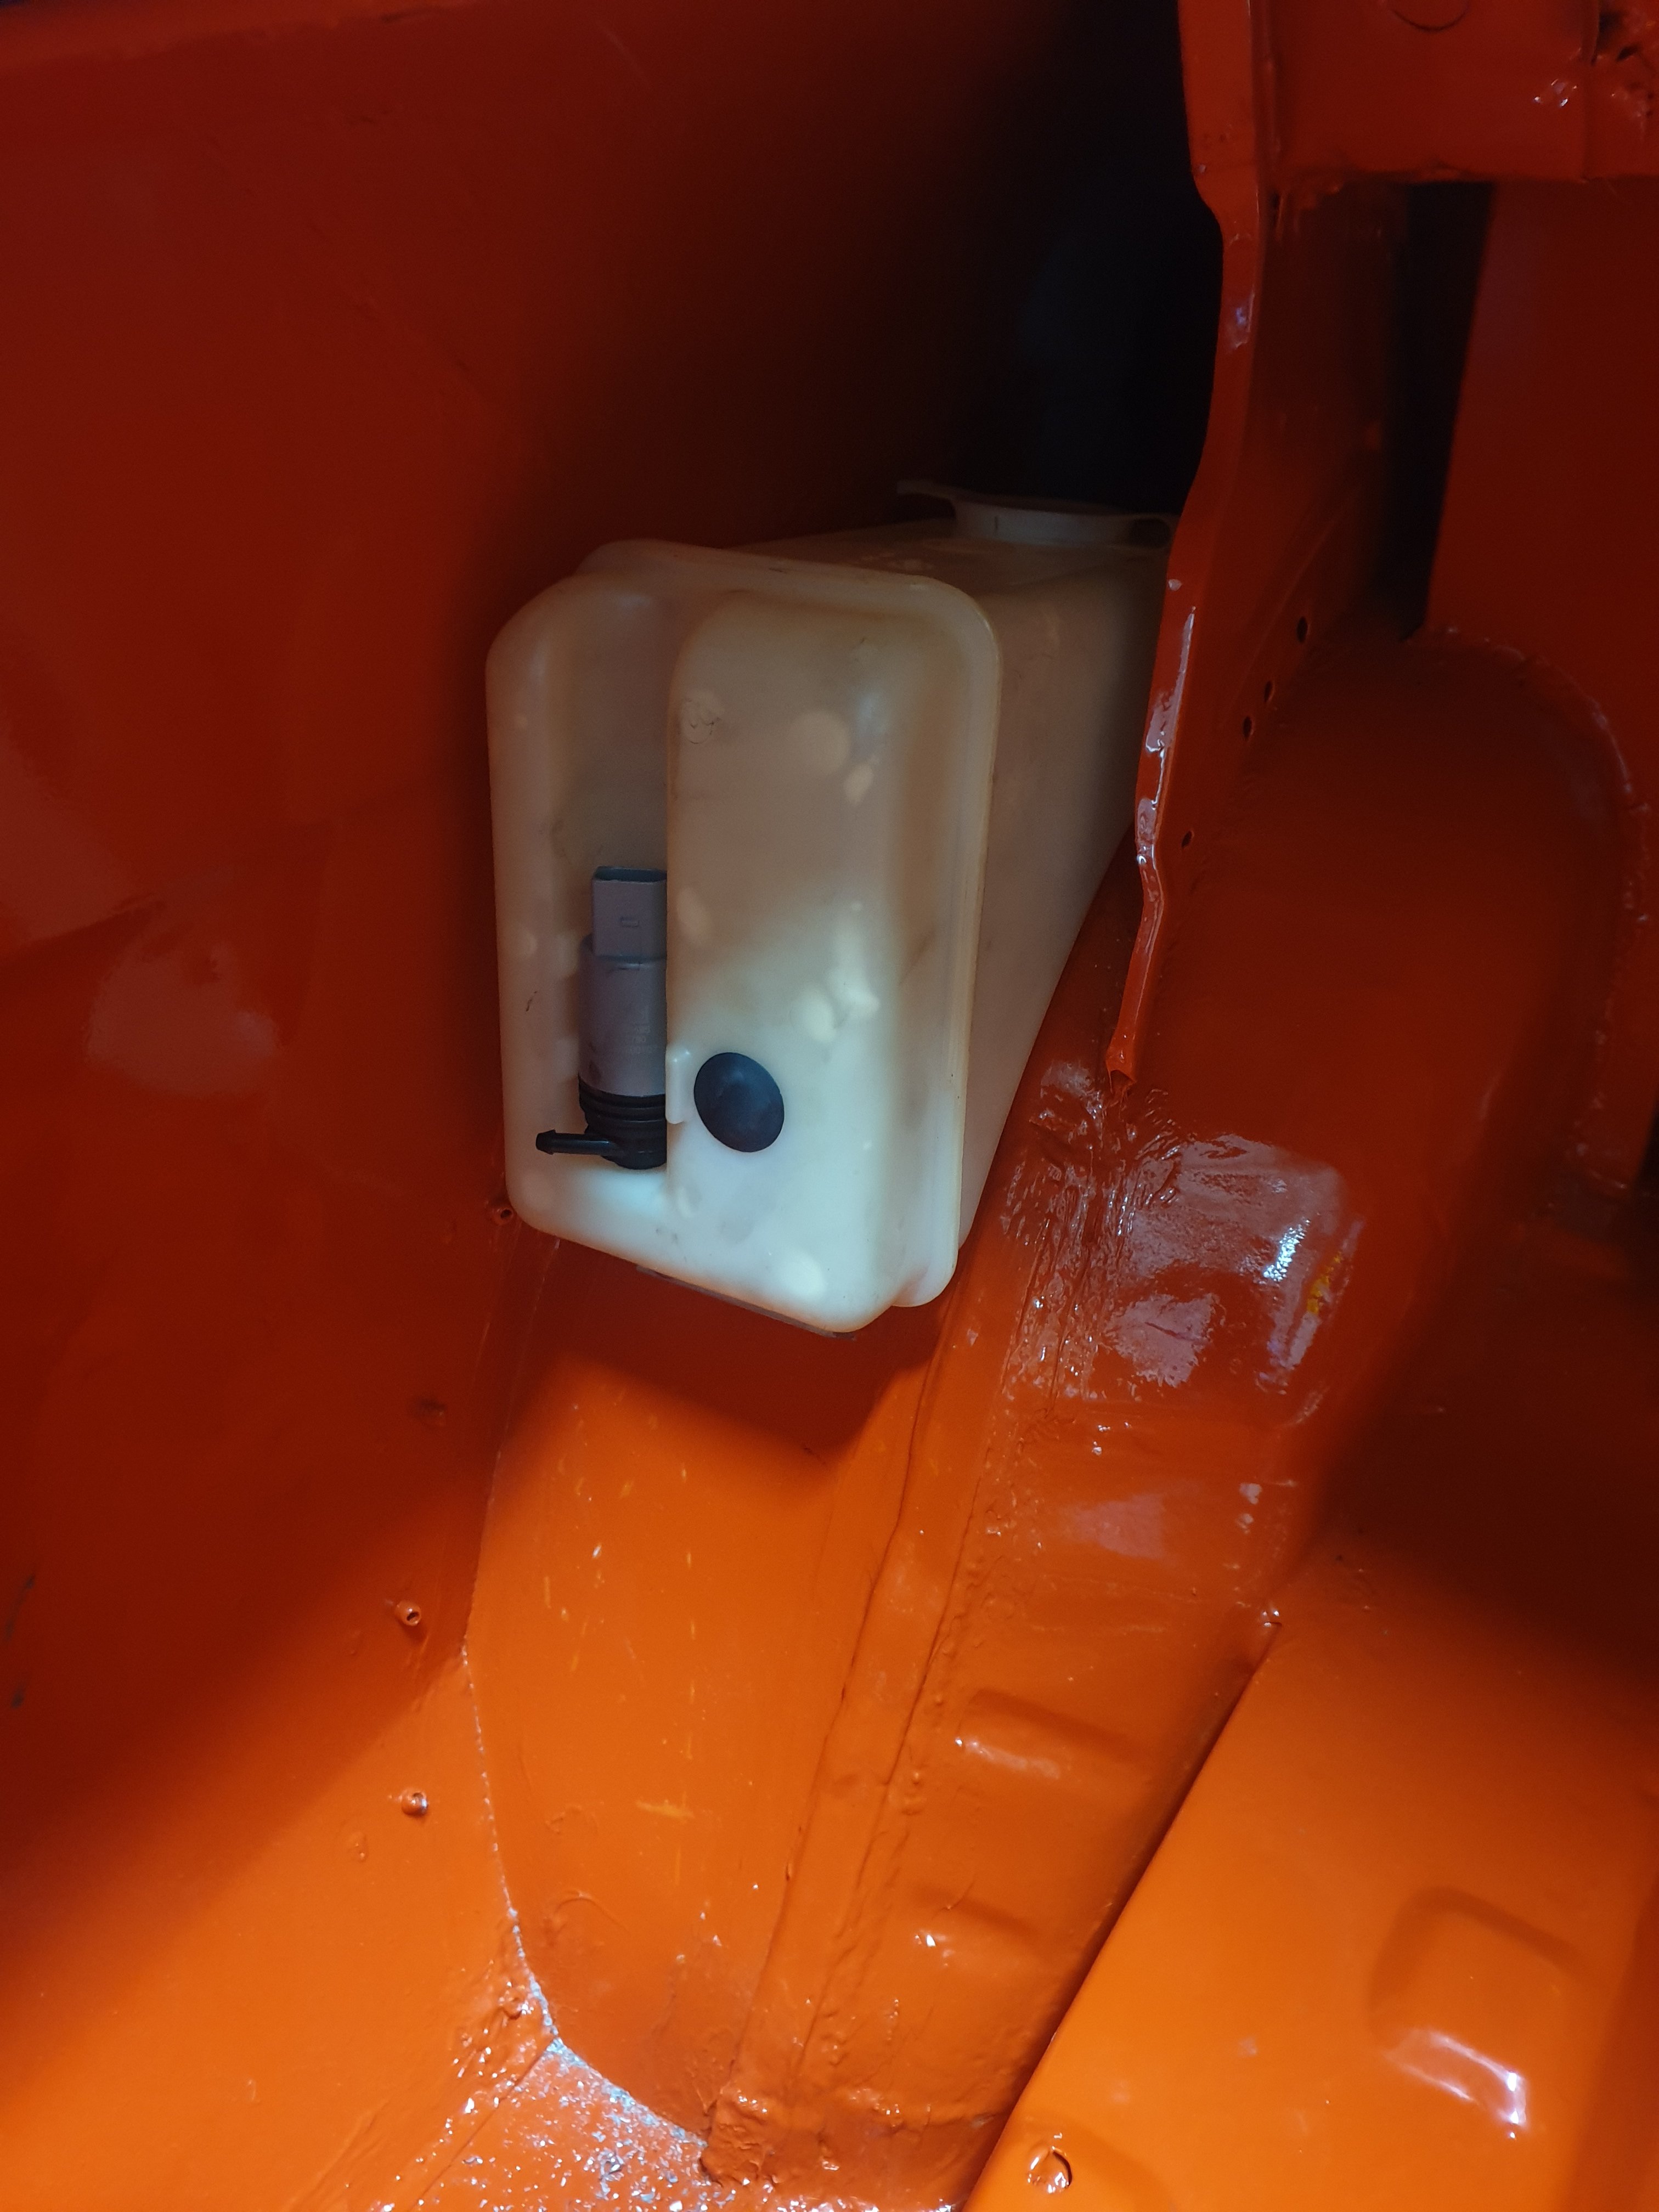
Also mounted the washer bottle
1 point
-
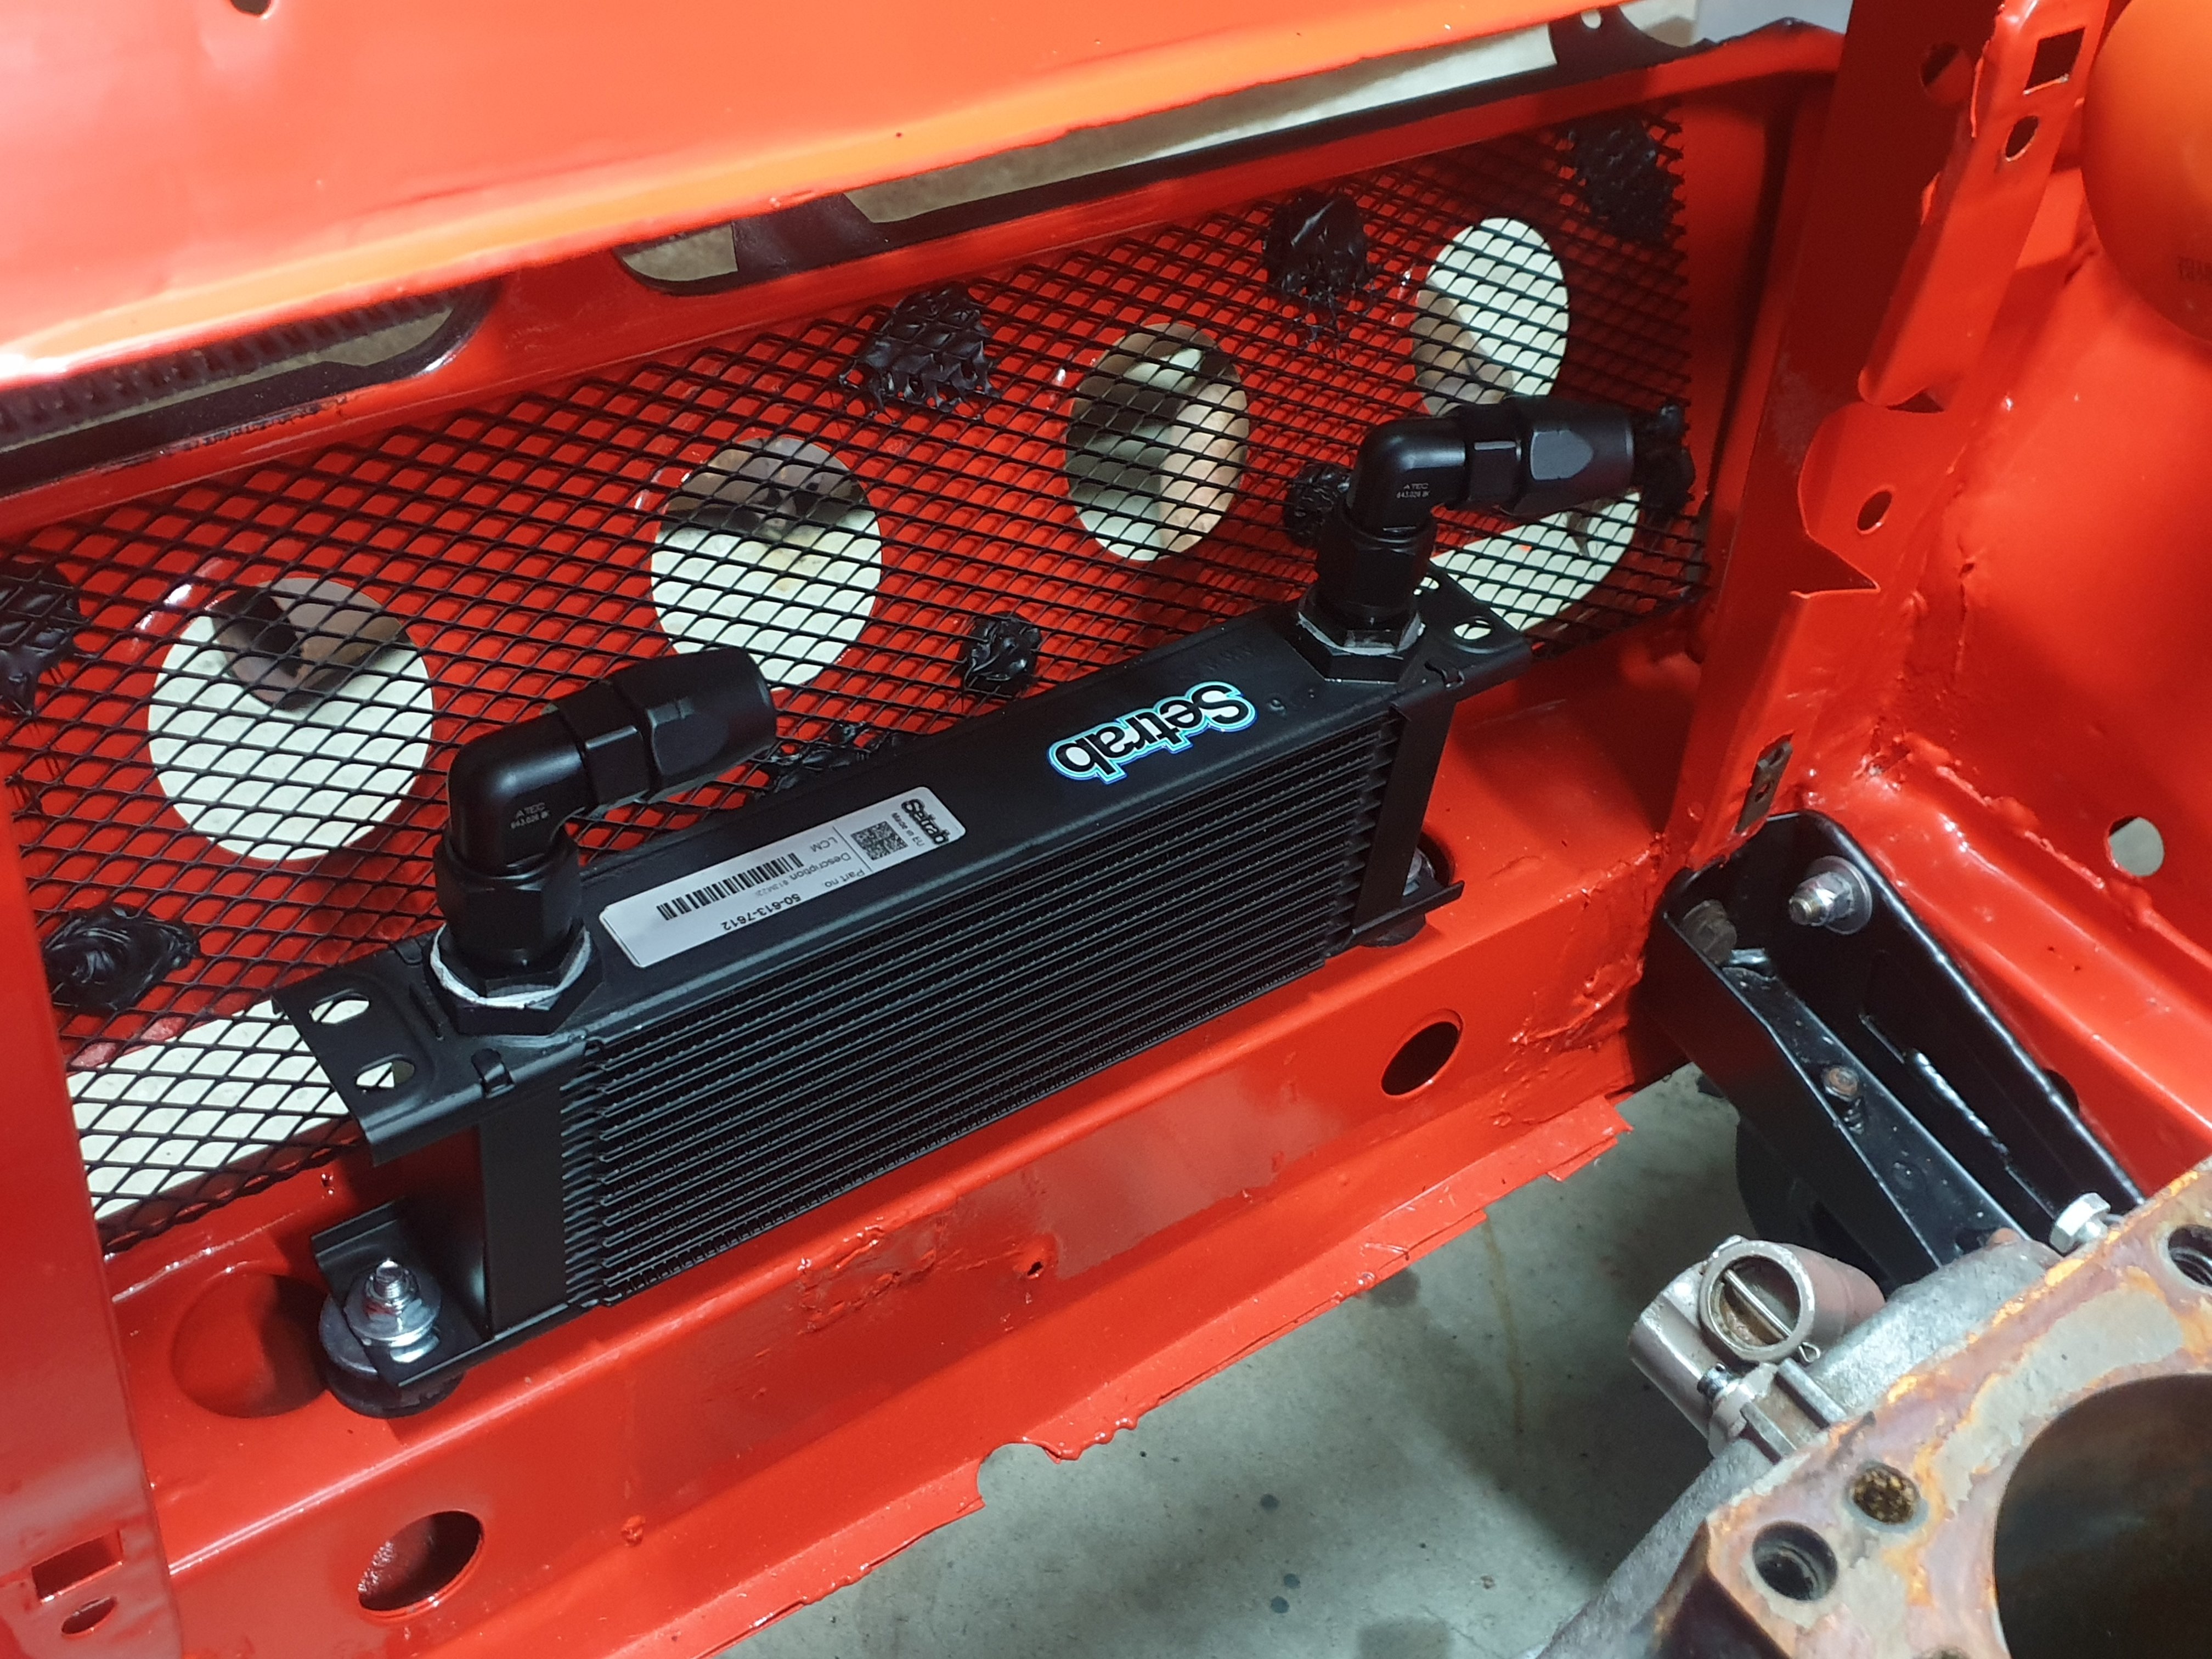
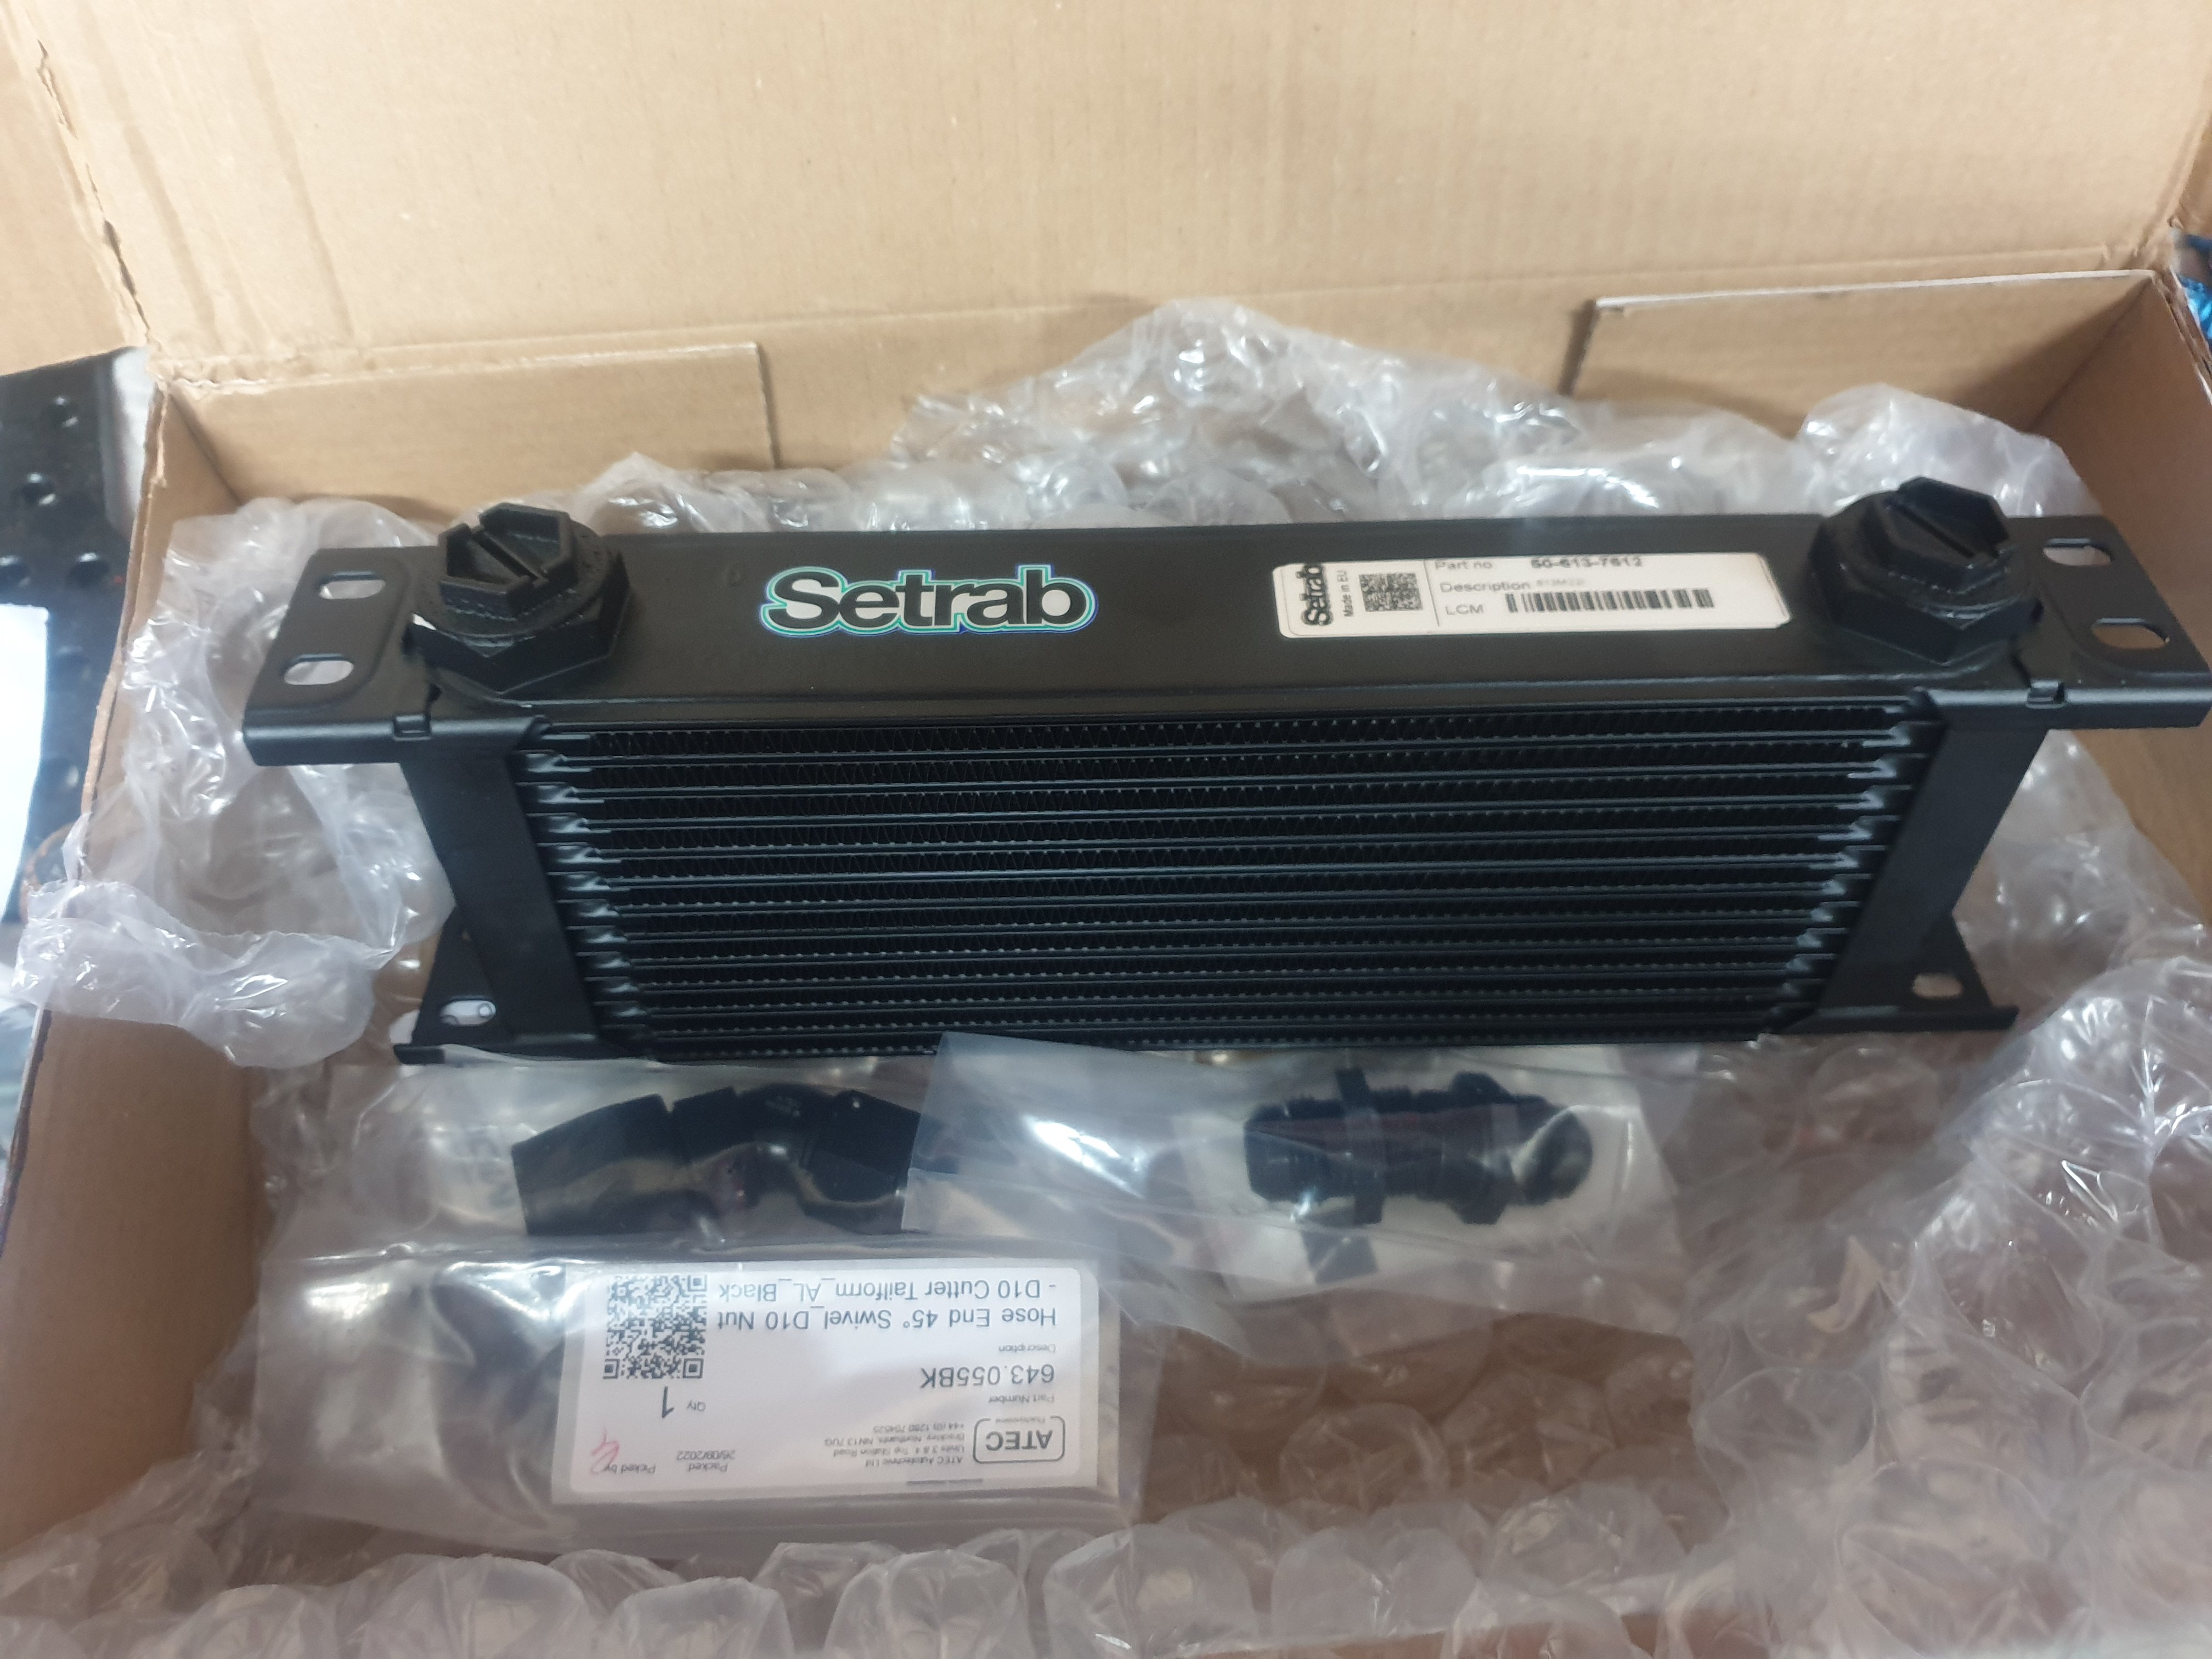
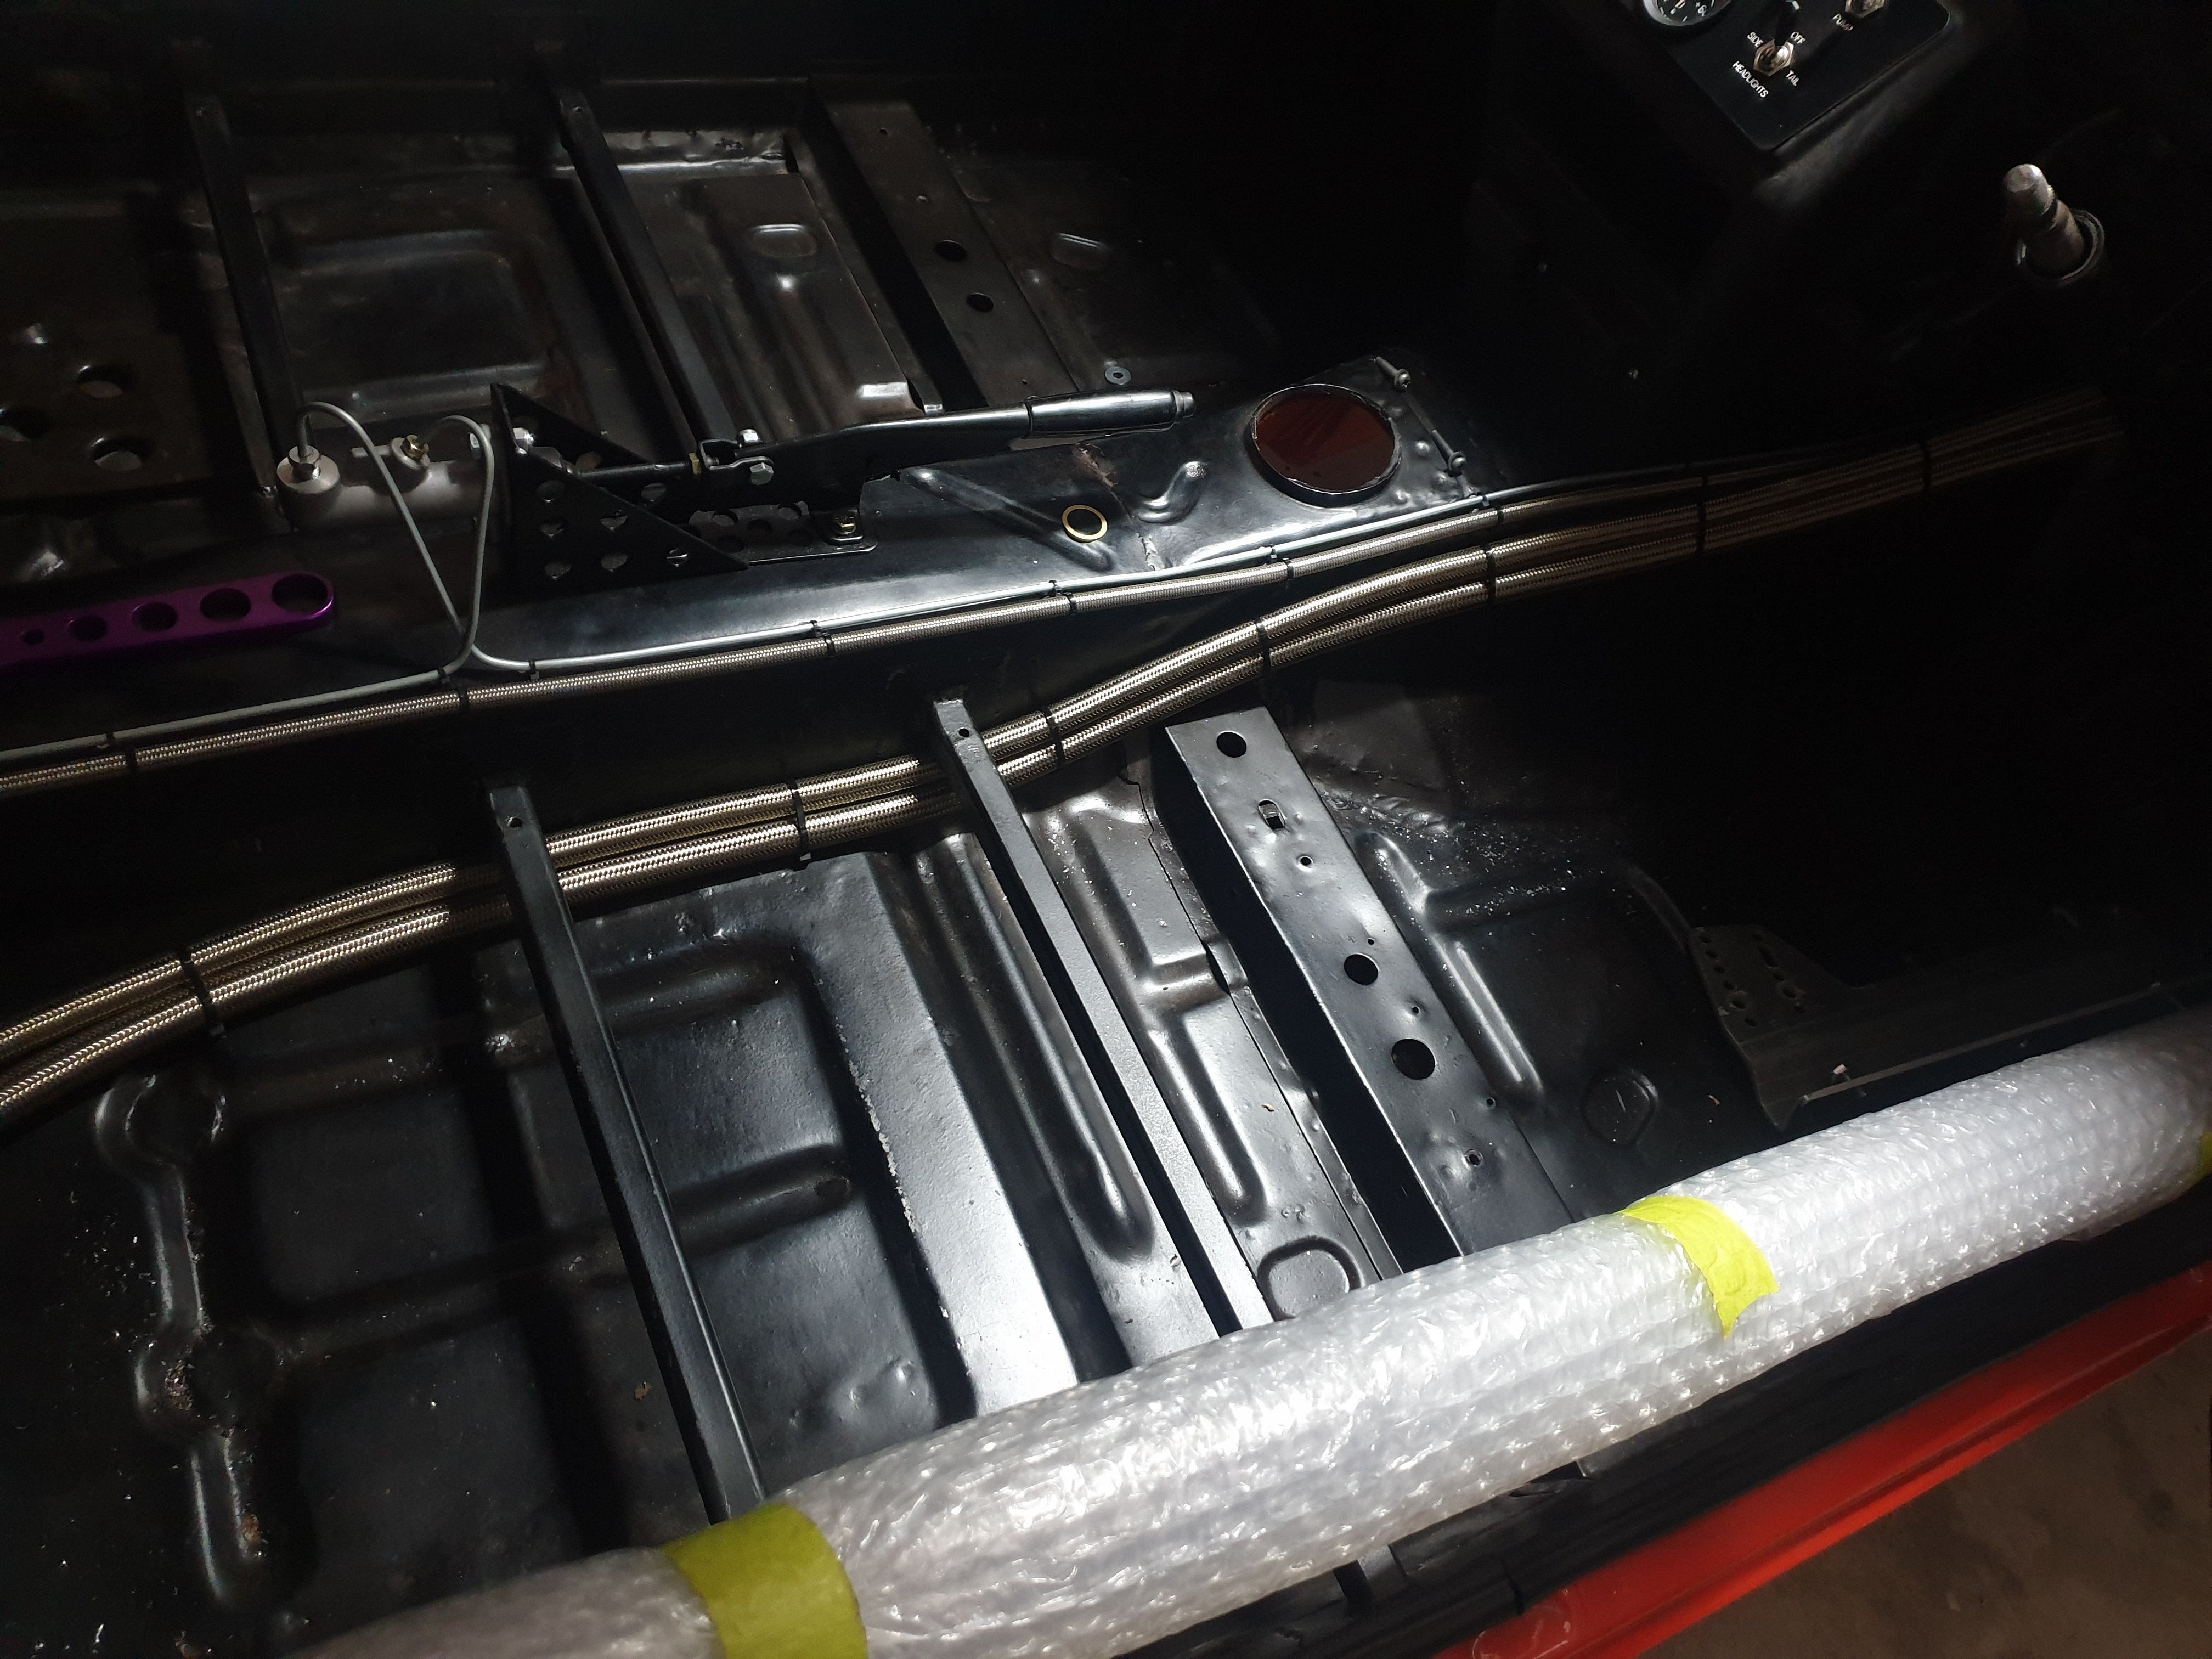
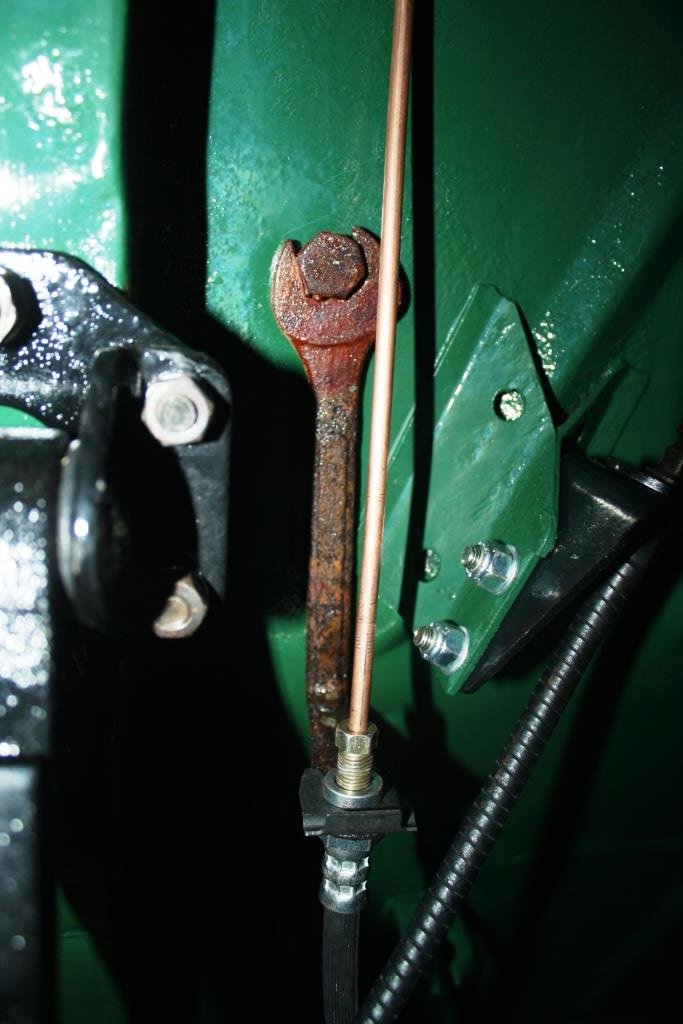
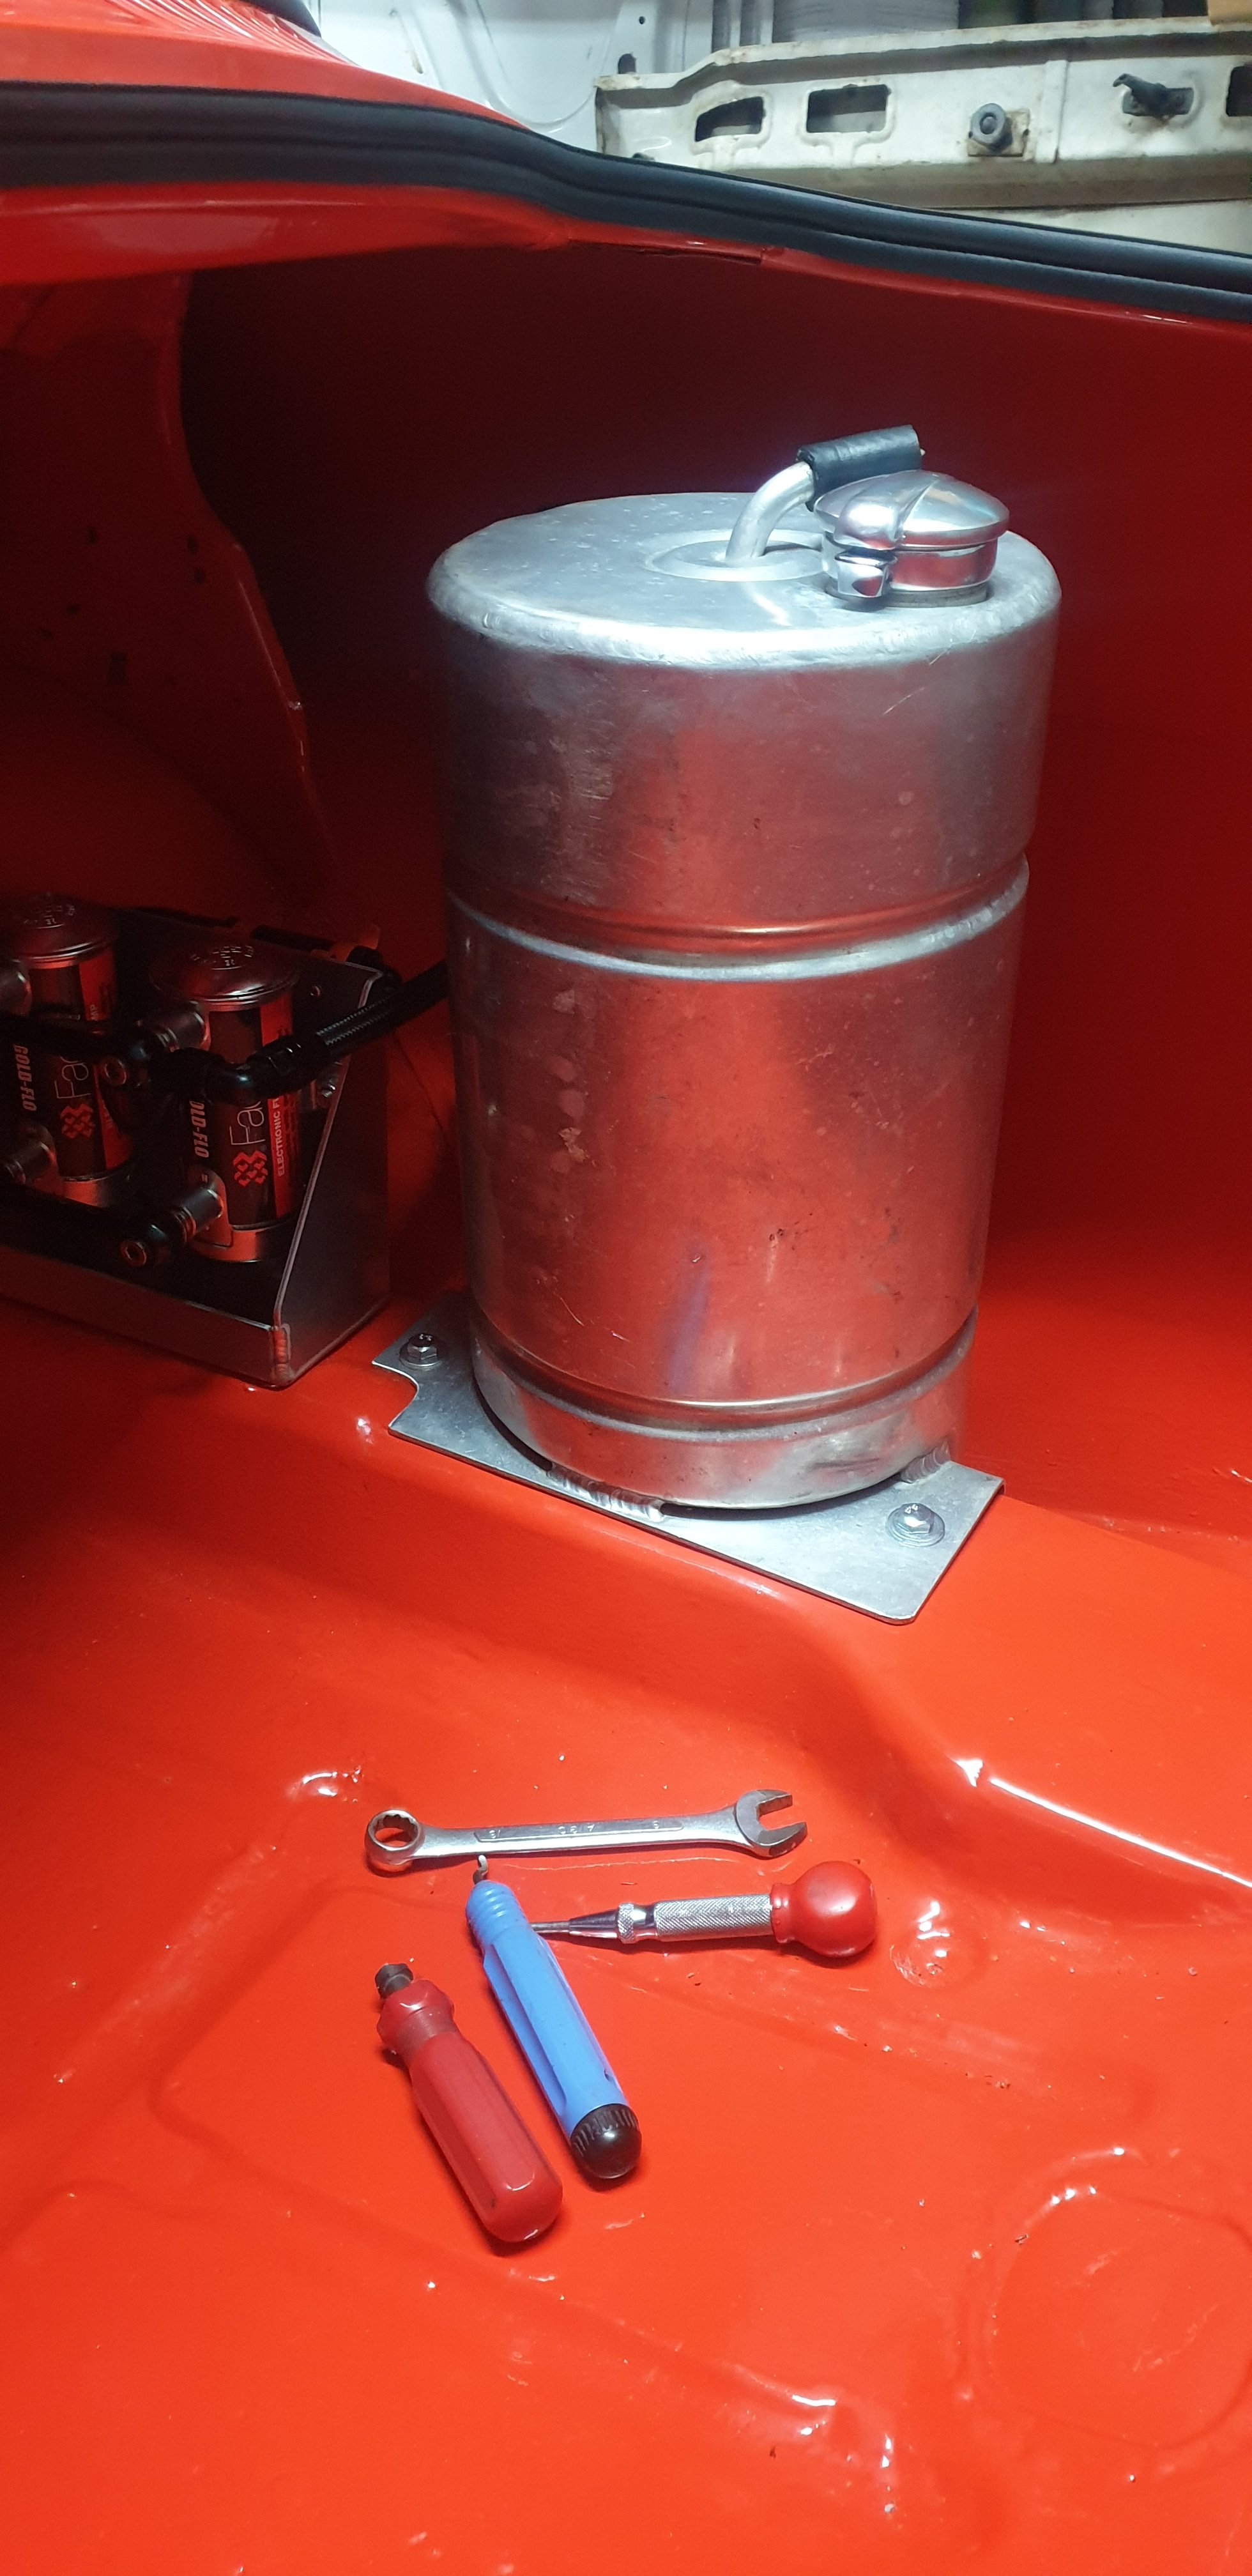
Some more Sunday evening plumbing pics... have now run all the necessary hoses through the interior. Boot is almost finished. Just awaiting the oil cooler arriving and I can wrap up the engine bay.
1 point
-
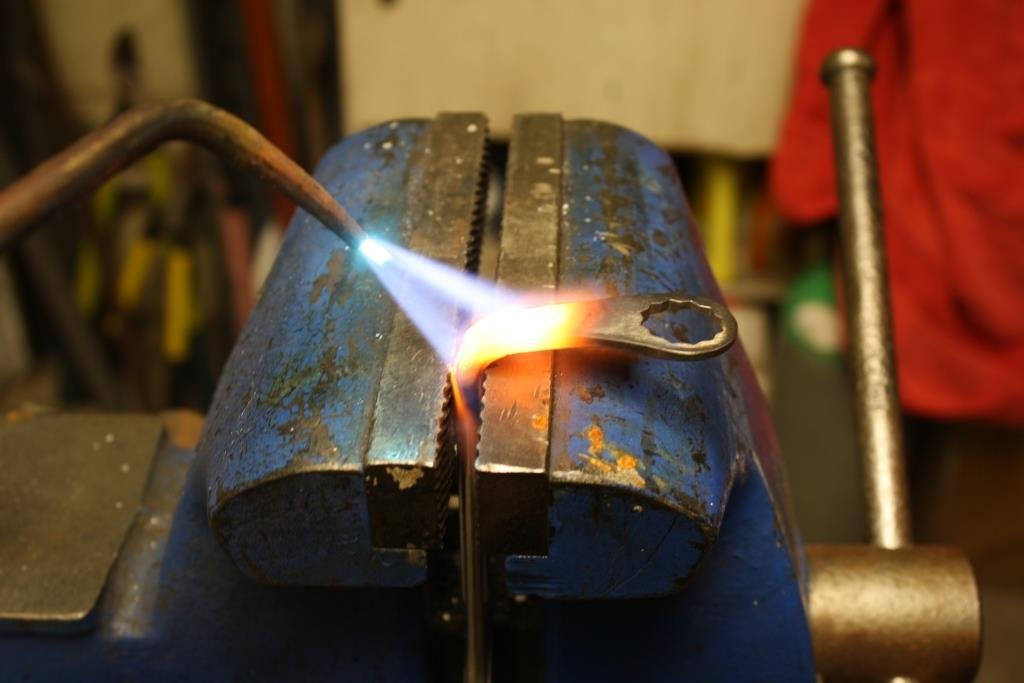
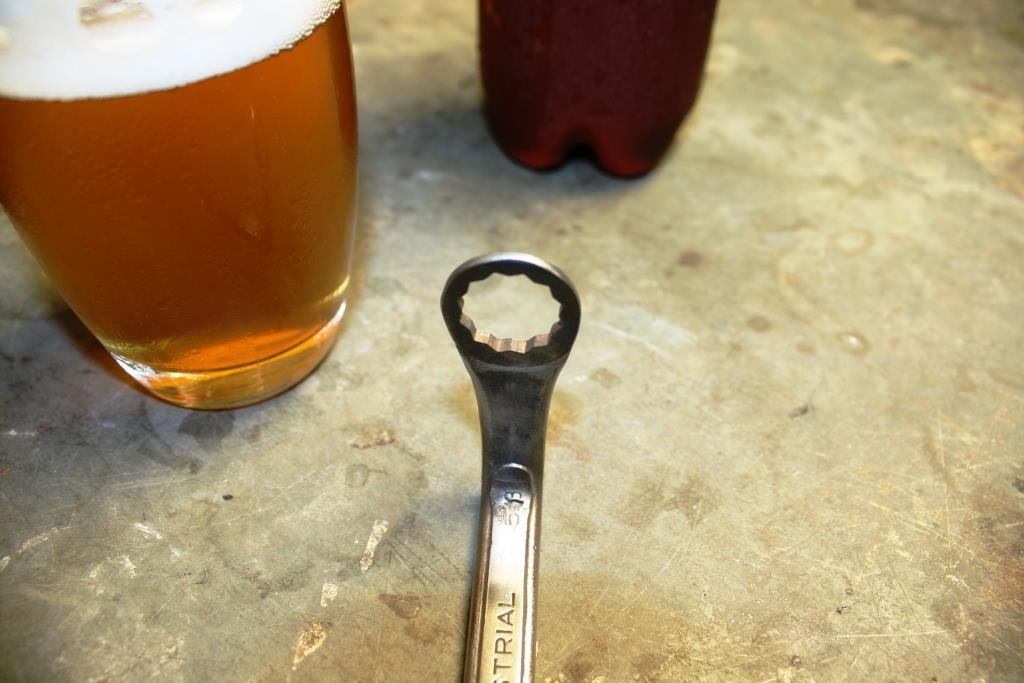
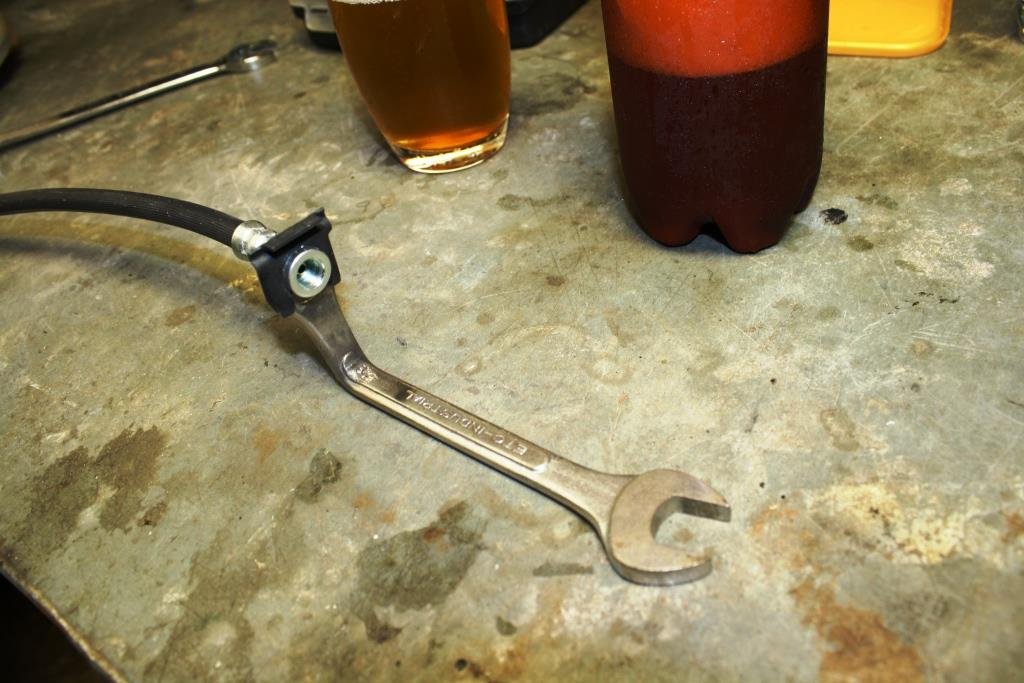
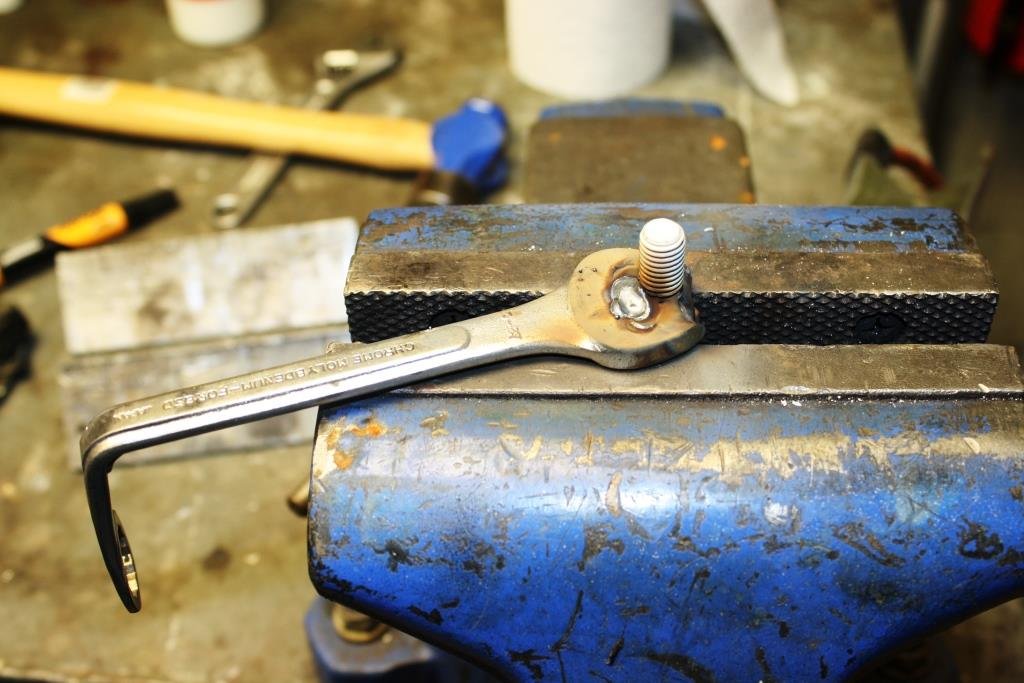
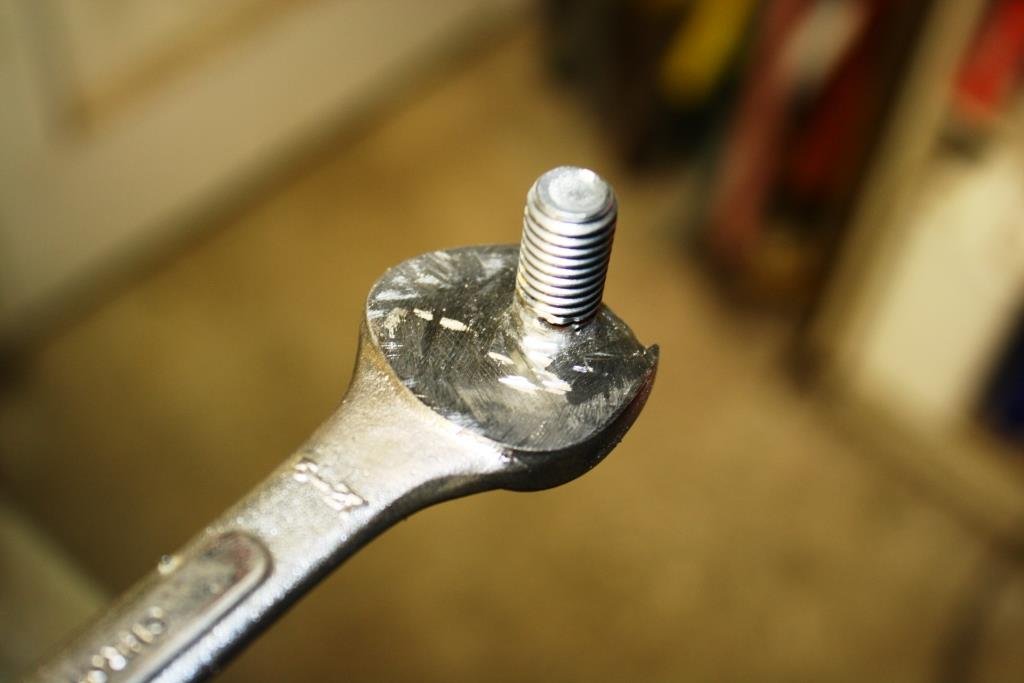
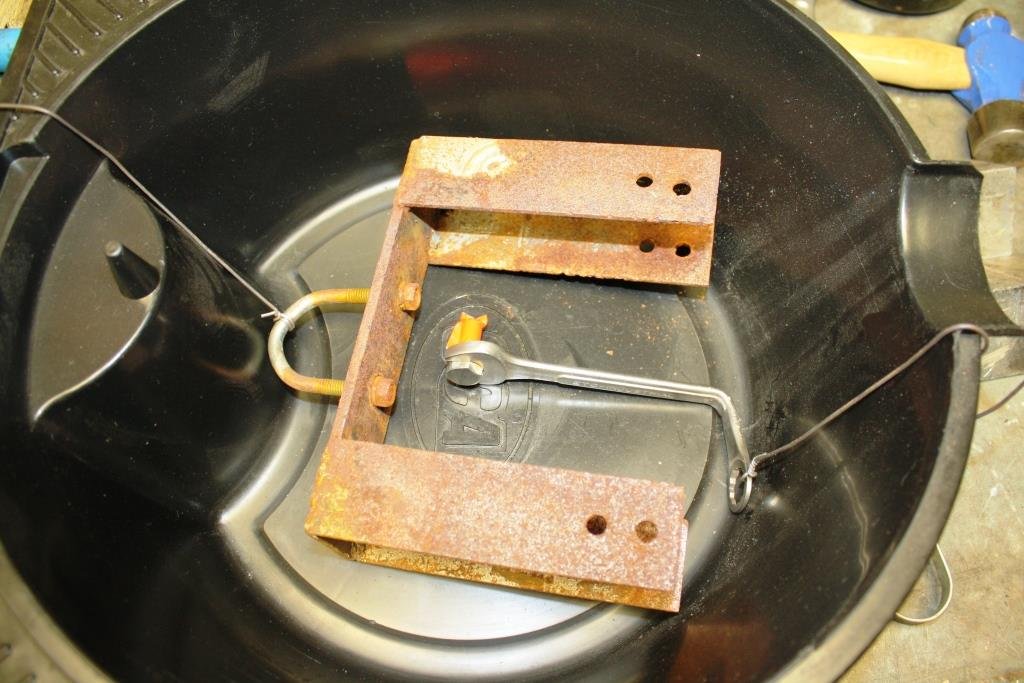
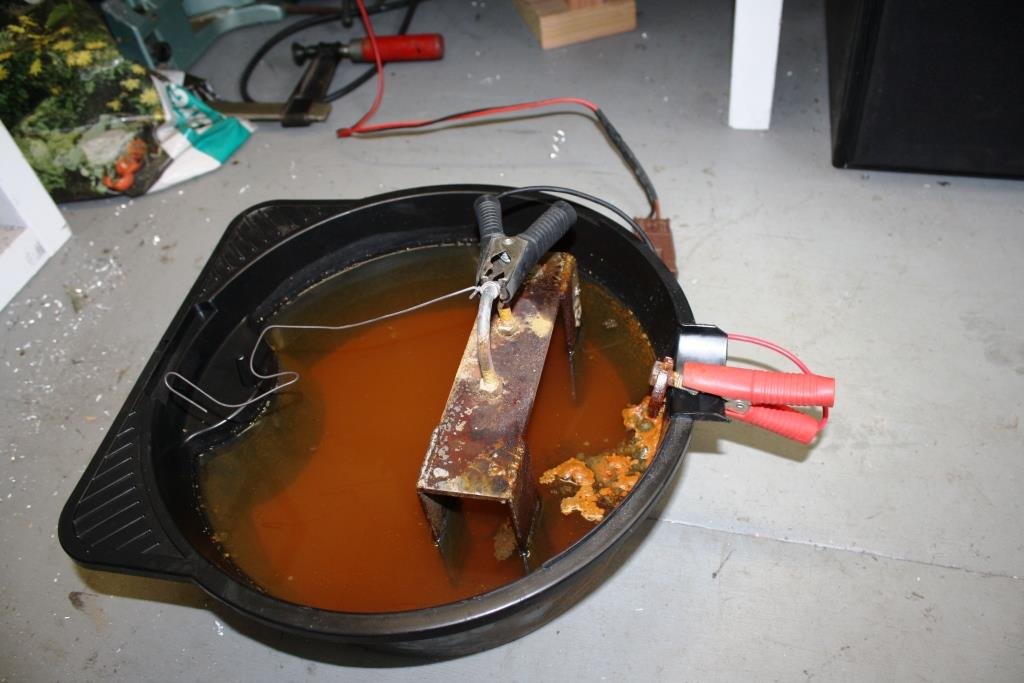
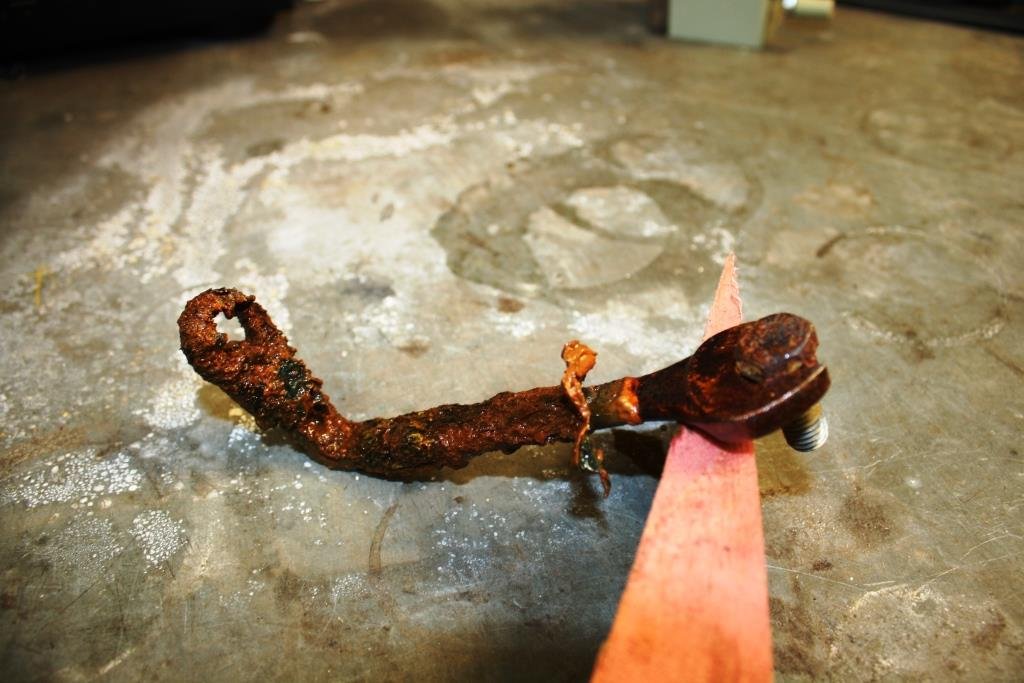
As I’d mentioned earlier I made the call to use HQ brake hoses as I figure they will always be available, (HQ’s are a religion in Aussie!). The problem with using the original rear brake hose mount was the large bend in the hose. One night Rigamortice and I got bored and decided we needed to sample the latest brew and devised a cunning plan…….. What could possibly go wrong? Found an old 5/16 AF ring and open end spanner and applied some heat. Hit the ring end with the linisher to make it a little thinner. A perfect fit for the HQ brake hose. Welded a bolt into the open end… And cleaned it up with the grinder. Started thinking it was all looking a little too shiny…… If you’ve followed this thread you’ll be aware that I’m a big fan of using electrolysis for rust removal, why not use it for rust plating? Found a piece of rusty scrap and made it the cathode, made the spanner up the anode, added some washing soda & water and hooked up a power supply. The following morning we had rust soup and a slightly fuzzy head. And a gloriously rusted spanner. Sealed it with some clear lacquer and bolted it in place. A nice little hidden surprise for the WOF man.
1 point
-
Decided while I had it out for the last time it needed a quick polish.
1 point
-
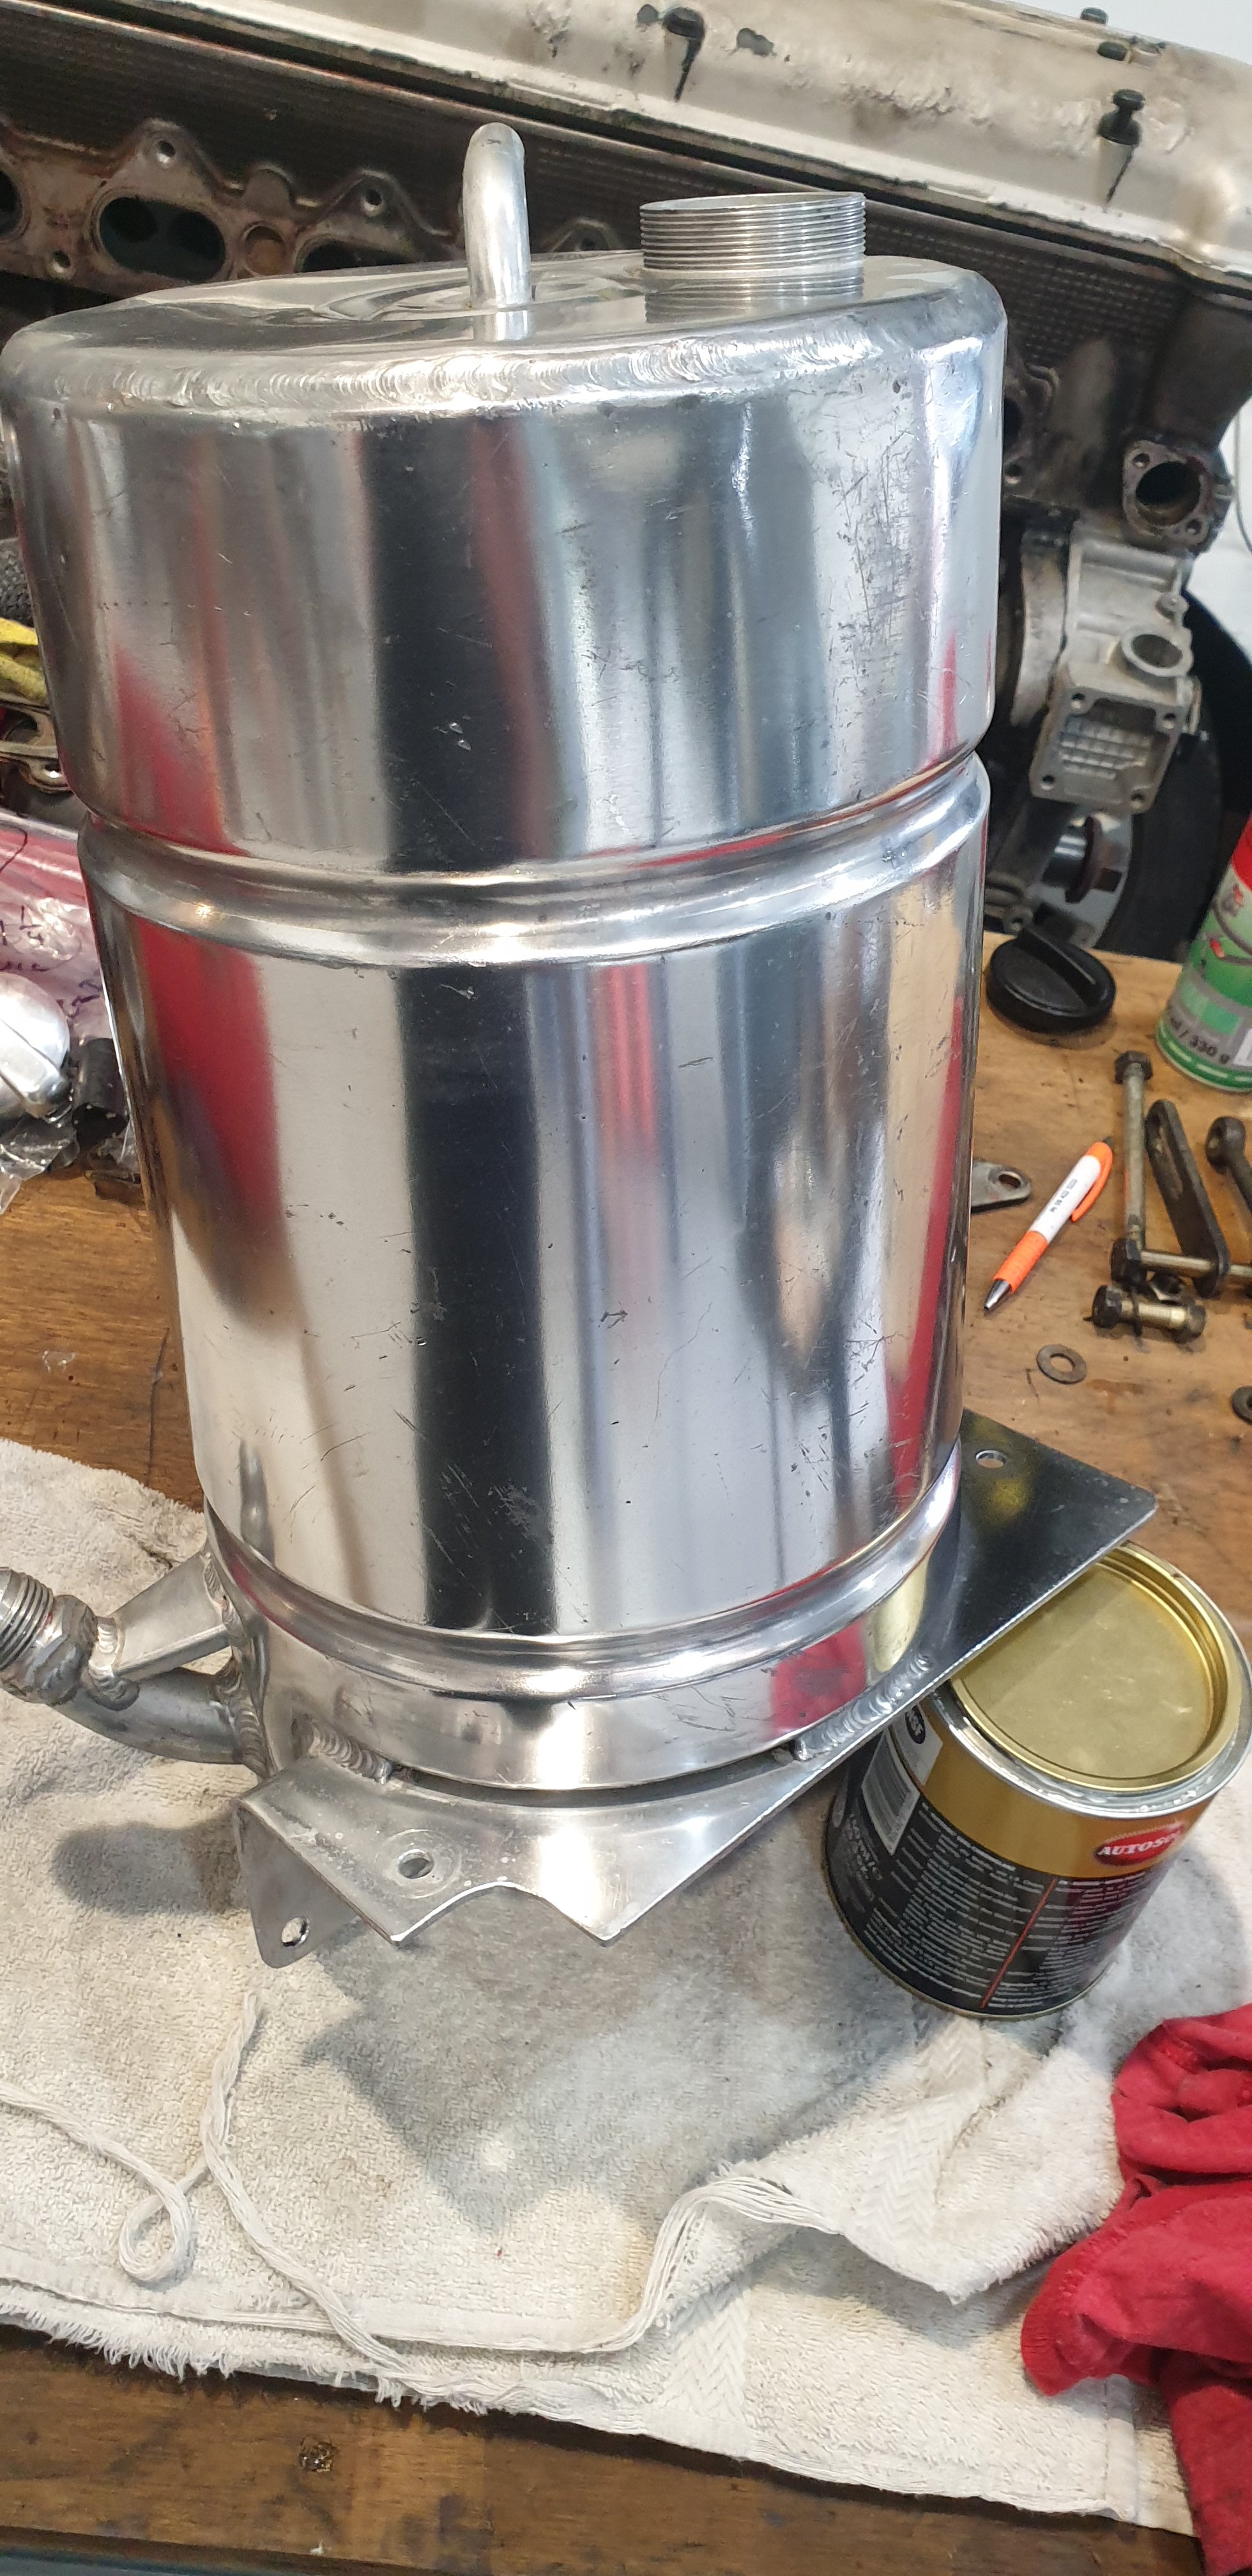
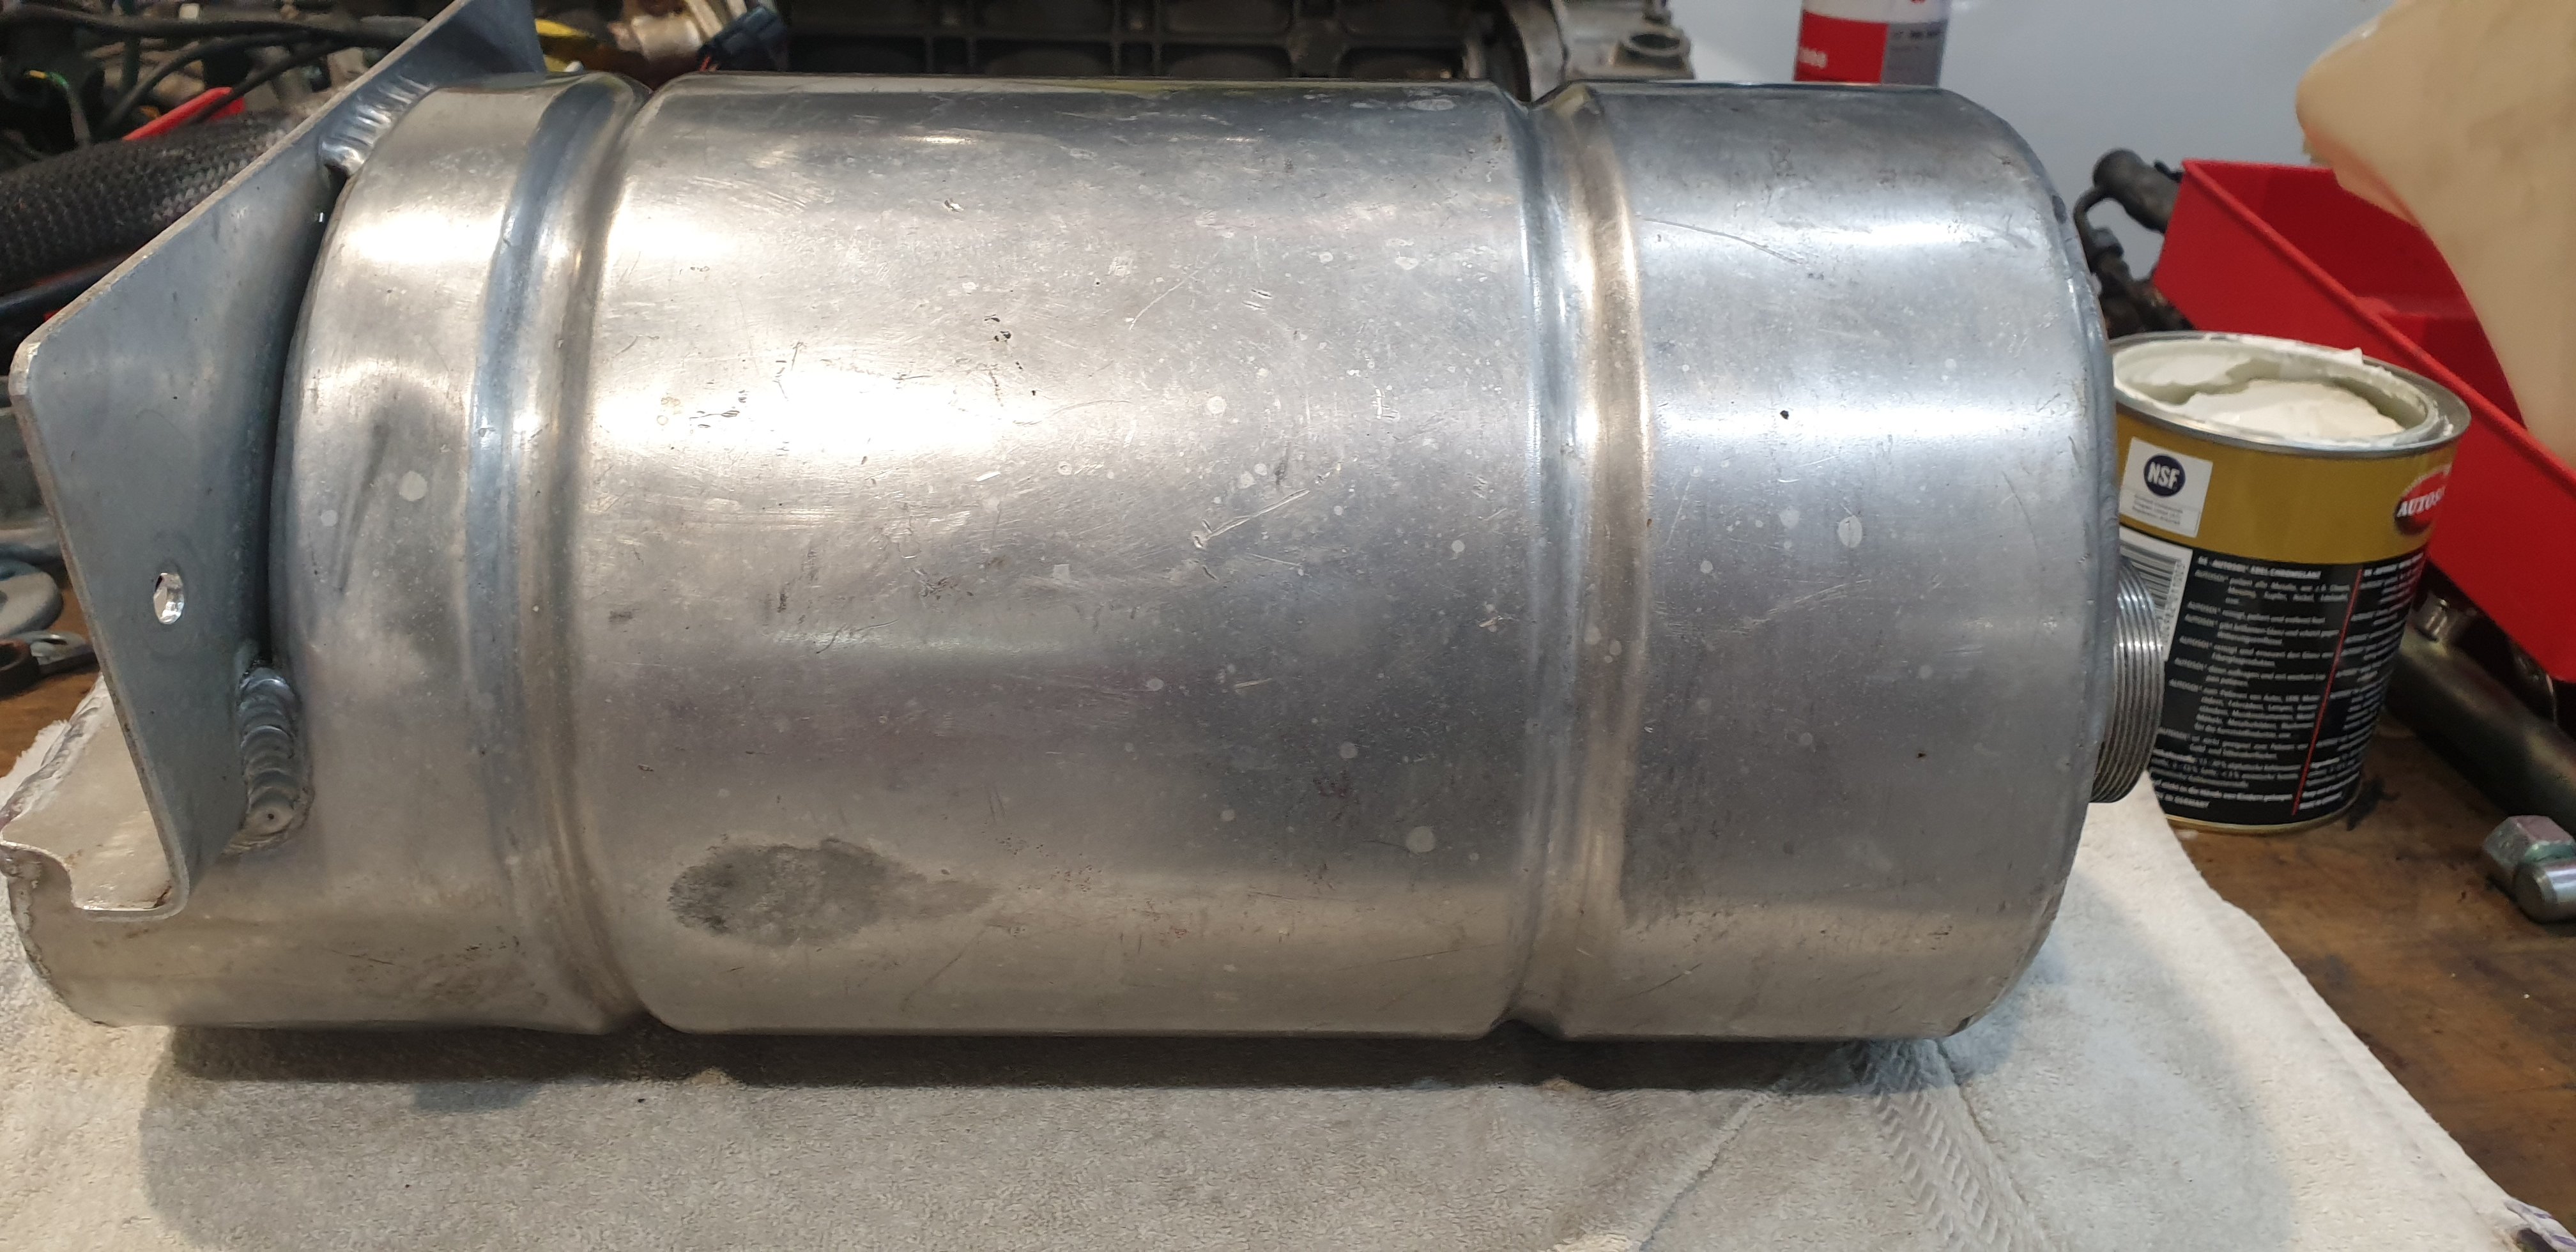
Now that the fuel system is 99 % done, it's time to carry on with the dry sump plumbing. Started by mounting the tank.
1 point
-
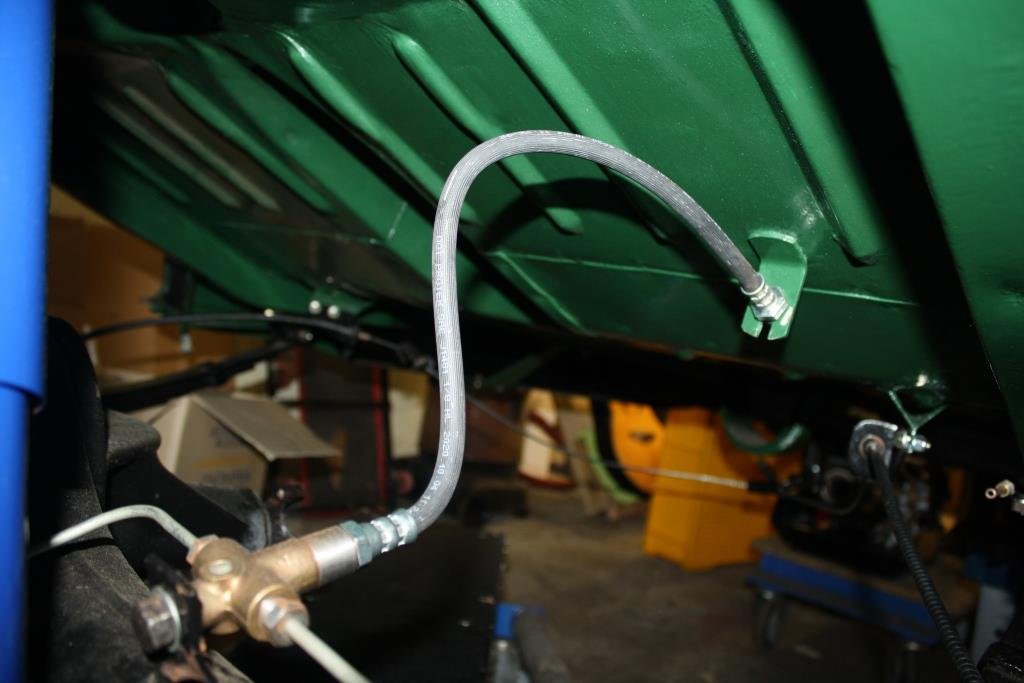
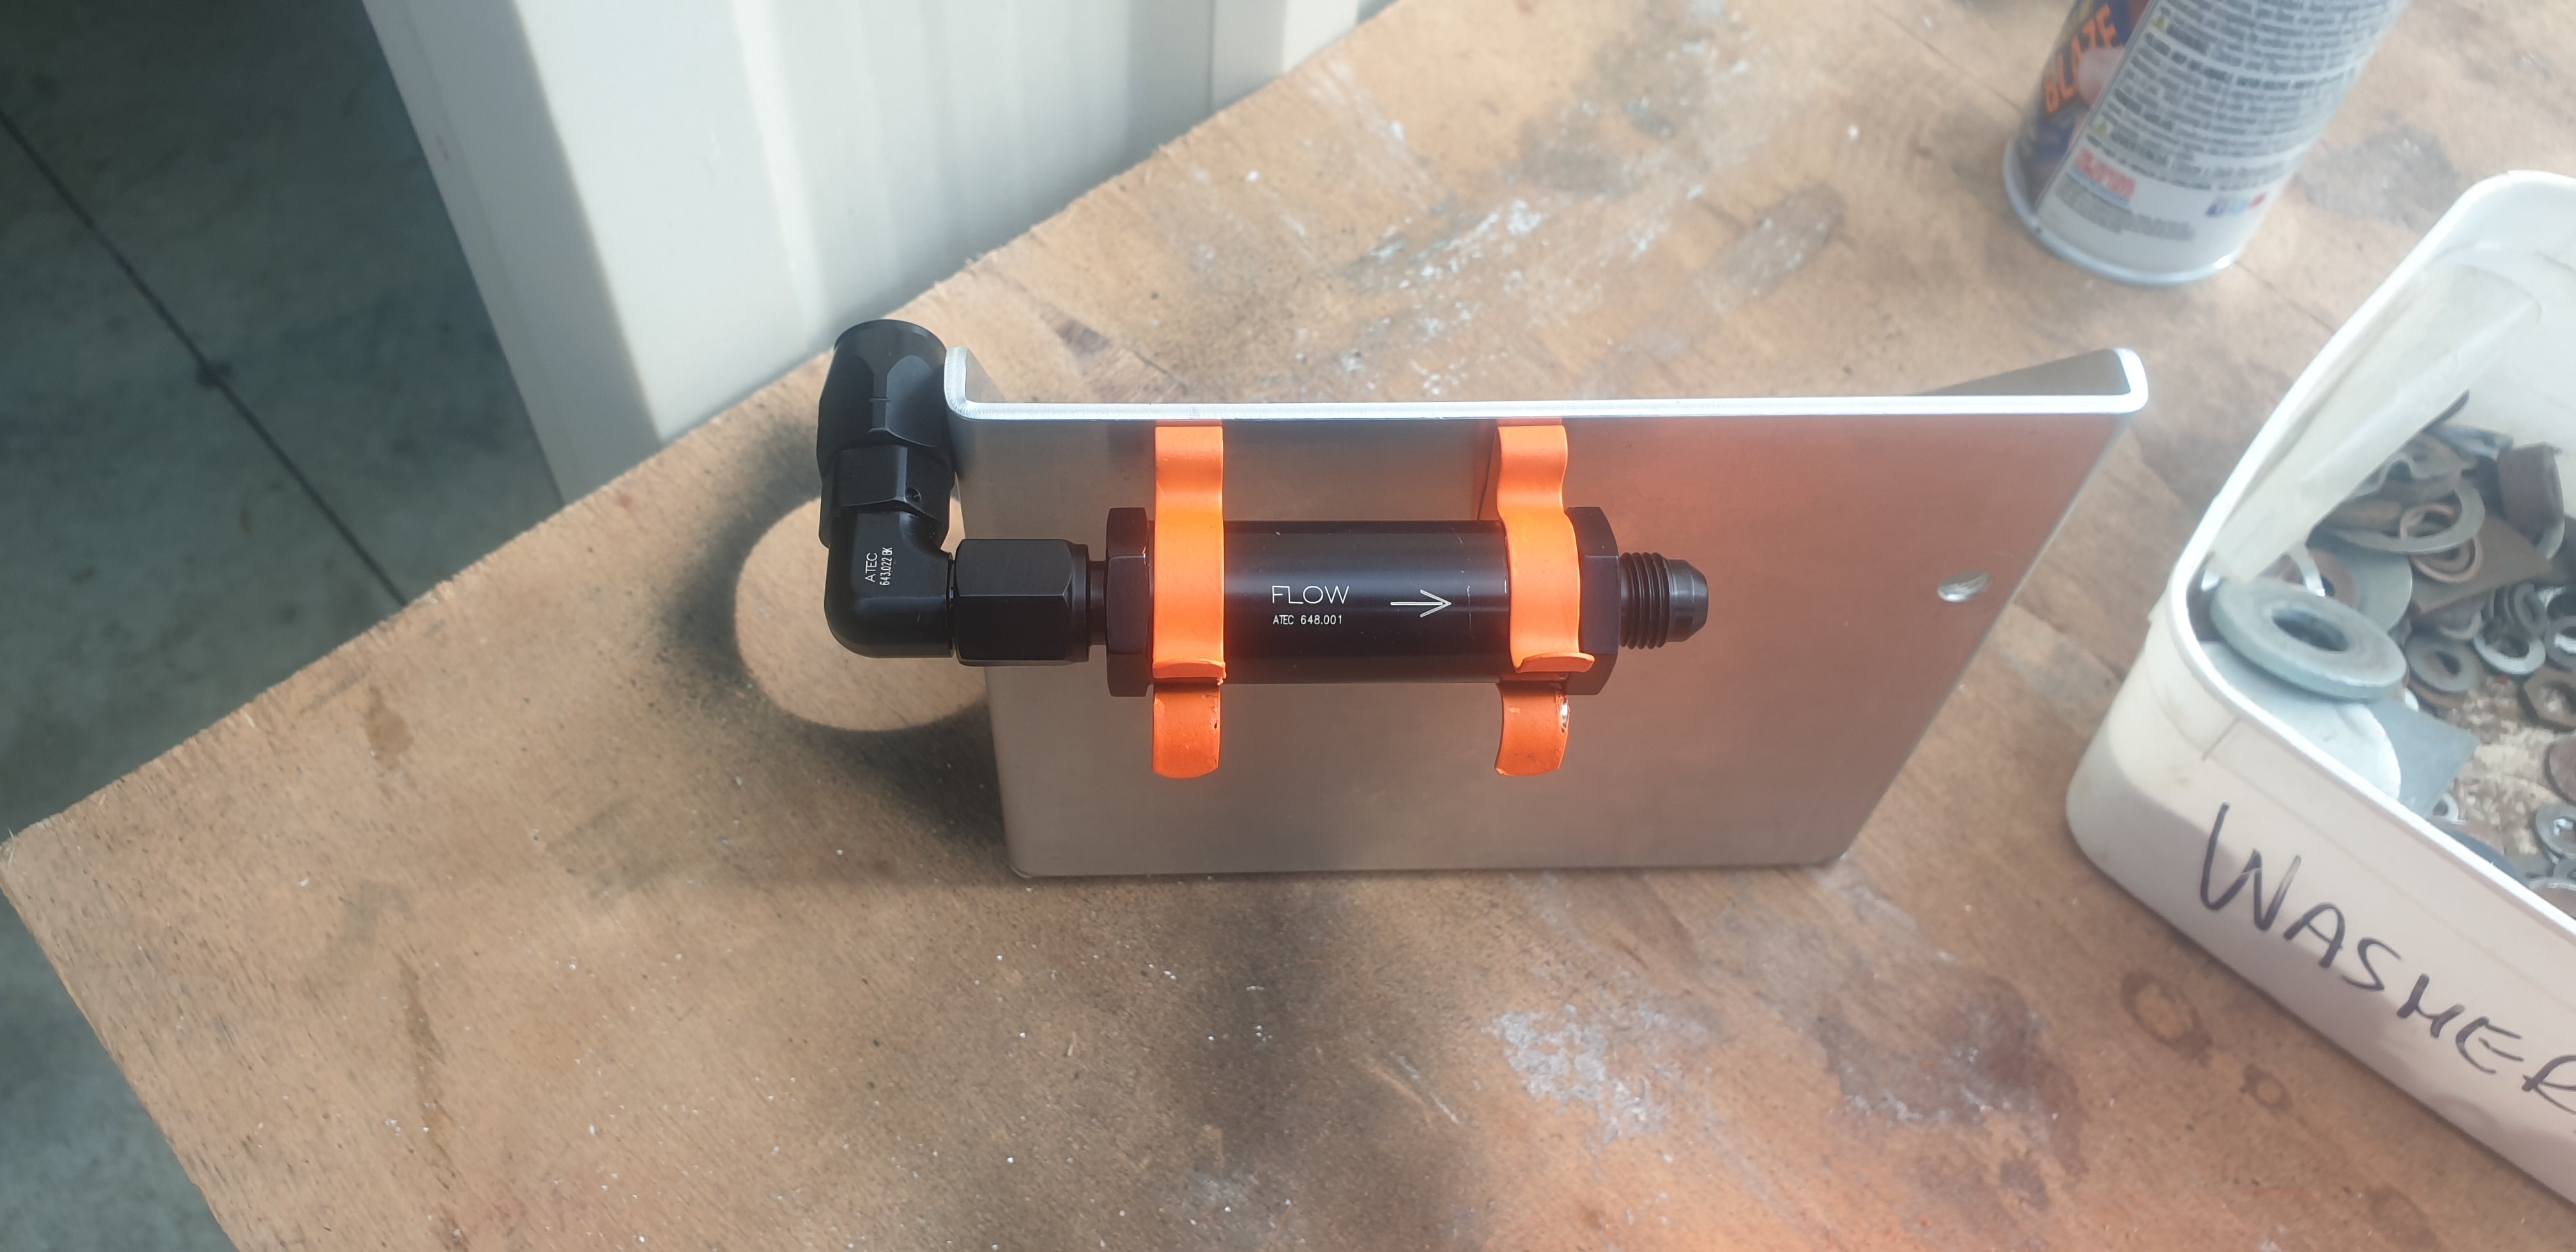
Only need one more Dash 6 fitting and we're done !
1 point
-
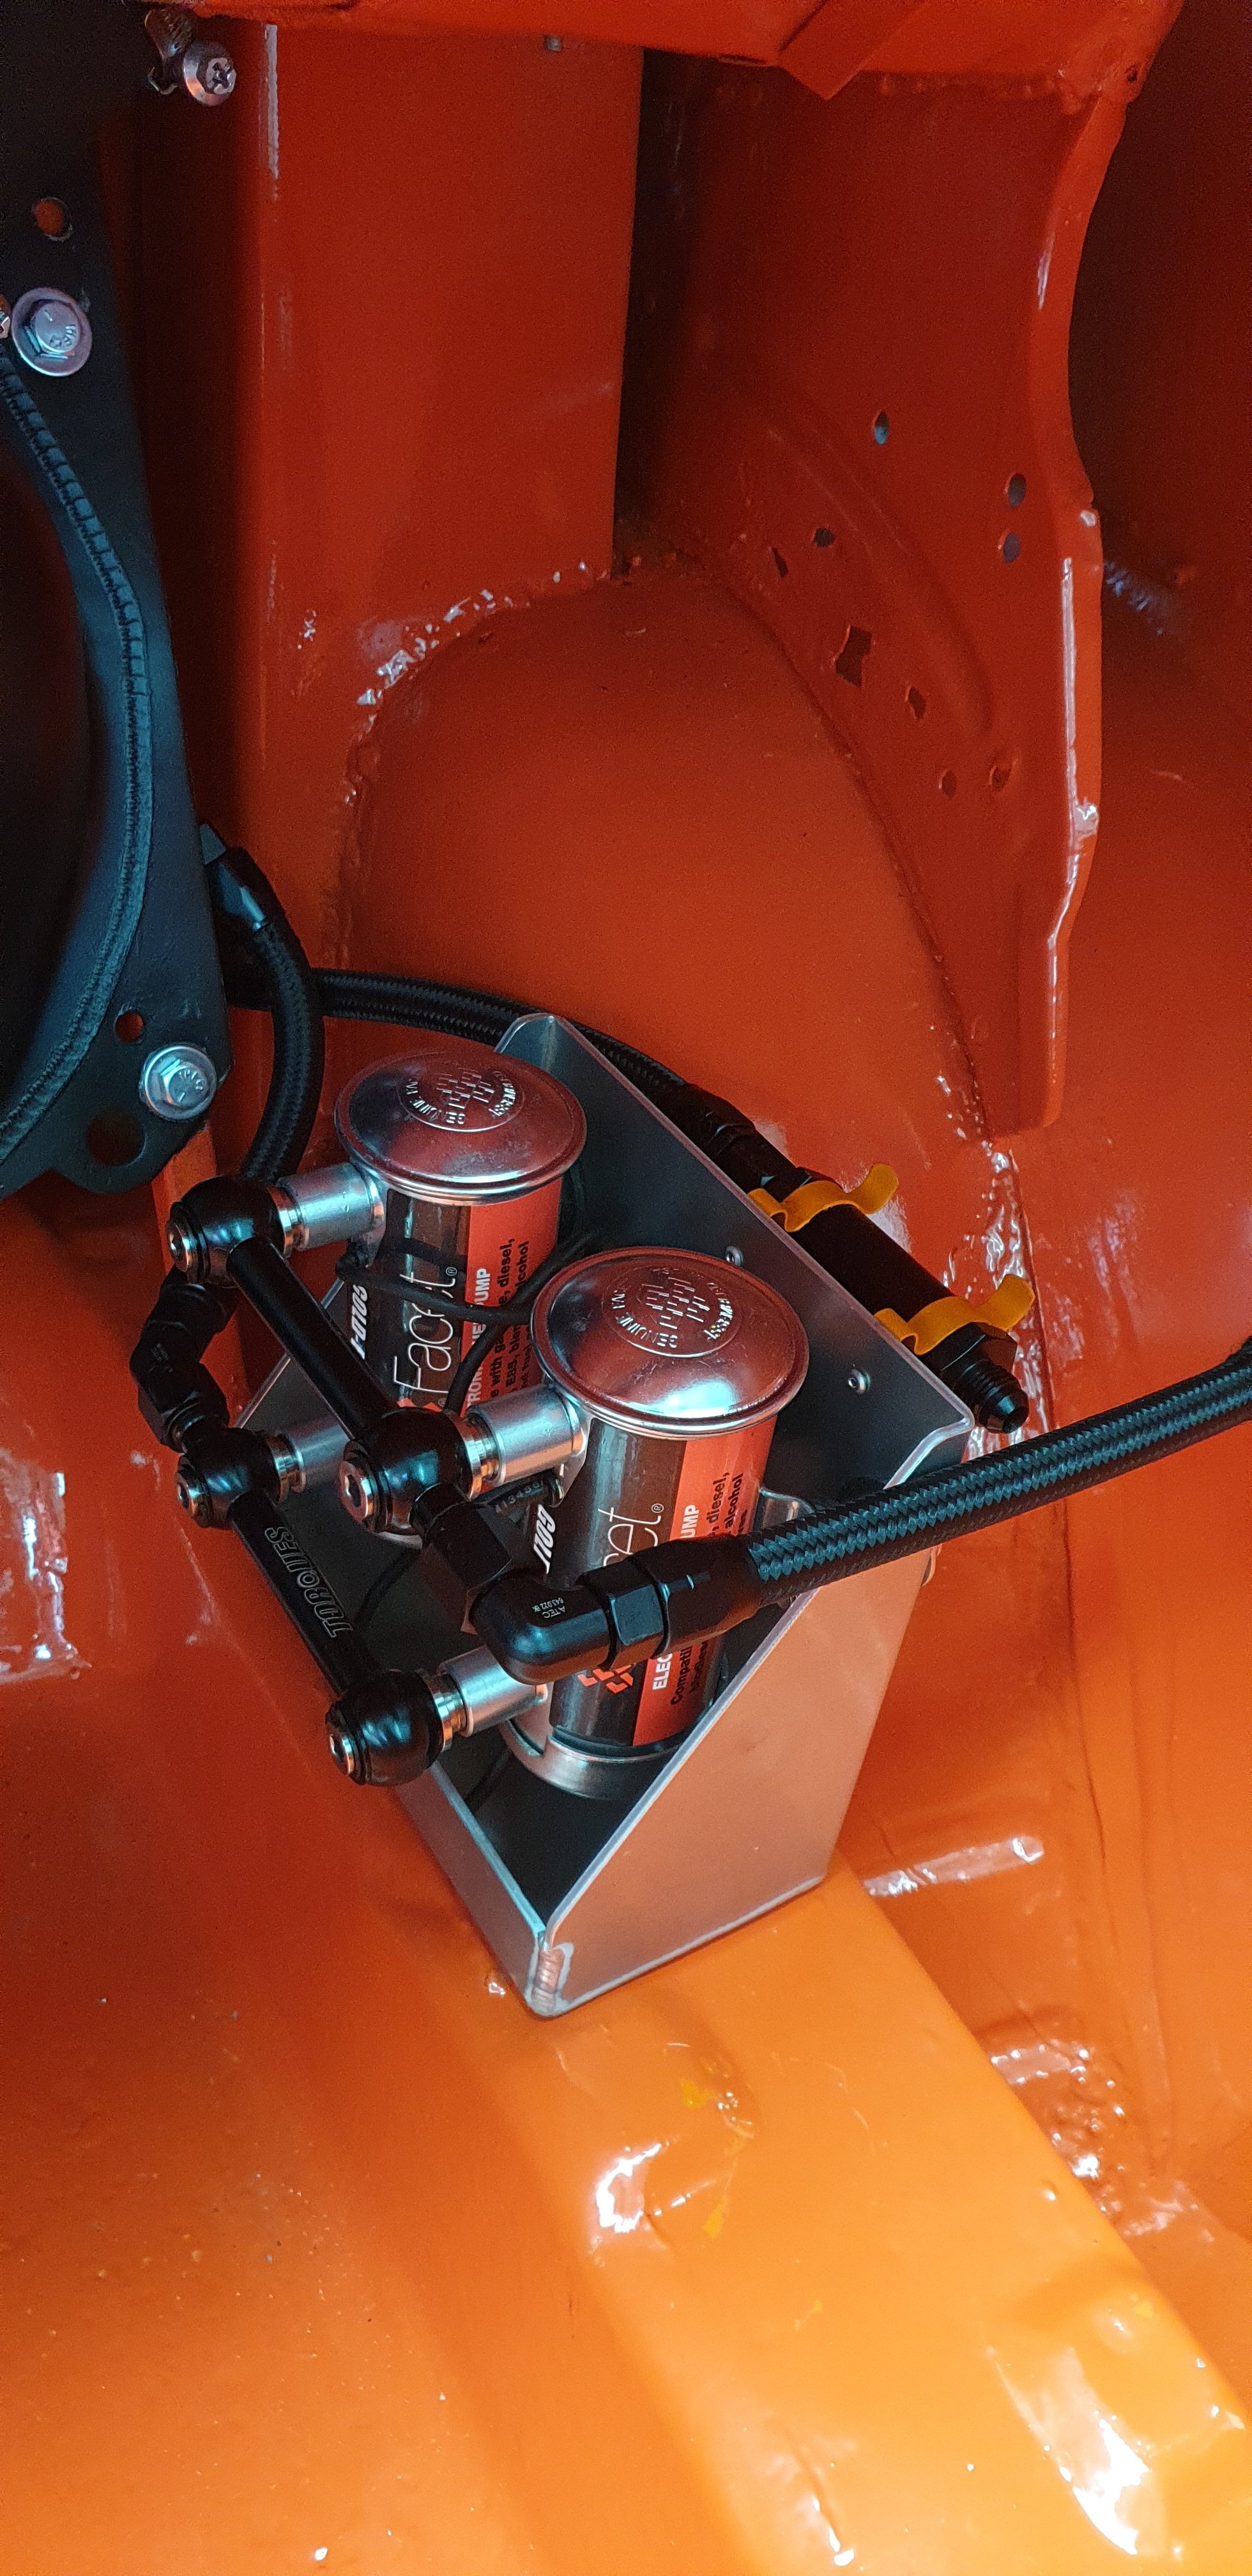
Trying to finish off the fuel system this afternoon. Made up the fuel filter mount on the back of the pump box and plumbed it all in.
1 point
-
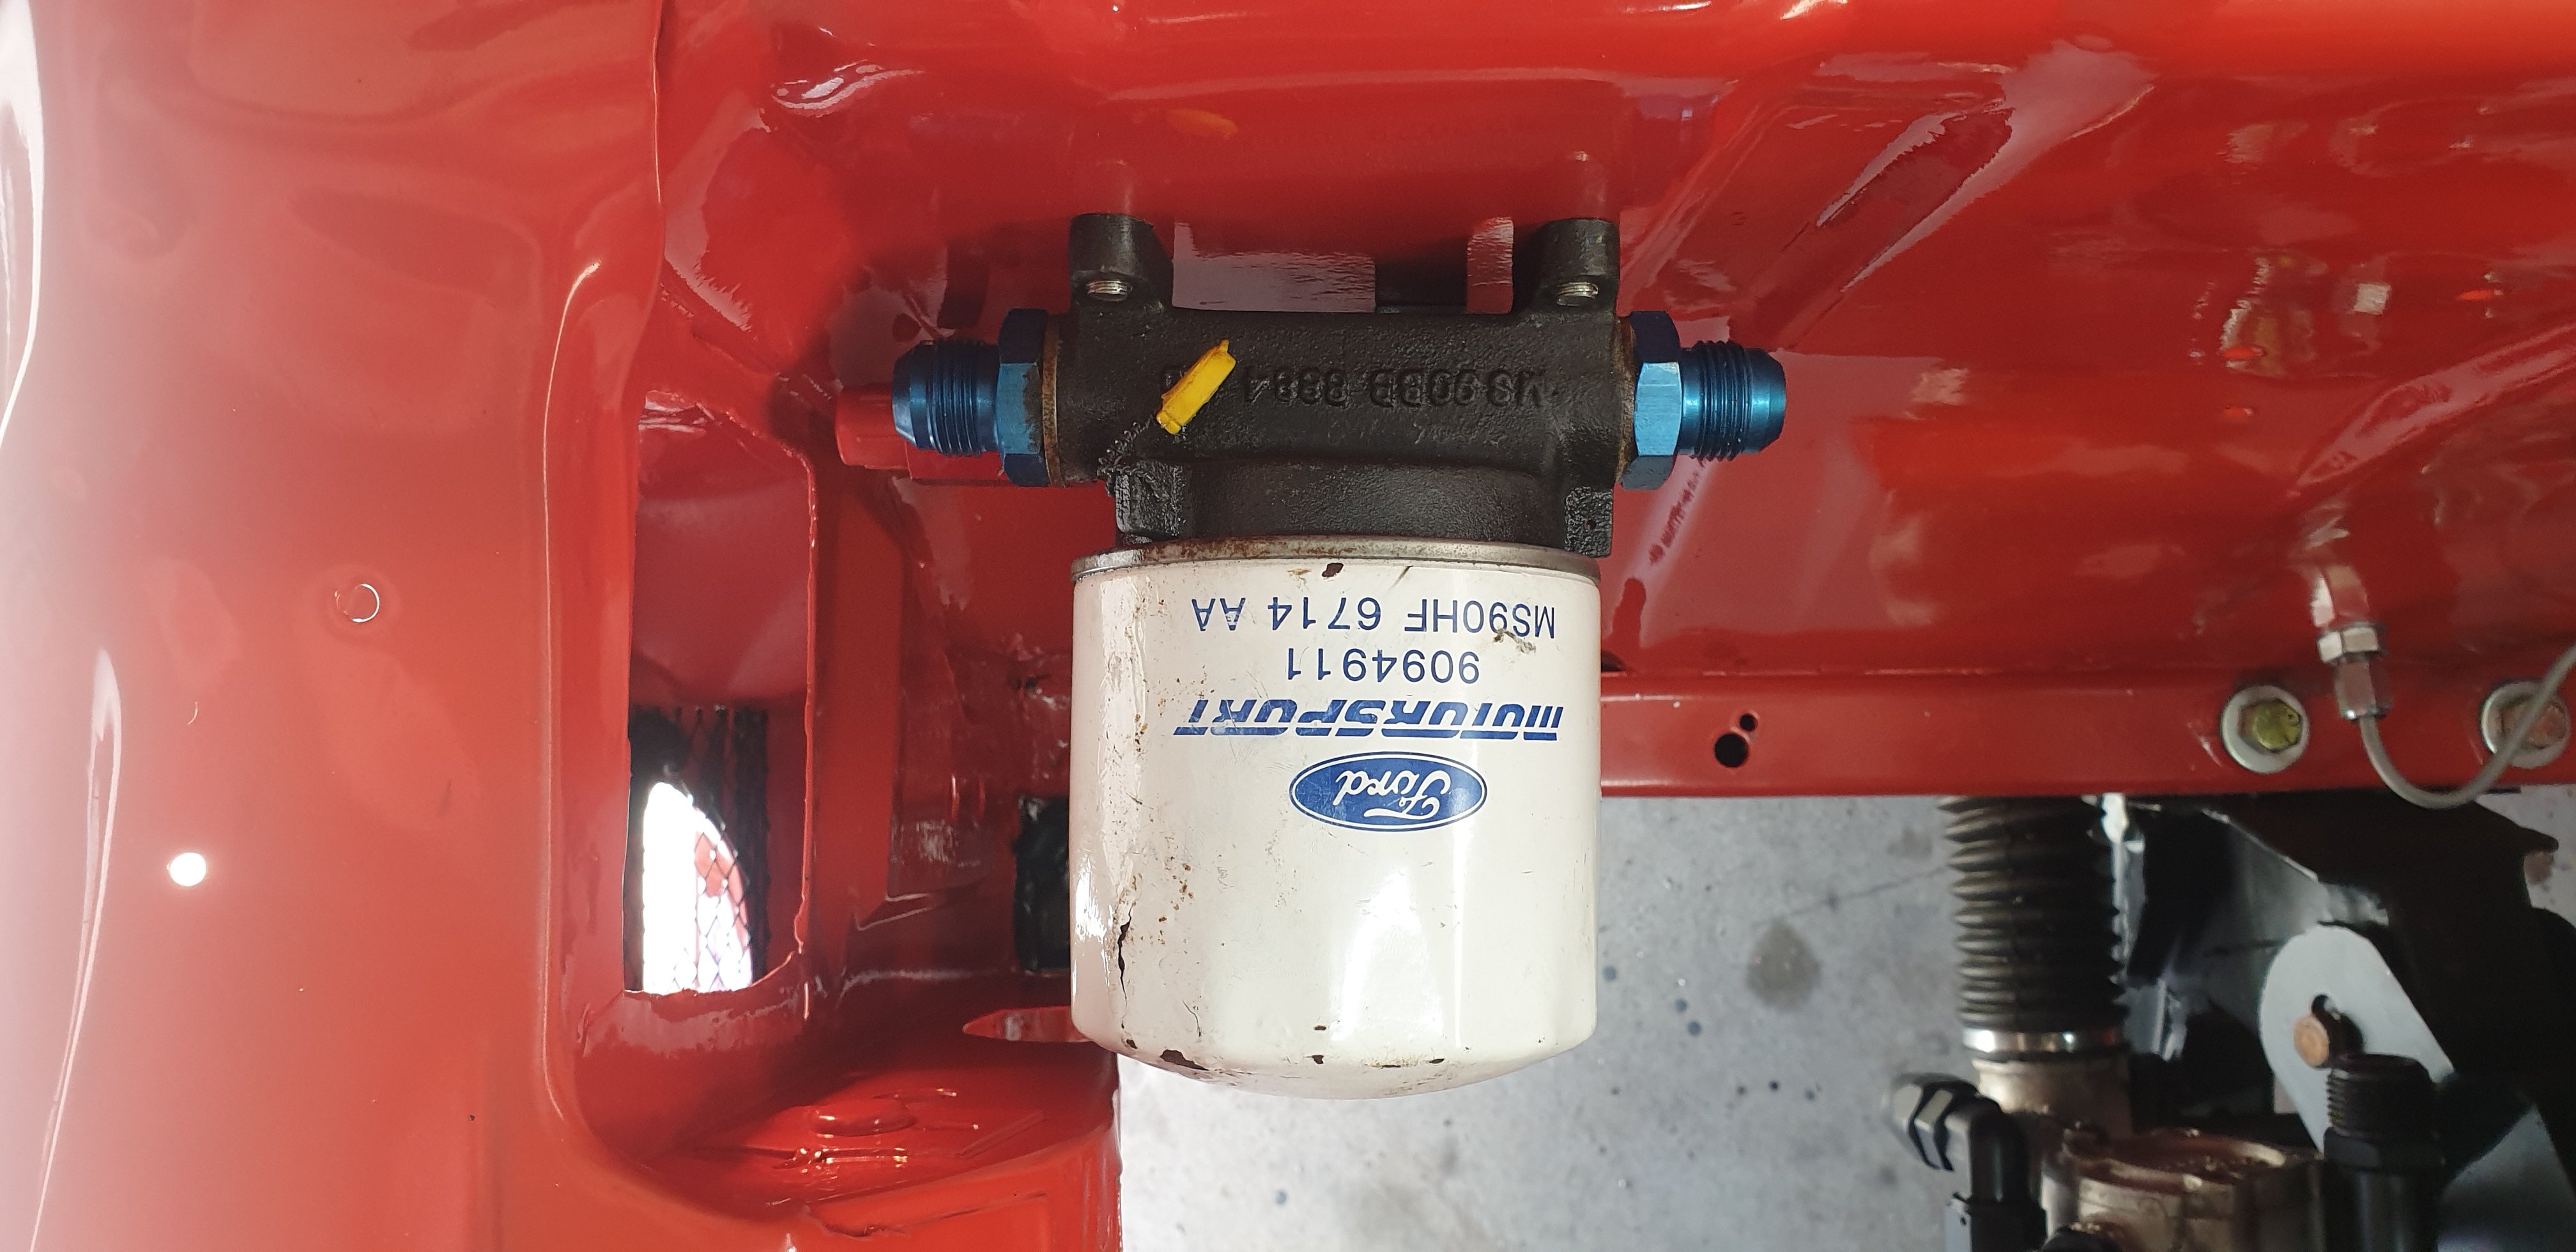
Evening all, small steps this weekend. Mounted the remote oil filter , I scored this while working in the Uk. It's a genuine magnesium remote filter block from a works Ford Escort Cosworth. Needs a new filter as this one has just been sitting in storage and ironically is starting to rust..
1 point


This leaderboard is set to Auckland/GMT+12:00