
Leaderboard


Popular Content
Showing content with the highest reputation on 06/20/19 in all areas
-
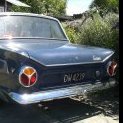
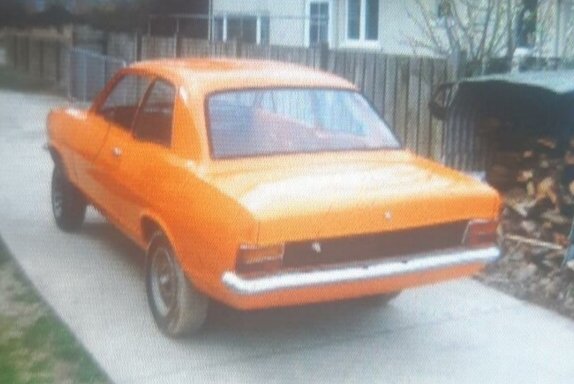
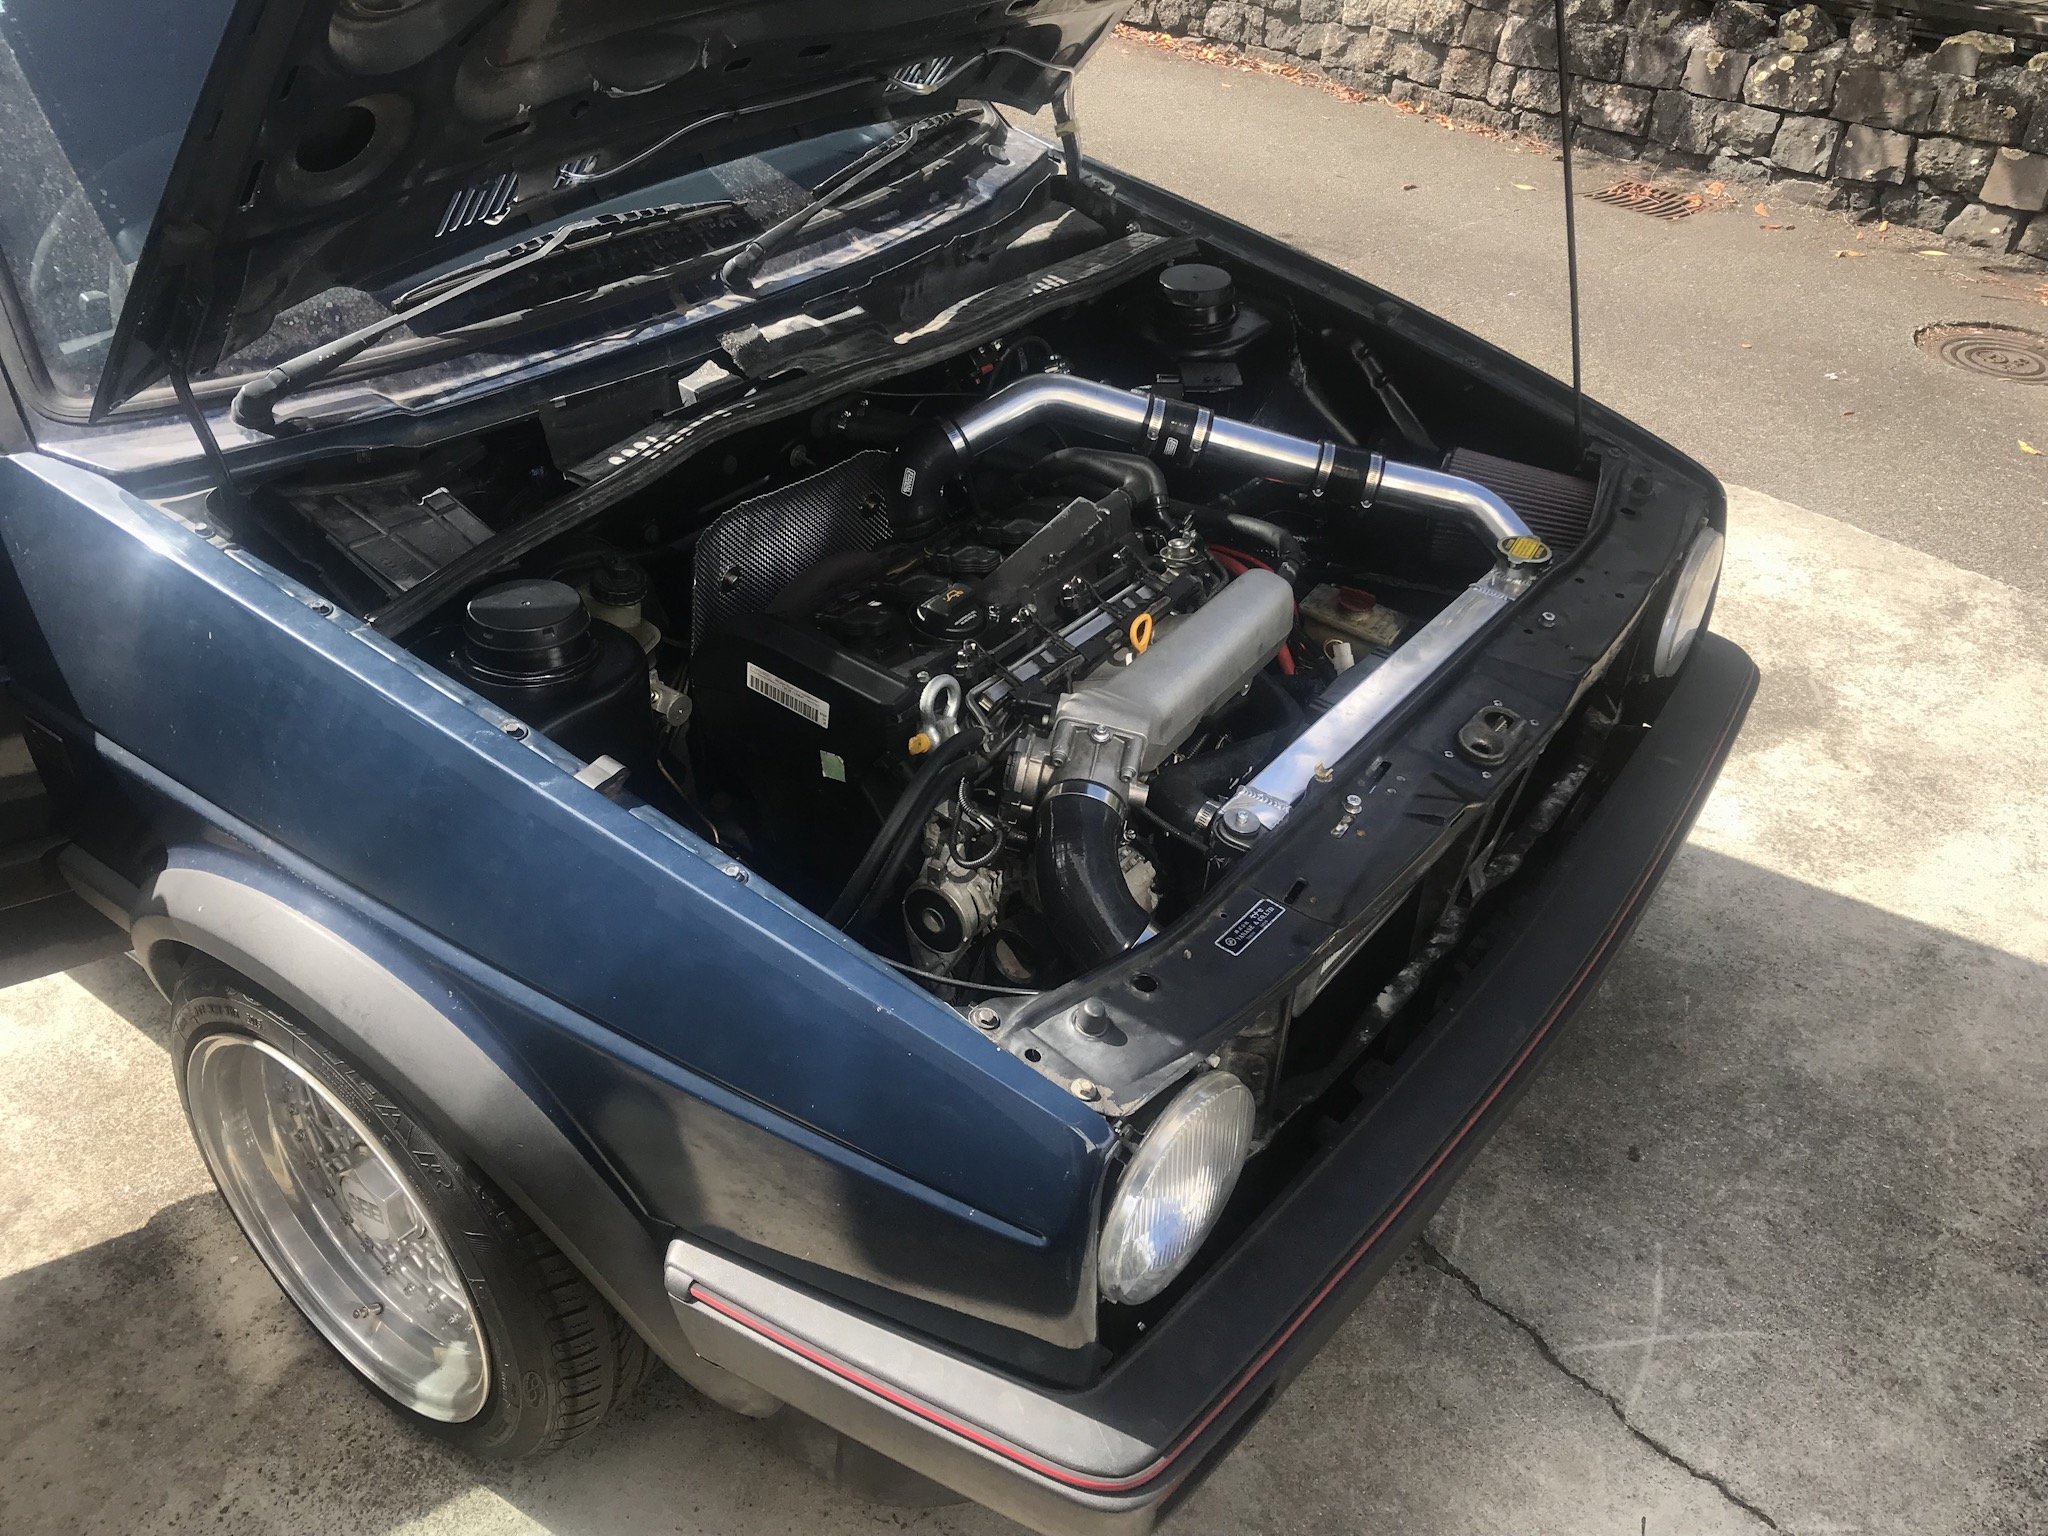
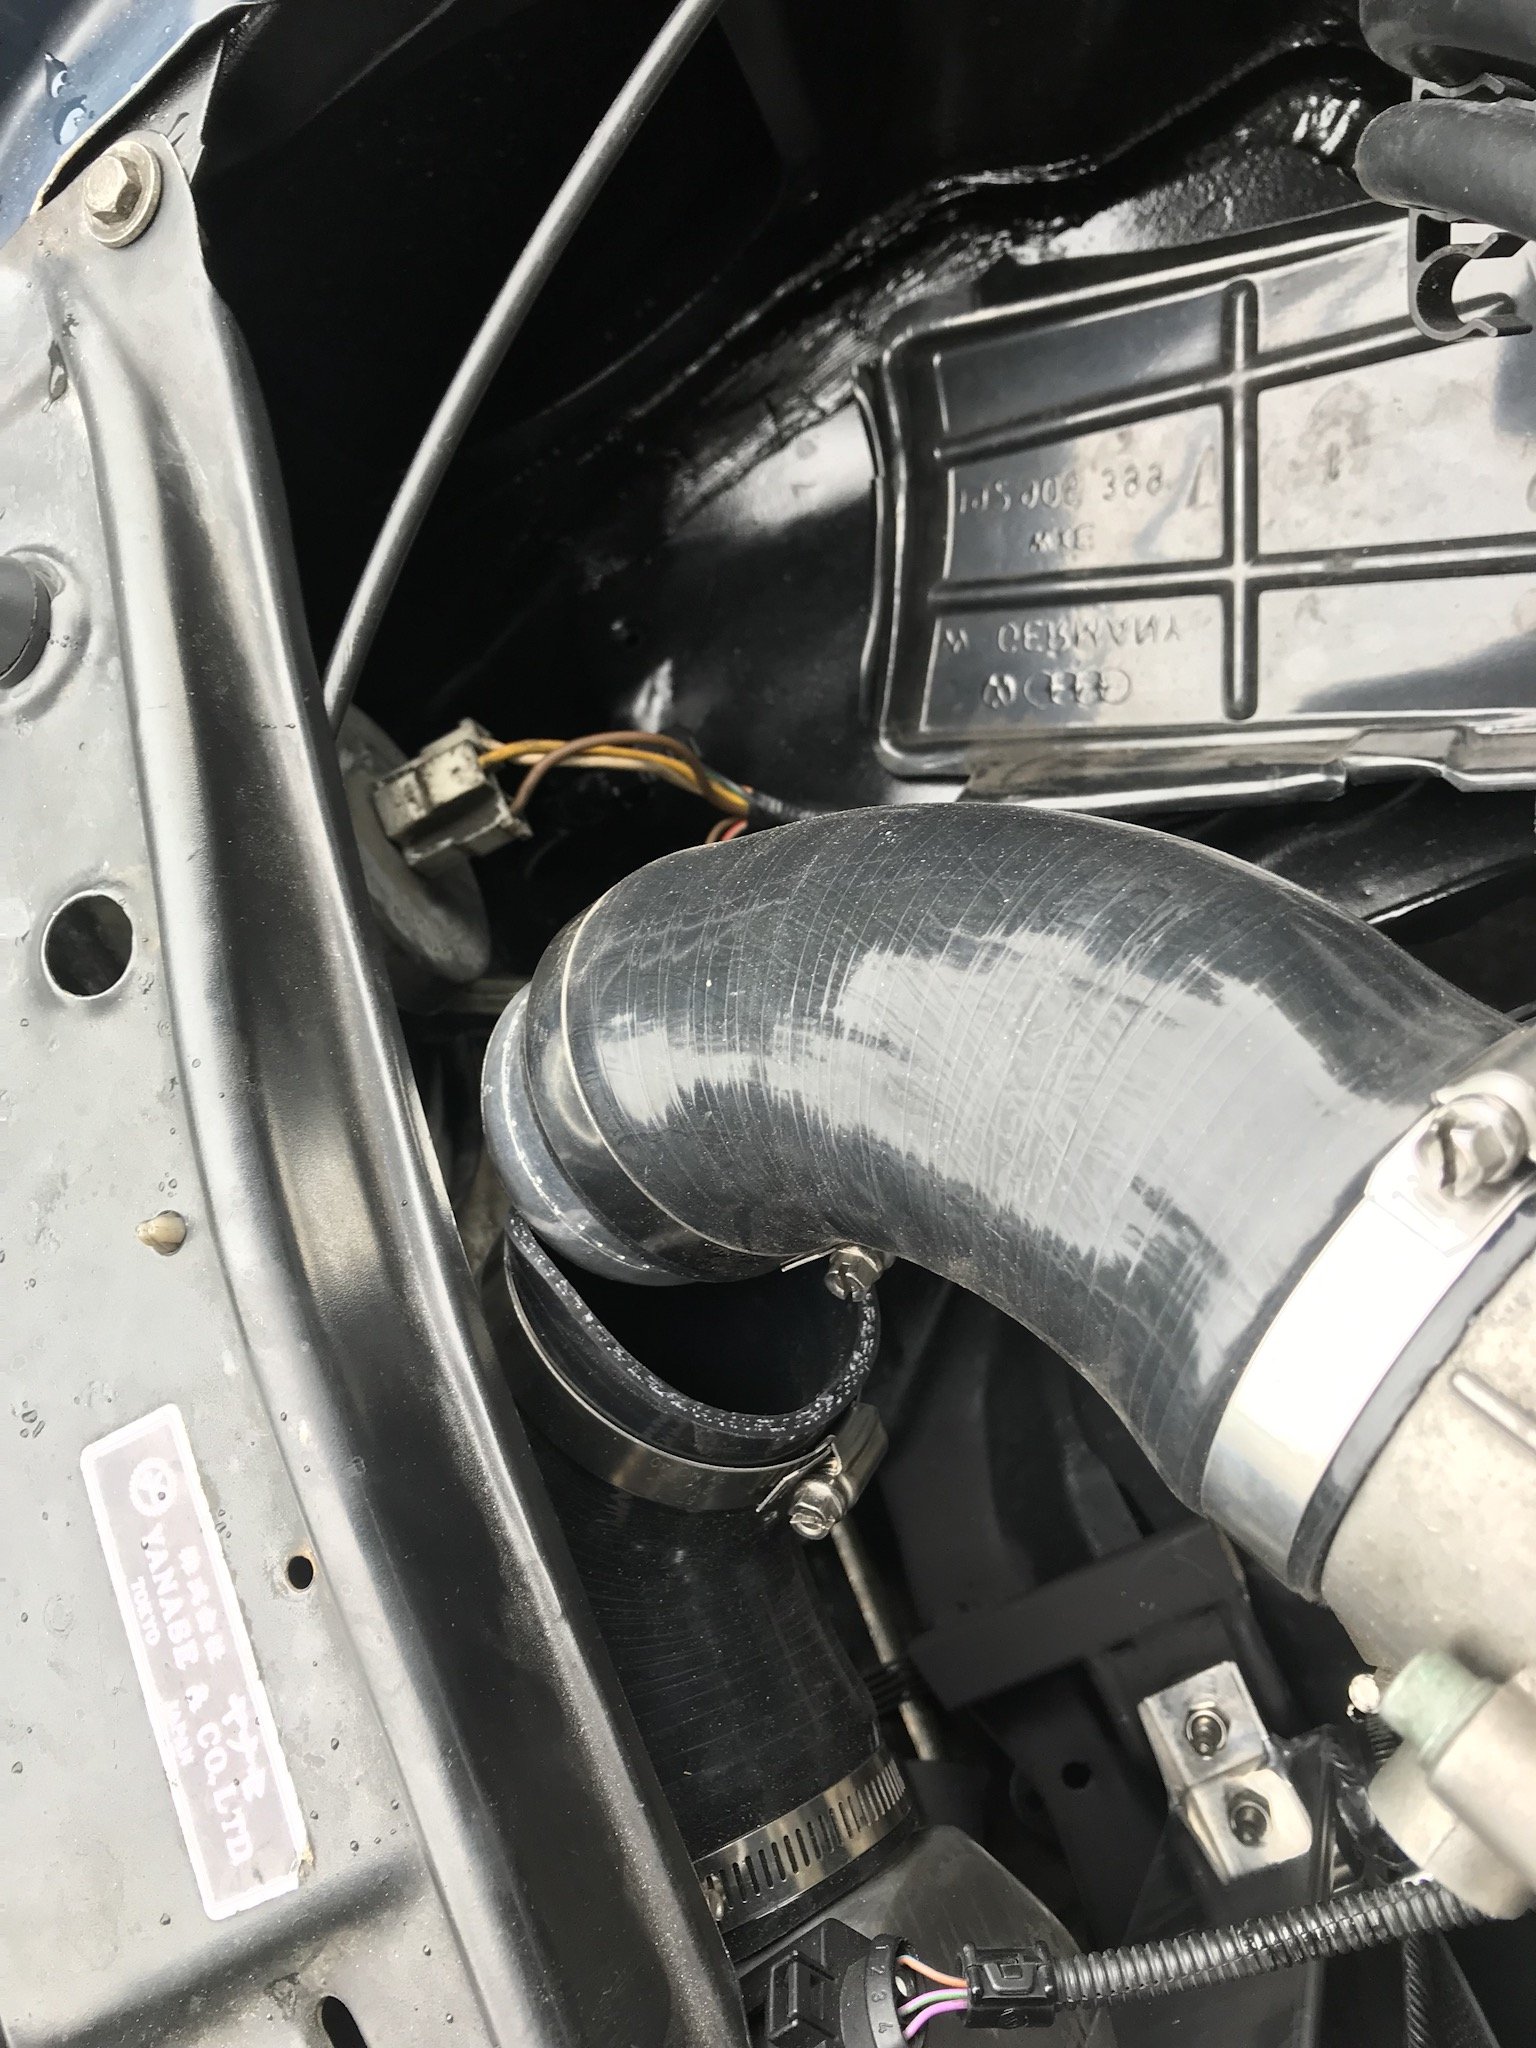
This bitch is finally alive. Started yesterday with no exhaust so fairly rowdy. Just needs exhaust sorting, cooling fan found (looking for one currently let me know if you have one please!) I seem to have lost it over the last decade. Pretty pumped as I got the engine rebuilt over 12 years ago and was a bit worried there would be issues. Will need a tune etc and no doubt some other issue will show itself but its getting damn close. Looking forward to taking it for a fang!
 9 points
 -
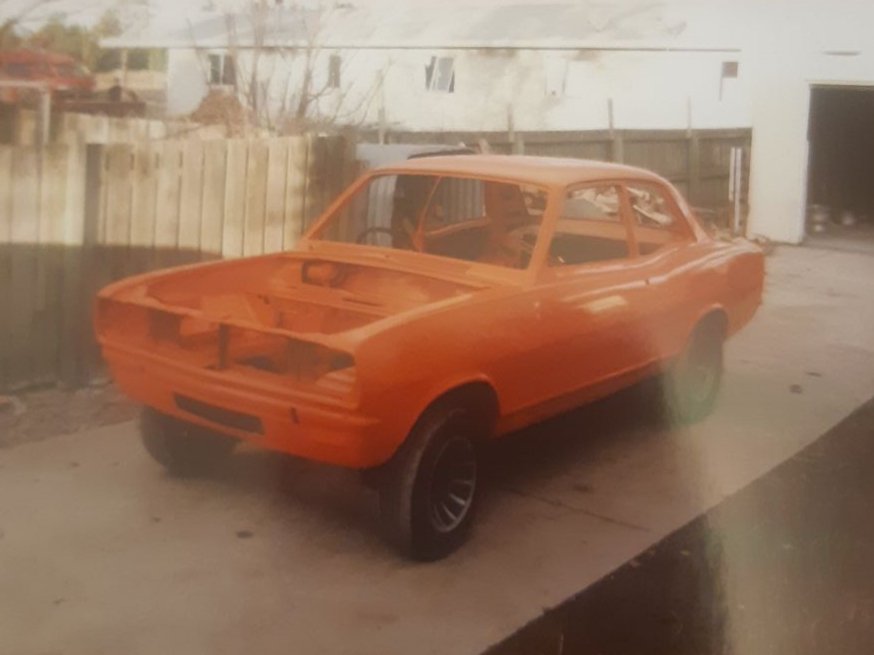
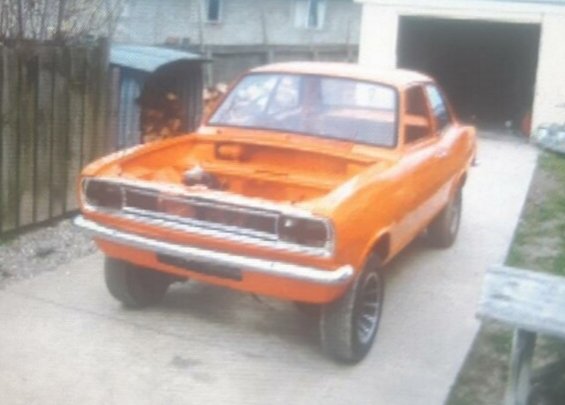
Gidday, Thought I'd start a thread on an HB viva I've just bought. It comes with a built 2.3l slant engine which apparently is a certified ripper but has probably been sitting for 10 years... I actually know very little about it, it's been a friends for as long as I can remember and he had some motivation a while back and got the body work done & painted it. Put in the GT grill and got GT badges. But these days he hasn't looked at it for years. Talking turkey with him at New Year 2018-19 and I said I'd look to buy it off him and finish it up and just sealed the deal about 6months later. I'm guessing the job list is: Strip engine, inspect, hone and replace rings. Build exhaust & extractors Rebuild carbs Radiator Install driveline. Clutch, gearbox & diffs largely unknown. But I think there are some spares from a 1.3l HC viva... Install MSNZ cage Entier braking system Poly bushes Springs & shocks Wheels & tyres Race seats, harness Fit enough interor to meet HSC class That should be the worst of it haha Anyway, I'm keen on some guidance on how to set this car up. E.g. springs to suit the 2.3l. Tips and tricks to set the car up for circuit racing. Brake components from other vivas etc. Won't be much work happening until I go collect it from the South Island which I think is going to be New Year 2019-20. Just want to get a bit of a plan in place and start keeping an eye out for any parts needed to get this finished up. Discussion thread here: Cheers, Pete
6 points
-
Fucking civilised as fuck. It's almost a Jag or a Roller now.
5 points
-
2019-06-19_01-30-25 by sheepers, on Flickr 2019-06-19_12-40-53 by sheepers, on Flickr 2019-06-19_12-40-43 by sheepers, on Flickr5 points
-
No major updates on the scoot, it has been kept locked up in the dining room while other things have been happening. Team photo. Good colours!
4 points
-
Pour it through a loaf of bread, then buy new oil3 points
-
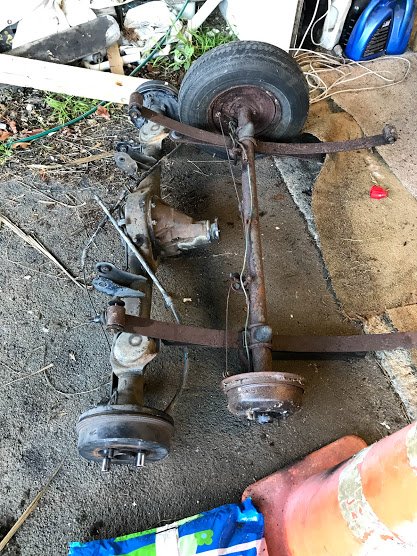
Took the axle and leaves off, jesus its tiny versus the Toyota t series one: Then played car Tetris: Just fits:
3 points
-
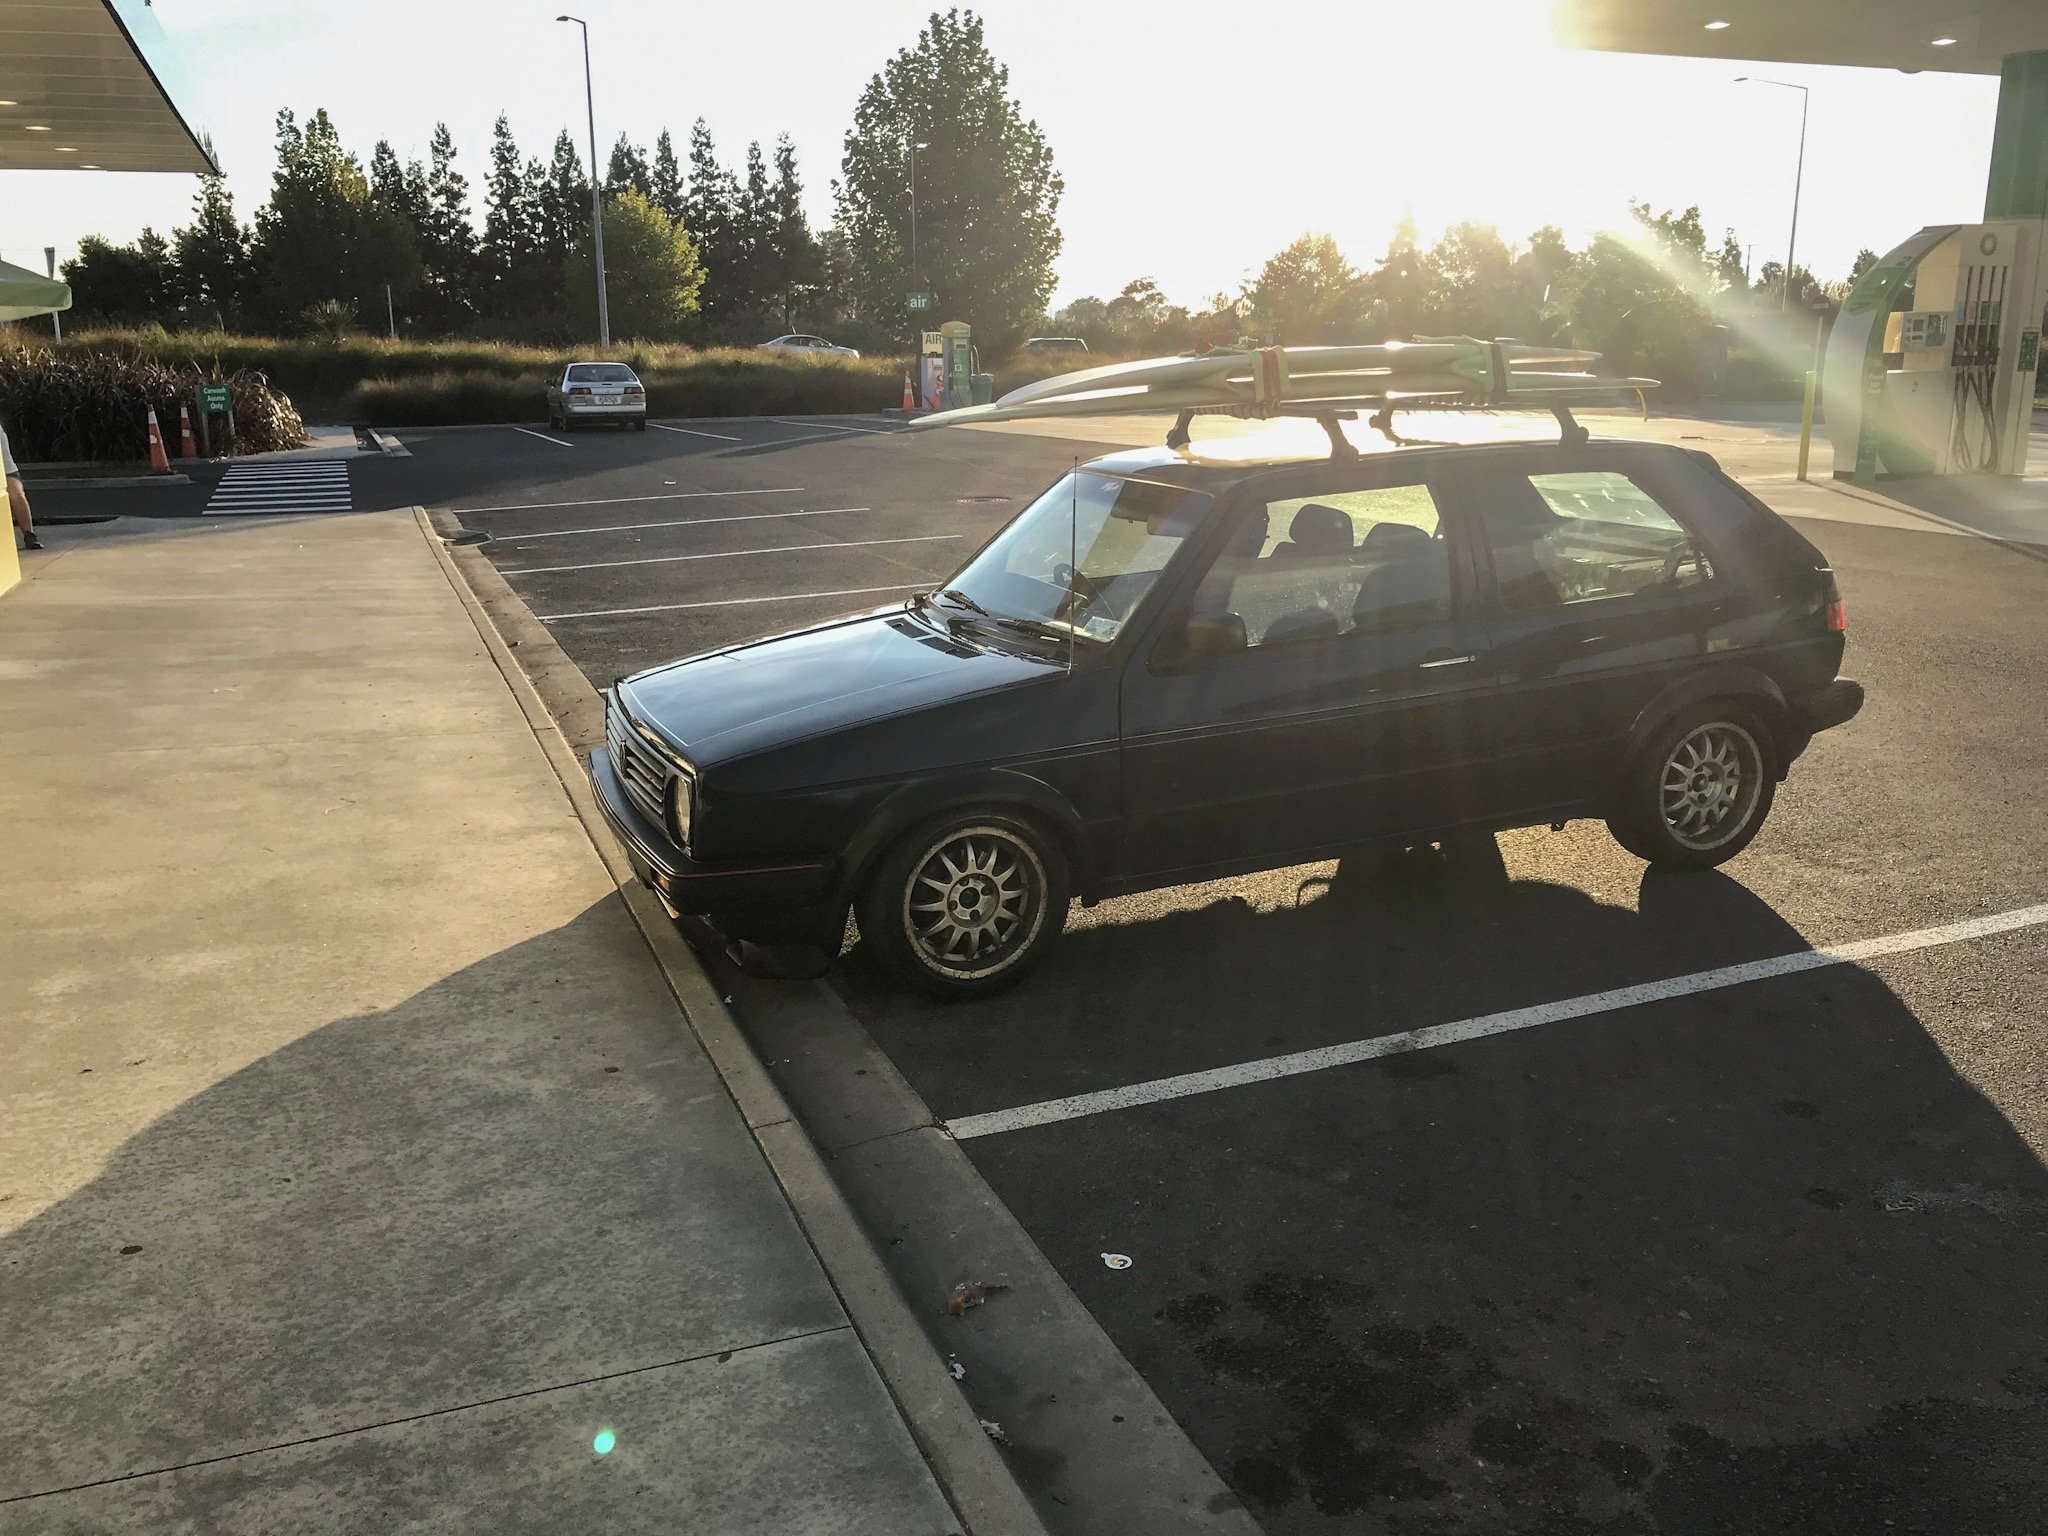
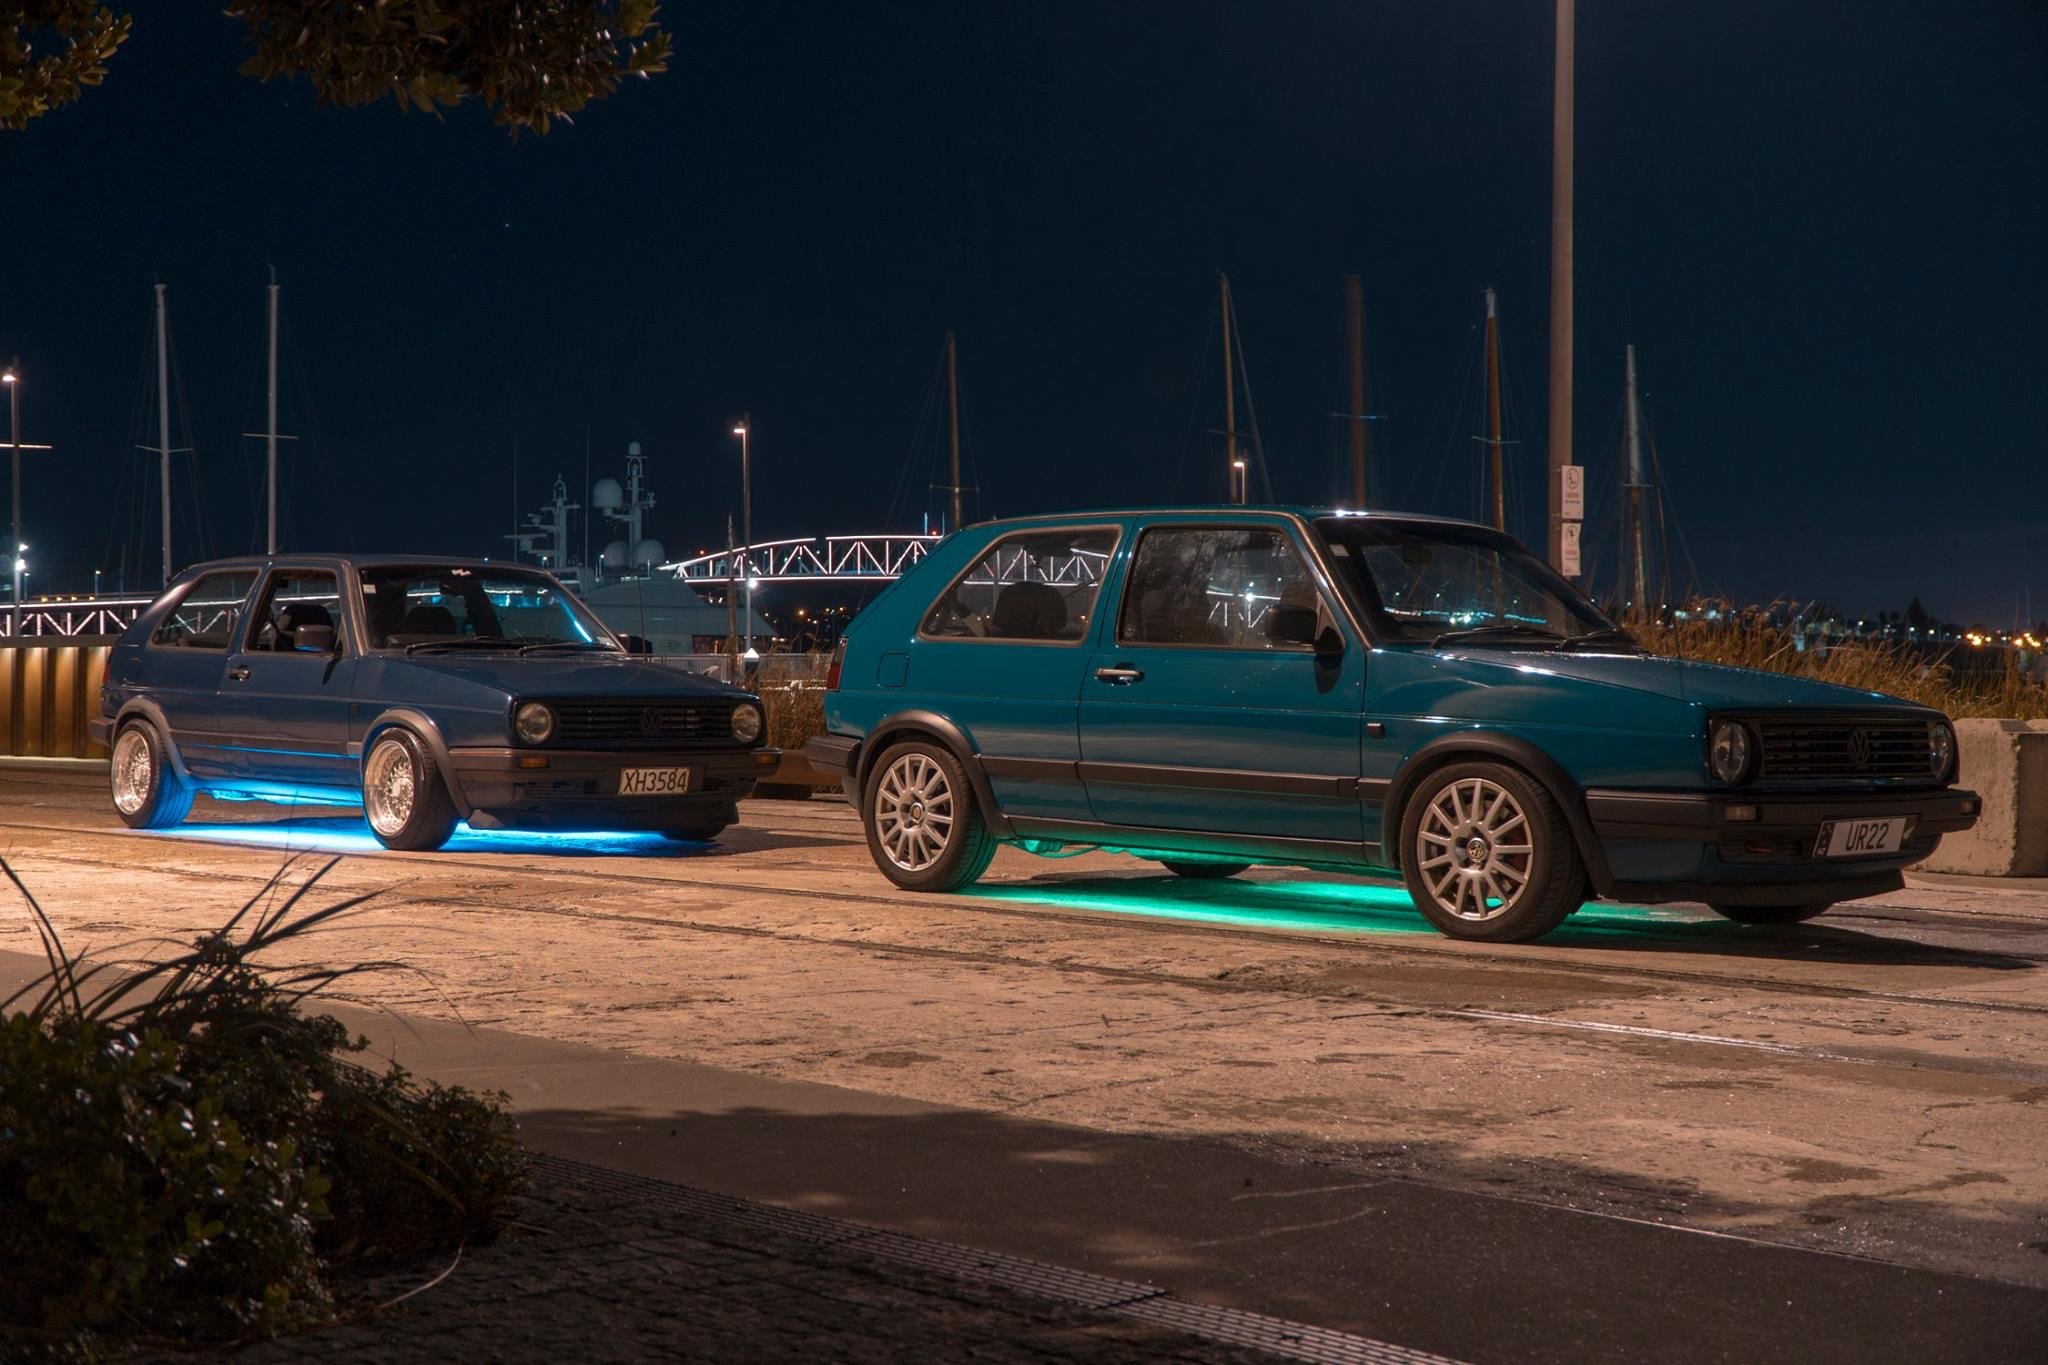
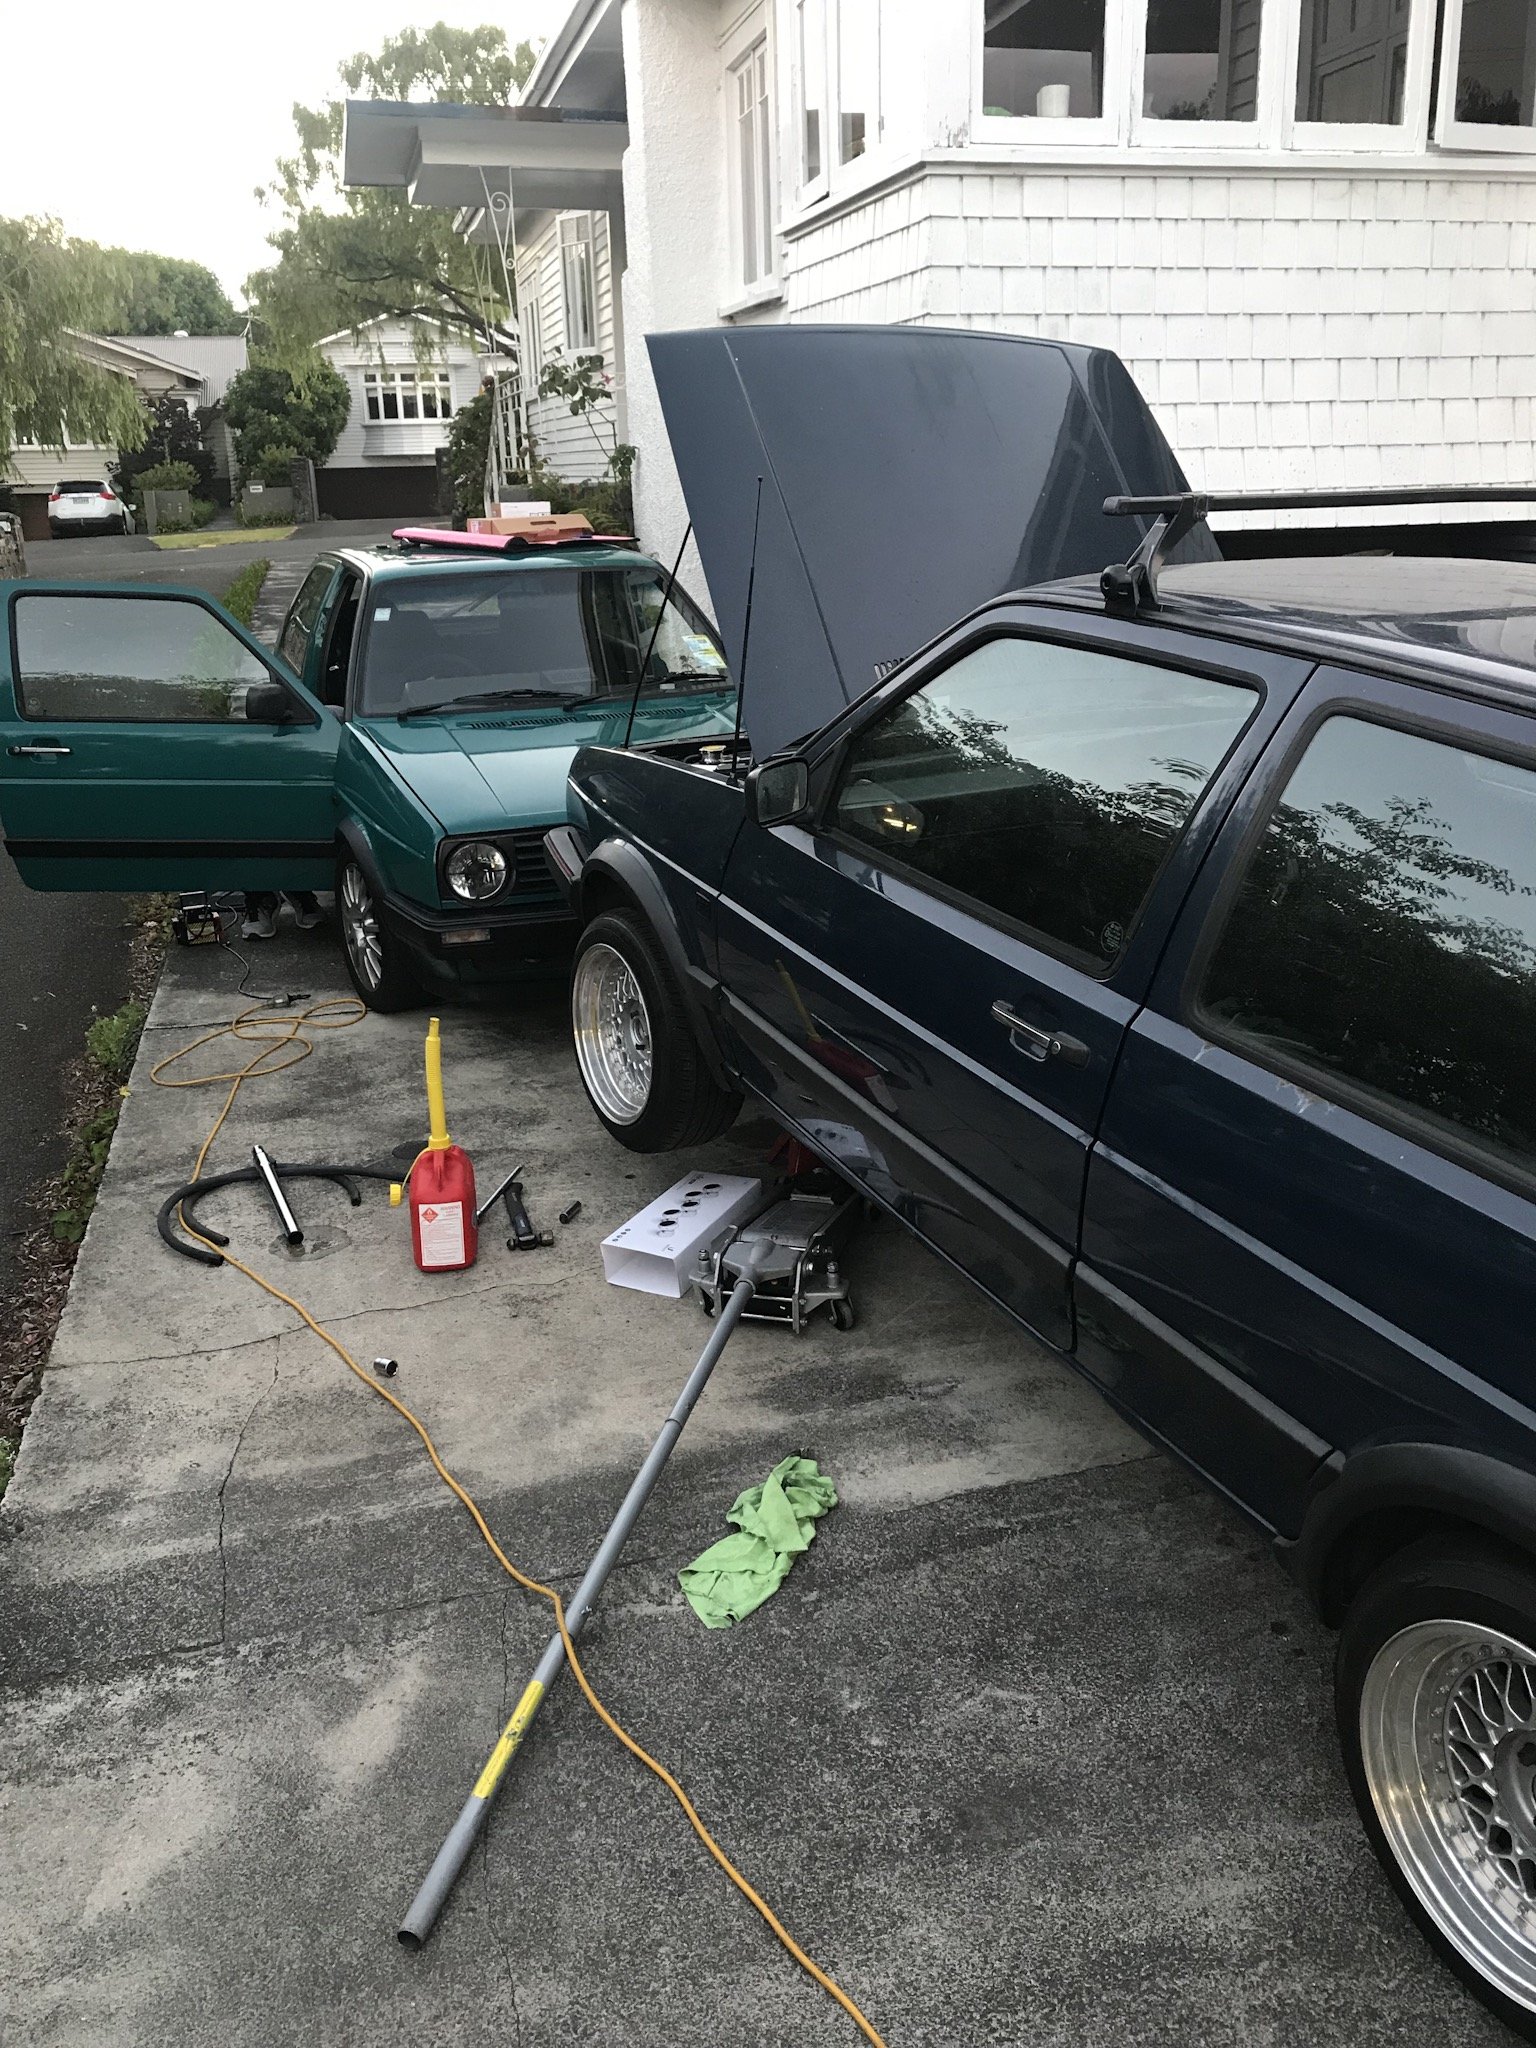
Made a bit of a drive to raglan so we could go for a surf. Made for a brilliant cruise, really couldn’t be happier, would be nice to put a lower 5th gear in it for cruising but I’m not to fussed. Also made sure to take the piss a bit with the neons
3 points
-
Welcome back viewers to yet another ever so thrilling update on the old Huddyson. Sitting here and looking back over the last few years I must scratch my head and ask where has all that time gone. I really did believe it would of been driveable by now - road legal or not legal. Life has its way of derailing such grand time frames as im sure you all are aware and the fact that even though the parts im using may not be the most expensive out there they sure dont come cheap. To paraphrase Oedipus, Hamlet, Lear, and all those guys, "I wish I had known this some time ago." Everything was such a damned nice idea when it was an idea yet as with everything How you look at it is pretty much how you'll see it I guess. And looking at it I can see the old gal ride low n slow down the street fast n loud on the highways everytime im out working on the old beast. God i got a tad philosophical there for a moment... what are they adding to the water around these parts. /twitch Enough of that nonsense. let start the normal barrage of images and brief explanations. Back floor all patched up over four link brackets. Holes added for access & removal of the top bars bolts. Sparks and smoke flying up front as the Trans cover was all made up like a big jigsaw. To help pull the drivers side floor up the brake boosters cover has been incorporated onto the trans cover to add rigidity. Since the brakes are all tucked away under the floor and me being a bit of a lazy sod im using a remote reservoir. The brake pedal was a bit of a sod that took up a heap of time. Due to the floors sloping angle and other factors we couldn't do a normal pivoting bar as the inside push rod where you stand would be pointing towards the floor. So a duel/tandem lever was made up. its somewhere between 4:1 and 5:1 ratio. Still got to get the adjustable top links. but tested with a bit of bar and have heaps of travel for the booster. Grease nipples all over the place. Machined up brass bushes and ya its solid as. Have to get the actual pedal and the other lever bar it connects to tested still. Moving on to smaller jobs now. Power steering. As i have mentioned I think some time ago im using a PSC setup made for rock-crawlers. So if its powerful enough to drive and survive the crazy setups they have it should be fine for my setup. Now I didnt want to take away from the finned engine dress-up stuff when you open the hood. So a low mount bracket was fabbed up. The little pump has a heap of adjustment, lines up nicely with the other pulleys and is tucked nice and low that will not only keep it out of eye sight but since the pump is gravity feed from the reservoir that will be mounted up by the radiator it will have ample full as well. Mounted up the trans cooler up front of the radiator after I drilled a few holes and added grommets for the hoses. Should be hidden away enough not to be noticed. Got the cad skills out again to design up the gas tank. Its about 19Gallons/72litres. The tail pipes are rather close together so the plan is cut a hole in the trunks floor and have half the tank through this and then the other half taking up much of the trunks floor space. Baffles will also add bracing for those times I may throw heavy loads like tires ontop of it. The bottom should be flush or just tucked up with the bottom of the chassis whilst the top will come nearly up to the trunks lip/bottom of the door. So it shouldn't be a hindrance or noticeable. One end is slightly deeper for the pump and sender. Josh and the guys at Apex in Oamaru cut n folded it up. Top guys with some great kit that I highly recommend. They also made up that Hudson logo for a bit of fun what was nice of them and chucked it in. Until I figure out what to do with it I plan to use it as a stencil to tag a few things around the garage. \,,/(-.-)\m/ On a bit of a separate note the missus has taken up slinging a bit of one shot paint of late. Hell yeah I say. Im more than happy to buy the brushes, paints and what ever if it means I can get some lines laid down on pretty much what ever I want. I think she is busting it out but naturally I may be a tad one eyed, biased and not the best judge in the matter. Take a look any way. Some panels up near the top of below pic in my garage. Cooler to go with her Morrie Door she made up for Flockie on an old 40s Ford pickup door. And of course hand bags... she has a thing for handbags.2 points
-
Factory 2ARFE pistons might work as they are 90mm Factory compression ratio is 10.4:1 2ARFE Head 50cc Pins 22mm Rods 157.5mm Comp height 34.8mm Think the dome is -10cc from memory and can't remember the pin height (also no idea what 18r pistons pin height is) Would need to see how they compare but heaps of wrecks around with them so can be found cheap and stock 2ARFE seem to handle 350whp Wouldn't be hard to work out what comp you would get in the 18R if you know the headgasket thickness and combustion chamber size of the head, if the rods are shorter then youll lose some compression but that wouldn't be a bad thing anyway :p Not sure if this is helpful or not1 point
-
Hiya, Cool car!!! Nice wheels... In my opinion, based on having set up a 2.3 in a chevette, owning a FD victor wagon with one and having driven a fair few HBs with the slant fitted.. I would use something lighter and better then the slant 4. They are asthmatic heavy old lumps with a terribly designed oil system. Fine for a road car (although always bloody thirsty no matter how you drive) but horrid for anything you want to trash all day long on a race track plus be able to go around corners properly. Your car will never be as good as an HB can be with one of those. Now you'll get your slant 4 fan boys quipping in and saying things like " oh but they are torquey and strong and Gerry Marshell was a god behind one etc etc " Yeah fuck that shit- one fella who told me off sternly at a NZ Vauxhall nationals for having stuck a Japanese motor in my Viva ..." how dare you put that shit in there! " followed it up with "you should have fitted a 3.3 Cresta six instead! " Obviously not that keen on going around corners with grace that man.... You could look into loads of great engines that are lighter, stronger at high revs, will last longer. So many to choose from. If you want to keep it looking all period then I would fit a Ford crossflow (who cares about badges...its just a car). I fitted one and they are quite light, look cool, sound great and can go fucking hard. With enough money thrown at one you could get similar horse power to a worn out old toyota 4age.... or mx5 engine with a turbo. My choice, when I get around to it, for my HB wagon will still either be another v6..because I just love the sound and revs, or the Duratec/Mazda L series engine I have sitting here. Tough choice- the V6 is still a tad heavy for the best steering. If you insist on fitting the boat anchor then do the handling a favour, cut the firewall out and mount the engine back as far as you can. Then buy an Accusump for the oil system... I hope this doesn't sound all high and mighty. I just think you can do that car so much better then a slant 4. Looking forward to seeing another Viva thread on here !!! Alex1 point
-
Seriously thinking about selling this to fund mechine work on my ford engine, not sure what it’s worth? Small tractors seem to go for a lot I gess it’s worth more that $1500?1 point
-
Since then? Not a lot has happened. Just the monthly drive out to the local car show. My daughter is nearly one year old now, and family has taken up most of my time - which has been very enjoyable. I’ve driven only 1500 kms since she was born! Future plans for the RX7 at the moment are unclear. But it’s no worry having it wait in the garage for now.1 point
-
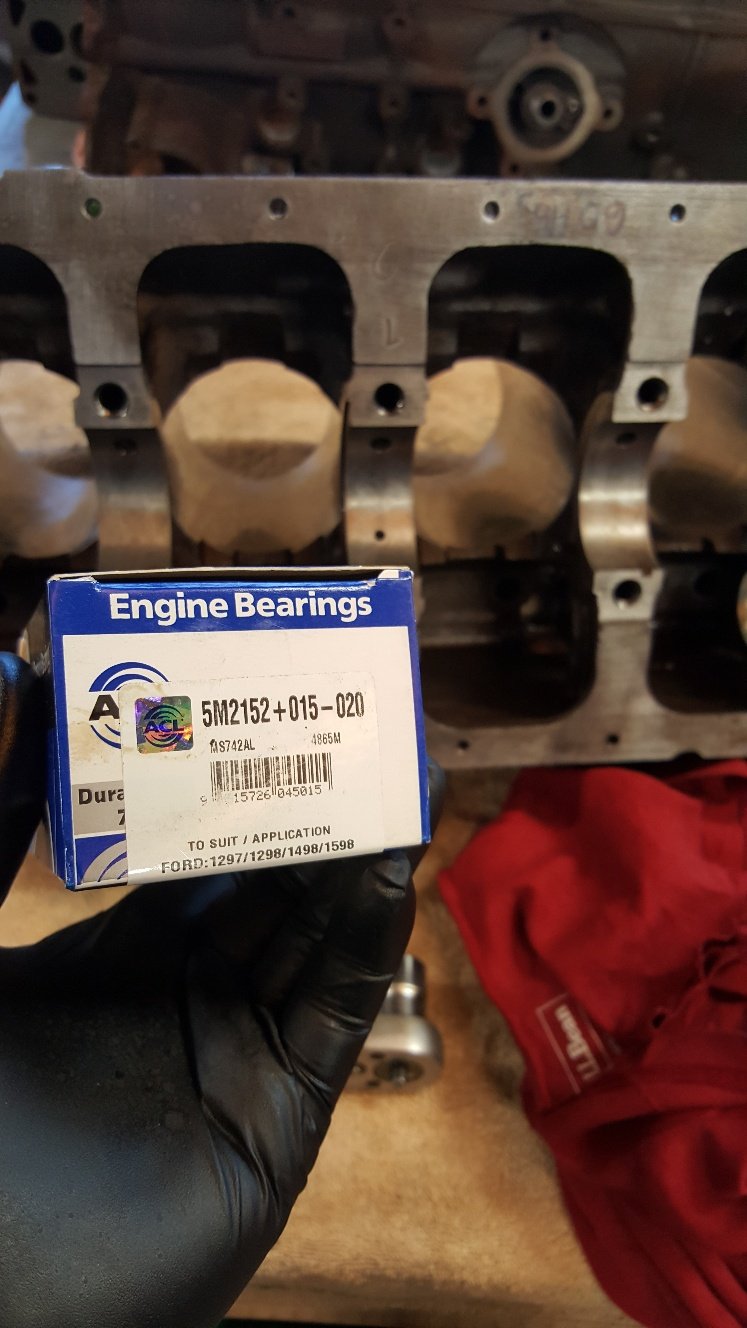
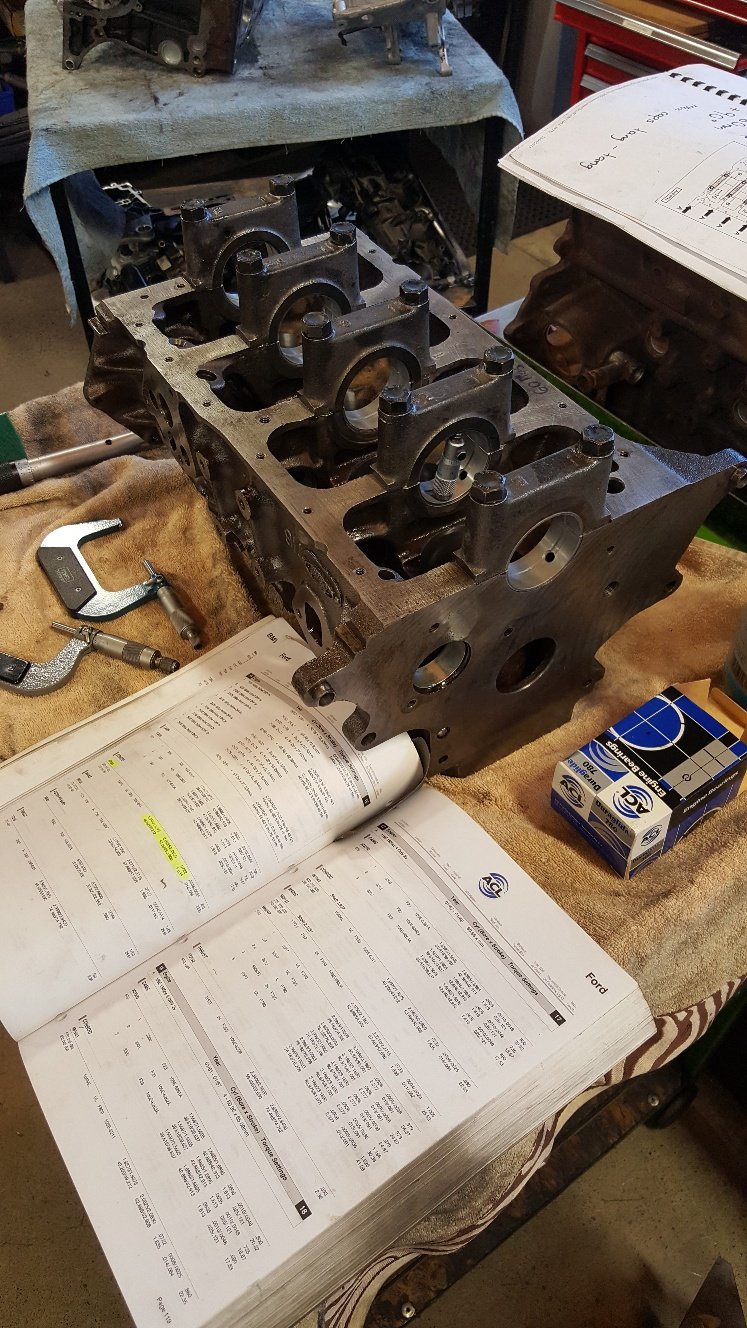
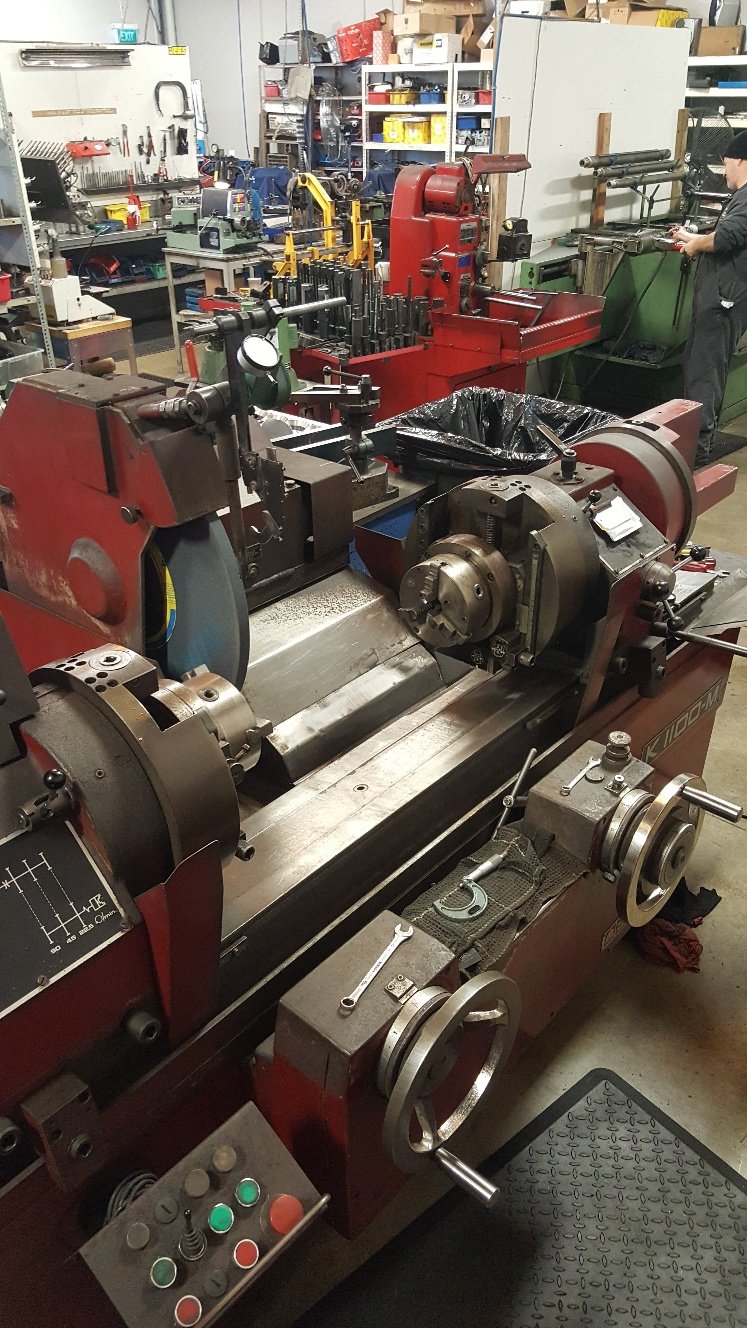
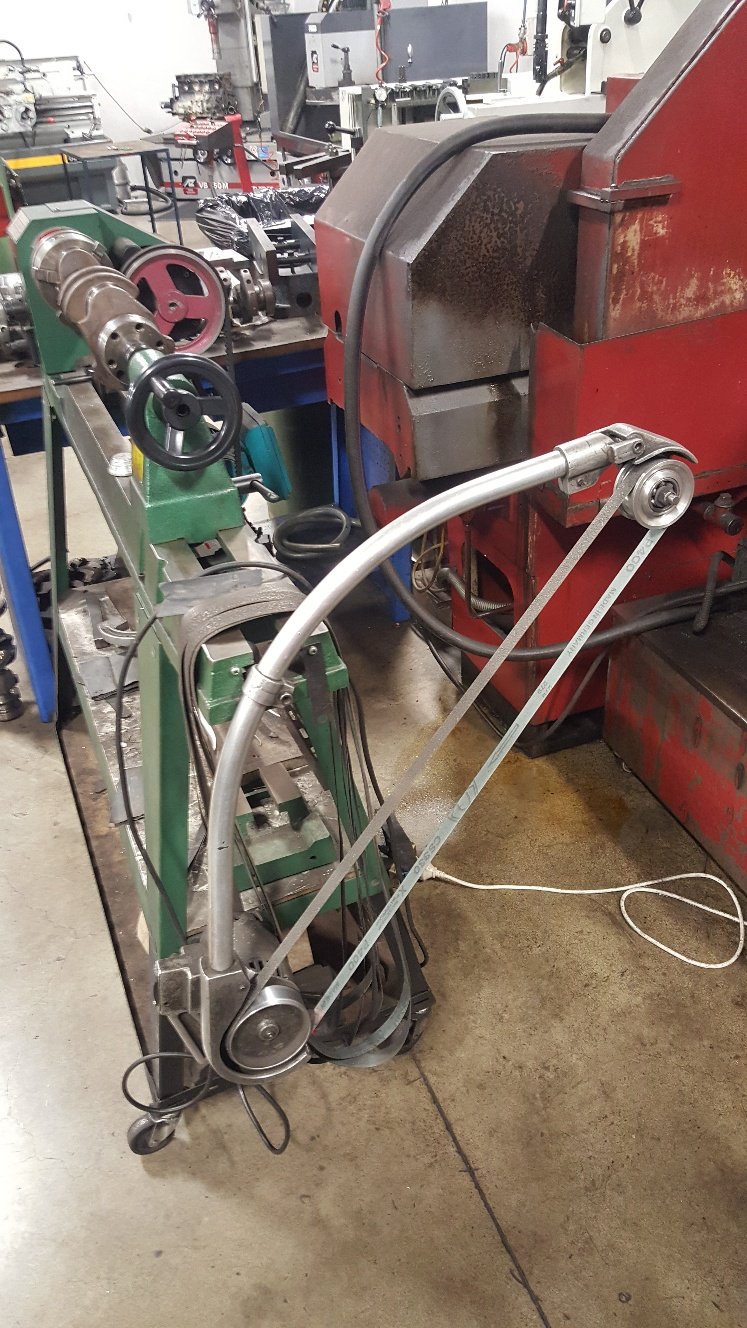
So i got my hands on some plus 15 back -20 main bearings. Thanks to Ford and their below average machining they mis machined the main tunnel on some of their blocks and had to come up with a solution of +15 back bearing to take up the slack. These can be challenging to get at times. So then I mount and measured them so I had a size to machine the crank too. Got the crank dialed in the crank grinder. Start to bring the wheel in and just touch the journal and you can see the .002 thou wear. The grinder has just started to clean up the left side and a bit in the middle. Once it's all ground we put it into this modified wood lathe we use for polishing.
1 point
-
https://jdmtsurikawa.com/collections/genuine/products/genuine-classic-4 $59 USD. Damn I have 6 of them.1 point
-
I was just checking the pics on rockauto and US spec Hilux images and had decided to look at it exactly like you said So I'm ordering them right now, delivery June 19th. £14 to ship from the states. Bargain. /I'll be round to yours if they don't fit.1 point
-
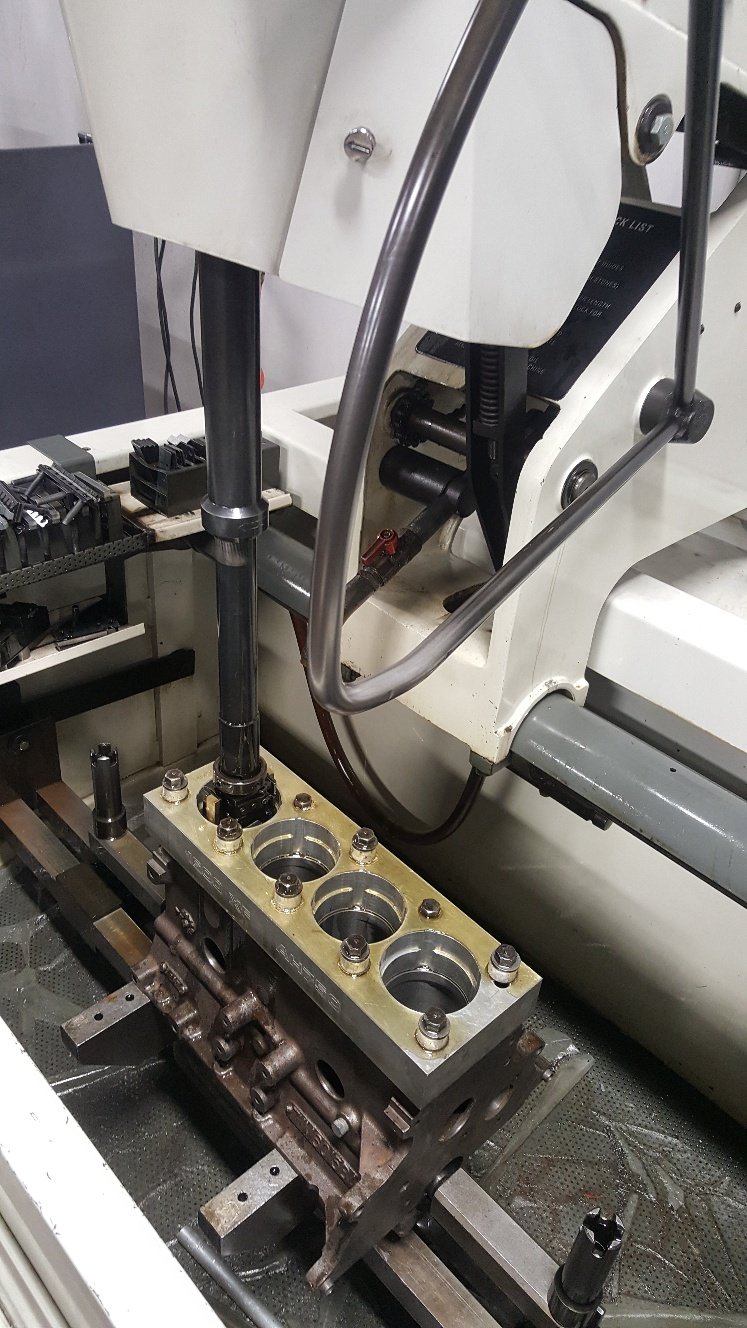
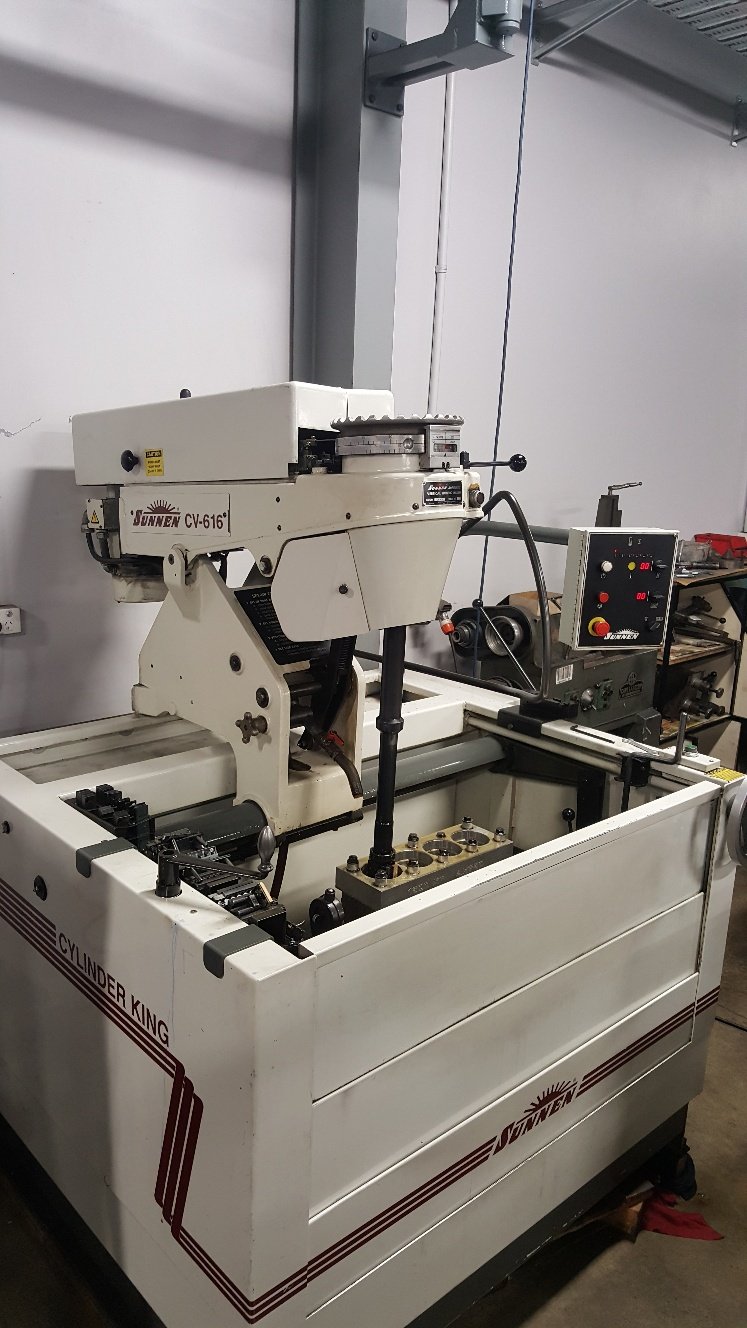
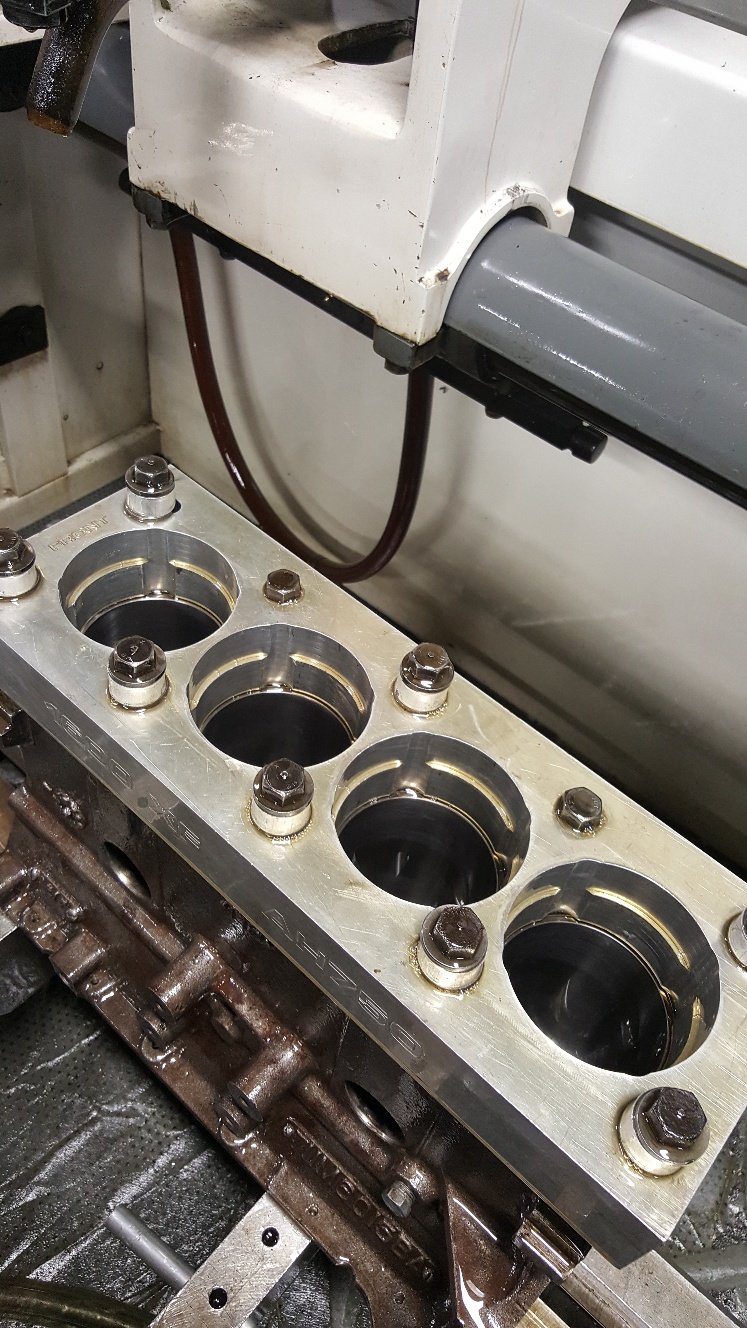
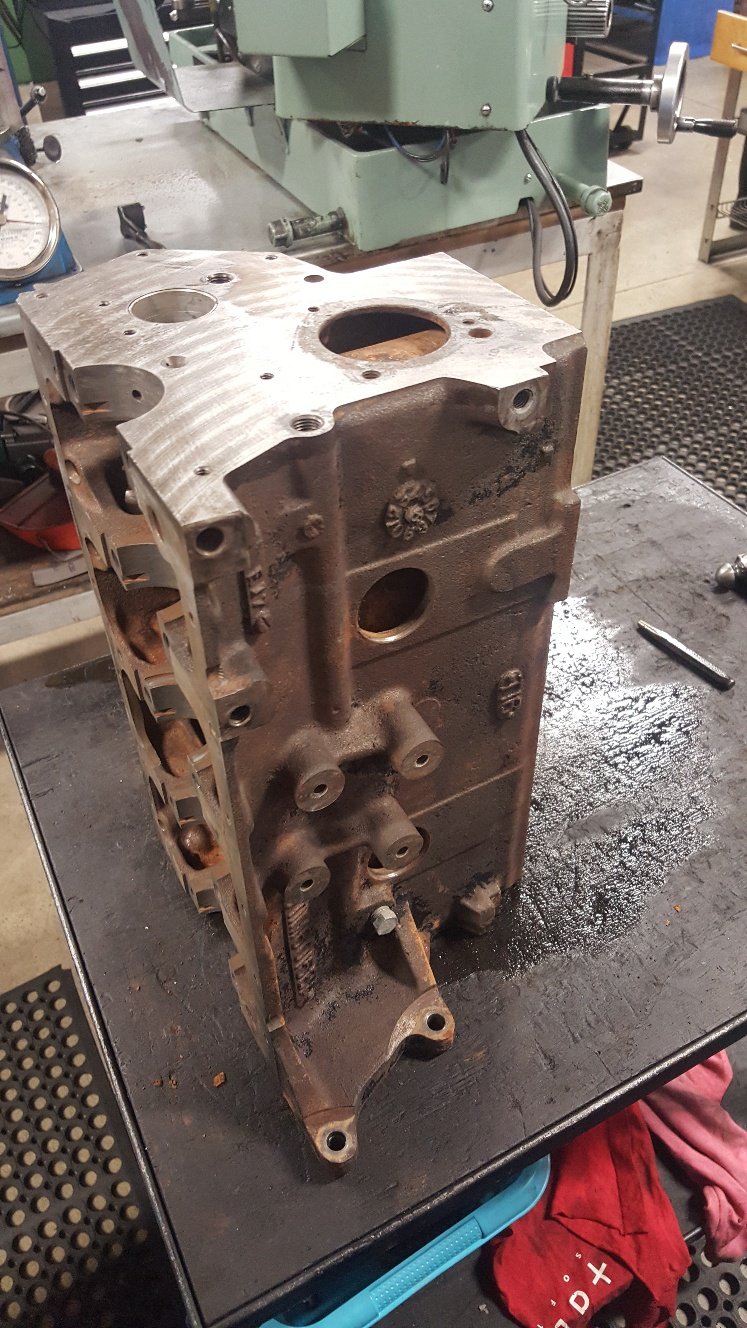
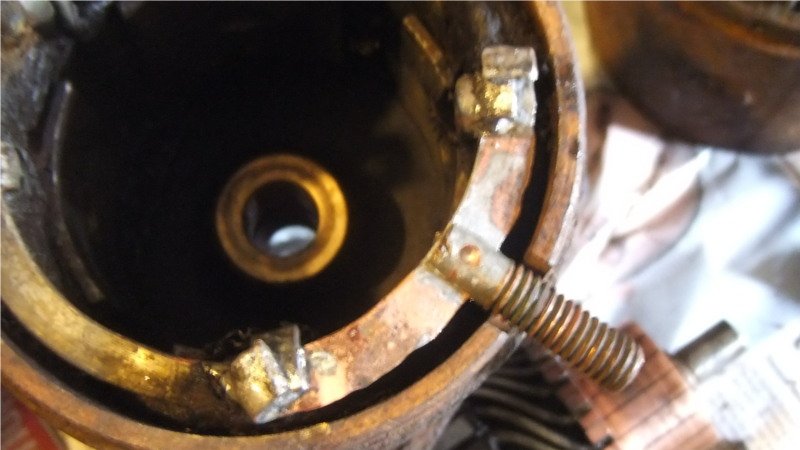
So i fitted the torque plate for the honing process. We only have torque plates for certain engine's. But lucky Ford xflow's are in formula Ford's so the boss saw the need to get one made. The torque plate allows you to simulate the tension of the cylinder being fitted to the block while honing. Some blocks move considerably from the head bolts being torqued up. This can distort the bore, sometimes up to 2 thou on various blocks. So it's like honing them in there assembled running state. I have heard stories of shops honing with hot coolant running through the water jackets to simulate total running conditions. All in the name of perfect ring seal you need a perfectly round and straight cylinder. We leave 4 thou of material to hone out as this gives us a good base to start achieving good rk rvk and there's another value aswell but I can't think of it right now. But we start off honing with a course stone which gives us a deep groves and removes material quickly. Once we've removed 3 thou we change stones to a smoother grit this removes the tops from the course stones while taking more material out. I'm also happy say I have removed all the bore wear marks after removing 2 thou of material. Now we move to a finer stone again same thing applies. Each different grade of stone removes material in different ways. Some stones will take more out of the bottom middle or top of the bore, so you have to measure the bore to make sure you're keeping it straight. The stones also react to load. Theres a round handle onto of the machine that applies load to the stones in the bore. If you wind to much load up it normally takes more material from the middle of the bore as there's no real strength there. Extra load can also create heat which will give you a false reading of size from the material expanding. Once we are at finish size we have what we call plateau stones. These are 800grit they don't really take much material out but smooth the tops off from the previous set of stones. Then we move to our cork stones. Which look nothing like cork. These are really good a removing left over honing material out of the cross hatch. We only give the bore a couple of strokes with these. Once a year we clean the machine out. It normally has about two 20 liter buckets fill of cast iron sludge sitting in the bottom of it. This machine runs 200 liters of honing fluid. Which is great as one of the jobs of the fluid is to keep the block cool as well as wash the honed material away from the honing head while honing. A drum of honing fluid isn't cheap at $2500 Then there's all the stones we burn through. So the honing process has one the highest consumables cost in the workshop per year. From start to finish it can take a hour to two hours to hone a block after a rebore. A deglaze or what we call a rering hone is normally about three quaters to a hour.
1 point
-
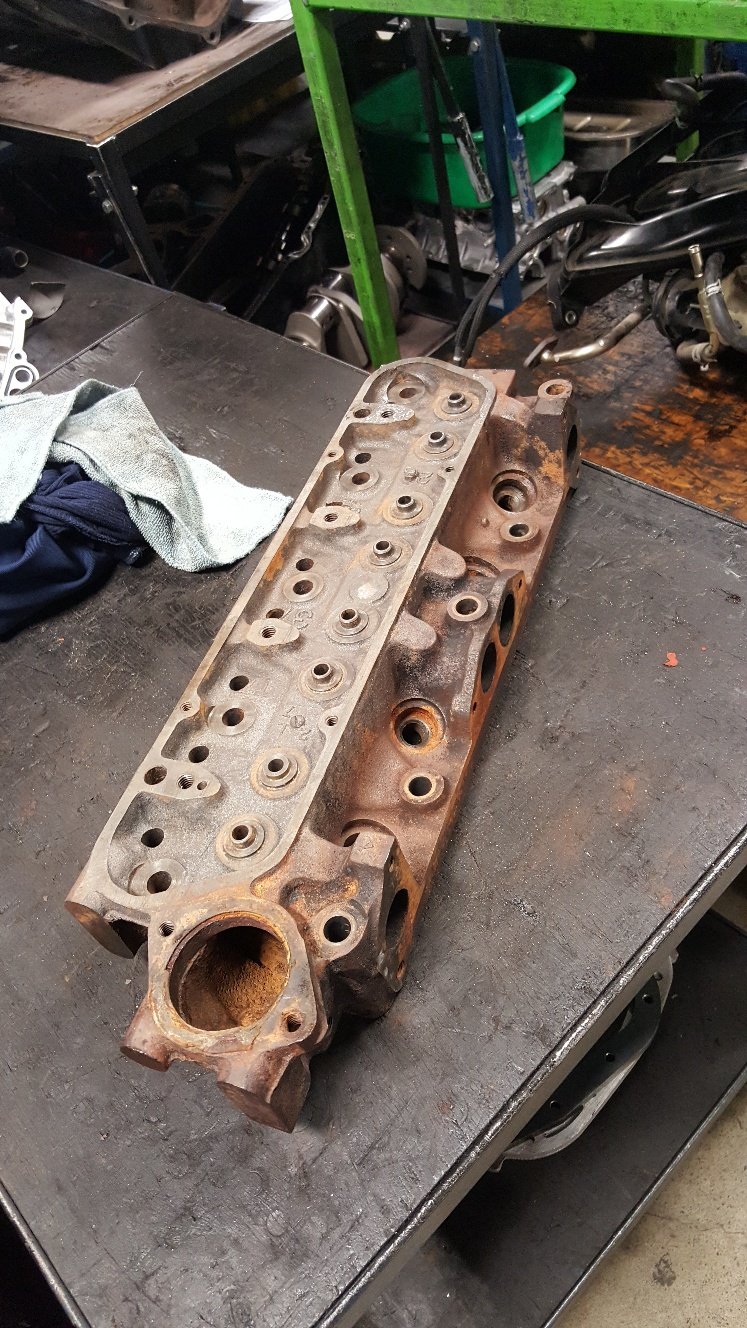
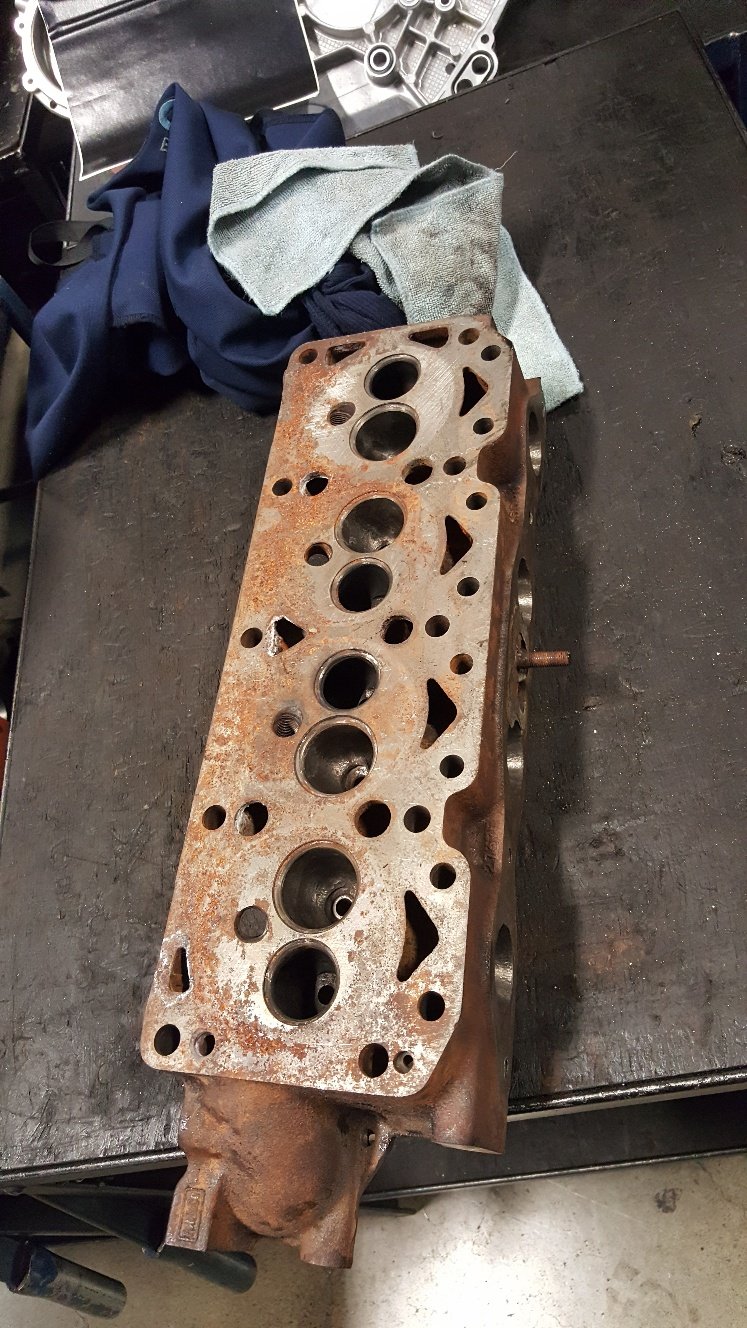
So I forgot to get a picture of the molasses. But here's a couple of pictures of the head once out. The molasses sort of just loosens the rust. Then you have to wire brush to get the rust off. I didn't put the block in what we call our hot tank as I haven't removed the cam bearing.. Our hot tank is only for ferrous metal. And the cam bearings would react with the acid. The cam bearings are in reasonable condition and this is build is on a budget. I run the tap through the head bolt threads and main threads. Removed all the gallery bungs and frost plugs. I found a decent build up of rust at the rear of the block that i chipped out with a screw driver through the rear frost plug hole. And also gave the block a good wire brushing. I gave all the machined surfaces a sand up with emery tape on a file.
1 point
-
So I looked at the prices of aftermarket pulleys and said to myself "fuck that, I can make those" so have drawn them all up and will be putting them on the cnc lathe soon. Idea is to make myself a set and get them anodised. Will likely sell these eventually too, have got fwd and rwd water pump pulleys drawn up and the alternator pulleys so yell out if anyone is interested. These are underdriven too. Nearly there with the design, just need a few tweaks to give some added strength and make them easier to run up on the lathe.1 point
-
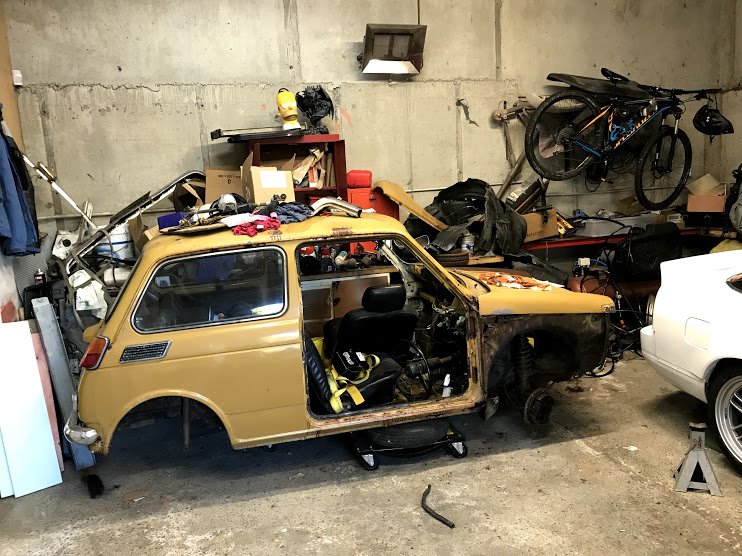
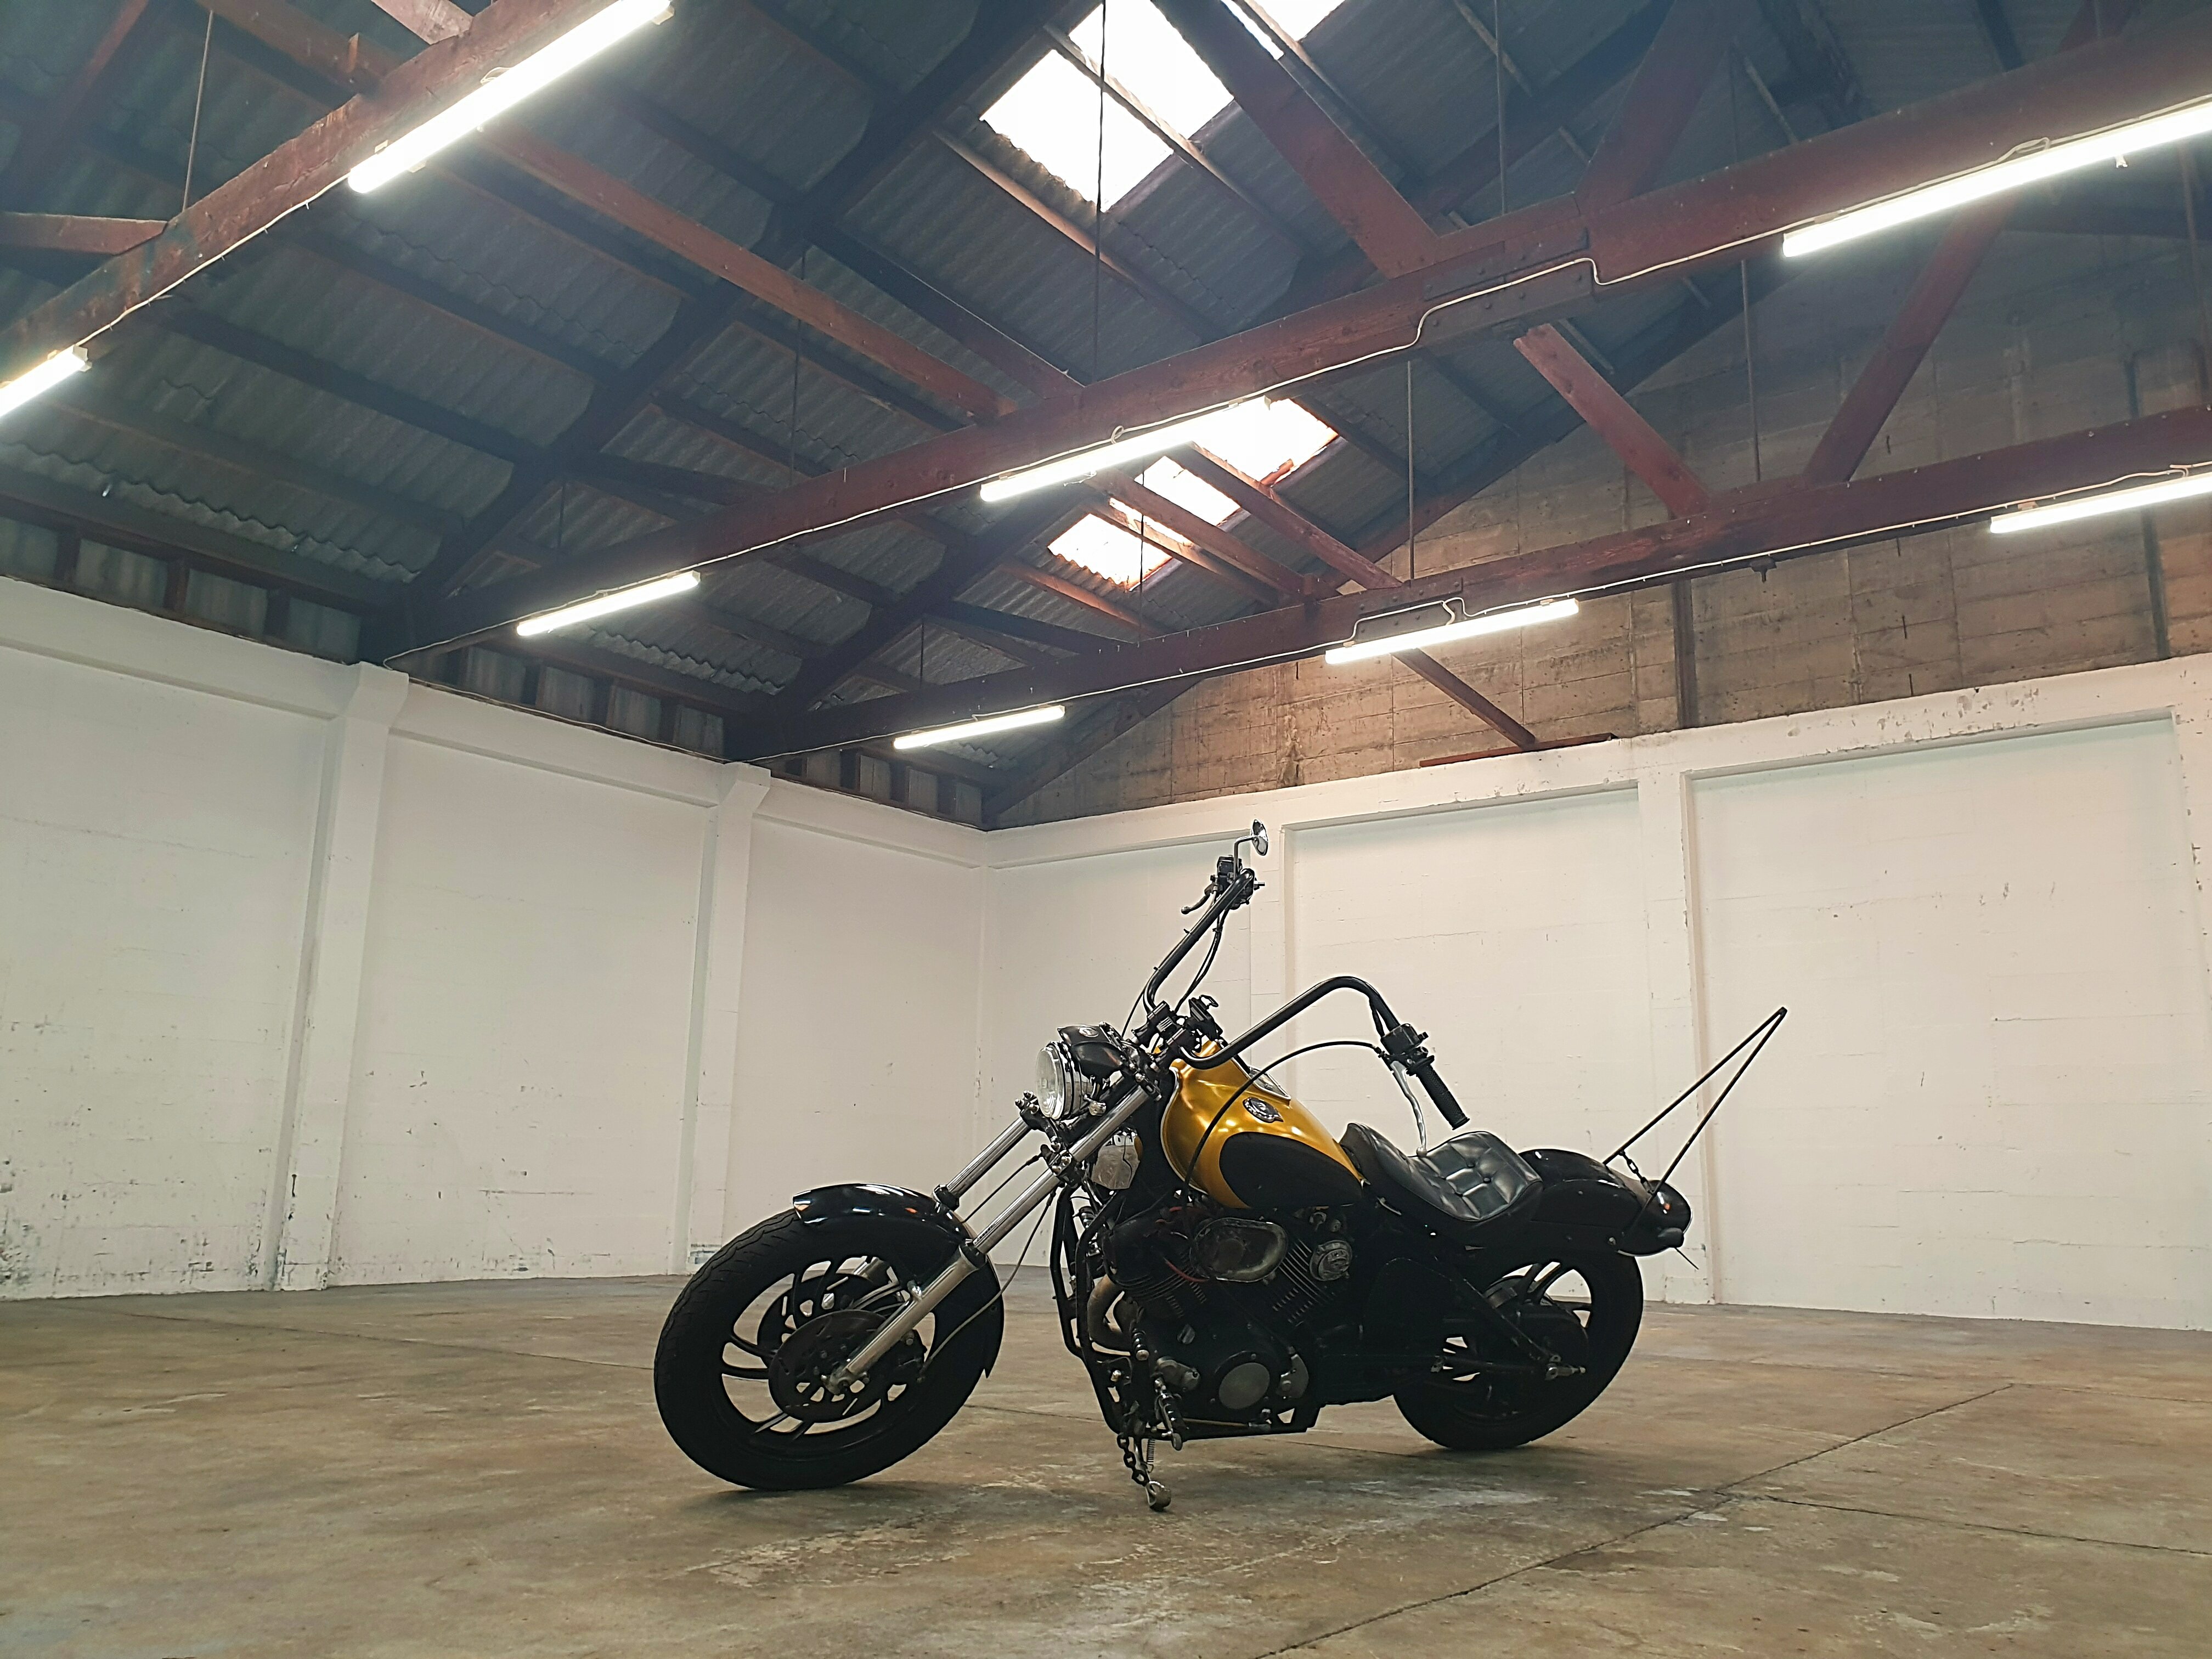
My bike if anyone was wondering lol
1 point
-
Ha ha ha. Nope. Damn close but a bit of a drip at the gearbox end. Fuuuuuuuuu......... /Still, practice makes perfect !1 point
-
Glued. Think I have achieved the correct gap-fill/splurge ratio to keep the oil in the sump and the RTV out of the oil pump. /fingers crossed, If this doesn't work I've got a 3.9 RV8/ Holley combo lined up.
1 point
-
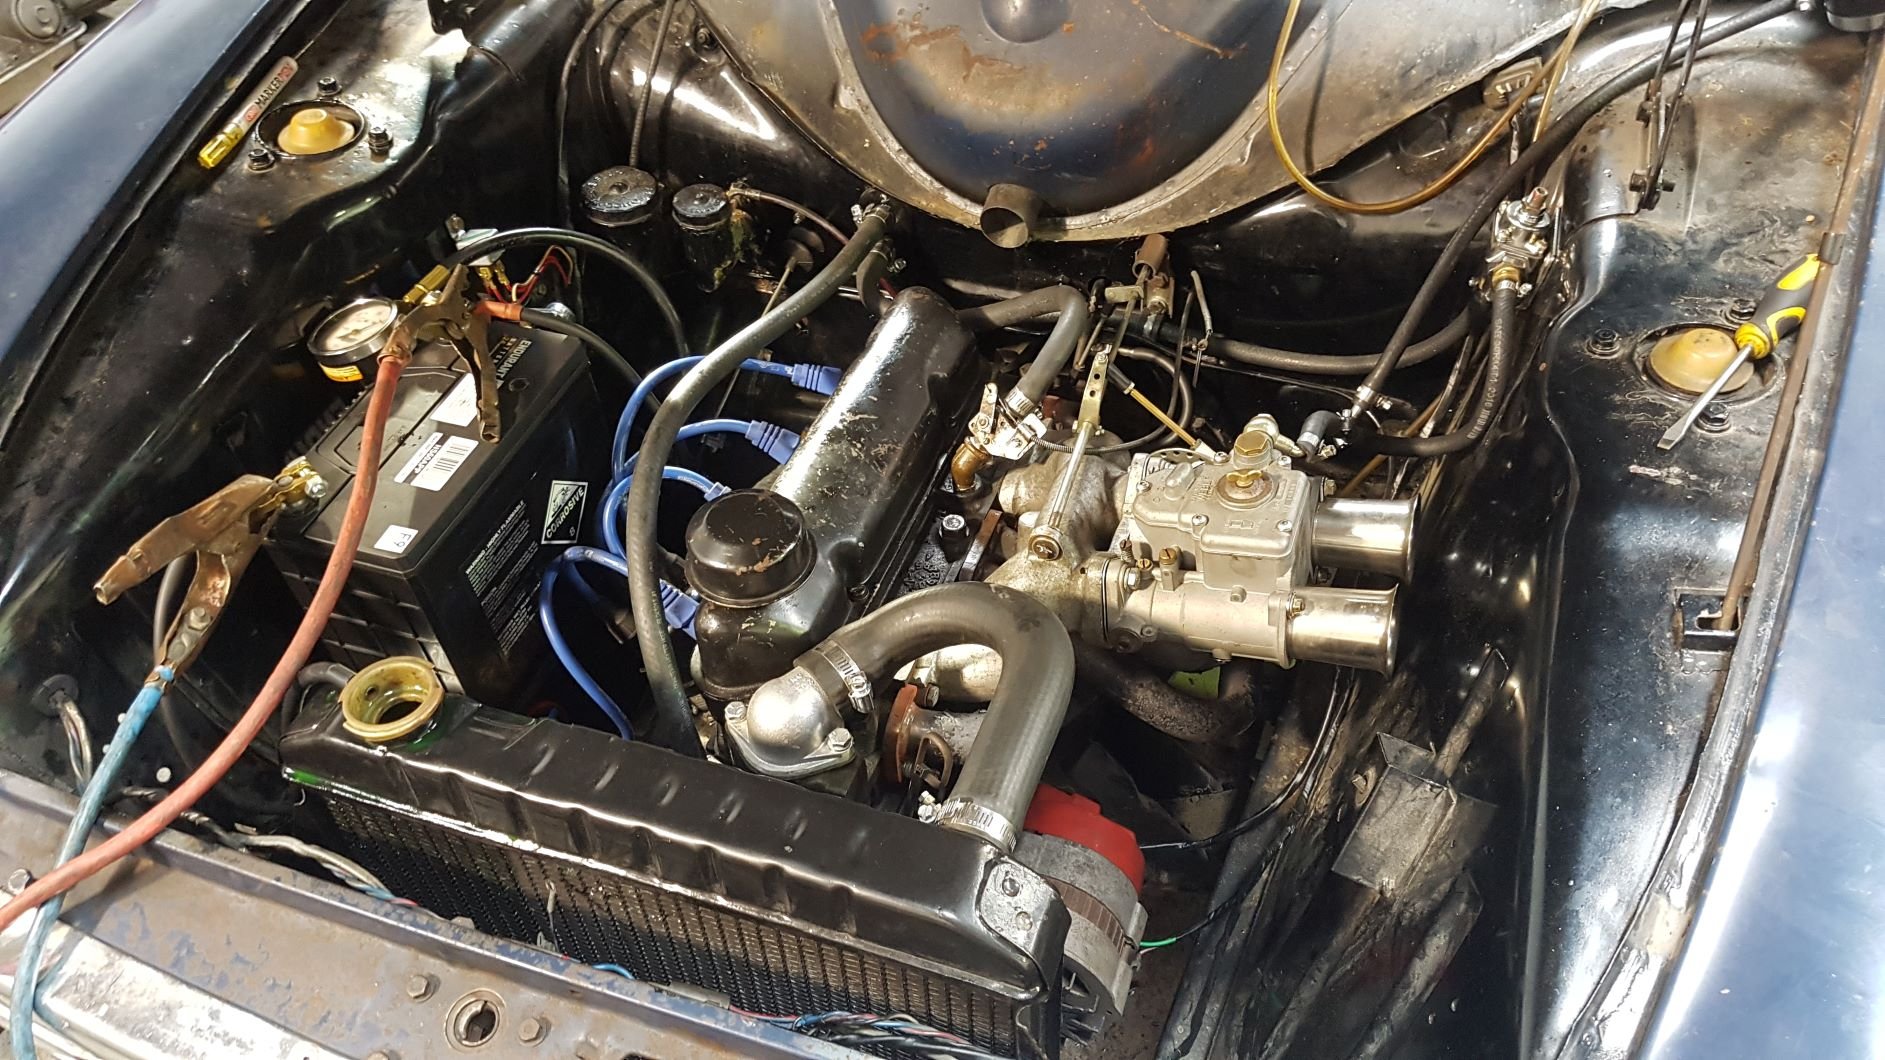
Car was closer to driveable, clutch feels great apart from it doesn’t go all the way to the floor but the tune was a bit of an issue the car would surge a bit from 3 - 4K rpm. Got a friend to log it as I drove around the block, did a little pull and lost power he said I was making 18psi then nothing almost like the map sensor had blown. Got back to the driveway thinking the worst, turns out I’m just a muppets and couldn’t do a hose clamp up tight enough. With this done we were able to send some of the logs off to some people overseas who did some wizardry and came back with the first solid tune that I am running and the car drives awesome! After this I did some of the usual spanner checks as well as changing the gearbox oil and checking fluids.
1 point
-
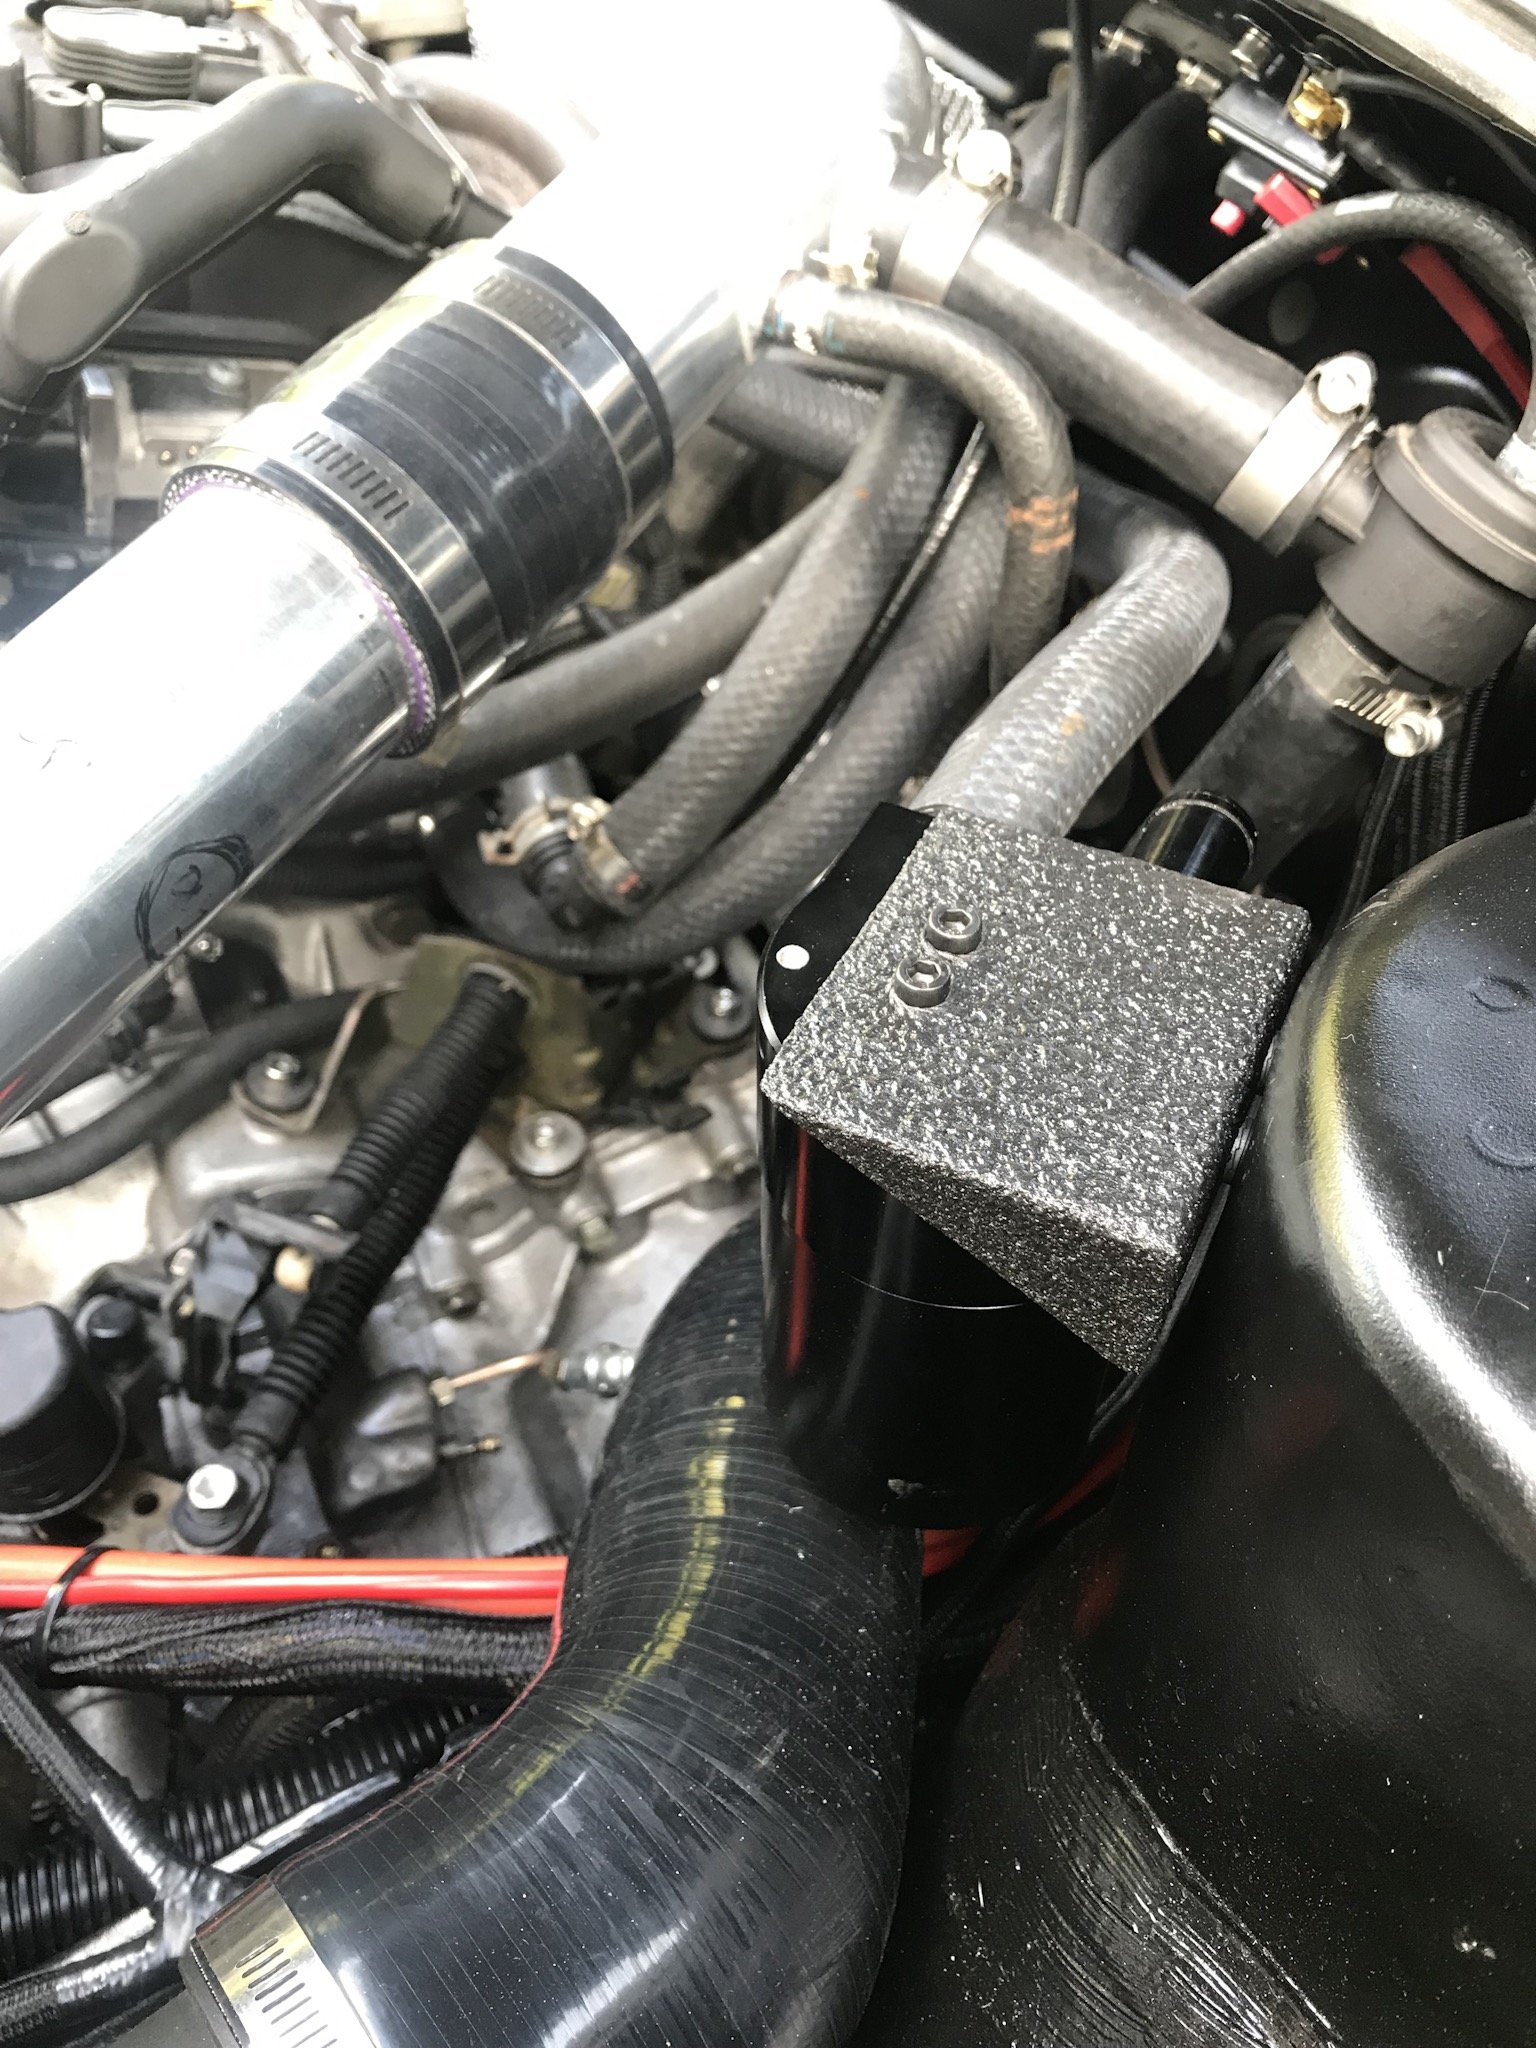
So the car was running, not good (needed a tune to manage those big ass injectors) but was back to fixing and problem solving. I never knew how brilliant having some sheet metal and a weldering was, bit of Pajero bonnet and utilising some cardboard aided design I managed to make a catch can holder added some textured paint and installed. It still needs the return to the intake for cert but for now it’s just breathing to atmosphere. Also my first radiator was leaking and it was from a mk1 so I had to try and source a new one. Turned out to be difficult but I got one similar because we had already raided partsmasters rad hoses and have it all positioned perfectly.
1 point
-
Stop it. If it cant survive a painted sump, a turbo will kill it for sure. /I'll stick with "gutless".1 point
-
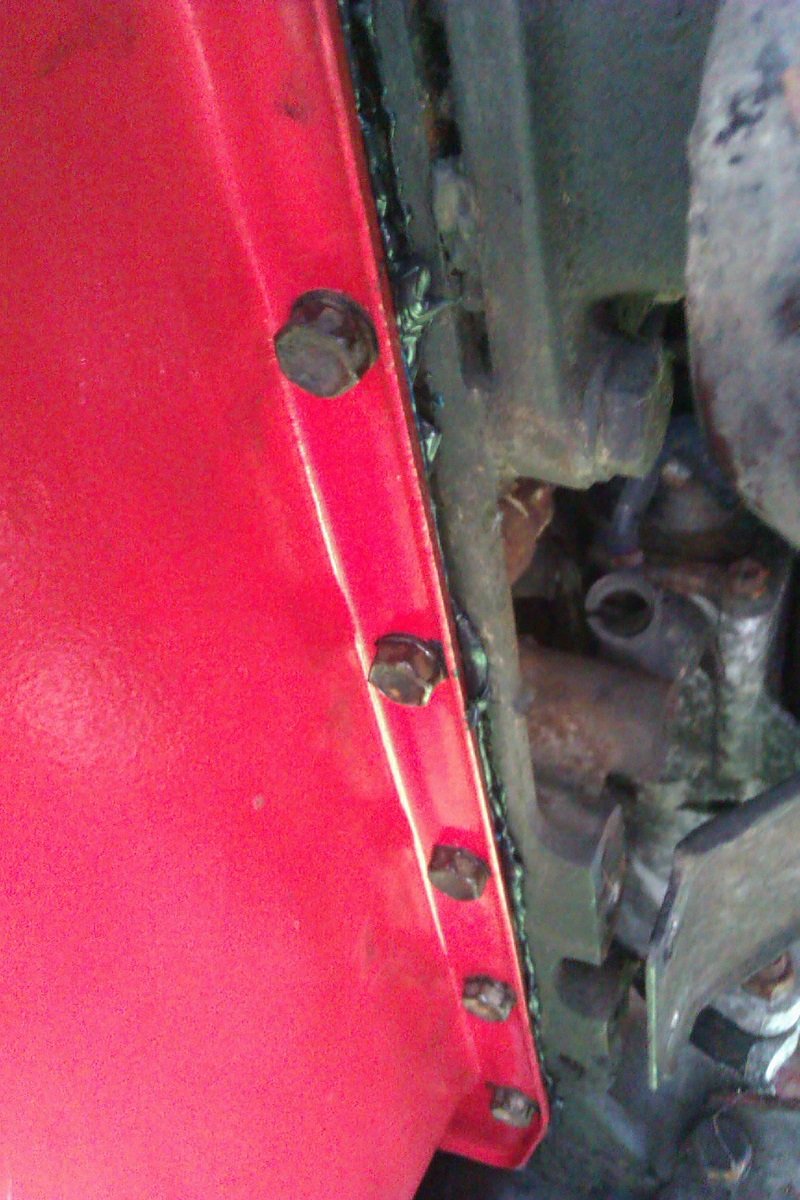
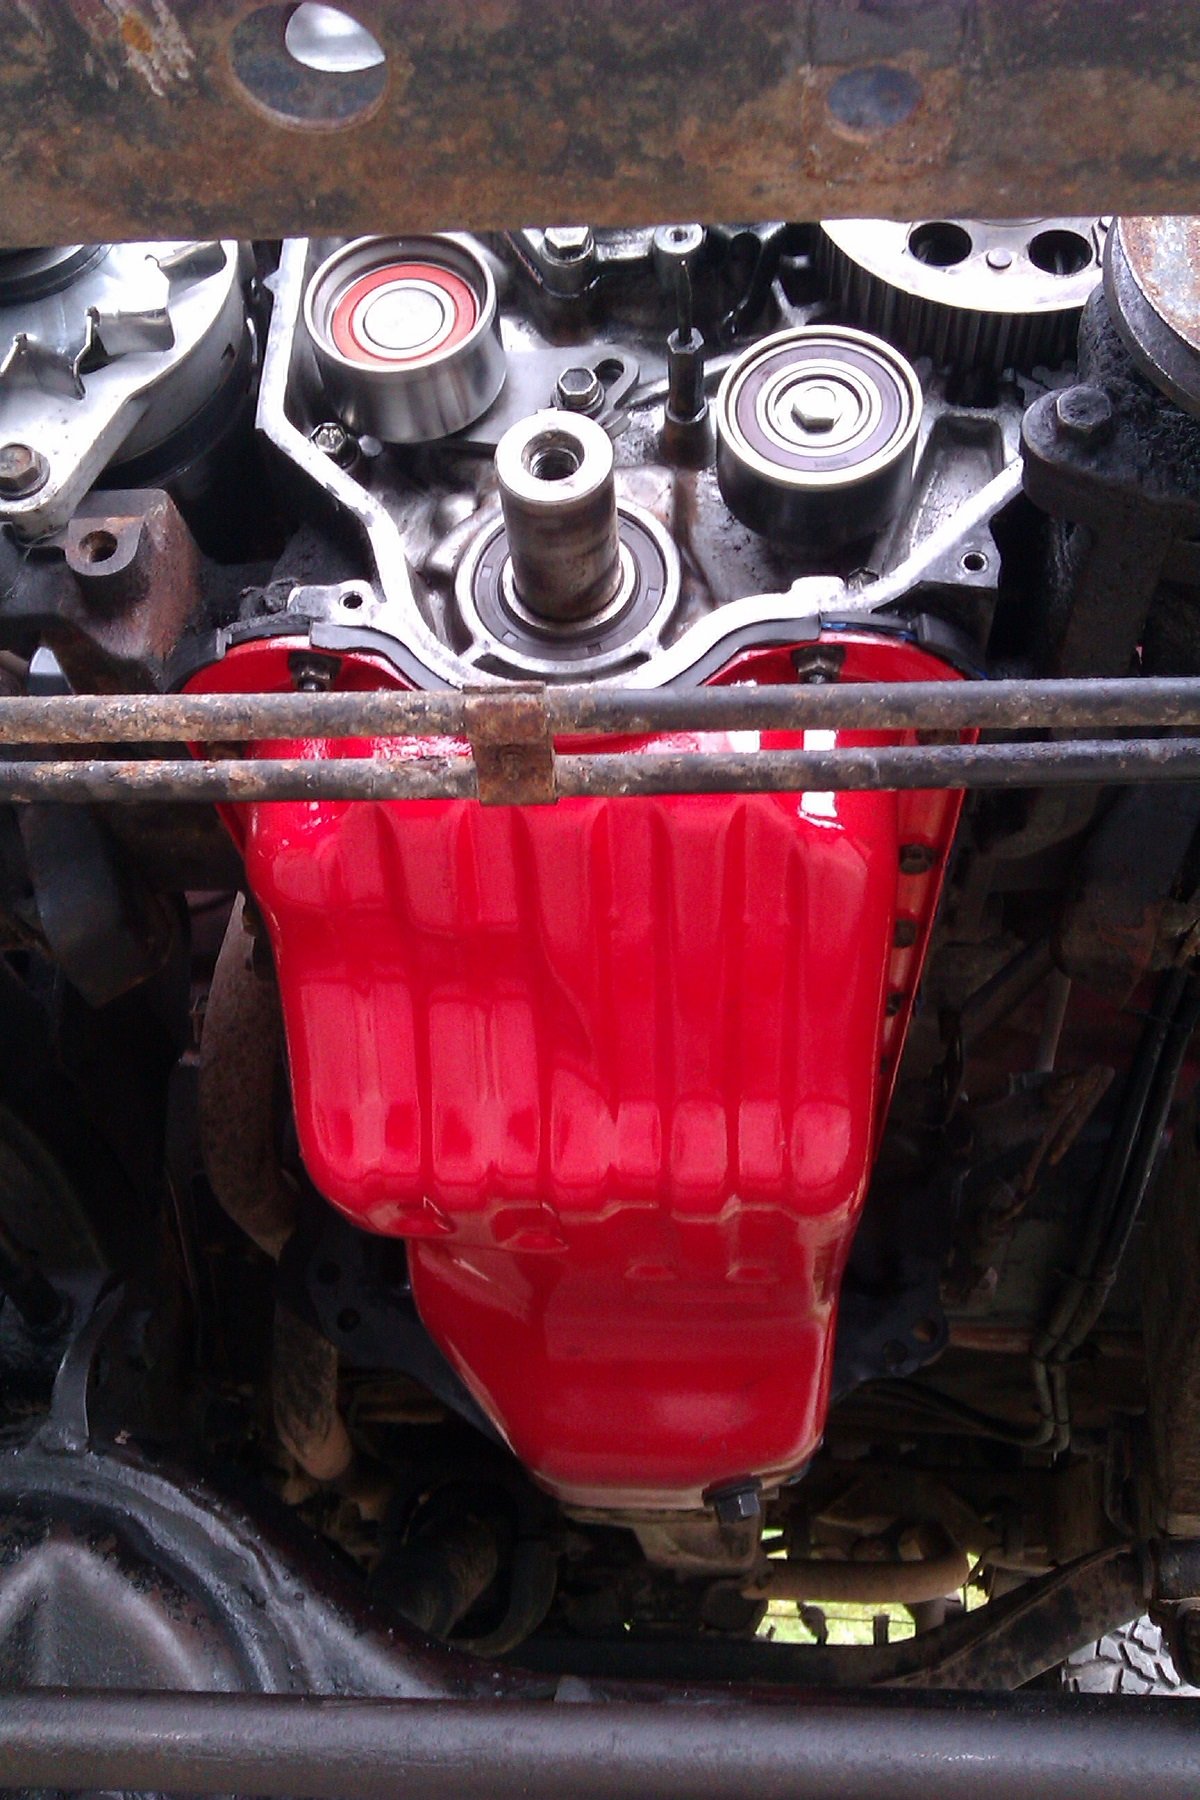
There isn't a single problem in life that cant be improved by painting your sump red. Not a speck of metal in the bottom of the pan, bit pleased after all these years/miles. New gaskets & crank seal fitted, hopefully running leak free in the morning.
1 point
-
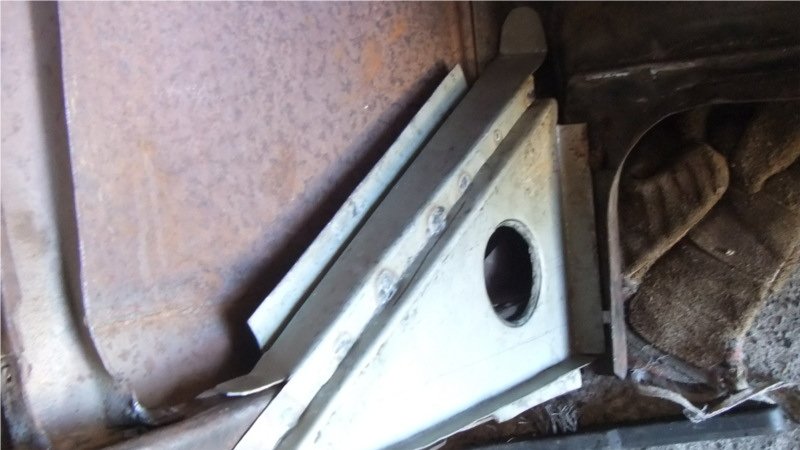
Started on the floor at the back. The cover over the diff will be able to be removed should we ever need access to the diff, air bags or what ever from the top. A few folded strips added for both strengthening and to giving us a place to attach the main 2mil sheet cover added first with nutserts. Cover that had been pre cut n folded dropped in place pretty much with a bit of tapping. The shelf is the perfect place for the Ridetech 5 gallon tank, twin pumps and all the other air ride junk. With it up there out of the way it frees up space in the boot/trunk. Positioned to the side to leave space for the stereo amp or what ever else. Need to get a few counter sunk bolts to attach the fuse panel. the 5 gallon tank has 5 outlets (not including drain ofc) three are used by the system. another I have put a tire inflation valve on just encase both the pumps die it gives me the option to pump it up at a service station. the last im thinking of putting a fitting on so I can plug in a hose that can be used to inflate tires. The system comes with multiple ways to control. Bluetooth/cell phone/tablet, remotes, or a control panel. Will mount the control panel on the air pod board at the back there.1 point
-
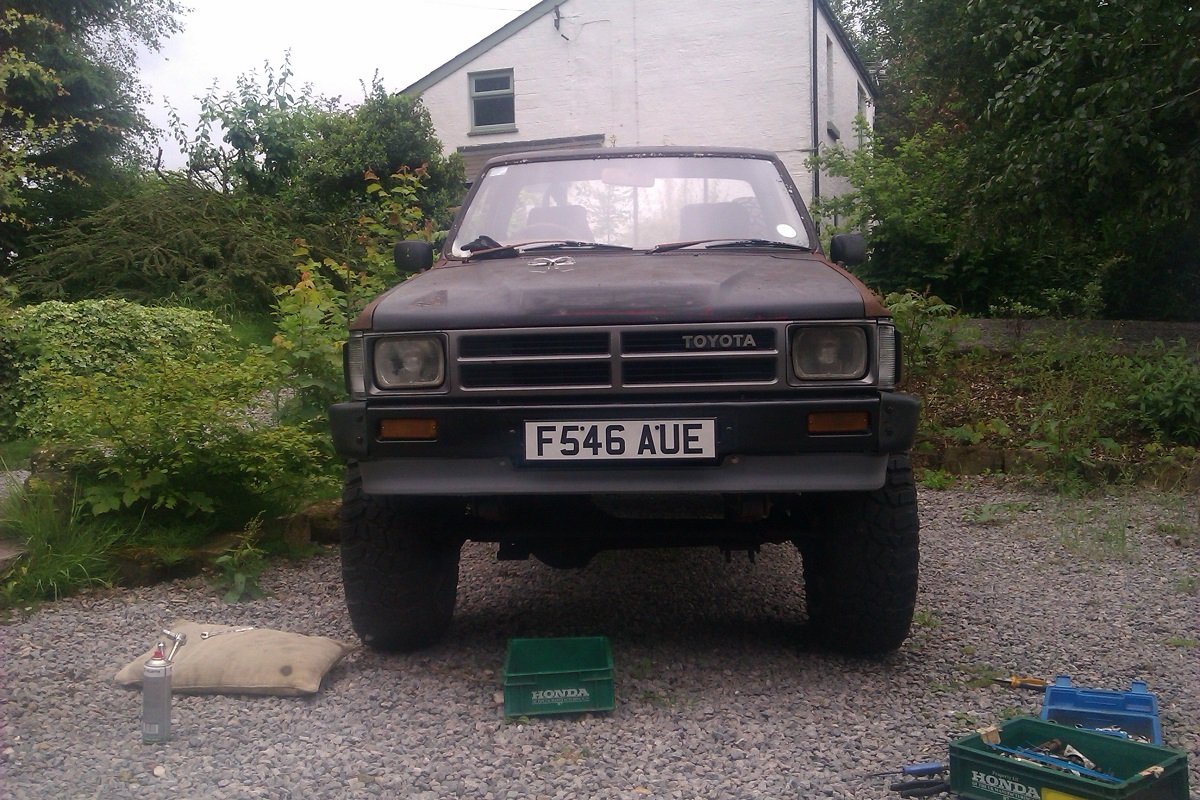
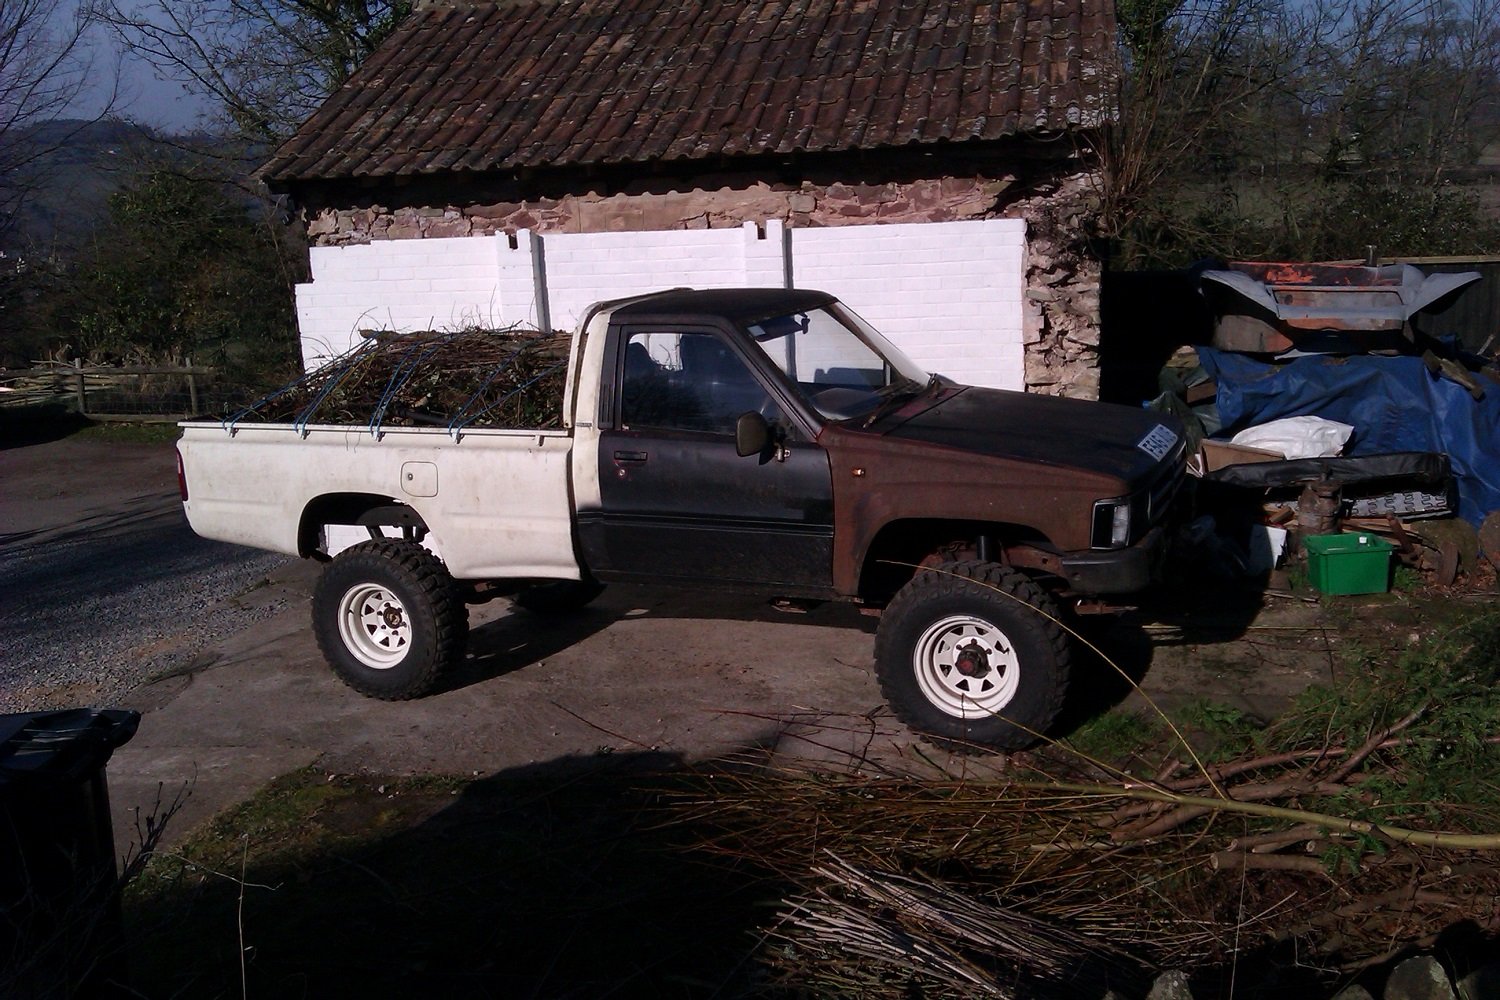
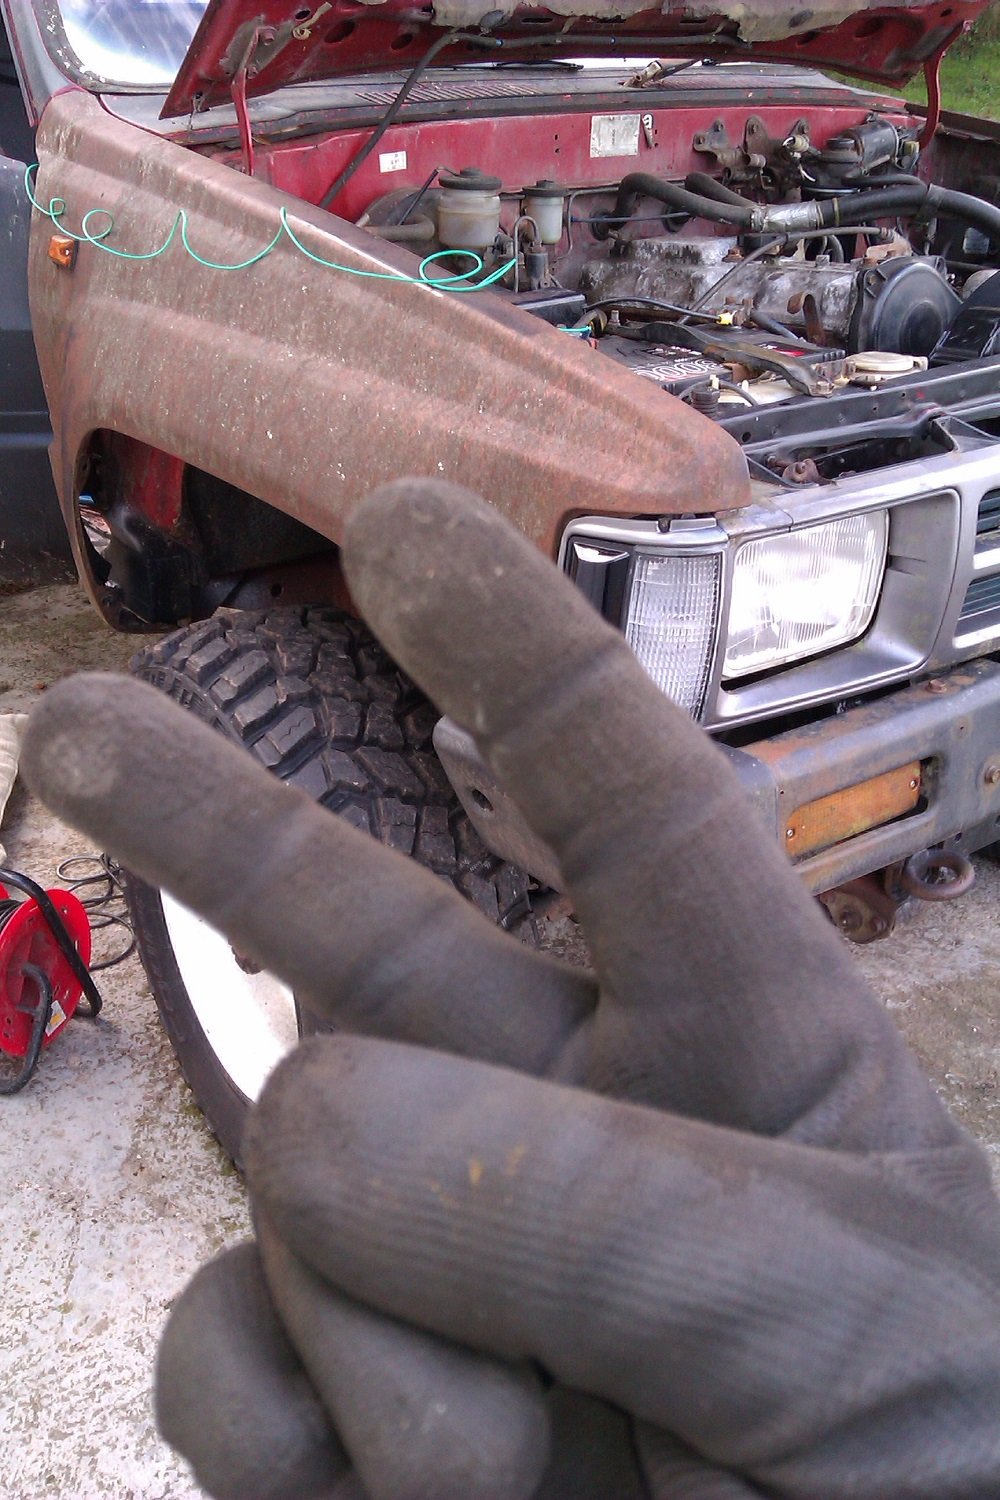
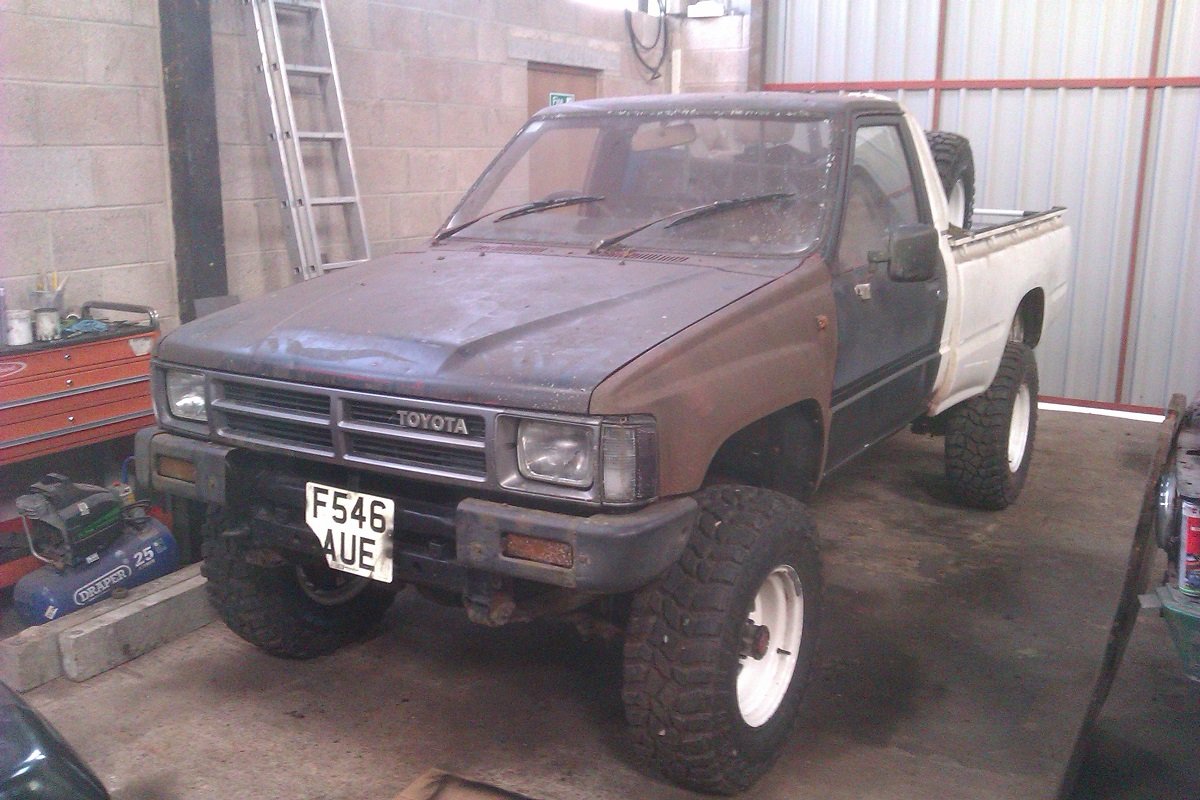
As reported elsewhere it passed its test. Whilst not with flying colours, it was good enough. Or maybe he just wanted rid of me. It's been a week now and I've done about 350 miles, the only casualty has been the alternator and P/S belts which have worn due to rusty pulleys. I'll have to have at them with the emery paper. I have no idea how I survived the last ten years without a pickup, it's been so useful this week. I know we had the L200, but that was only half a pickup really and had a lid on it most of the time. Mrs Shuzz drove it for a few miles and declared it "alright, but a bit slow". Blardy hooligans. Update when the weather gets good enough for painting it. Anyway, pics.
1 point
-
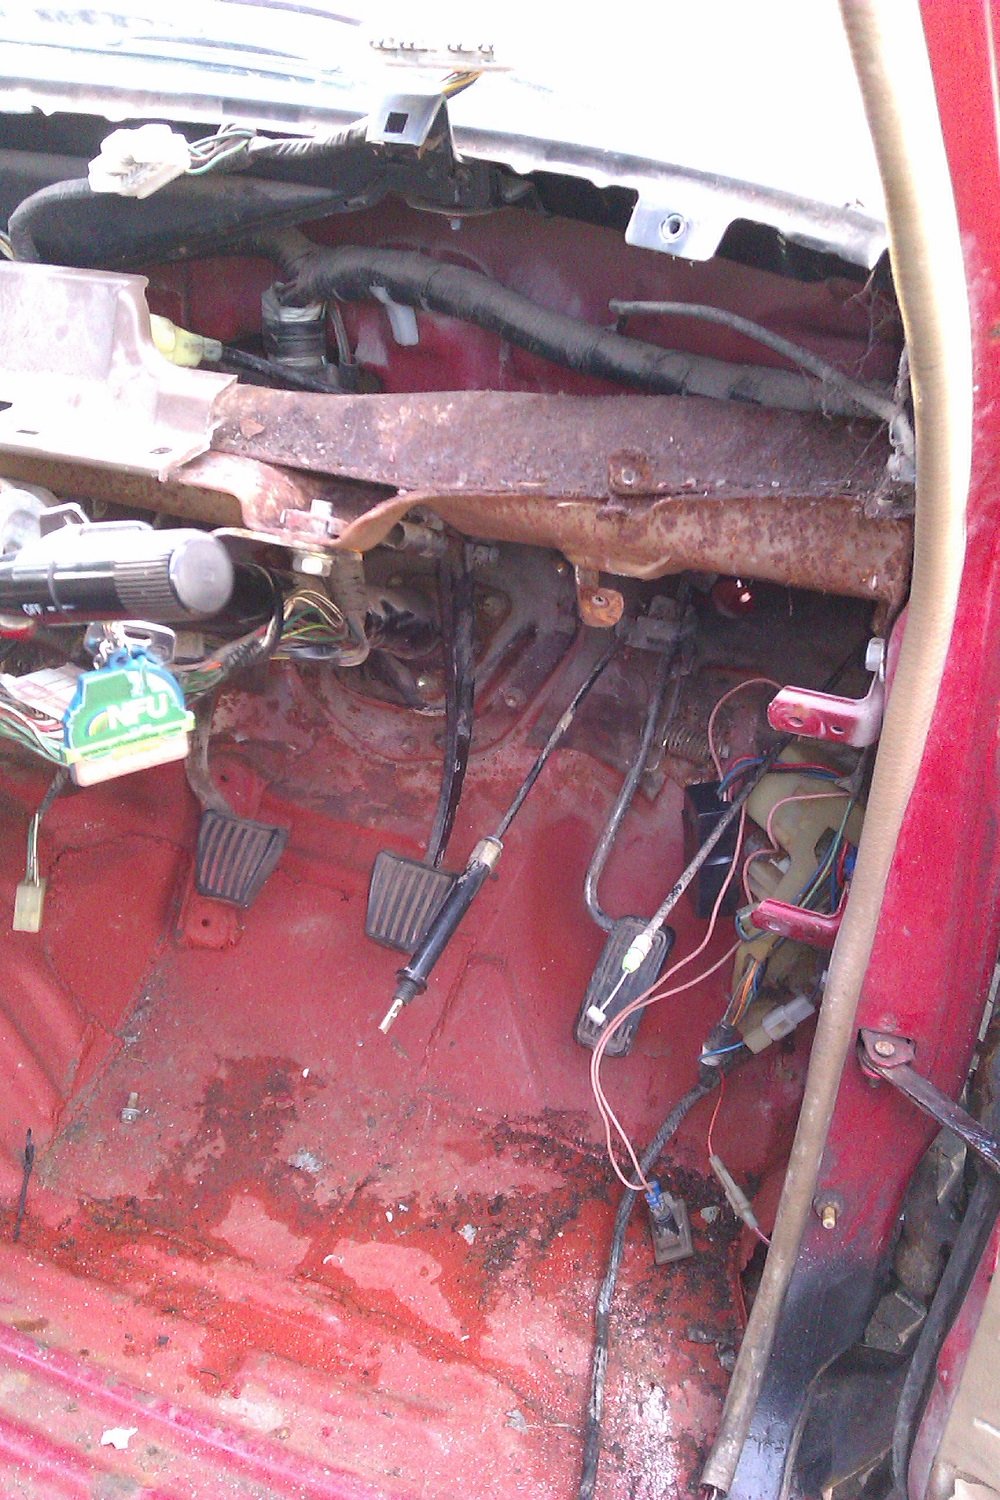
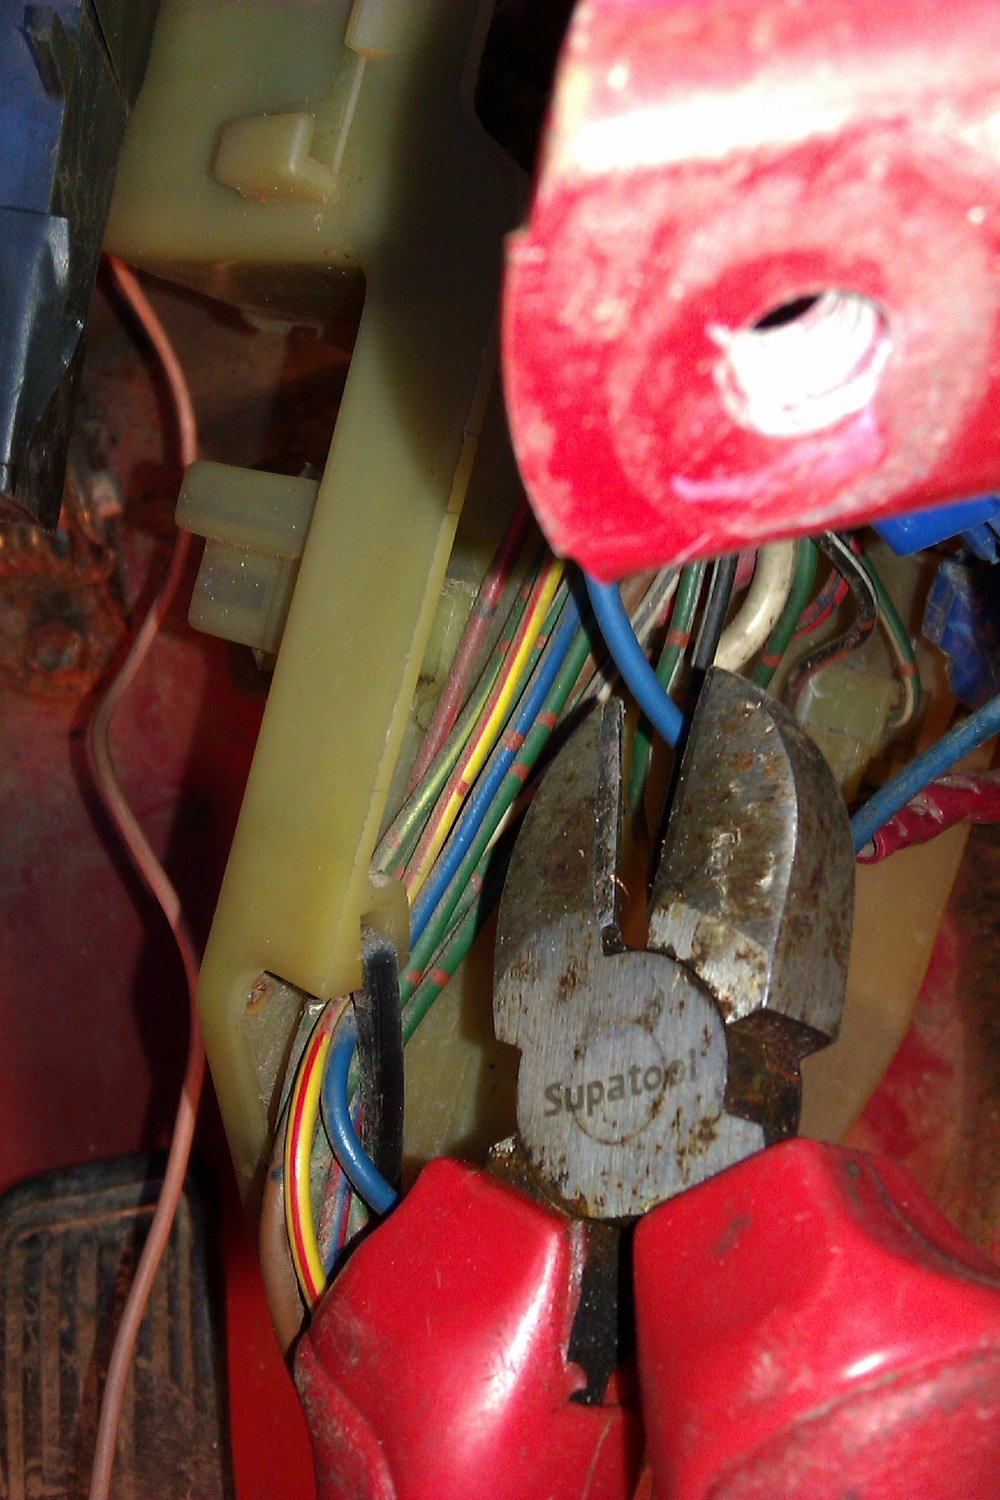
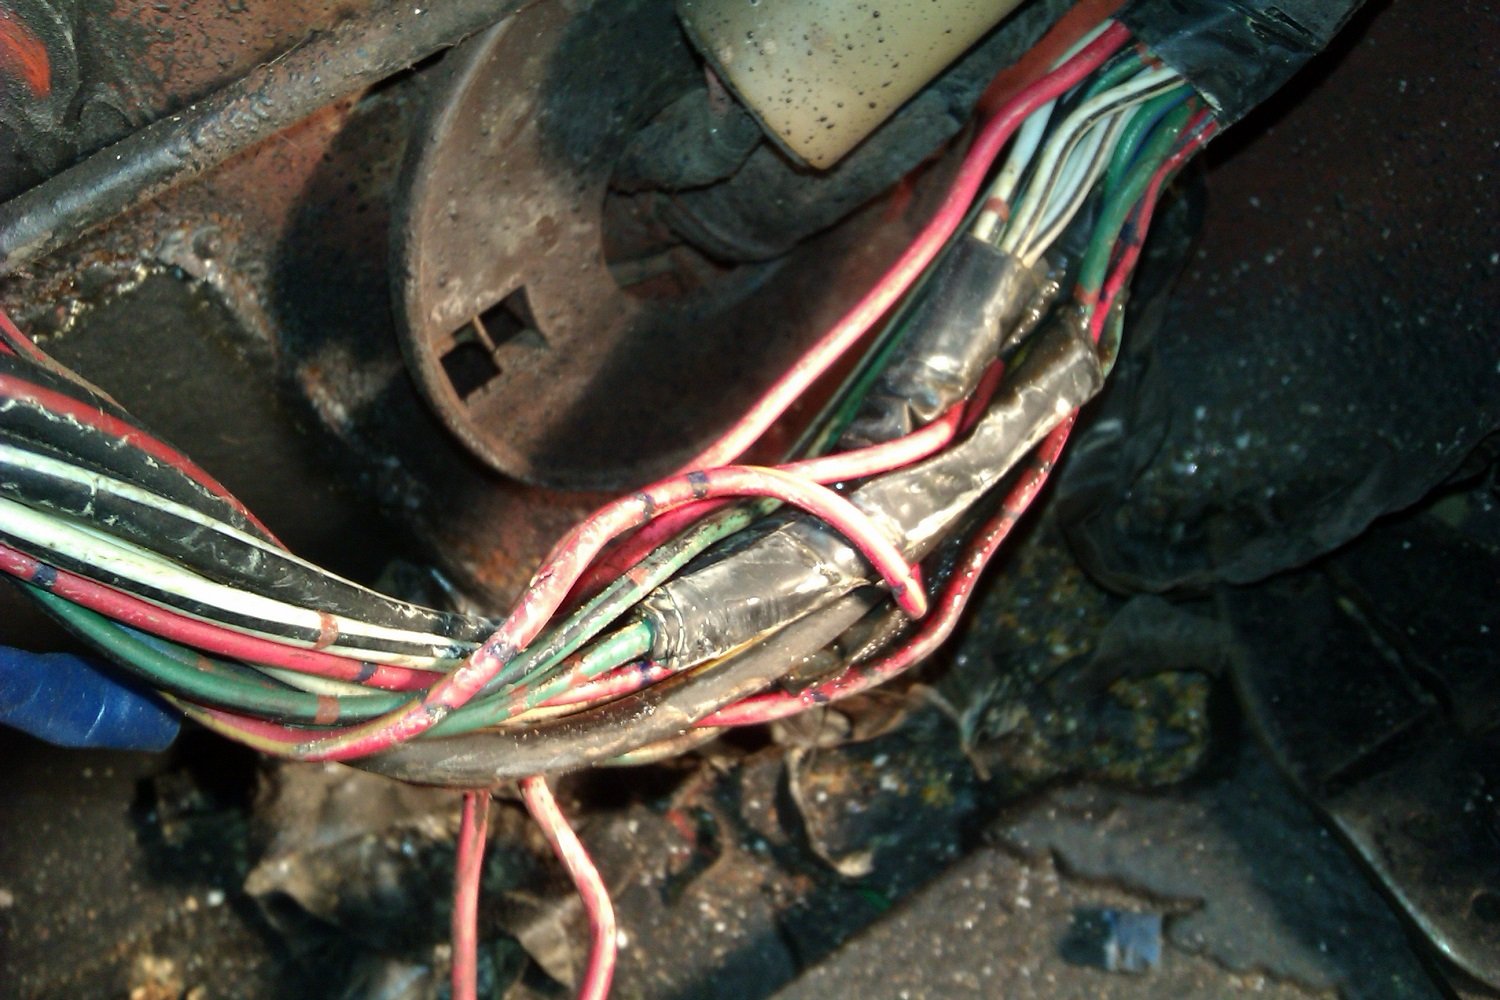
Fuck you for a couple of weeks. Had to walk away before I burned the twat. Made the interior look right pretty. Getting there with the electrics, lots of water in the loom & fuse boxes. Defusing the towing electrics. Blue or black ? Seems to have helped though. That's all I've got for the moment, not even going to tempt fate and think about when it might get tested.
1 point
-
So, just before I went to the test I thought I'd check the lights. One headlight not working on dip, also fog lamp and brake lights packed up too. Cancelled test. *sigh* Then found something hiding in the engine bay under the fuse box.. I'd like to find the sparky who did this & shake him warmly by the throat.... Rewire in the morning and hopefully that'll cure it. Ha ha, yeah, right.
1 point
-
IUZ-FE swap will get you going.1 point
-
I should really.1 point
-
I had to google that coz I know nothing. That's pretty mint but I've been beaten to it over here. /there can be only one. Fuck, I wish I'd kept what was left of my original tub.....
1 point
-
Door on, front shocks on, heater fan fixed, interior progressing, waiting for alternator, nearly run out of nuts and bolts. No seats or window mechanism yet gosh darn it, possum on a gum bush, etc. /pic
1 point
-
Slow day back at work so time for an update with some photos. Not a huge amount has changed on the scoot BUT it is finally legal! Bit of a process with border checks, lighting exceptions, vintage car club sign off and even the need to get a low volume cert (front disc etc). It is a good feeling not having to worry about the local fuzz and being able to properly insure it though! Had another 1600km Motto TT event last year, scoot went well until some minor mishaps near the end. Exhaust decided to open up and on the final day my statorplate shat itself. New tubeless rims before the event. Route over 4 days, 1600kms. Lots of Castrol TTS was used! Teammate helped patch up the pipe at a local bike shop in Wellsford which lasted well for the rest of the event! The stator plate then gave up around Tutukaka Coast on the final day so it was trailer time back to Auckland. Bit of a stink way to finish the event but still loads of fun with great people. Poked exhaust was a good thing in the end, it meant I could finally get my self an expansion camber. A friend parted ways with his Darryn Tayor tuned Evo pipe and I gladly took it off his hands. Still some tuning to happen but damn I am loving it so far! Next up is to sort the tune, maybe a dyno and trim rear floor boards for clearance on the pipe.1 point
-
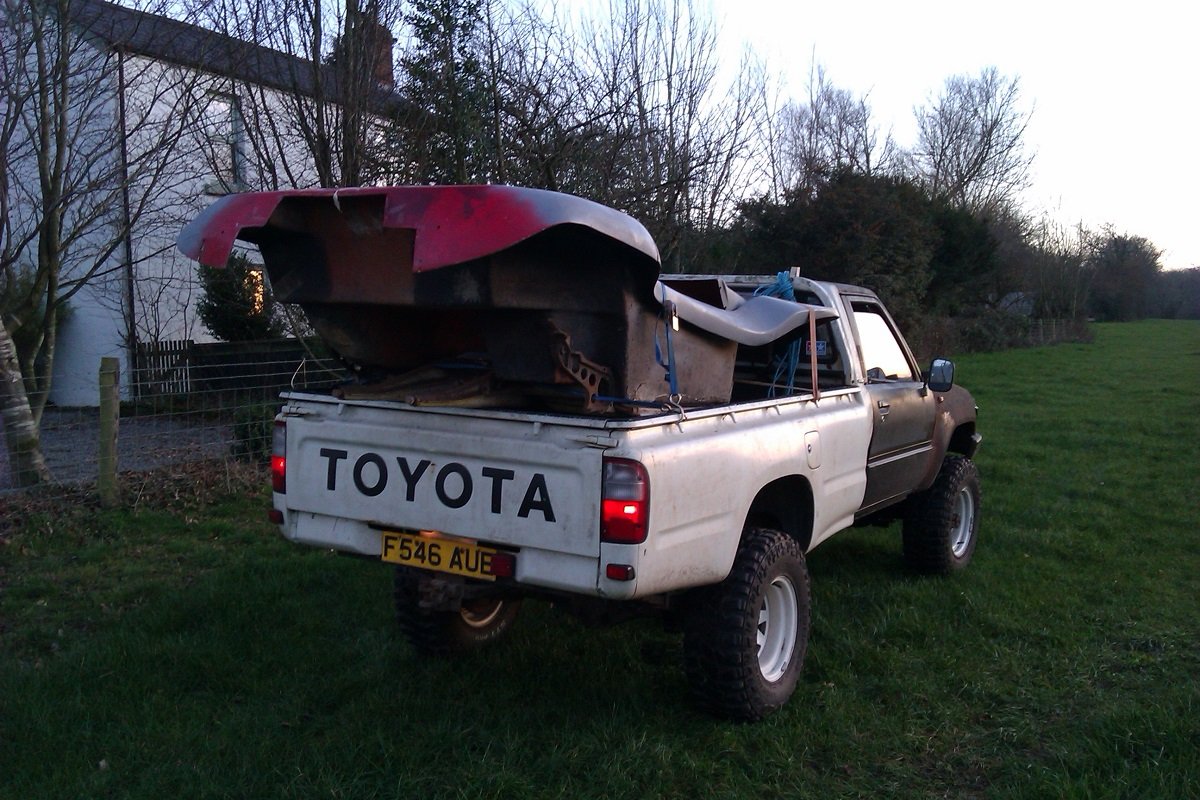
Things have been happening, just not really photo worthy, New stop solenoid wasn't broken, I'd caught the O-ring when I fitted it and jammed it open. The word "moran" springs to mind. All sorted now. Gave it a good rev and the cam belt stayed on the pulleys so I guess that's fine too. Radiator turned up. Looks good (bloody ought to for the price) so that'll be going back in tomorrow. I've just got to find the fan shroud from the last time I had the rad mended in 2001. I think it's in the roof of the garage. Maybe. Got to start the Skyline up and pull it out to get in the roof. Possible fiasco on the cards + some swearing. The winch is up there too so I'll be grabbing that n'all, and not dropping it on the Skyline in the process. I seem to be having a bit of a communication problem with the bloke who's selling me seats and a window mechanism. Gonna chase it up. Don't fancy sitting on those rat wee/poo seats again TBH. Steve did the repairs on the door skins yesterday, I primed them this afternoon and may just whack a bit of matt black on tomorrow. Talking of which, I'm now starting to think about colours. White would be the obvious choice coz it's half done already but I'd quite like to do it the original red (though I'm not sure about how it'd look on the new bed). Or maybe that Skoda colour that looks like grey primer. We shall see come the spring. For the moment it's just gonna stay rough. I've insured the truck, I'm genuinely hoping it'll be back on the road by the end of the week. I'll try my best to take some pics tomorrow. / one pic1 point
-
Ha ha. "Test drive" my arse. (Not literally, thanks). Rad didn't turn up, excuse being " We are waiting for the correct core to be delivered" My guess that is reconditioner-speak for " We'd completely forgotten about your rad and someone is looking for it right now" Checked the fuel filter for post-plumbing debris, refilled & refitted. Primer packed up. Rigged up a hand primer and covered everything in diesel. Nice. Got it running again, sounds great. Also still sounded great when I switched it off. New solenoid is knackered already. 5th gear, foot on the brake, dump the clutch. Gave up and did a few jobs on Mrs Shuzz's car as she's off with the bin lids for a couple of days. Back on the Hilux tomorrow. /It's getting too cold for this bollocks. //pics if you're lucky.1 point
-
Well, he did it again. To the other sill this time. Then started making up for it He's going to finish tomorrow, he told me. Says I don't owe him anything but I think I do. I pulled the tank out, it was a twat and I got an armpit full of stale diesel for my trouble. It was so f***ing cold I gave up at 3 and came home. Think it was a bit too cold to take pics n'all.1 point
-
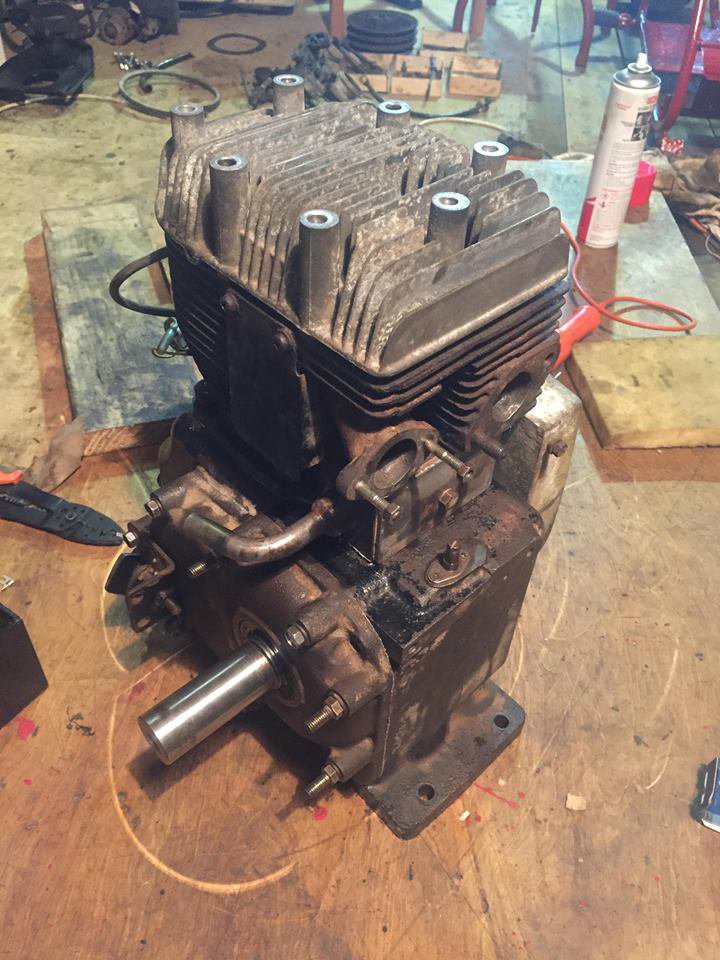
Engine is back together, unzezed and all crap and rust cleaned out, valves and seats recut, and end floats corrected, tappets set, points gaped, ignition condenser moved to outside of engine rather than behind the flywheel, I have the head bolted down now. Need to find a strong person to help me lift it back in, I got it out myself but it is over 90 kgs The PTO shaft is actuality the end of the cam shaft, its huge like 1 1/2"
1 point
-
RockAuto is really low on stock, wonder why. Factory drop spindles still available, used. No UK spec' ones available though.... NZ got canada spec ones.
1 point
-
Did i mention it that i think it should be lower? i can fit SOHCs version of this car under the chassis rails. Which are 24.5 inches off the ground (average, 24 front 25 rear)1 point
-
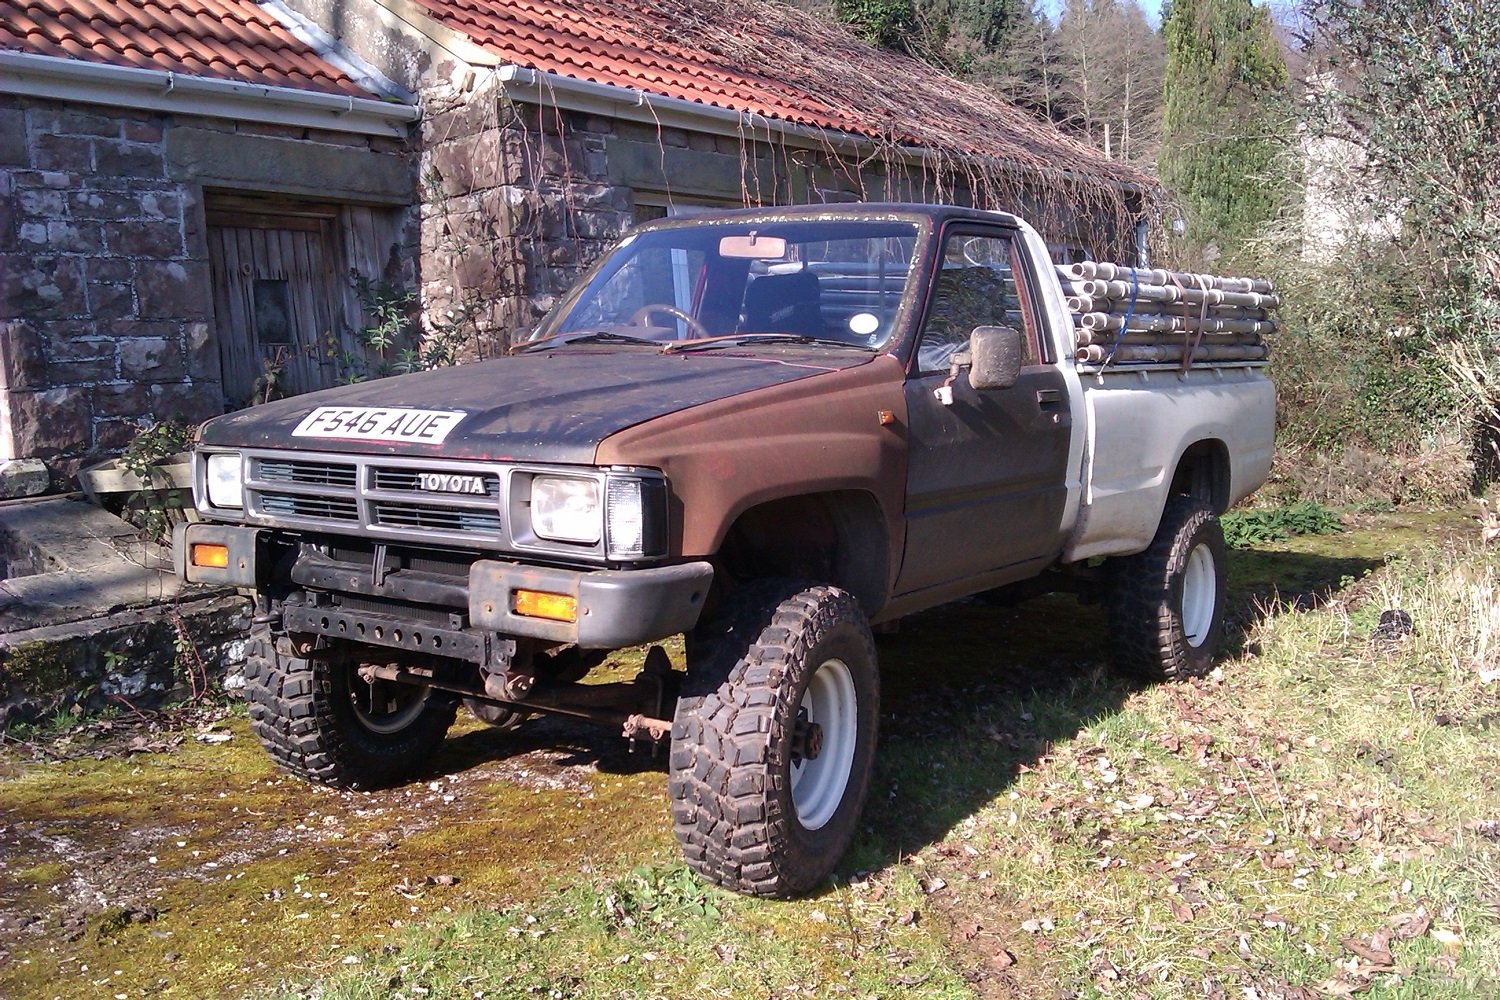
Needs front wheel bearings, about $1,000USD spent on manking the diff' nice (high speed gears & reduce the disturbing noises) reline brakes, fit floor and probably a few other things i haven't listed. Why is the exhaust bends crappy? Haven't got a pipe bender at home, i can cut that section out and replace it later. And make a proper hanger, it's tied up with wire for a test drive in those pics.1 point
-
Found air leaks, it lives. Milkshake oil, gears and brakes barely work but it lives. Handbrake doesn't do anything but then again the lining is 90 years old and crumbly.1 point
-
Only runs at above half throttle. Single jet carb, not sure what's wrong with it.1 point
-
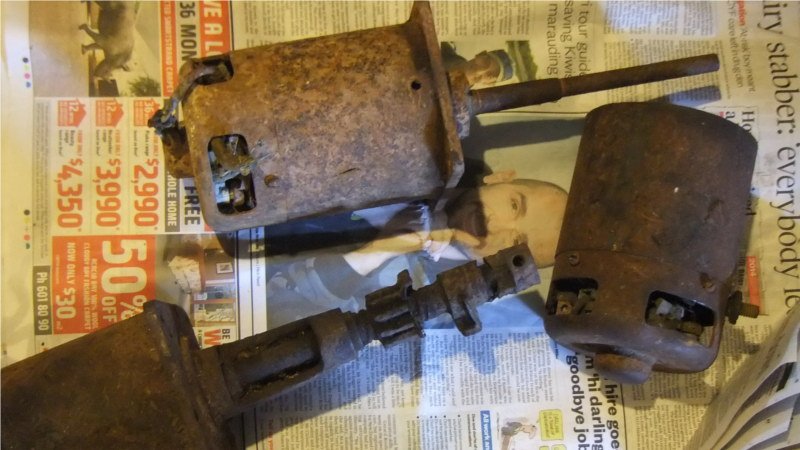
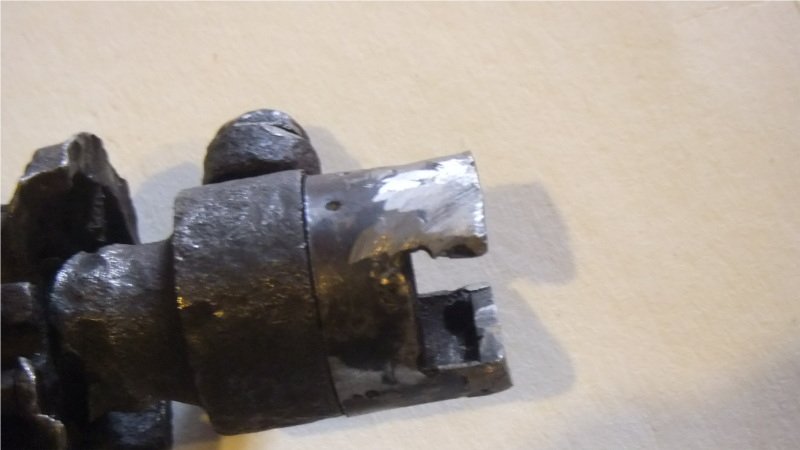
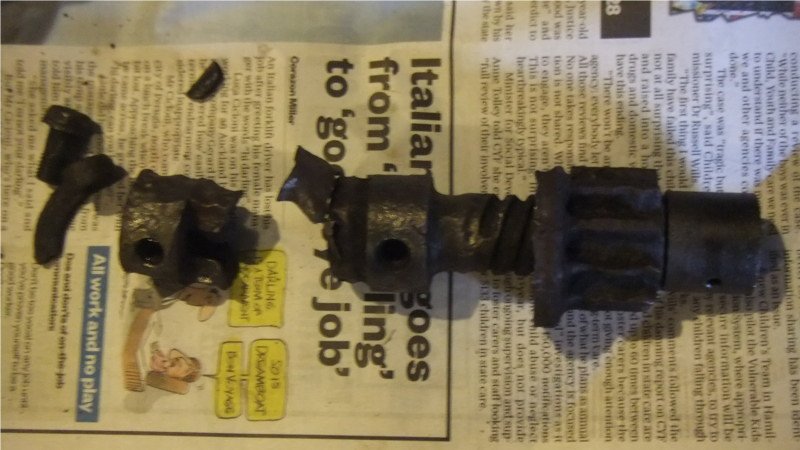
Found pieces of 3 90 year old starters. Enough to make nearly one, would be enough for two but someone cut the bearing nose casting off one of them. Made new spinny parts from bits of tube and offcuts. Slightly better than rusted away to nothing parts. Old contact thing had copper bolt riveted to it, sheared off from over tightening. Old timers would have thought that 6 volt electrics were so bad after tightening things and they get worse. Made new one and soldered in a copper nail through the hole in the old bolt. Most of the brushes are still good. Can't be bothered uploading more pictures but this thing too ages to fix, like 5 days worth of work. Had to repour the front bearing after i accidentally melted it out while trying to free up the rusted parts. And made new insulation from shoe laces, which is what the old insulation looked like, with cord wrapped around it with beeswax to seal it.
1 point
-
Made some square nuts. So when i sleepwalk i sometimes make mirror brackets. Not even mad about it. Thanks to a donor i have some leather to cover the seats with. Found some springs too but they were a bit harsh so i took them out to maybe rework them or swap them out later. Maybe give the foam underneath some better shape later but for now i'll live with the plain bulge. Here is the now leather seat base. Pretty sure it was BangBug who was the donor.1 point
-
So today i made a knife switch to operate the starter.1 point
-
Factory horn button actually looked like this, as in a wire running through the spokes of the steering wheel. Henry ford didn't want to change anything when electric horns came into fashion.1 point
-
Wooden parts need to be replaced with metal and the metal needs to have someone go over it with a better welder, i really need to acquire a proper MIG or TIG..1 point
-
This is progress right? Just so you know i'm not making this up out of my head. i even had a workshop weld the steering column mount. This is a new floorboard riser thing, i made it myself and had someone redo my welds because my welder kinda died. Only 2 exit wounds that i can find but little bullet shaped dents are evident in the dash and firewall, focusing on the gas tank.
1 point


This leaderboard is set to Auckland/GMT+12:00