
Leaderboard


Popular Content
Showing content with the highest reputation on 06/20/19 in all areas
-
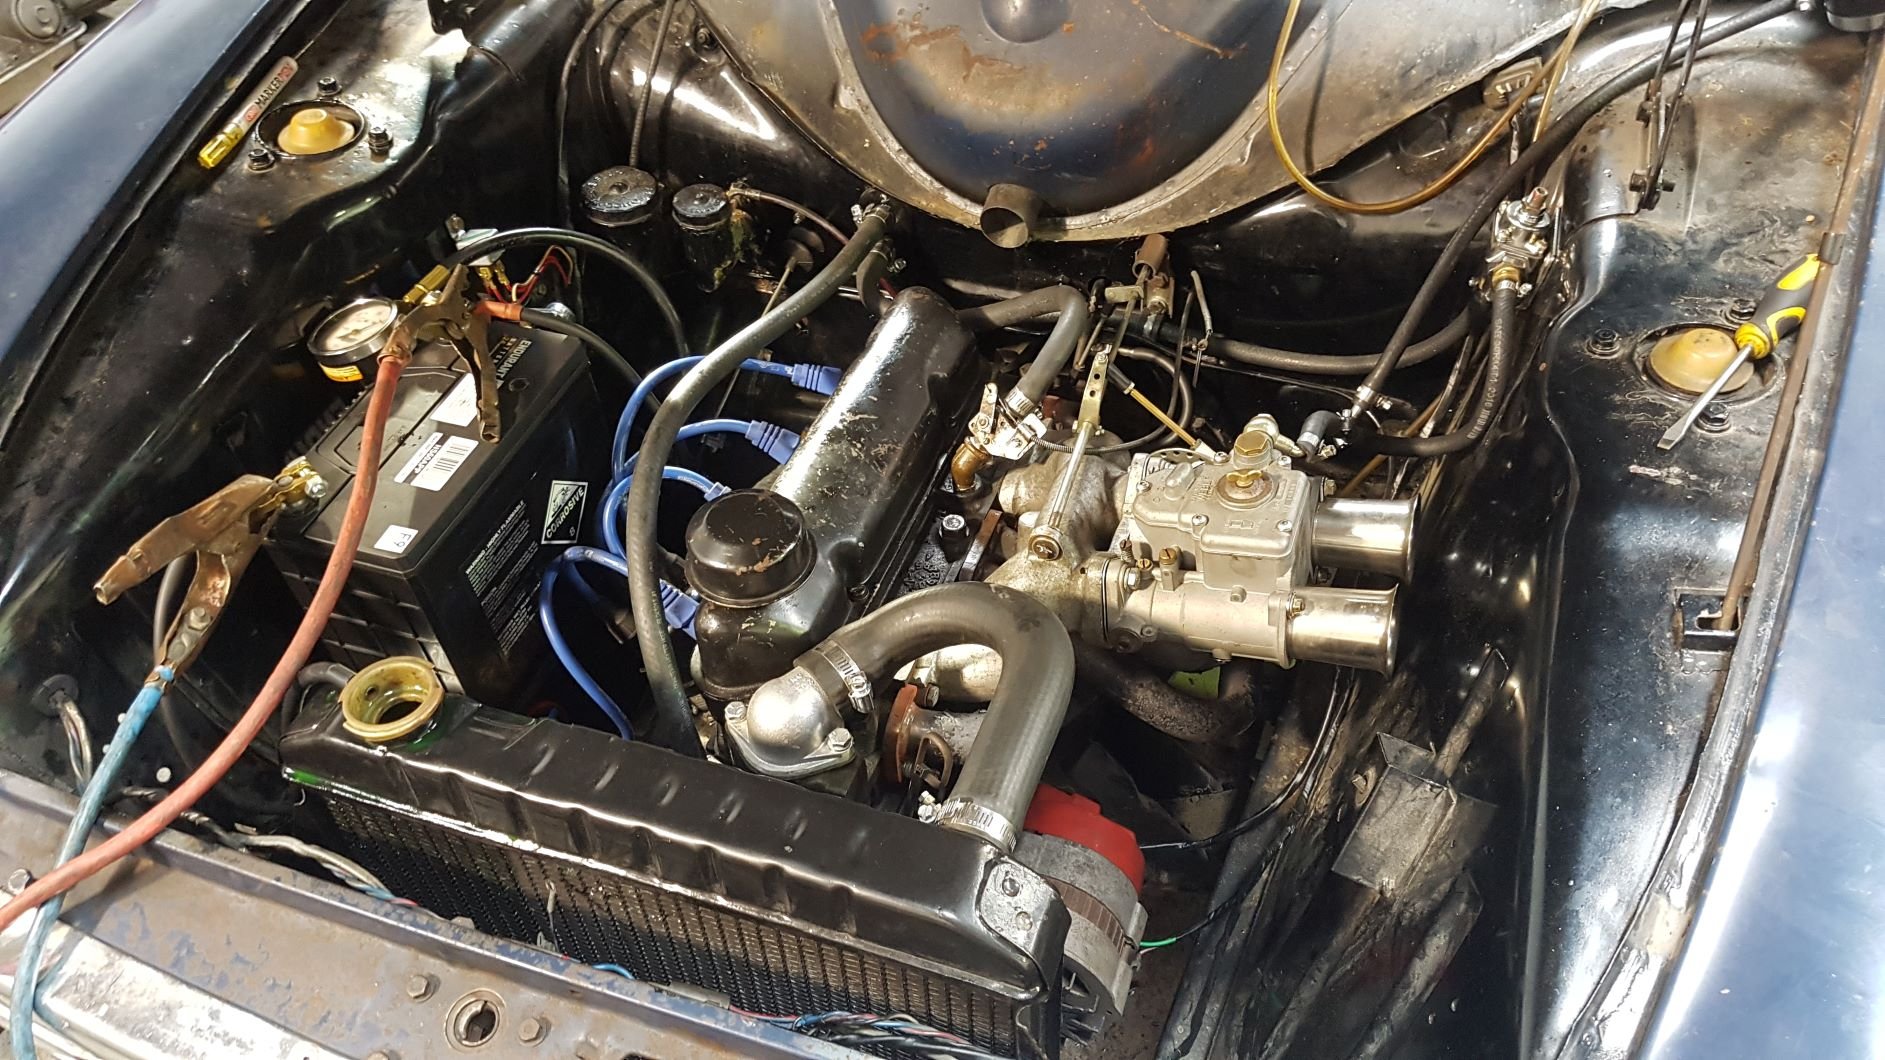
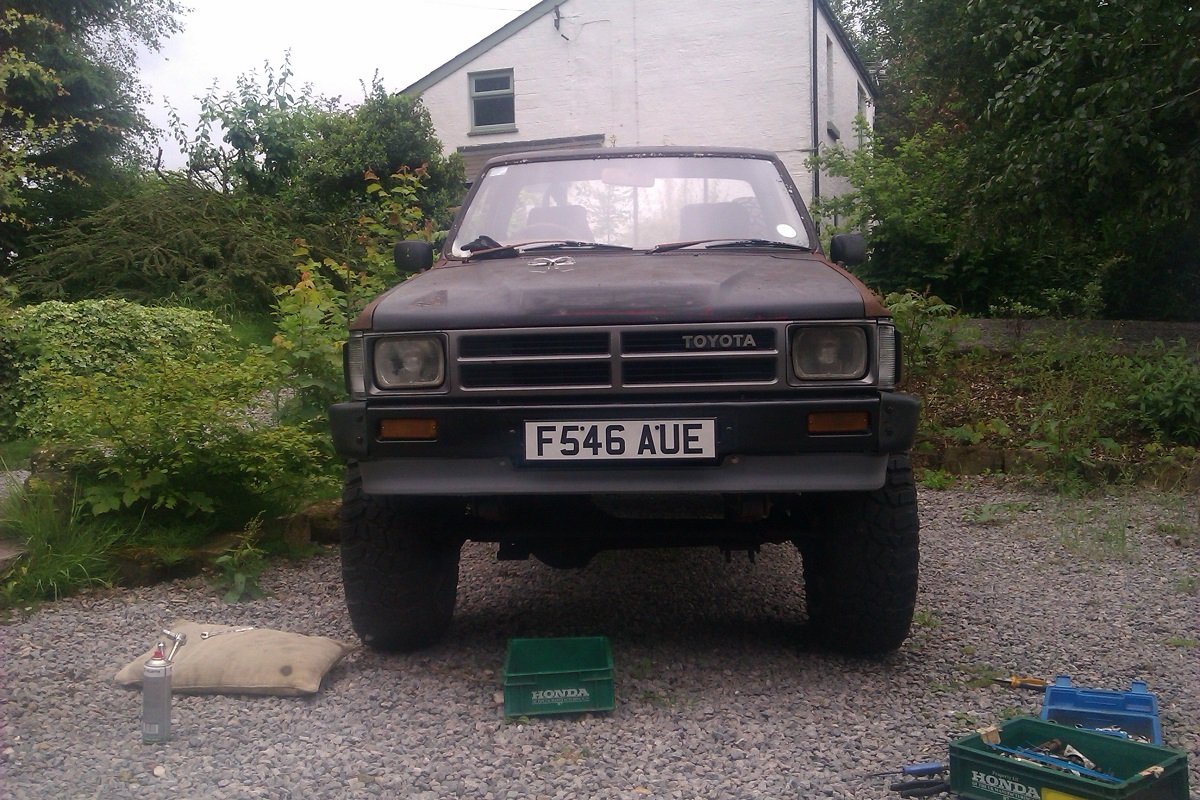
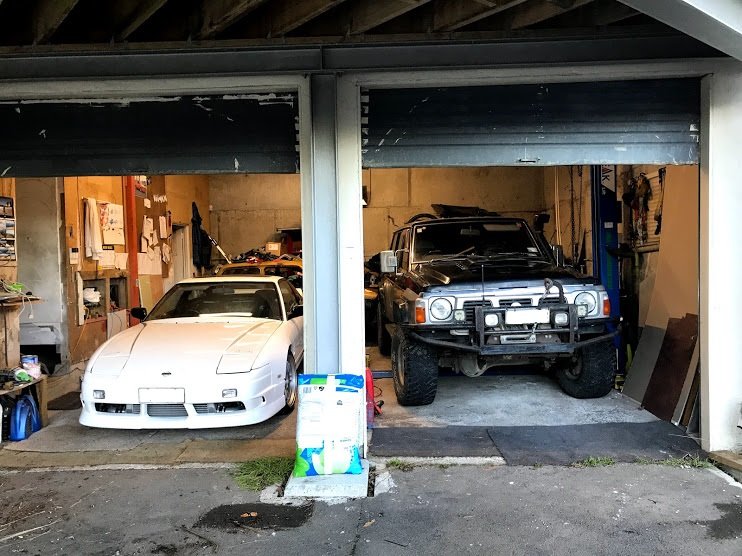
This bitch is finally alive. Started yesterday with no exhaust so fairly rowdy. Just needs exhaust sorting, cooling fan found (looking for one currently let me know if you have one please!) I seem to have lost it over the last decade. Pretty pumped as I got the engine rebuilt over 12 years ago and was a bit worried there would be issues. Will need a tune etc and no doubt some other issue will show itself but its getting damn close. Looking forward to taking it for a fang!
 9 points
 -
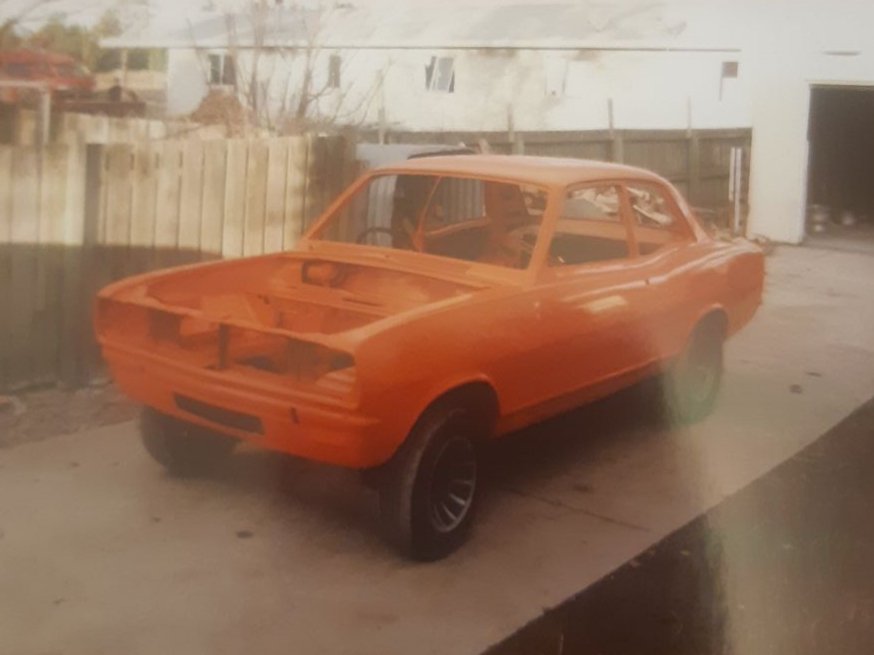
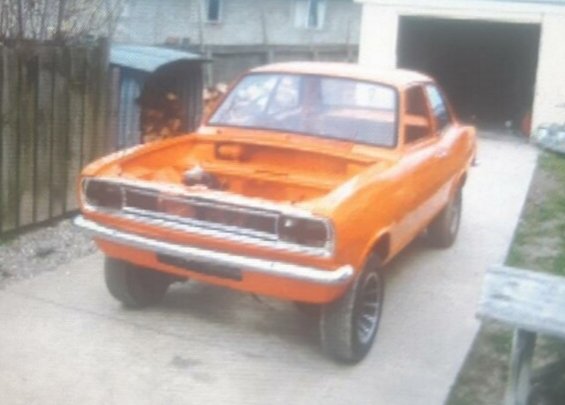
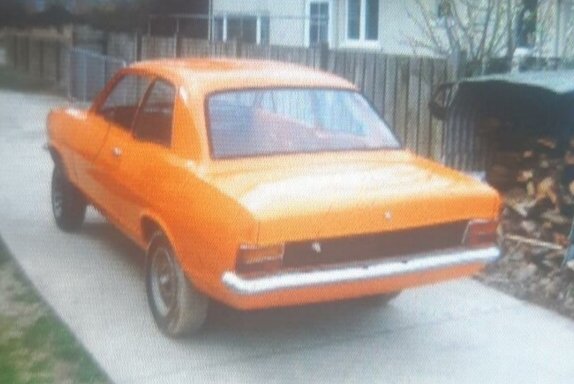
Gidday, Thought I'd start a thread on an HB viva I've just bought. It comes with a built 2.3l slant engine which apparently is a certified ripper but has probably been sitting for 10 years... I actually know very little about it, it's been a friends for as long as I can remember and he had some motivation a while back and got the body work done & painted it. Put in the GT grill and got GT badges. But these days he hasn't looked at it for years. Talking turkey with him at New Year 2018-19 and I said I'd look to buy it off him and finish it up and just sealed the deal about 6months later. I'm guessing the job list is: Strip engine, inspect, hone and replace rings. Build exhaust & extractors Rebuild carbs Radiator Install driveline. Clutch, gearbox & diffs largely unknown. But I think there are some spares from a 1.3l HC viva... Install MSNZ cage Entier braking system Poly bushes Springs & shocks Wheels & tyres Race seats, harness Fit enough interor to meet HSC class That should be the worst of it haha Anyway, I'm keen on some guidance on how to set this car up. E.g. springs to suit the 2.3l. Tips and tricks to set the car up for circuit racing. Brake components from other vivas etc. Won't be much work happening until I go collect it from the South Island which I think is going to be New Year 2019-20. Just want to get a bit of a plan in place and start keeping an eye out for any parts needed to get this finished up. Discussion thread here: Cheers, Pete
6 points
-
Fucking civilised as fuck. It's almost a Jag or a Roller now.
5 points
-
2019-06-19_01-30-25 by sheepers, on Flickr 2019-06-19_12-40-53 by sheepers, on Flickr 2019-06-19_12-40-43 by sheepers, on Flickr5 points
-
No major updates on the scoot, it has been kept locked up in the dining room while other things have been happening. Team photo. Good colours!
4 points
-
Pour it through a loaf of bread, then buy new oil3 points
-
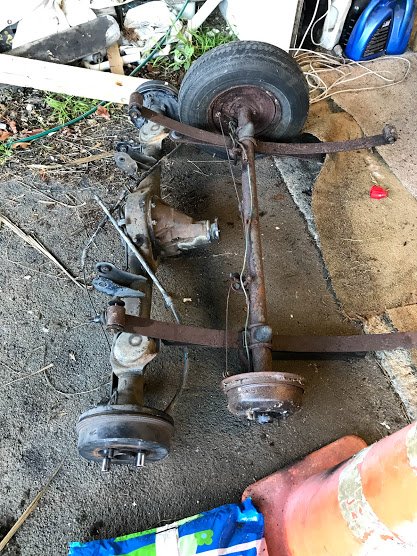
Took the axle and leaves off, jesus its tiny versus the Toyota t series one: Then played car Tetris: Just fits:
3 points
-
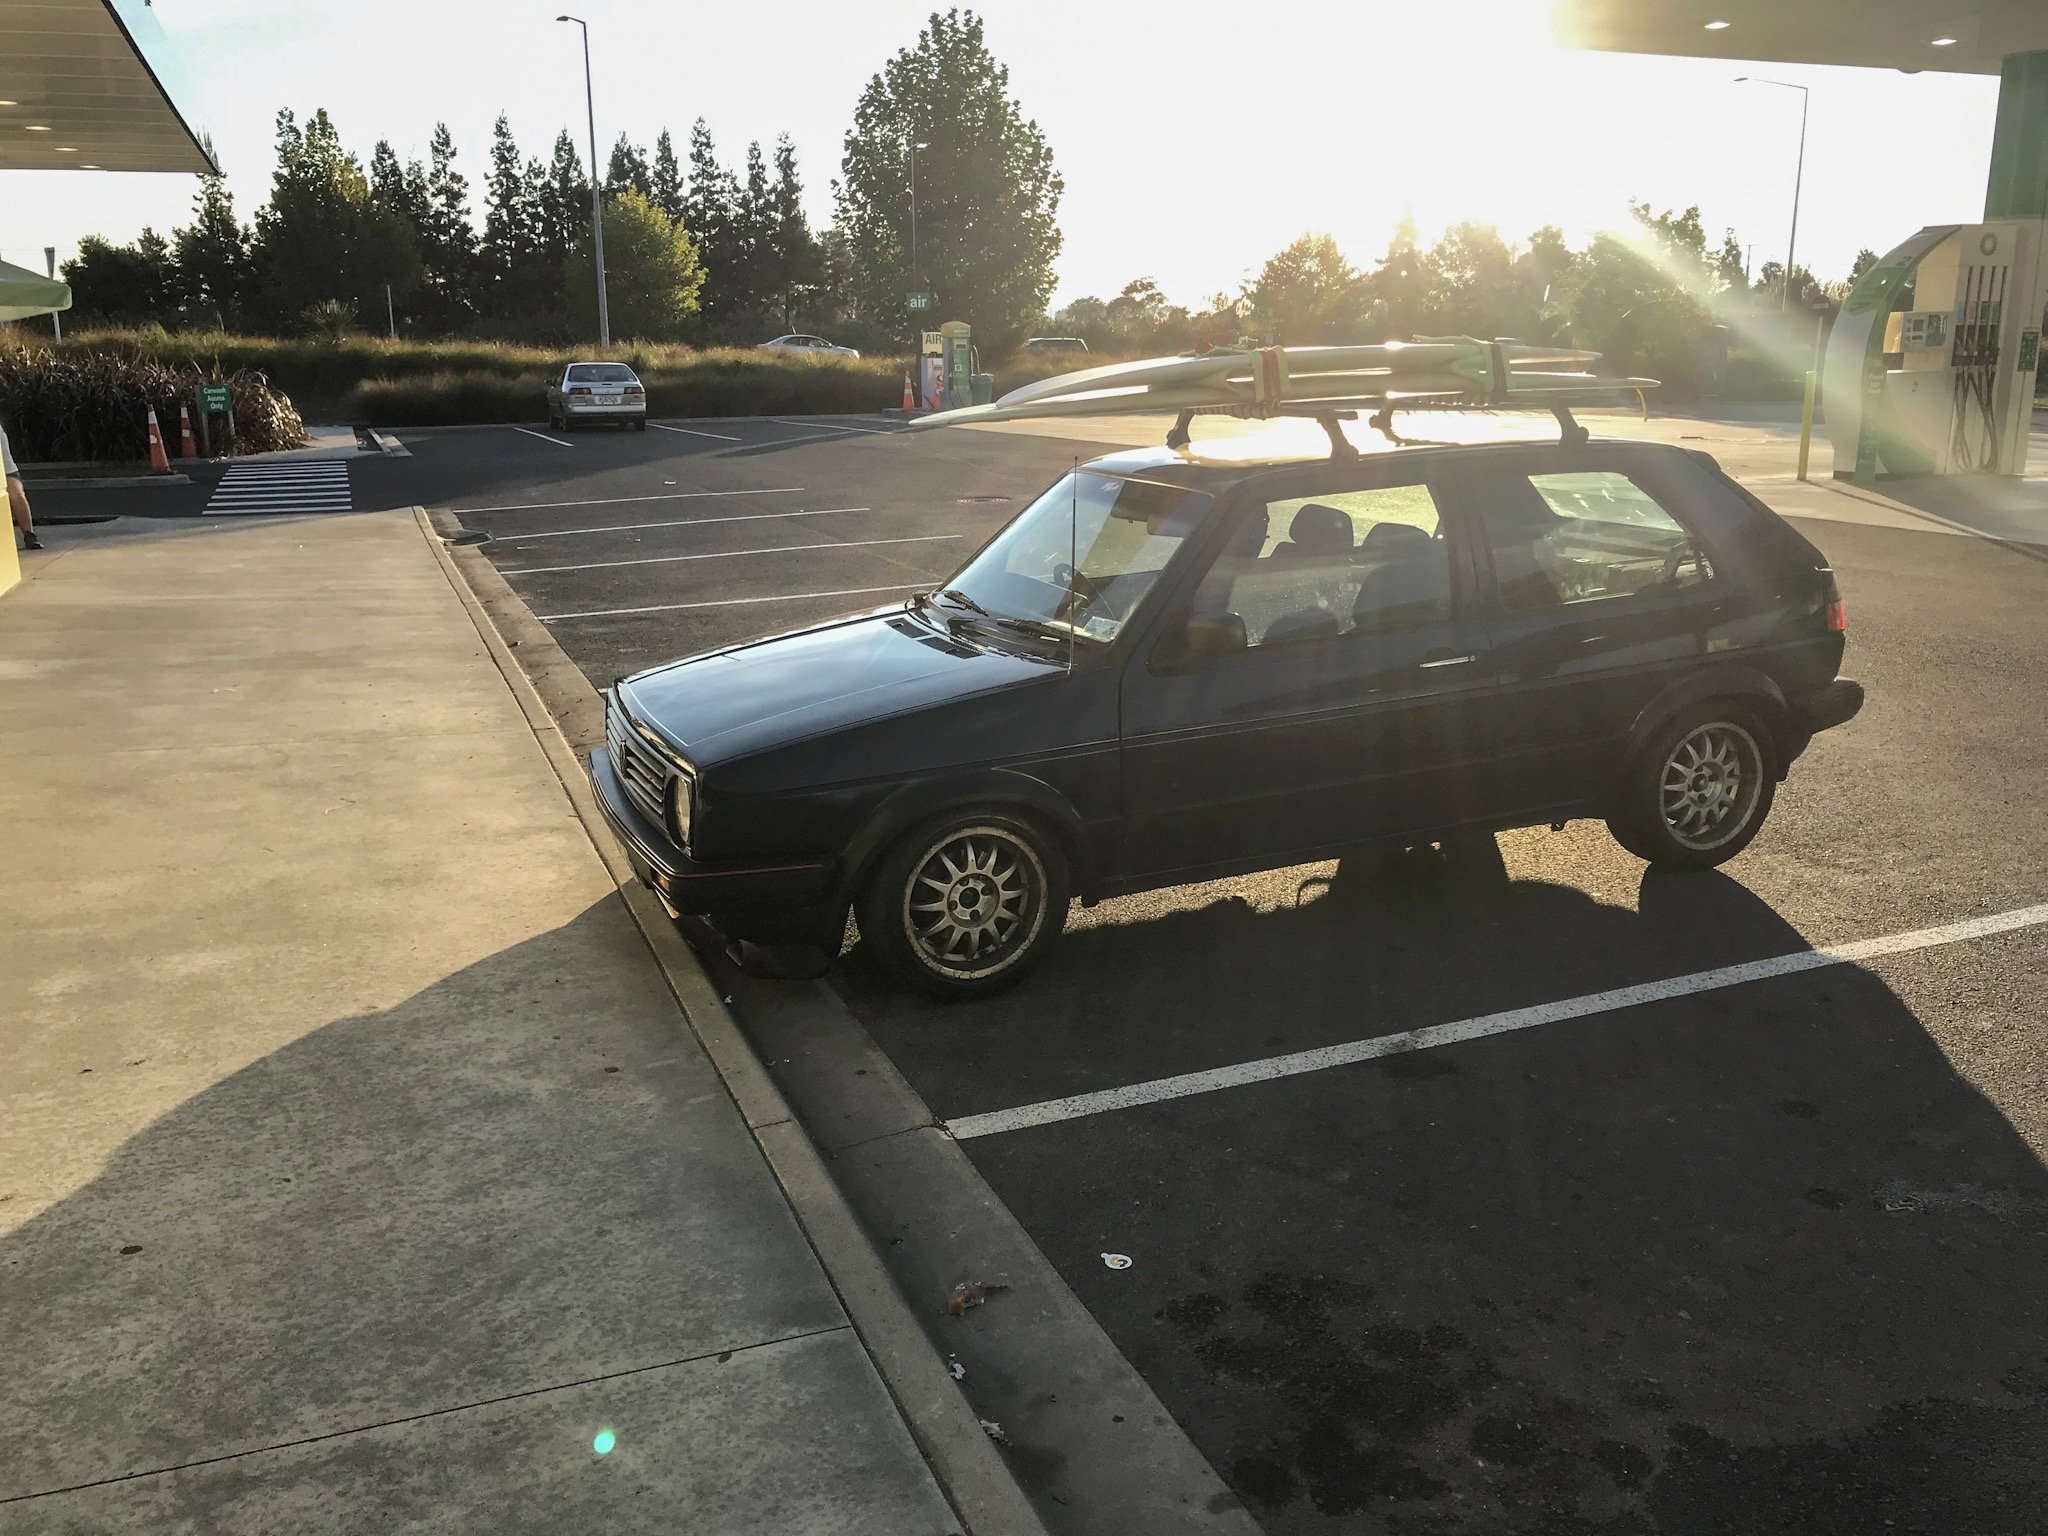
Made a bit of a drive to raglan so we could go for a surf. Made for a brilliant cruise, really couldn’t be happier, would be nice to put a lower 5th gear in it for cruising but I’m not to fussed. Also made sure to take the piss a bit with the neons
3 points
-
Welcome back viewers to yet another ever so thrilling update on the old Huddyson. Sitting here and looking back over the last few years I must scratch my head and ask where has all that time gone. I really did believe it would of been driveable by now - road legal or not legal. Life has its way of derailing such grand time frames as im sure you all are aware and the fact that even though the parts im using may not be the most expensive out there they sure dont come cheap. To paraphrase Oedipus, Hamlet, Lear, and all those guys, "I wish I had known this some time ago." Everything was such a damned nice idea when it was an idea yet as with everything How you look at it is pretty much how you'll see it I guess. And looking at it I can see the old gal ride low n slow down the street fast n loud on the highways everytime im out working on the old beast. God i got a tad philosophical there for a moment... what are they adding to the water around these parts. /twitch Enough of that nonsense. let start the normal barrage of images and brief explanations. Back floor all patched up over four link brackets. Holes added for access & removal of the top bars bolts. Sparks and smoke flying up front as the Trans cover was all made up like a big jigsaw. To help pull the drivers side floor up the brake boosters cover has been incorporated onto the trans cover to add rigidity. Since the brakes are all tucked away under the floor and me being a bit of a lazy sod im using a remote reservoir. The brake pedal was a bit of a sod that took up a heap of time. Due to the floors sloping angle and other factors we couldn't do a normal pivoting bar as the inside push rod where you stand would be pointing towards the floor. So a duel/tandem lever was made up. its somewhere between 4:1 and 5:1 ratio. Still got to get the adjustable top links. but tested with a bit of bar and have heaps of travel for the booster. Grease nipples all over the place. Machined up brass bushes and ya its solid as. Have to get the actual pedal and the other lever bar it connects to tested still. Moving on to smaller jobs now. Power steering. As i have mentioned I think some time ago im using a PSC setup made for rock-crawlers. So if its powerful enough to drive and survive the crazy setups they have it should be fine for my setup. Now I didnt want to take away from the finned engine dress-up stuff when you open the hood. So a low mount bracket was fabbed up. The little pump has a heap of adjustment, lines up nicely with the other pulleys and is tucked nice and low that will not only keep it out of eye sight but since the pump is gravity feed from the reservoir that will be mounted up by the radiator it will have ample full as well. Mounted up the trans cooler up front of the radiator after I drilled a few holes and added grommets for the hoses. Should be hidden away enough not to be noticed. Got the cad skills out again to design up the gas tank. Its about 19Gallons/72litres. The tail pipes are rather close together so the plan is cut a hole in the trunks floor and have half the tank through this and then the other half taking up much of the trunks floor space. Baffles will also add bracing for those times I may throw heavy loads like tires ontop of it. The bottom should be flush or just tucked up with the bottom of the chassis whilst the top will come nearly up to the trunks lip/bottom of the door. So it shouldn't be a hindrance or noticeable. One end is slightly deeper for the pump and sender. Josh and the guys at Apex in Oamaru cut n folded it up. Top guys with some great kit that I highly recommend. They also made up that Hudson logo for a bit of fun what was nice of them and chucked it in. Until I figure out what to do with it I plan to use it as a stencil to tag a few things around the garage. \,,/(-.-)\m/ On a bit of a separate note the missus has taken up slinging a bit of one shot paint of late. Hell yeah I say. Im more than happy to buy the brushes, paints and what ever if it means I can get some lines laid down on pretty much what ever I want. I think she is busting it out but naturally I may be a tad one eyed, biased and not the best judge in the matter. Take a look any way. Some panels up near the top of below pic in my garage. Cooler to go with her Morrie Door she made up for Flockie on an old 40s Ford pickup door. And of course hand bags... she has a thing for handbags.2 points
-
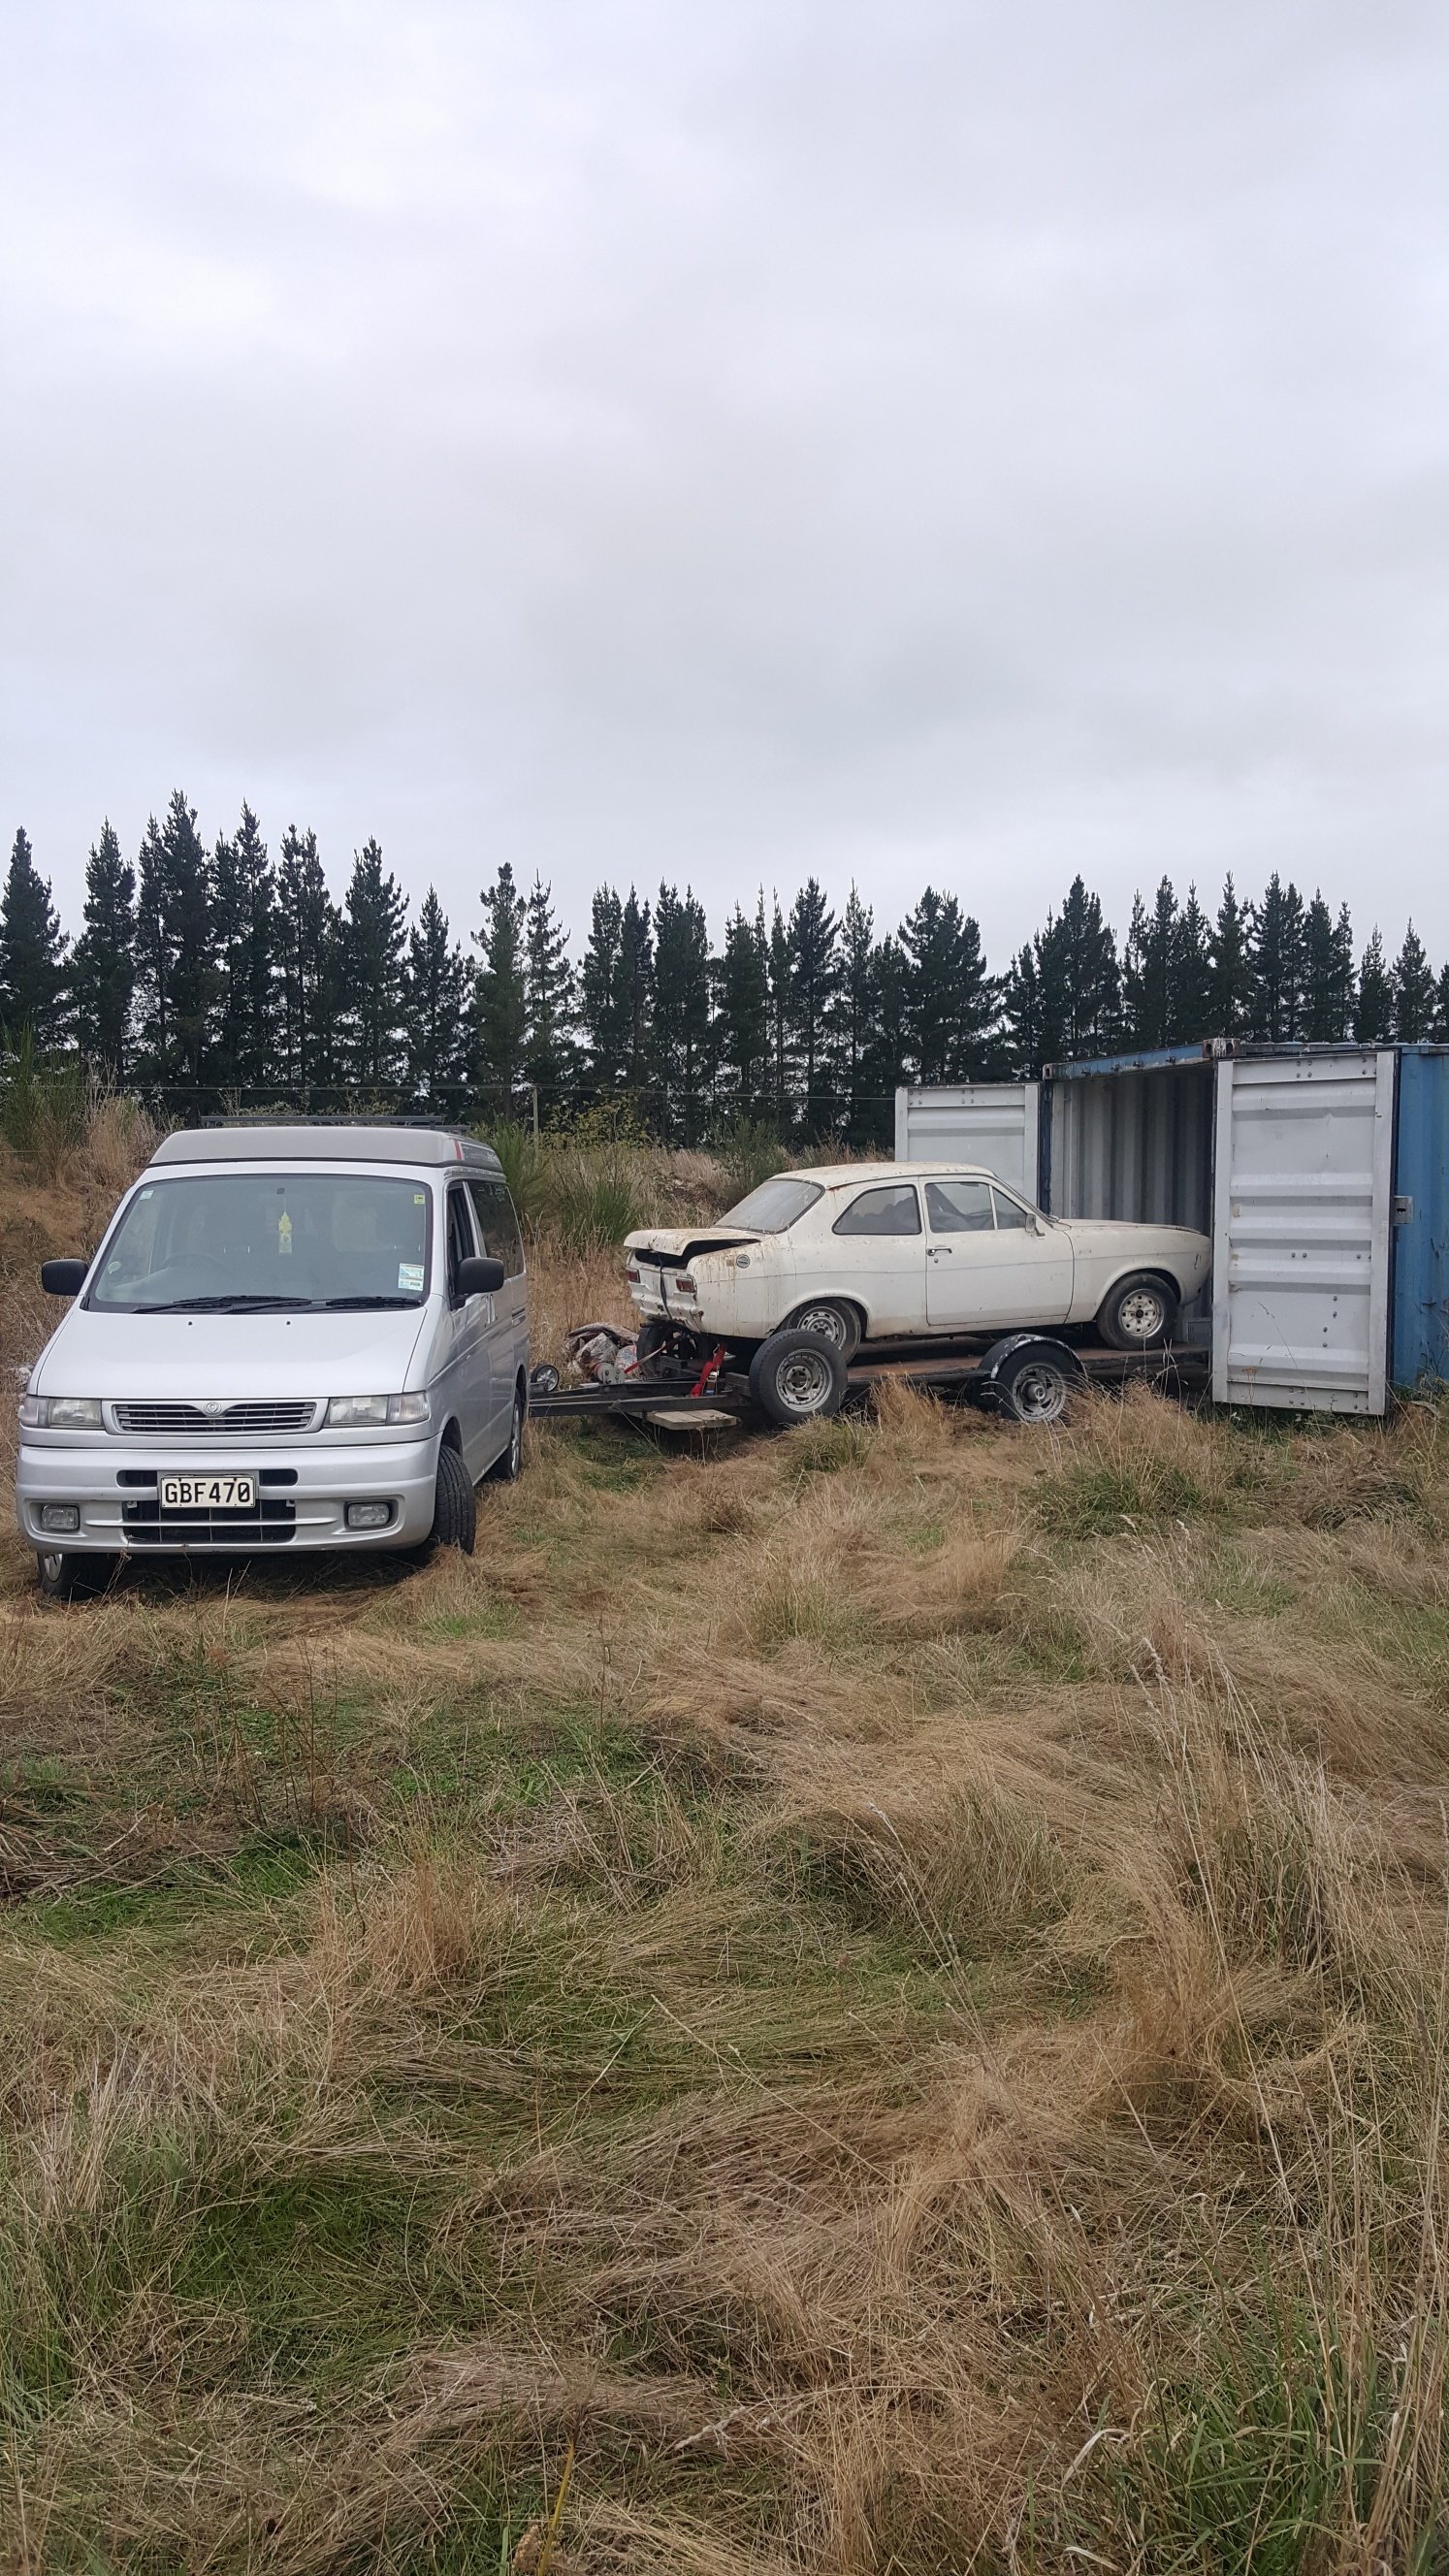
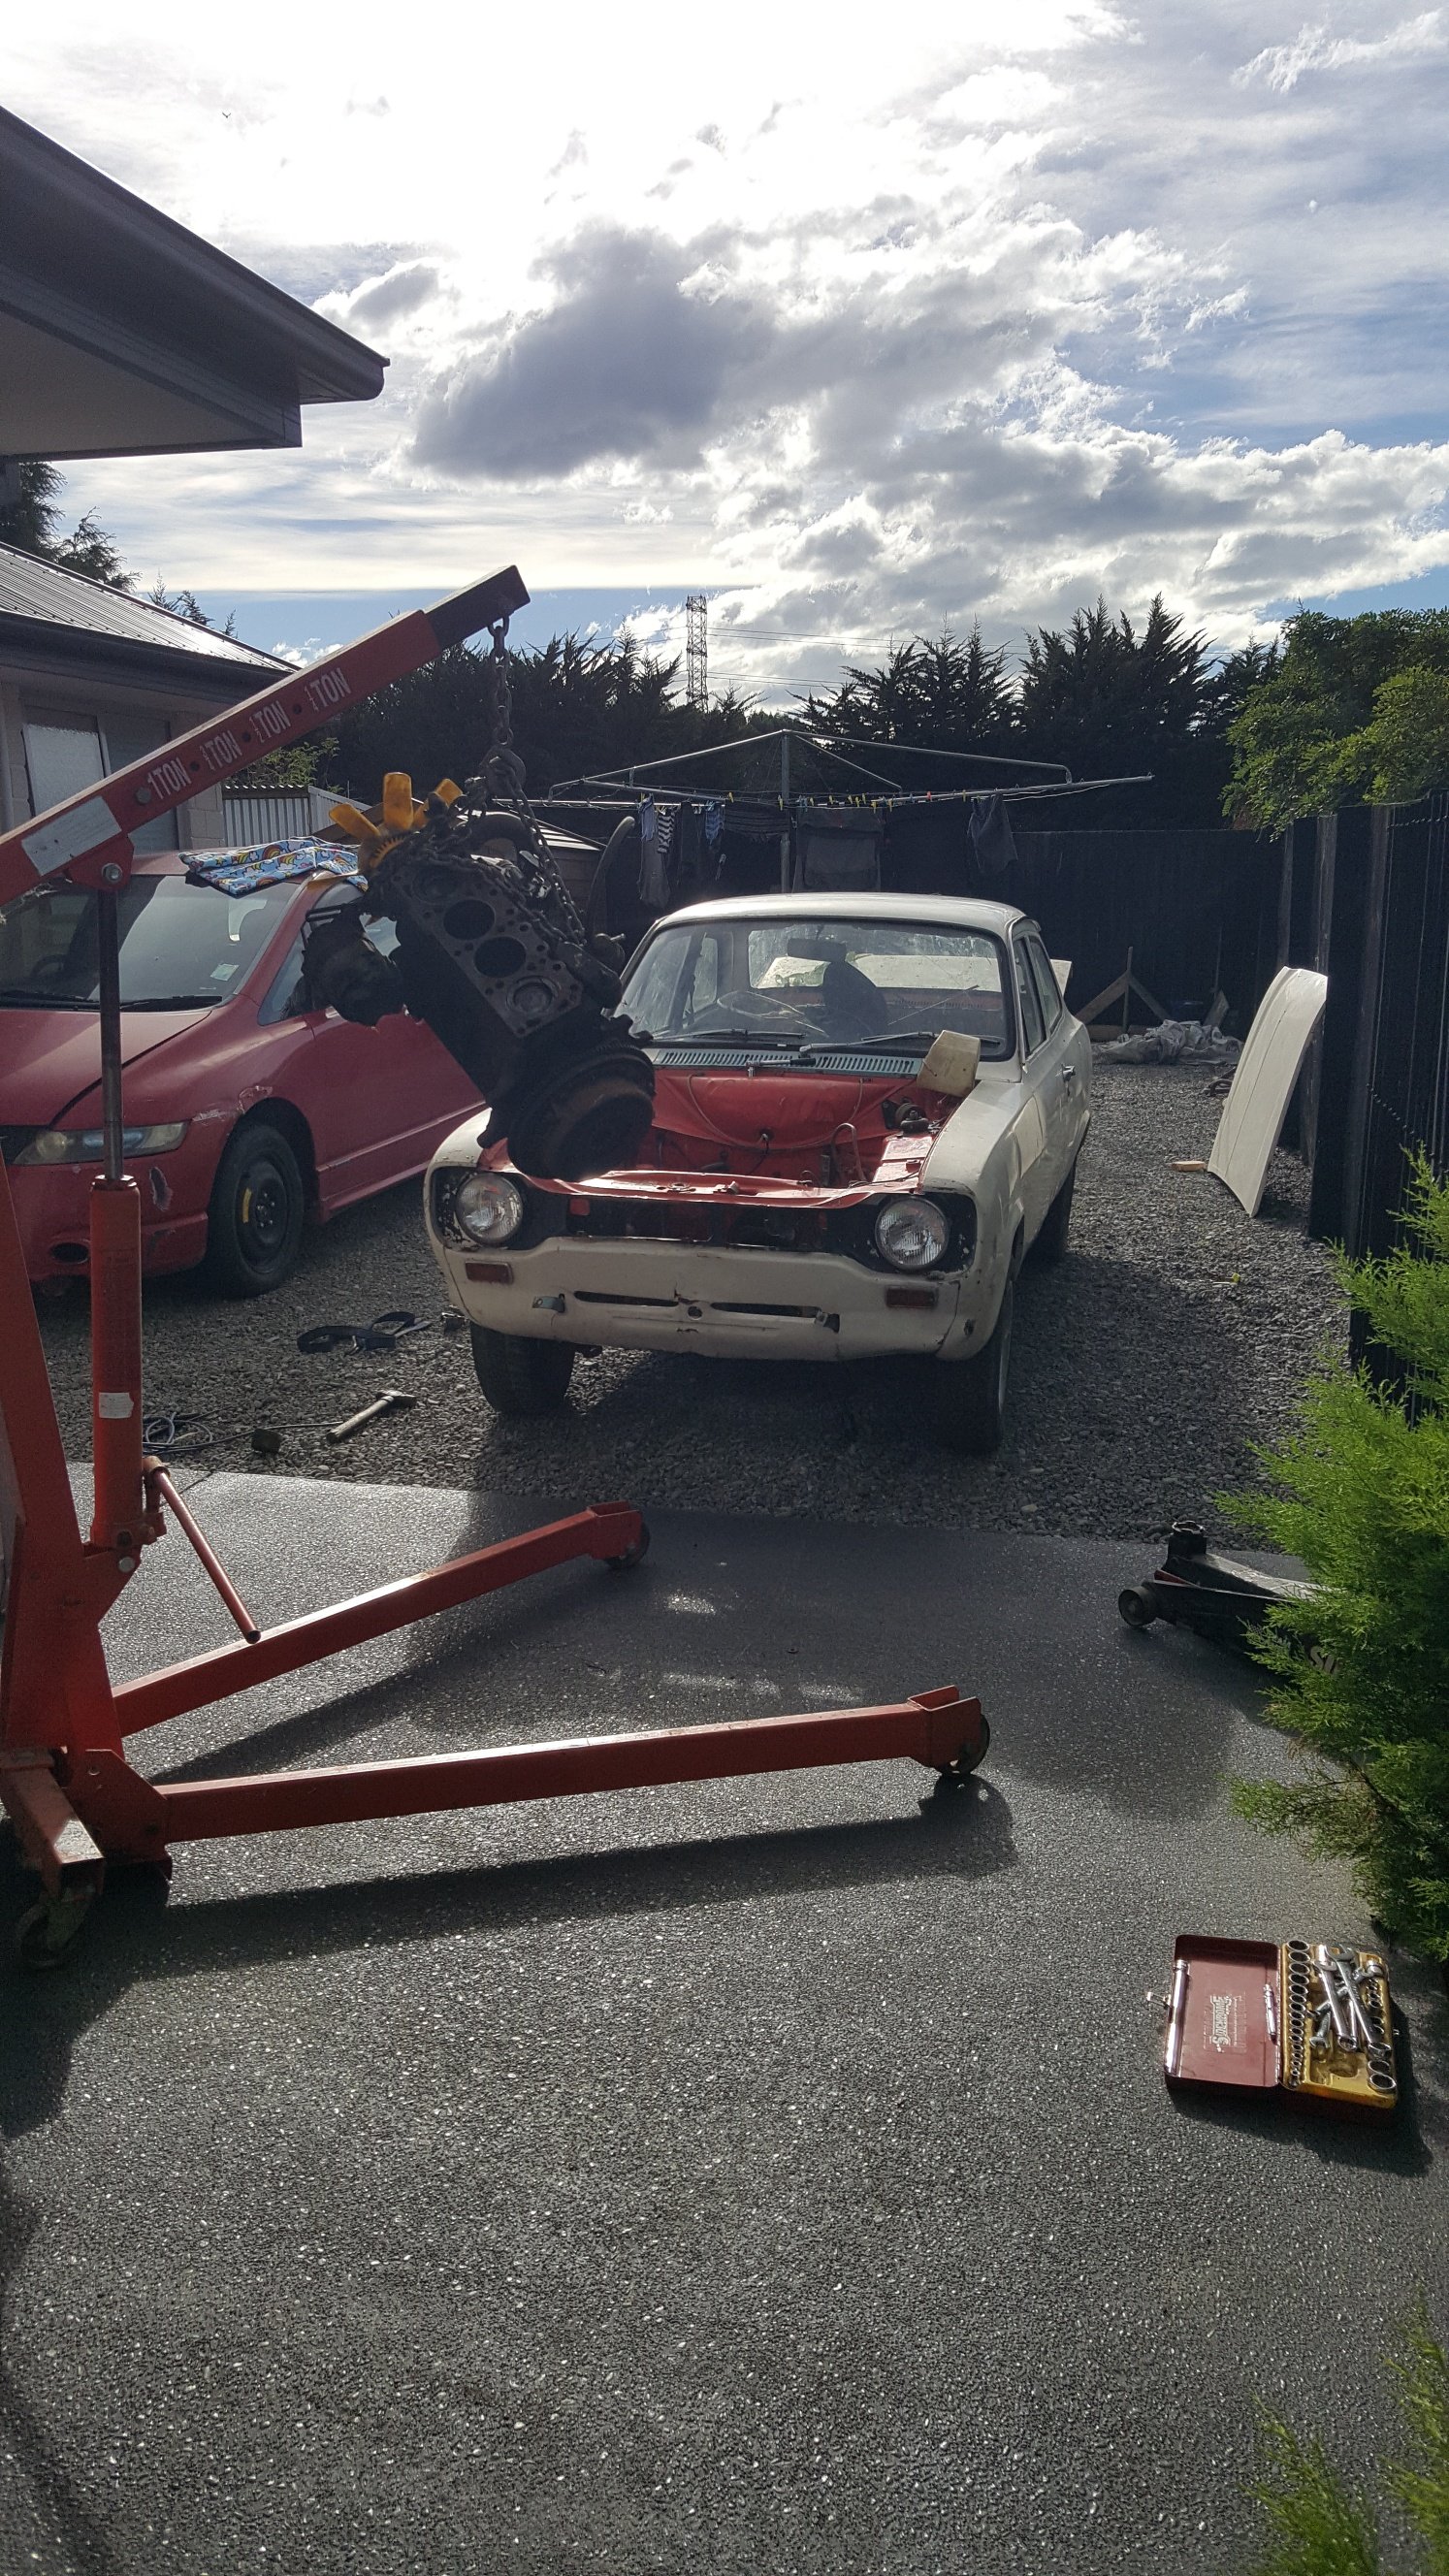
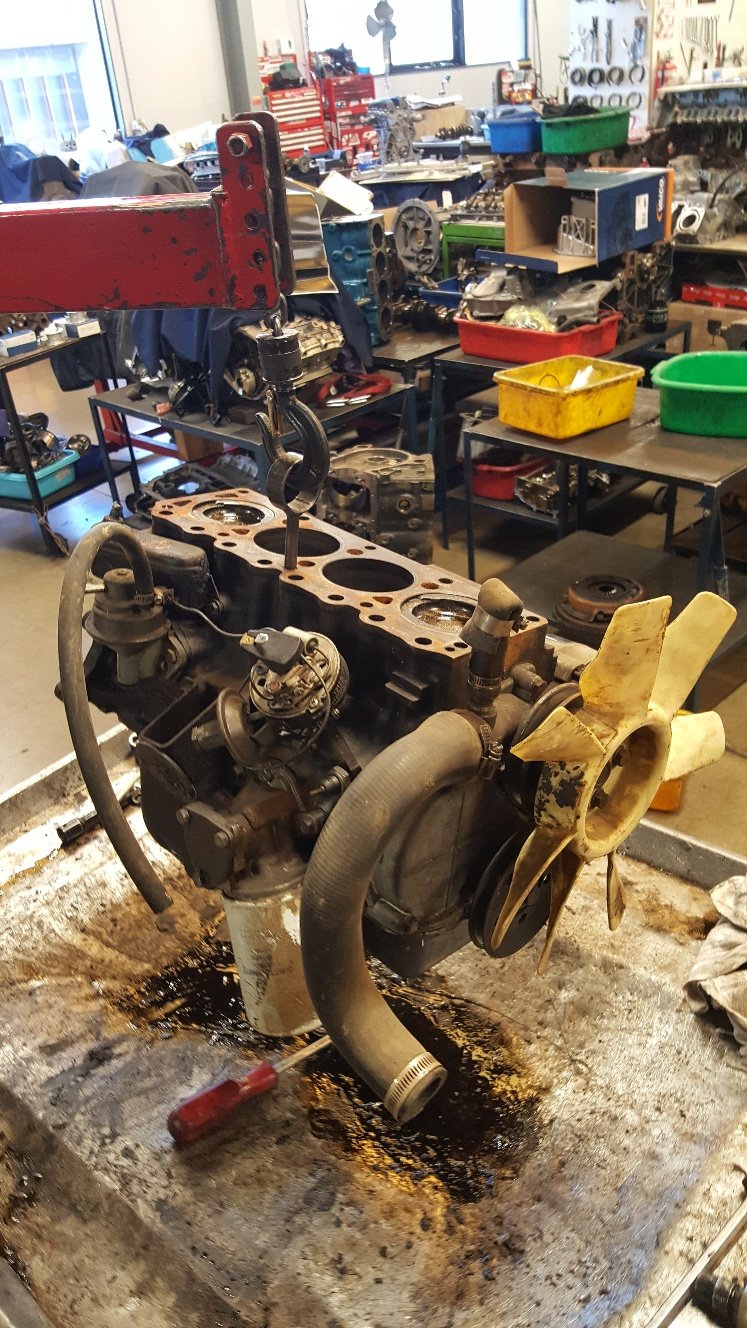
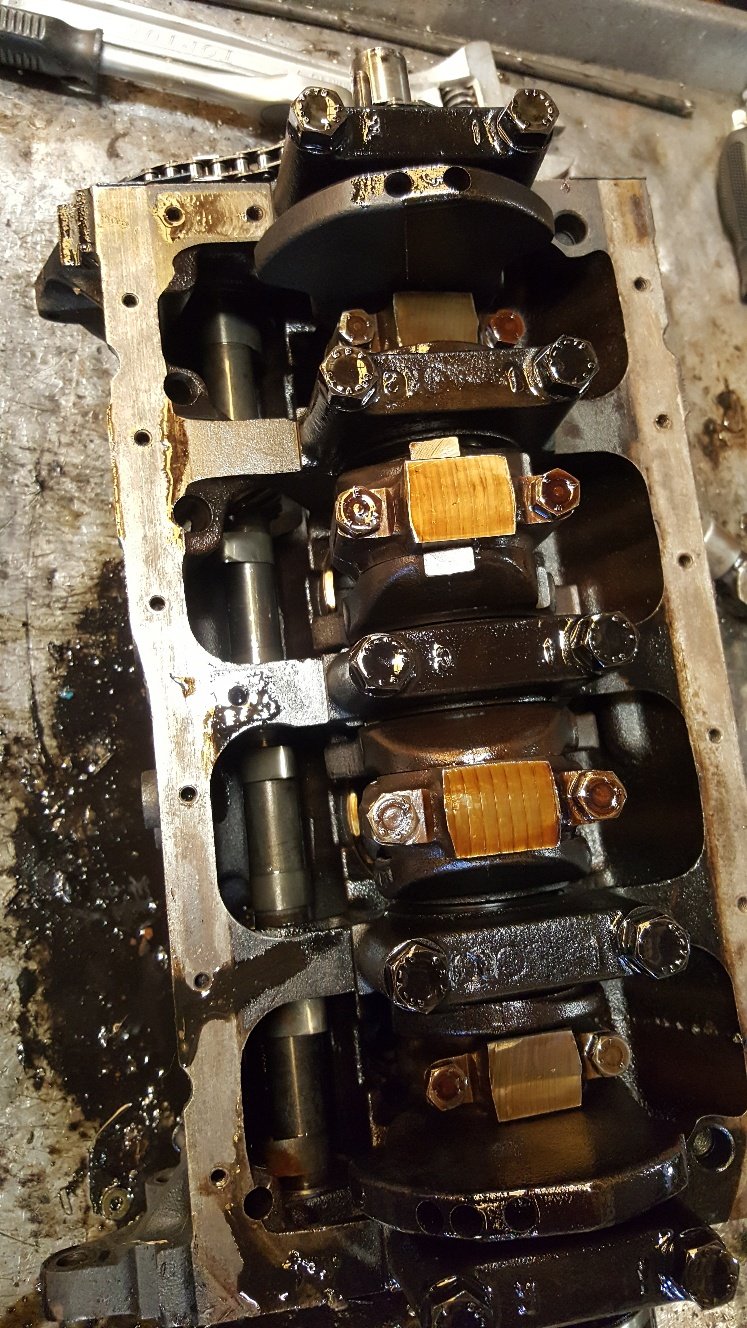
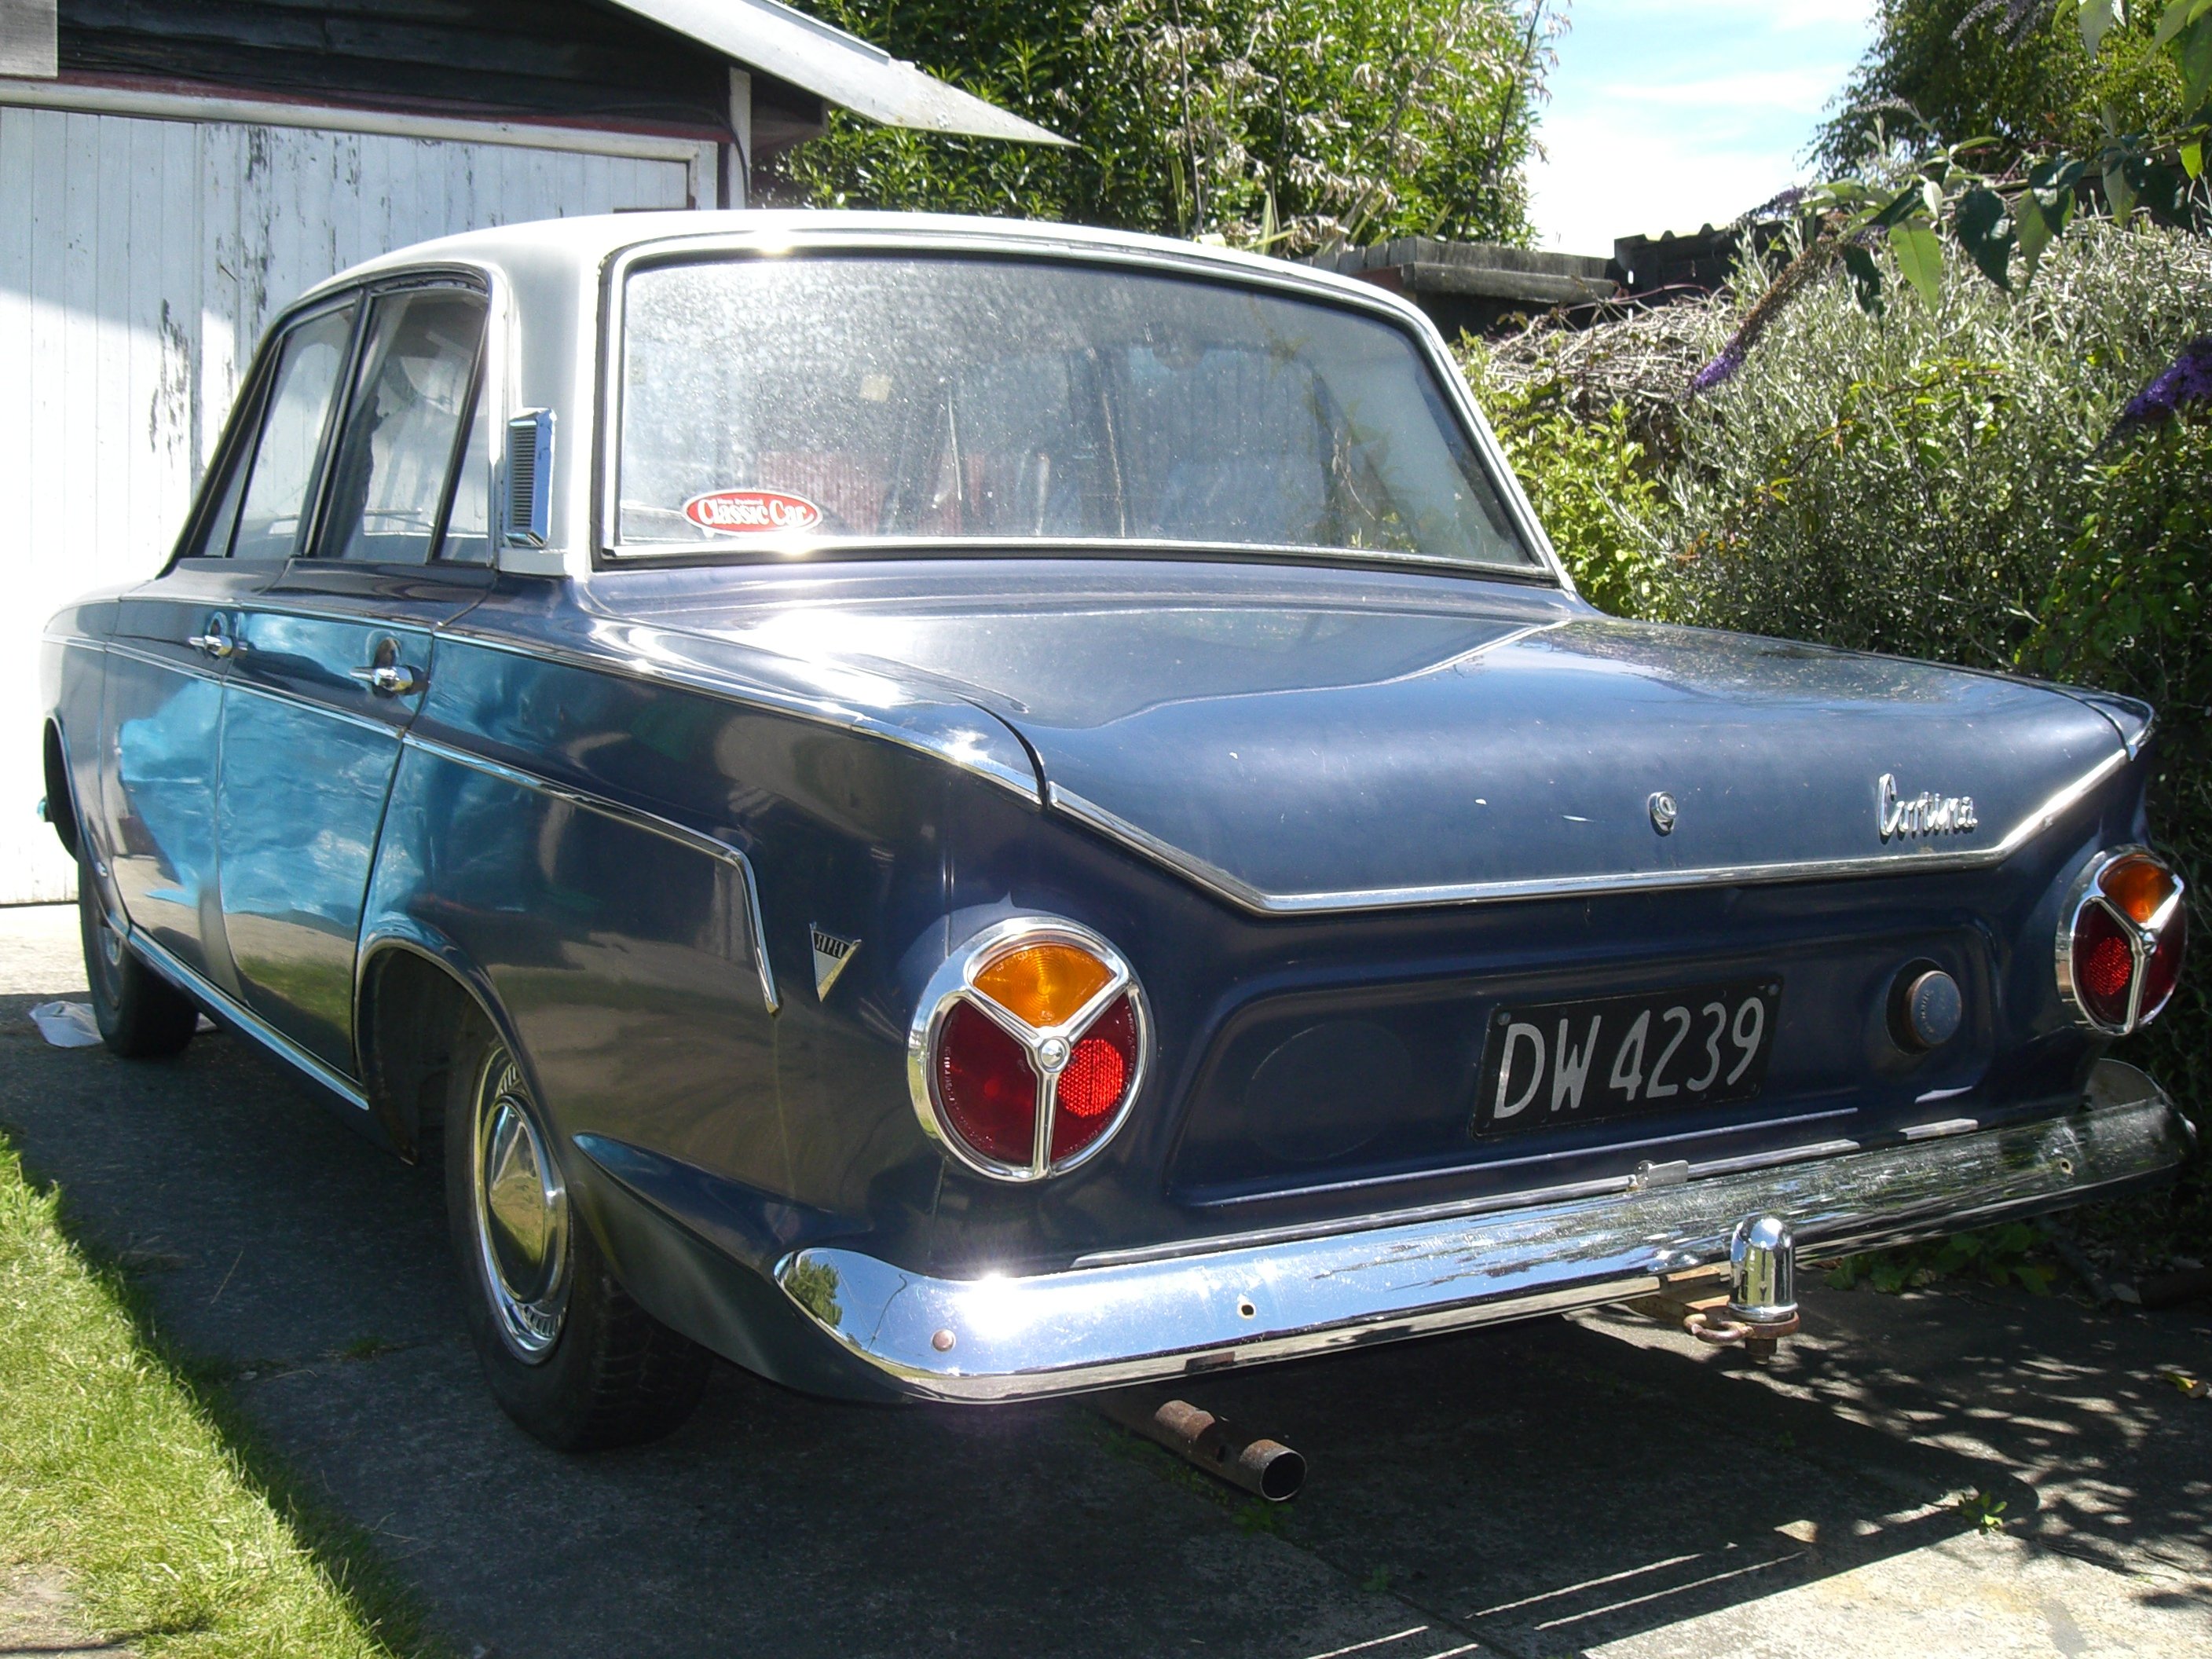
Project discussion above This has been in storage but that has come to a end so it was time to dig it out of the shipping container its been sitting in. I've had this for about eight years. I bought off my brother, its dead in the reg so plan is to get some live plates back on it. It has a few spots of rust in the body and the engine dropped a exhaust valve. So I pulled the short block out as the head had been pulled off years ago. Although it dropped a valve it hasn't done any major damage. Someone has done a sweet red paint job on the engine bay. I won't open up a can of worms by painting it at the moment. Just concentrating on just getting it up and running then focussing on the rust to get it back on the road.
1 point
-
Water marks are gay. But not the end of the world. I had a 3ct estima that had bore rust from someone removing the head and leaving coolant (water) in the bores. I rerung it and didn't smoke at all. But the corrosion hadn't eaten into the bore. It was more surface rust leaving a stain once honed. You really need to get the comp height of your original piston and go from there. We use the Wiseco website a lot for Piston info. They may have 18r info.1 point
-
Ok so for years i've been wondering why tractor pullers take so long to build rpm and boost, and only just thought to google it. Sorry if this is really obvious to you guys, but this blew my mind. The diesel pullers run a low compression engine.. Engine compression heats the air hot enough to ignite the injected diesel fuel. With the lower compression, diesel fuel has trouble igniting in the cylinder. This is why you see many of the diesel puller engine start with LOTS of ether assist. To build heat in the cylinder the puller will very slowly advance the throttle to speed the engine. If he pushes the throttle too quickly the additional fuel will cool the cylinder enough that the engine will die. As he advances the throttle he will load the engine by slipping the clutch. As the engine takes more load, the turbo, or turbos will start to build manifold pressure. As the manifold pressure increases the cylinder pressure rises allowing more fuel to burn. The more fuel that burns, the faster the turbo spins, the faster the turbo spins the more fuel. (you get the picture) As HP and RPM build the engine will finally be making maximum horsepower and the clutch can be released. And the pull is ON.. P.S. The low compression is so the turbo can pack more air into the cylinder without blowing a head gasket or worse. How amazing is that, it's squirting in so much fuel that it can put out the fire.1 point
-
Yeah good turnout, good sharns, even made it there and back in a dereg magna from pickapart. I'd call that a win.1 point
-
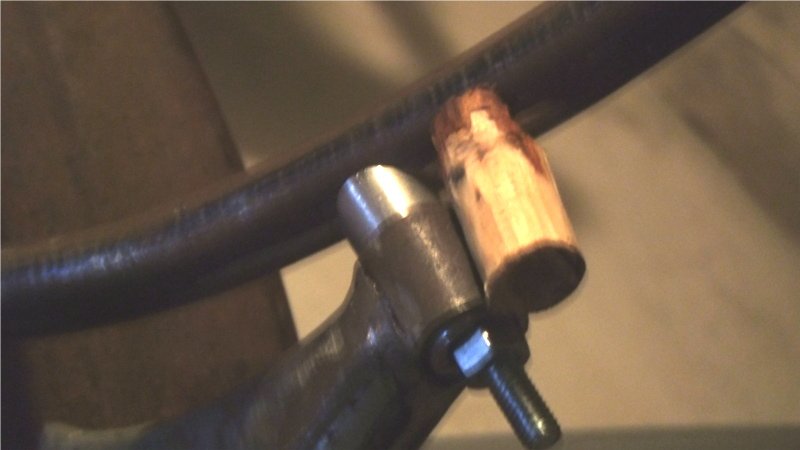
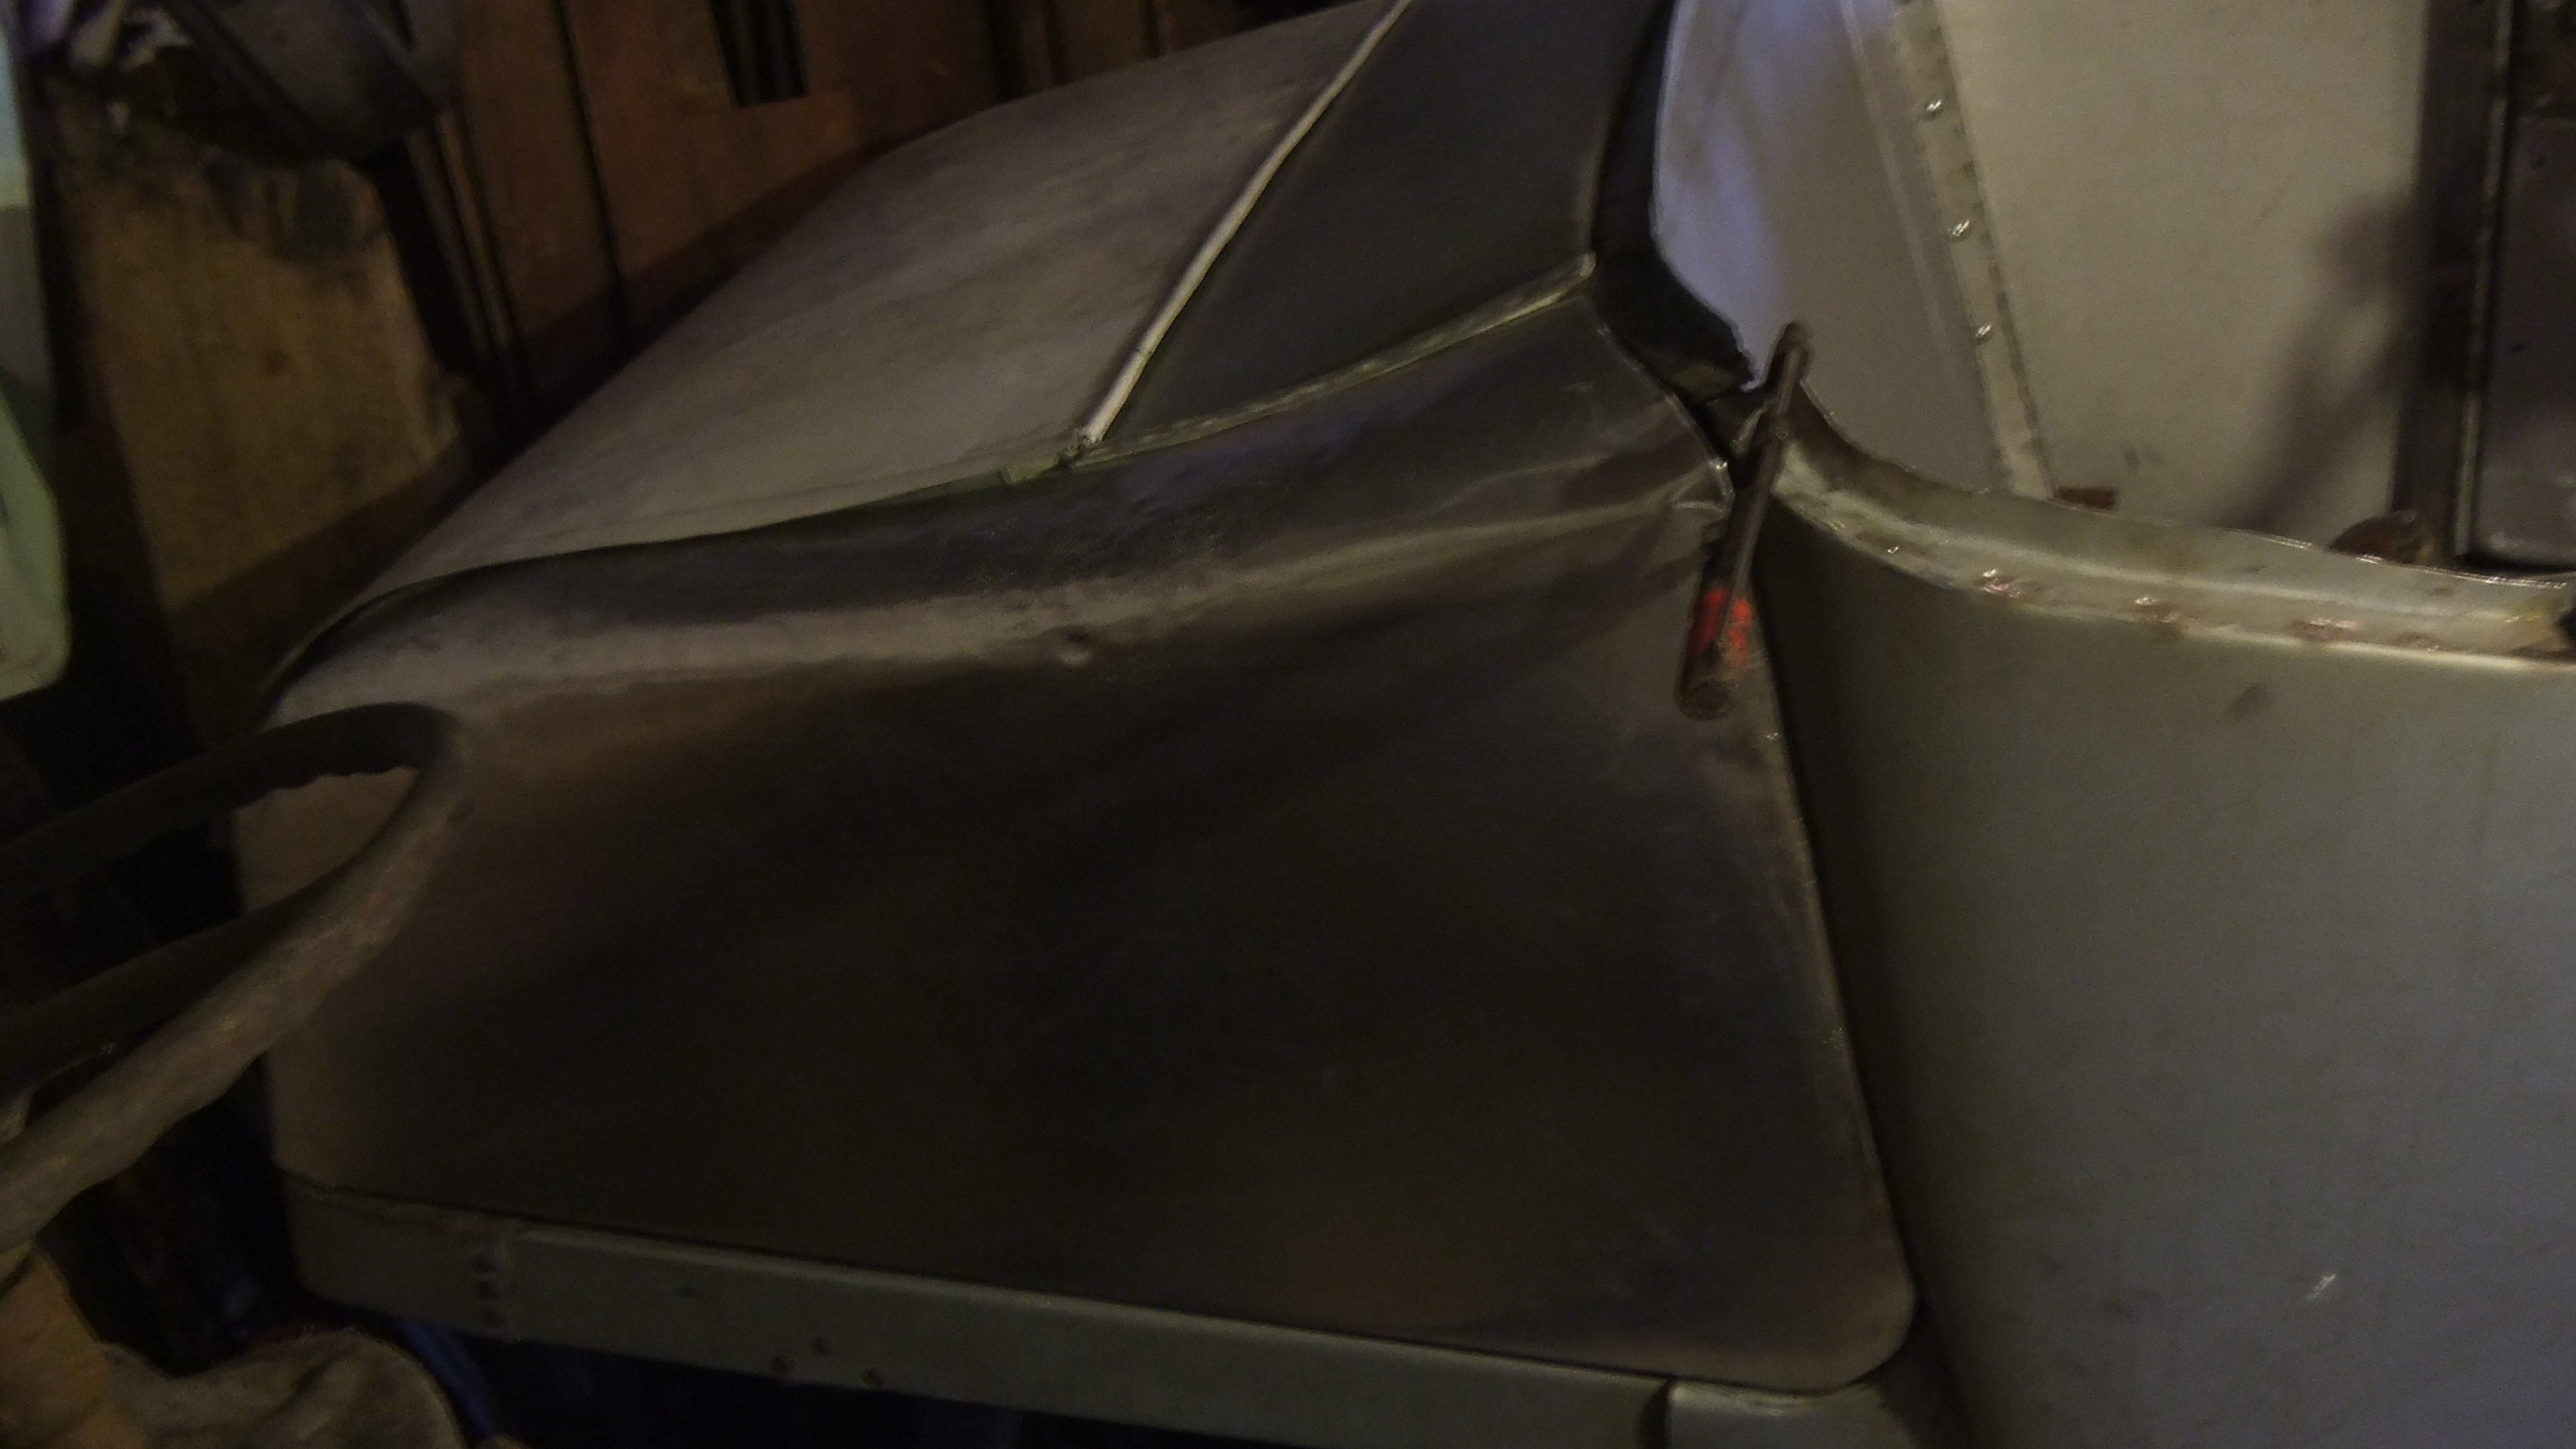
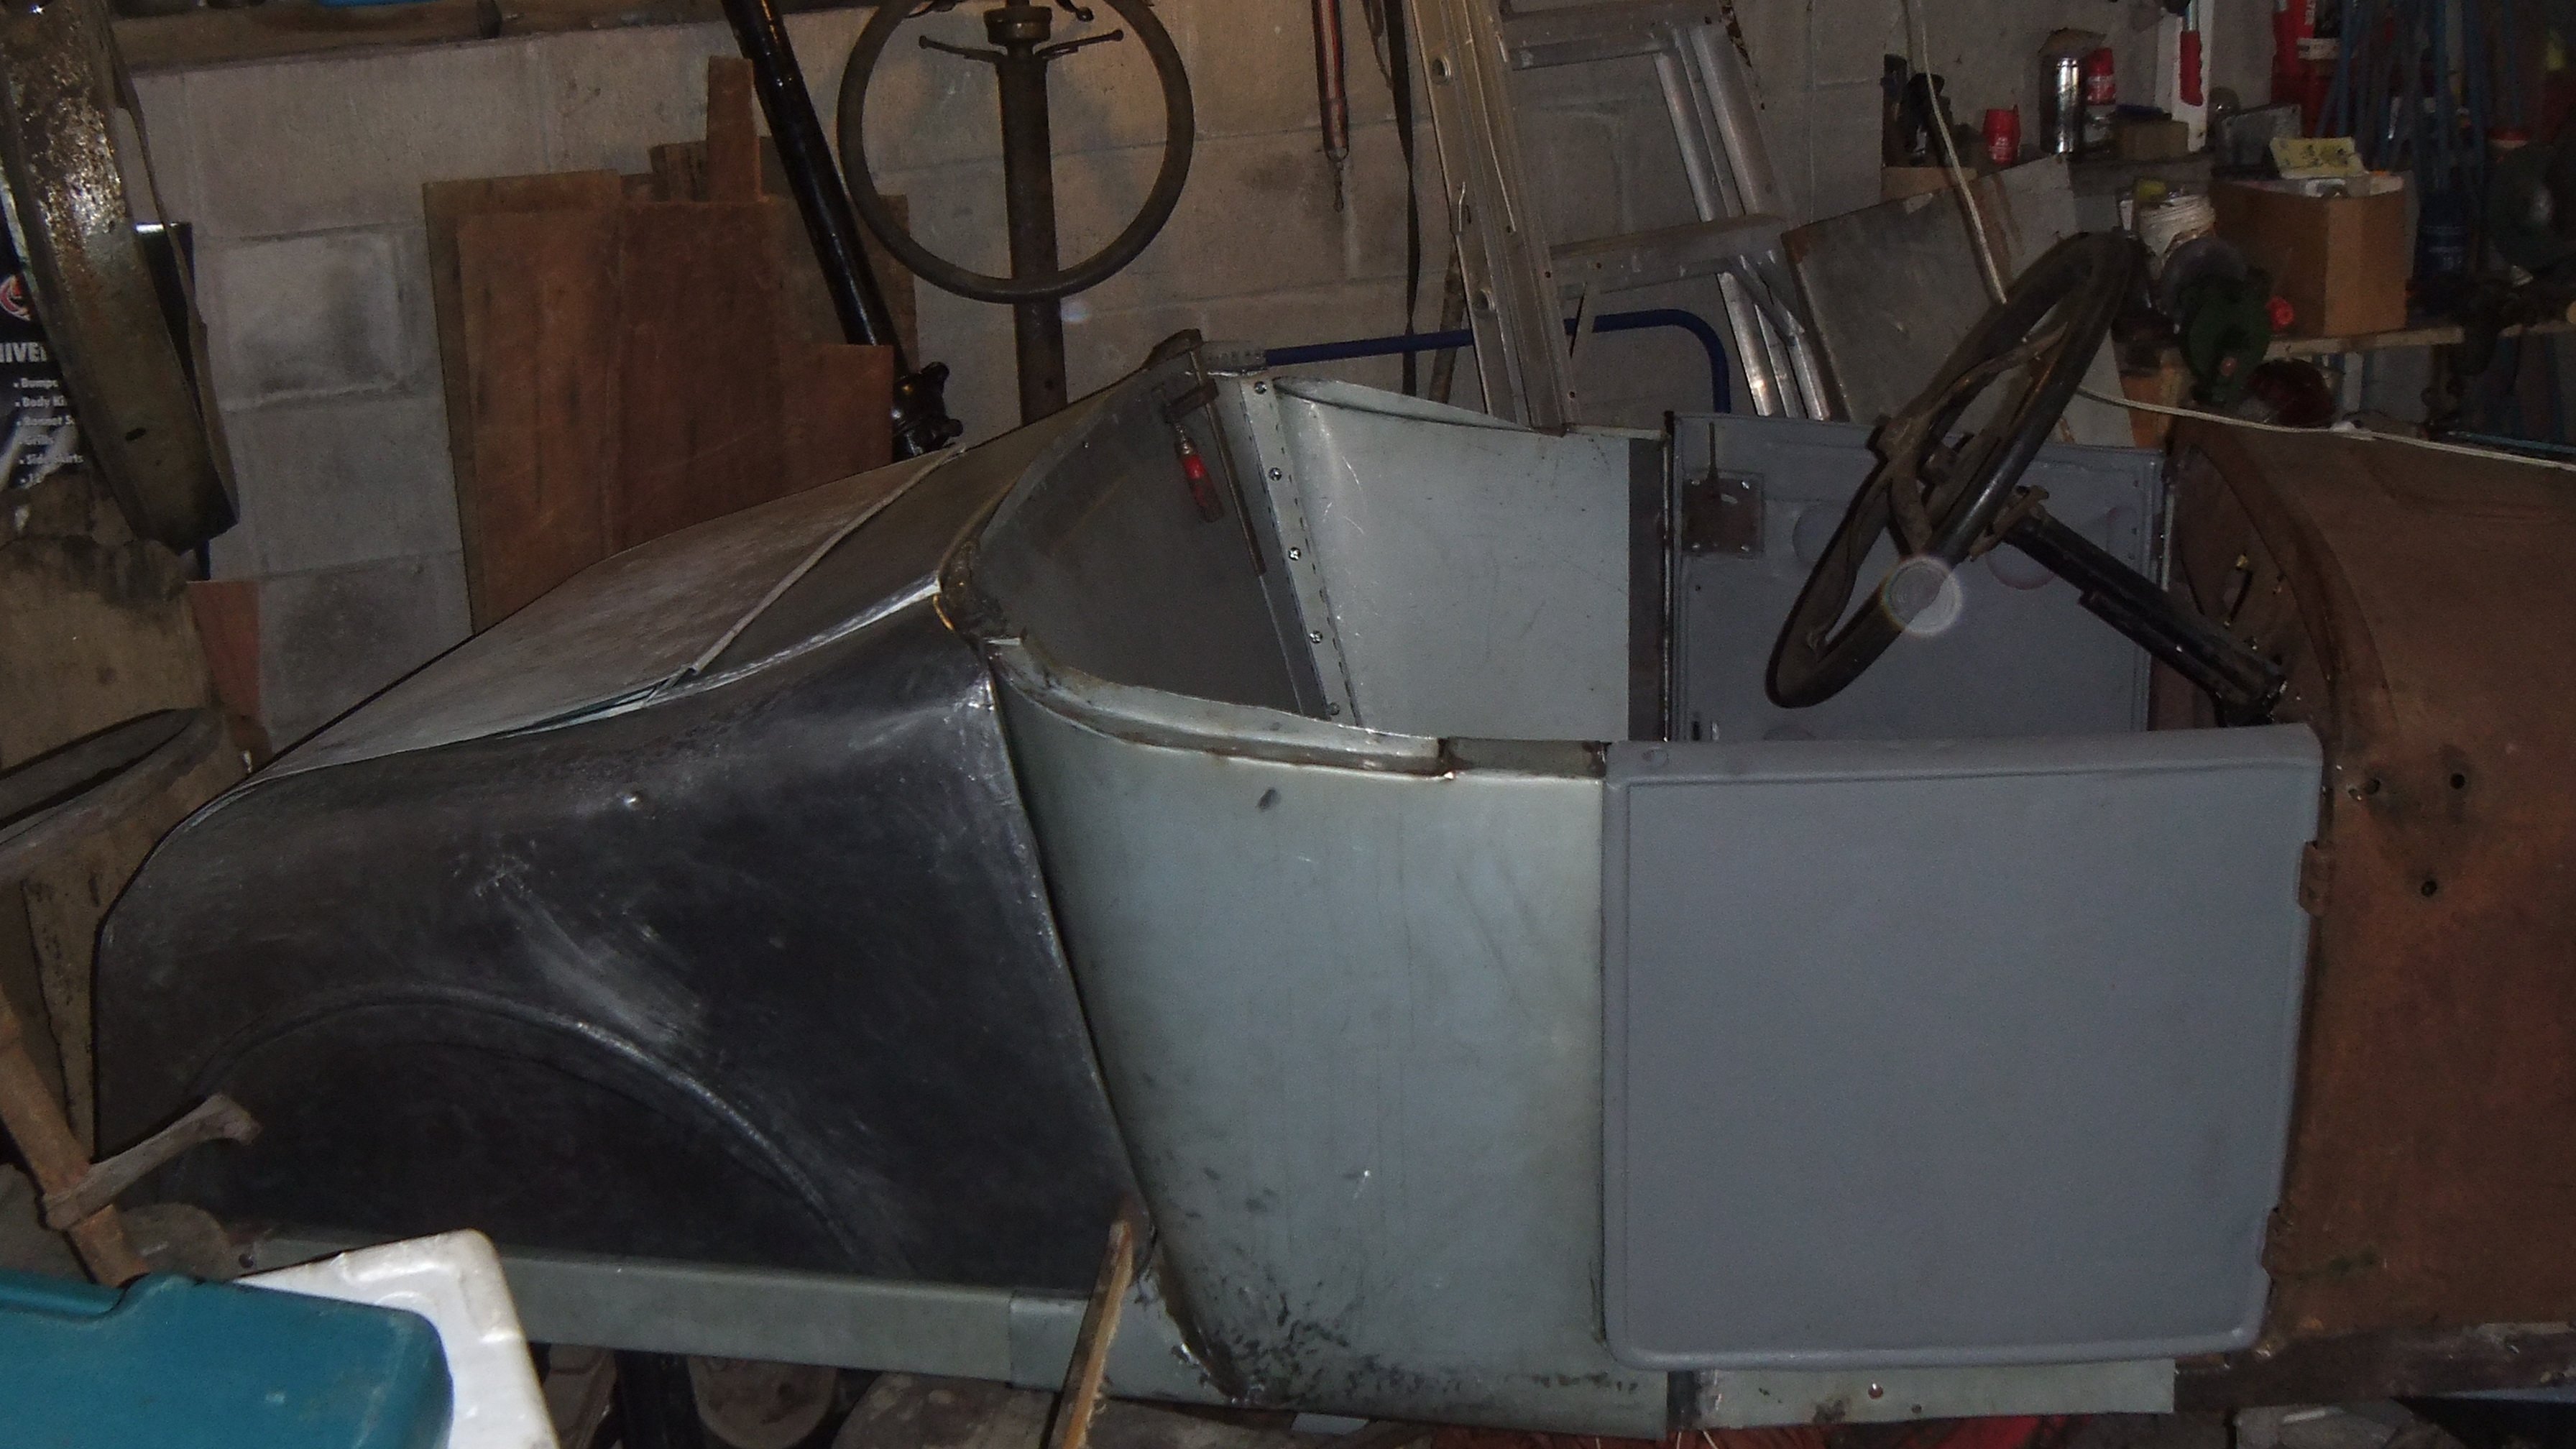
And this arrived today... Reckon the old crate's gonna look right fancy soon. Prepping and priming once I've put all the brakes n ting on the boxy car.
1 point
-
Tried more stuff, ended up back in the same place. Including this: -50kw was trying to find the first reflective wave. chased it along the rpm range cutting the pipe down 200mm at a time., but just found negative results. half way thru noticed the silicone joiners wern't playing the game and doing some crazy stuff. possibly giving some wack results. but pretty sure i seen what i needed to see. seems the loss in the super long pipe with bends in it offsets anything that would be gained from the reflective wave. Got the bmw throttles on there now running the big injectors further back in the throttle bodies. makes exactly same power throughout the curve as with the 47mm 20v throttles and injectors in the head. But soon as you mess with this: drop the top trumpets off and goodbye 10 -15kw everywhere. so yeh that setup seems to be on point green: current setup. with small extractors red: old engine big extractors blue: old engine small extractors And.. road test, not having the hole at 4500rpm plus bit more up top, shit hustles of the mark through 1st and 2nd gear. throttle bit too touchy for my liking though, need to revise the linkage setup.1 point
-
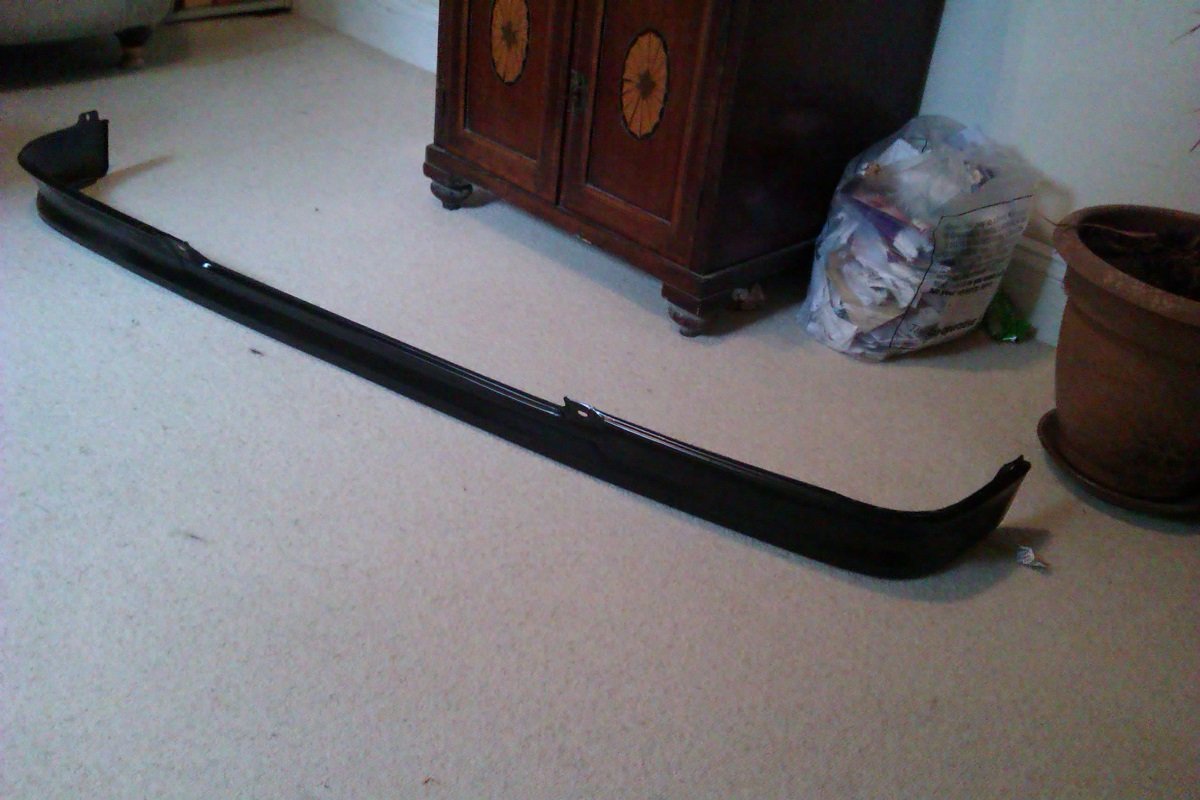
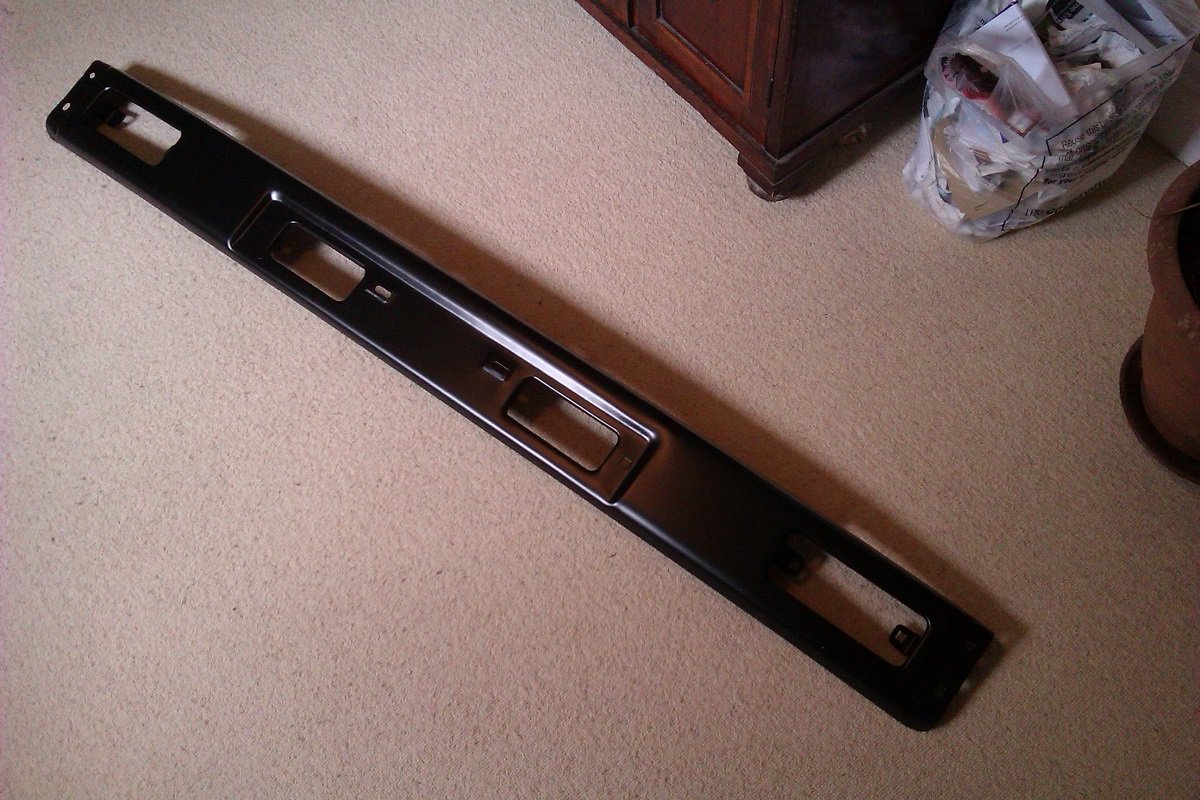
Well gosh dang it, possum on a gum bush, etc. Bumper arrived in less than 3 days, 4 days early. It's good quality, painted nicely not just primed & only cost 9 quid. Bargain. Save the tea for next time @Dell'orto God Bless 'Murica.
1 point
-
Stand alone switch, not on high beam. And not aimed to front distance like a high beam, (work lamp for lighting area around vehicle) Tilt it down at wof time1 point
-
Nah, meckal. " In primer, ready to paint to your vehicles specification " Anyway, if they're wrong it'll be Dell'orto's problem.1 point
-
What happened was....... I hadn't put quite enough rtv on one rear corner so it leaked again. Shame really as it was spot on everywhere else. Pulled it off (fnaar) and re-did it with a fresh gasket, a smear of rtv and a very small ratchet. It's fine now. Put a new stat in as it wasn't getting up to temp, but apart from that it's been ace. Decided I'm definitely going to fancy it up with a bit of paint, it's looked like a Mad Max extra ever since I've owned it. Found the Rockauto do a bumper for 9 quid and a valance for 5. What a bargain. Postage ? £ 170.00 That's one hundred and seventy pounds. Flipping Nora. Going to start prepping and priming once it stops raining. /No pics for fred soz1 point
-
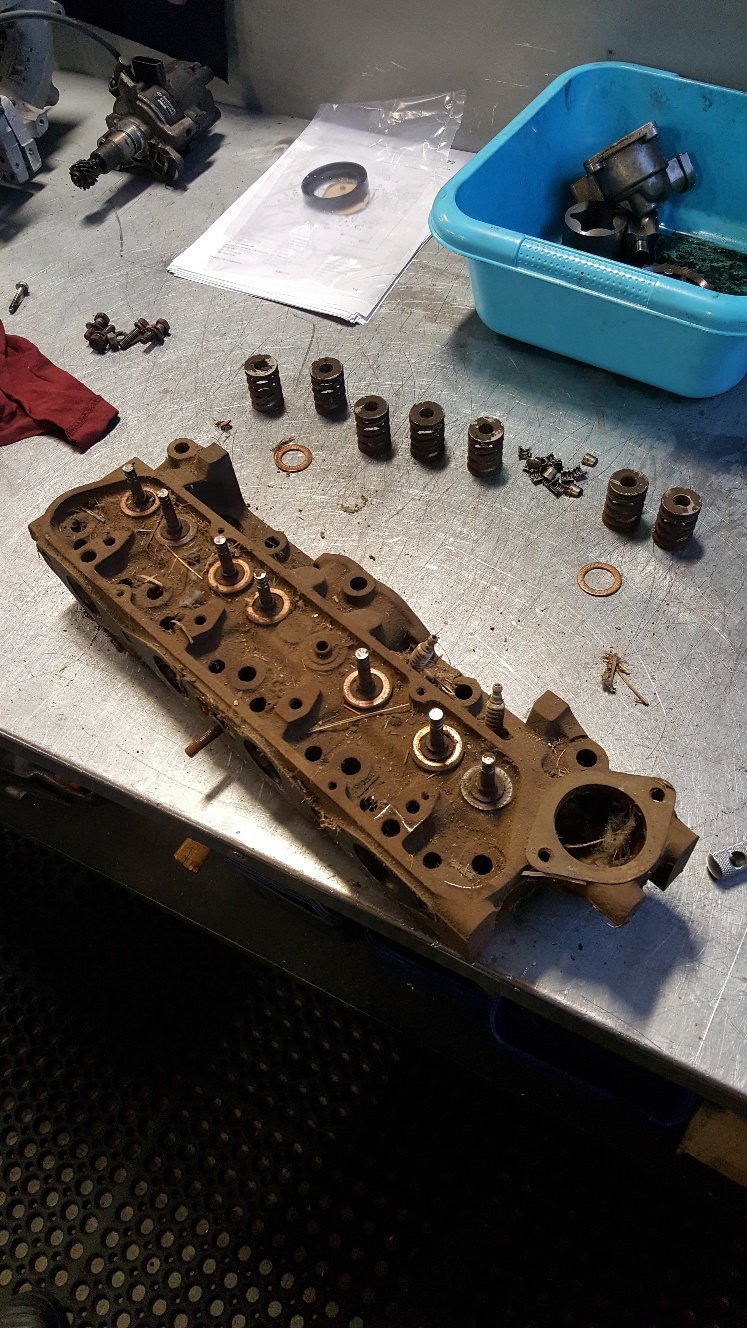
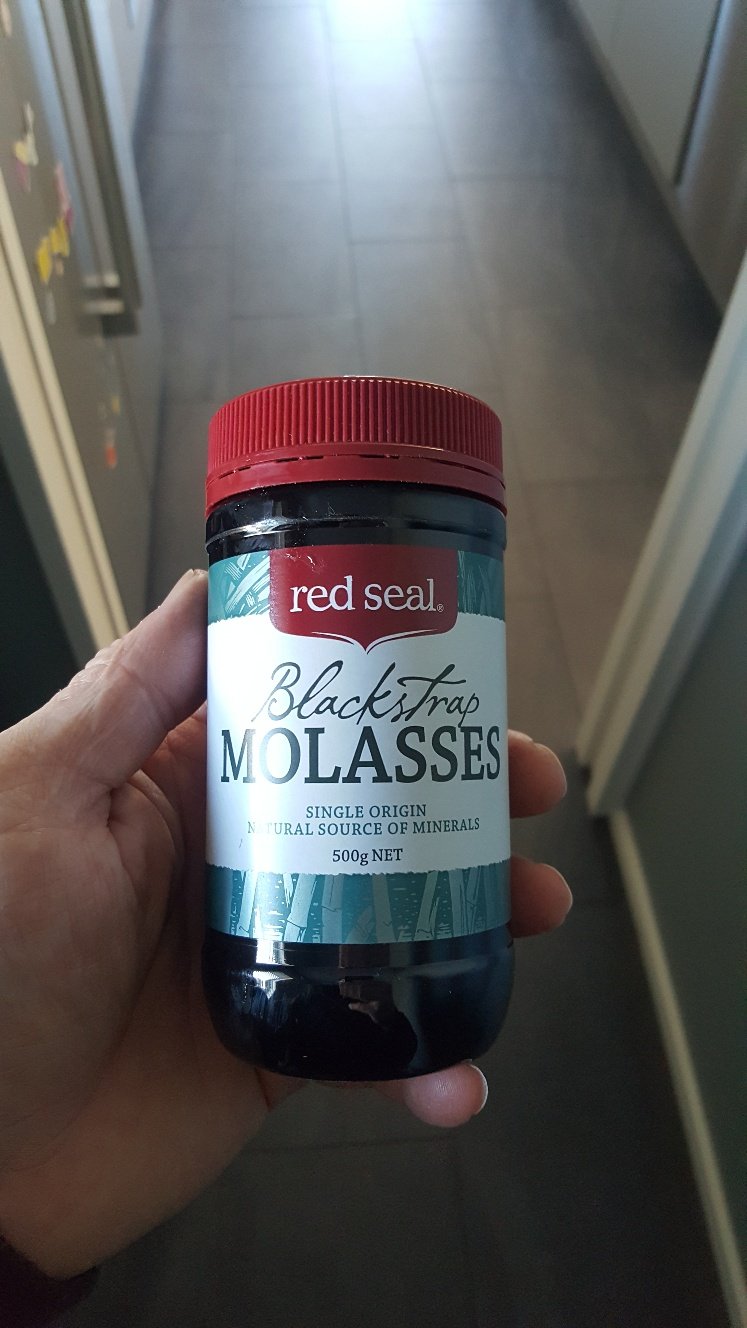
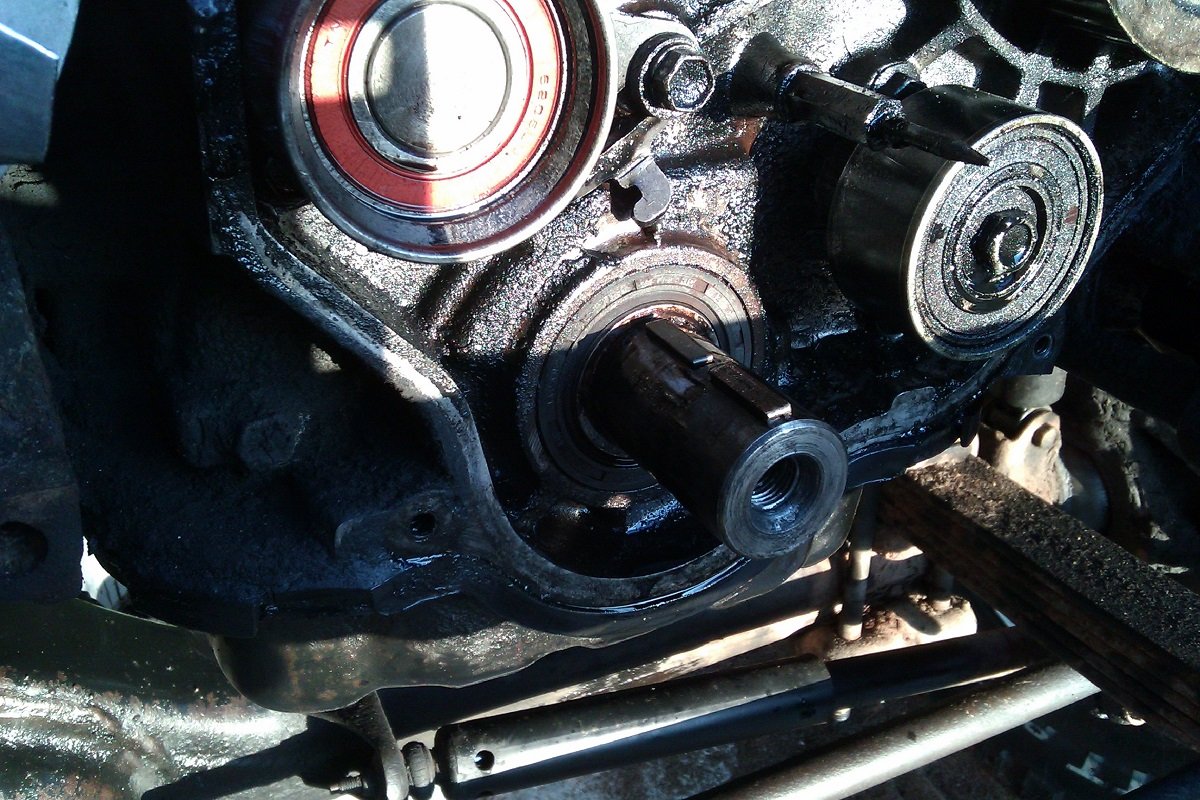
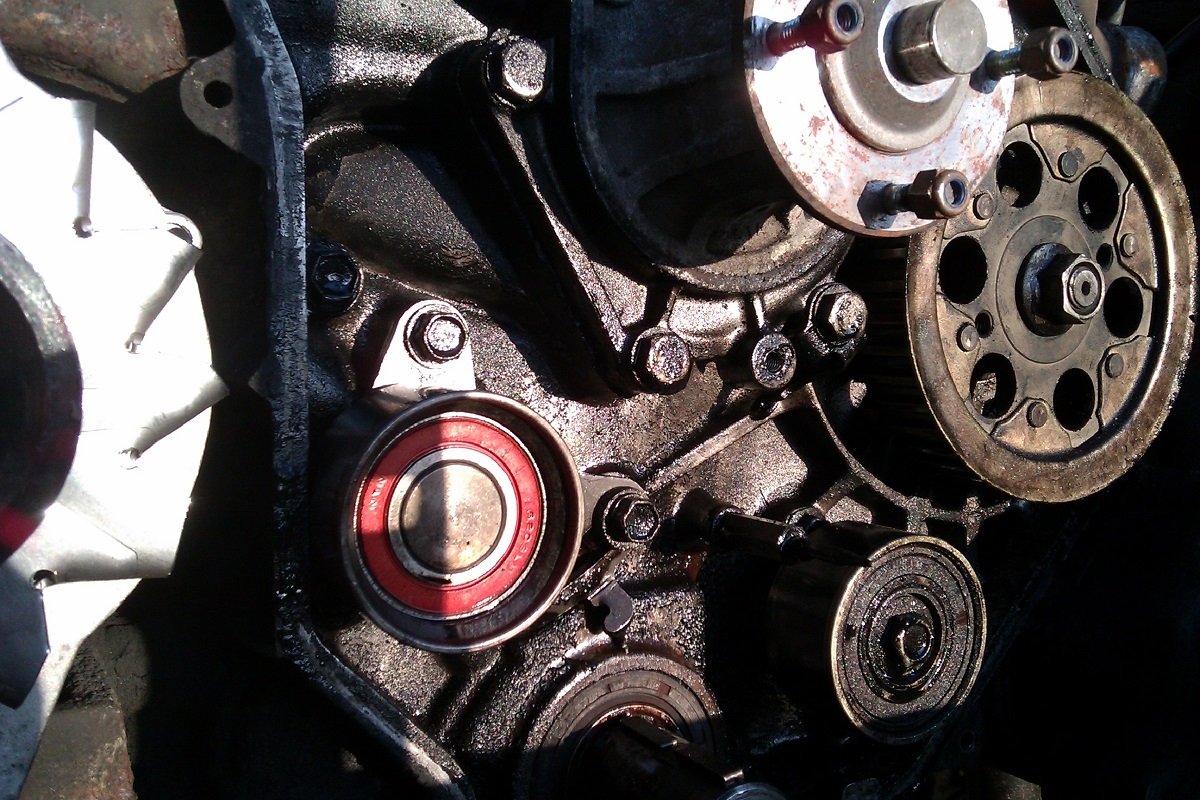
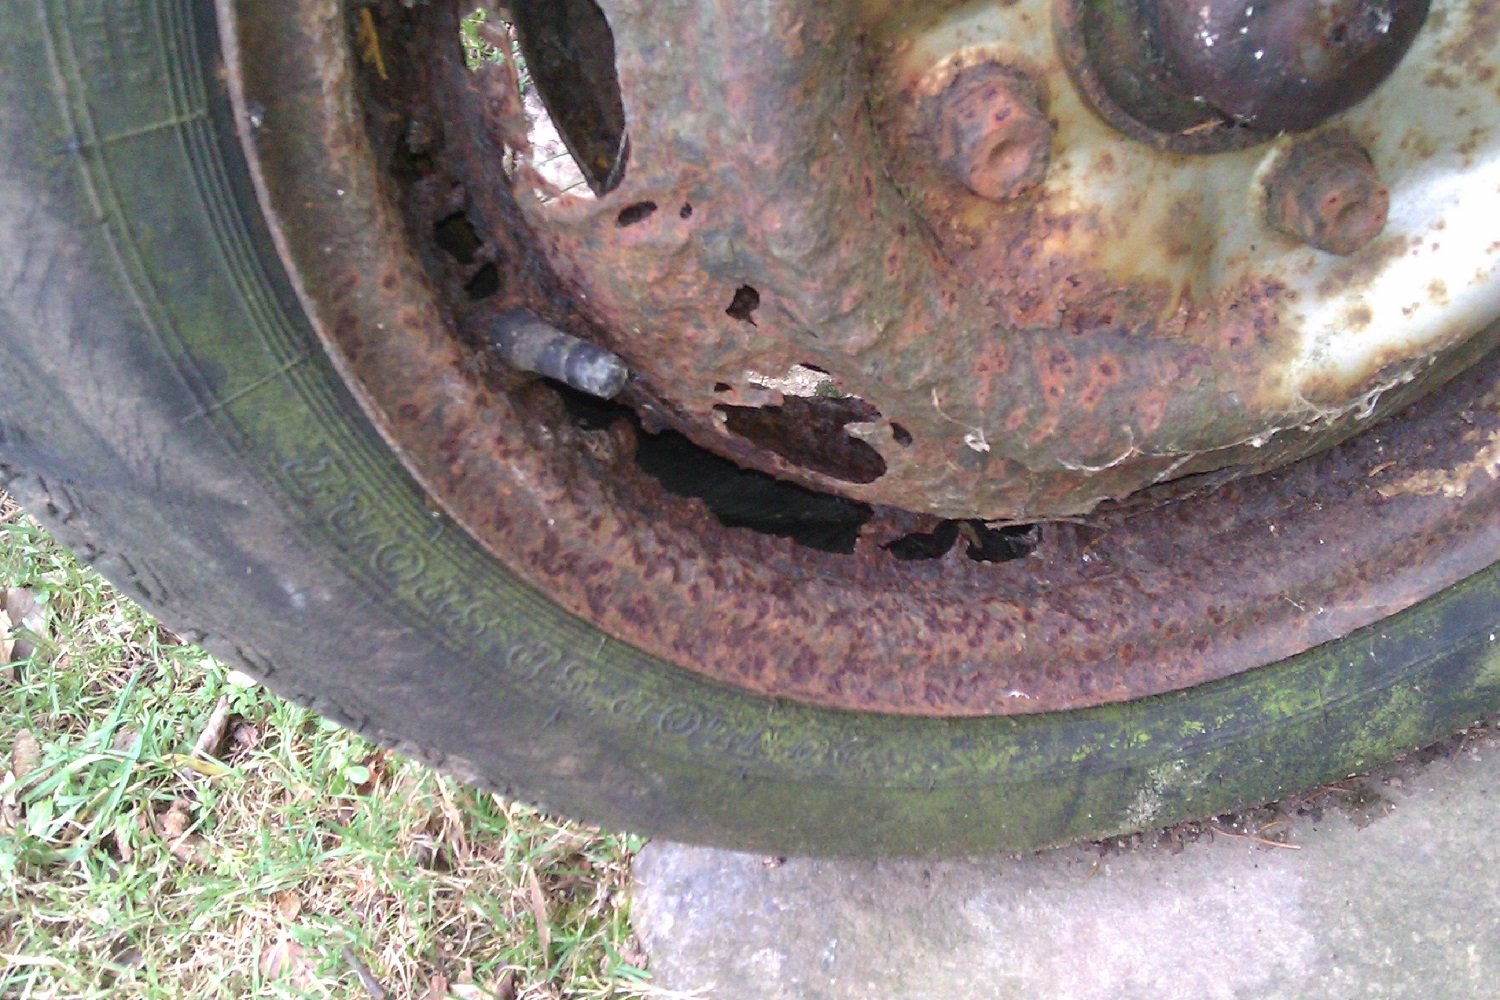
So I took the engine into work to strip and assess the damage. The cylinder head has been sitting around on the ground for a few years, so its pretty rusty. I have bought some molasses. It's pretty good for breaking down rust. We normally mix two of these 500g jars up with about 40 or so litres of water. The mix isn't that critical. I'll leave the head and rocker cover in the molasses solution for three or so days. The damage is pretty minimal. It's must of been idling when it dropped the valve. There's only a very small nic in the top of the bore and a small dent in the valve seat.
1 point
-
I don't have to jack my cars up for oil changes.. /ling1 point
-
still angry got stuck in engine is ready to pull once i get my crane back fuck this car. atleast the new engine will actually make power/not surprised this has happend this engine came out of a paddock what initially started as a suspicion the gasket had failed, due to some weird pressurization going on in the radiator, was then confirmed today when it started hemorrhaging out the overflow tank, and on closer inspection there now looks to be water in the oil, so i expect a full blown gasket failure it what i will find. aleast i know this car like the back of my hand and can get the engine out super quick, but thats the cheap part.....
1 point
-
Milk & two sugars ? Just dropped the oil out again... /wish me luck.1 point
-
The top of your head is correct. I gorilla'd them, relatively speaking That was my next plan if I've fucked the gasket. That or buy a cork tile and cut one out. /old skool.1 point
-
Except for still having a leaky sump, it seems. Someone, at some time in the past, over-tightened the sump bolts and deformed the gasket. (For "someone", read "me") (For "at some time in the past", read "last Saturday") It was fine for a bit & then it wasn't. Still, the chassis definitely isn't going to rust now. Surely I'll get it right in the end with all this practice.1 point
-
Hey Fred. Hilux has been mostly fine, various bits fitted to make life easier. New window mechanisms, door locks, rad cap, etc. Noticed a few drips of oil on the drive one day. Next day, full Amoco Cadiz spec under there. I dunno, you leave a truck in a field for 10 years.... To be fair I should have put a new crank seal in when I had it apart in the winter, but I was cold and it didn't look too bad. That, and the sump was held on with good luck & optimism. Pics... I thought I'd already done this once. I like to change my cambelt every 1100 miles, better safe than sorry.... Gonna do the sump gasket too, it'll give me a chance to clean the pick up mesh and see if there are any spare parts in the bottom of the sump. Big question is, what colour do I paint the sump while it's off ? Fancying red. Or maybe yellow.
1 point
-
So yeah. Dragging this post up from the depths. This is still a project. I sold it to my mate rob about 3 years ago but he never picked it up. So I bought it back off him. Finally bit the bullet and have taken it into my mates mechanic shop and he is going to get her going for me. Motivation is finally coming back and thought updating this post might help with that!
1 point
-
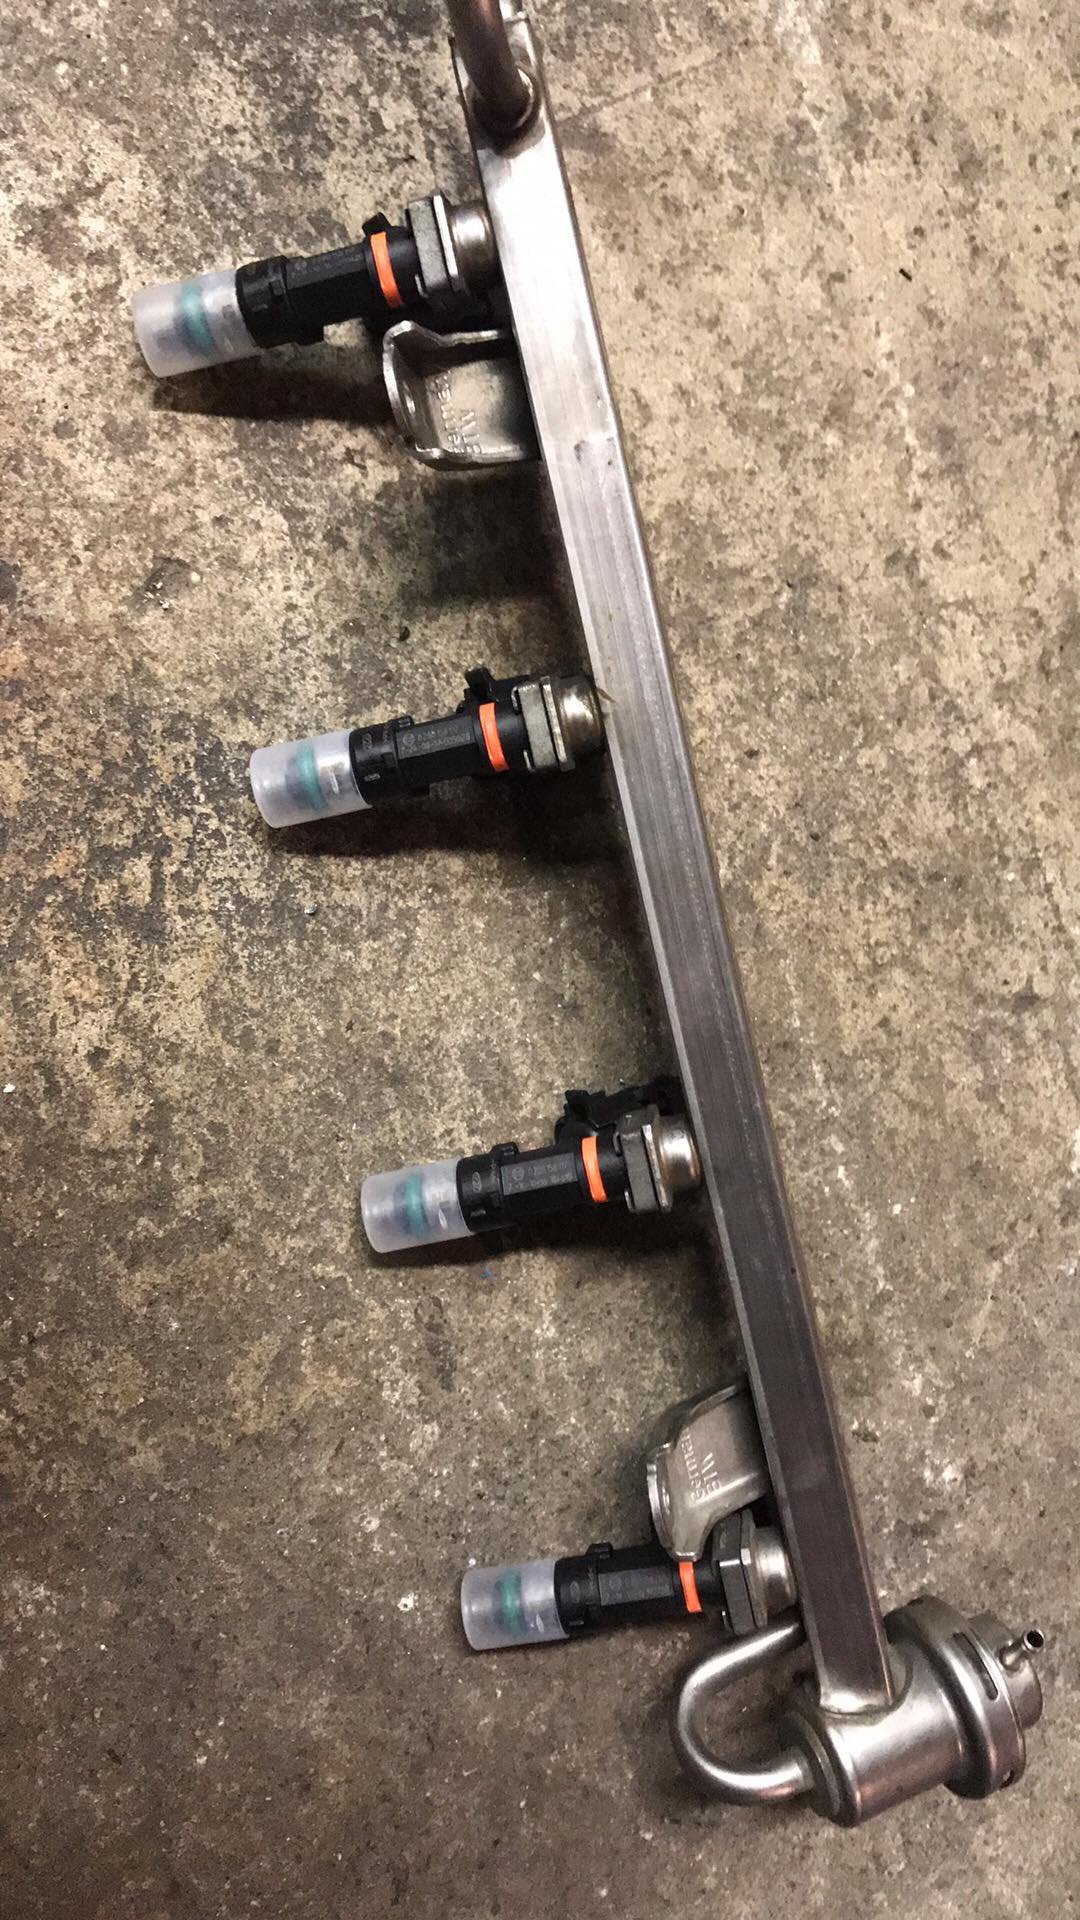
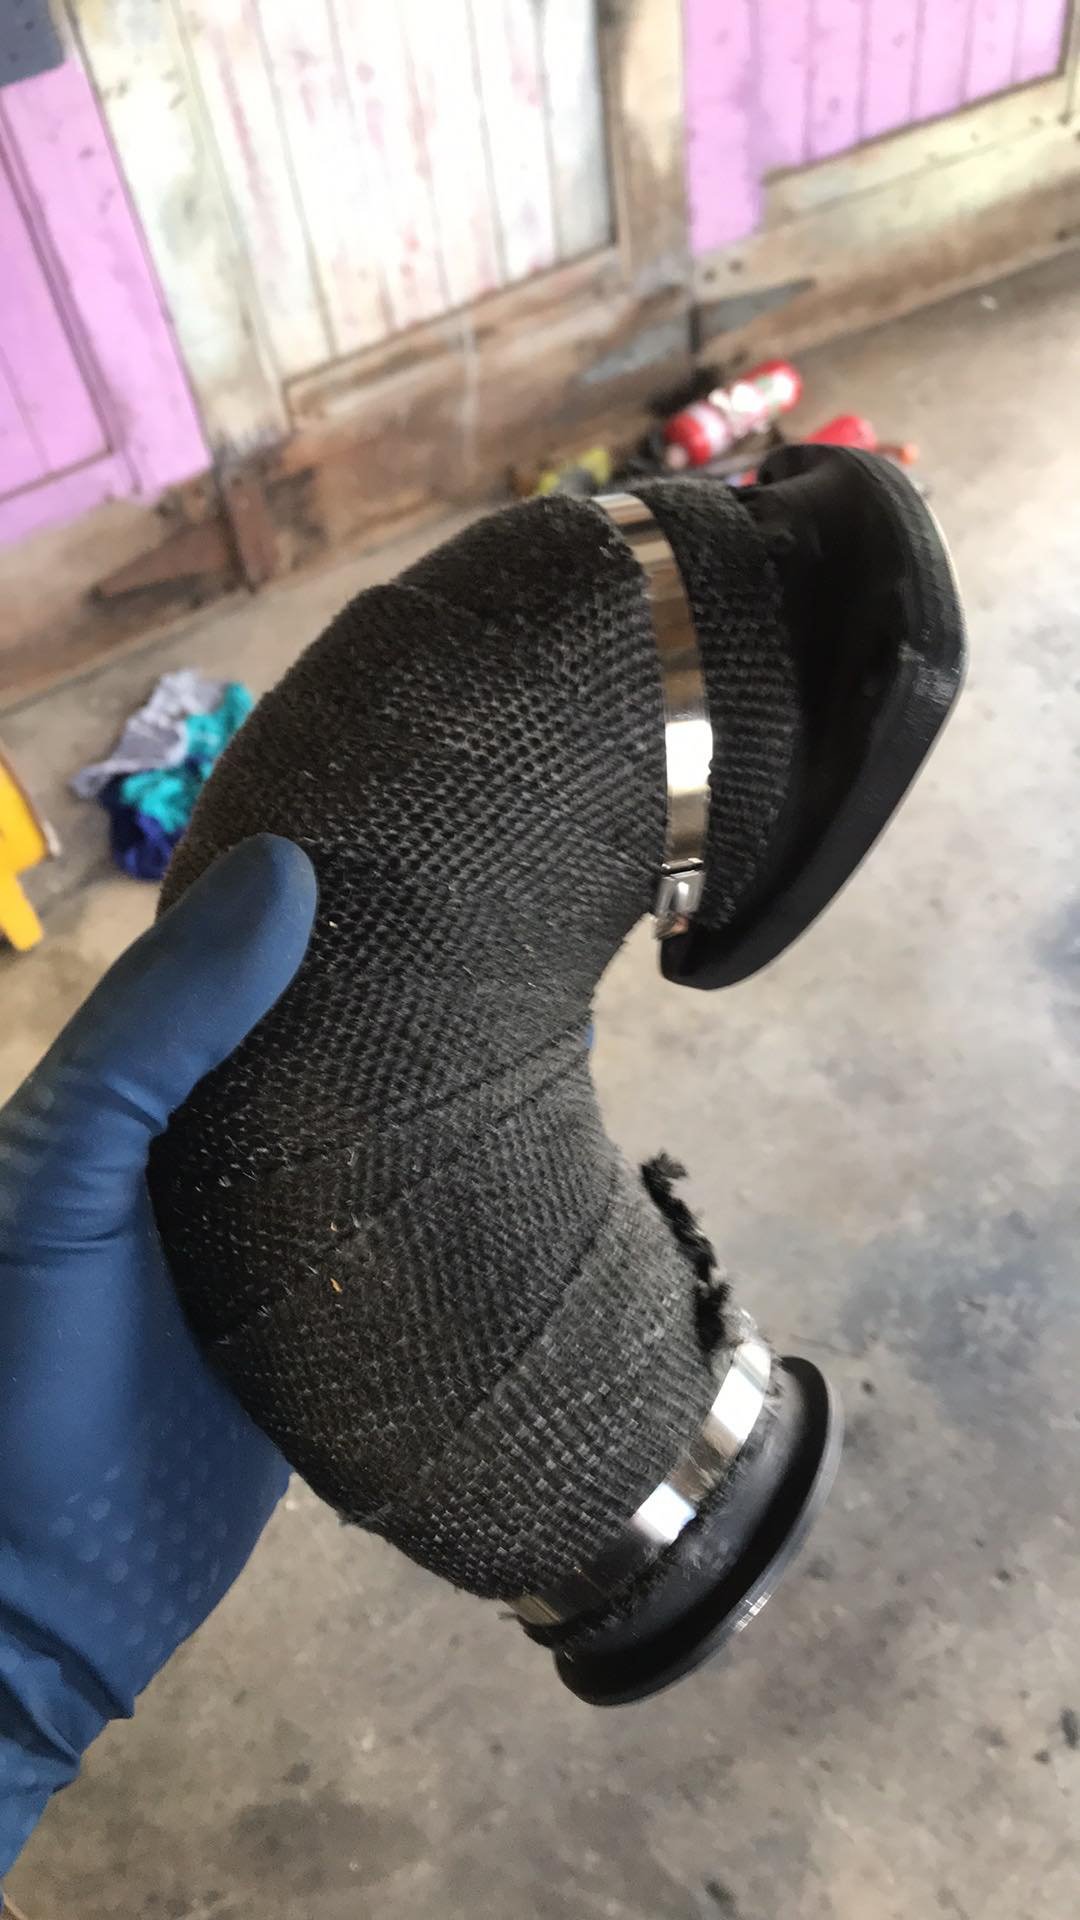
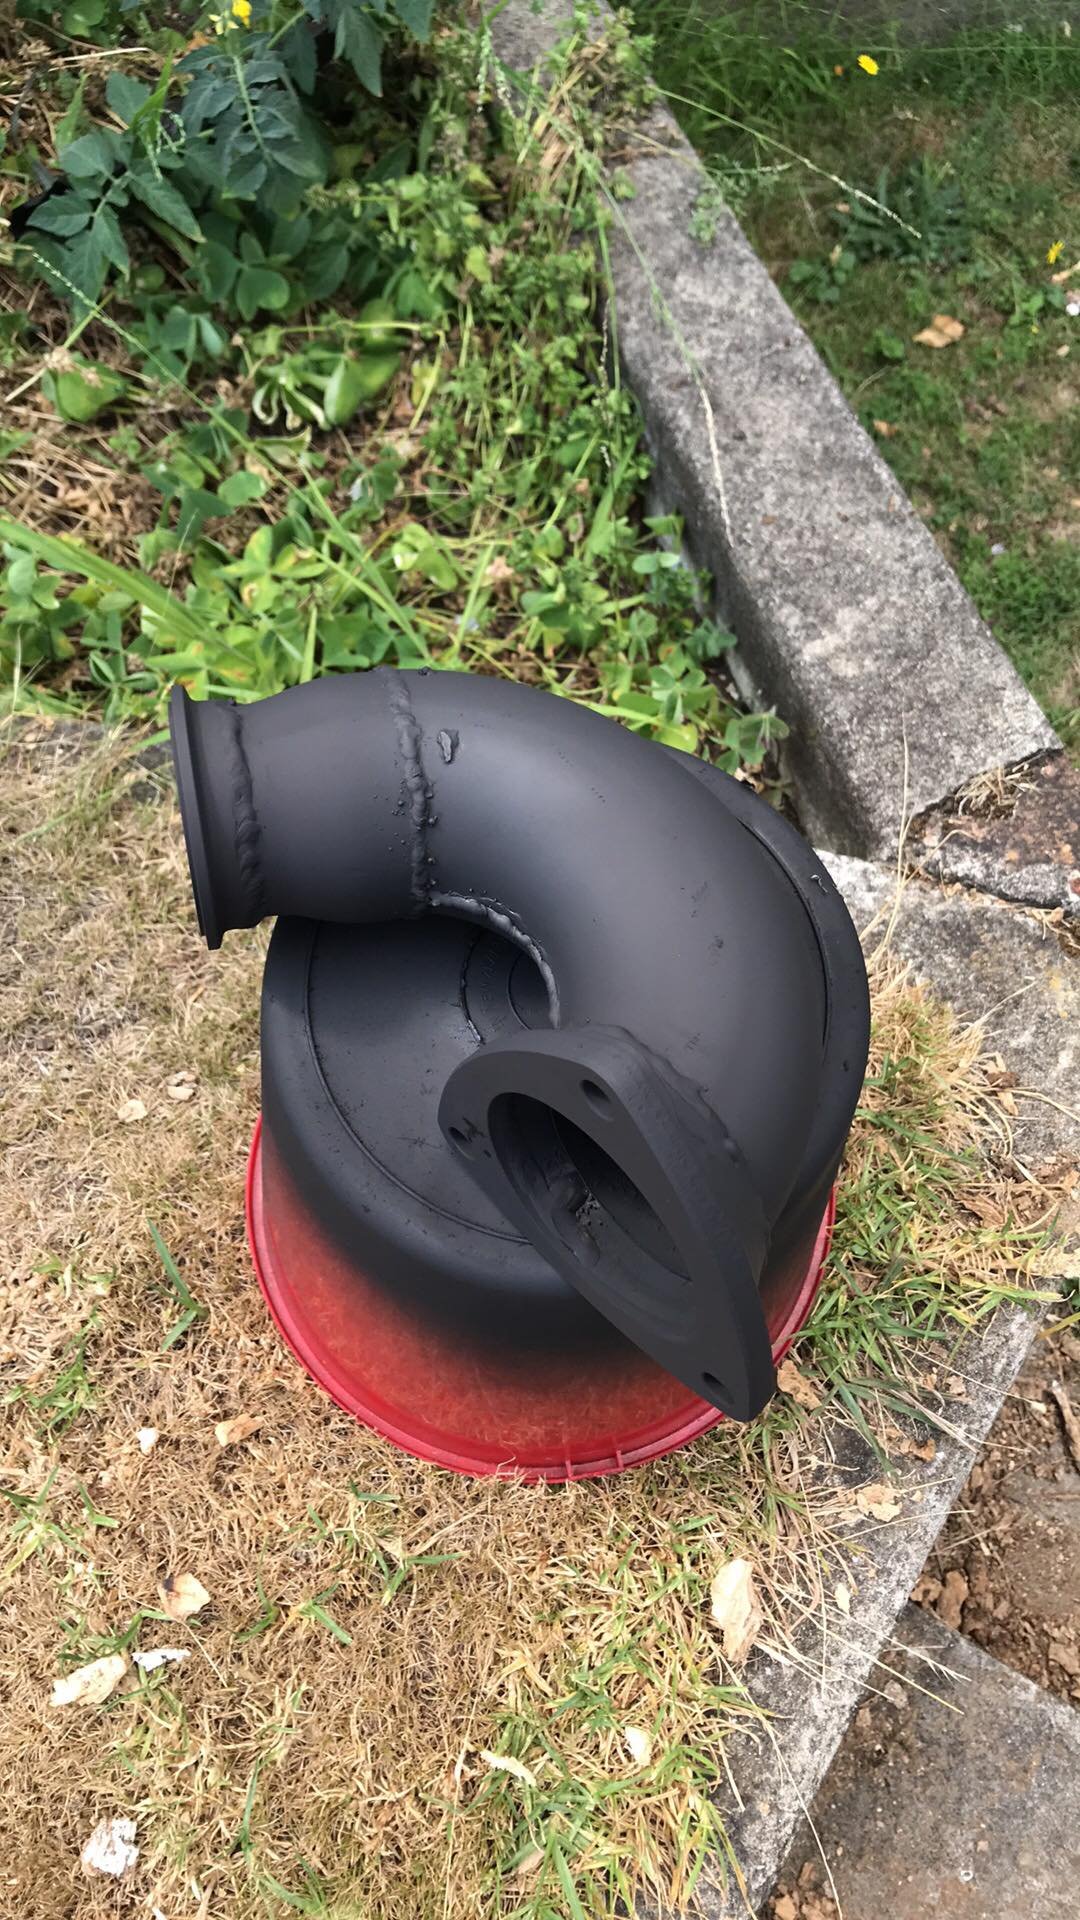
Some 550cc injectors and a 4 bar FPR to keep up the fuel. Have also fitted a mk3 fuel tank and pump which should be sufficient for the power being made. With the engine in place I was able to get an idea of the down pipe situation. The previous turbo would have run the exhaust gas straight out and down towards the tunnel. The new one runs it straight towards the drivers side shock tower. So i really needed a sharp 180 bend to turn away from the shock tower and engine mount. Excuse my crappy Tig welding, pretty new to it all so just having a go. There is also a reducer from 3 inch to 2.5 and then a Vband for easy repairs/engine removal. All painted wrapped and good to go!
1 point
-
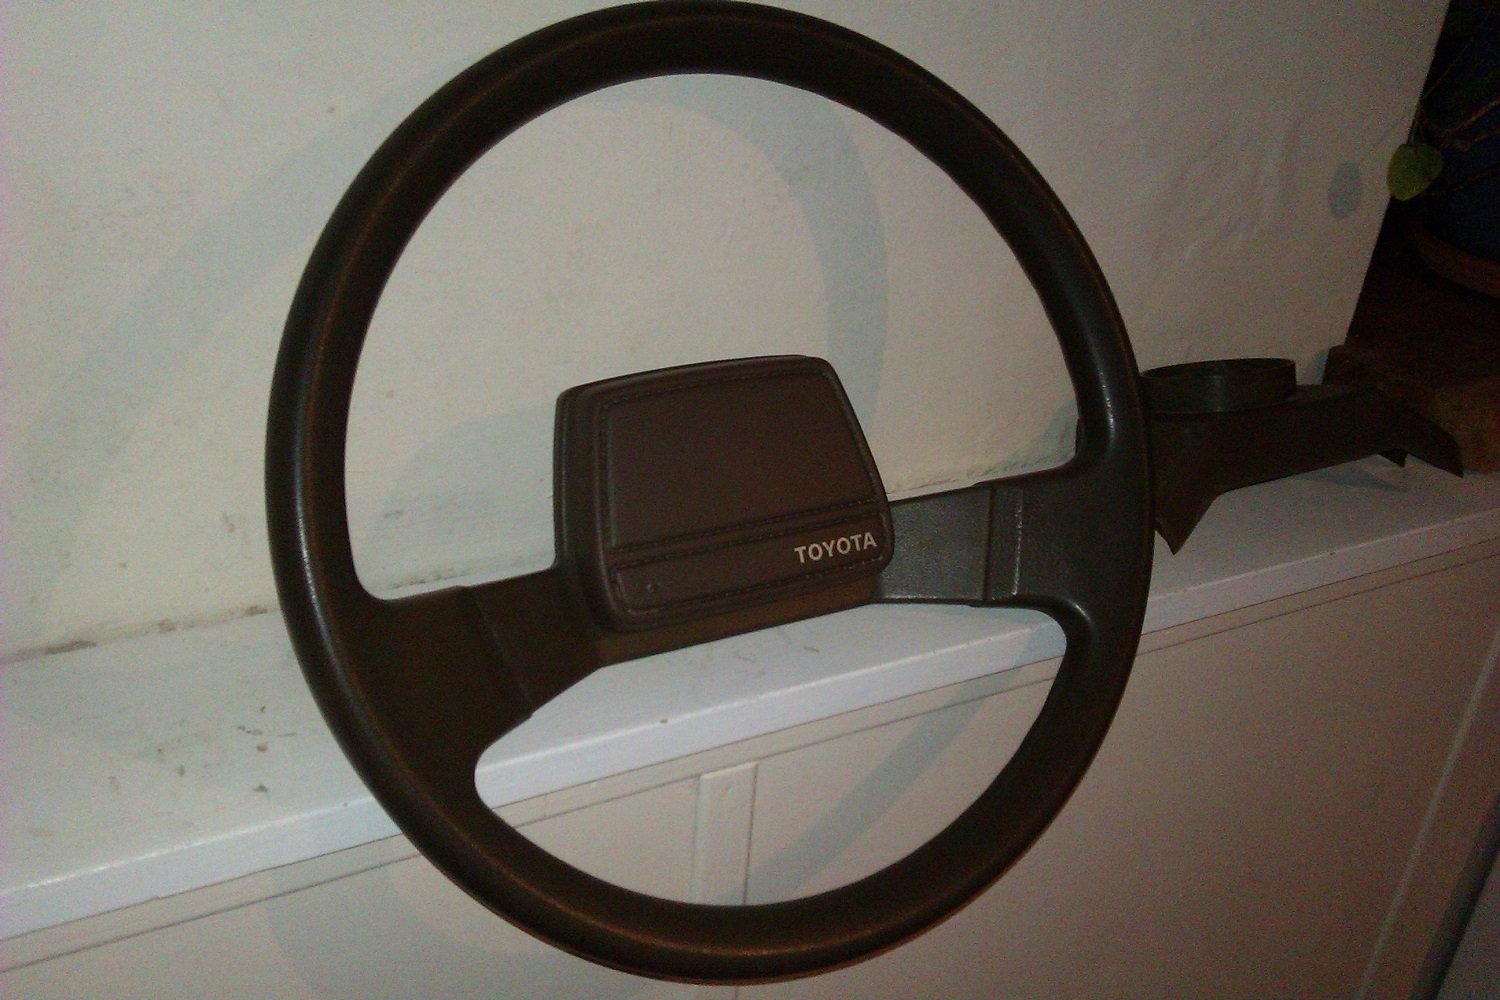
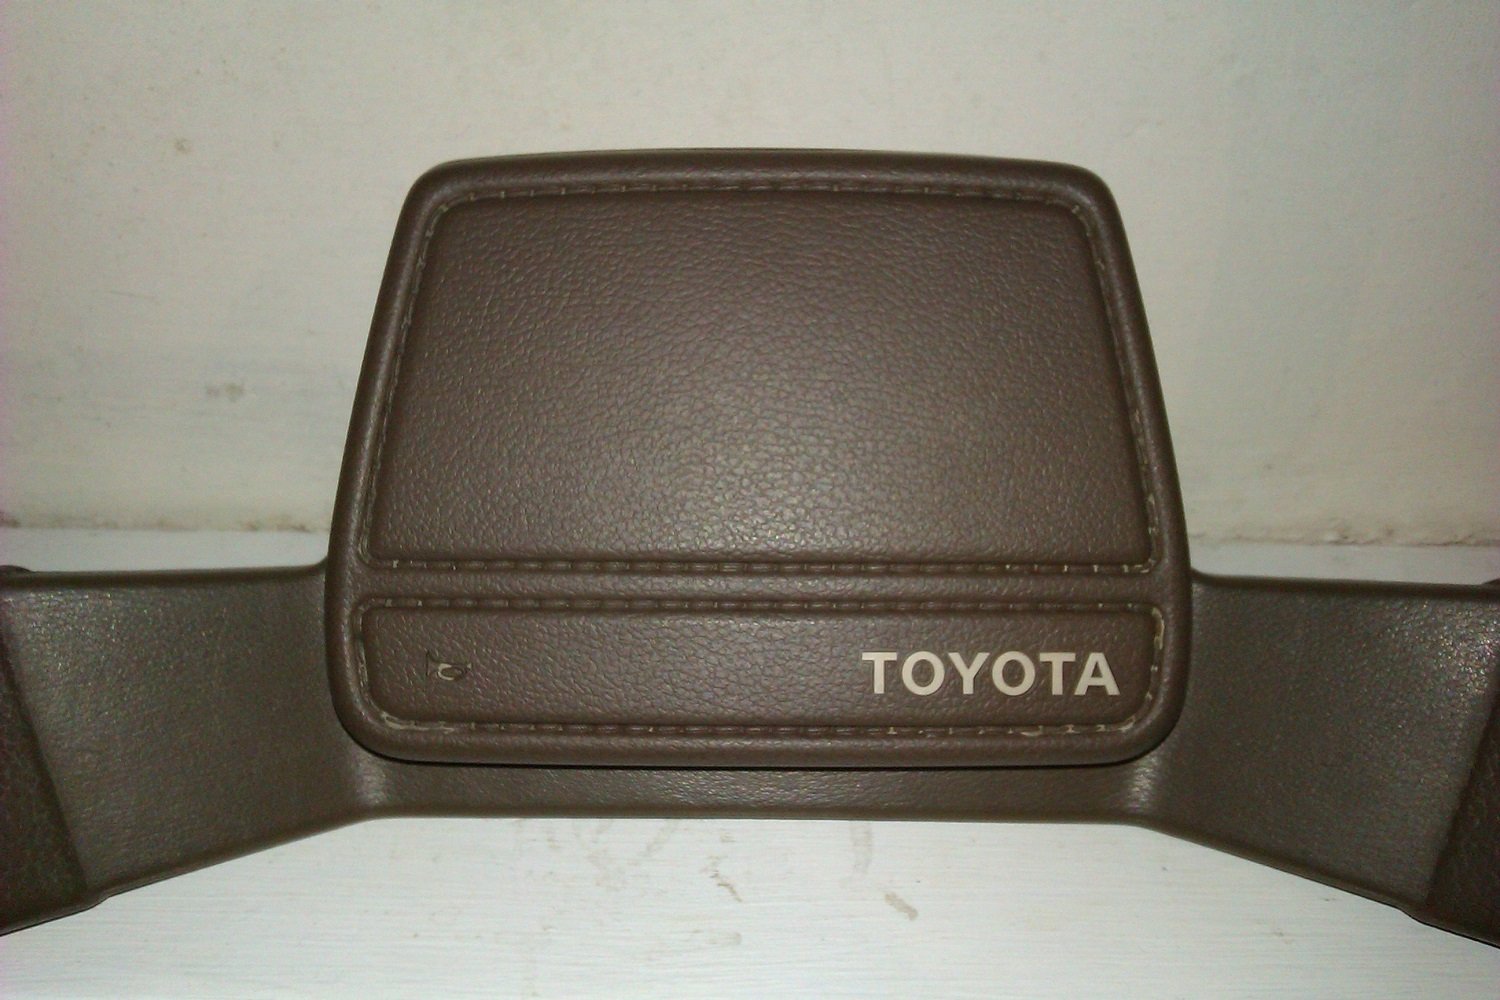
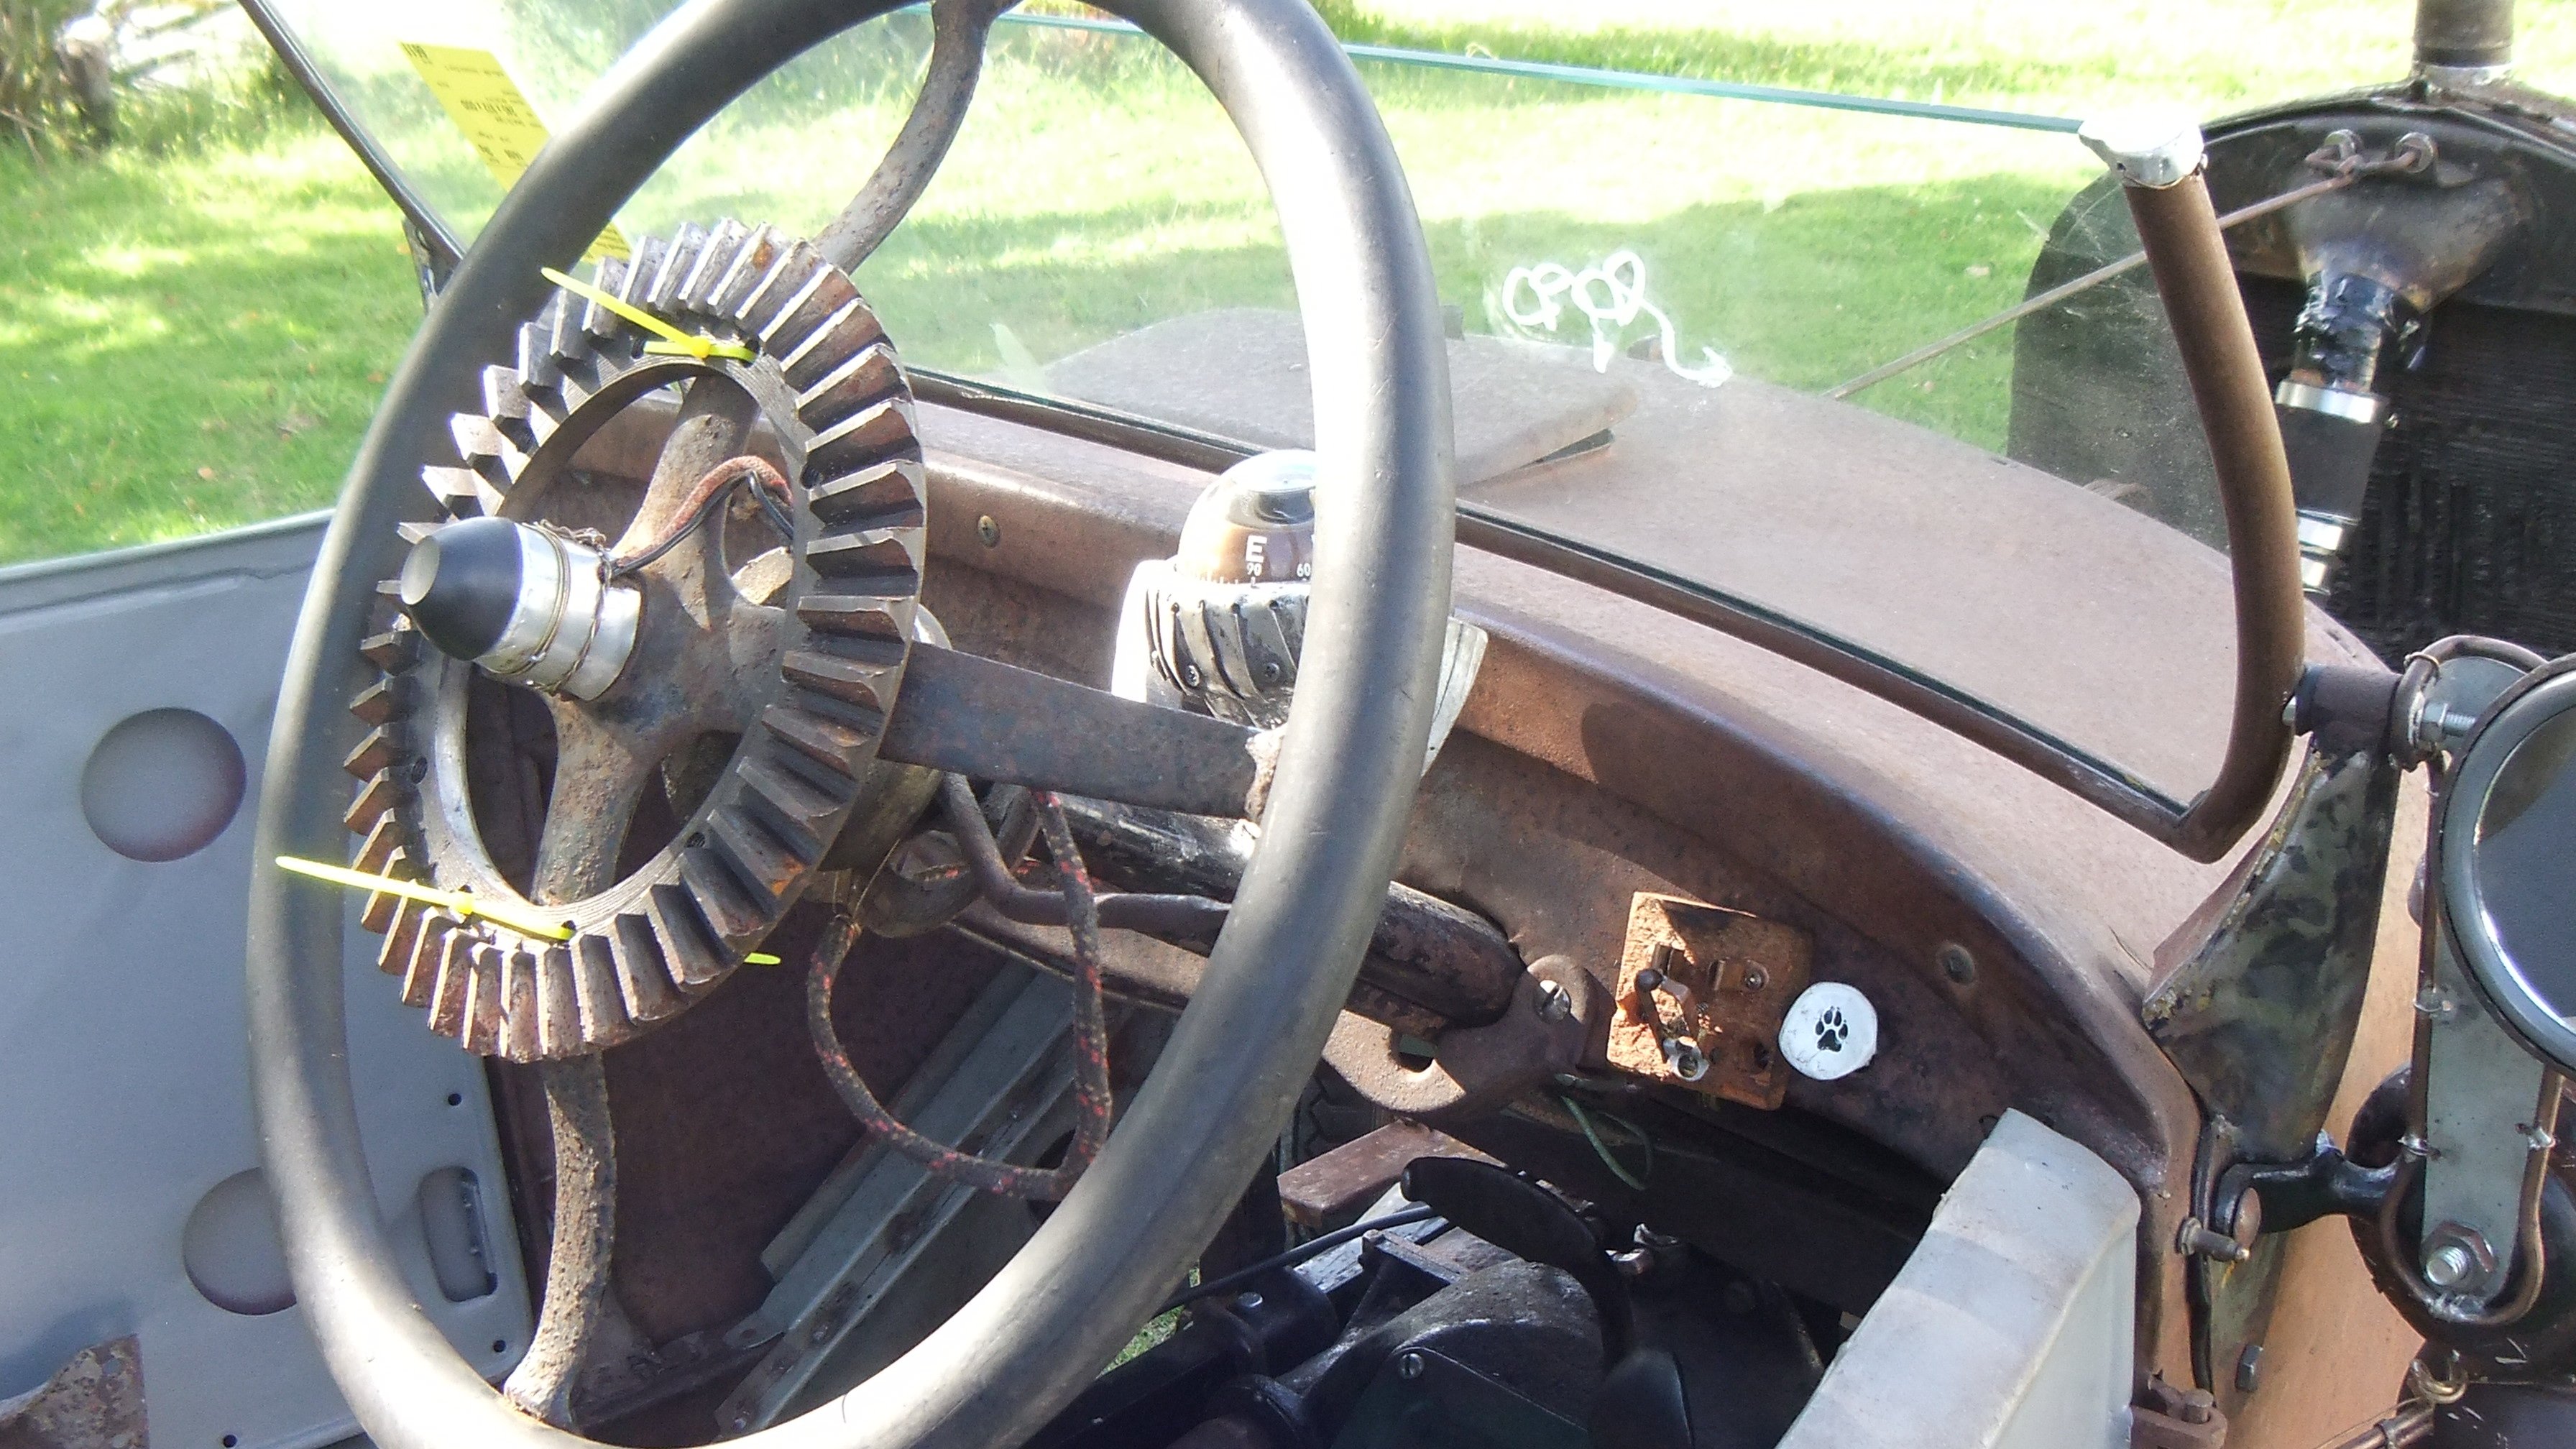
What happened was....... The problem of the sluggish performance has been solved. As has been pointed out the 2.4 litre 2L diesel engine is indeed "gutless". 68 bhp, so I'm told. However, the main problem was the rusty old nut behind the wheel. Too many years of triple diamond four-wheelin' mean't I'd forgotten where the transfer lever goes for 2H on a Hilux. It's not the same as a Mitsubishi. Derp. Autopilot plus hubs locked in and it's no wonder it was struggling. The new tyres weren't ever going to let the box unwind either. Silly Shuzz. MOT tomorrow so got it all ready and then set about tidying up the interior. Just as I finished today, the headlights and fog light packed up. Fuckity balls. Still, the interiors come up ok. 1980's steering wheel FTW /pics Hopefully some good road legal type news tomorrow
1 point
-
So he's not a Firetruck anymore ? I must keep up. Couple of pics for amusement.... Lube chart that has lived in the sun visor pouch since new. And on the back, me being a Barry about my oil changes. Muppet. A Muppet with a 300,000 mile engine that doesn't use oil.1 point
-
Youtube for the win....1 point
-
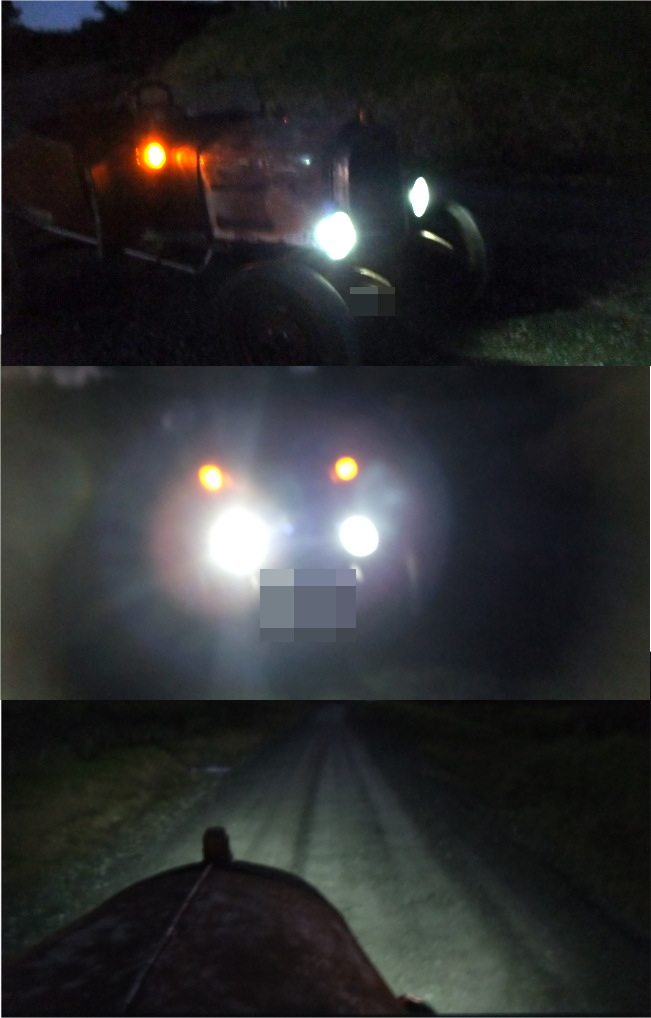
Nearly there. Drivers side window & mechanism back in and working, Seats in. Wiper mechanism greased and working. My "Illegal, not for road use, only for show purposes" front number plate has arrived. Nanny state gone crazy, etc. Bollocks to it, you'll never take me alive coppers. All electrics done except the brake lights. Fuck knows what their problem is, wankers. One for the morning I reckon. Once I've sussed that I'll book it in for a test. Mate wants it out of the workshop to move stuff around, it would be nice not to put it back in and take it home instead. We shall see how the morning goes. No relevant pics so have an ever so slightly rusty beetle wheel instead.
1 point
-
Just make it Barry Crump colours1 point
-
Got a few hours in today. Rad in, filled up and warmed up. All seems good, runs quiet aye. Fitted the rest of the front end up & sorted the electrics. Seems to be a bit of an issue at the rear, looks like water's got into the loom where it was cut for the tow socket. Starting to look like a Hilux again. Doors & sills painted black for the moment. Still no seats and someone's nicked my push bar (kairntz) but I've scored a Unimog bumper which will fit with a bit of fettling. Alternator got all excited by the activity and shat its guts. New one on the way. Thinking I might go for a colour like this in the end, probably with some orange & brown 70's graphics and West Coast mirrors. That's all I've got for today except for sore knees and a bit of a thirst on.1 point
-
1 point
-
Have i tried to sell you on the merits of LED lights lately? Even on high beam the amps draw is maybe... 1.2 amp? According to a century old gauge anyway... much less than the 10 amps they were previously drawing. And other people can actually see the lights now.
1 point
-
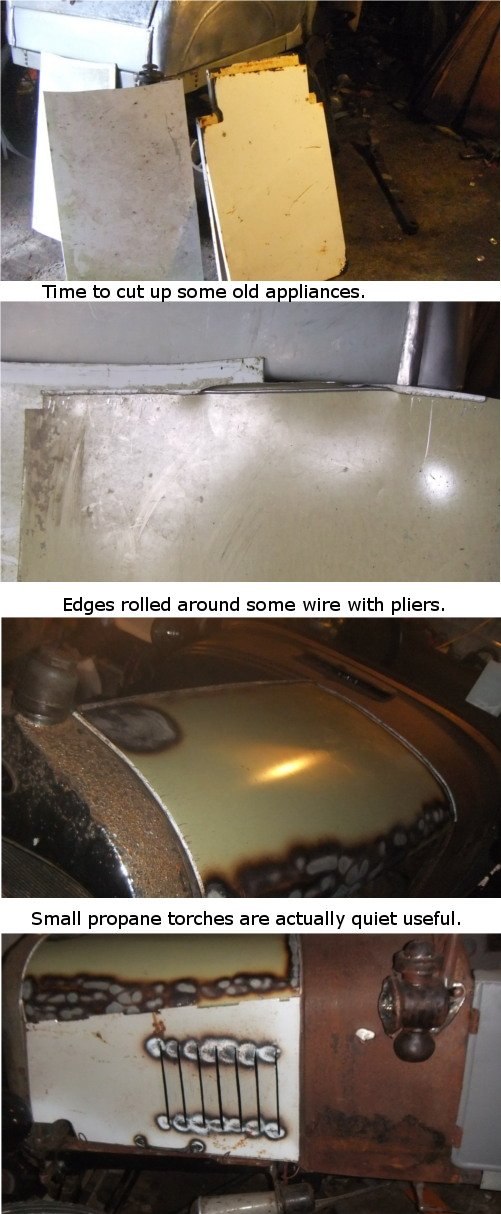
Hood tie down strap made from a leather belt. The belt is so long it forms a loop for someone 3 times my size. Could wrap that around my waist 3 times before it met the first belt hole, and it has a functional lock in it. Why would it have a lock? So i don't know if i should start a technical thread on "How to make trembler coils" as mine are toast and one of the borrowed ones died today. Never successfully made an ignition coil before, i think i'll need help of the electrical gurus on here.1 point
-
Ugh, close enough. Cant be bothered fitting it better at the moment. Think i'll sand the paint off though.
1 point
-
By my deeds i honour him V8
1 point
-
bad video of starter without a bendix spring Would have a shot shell starter if money & practicality were no objects.1 point
-
For lack of steel to fit an old time aftermarket cylinder head i am trying to fit the old head and carb'. Amazing how well those nuts rusted to little strips of thread held the carb' onto the intake manifold. Look how much i could port the manifold by if i had flexy grinder things... Fuel fittings made from bits of tractor, bits from a gas regulator i found at the rubbish dump and a broken fitting that was left in the fuel inlet of the carb'. Unscrewed the broken piece from the carb' and drilled it out enough to slide some tubing in it. Soldered the tubing into a piece from the gas regulator and used the end from the tractor fuel fitting to fit it to the fuel line. Probably was a simpler method if i could get more parts.. So the story behind my obtaining the tube cutter was i found it at the dump, someone threw it away thinking it was useless, looks like they simply wound the cutting wheel closer and closer to the little wheels the pipe is supposed to roll on and squashed the tube flat and they kept winding it until it pressed it's way through the tube? That's not how it's supposed to work.1 point
-
So after finding the once widely available fuel line fittings i knew during the industrial revolution are now considered "old fashioned" and not available at any place i could find i resorted to making my own. Notice the air line hose fitting is a close fit to the tube. If i cut it in half it becomes a perfect match for a 1/4 BSP fitting as used on old tractors. Bad picture but the fit is good. How convenient.1 point
-
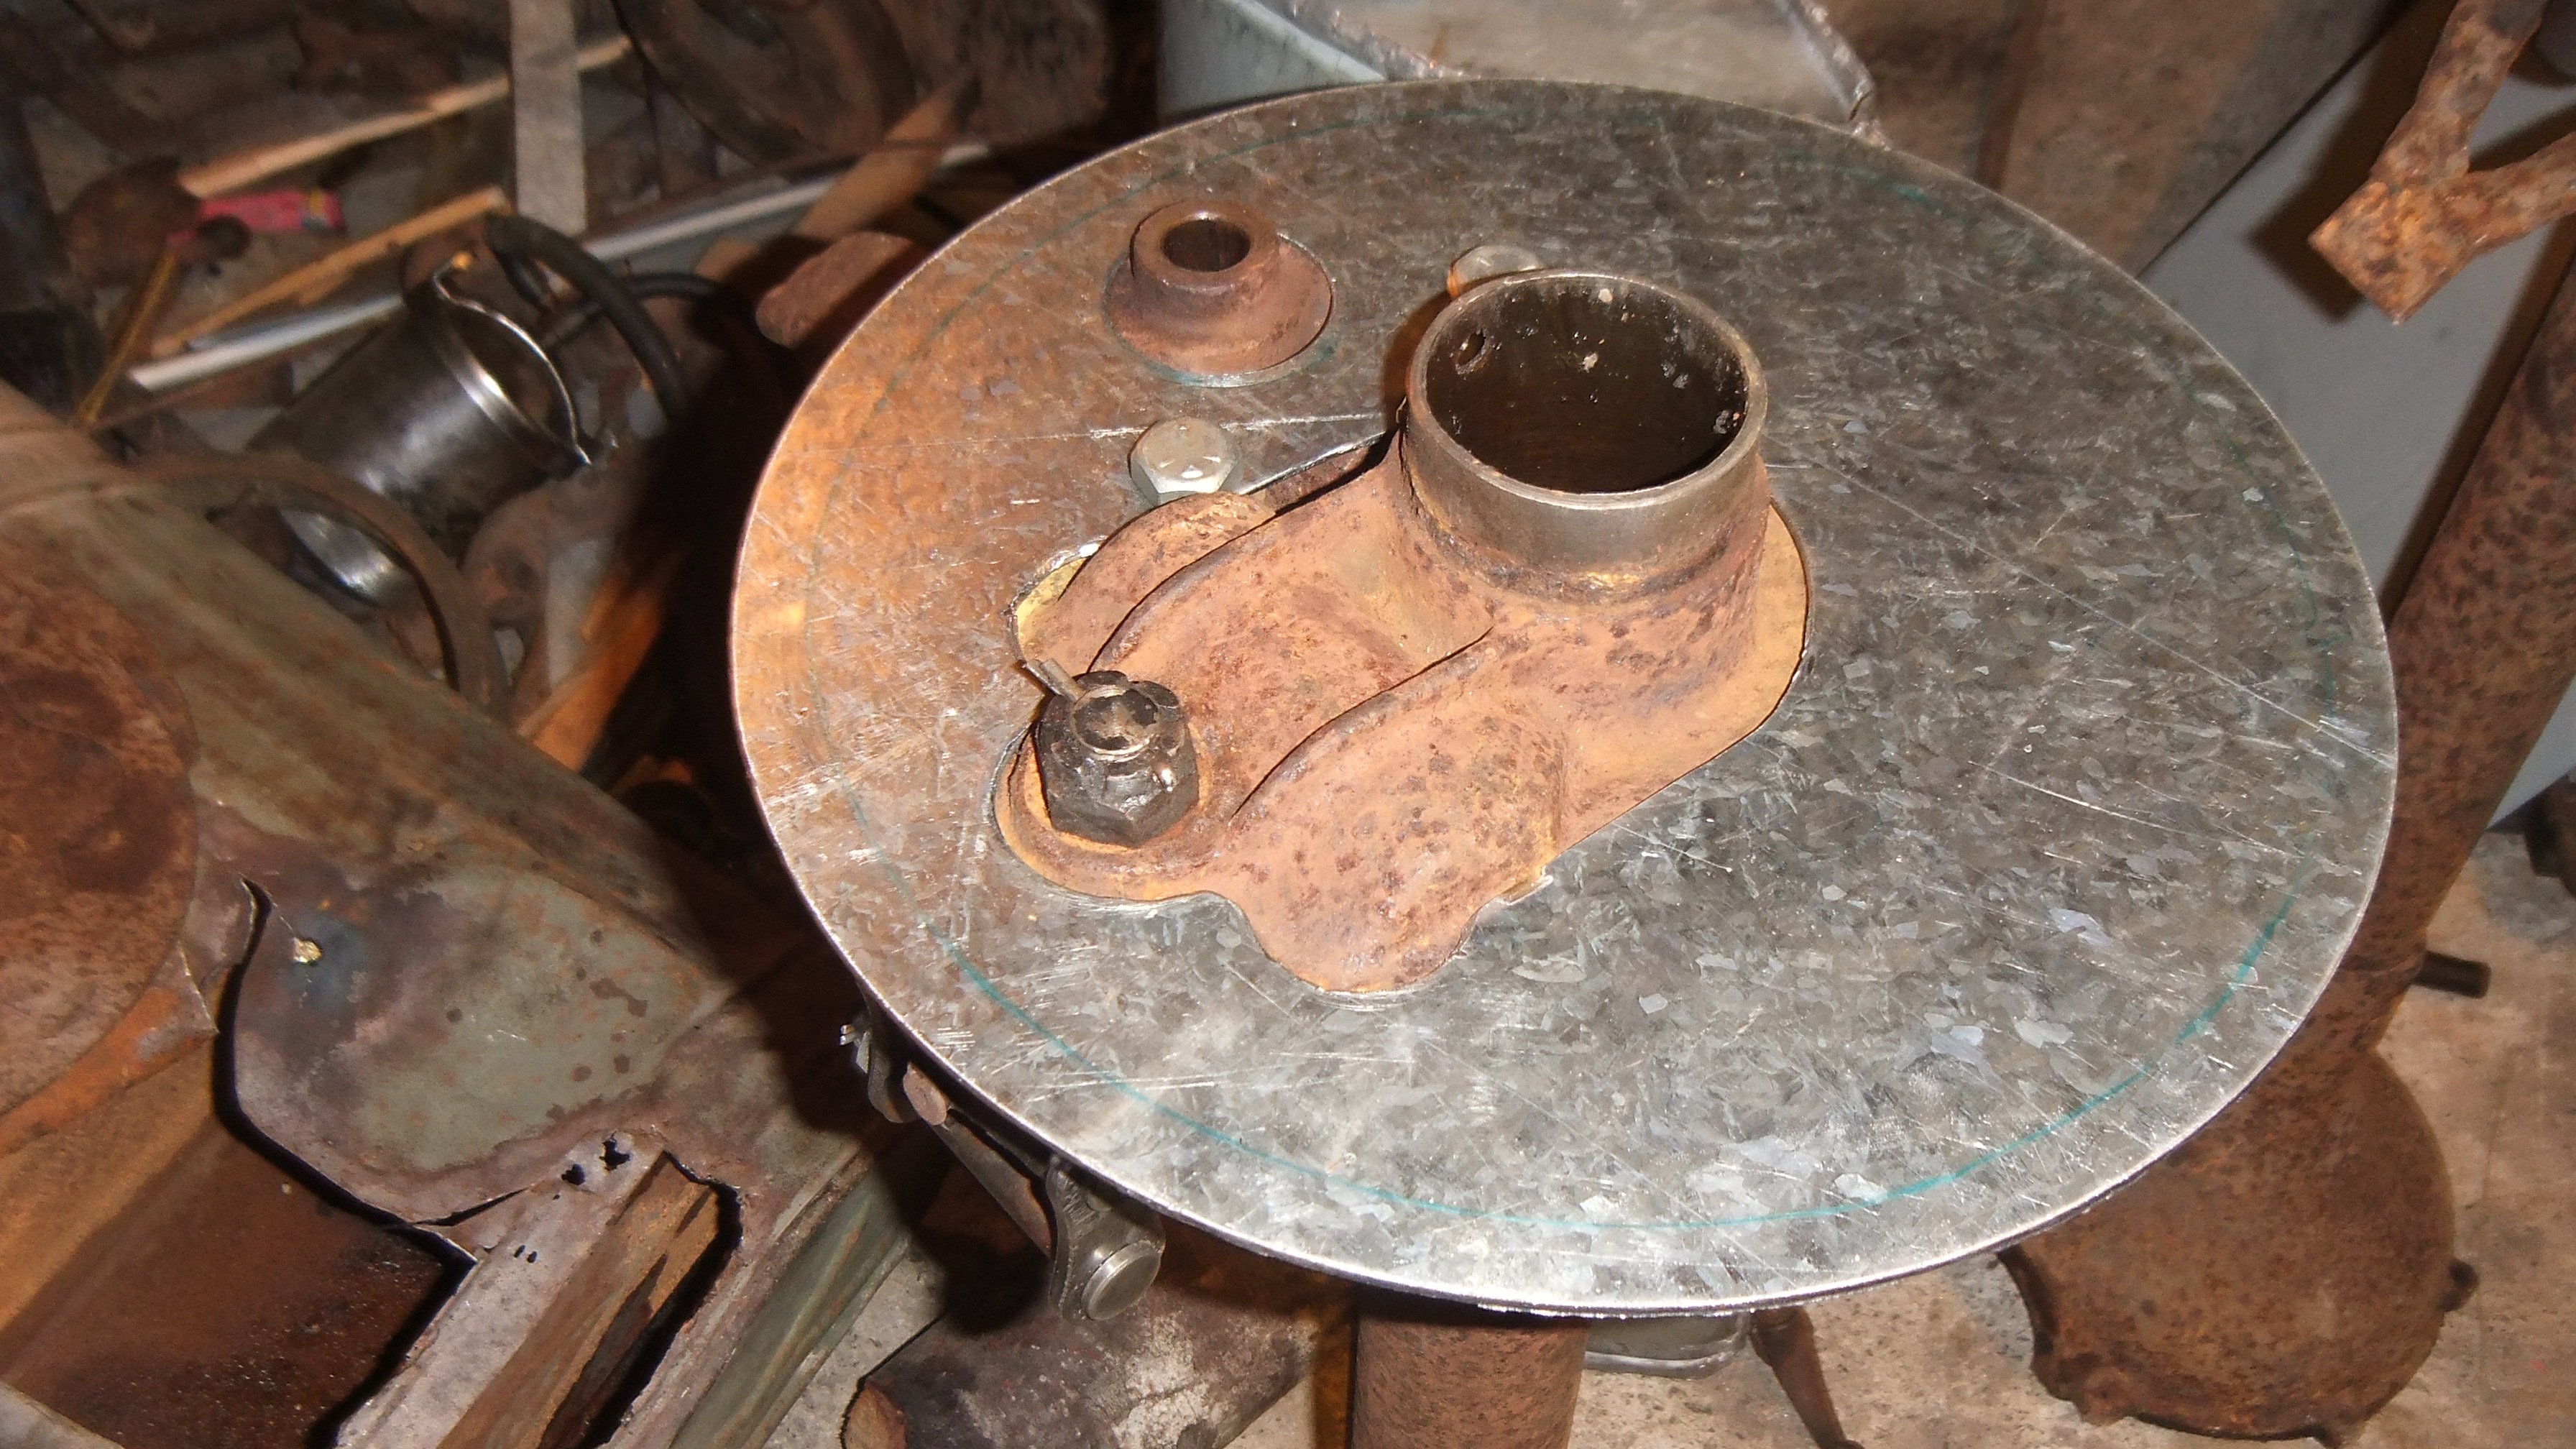
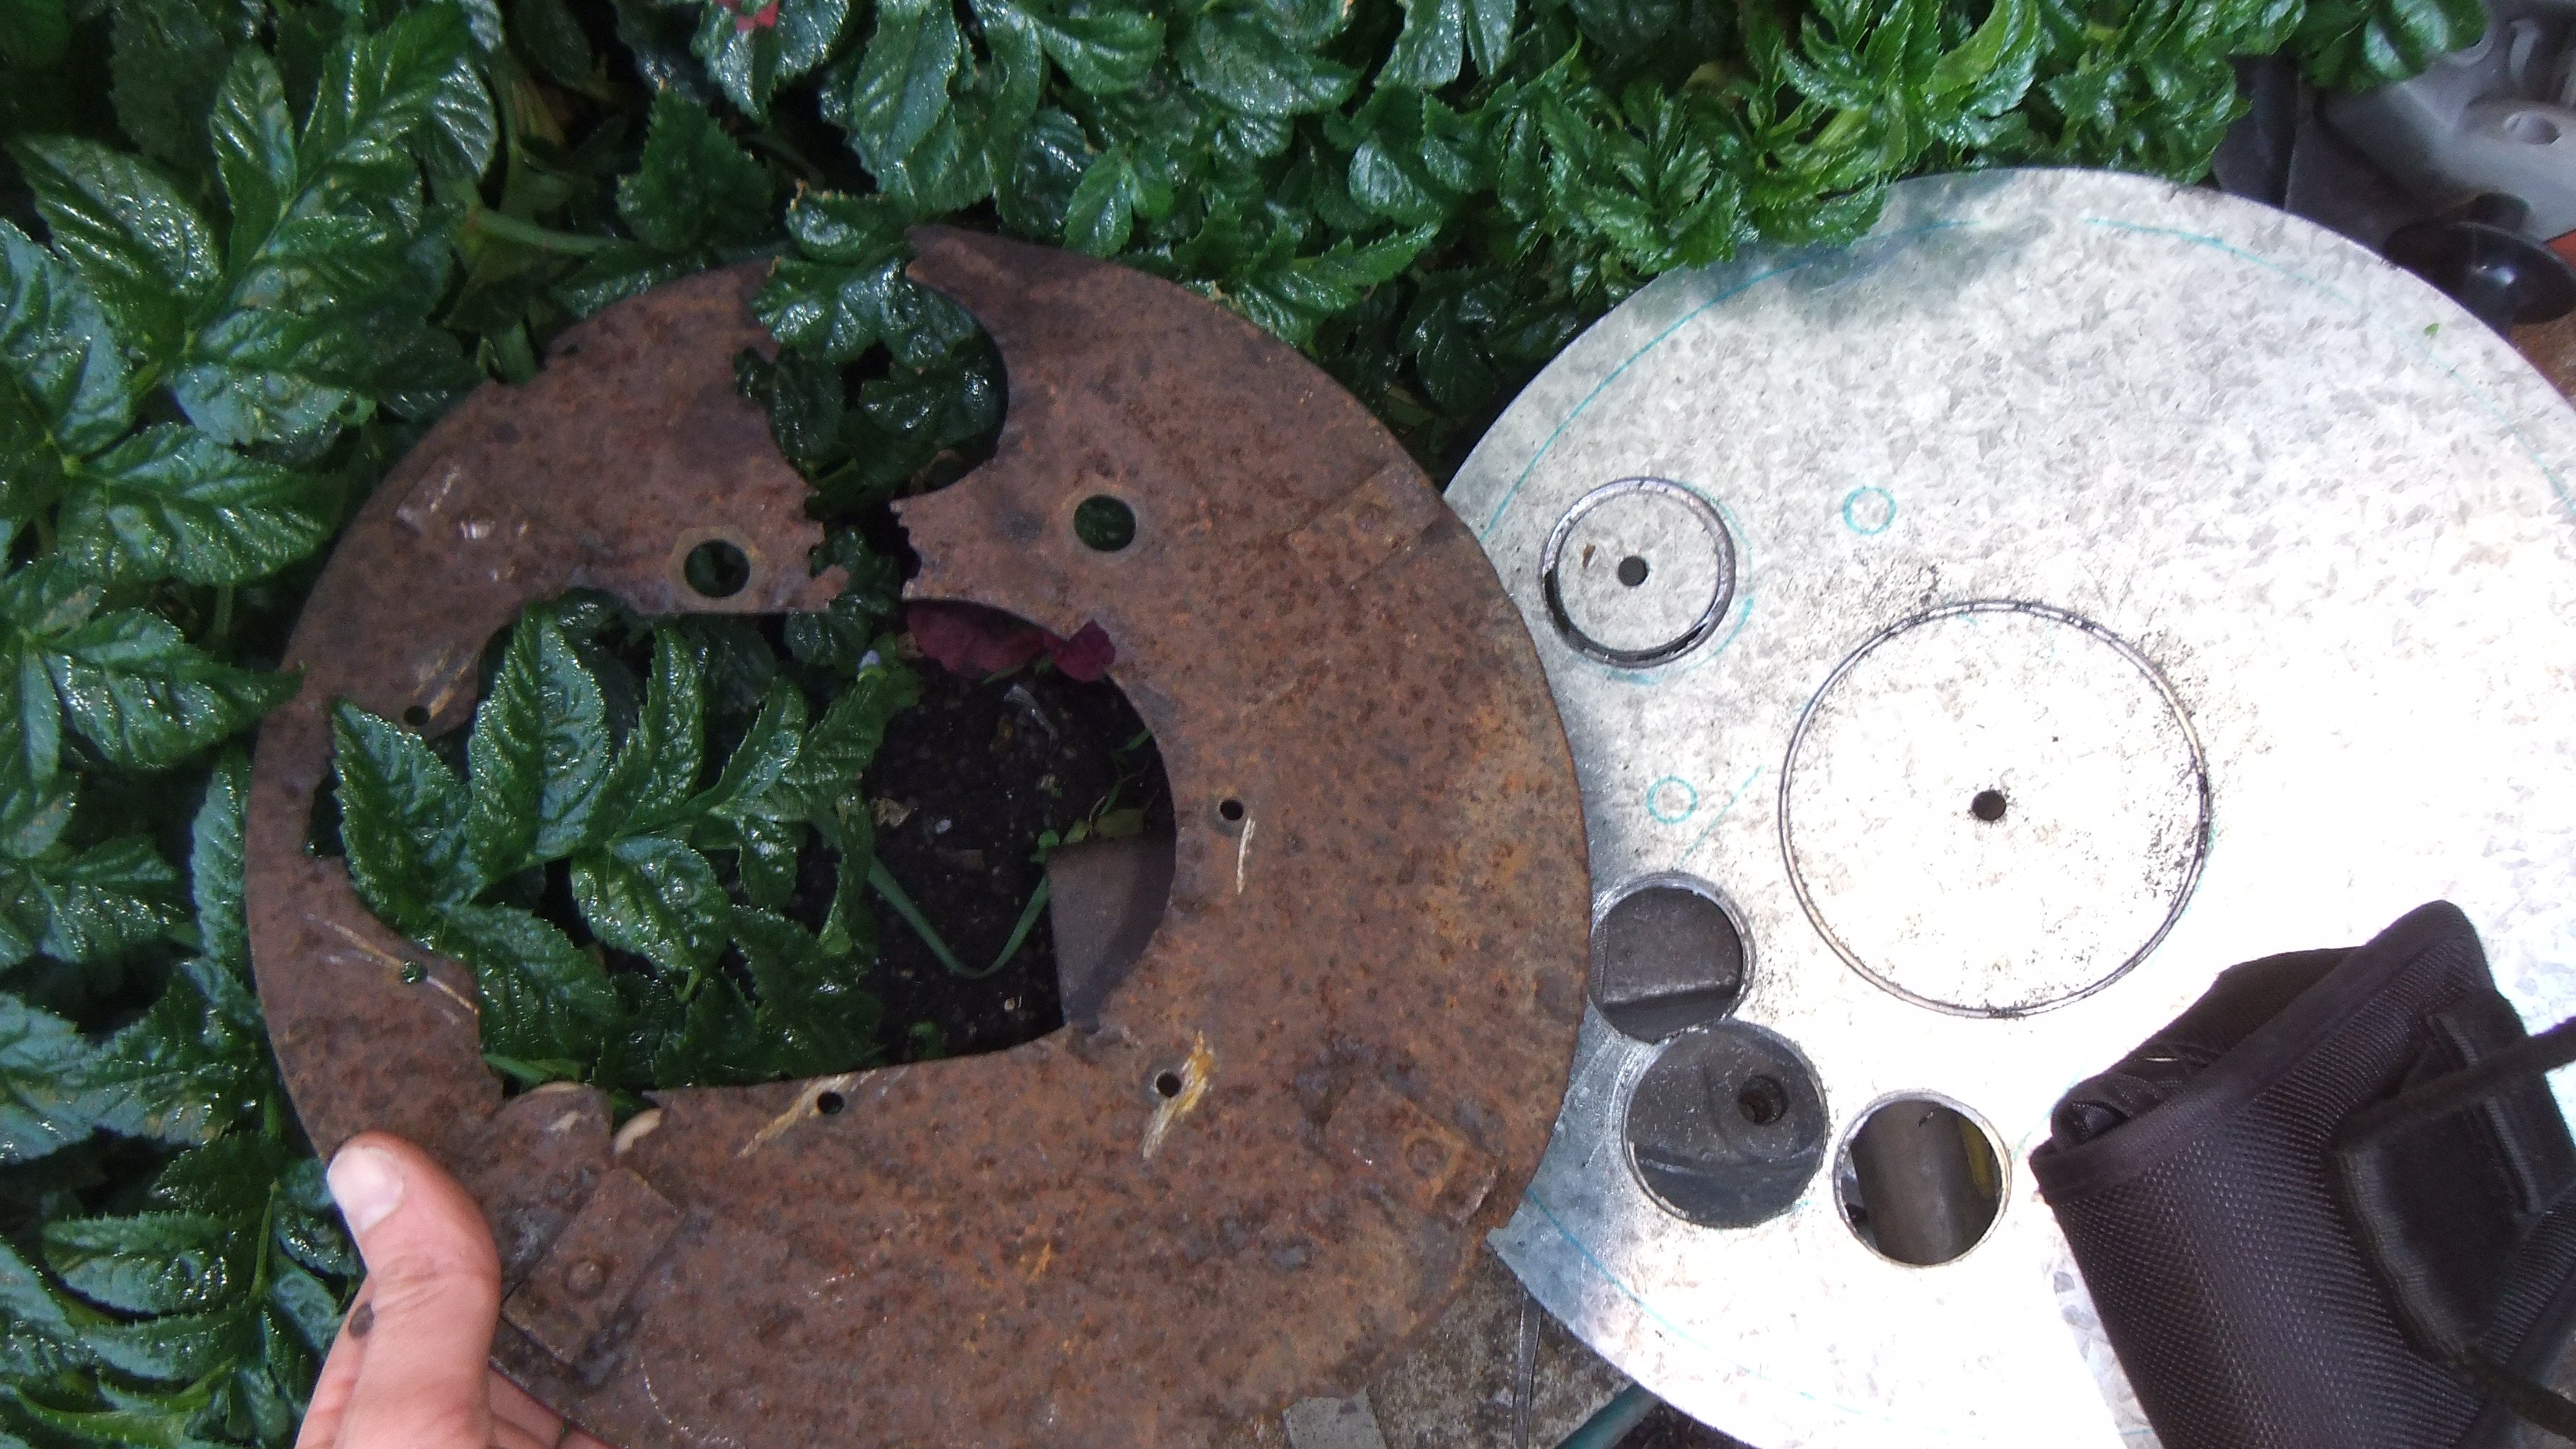
New brake plates fitted.
1 point
-
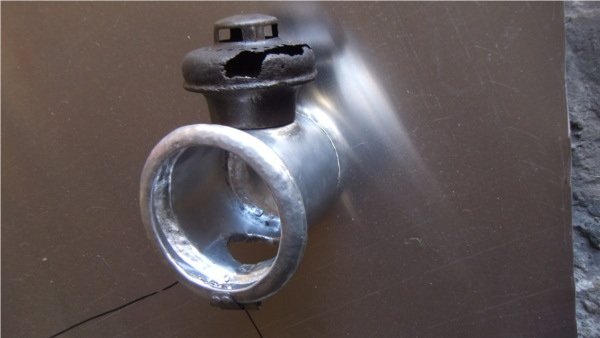
This week i spent way to long making and remaking parts. Replaced wooden things with metal ones. Repaired the old oil fired tail light. And by repair i mean replace most of it.
1 point
-
Looks less bad now. But it looks like i gave up on the bootlid... One day i may make a new one. the panel gap is terrible. People see this and ask me why i'm not a panel beater. This is why
1 point
-
Made a terrible mistake Looks yuck. rear curve is wrong. Might just live with it. Looks like i should have used more cardboard during design instead of bending wire and saying "close enough". Looks like someone tried to blend a 32 rear and a 26 rear.
1 point
-
Here is a problem i believe i tried asking in one of the technical threads but those posts are apparently deleted for being weird. Today while measuring whether i can fit ford wide5 hubs on the old spindles i found i cannot, so i tried measuring up the hubs next to each other. i believe the hub flange will sit slightly inward of where the wide5 hub flange would be, but the original hub was designed to carry the weight in between the 2 flanges it has on wooden spokes. The ideal place to have the wheel adapter wound be between those 2 and they are 30mm apart. From what i read on some government looking website http://www.lvvta.org.nz the most you are allowed to space the wheel is 20% of the rim width, the wheels i would like might only be 4-5 inch wide (they still have tyres on so i can't measure very well ATM) So what do you recommend the wheel adaptors be made from? i would like steel, 5mm would be be about right weight wise and be thicker than the wheel pressing but 8 would look beefier, but stupidly heavy. Would i still be allowed spacers behind the adapter? It's ok if not allowed but i would like to have the weight of the wheel nearer where the factory intended.1 point


This leaderboard is set to Auckland/GMT+12:00