
Leaderboard


Popular Content
Showing content with the highest reputation on 12/30/15 in Posts
-
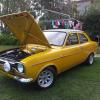
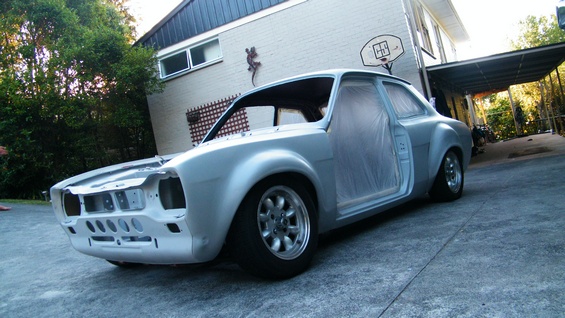
Discussion thread //oldschool.co.nz/index.php?/topic/51310-rhubarb77s-1970-escort-coupe/ Here's a few recent pics of my Escort that I've owned for the last 5 or so years. I'm the second owner so most of the body and interior is untouched except the RS front end, some gauges, new carpet etc. I first took interest in Escorts growing up in Central Otago. I think my first car, bought for $100 was a MK1 four door with house paint all over it. Lots of gravel roads = lots of great memories So now, 20 years on I have this escort. It took a long time to find the right car as I didn't want to do any bodywork. The current engine, 2.0L Pinto was professionally built at an Escort performance shop here in Queensland. It pushed out 150rwhp on the rollers and runs a 14.5sec 1/4 mile with standard diff and standard Sierra 5 speed. A few weeks ago I stumbled across a custom Pinto turbo exhaust manifold when I was buying some escort spares. So that's kicked off a whole new chapter. I've crunched the numbers for the turbo route and it looks expensive. So my MK2 Escort project will have to go and the 150HP motor is up for sale. Going turbo with the car is going to change it. A lot. Fuel injection, big diff, big brakes etc. I'm in two minds about going ahead with it really as the car is so well balanced & very original. That's partly why I started the thread, to get some opinions about it so please place a vote in the discussion thread. Cheers Turbo project- T28 ball bearing Turbo on custom stainless manifold, Sierra EFI inlet manifold, YB pistons, YB rods, YB distributor, Holden LS1 coils, Toyota Supra W55 gearbox with adaptor bellhousing. Shopping list is still huge.13 points
-
Have got someone making me some new tie rods which take a factory inner tie rod end, and a commodore outer tie rod end which has the pivot point lower, which should reduce the amount of bump steer. and i went to OS drag day also, big surprise, if you do skids for ages, brake drums dont like it and get shuddery. luckily i have a spare set, put those on today. it did a 14.28 @98mph. it did have a couple of runs where it had a splutter- its either running out of fuel (it has a stock fuel pump) or the lifters are pumping up. i have an old camera that i "improved" the battery door on by bolting a bit of steel to it, which also makes quite a good mount when combined with 3 strong magnets, its interesting to video the suspension and whats going on when you drive it. Quite surprising to see the amount of movement- eg 0.37 there is 2 reasonably heavy applications of brake, you can see the caliper rotating the spindle- this is mostly movement in the brake reaction rod bushes, but the upper arm bushes move as well, and if you study it closely, you can see the whole inner guard deflecting. in this one the camera is mounted to the bumper iron looking back at the left front wheel13 points
-
im not sure how much longer i can keep this up. 2015-12-30_03-19-36 by sheepers, on Flickr 2015-12-30_03-18-51 by sheepers, on Flickr 2015-12-30_03-18-37 by sheepers, on Flickr8 points
-
i have used them, best to set your gun on low/1, give it some nungas nungas , then set your torque wrench on like 80 nm, check it and wind it up till you find where its actually torqueing the nut to. and adjust your rattle gun setting to the best position. I did find when I went to a much better quality rattle gun I had to dumb it down to the lowest setting to get the right torque i went away from using them in the end because for my own peace of mind knowing that you torqued the nuts up helped me to sleep at night. especially on them long as days were your doing 14 jobs and you cant get of to dream land cause you cant remember if you did up the nuts on the last rush wheel bearing job. thankfully that has never happened to me, but as i said peace of mind knowing its right was worth the extra 2 mins . I do things the same way every time , so if I haven't put the torque wrench back in the draw I know I haven't torqued the nuts, its a good system, same goes for sump plugs, and brake caliper bolts, all ways put the spanner on the drainer, or ring end on the hub, if the spanner is on the drainer/hub then the plug/bolts aren't tight. I may be a little ocd but I have never left wheel nuts loose or fucked an engine cause the plug fell out . my 2 cents , got a little of topic sorry6 points
-
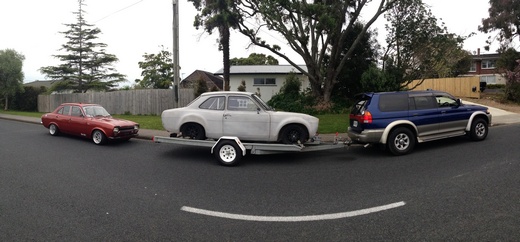
Well I am off to Motunau for new years. I was going to take the Anglia but it is not charging. The alternator provides 14.4 V for the first 5 min of running then stops charging. So the work wagon will be towing the teardrop up. It has the spearfishing gear, shotgun, .22 and AK fitted so should be sweet for a fun evening.6 points
-
Putting a cortina back together isn't as easy as i thought it might be. It's been a month since It came home and its been a battle in almost every respect. It dosent help that my search for perfection gets in the way, making sure every lil bit is cleaned and in mint working order or brand new looking. I know at the end of the day I will sit back with a giant smirk on my face bathing in the glory that is my cortina but even I know I have gone quite insane. Anyway for the fickle few who enjoy my update here she goes. 1.Today I finished my under dash wiring. I have installed some fuses for stereo and need one for main power feed. 2. I have made my rear parcel tray and back seat cover upholstered it my self.looks good. super happy. 3. Put engine in and installed battery and new coil + electronic ignition. Just have to install alternator and sort out radiator and fuel lines. Thanks peps that will do for now.6 points
-
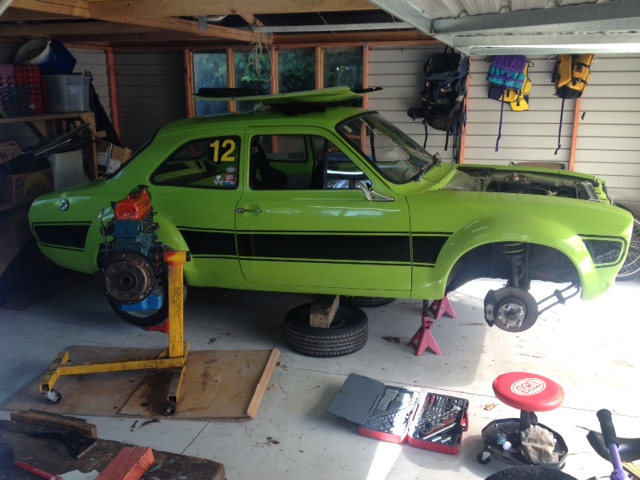
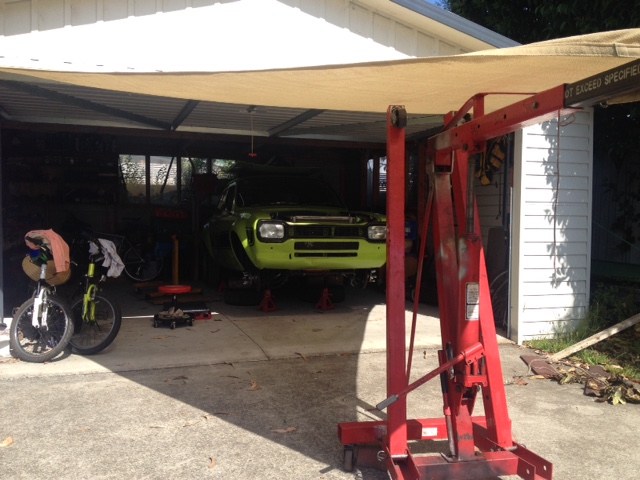
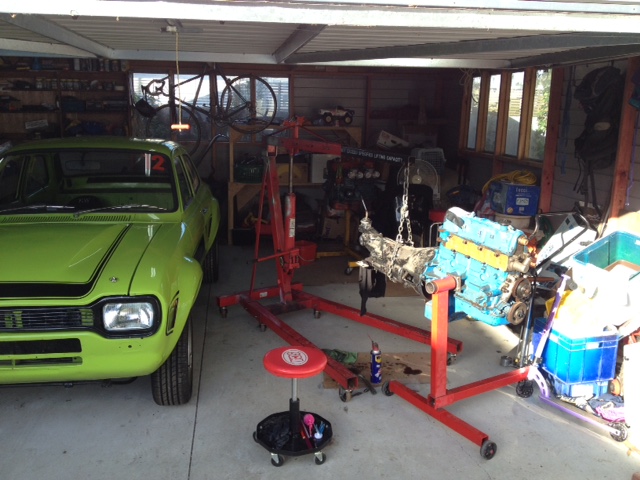
Hmmm, been a while so thought I had better prove I turned a spanner on the car... Approved summer use of engine crane
 4 points
 -
Thanks for the comments and compliments guys. It is a great car and the poll results are overwhelmingly in favour of leaving the car the way it is. Thanks for the votes. Brockzila the MK2 coupe is a 1980 2.0GL Denim pack. Not sure if I want to cut this one up either. But if I sell it who knows what would happen to it? It was a bit rough when I first got it. The interior is shagged. I've had a bit of rust cut out & repaired but overall it's a pretty solid car.3 points
-
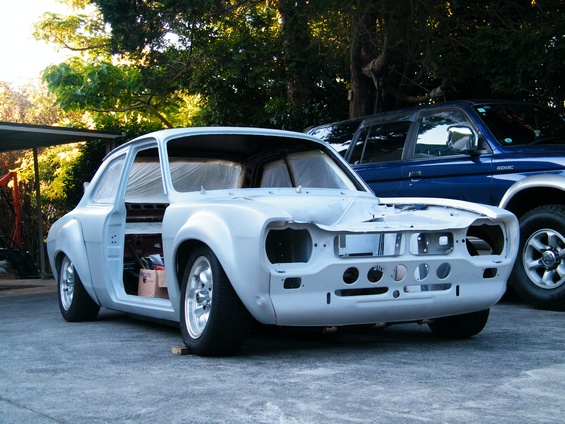
I have started fiber glassing the body, it is a lot harder than I thought it would be to go around edges... The first batch had quite a few air bubbles near the 90 degree bends in the cloth, I cut them out once dry and tried again.... I think I have it sorted now though.3 points
-
rear suspension, from the back of the car looking back at the spring/diff and another one of the front3 points
-
Jig complete and rake dialled back to 40 degrees. Thoughts?2 points
-
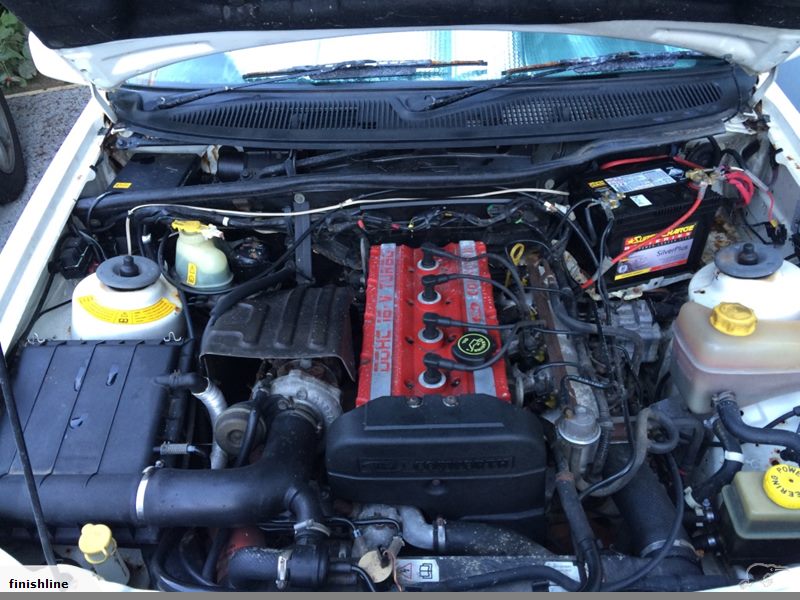
After a play this afternoon, the engine bay went from this To this guards and front back on, just need to sand and paint the bullbars and do a quick service and it will be ready for re-reg . Oh, and cut the rest of the paint to match the guards.2 points
-
I love your home vids! How old are your upper arm bushes? I'm amazed how much free castor you get under braking. Also, how hard does it hook up with the rear leaves so flat? And I thought that blocks had to be boxed in at the ends? I couldn't quite see the inner guard deflection you spoke of. Might have to watch those vids more. pretty riveting viewing.2 points
-
I say big turbo. It stopped being an original car the minute the Pinto went in, so just go the whole hog and turbo the bejesus out of it.2 points
-
Shit those videos show how much of a hiding factory suspension gets. Might spend a bit more time on my Cedric's going over all the front end!2 points
-
Hi You could possiably have one of the niceest period modified cars in the country. Please do not take it any further, as you said it took along time to find. You have a mk2 project?? Keep the mk1 as is and drive it. And turbo the mk2 .2 points
-
this one is looking back at the brake reaction rod, if you watch carefully you can see the front crossmember flexing under braking loads, and the engine moving around under braking2 points
-
things went well and now its beer o'clock. 2015-12-29_03-58-30 by sheepers, on Flickr 2015-12-29_03-58-40 by sheepers, on Flickr 2015-12-29_03-58-52 by sheepers, on Flickr 2015-12-29_04-13-24 by sheepers, on Flickr 2015-12-29_04-13-39 by sheepers, on Flickr2 points
-
today was a good day, now it goes again. neighbors may have been wondering WTF i was doing with it sitting in the driveway for 20 minutes at 2000rpm. fired up first crank, runs well and seems quite responsive. took it for a tutu round the block a couple of times. needs a few finishing touches, set timing etc etc, put the bonnet back on, couple of small exhaust leaks. it will need a quieter exhaust, curently has 2 straight thru mufflers (3'') so ill probably put a 2 1/2 triple pass muff right at the back2 points
-
got the block back, ended up with a bit more doing to it than originally planned. block tanked, bored, decked, rods resized, crank bead blasted and journals polished, all balanced. state of play at the end of today= also, this happened. photography was done by Richard/Snoozin, jolly good show old chap.2 points
-
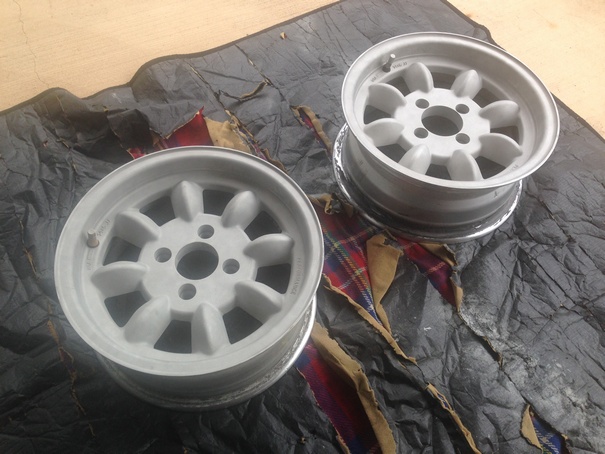
got the 14" wheels blasted and painted and some new semi slicks wrapped on them Hampton Downs Bound
1 point
-
Have your arms fallen off yet?1 point
-
Never used them, don't see any need to start. I always tighten by hand and then torque wrench....1 point
-
I left a note on one of your vids to 'edit' them on YT to flip them around, at least at work I can flip my screen (or Ctrl+arrow does it too iirc) but yea YT will do it for you magnets are choice1 point
-
Cool bike . These old bikes sure can be a learning curve and if your starting to loose heart have a look at what the pomms pay for them now ( classic bike mag ) , I reckon NZ is about 10 years behind UK classic bike prices . The kickstarter is a bummer , you'd probly find that its been a bastard to start for years ( carbs ? ) and the shaft has just fatigued . Have a good look at the sprag clutch ( or whatever one -way drive device is) behind the flywheel , probly find issues there and this will be why the chain and sprocket have been removed. Hamish1 point
-
Had a gander at caffeine and classics. Wheels look sharp man! Hung around for a yarn but couldn't see ya1 point
-
Looks good. Not as good as your plate though.1 point
-
what fletch said. talk to a fridgy guy for the copper. http://www.refspecs.co.nz/product_info.php?cPath=82_84&products_id=5931 point
-
So! Fitted my louvreshades: Need to clean my windows. Also mocked up a nx1600 coupe digital instrument cluster on the parts car: They look like this: Which I think is pretty badass!1 point
-
1 point
-
i cut a hole and filed it square, i found a piece of tail light on the road and filed it square, glued it in the hole and it looked ok, never failed W.o.F. Never made my own lenses yet though.1 point
-
Interesting, you have 2 now? i rode in a holden powered one today & suddenly think it'd be a good thing to own.1 point
-
Shit yarn. Discuss: http://oldschool.co....1-sc-chit-chat/1 point
-
Bought me some sweet white steelies, puhuhuhuhu. Oh hold up a sec... If you're confused, just Google "Bridgestone Super RAP". Discuss: http://oldschool.co....1-sc-chit-chat/1 point
-
More photos of the AW11, courtesy of Christian @ OCD. https://www.facebook.com/media/set/?set=a.412110952327454.1073741968.329051300633420&type=3 (should be viewable without having to log in to Facebook). Discuss: http://oldschool.co....1-sc-chit-chat/1 point
-
Holy shit. HUGE thank you to Christian, Andrew and Sam at OCD in Penrose. They've done wonders with shitty 29-year-old paint that's lived in grimy Tokio smog all its life and has had numerous touchups. Begone, scuff marks from previous Japanese owner's crummy car cover! Now I'm really afraid to drive it anywhere in case the shiny disappears, hahaha. Discuss: http://oldschool.co....1-sc-chit-chat/1 point
-
Now that the car is safely home, time to sperg it out like a dweeb. First things first, fit the TRD shift knob that's outlived two previous AW11s and crack open a new Air Spencer Giga. Ridiculous name aside, this scent is described as "Jasmine Rose refreshing scent system that images a fascinating Japanese men. Parfums Alain Delon samurai type of perfume." Okay then... <insert tired old joke here about fascinating men in two seater hairdresser cars> Reminds me of cinnamon e-cigarettes, if I'm honest. I'll give it a week then perhaps swap it out for something a little less overpowering (but less manly?) Last week I also pulled apart some Recaros I had sitting around, and out of a total of four with various imperfections assembled a matching pair of good seats with period-correct orange camo centres. Part of me thinks they would look awesome in the AW11, but part of me also thinks they would clash a bit too much with the blue exterior. It'll be a while before I can justify buying a pair of AW11 Recaro rails though, so for now these can just sit pretty in the spare room. Discuss: http://oldschool.co....1-sc-chit-chat/1 point
-
New lower crossmember has been fabbed from scratch, welded into place, and liberally coated with underseal/rustkill/Brunox. Parts of the front have also been tidied up with a lick of paint. The certifier visited this morning to complete his final inspection of the crossmember repair; but in typical tradesman fashion he won't be back until tomorrow to write up the actual paperwork for it The new front bumper supports also arrived courtesy of our man Mark at Manawatu Toyota. One of them will be affixed to the vehicle, and the other one goes into storage because you never know when it'll come in handy, right? Then I have to pull flnger this weekend to re-assemble the front, and the car will head back to compliance early next week... for what one hopes will be the last time. It ain't over until it's over! Dat TGP sticker. This one's in slightly better condition than the one which came off the car! Discuss: http://oldschool.co....1-sc-chit-chat/1 point
-
Received word from Rob at the panel shop earlier that the sandblasters completed their work yesterday and the certifier had paid yet another visit to survey the damage. Some choice words were exchanged between Rob and Dale (certifier) about why this wasn't picked up in the initial inspection, apparently there have been a few upheavals and slippage of standards at the compliance centre due to the company changing hands - which is unfortunate as they were a good crowd to deal with initially. Popped down on my break to have a look: Eek. Fortunately the rot is only confined to the bottom of the crossmember; elsewhere the steel appears good, and is consistent with the car being exposed to the elements over the years and more than likely striking road debris on more than a few occasions. The least painful recommendation was to cut out the affected piece, make up a new one, and slot it into place followed by a liberal coating of Brunox/underseal, so the signal has been given to git 'er done. Tomorrow morning I will go in and (carefully) deconstruct the front of the car so work can be started. Discuss: http://oldschool.co....1-sc-chit-chat/1 point
-
First time on all four
1 point
-
Drove the car for the second time ever since it landed, from the panel shop back to compliance. Already noticed a couple of things that will need fixing interior-wise, but I'll cross that bridge when the time is right. Marvelled at how smooth and rattle-free everything is, having less than 100,000km will do that I suppose. Discuss: http://oldschool.co....1-sc-chit-chat/1 point
-
So the car's been painted and ready for almost a fortnight now; unfortunately due to the repair certifier not actually visiting and signing off the final repairs until just this past Thursday I may have missed the 28 day vehicle repair window - which means I most likely have to pay a second fee to undergo a second compliance inspection. Can't say I'm very happy with this result, but shit happens. In the meantime, things have happened over the weekend... Car is now back together, yippee. And sporting its freshly painted new adornments from the previous update, which I fitted down at the panel shop on Saturday evening. The rear quarter has been resprayed and blended in the best possible manner. Once the car has been through compliance it'll receive a final treatment of the repainted parts, a full cut and polish, and touch ups to a few other non-critical areas. This coming week it'll head back to compliance to have all of its mechanical issues rectified - such as brakes, tyres and steering - and then once everything is sorted I can finally register it. I'm hoping this rare factory option decal doesn't get completely obliterated by the tints coming off (a condition of compliance). Discuss: http://oldschool.co....1-sc-chit-chat/1 point
-
Repair progress update. Certifier has been in and given the welds a clean bill of health, so things have now been rustkilled and prepped for painting. A couple of tiny patches will have to be added here and there, but for the most part the rust appears to be surface only. The replacement rear quarter section comes halfway up the B-pillar and the welds in this section definitely had to be inspected. Before anyone comments on how dodgy this might appear - the factory join on the other side of the car wouldn't look much better if it were all ground back like this! The only "serious" piece of rust on the car mentioned by the dealer also cleaned up remarkably well. (This is what it looked like originally.) This section of chassis usually obscured by the side skirt (another rust-prone area) had no issues. Second shot is of the underside, again, pretty tidy with only minor surface crap to clean up and rustkill. Admittedly I am a bit worried about the quality of the factory decal, those cracks in the clearcoat don't look very good :/ Yucky shit from above the left hand tail light, gone! Cleaned up section below the tail light. The panel join here was also inspected. A patch will be added where the metal has been eaten away right at the top; again this is due to exposure to the elements and less than satisfactory sealing. Discuss: http://oldschool.co....1-sc-chit-chat/1 point
-
Turns out the suspected rust hole in the C-pillar vent wasn't actually a rust hole, but instead a patch of grime-encrusted flaking clearcoat. Quite relieved actually. The clearcoat will need to be removed then reapplied in that area, ahead of the final repair cert inspection. My opinion of the car's quality has improved considerably from my initial assessment. Discuss: //oldschool.co.nz/index.php?/topic/49412-80s-kid-part-ii-eds-aw11-sc-chit-chat/1 point
-
Apologies in advance for the potato-quality photos. Moto Gs aren't renowned for their cameras (but are good enough for quickly documenting stuff)! As mentioned, the main point of concern for the inspectors was the join around the left hand tail light where the replacement quarter panel met the rest of the car. Due to the exposure of this section to the elements (and the fact this is a 1980s Toyota) it wasn't all that surprising to see this when the tail light was removed and boot lip seal peeled back: You can see some of the spot welds in the first photo of the series above which need to be signed off by the repair certifier once they've made sure they are as good as factory. Back in Japan some attempt was made to mitigate or at least slow down the spread of rust on the inside of the boot. Appears to be some kind of putty/sealant. Anyone who's owned an AW11 before will be aware of the dreaded water trap behind the C-pillar vents. My previous AW11 was one of the lucky escapees and remained absolutely pristine in those areas, but the New Kid (on the block) ain't so lucky: Bwaa bwaaaaarp! At least there's no discernible cancer around the bottom of the C-pillars themselves. Finally, the boot cavity rearwards of the wheel arch will also need to be cleaned out and checked to the repair certifier's satisfaction along with the welds in this area. So far in terms of rust the New Kid surpasses all initial expectations, considering it's had a less pampered life subject to the busy, smoggy streets of Tokyo from day one when it rolled off the production line in 1986, compared to my previous AW that managed to escape Japan for the crystal clear highland climate of inland Otago in the mid '90s (and as a result had minimal rust). Discuss: //oldschool.co.nz/index.php?/topic/49412-80s-kid-part-ii-eds-aw11-sc-chit-chat/1 point
-
While I remember, I would also like to thank Ewan and the lads from Stacked, Anna from Bay Customs Tauranga, North Shore Compliance, Rob's Body Shop, and John (S124AB on the forums) from Auto Kiwi for all their help so far. The AW11 is the first car I've imported "blind"; without being able to rely on my old contacts who have all now retired or left the industry. Special mention goes to John, who in true OSGC spirit has been working tirelessly of his own initiative behind the scenes ever since the car left the wharf to ensure the process has been far less daunting than it could have been. Kudos! Discuss: //oldschool.co.nz/index.php?/topic/49412-80s-kid-part-ii-eds-aw11-sc-chit-chat/1 point
-
Washing the accumulated storage grim off Felicity revealed her lovely condition. Oh she looks good and I must admit a few caresses were shared as she was tucked back into the garage... With inspiration flowing the W50 gearbox and Pinto bellhousing was trial fitted. Success! As it came together nicely. Then I left my rubber arm a bit too close to the guys and ended up accidentally buying something... Why chose this jellybean shape of '90's excess...? Because YB Turbo. Hmmmm a little distraction, again. Thank goodness I have an understanding wife as I dragged this home.
1 point
-
been doing boring things like fitting a headlight relay, found while doing that the wiring to the dip switch had been warm and melted a bit, i hadnt been using the lights much cause i was worried about melting the headlight switch with the extra current draw. ( i pinched the semi sealed beams out of the ute before i sold it, these have headlights that are unique to VG/VH and some other english thing that makes them super hard to find and usually only sealed beams that are barely brighter than the park lights) also tidied up the wring under the dash and removed some no longer needed wires and stuff and got back from a drive today and decided to change the tail pipe. when i changed the rear muffler i made a tip kind of like an E49 charger has, it turns up at the end, i made it curve up with the shape of the rear panel, looked good but was also good at staining the boot and bumper with 318 breath. so i cut a slot in the rear panel and made a twin 2 1/4 tip which sticks out a bit more to keep the shit off the back1 point
-
got the heads back and put the rest of the engine back together.1 point
-
after some goober with a die grinder attacked them waiting on valves to arrive then will send them off for some exhaust guides and seats. block should be machined this week. its having a 40 thou haircut to get the comp ratio back up. SB chryslers are terrible for low compression which is part of the reason i built a turbo one. most aftermarket pistons have a much lower compression height than original- the best ones i could find at reasonable price were out of a later model magnum 318, they were still 30 thou shorter than the factory slugs. without decking the block they would sit 60 down from the deck, about 8.5-1 comp. depending on weather the heads need a skim, comp should be 9.3- 9.5 now. will probably need shorter pushrods now too......1 point


This leaderboard is set to Auckland/GMT+12:00