
Leaderboard


.thumb.jpeg.b39a639a8ff8a614681c3c9dca730a70.jpeg)
Popular Content
Showing content with the highest reputation on 26/12/24 in all areas
-
Time for the next project, the main sail is very much on its last legs. The fabric has worn to be paper thin in places and there's 2 or 3 small tears developing. I think its about 10 years old and has been used hard in that time, so its justifiably end of life. As sails wear, the fabric stretches and they lose a lot of the nice airfoil shape - making them more draggy, less efficient and harder to trim. Talked to the sailmaker about getting a new one - the new sail will be made to suit the shape of the rig, so If we're not happy with it, now is the time to change things. So what is the current issue? Weather helm. Here's my simplified understanding as a novice; The boat rotates around a point somewhere in line with the keel. If the front and back sails don't produce equal amounts of torque around this point, the boat will always try to turn itself into the wind and the helmsman will need to apply opposite rudder to counteract the force. This creates drag and makes the boat slower. A small amount of weather helm is considered good, but any more than 5-10 degrees of rudder angle is universally agreed to as being bad. The boat currently has a LOT of weather helm when the wind angle is at 70-90 degrees. This can be countered by reducing the amount of power the mainsail is making, but thats reducing overall power and speed. At the moment, our mast is raked backwards quite a lot. Most online sources think 3-4 degrees is a good number. My bucket trigonometry estimates we have around 6 degrees. We want to move the whole sail plan forward a little relative to the pivot point. This can be done by reducing the amount of rake and putting the center of effort closer to the pivot point (around the keel). So this weekends project is to adjust the rigging to take some of the rake out of the mast. The art is in trying to keep a 15 meter long aluminium extrusion arrow straight using only tension on the supporting wires. I've never tried this before, but we'll see how we go. Unfortunately, a bendy mast profile with fractional rig and multiple swept back spreaders is one of the hardest configurations to get right. With adjustments needed on 3 different stays each side of the mast to keep it straight and tight and inducing the correct amount of pre-bend. Reading can only teach so much. Only one way to learn I guess.8 points
-
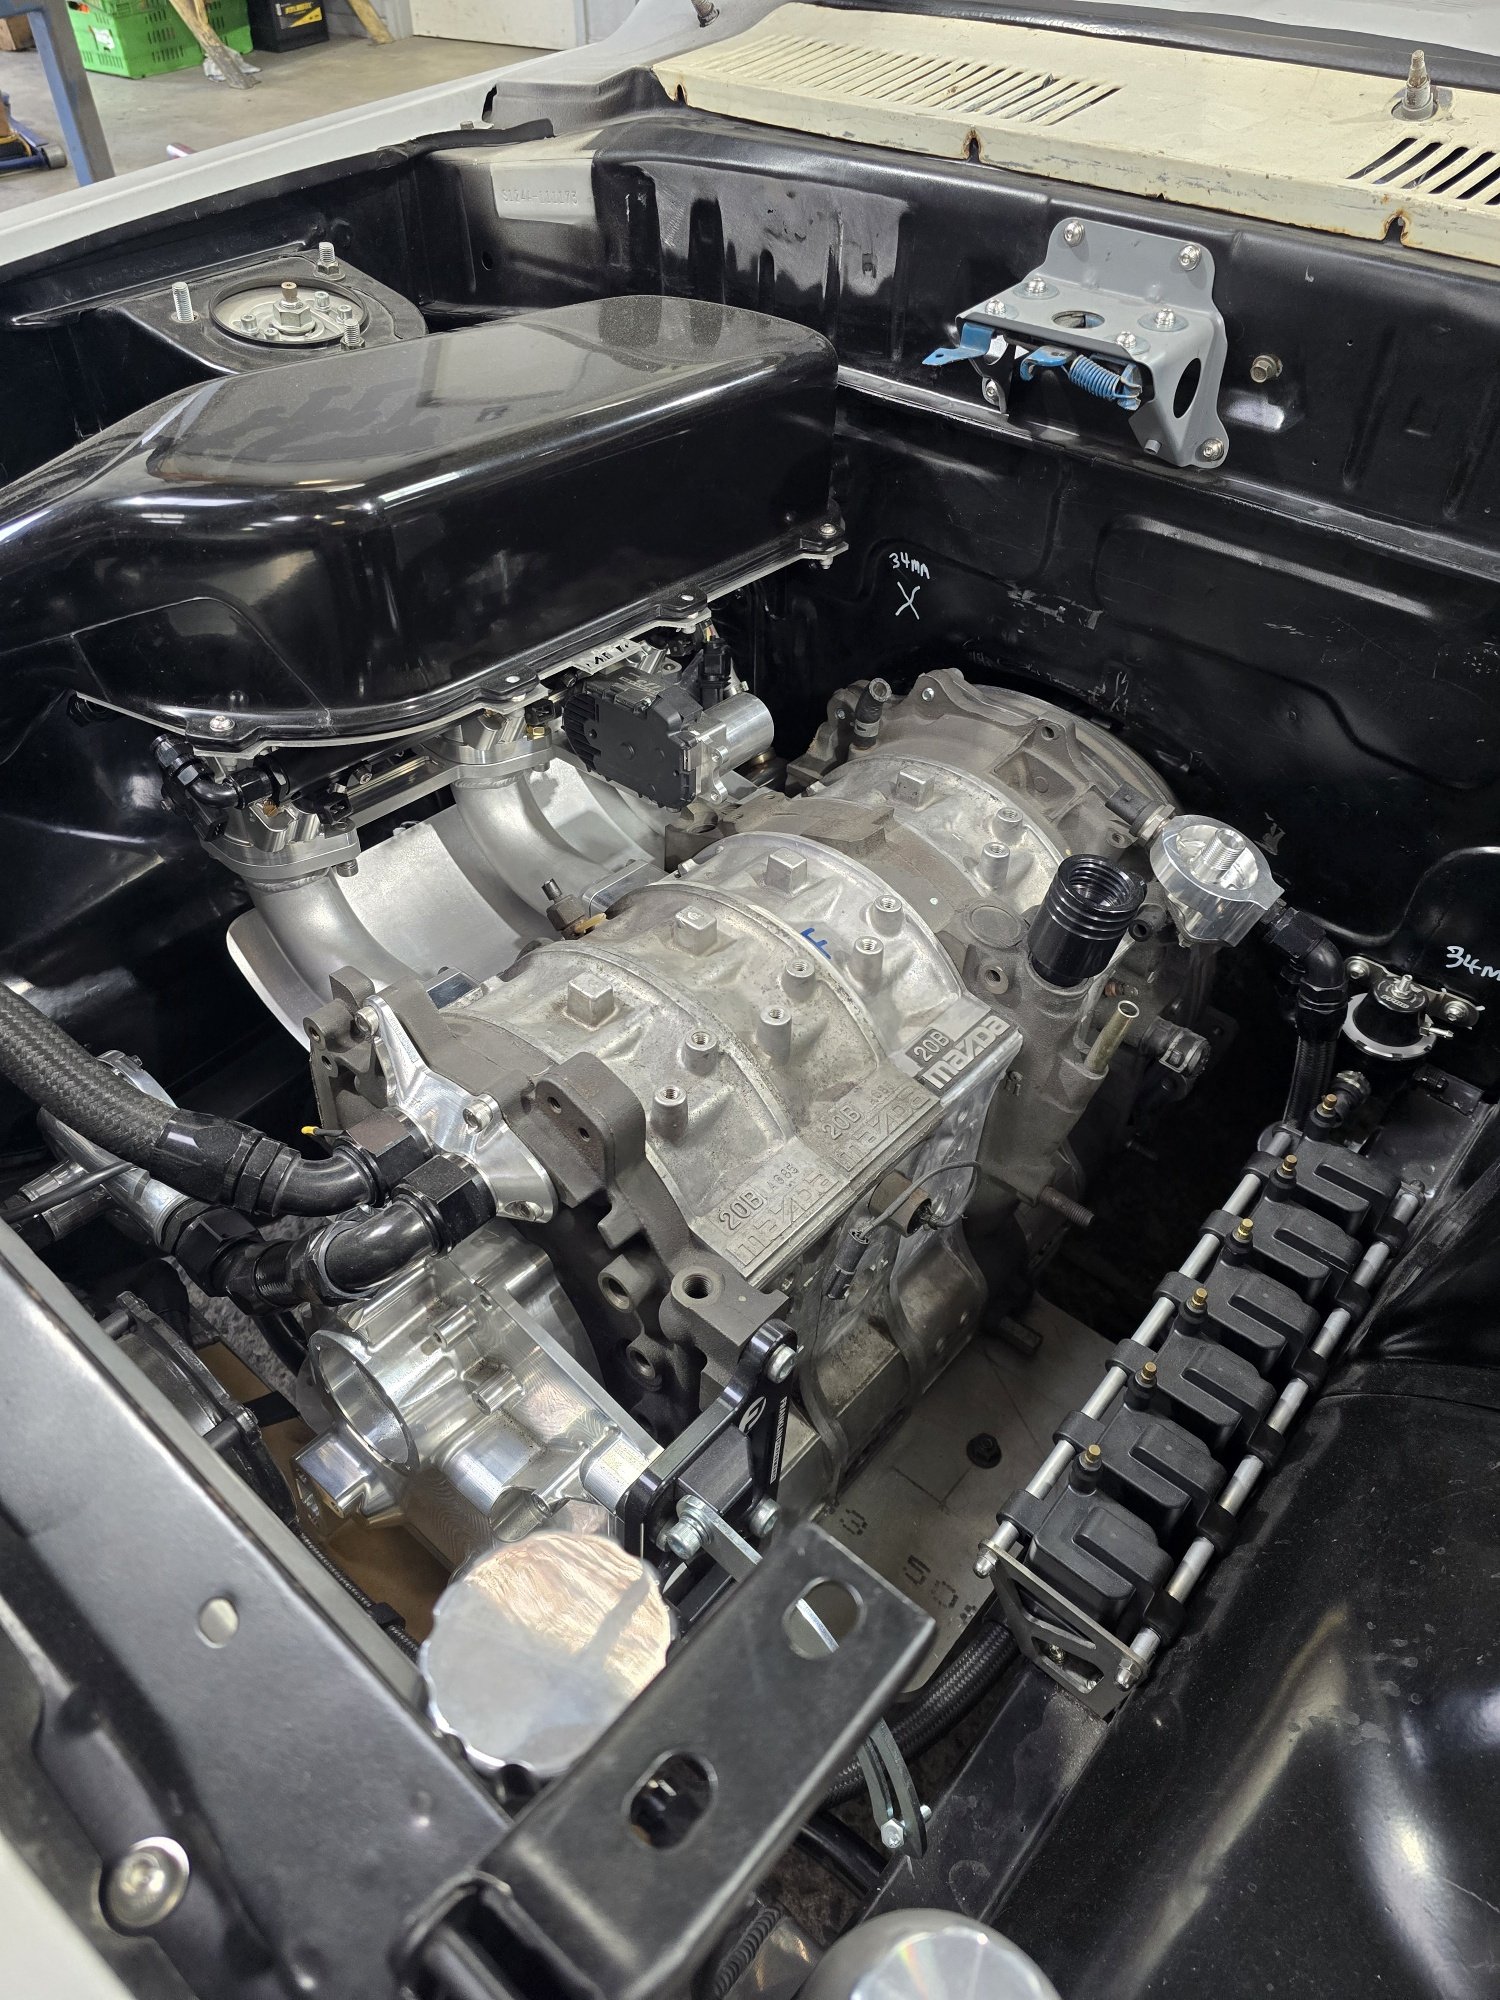
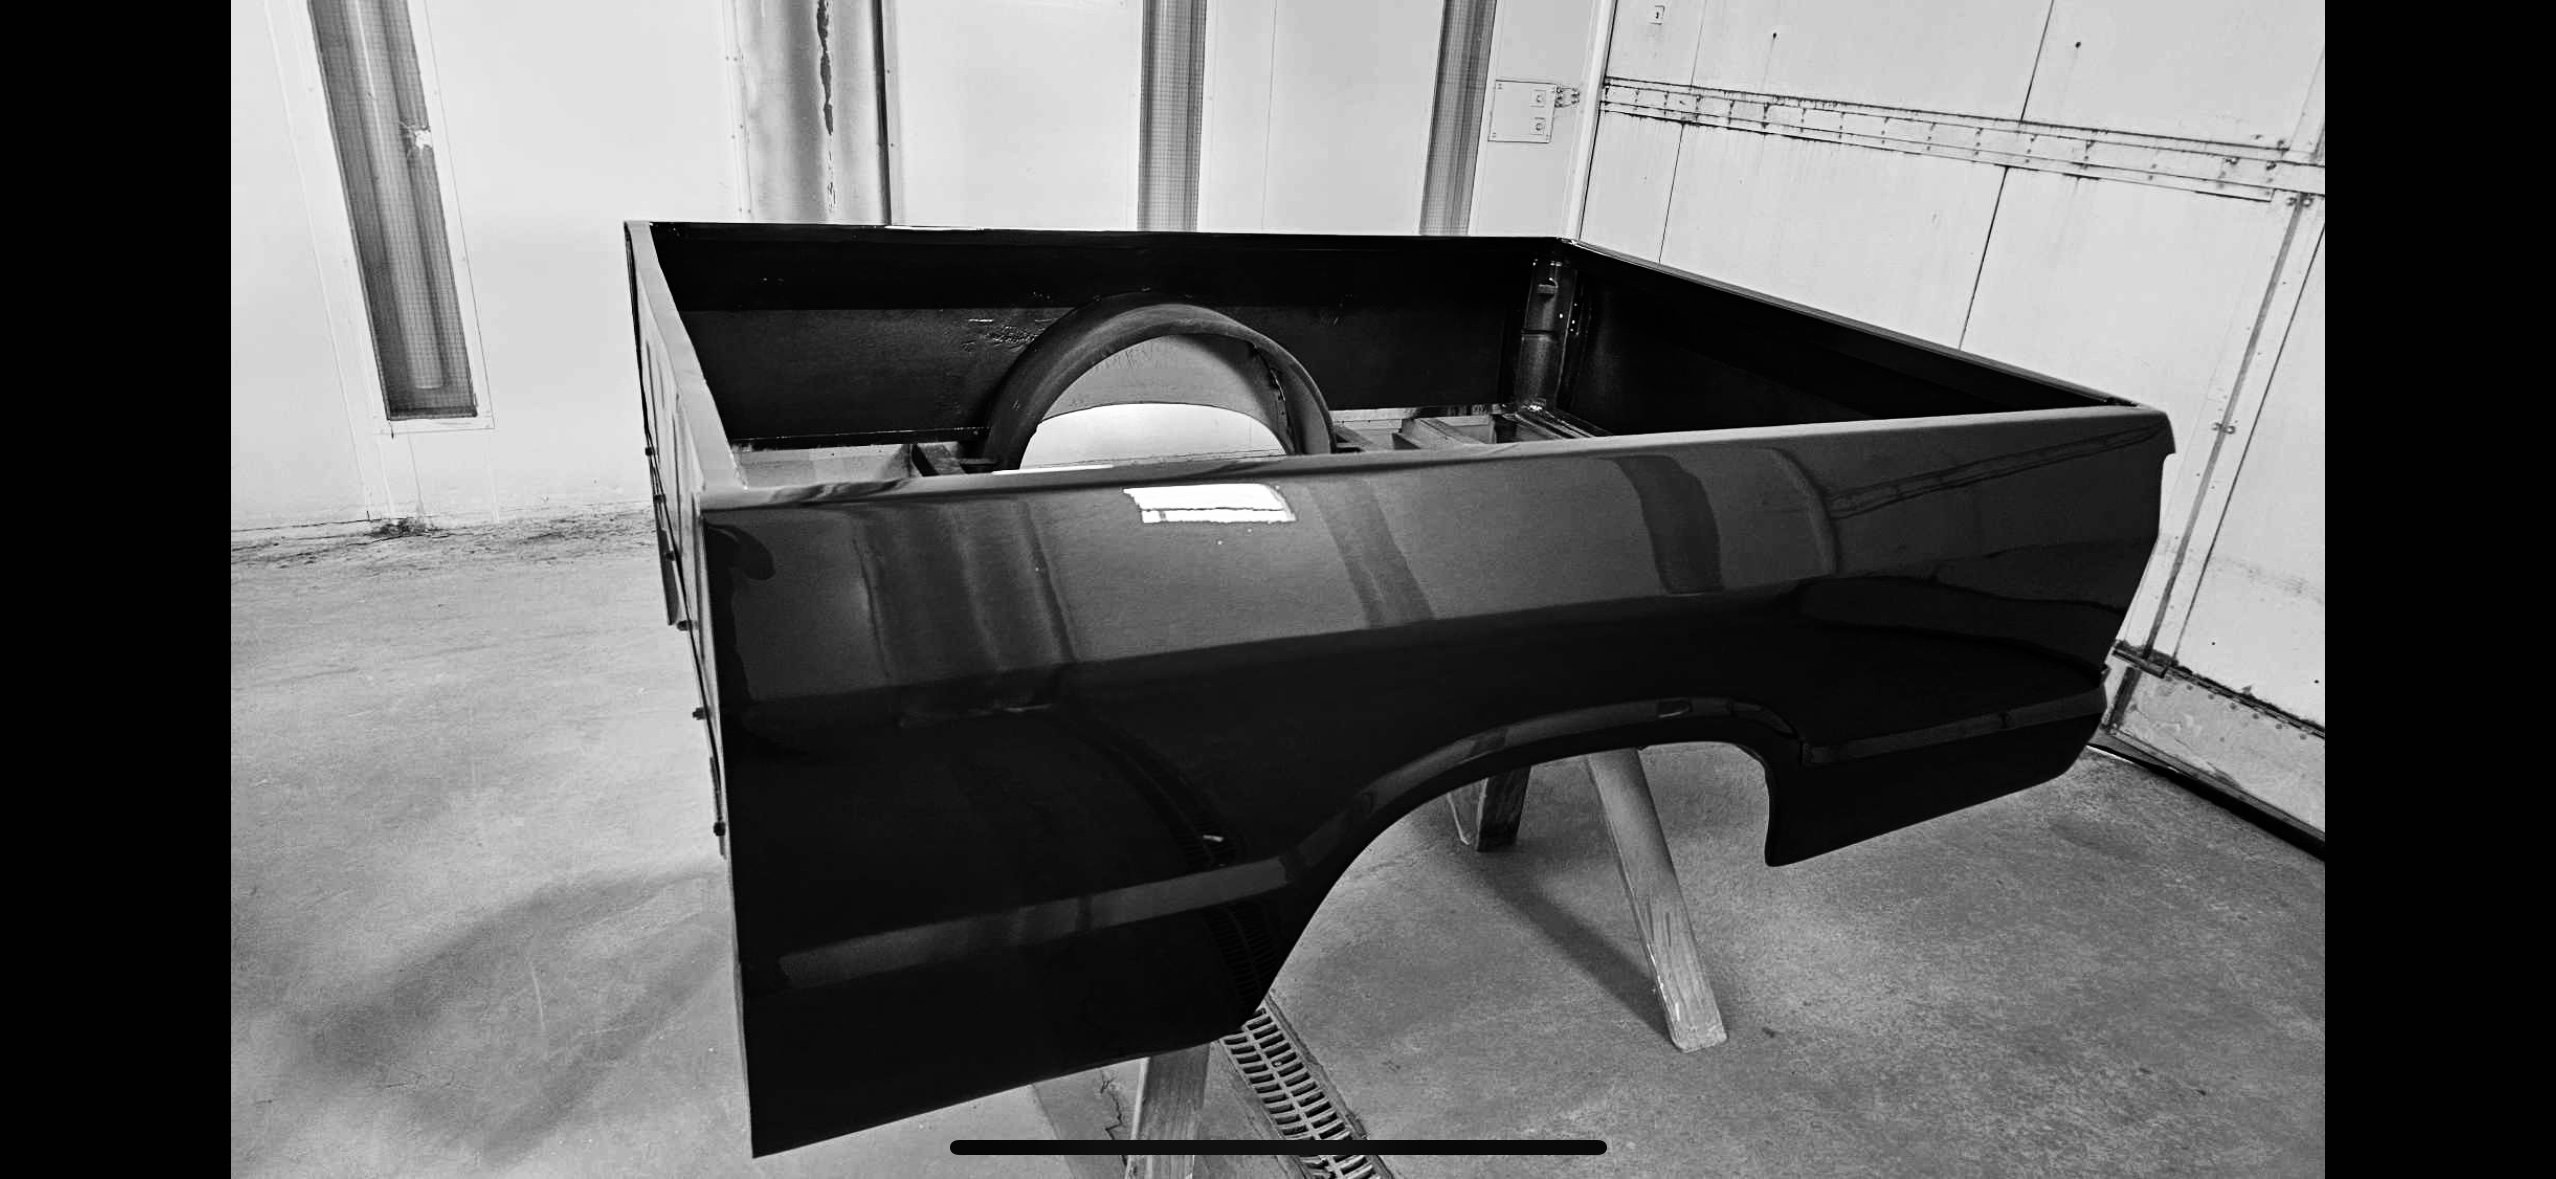
I've been whittling away on various things I wanted to repair or upgrade on the Honda engine before re-fitting it. First thing was the throttle body pulley. Even thought its an off centre progressive design its not progressive enough. So I made another and offset the centre hole a further 5mm. I had to slot the cable outer barrel adjuster bracket further to align the cable entry. I then popped the engine onto the big wheely table. Easy as because I made the engine stand the same height as the table and work benches.. Remember the nice alloy garnishes Id machined to fit on the cam covers where there used to be plastic badges. They looked lovely. For a while. Because on about the 2nd drive the double sided tape decided it didn't like heat and they both fell off onto the road not far from us. I did manage to locate one of them but it had been driven over a few times and looked a bit sad... So I had to machine up some new ones... This time round I painted them alloy silver and then sanded off the tops. They just looked nicer for it. I then glued them in place using some Sikaflex. I don't think they'll fall off now. In place.. Next job was the one I deemed most important. I discovered upon stripping the engine 4 years ago that they don't have very large crankshaft thrust bearings. They don't really need to because there's no clutch forces exerted upon the crank,with the Goldwing clutch unit being on a separate layshaft. It was something I had never thought about before getting the engine and its played on my mind the whole time. I consider it the weakest link. I may well totally be a non-issue but I'd rather see if there was a way I could help it last. There's about .006" of thrust movement stock - measured as such... I had thought it out and came up with a simple solution involving some expensive, hard, slippery engineering plastic designed for high heat. This was sandwiched between the rear engine plate and the back of the flywheel and had just a few thou clearance so being a backup thrust bearing when the clutch is pressed. Help share the load I thought. The plastic thought different. I knew it had decided to leave the party early because I could see its melted edges through the bellhousing drain hole. But how bad it was I wouldn't know until I removed the flywheel.. lol... Ha. So that didn't work as expected then. Version 2 time I've been thinking about this a while. I looked into very large, thin section thrust bearings. Found an ideal item in the UK but it was 1300 quid. Back to my drawing board. I came up with an idea that uses $10 bearings. I needed a big chunk of alloy to machine up. Local alloy stockist no longer sells 16mm alloy sheet cut to size. They want to sell me a square metre. I went to a Nelson based fabrication outfit that has a water jet and the nice fella gave me a bloody large section of 20mm alloy. I only barely fit into the frunk of my imp (so improving the handling no doubt..) Cut it to size in the trusty table saw that has amazed me.. Into the lathe where I created a massive amount of swarf. Milled out some slots.. Drilled some holes. Very critical this one! They had to be bang on. Machined up some tiny pointy domed sleeves for the bearings.. Assembled it (notice I'd even got out my surface table for marking duties) I shimmed it out, testing and measuring until I had about .005" thrust. Just enough so it'll only touch when the clutch is pressed in. Finally in place... The other main job to do was sort out the reason why I had ended up removing the flat six in the first place. That leaking clutch slave cylinder. Even though I had made an alloy plate to support the mounting face it was not burly enough. This coupled with the fact that I had already burst the slave cylinder previous and its was never squished back together as neatly as it could be. So I reluctantly shook the moths out of my wallet and bought a brand new slave cylinder. I than machined down the mounting points I'd added to the Subaru transmission to allow for a steel clamping plate. I don't expect to have any issues with it now ! I then flipped the engine on its end and gave it a clean around the head gasket seam on the oil return galleries. Its always weeped a tiny amount of oil on both sides at these points... Not enough to drip but enough to slowly make a mess and run down the sides. Not very easy to clean and seal with the engine in the car. Now's my chance. I masked the areas.. Then another Sikaflex product was used.. Sealed up.. I'll see how it goes. Another job that I decided to leave was cleaning up the window on the Mandolorian spaceship. Now that's not something you'll hear many mechanics say But its getting a bit oily inside from general fumes, as I expected it might. I undid the machine screws holding it down but it wasn't going to lift off easily. The foam seal has stuck it in place. I knew if I forced it would crack. Maybe a job for another day. ot important now. At least they are still visible and the leds still light it up nicely. Exhaust box had one baffle that was vibrating at idle. Very annoying. So took it apart and fixed it. Gearbox mounts were knocking the subframe so I gave them a tickle with the cutoff wheel and welded them back up. The gear linkage rod linear plastic bush is something I want to improve in the future with a proper linear bearing and some seals. But for now it got a clean and some grease. I also installed a hotter thermostat. Up from 82c to 88c. So with these jobs done and the weather forecast of two days of rain I set about removing the Datsun engine. I timed myself and it took about an hour because the rear valance has to be removed. swapped the driveshafts across. About 45 minutes because bearings need to be swapped too. I might get some new bearings so both axle sets have their own. Then bolted the Honda in place. This took 15 minutes. Smug faced me then realised I'd forgotten to attach the first part of the gear shift shaft. Whoops. Back out, fit shaft, back in. Plugged everything up and went for a starter turn to build up oil pressure. But starter kept blowing the 10amp solenoid fuse (I'm so glad I actually made a circuit just for the solenoid now!) I'm not sure what was happening but I took the starter out stripped it, cleaned it, pondered it, reassembled it and it then worked fine. Now a engine turn over. Whir whiiiiiir whiiiiir whiiiiir. Something wasn't right. It should turn over quicker than that! Took the engine out again. Removed the box. Engine was hard to turn over. Removed clutch and flywheel to discover that the clutch bolts were just protruding through enough to rub the alloy thrust bearing 2000 plate. Whoops. So I clearanced the plate, flap disked the protruding bolts down. Reassembled and all good. Bolted the lot back in, tested the starter and this time its turned over fine. With the clutch bled, the fuel lines etc attached I started the engine. It started up mint just like it was running yesterday. Tested the clutch. The thrust bearing 2000 rollers made a sound not unlike a noisy clutch release bearing and initially I was thinking 'well that won't do!' but they soon settled in. Still a noise but I know what it is and why its there. Better then potentially wearing away the crank thrust bearing So with the engine all back together and in place... So we went for a drive. Coolant still doesn't get as hot as I'd like to see but it could be that the pump controller had reset to the default so I'll have a play there. Otherwise get an even hotter thermostat. The engine runs fine. The new throttle body pulley makes for much easier driving off from standstill and smoother when crawling through our local village with the many speed humps. But the fumes from the exhaust getting sucked into the cabin when we lower a window is terrible. Its the number one fault now. I have tried blocking off the through flow vents sited just above the rear window but its not fixed it. The gearstick base plate has a gap - could it be possible there's a low pressure zone under the car and the gas can creep forwards along the tunnel and enter there? I'm going to design and make a new exhaust muffler setup. I'm still not happy with the exhaust sound and low rpm, it still drones and only really sounds like a flat six when above 3500rpm. I know these Goldwing engines can sound much better. More Porsche. Less Cifero. Possible benefit will be less fumes if I go side exit exhaust. The Datsun has a side exit and its much better with regards to fumage. I'm also not entirely happy with the look of my current exhaust box either. So I have taken some measurements and will start doing some design sketches along with more research.6 points
-
I printed some carb spacers for @ynot, he will be able to tell you at some point if they survived the ordeal... Why would I take advice from you when you yourself are so unwilling to accept the clear majority of opinion about the weight balance of the Imp?4 points
-
It does have 6 carbs too but they feed from a common airbox. I'm very much looking forward to fitting my itbs. I might have to enlist the help of @ThePog or @Roman to whip up some flanges to take them before I commit to alloy (if alloy is even needed) because I think i'll get bored very quickly hand machining something to suit them...
 4 points
 -
It actually won't take too long, the finish sanding is going alot quicker than I thought. The thought and effort that went into your jig paid dividends with only about a half mm offset between sides. With my automotive sanding block, taking the sides down flush isn't a big deal. I'm only sanding at 240 grit at the moment but already the grain and character of the various woods is coming out and holy hell it's going to look amazing when oiled.3 points
-
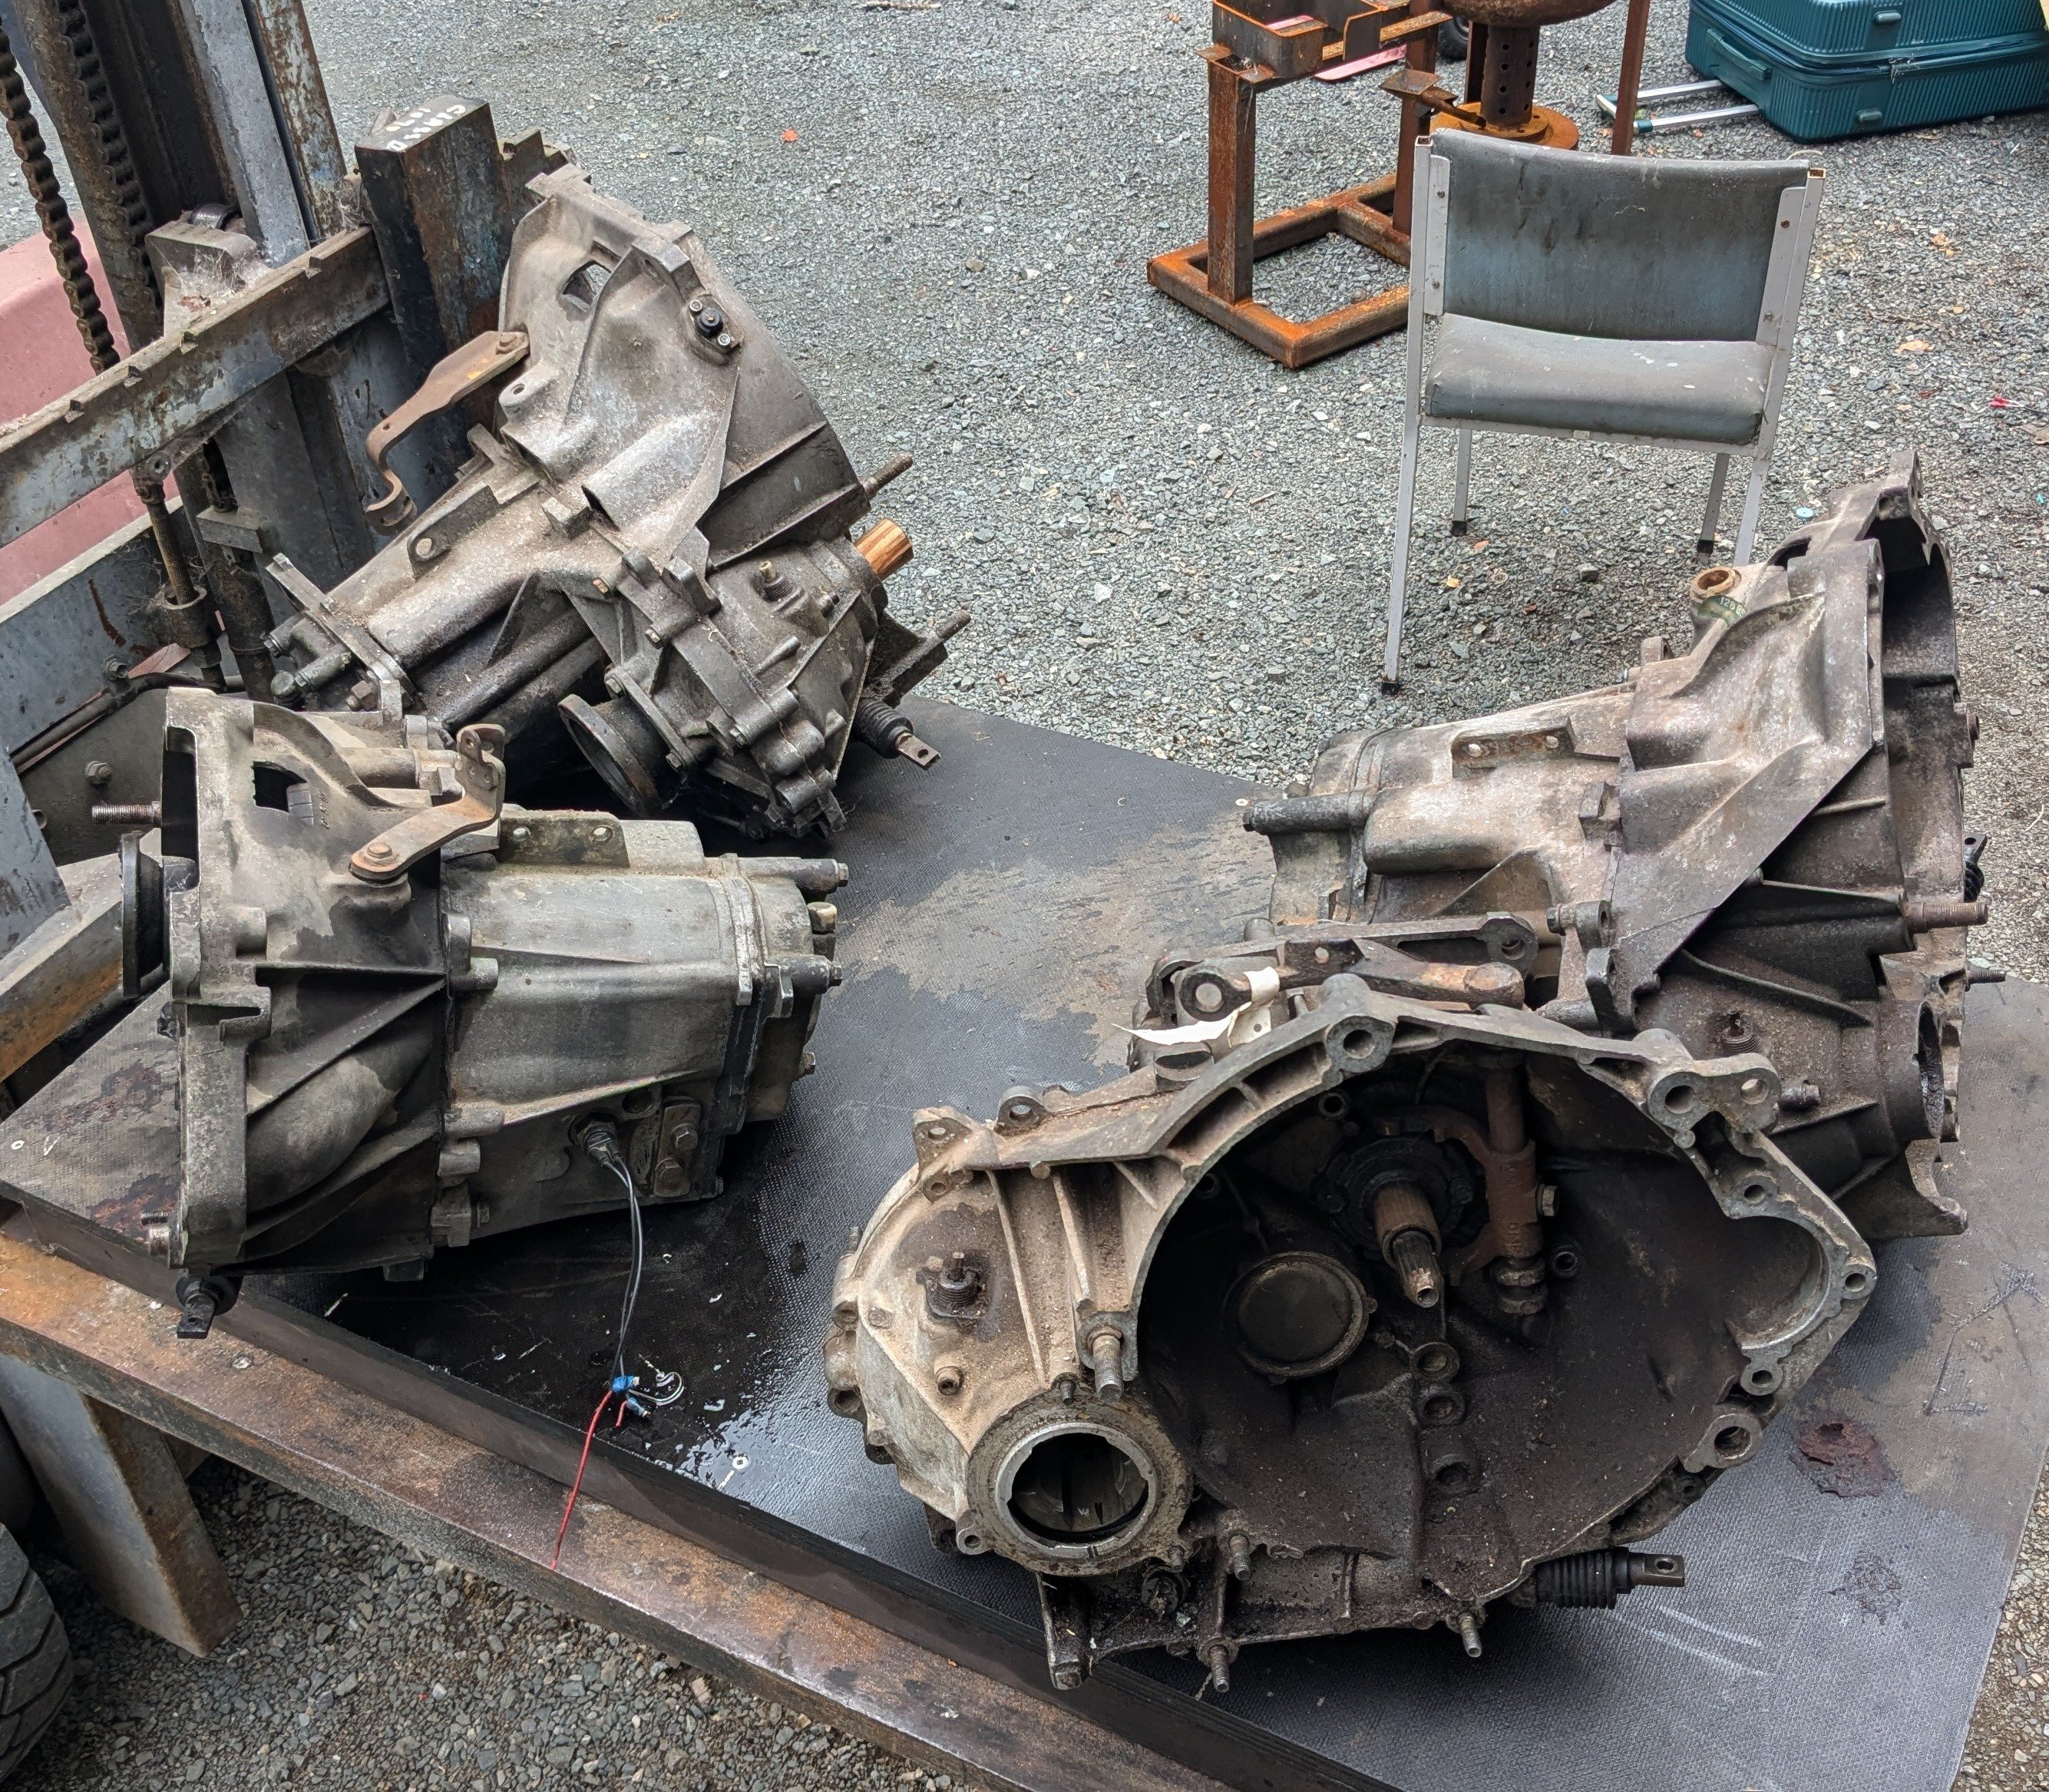
As it's kindof the hols for me I figured I may as well implement my gearbox backup plan, there will be family stuff today, but later this arvo I'll take a situational. Edit; did the deed. The old box casing was still leaking a bit even after Alex welded it, but this was probably my hacked bung design IRL. Then there was the broken keyway situation, so I swapped those bits out of the second spare box. The non broken gear cluster had different bearings but they swapped over fine. I might check the diff backlash but maybe Ill just send it.
3 points
-
Yea so I smashed things out a bit today, basically it is all back in now with a bit more shit to bolt on, which I will sort tomorrow. I then have to wait for either the new valve shims I ordered to arrive from the UK, or to take out the shims and get them thinned at Mean Machine, or for some GC to send me what I need somehow. But all of that is at absolute minimum a few days after the 6th so I guess I will be focused on other things. Anyway it was 10 mins to swap the boxes once it was all out. I pulled off that exhaust wrap, it was pretty shitty anyway and mostly fell off. I was getting bored of it getting me itchy everytime I touched it. During the action I stupidly lay down underneath where I had removed it all from the engine while bolting things on and now the crack of my arse itches. What a twat. I also printed some carb plugs which I thought was better than draping a rag over them. So let me know if you have some Fiat shims, 33mm diameter; 3.50/3.50/3.65/3.75 Pretty please.2 points
-
Clearly the answer is too mount the injectors spraying into the intake trumpets https://oldschool.co.nz/index.php?/topic/71963-inlet-trumpet-dyno-testing/page/10/2 points
-
You just wait till I load up the poster print consisting of screen shots of well informed Barry comments from a recent facebook post I had made on a modified car group. Much mirth. Some angry barries out there.2 points
-
I like this sound. Go to 3min2 points
-
Engine sounds better than ever by the way Lifter tick has actually gone away I think this engine may outlive me.....2 points
-
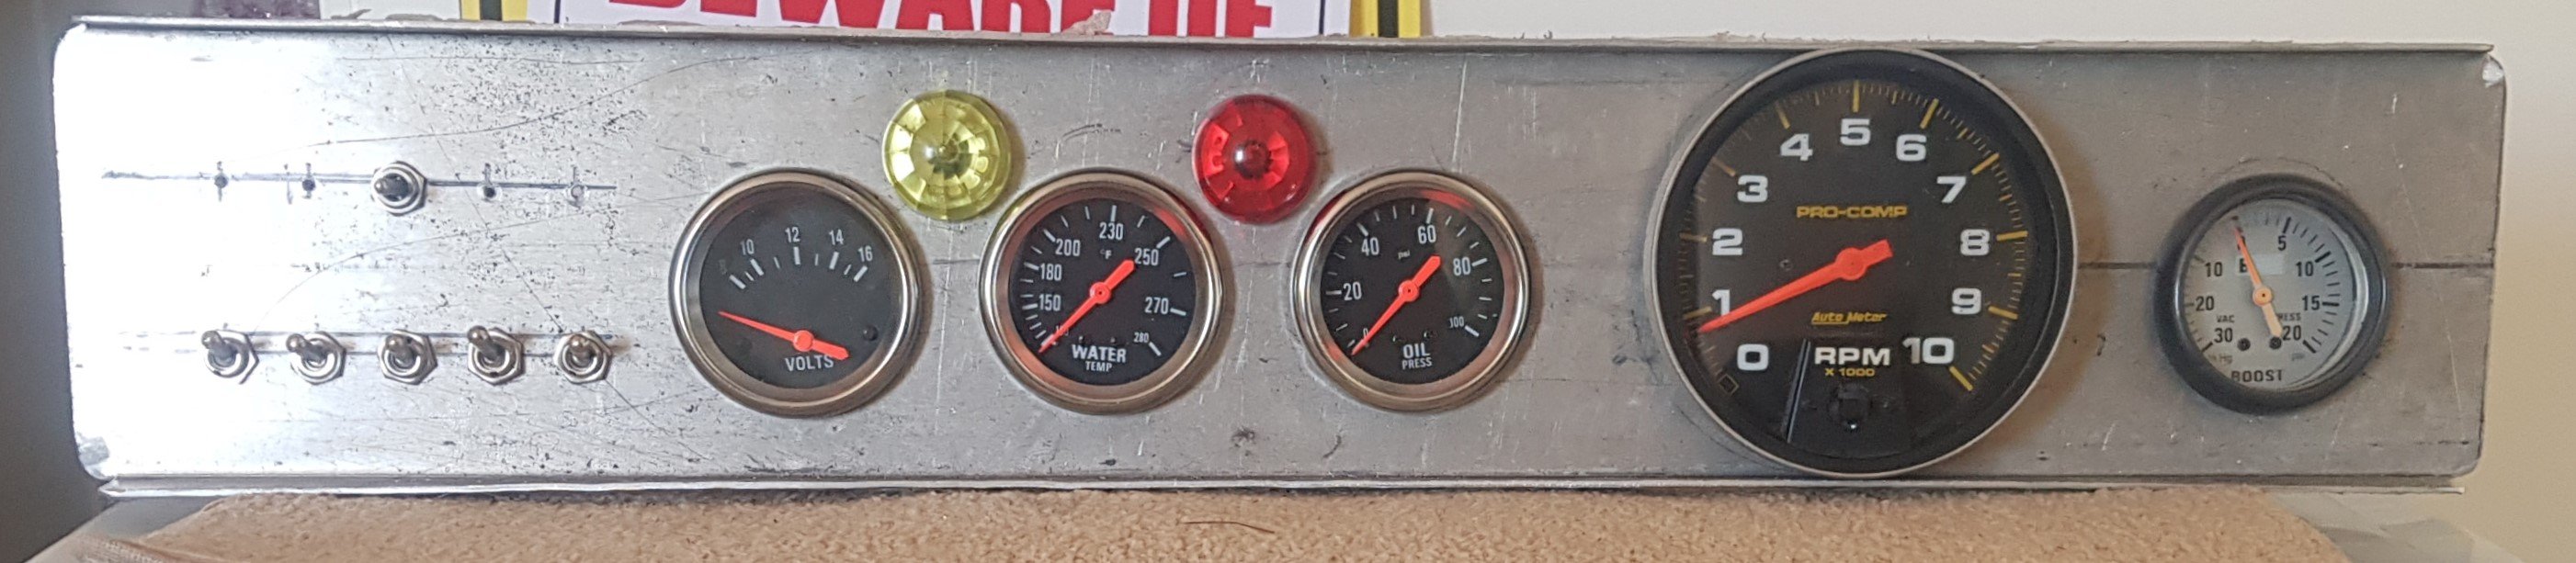
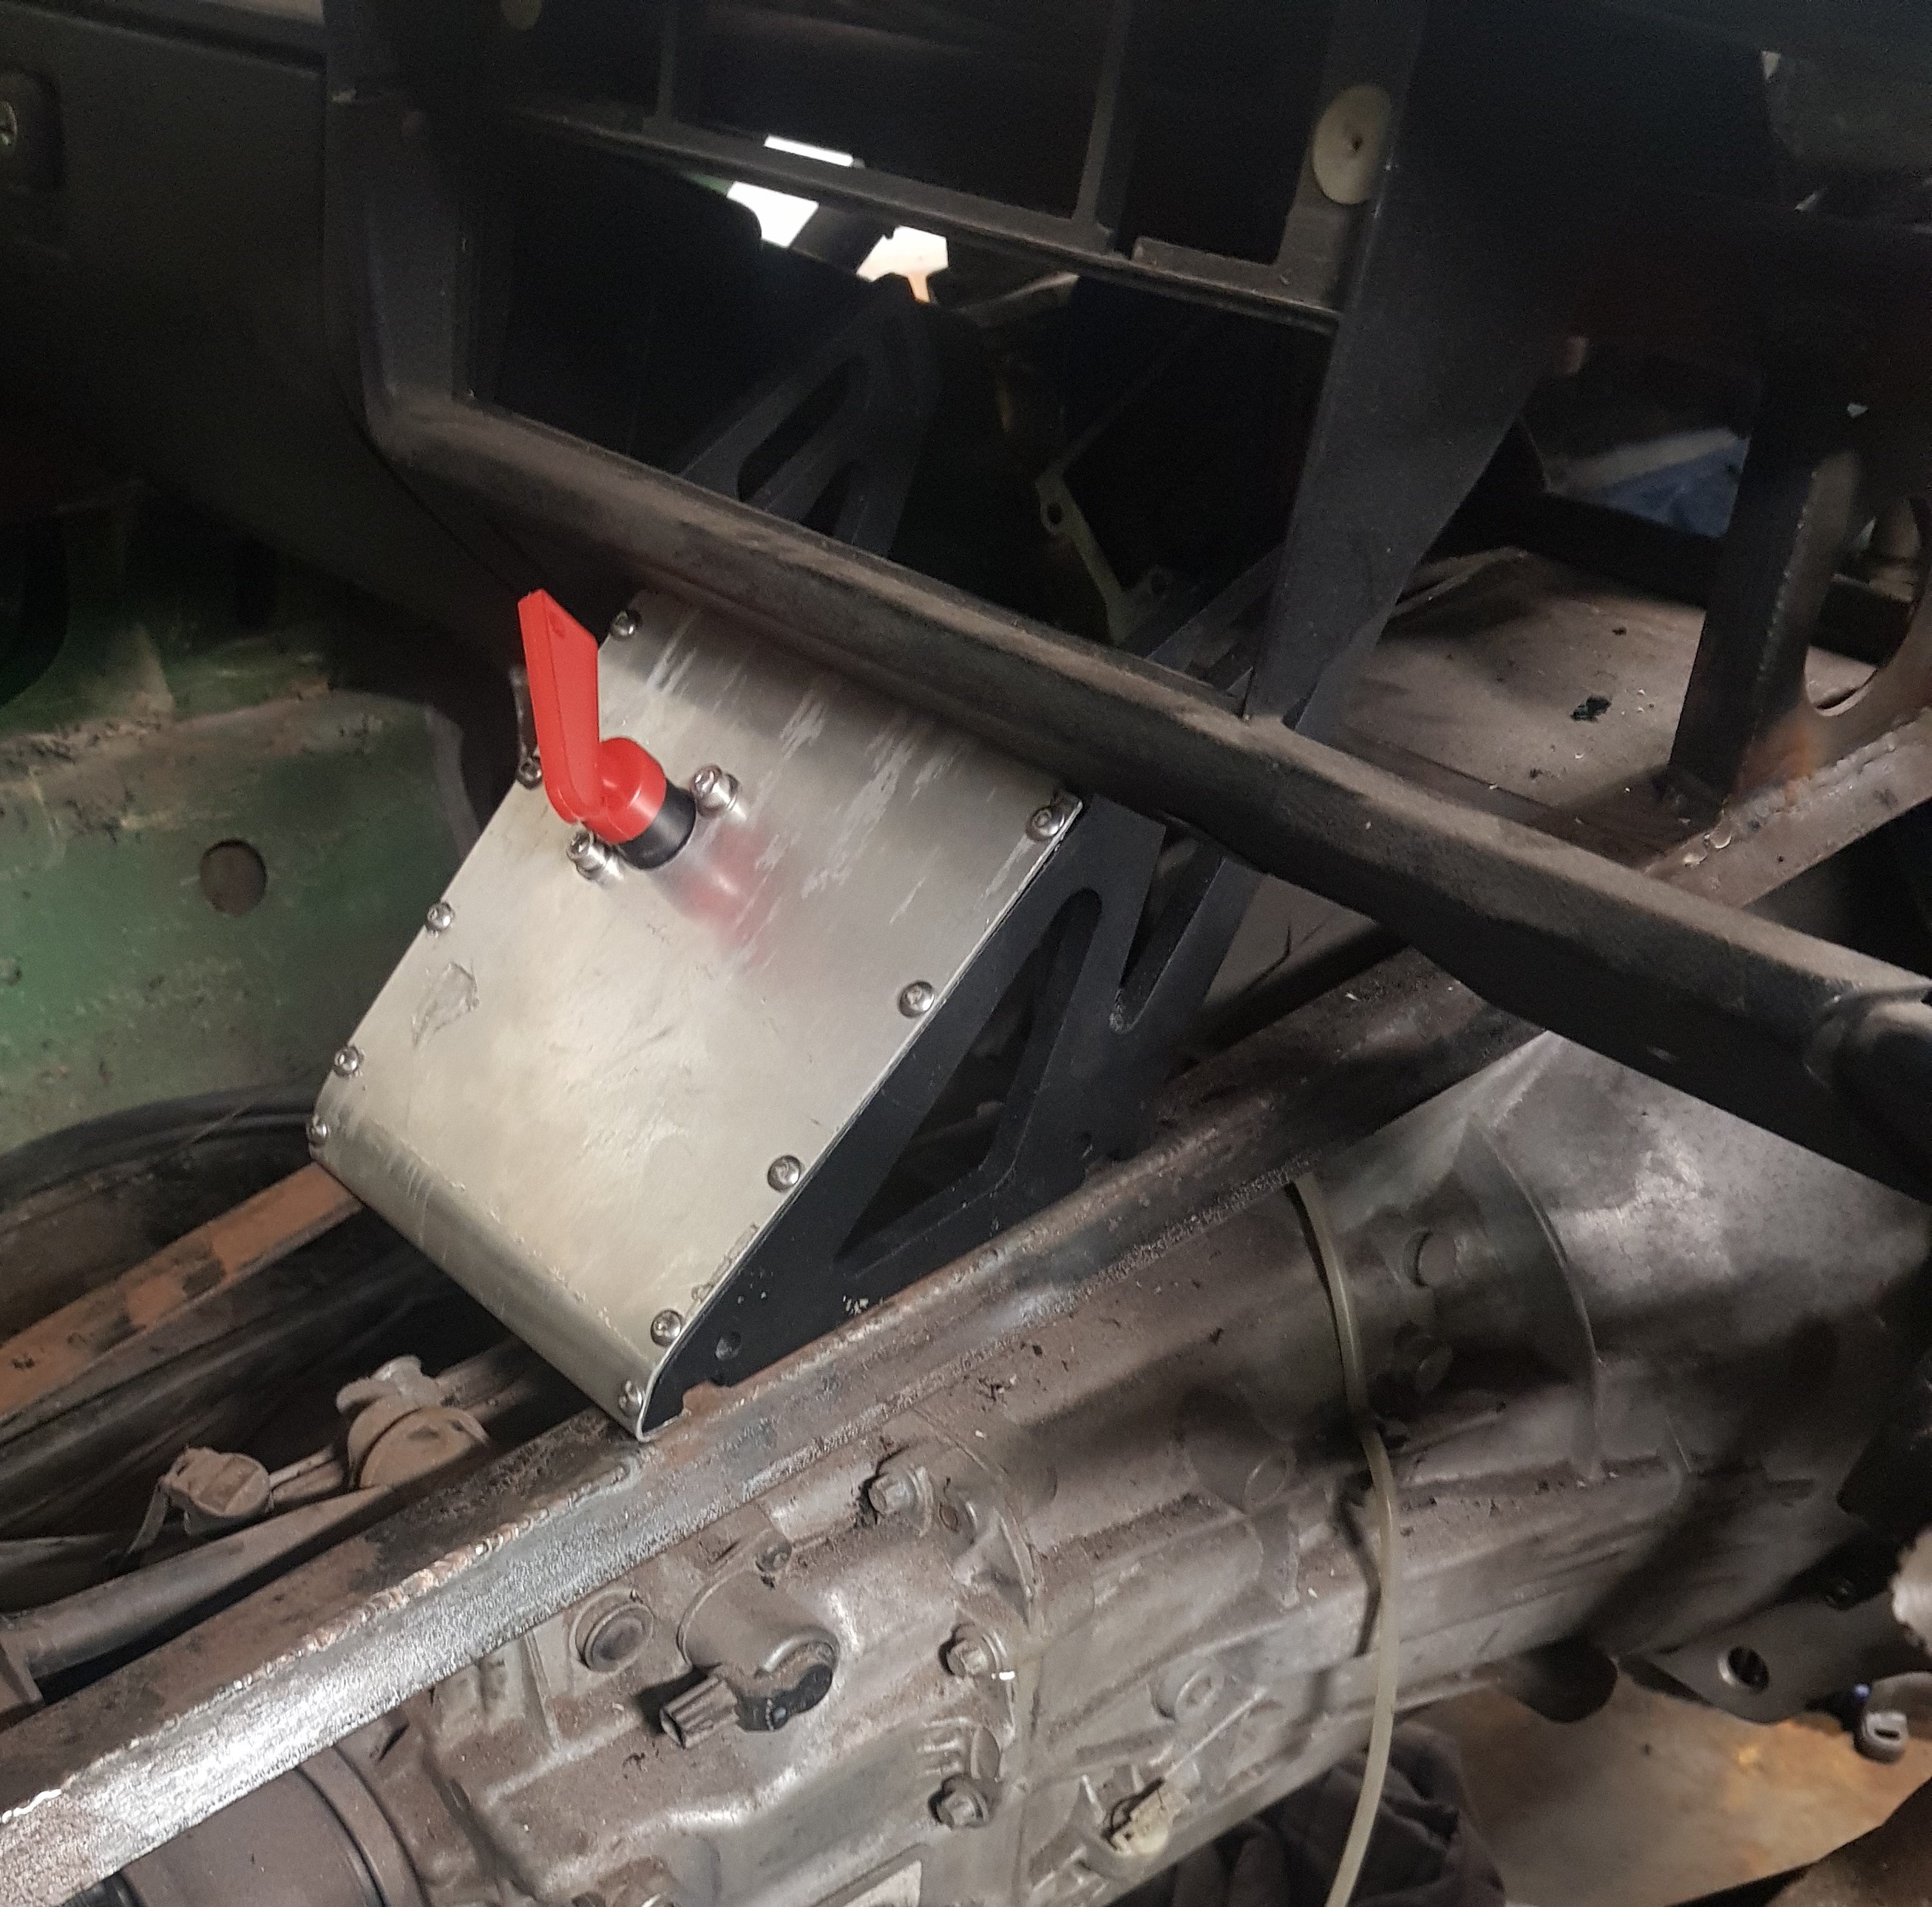
The dashboard is made from 2mm aluminium plate with all of the necessary gauges and non-essential switches: The 'essential' switches (ignition, fuel pump and start) will live down on the transmission tunnel console. This is made from 2 old spoiler mounts and another bit of 2mm aluminium, all held together with M5 SS screws: boot It also provides a good centre support for the dashboard.
2 points
-
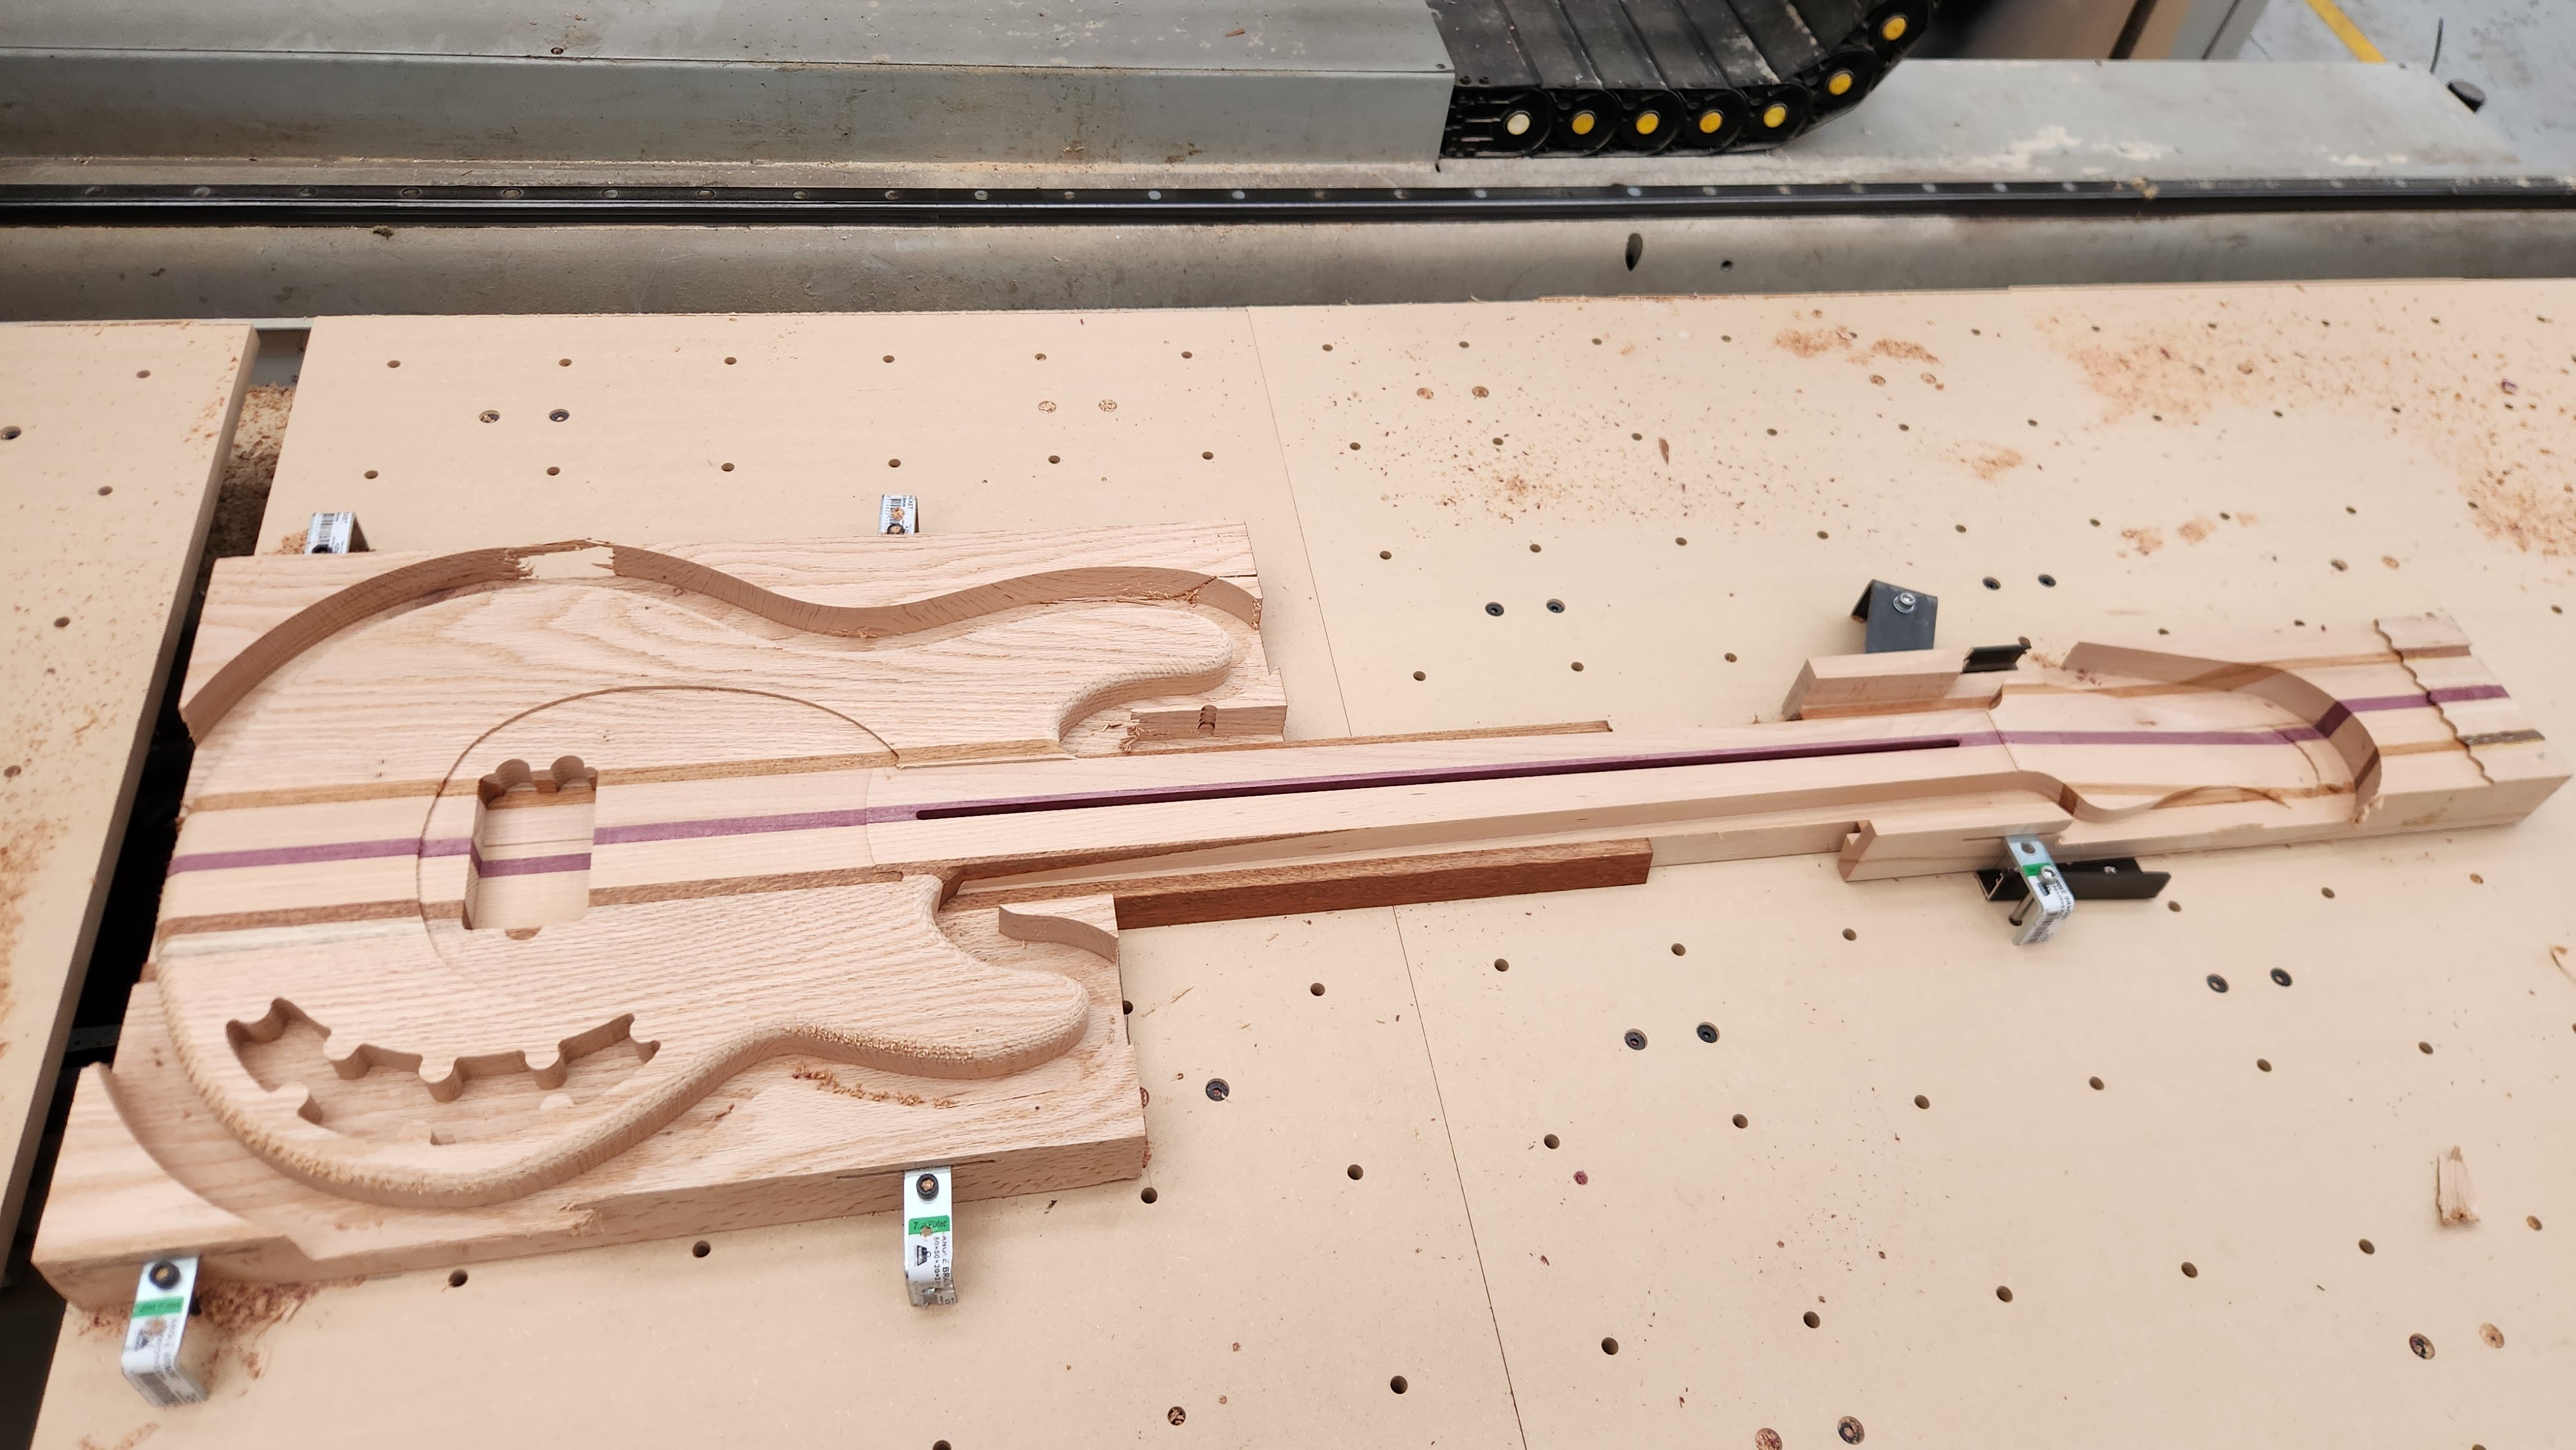
Was super fun to do, really sucks how work life kept kicking it down the order. Very glad we had the mdf one to check process on, that really took the stress off after all the effort that went into making the blank. This is by several orders of magnitude the coolest thing thats come off that machine, looking forward to the end result, no matter how long it takes to get there.2 points
-
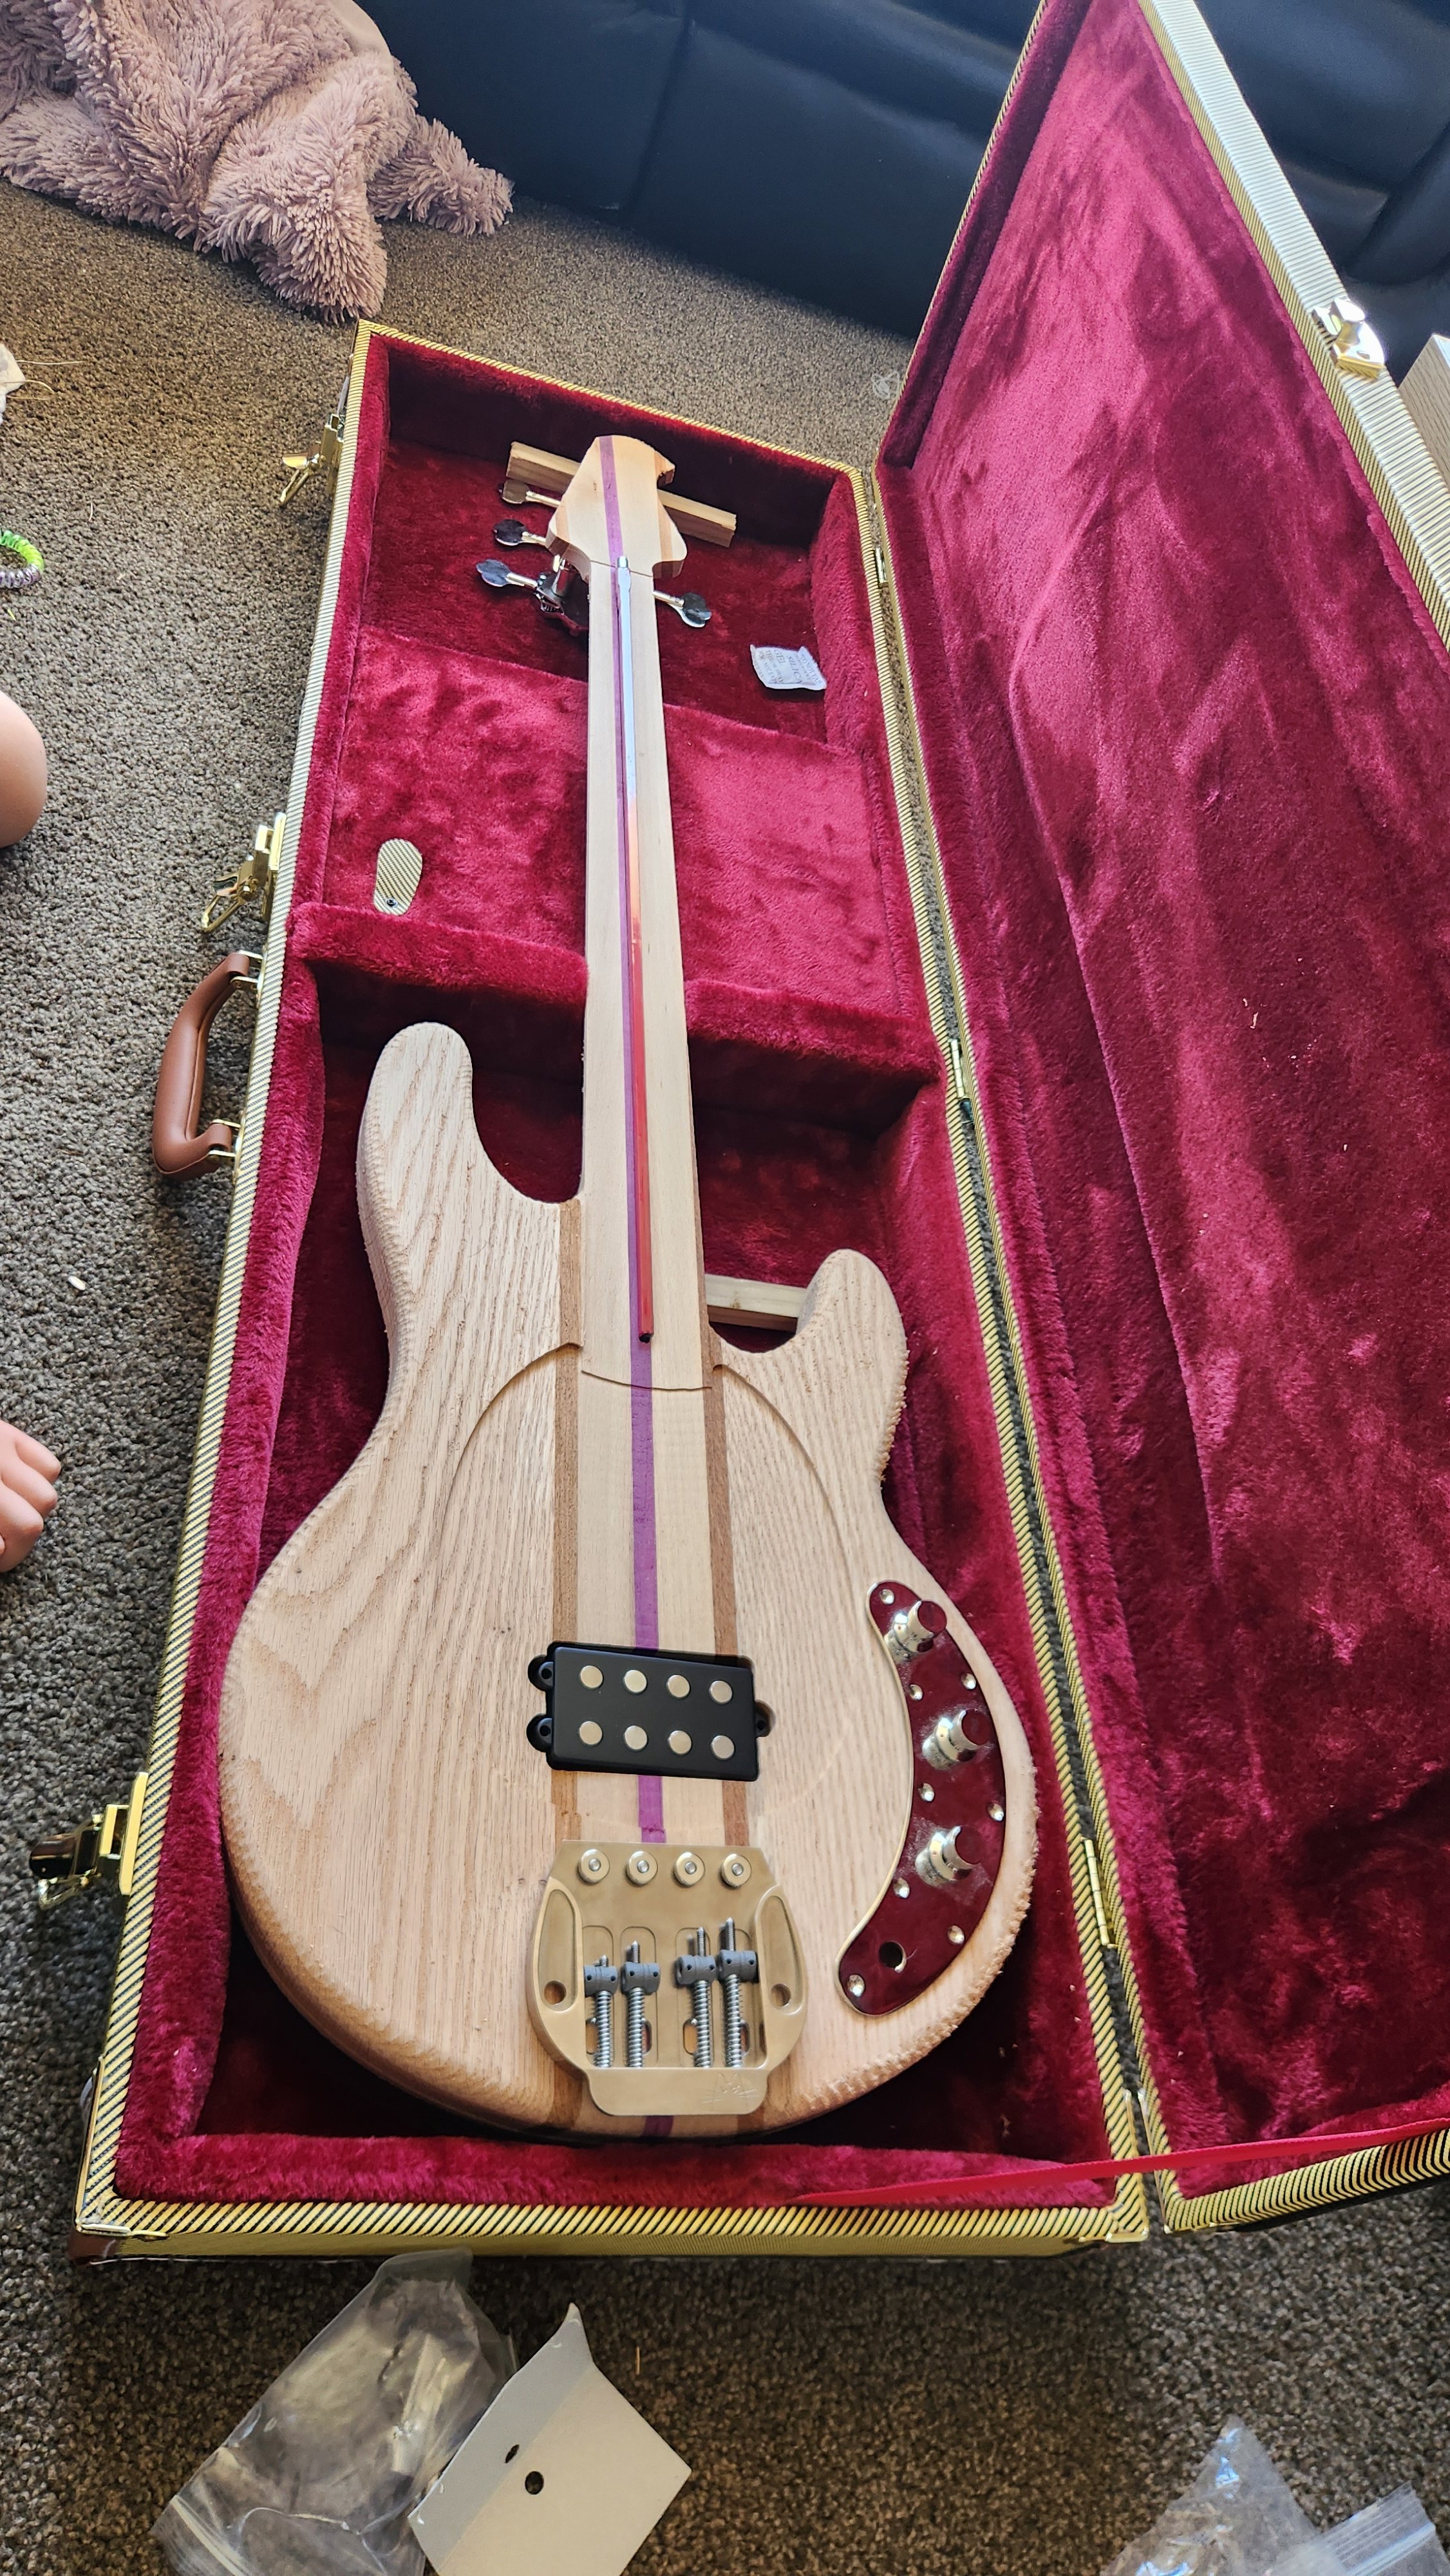
I couldnt help but lay some of the hardware overtop to see how its gonna look. Bloody amazing is how! i am tossing up very lightly staining the pickgard area before the oil goes on. 50/50 at this point.
2 points
-
And finished machining, put immediately into its case because im terrified of marking it before the finish goes on. I have plenty of finish sanding to do, and then a lengthy and involved process to apply the gun stock oil i have selected. but i wouldn't want it any other way, something this beautiful deserves the love and attention. I had better get to practicing so that i may actually be deserving of such an instrument. Once again, i cannot thank Nick enough.
2 points
-
You would scarcely believe it but I have a van update. I had a wof booked today, I was going to take my daily ute in but thought bugger it, i'll take the van in - it needs a good run and i'd rather the ute didn't fall due just before xmas. Didn't fly through but pretty good for a 70s BL product that has been essentially parked up for 6 years. Brake lights weren't working - the switch had died during hibernation. It exploded into shards of mediocre 70s plastic upon removing the wires, I had a spare - 3 whole years newer so swapped that in. They didn't like my radiator blanking cap as gas cap - So I guess i'll find a fancier radiator cap, the filler neck is literally a radiator neck - leyland build efficiency. Only other things were headlight aim and front brake imbalance, they are discs with sliders greased & pads changed maybe last year or the year before with practically zero mileage since - I think they just need a bit of exercise. Should get a sticker early in the new year with any luck
2 points
-
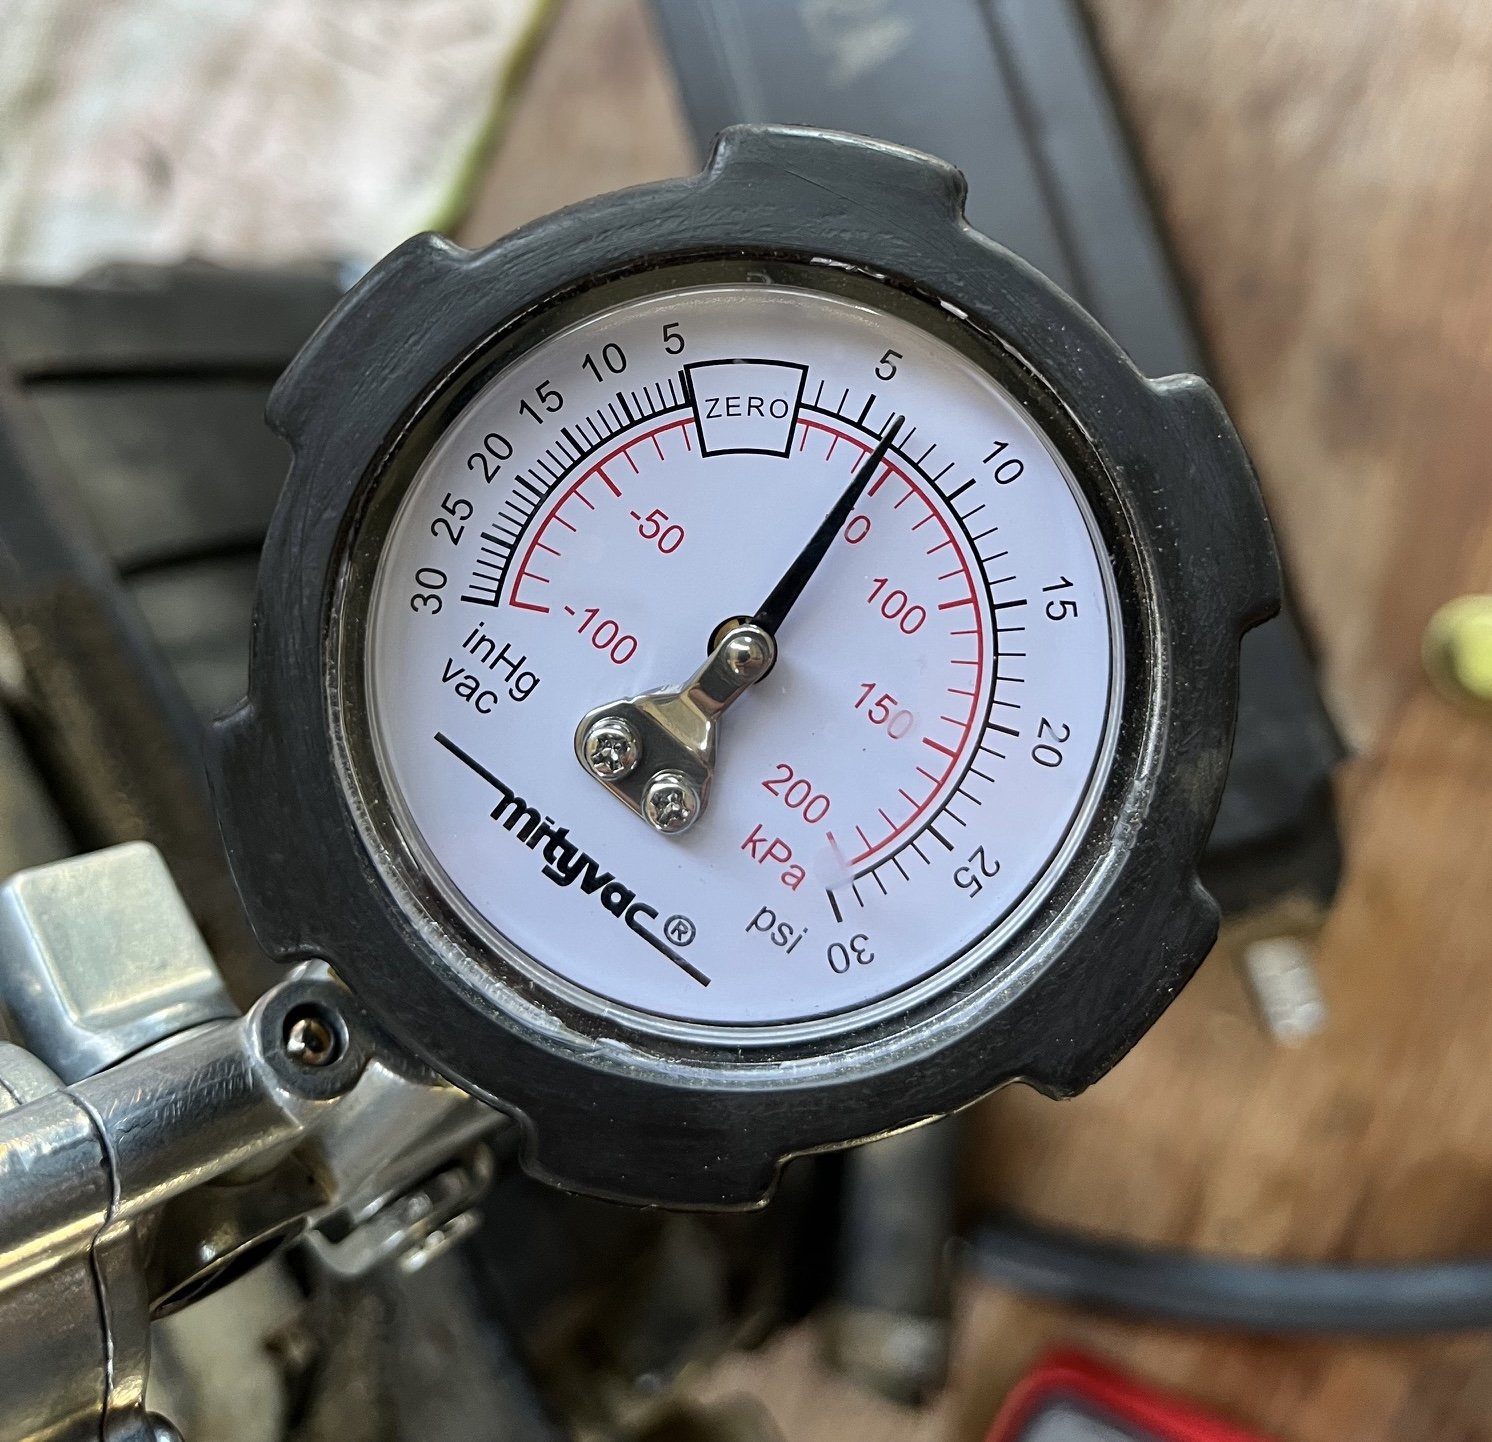
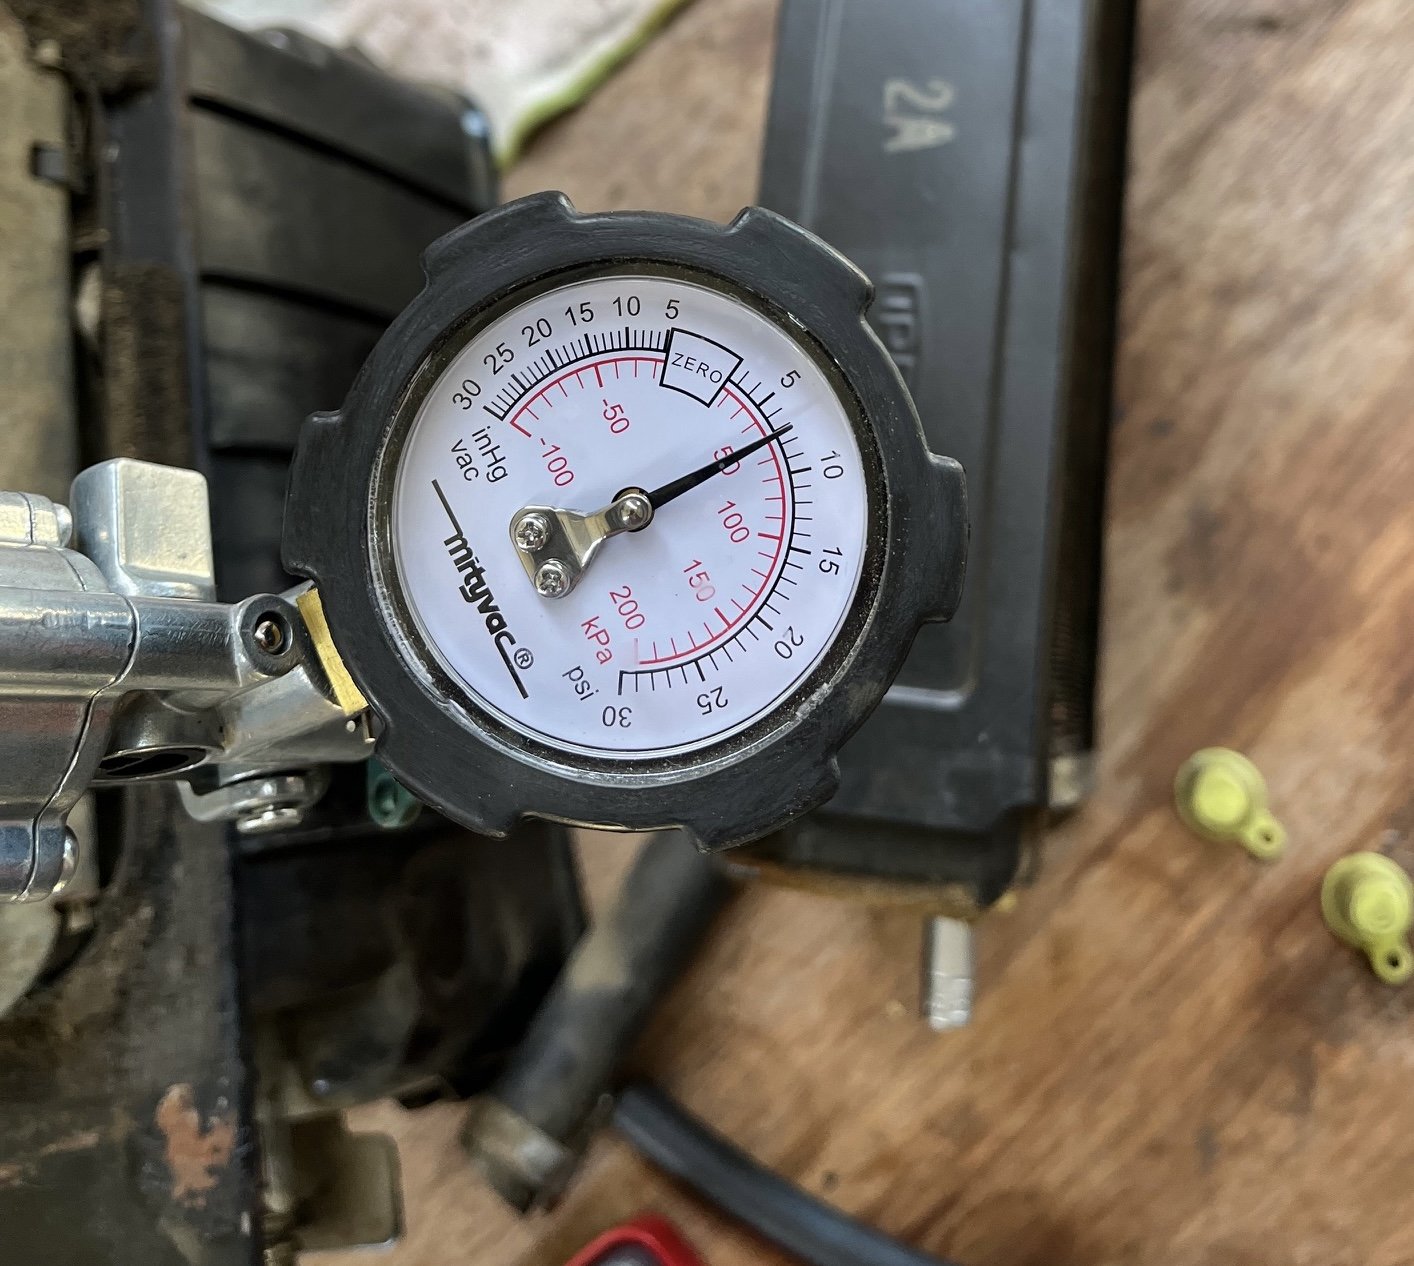
Maybe the heater core doesn’t leak. I pumped it up to 7psi with my old mityvac. one hour later… Further investigation looks like a possible leak at the heater tap gasket. The base of the heater tap does not look flat. Interestingly it looks like VAG & BMW were not the first to use plastic cooling system components! Either way, the core is well blocked with crap and it would be foolish not to take it to a radiator shop for a birthday.
2 points
-
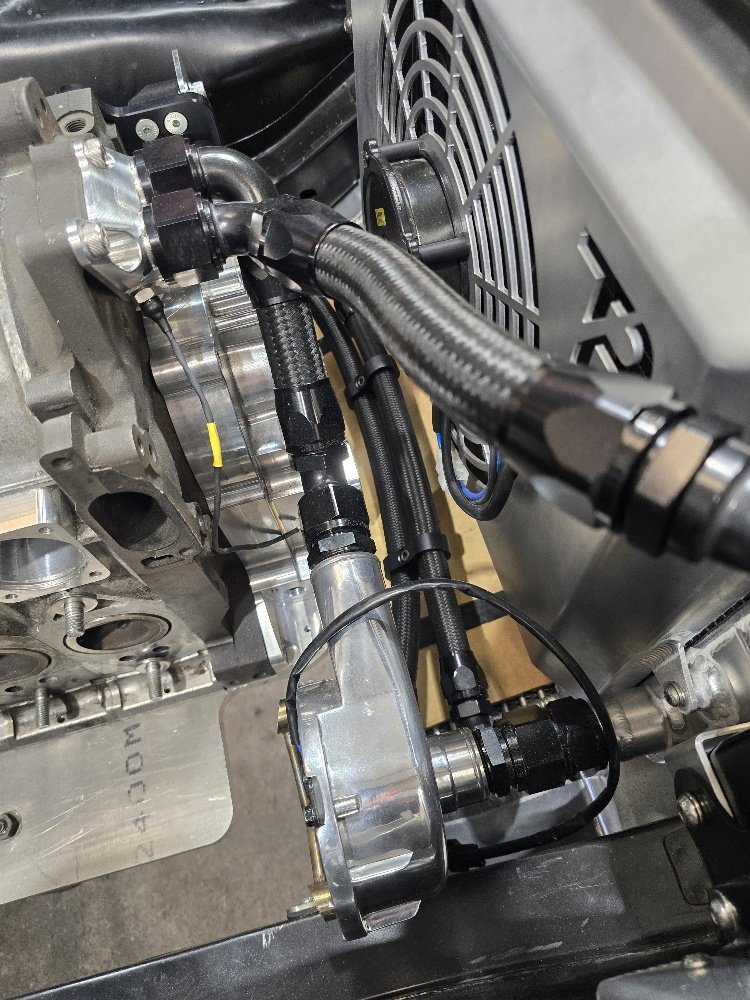
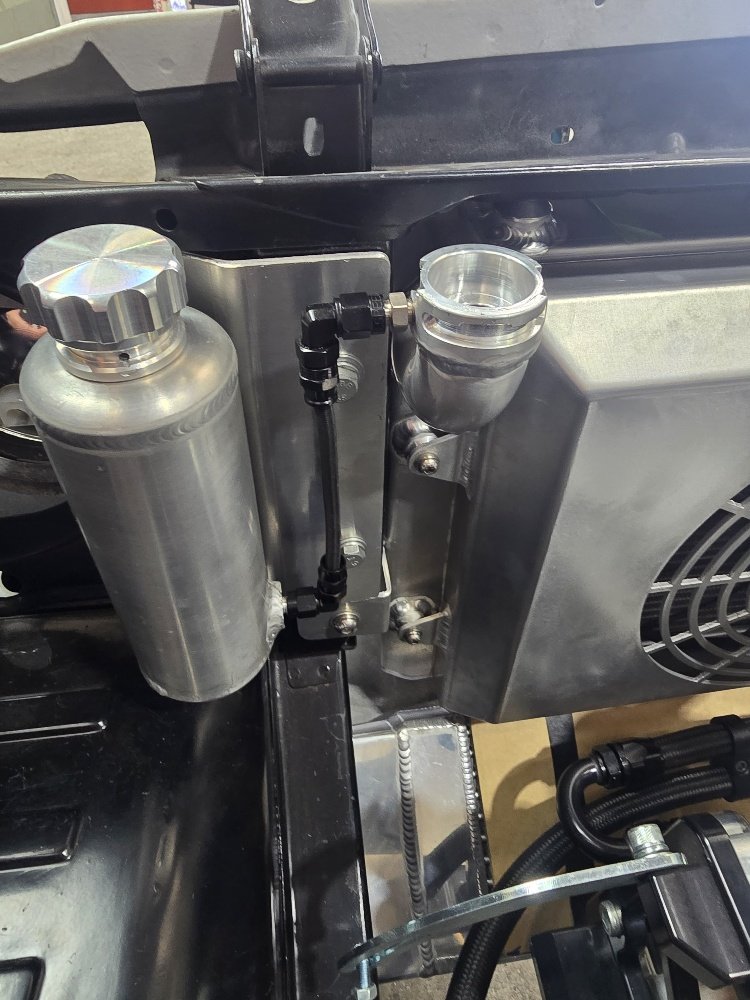
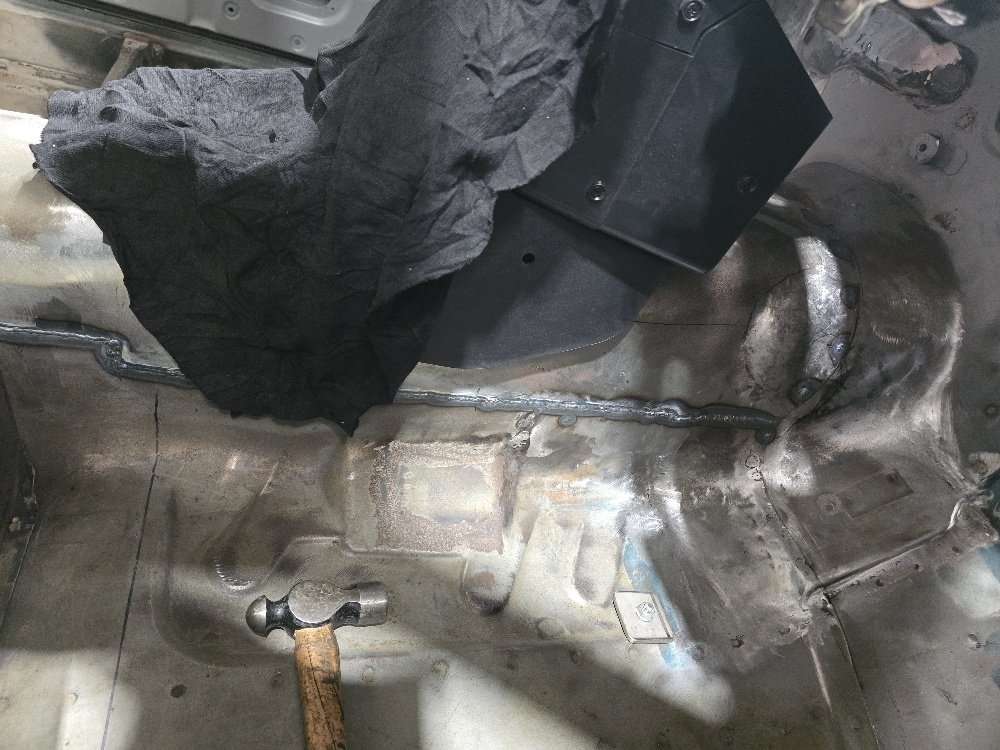
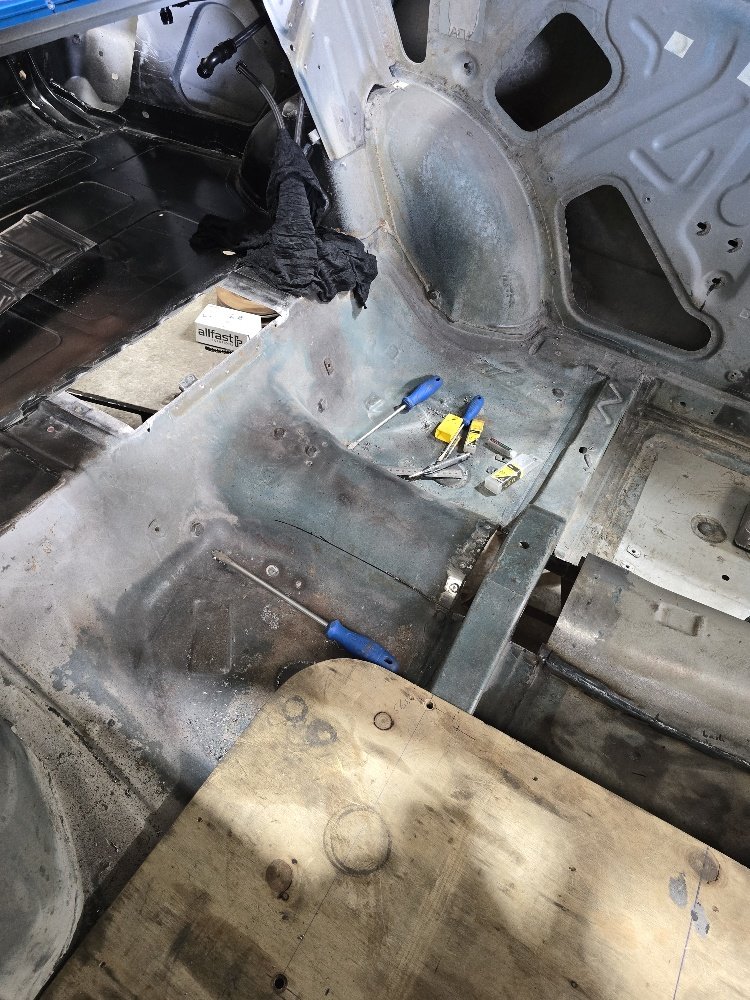
Well picked up the car yesterday from Rocket. Dan and the team have done a killer job. Ended up being quite a list of stuff to do: - Modify gearbox mount to suit Tremac TKX gearbox which required raising the tunnel 50mm to get angles right - Raised driveshaft tunnel 50mm to get clearance -Modify driveshaft to suit TKX tailshaft -Raise under rear seat area an behind fuel tank for diff head clearancing -Make intake manifold, with custom DBW mount -Mount airbox and modify intake feed to line up with airbox -Mount pedal box and reservoirs remotely in windscreen cowl -Modify diff and rear shock mounts -Modify exhaust to tuck it more - Few other minor bits and pieces Because we had raised the tunnel and diff head area there wasn't much extra work to allow the car to be a heap lower. So we ended up notching the rear rails, notching the inside edge of the rear tubs, modifying the rear tubs (Factory half the tub is flat and half tapers down approx 3 inch from the centre to the outer guard lip) so its flat across the top. Now have heaps of clearance at the height its at and nothing rubs which is awesome. Really happy with the outcome, car looks a heap better at the height and starting to come together real nice. Few bits and pieces to do over the holidays then back into it next year!
2 points
-
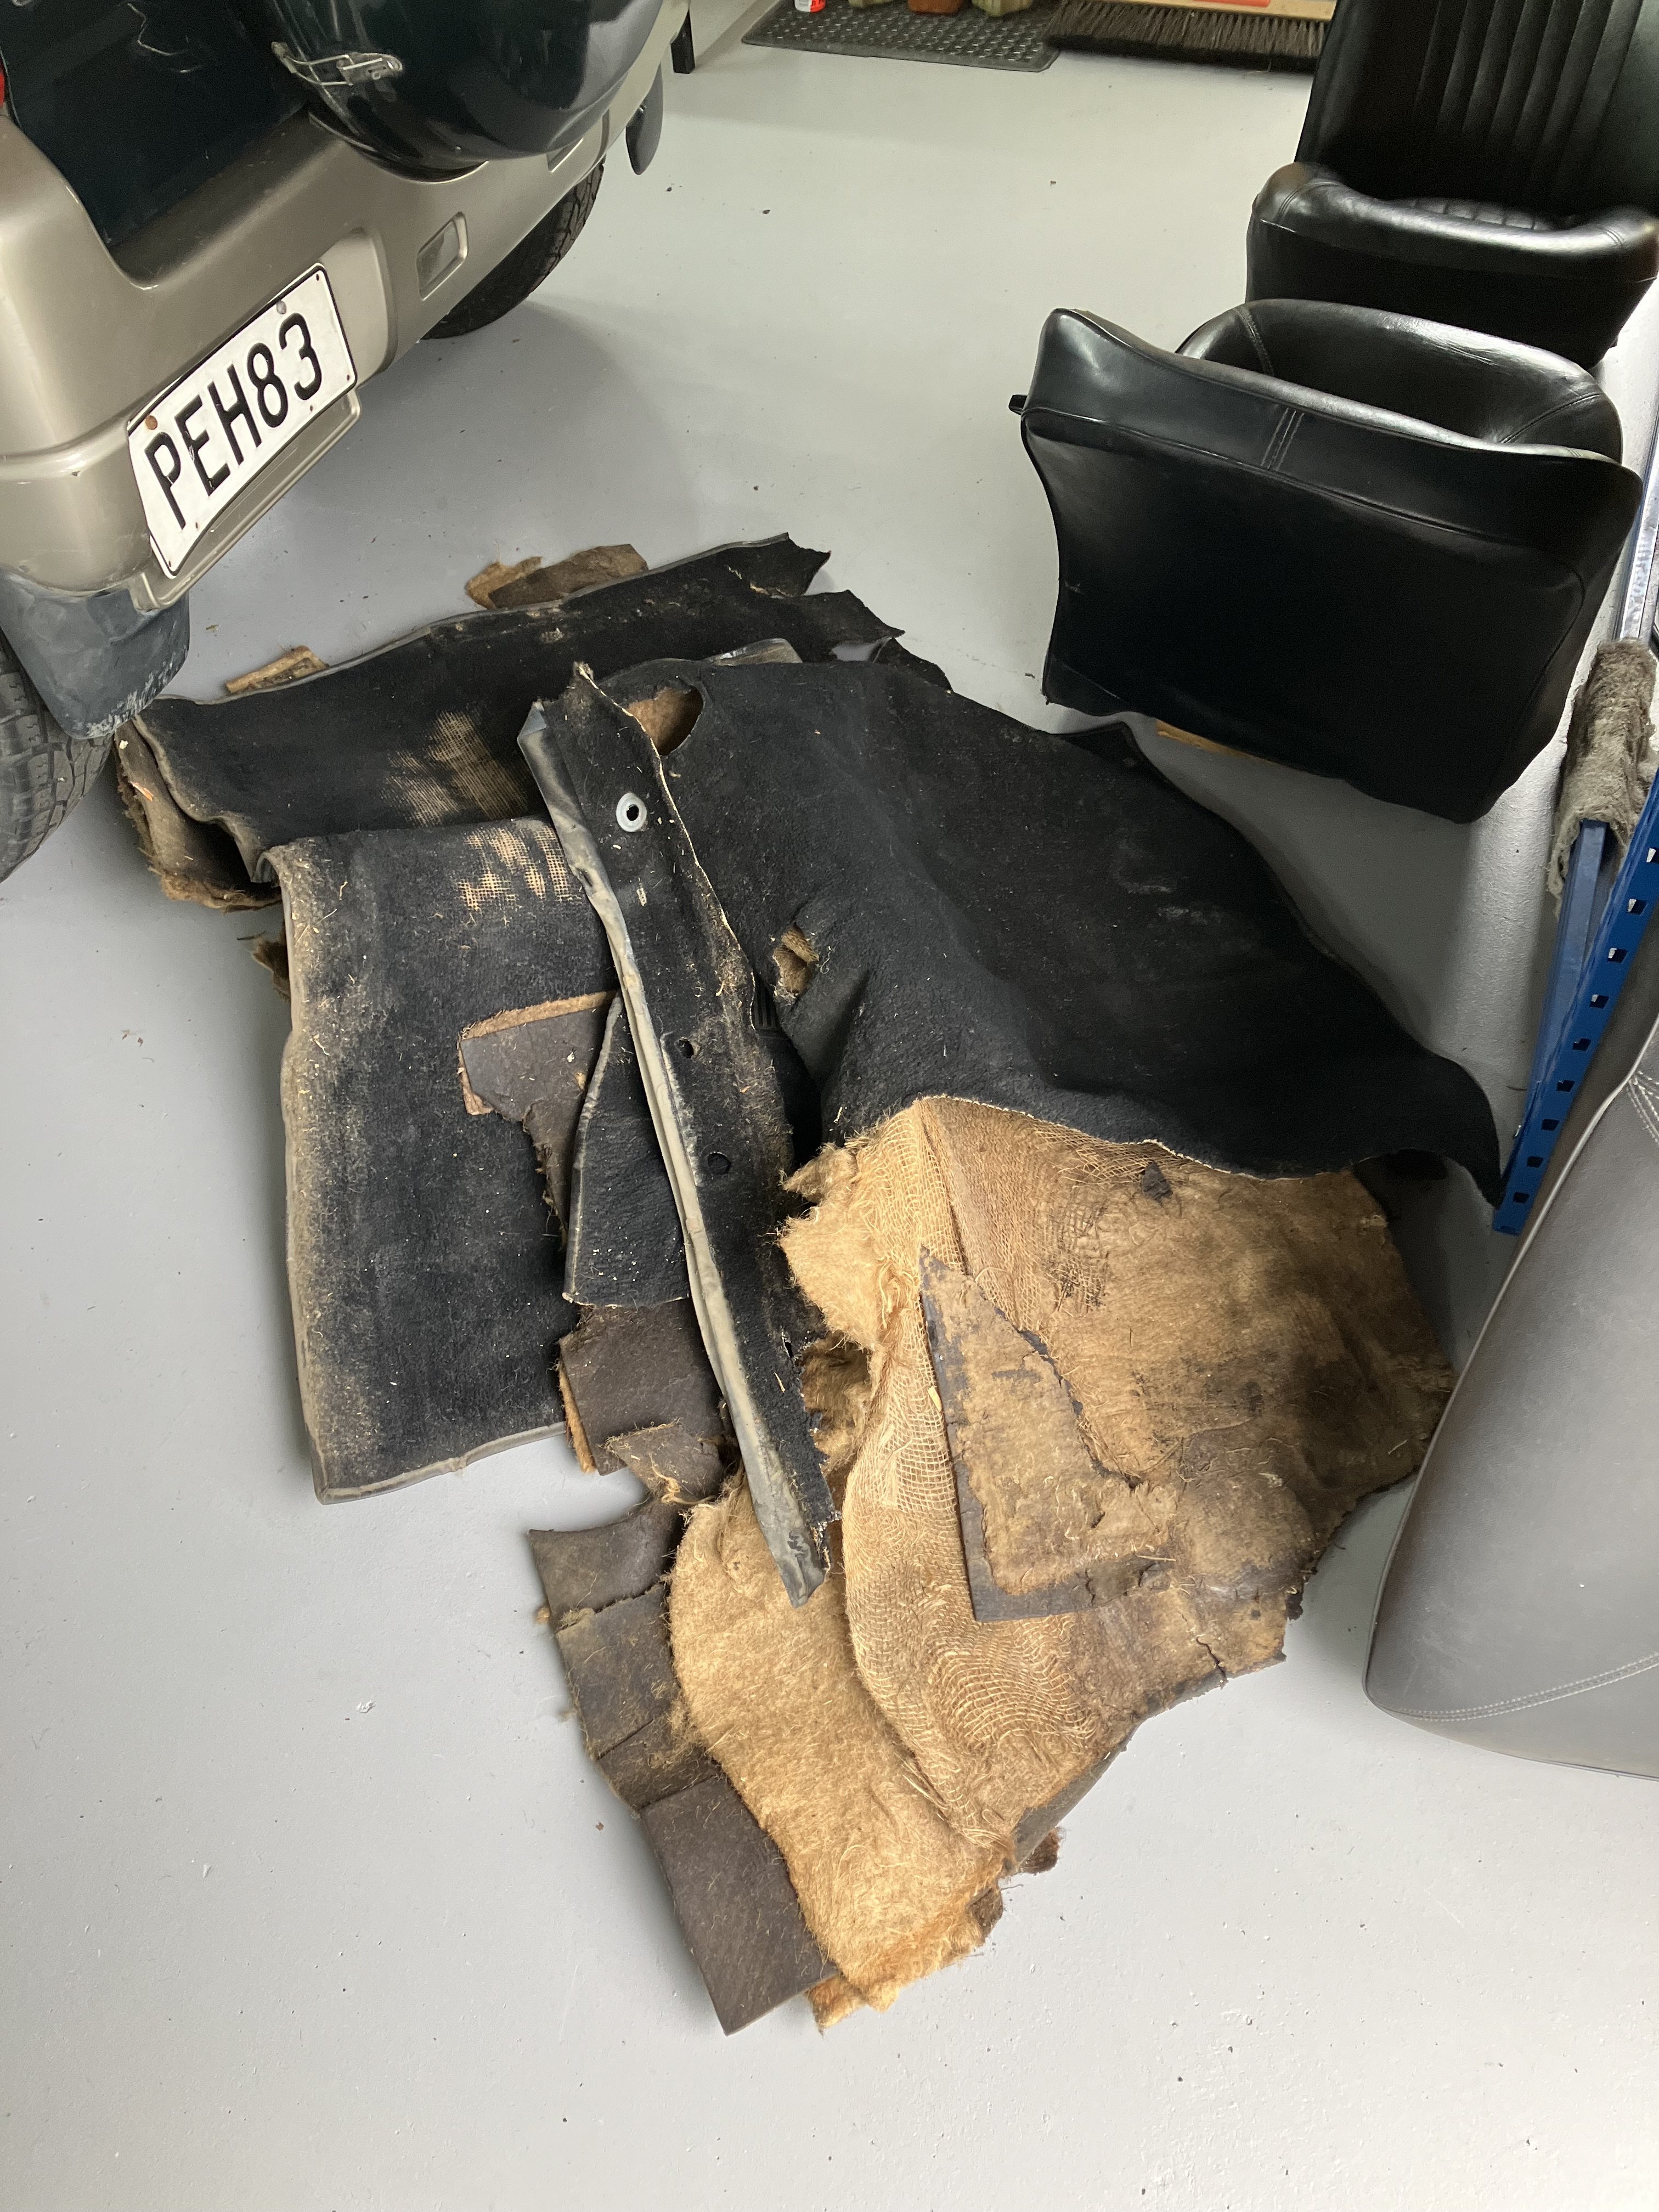
Oh yeah and a big pile of old carpet and lots and lots of underlay. So much dust and fibres, I’ll probably get some lung disease from it.
2 points
-
Just gonna leave this here.
2 points
-
There are no photos to accompany this post, so you'll have to use your imagination. I'm sitting knee deep in dirty water with the boat pitching all over the place. I tried bailing the water into the sink but the sink wouldn't drain. So I'd bail it into the toilet, then flush the toilet when the bowl got full. Then spew into the toilet, then it would all slosh out when we got a wave, them bail it all back into the toilet, flush and repeat. Water was coming out of the shower drain pump and seemed to be siphoning in from the sea. I guess the level of the hose was below the water line with the boat leaned over. So I shut off the drain valve through the hull. Eventually got rid of all the water and went back up on deck for another spew. Dad was soaked through having had a load of spray come over the boat. The wind was up to 28 knots, we were on the edge of control and needed a sail change and another reef in the main. Slipper island was only half hour away so we decided to drop sails and motor there to check on our leak and recover a bit. While motoring towards slipper island, dad went down below to change and found the carpets soaked, his bedding damp and with shit weather forecast for the next few days - nothing was going to dry out. The Whitianga race was a DNF, the Mercs were still at least 5 hours away and we would be motoring head first into the wind and chop making 5knots at best. So we turned around, pointed the boat back at Mt Maunganui and put the mainsail up. With 25knots of wind behind us, we spent most of the ride home blasting along at 8-10 knots with bursts up to 14knots surfing down the swell. Made it back home in 4 hours and had a great time doing it.2 points
-
Happy to do engineering design and 3d printing for beer.1 point
-
Mines fine when stationary. Only once moving along above say 20kph.1 point
-
Maybe what you need is two basic bike mufflers The stock SD1 exhaust has a swan pipe tip and if you stick a straight one on that pulls fumes into the cabin. Maybe a side exit might help, even if it's not a full swan neck. I've got proper side pipes on my SD1 and it's fine while driving along. Does steadily gas you when you're stationary though...1 point
-
I suspect you want the full Kraut heavy Panzer sound......1 point
-
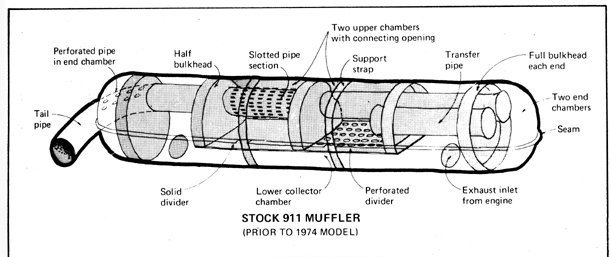
I'm going to make a whole new muffler much like this as found on 70s 911s.... Added bonus is that it has a side exit I think my straight through perforated pipes with glass fibre packing is only removing the high tinny sounds and it leaves a deeper note. Its a very smooth sound but not the sound I want. This is the sort of sound I am chasing. A bit more grumbly and less drone.
1 point
-
Man these look great with some subtle upgrades. While not 6G levels of punishment, I ran a facelift Legum VR4 a few years ago. No surprises the spark plugs on the rear bank were ancient.1 point
-
1 point
-
over the last couple of days @NickJ very generously operated his awesome and massive CNC router, aswell as handleing the programming for the cad model i put together for my Stingray. we first cut one out of MDF (which will now make cool shed art) and then set to attacking the hardwood. It looks incredible. i have no words to describe how happy i am with it, and without the help of others, this wouldn't be possible.
1 point
-
Let go of your wallet.1 point
-
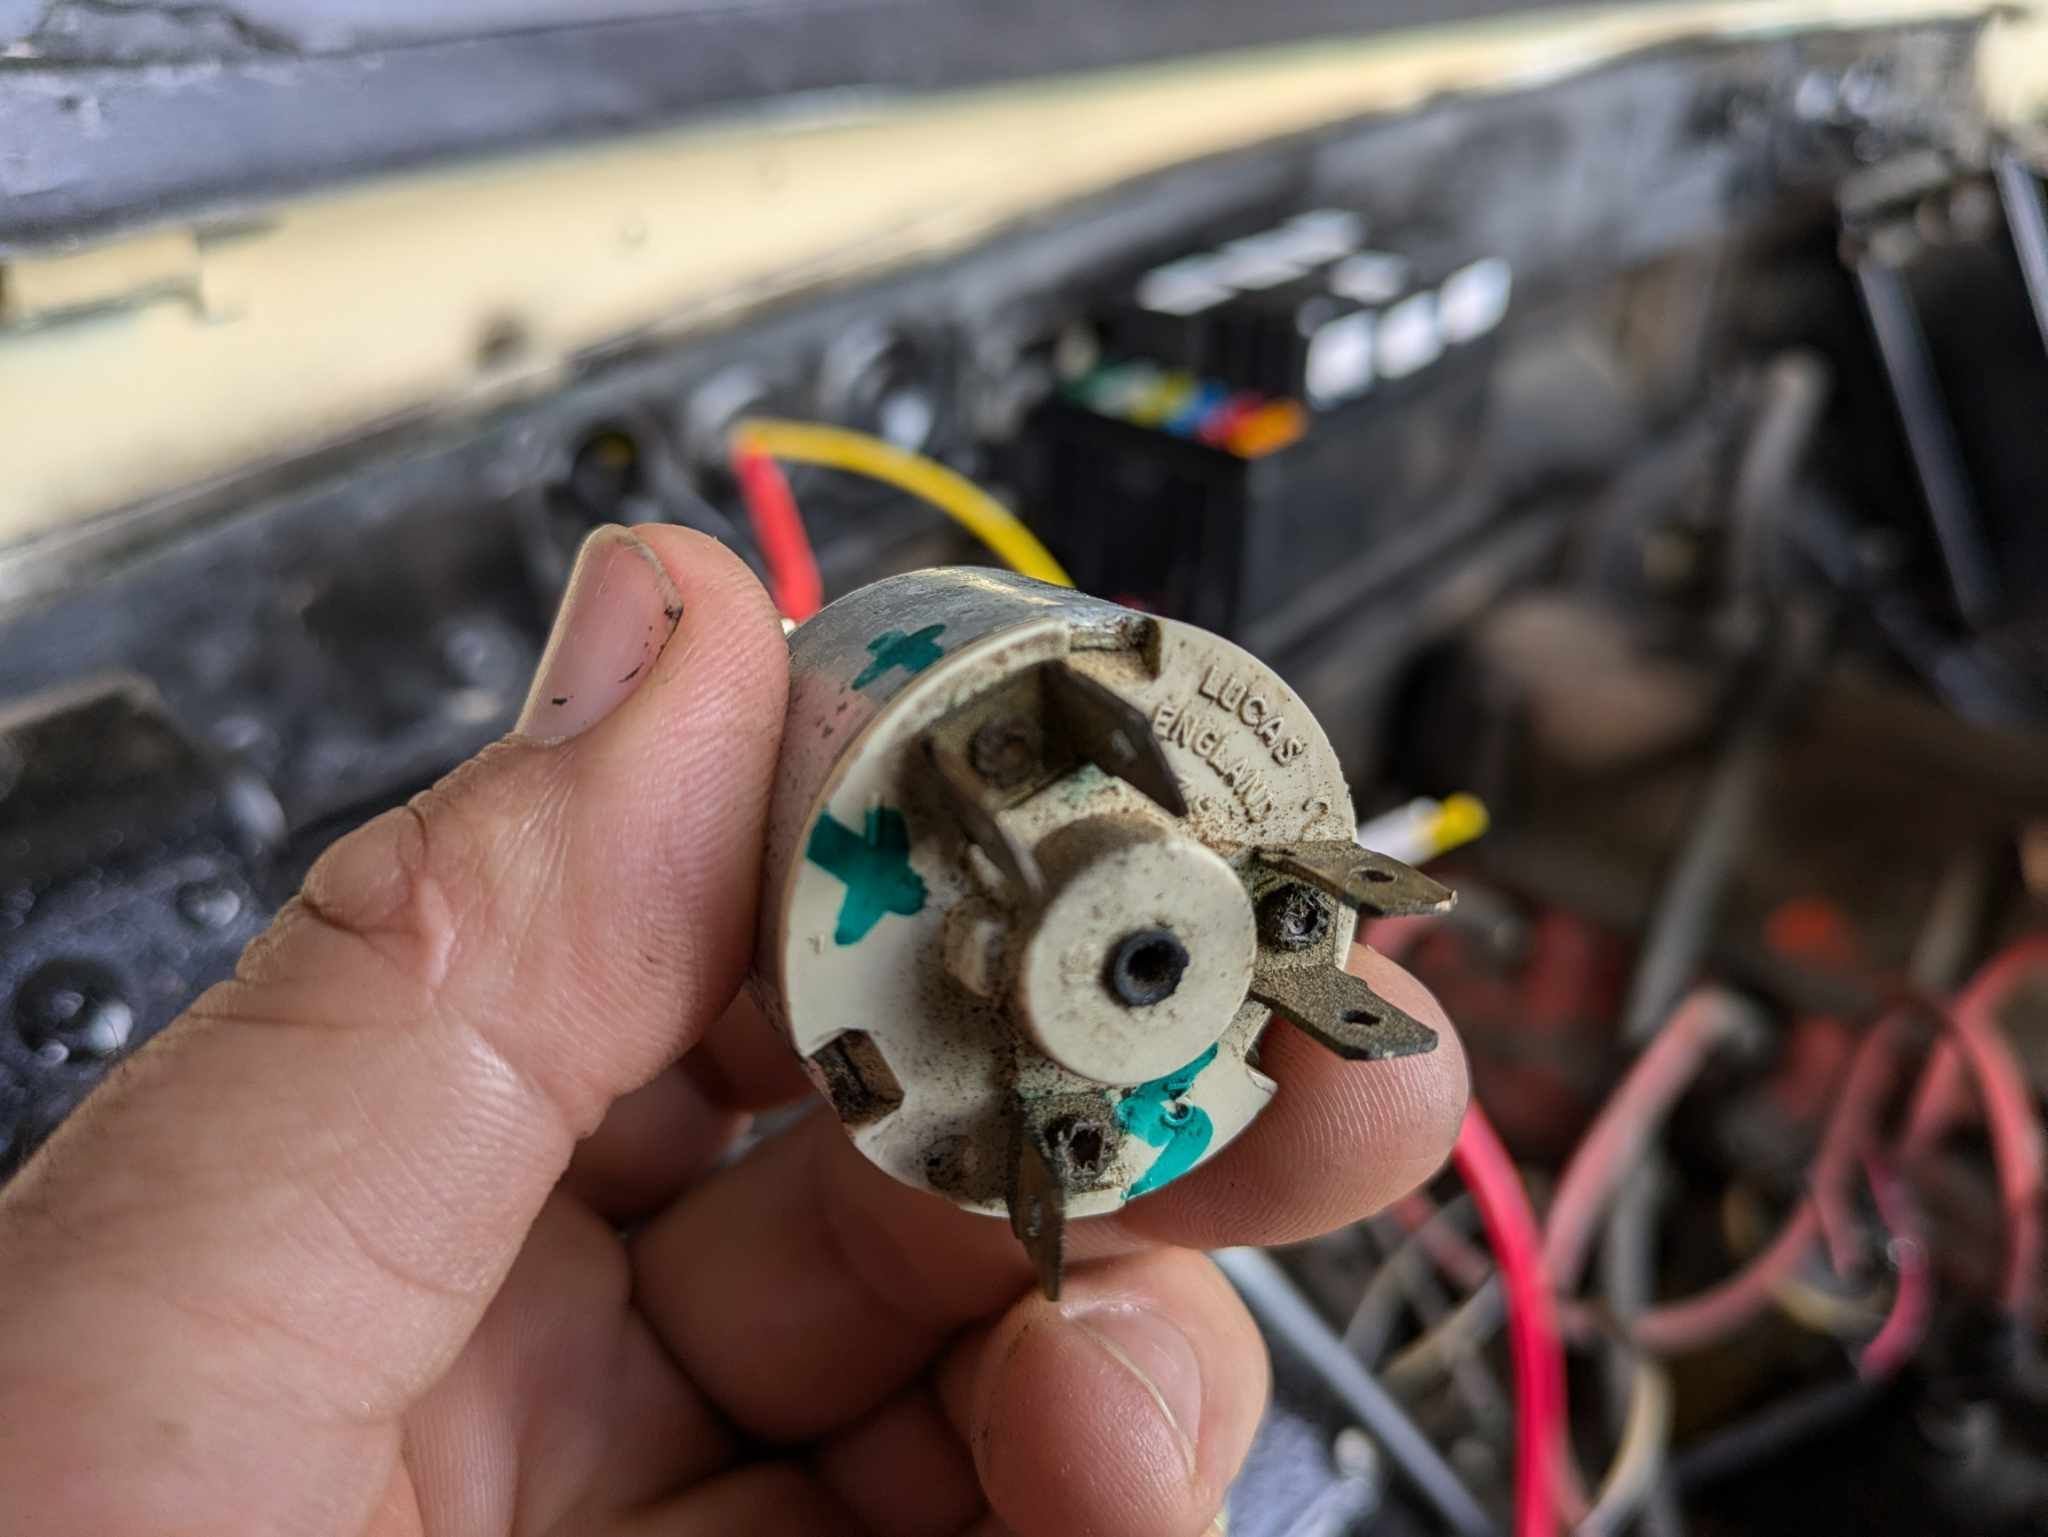
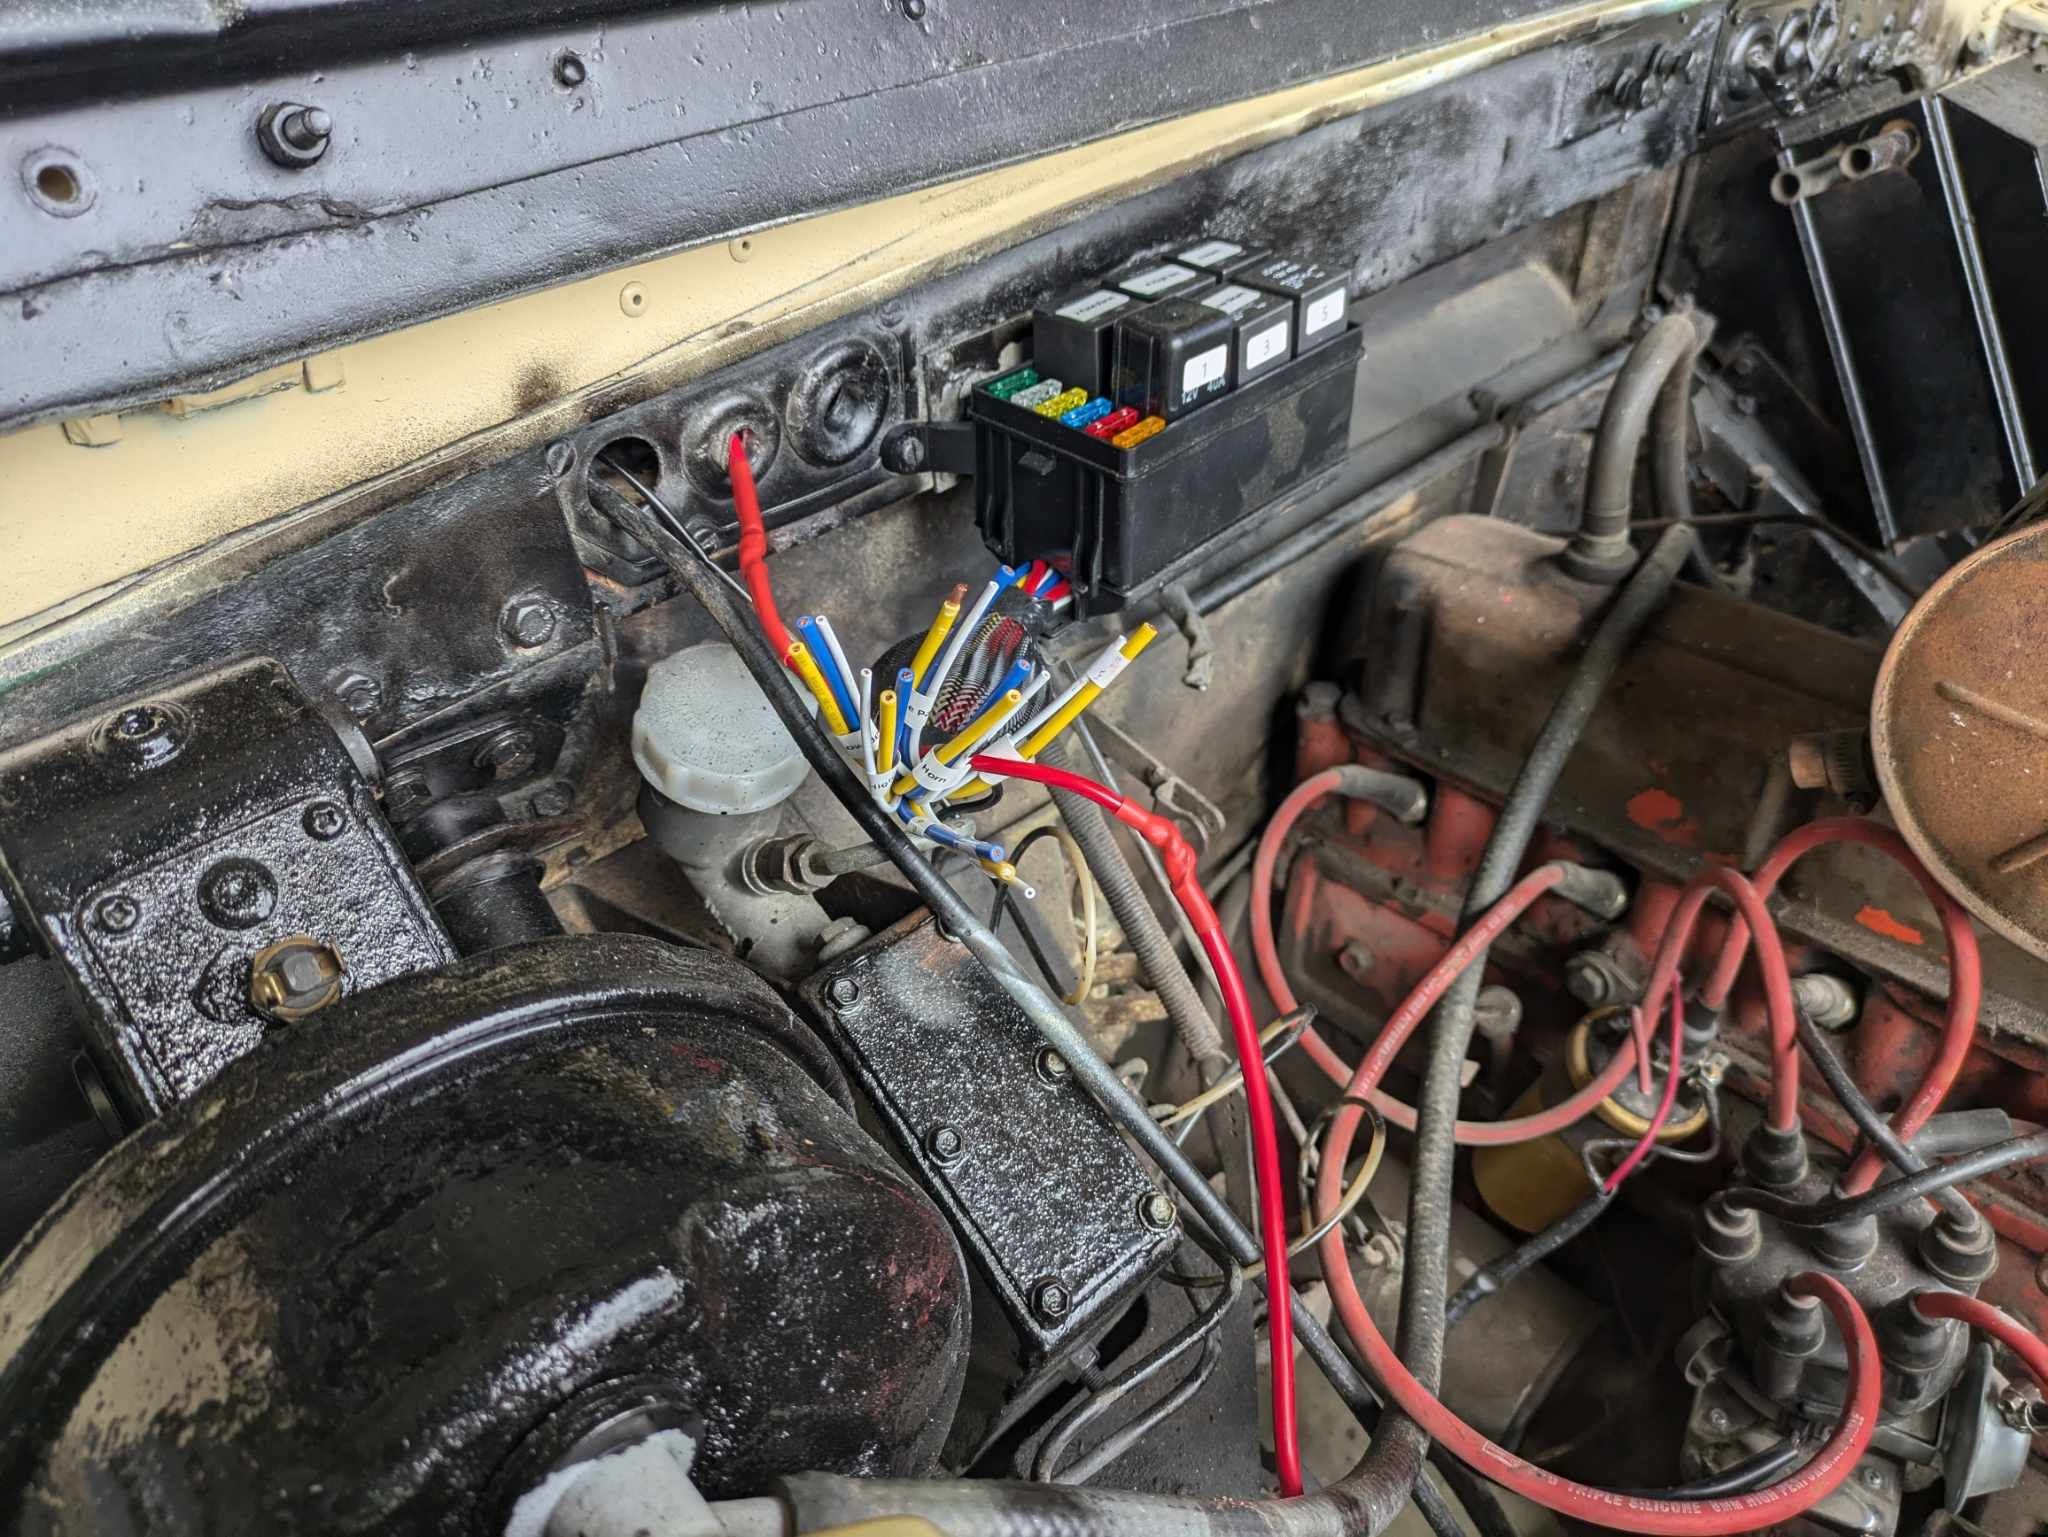
Pulled my back a couple of months ago (herniated disc) and triggered it badly on the weekend so am on light duties in the shed. Which is my excuse for having a bit of a mind blank this morning. Just sorting out the wiring for the ignition switch so I can get the Landy started to park next to the boat to work on concurrently. Just trying to think what else I need coming off the ACC switch on the key? Thinking coil, gauges...anything else whilst I'm down there? As an aside this is how I do my looms these days from scratch. I use a relay block in the engine bay coming from a circuit breaker and then a fuse block inside the cab for the basics. Dirt cheap and the relay block comes pre wired so I mostly just have to run trigger wires through the dash really.
1 point
-
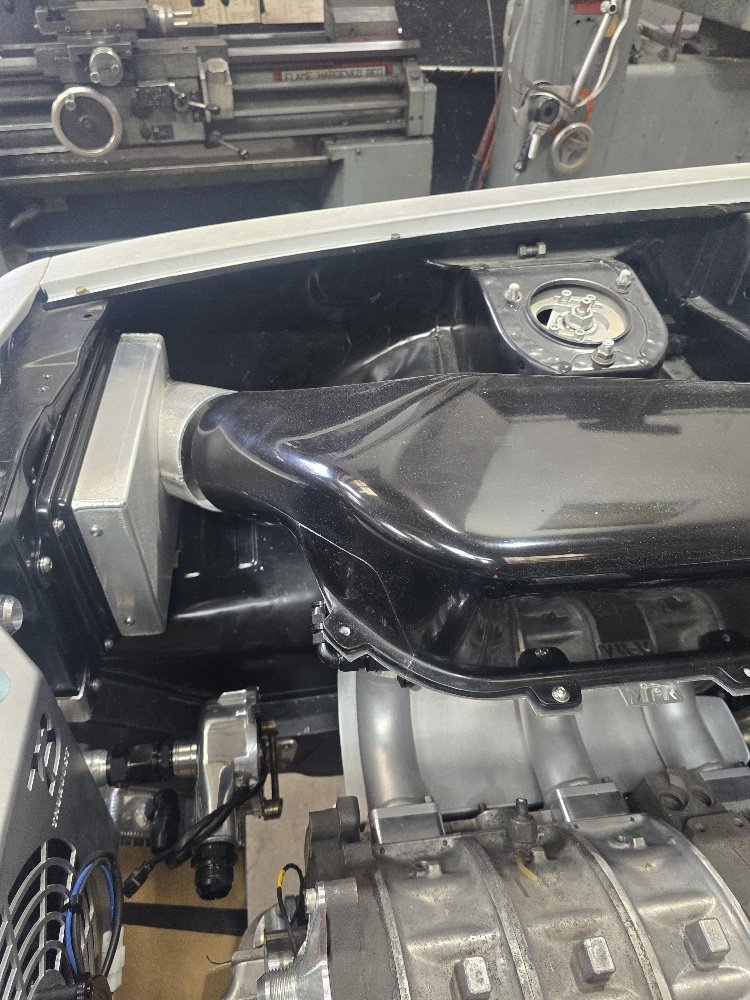
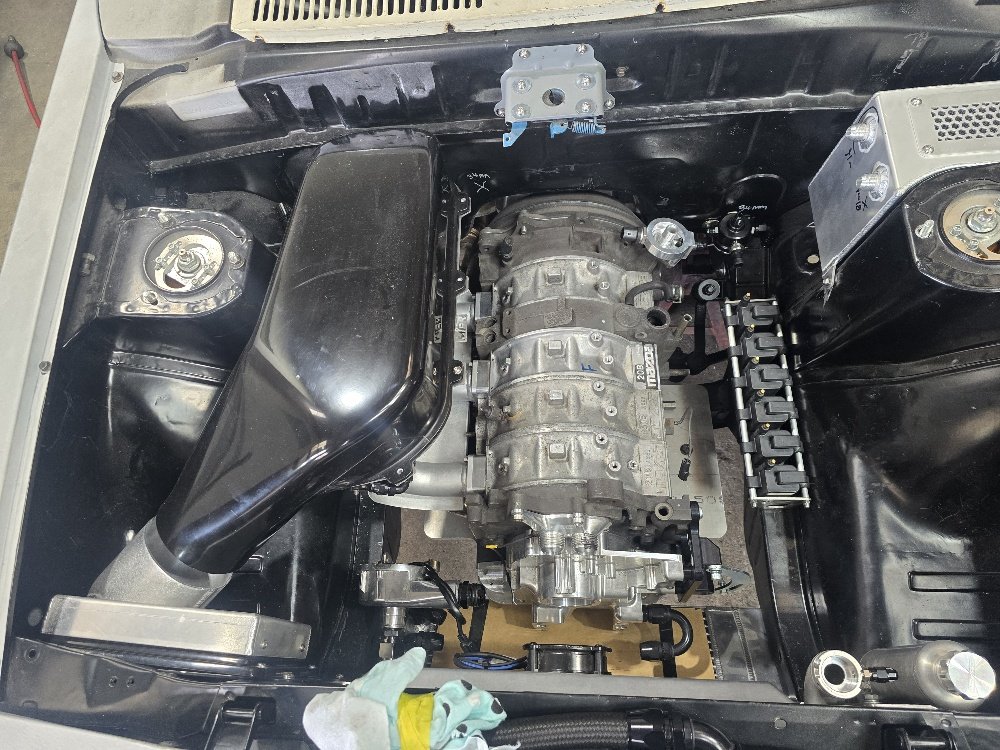
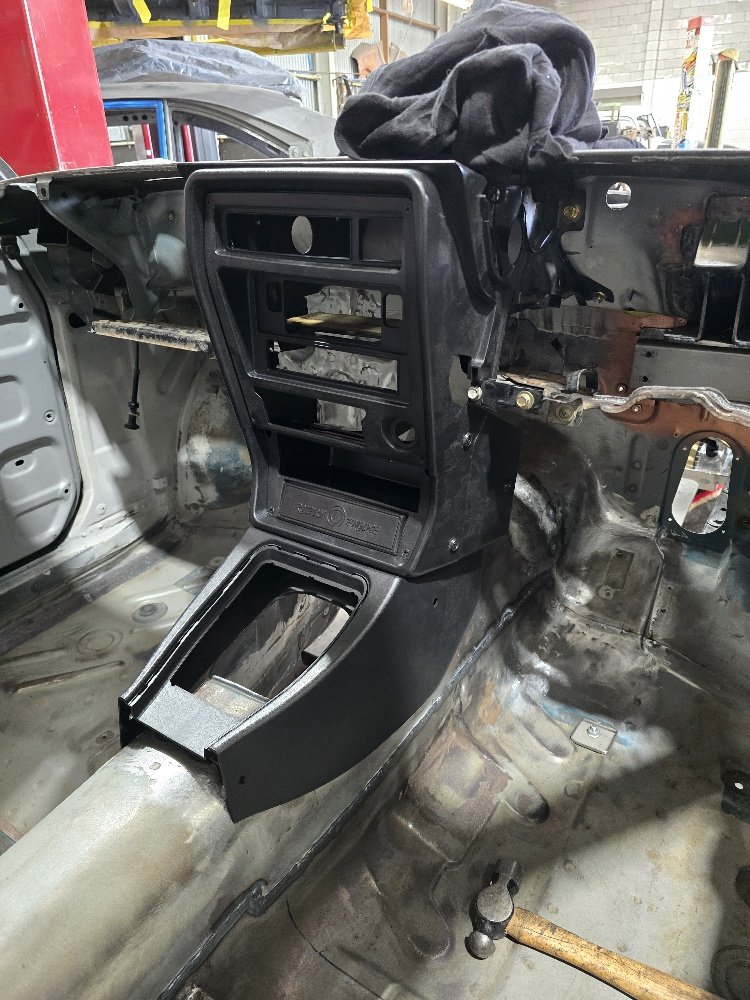
Dan and the team at Rocket down in Hamilton have been busy as! Tunnel raised 30mm and restitched in, did a bit of clearancing around the firewall/merge collector too to give a bit more space. Have plumbed up oil cooler, cooling system, mounted overflow bottle. Modified the MFR intake by cutting the back half off and folding up a new sheetmetal feed so it lines up better with the airbox intake. Modified the exhaust, moved resonater back from under driver to before diff so it can be tucked up into base of tunnel so hangs way higher, also cut exhaust and went under diff instead of over to add clearance. Can still run my centre console which im happy about was a key thing i wanted to keep with the modified tunnel so that worked out well! Few things left - Finish clearancing under rear seat/over diff head, - Brake/hand brake cables/lines - Modify rear tubs and rear rails to allow it to go a bit lower, now we have raised gearbox and d shaft tunnel its the last bit of clearancing thats needed to get a bit of extra slam. [
1 point
-
I need to do something about the depth sounder. Occasionally it would miss a few pings and report the depth as deeper than it was. The only thing worse than a broken gauge is an unreliable one. Now I could have sent this one back to Midas, replaced the transducer and got them to service and recalibrate it... But a Raymarine ST60 came up on trademe and it has some nice new features along with massive numbers I can actually read. This one will also network with my autopilot and display course errors, waypoints n stuff. Also has auto gain control and a much better backlight. Had to upgrade the transducer. Rather than remove the original one, I decided to install the new one slightly further back in a flatter part of the hull that's less likely to get turbulent water over it. Plus the original one had a lot of glue around it so was probably going to be a mission to remove. Now I'll keep my eyes open for the matching Raymarine speed and wind gauges.1 point
-
In today's episode of "5 minute jobs that took multiple hours" we have some upgrades. Repaired the deck underneath the keel hoist sheaves. Moved the jib sheet to the cabin top self tailing winch. This will make it much easier to trim the sail from a comfortable position. And attached this little placard in the cabin. Hopefully I'll get another one to go with it next winter.1 point
-
Yup that worked. Precision work with a flogged out excavator. Nicely done. Many thanks for your help Mr Bell. Didn't actually get a photo of it all nicely painted. What a rookie mistake.1 point
-
Got the solar panel hooked up and the engine charging circuit. Added some hanging wardrobe organisers for storing odds n ends. Cabin lighting sorted with a single white/red light in the fore cabin and some LED strips in the saloon. The LED strips drew a bit more current than expected so added a switch to the port side lights so you can run half if you don't need max intensity. Next up, new seat squabs for the interior, fit the shitter and hopefully some more reliable instruments.1 point
-
Got the lighter weight pink spinnaker out last Sunday. It's in great shape. Then Saturday this week, sent it around Karewa Island in perfect conditions. https://i.imgur.com/cMBiU59.mp4 Then the skipper for Sunday's open series race decided to go fishing because his boat wouldn't move in the 5 knot winds... So took the missus out on ours instead. Got the boat at the marina until next weekend's 2 handed race. Then I can tow it home and make some progress and post some more project thread content.1 point
-
Open series race on Sunday was around Karewa island, finished second in the boat I was on. Couldn't have asked for a better weekend tbh. And the cherry on top, placed second in the 2 handed race on my boat. Can't wait to try and repeat this success in 3 weeks. Next post should be my wiring upgrades finished with solar panel and engine charging circuit hooked up.1 point
-
Been doing some work on this thing the last few weeks. Managed to re-wire the whole boat, add cabin lights and make some ropes neater with new pulleys and shackles. Note to the previous owner; please don't wire everything with 6 core alarm wire. Sure it can handle the current but it just looks crappy. The speedo has started working better since I replaced the wiring to the sensor. Not sure why or how. That tinned marine wire is good stuff. All the copper core wire I pulled out was BLACK within a meter of any join. Today was the 3rd round of the winter series 2 handed race. We turned up and officially finished our first race! Had a cracking good battle against a very nice chap in a Ross 930 - "The Bondi Tram". Great name. Had the bigger foresail up and conditions could not have been better for us. Should get the results tomorrow night after the open series race which I'll be doing on a different boat. Mine will be up at the Marina for the next 3 weeks so hopefully I can get a few more weekends with good weather to make the most of it.1 point
-
Had my first race in the 2 handed series on Saturday. Conditions were perfect for my boat with very light winds so we ran the bigger foresail which I've never used before. It was the right call because we spent the whole race wringing every bit of performance out of what little wind was available. We signed on for the race via radio and were given a 1pm starting time....which was a problem since we were ten mins away from the start line and only had 5 minutes to get there. Crossed the line at 1:06pm and got straight into a battle with a Farr 1020. Managed to stay alongside the Farr and eventually took the lead. This made my dad happier and prouder than I've managed in the previous 30years. He was literally doing his happy dance. We were heading back towards the mount when the Farr sailed a course further into the harbour while I was heading straight across the entrance taking the shortest route to the next mark. It became apparent who was right as the outgoing tide swept us into a wind shadow underneath the mount and pulled the boat out the harbour entrance at alarming speed. Diagram attached, red line is the next mark we were headed for. I wasn't the only one, a bit further out the entrance was the boat that had been in first place. With no steerage, no control and seeing how hopeless the situation was - I fired up the engine and motored back into the harbor to a safe position and resumed sailing but planned on withdrawing from the race for cheating and using the iron sail We continued to fight towards the last mark, but with the wind dropping even more, it was impossible to make progress against the current. So after spending 30 mins tacking upwind to gain absolutely no ground - we called it a night and headed home. Turns out the Farr we passed and then got passed by finished in first place. The boat further out the entrance than us managed to complete the course and finish 2nd after motoring back into the harbour and doing some penalty 360 turns. Everyone else was a DNF. Lessons learned: Its ok to use the motor to get back to a safe position as long as you take the appropriate penalty and do it the right way. The boat is very competitive in light winds. Think about the current as well as the wind when deciding what course to take. Those self tailing winches are fucking excellent. Stay tuned for the next race in 3 weeks time.1 point
-
So let's give this story a real good shot with some context. Otherwise we look like a couple idiots.... Which isn't inaccurate, but not the whole story. A million years ago, Mr Keltik Snr decided he needed a hobby to melt away the stresses of the working week and chose sailing. He did all the appropriate study, got his dayskipper, yacht master and ocean master certificates. Bought a 28ft 1970s boat and made all the mistakes on it over a few years of sailing the shit cold brown waters of the Bristol Channel/Irish sea around Wales. Before eventually slamming down the credit card at the 1999 London boat show and buying a brand new Beneteau 31.7 Damn that was a nice boat. Anyways, a few years later we sold everything and moved to NZ. Naturally the old boy was going to need another boat so ordered something a bit bigger, a Bavaria 38. Selling your business, house and cars then moving to a country where the exchange rate triples your money allows such luxuries. We lived in Ohope at the time, dad specifically picked that house so he could park his new boat in the harbour 50 meters away. He bought a mooring and spent a few days with a fish finder in a dinghy charting the entrance to Ohiwa harbour as there are no channel marks or leading lights to follow. The yacht got delivered to the viaduct basin from Germany, final installation of all the electrical accessories and engine etc were done and we all went out on the sea trials. One week after it was signed off, we started the delivery trip. The first leg from Westhaven to Whitianga went pretty well. Second leg to Tauranga was easy and the third leg to Whakatane was a bit stressful crossing the river bar but went ok. We had planned to do the final trip over to Ohiwa the next day but the wind had picked up and there was a bit of a storm due to come through so we postponed for a week. The following weekend, we did the short trip over to Ohiwa. There was still a bit of a swell but it seemed manageable. Coming in through the entrance we had the dinghy towed behind in case we wanted to take it to scout ahead. Half way into the entrance, it was getting a bit shallow. There wasn't deep water where it was supposed to be. So while maneuvering about trying to find the channel, the keel touched the bottom. Before we could do much about it, a wave picked up the boat and gently dropped it down a bit further into the shallows. As dad tried to free the boat, a medium sized wave came through, picked us up and dropped the boat a little further into the sand. Having a thin lead fin style keel, it just speared itself into the sand and we were stuck. Whilst trying to figure out the next move, a few more rollers came in and knocked the boat sideways. In the trough of each wave, the propeller was getting out of the water. Then on the crest of the next wave - with full power to the engine, we were free! The bilge pump clicked on... Not usually a good sign. "Take the wheel son, give it full power back out to sea". I pointed the boat back out the entrance as dad went below to check for damage. I will never forget the look on his face as he lifted the floorboards in the cabin and stared through the multiple 6x18inch holes where the keel bolts used to be at the sea floor going past. He attempted to block the holes with the seat squabs or anything to hand but it all got sucked out into the sea as the boat rolled around. He made a mayday call then shouted at me to keep the engine at full power. The throttle was pinned... But now the water level in the engine bay was up to the air filter. The diesel slowly died. We all sat there in silence. Put on lifejackets. Grabbed some floaty stuff to hang onto and prepared to get into the dinghy... Which was gone. All that was left was a frayed piece of rope. I guess the propeller ate it and the dinghy noped itself out of there. So we stayed with the boat untill we just swam away from the cockpit. Some nice chap in a fishing boat heard the mayday and picked us up within 10 mins of being in the water. He dropped us off at the Ohope wharf and we walked the couple hundred meters home. Later that day, we hopped in the car and drove around to Ohiwa to find the yacht washed up onto the beach. The deck was split off from the hull, splintered fiberglass and damage everywhere. Dad called the insurance company and they were going to send some people to start the salvage operation. While we waited, we climbed into the boat and made a start on taking the mast and rigging down. The insurance assessor turned up just as we were unloading the fridge full of beer. A slightly suspicious look. A few hours later, 2 excavators arrived on the beach and set up a sling between their booms then carried the hull off the beach and loaded it onto a lowboy. Once the dust had settled, dad had to pay his $500 insurance excess and got paid out as a total loss. Not even 2 weeks from delivery to write off. Then after a respectful mourning period he bought another one and we all lived happily ever after.1 point
-
The weather for my first race was a real shame as the week before I had the pleasure of doing another race on a big catamaran. Absolutely no wind. So we drifted along for a couple hours, relaxing if not thrilling. 2 weeks later, did the next race in the series on the same boat. A perfect amount of wind and had a great race until we ran aground. So this next race, the forecast says we'll have 10 knots which is perfect conditions for my boat. Fingers crossed I can do the 2 handed race on Saturday and if the weather continues to be perfect, might do the open series race on Sunday. If the weather's shit, I'll do Sundays open series race on the catamaran.1 point
-
Got another job ticked off the wish list. Have had a saved search on trademe since November and finally the perfect pair of self tailing winches came up for sale. Very rare to see any come up for sale at all, never mind a matching pair in exactly the right size for me. So before we begin, let's make sure we know what a self tailing winch is. On a regular yacht sheet winch (sheet being the boaty word for a rope controlling a sail) you wrap the rope around the winch drum a couple times and apply tension to the loose end (the tail) whilst turning the winch. If you don't have enough tension on the tail, the rope just slips on the drum. So to get maximum power into the winch, you really need 2 hands on the handle turning it - and a second person pulling the loose end or 'tailing' for you. Not ideal when you only have 2 people and the other one is supposed to be steering or doing something more important. So the existing Masport Barlow winches just won't do. They also have no gear reduction so the drum of the winch turns at the same speed as the handle. Picked up some grease and some machine oil and set about stripping the new ones down. They'd been in someone's shed for 10years collecting dust so I thought would need a really good clean. So nice to see a piece of kit that's about 25 years old and still in excellent condition. The base and gear train are solid bronze, the winch drum is anodized aluminum and the bearings and ratchets are all stainless. A few delrin spacers and some chromed bronze external hardware. I kinda get why they are like $1,400 new. Especially when you're going to expect 20+ years of use in a saltwater environment if they're treated right. And installed them on the boat. You can see the magic of the self tailing winch. The loose end goes over that horn and into a spring loaded grippy groove. This does the tailing for you, leaving your second crew member free to fetch beers. The new winches also have a gear reduction so the handle requires more than 1 turn to spin the winch drum once. This reduces the effort required. These winches aren't big enough to have multiple gears - on the bigger ones, you'll get one gear reduction turning the handle clockwise and a greater reduction anticlockwise.1 point
-
The riggers got the mast finished Friday afternoon. Loaded up the Mazda service team on Saturday and filled a chilly bin with beverages. Some sick fucker brought a box of big can ranfurly. https://i.imgur.com/tLBWj7T.mp4 Didn't have reefing lines so had a bit too much sail up for the amount of wind. Sailed past the mount and had a look outside the harbour but it was a bit too hectic. Heading back in, we tried a gybe (turning the back of the boat through the wind) and got massively overpowered. Had the boat heeled over so far the water line was half way up the cabin windows and half way up my back sitting in the low side of the cockpit. Decided to drop sails and motor for a bit after that. So we found a sheltered spot behind matakana island, dropped anchor and threw some lines in the water. Pretended to fish for a couple hours, had some lunch and plenty of beers. A good day out. Headed home with just the small foresail up and the engine humming away at low revs. Next job is to get some reefing lines run for the main sail so it's not so unwieldy. Should have a good day for it this Sunday then I'll bring the boat home from Tauranga Sunday night. Thanks to the average weather I didn't quite get my money's worth having it in the marina. It was nice not having to set the boat up every time but it felt a bit lame knowing every week is $100 you don't get back so you feel extra pressure to go out.1 point
-
Had the local rigging guy take a look at the boat. Since it's 'rod rigged' with solid nitronic rod holding the mast up instead of multi strand wire - the usual wear signs of fraying or unraveling wires don't really exist. It just fatigues, cracks then your mast falls off the next time you load it hard enough. So the experts recommend having it all removed and checked every 7-10 years. The expected lifespan is 15-20 years. Well this rig is 30 years old now. So today we took it all down and sent the lot off to his workshop for inspection. Turns out one rod had some cracks in it, a couple of the rigging toggles were damaged and needed to be replaced and the whole way it was set up was a bit janky. As all of the rigging wire gets coiled and bent out of shape when you lower the mast to go on the trailer, the solid rod was a massive pain in the ass to deal with. Especially when you need to be careful not to kink it. It needed a minimum bend radius of something like 1.5m so was rather unwieldy to tie down. The bonus of rod is that it lasts longer than wire and doesn't stretch, but the rest of the boat probably won't make another 30 years and racing performance is less important to me than ease of trailering the boat. So I've made the tough decision to throw money at the problem and make it go away. Hopefully on Friday we will put the mast up with the rod replaced by more conventional easier to handle wire. All new hardware and a few other minor annoyances fixed. At least once this is done, the chances of being killed by a fallen rig dragging me into the sea will be reduced. My wallet is thoroughly beaten and bleeding. Fingers crossed we get it all done in time for Saturdays fishing trip.1 point
-
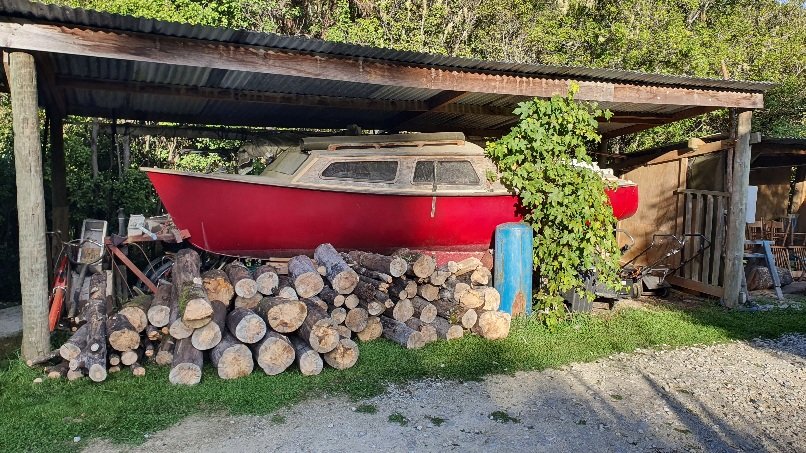
inspirational. This reminds me that I too have a boat. Its really good at propping up old bikes and firewood. I promise I will try harder.
1 point
-
Did a sailing New Honda outboard is a peach. Had enough grunt to start bending the mounting bracket in half so will get a tig magician to lightning glue a strengthening backing plate onto it. Mrs didn't freak out this time. Put it in the boat park for a few weeks so I don't have to dick around setting it up each weekend. Next event is taking the workshop lads out for a drink/sail/fish on Saturday if the weather holds up. Then going to do the plate island race the week after.1 point
-
Update time. Got the hole fixed. Sent it to Mr Jones Snr who has the luxury of being retired so had plenty of time to spend on it. Towed it into work to paint the bottom so I could have a nice warm dry space. Lifted the boat off the trailer with a jack under the front. Found a screw had backed out of one of the bunks and ripped a hole in the hull. So quickly bogged that up. Got 3 coats of epoxy barrier paint on the bottom. Learned that the fumes from that paint are pretty grunty! Then threw a couple coats of antifouling paint on there. Last paint job is to add a silver pinstripe along the waterline. Got the signwriter to throw a name on the side. The star is some kinda hi-vis stuff used on road signs. Looks mint with some light on it. Tempted to hire a berth at Tauranga for the rest of April so I can do a few long weekends without having to set up the boat and tow it around each weekend.1 point
-
Took dad sailing for his birthday. Absolutely perfect day for it The missus had a bit of a freakout. She's never been on a boat in the sea before and never been sailing with any wind. Heeling over going to windward was a bit much for her. She had the death grip on the bulkhead and wouldn't move or speak. Anchored off matakana for a bit then dropped her off at the ramp and went for a quick blast with the old man to push it a bit harder. It's quick! Sails like a much bigger boat. I'm thoroughly impressed. Doesn't point as close to the wind as I'd like and there are some other handling quirks to get used to. On the whole, I feel a lot better now I know it works.1 point

(Medium).jpg.2463f413c62392d571b907aa120e4272.jpg)
(Medium).jpg.98bc32f86a98283931078c46f9ad9996.jpg)


This leaderboard is set to Auckland/GMT+12:00