
Leaderboard


Popular Content
Showing content with the highest reputation on 05/22/17 in all areas
-
and this it todays efforts.holy shit painting a car takes ages!!!this was about 5 hours work, sanding down all the insides of the bonnet, engine lid and all four fender.I was hoping the do the insides of the doors aswell but didn't have enough time.I don't think I used any filler inside these panels because why? except for the engine lid around the vents, so the finish isn't great and the bonnet had to lay on some cardboard on the floor. less than ideal but its all shiny and red and thats the main thing!14 points
-
With the car now off the rotisserie its time to start looking at the front end. As is blatantly obvious there is a slight lack of one currently. Its laying outside somewhere. The old Hudsons one although fine in the days of dirt track NASCAR was a little lacking for what I was after. That being an updated drive train with disk brakes, power steering, airbags and room to fit the engine & trans in. Unfortunately the heavy old setup fell short on pretty much all these points. Now I think I have already rambled on about the process of deciding what to do up front and so wont go on about it to much. Basically it boils down to shelving ideas such as restoring & updating the old setup, to a Fatmans front clip, to Jag IFS, to a Holden HQ-HW setup, to the current custom made setup that is made to my ride height, weight, drive style with zero bump steering, anti dive and all that guff. It also meets all the rigorous New Zealand certification requirements. The little progress we did on Saturday was just assembling the fronts hubs & brakes along with nailing down the desired and final air out height up front. So nothing to hardcore. Using a Wilwood setup. Main thoughts being I already had Wilwood at the back, they sell the complete hub & brake kit so things should fit together easy, and they should give no worries with stopping the heavy hung of iron. Also the kit should fit under most 15" wheels but would be fine with larger wheels upto say 20inch. - yes im still unsure what im using wheel wise. The kit used is a 6 piston, vented, drilled & slotted 12.19" rotors with ford stud ( part no. 140-10741-D ) purchased from Summit who had them on special and nicely also chucked in stainless hose brake kit for free valued at near $60 USD. Nice perk that will make it not only fit all together easier but will look sweet as well. I must admit I think Summit Racing is one of my favorite stores in the world *~*' Bearings and aluminum hubs all fitted together nice. packed up with high temp grease. Of course Wilwood would have to be different and used bleeping star shaped T40 & T45 headed bolts. And naturally we had to drop everything to pop down to the local engineering shop to pick up a half inch set so we could torque em up. Once back said newly purchased sockets firstly snapped trying to torque to a small 20 or 25lbs then twisted trying to do the next size ups 40lbs. Was more than disappointed with Teng Tools quality and they will be going back. these happened to be the only ones they had in imperial at the time. It will all be pulled off anyway when we go to paint everything but still... holdups and crap tools. Sure many of you know the frustration of it all. And whats one of my posts with out a bunch of photos... Setup on the welding table. Sitting in front of the car. Drilled holes in the shock bars at air out/low height and have it set to that. This is the car at our original ride height. note the 25mm/1 inch bar up front under the car. Bleeping low and we have decided to raise the front up another inch so will have two inch clearance at this lowest point when air out. Will also give a slight rake to the car whats cool. The rear can be raised or lowed as well as its on its middle setting but we are planing to keep it there currently. And to give a better idea of how high it currently is.. a pic of yours truly standing next to the car. Love how the roof looks chopped but its still factory. Again note this is air out not at ride height.13 points
-
Finished another patch of rust. Hate trying to do them when you can't get in behind with a dolly, makes it difficult. Made up some strap sort of things to mount the fuel tank. Spent a lot of time trying to figure out how to mount it and decided that adding another bar between the chassis rails was the best. The straps pull the tank up against the top brackets, should hopefully hold it in place well enough. Made up a aluminium tray to mount the air tank and compressor in. Being able to draw stuff up in cad, program it, laser cut and use a CNC press-brake is pretty great! It's pretty tight but fits. Will swap the tank to the back as the tank will look better being visible through those holes than the compressor. I'm sure I'll paint it black so it's a bit more subtle. Got the rest of the exhaust tacked together as well. Not sure if I'll change where it exits, because at the moment it sort of comes out between the tailgate and bumper or just leave it as is. I think the whole exhaust has 10-12 u-bends in it now haha.12 points
-
So before our wee accident last year I had left some money with a friend to get a truck or van to send home. The plan was to spend a day or two with him when we returned the rental car. That didn't quite happen but he still had the money. We both spent months looking at craigslist and looked at a few vehicles but nothing was right. I saw this van one day but It was FULL of tools, I thought to my self I can't ask Scott to deal with a van load of tools so I passed on it. I was talking to him on the weekend and he said he just bought a van full of tools.... HE siad he bought it off a old guy who was retiring and ended up chatting for a few hours. It was a bit more than I left with him so I transferred some money to him and a deal was done. A few months and many thousand dollars later I get a email with the collection documents. @piazzanoob Offered to help pick it up so I met him at the shipping yard. I was stoked when it started nicely for the the guy bringing ti to me, no horrible starter noises like my old c10. I put some fuel in, topped up the radiator and drove it home. I didn't receive the title or and paperwork so i'm hoping its still at the importers somewhere, I'll email them before I start panicking Getting picked up from phoenix I finally spotted it at the yard (just) The old guy has made some pretty decent cupboards etc, I found a lot of receipts in the glovebox. The screen was replaced in 2004 and the trans was rebuilt in 2002 by the looks of it. I was wondering what the small peddle on the left was.. He had cruise control installed too, there is even the paperwork& guarantee with it! I'll have to figure out how to get it to work. The aircon has been converted to r134a so it should just need regassing and it'll be lush. Its got lovely plush seats with two arm rests and old mate has even made a cupholder with a build in stubby cooler! Lush. Scott got a whole load of parts for me too as its easier to have them arrive with the van, a set of shocks (air shocks in the back) pads, ignition stuff and a fuel pump. It was better than Christmas tbh. lush cupholder/drawers There is a full length shelf beside these She just squeezed beside the house which is good Don't even need a free candy sign, piazzanooobs nephew came with him for a ride and was right in the passengers seat as soon as it was unlocked. I'm really poor now so progress will be slow for the next few months, I'll give it a good wash/wax and polish then start with all the service parts. Probably do a de cat at some point too as its huge and its too quiet, you can't hear any v8 rumble at all. It should be easy enough, just replace the cat with a section of pipe .9 points
-
Since the car has been on the road again, I’ve put on a set of Bridgestone Potenza RE003’s and printed some custom hub-centric rings. For the hub-centric rings I used ABS plastic which should be okay, its transition temperature is around 105c and it would probably still be okay around 140c. Really its only used to locate the wheels while doing them up and don’t really serve a purposed after that. This is where I am today, almost the middle of 2017, 12 years after buying the car. Where to from here?8 points
-
Coming together nicely... Need to start on the engine bay.
 7 points
 -
So, steering box had a bit of a leak. ID'd it as a 2nd gen l200/starion/dodge d50 box. ordered a kit from the states stripped it down, input and output seals were dried out, output seal shattered to bits when I removed it. Teflon inside was looking sad and the fluid was pretty dirty tight as to pull it out, but not as bad as it could be cleaned up and resealed back in and bled. went alright actually, but id be a rich man if I were getting paid hourly6 points
-
Yep agreed, great write up. Not many people take the time to do this since Facebook came along and most forums died off. (Note: FB is a fcking awful alternative to forums).4 points
-
It was awesome, little intimidating when I arrived and everyone was unloading their dedicated race cars off their trailers, then all donned their flash race suits while I put on some overalls that i grabbed from work. But once we actually started it was all good. The car ran like a champ so now the driver just needs to get a whole lot better / braver.4 points
-
This!is my new best friend.Going back again.don't leave those chrome knuckle guard things on your car to long!thats a bunch of rust and a small hole in a stupid ass place.primer on small things. Last bit of the old red paint getting sanded down.going back looking at the old pic of the sides it looked okay, after I worked it over with the 2x4 it needed alot of work, I must have but a good 8 hours into each door and quater panel in this thing.getting closer and closer to top coat!finished up at about 6pm, temp was dropping, gun was blocking up and spraying like shit, hopefully it will be okay.last little bit under the tank/beam mounts.4 points
-
okay so going back a wee bit, I had to find all the bits and bobs from their hiding places.made sure the new lights workedhad to make a few small repairsshut up! it might work!!! got the front seal holder on and bare metaled the whole thing, kinda had to as there was much missing.extreme close upgot some mud mudded on.started on the rearI hope I never have to do these again, very tricky, not 100% happy with the back one but, its done now.also repaired the very top points of the rear valance, when I removed it all those years ago, I'd had to drill out a spot weld right on the tip of both sides, so I had left it in the toohardbasket till now, welded it up and ground it down in a few minutes really, guess I have learned a few tricks on this project?3 points
-
I only seen a couple of oldschoolers today, and they were too busy driving fast to talk shit with me. Plus I spent most of my time there hiding in the bushes with my camera. With such a wide range of vehicles it made for an interesting day and listening to all those unmuffled engines as they flew past was worth braving the cold morning. I will start off with photos of Matts(MattJ) Anglia and Tonys (Ynot) Punto. Followed by random shots So i've been thinking about over the winter months to having our meets at a local spot (Pub, Cafe, somewhere) on a set date every month like alot of the other cities do. Whats peoples thoughts on this? location suggestions welcome3 points
-
Just a small update We have Low thanks to 2" lowering springs up front and 2"blocks in the rear.
3 points
-
Ass end is pretty much done! Well the hard parts any way. Full ridetech 4Link tacked in and Moser housing in place. Useing HQ 8000 series Shockwaves from Ridetech at the back. The mounting brackets have three height settings. All welded in and a quick coat of black. This is shown at the lowest height. once the skirts and rocker panels are on its going to look pretty good on the ground at this low height. Guess i will do a bit of a write up of whats going on gear wise back there. Whats in and still to be put in sitting in boxes. Talked about the Ridetech 4Link but im also using the before mentioned Shockwave airbags from the same brand. For those not in the know click here to check them out with all the fancy videos and marketing guff. Basically they are air bags that mount like a coil over but with air shocks with 26 tuneable rebound clicks. The company was great to deal with and extremely helpful. Another company who had exceptional service was Moser Engineering. Drag racing heritage & brand so built to withstand alot of abuse. the guys build and race the kit they build. Website here. Man i feel sorry for Brian Miles as he steered me through the process of ordering the custom 9′ rear end. A million emails, measurements, re-measurements latter we got it sorted. Bare classic looking Ford 9″ Housing made to my measurements. (2inch narrower than stock Hudson) Moser axles w/bearing package 5×4 bolt pattern with screw in studs. Moser perf nodular case. Trac Loc posi 31 spline. Nodular support. 1350 Pinion yoke – steel gearing at 3.50 fill & drain plugs. Wilwood breaks i will cover when i get to installing. Should last me well. So next step is taking it down off the rotisserie and sorting the front end. It will be back up on there a few more times yet i imagine3 points
-
Hey ya. So recently I picked up a new project now my 52 Buick is complete – a 1949 Hudson Super. Story goes I was browsing auctions with no intention of buying anything just cyber tire kicking so to speak. “Hey a cool old barn find car has surfaced 45 mins away. Want go take a look?” i ask my better half. With a promise that we would go get something tasty for lunch we pile in the old 52. Walking up to it & seeing the fastback shape and roof that looks chopped straight from the factory the better half mutters “I wont say no if you want to buy it” ^^ what more can i say… talked the price down for cash & shook hands with plans to pick it up the following day. Next day swapped the fat wad of bills for the original registration papers, original ownership papers showing two owners (father then son), a few old photos from 1962 and a set of keys to a car that hadn’t been started for 47 years. Now I already have a Straight 8 in the Buick and not really interested in another inline. Fabulous Hudson Hornet NASCAR history or not. Saying this im not into chevy swaps. I do like Buick Nailheads… rare here in New Zealand and always catch my attention when dressed up. I look at the Husdon, scratch the ol chin and go “yus sir that would be mighty fine”. Nailheads have an old school look that would suit that engine bay mighty fine. Images from the Auction & First Look. So what the old timer said was wrong with it: Fuel tank out as he has had it patched n cleaned cus had a few small leaks. trunk floor has a split where fuel tank mounts. guessing due to weight & old NZ roads being not the best etc small patch rust on left rear skirt. patch rust on right front panel. front right door pillar has a split at bottom. apparently he use to chat to people leaning on the open door and thinks this might of been the issue. brake Master cylinder needs put back in as it and all the drums have been redone. Water pump is at a shop getting redone. Rats have nested in seats. All easy stuff really. the splits are clean stress splits with no rust or nasty stuff to be seen. Still trying to figure out my build. Any help or ideas are most welcome. I do know the history of Hudson and NASCAR etc but I already have a hotrod looking restored car and dont want another. im after a more custom look. I haven’t been in a Hudson moving under its own power so im unsure of many things like suspension etc. Plan so far: worked 401 Nailhead. (hard to get here so may need import) Worked 700R4 trans rewire using American Autowire highway 22kit. Wilwood disks all around. Media blast. Shave the handles. French the lights. and do all the normal custom shiz Change up the grill. Lower it. new interior. Thinking 9 inch in the rear to handle the Nailheads torque and power. Not sure what ratio. Not sure for front end. I read how great the near 70 year old front end was. Maybe new hubs for disk brakes and a thicker swaybar. But then i think why not just throw in a jag IFS. comes with disks, power steering etc and is cheap here in New Zealand (cheaper than reworking the old hudsons setup) Driveshaft – unsure. one or 2 piece… So ideas? Suggestions? This will be an expensive project for me. Being at the bottom of the world/New Zealand means expensive shipping. We have a lot of Holdens here and a fair few Euro cars. after a old school look & sound with if possible a more modern handling. Thanks guys Alex2 points
-
Moutere Inn is a much nicer spot!2 points
-
I've got a pair of axle stands you can borrow2 points
-
Up until this point, I hadnt had anyone else work on the car except myself, but I was just getting to busy with life to spend time working on the car, I also had a bit more cash flow to do things properly compared to 10 years earlier which lead me to take to the car to a fabricators to help get the car to the next iteration. We started by removing all the crap from the boot, the W2A resoviour, sub, surgetank and fuel pump and in the bin. What is left is just an nice, lite, empty boot space. The lunch box on above the battery is the fuse & relay box for he fuel pumps. Which has been moved under the rear passenger seat with a custom surgetank and new ½” lines to the front of the car. Future proofing if corn juice is to ever be needed, though I would probably need something a bit better than an 044. What happened to the W2A resoviour? It was moved into the engine bay. The fabricator made a new intake for the turbo and built two resoviours, one closest to the air box is for the barrel cooler, next one across is the overflow for the radiator. The W2A pump was moved to the front of the car which has helped significantly shorten the piping run lengths and helps reduce total water volume and weight. I pissed off the air horns and replaced with a set of dual tone Mitsubishi 380 ones. With the larger 6 piston Wilwood’s the 1” brake master was a bit small. I grabbed a 1” 1/16 brake master from an Evo 7 and a Legnum brake fluid reservoir and had some custom lines bent up to take a brake bias valve installed on the rear lines. The car does stop good, but as I mentioned before it still feels very under assisted, you need a pretty strong leg to get it to pull up. There must be something I can do about the booster, but I haven’t found any other options. Something unfortunate happen during this time, I seemed to have gotten fatter, much fatter and could no longer fit in those stupid Bride fixed back bucket seats. I put the stock passenger seat back in and found a genuine Bride recliner that is sooo much better, Worlds apart compared to the fixed backs and people of normal size can actually sit in the damn thing too! Here is the engine as it sits today, changed most things over to black silicone. And it was just recently tuned again… On a different dyno and a totally different tune, it made 300hp @ about 21psi, or 25 hp more than before – but it’s hardly an apples-to-apples comparison. This tune is much nicer, they spent far more time getting the idle and cruise conditions perfect which has made the car much nicer to drive. The tune is also running very rich at 11.5:1 and there is only a max of 17 degrees’ total advance compared with 20 degrees previously. So, over all its made slightly more power but with a much softer tune. High five! It has been nearly 9 years since I had the car in a drivable mode and I am amazed at how old I’ve gotten. The car is raw, grumpy and takes a lot of effort to drive – god it’s fun – but this isn’t something I would appreciate driving every day and I don’t think it’s something I could.2 points
-
Off the rotisserie. Sitting at Air out lowest height. Looking at assembling front clip this week at some point. Then from there its fabricating the new front ends rails etc and getting it all together.2 points
-
Now that some of the old crap is off the rear its time to start the cutting and welding madness! God damn but i am excited! So as you can gather from the above posts the springs etc have all been ripped on out. I chose a RideTech Triangulated 4Link to take its place. Must say im happy with the product. 5.6mm(0.219inch) wall thickness tubing and 4.8mm(0.188inch) laser CNC brackets – included is brackets for the shockwaves. It just feels sturdy and built right. Ridetech sales reps are great to deal with and more than happy to go over everything making sure the right product was ordered for the car, weight, ride height and driving style. I chose triangulated for a few reasons. One being no panhard being needed to free up room with luck for the exhaust as not much room under the Hudson for two pipes. Another was i could get tighter wheel to fender clearances due to less or no side to side play compared to a parallel 4link. They should give a much better ride quality than springs whilst being able to cope with rising and lowing the car better as well with bags. Anyway a refresher of how it was once the big stuff at back was stripped off: Below you can see the old brace and spring mounts. Flockie dealt to these. And then fabricated a Hudson bracket kit & pipe support to replace original chassis brace for each side. Good thick 5mm plating. Welded the four brackets to the car along with the ride tech one. Everything is rust killed and sealed up under the plates. With bottom bar attached. Bottom bar & mount. Right hand side bottom bar done. Left hand side bottom bar. And done! Bottom two bars attached to car via with some nice brackets. Next is notching the chassis to allow diff, rising the unscraped section of trunk floor a bit and attaching the top triangulated bars. Flockie just sees the gear and the car, visualizes so quickly how it will go together, quick glance at the NZ certification rule book to make sure its good then attacks it.2 points
-
Got asked if i have any pics of the car from when it was in storage. The better half did a quick search pulled these off the interwebs. Since it was off the road since 1969 im guessing it also had other older accommodation at some point. Three owner car so i guess the person who took these was the second owner who had it for a handful of months & we purchased from. And a few old photos we got given of the car & scanned from before it was painted mid 60s. Dated on the back 1962.2 points
-
Works been flat out this week so haven’t had time to get in the garage much. Engine is sitting waiting for me to pull my finger out and hook the trans up to it. And talking of the Trans. Its a 700R4 from Monster Transmissions worked up to handle 650HP & 600ft/lbs torque. Medium firm shift kit. Wasnt happy with the service from Monster trans. Order took 6 weeks to build, test and ship. During that time they didnt answer a single email and only a few Facecrack messages. Still it was very well packaged on the crate and looks to be of decent build quality. Time will tell though how it shifts and handles. They have discounts every day from 5-20% off with free shipping USA wide along with cash discounts. I was able stack like 3 discounts to get it at a reduced price by just checking back every day for a few weeks. Package Link: 700R4 SuperStreet master conversion package. Comes with pretty much everything needed to install other than fluids, cross member and driveshaft. Kit contains: 700R4 SS Mega Monster Transmission, rated up to 650hp/600tq What’s Inside The Transmission: 5 PINION FRONT & REAR PLANETARYS PRECISION MASTER OVERHAUL KIT SUPERIOR HIGH PERFORMANCE REPROGRAMMING SHIFT KIT SUPER PUMP DIRECT/REVERSE INPUT DRUM TURBINE INPUT CLUTCH HOUSING MODIFIED SUNSHELL DRIVE GEAR TO INCREASE REAR PLANETARY LUBRICATION MODIFIED INPUT SUN GEAR TO INCREASE FORWARD PLANETARY LUBRICATION UPDATED/MODIFIED ACCUMULATORS RAYBESTOS PRO SERIES KEVLAR BAND UPDATED & MODIFIED GOVERNOR w/SPRING KIT & NYLON GEAR RECALIBRATED VALVEBODY w/UPDATE TV VALVE ASSEMBLY RECALIBRATED VALVE PLATE FOR SHIFT FIRMNESS NEW HIGH FLOW FILTER NEW LOW/REVERSE HEAVY DUTY SPRAG NEW 29 ELEMENT HEAVY DUTY FORWARD INPUT SPRAG NEW HIGH PERFORMANCE ALUMINUM SERVO What’s Included With Conversion Package: Performance Torque Converter, your choice from 1650-2500 Stall Universal Fillertube with updated Locking Dipstick Updated Universal Fit Throttle Cable with metric bolt Metric Linkage Nut 2 Brass Coolant Line Fittings Metric Torque Converter Bolts Universal Transmission Mount with bolts Speedometer Drive & Driven Gears Speedometer Housing & Support Bracket Speedometer Housing O-Ring External Lock-Up Kit 700R4 Chrome Throttle Cable Bracket Hayden Transmission Cooler Kit 700R4 Universal Dust Cover 700R4 Stock Depth Chrome Pan Unboxed: Painted up to match the engine: Using a trans adapter to mate the old Nailhead bolt pattern to the 700R4. Seems well made but the manufacturer ( Bendtsens ) is a jerk. Total ass hat and i wouldn’t ever go back to him. Once i get down to the shops to get some locktight i will get it all together. God i hate those annoying hold ups. already to go but cant find my locktight after ages of searching. frustrating to say the least. On a different note the Hudson is away at Flockies kustom chassis hotrod shop. Moving the car about is a breeze with the tractor. /Jealous. His boy is following close in dads footsteps it seems. Even though he is young he is out there helping wrenching along side his dad learning the skills. Till he gets to an age to use the welder seriously he is stuck with cardboard and making some serious customs and hotrod models from scratch. Kid has some great ideas and sure likes to chat about them to any who will listen. Exciting times i tells ya. just wish i had more time to tinker.2 points
-
Well haven’t updated this for some time. Yet on that note i haven’t done much to the car really until now. Up until this point I got it going on its old motor, gave it a bit of a drive about. took a few vids for proof that it moves & stops under its own power etc for when i would sell the heart of the old beast. And affectionately dubbed the car “Crudson” due to its ratty & oily crud smell. Well i guess that wasn’t the full extent of my endeavors to date. I have gone and spent a fair bit of wedge on the mechanical side of things. Raiding the cosmetic budget (paint n panel, interior etc) to get the car setup solidly underneath where no one will likely ever see. Seemed like a good idea at the time. Said parts have enjoyed a lovely cruise on a ship around the world from the states to New Zealand then been fumigated & inspected by NZ customs and finally released for pickup tomorrow. Will do a few pics etc of whats to go in the car and my experience with the vendors once i have the goodies here and inspected. I will say Kiwi Shipping who freight forwarded nearly a tonne of parts to me was great to deal with and would go back to them any day. The shipping part (not customs etc) was only $665NZ($470USD) what i thought was bloody good seeing it had to go half way around the world & that i normally pay half that per order from Summit etc Happy as this certainly made me i suddenly realized i hadn’t even started pulling the car to pieces to slip in my new found treasures. There is a certain joy in the freedom of not giving a fek about the parts you rip out of a car. Often for me its “ohhh i should keep this just in case…”. But seeing everything under the car etc will be replaced i haven’t had those moments and i have had great fun ripping everything out. Few choice words have been spoken yet a fair many beverages consumed to date. Making it better my Better half has been right besides me the whole time learning whats what and how a car goes together hands on. Got to love a girl who not only loves lipstick n heels but also lets me store parts in the spare bedroom. So im rambling. Heres the progress made today with various tools of destruction. – started with screw drivers & sockets but soon progressed to wire cutters followed by a hammer or two then for the finale saws etc. Shrunken Head was one of the first to go but he will be back. Hood off and ready for destruction! Electricals, Rad, Bumpers, Lights and other junk out ready to unbolt the anemic inline. One thing i like about these old Hudsons is the large Engine/Trans/Drive shaft access panel. Lift the carpets and unscrew a dozen bolts on the front floor gains you easy access with no need to raise the car. Engine unbolted and ready to go. Tell ya engine levelers are great if you dont have one get one! Garage Kitty El Spokecamino (so named due to his ripped up ears and he can be a mean lil b@$#ard) supervised under Kreeps our 52 Buick for most of the time.2 points
-
How about a link to the build in your first post? I'm now going to look at purchase.1 point
-
Thursday weeknight meet would suit me best ie. zero brownie points needed. But happy to work with what works for others as a meet by myself would be on the lame side...1 point
-
Im a regular guest here browsing but I made an account just so I can post on your build. Have read the whole build thread start to stop a few times over in a row and where i see you taking this is awesome. Totally impressed. Its a big dollar build whats cool to see. Unlike myself and every other person on here who just recycles old crap then needs to massage it and fix it up to suit. I also had never heard of a Hudson until the movie "Cars" and Doc Hudson. Seems to be what all the Mercs want to be but cooler due to race heritage. I see in the upcoming Cars 3 they have a hudson pickup. after looking them up I started drooling with truck envy. large, wide and chopped looking. Im now a fan of the Hudson vehicles. Hudson car envy aside. I have to say a dressed nailhead happens to be my favorite engine. Nice to see a swap that isnt a 351 or a chev. Those finned covers look ace. But im worried. two x 650 carbs. Over carbed to the max? most guys would run just one of those and be optimal. Welding workmanship is spot on and that C-Notch is just done right and looks so good flowing like that and not all boxy. Needs to be as this could be a show winning car once done. At first i was like "Racing brakes are a bit overboard for this style of car" but then i asked my self why? And couldn't say why not to use them. As i said its got potential to be a magazine car so why the hell not. Also using Wilwood MC and other power break parts? Cant wait to see it all together and with that 1950 Buick grille and what ever other custom mods you do. will look amazing air out. keep at it and at the level you are doing it at bro. The Rev'1 point
-
Moutere Inn certainly suits us Mot folk a bit betterer.... So any date set?1 point
-
Read that on facey - fuck yeah, shame the head gasket blew - wonder what it would have ended up as.1 point
-
A DKW 3=6 that popped up for sale last week. Click the picture to go to the Trademe Auction:1 point
-
Could be a good idea - I completely forgot about today. Would have been a good excuse to get the kids out of the house. Looks like there were some non-caged vehicles, or are they just spectator vehicles...?1 point
-
Thinking of going full retard with a Drag style spoiler: Thoughts??1 point
-
cheers Russell, if that is your real name. im pretty keen to see it finished too. the floor joists in the bathroom are to far apart for the tiles substrate that were using do we need to add extra joists. in order to do that i had to remove the floor. like so, 2017-05-20_03-37-05 by sheepers, on Flickr there is also much to do to the existing footing wall to joint it to the new slab and so access needed around th edges. like so, 2017-05-20_03-36-55 by sheepers, on Flickr1 point
-
Over the new month I get the tune better & better but I started to notice that not all was good. All that extra weight in the boot had changed the car, the way it handled and they way it drove was very different and not for the better. I guess there would be about 40kg in the boot and it was all high above and behind the rear diff, this made car feel like it had a few bags of cement in the boot all the time, but worse, much worse. What was once a nible agile car had been ruined, what had I done! Early 2011 and now “life” really started to accelerate for me and over the next four years, I started my own business, began a family, purchased a house, family got bigger, I took a stable job at a large multi-national and my career sky rocketed. Through all of this I was battling health problems and progress on the car took a back seat. Truth be told, I was also pretty pissed at myself for the direction I had taken the car. If only I had found the cyclone issue with the intake manifold after it was first tuned, then I wouldn’t have the car in this state. I could have been driving the car for years without spending all the cash – yada / yada. Hindsight is 20/20 – I wasn’t going to sell it, so lets make it what I should be. Back to the overheating issue, I wasn’t convinced that I had solved the problem by adding the bonnet vents and wrapping the exhaust manifold. The car has airconditioning, but I had never been able to use it as when the car starts to overheat the A/C would cut out and I would actually have to turn the heater on to help bring the temp down. This was unbearable on a 38deg day sitting in the car with the windows, sunroof open and the heater blowing full tilt, picture a sauna, that’s what it was like – except not as pleasant. Well, the revaltion to me was that I should get rid of the A/C as without the condensor it would give me a better mounting position for some slimline fans and if that works in keeping the engine cooler, it would actually make it more pleasant to drive as I wouldn’t need to have the heater turned all the way up on a hot day. Thinking man. So out comes the air conditioning. And in the place of the A/C condensor goes two 12” SPAL slimlines. The little cooler you can see is for the powersteering. I took a good look at the stock radiator and decided it could use an upgrade at the same time , ADRAD in SA built a custom radiator that fits magnificantly, it seems to be based off an Evo 1-3 radiator but at slightly different dimensions. The heatwrap on the exhaust manifold got binned as well and I had the manifold, waste gate screamer pipe, turbo exhaust housing and the turbo dump pipe ceramic coated by a local coater. This should solve the overheating once and for all. The new slim line fans are now mounted in the best position, I plugged all the gaps around the radiator with foam, there was no more A/C condensor adding resistence to the fans while stationary. The ceramic coating would (hopefully) provide some radiant heat sheilding and the new radiator would add another level of confidence that the problem should be erradicated for good. 2012 rolled around and time for another brake upgrade. The VR4 Twin Pots were much better than stock, but still not what I would call great. I could have gone late model Bremboes, but that’s a common upgrade. I found Wilwood 6 piston kit ex US with 320mm two piece rotors for a very reasonable price. Shortley after installing the bigger brakes I took the car out for a glamour shoot.1 point
-
This car had a few partial resprays in Japan, its definity good from afar but far from good. At some point the boot lid had been resprayed and the original decals where missing. I thought it would be quite hard to get a set but thankfully a knowledgeable person in a Mitsubishi dealership was able to track down both the Mickey Mouse Club and Cyborg decal ex Japan. Originally, there would have been MIRAGE in the centre of the tail garnesh, but there were none available when I enquired. I should look at getting a reproduction made as it would just be a normal vinyl sticker. I quite offten keep an eye on the forums for items of interest for sale when I spotted a full Cyborg driveline that was from a 1990+, this mean it was the newer style gearbox and 3.545 ratio, but even better front and rear LSDs! I jumped and had it sent from Sydney to Perth. Nice 3.545 rear mechanical LSD. Here is a look at the tiny 22 spline rear axles, this is now a spare set as the ones in the car have already started to twist the splines from all the launches. W5M33 with a front LSD. Delish! I’ve added these to the parts collection for when I break all the early model geaboxes and diffs I’ve amassed. It was late 2010 by the time I finished installing the barrel cooler setup and because the old tune was for a different intake and cooler setup, the car needed a re-tune. I started looking at closely at the ECU map and comparing against other tunes from across the web. I was quite taken back at the amount of the total ignition timing that it was running, 20 deg which seems right up at the peaky end of where you would like to be. The original tune was the based of the stock VR4 map that comes with the Link and when I compared with the the Evo 1-3 the VR4 map was missing a lot of resolution in the fuel and ignition tables. Ignoring the engine differences between the VR4 & Evo motors the Evo map did look like a better starting point. I loaded the Evo map, set the base configuration and roughed in an idle tune, had a mate drive the car around the streets while I sat on the laptop letting auto tune sort out the low to part throttle fuel table. We pulled into a small carpark when I heard a loud “thunk” at the back of the car, I get out and look at the back of the car where I heard the noise and there was a bloody dent/scratch behind the wheel arch. WTF. I looked across the road and there were two kids, probably 7 or 8 who had thrown a rock and when they saw that I had put 2 & 2 together they piss bolted for the nearest alleyway. I gave chase and the kids headed straight to their home where, after I caught my breath, I tried to have an adult conversation with their junkie mother that went something along the lines of “my little johnny is an angel, he wouldn’t do anything like that, you are making it all up, im not talking to you any more, come back with the police”. Nothing ever became of it and it wasnt worth pursuing, it does still piss me off that the first day on the road after nearly two years in the garage the car gets a dent from two stupid kids playing silly buggers.1 point
-
Following that line of thinking I spotted a second hand PWR barrel cooler setup for sale that was used on a very well sorted VR4, perfect! When it first arrived, I set it all up for a test run. The reservoir was built quite large and had a [dry] ice pocket inside for extra cools, but that also made it large and heavy. The reservoir was originally mounted in the boot of the VR4 it came from so that’s the route I intended to take. I added some ball valves so the system could be drained and to allow bypassing the radiator for pure Icey cooled water, most likely a bit overboard. Now, I was still using the Fidanza Aluminium flywheel, sintered puck friction plate and a something/something pressure plate that I mentioned earlier and I had come to the realisation that it too, much like the twin plate was probably a bit unsuitable for this cars driveline. Since I had the barrel cooler setup to install now would be a good time to drop the gearbox and install something a bit more practical. This time around I went for a Fidanza chromoly flywheel, ClutchNet Kevlar puck friction plate and Fidanza 1500kg pressure plate. The idea here is that the Kevlar friction plate provides enough slip to give a good increase in driveability, while also being resistant to overheating and the heavy pressure plate helps with the overall power handling capacity. Clutch setup No#3 While the box was out again I installed some Nolothane engine mount inserts in the north – south, gearbox and cam mounts. This was not an easy task as the new mount inserts eliminates all the minor free play needed to bolt the engine in easily. I needed to get quite creative with the order in which the mounts were installed, jacks and pry bars to get it all lined up and installed. Before reinstalling the gearbox, I gave it a quick lick of paint to help hide it in the engine bay. Gearbox Nolothane mount installed as well, engines rock solid now. Tick. How the heck was I going to fit that barrel cooler? The outlet of the barrel was 3” and the throttle body was 2.5”. It also needed to reduce through a nearly 90 degree bend and had to be a little flexible. Easiest way I could see the cooler fitting is like the below dummy setup, but if the throttle body was 3” it would work well for the top bend. Taking a closer look at the intake manifold. It’s the original Cyclone intake from the VR4 the engine came from. It’s a rather complicated intake manifold compared to others in this generation as it has two runners per cylinder of differing lengths. In the picture below the blue line is the short runner and the green the long runner. The short runner has a set of butterflies that close at low rpm to help promote velocity through the longer runner and then the short runners open at about 4000rpm or 6 psi of boost. Interestingly if the butterflies were closed at high rpm it would be a significant restriction as it would act like a choke… hang on… let me re-check the wiring to the Link G3 – Fuck! Turns out I had setup the G3 to Close the butterflies at 4000rpm instead of opening! This was likely the restriction that gave the lower than expected dyno result! FFS! Too far into it now to stop though… The next logical purchase to solve the barrel cooler mounting problem and my inability to check the old manifolds cyclone wiring is of course a new intake manifold. Perfect sense. Only the best eBay here, but I had them move the vacuum port location from the top of the manifold the rear and to leave off the standard throttle body flange. I then ordered a Plazman 3” throttle boy and had the adapter flange welded to the new intake manifold. The throttle body, unlike the manifold is a work of art and has a cammed/progressive linkage to try and help with small throttle positioning. In the picture below I briefly consider mounting the barrel over the top of the turbo inlet and clocking the turbo. Eventually I decided against mounting the barrel high and used the original low route, I think it makes it look like there is more room in the engine bay. Here you can see the short outlet pipe from the turbo to the barrel, on the underside of that pipe is the blow off valve which just vents to atmosphere, though it does have a little filter on it to keep shit out.1 point
-
Speaking of induction, you may have noticed no exhaust manifold/turbo or intake in the previous images. Well, I happened to acquire a TD05 16G-6 from a Hyper RVR, this turned out to be a bit of a gem as when we looked closely at it, it was the same physical size as a normal Big 16G but had a revised compressor wheel, which I assumed to mean good things. One drawback was that I would need to clock the turbo compressor cover to fit and that would mean I couldn’t use the stock internal wastegate and actuator. Damn. So, to solve that problem I purchased a TRR Stainless manifold with a 38mm Tial Wastegate. This was before the golden age of Chinabay and quality was assured A couple of other parts arrived, a 2.5” Throttle Body Inlet and an Injen Turbo Intake for an US Eclipse. A bit more happened on the fuel system and boot. I wasn’t thinking of building a show car, just a nice streeter and I was trying to keep the boot a usable place. Battery boxed and a huge fuse added inline. I have a friend in the sign writing business who owns a CNC router, he machined me up this awesome custom sparkplug cover and I added some Taylor Ignition leads for something nicer to look at. The standard intercooler wasn’t going to work for this engine, its tiny and sits inside the driver’s side wheel well. The obvious choice at the time to was use the VR4 cooler, being the Evo Zero spec it was slightly larger than the normal JDM Galant cooler and with a 2.5” end tank mod should work well for this setup. I positioned the standard VR4 Oil Cooler in the passenger side wheel well, it gets its airflow from the standard bumper vents, but probably needs a little fan behind it for the summer time. …and I also added a little cold air induction on the driver’s side in the form of a 250mm 90deg Bunnings spec storm drain, this earned the car the affectionate nickname: POSBOG from my mates. With Cyborgs & VR4’s, they share a lot of wiring and sensors. This made the swap quite easy but when it comes to ECU’s there are only a few good ones and they are the single board ECUs from late model VR4s. These late model single board ECU’s can be chipped and they can also data logged via an OBD like protocol. Thankfully with the 2.0 litre engine came the accompanying MD165808 ECU that I had socketed and chipped by a local guy to include a stock VR4 RS Fuel & Ignition Map, updated code for the newer E1-3 Air Flow Meters and “stutter box” which is a launch control mode that creates about 7psi of boost while popping & banging. The data logging on the single board ECU is done via a Palm IIIc with MMCd Logging software installed. It works really well and is a lot faster than real OBD/II, enough so that it actually provides useful information and can be setup in a dash mount with night lights.1 point
-
Now around 2006, I started attending a few of the local car cruises and on one night I had done a few clutch dump launches in a row and then heard a little “ting”. The car still drove okay but something wasn’t right, it would almost drive like it had a locked rear diff. I wonder what it could be? Mmmm never mind it still drove. One of the reasons I convinced myself to by the Borg was because of how easy it was to upgrade with VR4 parts and after keeping an eye out in the local trading paper I found a 1992 ADM Galant GSR that had a JDM Galant VR4 Evo Zero front cut installed, but it wasn’t running properly. This made me start thinking of doing an engine swap, which from what I had read was easy enough as the 4G63T is the same family as the 4G61T except 2.0 litre vs 1.6 and the only real physical different is a 10mm taller block. A good reason to hunt down a VR4 Evo Zero was because of the factory upgrades over a standard VR4. The Evo Zero makes 176kw and 304nm vs 150kw and 294nm for the standard VR4, this is mainly achieved with 510cc vs 450cc Injectors, TD05 Small 16G vs 14B, Larger Intercooler and piping, slightly more aggressive Cams and a better tune in the ECU, which is a single board and chippable. When I looked at the swapped Galant GSR, the engine ran fine, compression was good but it wouldn’t shift into any gear and the clutch just didn’t feel like it was there at all, but the basis looked good enough and I really wanted that engine! $1800 later and it was mine. No use wasting time then… I sold the stock 4G61T complete minus wiring loom to someone in Adelaide for almost the cost of the Galant with the VR4 motor, probably the best deal I had with the car. Gave the VR4 motor a birthday, new Cambelt, pulleys, water pump and balance shaft removal. When removing the balance shafts in 4G63’s it tends to increase the oil pressure significantly, it’s not uncommon for it to go way above 100psi which can cause a few problems with turbo oil seals etc. The common solution is to port the standard oil pressure relief valve, I may have gone just a little for far here, but it works! I had a new engine, just needed to sort out a gearbox. The one that came with the new motor was cactus, it had a dodgy FWD conversion done, broken bellhousing from probably running into something and the clutch release bearing had collapsed. I stripped it down for some bits and binned the rest. It wasn’t too much of an issue that the VR4 gearbox was unusable because with just a VR4 clutch and flywheel the stock 4G61 gearbox would bolt up fine. I just needed to find a clutch and flywheel… Lucky for me I guess, I found a Direct Clutch Twin Plate for sale on eBay, total over kill!1 point
-
concrete in the hole 2017-05-18_04-27-19 by sheepers, on Flickr1 point
-
Will try and document the more interesting things I thought this was a nice touch. Fuel cap IMG_20170513_144634 by John Bell, on Flickr Looks pretty normal, has a straining mesh in there IMG_20170513_144642 by John Bell, on Flickr It pulls out and locks in like a spout so you can fill your vehicle with roadside diesel from innapropriate vessels in Africa/Ruatoria IMG_20170513_144701 by John Bell, on Flickr1 point
-
bit more progress.body on wooden stand.doors bogged and primed.fenders bogged and primedtook a lot of work, many late nights, all day Sunday and half of Monday.A little tip, don't try welding 6 fenders together to make two, so much work to make them look good Still heaps to go!life looks like this now.time to finish up the shell and get those valance's done!1 point
-
Been one of those months that I have seemed to be playing catchup the whole time. Works flatout crazy but seems to be finally settling down as the Easter break approaches. The few breaks from work flashed by. One was a pretty cool car show we took the Buick to “Timaru Caroline Bay Rock n Hop” and the other was a mission to the docks to collect the 50 buick grille and other parts that landed from the states. Flockie has been busy as well but lately has been able to get back into the project. C-Notching the rear so we can get down nice and low. A few pics of the progress so far: Note the forum seems to be resizing the images weird. Making them squished in so if you want a better look click the images to see it in the correct proportions. Initial cuts to the frame and boot floor. Check out the gravel that fell out of the rails that piled up in the inner bottom wheel tub And thats after a bit of a cleanup.. Moser Diff with Wilwood break mockup to check clearances & how much of a notch is needed. Few more cuts made for the top links to fit etc. More cuts are needed to get the diff to sit where we need it air out/lowered. Flockie got his plasma cutter out and made up the plates needed for the C-Notch then tacked in place. As you can tell from this pic to the above a lot was cut out to accommodate the new rails. The angles are bent to keep the original bump stops that we will be reusing. Process of welding it all together started along with the internal braces. First side done! And both sides done. Again the forum is messing with images squishing them. so click em to see the images in correct proportions. Im pretty happy with how its turned out. Next will be the other ridetech triangulated four link bars. Only issue and it isn’t a biggie is the place i had planed to put the airtank & compressors etc was the floor that the c-notch has now invaded. Tank may still fit in the space not sure yet but im thinking it will need to be moved or parcel tray massaged what could be more of a pain than its worth.1 point
-
had a busy week and weekend, got the first couple coats of red on the car.did the bottom and the inside and dash area,pretty pleased with it, did one coat on saturday, missed a couple spots, worst thing that happened was sweat running out of my glove on the wet paint, bugger it! gave it a wipe with thinners and it came really nice on the second coat today. Got a few small runs but stoked with it. not bad for a rookie!1 point
-
Took the Rover out for a Rove today, its driving really well, with only minor hiccups every now and then. Still some ironing out to do in the tune. On the other hand, i filled up today. Spotted this in the owners manual and had a lol Clearly BLMC had some sense of humor back then.1 point
-
Rolled into Flockies today after work to have a yarn about the important things in life… cars. Focusing on the rearend at the moment. To gain the air out/low height and drive height we are after means getting the diff up higher. This will mean more fab work than initially expected but really it aint no great surprise to tell the truth. C-Notching the chassis rails about 4inch and then raising part of the floor in the boot (trunk for you yanks) to get more clearance for the diff housing. Also may need to alter the floor slightly under the rear seat for the two piece driveshaft. We are looking at a ride height of a minimum 100mm (4inch) maybe an inch or so higher if needs be. Then of course we can go up or down from the bags when the mood suits. As you can see in the below image there is sweet fek all clearance and the ride height is still to high. A slightly better image maybe. So those rails are looking at getting about 4 or 5 inch C-notch. So up inside the trunk a bit. On a side note the wall thickness of the Ridetech 4Link that will be bolting up in here is much better than expected. Just above the center diff housing is a small raised section of the trunks floor. This will need to be raise up a bit further to get clearance for the housing. Still should be enough clearance on the ledge for the airtank etc. So no great loss really. Looking at running the exhaust under the diff. In the above pics you can kinda see just in front of the diff (opposite side than we see) that the seats floor pan is looking like it might just slightly be in the way for the drive shaft. May need a little massaging. Another issue maybe changing the tire. Will give that better thought once we know where everything will sit better. The diff is slightly narrower than stock to help with this. Also pumping up the bags will help a bit. Doubt some unbolting of the diff scenario will work due the exhaust going under the diff. All i can say is im happy that my insurance comes with free AA roadside assistance nation wide. AA stands for Automobile Association in New Zealand NOT Alcoholics Anonymous. Would be rather amusing to dial for a 12 steep program to change a flatty stuck in a wheel well. Now this is all nutted out its time to get the certifier involved just to make sure he is happy with it all. No point cutting then to find out it wont meet cert. Hope he gets out there this week but i doubt it unfortunately. Im bleeping eager to get Flockie welding shit up.1 point
-
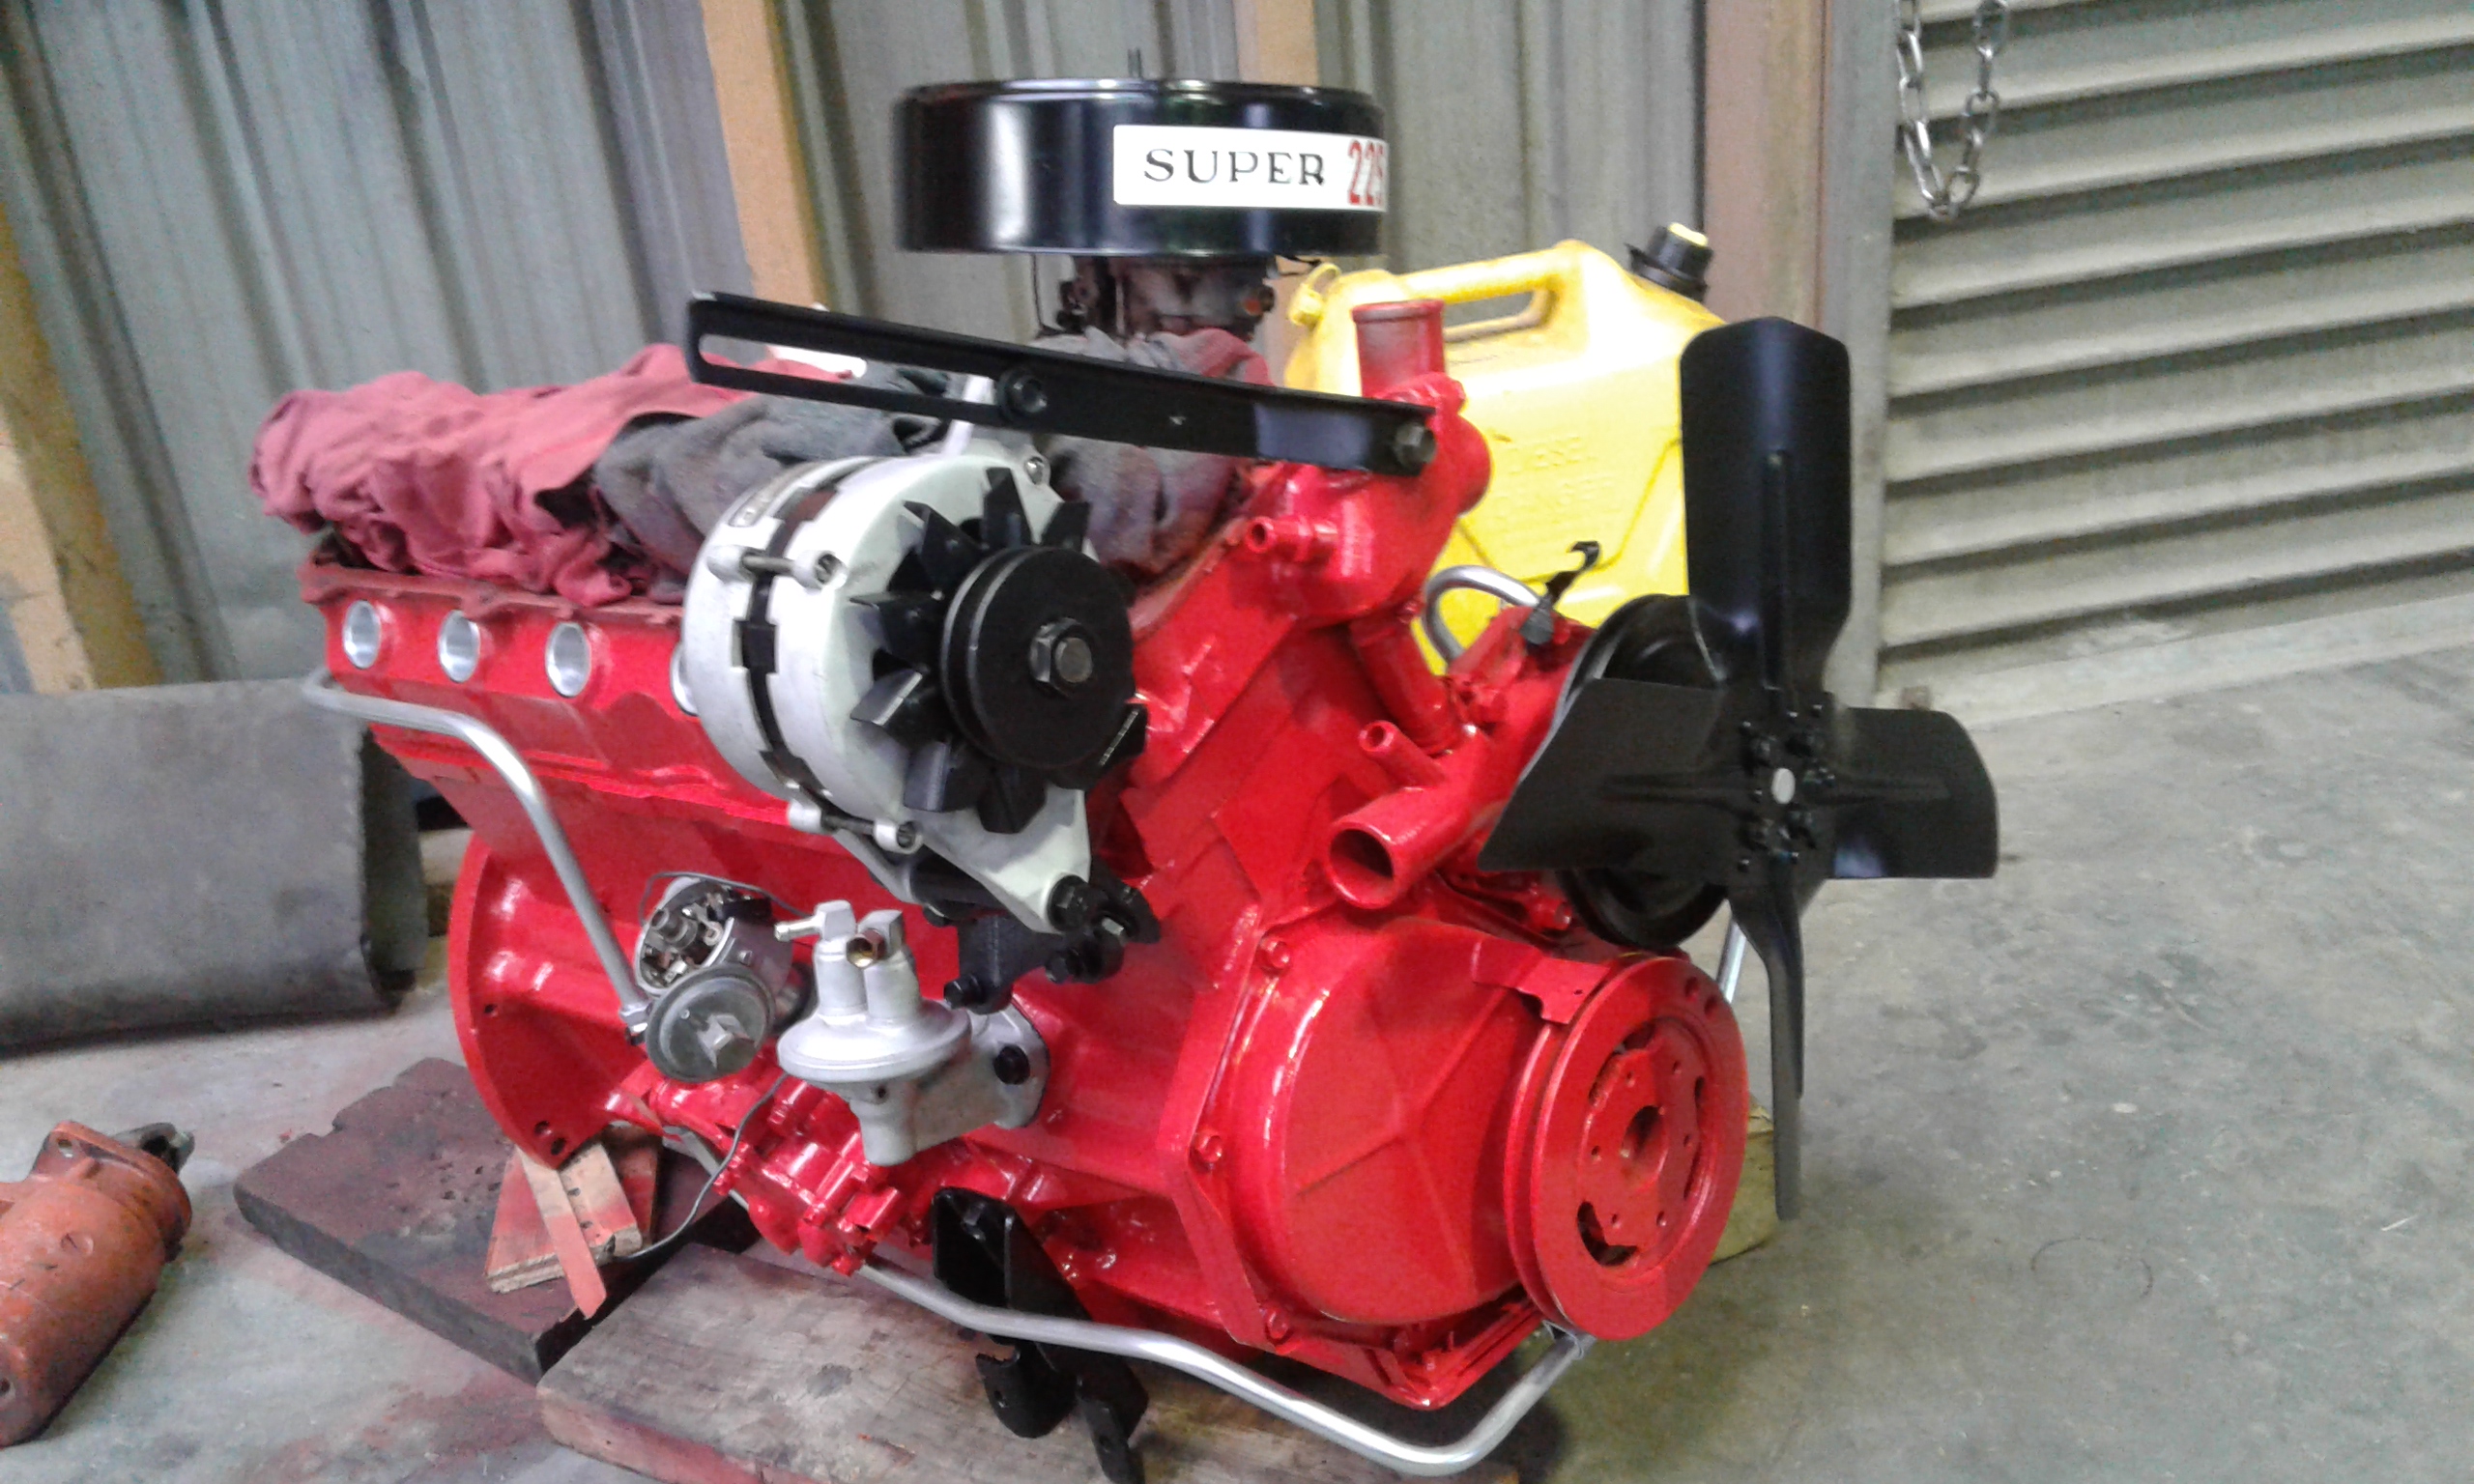
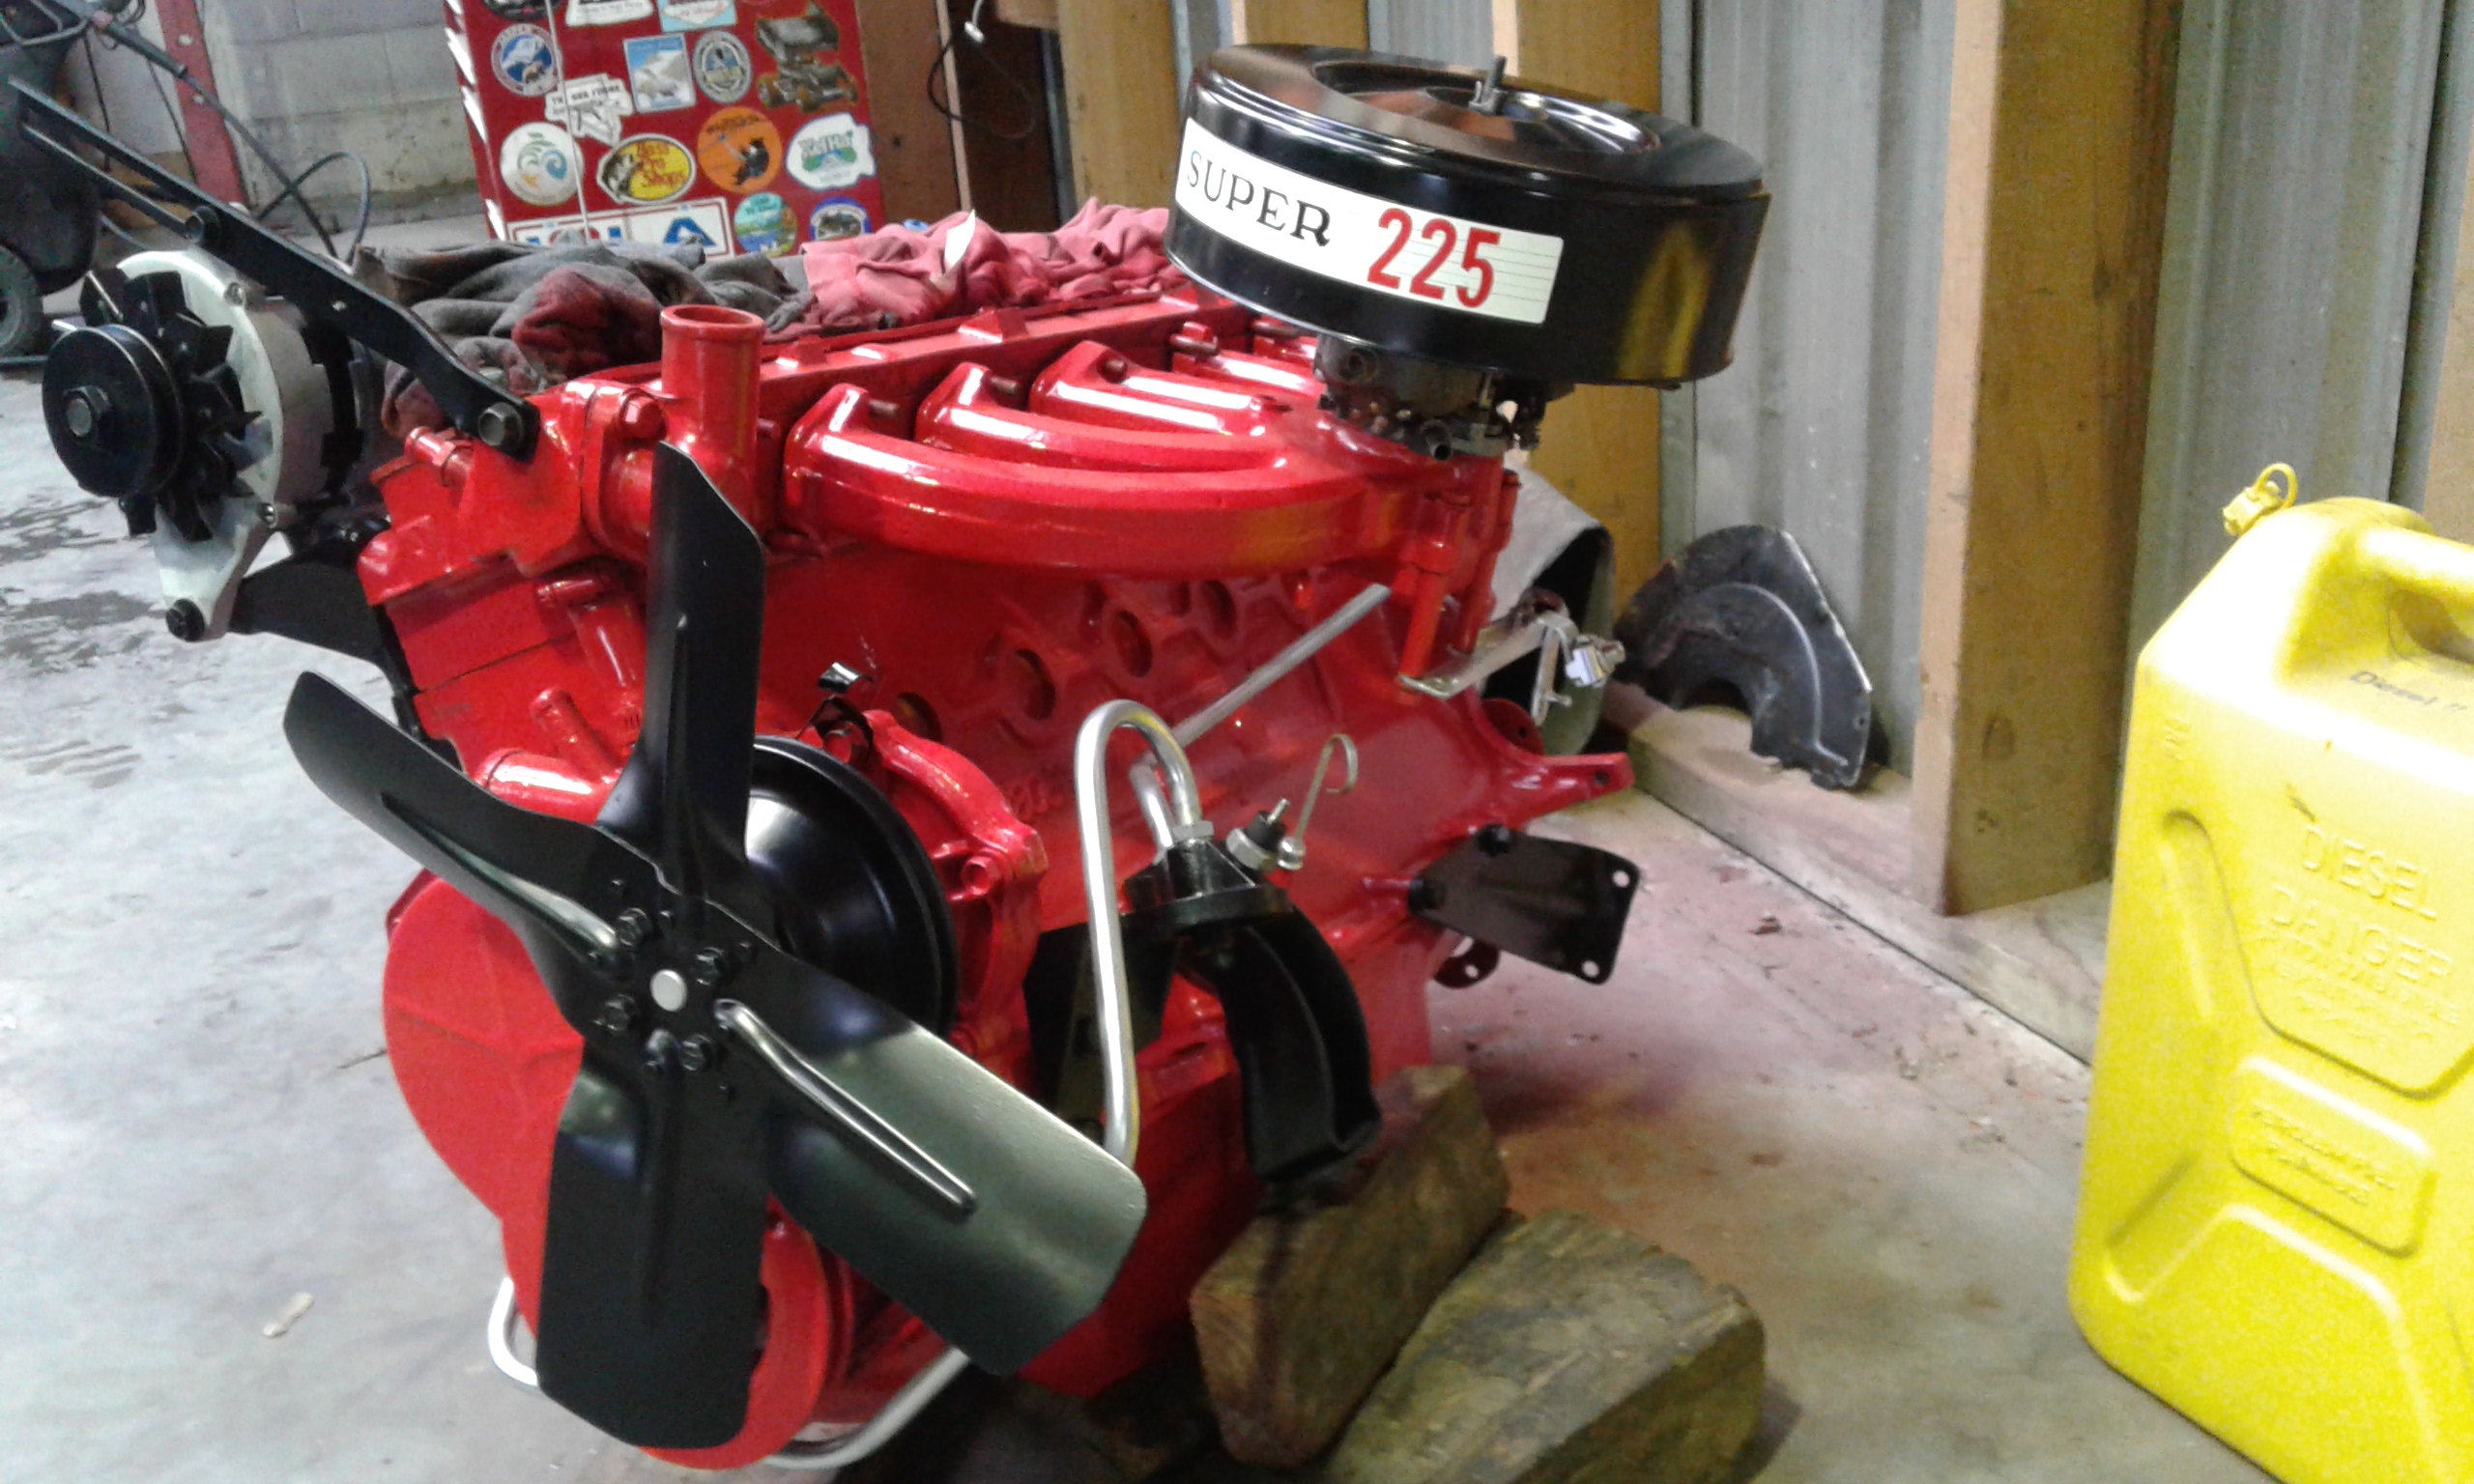
My dual quad intake arrived just before Christmas & i only recently have had time to look at it and the engines induction. So the intake was one of the first things i ordered way back in August. I was told it would take 4 – 6 weeks to ship. four months latter and many many emails it finally arrived. Prior to buying the crudson i was toying with the idea of Nailheads and had seen the brand Eelco as being the best intake for the old engines, better HP gains etc than the even the Edelbrock manifolds or six carb setups. Not to mention they just look bleeping cool. So off i went and brought one. Wasn’t until months latter and no intake along with a HUGE list of excuses i did a bit more research and found out the manufacture had an extremely poor reputation. mostly for taking the cash and never delivering the goods. a few threats of contacting paypal got the fire under him and the “motorbike accident”, “surgery” and god knows what else all suddenly cleared up and goods sent. The intake is all i wanted and more. Extremely happy with it. Its so light weight when compared to the factory single 4brl one i had. Nailheads love alot of carb. So two Edelbrock Performer 1405 carbs delivering 600cfb each will sit on top of the new aluminum intake. Got these from Summit when they had a sale coupled in with an instant manufacturer rebate meant i was able to get the two carbs at about the same price i could pickup a single carb for here in New Zealand. Obrein truckers sorted me for the washable airfilters along with the old school finned cover. Got to say Dennis Obrein was great to deal with. Extremely helpful and answered all my emails fast and fully. gave options and suggestions. top man in my books and I would happily shop there again. Quick pic of the induction components before I got busy on them all. So first thing was cleaning up the intake then painting it. Me being me i got a lil eagger and even though i knew it was not the best weather/temp to spray i still went ahead and sprayed. I know i know. Middle of the night when its cold and raining out should be a no brainier for not laying down paint. Still I blasted down my primmer coats and was happy enough with it i went ahead and splashed a few coats of black on it. Went off to see my old man for a few days the follwing morning but had a quick look at the intake before leaving and was relived to see it looked fine. I decided it was for the best that i was away for a few days to really let the paint cure otherwise i would of done something stupid no doubt. I also had planed to pick up the needed intake gaskets when i was in the city. No luck. All the car shops had never had one in and some had never even heard of a Buick 401/nailhead. Sigh… looks like i will be ordering them in. yet another holdup. Got back and popped the carbs, progressive linkage & fuel line on. Need to get some Vac block offs to cover a few unused ports. also the main PCV port on the primary carb(rear carb) is so close to the secondary/front carb i doubt i will be able to use the port & im thinking I will have to block it off as well. The Edelbrock carbs have a vac port at the back of the carbs meant for power brakes & im thinking I may be able to use this. Would suit me best as the PCV is located at the rear of the valley pan between the intake and distributor so this would mean the shortest rout if i use this vac port. Anyone here used the rear vac port on an Edlebrock for PCV? And of course i couldn’t help my self and popped the setup on the engine to get an idea how it would look & to check clearances etc. Its all a bit grubby but thats to be expected. im pretty stocked how it all looks. cant wait to turn this thing on \,,/(-.-)\,,/ And even though its not related to the the Hudson here’s a pic from yesterdays backroad explorations in the Buick. Took us through gorges & passes to some decent secluded river swimming spots then all the way to the ocean and sandy beaches. Nothing like a sunny day cruising with ya missus in the middle of the bench seat. Tunes blasting and a retro cooler of goodies. Pull up for an ice cream or to get fresh fruit from an orchard and watch from the shade of a coolabar tree as people congregate around the car taking selfies & pics. Also stumbled upon a Fair – same old crap really with little of interest. Happy New years guys1 point
-
As often is the way~ life and work are getting in the way of what i really want to be doing: saving this heap of steel from restoration. Time of the year i guess with Christmas fast approaching and clients suddenly deciding its the end of the world if XYZ isn’t done like yesterday. i just stand there baffled as there mouth is moving wondering to myself “yes all very good and nice but come on surely they must agree the old car is more important… LEADSLED GOD DAMN IT!!!!” Its really starting to get out of control. I take it for granted its completely normal and sane if not even healthy for a guy to dream of cars n shift like that. But my dearest the other morning commented she is dreaming of cars. Cool i think to my self but whats that say about us o.0 – should note here we do live in a Bogan town so this may be common with in the local female populace..(you yanks think redneck i guess just dont youtube Bogan please) Anyways with said working life getting in the way i haven’t done sweet jack all. Popped on the Trans adapter, ordered a few small parts i needed is about all. Dropped more stuff off to Flockies Chassis Shop. Some of the projects the maestro is tinkering away on: Not much room at the moment but with luck he will have some of the projects cleared soon and the Hudson chassis etc on its way.1 point
-
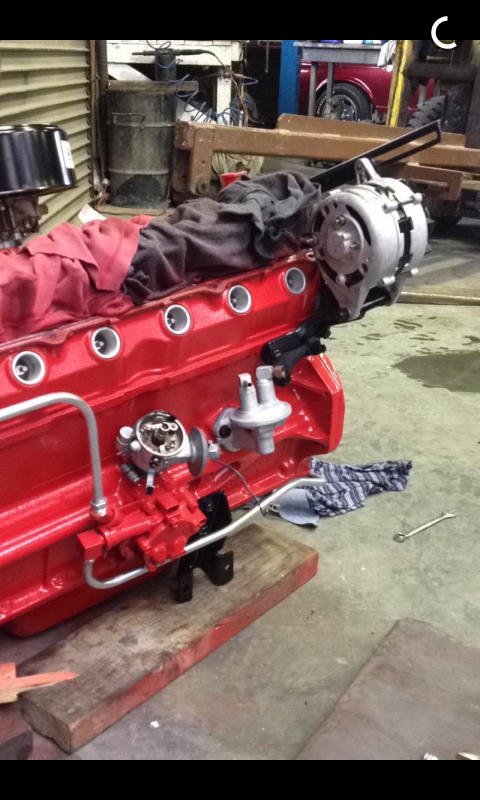
Well it seems i have swapped clouds of dirt & dust for paint spray mist and vapors. Really need to upgrade my mask i think. Still a happy trade i must admit – was getting sick of the dirt, oil n rat shit. Before i get ahead of myself i should do a quick splat on whats what regarding the new heart of the beast. 1965 Buick 401 or as most affectionatly know them by a “Nailhead” Came out of an Electra or Wildcat i think. Sonic tested prior to any work being done. Had huge issues finding one that was in decent shape here in New Zealand – ones i did find hadn’t been turned over for 15 – 25 years or had been in parts for about the same amount of time. Price to get one of these old things back in shape soon made me look to the states. I could get one already tested, worked and landed here in NZ for cheaper. Now i use to run an online business and brought most of my products in from the states so already had my customs client codes and was familiar with the process etc. So naturally i tracked down a good builder with a reputation to suit and went from there. And the work done by Dual Quad Dave reads as: 1965 Buick 401 core Bored .060 over to 413 Decked .020 to compensate for modern head gaskets(original gaskets were .017 thick, new ones are .045 thick. You lose .5 point of compression if you do not cut the deck to compensate) New cast pistons New Hastings moly rings Balanced Rods resized w/ ARP rod bolts Crank turned .010/.010 and polished Oil galley plugs converted to screw in(factory are press-in) New Melling oil pump New Melling cam/lifters New Melling valve springs Heads rebuilt w/ new valves, new iron guides, cut for Teflon oil seals(factory had no oil seals), milled .010 to ensure excellent seal New freeze plugs Updated to modern silicon front/rear oil seals Good used timing cover New timing chain New water pump Included pulleys& alt/ps brackets. Included stock exhaust manifolds Stock Power steering pump. New Powermaster 1wire alt. Stage 1 porting. Polished chambers. cleaned up castings. Adjustable pushrods. Stock 4brl Intake Media blast & prime. think thats about it. no doubt i missed stuff. I will blame the multi coloured paint boggers clogging up my brain. Dave who built up the donk was great. Gave lots of performance options and stages. Answered all my questions well and gave options. Gave free shipping to the docks. Inspected everything – found a small crack on one manifold after sandblasting so popped on another but didnt have time to blast that. Sent another box of stuff separate to NZ. Now i know what you are thinking… Cam. Its on the list to down the track. The nailheads came out with for the day a rather aggressive cam – today i guess it would be classed as mild but still decent. First i want to drive it and hear it. if i want a more lumpy cam then no problems. if im happy with it but would like a different tone to the sound then i will fiddle with the exhaust. Also another large factor was the porting. Nailheads main issue is breathing. Heck its why they are called nailheads as the valves are like nailheads. I could pick a cam up easy enough but to get porting done by someone who is experienced on the old motor here in NZ would be harder. So put my cash towards porting. Should help it breath a lil better. Power wont be an issue no matter what cam i use. The old Nailheads are known for torque. heck Buick use to lable the engines by the torque rateing not HP and they listed some impressive numbers from the factory floor. Currently its sitting about 360-370HP and 475-485lbs add another 20HP with the Eelco 2×4 intake when it arrives then another 20-30hp from headers i should be up around 400HP or 1HP per cube. Obviously a cam will push these higher if I feel I need more power. Some pics of the engine: As you can see the old Nailheads are semi hemi. and loaded up in the states: Yesterday we masked it up, took off the intake and exhaust manifolds etc. gave it a bit of a sand and another prime then sprayed it Gloss Black. Still unsure what color we will paint the car whats been a big issue. Originally satin black with pinstriping, then dark red or purple, then white with tinted windows. Already have a matte Black car. White looks good next to it but still unsure. Ideas? Anyway we figured black goes with anything and would look good with the finned accessories etc. Engine will be out again once we have done the mock ups. when we strip it down and do the panel n paint. So if needs be can repaint it again then. Will get some pics of the engine latter in its current black state. Im off to chase up my new intake then watch some custom car shows online. post ideas for paint! ohh and post some good hotrod, custom etc car shows. like Fast n Loud, Counting Cars, RoadKill, Full Custom Garage TV etc1 point
-
have been asked via PM a few times about my choice of front ends etc and thought i would quickly post a quick rant on it. So yes. For its day 70 odd years ago the old Hudson had state of the art suspension that helped the Hornets win so many NASCAR races over so many years back when it was done on dirt tracks. I had seriously thought about keeping it and reconditioning what i had then updating it with disk brakes, larger sway bar and power steering. The center point steering coupled in with issues installing airbags, decent brakes, finding a PS system and then clearances with the nailhead soon turned me off. If i was going to spend alot of wedge i would rather get an updated system. Looked in to Jag IFS – similar weight cars. still would need rebuild and would need change up the rails due to the old unibody chassie. So i would have to cut up the front end rails no matter what i would fit in. Looking about I saw Fatmans Fab did a full front clip. weld in jobbie that had all the holes in place for panels, rad etc etc. Problem was they seem to fail NZ cert so much. My local Certifier wasnt keen so no point wasting the time and effort bring one in from the states. Also note Fatmans no longer sells to NZ or Aus due to our vehicle regulations and they dont meet the standards. So if you are after some junk from them then send it to a freight forwarder state side. So started looking closer to home. Holdens HQ- HZ looked like a good option. Started searching for a HZ as they had slightly better suspension (RTS) compared to HQ. A wrecker i have alot of time for told me he new of a HZ 1 tonner with PS up for grabs. Excellent i think. problem solved. Take it away and unload it. Then on close inspection i notice the front suspension dosnt look right. turns out it was a HQ ute. Took it back and started looking again. Soon found out they can be a bitch to bag and shockwaves just wont fit in them as they are to wide (6.5inch wide). weight wise the front clip may not handle the job either. Cross off Holdens and mutter a few choice words. Now by this time I had been trying to figure out the front end for near on two or three months and was starting to get a tad pissed at my seemingly lack of any solid progress and constant setbacks. hmm i should also mention one bright side I had. That coming in a package of a Hotrod builder and ticketed welder with decades of experience on a huge range of cars. Better yet it was the certifier who recommended him(anything he says i do pretty much as he is god in the end). Wayne Flockton hence forth and forever more dubbed “Flockie”. He has had cars featured in a number of magazines including Hotrod. His shed is a vehicular wonderland of awesome. Chassis in various stages with all kinds of parts grafted on to them. Airbags, Engines, custom grilles all sit amongst pickups and hotrods that he is building for people and himself. Options, ideas, suggestions and everything happily supplied. One being Rods by Reid. A NZ hotrod shop ran by John Reid. Making NZs only pre approved for cert front end. Also a life time honorary member and top ranked man in NZ cert crowd. Also had many mag cars along with winning rides at a number of yank events like Goodguys. So after talking to him i settle on the LO-RIDE 3 with wilwood & bags made to my ride height, weight, width etchttp://www.rodsbyreid.co.nz/front_suspension.html Flockie will be cutting off the old hudson front clip and welding in a new one with the above setup. Exciting times. God I hope thats the end of the nightmare the front ends been. But I have a sinking suspicion that was the easy bit and the real hard stuff is only about to begin. >< Anyone here used a Rods by Reid IFS?1 point
-
So did the 6 or so hour round trip with the trailer to collect my new found treasures. Sun was shining, my bird was looking top shelf and i do believe i had a grin on my stupid face the whole way. felt likeChristmas from when i was knee high to a grasshopper. Eager dosnt begin to describe the feeling. As the three pallets got loaded up we had the pleasure of checking out a number of old cars that people are bringing in from around the world. One being this sweet 54 Buick convertible. So loaded we head back home. constantly catching my self speeding in my eagerness to arrive home and unload. Have i mentioned the feeling of Christmas day when i was a kid yet? Throw a few brews to the neighbor to get his tractor with forks out to help unload and im golden. Popped of the engines crate – will note here that my cordless drill died recently and i had to undo all the screws by hand. Frustrating to say the least. LET ME IN! <insert xmas day remark> Pictured is most of whats needed to get the car updated and running. Some things like drive shaft, rad, steering column etc i need to wait to get measurements. Other things like ignition system, 2×4 intake etc are still on there way. But new front end by Rods by Reid, New rare from Moser, Ridetech 4-Link along with air system, Wilwood, worked 700R4 Trans and of course the worked 401 nailhead along with other bits are sitting there ready to find there new home in the Crudson. Missing one package from Ridetech. Have images of it packed in the crate from Kiwi Shipping USA. But wasnt included on pickup in Christchurch New Zealand. Need those airbags for the rare and Kiwi Shipping are looking into it as i type. <Insert excited Christmas quote here> So its time to finish ripping the car apart. How it sits currently: Exhaust system, driveshaft, fuel cell, engine & trans etc all out. Time to get those front panels off so we have easy access to the front chassis rails so Flockie can do his measurements and then cut em off and make up a new set. Got a few good vids of the missus hard at work on the car. Think she would kill me (or worse deprive me) if i was to post them. Still funny stuff to look back on. To the garage and general mayhem i go.1 point
-
Knuckle progress, thanks to fletch here on old-school i have the loan of a tapered reamer so put it to work... I settled on 98rpm for the reaming speed. Then machined the outside taper and parted it off at the correct thickness. Knuckles now look like this, they have been on a bit of a diet..1 point


This leaderboard is set to Auckland/GMT+12:00