
Leaderboard


Popular Content
Showing content with the highest reputation on 11/27/23 in all areas
-
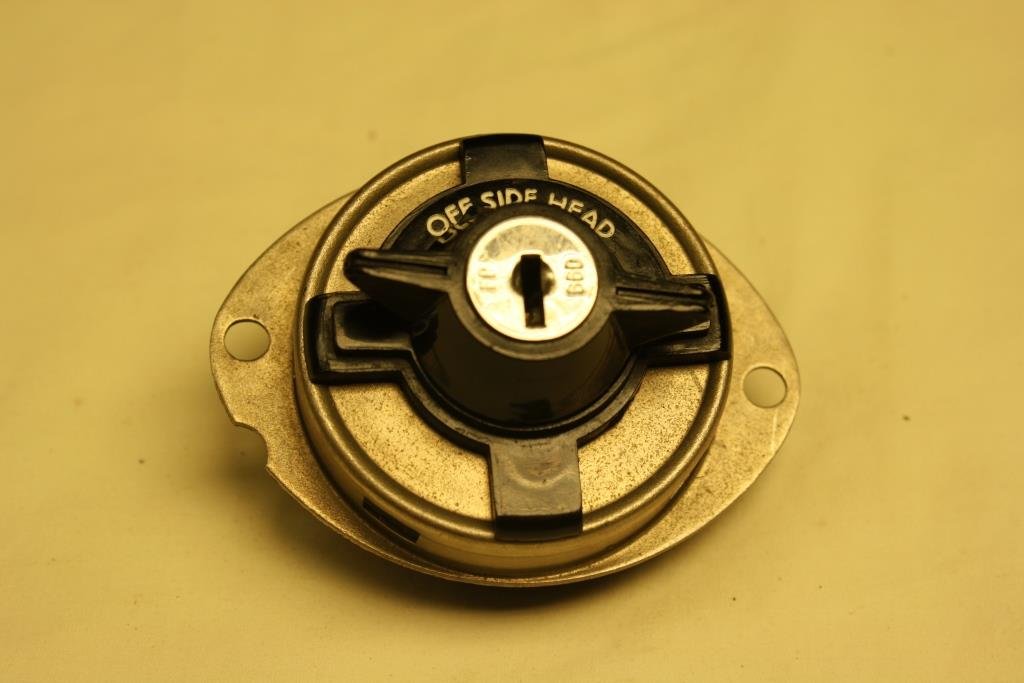
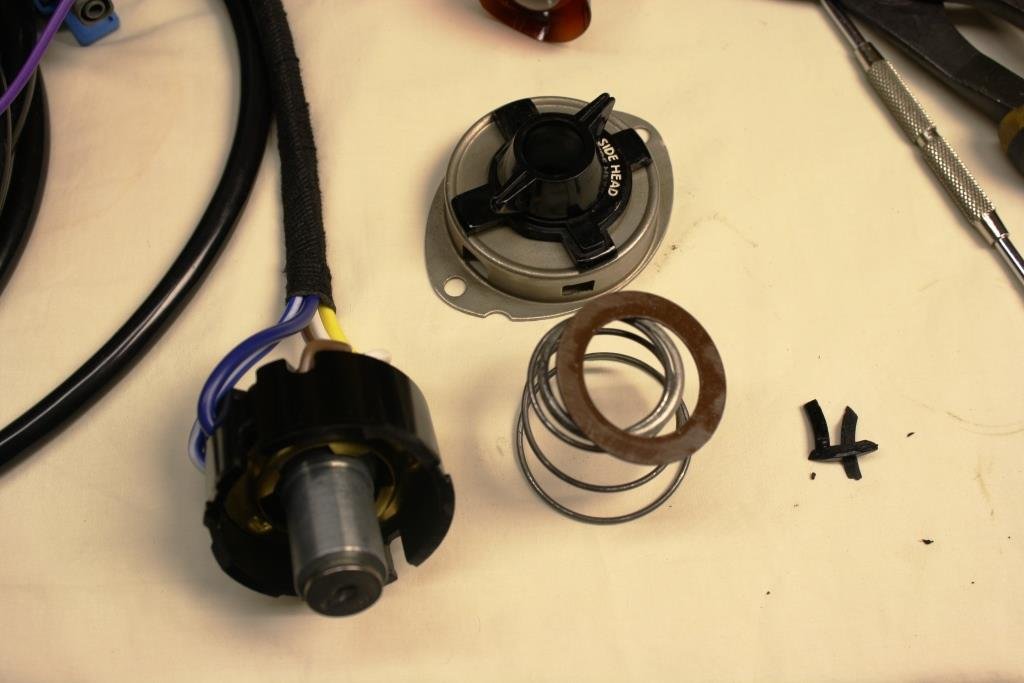
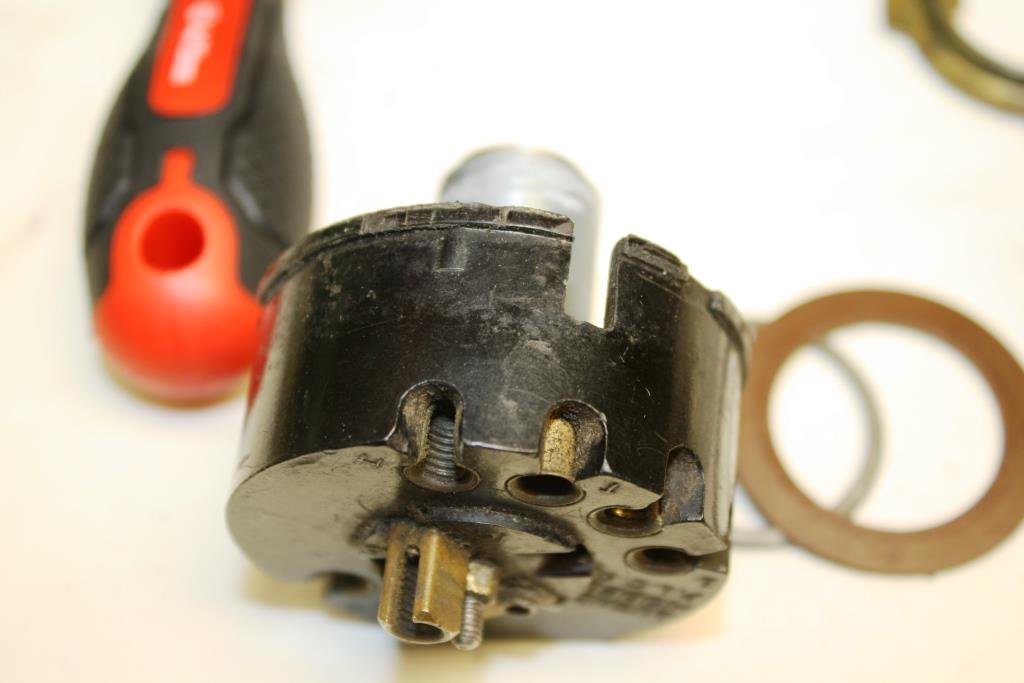
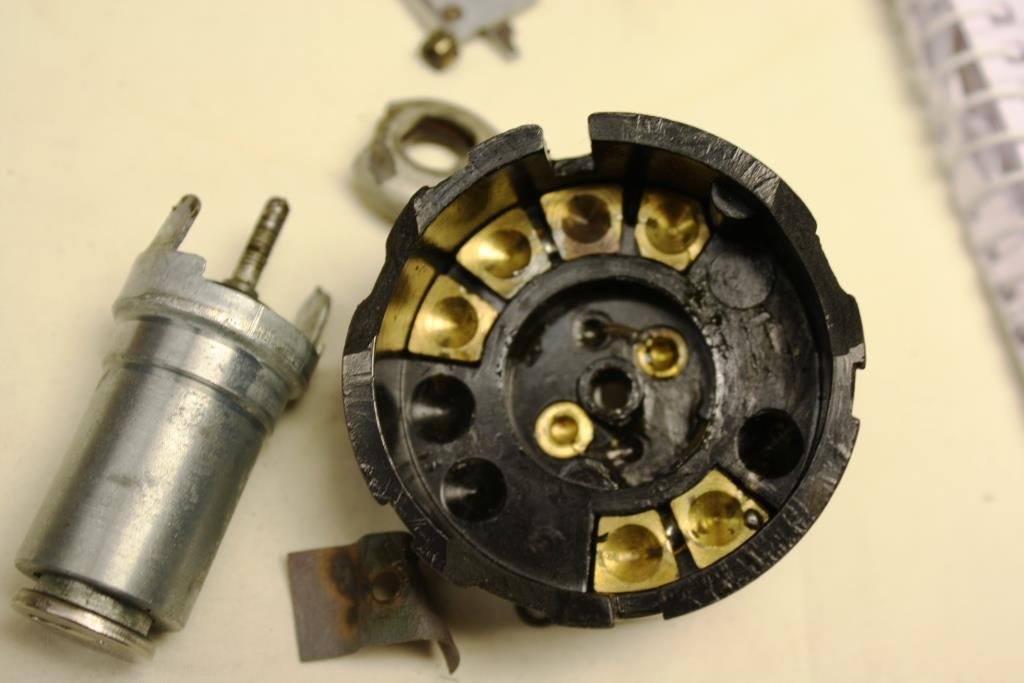
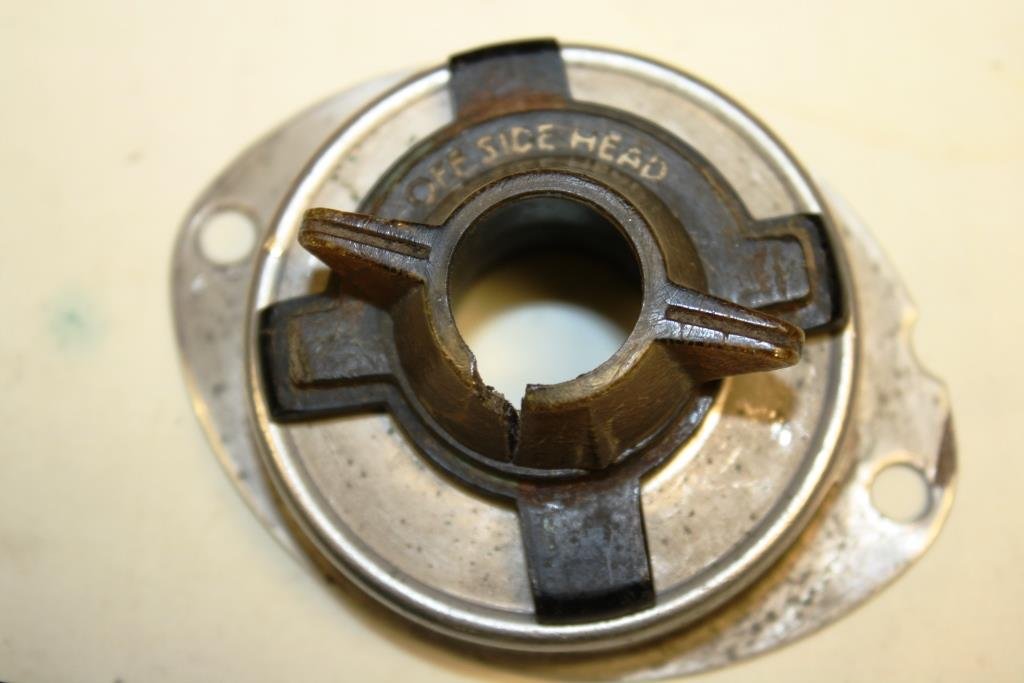
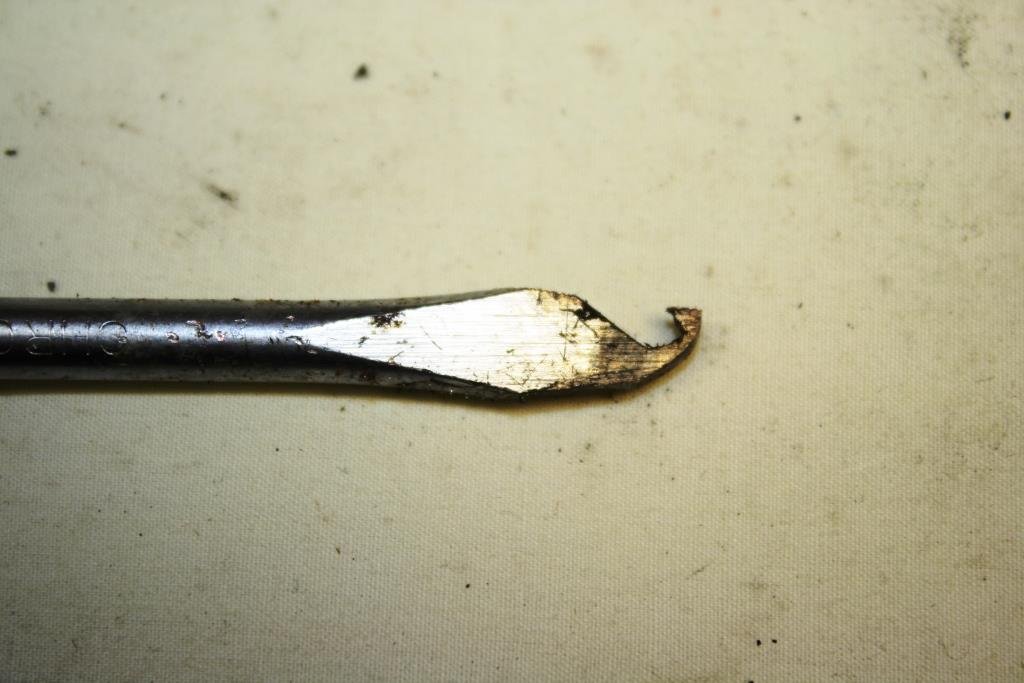
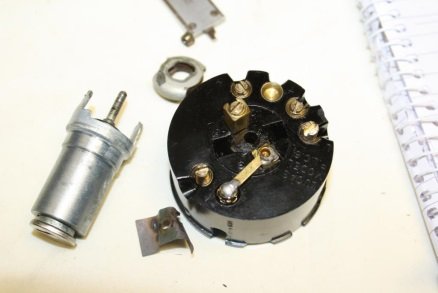
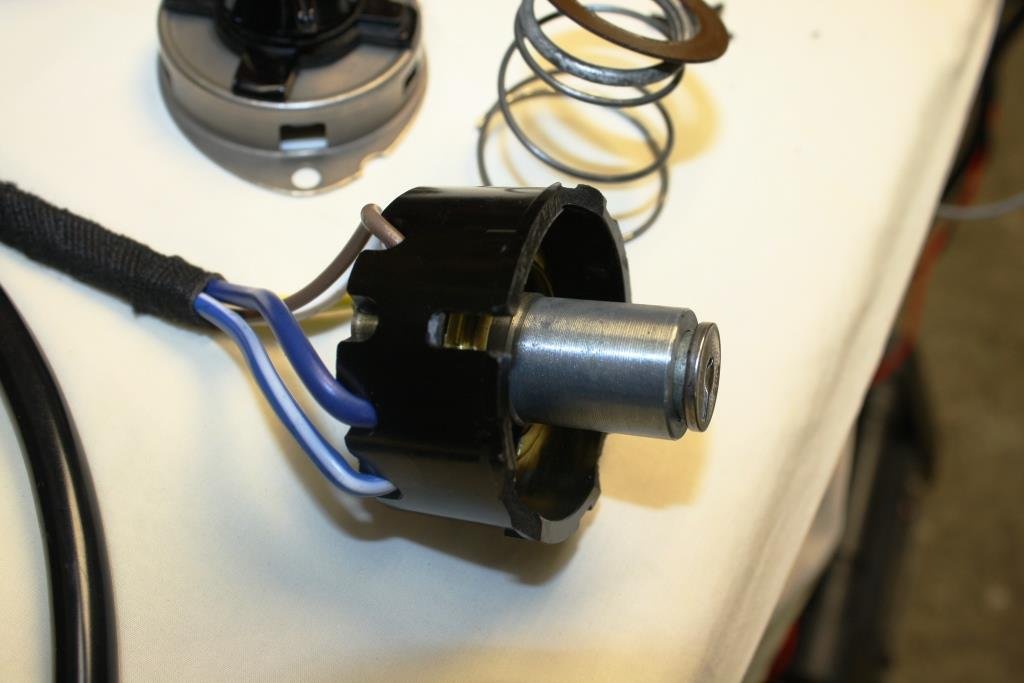
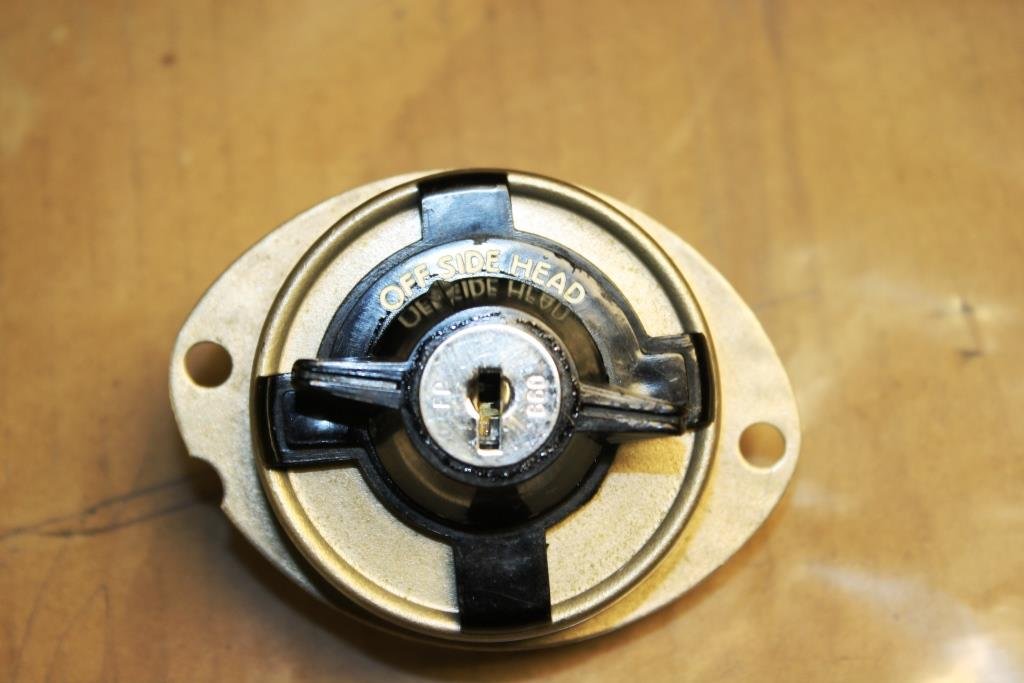
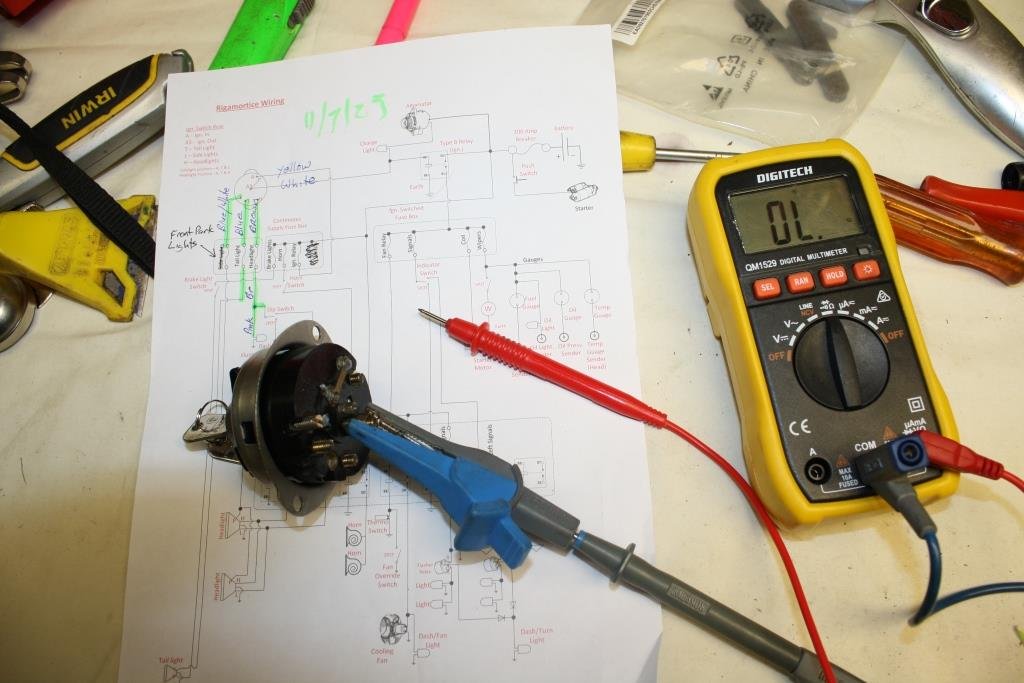
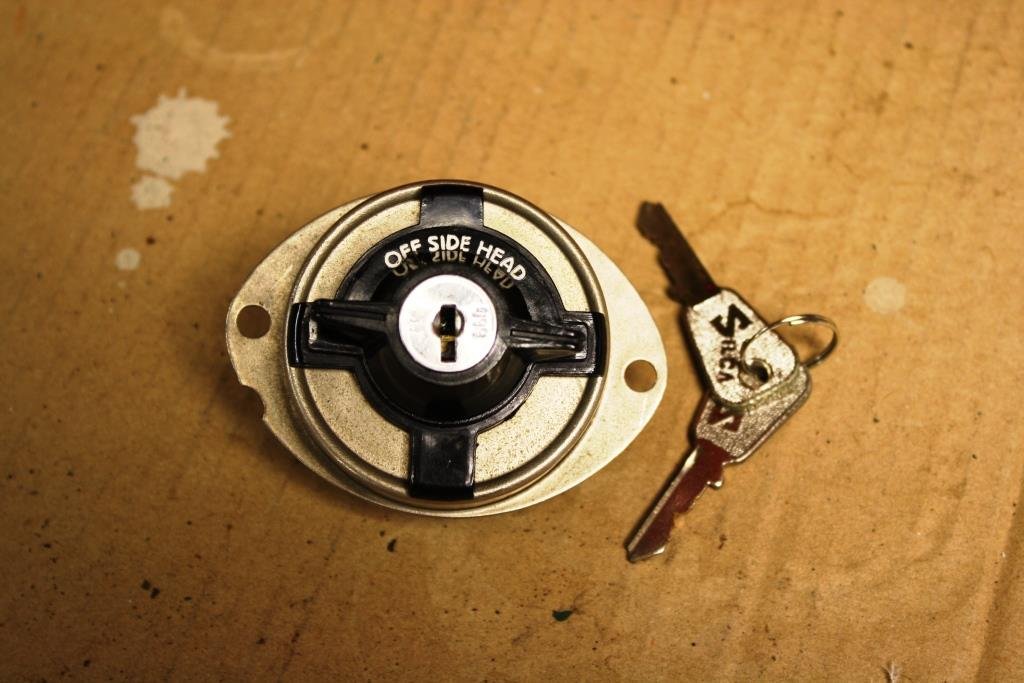
I was bench testing Rigamortice’s flash new wiring loom while admiring the cool ignition/headlight switch….. ….everything was looking good when the entire switch assembly blew into pieces in front of me. The locking tabs on the Bakelite body had disintegrated allowing the spring to do one very quick disassembly job! I had a big hunt through my spares and found I had another one. The front was a mess but the main body looked in much better shape. (Sometimes you get lucky). I had to sacrifice an old screwdriver to make an assembly tool. Everything cleaned up well….. And I managed to fit the original ignition barrel. The assembly procedure obviously required six hands …….when I got it wrong the spring blew pieces all over the esteemed sr2 man-cave! Three attempts later I finally managed the job with only two hands, gaff tape, copious shots of Wild Turkey, some nasty horrible expletives, and old-school perseverance. And it even tested OK
 12 points
 -
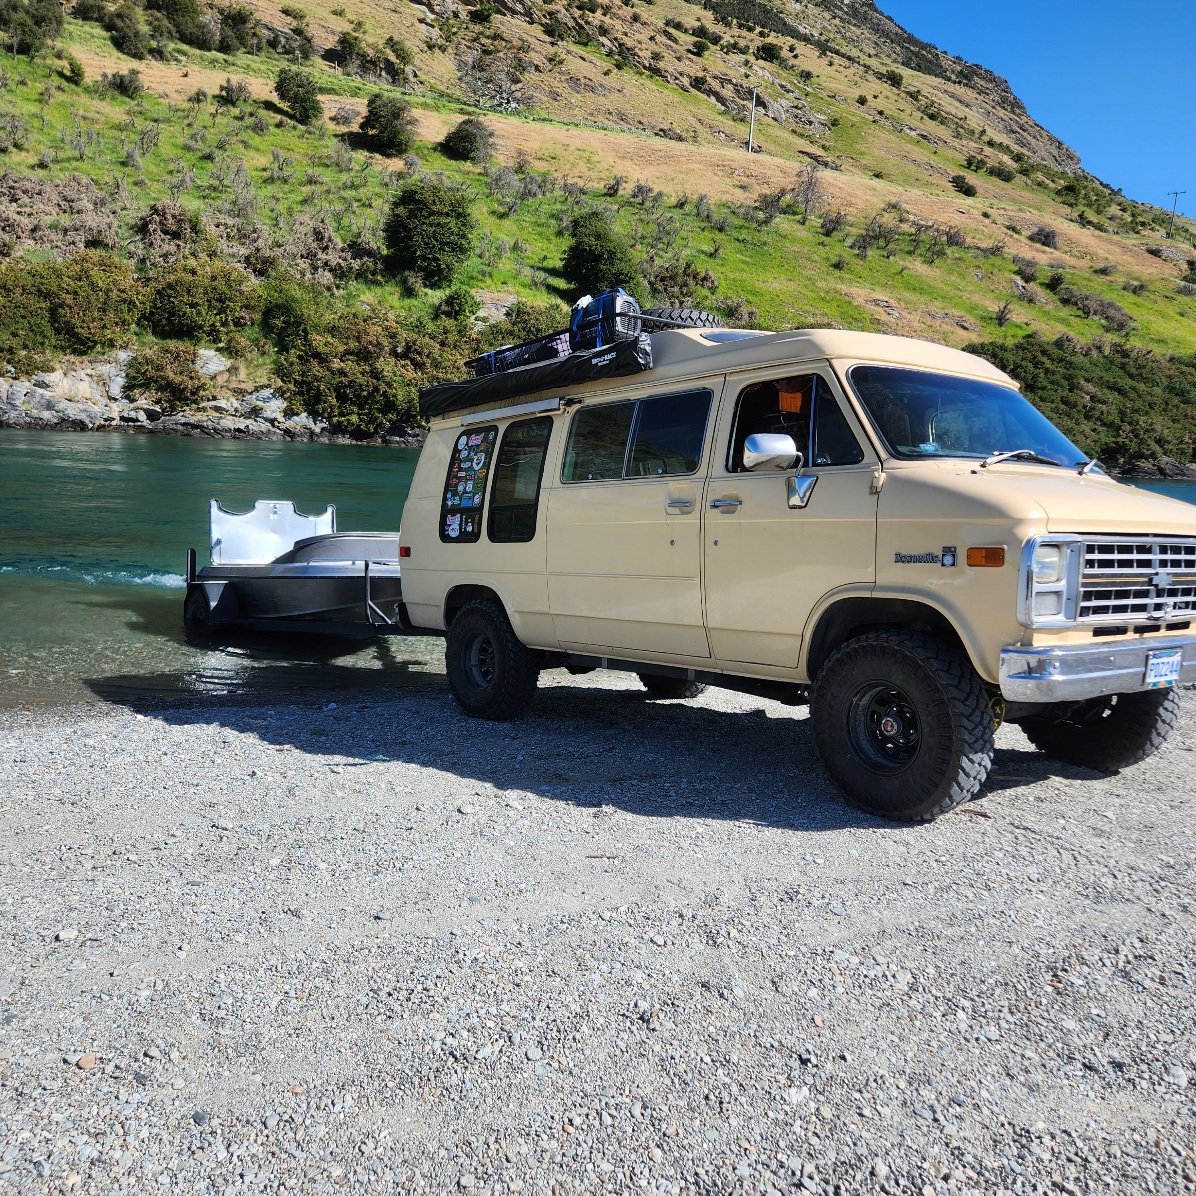
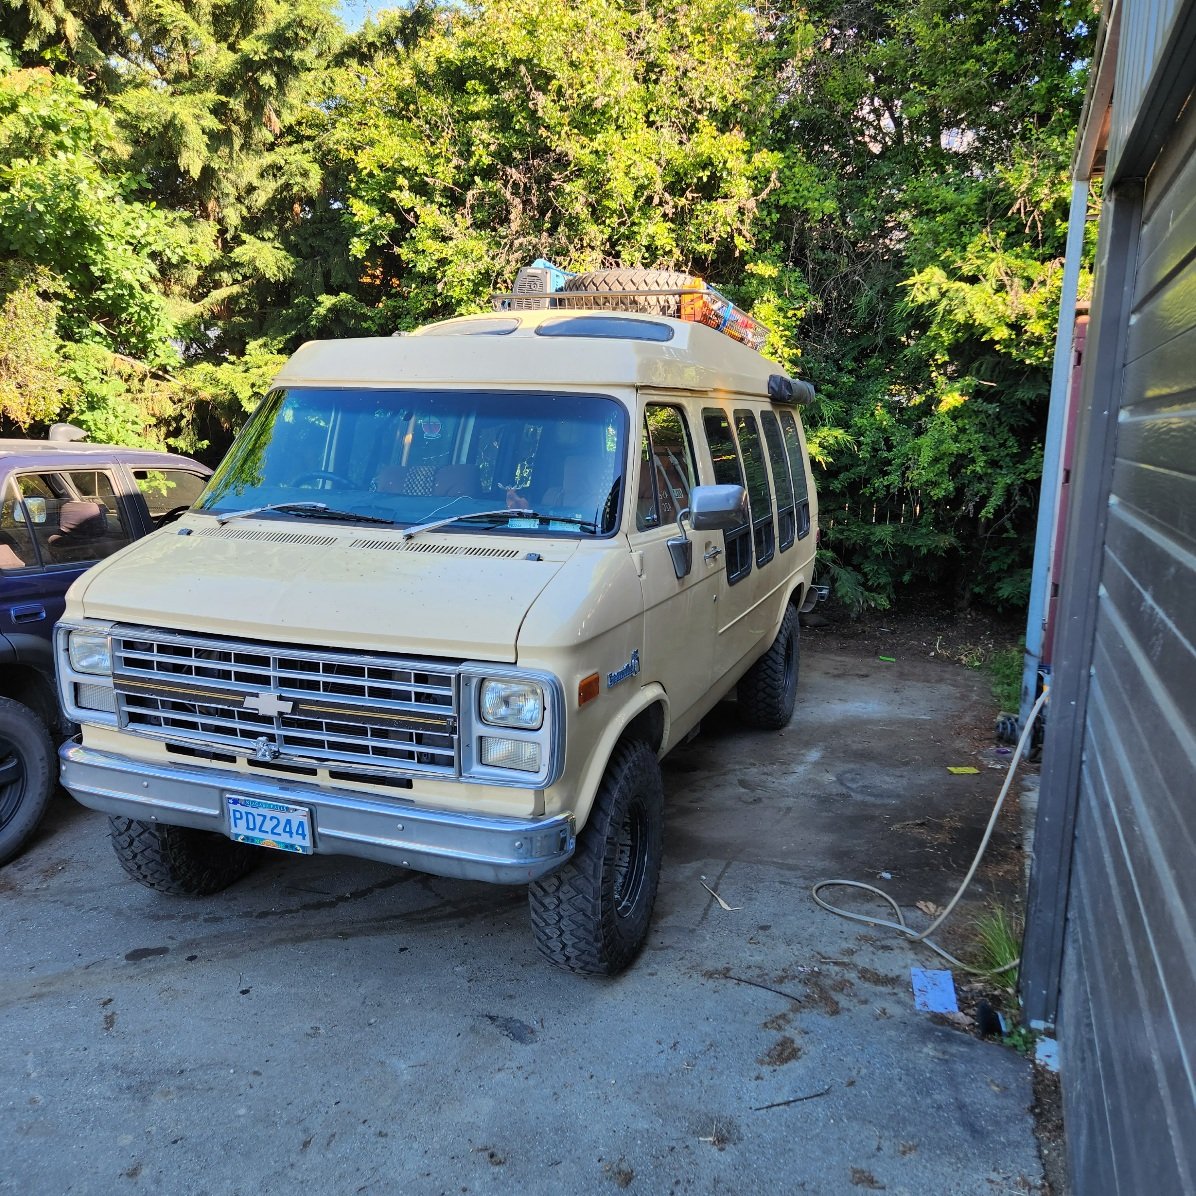
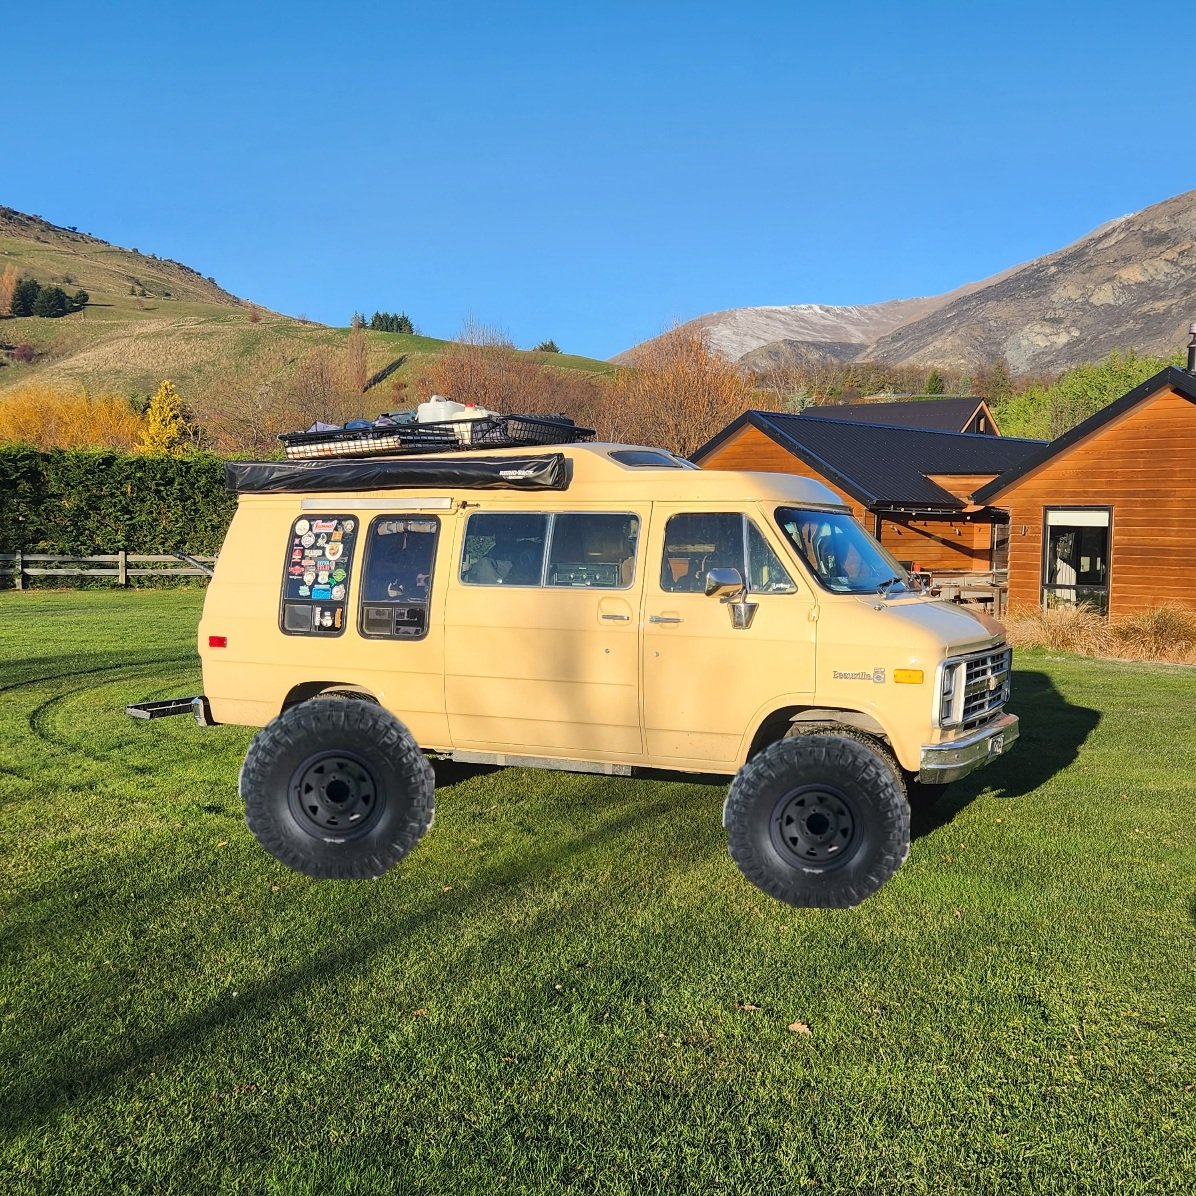
I got the trans back In yesterday, pump seal has chewed out when flexplate came loose which I should have checked. I torque checked the flexplate bolts again too, no movement and no leaks. I also got the high / low lever rigged up and got to launch the boat today on a shitty gravel beach in 4 low, monumental moment. I got permit to go up the shotover canyon to the pub up there with the misso and a couple of mates, van rules, especially amongst a row of hiluxes at the launch. Ceritifier has vapourised and has missed a few appointments last week so not sure when I'll be able to get it looked at but there's a few that need doing in town so might try and pool together and get someone in
10 points
-
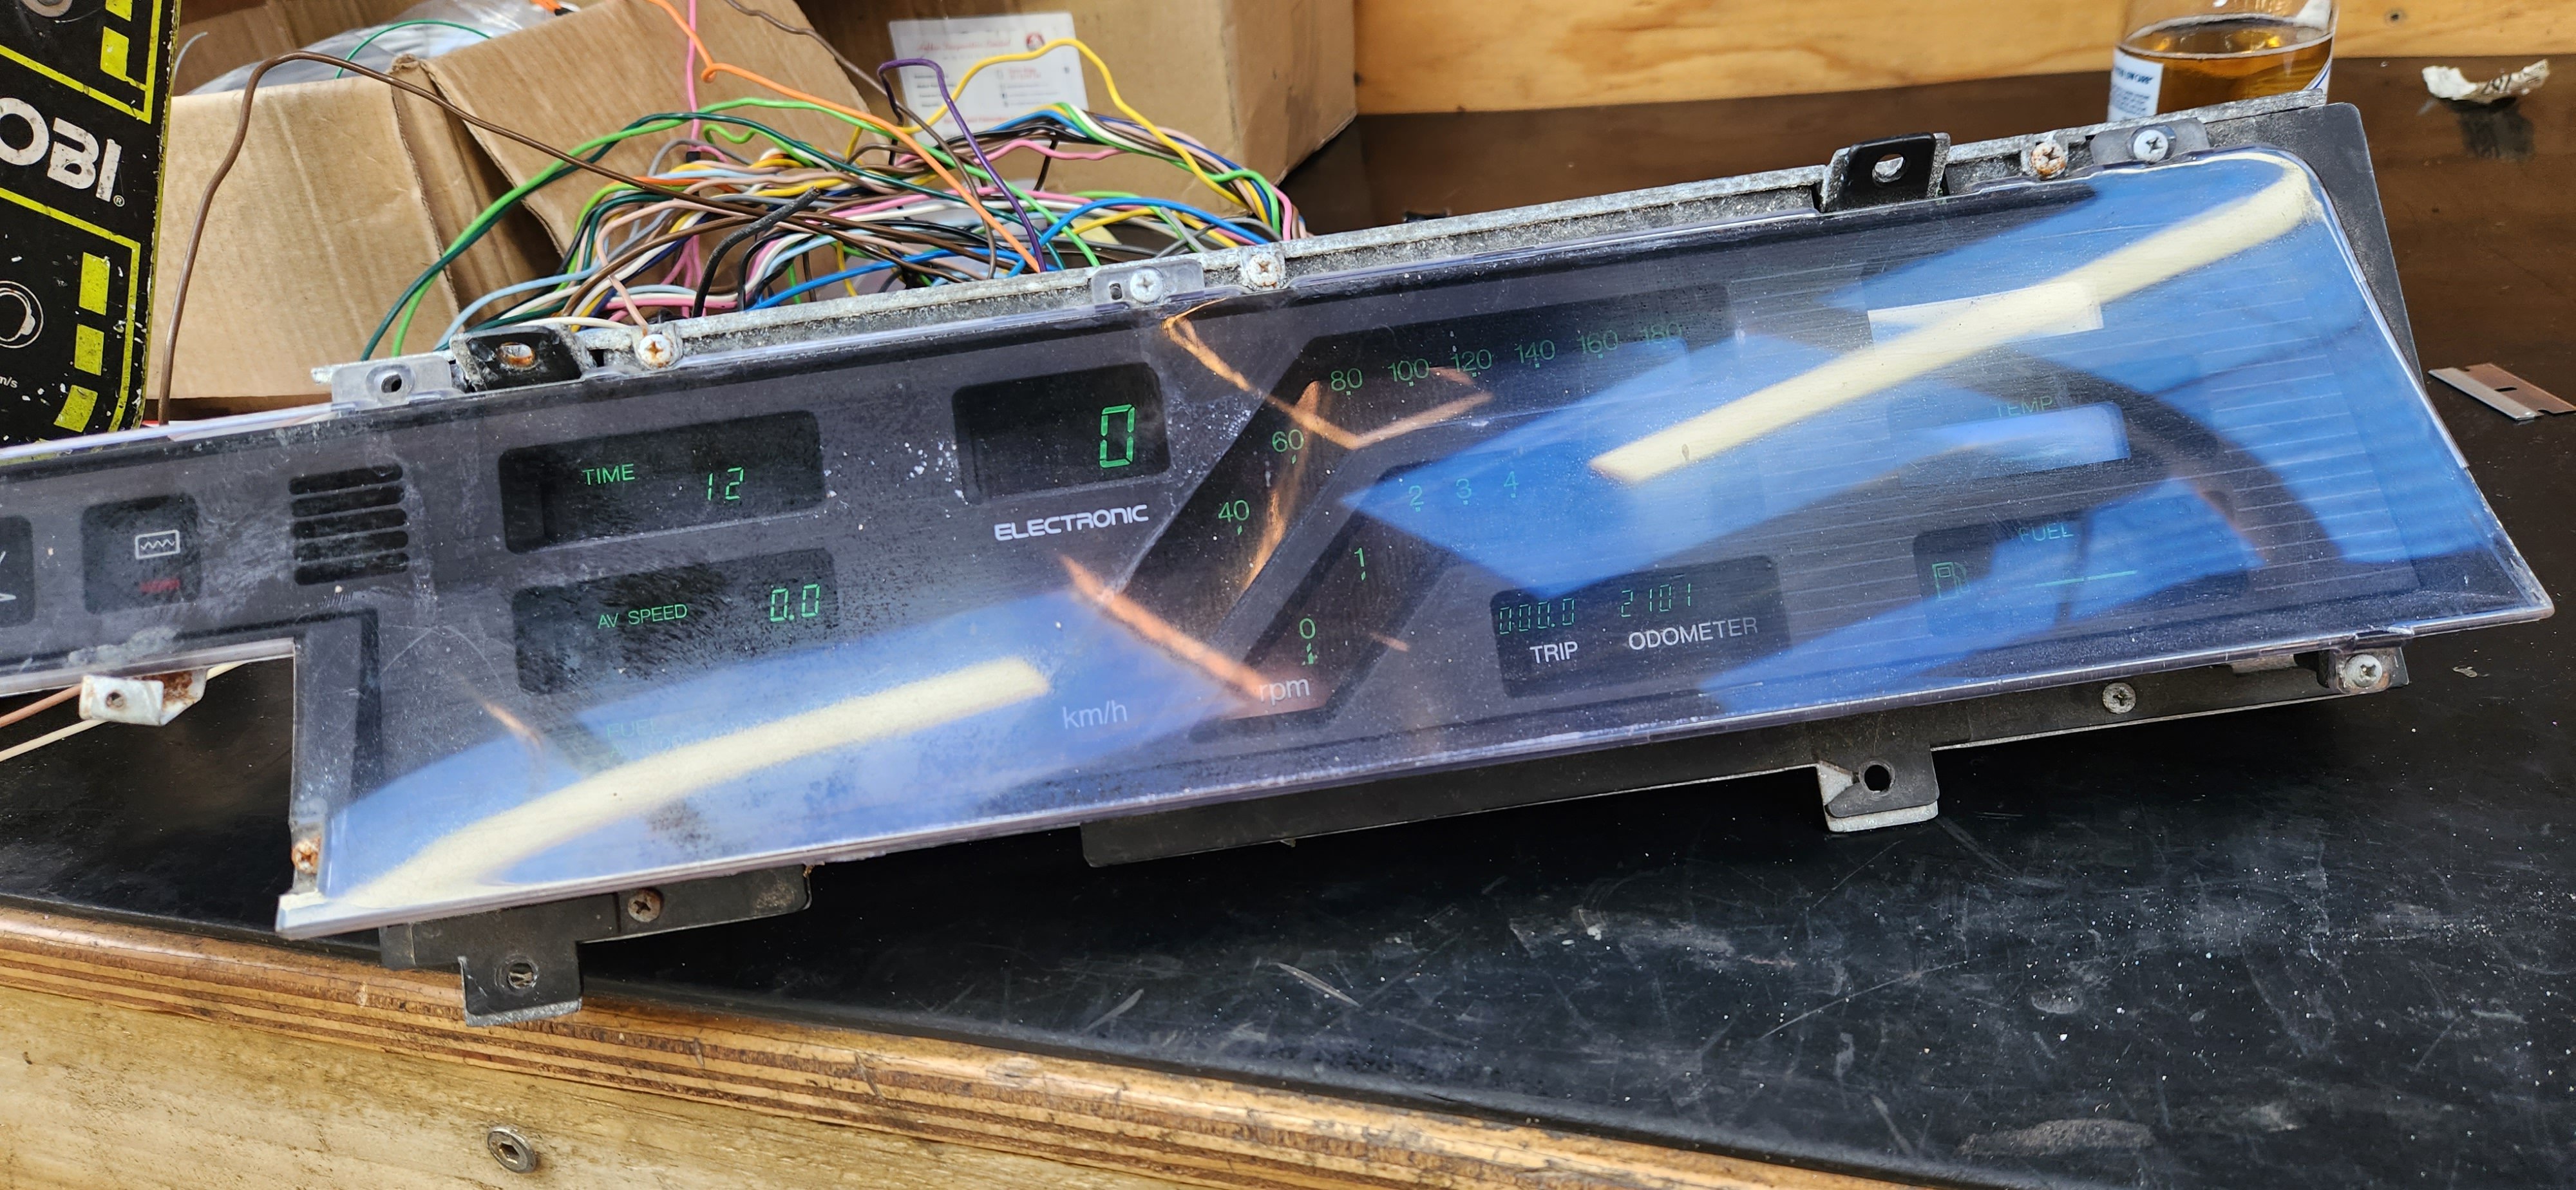
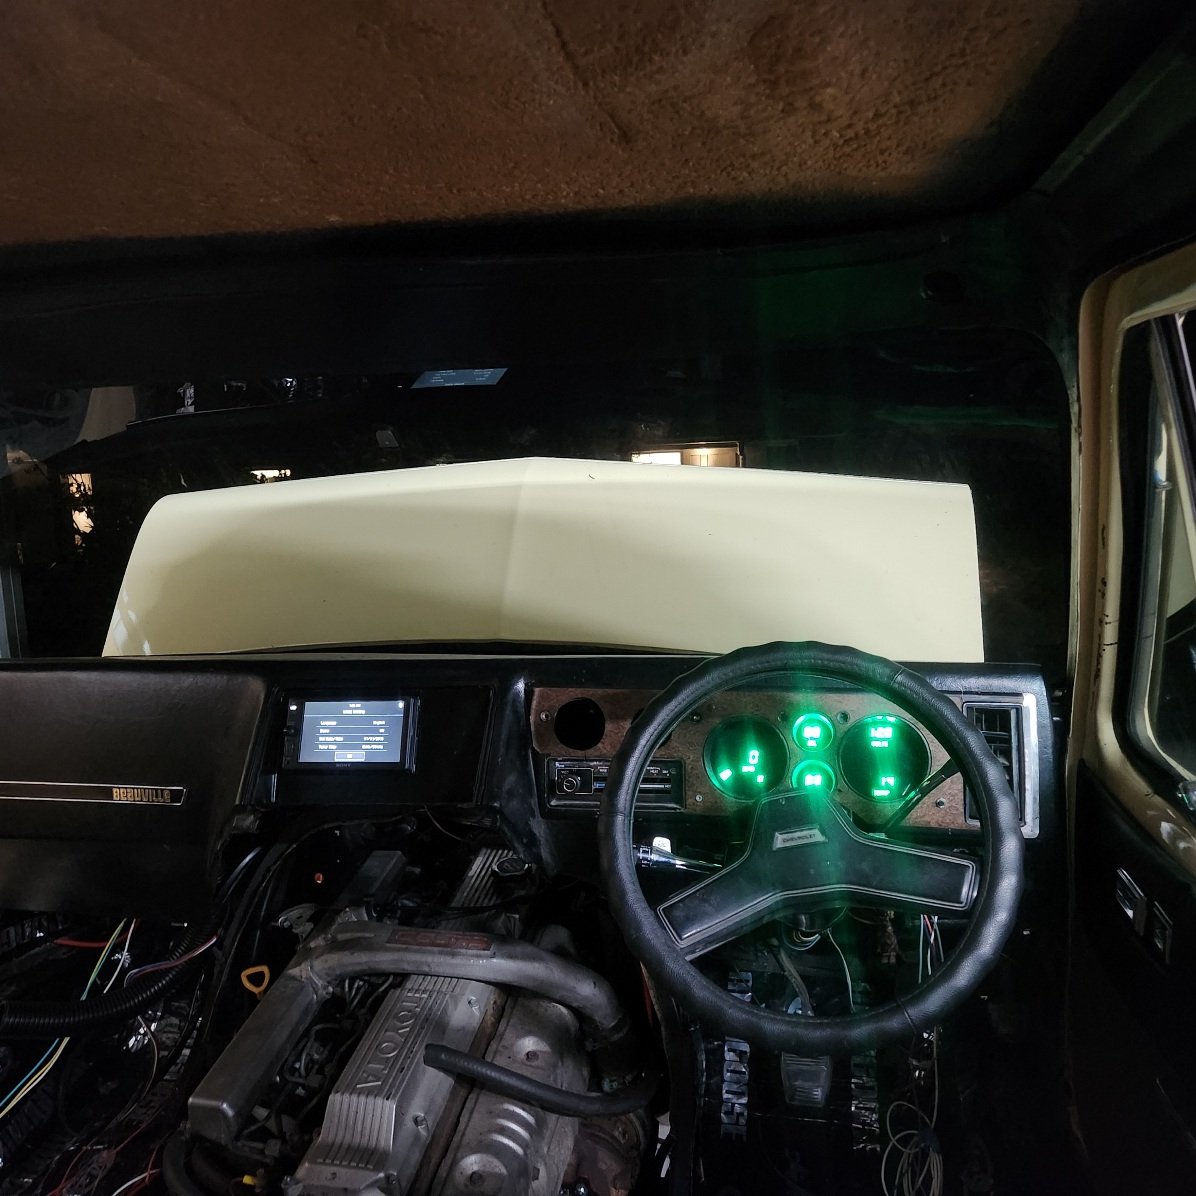
Replacement block heading off to Marsh motorsport this week for machining and rotating assembly balancing, gone to a new clutch with a sprung plate to make it nicer on the street. Got distracted on a side quest, vk calais digital dash popped up on market place. Not cheap but so much 80s cool. Gonna set it up all running off ecu outputs maybe a canbus io module, so it will be fully functional including fuel used & distance to empty and can calibrate it so it reads right
7 points
-
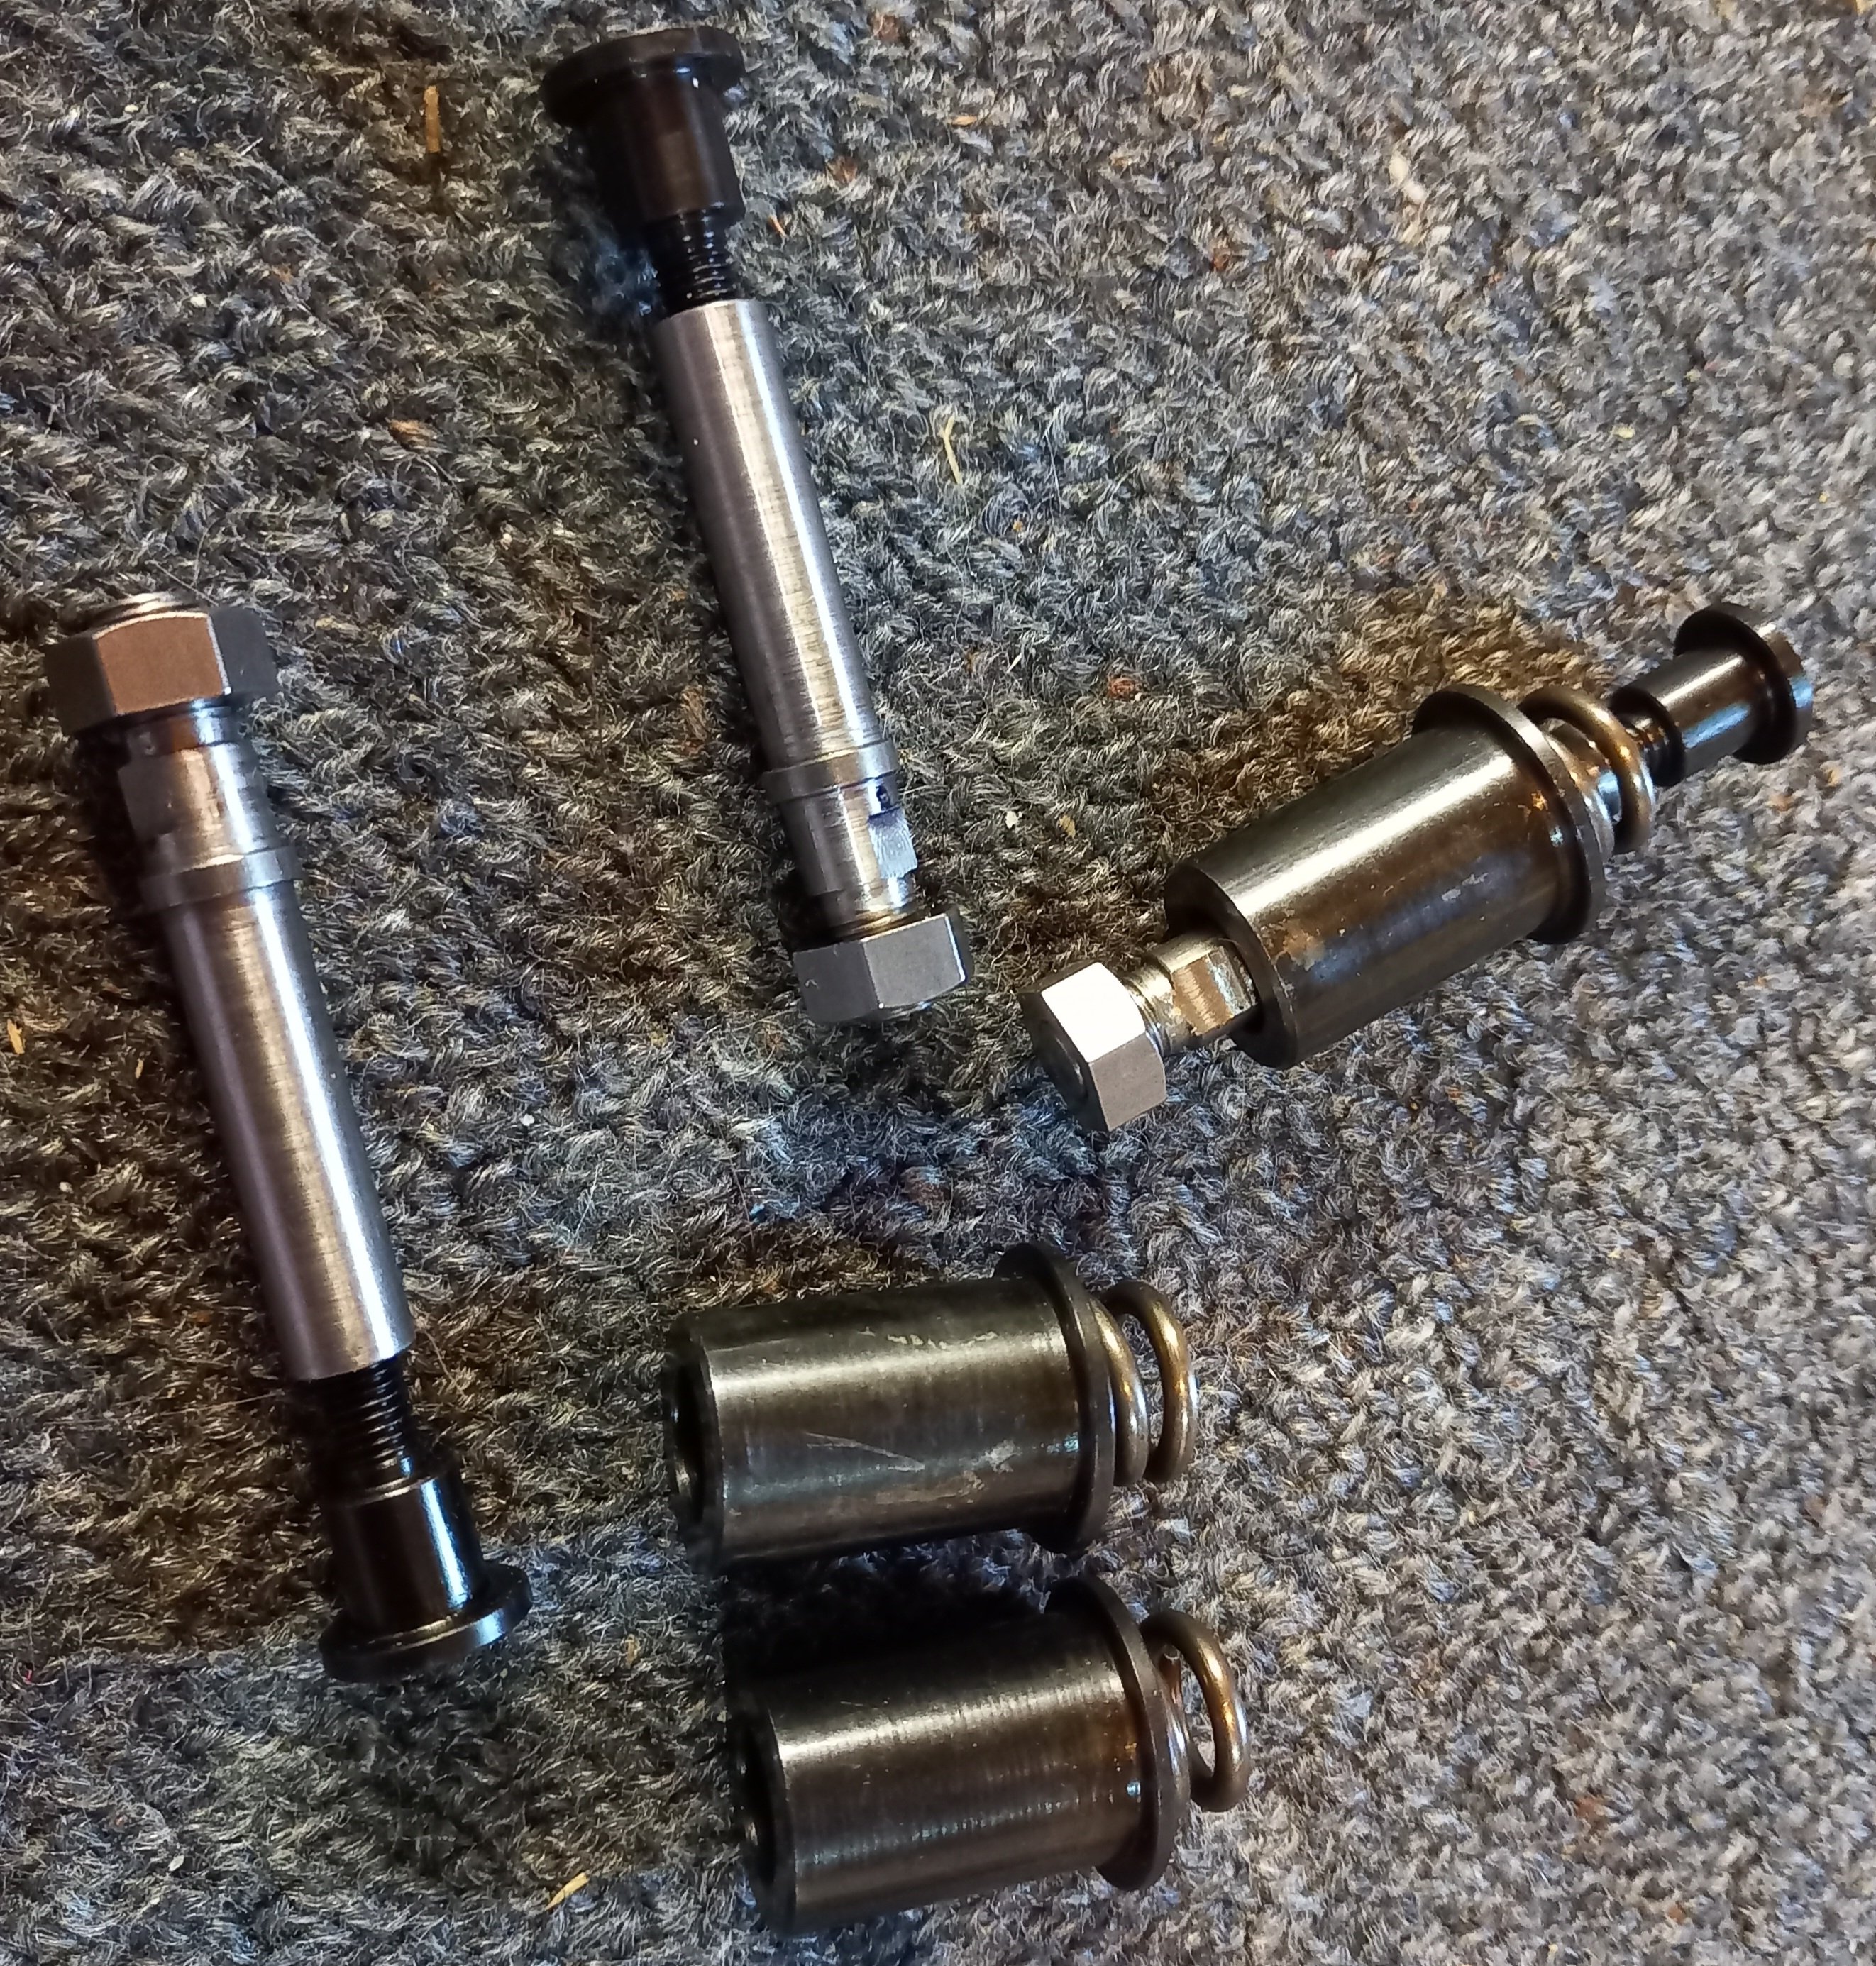
Okay maybe not entirely done. Since the previous hoses leaked everywhere I really wanted to get the high pressure EFI ones redone professionally, so I took them to the same place I went to last time for the ruptured hose in the engine bay. They presented me with two lovely EFI rated hoses <3 The one on the right is the one I care about for now, it goes from the fuel pump to the hard line. The banjo fitting needs copper crush washers and I decided to re-use the ones from the red starion. I gave them a quick go on some sandpaper on each side, heated them up to a stupid degree with a propane torch and quenched in water to anneal them. There's a chance I melted one of them a bit and used the black car's washer. A chance. Then, with difficulty, jammed everything together as hard as I could. The manual I have explains every detail of the fuel system EXCEPT for the fuel pump, which is quite both surprising and annoying. I thought for a lil bit over the next day about testing this. The last time I did this up, it leaked everywhere - mind you I was told bad info on how tight to make it, but still. It was also super easy to access at the time, thanks to it sitting in its L&P bracket instead of sandwiched between a fuel tank and a car. I could have hooked up the loom to a 12v battery and fed the hose into some isopropyl or something, but I don't have anything handy on me to block the other end of the line and create pressure, so in the end I just sent it. The tank's bolts were all underbody coated so I chased them, Then began the arduous task of lifting this asshole into place. It's not that heavy, but "not that heavy" is still too heavy when trying to connect the hard lines up to it without actually bolting the tank in. There's a lot of space for activities when the tank is dropped and I wanted to try and make things easier on myself. However, I couldn't quite get the right angle. The jack was in the way, boxes I used for additional support were in the way, and the EFI line had decent flex but didn't exactly meet perfectly so was a biatch to try and wrangle whilst also wrangling a large unbalanced tank on a jack. In the end I just jacked it all the way up, put some nuts on and dealt with the shitty access. This image does not adequately convey the amount of bullshit it took to get those lines on. Then I used new nylock nuts and washers to get the tank into its new forever home. I really hope I don't have any leaks or I get to do all this in reverse, then forwards again. I'll leave the rubber boot etc for the fuel filler until the body is properly zhuzhed.7 points
-
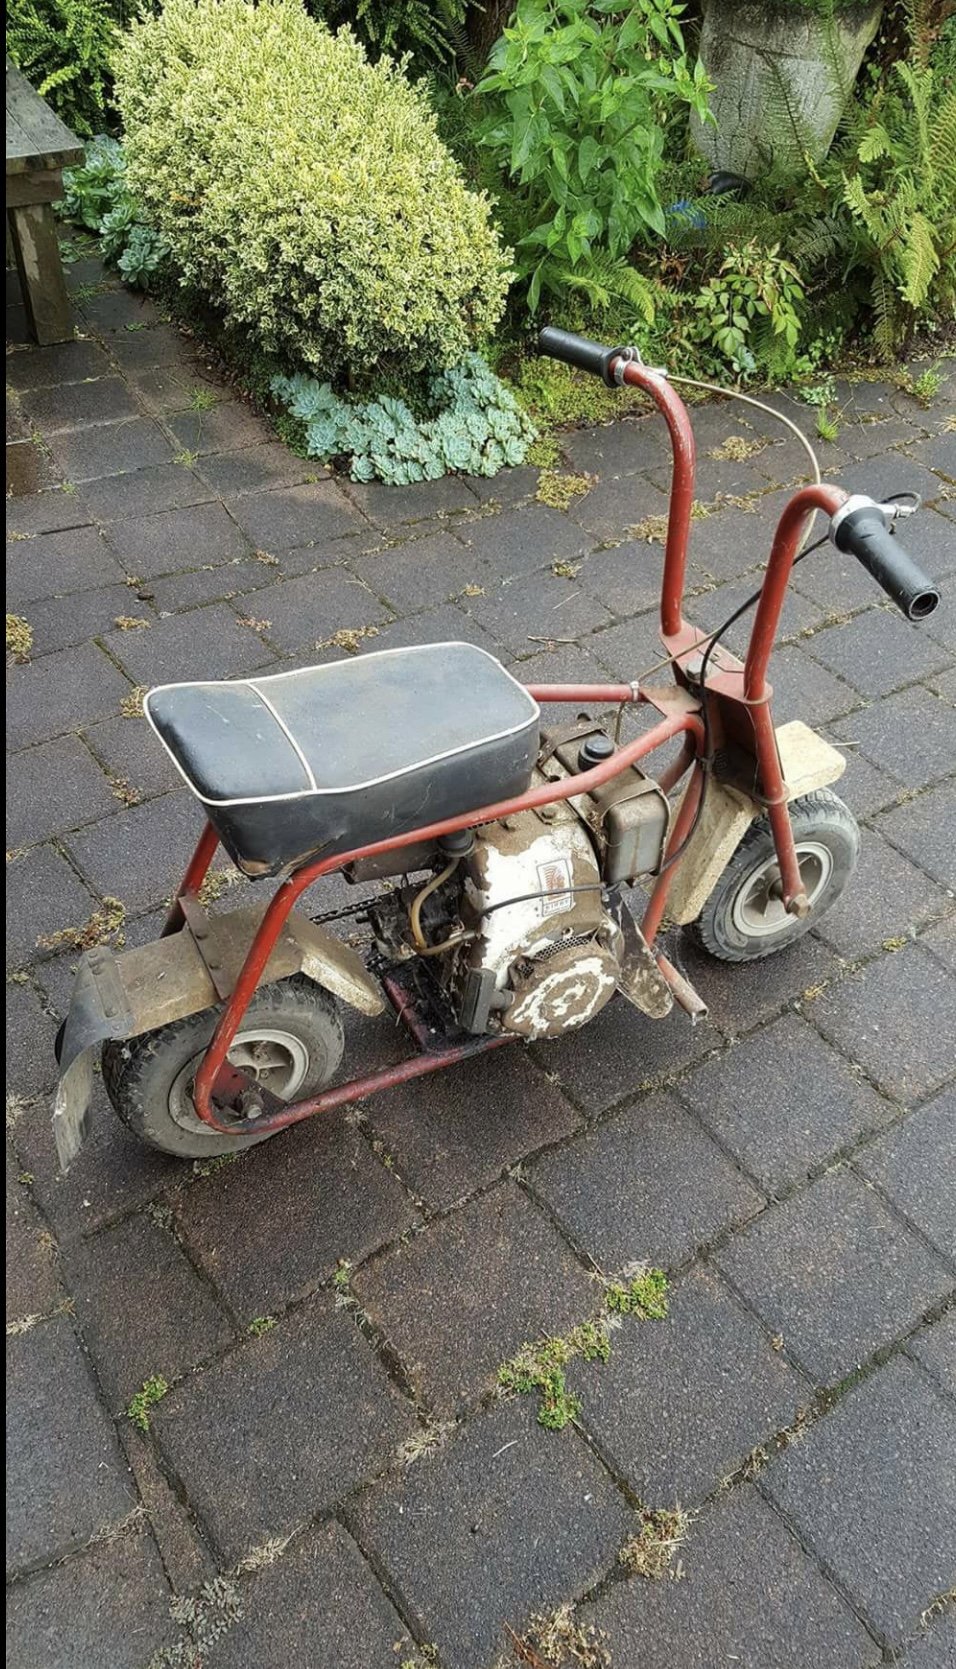
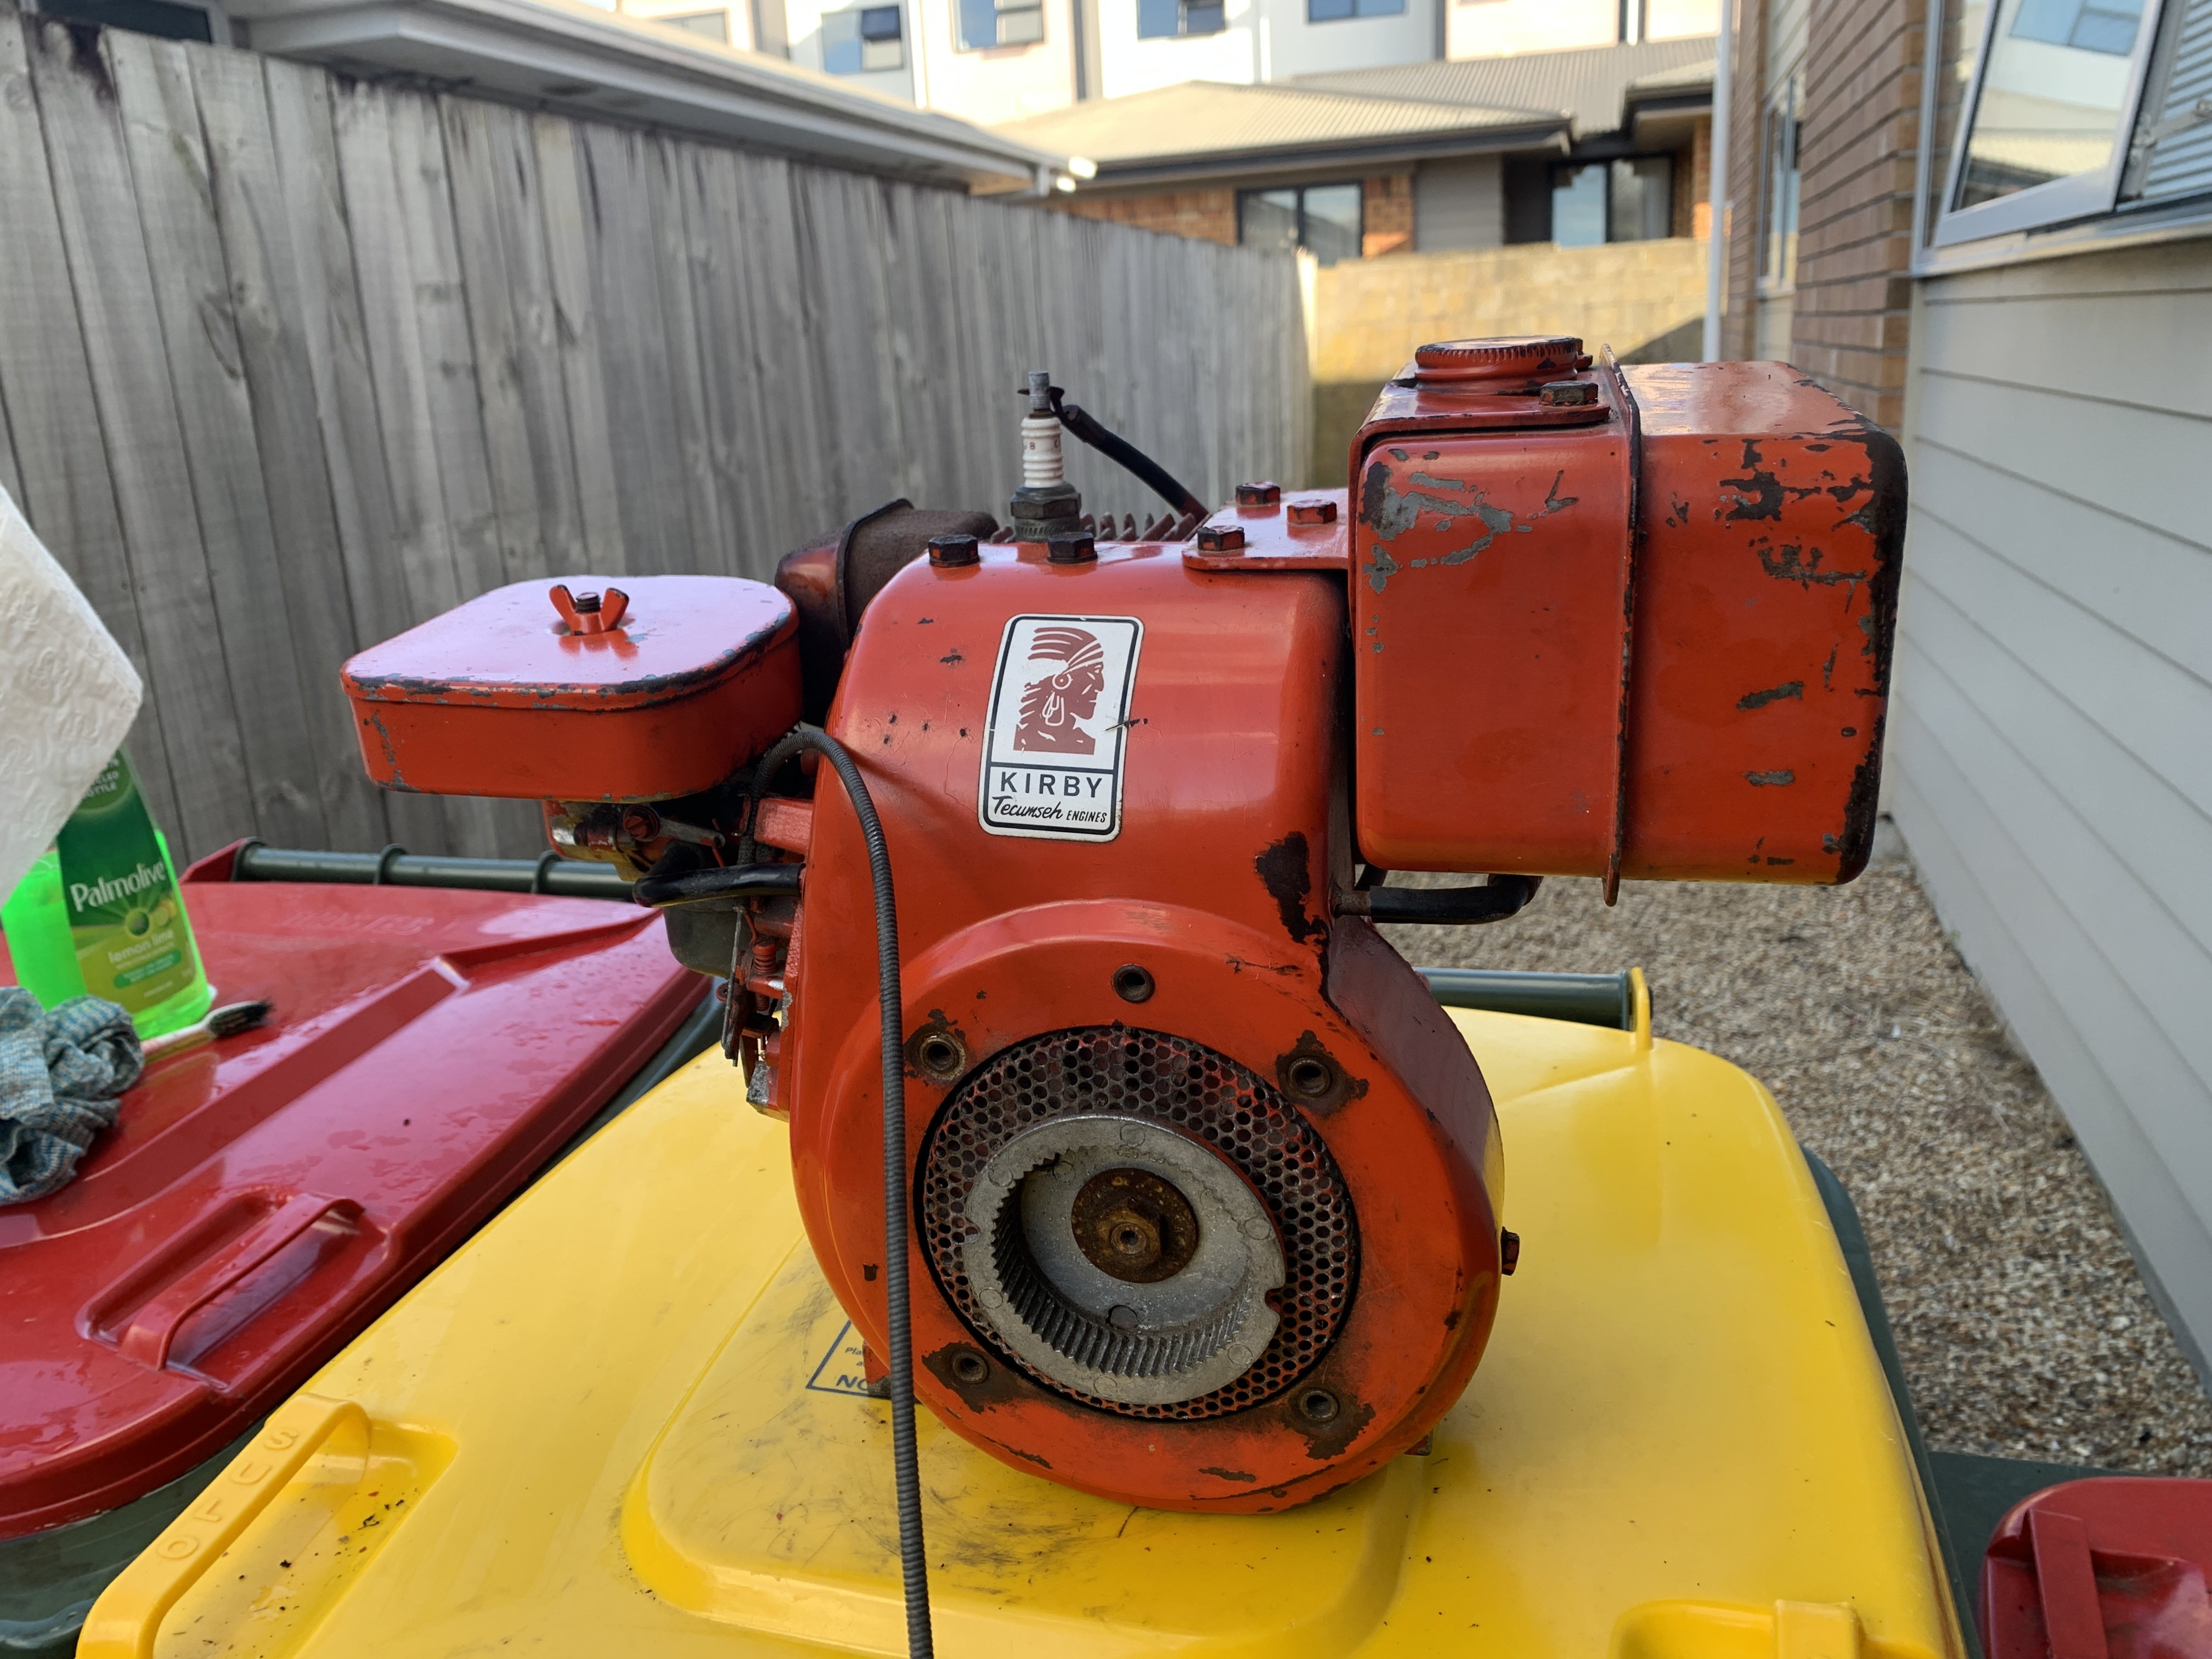
Hey everyone this is my first post so I thought I would start fairly strong. My name is Will, I’m 22 years old and absolutely love Mini Bikes. My current project is a tru test mini bike which I purchased back in 2017 in a very original state, as far as I can tell it was essentially a complete bike as they would have come from the manufacturer albeit worn down as a 40 year old bike would be. It ran a Kirby-Tecumseh HK35 and had custom mudguards which I believe were produced by tru test themselves. I had the frame acid dipped and then powder coated, original new old stock grips I sourced from eBay and recently after a 4 year hiatus I managed to track down another Kirby engine which I’ll be putting on as it’s more complete and in better condition than the original was. I have a tiny bit of regret for not just cleaning the bike and leaving it in its original state but I know I’ll be very happy once my restoration is complete, Also if anyone is able to date the Kirby engine tag I’d love to have a rough estimate of what year this engine was as I have no clue what exact years these bikes were made and that could help, the tag number is “F1027” and “35093” I can’t seem to post all the photos so will try do some comments of how the frame currently is Cheers
6 points
-
Got the other side done over the weekend. Started by drilling a locating hole in each bar for the Kawasaki switchgear... Not sure what ink the wrecker used, but it's good stuff, hard to remove the writing... Took tank off to fettle the new accelerator cable. had to drill out the ferrule holder on the carb to accept the new cable, and toyed with installing the return pull cable as well, but decided againt it, maybe in the future. Cut cable inner to length and soldered in a new brass lug, all works well... And installed new master cylinder, no dramas, bled things with m/c below the caliper and nice easy job, bleed screw wasn't stuck and the cheap SCA green Dot 4 fluid made it easy to see when new stuff came through... And I wasn't certain what size the new bore size was, but it was cast in as 5/8" on the Nissin m/c... And all in apart from wiring, fitted new Biltwell 7/8 Kung Fu grips, think it looks pretty good... I was going to wait for the connector plugs to arrive but it was a beautiful day so I made some temporary connections with strip connectors to check things work... And it works well, nice not having to worry when the switches will let me down next, and I find them easier to use. Took her for a few rides over the weekend, clutch is still too hard to use easily, but brakes feel better with a slightly different ratio. There is a slight oil leak that is nothing compared to the Exxon Valdez of old, but I'll wait till I've replaced the clutch springs and primary cover to look at that... Pretty pleased how things turned out though...6 points
-
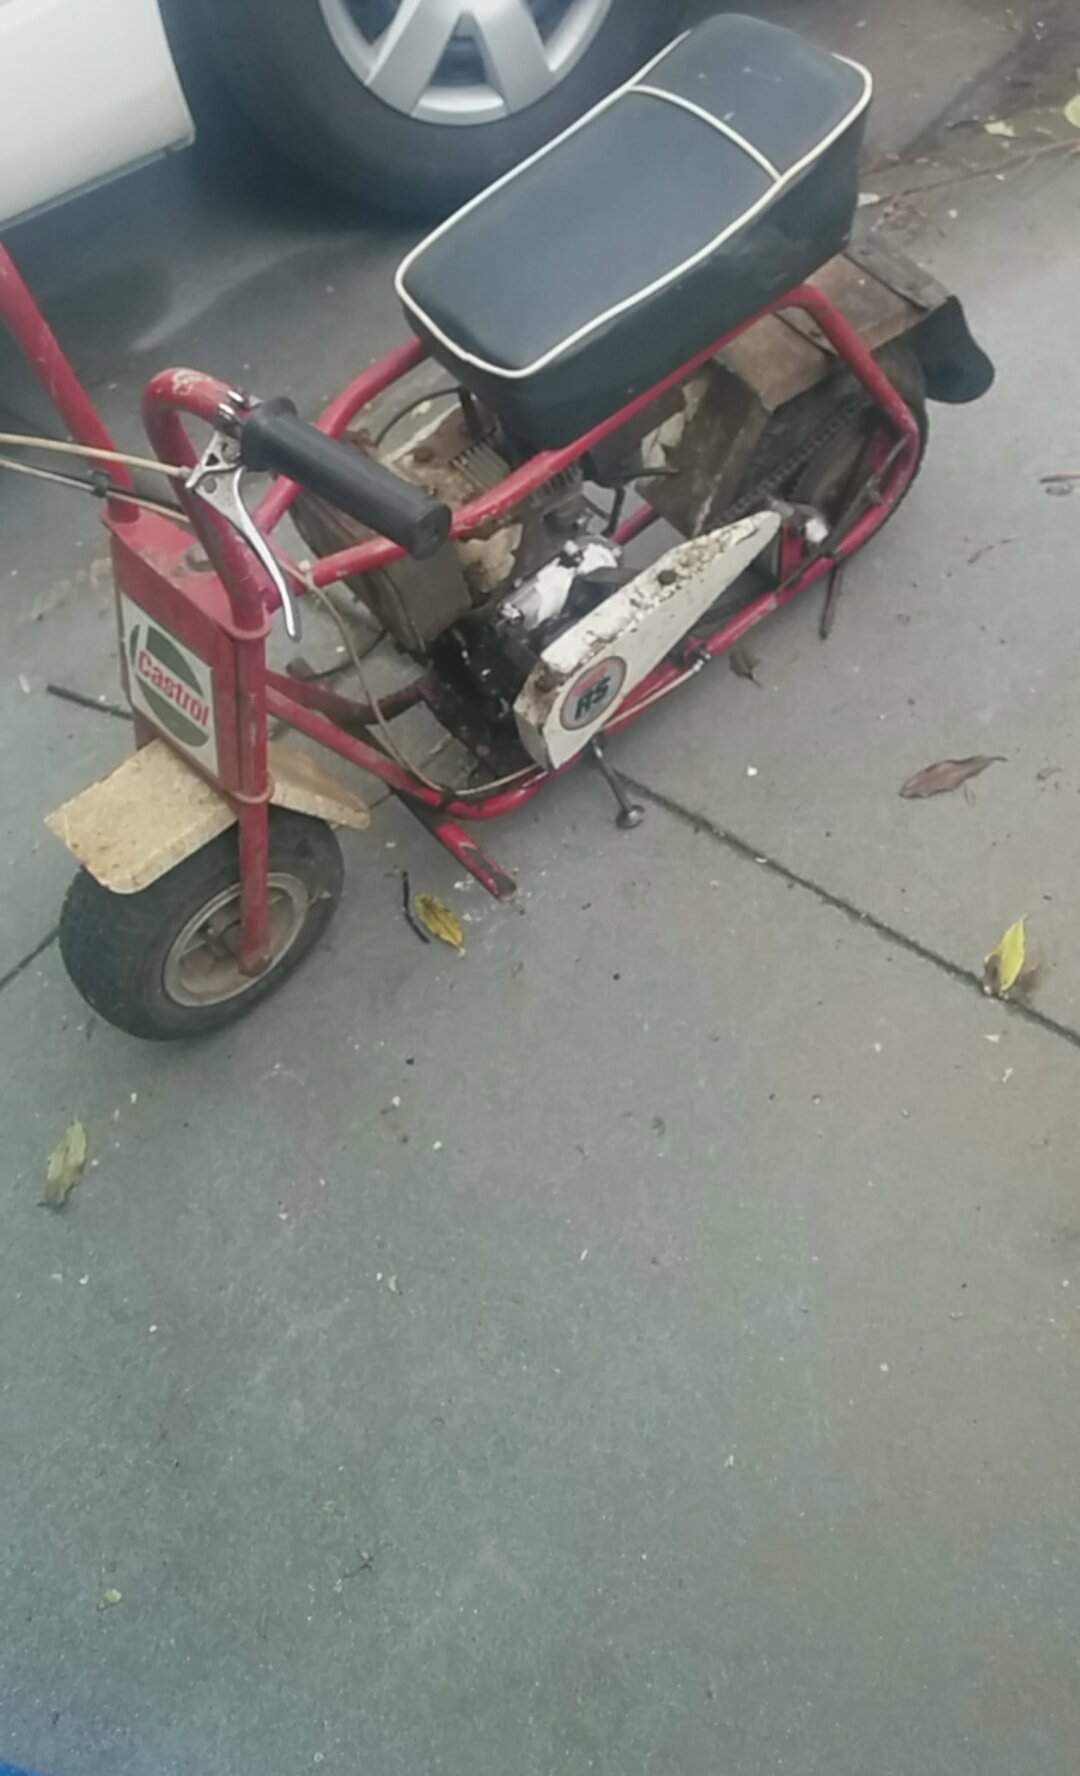
This is how the frame currently sits I also forgot to mention I had a new seat made which I may end up getting another as this one’s a bit thin and I’m trying to be as close to original as possible but I’ll see
6 points
-
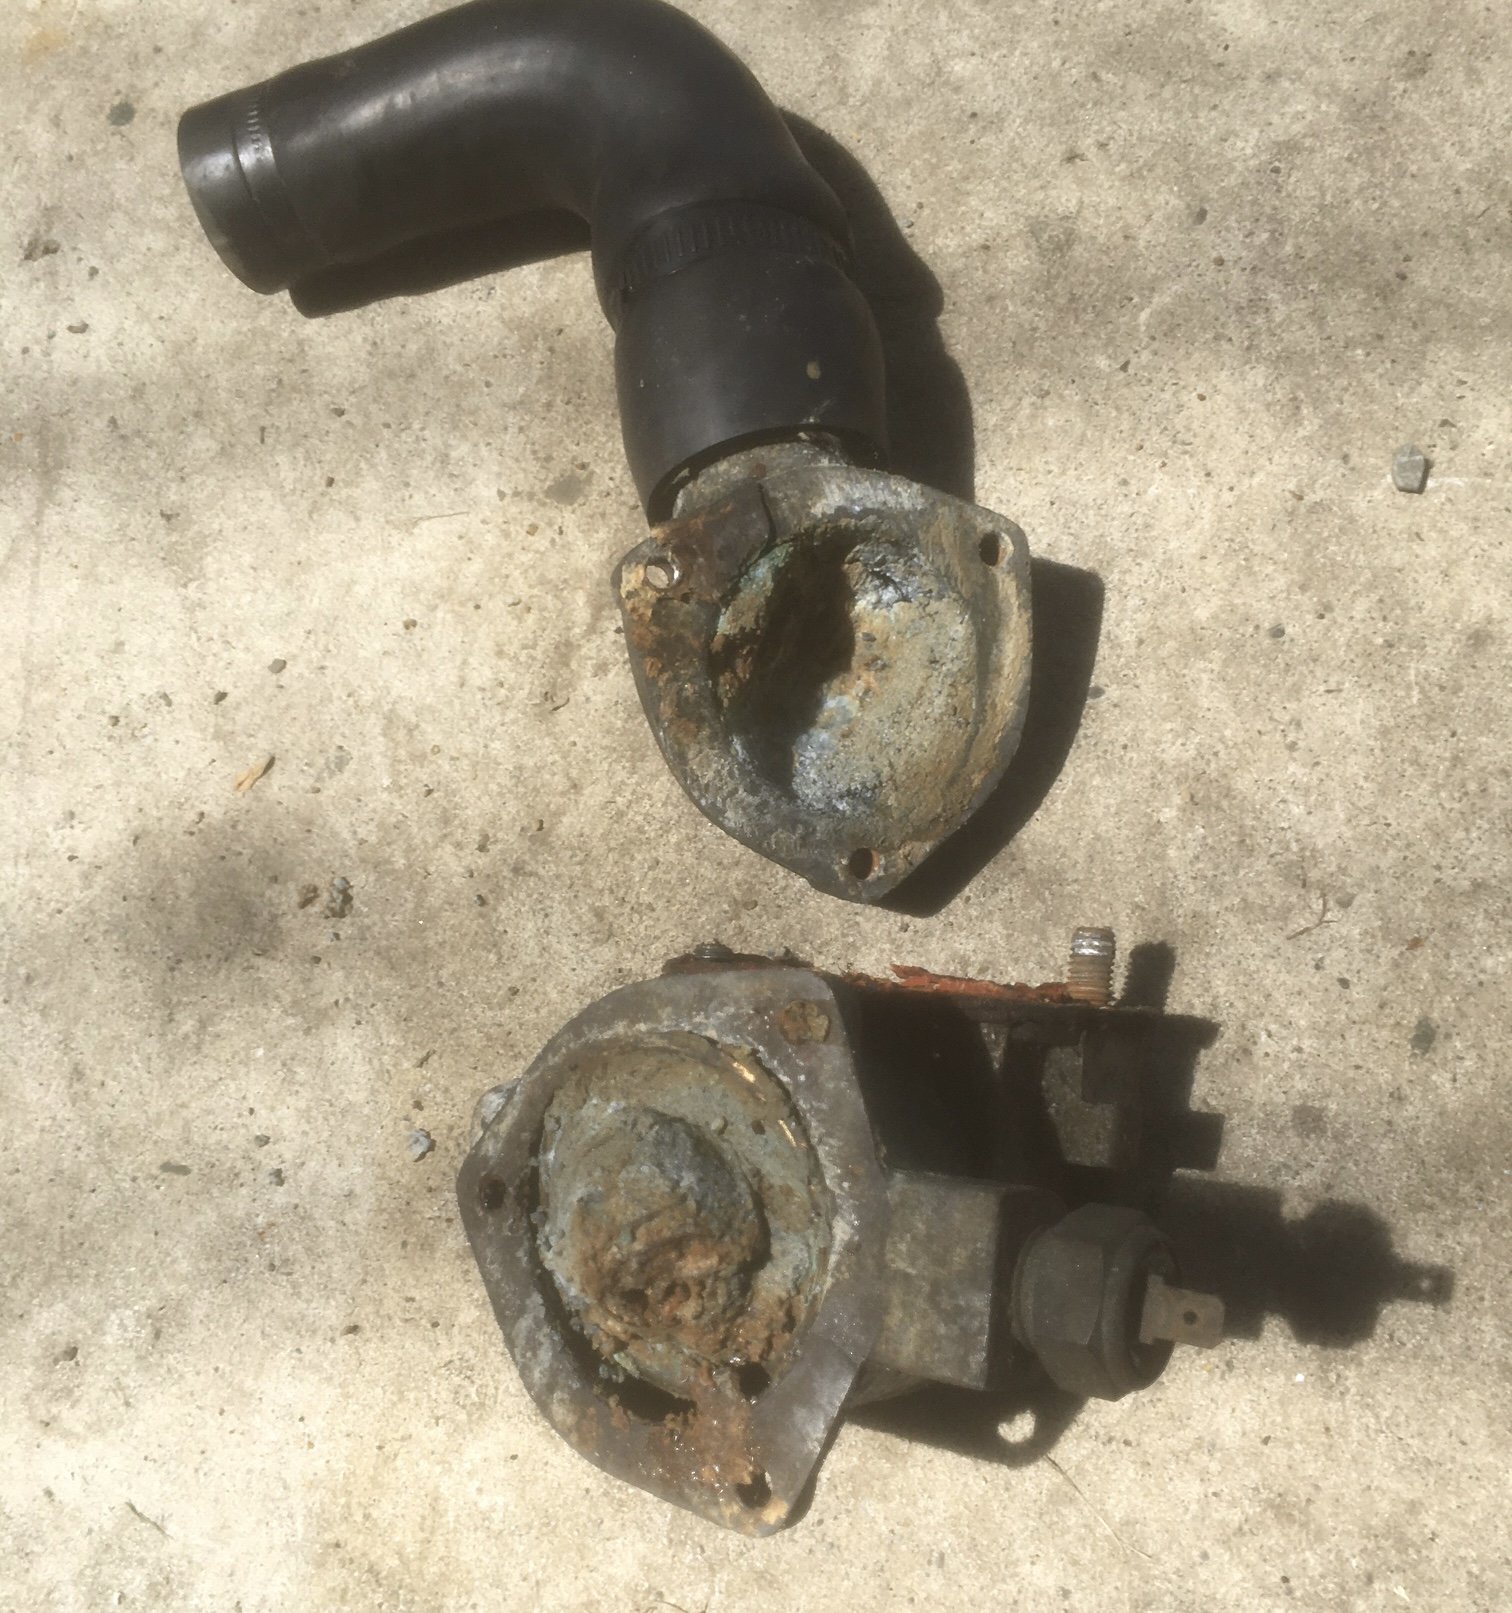
It boils after 3 minutes of running. Let’s check the thermostat. Yeah, that’ll do it I guess.
4 points
-
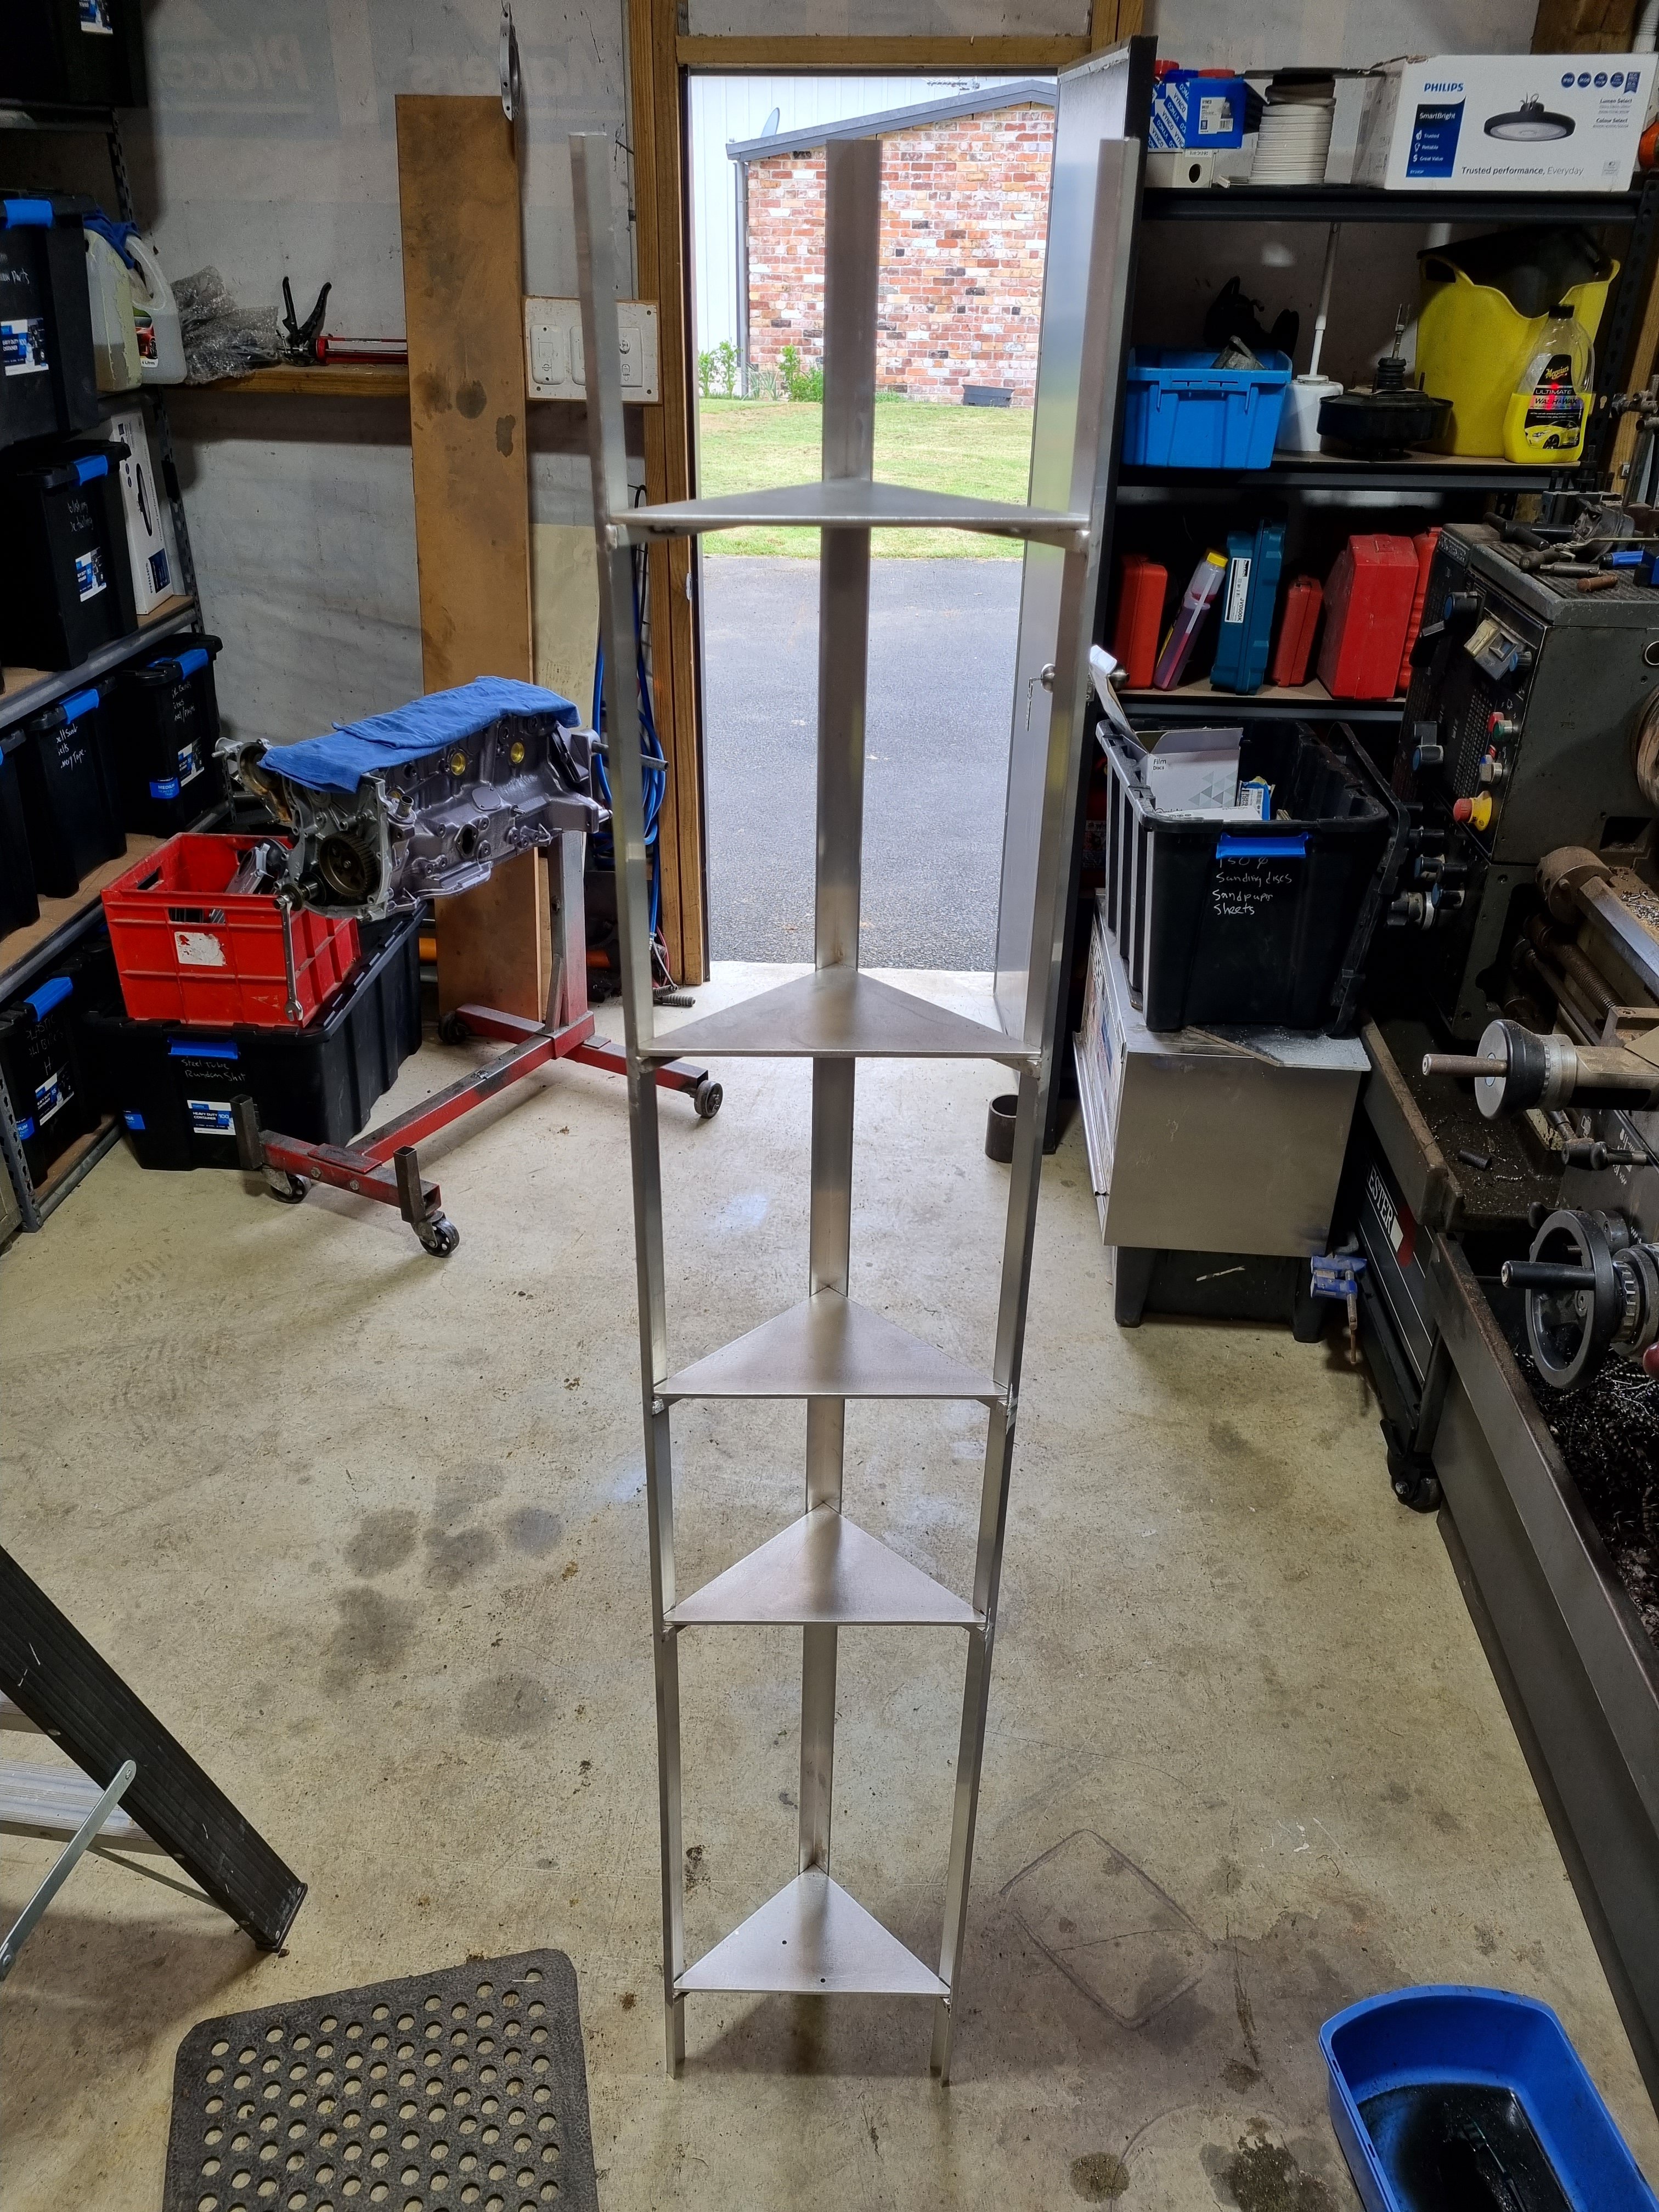
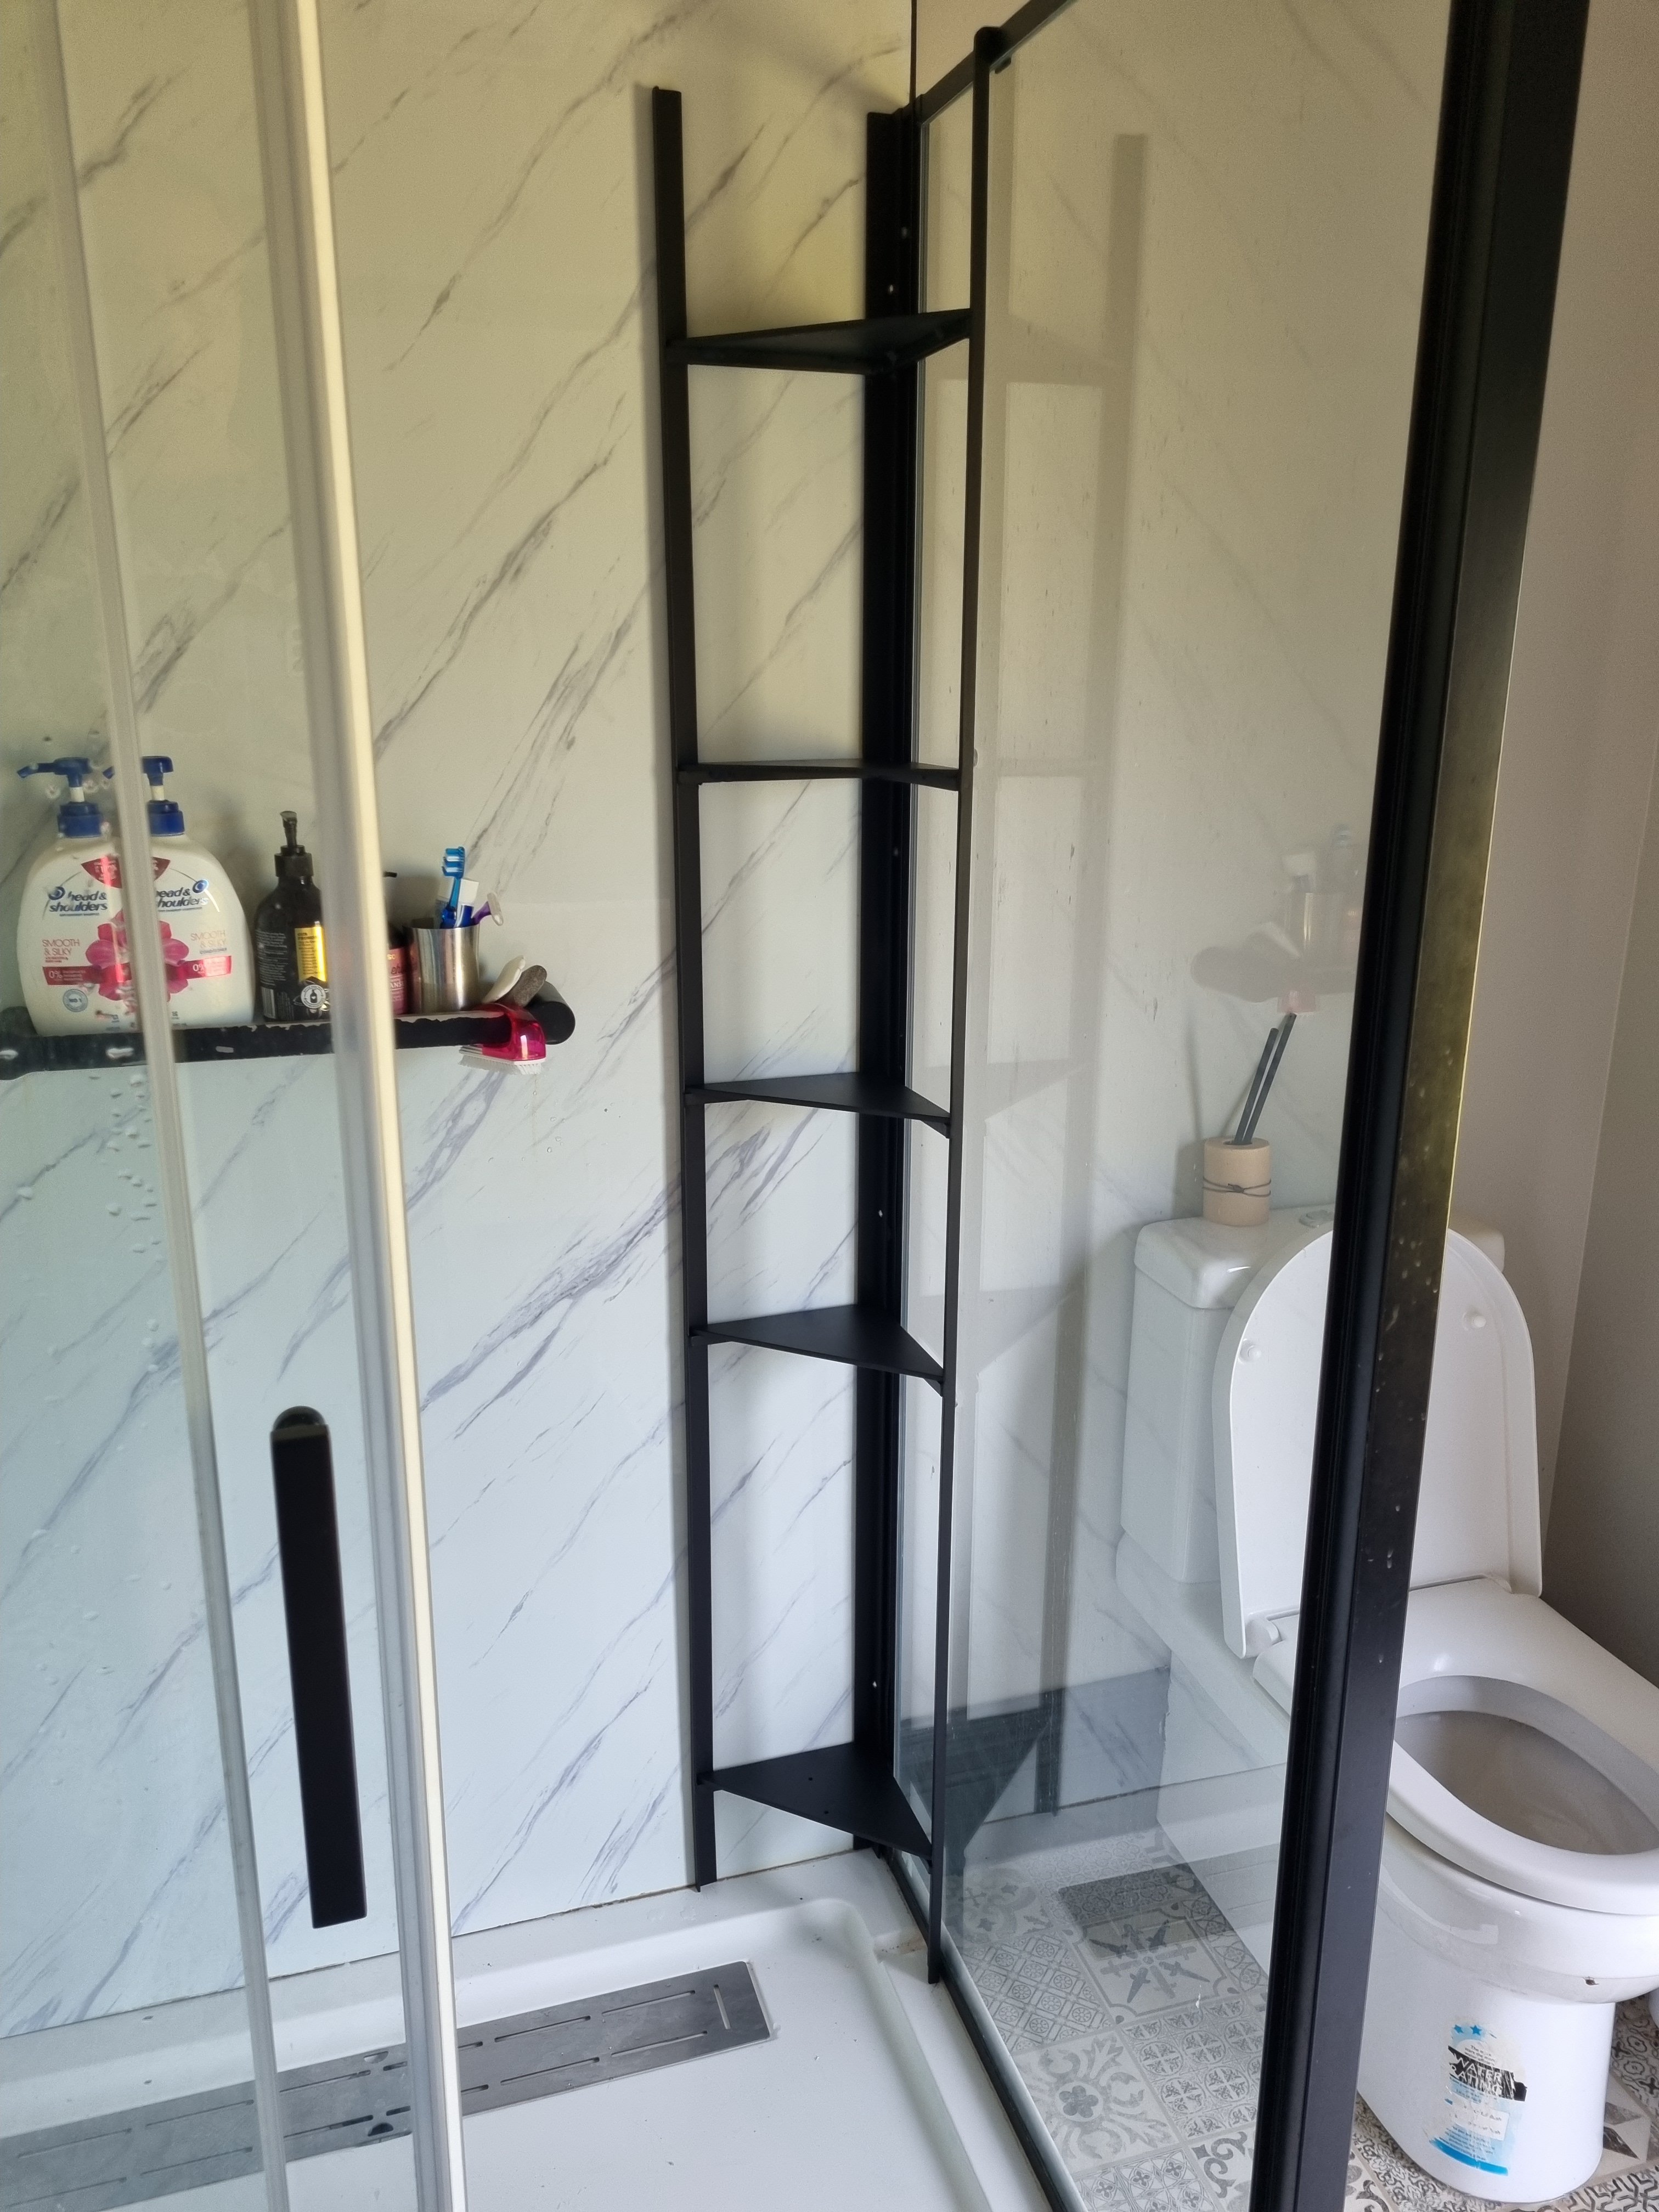
Also I made this. It's a corner shelf for the shower. Currently there is a tiny shelf thing which is worse than useless and gets drenched whenever the shower gets used to soap gets turned to mush very quickly. It's made it is some bits of ali angle and chanel I had.
4 points
-
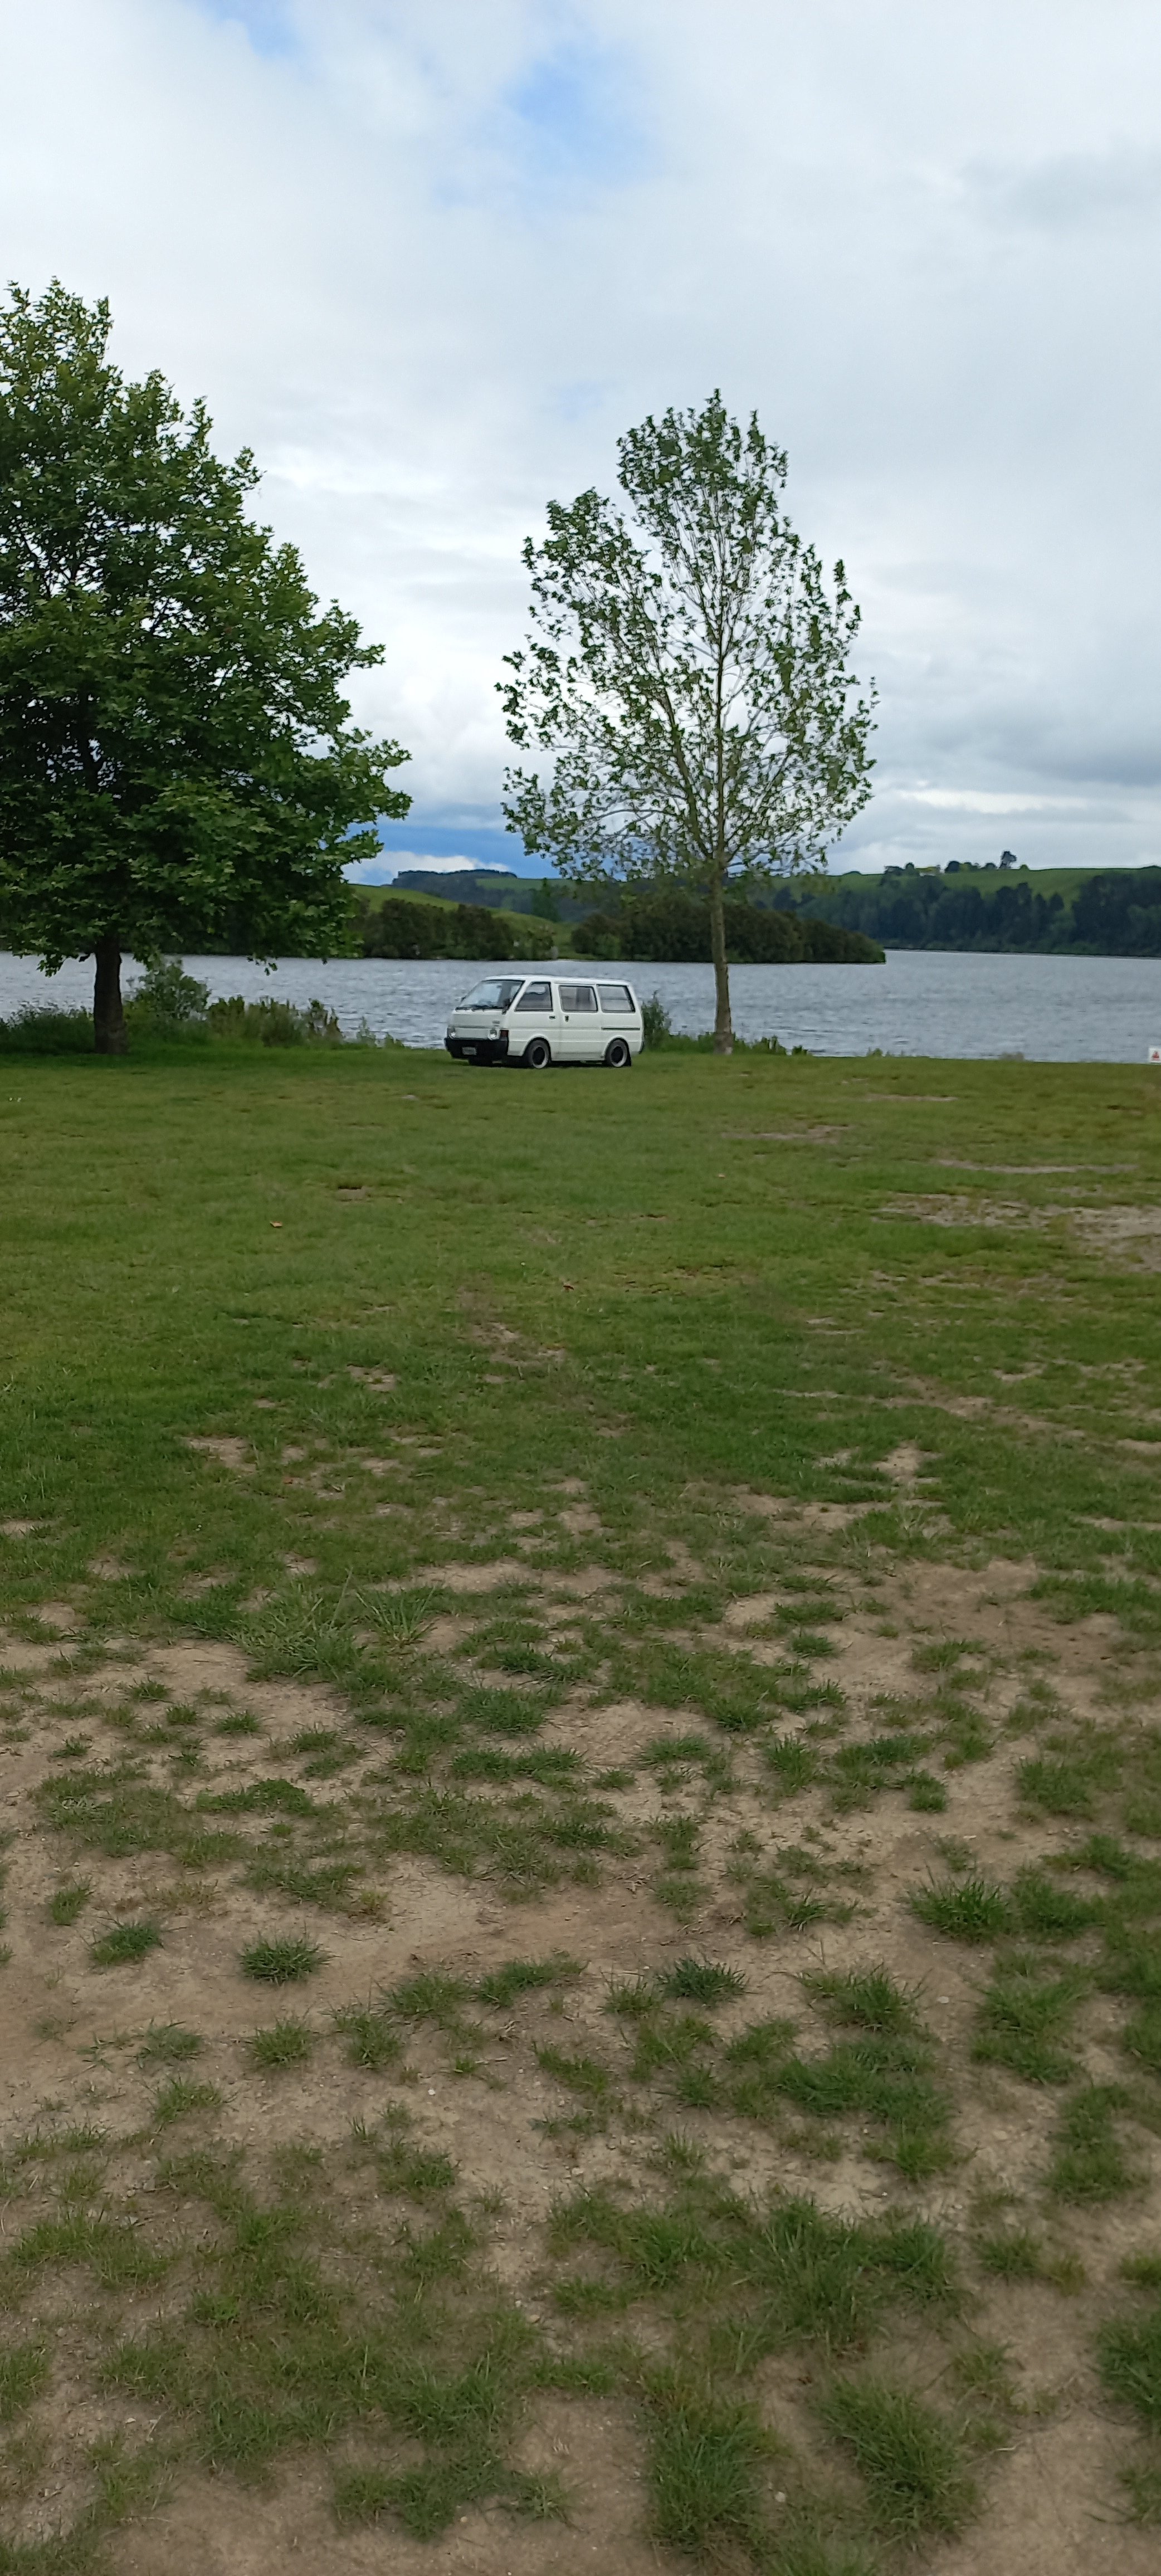
Be getting this thing ready for OS drags soon.
3 points
-
The sticker covering a scratch on my glove box fell off a while ago so i got a colour match one at a car show haha, awesome day though heaps of cool cars out karapiro...The car behaved well with the cam, did another oil change because, well, turns out if you dump a bunch of diesel through the engine, even if you flush it all out.... it will clean the sht out of everything and put it all in your oil and filter, then change filter and oil twice it still takes a good 100km to get rid of the crankcase fumes and residue burning off.. i would not recommend using diesel but i had mixed it with atf and initially thought it a ok method to flush out some small particles of gasket and crap i dropped in the valley from the heads... I was a bit confused about the smoky exhaust and fumes when i first drove it... But it runs great and sounds great now and i bet its clean inside now hahaha
3 points
-
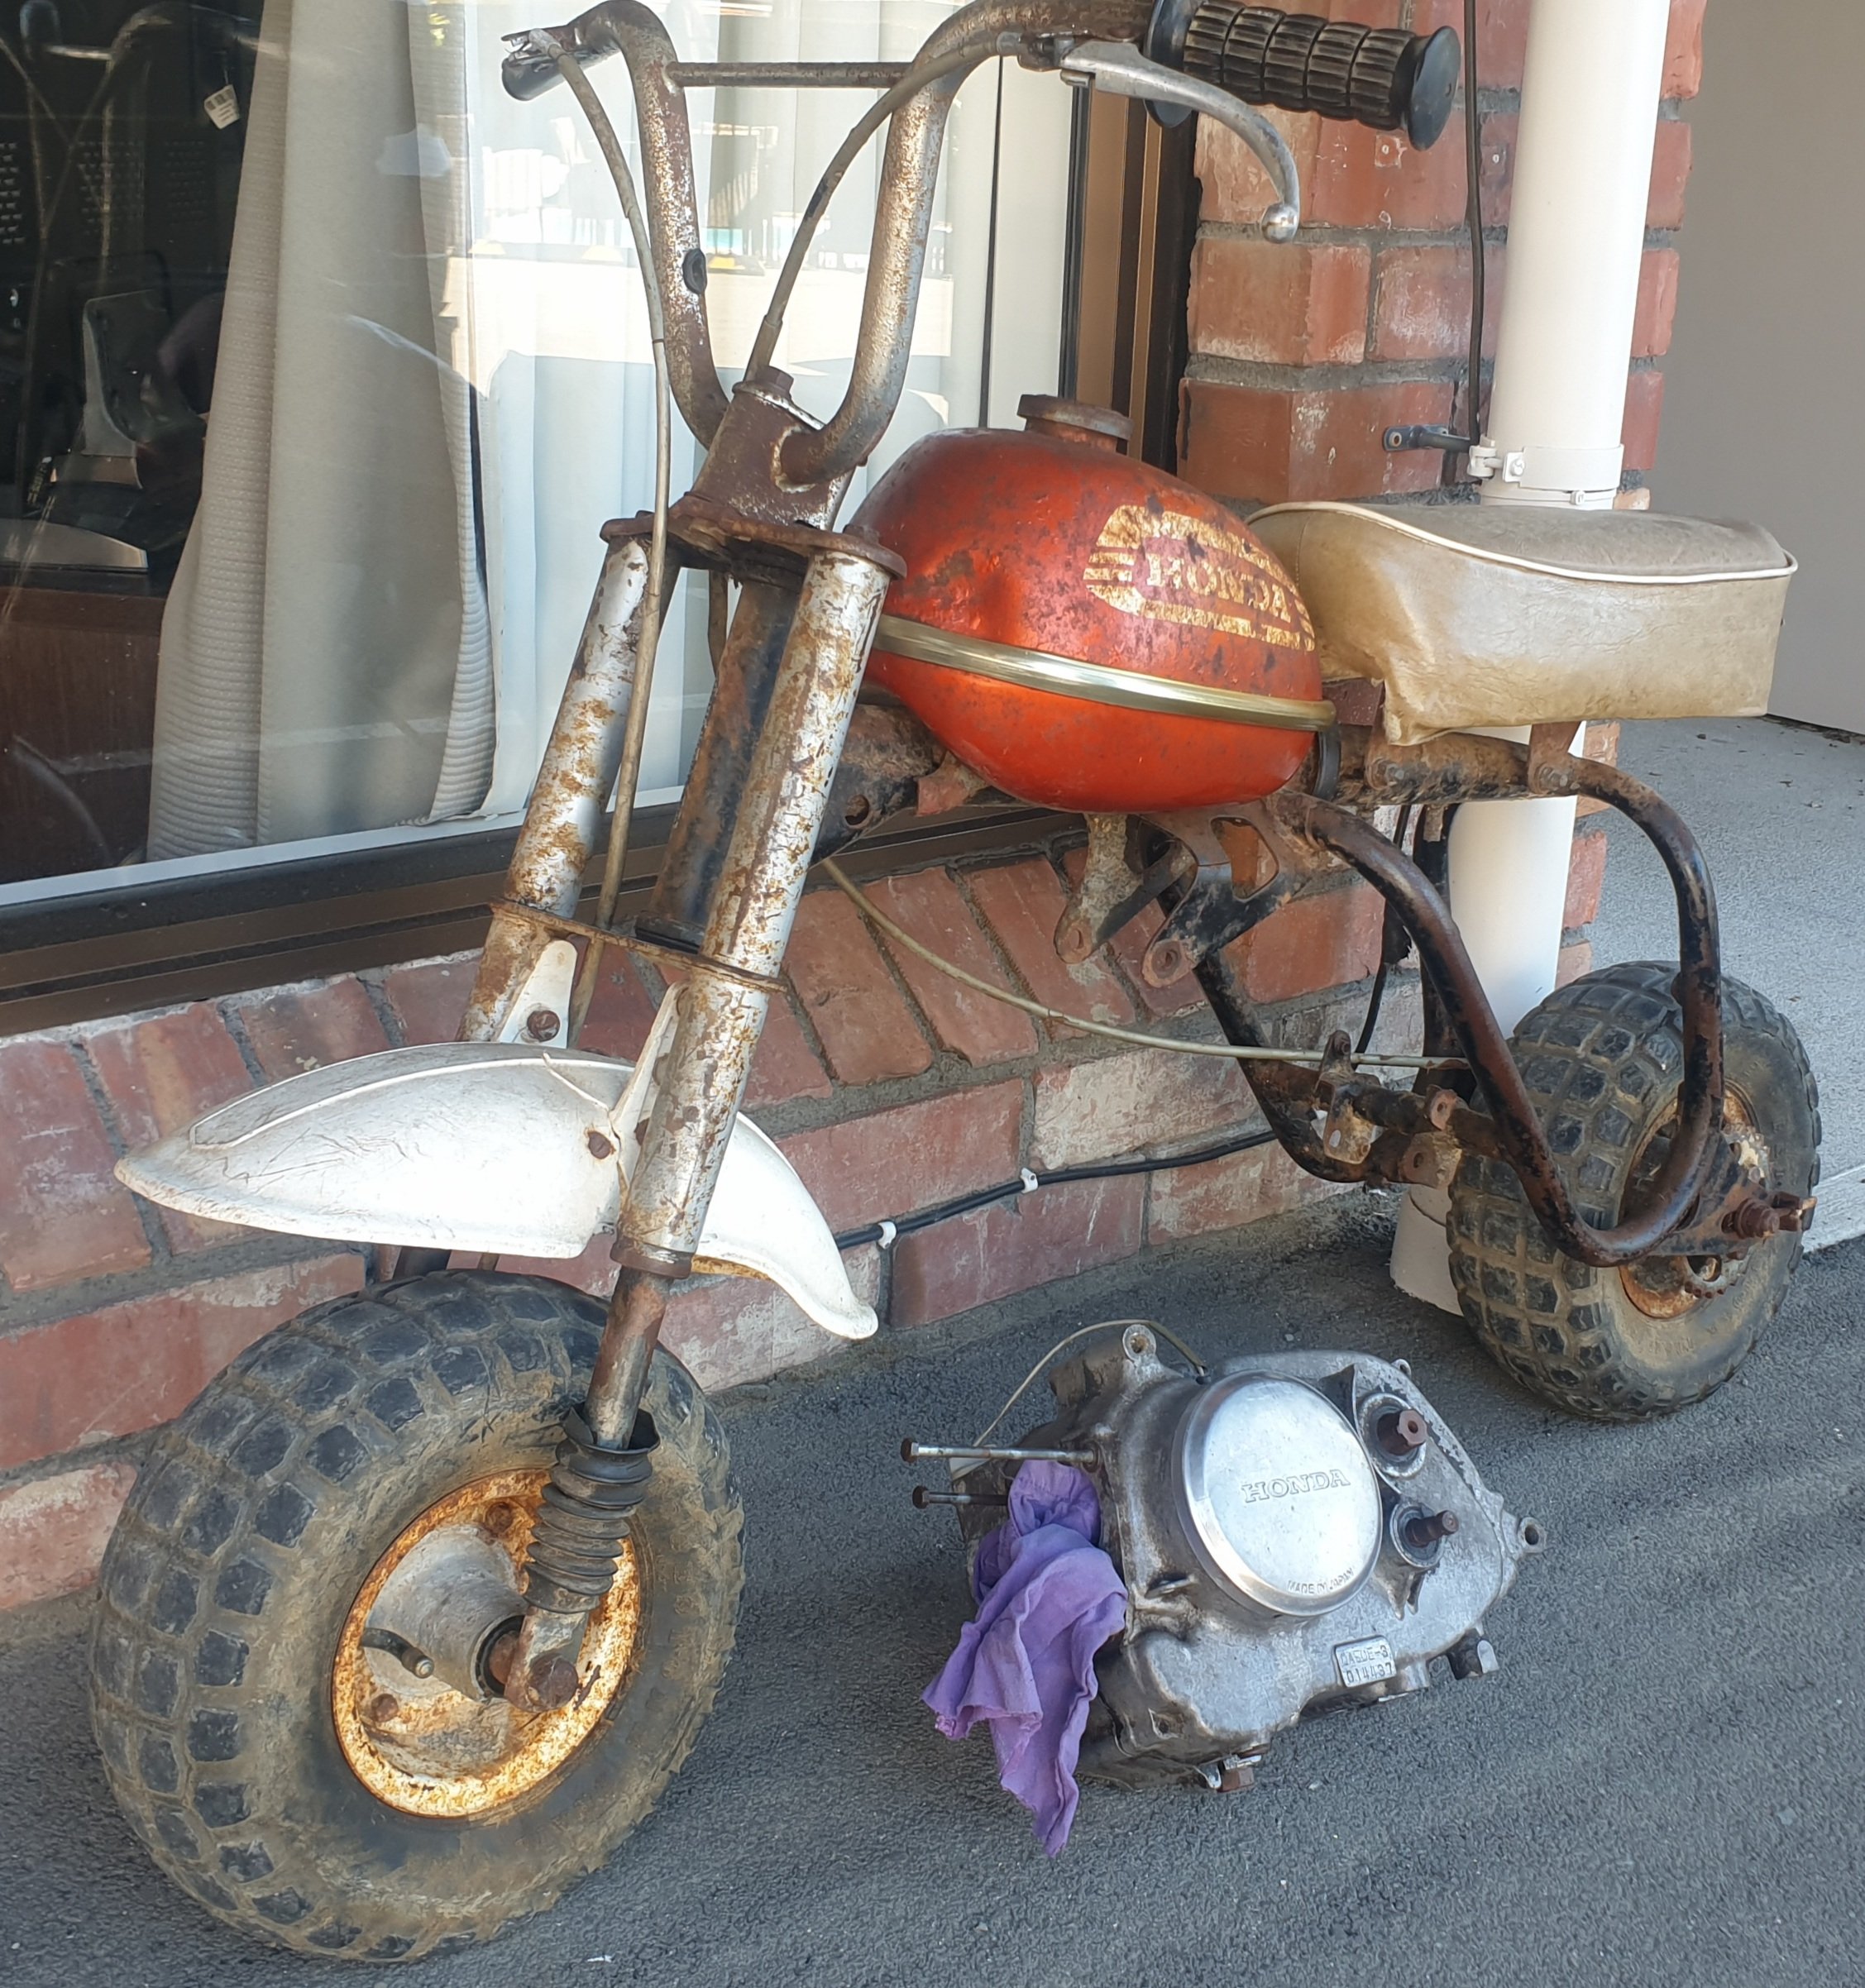
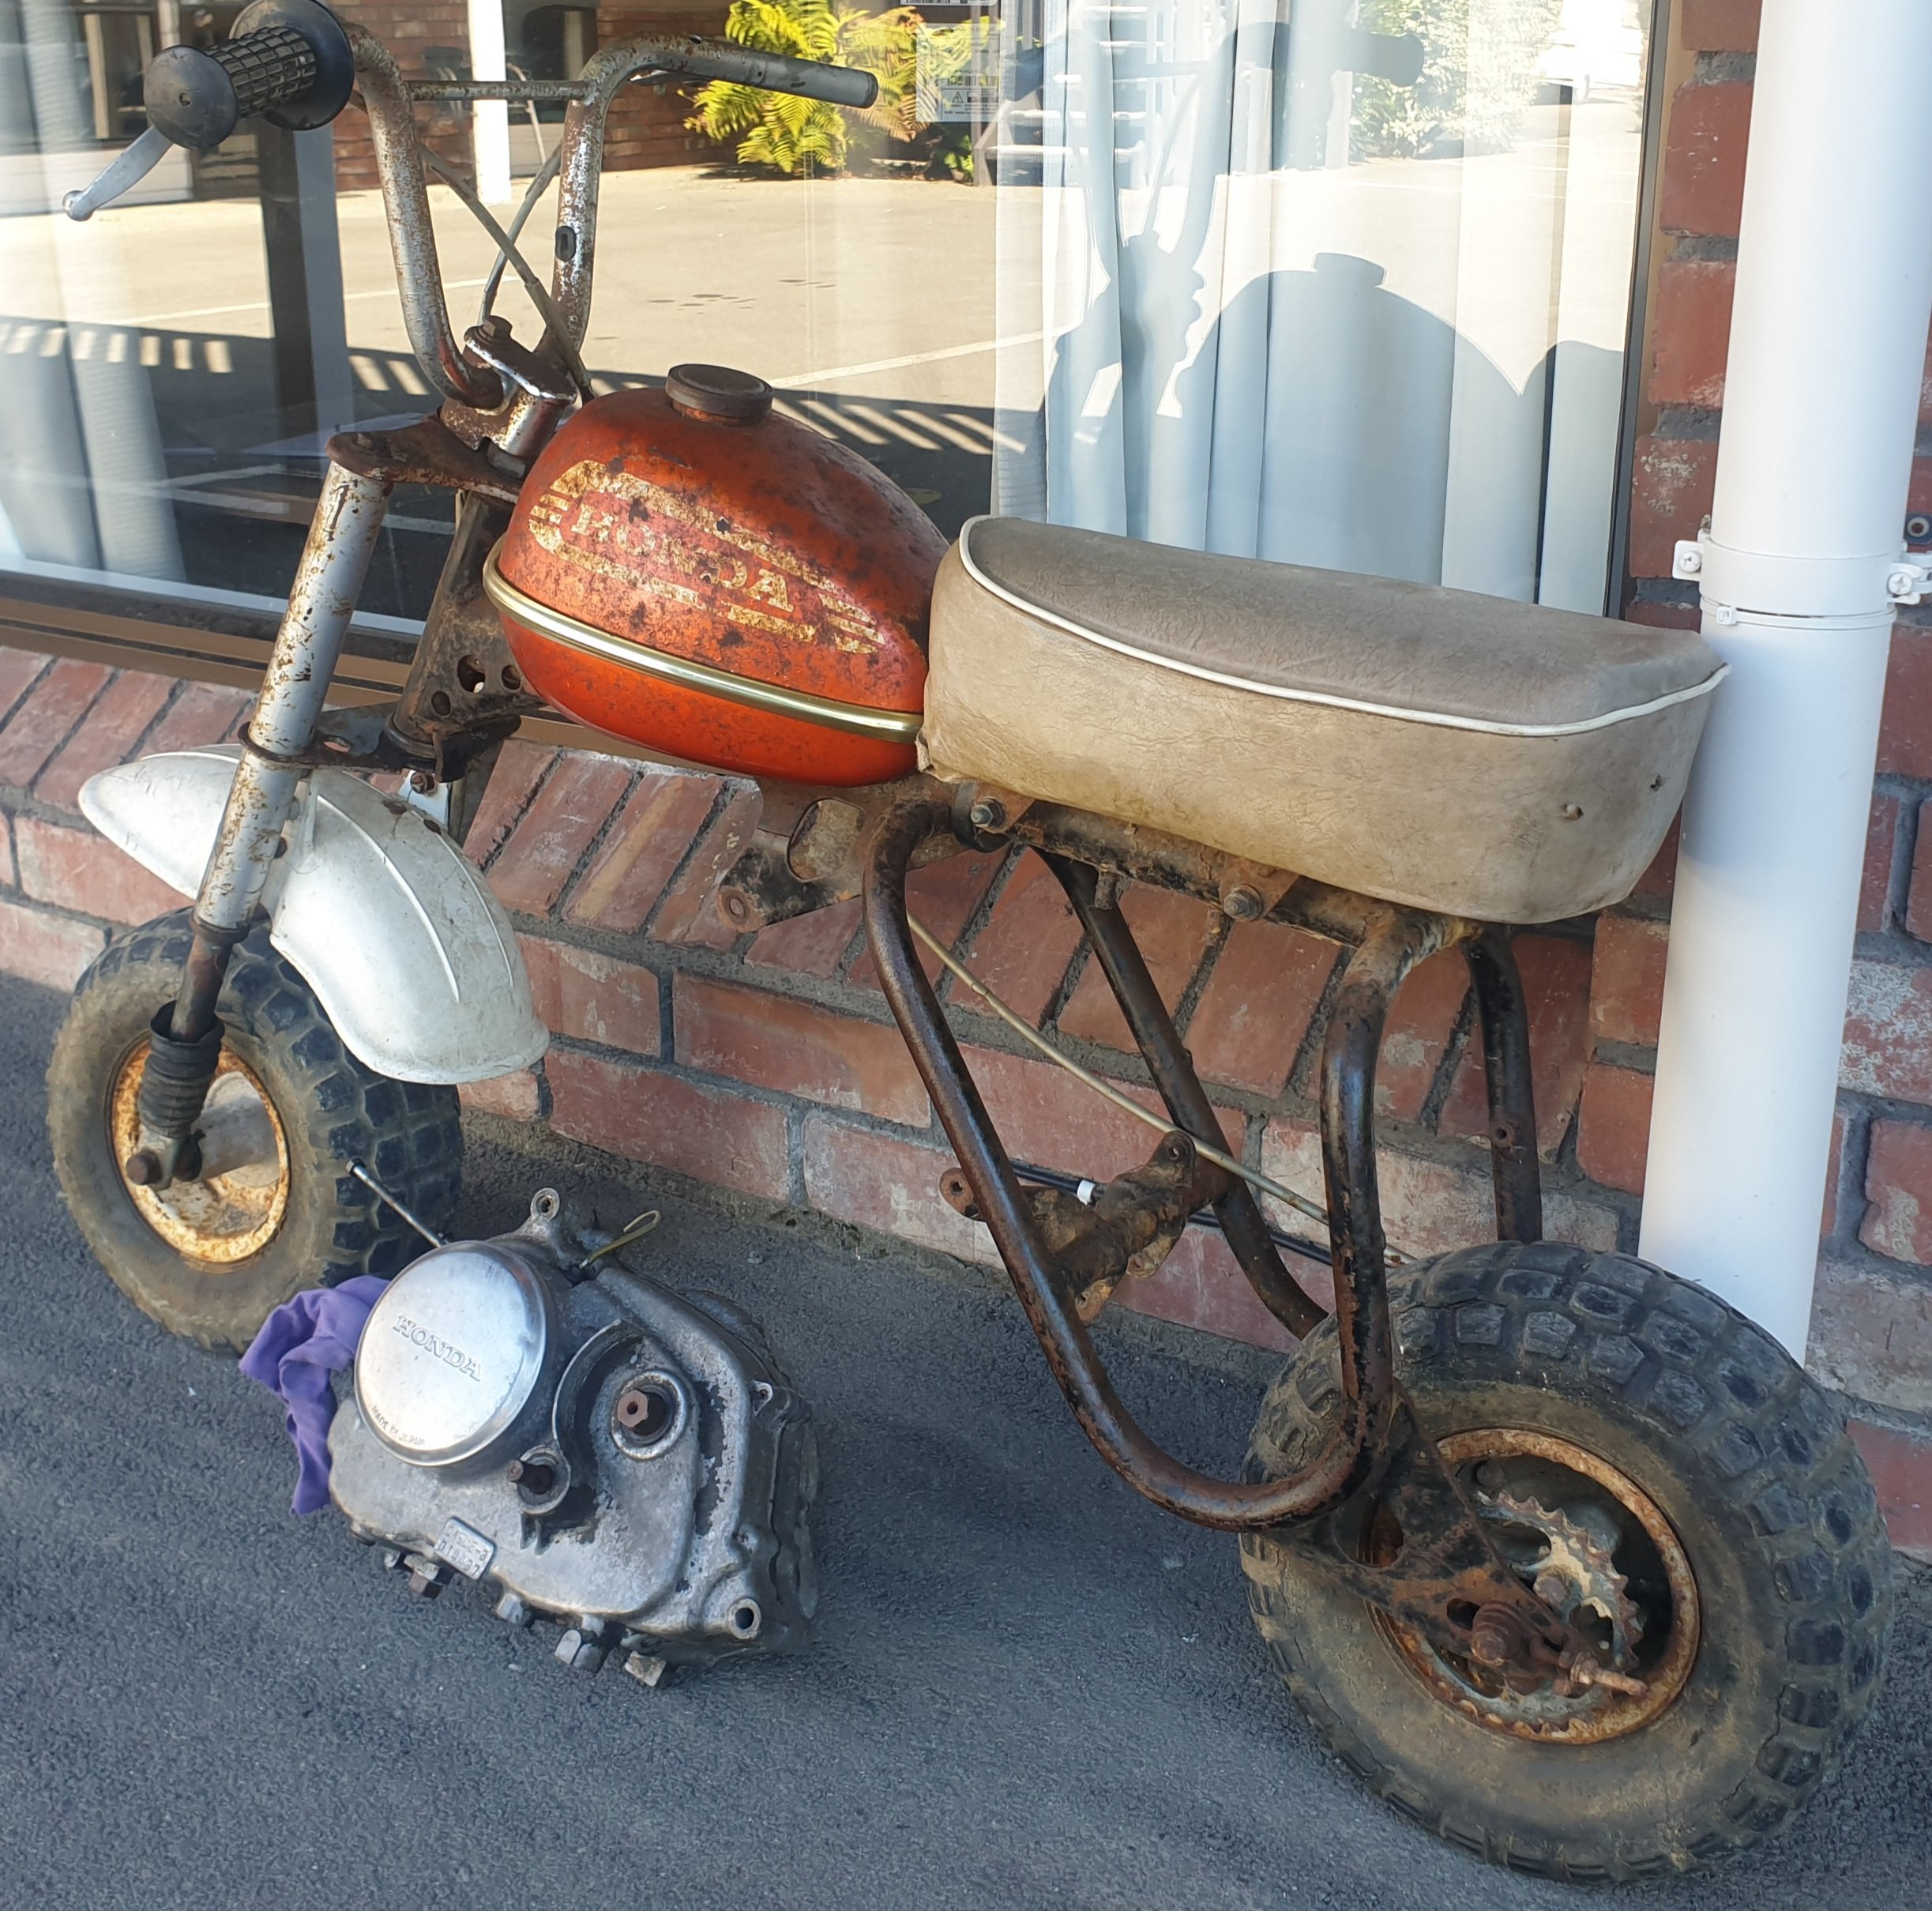
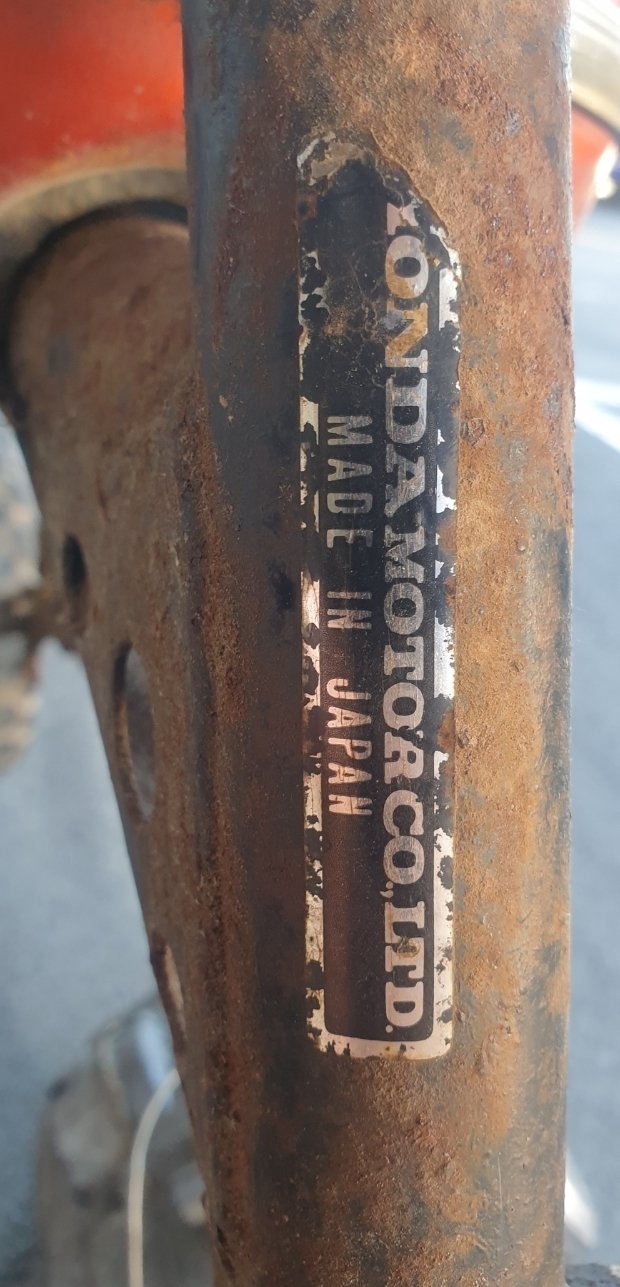
Got this today prety cool verry solid needs a strip down rust kill zinc and some paint. Ive alredy sorced a honda qr50 motor a legit honda nota lifan Gona b a big build i look forward to tinkering with it at some point soon
2 points
-
While sharning about piston speeds. The StanceWorks K24A powered Ferrari blew its motor recently which is a pity. However it was running to 9500rpm with 99mm stroke. That's 6100 ft/min piston speed. Whether or not they were running on low boost, thats some crazy shit. That motor was not long for this world!2 points
-
The 2GR heads will be best, since they have huuuugggggeee valves because of the much bigger bore (94mm bore vs 83mm 4GR) So as a result the valves are 7-8mm bigger diameter which is crazy. If you put a 2MZ crank into a 2GR then you end up around 2.9 litre with a stroke that "should" allow 10 or 11k rpm. I guess the thing is, first I just need to get a motor together and see what happens when it runs. It is entirely possible that there is some insurmountable issue with the valvetrain (or whatever) so arguing semantics over which motor will do 11,000rpm is irrelevant when the whole thing explodes at 9000 anyway. Haha. God I love wildly speculating though2 points
-
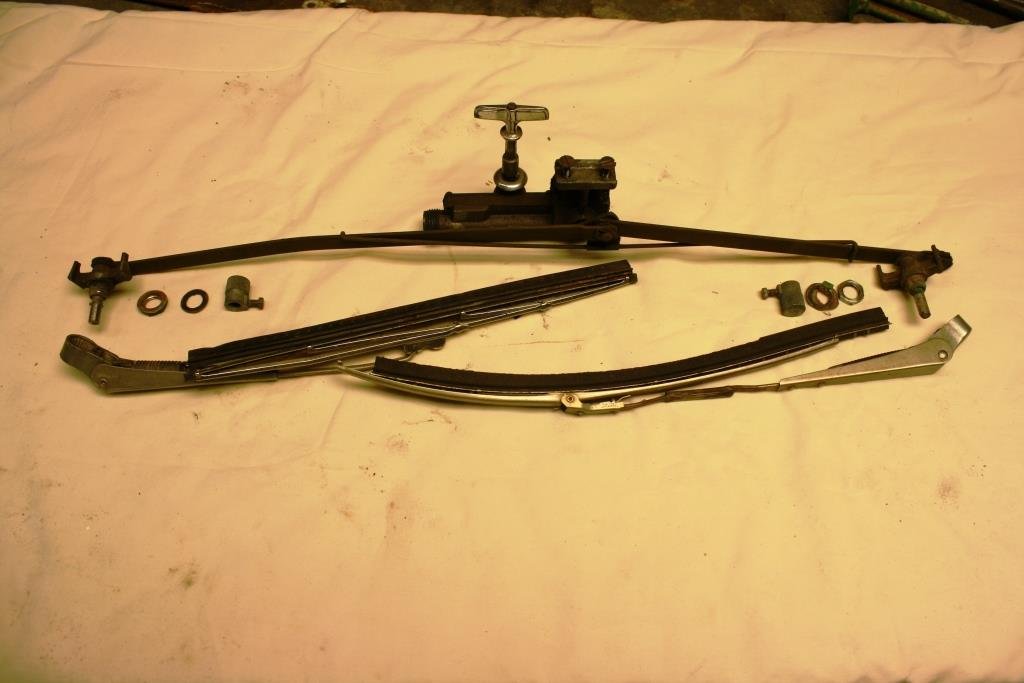
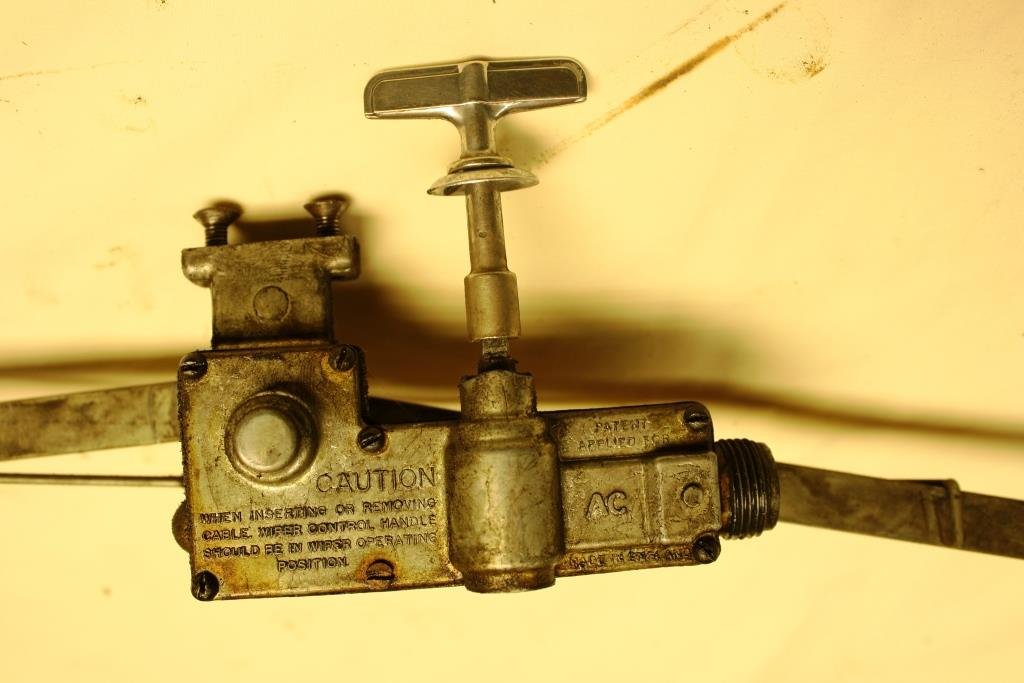
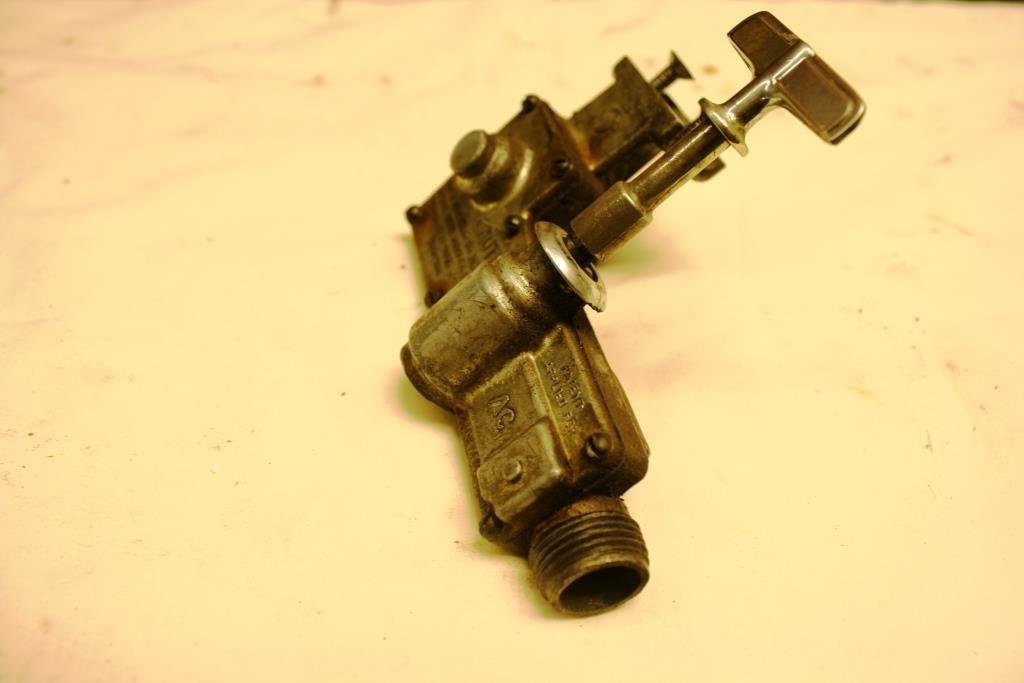
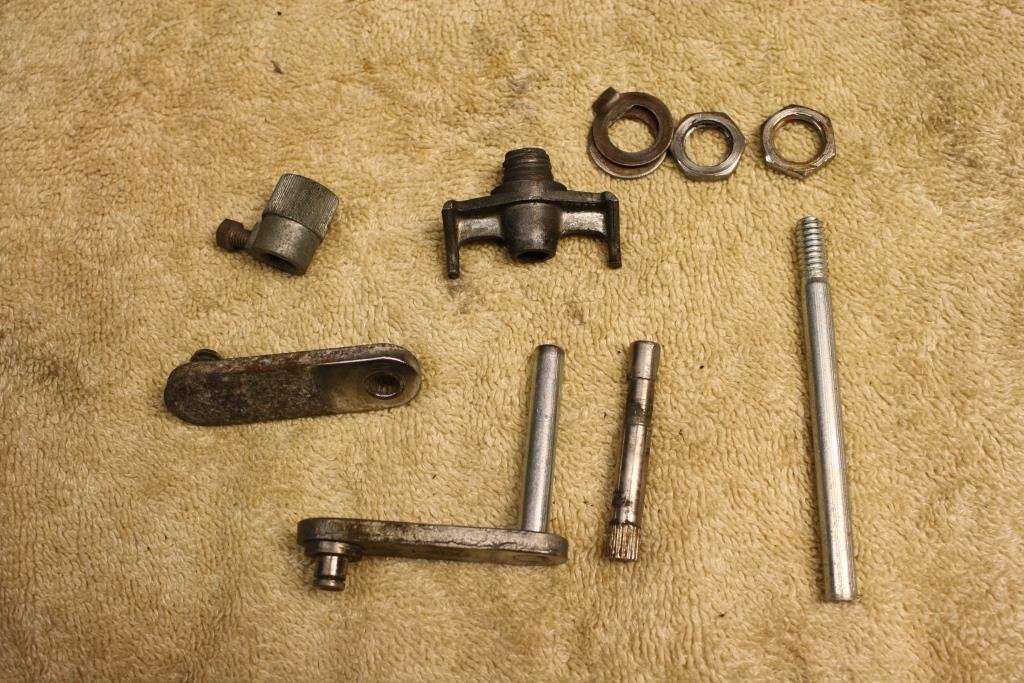
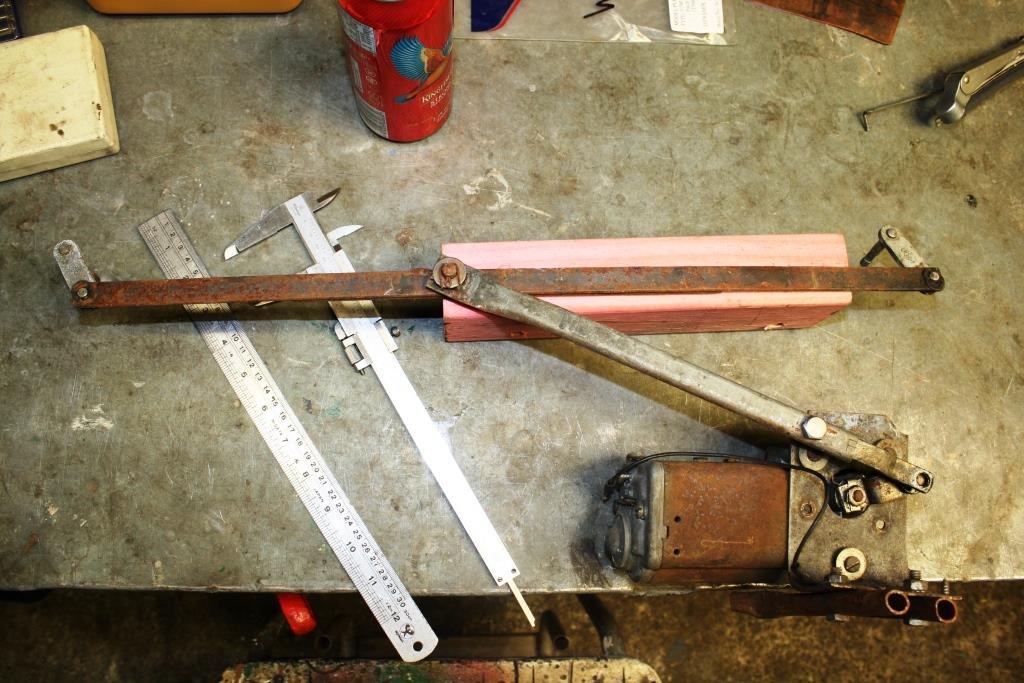
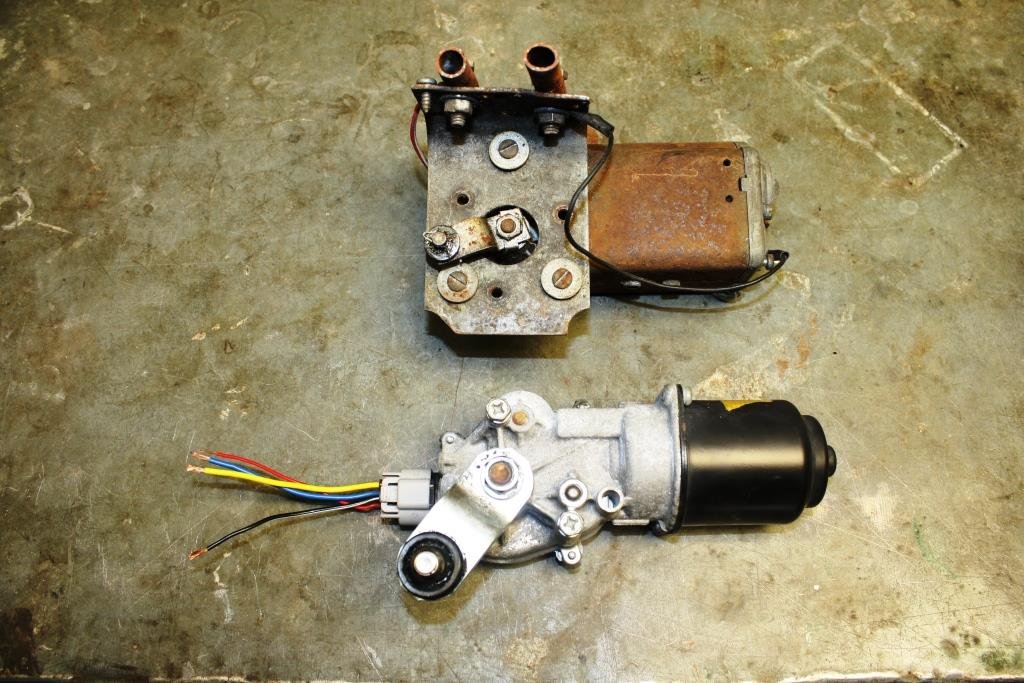
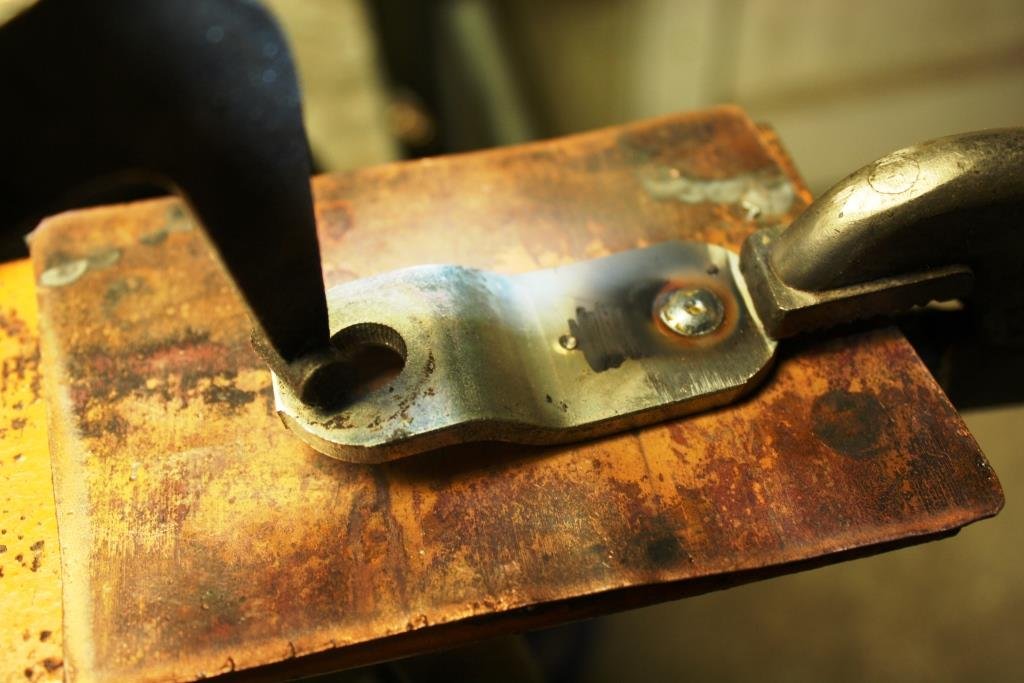
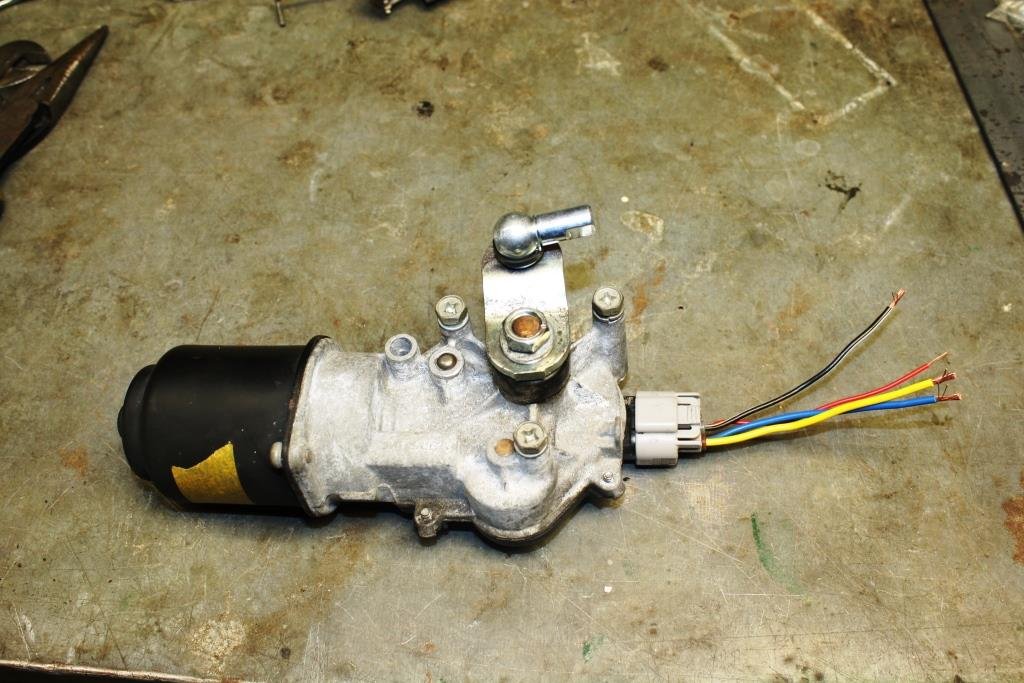
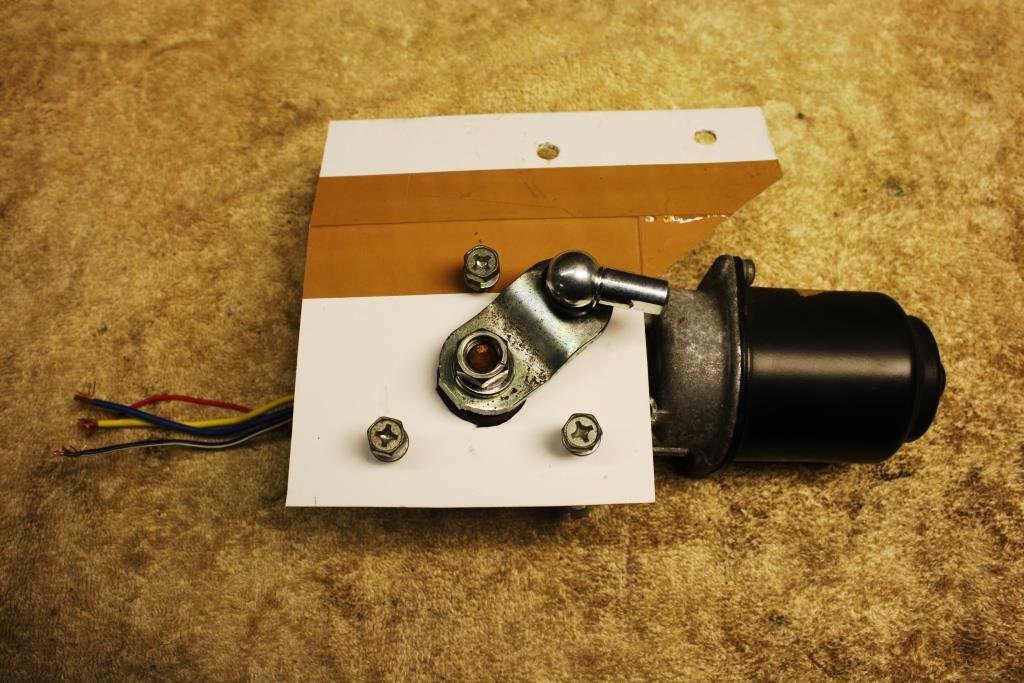
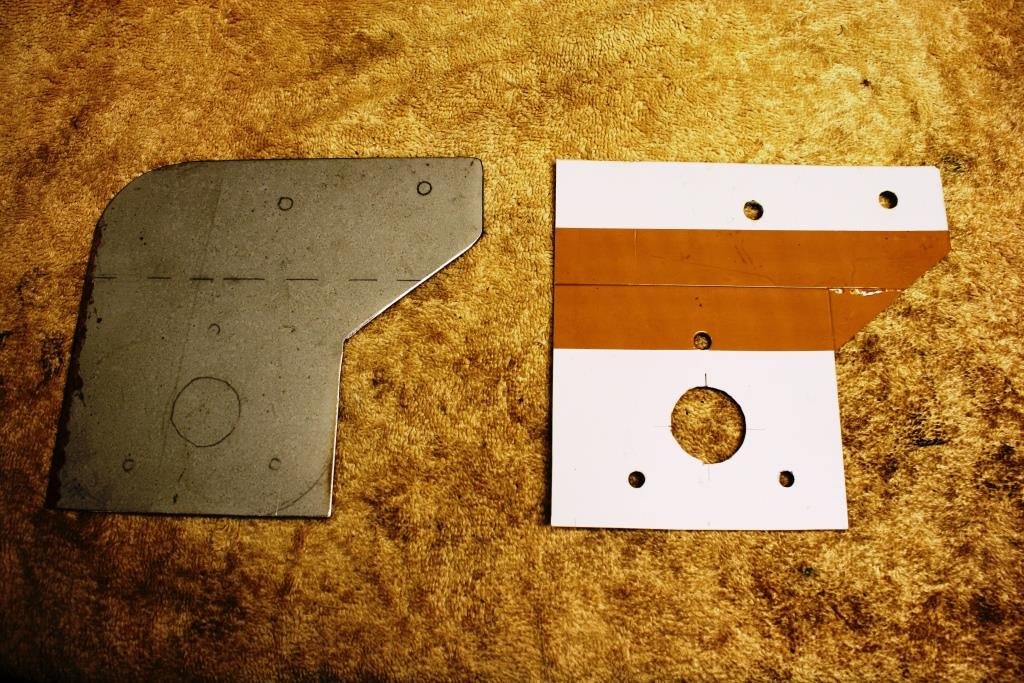
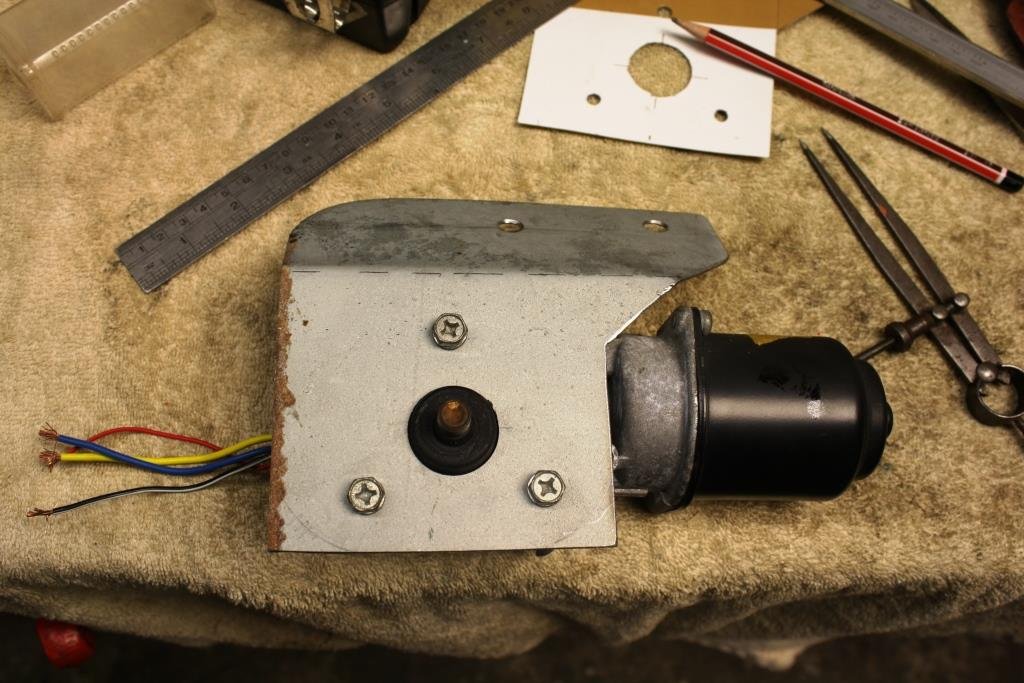
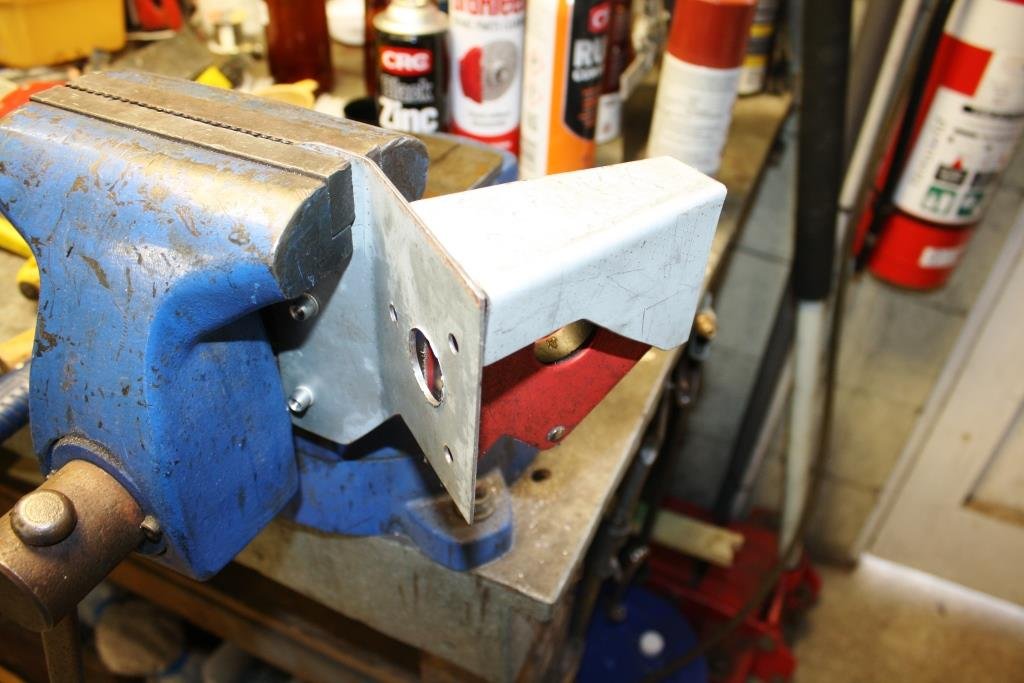
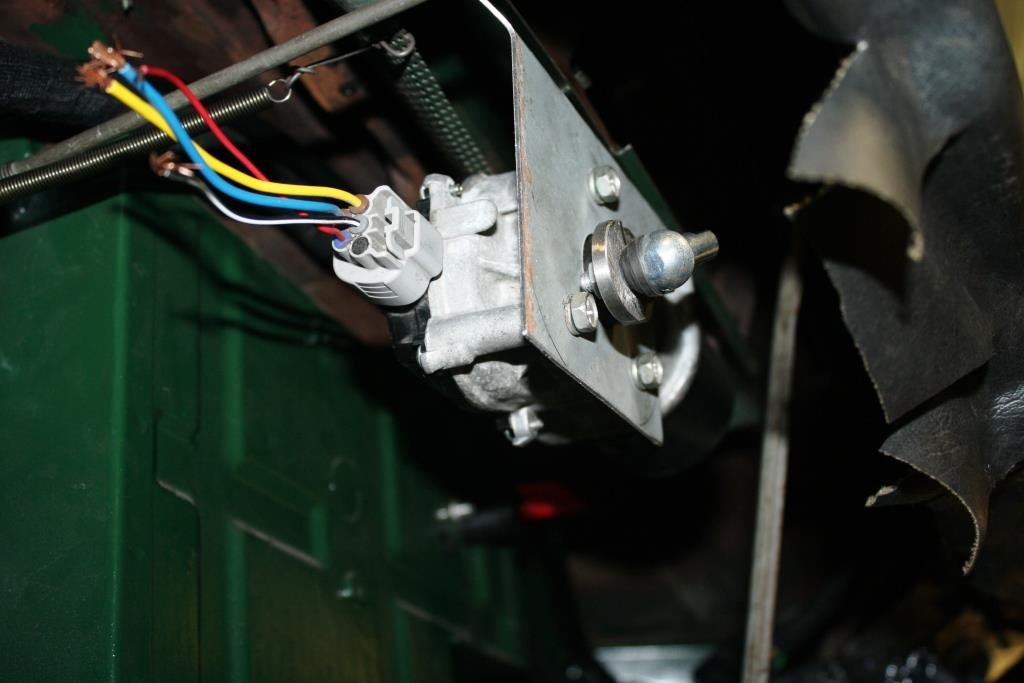
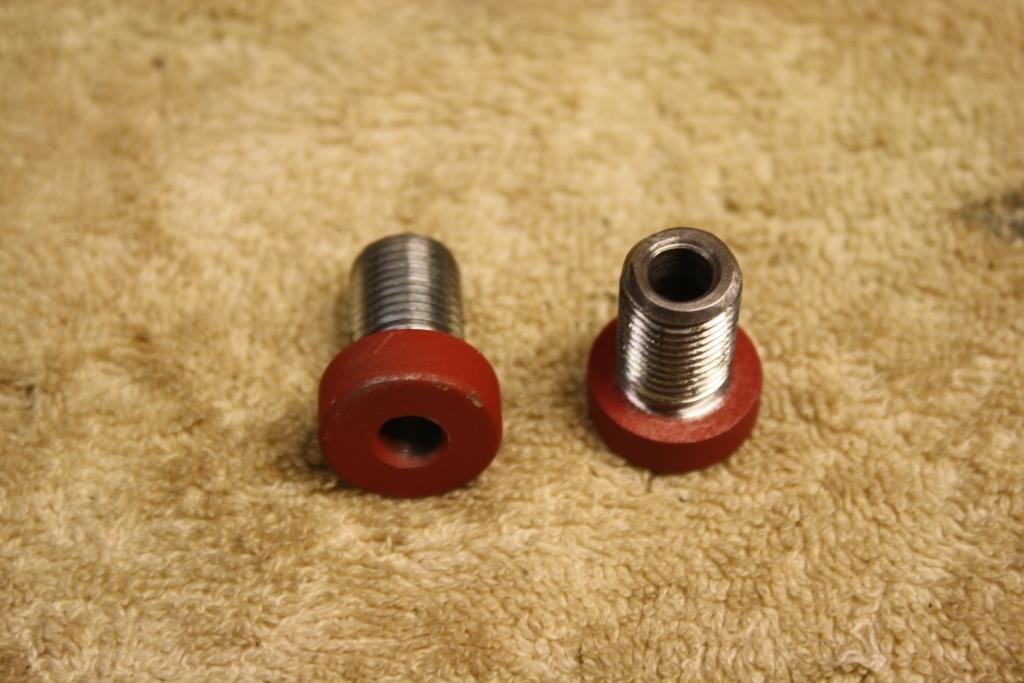
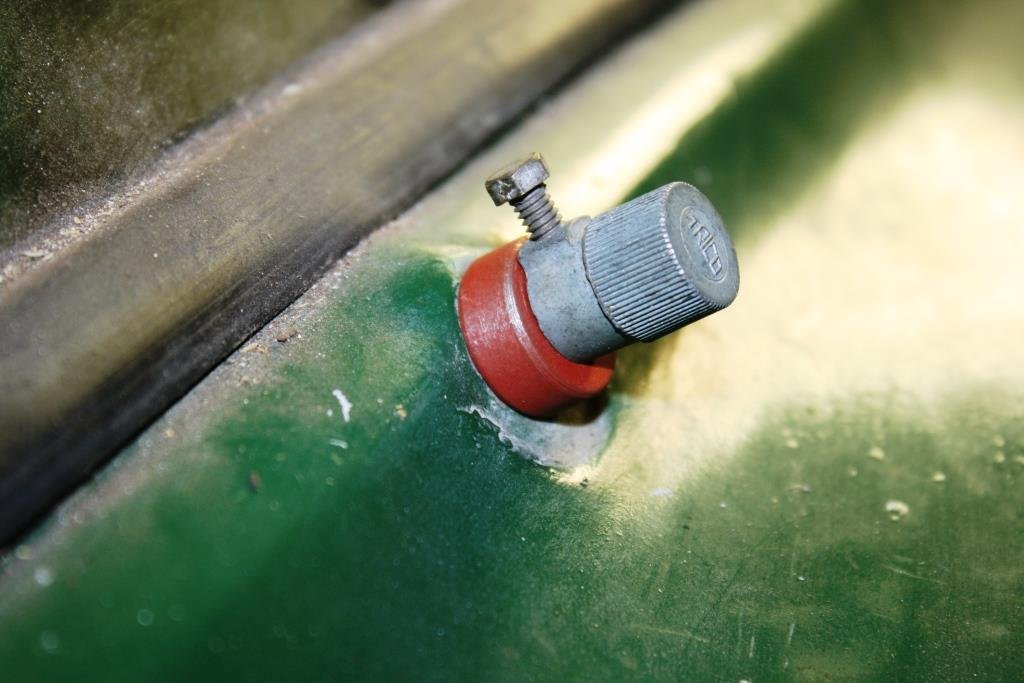
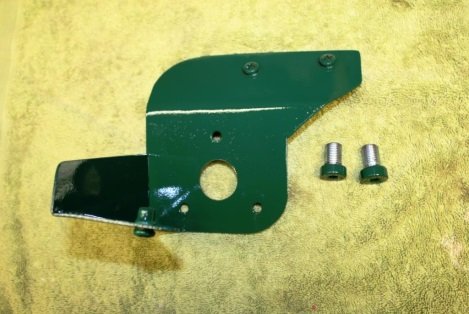
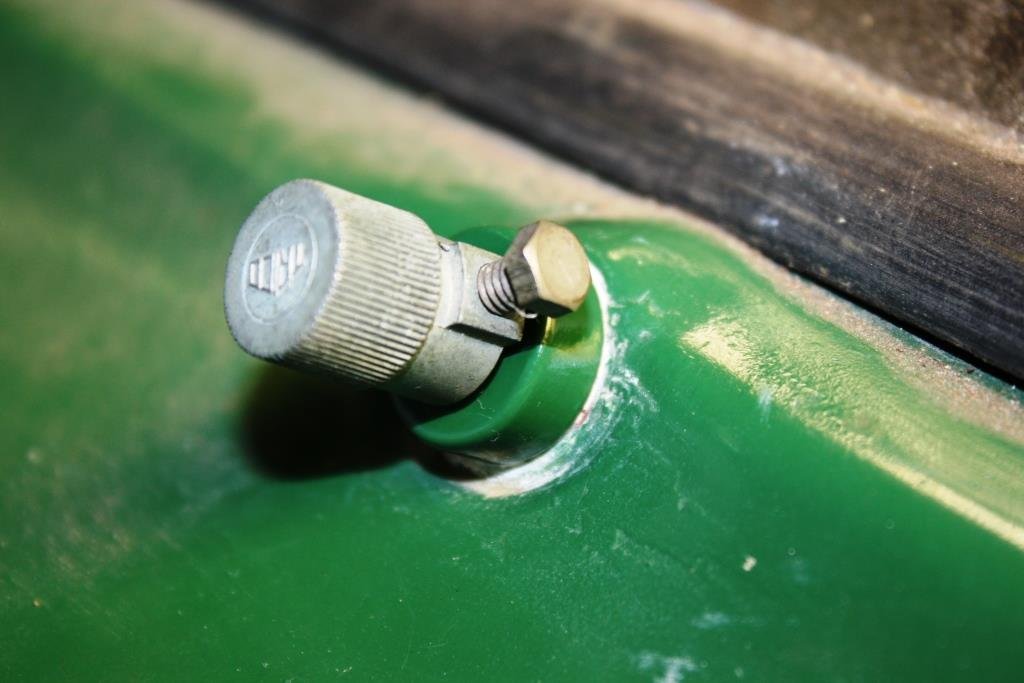
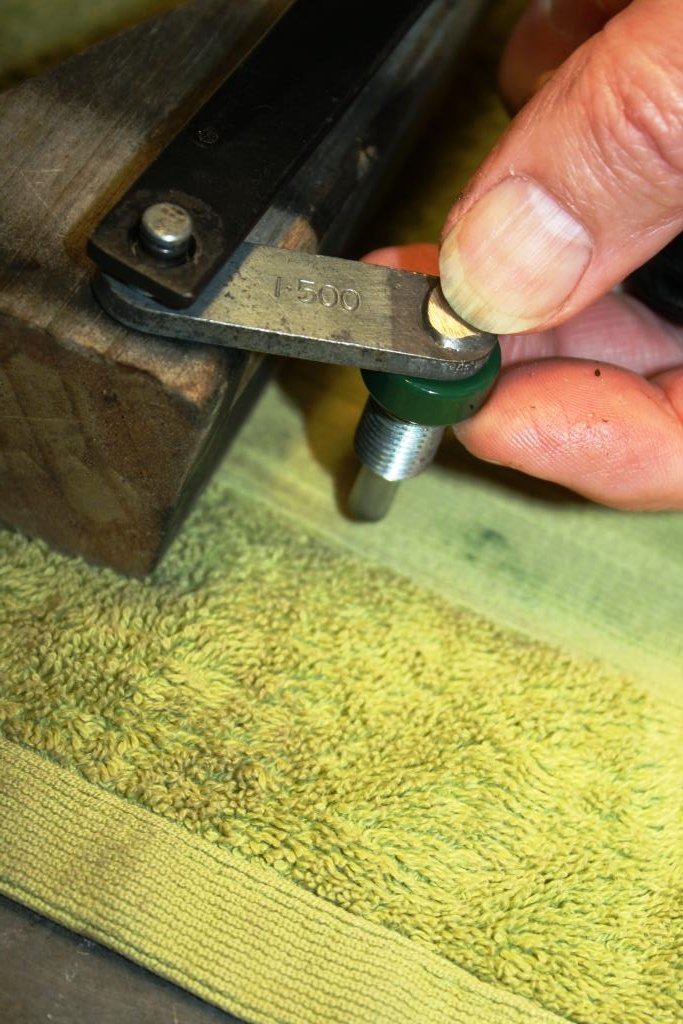
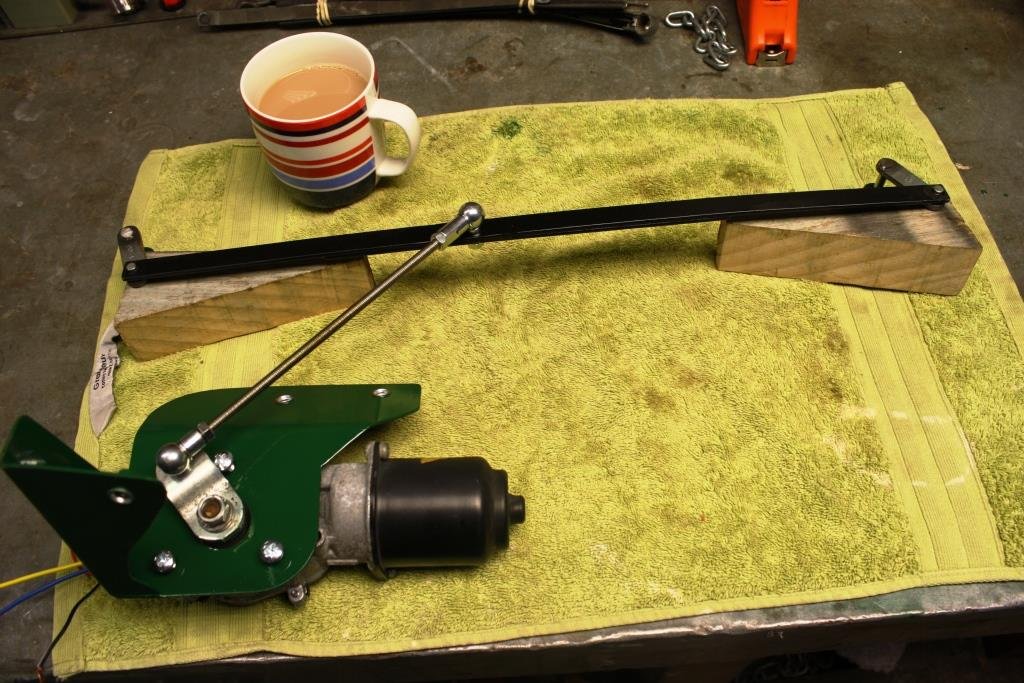
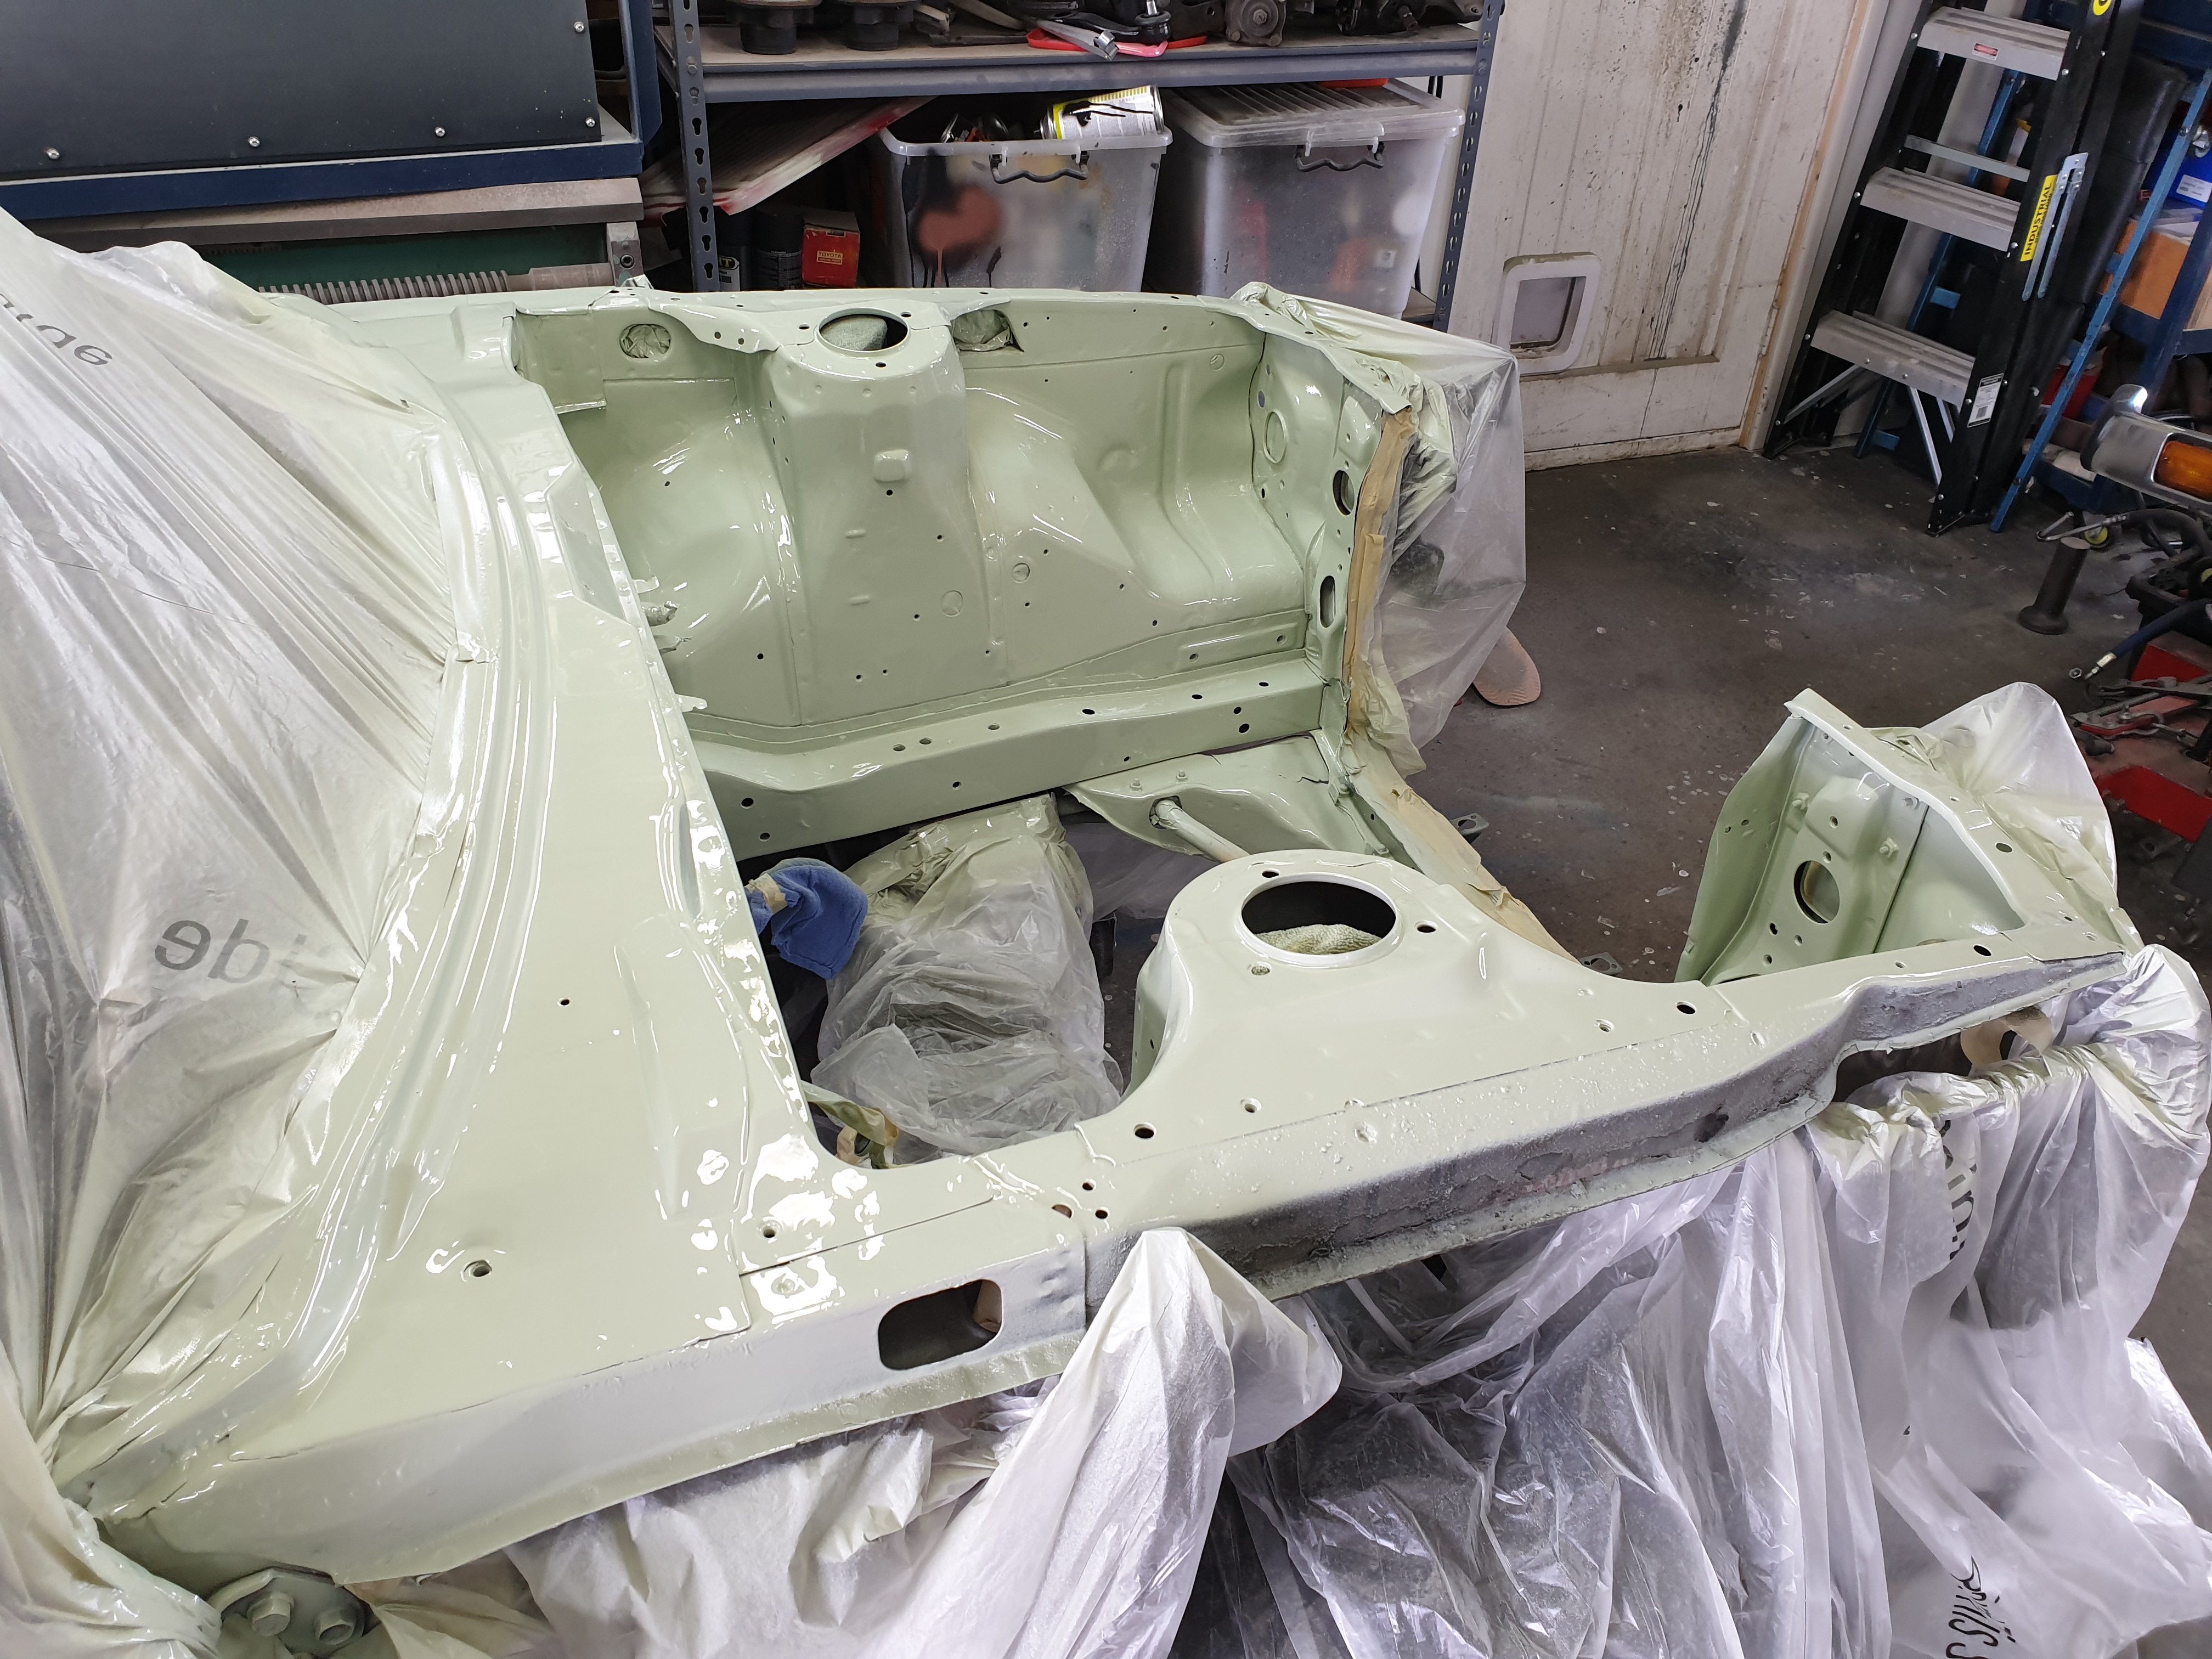
I’m at the stage where I need to make a call on the windscreen wiper setup as there is limited room under the dash and the wiring loom needs to clear the moving parts.. The original pre-war system was driven by a Bowden cable that believe it or not was in turn driven from the camshaft. If you think the old vacuum wipers were crazy, matching engine rpm to wiper speed added a whole new dimension to driving in the rain! It had a cool little AC Delco gearbox with a clutch. I toyed briefly with the idea of powering up the Bowden cable with a small electric motor but due to the overall condition of the system I made the call to start from scratch. I’d done an electric conversion in the early 80’s but it was pretty rough (to say the least) and the “Lucas prince of darkness” wiper motor was locked up solid. I found a Nissan rear window wiper motor that was small and compact……. Old vs new……. I modified the output arm to take an 8mm rose joint. \ And once again fired up the CAD… Some bending and welding….. ….and it tucks under the dash well out of the way of the instrument cluster. The alloy wiper pivots were badly corroded……. So I made up some new ones Some more “insipid green” paint………. A bit of mucking around to get the ratio’s right……… One last assembly on the bench……. And it all tucks away, out of sight behind the dash. Not only does it work it even has two speeds! (I’ll just have to hide the switch somewhere).
2 points
-
I've always loved Kei cars, but when my partner and I were in Japan earlier this year it was basically decided that we had to get one. So when we were able to come up with an excuse to get rid of the Leaf, we pounced. And hey it may be our new daily, but there's no reason it can't be a fun daily, right? Introducing our freshly imported 2019 Suzuki Alto Works. It's the HA36S chassis, FWD, manual transmission, and the previous owner was nice enough to kit it out with some KYB springs and shocks, an aftermarket muffler (perfect level of bubbly I3 noises), and classic-style enkei wheels (though the OEM wheels are also enkei, and I'd probably have chosen a different style, but they're growing on me). Also growing on me are the leather seat covers, front and back, which must have been made specifically because they perfectly wrap the stock recaros and rear bench. There's some stuff to do. First thing we did was give it a thorough clean, the sea journey really does a number to it, we still have to do a bit of a polish because there's some deeply ingrained gunk in there. But it came up pretty nice with a quick soak and the car's paint is immaculate. The japanese owner had some some other random stuff too, like hack apart the console for his stereo (which he then kept when he sold the car and blanked it out). I've got a new stereo to put in that should effectively hide the edges. He also put a random button in (also seen in shot) that turns on some footwell lights. Not really sure why. Also a bunch of bits of padding in the door and boot jams, I guess to stop rattles or something... clearly it works because the only significant noise in the car is the exhaust note. More frustratingly, he debadged the car. I snaffled a new boot logo from Japan, and managed to wrangle the part numbers for the awesome side decals, but they'll cost $800 to get here so will probably hit someone up locally to reproduce them. Compliance gave it new brake pads and wipers and I did the rest of the service - replaced oil and filter, new air filter, new cabin filter, replaced the coolant (old stuff was just water so happy about that), and now that I know where the fill plug is I'll replace the transmission fluid. I also have some new plugs that I'll get around to putting in. Better safe than sorry. The oil looked nice and see through and the filters were lightly used, it's a 122kkm car but has been well looked after. Tiny filter! The little thing can really go despite having a 660cc turbocharged engine. It's limited to 64kW by law but with only 690kg, decent torque and some amazing handling it can really get out of its way in a hurry - and sound great doing so. We've owned it for a week now and turn heads everywhere we go, it's funny seeing people merge in behind us to try and figure out what the hell we're driving (good luck without that works logo on the boot) or how they got chopped by a shopping trolley going up Hayward's. One of the cool things about this car being a modern enthusiast car is that it's pretty big in Japan. They've got accessories and mods flowing out of the stores over there and it's an awesome change from having to deal with the Starion or even the MX-5. The cars we worship are yesterday's news over in Japan, so it's fun to be near the cutting edge of what's hip. Plans for the future: - We've already ordered a huge wing for it ;3 - LSD - Upgraded turbo, wastegate, intercooler and intake system - Tuned ECU - Sweet stereo system - Dashcam (have installed a decent front+rear one already but didn't take pix) Napkin maths says with all of the above this thing will have a better power to weight ratio than most sports cars... but the Starion takes priority, uh, mostly... for now.1 point
-
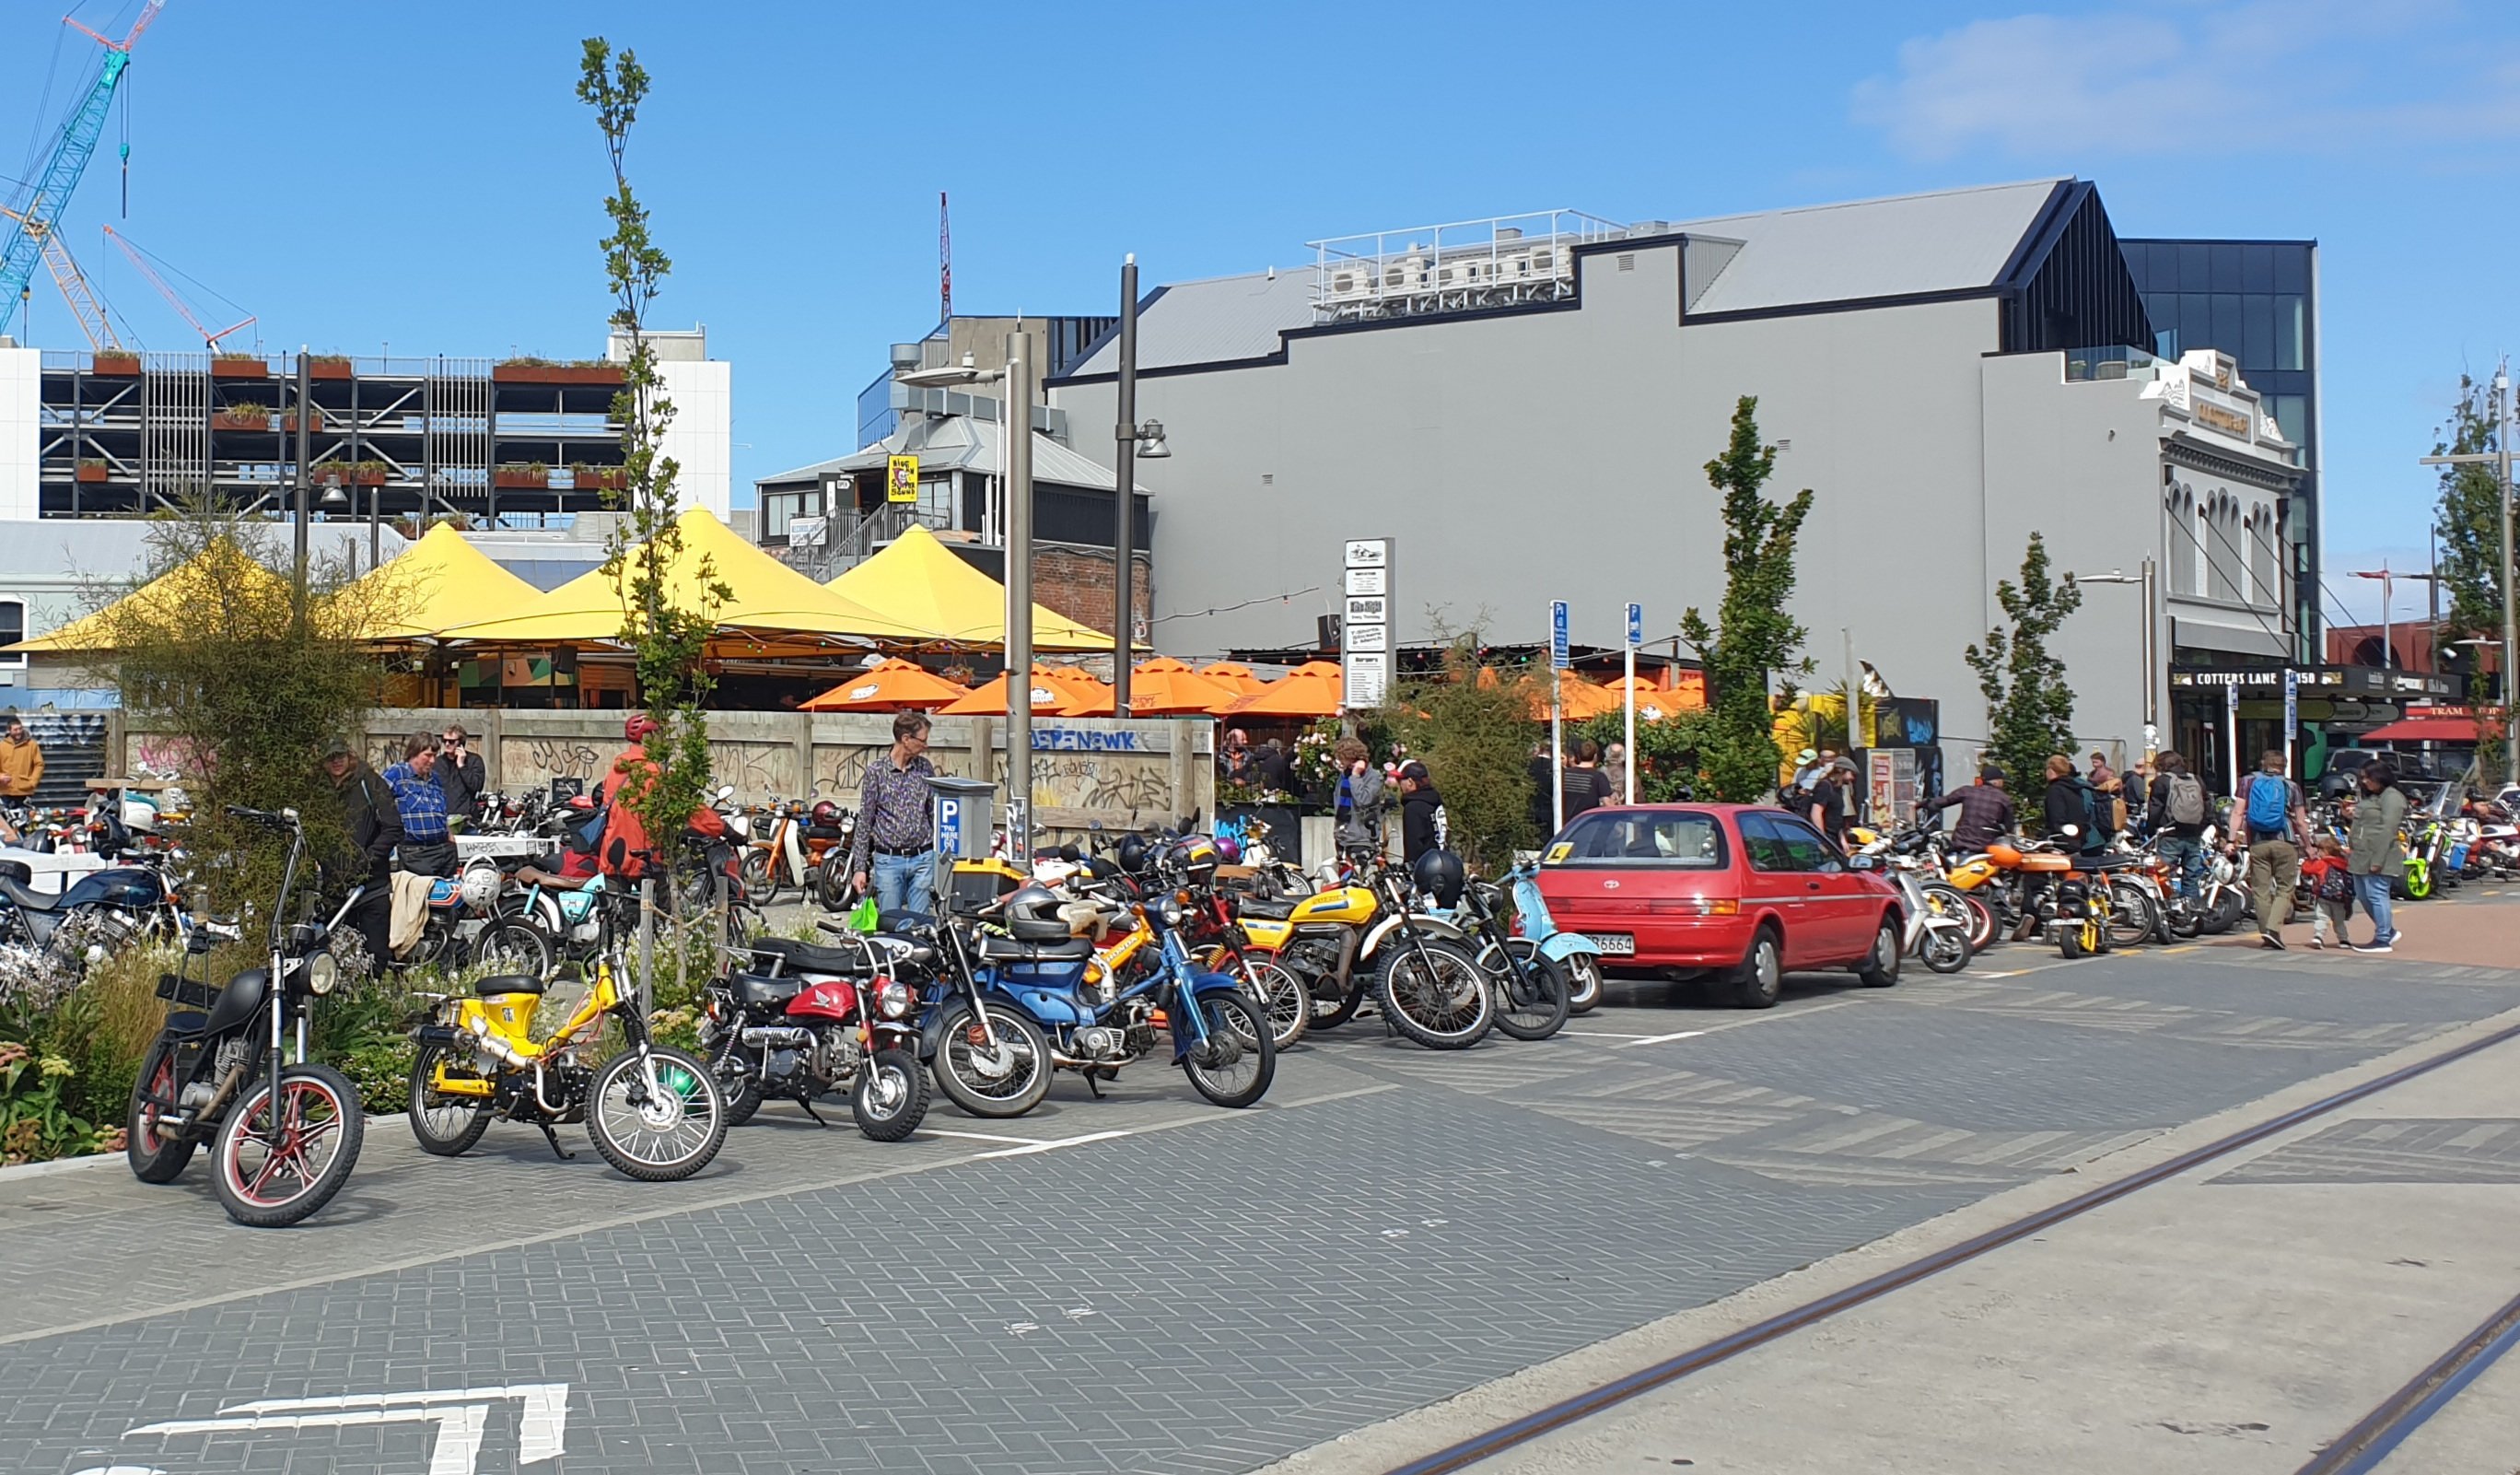
Old mate did awsome today at syds run Did the whole day no issue 2nd year in a row. Old mates the 3rd bike from the left
1 point
-
I saw some witness marks where the diff and uj were hitting the pipe so gave it a bit more clearance Old vs new. Bigger primary tubes which are actually port matched along with a better design should make some improvements1 point
-
Went to Macintosh and got some clutch parts, still need a heap more but it makes the clutch so much nicer
1 point
-
Was driving home from work yesterday and I came slowly coating to a stop at a red light. As I was sitting there the car stalled as the light went green and I went to take off. Weird, cranking resulted in what was obviously something wrong, it was cranking with a weird rhythm and wouldn't start. So me and the wife towed it the 4ks home and I started trying to figure it out. End result is that somehow the cam belt jumped a couple of teeth. Like how the fuck did it do that? Seriously it was idling, nothing looks wrong but the tensioner does feel a little weird when I compress it and release it. Is not like any of these parts are old. Fucked if I know, anywho I might as well put a new belt and tensioner in it. I don't actually know if this engine is an interference motor or not, obvs stock jen one UZ aren't but this has kelford SC cams in it and I can't remember if they make it interference or not. I didn't hear anything at the time but the radio was on and from past experience when the pistons just kiss the valves they don't actually make a lot of noise. I'll get new parts, put it back together and do a compression test I suppose.
1 point
-
What is also cool, is that someone asked me if I could send them a file for the ITB adapter. Sure. So they had some CNCd And they've also made some 14.9:1 pistons. How good! And this is all going in a tube framed EP80 time attack car for a European hillclimb or autocross or something series. It still looks like cams are the bottleneck though, but it will be interesting to see how it goes with the higher CR and presumably some race gas.1 point
-
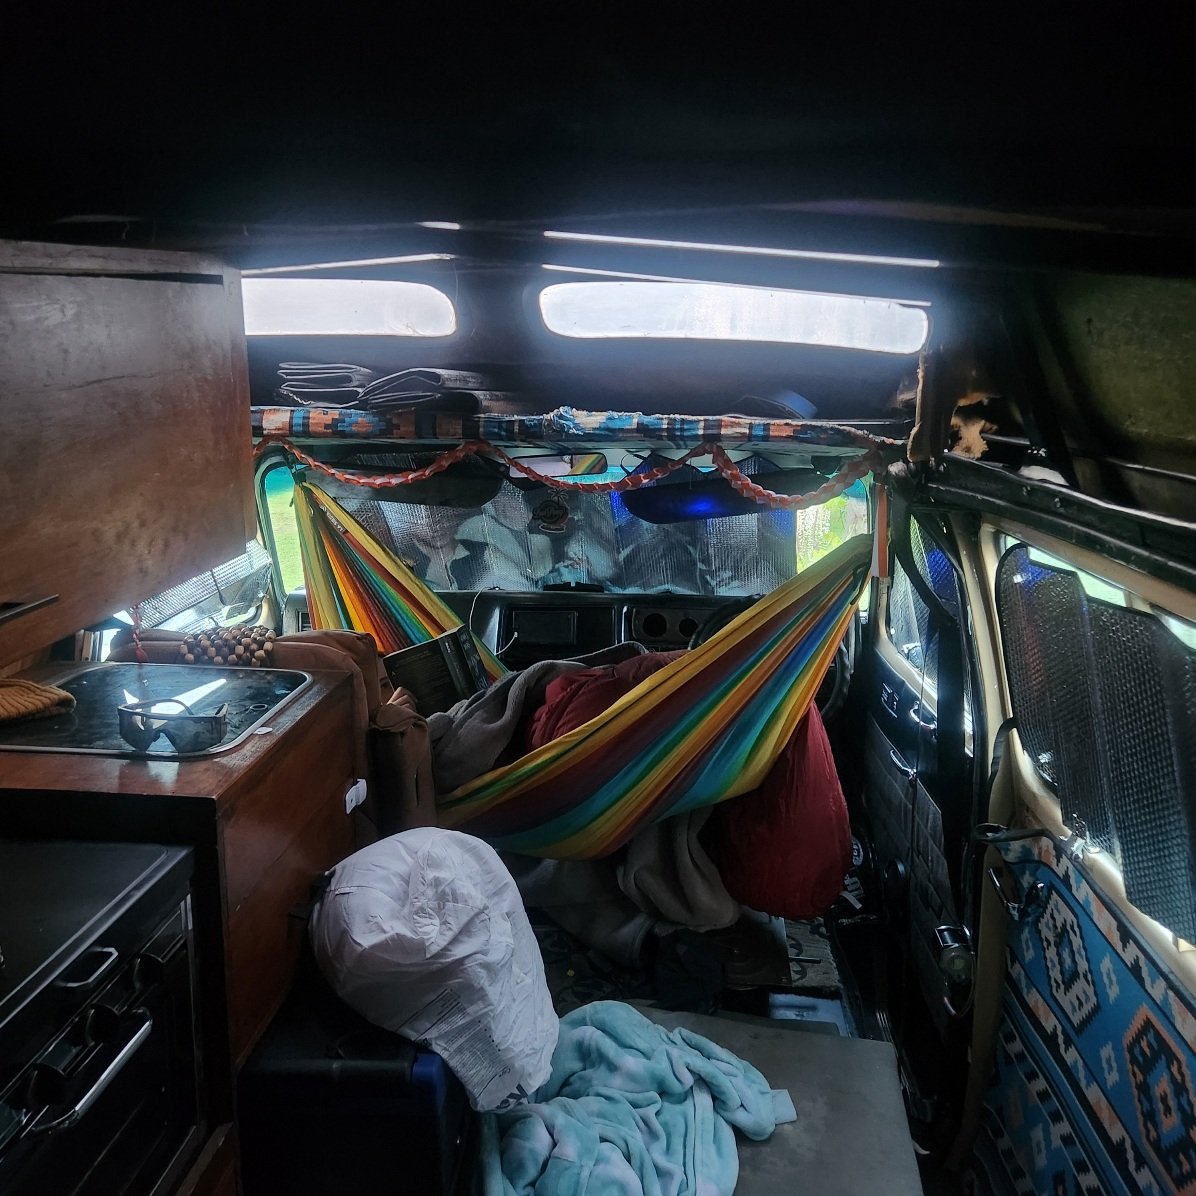
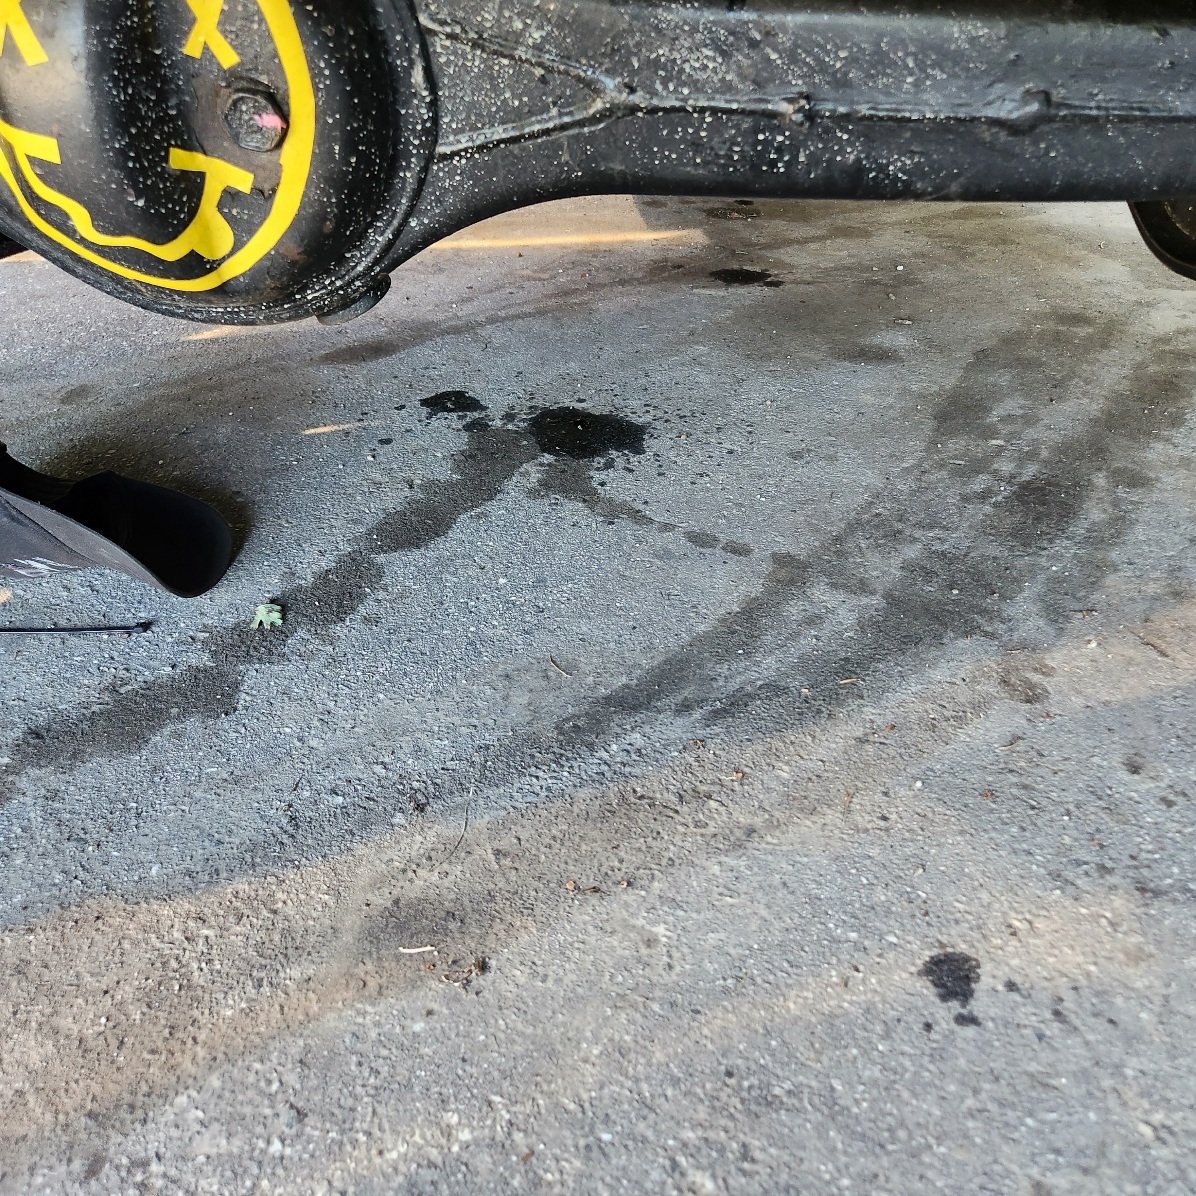
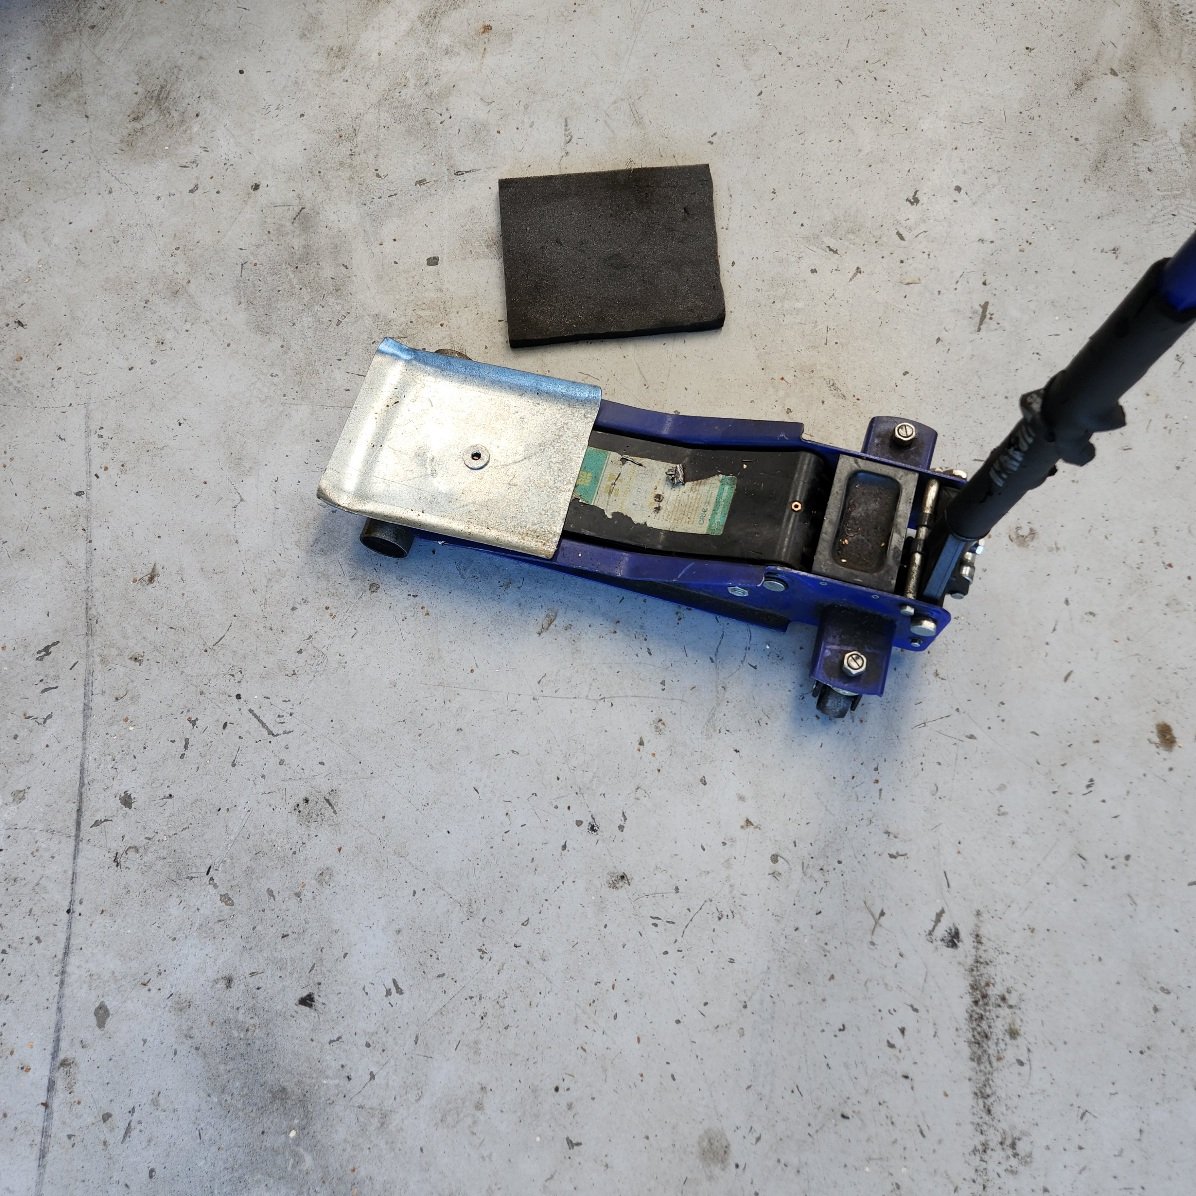
Welp, 3 steps forward and 1 backward up in here. I got the shits with the flexplate setup and changed it all. The only reason I can come up with is that the counterweight grabbed off centre when I put it on then wobbled loose once I'd driven it. The bolts weren't bottomed out in the crank and came out easy, the spacer I thought was missing isn't used in cruisers and I never checked flexplate runout once it was all installed which might have told a story. Anyway back together and it's going good. Did some at home camping past night, this is the groms hammock up front, she loves it, I wouldn't be able to get in or out of it. The reason for the at home bit was we went to leave and my seat hinge snapped and fell backwards, and I noticed this on driveway It's trans oil and looks to me like pump seal has ruptured, I'm assuming I tore it messing with torque converter, fuck it all. I'll pull it again this week once new seal shows. I bolted and old chunk of trailer wheel arch to the jack to drop the trans in and out, works a treat It still looks cool buttfuck. Cert next week hopefully.
1 point
-
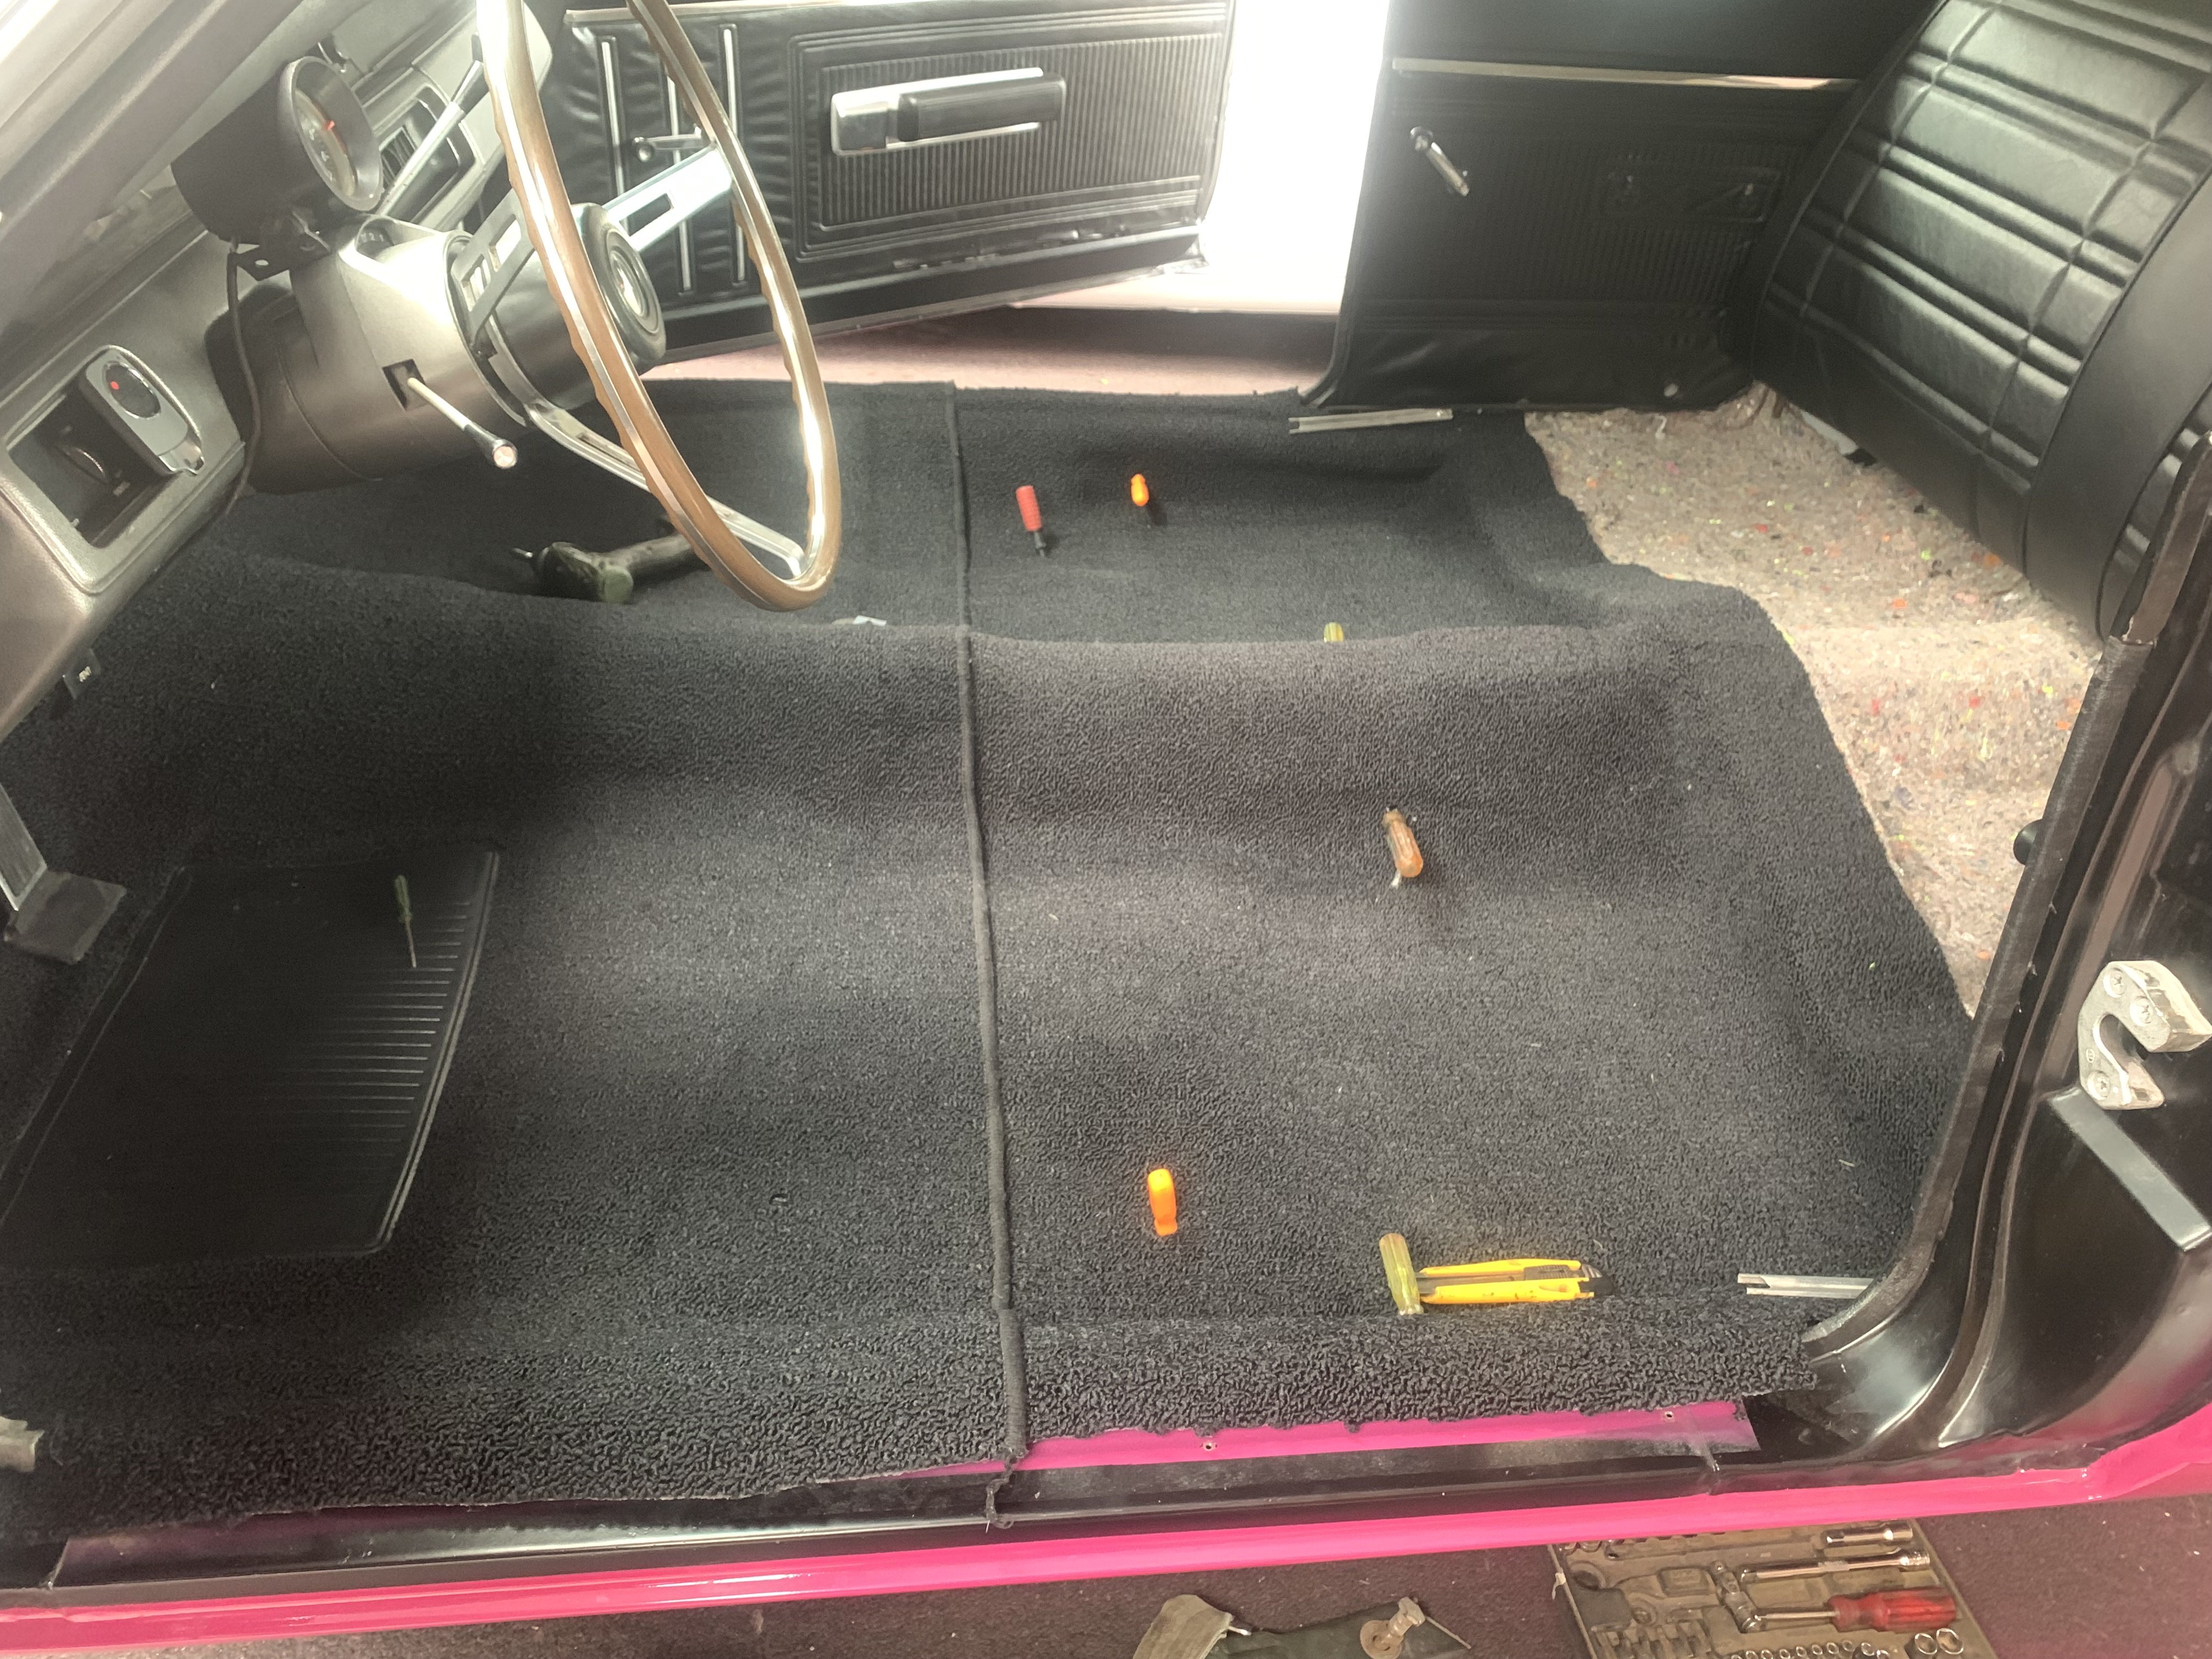
Done a few more miles, got Automan to have a look at my kickdown cause it wasn't shifting into top until 2300. He said i was on the right track but should change my bracket so it pulls more true. Did so, did some adjusting and its much better but not mint.. ideally need to get the timing and carb bang on before nailing the trans. It was greasy out so I tried to do a bit of a stall skid, big rev then it started running like a shitty 6 cylinder and barely idled..fine when cruising though. Convinced it was a vac leak i tried all sorts but couldn't find anything, so pulled plugs to check, all 8 good, installed the set of new plugs i had already at the same time. Tried a few things, noticed a choke linkage had over-centred but wasn't until i pulled the dizzy out and re-set the points gap that it improved.. odd cause it wasn't noticeably out. Also took carb apart and cleaned, so much shit in the bowls! Now its going well again, but found it locking up the front brakes real easy last time i drove it. Backed off the hottest rear drum and shortened the M/C push rod a touch, will test drive shortly. I grabbed some generic steel-rimmed weather strip and installed between outer of door skin and glass all round to mimic factory. Didn't want to spend the big $ on direct fit X USA. Now the glass doesn't rattle or risk scratches from old clips. My carpet set showed in Auckland so i shot out and grabbed a roll of underfelt before it arrived on tuesday. Turns out the bloody carpet already has some attached! Started install last nite, all finished this morning.
1 point
-
Ended up cutting the weld and at the flange Couple of cuts and ugly tacks It's super close but clears stuff1 point
-
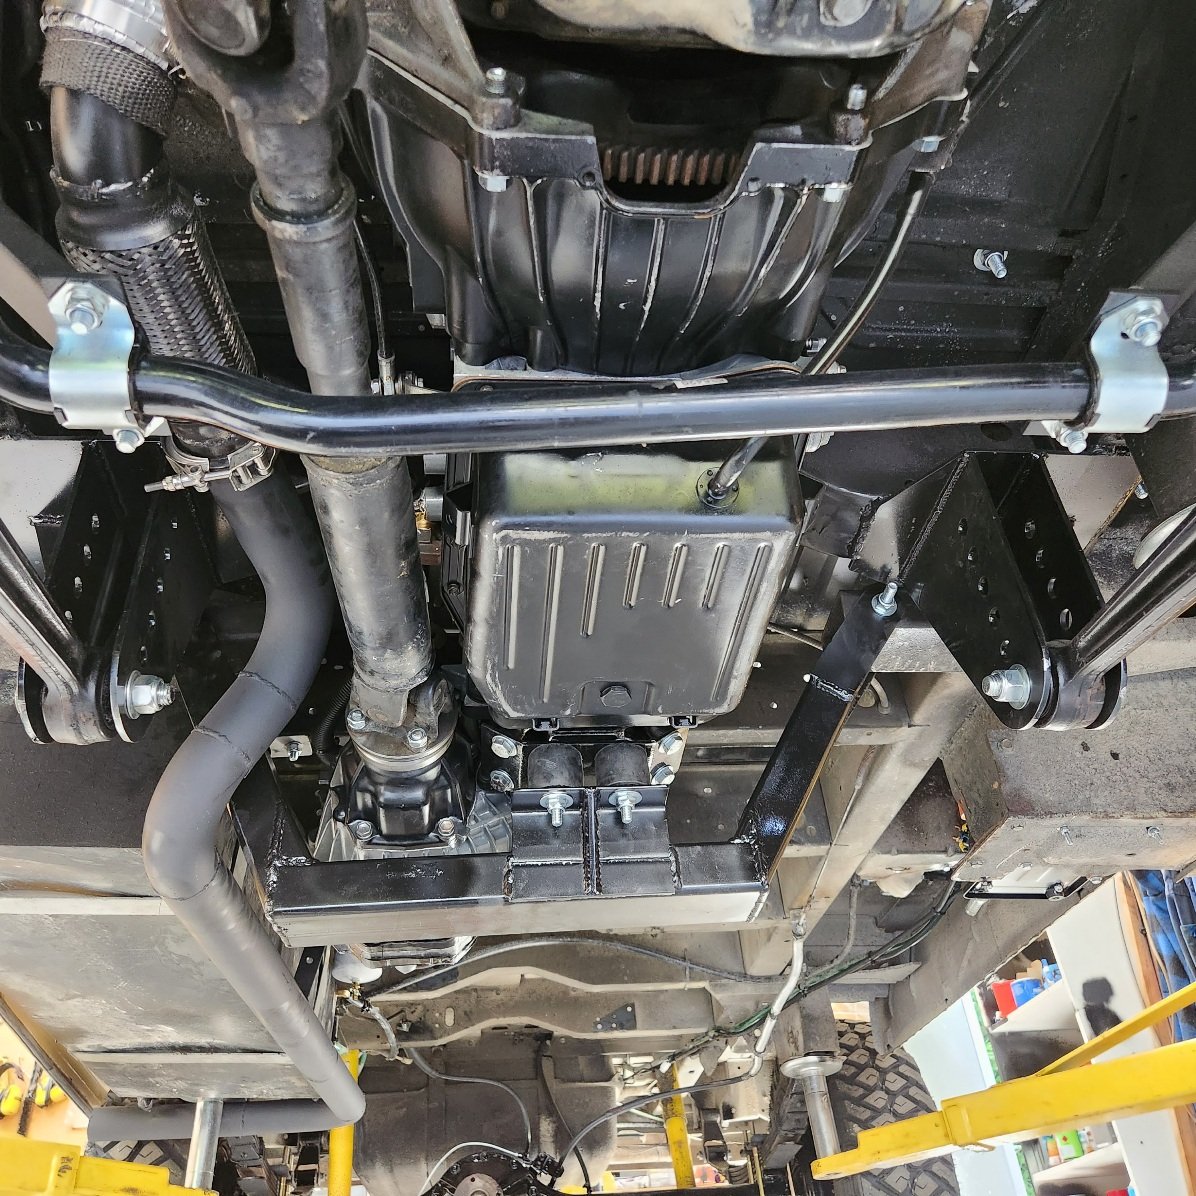
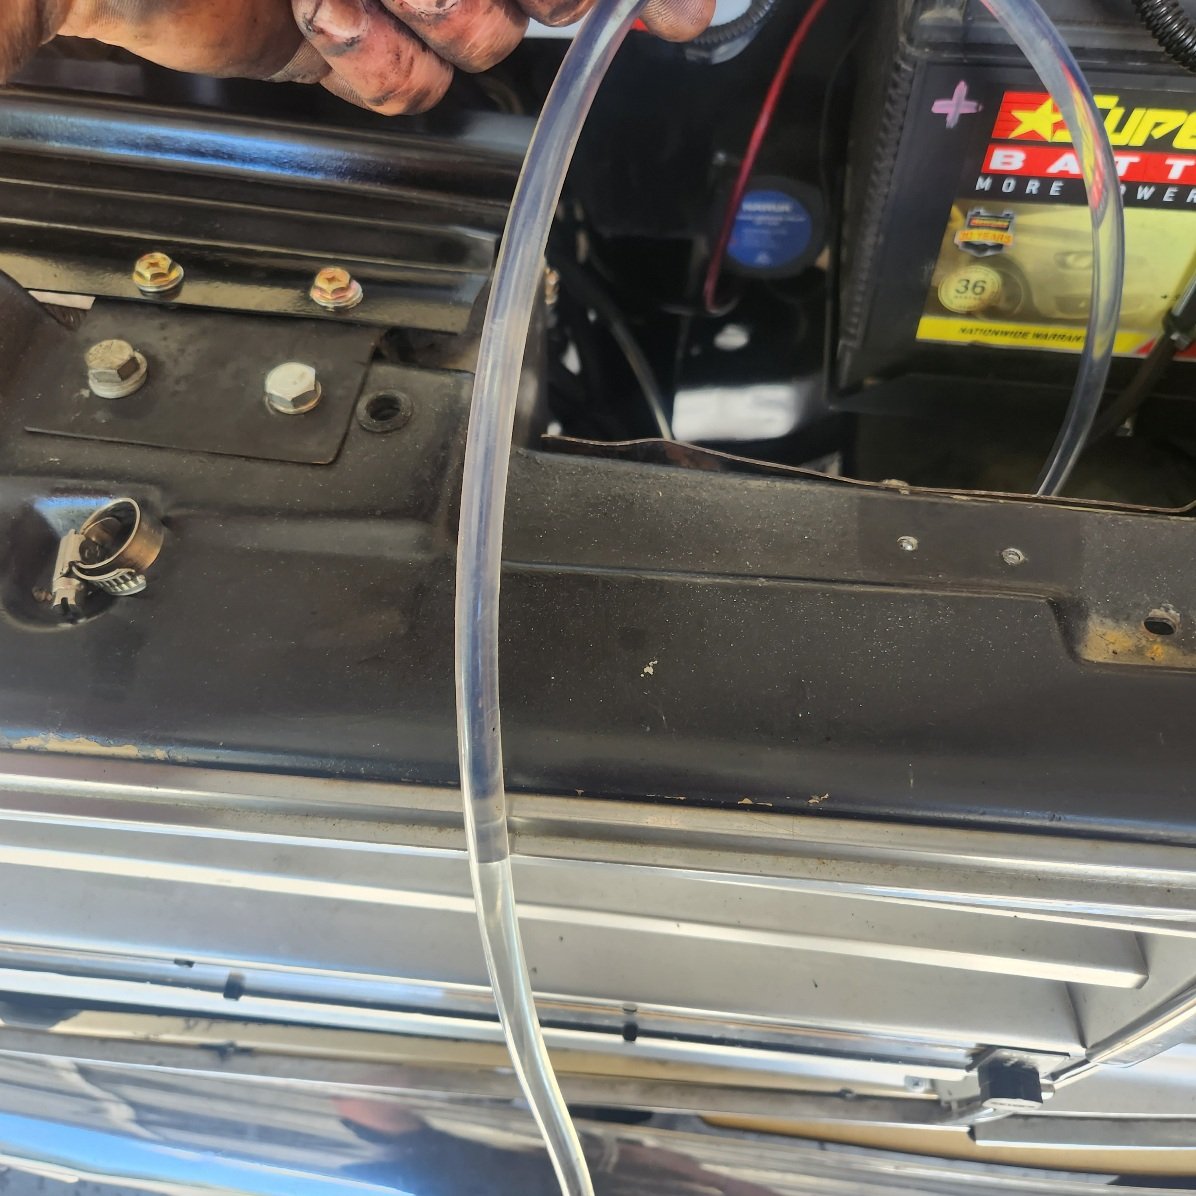
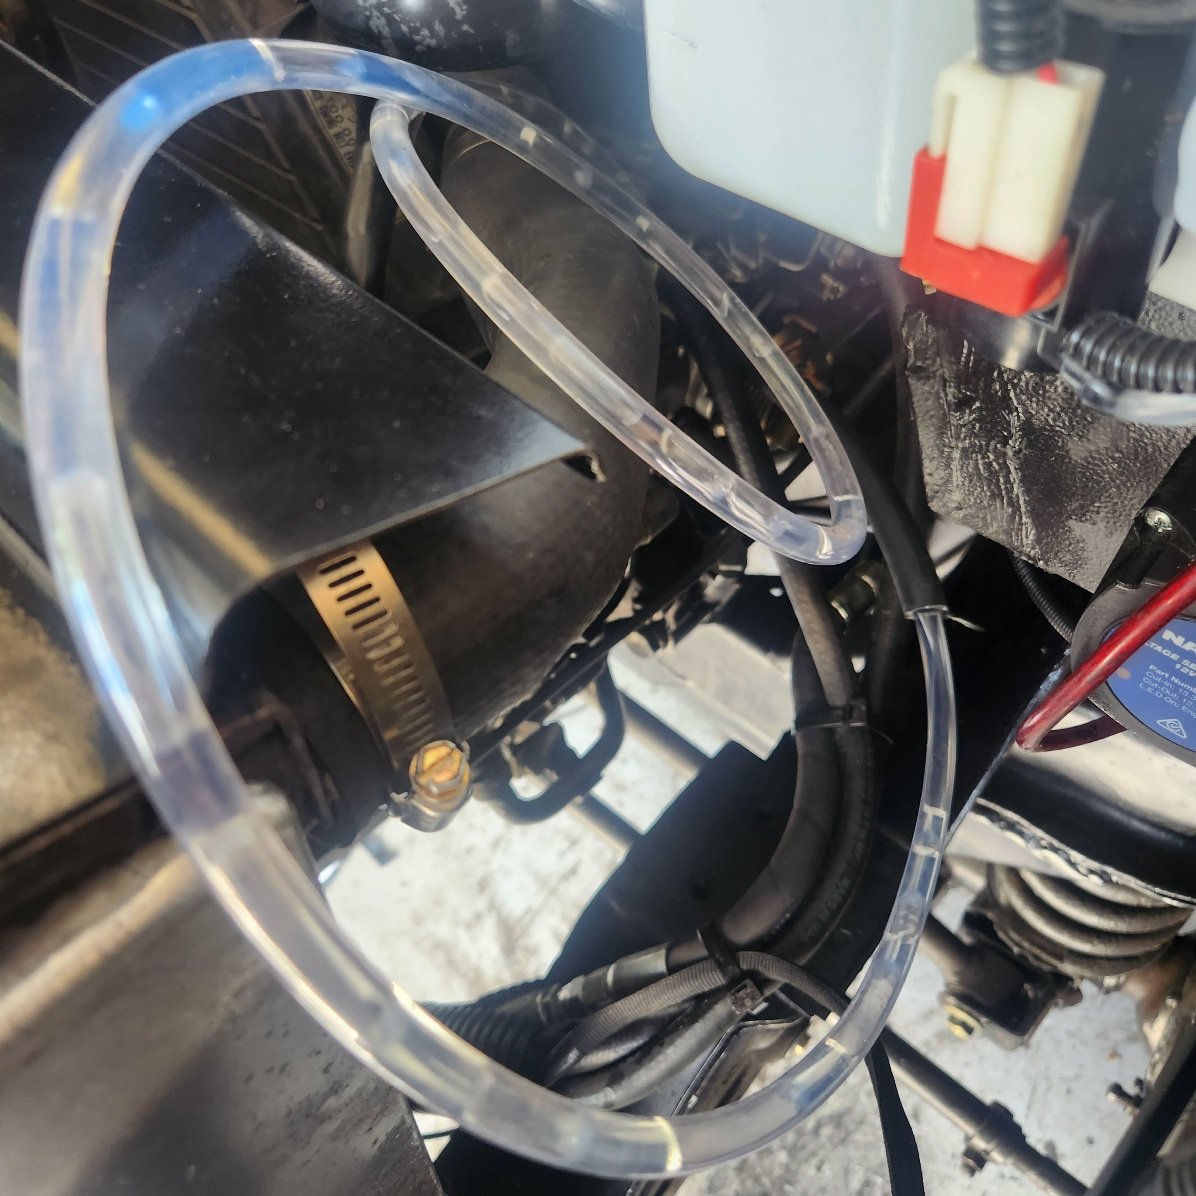
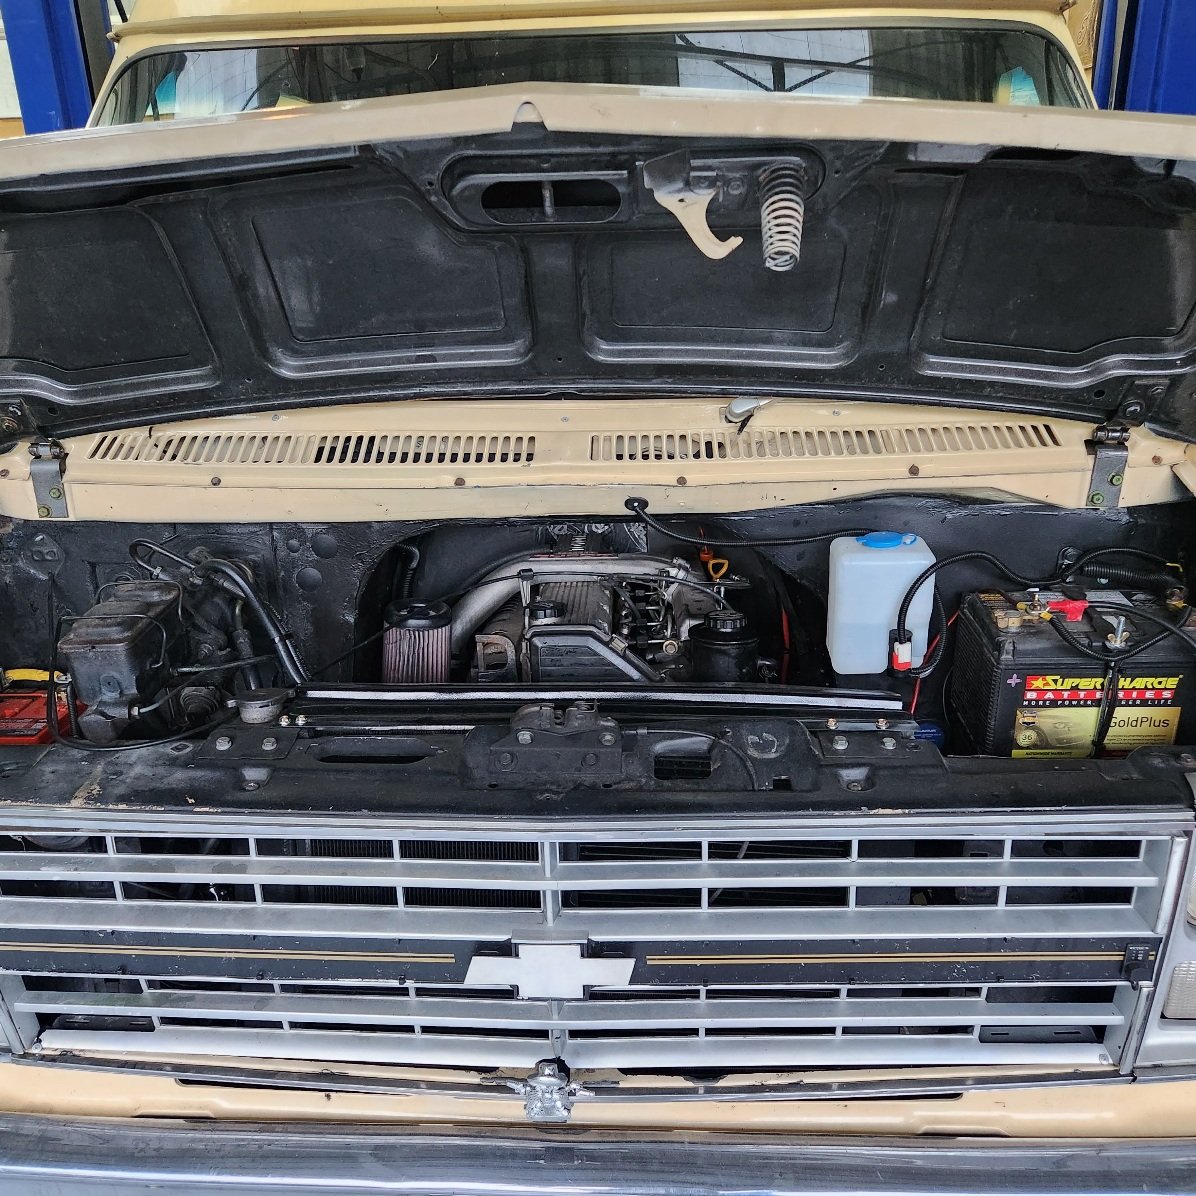
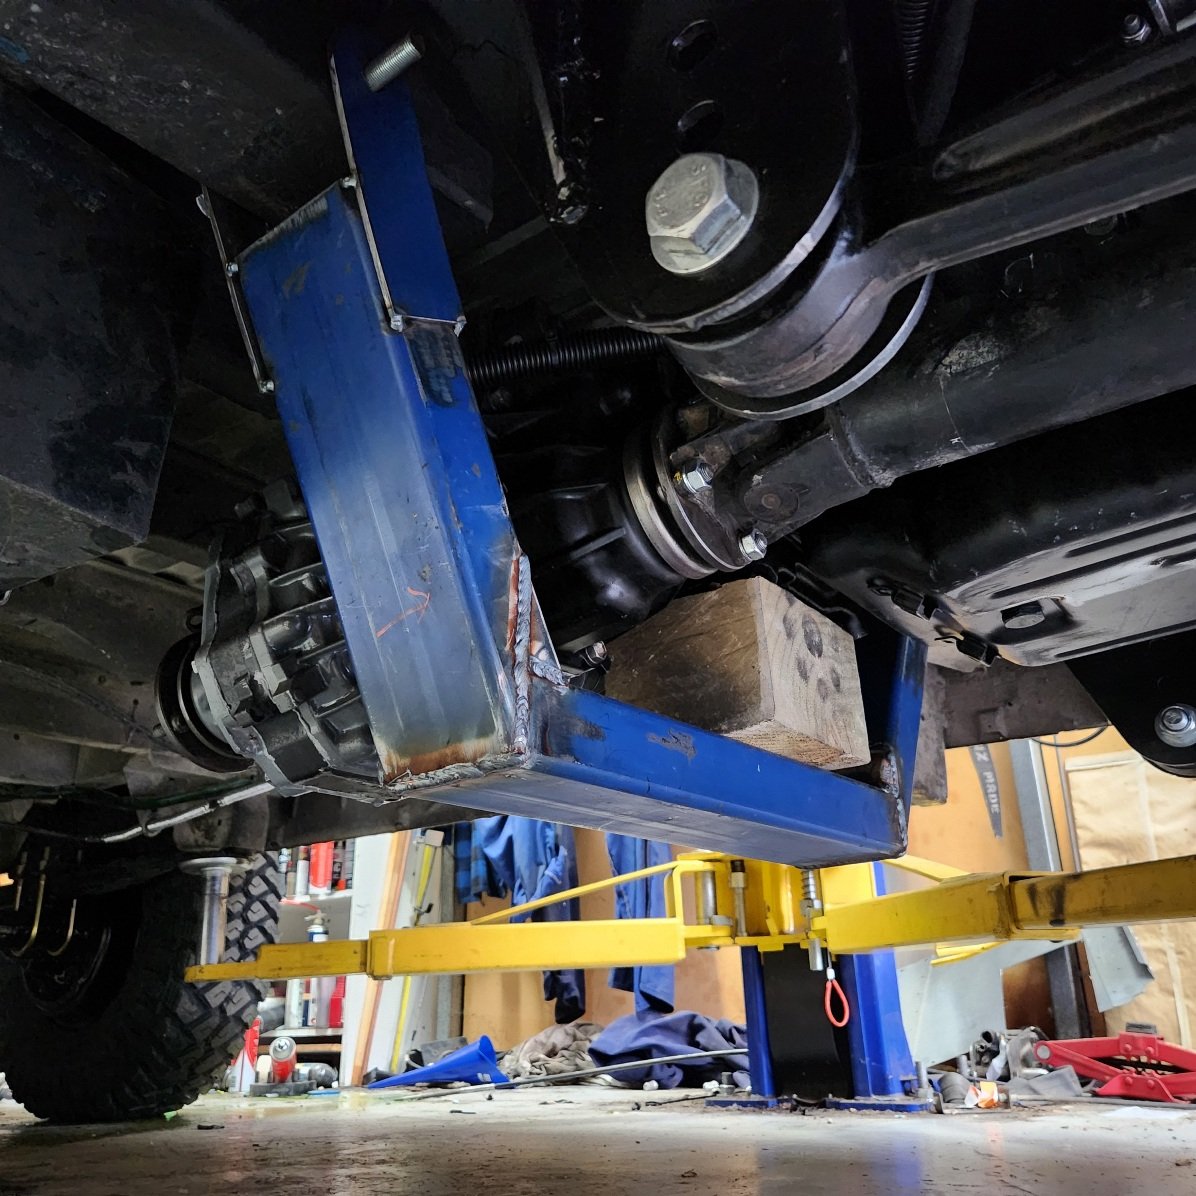
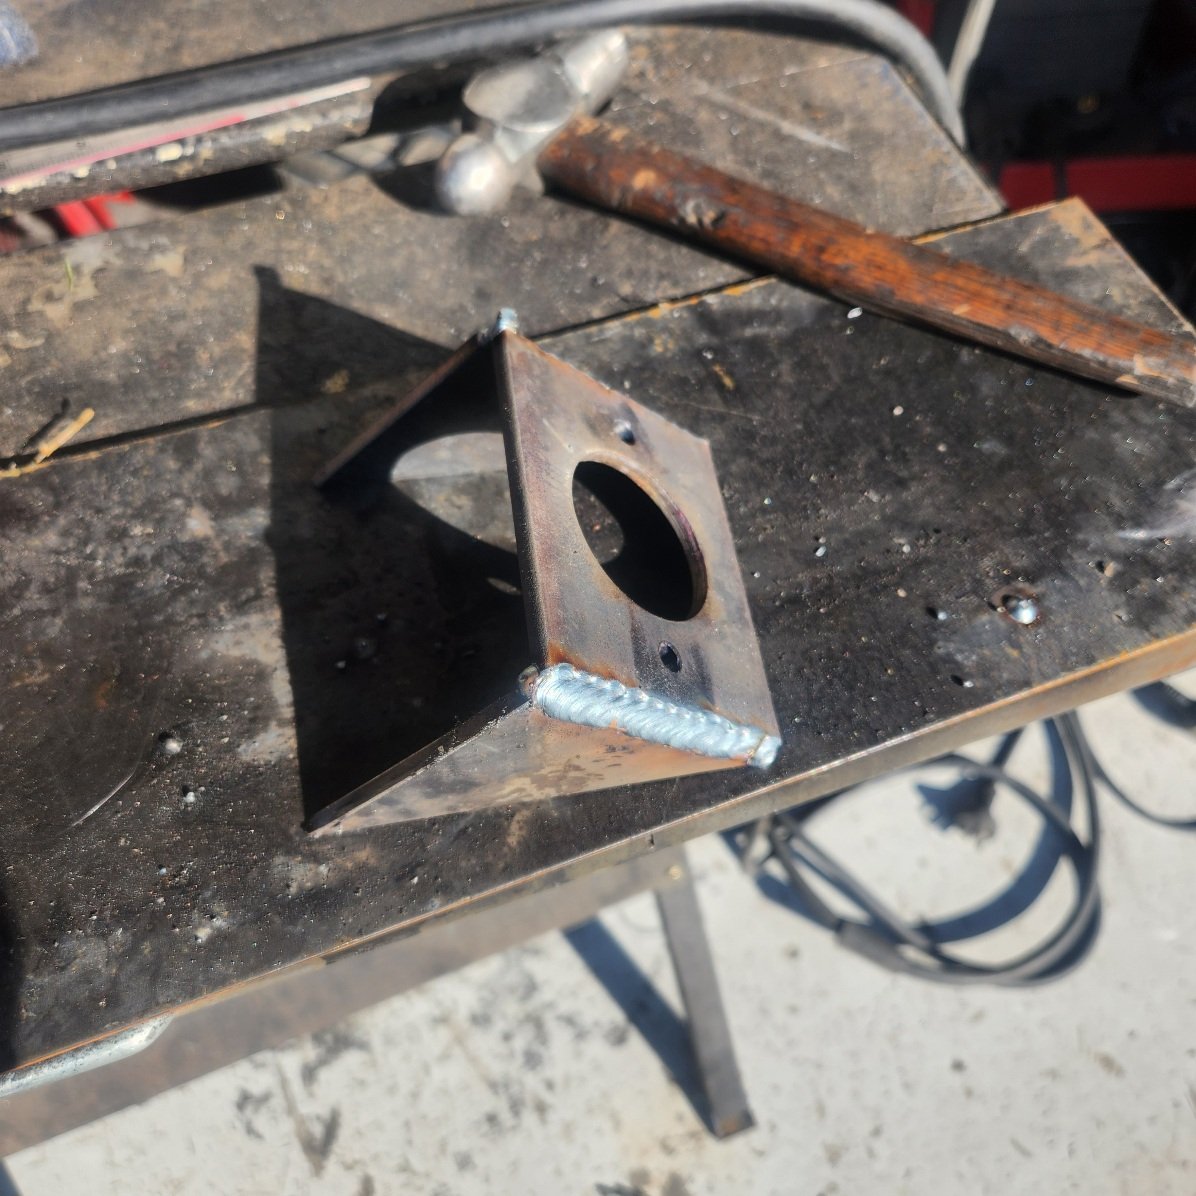
Few more odds and sods this week, the starting issue ended up being a fuel / air leak, these don't run lift pumps so lines are normally in vacuum. I stole an idea from some clever sausage and used clear tube to watch fuel flow Before ; After ( sans bubble ) : I got the trans crossmember done, ordered 2 mounts, neither showed So I just used a couple of big bobbin mounts for now It hangs below the transfer case and seems to work good Also got sway bar mounts made, they are on chunks of 50x25 and pivot point is level with radius arms mounts so hopefully it doesn't move forward and back enough to snap them, I cycled it a few times and it seems ok So here she is, just waiting on back driveshaft which should be here tomorrow avo, I might still get away in it on weekend if I can get some miles on it Thursday / Friday Close to concept I think
1 point
-
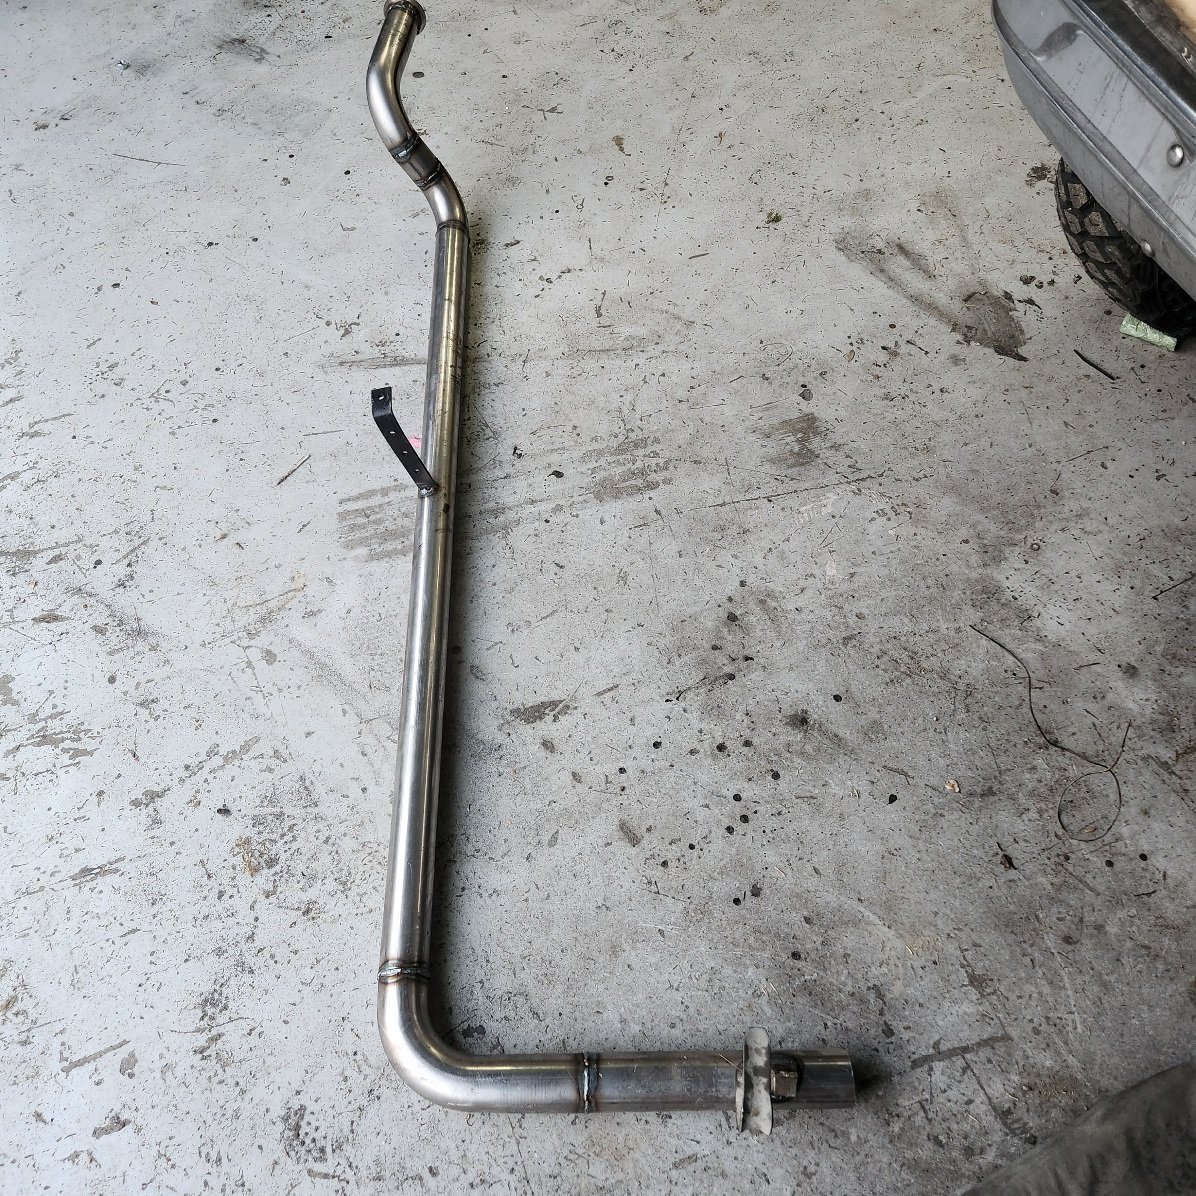
Well she runs, it needs a shot of ether to fire for some reason, I think either fuel is bleeding back and I'm losing prime and it needs a lift pump or theres a big hole in vacuum system maybe ? I also need to read up on how auto choke works. Glow plugs seem to be working fine It runs fine once it's fired and restarts like it should. I got the front shaft in and went for a circle round the lawn, happy days My relay box for 4wd didn't work straight away so I packed a shit and tore it out, and have just put a momentary rocker switch putting power straight onto the transfer case actuator for now, I'm sure thisll screw the motor long term but it works. I got a basic exhaust built, it's not loud with no muffler so will.try it and see, I didn't have enough bends to get over the diff and also couldn't be bothered so out the side she goes I also made a new trans crossmember,.Ive left the mounts mocked up for now until the new rubber centre mount shows,. hopefully Monday Also got most of interior back in and engine bay tidied up it just needs rear driveshaft and gearbox crossmember finishing now.
1 point
-
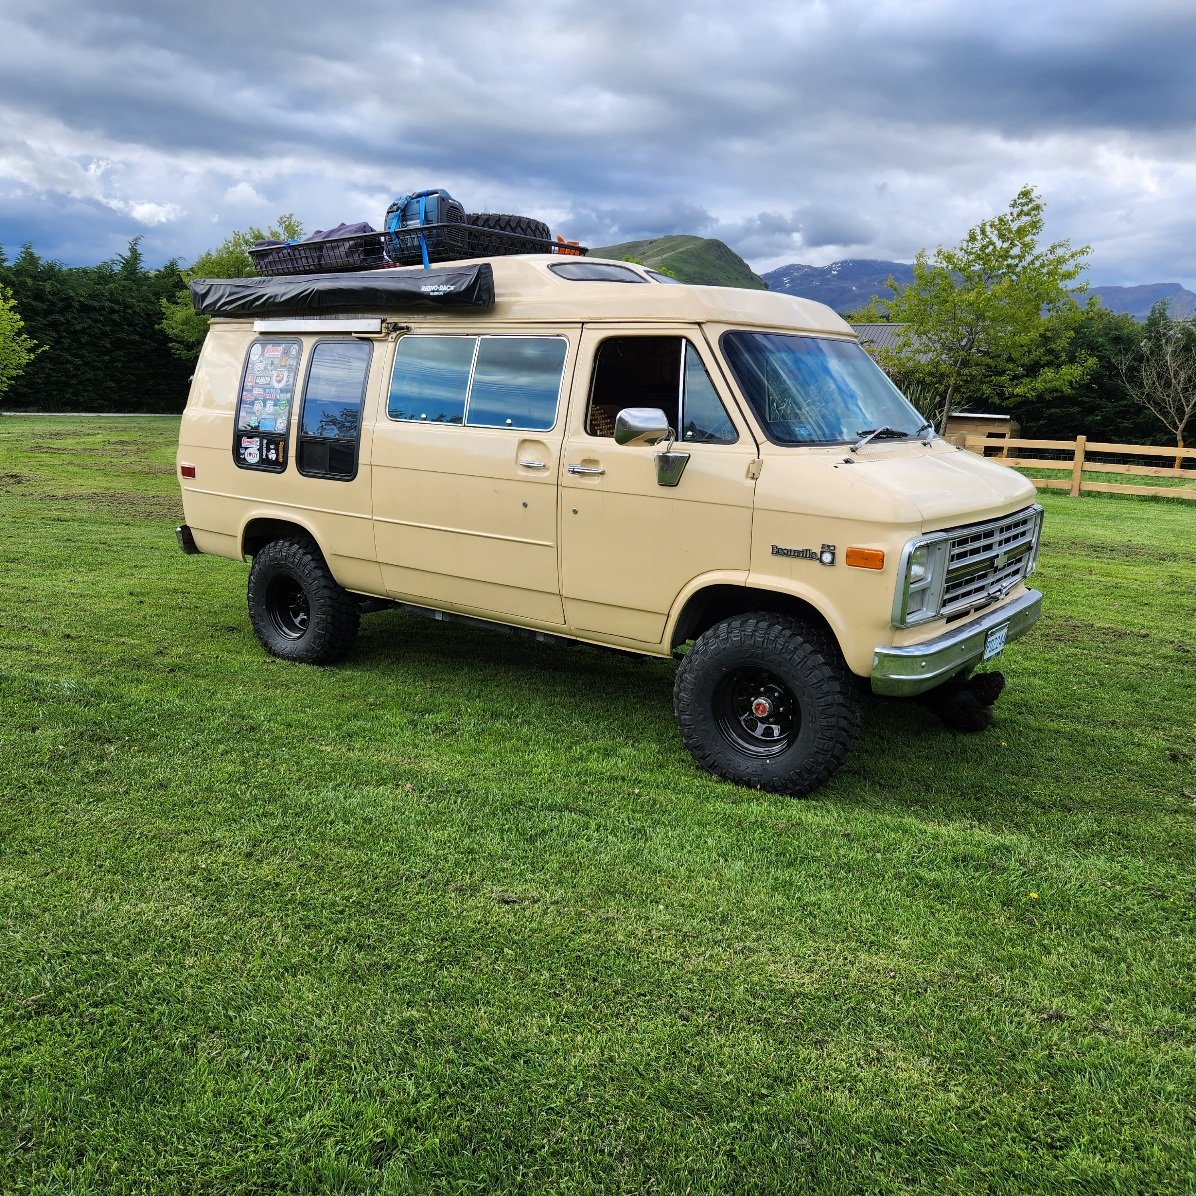
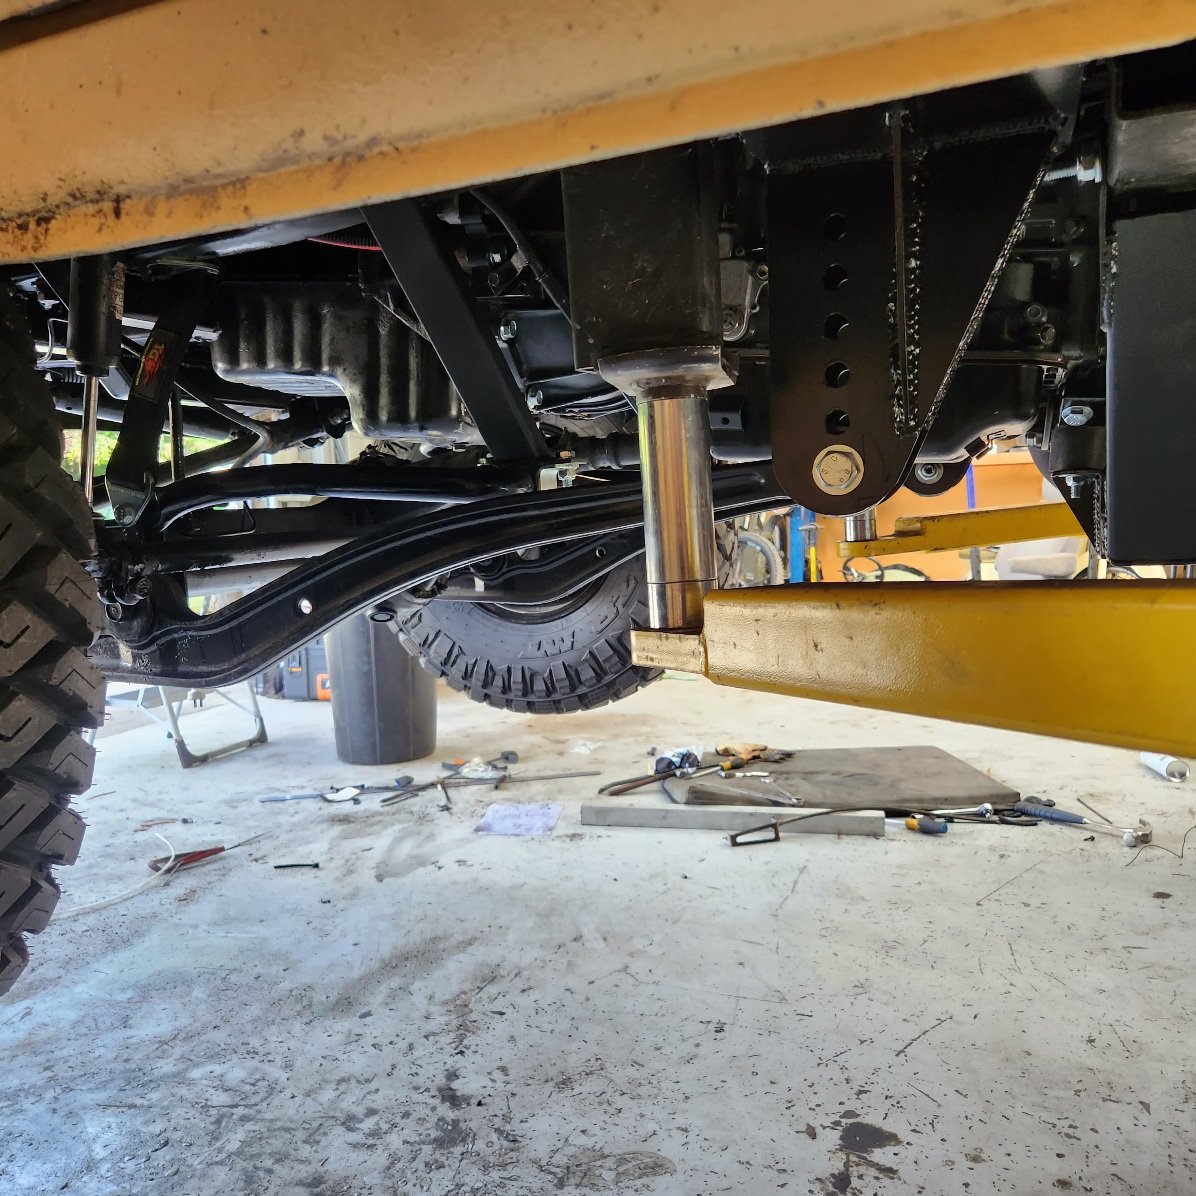
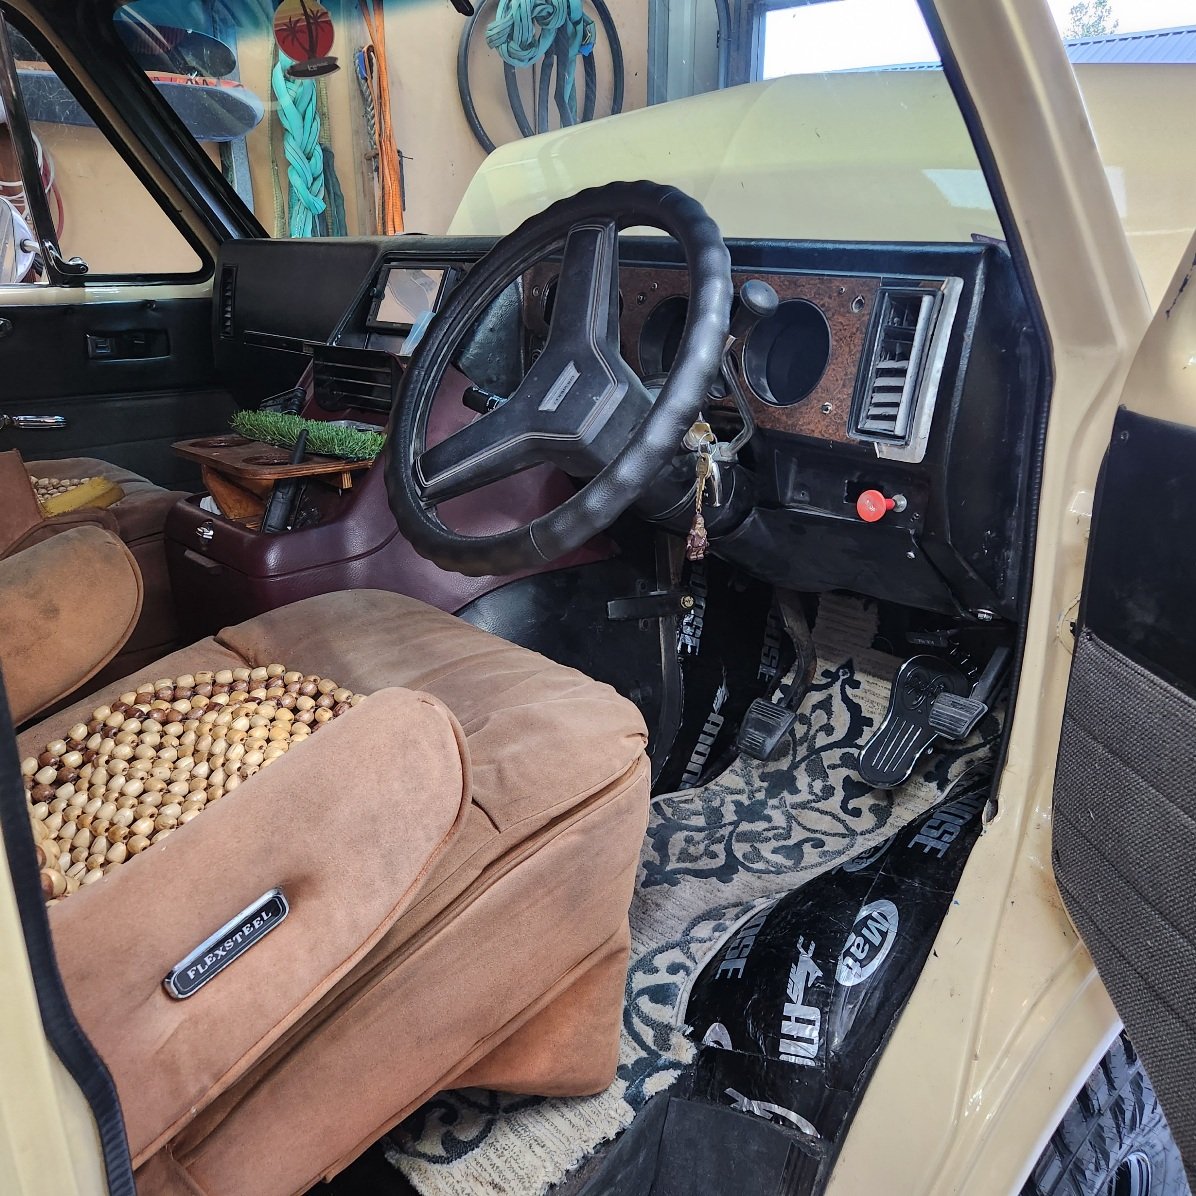
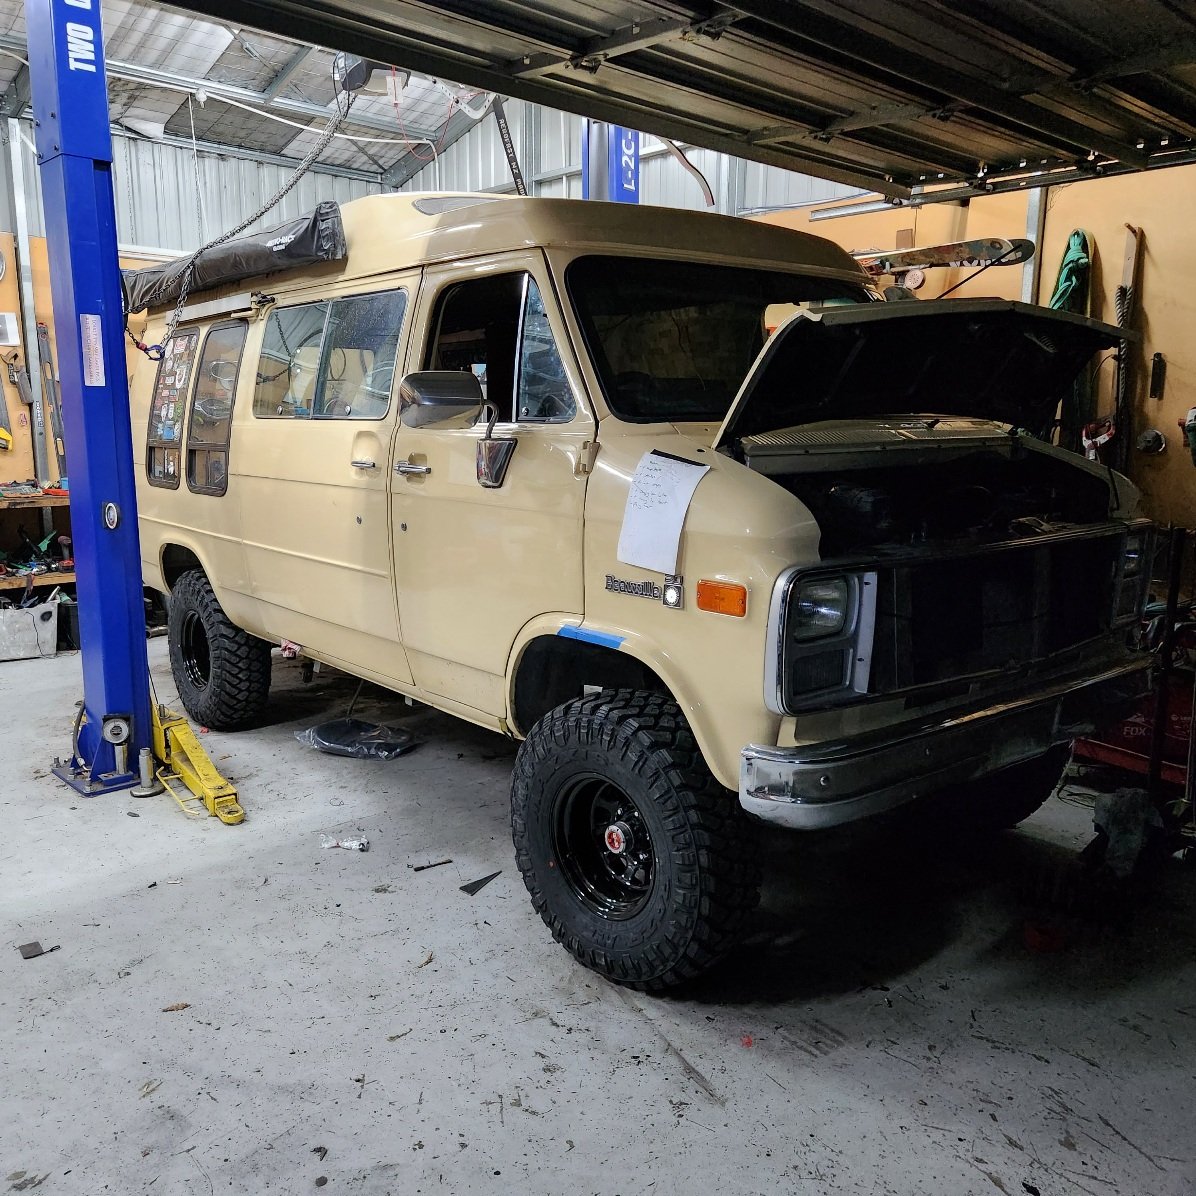
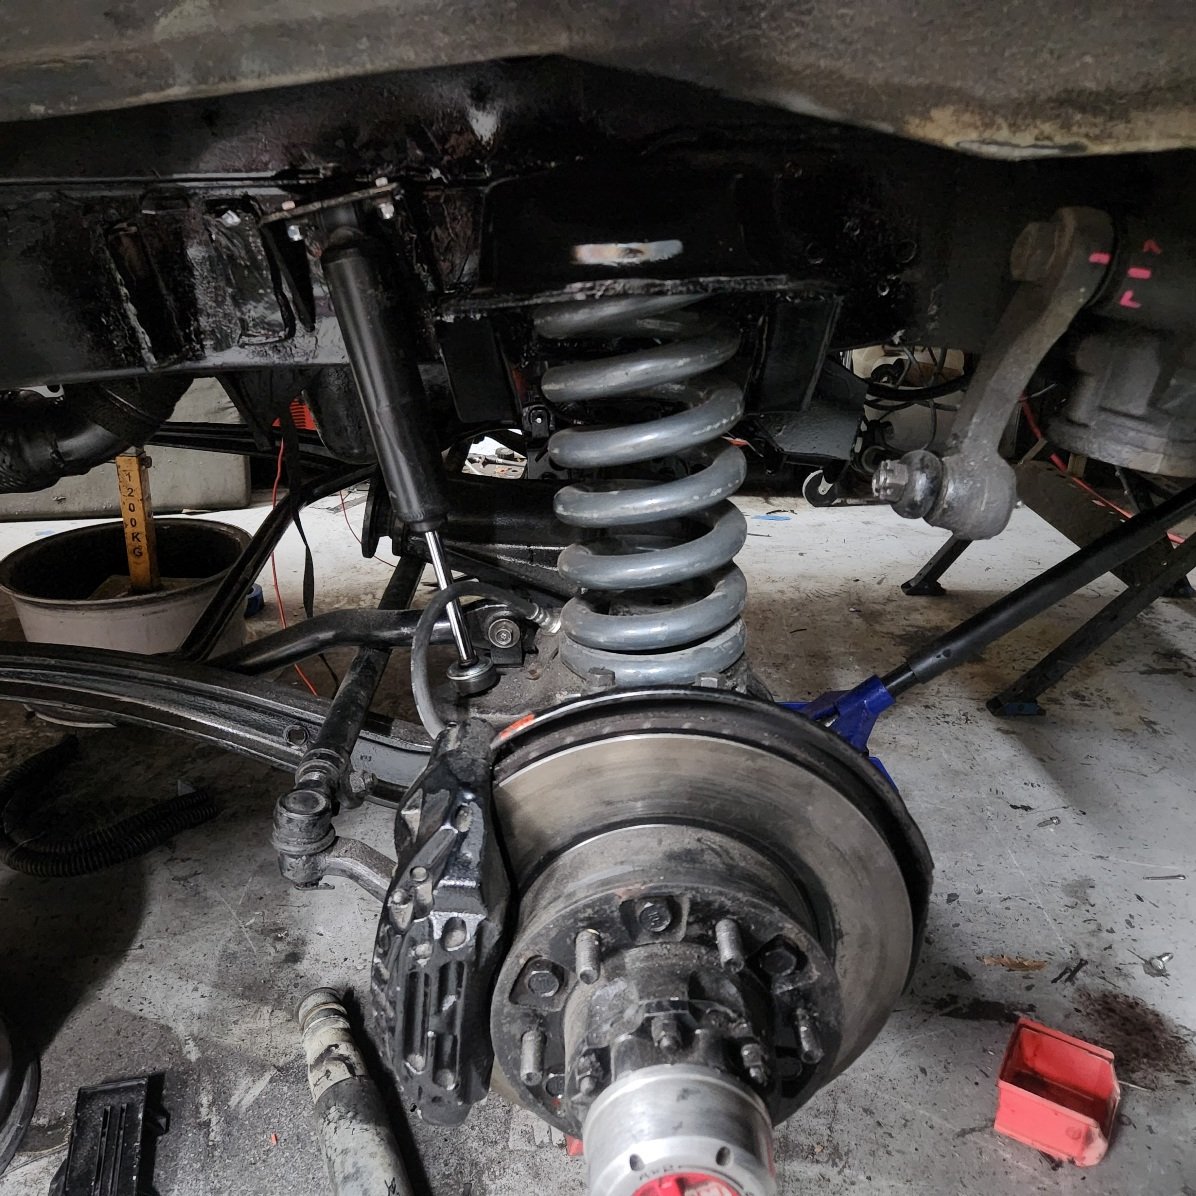
Bit more progress last few days, I got the dash back together, the instrument panel cover bit is pretty fucked, I might try and make a new one or try find one on eBay. But the new cluster work good and mounted ok I made up the front shock mounts, shocks are some ones I had, Google says Hilux, Torana and a few others so will see how they go for dampening. I think I'll use limiting straps aswell for top out, it'll be a heap of weight on the shock shaft otherwise I also farted around with springs. I got a set of cruiser ones but they are way too big so I chucked in some g30 ones I had, I know they ride good and have lifted it another couple of inches which it needed. Im stoked as fuck on how it looks, big feet and stock body. I live in a town infested with late model Japanese 4wd utes covered in every accessory know to man, this brick will stand out.
1 point
-
bought some carpet and put it on the box. then i put it in the car. fuck me, the hype over this sub is all fucking real. what a fucking unit! 2021-04-12_08-00-53 by sheepers, on Flickr 2021-04-12_08-01-00 by sheepers, on Flickr1 point
-
ive had this Boston 12.5LF sitting around for a while so i decided to make a sub box for it. i had to make it a weird shape so i could get it right at the back and still close the tailgate. 18mm MDF with bitumous tape (basically the same as sound deadner) over the joints on the inside. ill cover it in either carpet or maybe some stretchy vinyl then its done. i need to make some sort of way of holding it down in the right place but also i need to be able to move it out of the way if im putting something large in the back. ill think of something. 2021-04-11_03-23-51 by sheepers, on Flickr 2021-04-11_03-23-44 by sheepers, on Flickr 2021-04-11_03-23-36 by sheepers, on Flickr 2021-04-11_03-23-29 by sheepers, on Flickr1 point
-
the dash is coming along but i thought i should see if it works before i get to much further down the track. temp wired it and it works. now i have to learn a bunch about customising which data gets sent to the dash and also how to drive the dash customisation software. 2021-01-14_08-13-50 by sheepers, on Flickr1 point
-
heres the pics that i couldnt post yesterday. 2020-06-22_07-55-31 by sheepers, on Flickr 2020-06-22_07-55-58 by sheepers, on Flickr 2020-06-22_07-56-05 by sheepers, on Flickr 2020-06-22_07-56-12 by sheepers, on Flickr 2020-06-22_07-56-22 by sheepers, on Flickr1 point
-
did another 300Ks in it today, got in a mild traffic situation/has to slow down a bit on the motorway and it was fine but TBH it was not stopped traffic. i do feel like its getting better though. weird looking picture of car contains bonus steam trains. 2020-06-01_03-30-37 by sheepers, on Flickr1 point
-
i decided i needed to get the cold air intake sorted because intake temps at the moment are a bit shit. so i bought a generic pod filter with a view to it being replaced every 6 months or so depending on how much i use the car. i got a K&N one because they are fairly standard and easy to get others. the plan is to run the filter outside the engine compartment in front of the front wheel. i had a setup like this in the blue car for quite a while and it seemed to work fine, i trialed it with rain and heaps of water and never had any drama. there will be a rain shield between the tyre and the filter which ill probably tackle tomorrow so i started making a pipe. 2020-03-11_06-56-28 by sheepers, on Flickr 2020-03-11_06-56-35 by sheepers, on Flickr 2020-03-11_06-56-19 by sheepers, on Flickr 2020-03-11_06-55-54 by sheepers, on Flickr then i needed a pipe for the cam cover vent to go into the intake. i didnt have any alloy pipe in the right size so i decided to make some. i also cut the inlet temp sensor mount out of the old intake pipe and welded that in. 2020-03-11_06-56-11 by sheepers, on Flickr 2020-03-11_06-56-00 by sheepers, on Flickr 2020-03-11_06-55-47 by sheepers, on Flickr 2020-03-11_06-55-40 by sheepers, on Flickr1 point
-
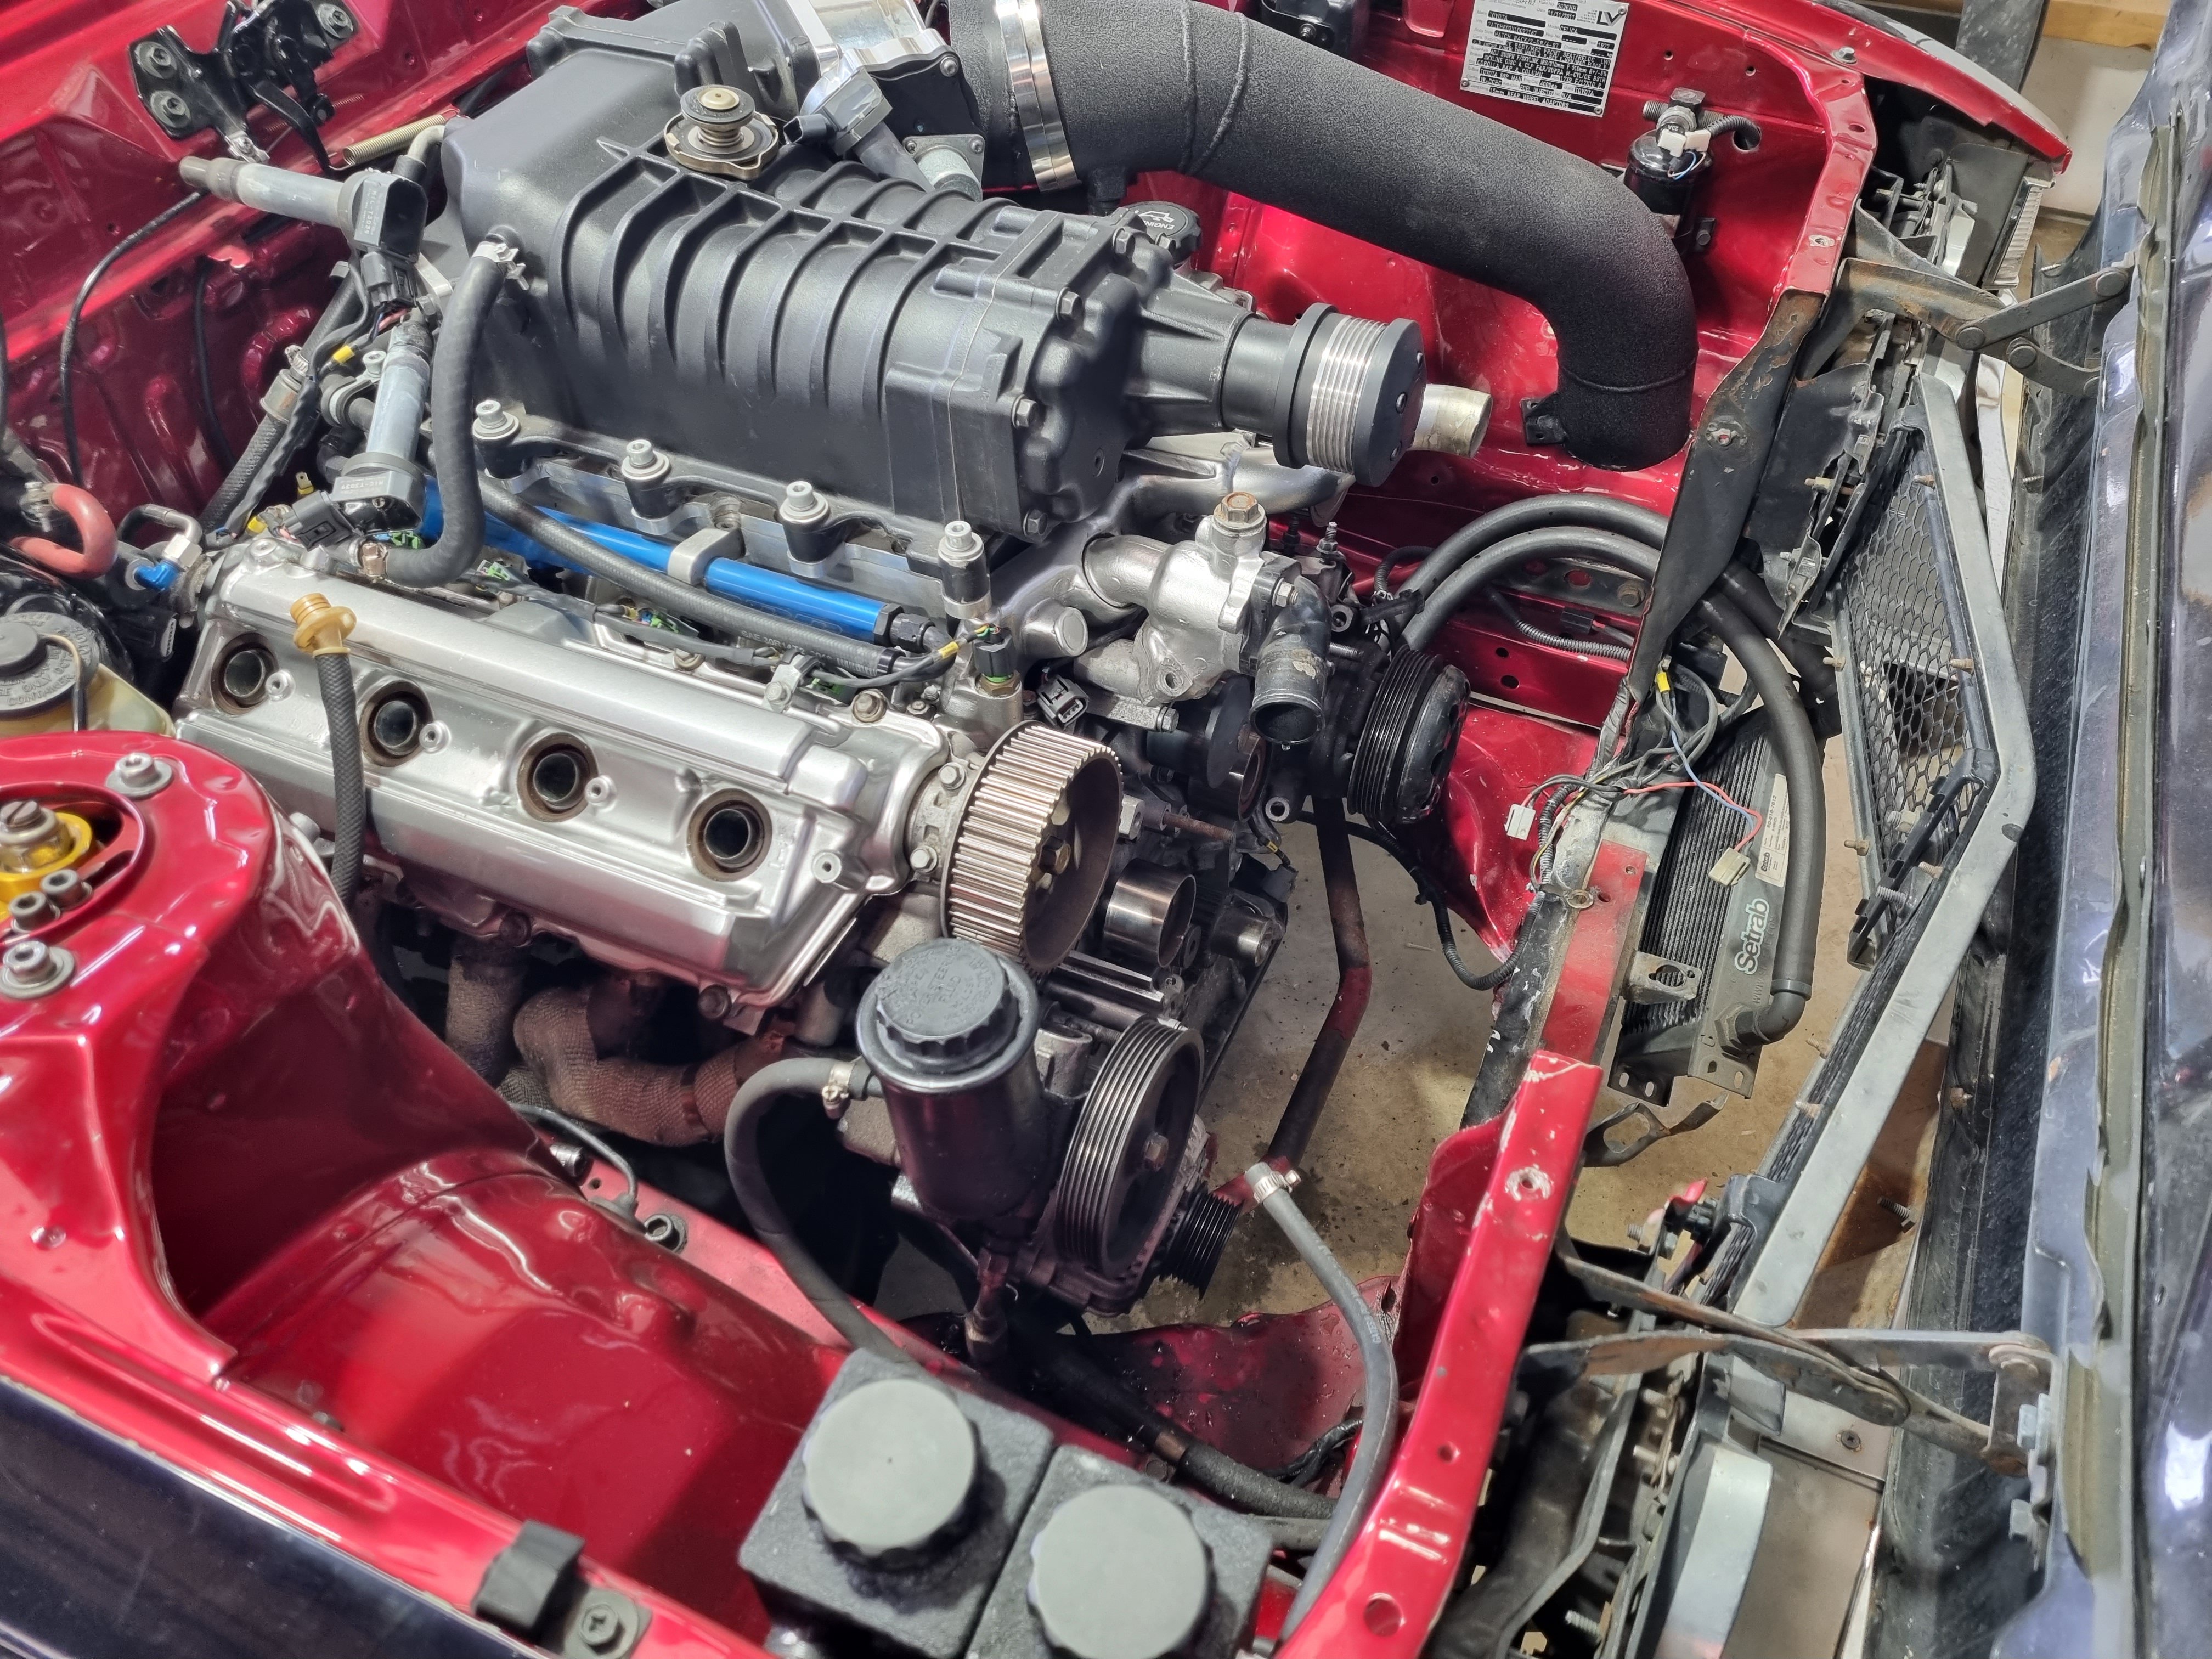
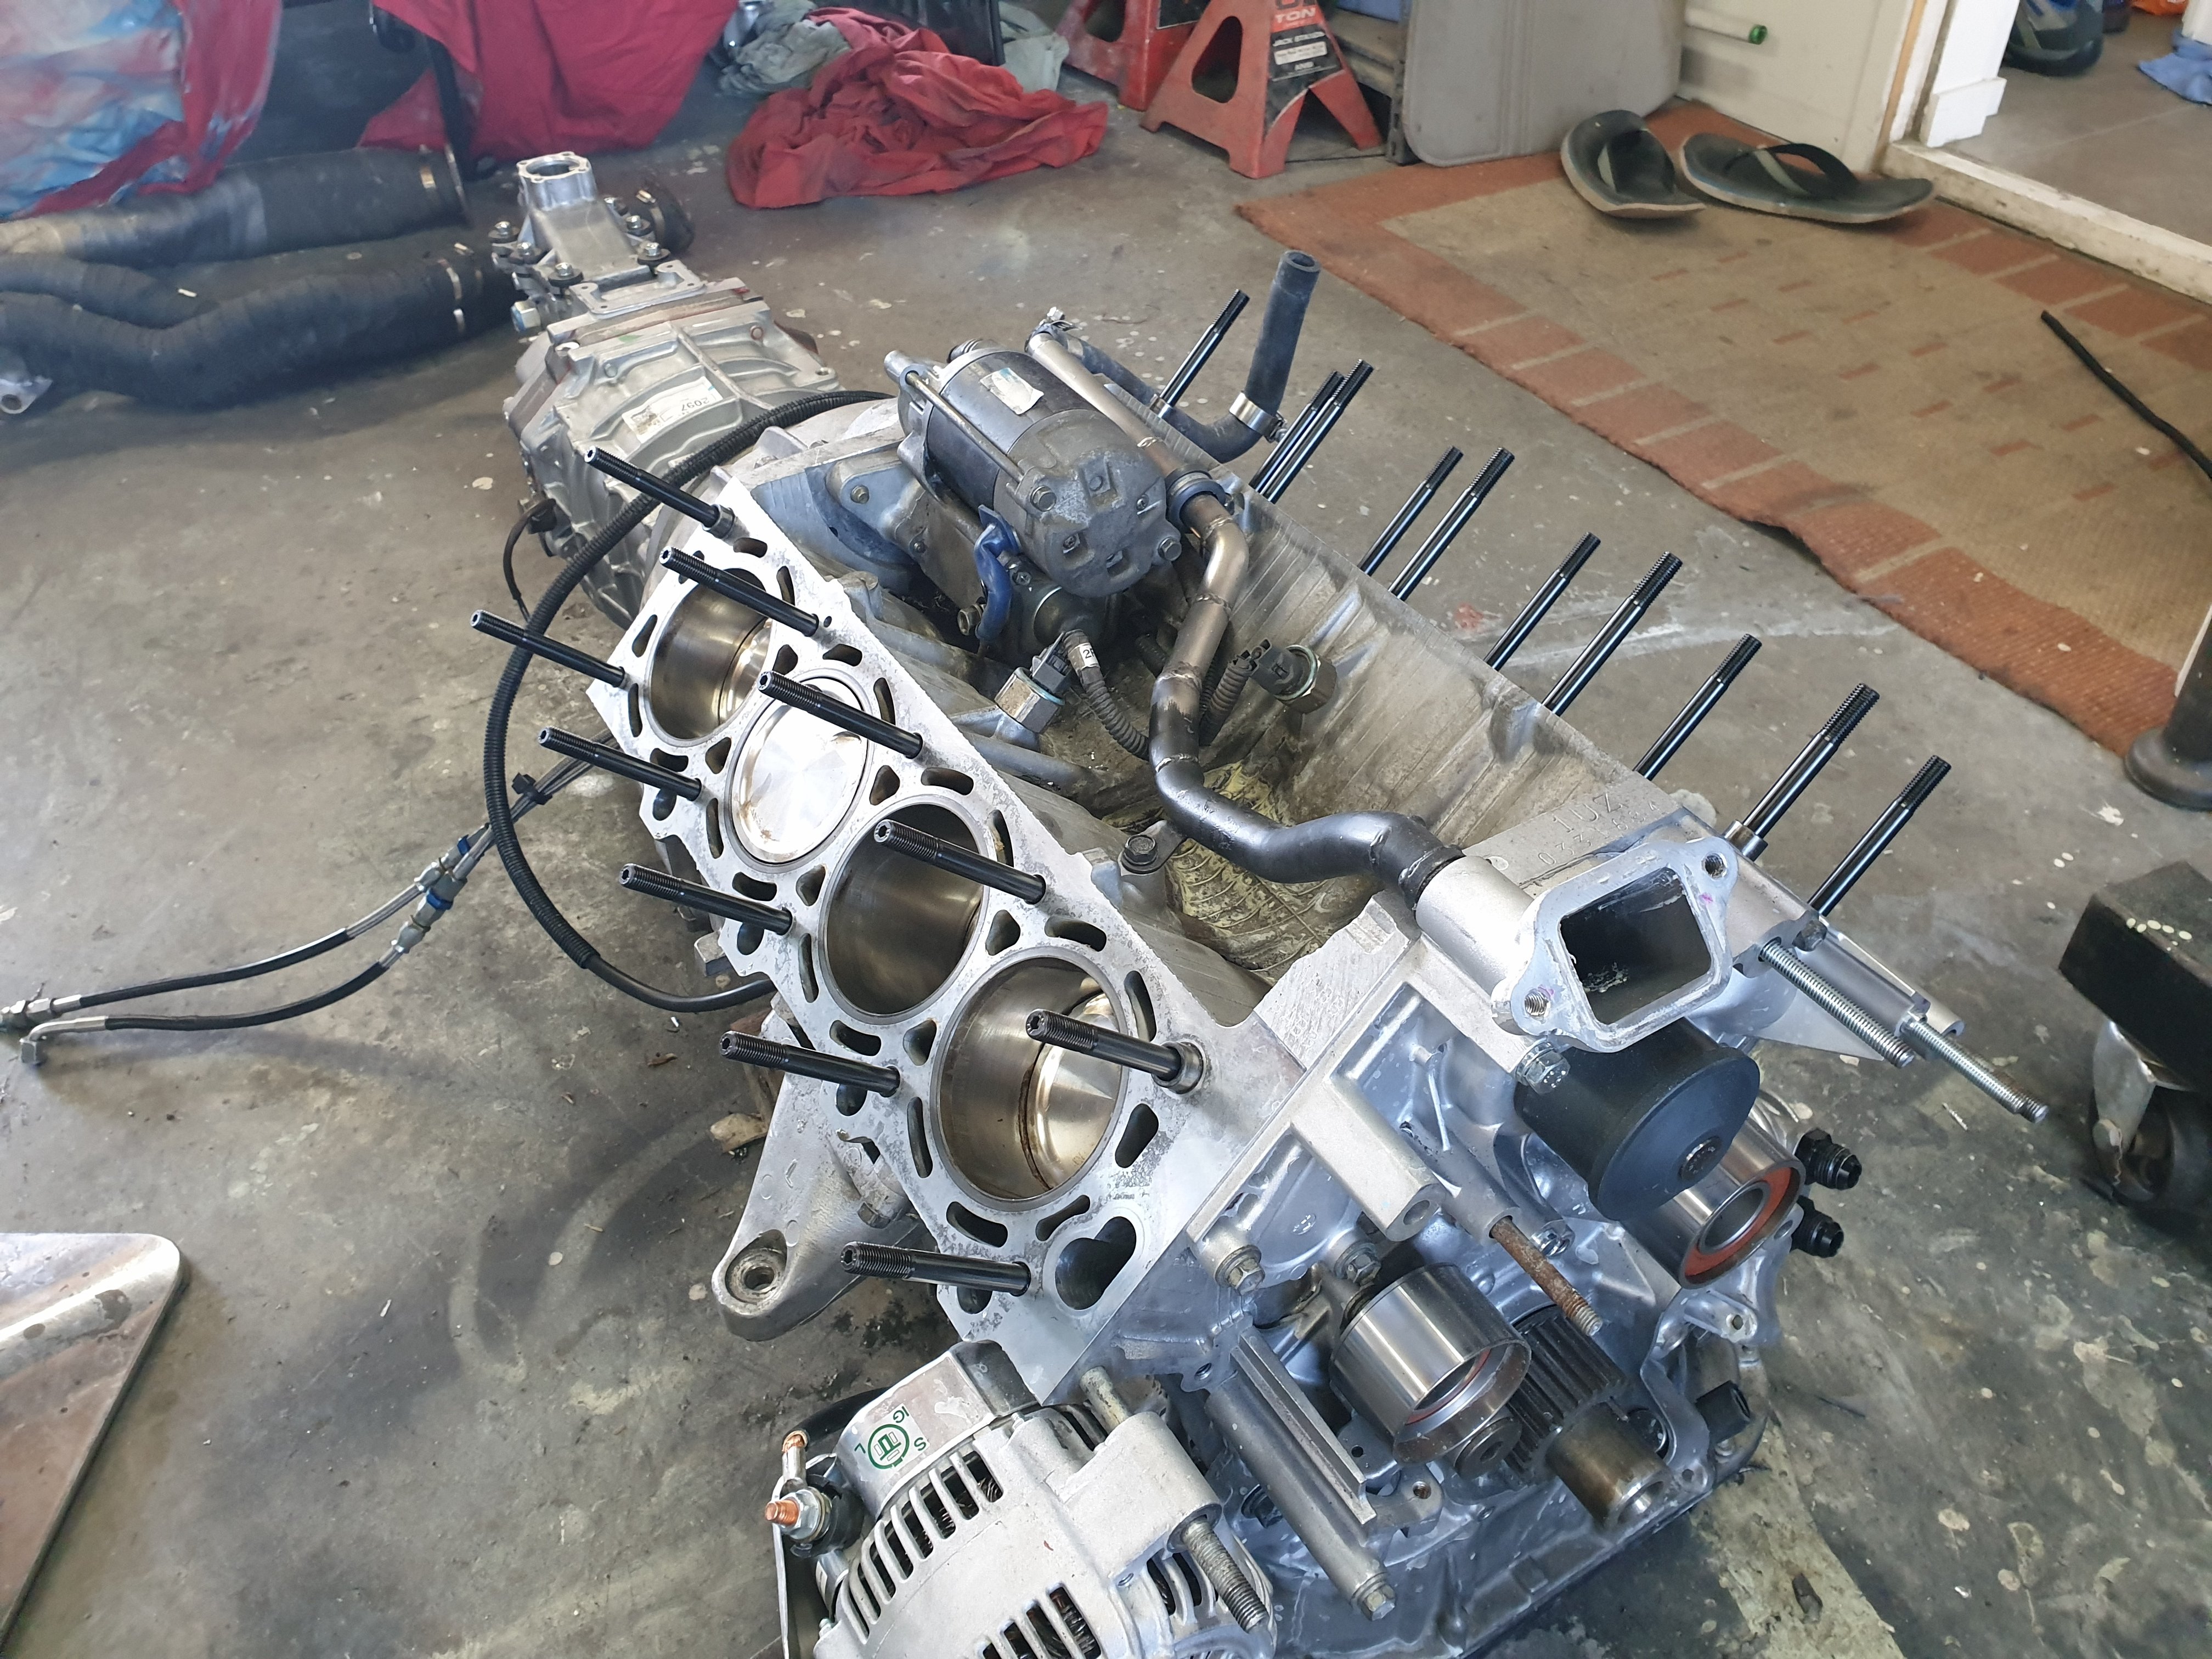
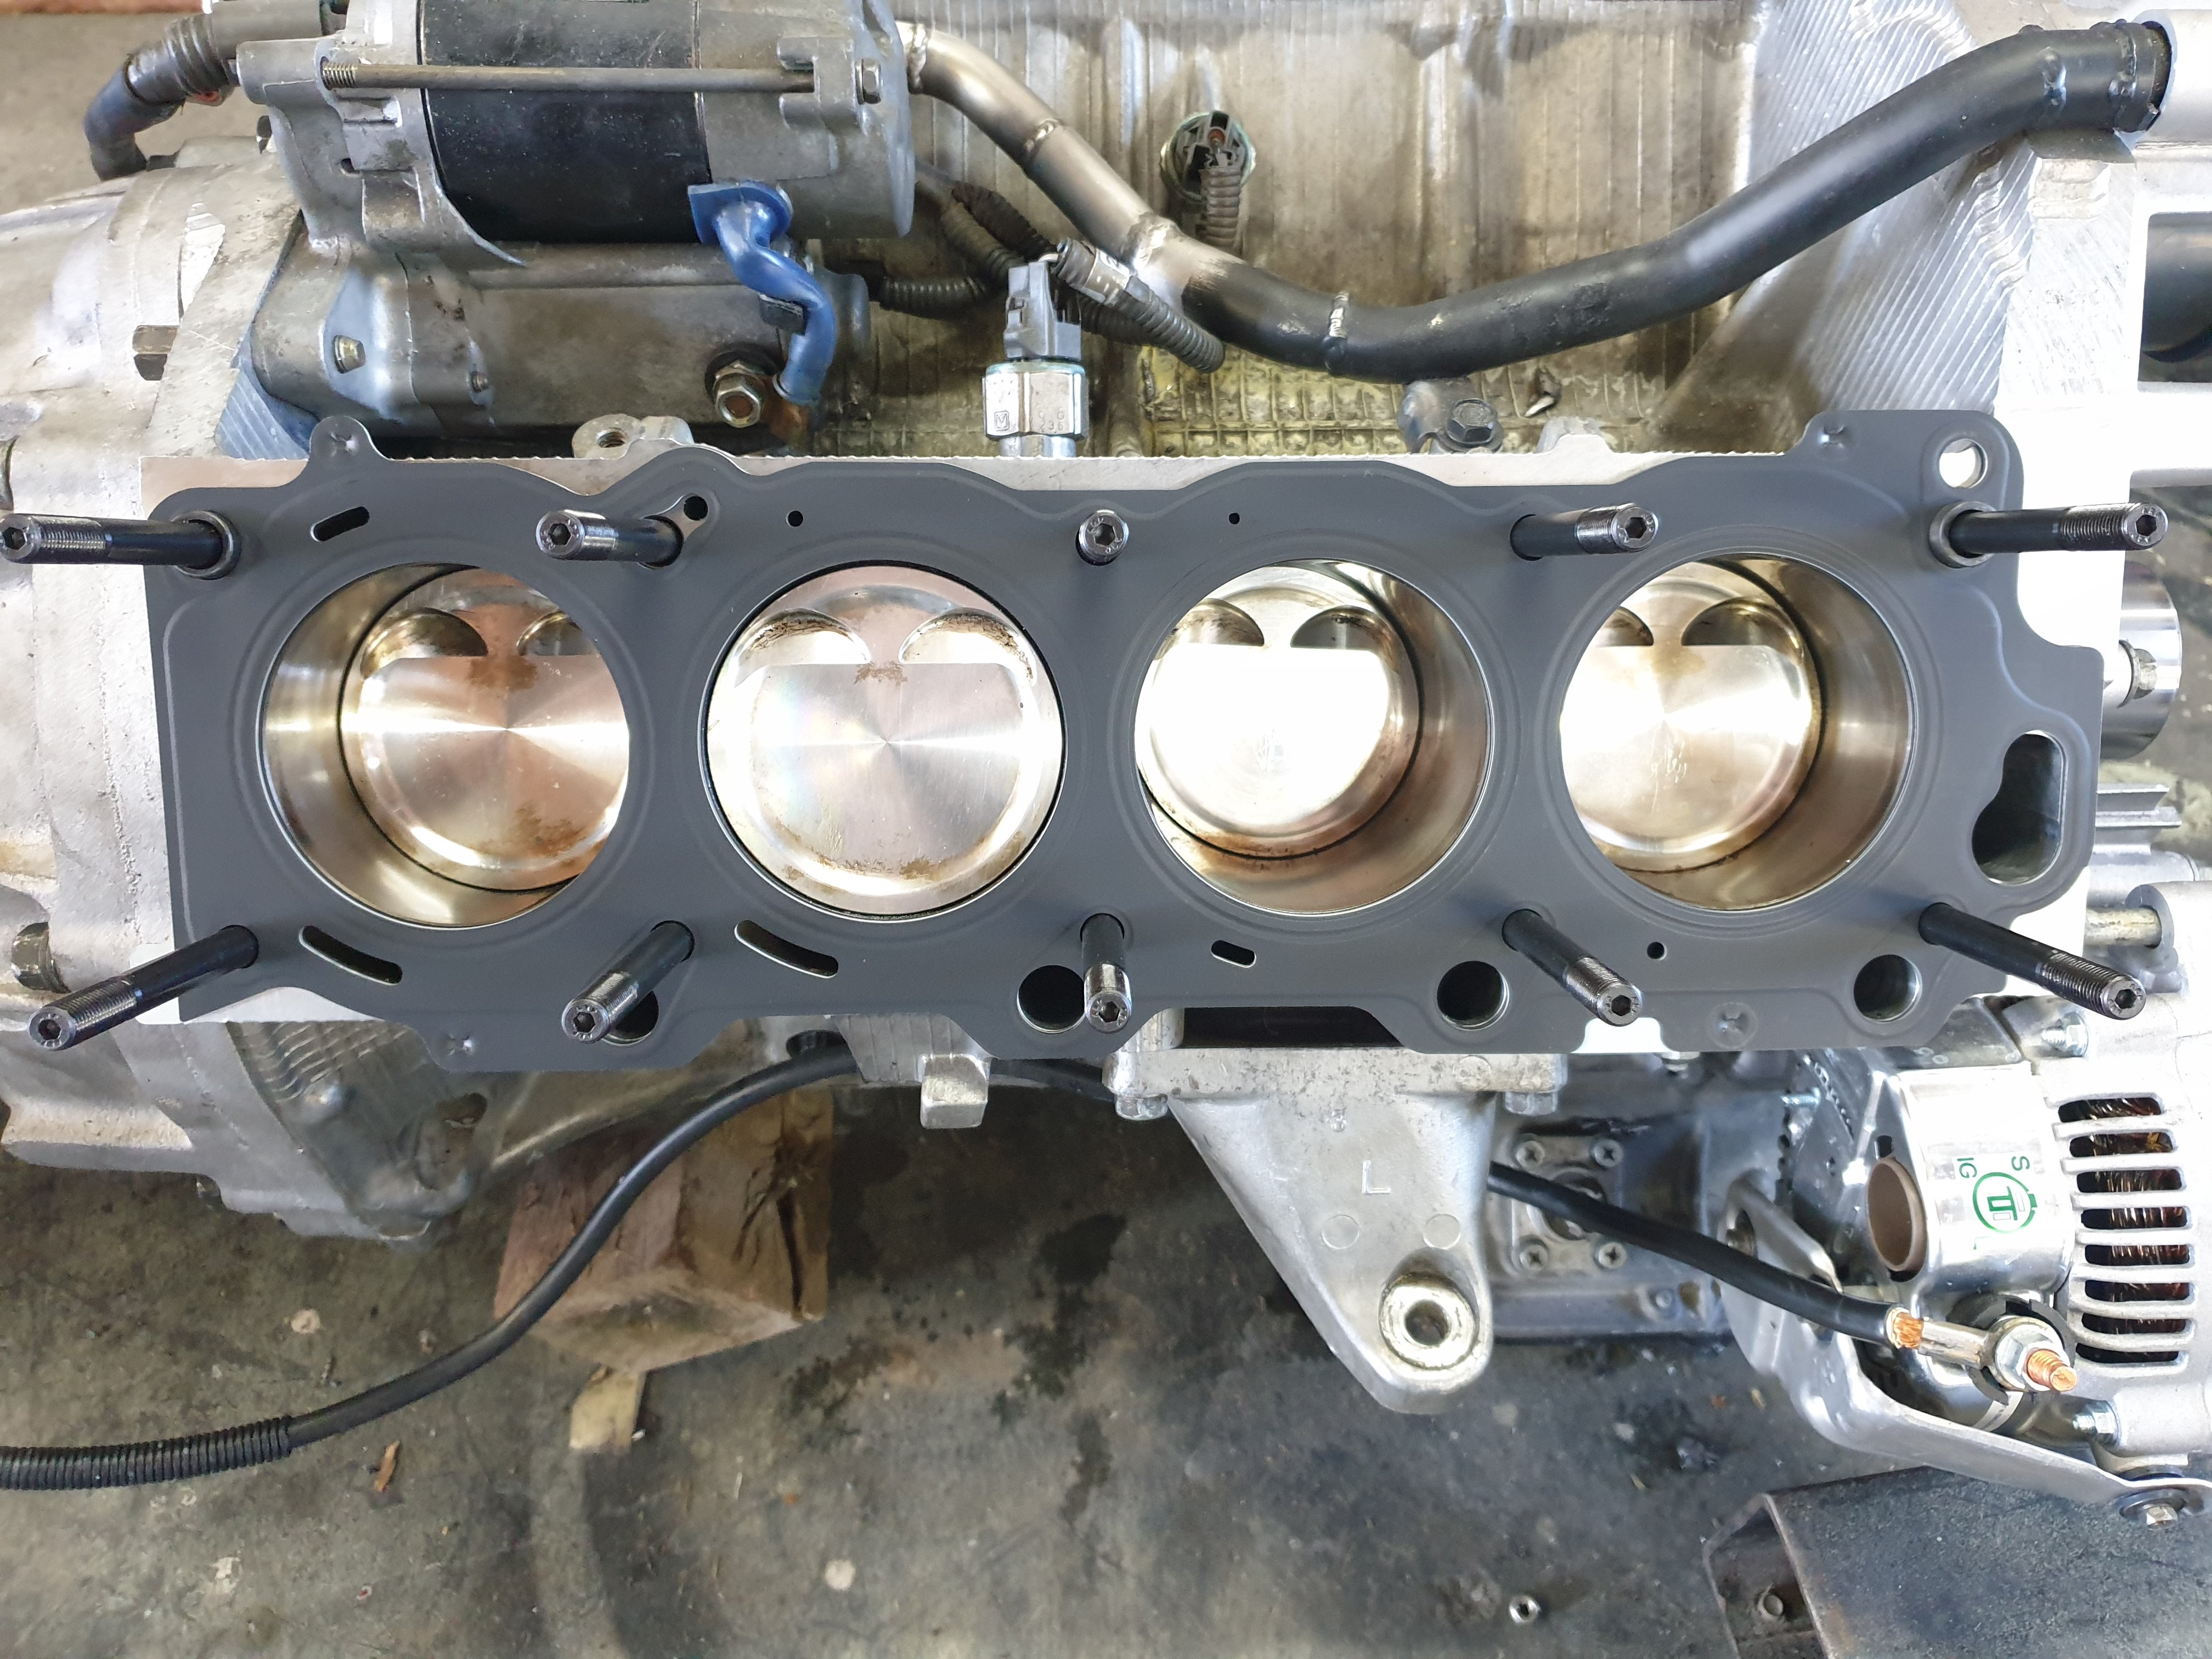
Motor is back together with ARP head studs and vvti 1uz multi layer steel gaskets. So it's better than it was before. It's ready to go back in which may happen tomorrow.
1 point
-
more stuff. exhaust is all back in. all the plumbing is done, it has a clutch, oil in the motor, power steering fluid all over the floor and save one radiator hose that i cut the wrong end off it would have water in it too. all the wiring forward of the fire wall is finished as well. i had to notch the chin spoiler to accommodate the oil coolers and hopefully it doesn't look to stupid when its all back together. tomorrow i should be able to crank it and get oil pressure up and also test the fuel system at pressure. good. 2020-01-31_06-25-47 by sheepers, on Flickr 2020-01-31_06-25-28 by sheepers, on Flickr art. 2020-01-31_06-49-13 by sheepers, on Flickr1 point
-
motor in. pretty stoked tbh. its funny how quickly i forgot how little room there is around this thing when its back in the bay. also the bonnet fits. 2020-01-24_05-44-54 by sheepers, on Flickr 2020-01-24_05-45-02 by sheepers, on Flickr 2020-01-24_05-45-10 by sheepers, on Flickr1 point
-
been doing some wiring. i found it pretty hard to take a photo that showed what ive done so the pix are a bit shit really. just imagine i had no loom at all, then i did. its a whole new world having new plugs and looms to make everything. i learned a whole bunch making this and im really happy with how its come out. i now have the body interface to sort out which will be a cool process and ill be able to fix heaps of stuff. bit of fucking around and then i can put the motor back in the car. 2020-01-23_07-16-12 by sheepers, on Flickr 2020-01-23_07-15-57 by sheepers, on Flickr1 point
-
well, that was fucking stressful. first time ever laying a candy/3 coat colour and it so very nearly went very very wrong. i completely fluked it and managed to get it looking right but i was seconds away from disaster on more than one occasion. im fucking turbo stoked with how it looks, its got some dust in it but i couldn't give a fuck, theres way more right than there is wrong and thats a fucking win. 2020-01-09_06-20-37 by sheepers, on Flickr 2020-01-10_07-39-39 by sheepers, on Flickr 2020-01-10_07-39-48 by sheepers, on Flickr 2020-01-10_07-39-58 by sheepers, on Flickr 2020-01-10_07-40-05 by sheepers, on Flickr1 point
-
sand, fill then prime again. i have the colour mixed for the top coat so ill be attempting to paint it red probably saturday. 2020-01-09_12-19-49 by sheepers, on Flickr 2020-01-09_06-20-37 by sheepers, on Flickr1 point
-
Primer.
1 point
-
re-did the passengers side. then it was time to start welding things into the car. coated the backs of everything with copper primer. then weld. it came out pretty good for a but joint that you cant get to the back of, its pretty flat as you can see, and its hollow as opposed to high with is great. 2020-01-04_05-03-02 by sheepers, on Flickr 2020-01-04_05-03-14 by sheepers, on Flickr 2020-01-04_05-02-45 by sheepers, on Flickr 2020-01-04_05-02-21 by sheepers, on Flickr 2020-01-04_05-02-14 by sheepers, on Flickr 2020-01-04_05-02-30 by sheepers, on Flickr 2020-01-04_05-02-37 by sheepers, on Flickr obvisly ill patch the hole at the back but i wanted to get the bottom part fixed in place before doing that. tomorrow ill do the passengers side and button up the last two holes and its done.1 point
-
re-made the drivers side patch. im way happier with it. i took heaps of measurements off the RA23 to try and get it as close to factory as i could. the only thing i couldn't get right was the hole for the bonnet stopper rubber thingo. i dont know how but when the top of the chassis rail was last mangled by senior Holt the bolt hole moved in by about 5-7mm. this meant that the center line of the bottom fold didn't go directly through the center of the bolt hole as it does (as best as i can measure it with simple tools, its within +/- 2mm i reckon) on the RA23. its not the end of the world by a long margin, its interesting that there is a difference between the two, could be manufacturing tolerances? who knows. anywho, all that meant is that the circular shaped rebate that the stopper bolts into is offset from the center of the fold a bit. TBH its pretty hard to tell the difference between the two celicas and once its got paint on it you might not be able to see it at all. whatevs, its close enough now that im happy with it. on to the other side then i can splash some paint around. 2020-01-02_05-49-23 by sheepers, on Flickr 2020-01-02_05-49-15 by sheepers, on Flickr 2020-01-02_05-49-03 by sheepers, on Flickr1 point
-
right so, rust repairs. usual story. cardboard template, cut the piece out, fold, fuck around, make the next bit. in this instance i was lucky to have an unmolested example to copy so i knew i got the patch the right shape. i just use basic tools, i think the fanciest thing i have is a shrinker/stretcher. anywho ive taken some fairly self explanatory photos of the process, only one that might need some explanation is welding up the gap. i use a copper plate behind the gap and weld onto that, the metal wont stick to the copper so it helps if you've got a gap to fill. 2019-12-29_03-56-09 by sheepers, on Flickr 2019-12-29_03-56-18 by sheepers, on Flickr 2019-12-29_03-56-25 by sheepers, on Flickr 2019-12-29_03-56-33 by sheepers, on Flickr 2019-12-29_03-56-52 by sheepers, on Flickr 2019-12-29_03-57-00 by sheepers, on Flickr 2019-12-29_03-57-08 by sheepers, on Flickr 2019-12-29_03-57-17 by sheepers, on Flickr 2019-12-29_03-57-25 by sheepers, on Flickr 2019-12-29_06-07-34 by sheepers, on Flickr 2019-12-29_06-07-41 by sheepers, on Flickr 2019-12-29_06-07-49 by sheepers, on Flickr 2019-12-29_06-07-57 by sheepers, on Flickr1 point
-
motors all back together and pretty much ready to go back in the car. got a couple of little things left to tidy up but nothing major. and with that i started stripping out the engine bay for repaint. 2019-12-20_04-33-06 by sheepers, on Flickr 2019-12-20_04-35-02 by sheepers, on Flickr1 point
-
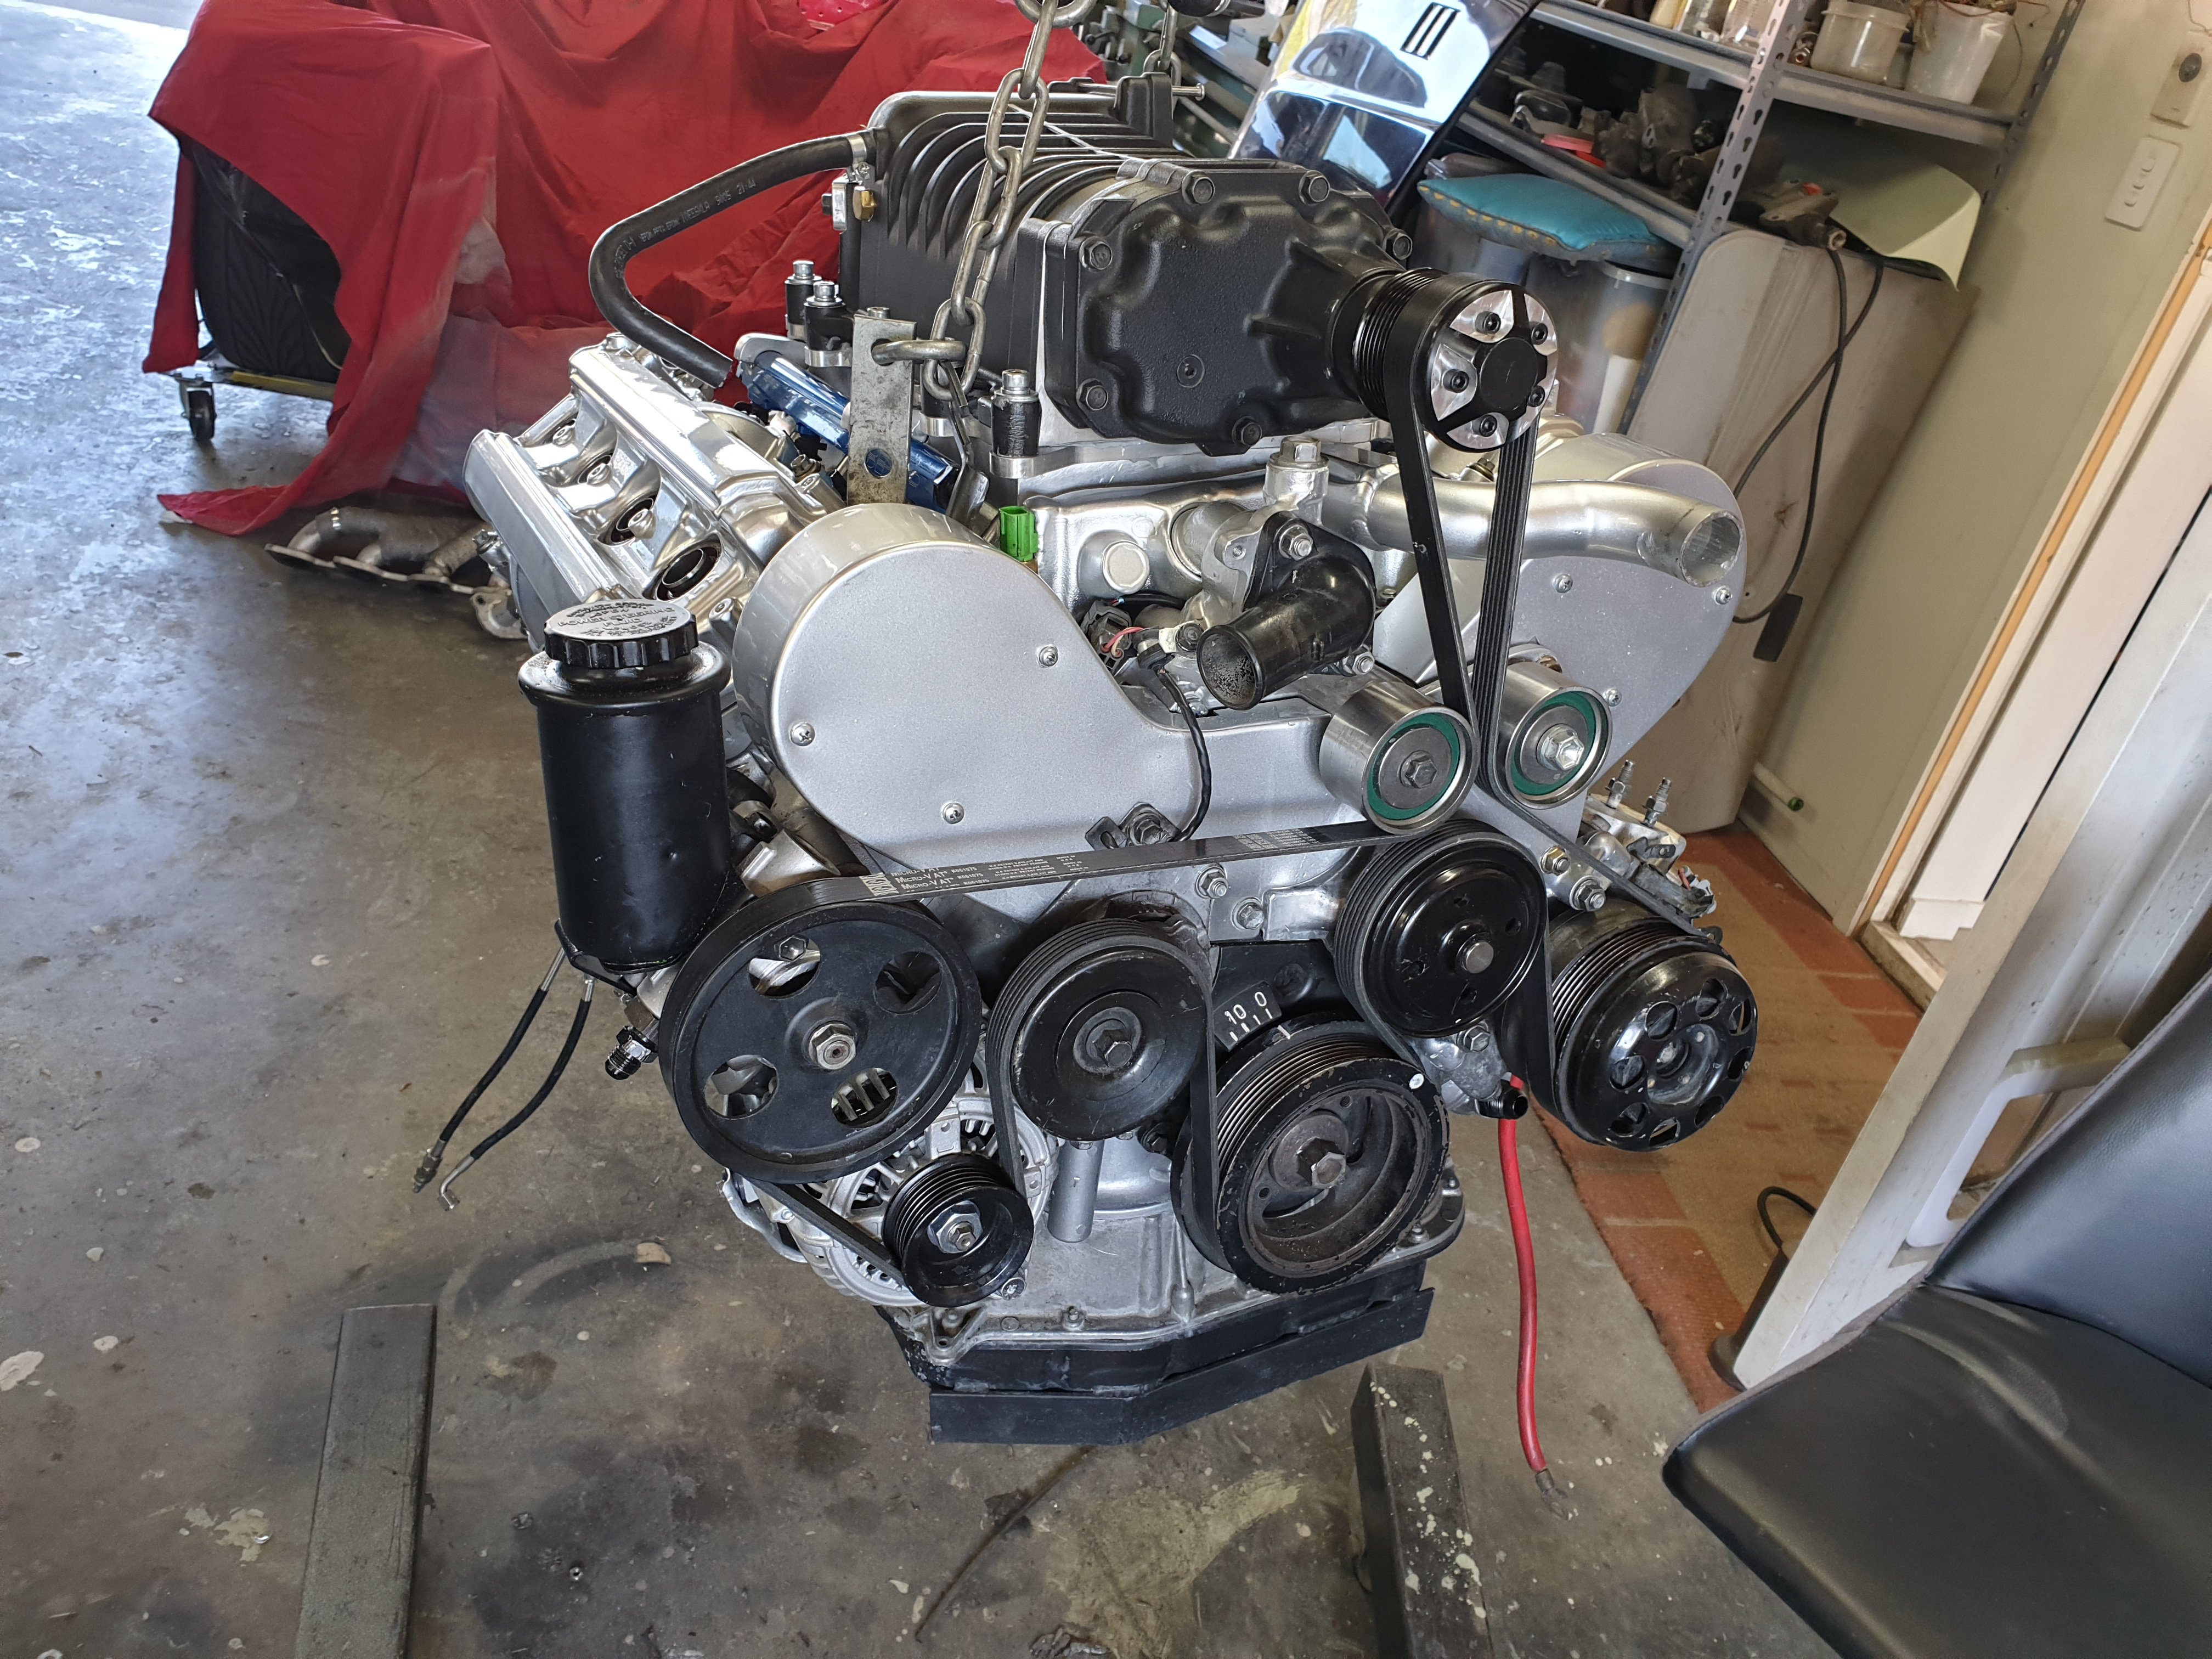
the old "find the right length belt "dance. usually involves 7 trips to the parts store to get successively longer or shorter belts until you fluke the combo of one that the parts store actually has and one that actually fits. this time around i only had to buy 4 different belts before getting one that fits. this is the longest one available off the shelf in NZ, if this one didn't fit i would have had to rock auto some. anyway, it fits and thats the serpentine belt sorted. 2019-12-18_07-21-54 by sheepers, on Flickr1 point
-
coil mounts. i made a set of clamps to hold down the coils. 2019-12-17_04-57-49 by sheepers, on Flickr but i didn't like them so i binned them and made these plates instead. i have a full set of new plugs which are all black and it'll have all new wiring when its done. 2019-12-17_04-57-59 by sheepers, on Flickr 2019-12-17_04-57-40 by sheepers, on Flickr 2019-12-17_04-57-28 by sheepers, on Flickr1 point
-
i finished the spacer by drilling the through holes then i put a very light coat of etch on it. that was enough to make it not fit so it needed a little polish. then i shrank the hub onto the superdupercharger shaft. it had to be pretty hot to grow enough to put on, as soon as it was on i suddenly realised that the heat might fuck the front seal so i wet it to try and cool it down. i hope like fuck i haven't coozed the front seal, will find out later i suppose. ill go buy the right bolts for it tomorrow and its all done. 2019-12-15_03-37-05 by sheepers, on Flickr 2019-12-15_03-36-55 by sheepers, on Flickr 2019-12-15_03-36-47 by sheepers, on Flickr 2019-12-15_03-36-39 by sheepers, on Flickr1 point
-
finished up the water pipe that goes under the manifold. it had to be modified to clear the superdupercharger manifold. 2019-12-09_08-34-58 by sheepers, on Flickr once i got that finished i thought it would be a good idea to rig up a pressure tester and test all the welds. 2019-12-09_08-34-45 by sheepers, on Flickr the only bit that leaked was the one bit i hadn't touched at all. the chem wash the block went through at the engine builder must have dissolved the schmutz holding it on. it was this plate. ive glued it back on now, but apart from that everything else is sealed up. 2019-12-09_08-34-36 by sheepers, on Flickr now i can put the manifold on for final. one step closer to a finished motor.................1 point
-
in other news the alternator was fucked. surprisingly enough it was full of power steering fluid and dirt and fucked. so Nick the sparky got me a new one and i was able to finish up all the accessories on the front. ill move on to sorting the superdupercharger drive next. 2019-12-03_07-13-43 by sheepers, on Flickr 2019-12-03_07-13-51 by sheepers, on Flickr1 point
-
rebuilding power steering pumps. ive done a few of these now and had great success with all of them. you might do it a different way, whatever, this is how i do it. firstly, take a picture of each stage of the disassembly, there are many subtle differences to the orientations and alignments that will fuck the whole thing up if you put it back together wrong so take pictures as you go. the pump off my UZ was really fucked, lots of really bad scoring on both the stater plates and the rotor, but the inside diameter of the eccentric ring was good so it could be fixed without to much drama. 2019-12-03_09-20-52 by sheepers, on Flickr 2019-12-02_06-38-54 by sheepers, on Flickr so, how to do? you need a good flat two sided stone. not one that has been used to sharpen chisels or knives but a flat one. i have one i only use for this type of work so i know its flat. you're going to be trying to polish the plates to within 0.01mm over the surface so the stone needs to be good. also so good cutting oil will help no end. the other thing you really need is a micrometer, for two reasons, obviously to measure the parts as you go, and the other reason is that the mic can give you a really good feel for where things aren't parallel or where the high spots are. once you give it a try you'll see what i mean. 2019-12-02_12-07-21 by sheepers, on Flickr so, mic all your parts and write down what each one measures. (this picture shows after stoning so there are two measurements but more on that later) 2019-12-02_06-28-53 by sheepers, on Flickr polish the parts on the stone using circular motion or a figure of eight motion (don't do long strokes along the stone because you'll grind the surface out of flat and its very hard to get it back) and rotate the every couple of passes so your pushing on a different part of the plate. use the mic to measure the plate and make sure its still flat and both sides are still parallel. keep going until the plate is smooth. i couldn't get the last deep score out of this plate so it will just have to live like this, its not to bad but these deformations allow oil pressure to get between the side plates and the rotor pushing them apart and you loose line pressure. 2019-12-02_12-07-14 by sheepers, on Flickr in the above picture you can see the scratch marks from the rough side of the stone. once you've got the scoring out and they are flat and parallel you can give them a polish on the smooth side of the stone. this serves two purposes, they need to be smooth so they work well and dont score again in service and it gives you a second chance to check your work. 2019-12-02_12-07-28 by sheepers, on Flickr you can see on the rotor the area to the right is not flat, that only showed up after smooth polishing. i had to go back and re-do it to get it flat. this meant that i had to remove 0.04mm from the rotor. because of that it meant that the vanes were to wide so i had to stone them too. to check that the vanes had correct clearance in the rotor i used the mic. in the two pictures you can see i set the mic on the rotor, then inserted a vane, i was easily able to move the vane in and out confirming the measurement. 2019-12-02_12-07-54 by sheepers, on Flickr 2019-12-02_12-08-02 by sheepers, on Flickr once i had the rotor flat and the vanes 0.01mm thinner that the rotor i needed to address the eccentric stater plate. this sets the spacing of the whole assembly and because i had removed so much material from the rotor there was now too much clearance between the rotor and the side plates. this pic shows the "after fixing the rotor fuckup" measurements. 2019-12-02_06-29-11 by sheepers, on Flickr you can see the initial clearance was about 0.04mm and i have removed 0.04 from the rotor so i had to remove the same from the stator plate (i didnt write down the final measurement for the eccentric plate in the picture so it still says 15.03 but i actually polished it to 15.00 to keep the 0.04mm clearance). so, once thats all done the rest is simple, new o rings, new seal and a new bearing (which cost the grand total of 38$) and the pump is good as new. hope this helps you in future, like i say, theres more than one way of fucking a cat but this is how i do it.1 point


This leaderboard is set to Auckland/GMT+12:00