
Leaderboard


Popular Content
Showing content with the highest reputation on 06/15/17 in all areas
-
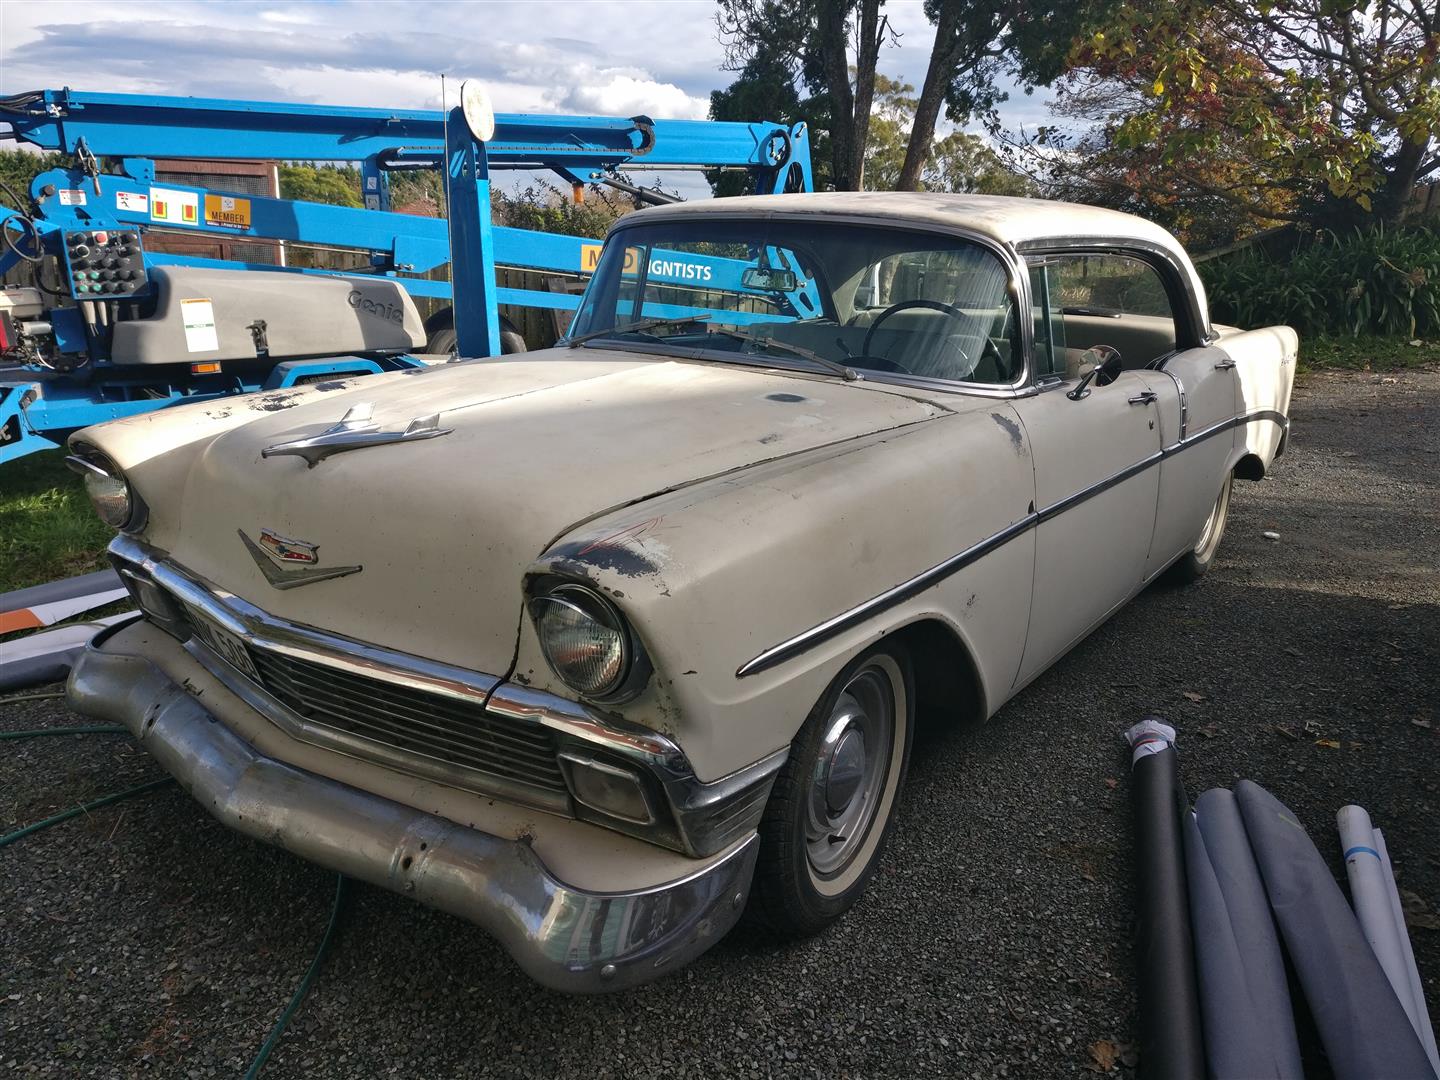
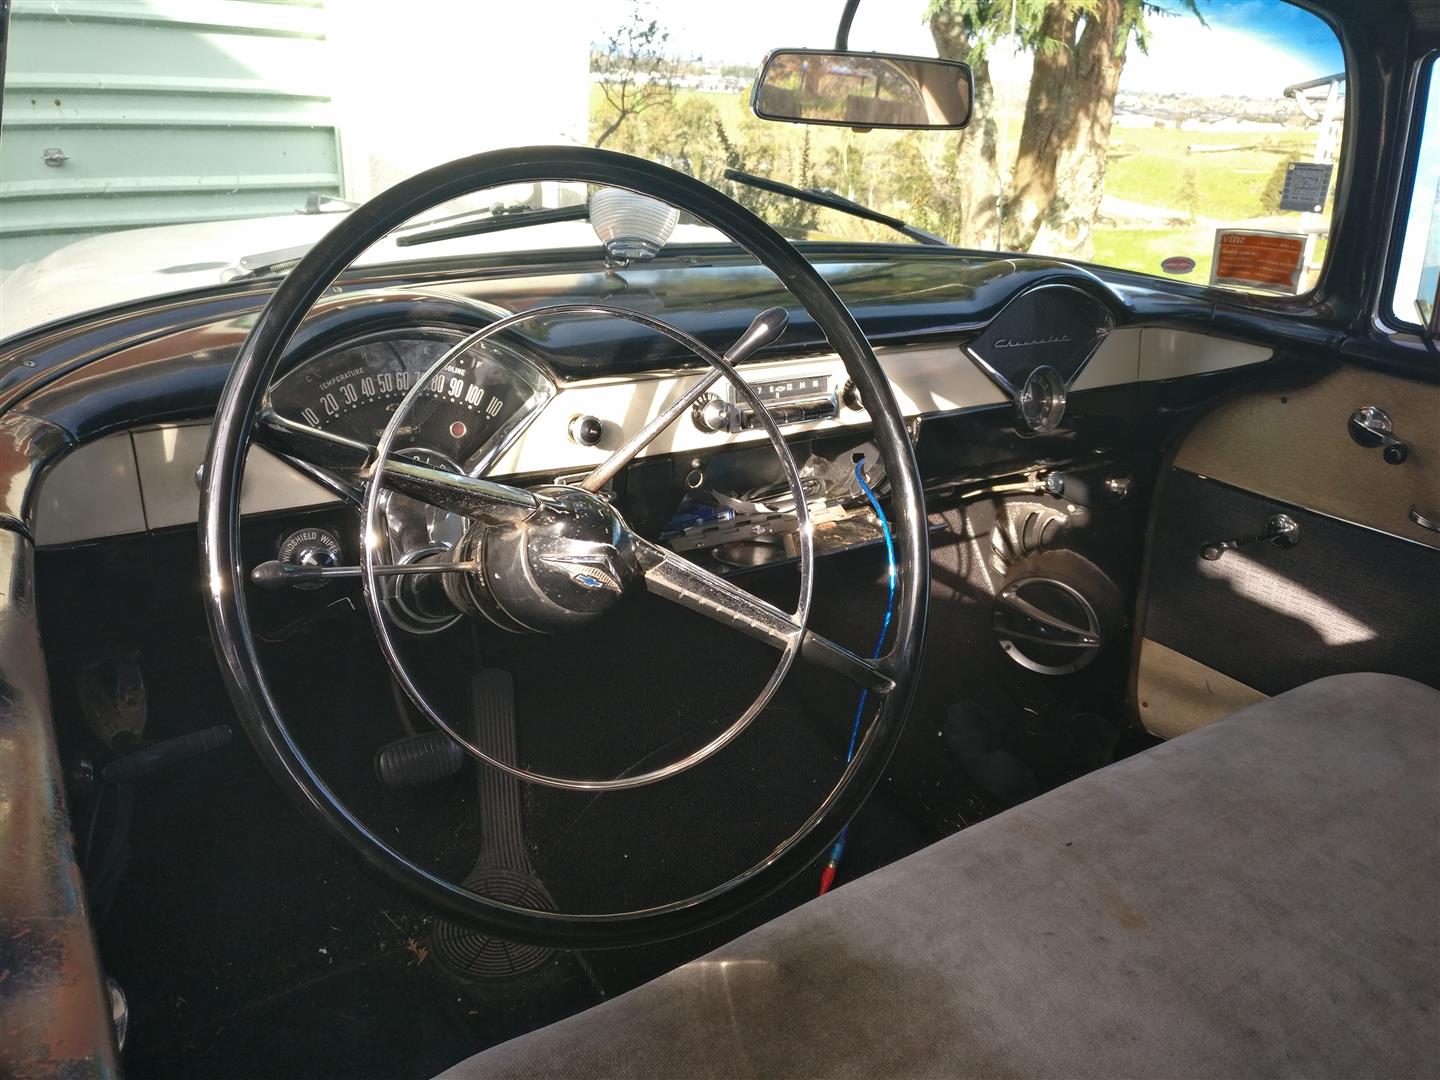
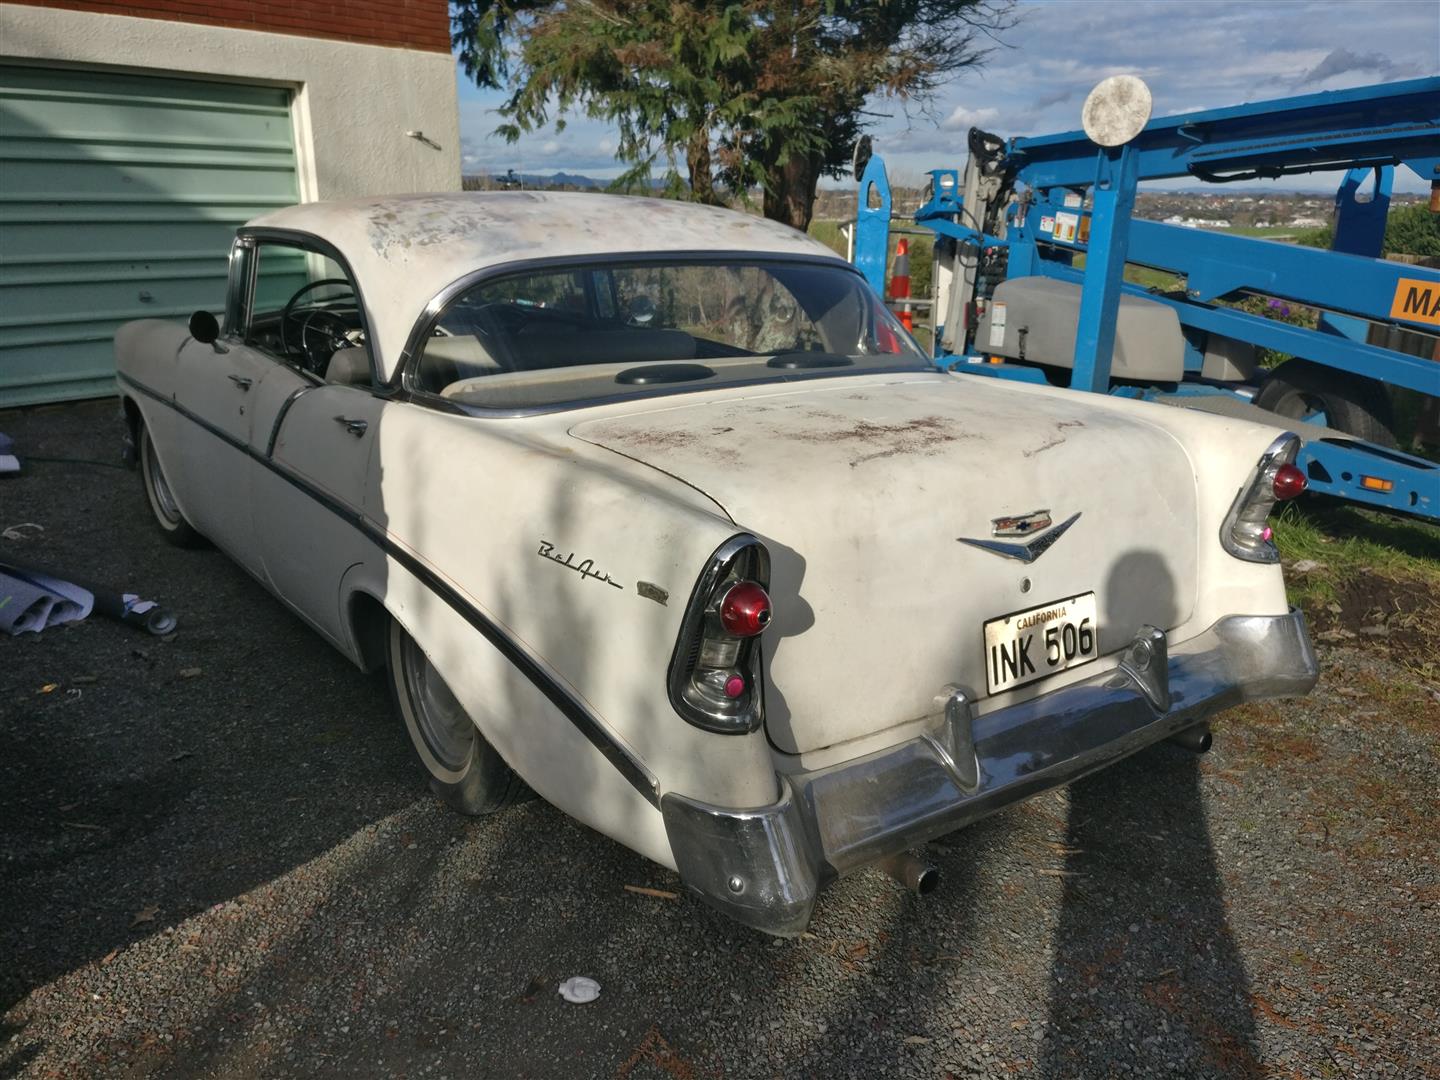
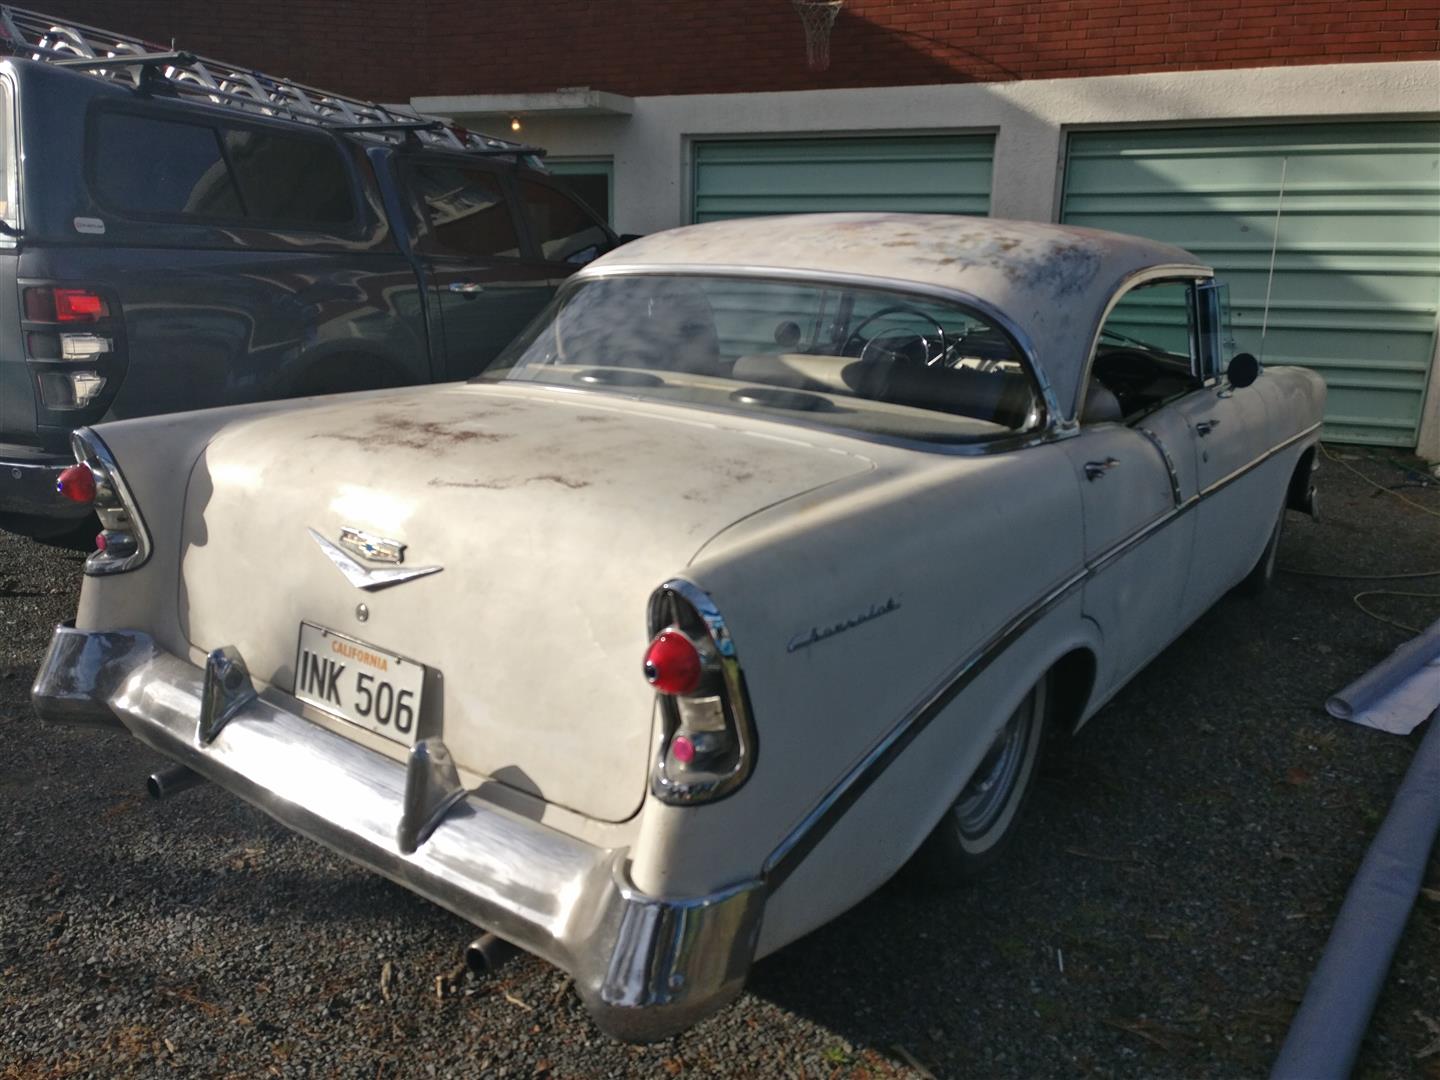
Bought about a month or so ago. Old man's and wanted it in family so that was a yes from me Plans.. Cruise and Enjoy. Running 265 V8, New Edelbrock 500 carby.
 23 points
 -
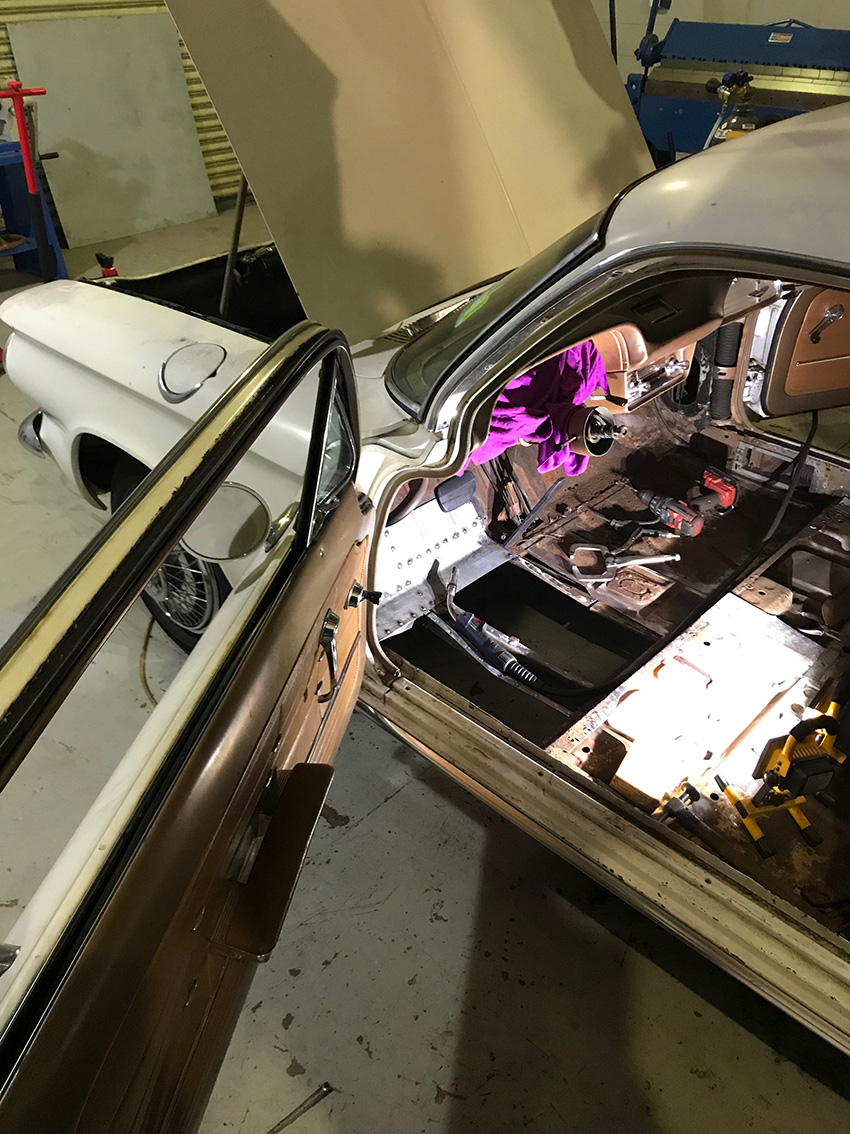
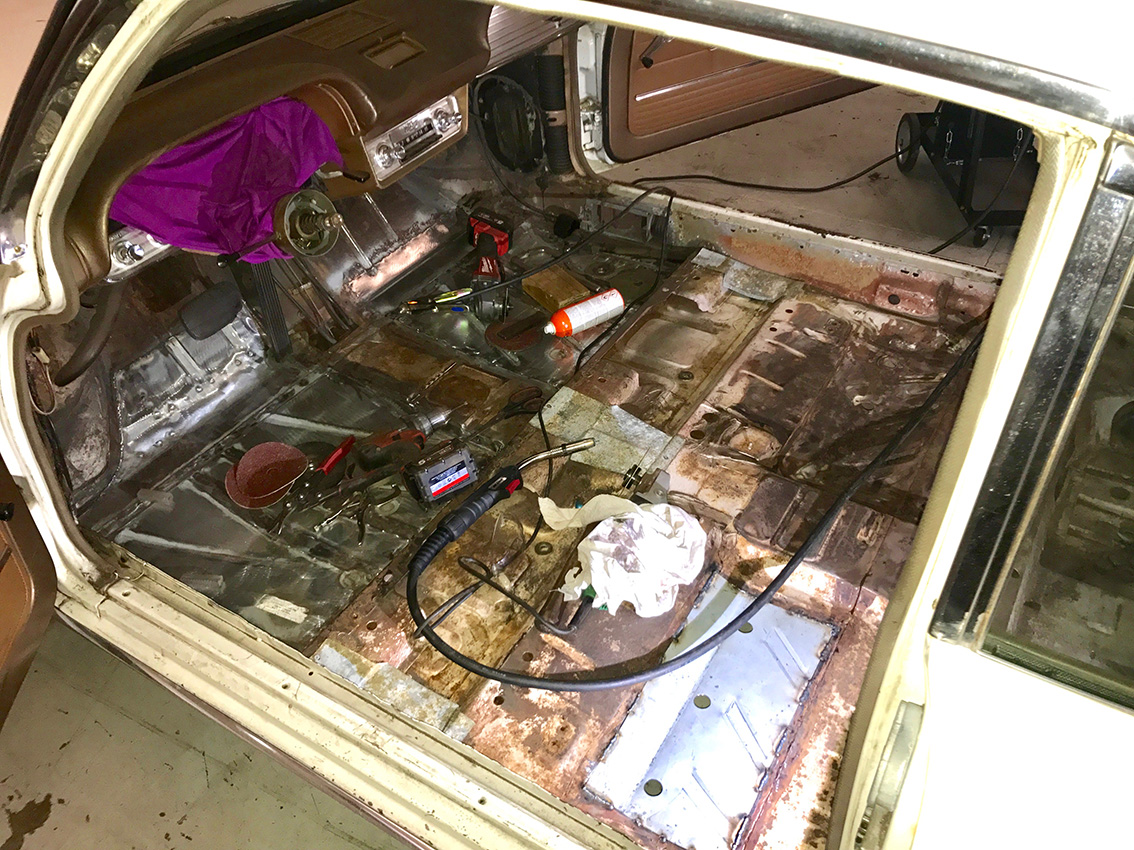
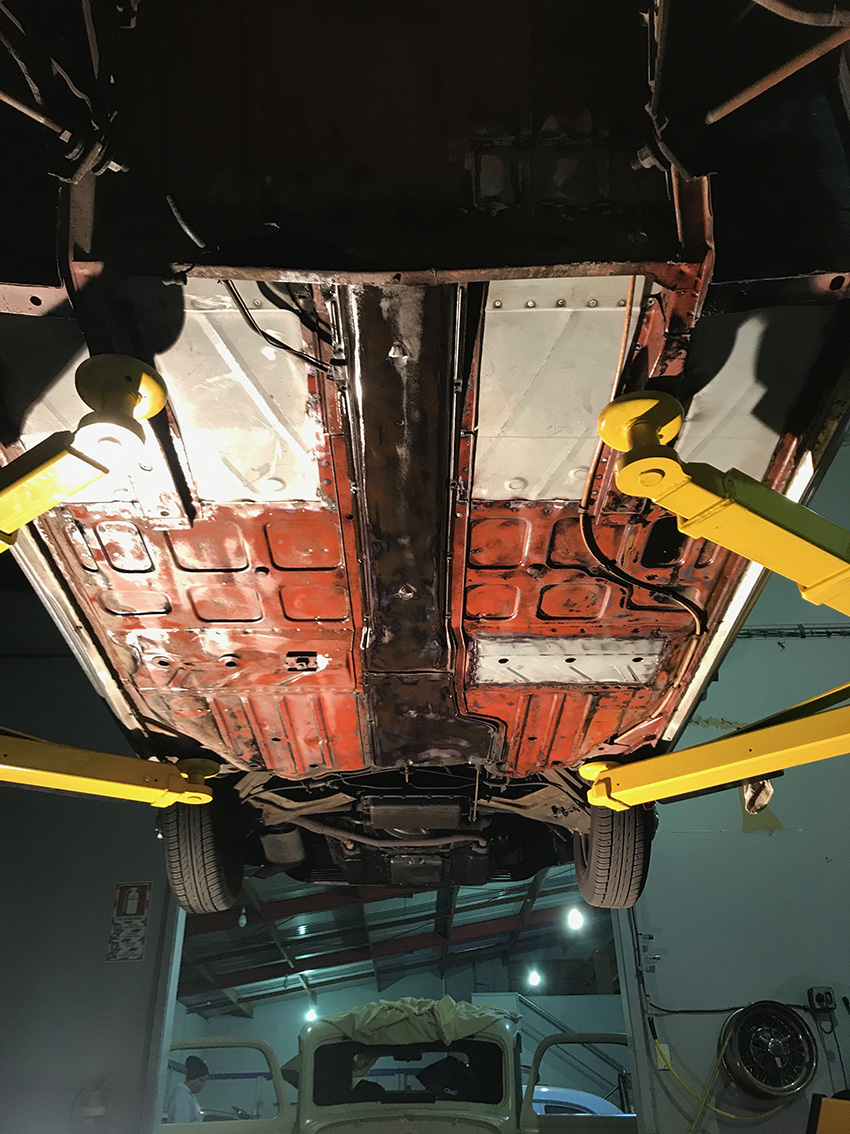
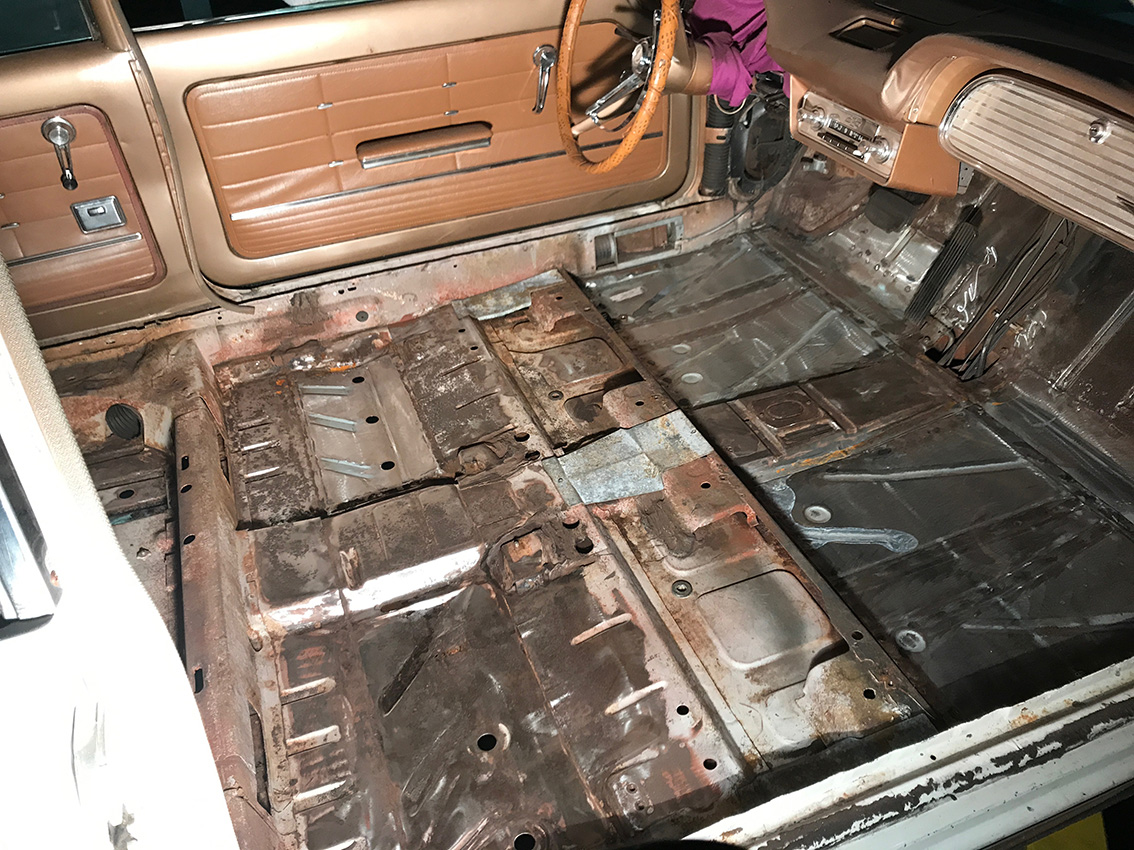
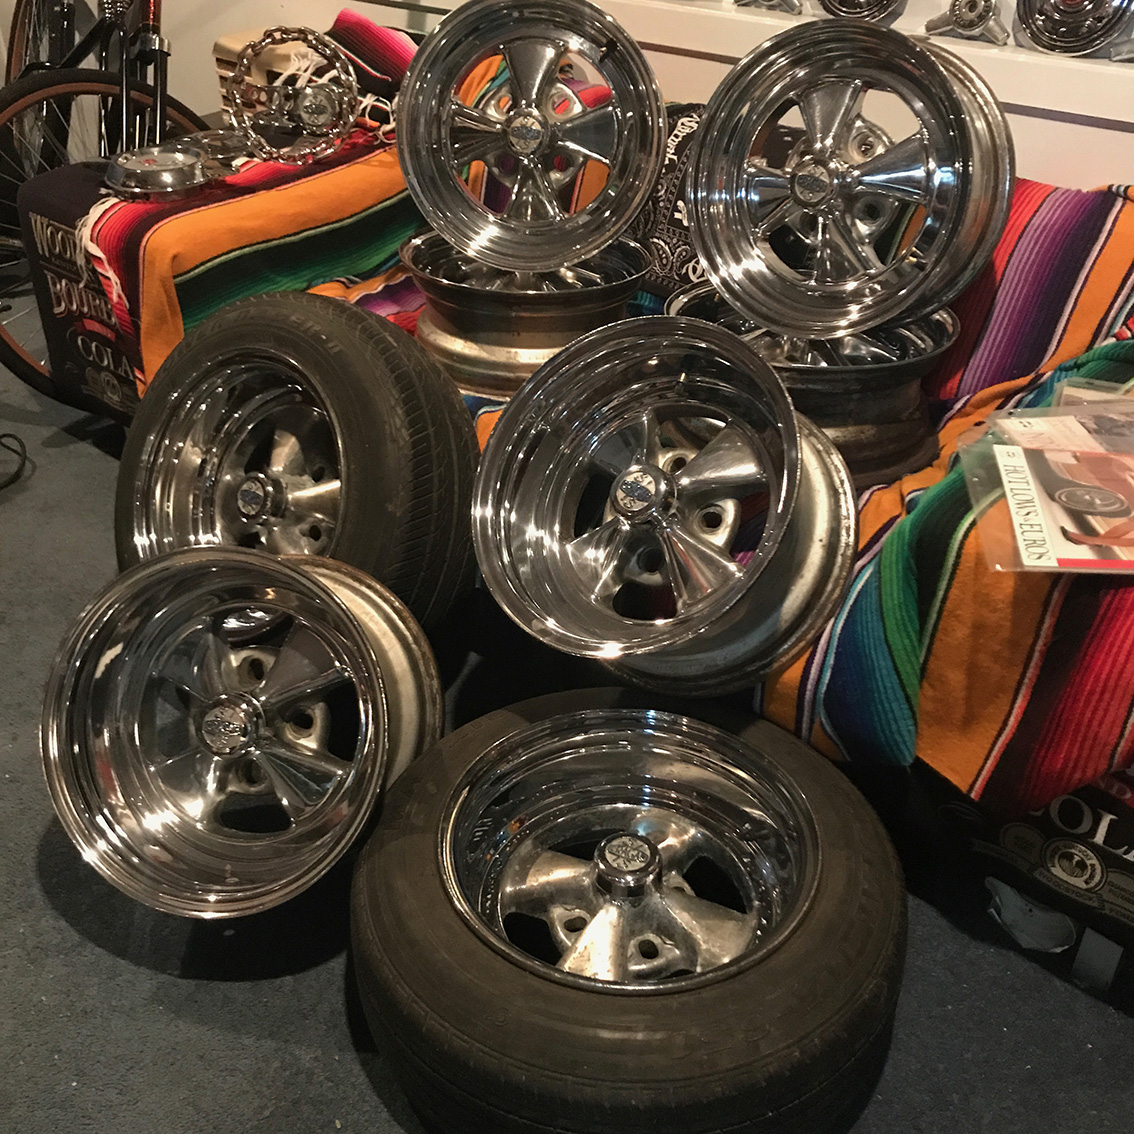
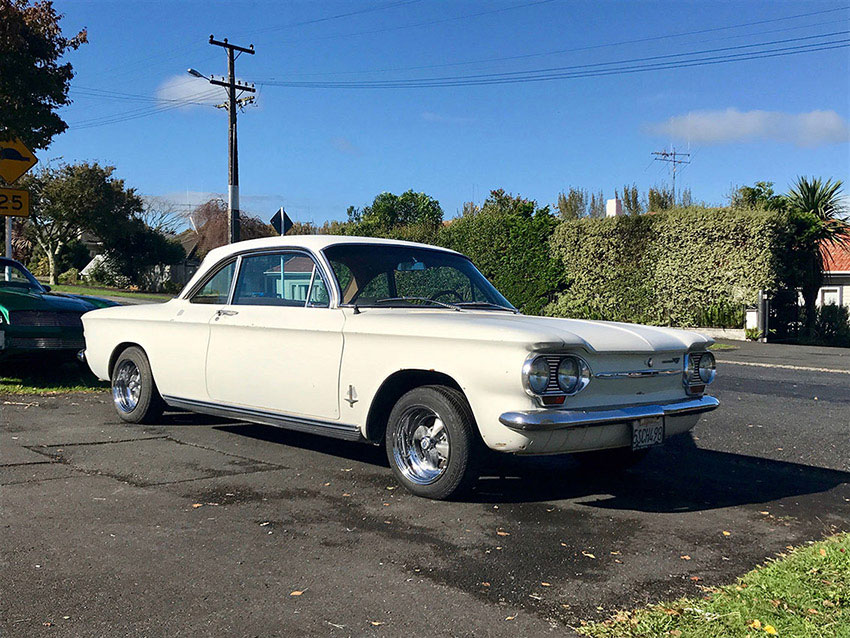
Been doing a bit of work on the Corvair. I took it down to my brothers workshop and they've removed the rust in the floors. Its starting to look good... I got the fun job of cleaning the floor panels of any surface rust to keep the repair certifiers and vinning people happy. Now that the rust is pretty much done with sealing left to do we've been talking with the vinning people to figure out seat belts and what they want. Hopefully go with lap belts. I've been busy collecting 13" four spoke Cragar's. I've found another set; standard offset 5.5" that are in decent condition and have one more 13x7 on its way from America.
7 points
-
Haven't done much more to the dash apart from fit it into the cab, as I am undecided how to approach the rusty holes under the gauges yet, a bit too many complex shapes! My Dad had a 55 Chevy steering column laying around, so we started to mock it up. The shaft out of that column had been welded in multiple places so we found another column that had a mint shaft and it was also longer so didn't need an extra universal joint added. The outer tube of the column was pretty average, had lots of extra holes, cutouts and had been shortened, so drew a new one up in Solidworks and got it put through the Tube laser at work. It's now made from 2 inch stainless tube.4 points
-
just baffling isnt it.... \
2 points
-
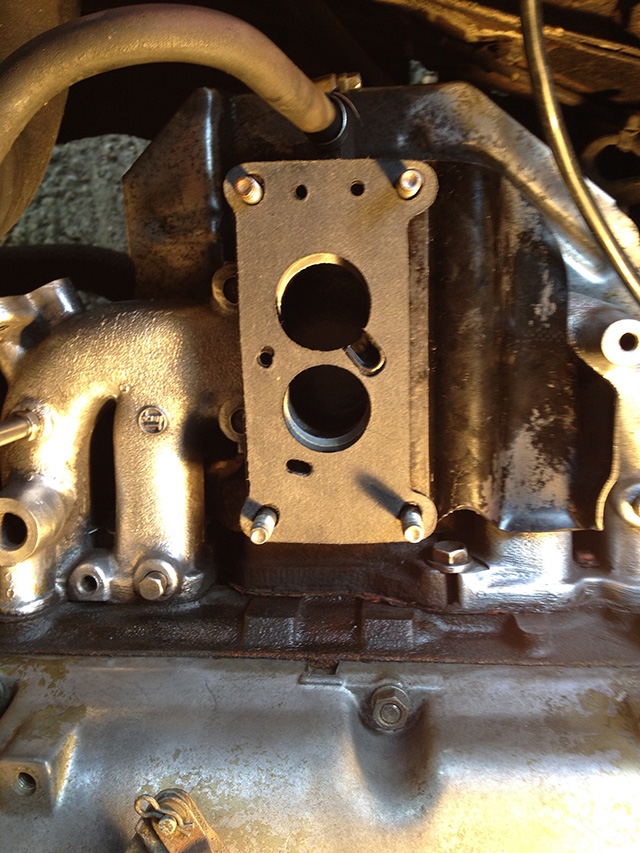
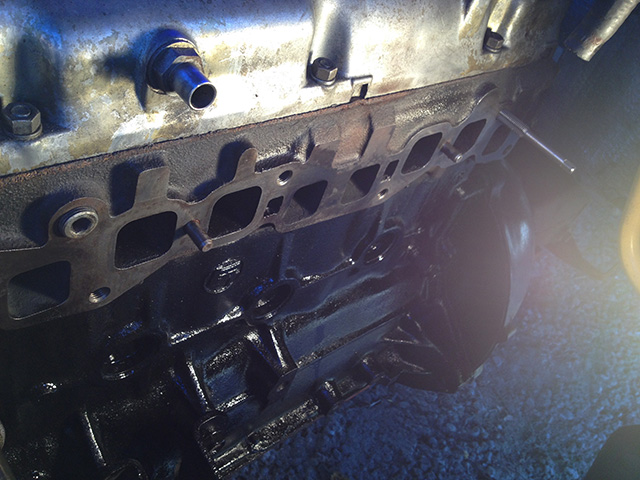
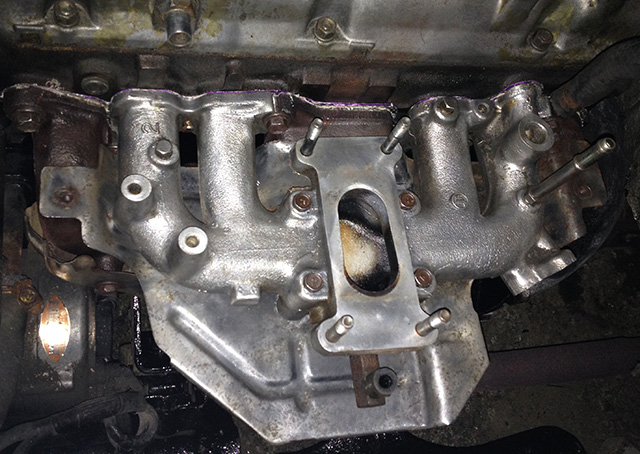
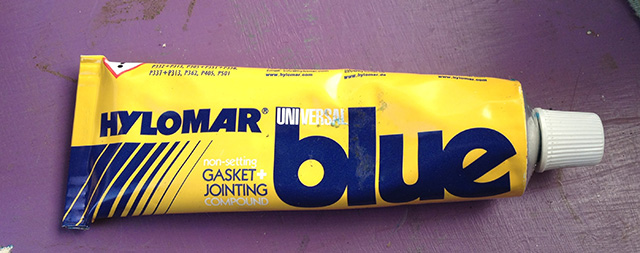
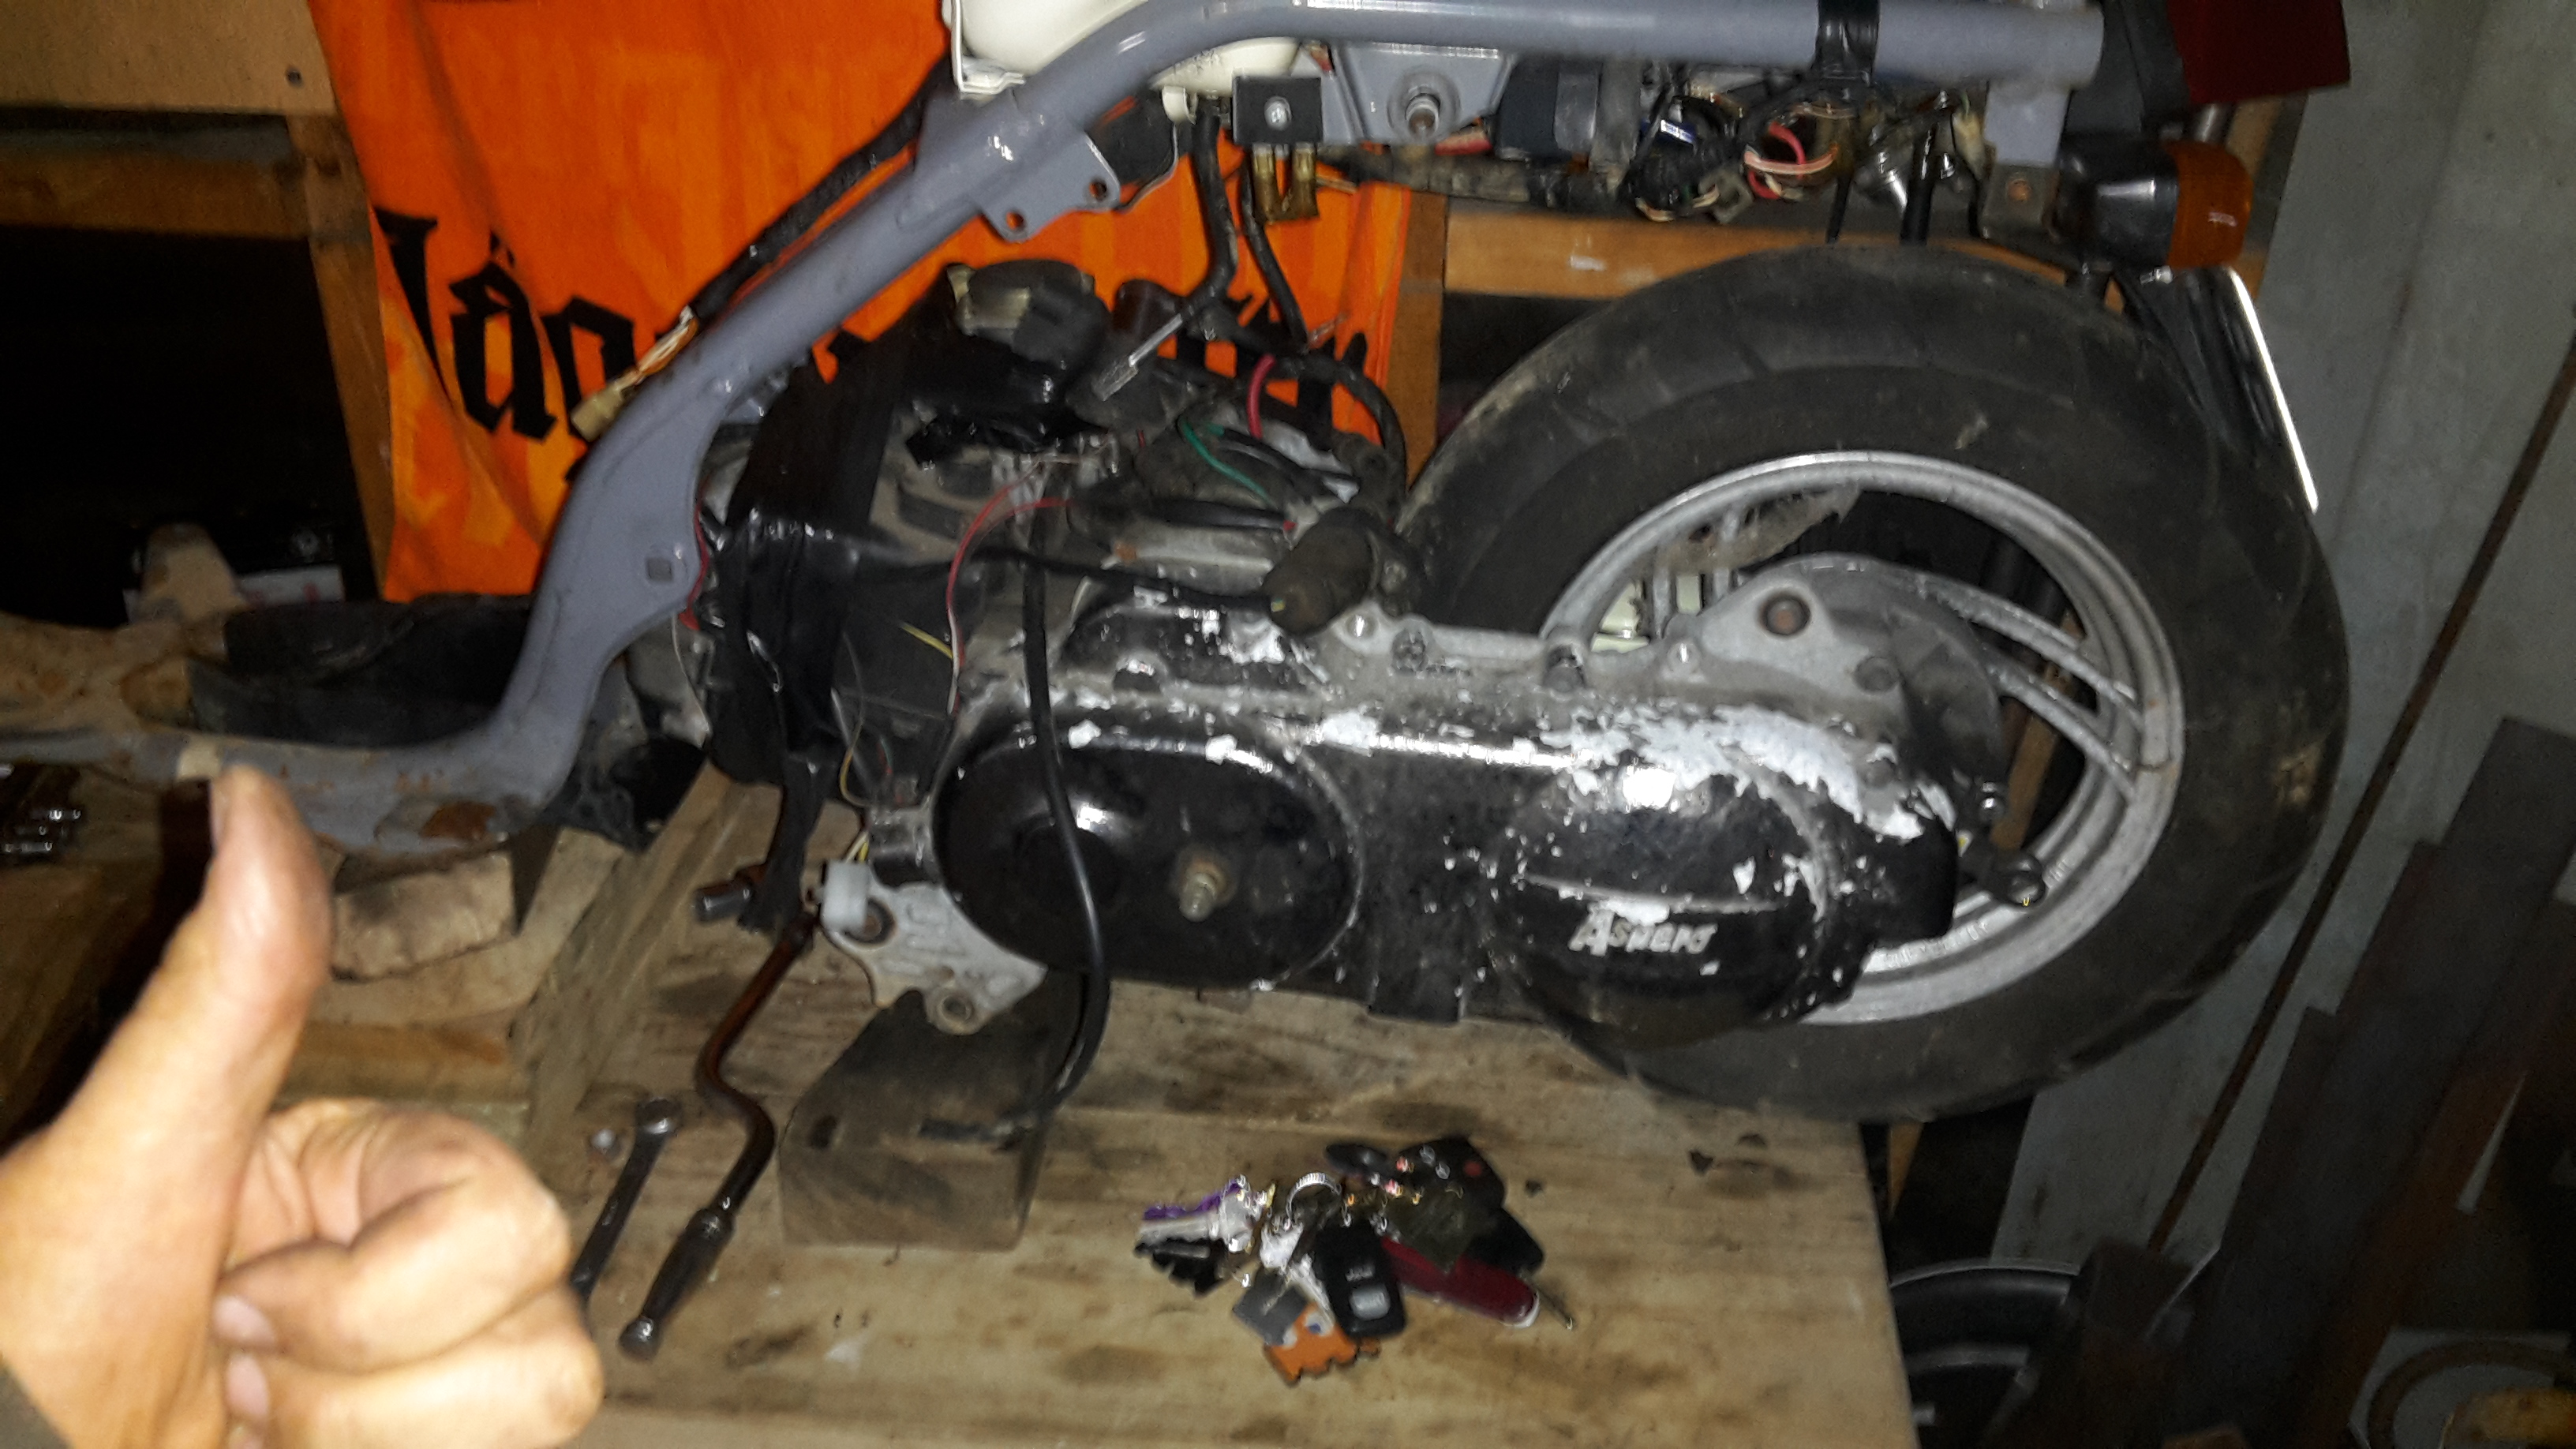
Developed a vacuum leak around the base of the carb. Looks like someone used RTV or something on it. Had to remove one of the probably asbestos gaskets from the spacer plate. Can't find these things anywhere. Got rid of the oil catch can and reinstalled carburettor after small rebuild. Still has a slight vacuum leak, probably because of these cheap paper gaskets I got off eBay. Removed manifold and resurfaced exhaust side. Head is straight as. Got it all put back together and torqued up. Can't find any new old stock Toyota manifold bolts for it though. Found the cause of the vacuum leak. One of the spacer channels runs right along the edge of the intake manifold. Used a thicker gasket and some of this stuff to seal it up. On the road again.
2 points
-
the good.the bad.the gun spat here on the left rear fender.so I stuck heaps of paint over it so I can hopefully polish it out so it sagged here.and when painting inside the air vent I made this mess, looks like I'll be learning to wet sand paint now!All in all I'm pretty stoked and glad it's over, heaps of runs and spots of over spray and areas of orange peel etc..but not bad for a noob in shed in west auckland.looking forward to assembly.2 points
-
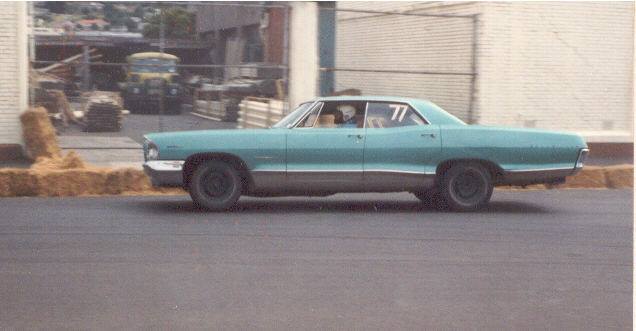
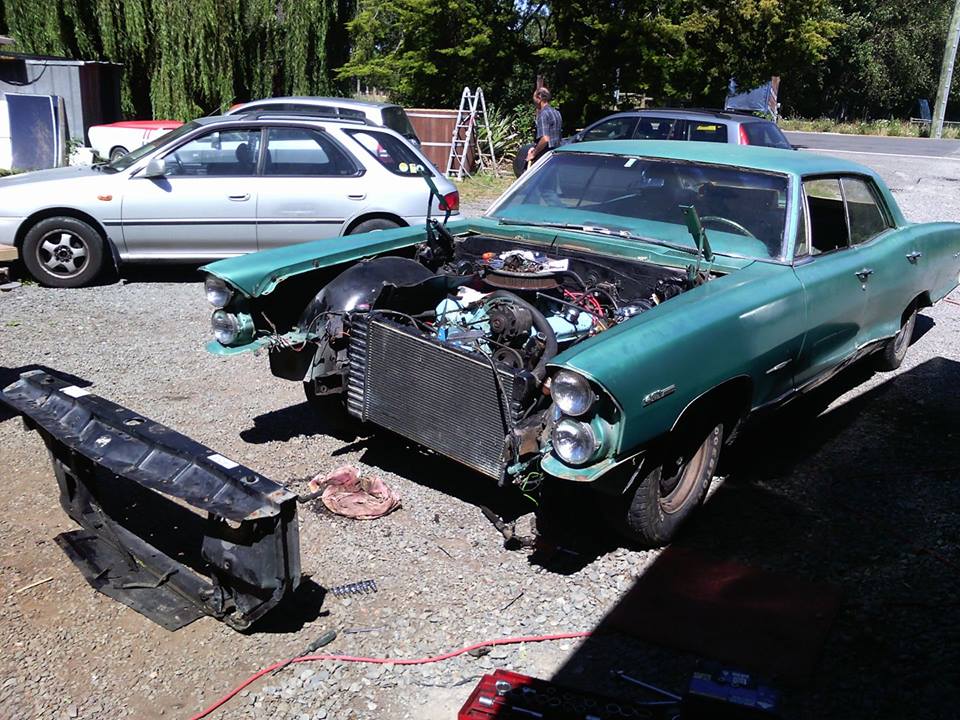
for those interested in an already involved project here is my dads 1965 Pontiac Bonneville when it was raced in the 80s it has beefyer swaybar in the front and one put in the rear. the front suspension has been lowered and aligned for racing and good turn in. disk brakes are installed in the front to replace the drums. along with a dual circuit holden hq master cylinder. the motor is the original matching numbers 389 couples with a th400 trans also original and untouched driving a 2.56:1 diff also original. the car is now just giong to be used as a awesome powerful cruiser. with some racing heritage. He has had the car 40 yeas this year. the last 20 of those it has resided in the garage in hibernation. during the new year i set about installing the 389ci v8 back into the car and making it run and drive.....stopping was another issue.....later though as typically an old car does it has some rust so that will need dealing with before i go for a wof nothing to bad just a little in the radiator support panel/cross member , both c pillers around guttering, right rear door shut area and the left rear dogleg . all fixable though. this is how i went about fixing the radiator support panel... just take the whole lot out and put it on the bench....... much easier drive down the road to wals... no bonnet....no reg..... no wof...no worries for those interested i have some old racing photos of the car from the 80s. i will try take more photos of what i do on the car.
1 point
-
This is my '51 Chevrolet Pickup. I finally got some motivation to work on it after owning it for about 5 years. I bought it back in 2010 with help from my parents, when I was 14 turning 15. It was 100% stock, farm spec when we got it. Was originally from Bakersfield, CA. Had the straight-6 blue-flame engine which has been sold. Currently sitting on a jaguar front end and Holden LSD rear end. It's the longwheel base model, which I wasn't too much of a fan of, but it is growing on me. The extra long tray has been good for storing parts and boxes. Has hardly any major rust, just a hole is the passenger's foot well were the heater was leaking. The plan is to keep the body as is, slam it more with airbags, and chuck in a v8 (probably a 1UZ) Already have new rubbers, chrome badges, handles etc and airbag kit. Next major task will probably be to c-notch both the front and rear to get it sitting where I want / as low as the ground will let me. //oldschool.co.nz/index.php?/topic/47317-matts-1951-chevy-pickup-discussion/1 point
-
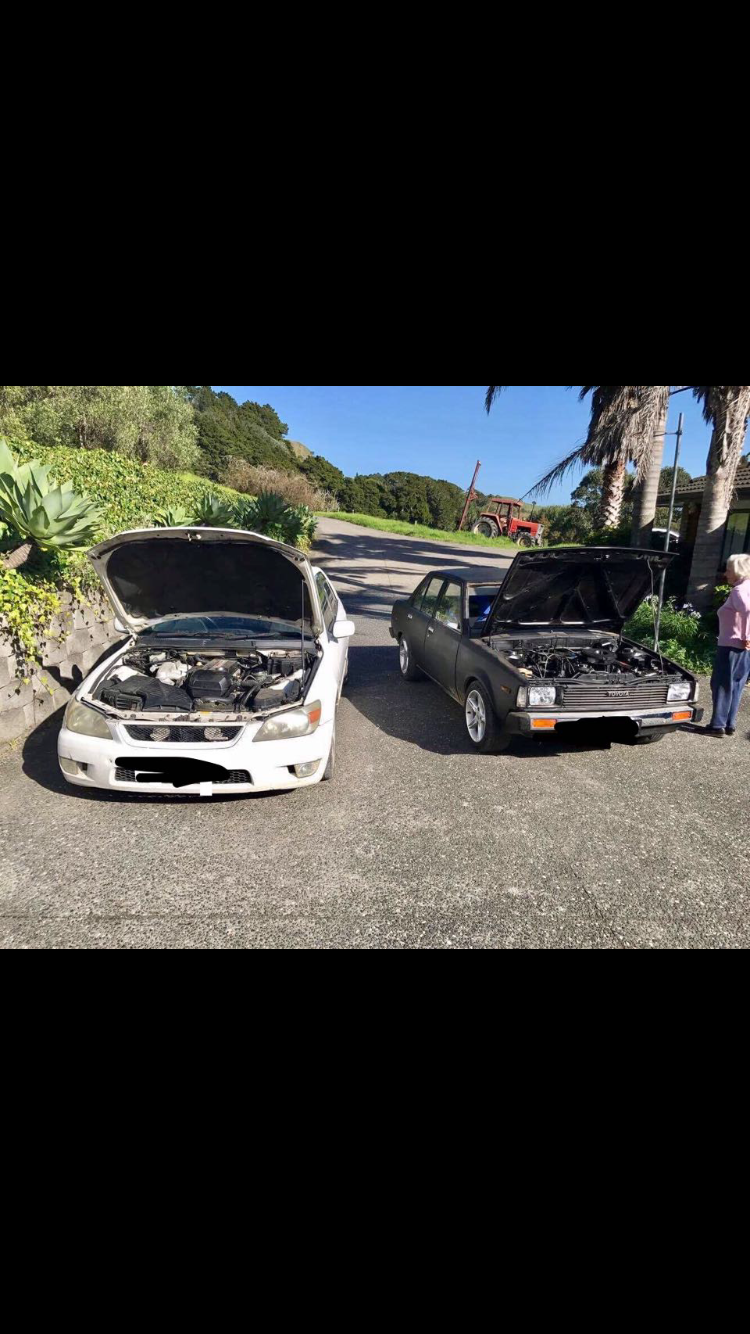
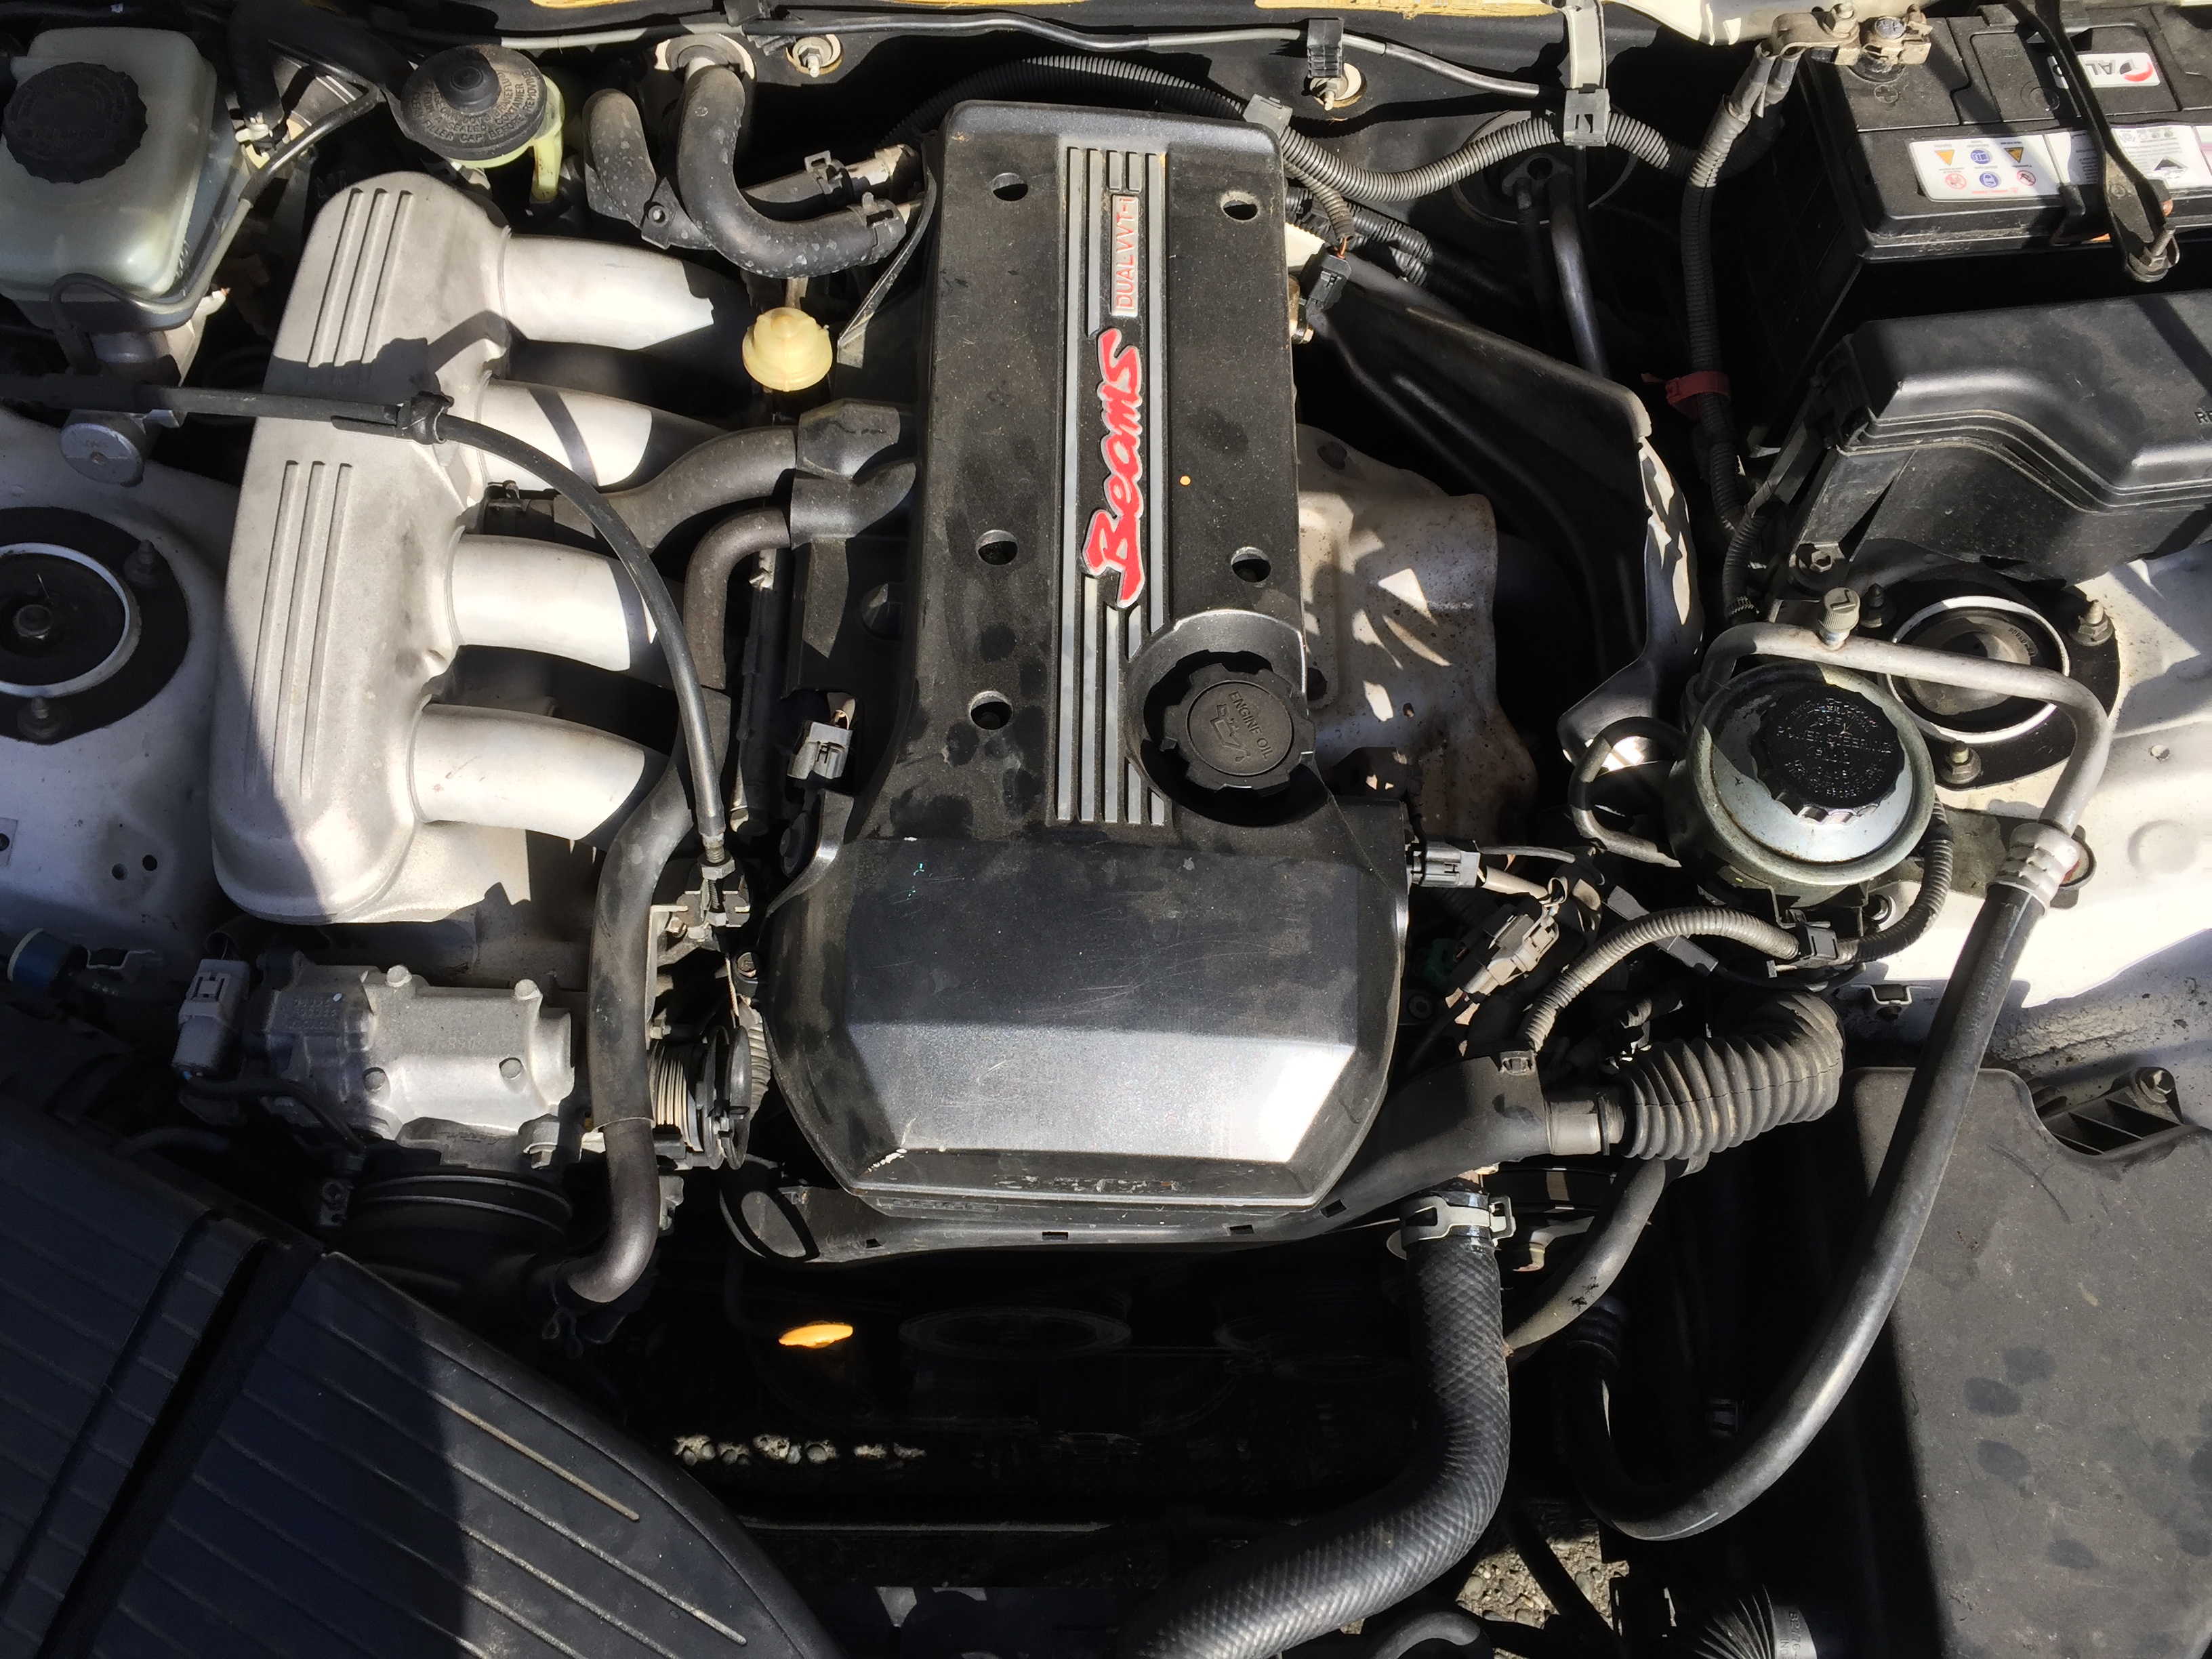
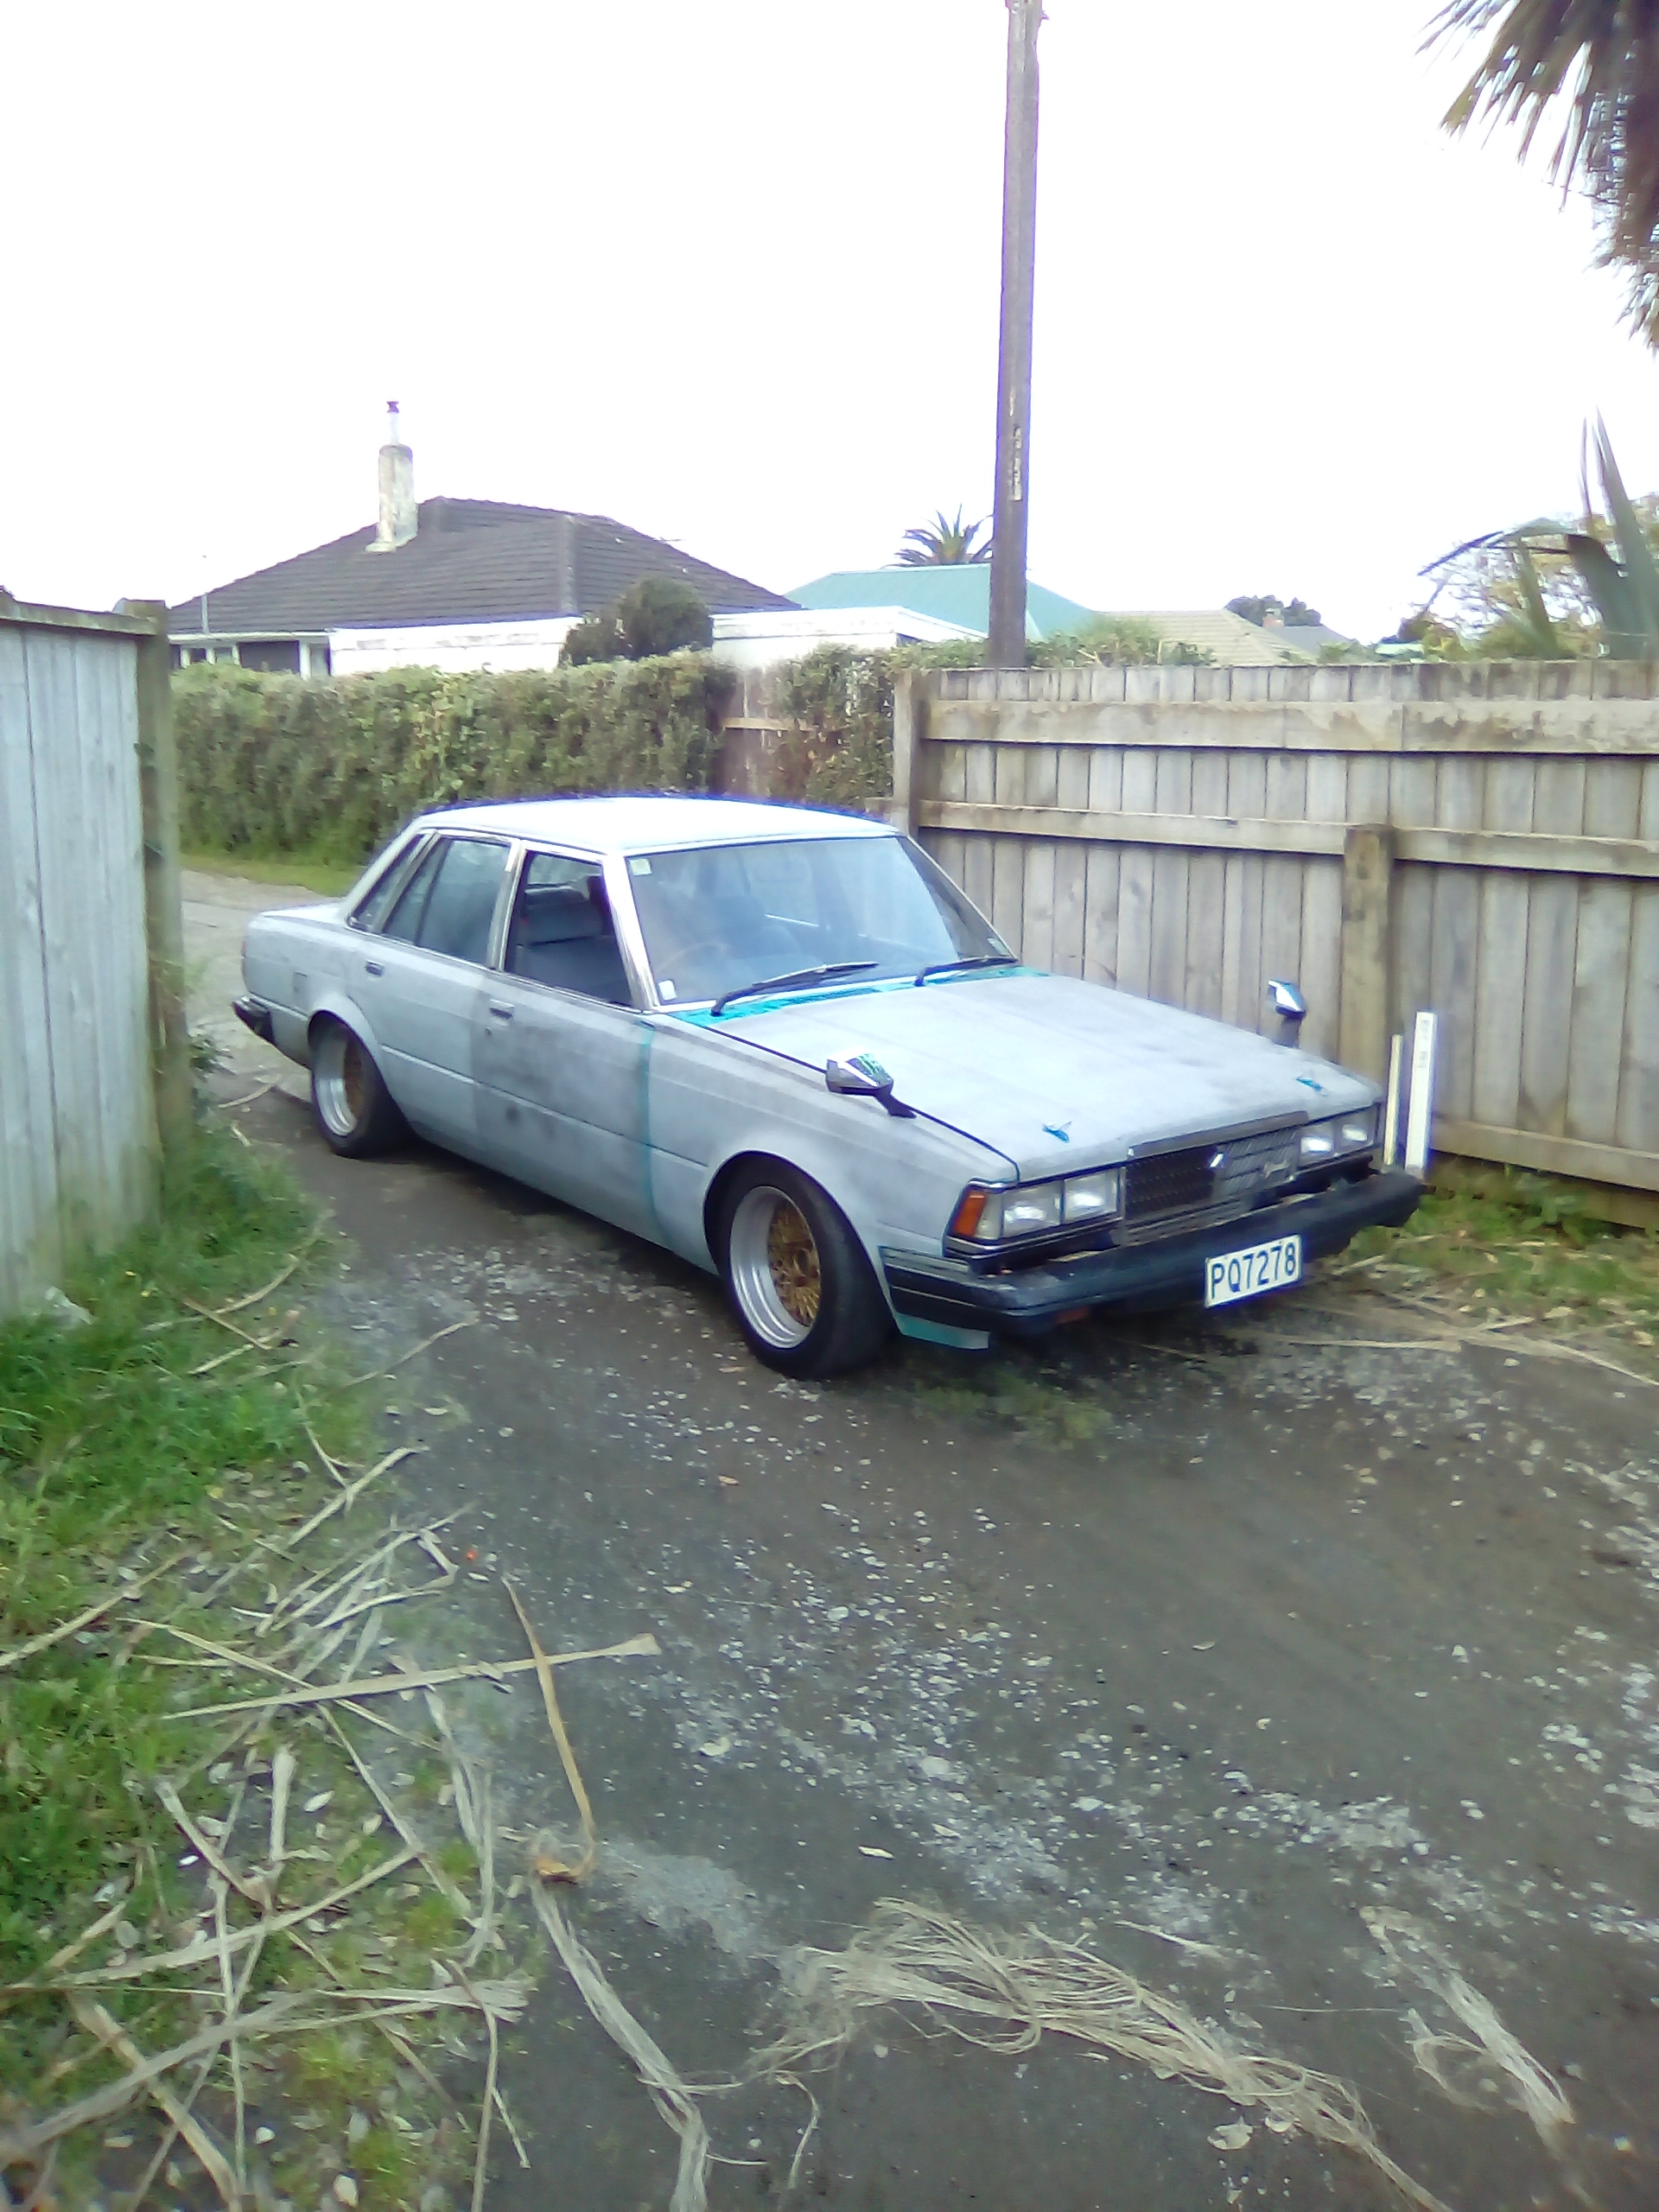
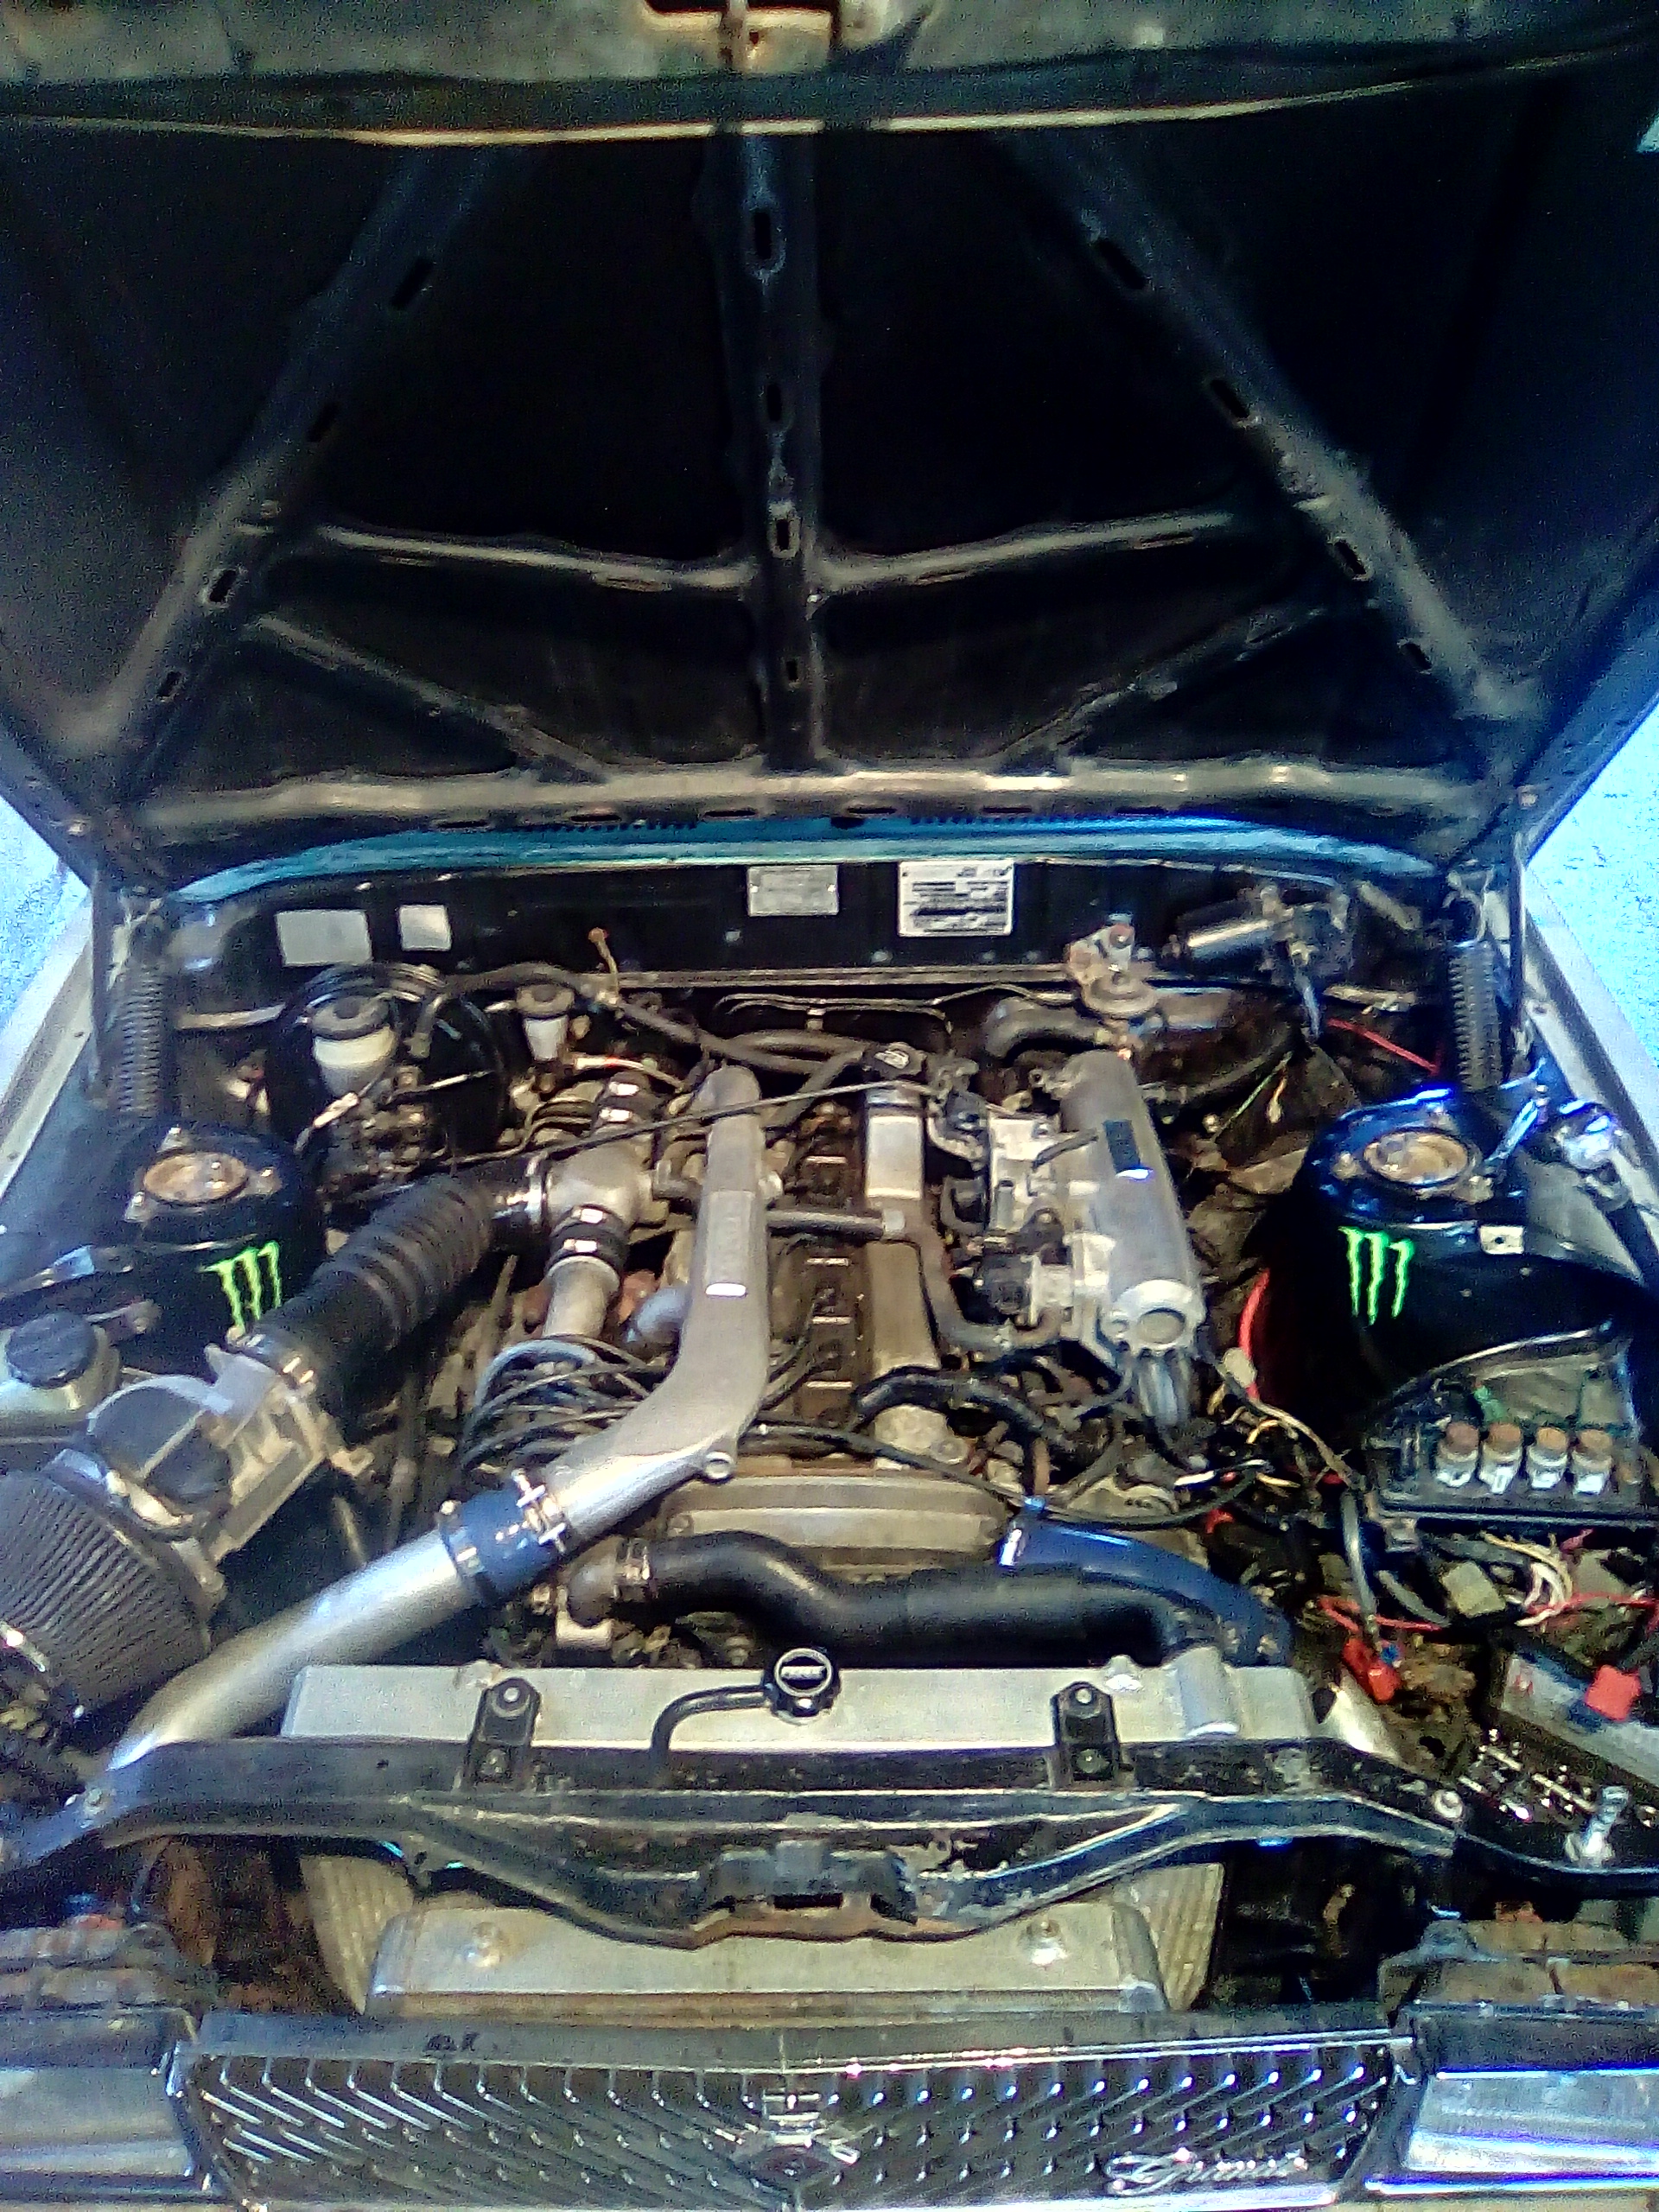
I have bought a poorly treated, unloved 1981 KE70 Toyota Corolla, with the vision of restoring and also upgrading it to the 3SGE Beams Black Top. I want to set the car up so it can be taken to the track and also used as a show car. I have bought a 1999 Toyota Altezza with a 6 speed manual box and the donating Beams engine. Will post photos and discussion as the project goes on, please feel free to ask questions
1 point
-
Thanks Man. Just had a 20 minute lesson from Delboy on how to plastic weld at home. Definately a better option than gluing!1 point
-
you are best to use donor plastic from the same item if you can. then you know the plastics will be compatible. so yeah the old fairing is your best option by far.1 point
-
Nice, mate.1 point
-
here's an idea. check the venturine tubes are in the right way round. backwards will give the symptoms you speak of.1 point
-
No plans for an intercooler if I can get away with it, it'll be an absolute nightmare trying to get pipes out the front. Only going to be running around 5-6 psi so shouldn't have any issue. And yes many conversations with ashkellybarr about the right way to set the tb up etc. I have an sr20de water pump pulley on the crank with is a bought 1-1 ratio, this will probably result in too much boost, but I had it on hand, and didn't want to go to the trouble of sourcing a smaller pulley and finding out that in the real world it only made 3psi and the sr20 pulley was the one all along! Engine Is 2000cc efi cross flow, 8v big port head. Compression ratio I can't confirm but I believe between 8.75 and 9.25ish Also note that the passenger is going to get a face full of blower noise due to tb and air filter placement!1 point
-
Lasered all my nail lines so they all line up..1 point
-
Well Sunday was a big day! I was/am knackered! Spent at lease 3-4 hours spraying, came out looking like a pink Immortal Joe, Shiny and Red!!Witness Me Sweatheart!!!!! But first! a couple non cell potatos for the inner fenders and engine bay.inside of the doors painted and hung.and I don't have one of the trunk, but that one up there is pretty good so...The body was starting to take shape, I'd spent ages sanding and bogging and more sanding, but the bonnet, engine lid and rear fenders really only had one layer of primer/high fill on them.So I gave them a going over with the long board (2x4,2x4!) and pretty much started again.I think this was last weekend, I dunno, it's all just blurred into one big session in my sleep deprived head.Chair/panel stand.fronts needed another layer after fine filler.bonnet looking good.was pretty please with the light set up at the time, had 4 of these blazing half the night, gotta have good light for this work.better.details.details.details!getting close now.1 point
-
1 point
-
Fuel tight (hopefully)
1 point
-
Have done a couple wee tidy up jobs lately - Got new control switches for the bars, rewired a bunch of old messy crap, painted a couple wee things, jetting the carb a bit better. Still needs a wee bit of fine tuning though, I need to go and get some more plugs! Also I finally got my license so have been riding everywhere, so much fun. Will work on getting on expansion pipe and popping the new motor in soon! Peace1 point
-
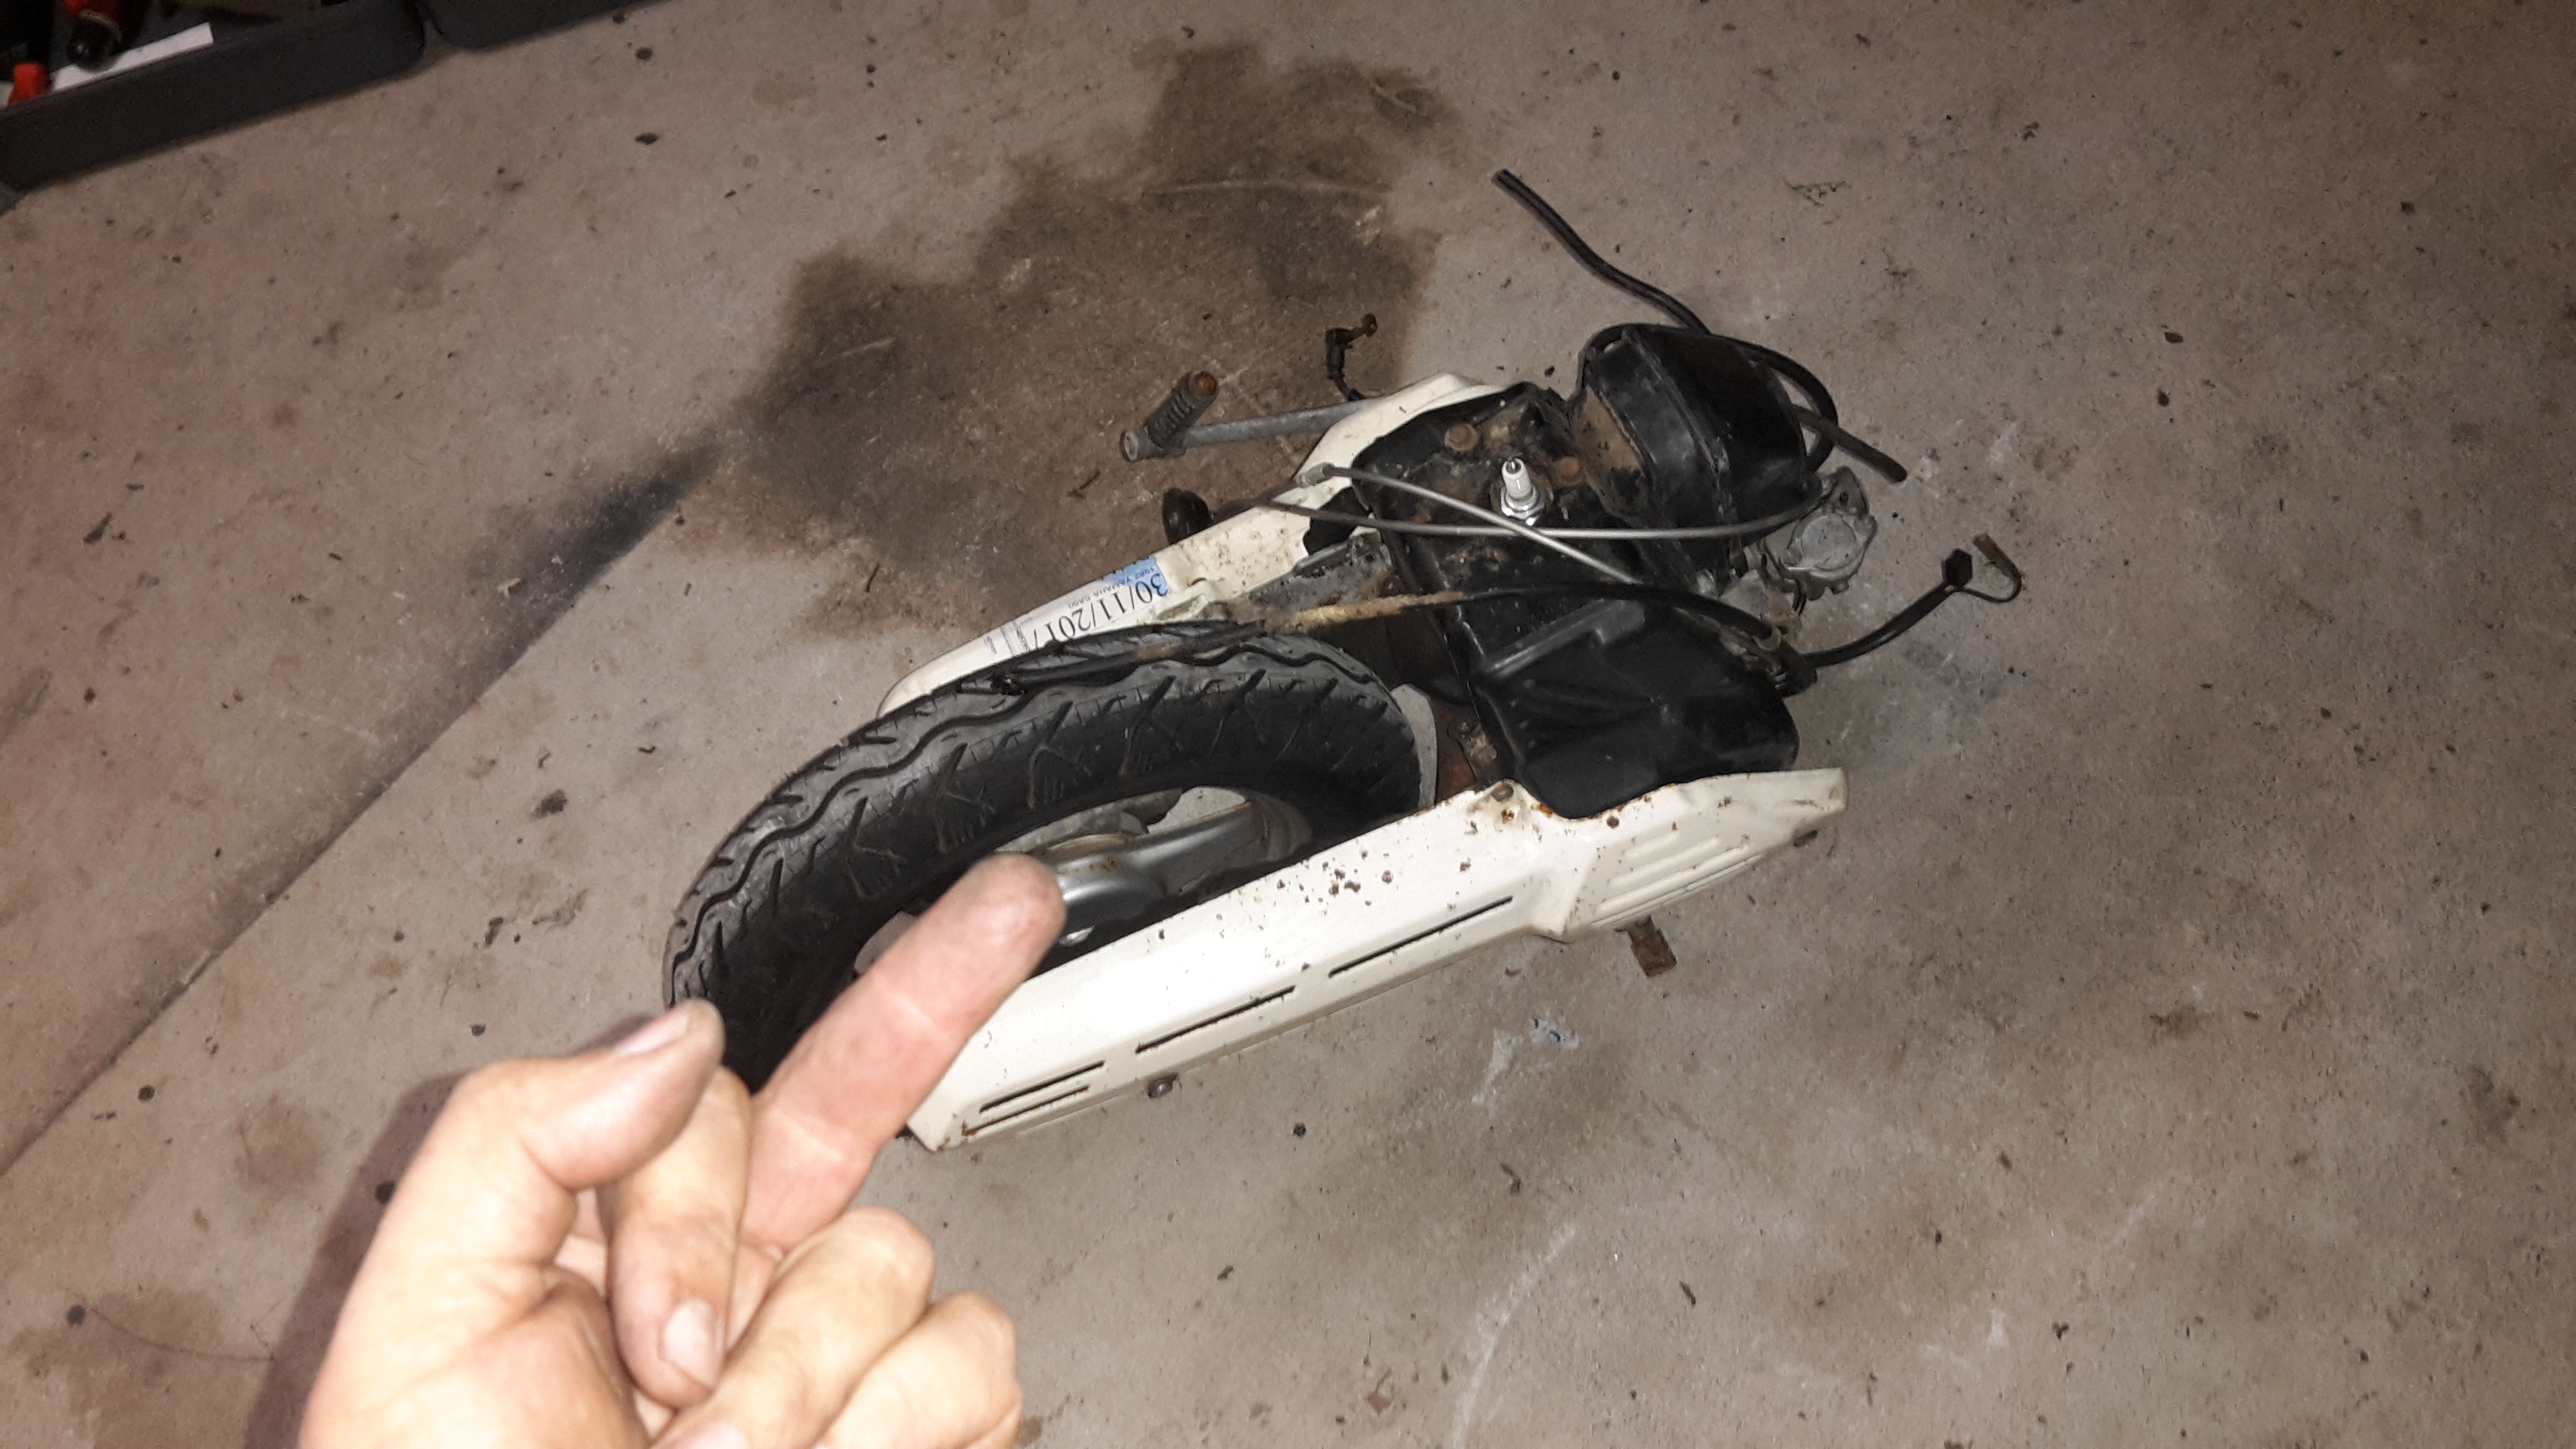
Logical thing to do once you get something running mint , registered and legal- disassemble it. I rode it a couple of times but it was too slow to the point of being dangerous when a hill is involved, and there's hills everywhere where I live. I have a spare gy6 chingaling scooter engine so I'll swap that in and get a big block kit for it
1 point
-
YH51 Supercustom turned up at the lowcal PaP so I grabbed the seat rails from it and found a set of Recaros lurking in a Bighorn A bit of flat bar, some average welding and fabrication So much comfier and they dont look too out of place1 point
-
Made some brackets to mount the valves. For some reason the holes ended up too far out so had to slot them a little. They're held in with countersunk screws so it's all still flush underneath (not that anyone will be able to see underneath anyway haha). Played around a bit with the location for a while and decided this was the best. Wasn't really enough room for the compressor to fit in between. Will mount a compressor on each side of the bed, just above the exhaust area. Back to fitting and fixing the rust in the dash now. Cut out the good/un-butchered section of the dash that some idiot tried fitting a commodore cluster in. Glad to finally throw this shit out! Pic for motivation1 point
-
5 Years today together Happy Anniversary baby That's the day / night I got her btw1 point
-
and this it todays efforts.holy shit painting a car takes ages!!!this was about 5 hours work, sanding down all the insides of the bonnet, engine lid and all four fender.I was hoping the do the insides of the doors aswell but didn't have enough time.I don't think I used any filler inside these panels because why? except for the engine lid around the vents, so the finish isn't great and the bonnet had to lay on some cardboard on the floor. less than ideal but its all shiny and red and thats the main thing!1 point
-
still sanding....1 point
-
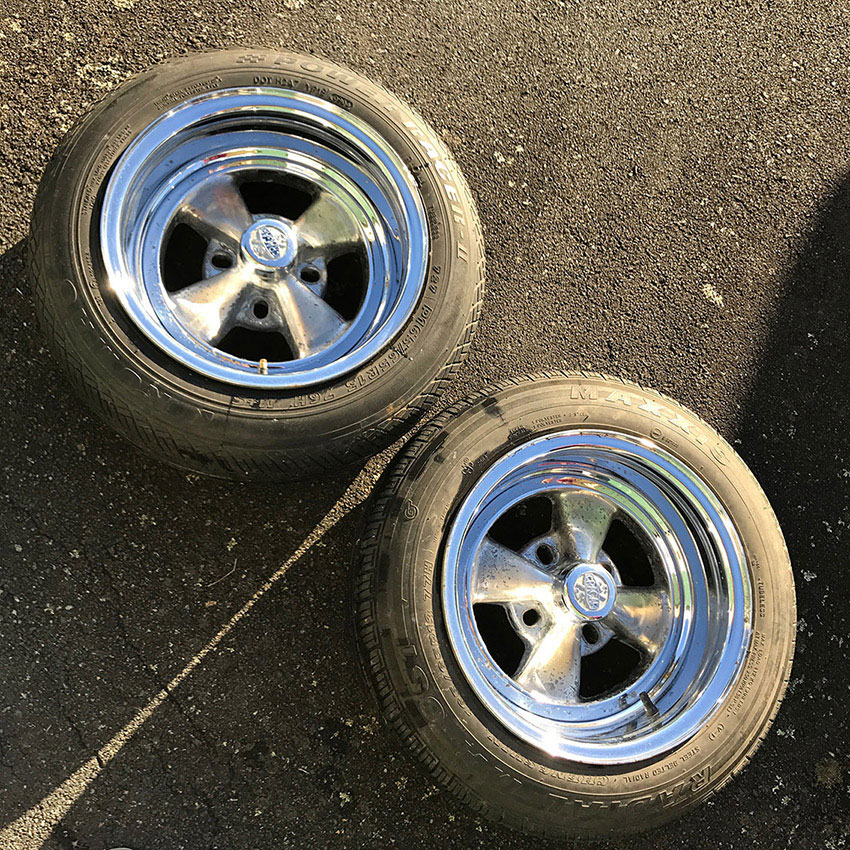
A little progress... Met with @dave a while back and bought 2 more 13x7 Cragar's from him. Thanks man. Gave them a good clean, the rims came up pretty good but the centres are pretty corroded. The centres were painted silver, who ever painted them sanded the chrome so they're pretty dull. Overall condition isn't to bad. Still on the lookout for a cleaner pair... Stoked I have a set now though! Did a quick test fit. I was a little worried they'd be too wide and poke out but turns out they're sweet. Still need to get the proper tyres I want to run but gives you an idea... Discuss here, Cheers!
1 point
-
bit more progress.body on wooden stand.doors bogged and primed.fenders bogged and primedtook a lot of work, many late nights, all day Sunday and half of Monday.A little tip, don't try welding 6 fenders together to make two, so much work to make them look good Still heaps to go!life looks like this now.time to finish up the shell and get those valance's done!1 point
-
Done the floor patch, just need to do the bit up the side and then there's a few little patches of rust, where the top of the guards bolt to the cab on both sides and a pin hole in the rear cab corner. That'll hopefully be all the rust in the cab done, then I can start on the transmission tunnel.1 point
-
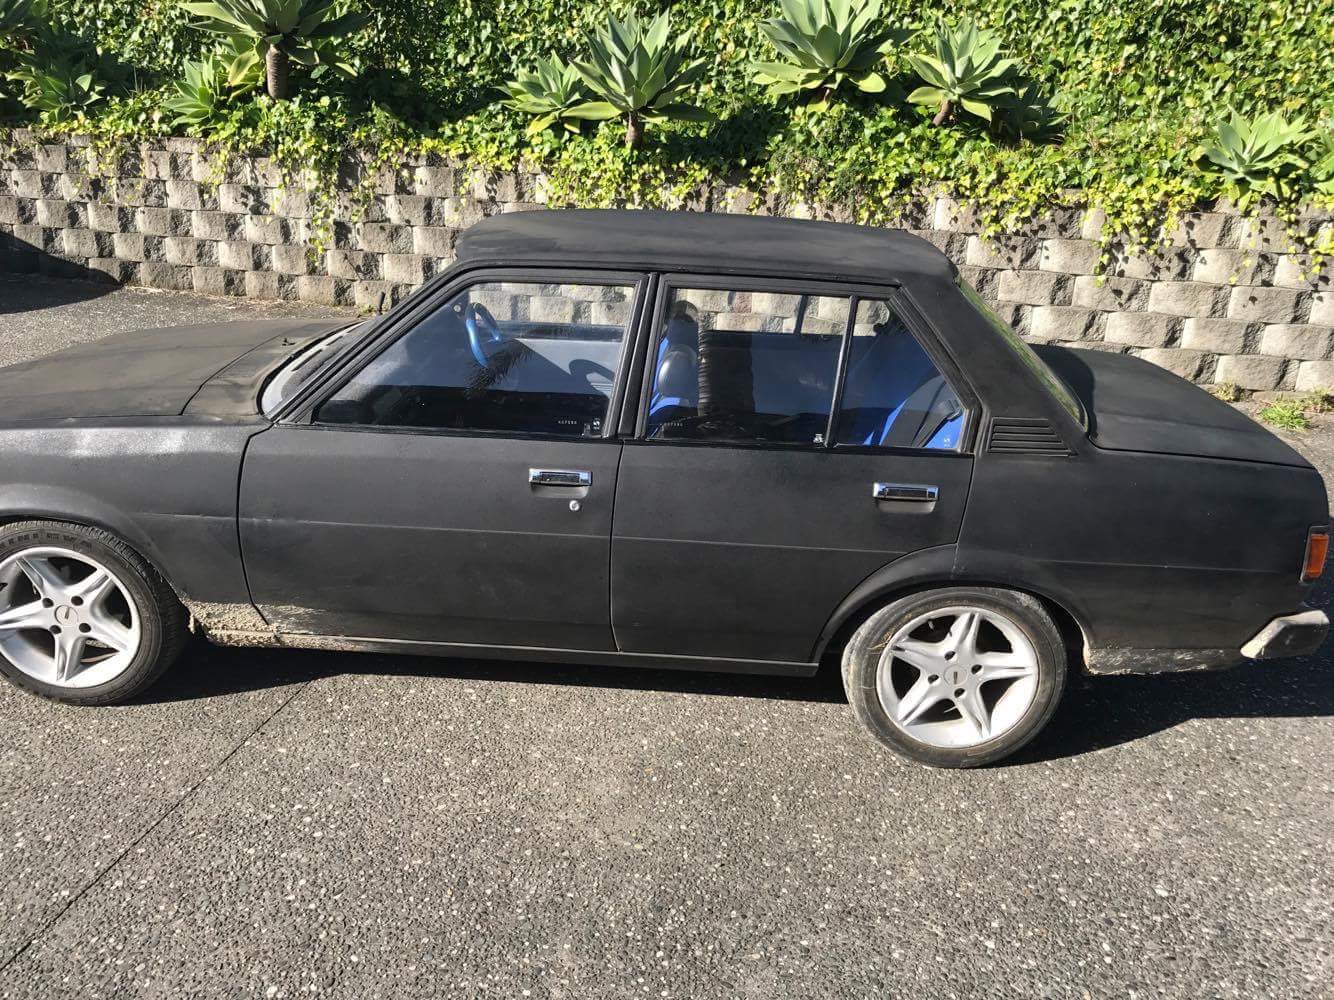
The idea is to give it some old school lowrider flare. Lowering and patterned roof to begin with. I'll just polish the lower part of the card so it will have faded/rubbed through paint. First though get it up to spec for vinning. I'm in search of some 4 spoke SS Cragar rims. Any leads will be appreciated. Pic for reference... Cheers, Kenny Discuss here, Cheers!
1 point
-
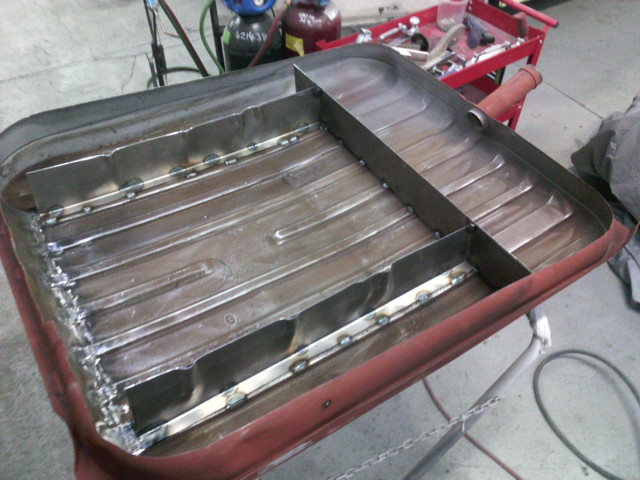
Longest exhaust build ever! What a stupid idea it was to design it like this haha. So far has 5 pairs of flanges on each side if you include the ones at the end of the headers. Will have another pair after the diff as well. Got some flexi's and welded them in, as well as the rest of it. Need to put the tray back on now and see where the rest of the exhaust can run out the back. Made some mounts, after making them incorrectly to start with. Had the rubber hanging under tension where-as it should be compressing, otherwise it would most likely tear the rubber in half. Also made some gussets for the 4 link brackets since they didn't quite look strong enough. Might make some to tie in the other side as well. Need to make a start on the fuel tank soon. Any recommendations on an in-tank fuel pump to use? Don't really know much about them, 255LPH should be enough? Tank will be about 220mm deep if that matters.1 point
-
Got some more thinners and got the front under bonnet/boot painted next.tried to get a good coverage on everything.over the years many stone chips had done a number on the paint under the arches.one more wire wheel dead.had a crack at heat shrinking some of the mess I'd made of the front quarter, worked a wee bit, stopped it popping in and out so easy.bog time!I spent Monday, Tuesday and Wendnesday night last week from about 9pm once the kids were sorted and the next day organized, sanding, sanding and sanding till about 1 or 2 am.And finally on Thursday night.a bit of etch.followed by...just the engine bay and the front valance to prime.but that will have to wait till it's off the spit as I still need to spot weld the bonnet seal strip on both valances as the frame it's bolted to is in the way.still needs heaps of work, found a few dips and bumps after the paint went on, needs lots of sandpaper marks filled in/sanded out, but I should be able to do the seam sealing and smash some red on the bum soon!1 point
-
Got just a few flanges laser cut. Got most of the exhaust tacked together. Couldn't pull out the part with the resonators so they're going to need a couple more flanges welded on either side. Looks so good though! Will it need any flexi's up the front? I'm thinking it will be mounted at the front of the resonators and at the back where the shock mounting bar is with some quite stiff rubber mounts. A package finally arrived from America. New floor panels!1 point
-
Went out to buy some resonators, realised how overpriced for how simple they are, so decided to make my own. Rolled up some perforated sheet, wrapped in stainless steel wool and fibreglass strand. Will probably make another couple to put in behind the diff, which hopefully will make it reasonably quiet. It's a real shame no-one is going to see underneath here once it's done.1 point
-
Finished this patch Made a start on the exhaust and realised I have a problem with it fitting between the crossmembers. It's going to have to be made of lots of different sections with a heap of flanges, otherwise it won't be able to be removed or fitted. It's fairly tight just to get the x-flow bit in. Might be better if I put the x-flow underneath, so then that whole section to the headers can be one piece and just drop straight down to remove. Only problem with doing that will make the exhaust sit very close to the ground, but should be fine as it won't be as low as the running boards. Will run a resonator on either side in the middle and hopefully those sections can be slid out the back if there's a flange just before the diff kick-up.1 point
-
Finished off the outer patch, then cut out the rust on the inside and welded in a new piece. Was a very difficult shape to form. Went to remove the left hand door and got 3 out of the 6 bolts out, but one had a stripped head and the other two's captive nuts started spinning on the inside. Sorted the stripped one by welding another bolt to the head and then undoing that. There was some rust holes on the inner panel so cut it out to gain access to the nuts as well. Ground off their heads and punched them through, so now need to make up a plate with a couple of tapped holes and plug weld it in there. Pulled off the door strikers and a few other bits so the inside and underneath can get sandblasted this week. Hopefully they stay within my paint-pen lines and not blast any of the outer body!1 point
-
Some more rust, this time the cowl vent. The channel where the rubber seal sits needs to be completely replaced. The other piece that is spot welded underneath just needs a few small holes patched up. Attempted to use a shrinker/stretcher to make up individual pieces but it wouldn't stretch enough for the tight radius. So then I thought about other ways and decided to try and form it out of one piece. Drew up some cad drawings and got them laser cut. After one hour of smacking it with a hammer. Came out way better than expected. Just needed to fold the inside up now. The inner corners required heating as they needed some decent stretching. The shape and fitment turned out as good as my measuring and cad drawing skills.1 point
-
Spent most of the last week of holidays in the shed, cleaning and painting the beam, brakes and gearbox, so i could get it back on its wheels and get back to the shell.Everything was covered in grease,rust,dirt and paint, so the process was dowse in turps, scrape and wipe as much grease and muck off, wire wheel, degrease, brake cleaner, sand, acid etch and or paint. Filthy work.I ended up getting two cans of POR15 in rattlecans, which saved a bit of time painting.trying to keep track of all the partswhen I first got the car the front was sitting pretty high, and the front bump stops were under the rear seat with the battery, when I installed them I found out why. One side went on fine, the other fowled the shock.Whoever build this beam, had cut and turned the bump stop horns and had welded on crooked, so all I had to do was cut and reweld, matching it to the good side, easy! except when I removed the rubber off the good one, the horn came off in my hand, that's some good welding!you can see the gap were the weld missed.also found this tiny blob of weld on the edge of the beam bearing, has not made friends with the trailing arm over the years, I'm sure someone will be posting up all my mistakes on this car one day.like the shitty huge welds that now hold the horns on. acid is a hell of a drug!but it sure does make POR stick well.cleaned up my oddball drums.smashed on some matt blackFirst part installed on the pan.Filled the tunnel up with Rustroy, that shit stinks!Darrell helped me bolt up the gearbag and beam.matty b on the box.Now I bought these grease seals for the beam about 15 years ago and never got around to installing them.until now.gearbox is matt black, axle tubes are Gloss Black POR, backing plates are grey.I've started cleaning up the brake parts, shoes etc, just need new cylinders (wheel and master) reinstall cables and paint pedals and steering stuff, feels like a major milestone!1 point
-
Front right cab corner no longer has rust holes in it now as well.1 point
-
All un-needed holes are now filled! And is now covered in etch-primer.1 point
-
This all looks very familiar.....1 point
-
1 point
-
Alright! Alright! I hope you son's of bitches see the light. you again, you again. I know you've got the metal age of ten. Listen up, Listen up. I wouldn't swap ya for a thousand bucks! so after all that, it all seems to go back together the same, which is handy. but it still doesn't fit the body correctly, the belt line is still a good 5mm lower than the door. But I can't lift the door much as it is already tight against the A pillar. least I didn't make it worse, which I was worried about. Made a start on the window sills. patches lined up using the clip holder that the one piece glass scraper is held in with.1 point
-
well I managed to make a bit of mess of this patch! I'm sure it was all nice and flat?? before?? that is terrible. solid as though, must remember this is the bottom of the door, so fuck it. looks good from this angle.1 point
-
So I want these doors solid, I'm just not completely disassembling them like the shell. That said the bottom hinge on the drivers door needs some major work, some numpty(me) tried to drill out the pin about ten years ago, removed runningboard, jack car up on one side and drilled straight up, sept the car was on a angle this it's self would be bad enough, having to drill out the rivets in the door, fit a new hinge and then suss out nuts and bolts to hold it in place, but I can't. Because someone at some point folded this door right round and half ripped the rivets out, and then welded everything back together. So. This is stuffed anyway, so off it came. See how I skillfully drilled out half of the pin! this is looking from the bottom of the door, there is even less meat left on the top of the hinge. I was hoping to somehow fix this half of the hinge and just use half of the new hinge, but everything is so bent and twisted it really needs replacing. after thinking long and hard about the easiest, fastest or best way to fix this thing, I did this. and chopped the inner panel, hinge and all, out. started removing rust and hammering the folded door skin flat, something I couldn't do with the inner panel in the way. Also cut this out of the other end on the bottom of the same door. very krusty in here. removed parts and new hinge from this angle you can see how far the hinge has pulled though the door. it's going to take some work still to separate the hinge without damaging the door panels shape. Again, What have I done!! started making a patch for the bottom corner, might have to wait till the weekend till I can cut the hinge out of the door panel. Also finally welded up what must be the last rust hole in the body, on the passenger rear quarter window sill. and just a wide shot of the shed just to prove I haven't cut the whole thing into tiny chunks. my names Angus and that's my story.1 point
-
Got most of the top welded up and a little bit of the bottom done. It didn't really take as long as I thought it would. Can probably flip it over now to weld the rest of it. Need to also start designing the crossmembers sometime soon.1 point
-
Certifier came and looked at this last week and said everything looked good. His only suggestion was to box the whole chassis because of the engine upgrade. Finished the top airbag mounts in the front end. Fitted together quite nicely. Just need to get the lower airbag plates laser cut, then drill some holes for the bags and the front suspension should pretty much be done for now.1 point
-
More progress! Got the top fully welded on now, chassis cut out and the bottom partially tacked. We are thinking of putting the airbags on the outside of the chassis, since they would be pretty close together if they're on the inside. Like the pic below, except the top bag mount will be about an inch or so lower.1 point
-
I got the c-notch semi welded up. It's welded on the inside to the chassis and plug welded on the outer sides. Also has some reinforcing plate in the middle. Just need to fully weld around the top now, then cut out the original chassis and bend up the bottom piece. Also found a use for the rear bumper.1 point


.thumb.jpeg.e0a4bff61111e0c8c7396950fcc94da1.jpeg)


.jpg.f8e94d8625df5fcaf9a9d629d0f9f023.jpg)


This leaderboard is set to Auckland/GMT+12:00