
Leaderboard


Popular Content
Showing content with the highest reputation on 02/19/15 in all areas
-
A lot of work has been done on the car now. All the rust has been fixed and we should have it back fully painted next week! The car is in pretty good condition for its age, it was only those major rust patches to fix and the clamps for the door windows. rusted window clamp and new one welded up and rust proofed while the windows were out i cleaned up all the parts for them cleaned the seats lights as well We sanded under the bonnet, boot, door wells, behind the doors and all those bits have been painted the cars all primed, getting put back together and then the final sand before paint.5 points
-
After being a member here since September '11 I figure it's time to show my ugly mug! Will be there camera in hand4 points
-
3 break downs on the way home, clutch pipe blew, so no clutch, coil overheated and missfired like hell then quit and had to cool down before we could go again and the thermostat stuck and blew up the radiator!!!! Apart from that super unevenful We're bringing Neils Oxford Next, last ran 1983, so that should be fine! Thanks everybody for helping out, definitely wouldn't have made it home without you, we will bring a rebuild kit next time4 points
-
Its alive just in time Nats track Day3 points
-
Heres hoping the Marina made it home...3 points
-
Hey, I've got a 1978 Mitsubishi Colt which were doing up. Its pretty much a driveable project car. I've had it for 2 and a half years and i'm finally starting to work on it, so i thought i'll join oldschool for any tips or ideas. I think its also known as a Sapporo but its registered as a Colt. The pillar-less ones are pretty rare.2 points
-
That crash last night really pooed up the Northwestern citybound. I could see the road had been shut and lots of people no longer actually in their cars as I cruised onto the motorway at Te Atatu. Wait, didn't I see Chris briefly as I left Burgerfuel last night? I distinctly remember asking him about some shelving brackets.2 points
-
Finaly got the wheels mounted, exhaust done and a tune! The vacuum advance has a hole in it so am trying to source a new one, then the tune can be finished. I have only been able to find one supplier and they want $158 for it! So may end up buying a whole dissy new or second hand and using it for parts and spares. She was running like POS last night and I found out today that the brand new thermostat has locked shut (I even boiled it and it wouldn't open). Whiped it out and drove her around without one in and a huge difference off the bat. Will slap one in tomorrow night. I aim to get some cool pics up but here is one i got tonight before it got too dark. Front /rear ride height needs a tweak......not sure if I should raise the back an inch or drop the front. Will let the suspension settle and put pics up for your guys 5c on the matter. lovin the mags!2 points
-
Thought I might pop a thread up about the GB400 I picked up recently as I slowly try to tidy up some of the dodgy bits. Day one at home: Plenty of dodgy bits to choose from. First problem was there was zero rear brake. The seat had a big hole in the rear section and was held on to the bike with a nylon strap. The bar-end mirrors have stupidly long bolts that very nearly hit the tank, the battery was rooted, air filter was black, rear tyre was square, foot peg rubber consisted mainly of blue electrical tape, front guard looked to have been finger painted by a 2 year old and generally pretty grubby but was running well. After a new air filter, oil change, rear tyre, battery and fresh foot peg rubbers I started stripping the bike down to polish all the stainless bits. I chopped the huge front guard down a bit and painted it matte black to hide it a bit. And this is how it looks at the moment. Just want to tidy up the engine covers and casings a bit more, sort out the ugly exhaust box and bar end mirrors. Might also lower the clip-ons, guages and head light but just enjoying riding it for now.1 point
-
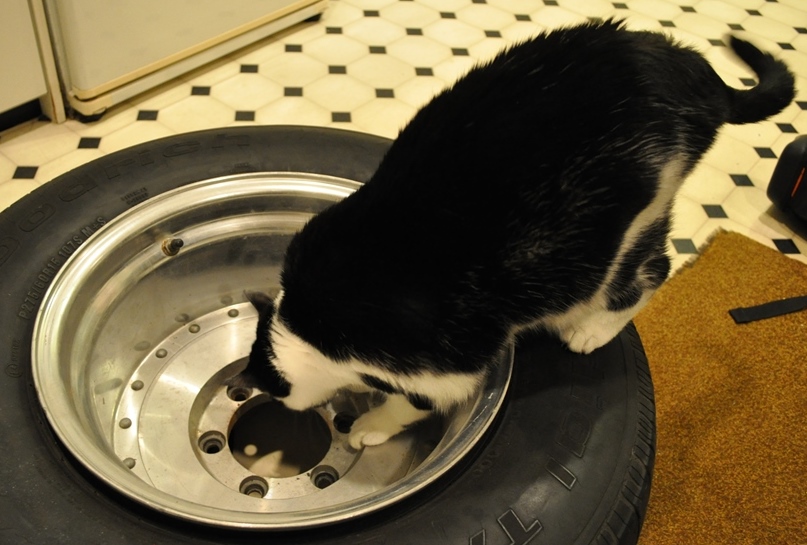
I have a problem... Its okay, My cat approves So I havent done much at all on this recently, all its done is sit gathering dust. These popped up and I had to have them. There Enkei 15x10! so fully JDM and have massive amounts of dish. They should look a bit better than the 8.5in wide steels. Plan is to give them a polish and mount them onto the 33x12.5 mud tyres. YAY! Also opinions on fender mirrors on this VS the factory mirrors on doors? need to decide before paint
 1 point
 -
+1 for chemiweld in a shitbox car you dont plan on keeping forever i got another 6 years out of a civic of my grandpa's cause i couldnt be bothered fixing a BHG, had to put a bottle in every 3 years mates VL went for 2 years with the same issue getting caned every day it does bung stuff up though1 point
-
Its a farm car1 point
-
as per title1 point
-
Have rolled and crimmped cores before. Like a tube of toothpaste. Get some good 2 part epoxy too. Have used that over the crimp and never had a leak again my cars are thermosyphon mind1 point
-
We have been known to appear in different places, at the same time, on occasion. It's a phenomenon referred to as the BiGrantalLocation Flux.1 point
-
This will hopefully be me one day Such a lush build. Inspiration peaking!1 point
-
dam it i missed a good meeting!! ahh well i got my shower almost installed always next time and nats1 point
-
i didn't see the oxford.1 point
-
I had one of thees a long time ago, they are very very hard to kill, watch out when you come off the gas quickly. Mine snapped the mount for the rear brake caliper and the whole lot spun round and smashed off.1 point
-
If you need someone to keep your mum quiet just pm1 point
-
buillt this about 5 years ago now running rb30det gt45 5 speed microtech shortened diff and big brakes off merc/skyline1 point
-
1 point
-
ok, well as some of you know, on my way to do my euro trip i blew the gearbox coming into stormin the castle, so i ditched the beemer and bought a bandit12 to do it on, fast foward to a few weeks ago when i finally got round to picking up thebmw and dropping it off to a local guy who is an expert on air head boxes, he has dozens of them and they get sent to him from around europe to do, luckily he agreed to do mine as he had nothing on, and didnt even want to get paid for the job, just pay for parts, so here is his write up on the job I had a quick look at the bike after you had gone. That box sounds as though its got a really serious problem, I've never heard a noise like that before. It will be interesting to see what happened (I'll post pictures). I was out with horses today and tomorrow I've got to sort out a neighbour's chainsaw before doing anything else but hopefully I'll make a start at getting the box out. I'll report back on progress. .... Just to remind you, this is what turned up: It was very difficult to push about as the box wasn't running free in Neutral, this was accompanied by horrible 'clunking' noises. Pretty soon it was a sorry little Rat Bike Taking it apart wasn't difficult. The tank was held on by the single fuel pipe and the airbox only had one bolt - which was very loose. The seat was clinging on with two nuts that were just started on their threads The air filter is a scrapper :blast. Anyway, the box was soon on the bench: The Output Flange nut came off OK, but the taper was very tight (a good sign). The box was very dirty around the clutch end. The clutch lever was very stiff so I was expecting trouble there. The magnetic drain plug didn't look too bad - which surprised me as I was expecting more swarf than this: Soon the box was apart to reveal . . Swarf everywhere I can't show it in stills, but the rear bearing on the output shaft was the worst I've ever seen - its almost possible to remove the outer track from what's left of the balls and cage. The other bearings are shot as well - but are not as bad. The output shaft has been pulled back from the front bearing. There shouldn't be any discernible space between the bearing and the fifth gear pinion. This is why we fit circlips to the front of the inner bearing The swarf has contaminated the oil and has worn the two bearing sleeves that the first and second gear pinions run on - The plain sleeve for First Gear: The First Gear pinion has a plain thrust washer on each side. The inner one has been pressed into the Third Gear sliding pinion - its supposed to be flat. This has further damaged the bearing sleeve that did the damage to it. The (expensive) roller Bearing on the front of the Input Shaft is usually OK, however, this one is jammed solid and the rollers won't turn so I guess its full of swarf I think the box has run low on oil at some point in its life (there was oil in it when I drained it) as the Input and Output shafts have been 'blued' with heat where the bearings have been choked with swarf: I'm not intending to replace them as the bearing sleeves will be renewed. I can't see them going soft (or brittle) with the heat treatment. Some of the retaining washers and circlips on the Output Shaft are damaged and will be replaced. One circlip has been reduced to almost half its circumference, yet I didn't find any broken pieces The 'clunking' noise heard when the bike was being wheeled about came from the Drive shaft. The rear bearing on the Output Shaft was so worn that the Drive Flange was hitting the outer sleeve on the rear gearbox cover - where the 'boot' attaches. This movement allowed the Worm Drive on the Flange to chew-up the Speedometer Drive gear - you can see how the spline teeth are now tapered towards the lower end. I have ordered a 'Good used' one from Motorworks. Worse, the Drive Flange has cracked the rear cover. Its not critical and I'll put a touch of Epoxy adhesive on it. A 'Good Used' rear cover is £110 from Motorworks The good news: There is some. The selector forks are fine with just one tip showing signs of heat. They will go back in OK. The complete Selector Mechanism is also A-OK. I'll replace the springs and Indexing Roller as a matter of course but this is actually better than some I've seen The cam faces on the Input Shaft Shock Absorber are also very good. The Clutch: The Clutch assembly looked well past its sell-by date and I wasn't very hopeful about saving all of it. I removed the six 'hold down' bolts and expected the outer retaining ring to fall off and the Friction Plate to fall out . . . not a bit of it, the thing was welded together and nothing would shift it. I soaked the three locating pegs in Penetrating Oil and left it for a couple of days - still no movement. So with a gas torch and a hammer and cold chisel (to use as a wedge) I eventually got the bits separated. The Friction Plate is just down to the rivets and the rest is rusty and seized. I'll save what I can but I have ordered three new parts from Moto-Bins today. The problem then was that all the components were contaminated with very fine metal swarf and I didn't want to put anything back in that state. Washing the Gear Pinions in Kerosene didn't remove the swarf so I dug out my 27 litre Ultrasonic Cleaner "Hubble-Bubble" After two 20-minute sessions, the cleaning fluid was a dark brown colour. When the fluid was drained the bottom was coated in particles - mostly steel swarf. I cleaned the tank out with a large clump of paper towel which came out covered in sparkly bits. As the gear pinions and so on were now thoroughly de-greased I carefully re-oiled everything and set it aside ready for assembly. I have a couple of (large) orders outstanding with Moto-Bins and Motorworks so assembly will have to wait until the shiny new bits have arrived. To be continued.... ..... I fitted the centre track from a 6403 bearing onto the Output Shaft and then stuck it in the lathe. Using a carbide strip ground down to a shade over 1mm thickness and given a cutting tip, I cut a circlip groove into the forward end. It doesn't take long and a new circlip fitted OK. Then a van arrived . . Oooooh, shiny bits Hmmmm, doesn't look like £432-worth does it It's not all for this bike as I'm re-stocking some of the small stuff . New vs. Old. The second gear bearing sleeve was a nice tight fit on the shaft. Always ensure that these oil holes are lined up as there isn't an oil groove on the inside of the sleeve. The new 'High Fifth' gear was fitted, along with fourth & Second gears, front bearing and the all-important circlip. Second gear is a lovely fit on that new sleeve - smooth without any hint of play I then added the third and first gear pinions. First gear is also a nice smooth fit without shake on its new sleeve - quite unlike the way it was when it came off originally. The 'Standard Fifth' gear is shown, there is no difference in diameter they just cunningly re-profile it to include fewer teeth I built up the Input and Intermediate shafts yesterday, but didn't take pictures (it involves spring compressors, various home-made steel 'dollies' and my floor press) all three shafts are now ready to go back in. The Gear Selector mechanism is also ready with new springs and Indexing Roller. I may get the box assembled tomorrow but then there will be a short break as I'm off to "The Bristol Classic Bike Show" at Shepton Mallet on Friday/Saturday. I won't be on the 1150GSA this year as I don't fancy the M6 on a Friday with snow and ice - I'll be taking a large 4x4 . I must be getting old and soft I put the gearbox casing through the Ultrasonic Cleaner yesterday. It is clean but the alloy is now dark and mottled. I'll see if I can clean it up with something before building it up. To be continued . . . . ..... More progress to report Having assembled the three shafts I heated the gearbox case with a Propane torch and fitted them along with the intermediate shaft selector fork that has to go in at the same time. There are two oil baffles in front of the Intermediate & Output shafts and the Input shaft's roller bearing has to go in before the others as all three bearings are an Interference fit. It entails a bit of juggling and one has to be quick. A quick tap with a rubber mallet ensures that all bearings are seated before the case cools. Then the Selector mechanism, Output Shaft Selector forks and shaft and main oil baffle are fitted. When the case has cooled the gear lever if fitted and the gearchange is checked. It isn't great with the rear bearings unsupported but as long as all gears can be selected it will be OK when the rear cover is fitted. Then the rear cover gasket goes on with a light smear of Blue Hylomar. And now for the technical bit - Shimming the end-float . One needs a 'Shimming Plate' for this job: I have drilled mine so that I can bolt it down on top of the gasket. I think that this gives me the most accurate measurements but people have different approaches and may just rest the plate on the case or put the gasket in after the measuring has been done - each to his own. I use a 'Outside Micrometer' and a 'Depth Micrometer' for this job. First measure the thickness of the Shimming Plate: Then measure the thickness of the oil baffle that goes on the rear of the Intermediate shaft: Using the Depth Micrometer, measure the height of each bearing above the plate - I take about six measurements around each bearing. Then measure the depth of the bearing housings in the rear cover - again, I take about six per bearing. All of this is written down and then the shim thickness is calculated for each bearing: The formula goes . . (Depth in cover - 0.05mm clearance) - (height above plate + plate thickness + baffle thickness) = Shim thickness. One then has to assemble a collection of shims to the right value. These come in four nominal sizes - 0.20mm / 0.28mm / 0.38mm / 0.50mm. However there is quite a variation and I spend time mixing & matching until I get the right result to within 0.02mm. Here, I am looking for 0.95mm for the Output shaft and the shims measure 0.94 - good enough for me . The collection of shims are lightly greased and placed centrally on the bearings - you don't want them moving as the cover is fitted I screw four 6mm studs into the back if the case as a guide for the cover. It will be hot and if fumbled causes mayhem with shims falling about the place . A final check is made of the rear cover to ensure it is flat. If not it will cause problems. And then the cover is heated with the Propane torch and carefully lowered onto the bearings. It is then tapped down with a rubber mallet and five of the nine set screws are fitted. The studs are removed and all set screws fitted and torqued-down to 9 lbs/ft. When the box has cooled and I am happy that the clearances feel right I fit the three oil seals. First the input shaft splines are masked and the shaft given a light smear of grease. I use a long socket of appropriate size to seat the oil seal into the case. The seal is given a light coat of Blue Hylomar to ensure its oil tight around the case. Surplus compound is wiped away and that's one done :thumb. Now remove the gear lever and repeat the process with the gear lever shaft oil seal. I used an 18mm socket to seat it. The gear lever shaft is given a light smear of grease and replaced. The Output Shaft oil seal is given the same treatment. This is a Monolever bike so the oil seal lips face outwards to let the box breath into the leg (which has oil in it). Paralevers have a different oil seal that is faced inwards as the leg is dry. Paralever boxes breath through the hollow bolt that secures the speedometer cable and battery earth strap. I use a flat steel disk I turned on the lathe with a 50mm 3/4" drive socket to seat the rear oil seal. The output Shaft drive flange is then given a light greasing and fitted to the taper shaft - the taper is kept dry. The nut is torqued down to 161 lbs/ft which is a bit of a heave. I use a long locking bar and a Certified 50-300 lbs/ft 3/4"-drive torque wrench for this. Almost finished now. The Neutral Switch is checked with a Multi-Meter and fitted with a new washer. The Drain Plug is also fitted with a new washer. I cleaned the swarf off the magnet with cloth and a high-pressure air line (don't try this at home kids :rob). The replacement Speedometer Drive, a new collar and the breather bolt are then fitted (it doesn't strictly need a breather bolt as a plain one would do but it has one so it went back in). And that's it - the box is finished . . . . Now for the clutch . . . . ...... so thats it, box is done clutch done, bike back together and a massive parts bill to pay, almost to the price i paid for the bike a couple of years ago1 point
-
Got itchy arms trimming this heaps. Thanks Neal for sorting this out for me! Completely unsure which direction to head now. It fits far better than expected but still needs a ton of work (as well as a donor front steel bit to cut up) It does have some starved horse syndrome happening but pretty minimal considering how many thousands must have been pulled from this mold (rapidly, to keep up with demand) It won't ever look good in glass paint because its glass... But I'm not sure how much I want glossy paint on the whole car?1 point
-
Another tiny update guys, don't mean to sound like a wanker, but I'm pretty flippin pleased with this wee thing! remember this? even though I had it sandblasted so all the rust was gone, this left the metal pretty thin in places. And as this is a strengthening panel I thought it best to put it right. So I cut it back to were it was solid and had a go at metal origami. test fitting the rear fender so I get the stud in the right spot, also checking the quarter panel would fit back on top of it, so many layers of metal in this bloody spot. like so and welding it together, there is also a wee patch at the top, were it was damaged when I removed(ripped) it. tidied up very happy with the fit, took alot of bending and hammering to get this back were it should, I made a bit of a mess of the shape when I pulled it off. yeah the stud I used is just a old bolt I welded to the back of the panel and then ground the head down as it was to big. hope you like?1 point
-
Front suspension MK3 Brought a nz hobby car manual that says what you can and cant do in regards to building a car in nz, should hve got one when I started this but im not usually one to do things the easy way, So found the suspension arms I made wearnt up to spec, need to to be beefier and need to tig'd, not mig welded plus i didnt like the rod ends so heres the new ones with bushed rod , hopefully should be a bit nicer ride then the solid ones and not wear out like they tend to. Threading the ends for the rod ends, 3/4únf Made up some press tools to put the ball joints in and tryed using my bench vice but no chance so shot down to the local engineers and he let me use his big press Final welding on bottom A arms, still need to make a mount and hole for the shock mount to and somewhere for a bump stop Waiting on bushes and more rod ends to show up so I finish mount these ,1 point


This leaderboard is set to Auckland/GMT+12:00