
Leaderboard


Popular Content
Showing content with the highest reputation on 04/27/24 in all areas
-
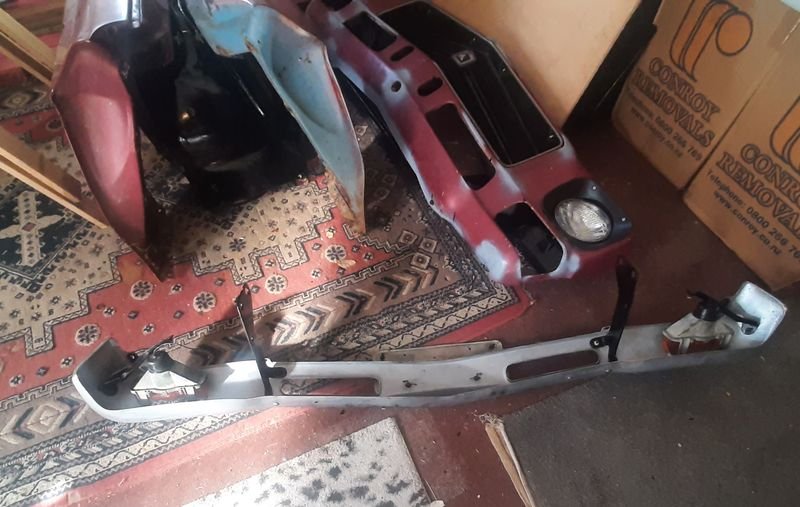
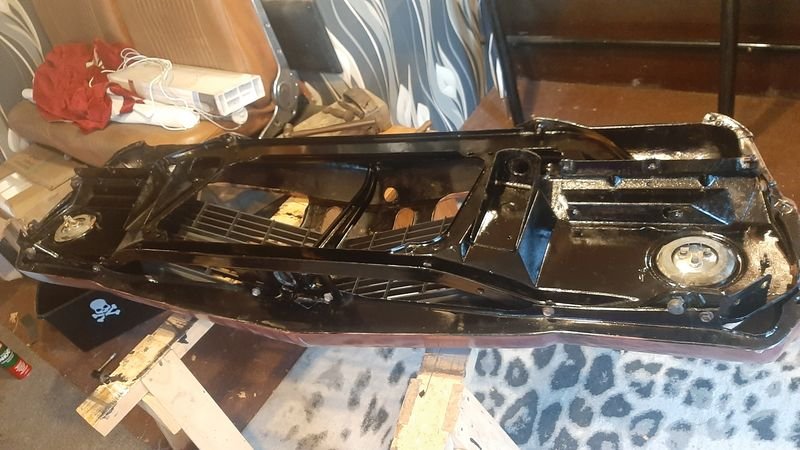
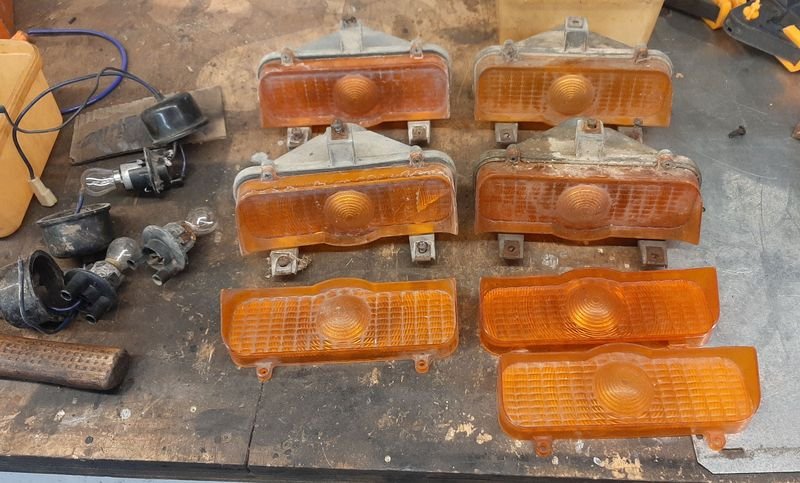
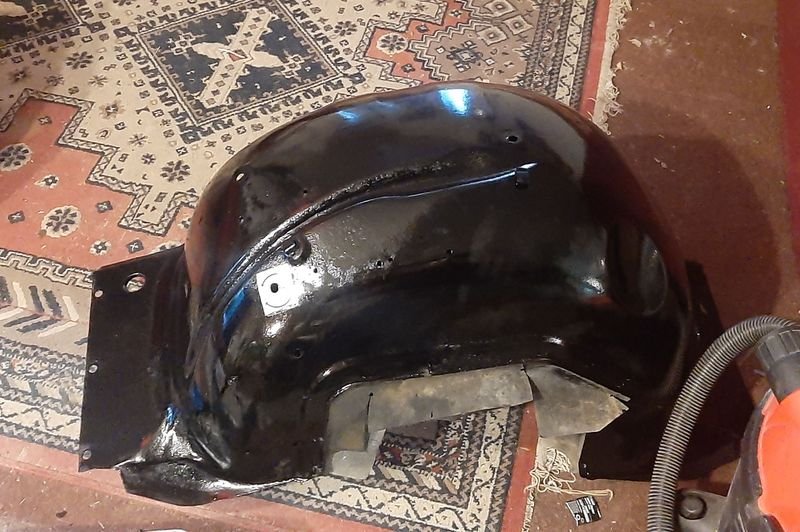
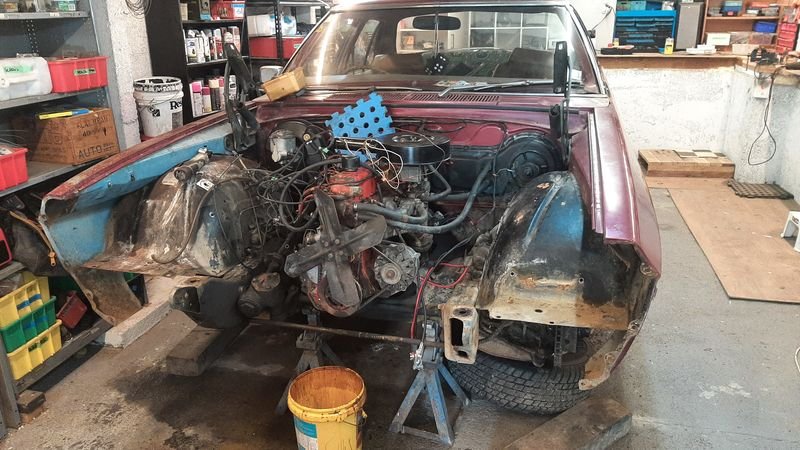
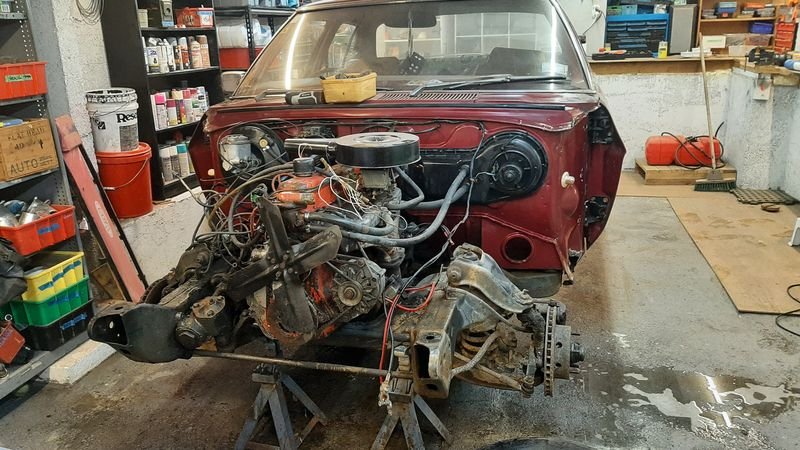
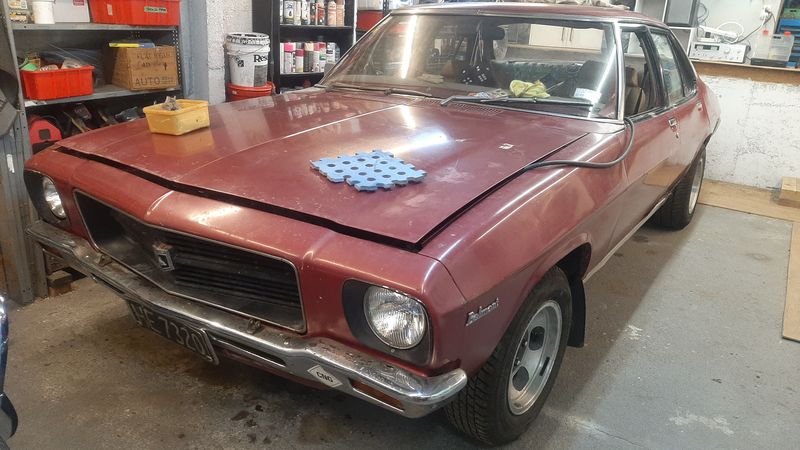
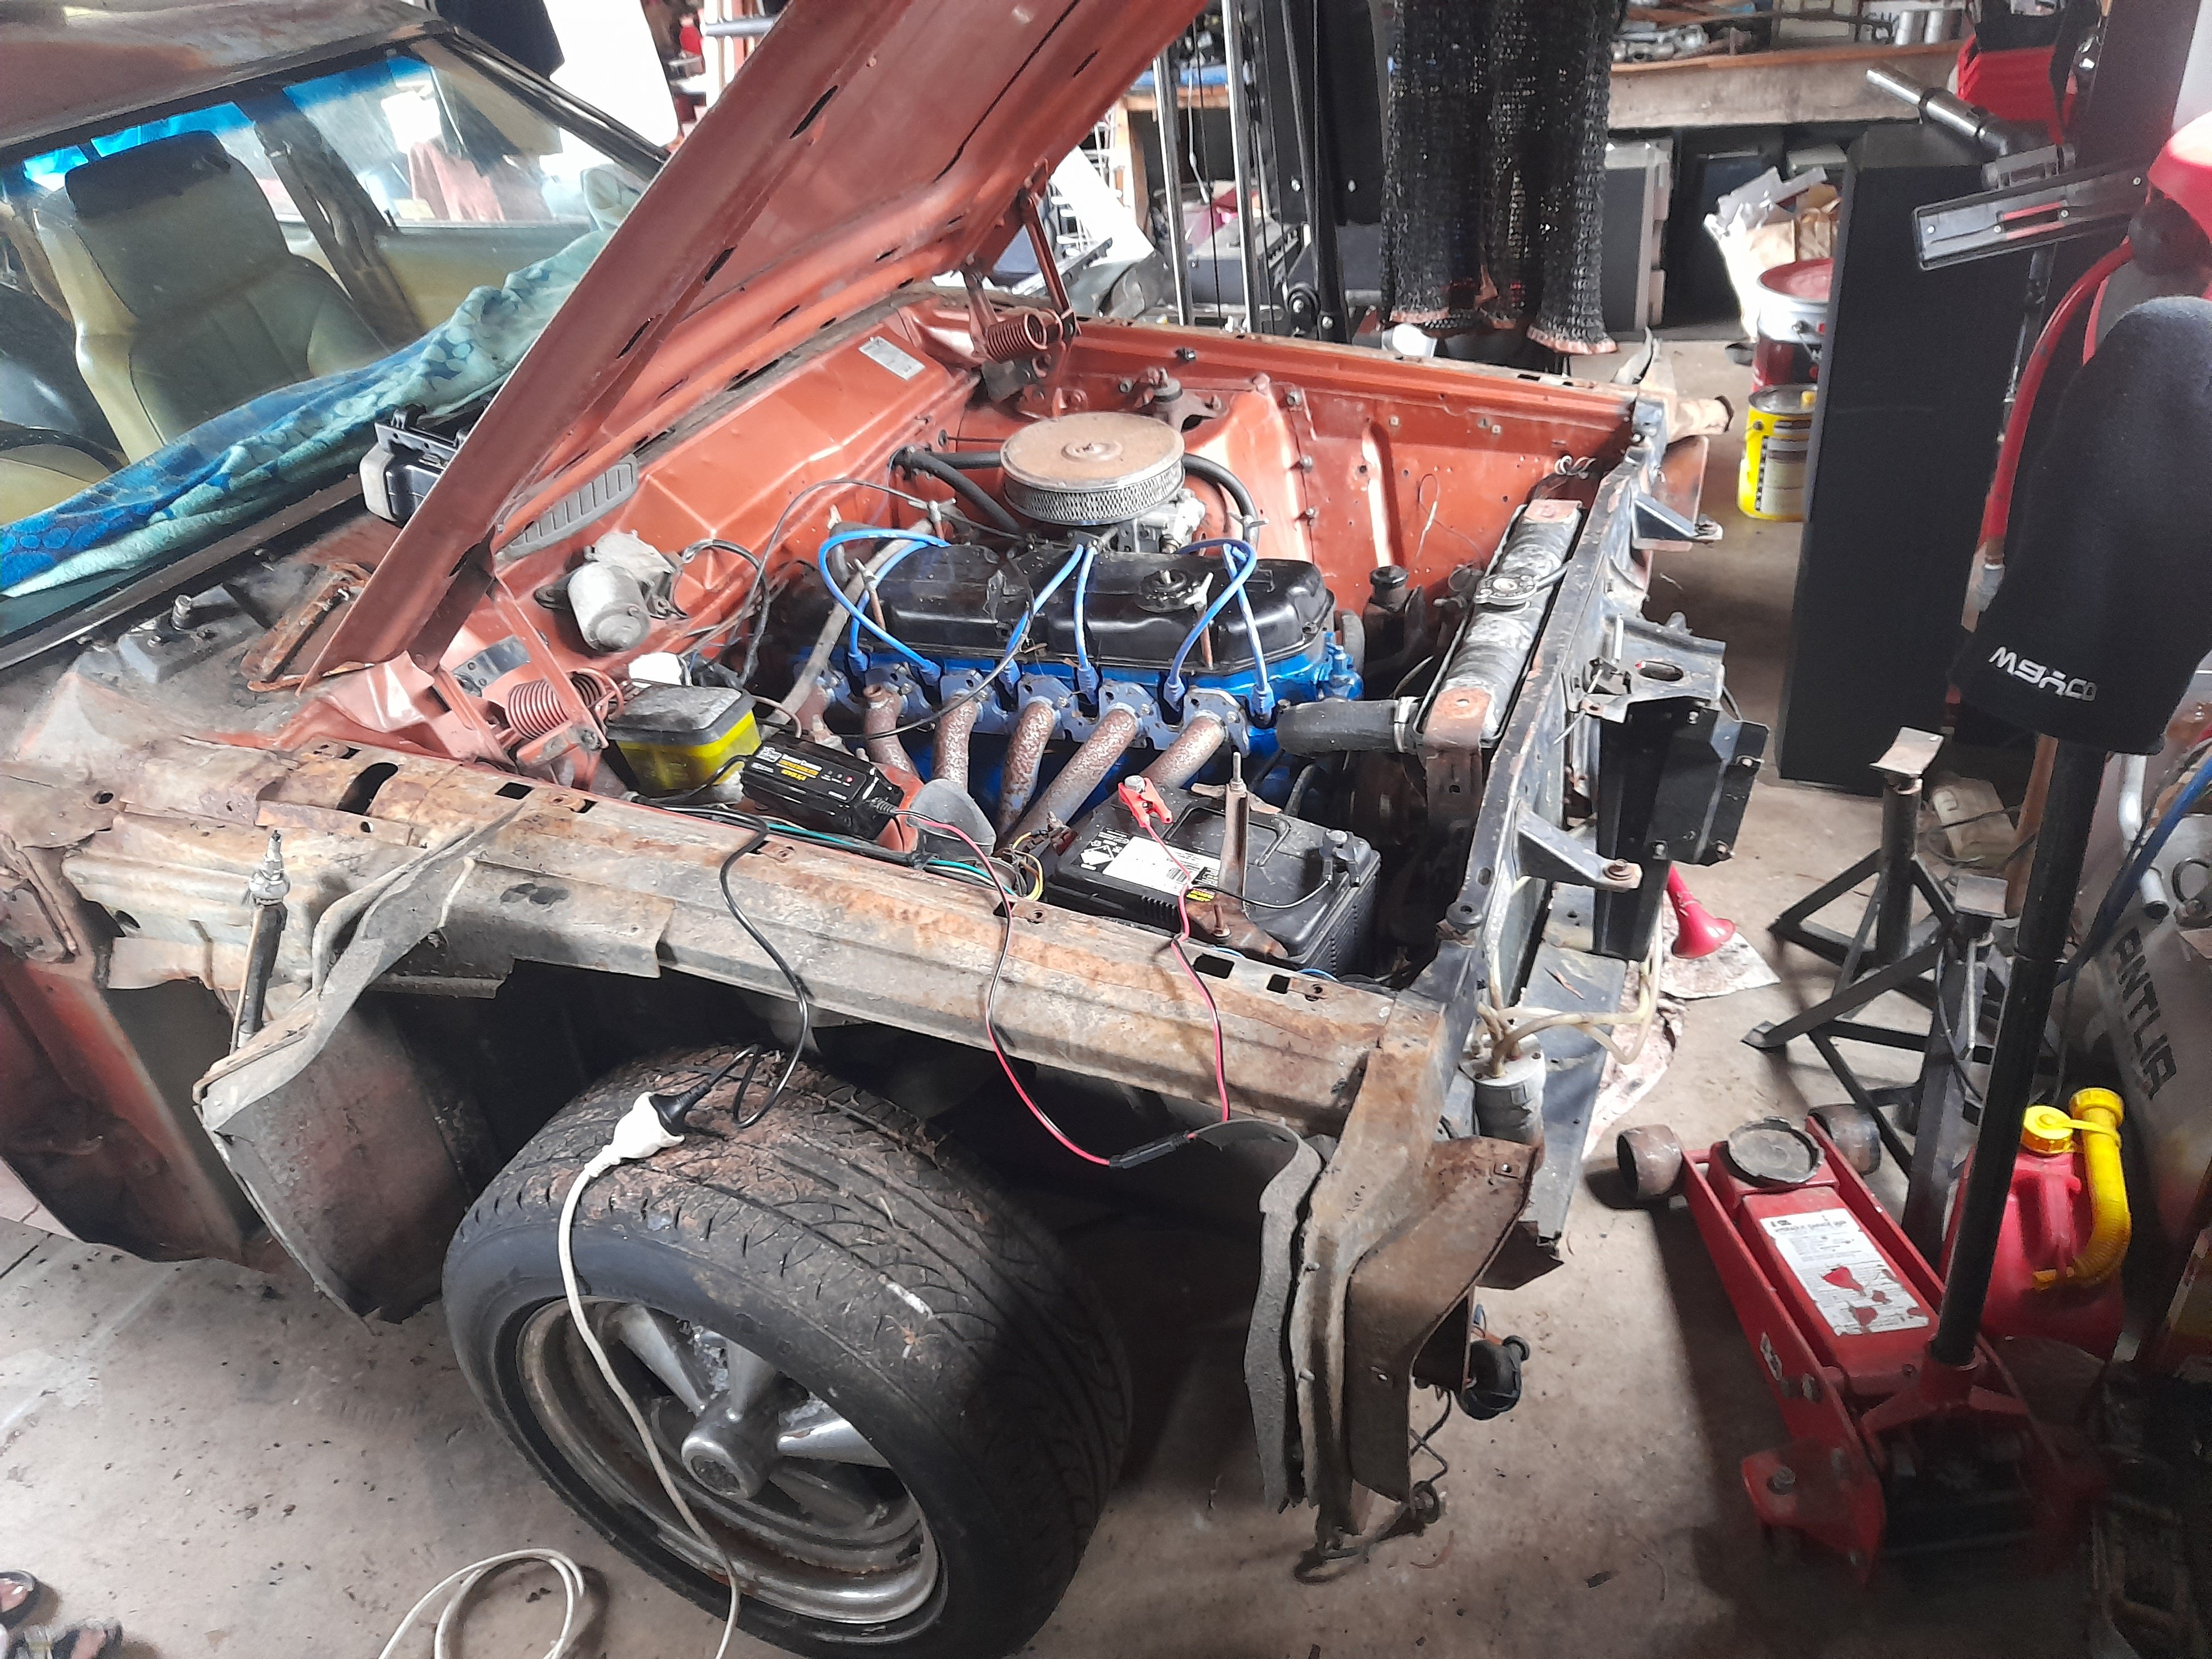
We decided to remove the front clip to tidy it up and make it easier to get to the suspension and enginey bits as well. Check out the custom radiator shims - the Torana must have a shorter engine bay. We got $50 of random 202 bits of FBMP and amongst a couple other handy bits that included a near new water pump, a much better thermostat housing and the extended fan thing. Nose cone off Note the blue inner on the drivers fender i think this was replaced post restoration as the paint is overall much worse than any other panel and seems to have been painted only once bolted on - the passenger side is also a replacement (originally a pale yellow/mustard) but was fairly obviously repainted with much more prep and attention while off the car. Other than the fender rust behind the front wheels where water and mud collects, the front clip panels are entirely rust free which is nice Fenders out Pulled everthing to bits, cleaned it, derusted, and painted Pretty pleased with that, pressed a couple of dents out with the press and it seems to sit nicer too Going through the front indicators to make at least 2 ok ones inner fenders tidied up rad support seperated from the nosecone and all bits including the lamps all cleaned, derusted, unbent, painted, threads tapped and reassembled. Nose cone has similar treatment but just knocking the cracked paint off on the outside and primed it. Looks worse at first glance, but its straight, rust free and ready to bolt back on, or for body work at some future point. Need to sort the rust at the base of fenders but all that stuff is ready to bolt back on. Because my big sheet of 0.8mm is for baby cars, I picked up some 1.0, 1.2 and 1.4mm panel steel offcuts today for $15 + GST ( https://rietveld.co.nz/ - what a treasure of a place - a true barry paradise!) so ill probably make a start on patching the bottom of the easier of the two fenders next to start to ease into it.
 6 points
 -
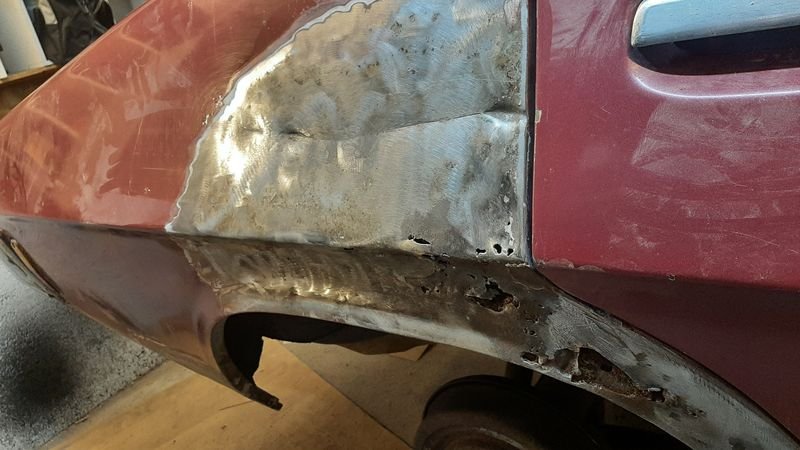
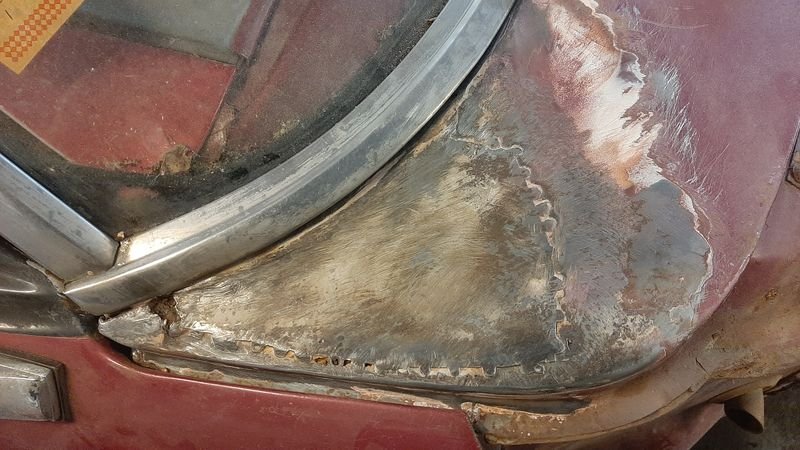
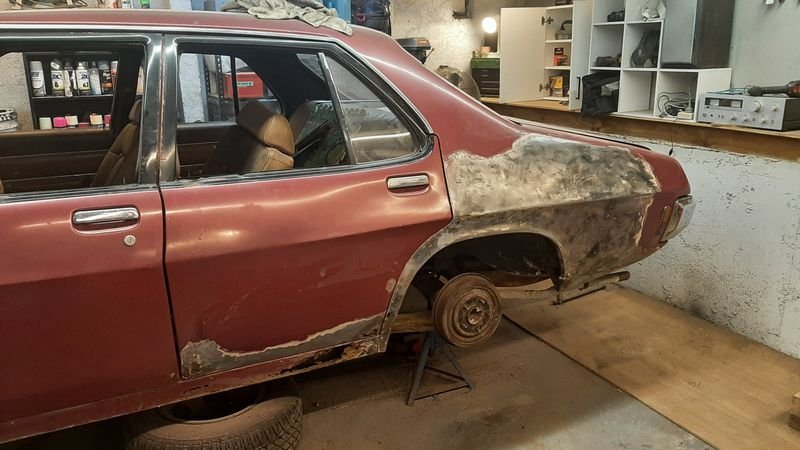
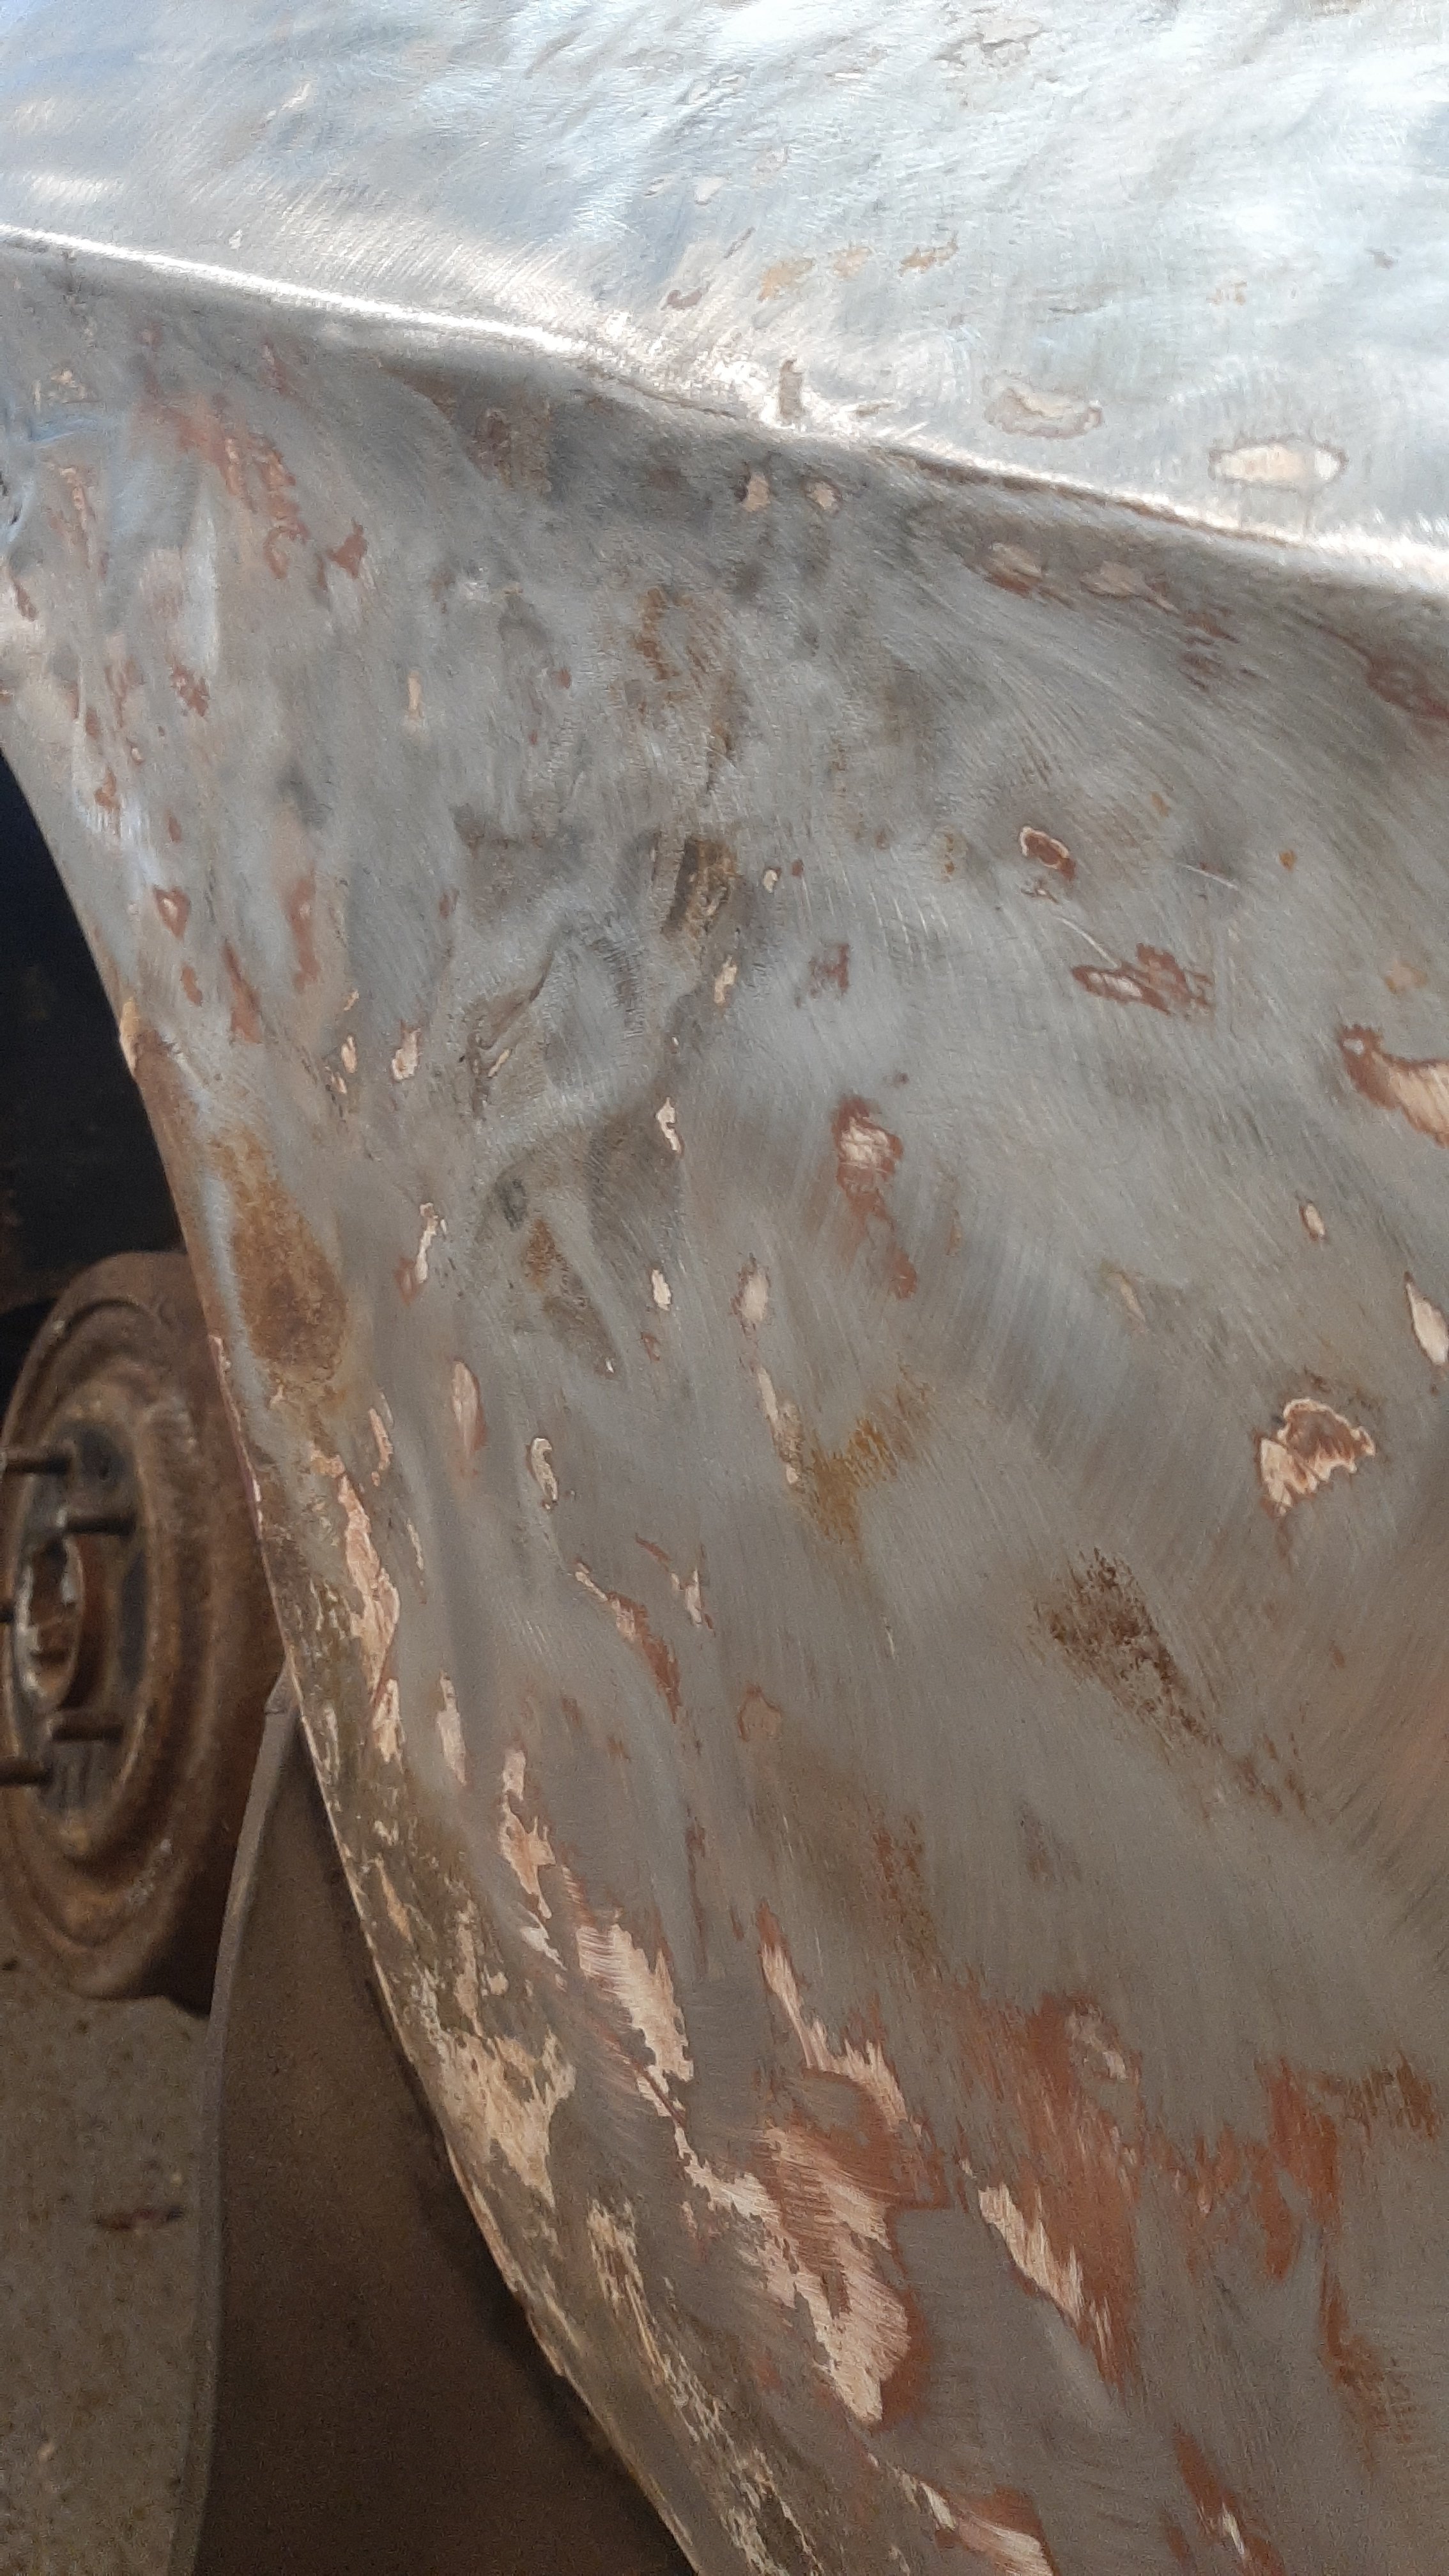
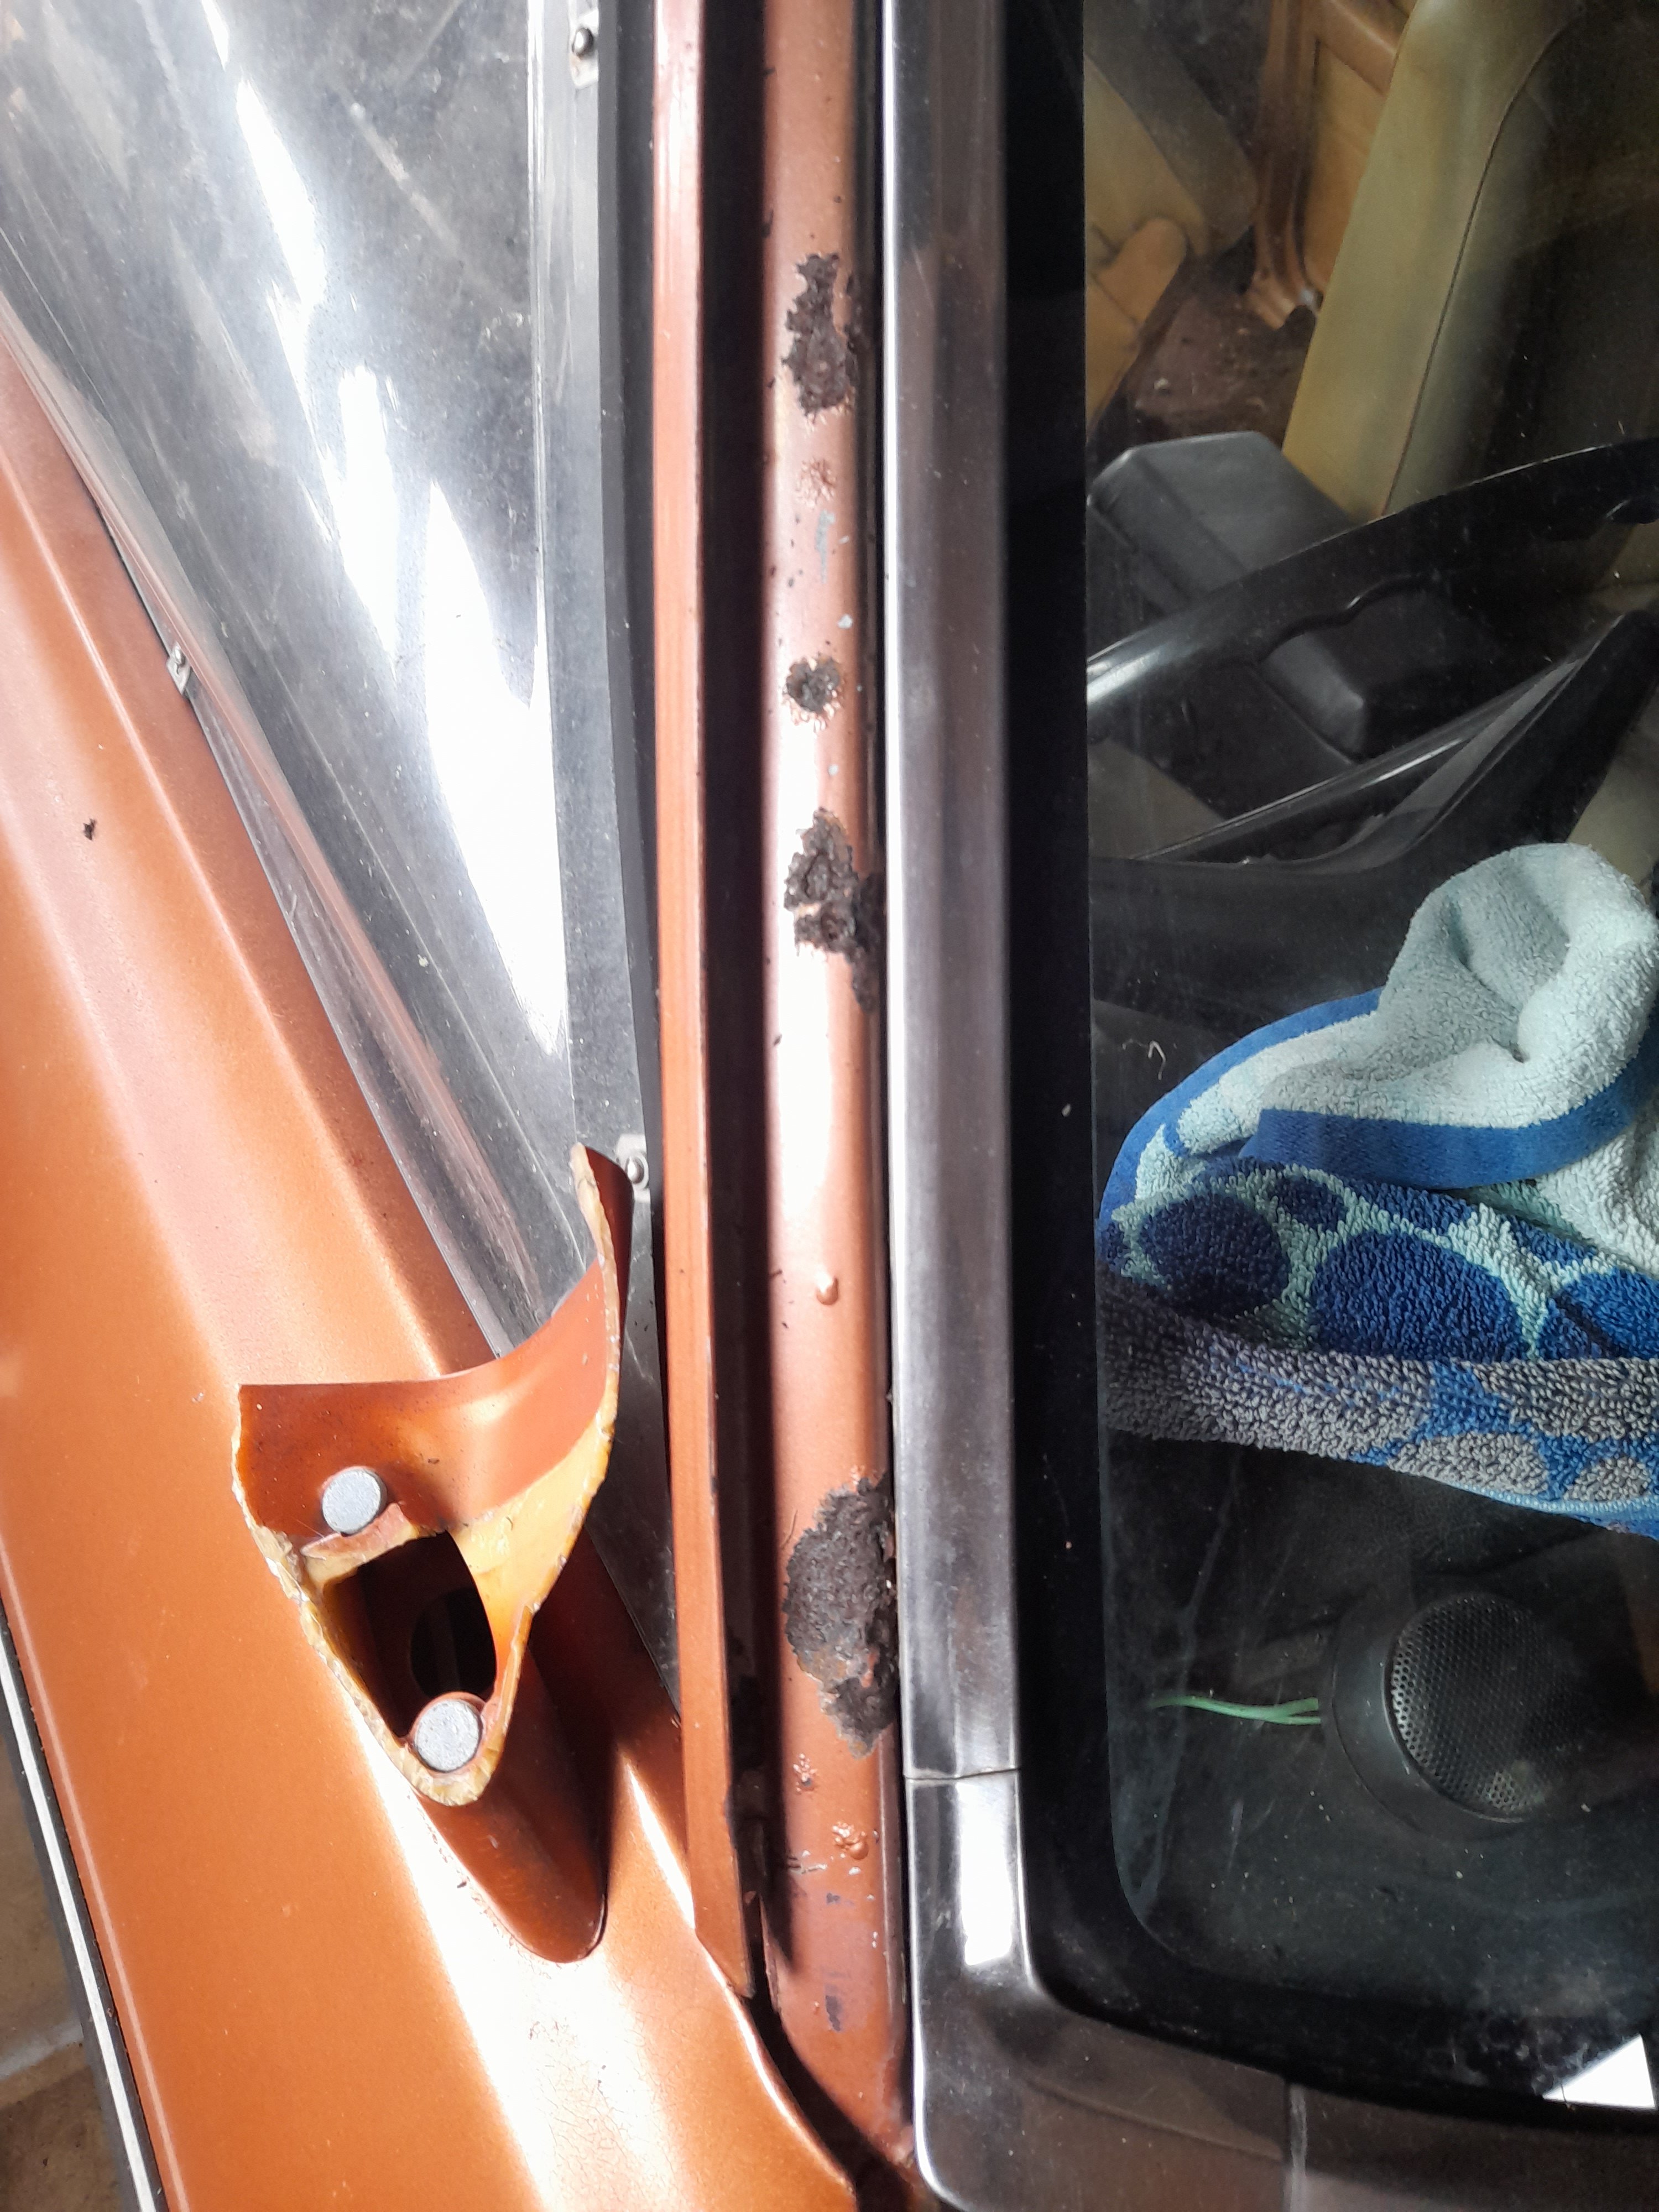
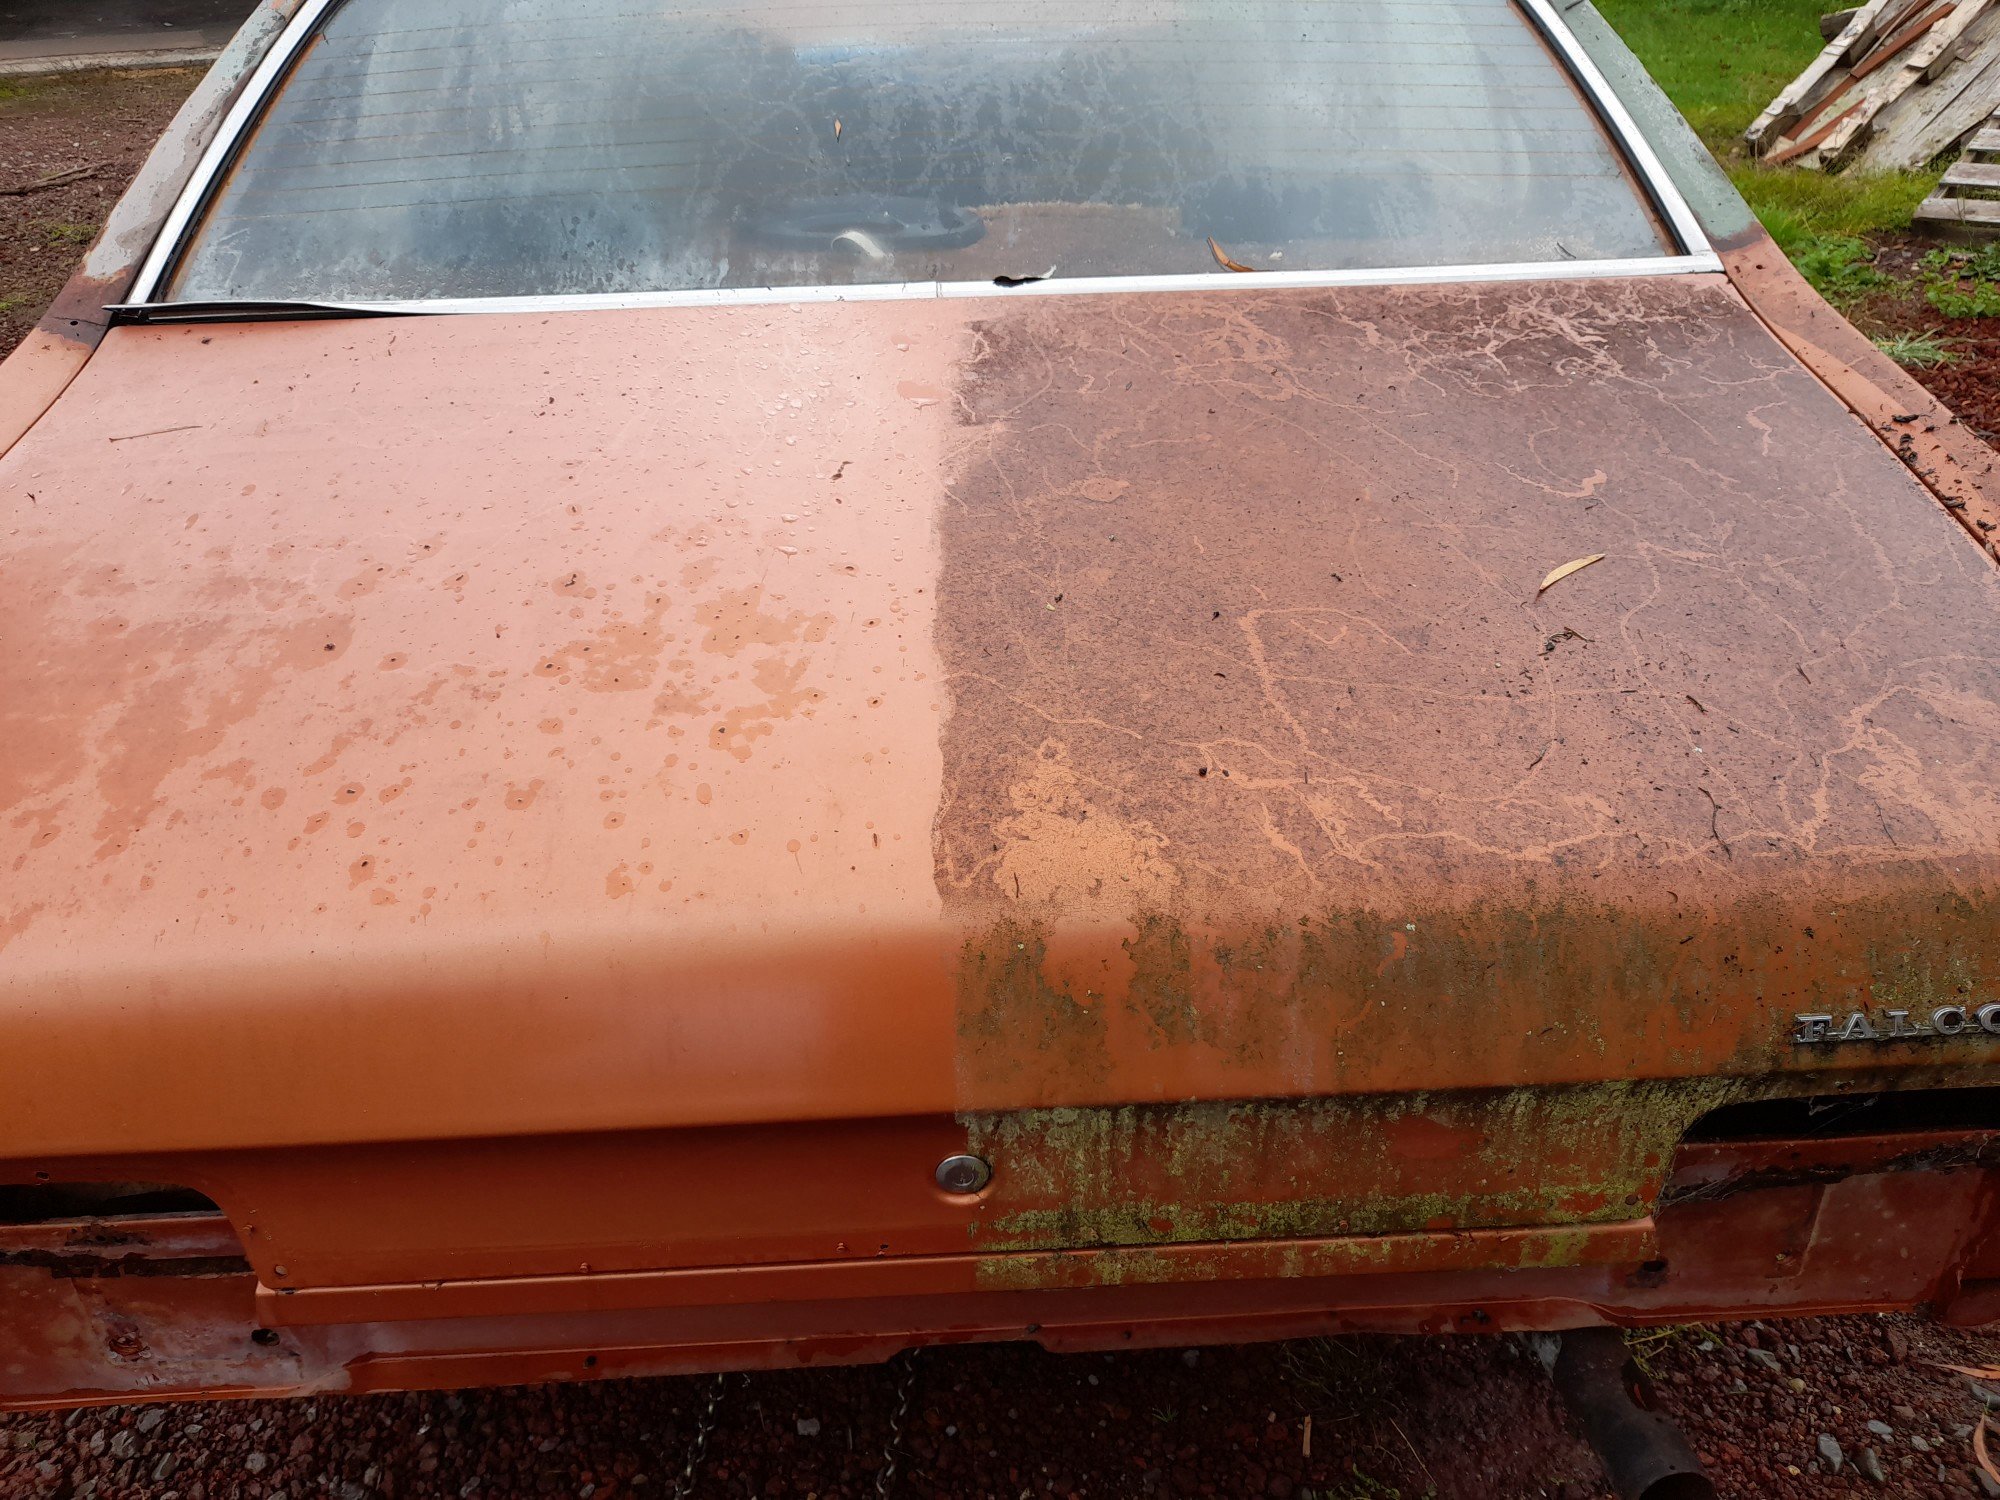
Removing the mud and giving the old girl a good bath made it look better, but also made it easier to see a fair few issues. I think this has been restored once before and there are a few rust bubbles starting and a fair bit of paint adhesion and filler cracking in all the 'usual' spots. I shouldn't have but i started to pick. The Premier sill garnish that had been riveted on this lowly Belmonts sills was holding a lot of mud so i drilled (some) of the rivets. Sucks teeth Ill think ill just put that back up there and pretend we didnt see that With the seal definitely broken i dug into all the suspect areas to see how many repair panels to put on the list . This deep crease explains the thick filler on the upper half of this quarter panel, the filler probably made the rust on the lower half worse. Removing the deep filler means the door shut looks 100x better than it did Good 5mm of filler of this too, and much the same on the other side, except that side has braze as well There were signs of lots of filler on this quarter too. It has also been (previously?) brazed some of the filler was 10mm thick Took most of it off with a heat gun, much less messy than with a whirlywoo. The panel looked like this underneath it, from a prang in the rear Spent a bit of time with some hammers and dollies and a bit of extra heat trying to shrink some spots and it is quite a lot better. Like the other side, removing the filler also significantly improved the fit of the doors to the body! So yeah, some bits are pretty much as i expected (doors) some are much much better than i feared (quarter panels, cowls) , but some i didnt even suspect, like the sills, are quite bad indeed. We will need every patch panel you can buy, which basically means its got bitten in all the usual places, but that is a nice change from not being able to buy any panels at all!
6 points
-
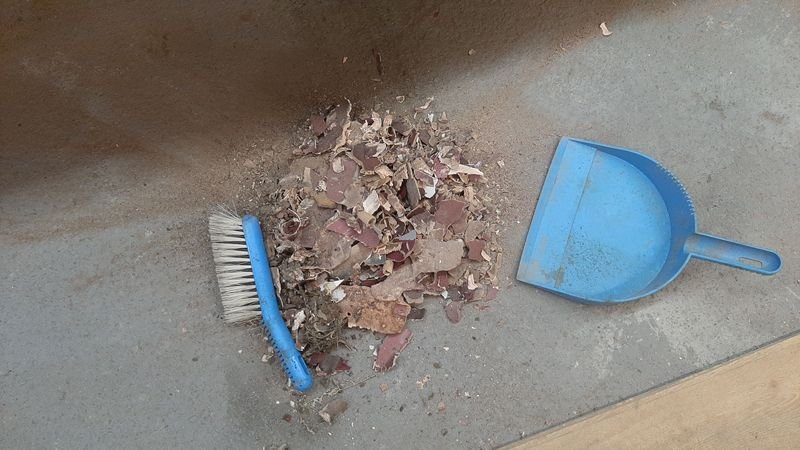
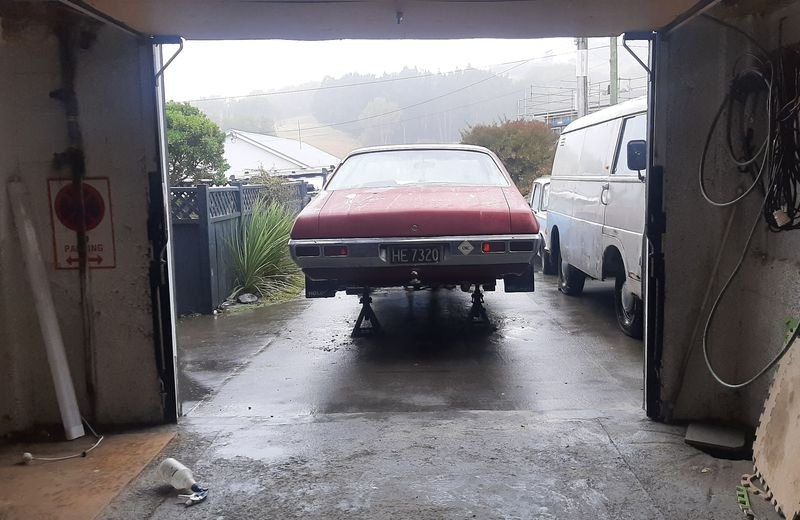
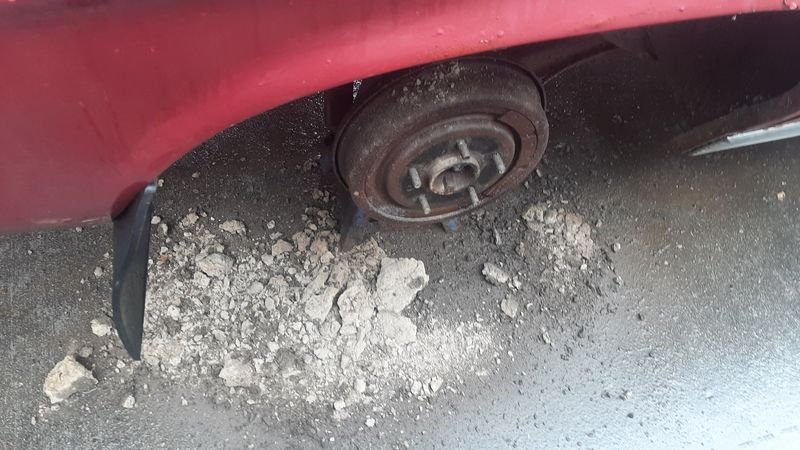
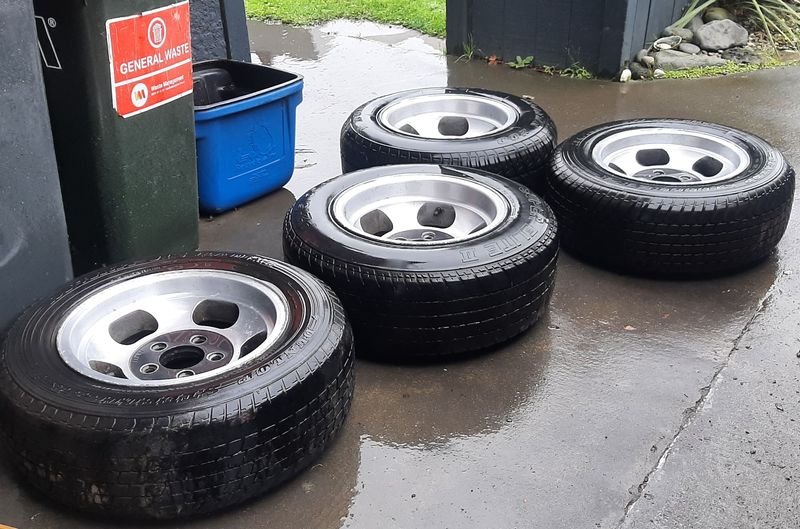
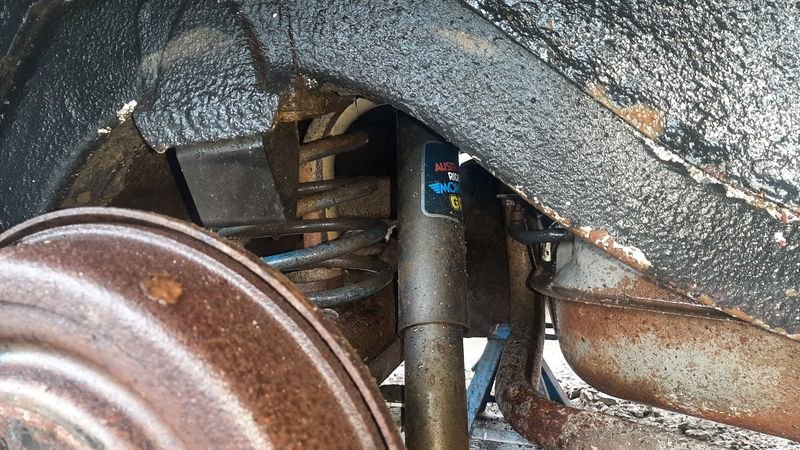
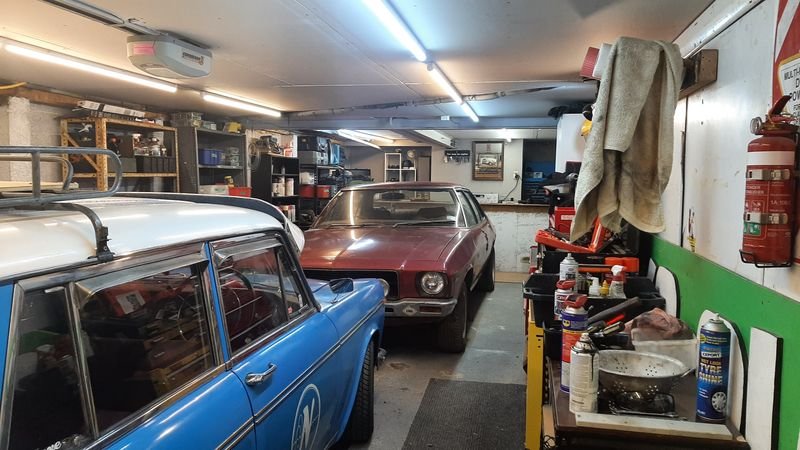
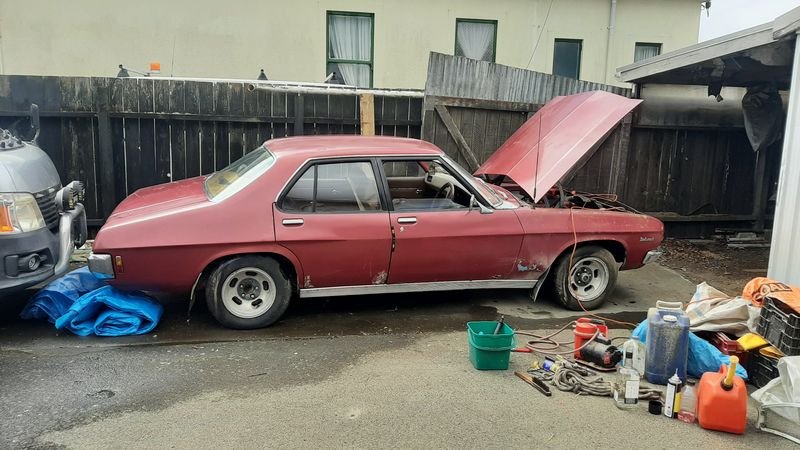
So point of having it stop is to have it driving is so it can be moved around. Driving a project is a good motivator too Point of being able to stop is to drive it outside to give it a good clean underneath, mainly so we can see whats under there and dont get filthy while working on it This car was driven a lot on wet gravel roads. There was a LOT of dirt underneath Quick tidy of the 14x7 and 14x8 Cheviots while they are off with some fine scotchbrite to get the worst of the oxidising off Some blue springs and matching blue ADJUSTABLE RIDE MONROE GAS shocks in the rear. Pretty sure both he springs and the shocks are completely shagged from carrying around the LPG tank but interesting to see. Didnt spot any lines coming out of them either. This thing is an absolute whale compared to the rest of the fleet Gave it a wipe down with a waxy towel Swept out and tidied up stuff And shuffled everything back to bed
5 points
-
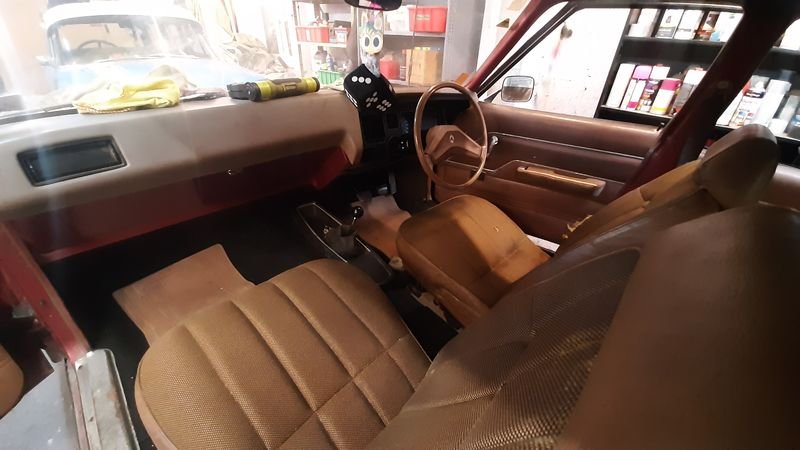
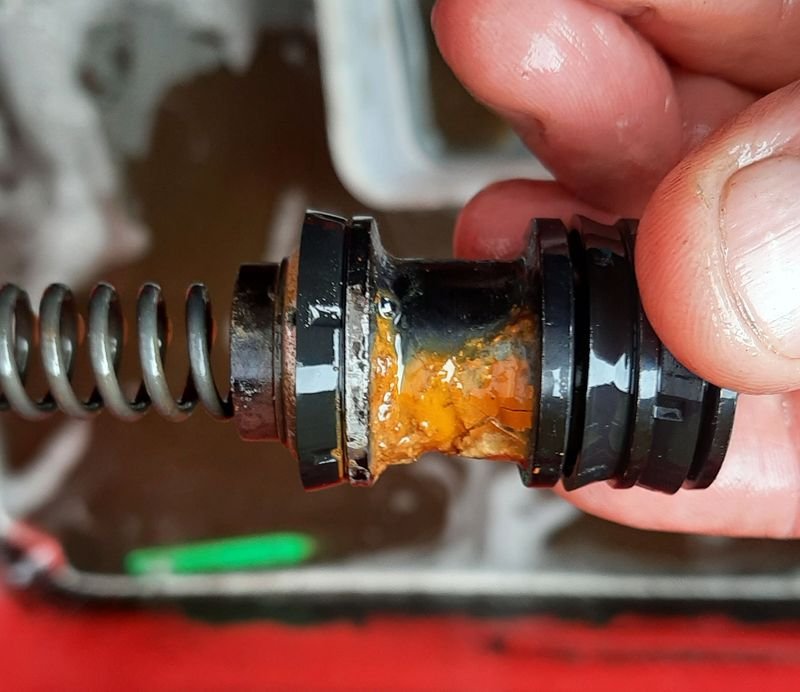
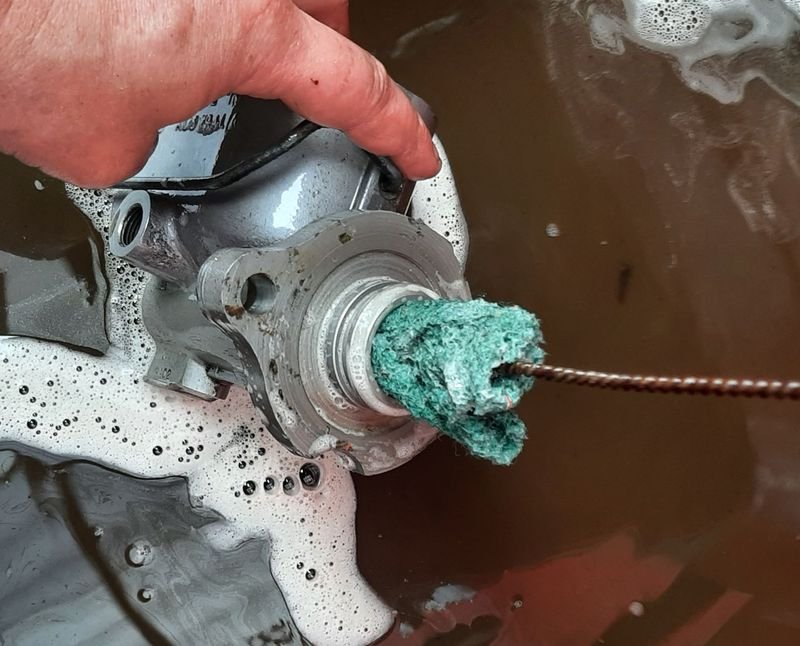
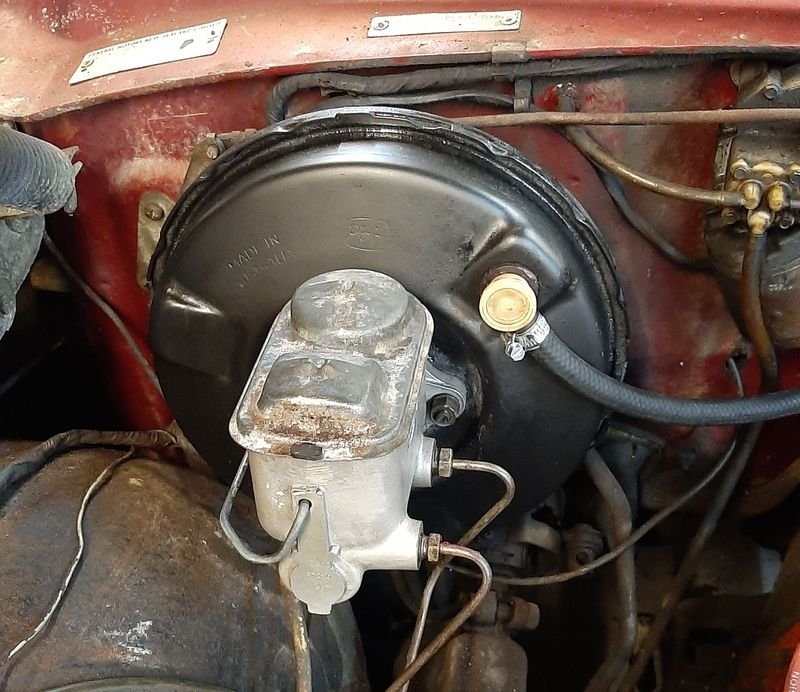
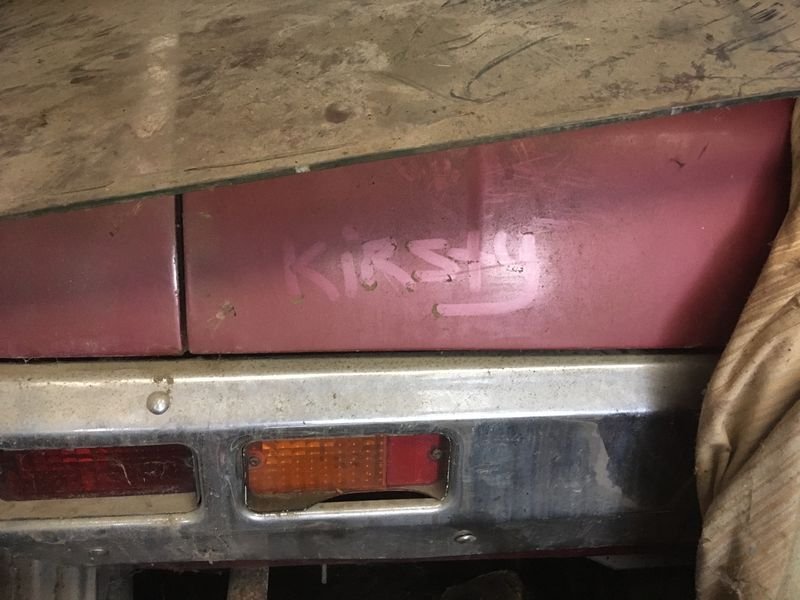
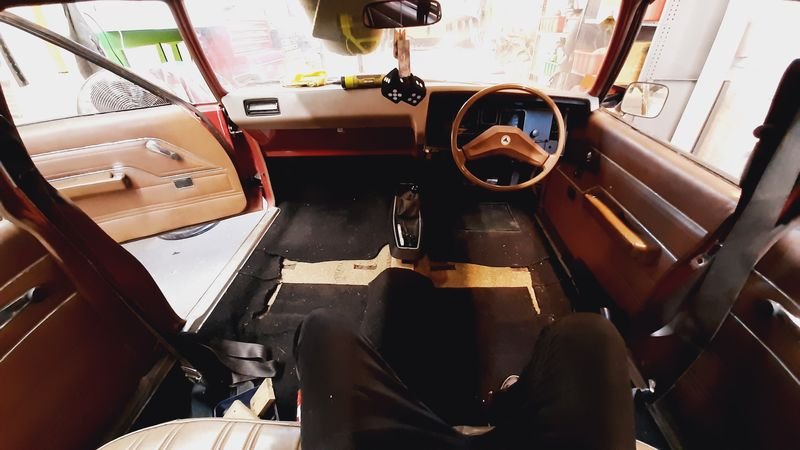
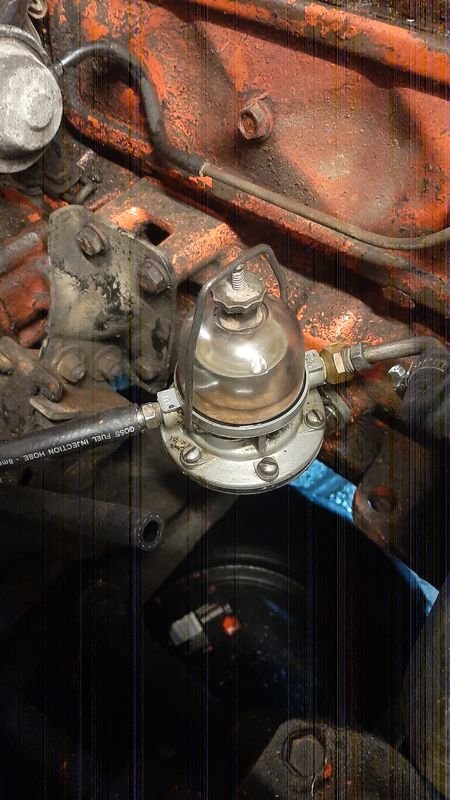
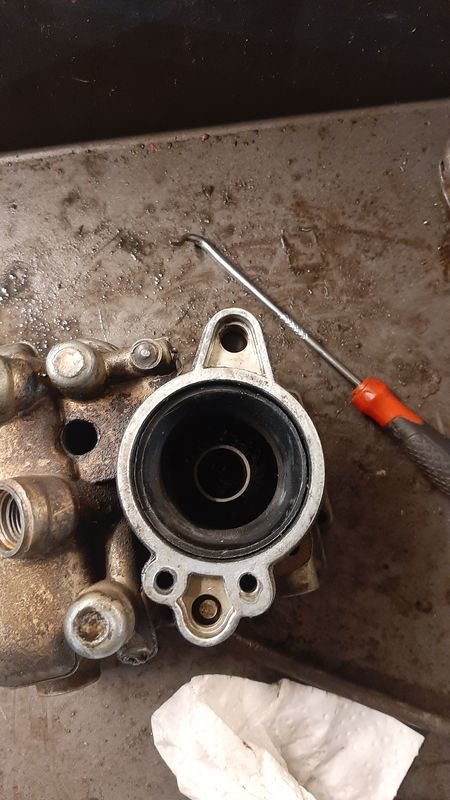
last month or so Kirsty and I have been poking away at this Got the interior back together, the Torana seats look pretty cool in brown, but there is no reclining function, they only bolt to two of the HQ factory holes and there are bits of wood under the two feet, so some factory or better seats are on the list now too. Seatbelts as well. Got it running off a boat tank off the key reliably, and next task is to make it stop so at least it can move it self around relatively safely. I like having projects be drivable, I like that they can do their main function, lots me think they are pretty much done apart from some petty technicalities. Started bleeding from the master as the pedal felt like the piston was stuck. No fluid exiting from the front port (rear brakes), rear port (front brakes) seemed fine. (Notes for later reference: PBR alloy master, cast iron front callipers, drum rear) Yep - was stuck down and full of schmoo. Got it professionally line bored Assembled it with lots of rubber grease and 'rebuilt' the brake booster Tidied up the engine bay a bit more as well Aaaaand now it leaks fluid into the booster when the pedal is pumped.. I may have assembled it wrong but i suspect one of the seals is blown/nicked or the bore is pitted somewhere (looked fine). Will need all new brakes at some point anyway so ill try to find a kit for cheap, or a new master even (seems they are around $300 from the usual places)
4 points
-
Yeah the machinist lapped the valves in the head and did leak tests on each one Thanks for checking. Crap... I think that's an action shot, but god damn it now I have to go back and check lol. Fortunately I have photographic evidence. Yep it's an action shot. Phew3 points
-
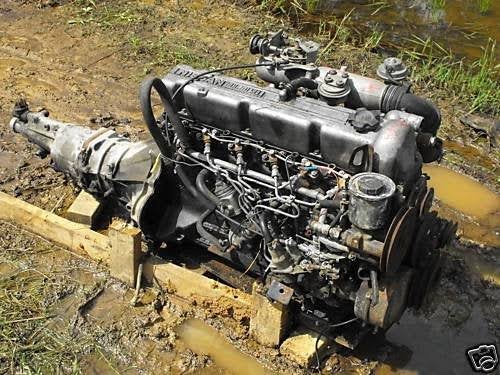
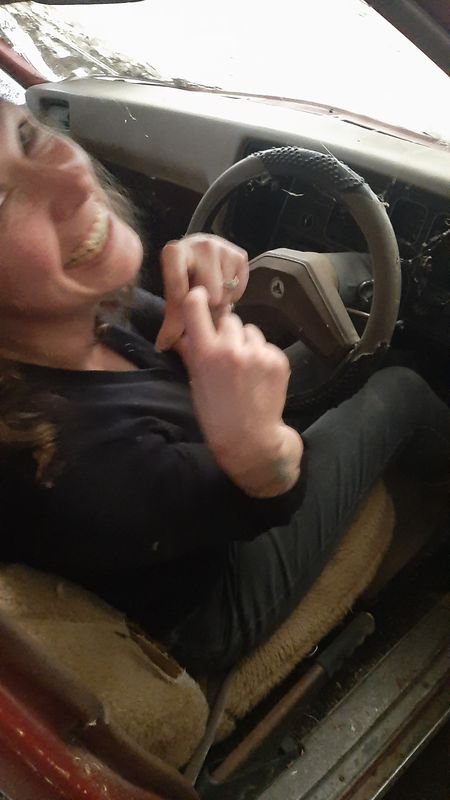
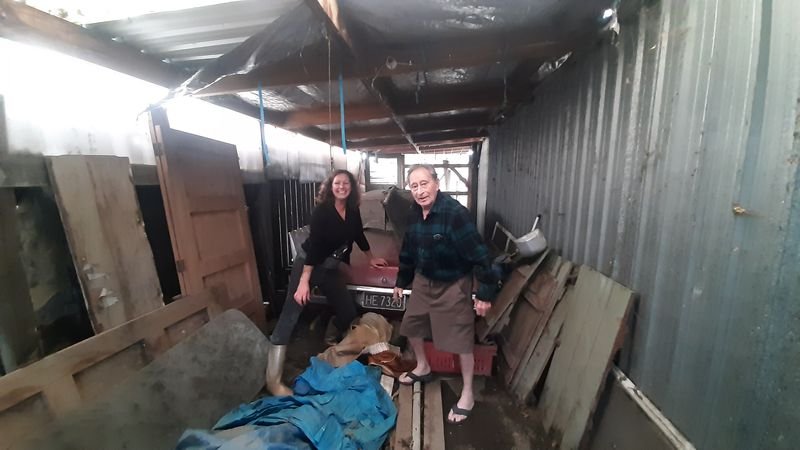
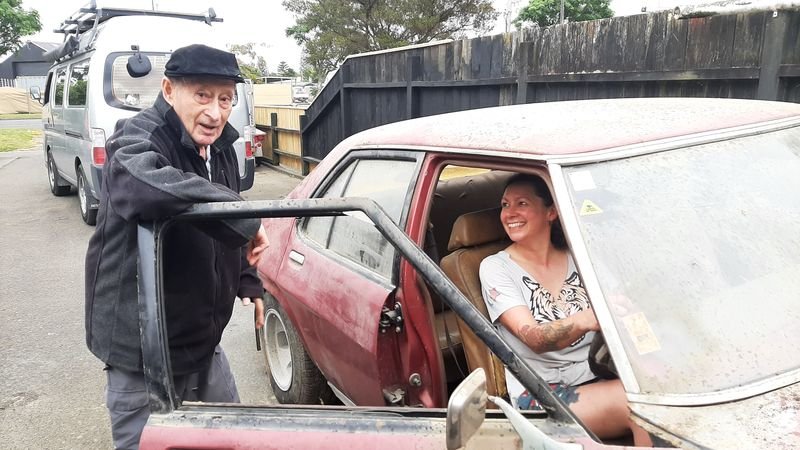
This is not my car. Im just the low rate mechanic. What i knew about this car was: My Father in Law, Bill, has 'The Holden' in a lean to shed. Kirsty learned to drive in it, and shes always wanted it and Bill said she could have it one day. It has the engine and gearbox (exact details unclear) from the Torana her older brother rolled when he was 16 'dodging a rabbit' on a gravel road. Its been in the shed pretty much since they moved into the 'new house'. He used to bring it out sometimes to wash it but hasnt for a long while. She put her name on it a few years ago and sent me a pic. My first and only view of it till now. Then a couple months ago, he said 'come and get the Holden' So, we did.
2 points
-
Is it safe to assume you fixed this before the cams went in?
2 points
-
Well its been a while but I am back. Finally got my hands on another old-school car after much going back and forth on several other choices. Car arrives in mid-May. Has a 2M and 5 speed but will be swapping out for modern drivetrain later on.
2 points
-
2 points
-
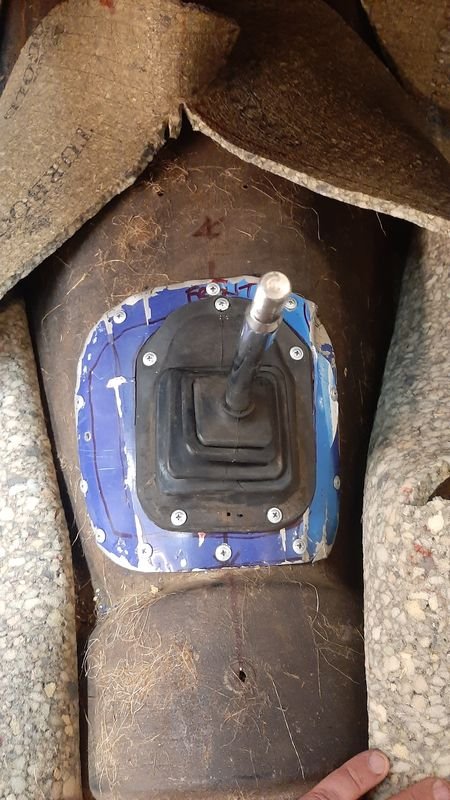
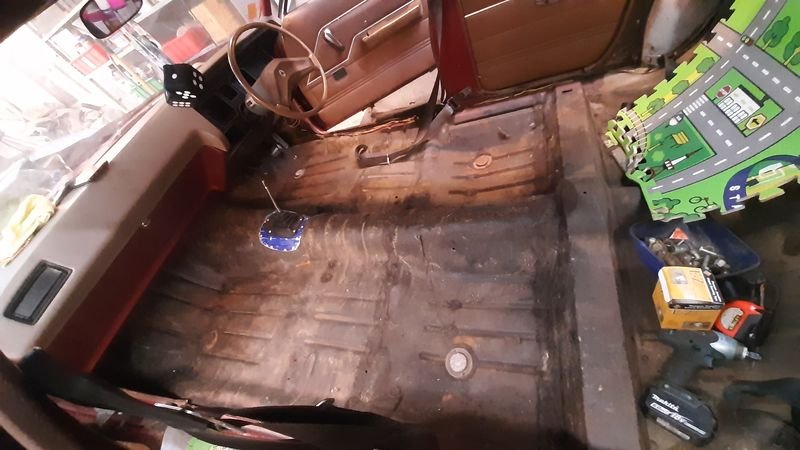
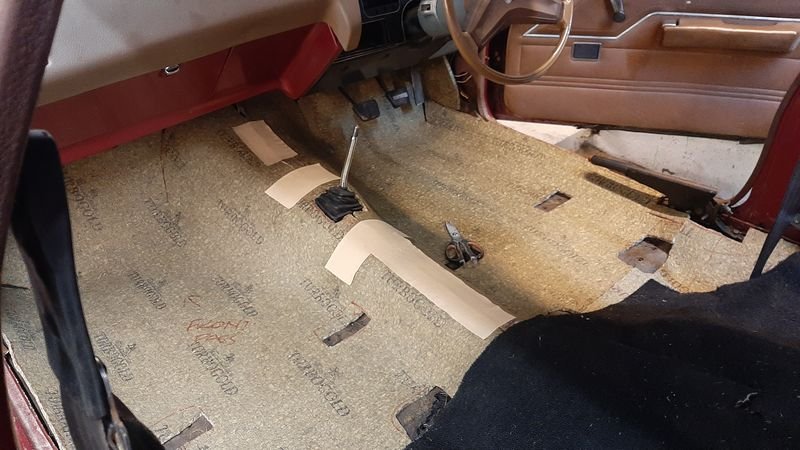
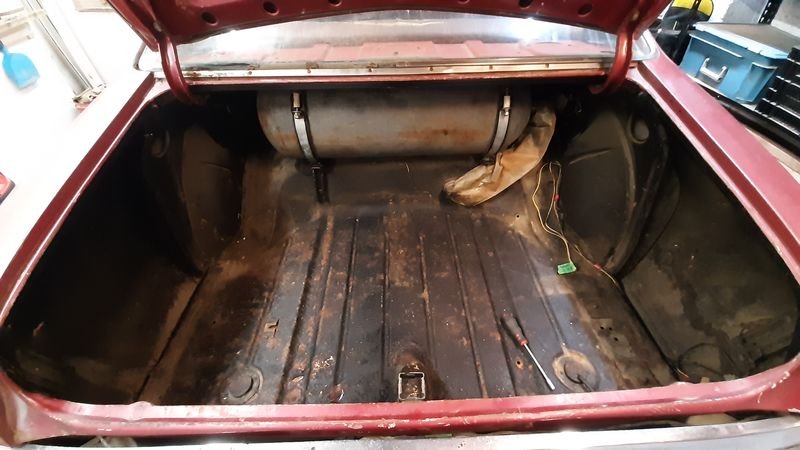
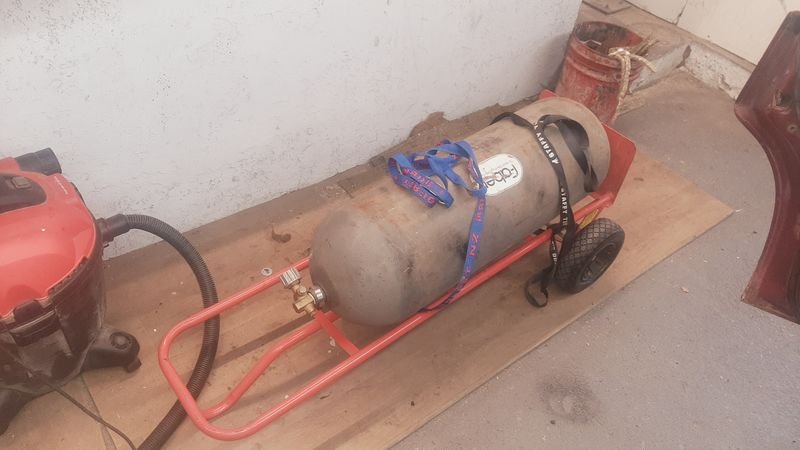
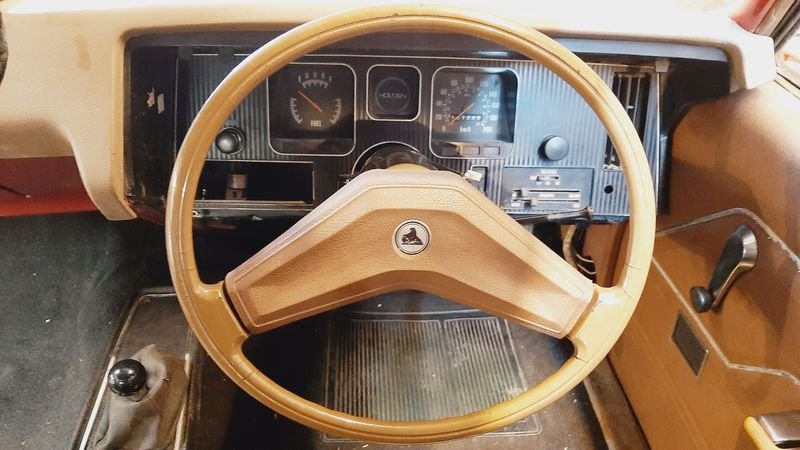
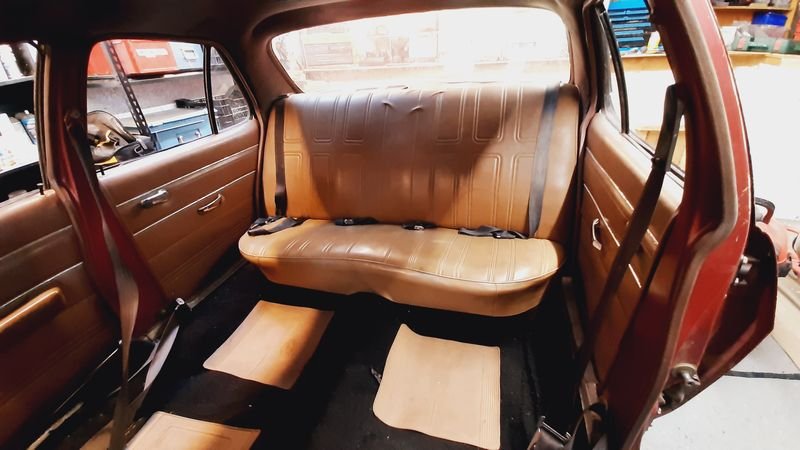
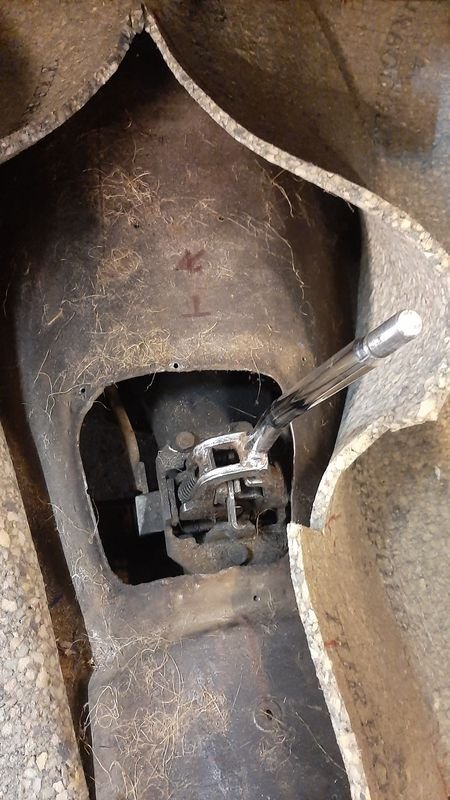
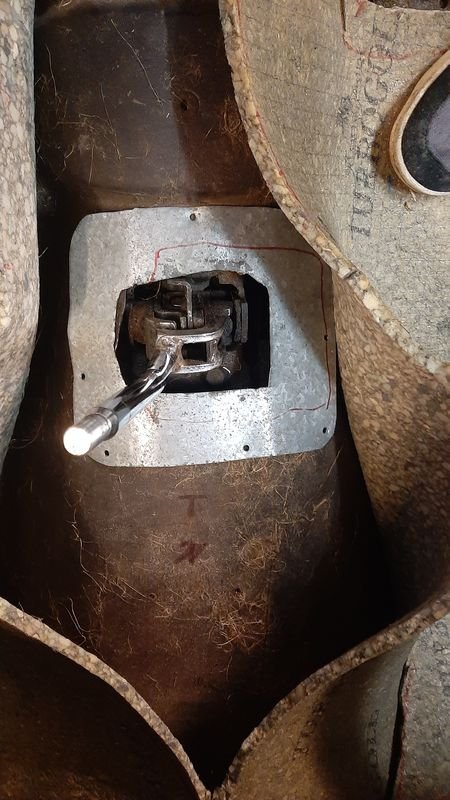
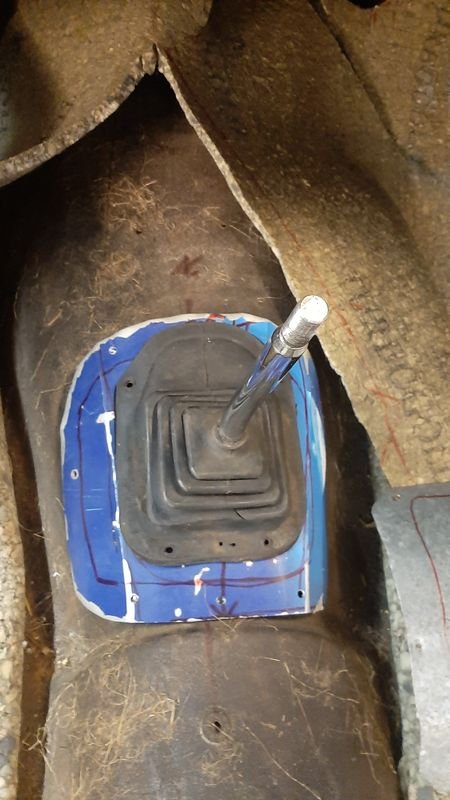
Now we know it runs, next step is to make it worth driving The interior was pretty good condition but there was a lot of evidence of rats eating and storing snail shells in the engine bay and mice droppings in the interior, but no evidence they lived there long, and the shed it was in wasnt water tight so it was all a bit smelly and musty Anyway, all needed to come out for a clean & deodorised the seats, throw away the original horsehair underlay and to make it easier to do a few other jobs, like... Improve the shifter opening, replaced the galv flashing and countersinks that dind really cover the hole with some alloy sheet (from the Sign of the Year! - now in 5 of 5 of our classic cars!) and a rubber boot - adding my first FIAT part Removed everything else and give it a good cleanup. Floor condition is excellent, no rust at all! 'New' Underlay (free second hand stuff) to replace the original horsehair stuff that was a bit smelly and flat. I think the front carpet might be ex-torana too, it doesn't quite meet up with what im pretty sure is the original HQ rear carpet. Both carpets are in nice nick, and we will cover the gap (which under the seats) with some cheap nylon outdoor carpet from m10 that we will also use for the parcel tray that is also unmolested by axe holes for 6x9s etc. Rear came up nice as well, car has a tan interior with dark brown headlining - class! Removed the steering wheel spayed the steering column black (was grey and still has the column change mech in it) and tidied the (omg its so janky!) dash up a touch, and the wiring behind it mainly by removing anything that has added in And then remove the dead weight out of the boot to make room for bodies and crates of DB Its easily 80kgs, empty Things will likley slow down a bit now, as from here its time to start spending money on parts, most likley starting with brakes which i have not even had a wheel off yet to even check what they are apart from being discs up front and drums out back) I suspect the weird too easy/dead stop half way pedal/no brake function issue is the piston is jammed halfway down the master cylinder, as there is no leaks from any soft lines, and lots of fluid in the MC.
2 points
-
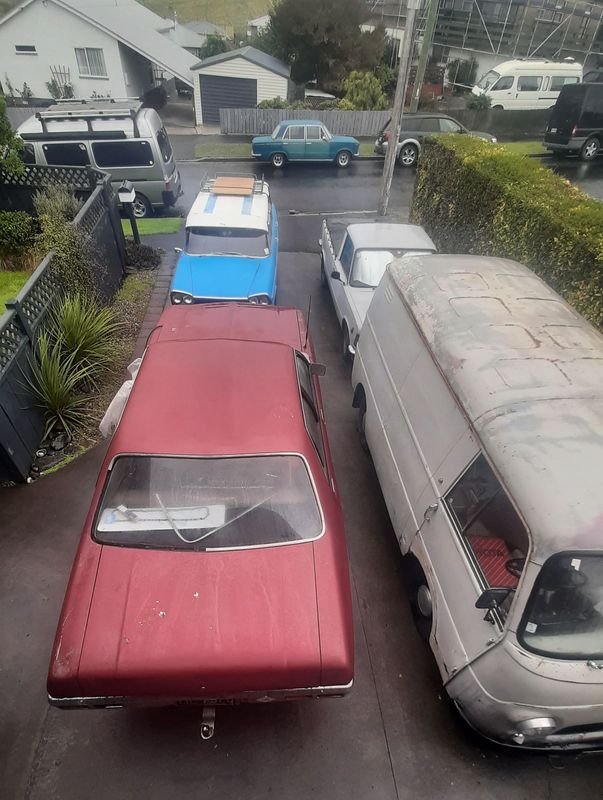
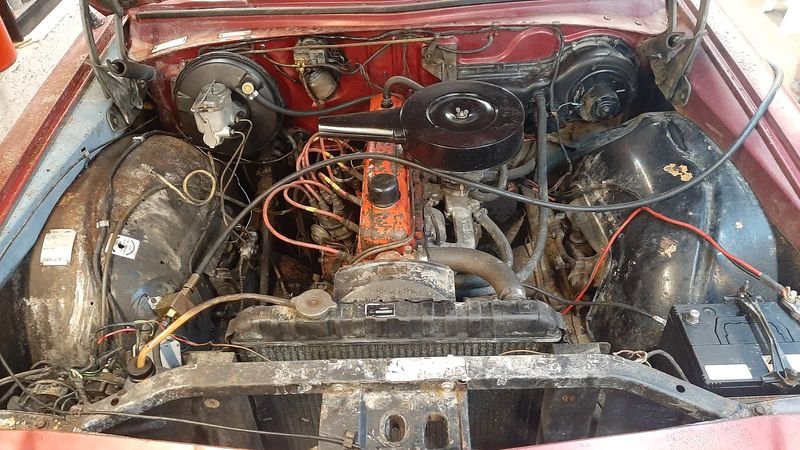
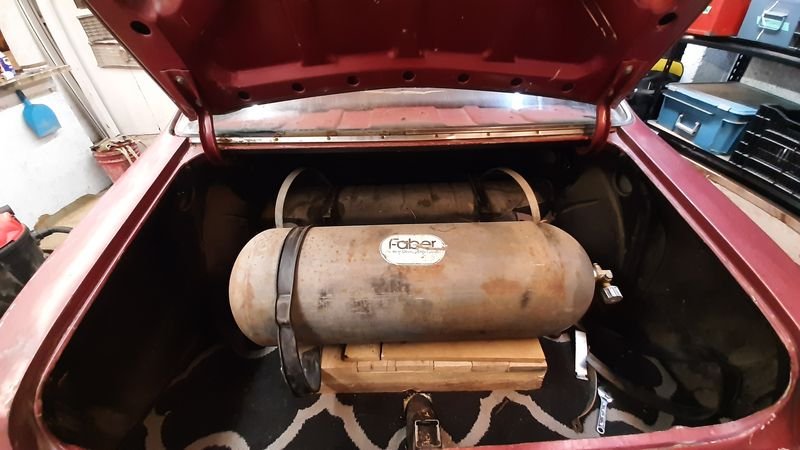
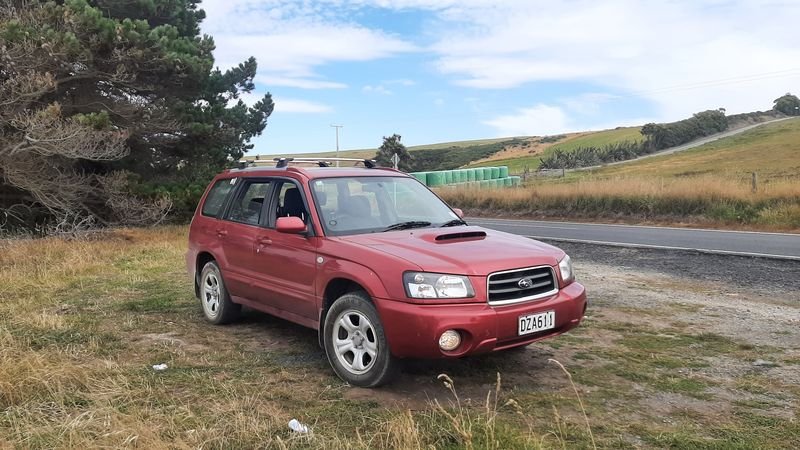
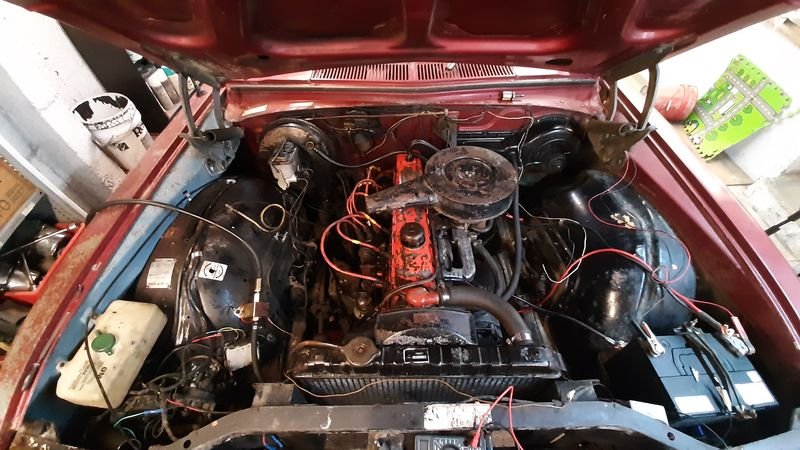
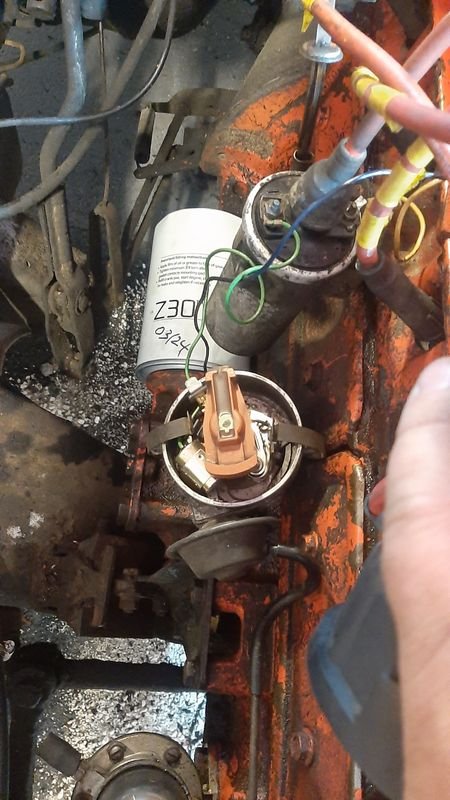
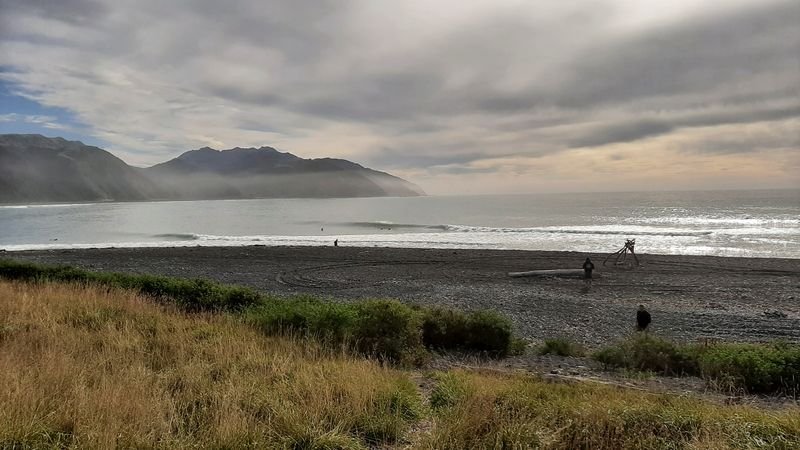
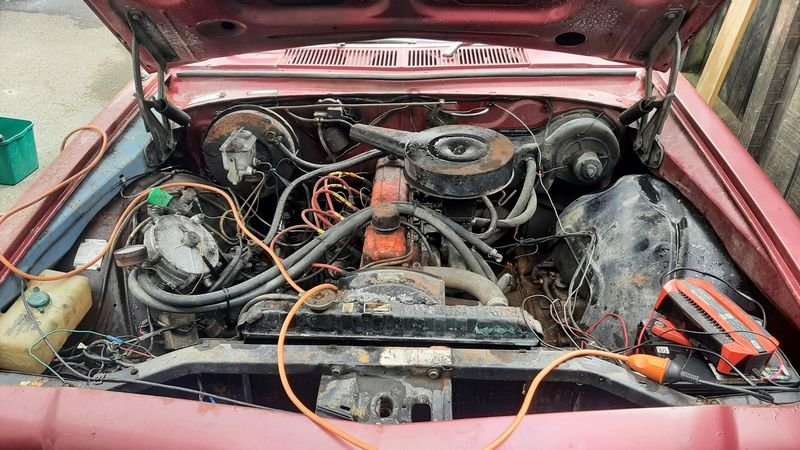
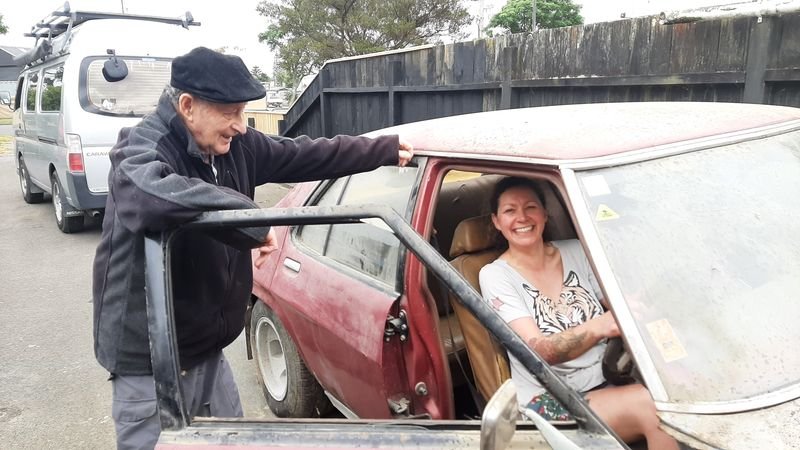
Ma te wa to Bill and whanau, then we headed home, with our van loaded up with other treasure from the shed(s) Forgot to mention i got jealous of her getting new car, so I got me one the same colour as hers on the way up. Given i had to drive this, Kirsty was driving the van the whole way home, she was none too pleased about it (But, yes it is better than my current 2005 Forester X its replacing in every way, thanks for asking - 2002 XT, totally stock, sub 200k and after a few wee issues (MAF sensor, oily connectors, new spark plugs) it really kicks when the whirly boi winds up!) Good Day in Welly before overnight sailing Breaky fry up in Kaikoura a quick stop to rise the north island off And about 3 days after we got home, this turned up. Used Classic Towing - worked out fine, but lucky both Bill and myself are home most of the time because the communication around changes of plan was a bit lacking tbh. The man can sure back a trailer tho. Its a fricken whale compared to my 'big' Fiat, an easy foot wider. Time to poke the bear First thing, remove the CNG stuff from the engine bay. Not only is it unfillable, the electrics are one of the layers of fuckery (the least bad to be fair, but also totally redundant), the tees that loop into the factory heater coolant lines to stop the regulator freezing up were corroded apart, and the carb hat gas injector thing made the air cleaner butterfly nut rub on the underside of the hood. 'New' heater hoses (from the old CNG line) and a bit of a wiring tidy up Fuel pump clean (no go in Feilding, leaks like a sieve now, still no pumping action), now bypassed with a clicketyclack, needs a rebuild kit (diaphram and gaskets) Carb cleanup, was pretty clean inside the bowls etc, works ok now, needs a kit too (tore a gasket) Sitting clean on the still very oily 173 Dizzy removed, cleaned and oiled, gap reset, but all the points, cap, rotor, leads and sparkplugs all look relatively low miles Changed the oil and filter (black and smelled like petrol but no chunks), re-crimped a new loose connections, taped some twisted wires, removed some vampire taps and chock blocks as well Put it back in starting from first principles (ignoring the marks, get cylinder 1 on compression stroke at as close to tdc-ish you can with a long thing in the spark plug hole, rotor pointing to lead 1) and it was about 90 degrees off where it was before - dizzy couldnt be turned enough to get the right timing, so i wonder if it had been tutued with before and the hassle of it not running well was why it got parked. Bill did say it had several minor issues needed sorting out and they got a newer, better car and he just stopped driving it. Anyway, buttoned up and after some further fine tuning it starts on one pump of the pedal and idles smooth. Not smoky (any more) Still no coolant or brakes.
2 points
-
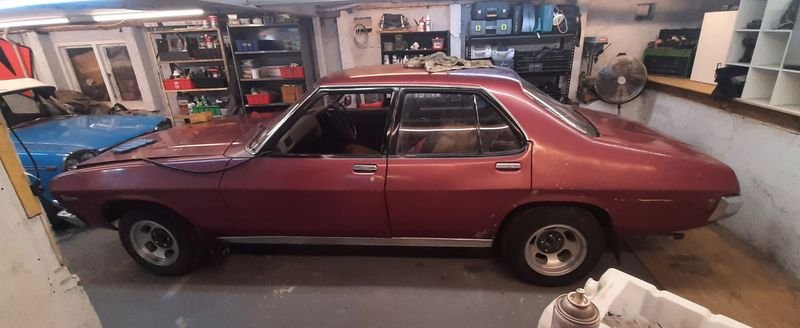
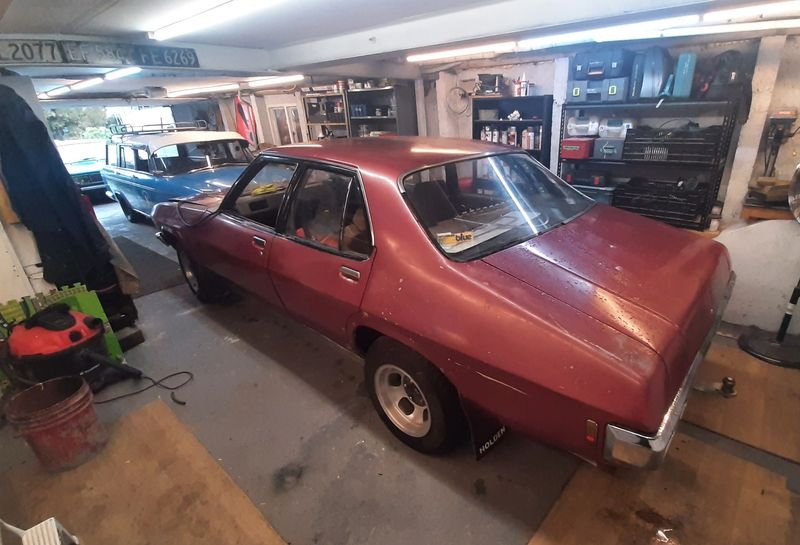
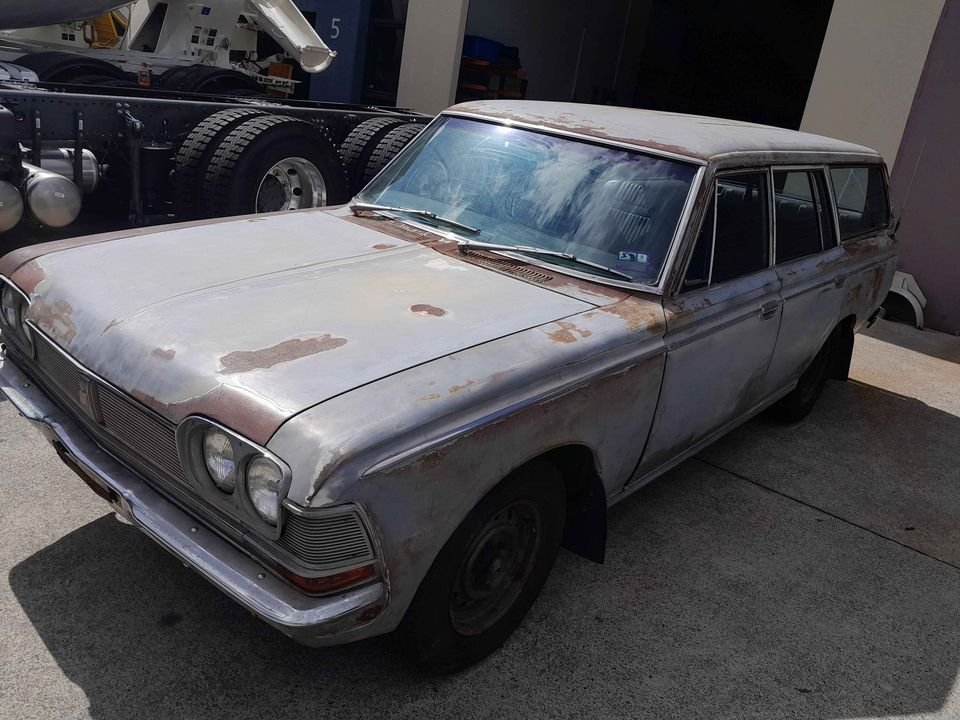
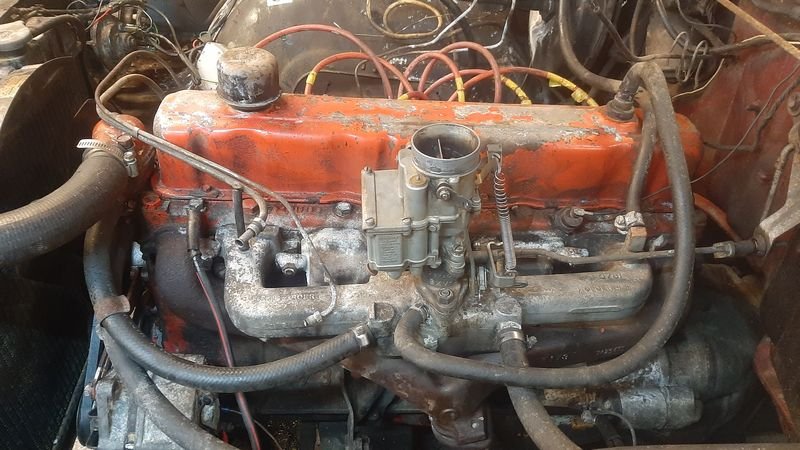
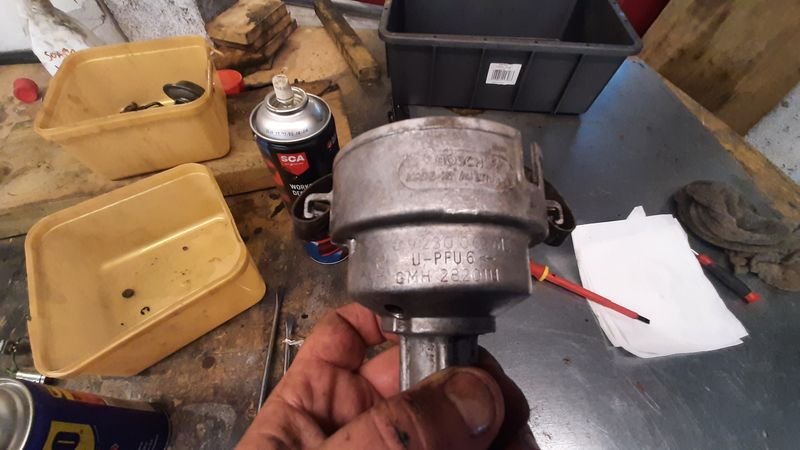
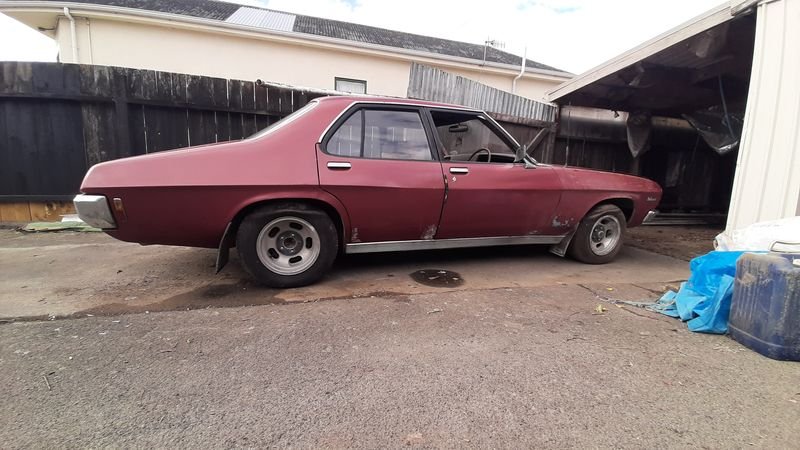
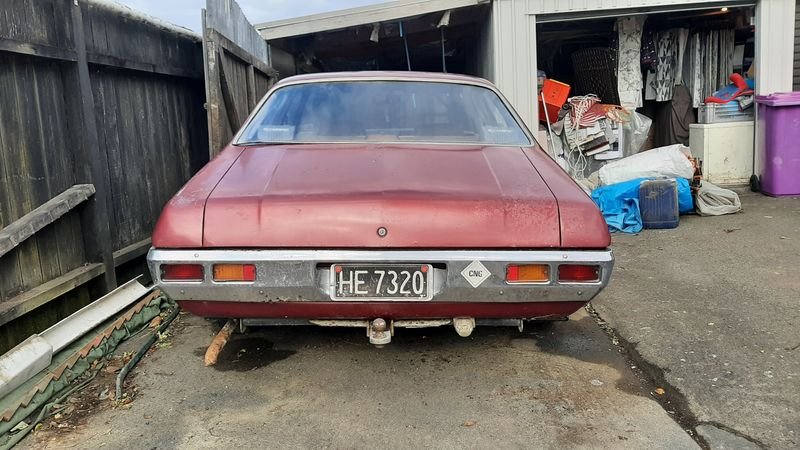
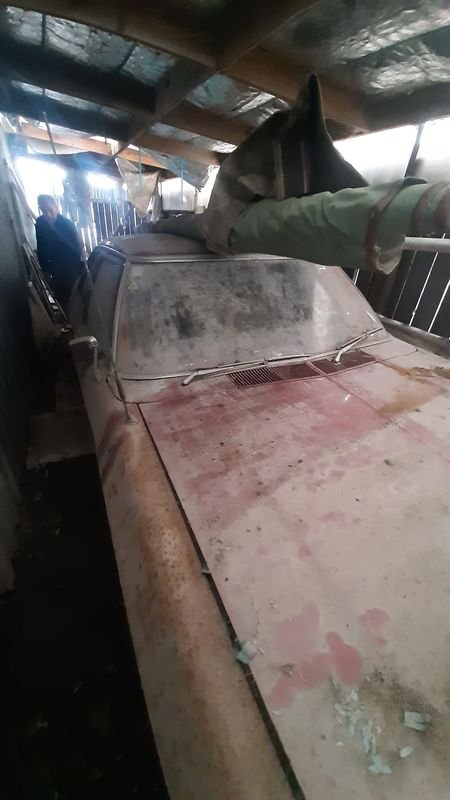
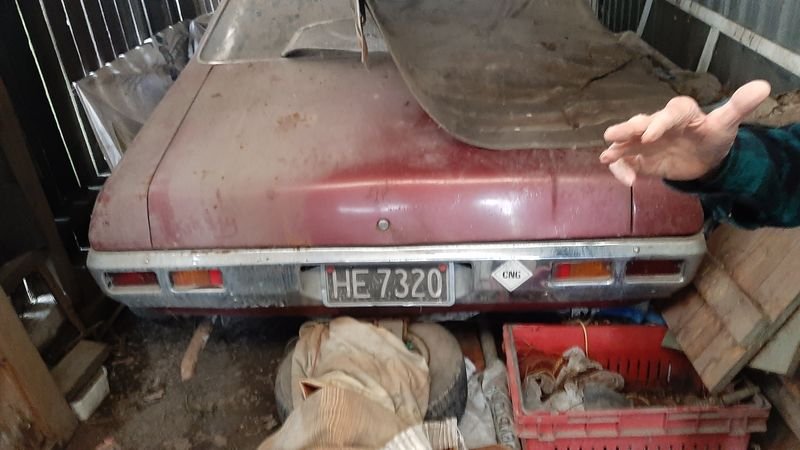
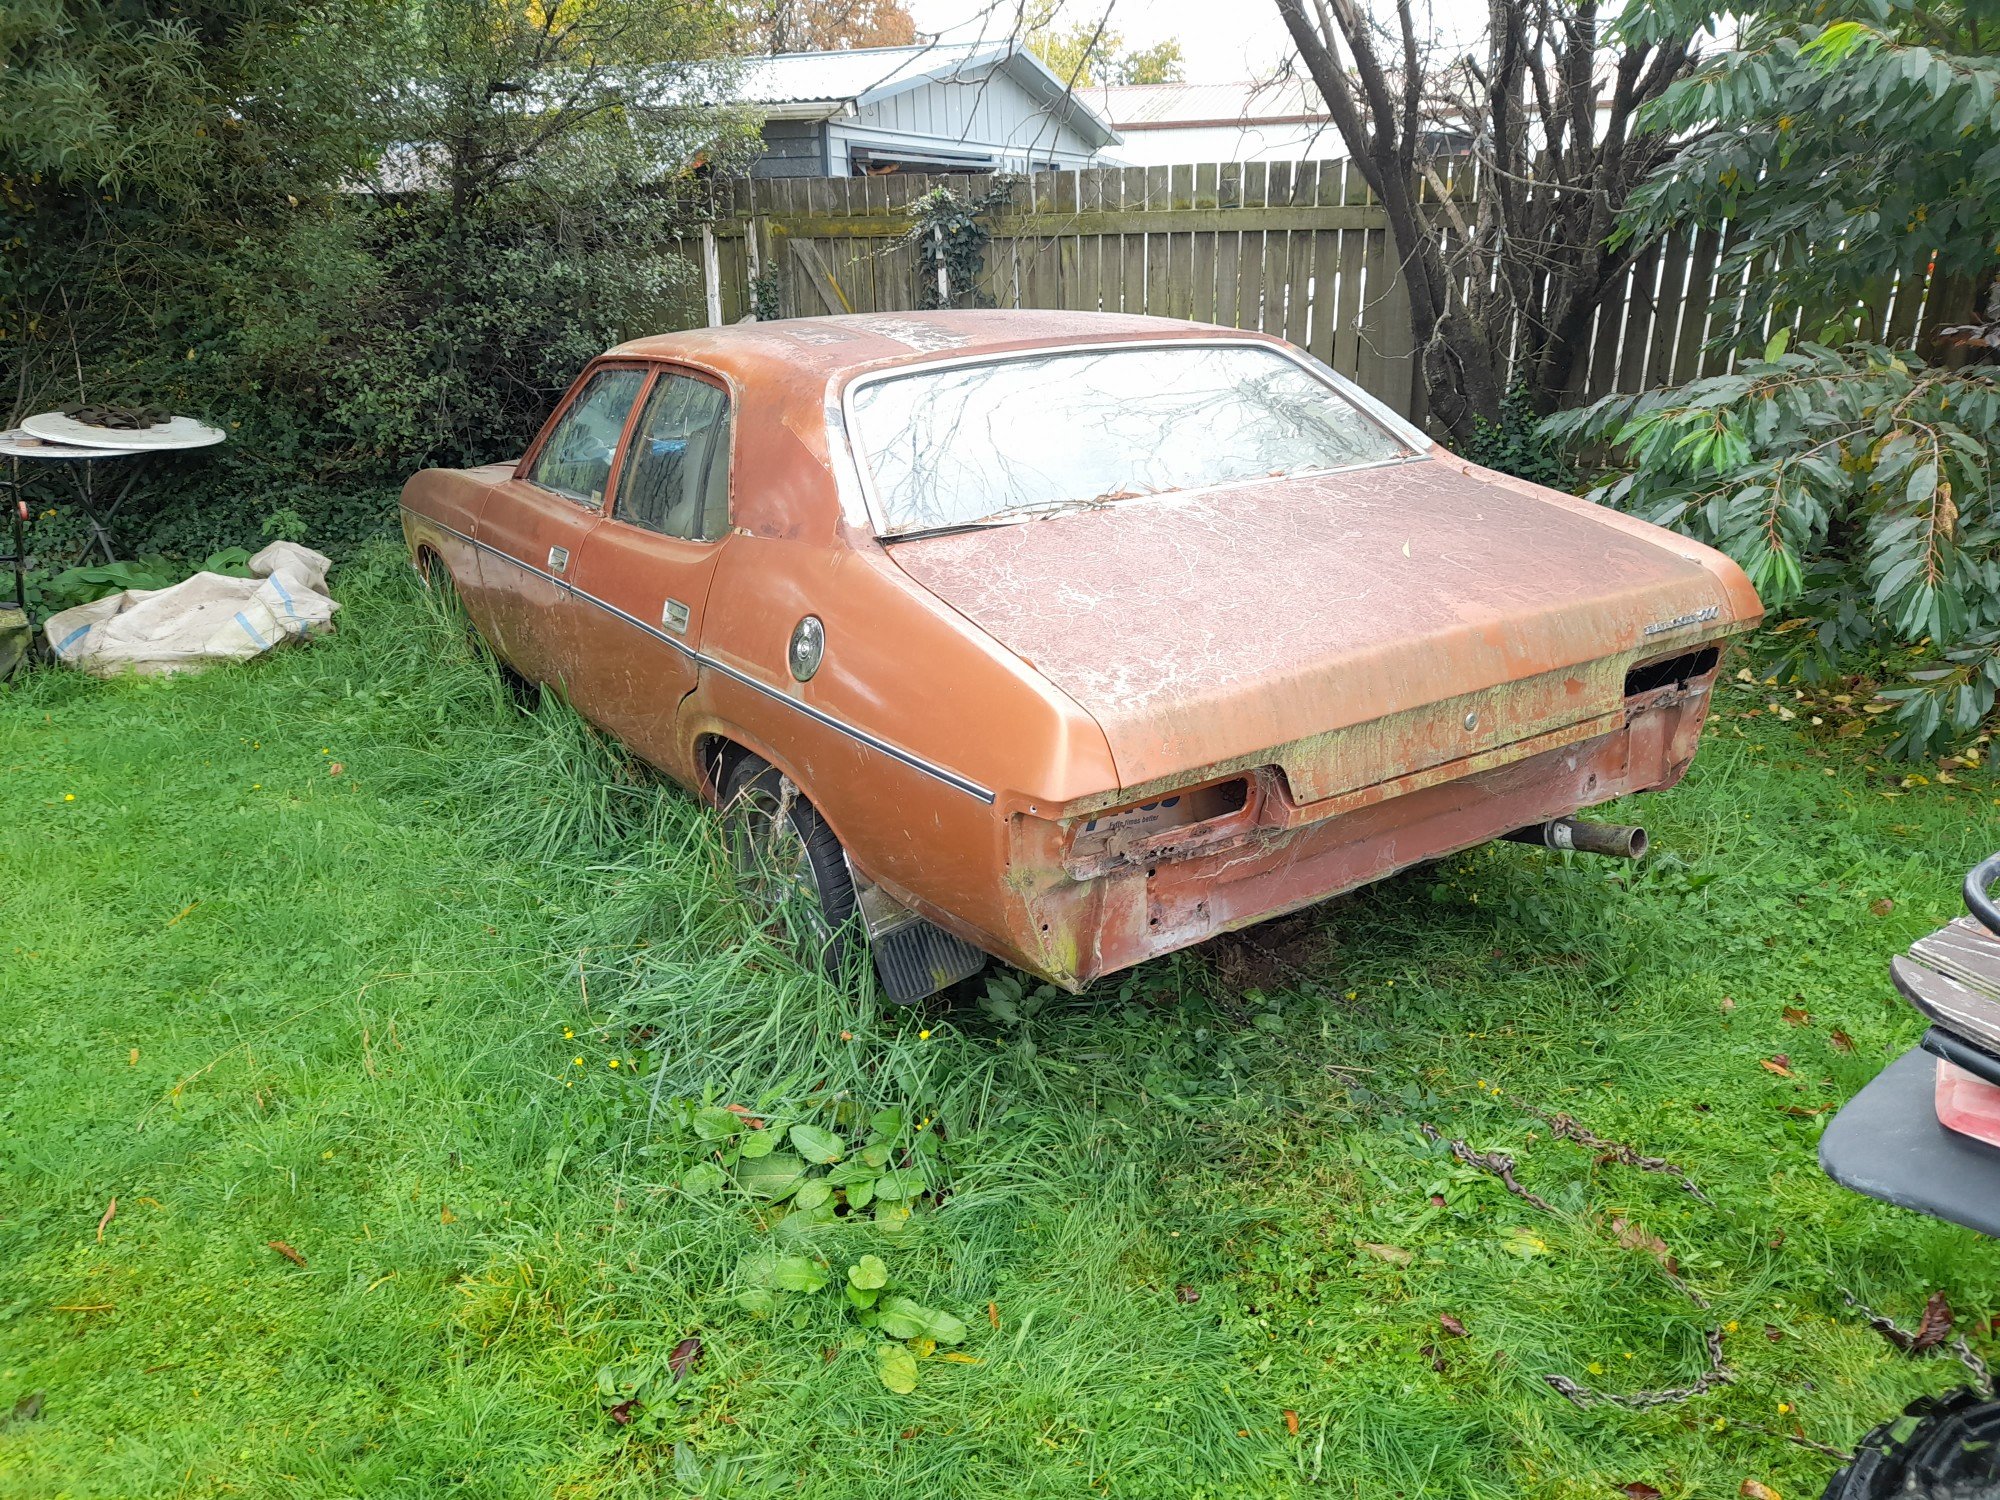
Then of course it was time to have a good look while cleaning it a bit, and taking stock So, its a 1974 Holden HQ Belmont Sedan in Orchid Red. Last wof/reg in 2001, so was on the road into Kpies early 20's around the same time i met her. Seems it also got the Torana front seats, maybe the centre console? Interior looks pretty good under the dust. Overall looks pretty straight and complete. Some rusty bits of course but not too bad at all for one of these 8s out back and 7s up front, massive CNG tank in the book gives it a rake. This car was a NZ new factory 202 manual 3 on the tree car. Bill bought it cheap from a guy who bought it to put the v8 that was in it into something else, or something - bought with no engine in it anyway The engine and box now in it is a 173 (2.8l) with a manual 4 on floor from the aforementioned rolled Torana, which had recently had a fair bit spent on the engine (??) It has a single barrel Stromberg and also has CNG. Only $4.20 to Whanganui! Took the plugs out and oiled the cylinders, cleaned the sparkplugs and filed the points and hooked up a battery. Neighbours come to assist. Many opinions were shared We managed to get it to fire off on squirting gas down the yap, but it just wouldn't keep running. The consensus is that the timing and/or the electrics are weird Brake pedal does nothing till halfway then hard stops, no braking action. Handbrake kinda works. Engine isnt stuck and clutch is free and gearbox goes into all gears. Bill is stoked it fired up, Kirsty is happy, and that it rolls at all is good enough for the transporter man. We push it back in the shed to wait for the transporter
2 points
-
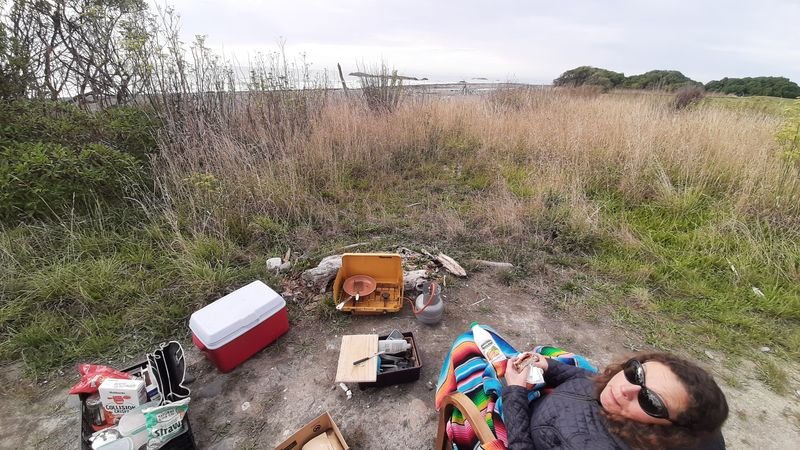
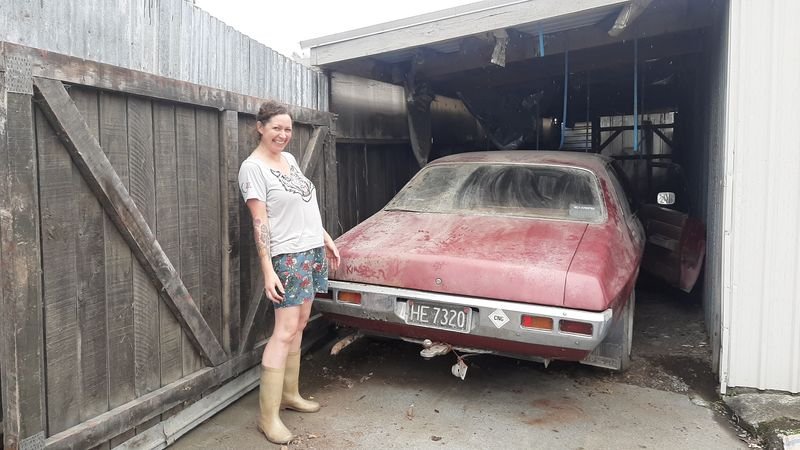
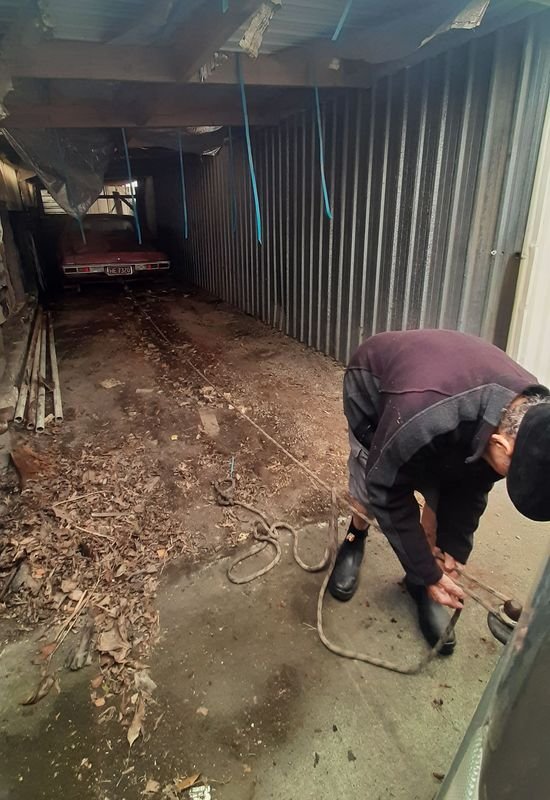
Organized time off and ferrys etc and a cool 10 days hanging in Fielding. Real barn find! Her names on it so this must be it. We pumped up the tyres and had a general look around one day Then cleared all the stuff out over the next few days, did a lot of gardening too, Hooked it up to the van and pulled it into the light
2 points
-
Hey I really hope I've mis read but did you lap the valves to the seats before you reassembled or did they do that at the shop and had the valves labelled to fit the head? If it came back a bare head I'd be worried about valves sealing to the seats And did you leak test the valves before you put the head on the block? If the machine shop/engine reconditioner lapped the valve seats to remove pitting then just putting the valves back into the head may not seal as well as it should Happy to he corrected and I hope that makes sense Great to see progress and I hope it all goes vaxk together well1 point
-
First job ticked off. Welded up a box for the gearbox cover. The only thing it does is provide access to the selector uni grub screw. Even that's pointless if when taking the engine and box out I slide it backwards. If the engineer asks me to weld it in it wont be a big deal. Just a faff around with making sure it doesnt catch fire. I have to put the rear seat back in sans some springs in the middle. No biggy.
1 point
-
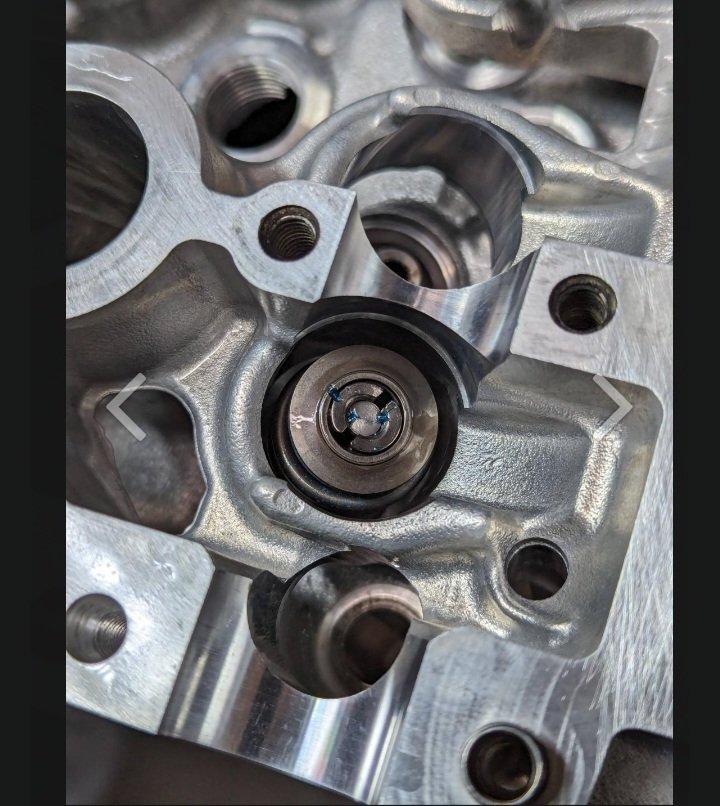
I picked up the engine wednesday and got bizzy after work. Mmm shiny Outside not so much - I think I prefer this, because it'd fuck with me if I only had some parts that were super shiny on the outside. They skimmed the head, checked for cracks and heat issues, and only found minor pitting on some valve seats which they lapped out. Forgetting that I hadn't done this ahead of time, I went through a soapy water -> water rinse -> brake cleaner -> fresh oil routine to make sure the engine gets as little extra iron in its diet as possible. The valve stem seals go in with a socket and extension + oil... I uh accidentally put a used one in at once (visible at bottom of image above), because for some reason past tom put an old one next to a fresh one... Special tool 09916–14510 Special tool 09916–14522. If I had to change this I'd make it a little longer. The first one went in reasonably easy. I used some shitty aliexpress tweezers (might as well be made of slices of takeaway container plastic) and grease to hold the bingles in place. It made me think that this would be easy... Turns out almost all of them gave me a fight. The bingles HATE going into position and the intake side is even more of a bitch as they need to seat deeper. They'd wiggle free, pop each other out, stick to the tweezers or whatever else I put in there, and just generally be a bit of a bitch. The tool I printed left too short a window on a couple of them to keep a piece of material in there to hold the bingles down. I tried a bunch of tricks, including putting foam in the special tool and in a socket, but ultimately the best technique was to just struggle and eventually get there. The next day we aimed to get the head and the block together. We got the shop to do the rotating assembly and I think it was well worth it. Before we could put the head on there were a couple jobs we wanted to do first. First, the oil seal housing. Some internet sleuthing tells me that Threebond 1217G is equivalent to Permatex Ultra Grey. Special tool 09911–95010 helps get the seal onto the crank. Girlface finishes off cleaning the breather plate and we get that back on too. While we waited for the sealant to cure, we got the engine set up on the hoozitchacallit. Then after an hour we came back and torqued to spec. Wiping down all surfaces with brake cleaner, we busted out the dowels and head gasket... and then the engine got marginally larger! The head bolts are next. We got fresh new ones under the assumption that the old ones underwent enough plastic deformation to be unusable, but I haven't actually checked. 20 Nm, then 40Nm, fine. But then +60 degrees, which introduces unhappy metal sounds and vibrations, which is really disconcerting! And then another +60 degrees which put us completely in anoos puckering territory. Fuck me I'm glad that's over and nothing broke. Today, I set my sights on the camshafts, sprockets, chain and oil cover. I still hadn't disassembled and cleaned the camshaft parts so that was the first job. Gingerly separated the cams from their sprockets in a vice, then cleaned in the parts washer before rinsing thoroughly with brake cleaner and then a further rinse in fresh oil. The exhaust camshaft was a lot simpler to clean The intake camshaft has a bearing at the sprocket end, just the one, I guess because there are some complex oil gallery stuffs going on there. The old bearing felt fine but I grabbed a new one anyway, it's only one size. Then the cams go in! It was ambiguous in the manual whether to use oil on the bolts but I thought yes and the internet backed me up so that's what I did. Kelv later told me his gut said no. So Kelv, if something fucks up here, you were right. It was at this point I tore the garage up trying to find the crankshaft key. It gone . I remember seeing it at some stage so I can't imagine it has gone far but ugghh what a bummer, let me keep assembling god damn it! I kept going anyway and got the chain, guides and tensioner set up per the manual. Before I torqued the tensioner down I tested that everything can be removed with it in place for if I find the key / need to disassemble the head later, so that gets the ol' paint marks on the bolts treatment. The other annoying thing: the machinist said to check the valve clearances due to the lapping. I slightly fucked it up (measured at parallel instead of perpendicular because the above image didn't load first time and I'm a numpty) but I got a 0.2mm in (good) but not a 0.25mm in (bad). I also wanted to get the chain properly set up so I could start rotating the lobes into the correct positions for measuring so that annoyingly threw me off today. I'll find some way to measure those little bastards tomorrow though. I really hope I don't have to wait for new tappets and/or key from Japan... But anyway progress is progress!1 point
-
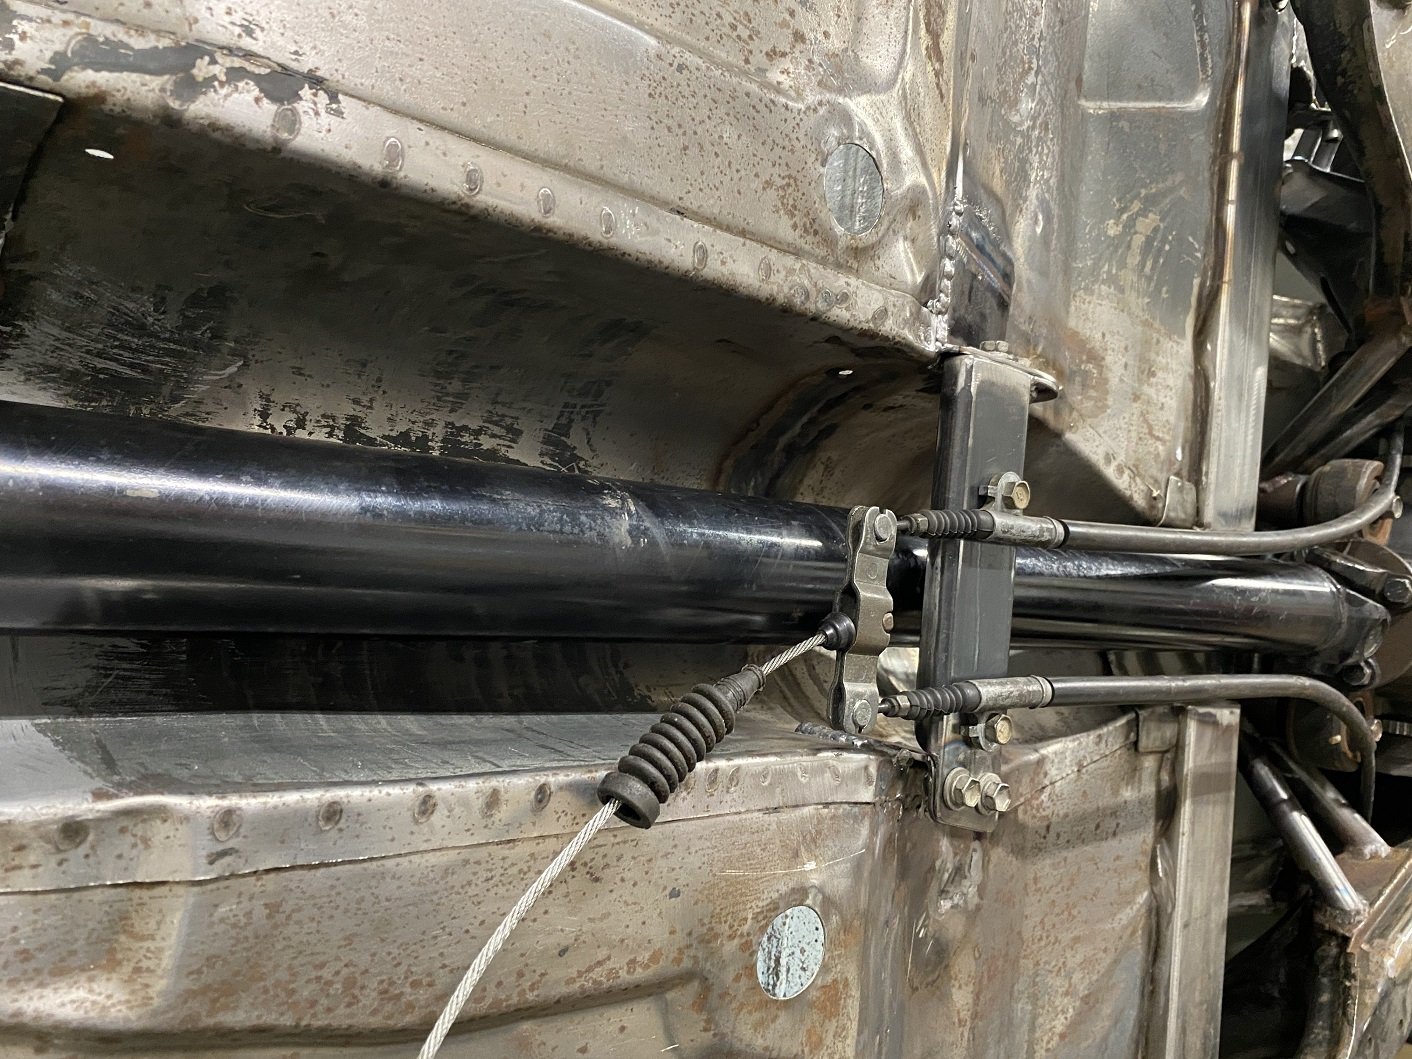
I made the handbrake cable bracket. I can make the cable outer touch the propshaft flange, so I'll make some brackets to hold them away. I'm fairly confident they wouldn't touch by themselves anyway... I must decide how I want to marry the Triumph handbrake lever to the toyota cable so it's still adjustable. The handbrake is offset to the drivers side, so the cable 'just' misses the propshaft.
1 point
-
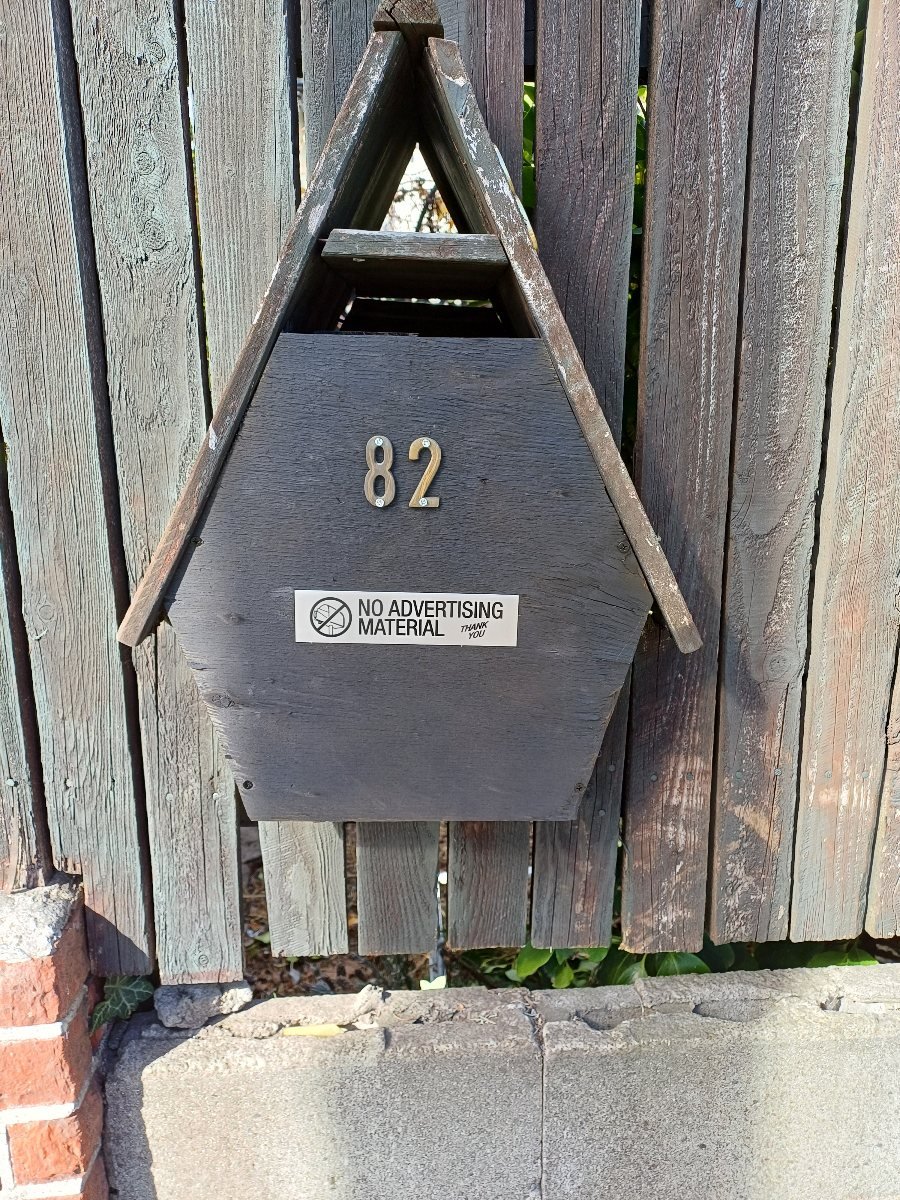
Old guy next door who loaned me that big van, died a couple of years ago, and his daughter isn't really coping with home ownership. She's been away ~3 months looking after an ex who was having heart surgery. So I had a bit of time to think as I wombled around doing this, and concluded doing something for a neighbour was pretty appropriate for Anzac day.
1 point
-
Drivers A pillar is no good. Fixable though. Found a hole under the wiper panel too, will see how bad that really is when i pull the dash out. Not looking forward to it tbh.
1 point
-
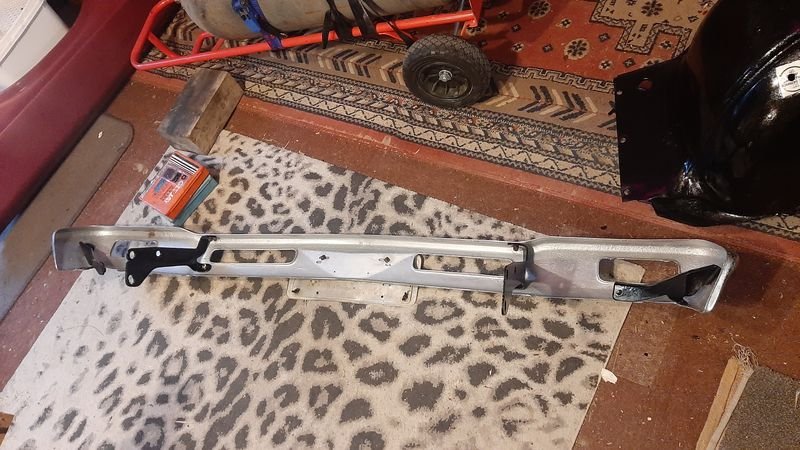
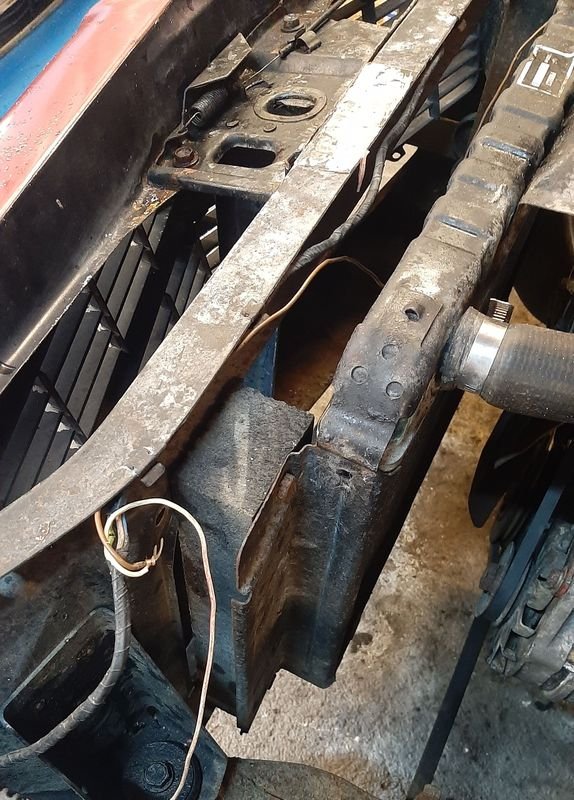
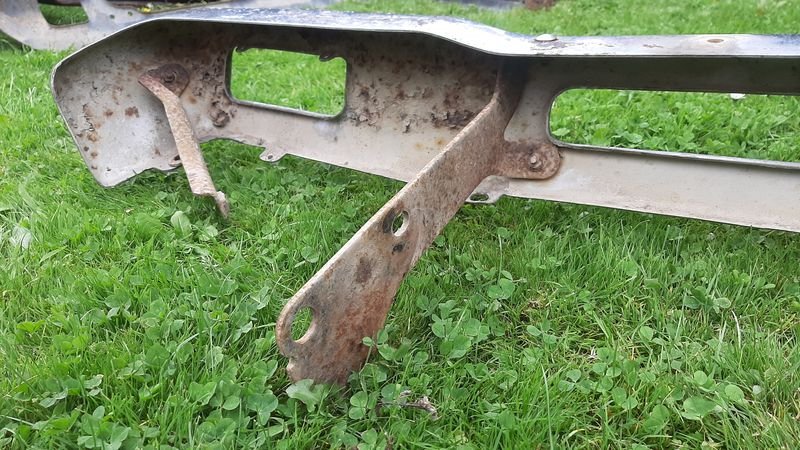
Went out this morning to pull the front bumper off and check out how things look. Got carried away but at least i know most of the front end is in good shape now.
1 point
-
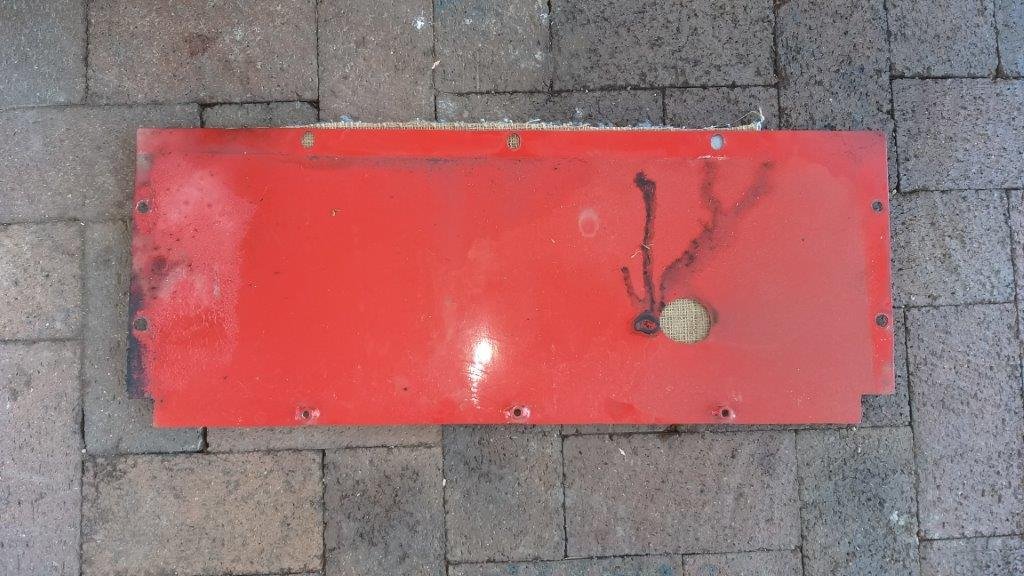
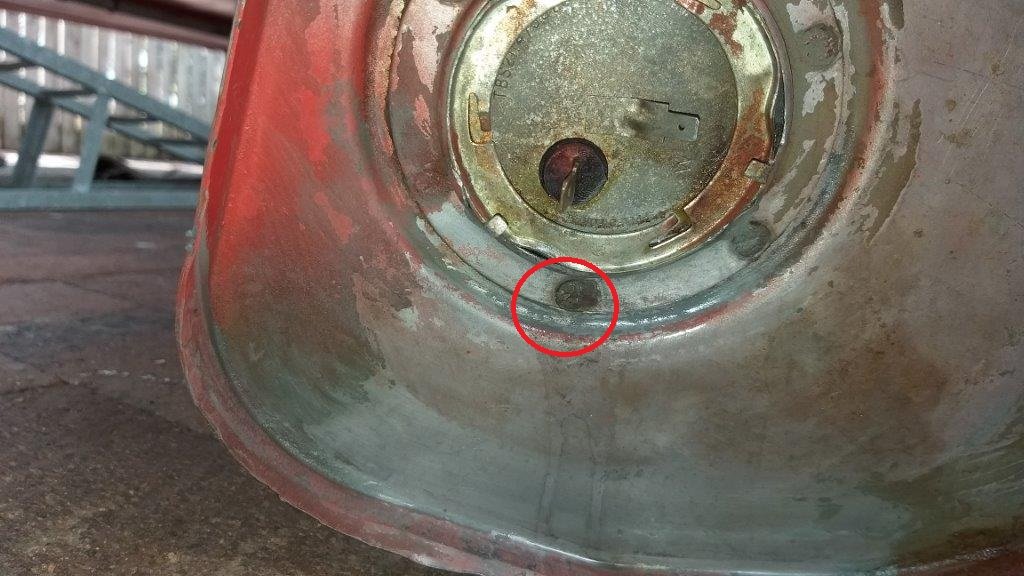
Since day one of ownership the Moke has always whiffed of fuel when parked in our garage. At first I attributed the issue to the cork gasket on the fuel cap which was badly shagged. I ordered a new one from Minisport but it made no difference. I began to notice that the smell was particularly bad when the tank was anyithing above about half full. We lived with the problem for a good while until one day I decided it was time to do something about it. Crawled underneath and removed the under tank cover plate for a quick look see. Sure enough there were signs of old fuel drips on the inside of the cover plate. At this stage I suspected the problem to be the sender unit rubber seal that sits on the side of the tank. So out came the tank and I removed the sender unit and replaced the seal. Sadly still no luck. In desperation I decided to drop the tank one more time, then filled it up with fuel to just past the sender unit to see what would happen. And .... a slow leak from one of the spot welds that hold the tank sender locating collar in place. I ended up chucking some JB Weld over the spot and that solved the issue.
1 point
-
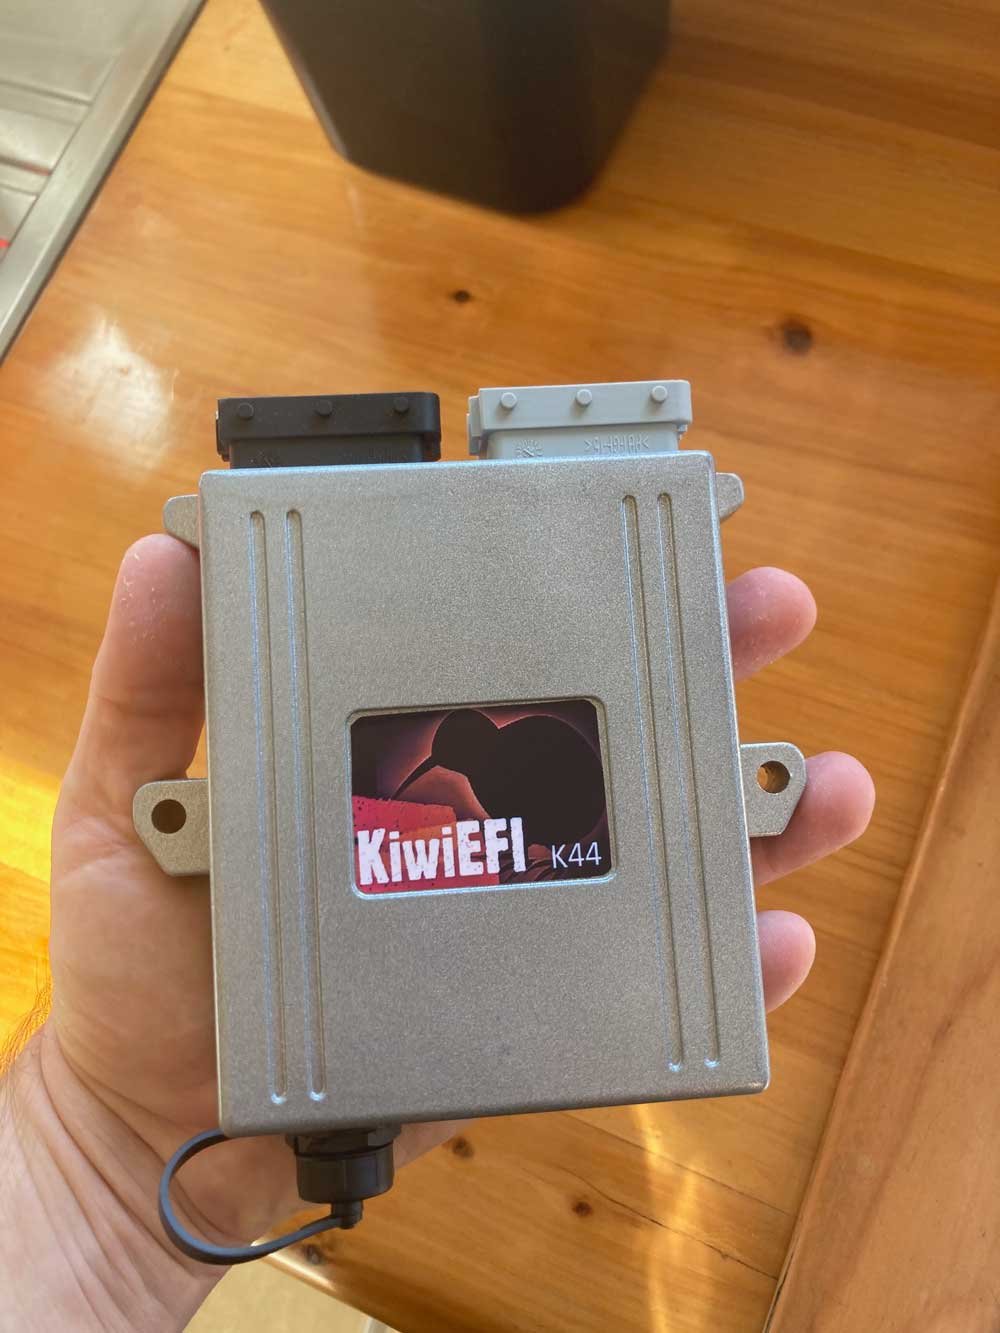
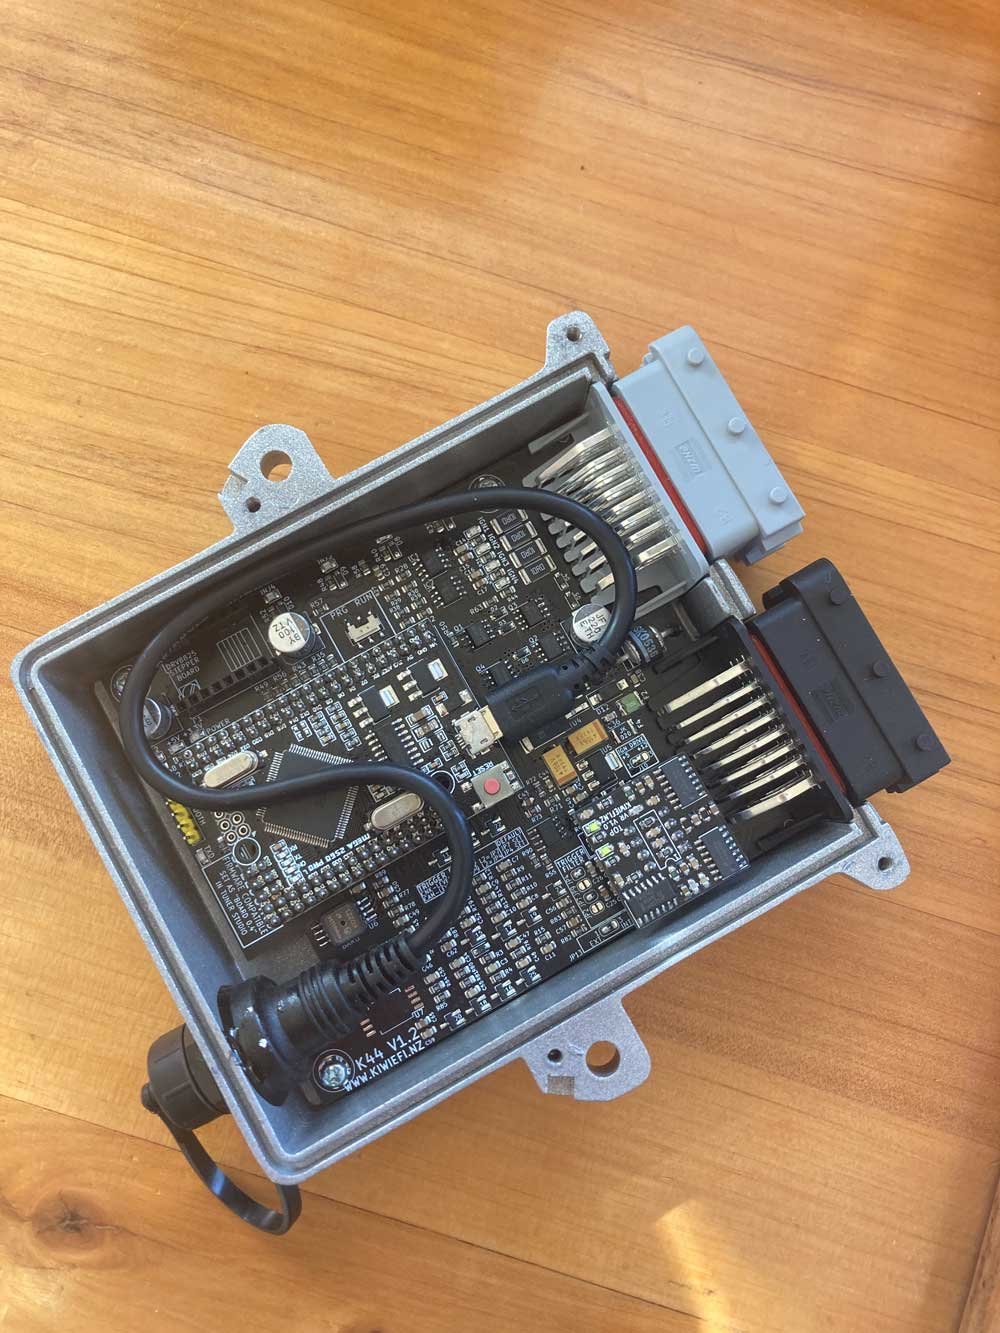
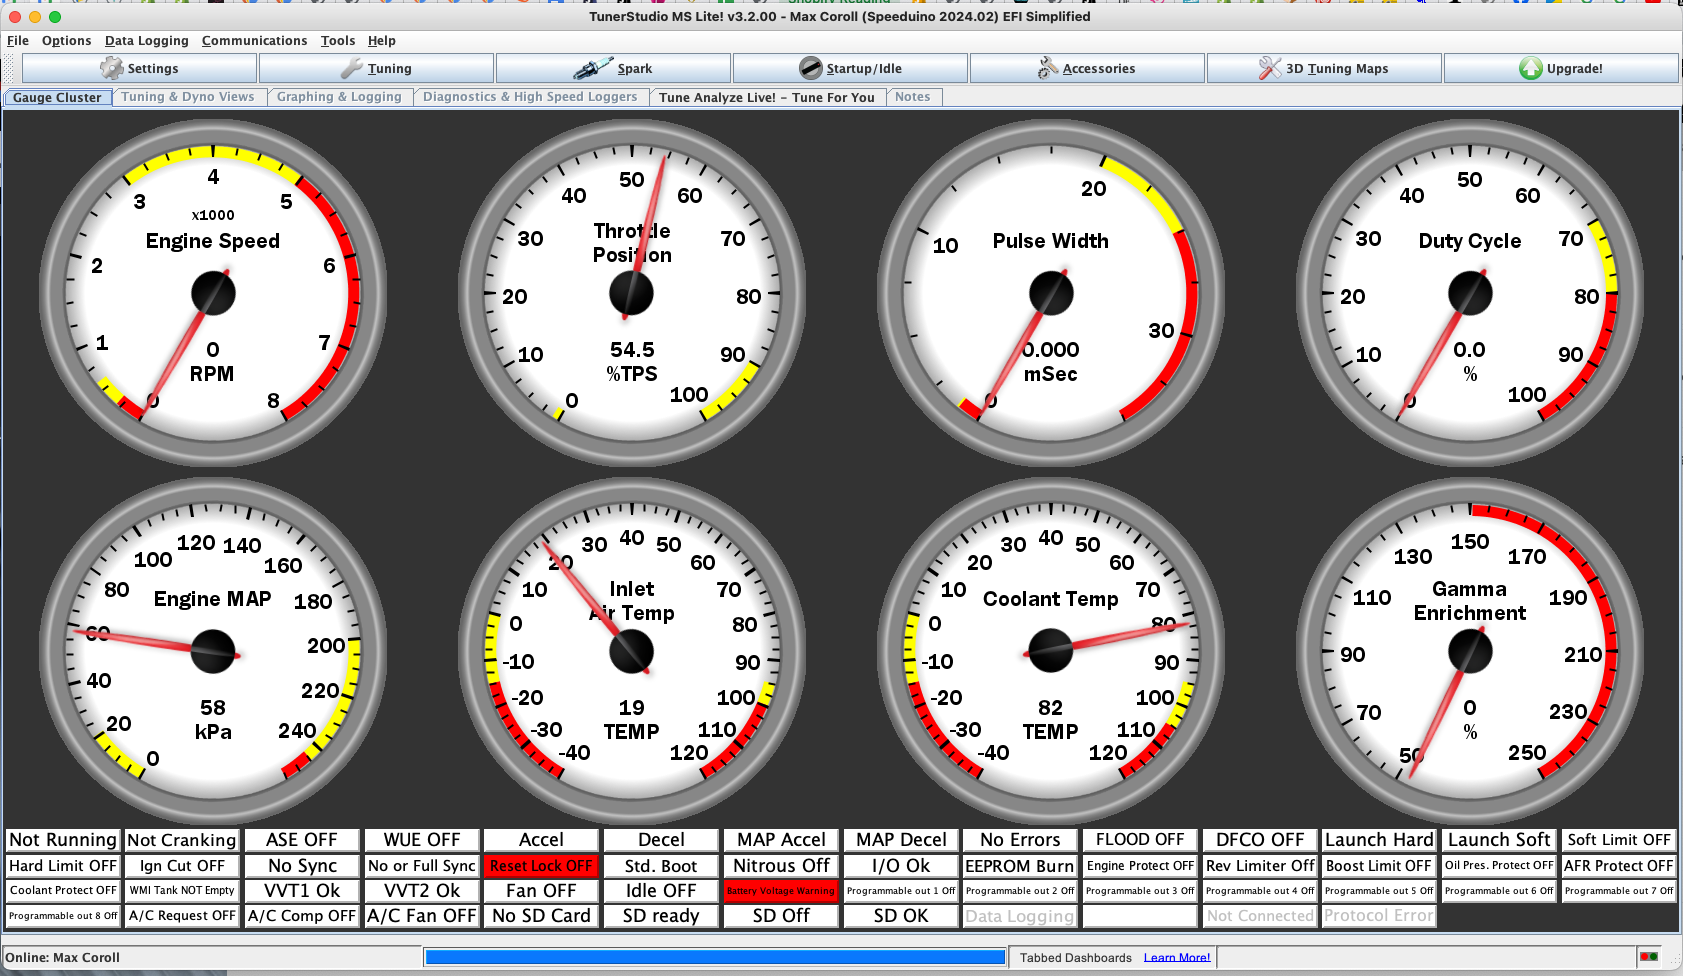
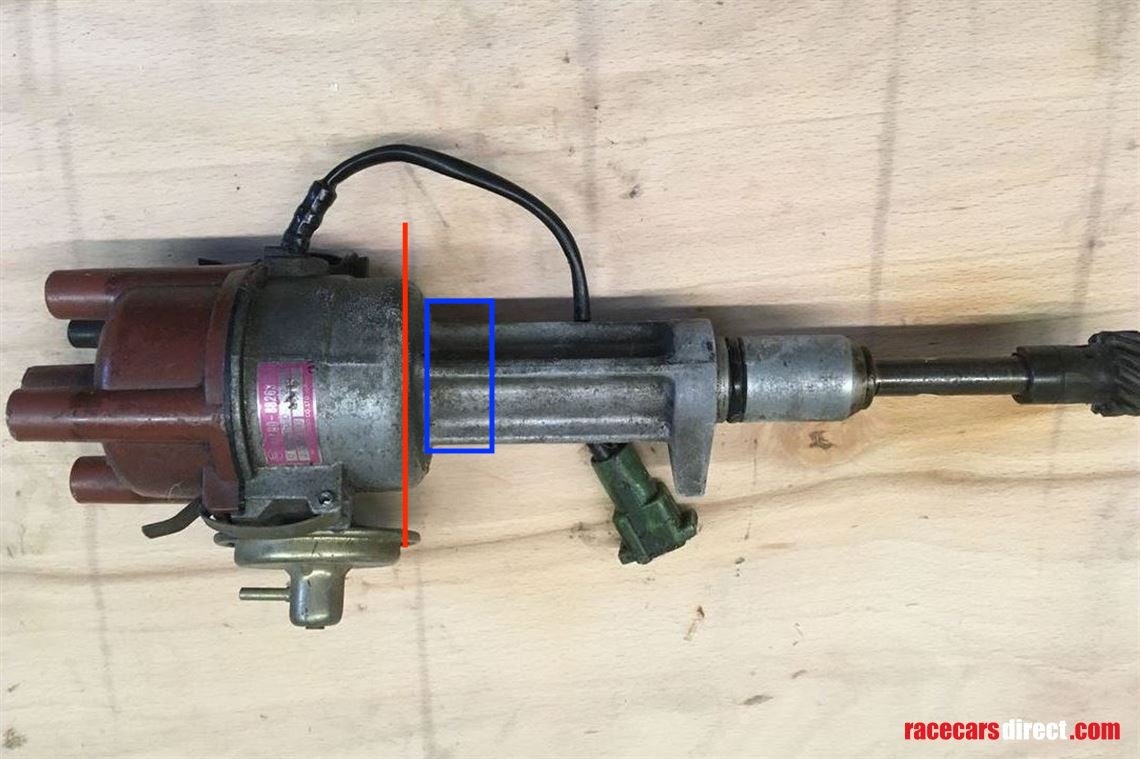
The ECU has arrived, consider me impressed. The micro USB is a bit janky, but that's neither here nor there. It's been fitted with a VR conditioner and configured to suit the Toyota 24+1 trigger setup. It connects to TunerStudio which I'm quite happy to see has Mac support. Now I just need to resuscitate a laptop, as I don't think my Mac Mini will work very well in the car. I went and saw Max on Sunday and we stood and stared at the two disassembled dizzies for a while. The guts of the 4AGE dizzy are too big to fit in the 2TG dizzy, so it sounds like there is going to be some sort of choppy choppy sleevey sleevey action going on. We're looking at potentially cutting the 2TG dizzy off at the red line, turning the blue section down and turning the base of the 4age dizzy down to be joined with a sleeve and joining the two dizzy shafts somewhere in the mix. Max also pointed out the oil port on the side of the 4age dizzy for lubrication and told me he was gonna lie awake at night designing something in his head. I guess my next step is to start stripping the 2TG loom down and working out what I'm keeping, what I'm removing and what I'm adding, along with what is already in there that can be reused. I'm already planning to run the map sensor and IAT sensor off the AFM wiring having done this previously on a Silvertop to Blacktop 4age swap, and I know I'm gonna need some more injector and ignition wires.
1 point
-
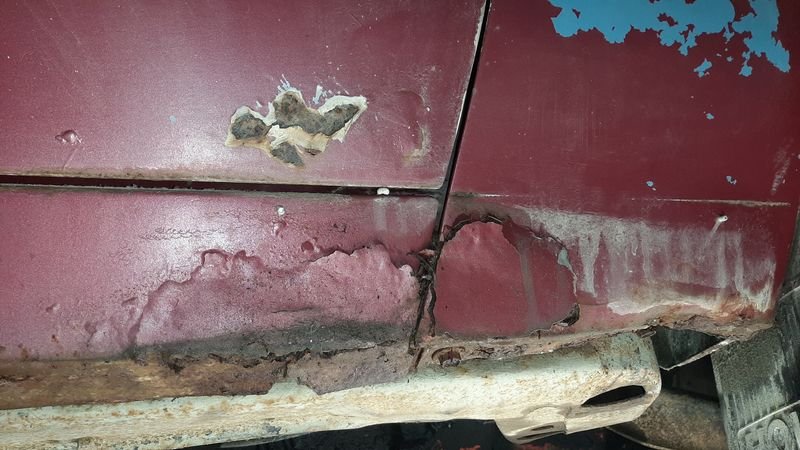
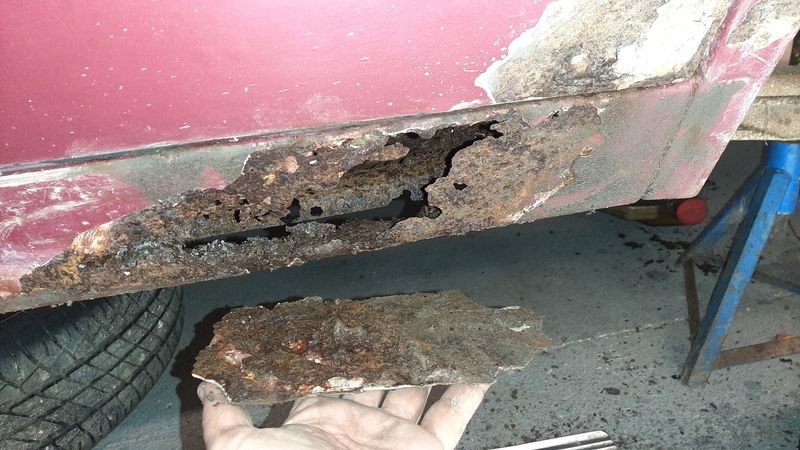
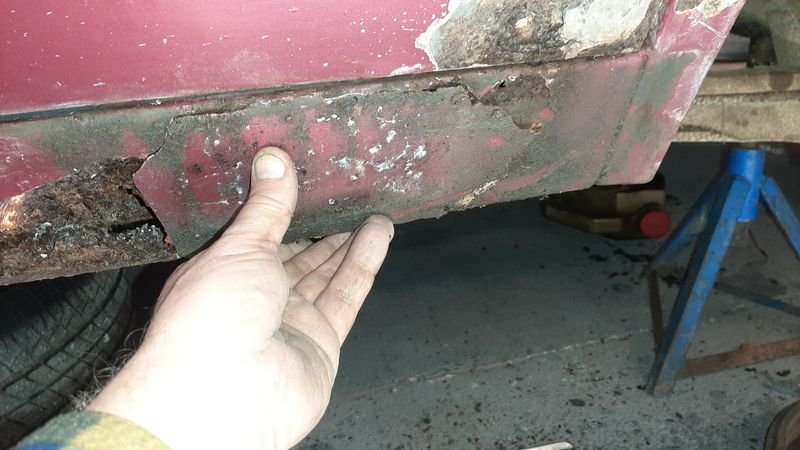
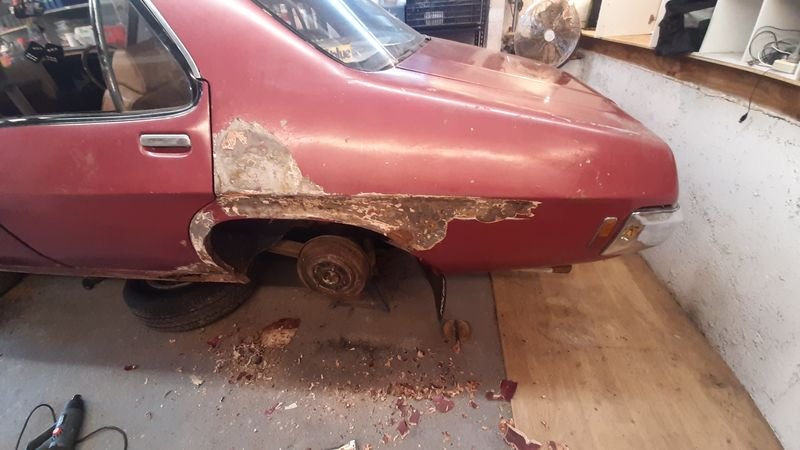
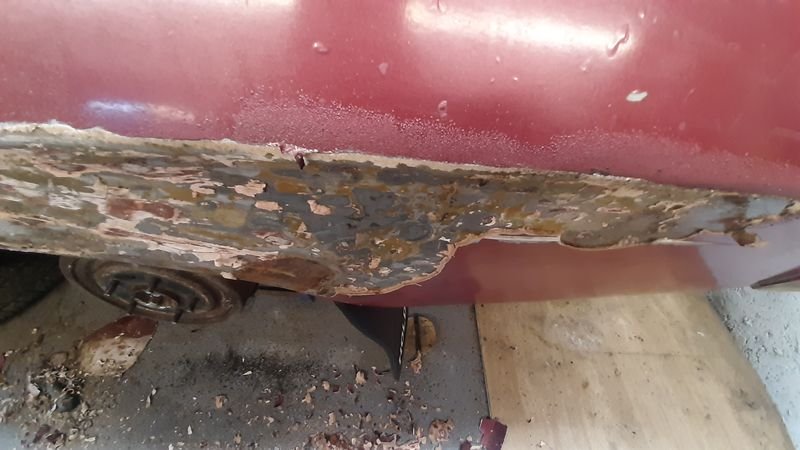
Today went pretty smoothly, managed to solo tow the old girl off the lawn and onto the driveway and waterblast 2 years worth of lichen off. Found lots of cancer had spread but not as bad as it could be. 15 yard test is still a pass. Also found lost of lifting bog from its life before me, will make for interesting times ahead. Had to use the quad with a bare tire on the front to push it into shed as the brakes were binding on, got wife to steer it and it went slowly rolling into the jack, axlestands and compressor. She hops out 'i tried using the brake but it didn't work, its not my fault!!' Calmed her down with 'if i told you it had no brakes would you have hopped in it?' Prolly no dinner for me tonight lol.
1 point
-
As per the title this next stage of building the exhaust silencer/muffler/back box/ take your pick has taken much more time and effort than I had always expected. I started by taking the blue imp apart. To Woolf valley garage I went.... ..where I removed (rusty mild steel) exhaust, bumper and rear valance.. Popped it onto rusty imp shell... Now I knew exactly how much room I have to play with. Whatever I was going to build had to work with several things. I wanted the box to be mounted higher than the existing one behind the Datsun engine as I was sick of scraping it on steep driveway exits. It had to be built completely of stainless steel, no exceptions. No more corrosion. It had to look tidy and fit within the bumper line, tailpipes excluded. The tailpipes were to be twin centre exit. I had a very specific look in mind and they have to be just right. It had to be quiet enough and yet still sound sporty. This last one is tricky and will most likely need modifications to get right hence the last design point... It has to be modular, easy enough to disassemble and repack with sound deadening (most likely glass fibre) Now I knew the size I could build it to I started by making some flanges. This so I can unbolt the flexible sections between the V clamps and the box. Made to suit the 44mm tube as per the tube off the V clamps. Lifted the big folder we'd made onto the bench top and folded up some 1.2mm stainless. Although heftier than I could have used I've gone with this thickness to helped avoid the tinny sound thin stainless boxes can make. I wanted perforated stainless tube but couldn't find any within NZ. Got some perforated sheet instead - again 1.2... Which I cut strips from and formed up into tubes as such... Welded... Now I had the start of a box and some tube. I could sit down and nut out a design. I have had some basic ideas for ages on how it might look inside but it was really good to sit down and see how it might work. Drew some ideas up.. Nutted out something I think would work well and be easy enough to change if need be. Time to commit. I had to cut some blue steel. First actual act of modification to the imp in my quest to plonk a flat six in it. Now I could double check box sizing and weld the flanges in place. Folded up the second box side.. Complete with captive nuts to suit a lid.. Tail pipe time. I almost went with twin 2" exits but they were just a tad too big. Settled on twin 45mm. Tacked them to yet another stainless pair of flanges to work with the modular design aspect. Happy with the look I then fully welded them on the inside. The flanges will be sealed with a soft copper gasket. Happy I had the look right I cut the centre top from the box, created a recessed bit and carefully welded in the second threaded flange. So now I have inlets and outlets where I want them and just have to connect the dots. Ideally a nice long a route to dampen sound while keeping it as smooth flowing as possible. Plus, as per original brief, it has to allow for easy disassembly and re-packing. There was quite a bit of head scratching with this bit of the build but eventually I sorted a design out. I cut various bit of sheet and put big holes in them with a nice brand new holesaw set. Made little boxes with more big holes... Shaped bits like a heart...(#putmyheartandsoulintoit.....) Welded the ends onto the main box, curved in bit to help with flow and also hide the external bobbin mounts from view a little. Now I had a collection of parts that would come together and form a london underground of tubeways for the exhaust gases to follow. I was pretty happy with the layout for its potential silencing effect. However I now wondered if it might just end up being a touch too quiet and restrictive. Luckily I had come up with an idea early on where I could add some valves. Quite a little bit of extra work involved but the more I'd thought about it the more I was convinced it could work well. With this in mind I had built the middle chamber width to allow for some valves and made sure they could be removed to fit said valves in place. I cut some 44mm holes in the middle chamber lids and made some to valves to suit... Whipped up a little press form to create brackets.. Valves mounted. Underside of lids have the heart halves which help direct flow from one tube back too the next, or up and out through the open valves.. Valve shafts stick out through back of box. Sealing will be by a combination of spring loaded fibre and silicone washers. Now for an exciting point in life that every shed 'Barry' looks forward to. Emptying out those boxes of little random fittings that have been stashed away 'just in case you might need them'... Such fun! I selected my (stainless!!!) treats and scribbled on some alloy. Made lots of alloy swarf.. Ended up with these levers. Pinch bolted to the shafts along with added grub screws. The short length of threaded rod will be changed for a long length of stainless rod, actuation method from within the car yet undecided. Possibly a 12volt door lock motor etc or maybe mechanically with a bicycle cable. Recessed the backs to allow for seals.. So yeah. Lots of parts! Compulsory photo of thing exploded into many bits... All together now with some arrows. Remember each side is just a mirror of the other side (there is a small cross over hole in the centre plate that separates the sides) Valve closed... Valve open... I think it'll be quite a difference in sound and look forward to hearing it. Valves can be seen in action in this very exciting video... So It's pretty much complete except for the mount points which I'll do once I've got some bobbins from engineering shop along with seals. The lid will be sealed by running a bead of silicone which I'll let set before clamping the lid down. Oh I weighed it too. I was worried it might end up quite hefty but it will be only about 6.4 kg once all the bolts are in/packed with fibreglass.. The box will be painted satin/matt black leaving the tailpipes shiny. Silencer mounted in place... View from above showing plenty of room for the valve linkages in place. I ended up cutting a tiny bit more of the valance away so there's room for a stainless heatshield. I then covered the valance with some masking tape to help prevent it getting too scratched while I put back in some internal strengthening and capping it all off. I'll also be adding mount areas for the bobbins. I'll remove the engine next and add in the big multi-pin connector to the engine loom. Then I'll be seriously very close to removing the Datsun engine and cutting out the under seat area just as I have on this rusty shell. Wow!!1 point
-
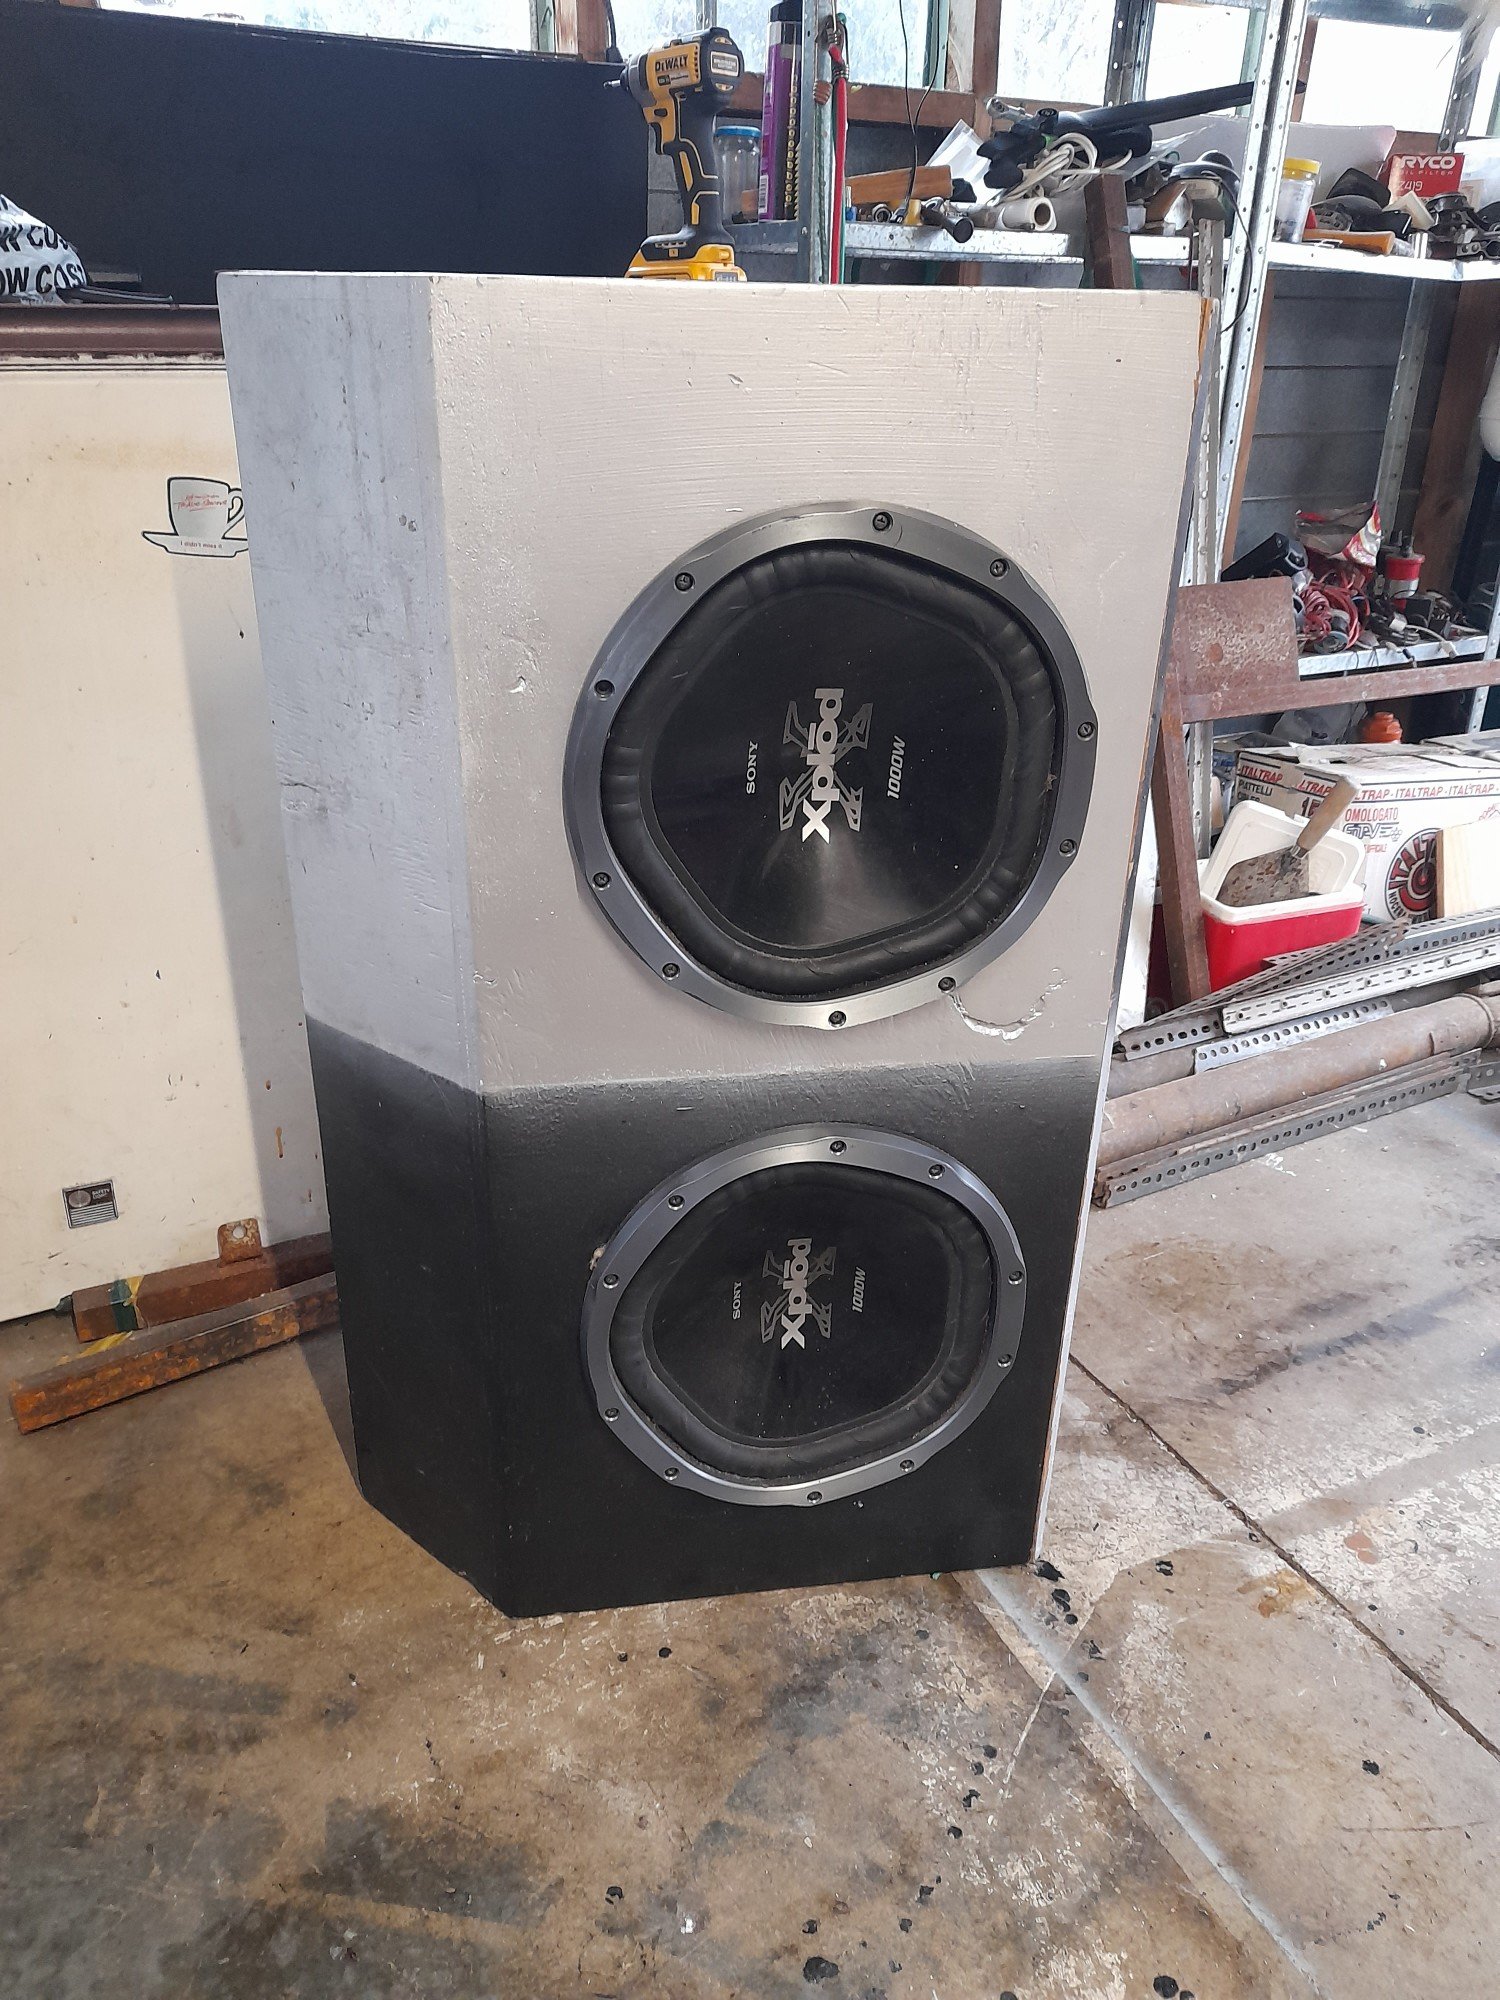
One of the multitude of reasons this car never gets any closer to be finished is my never ending flow of side projects and half arsed ideas filling up the carshed and not leaving enough room for the car! Rainy boring day so perfect for a shed tidying session. Got sidetracked making one of my kids a wand first up (see never ending projects comment above), but got a solid effort in this afternoon so far. Have been putting up with this behemoth being in the way everwhere for years now, never wanted the box anyway so today it got cut up for the burn pile. So much more space efficient now. Lots of things along those lines and now i can see a car sized open floored area again! Will cut open another burning drum tomorrow and get rid of all the scrap timber that has accumulated in the back shed. Then continue the relocation from hoardingsshed 1 to hoardings shed 2..... of 4. Then to tow/push/shunt the car out of its lawn divots!
1 point
-
Old man had a Kingswood wagon when I was 7 or 8. He swapped a Chevy big block in, not sure exactly what size but it was rowdy. I remember when he sold it, guy who bought it was in a wheelchair, had no legs, tried to pay in weed. So yeah the 90s were interesting1 point
-
My other old Holden story is my (step) Uncle Gary is into them, and still has a pile of them (in northland) Me and my step bro learned to drive a rusty/mostly fibreglass HR? Ute that he must have given his brother (my step dad/old man) to use in the 5 acre paddock we had out the back of the house. It was good for chucking old farm crap (rubbish, fence posts, thistle, boxthorn etc) into to take to the bonfire pile and doing donuts in the paddock that couldnt be seen from the house. The problem was, that the donuts left marks in the grass that could be seen by the old man when he went on his walks around the place, so then we couldnt do that any more. I remember getting it stuck once and not being able to rock it out of the hole it had dug (i was like 12, the only thing i new which was giving it more jandal wasn't working - what to do???) and Gary saying, ill show ya, jumping in and rowing the column change and heavy clutch between 1st and reverse like a drift car driver, SKILLZ! From what i can recall the ute disappeared when we had tidied up most of the paddock and built some fences, Uncle Gary probably grabbed it back, and probably still has it. Less classic Holden yarns The old man also had a series of new two tone (maroon upper, silver lower) V8 Calais, i think VS, VSII and then maybe a VT, before changing tack to a V8 Cherokee (in the same colour) - i think he said the Holden salesman gave him some side eye or tried to stiff him on the trade in or something, and after buying 3 new top spec cars in 5ish years told them to shove it and must have gone to the Jeep place instead. The VS was the best one (IMO 12yo opinion) still love those flat rear arches. Mum also had a first gen Opel Vectra GT at the same time, that was pretty quick too (when the old man drove it!) and had a great sporty exhaust note The 90s were a good time.1 point
-
H series Holdens, X series coons and V series Vals FTW...1 point
-
Tell me about - how you/brother/dad/uncle/cousin/mate used to have one Never had an HQ but did have an HJ(?) Wagoon - why my mrs is now tougher and cooler than me Always was - why big Australian cars with a mix of metric and imperial fasteners are better than silly little European ones that only use metric ( i had to dig out my very limited and mismatched Imperial sockets and wrenches that had been banished to the back of bottom draw of the tool box and put them right in the top bit ) Hey, at least they don't have BSW - where to get new parts easily/cheaply/locally Um, BNT? - why the second hand stuff on FBMP is outrageously priced and clearly owned by meth head bogans and how to avoid them Maybe try Invercargill area? - tips and tricks for hotting up your 173 using OEM + parts (commie inlet and exhaust manifolds? - the single stromberg and right angled log exhaust manifold offends me!)) I've got a couple of twin carb setups but never fitted them - can you bolt a 202 to the Torana 4 speed? Should be fine, I think the red motors are all the same - where to find a nice 202. In a rusty Landrover or CF Bedford - why do i even want a 202 (re-rego mainly), the 173 is probably perfectly fine, KPie doesnt really care (unless its a v8), and it wont be the engine from the Torana any more, You don't - where the fuck is the fill port for the CNG system on this car? (its not behind the number plate with the petrol filler) I dunno, but I made a brazier out of a CNG tank many years ago and it hasn't rusted away yet. Those things are stout.1 point
-
Regale me with your HQ related tales of triumph and woe, and ownership hints and tips here ^1 point


.jpg.c472fa6721301e28f293a24cf337a896.jpg)


This leaderboard is set to Auckland/GMT+12:00