
Leaderboard
.thumb.jpg.570970b401ac8d26ce9af7c1bf2bd8cd.jpg)


Popular Content
Showing content with the highest reputation on 01/02/24 in Posts
-
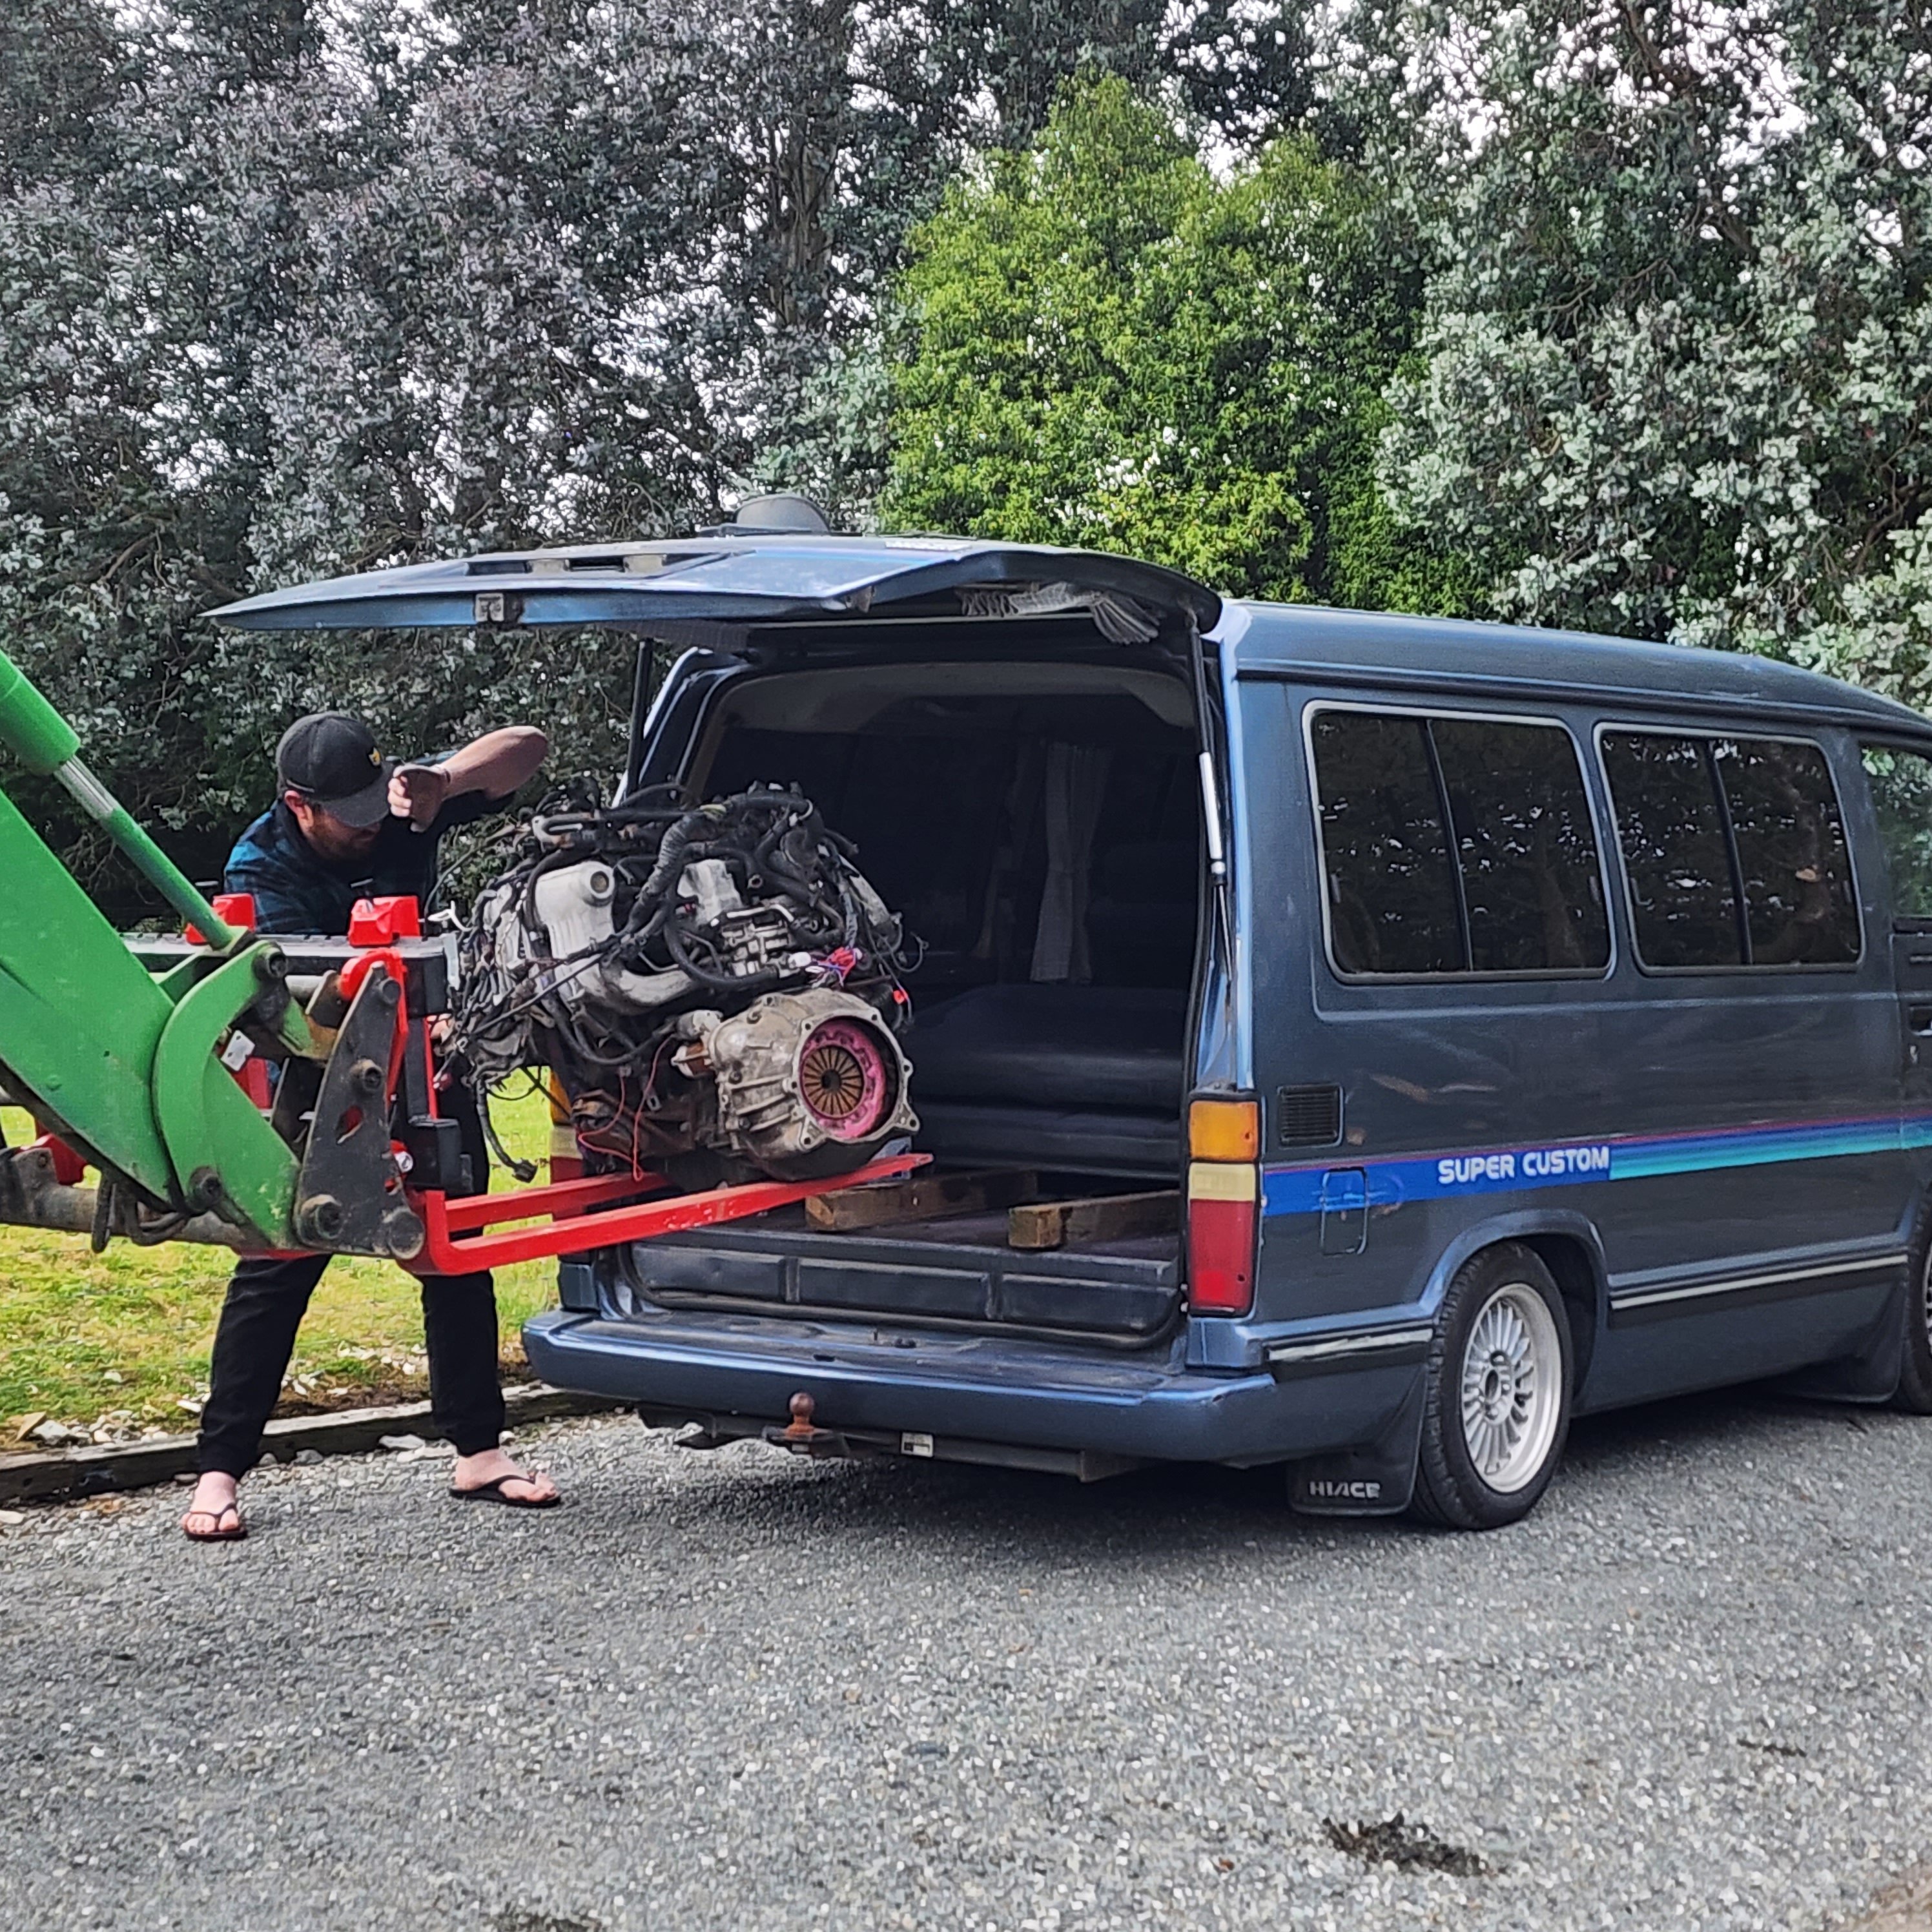
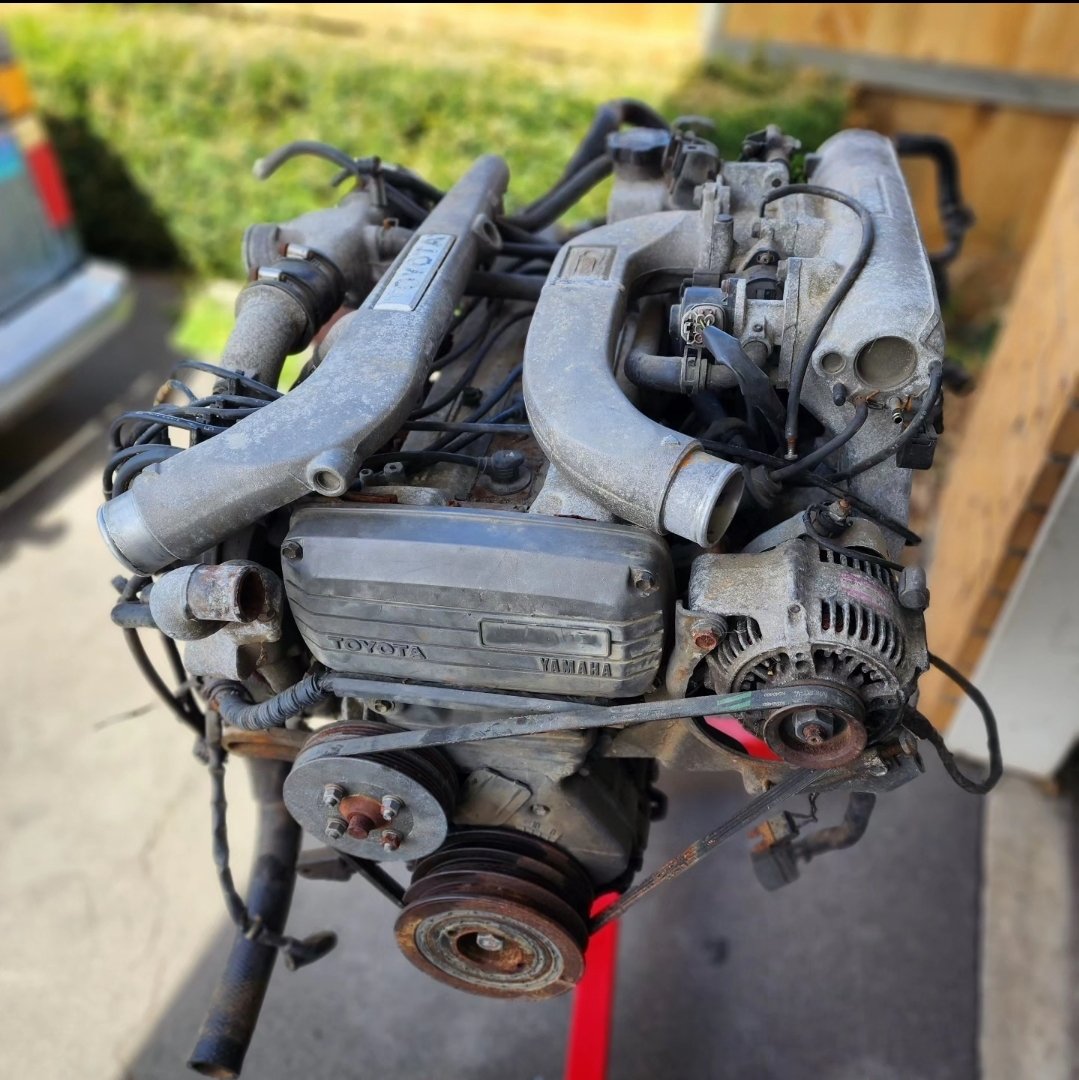
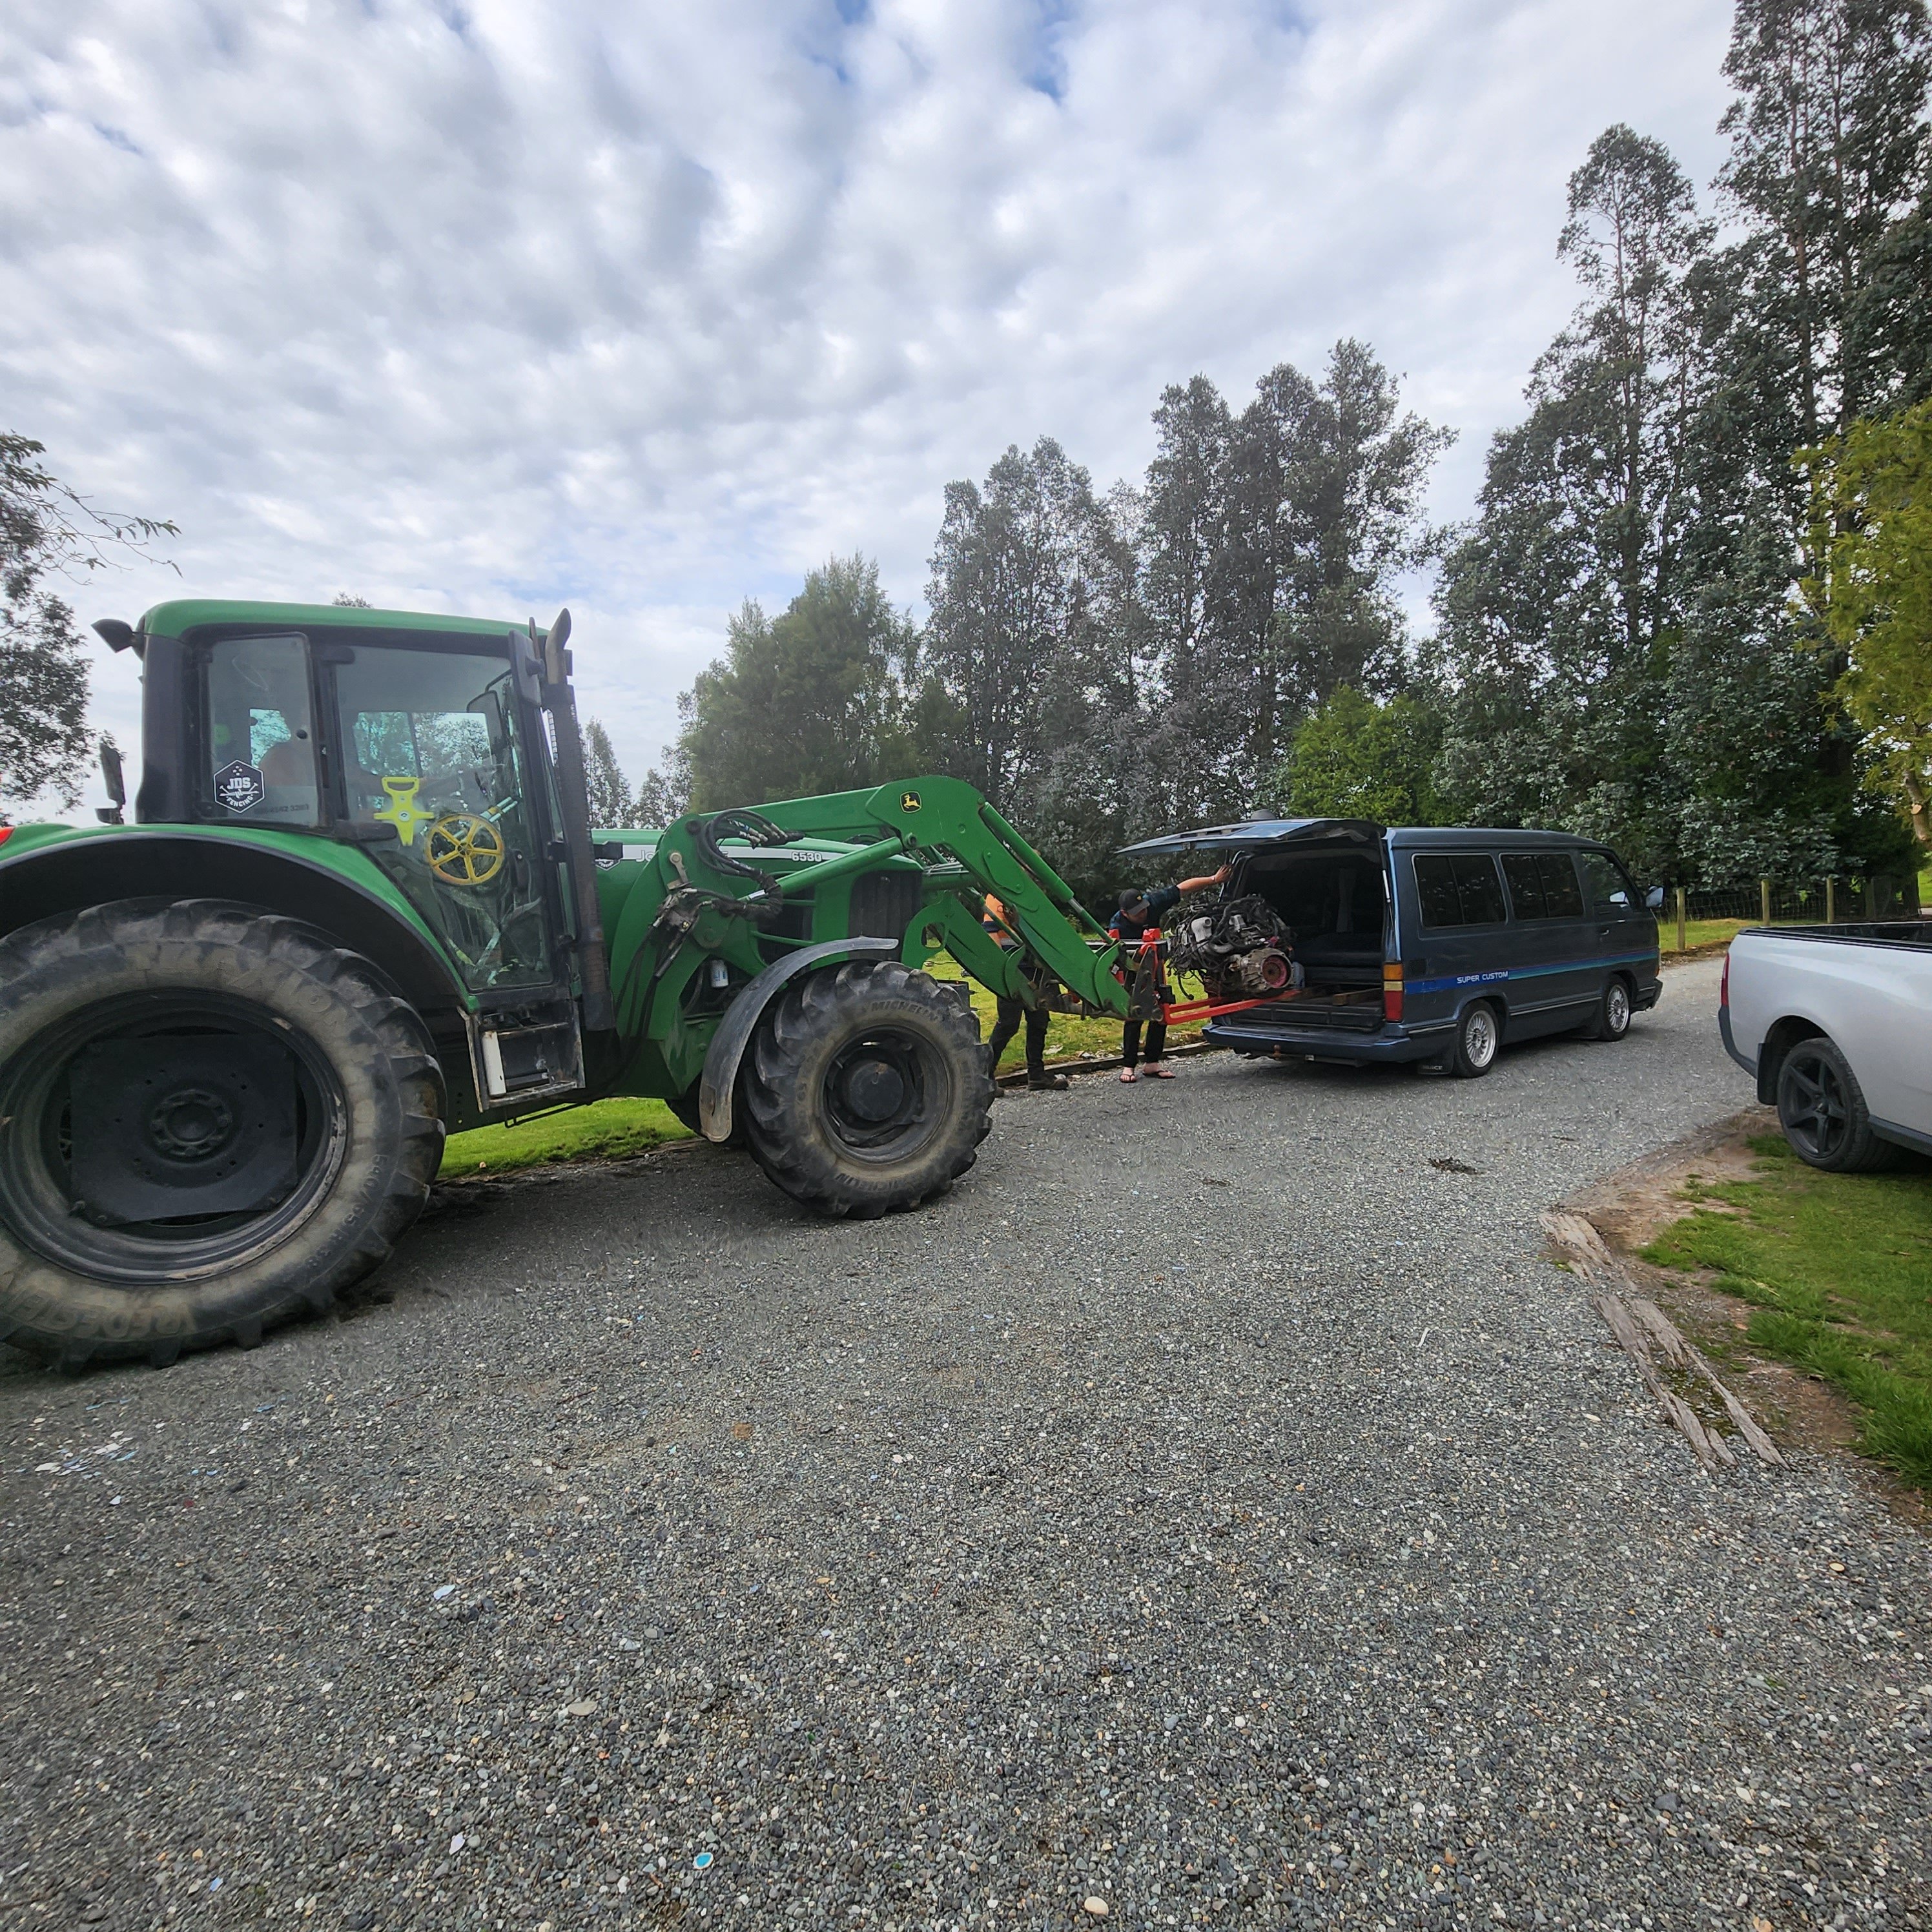
Went on a mission to Invercargill to pick up another 1G-GTE that had been on marketplace for ages. Have started a weird tradition of picking up transplant engines with vehicles they are destined for with the gx first, then the liteace and now the hiace
 9 points
 -
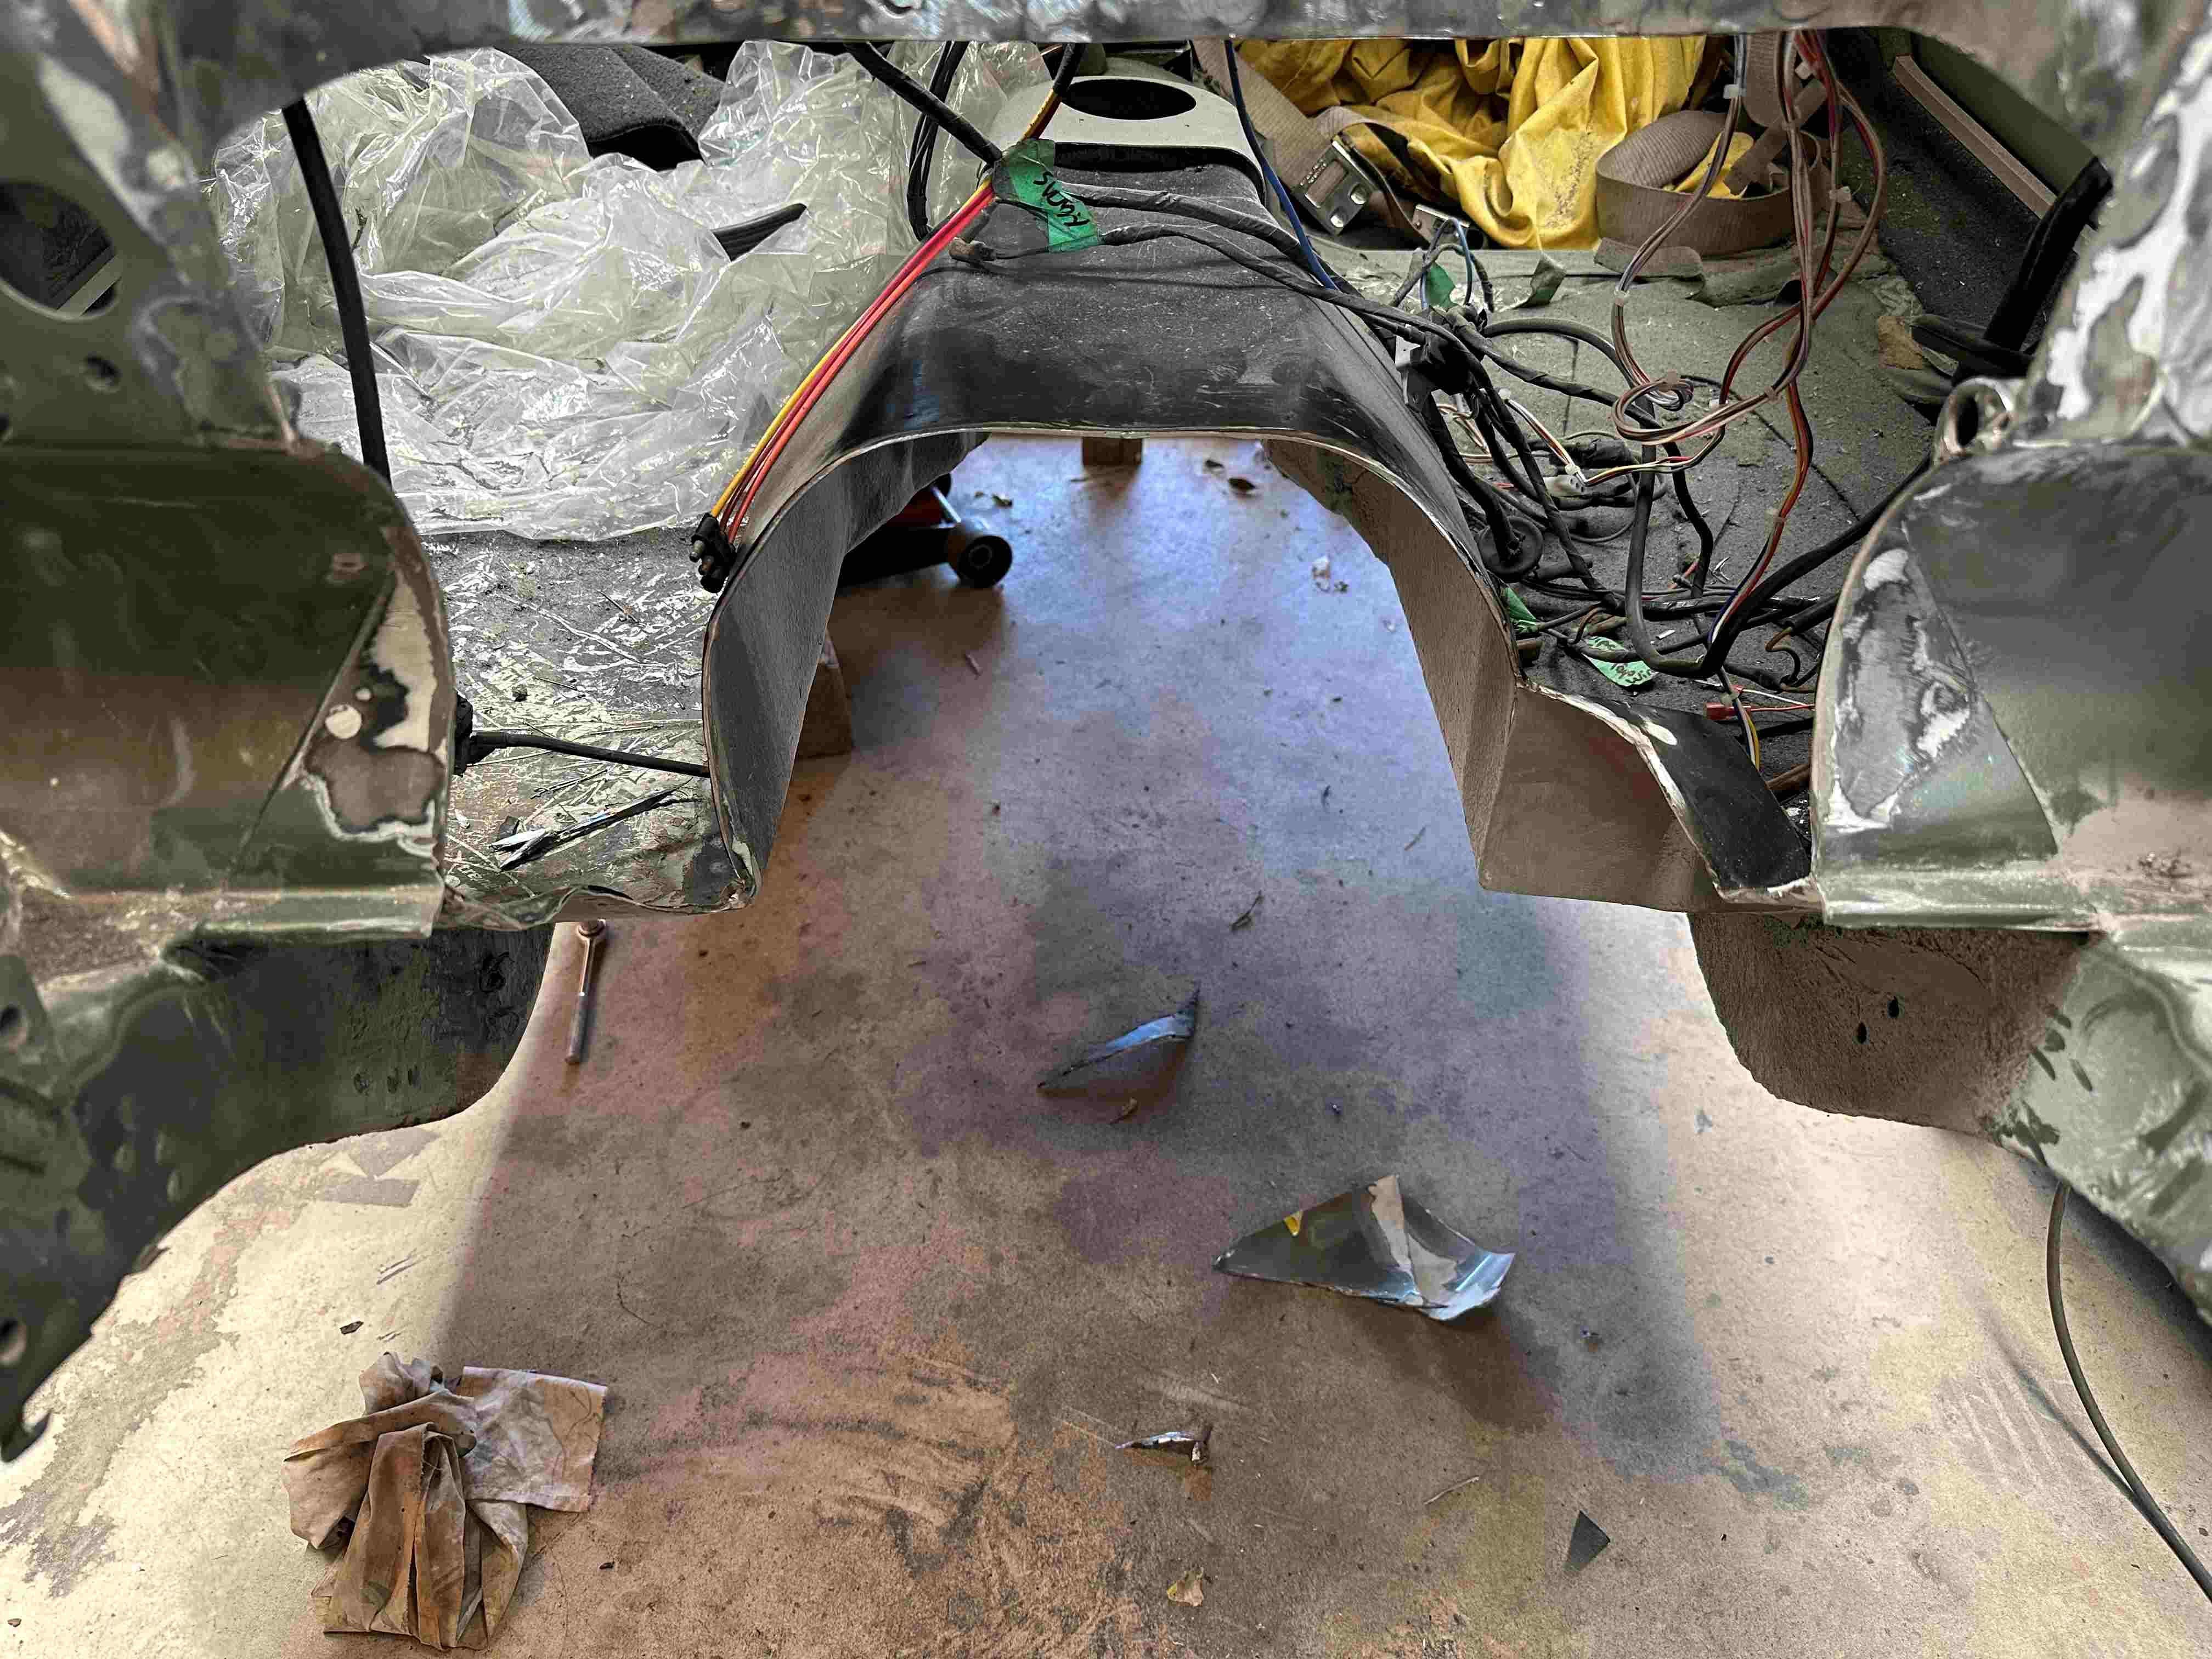
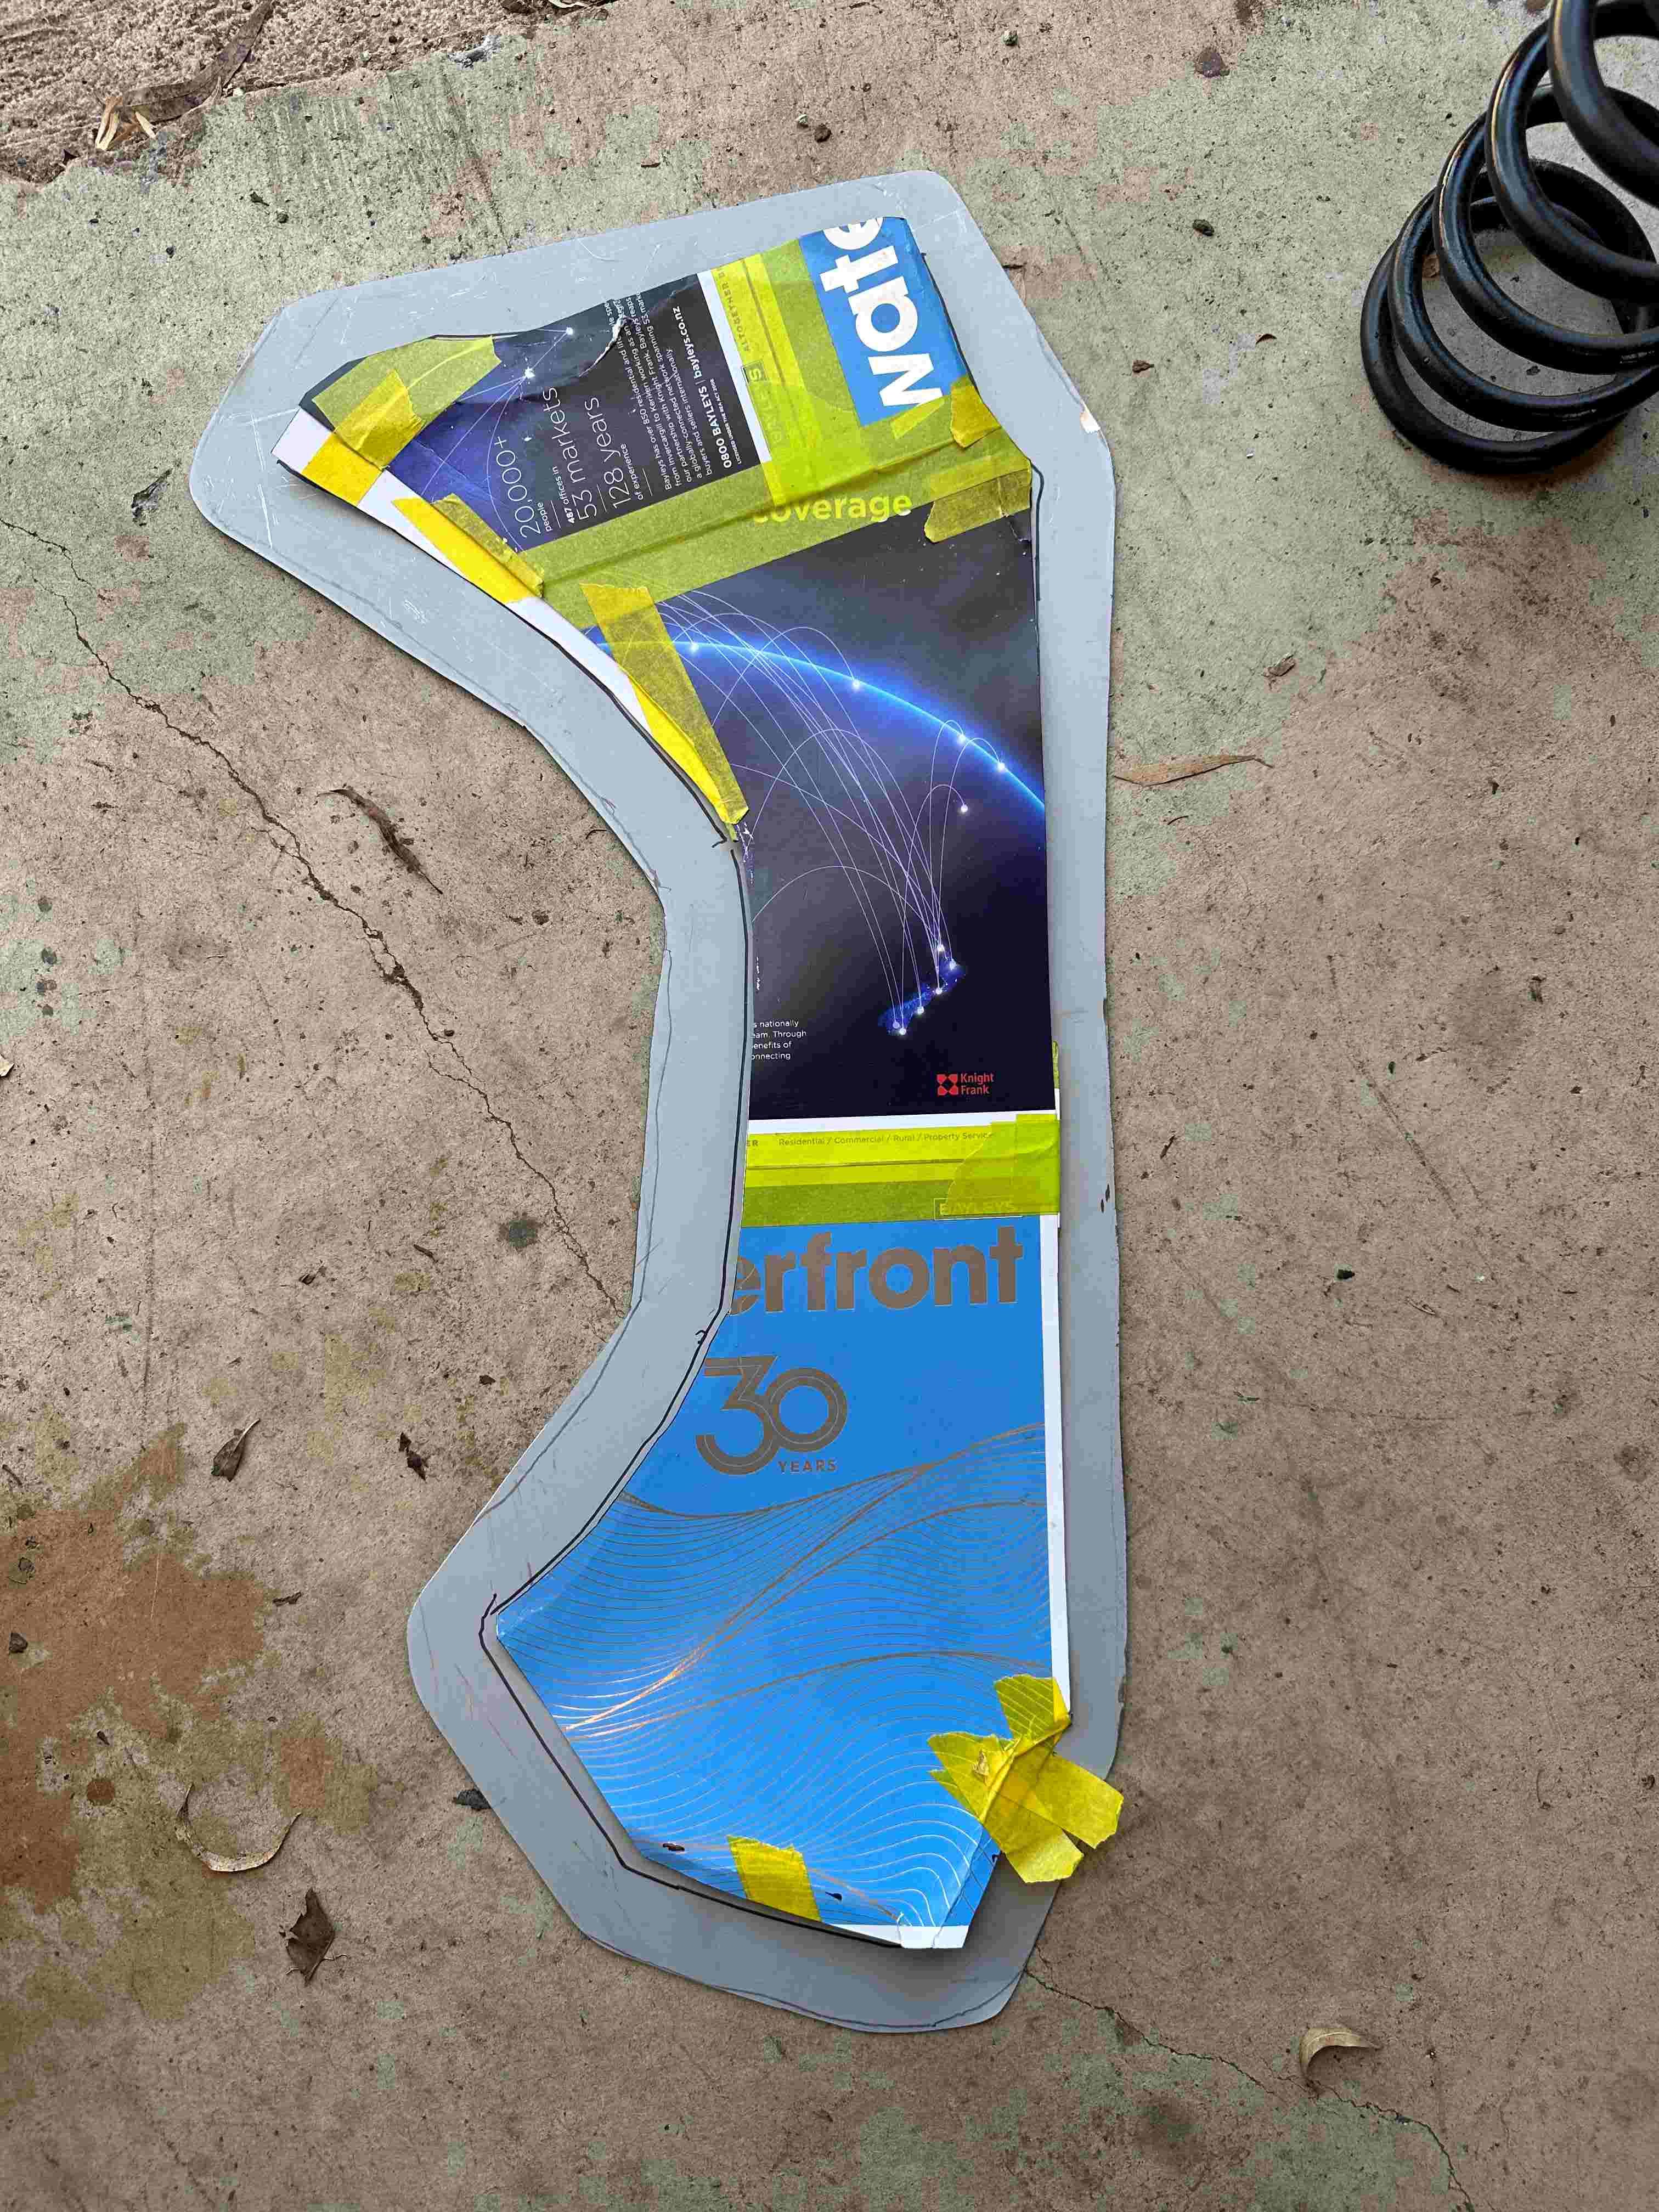
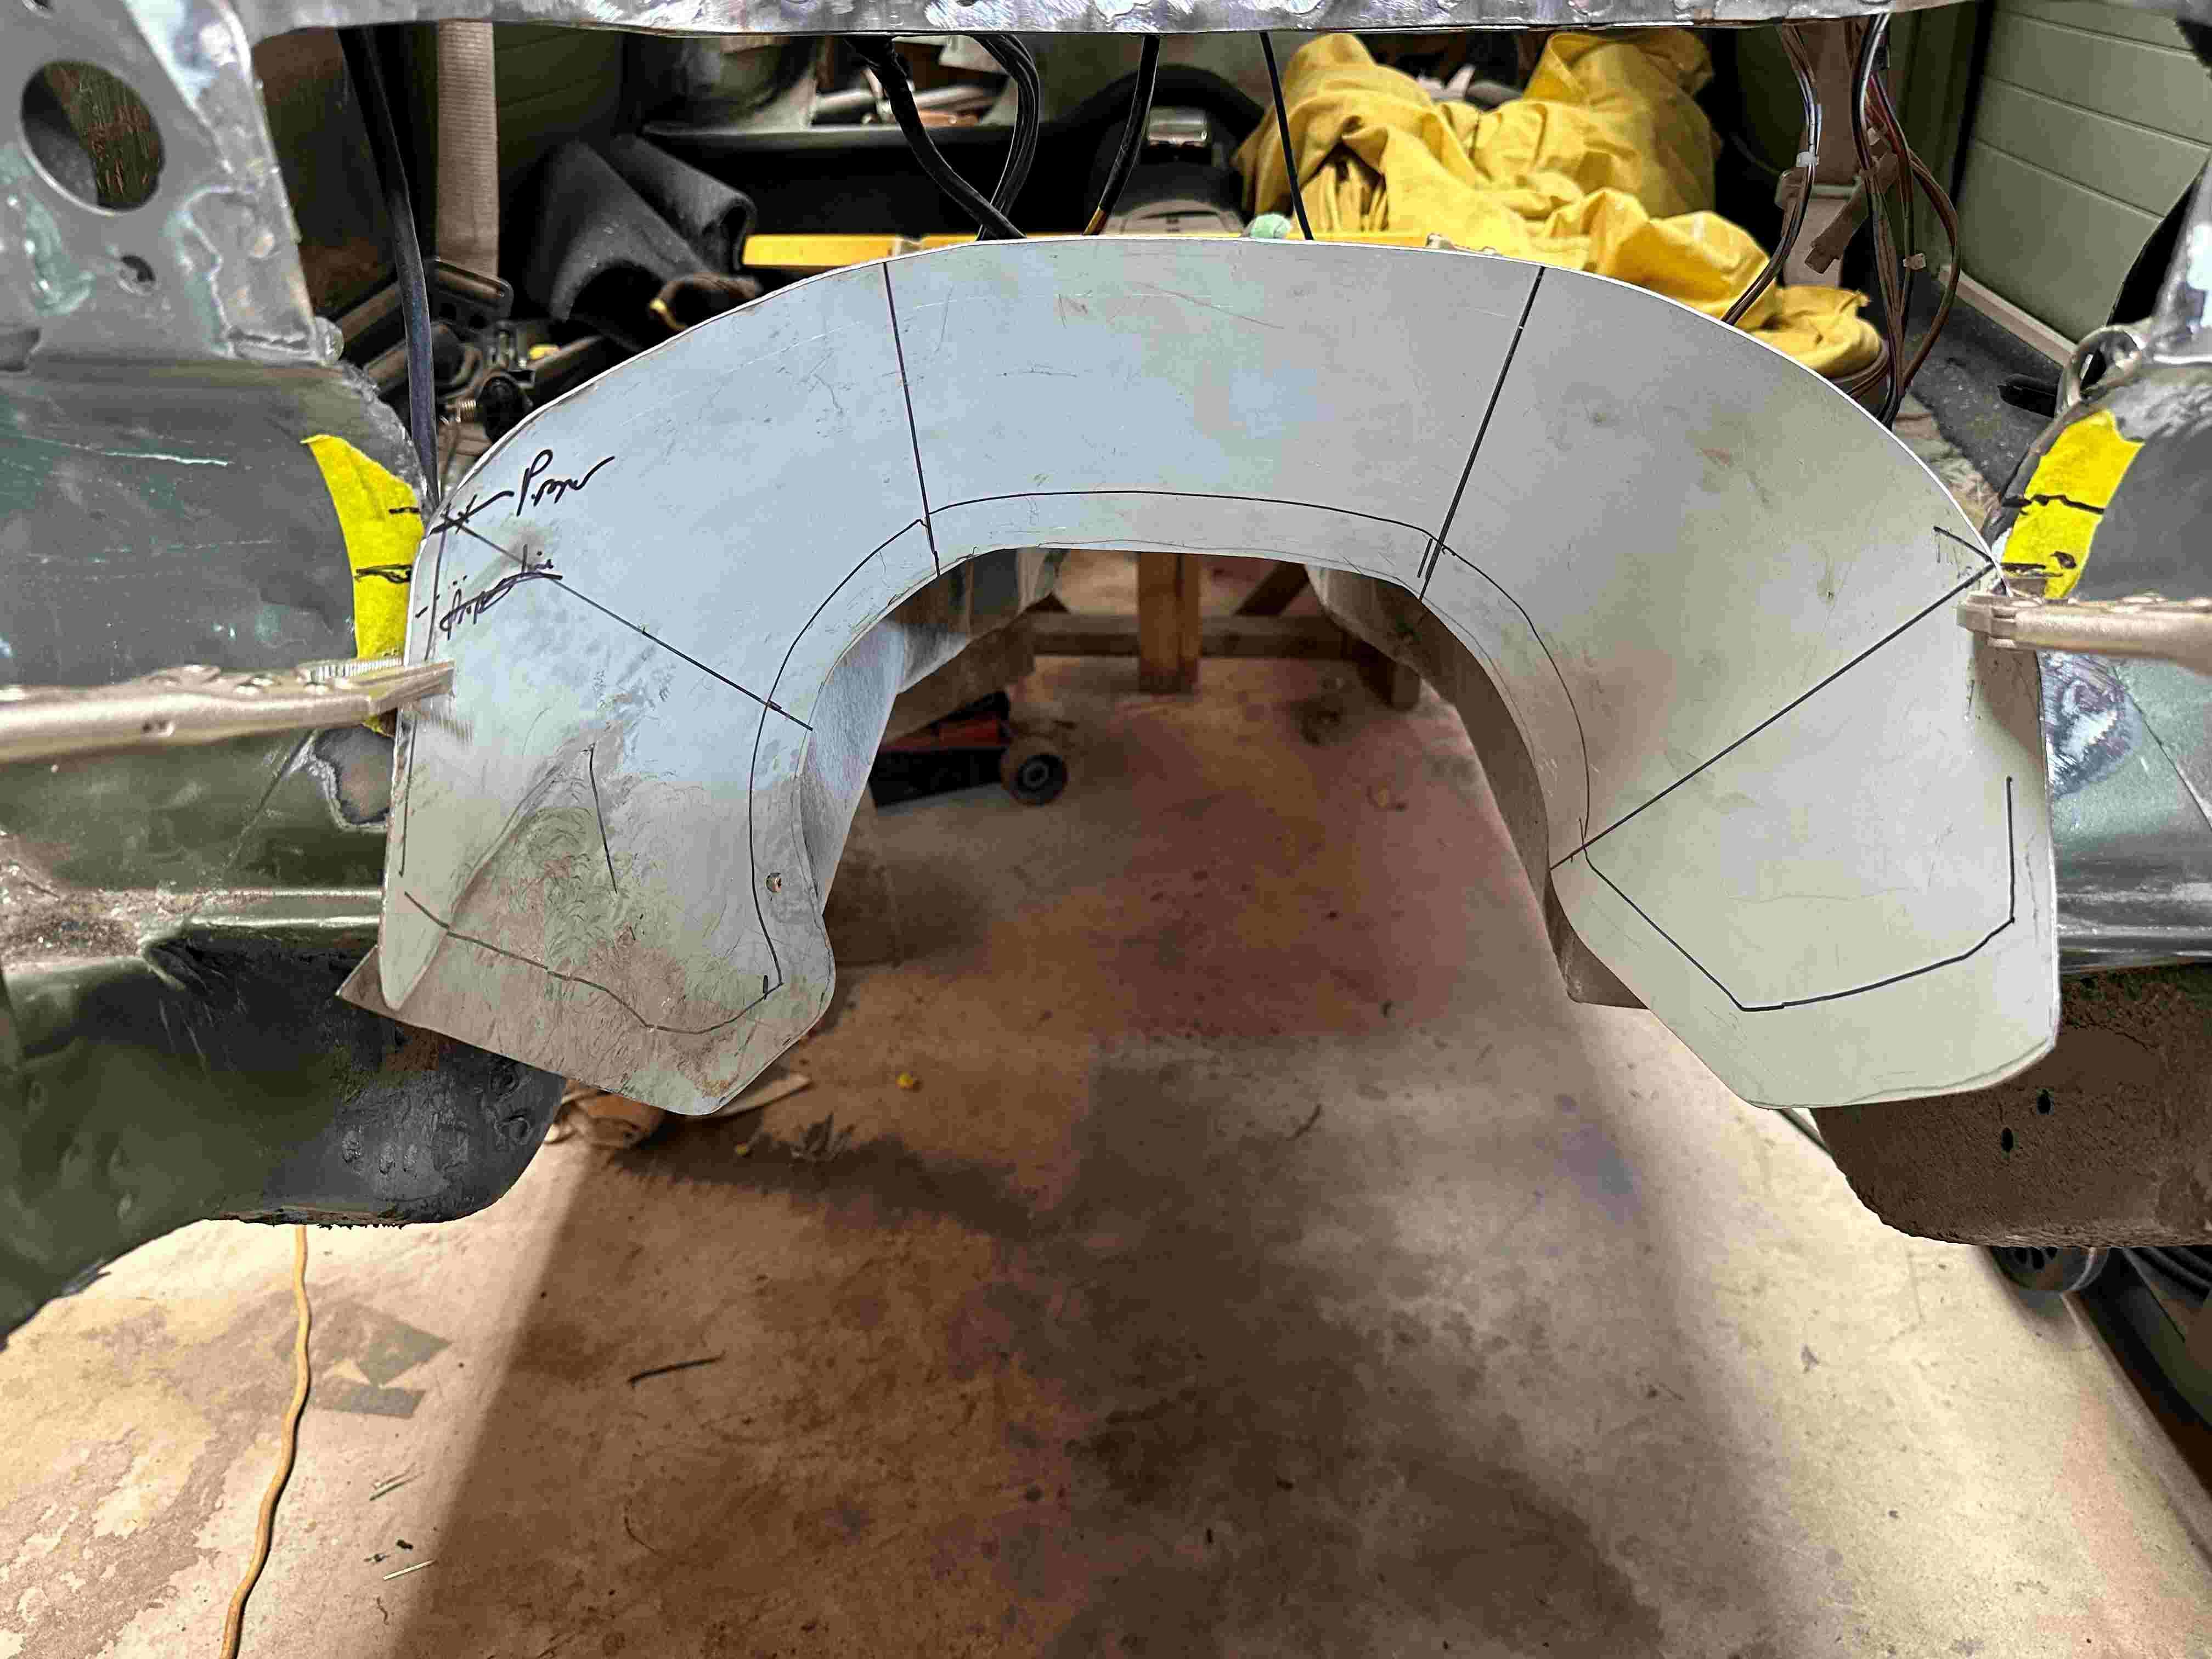
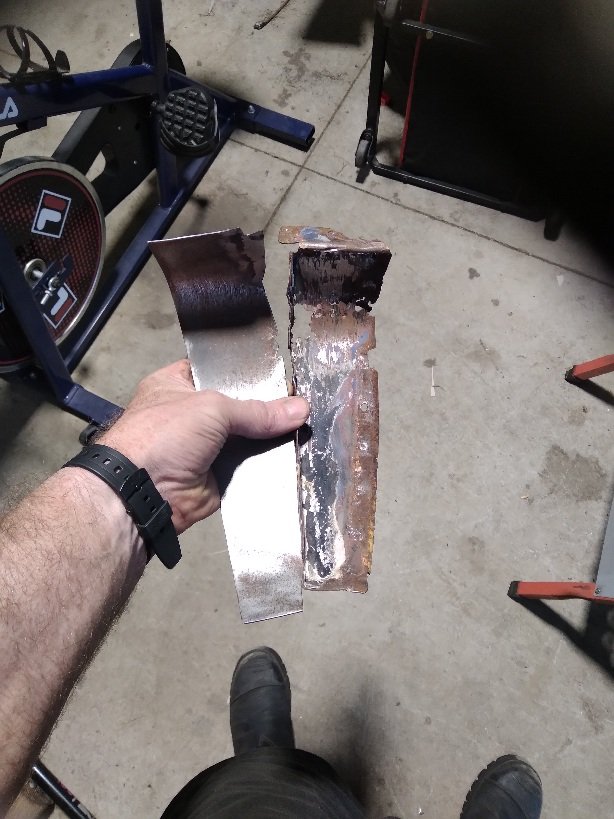
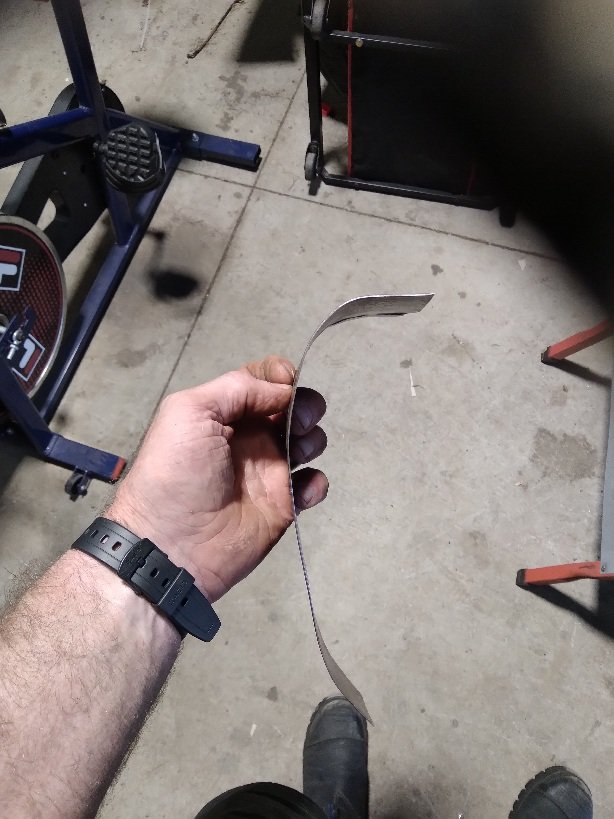
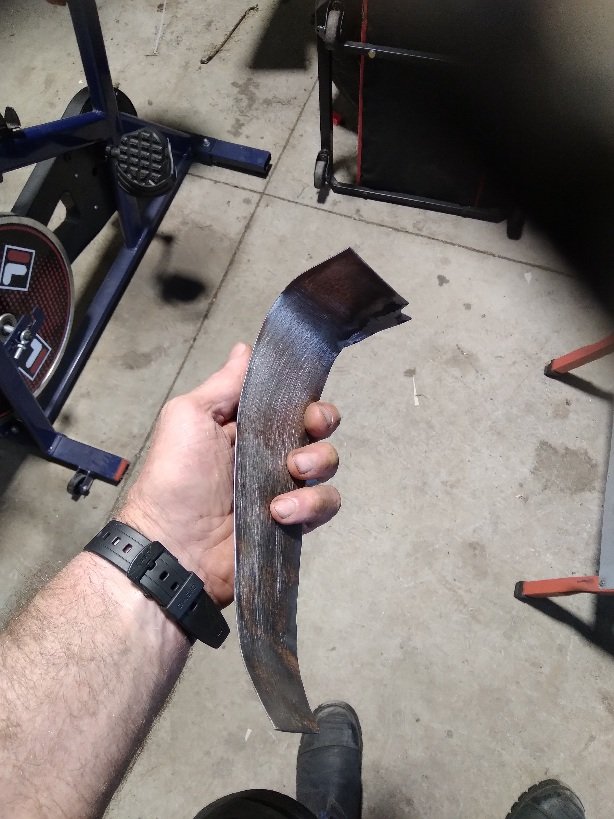
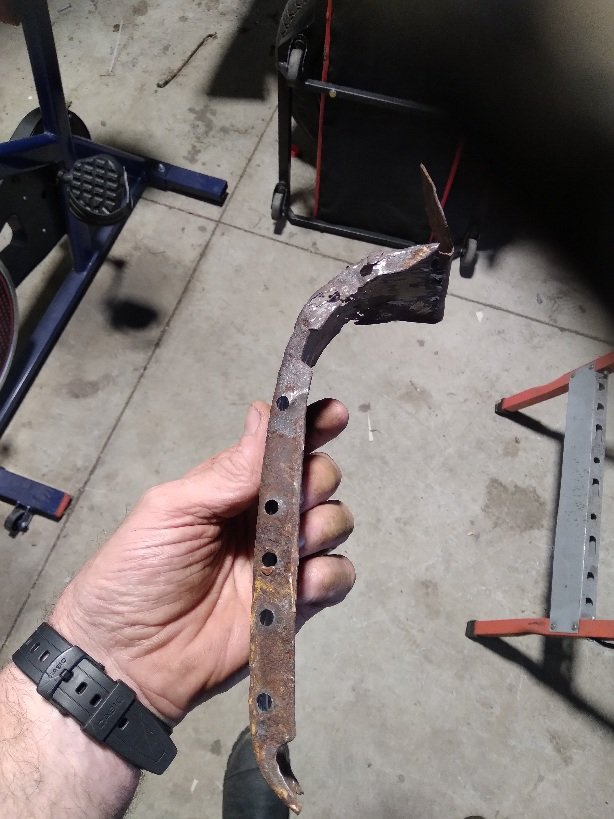
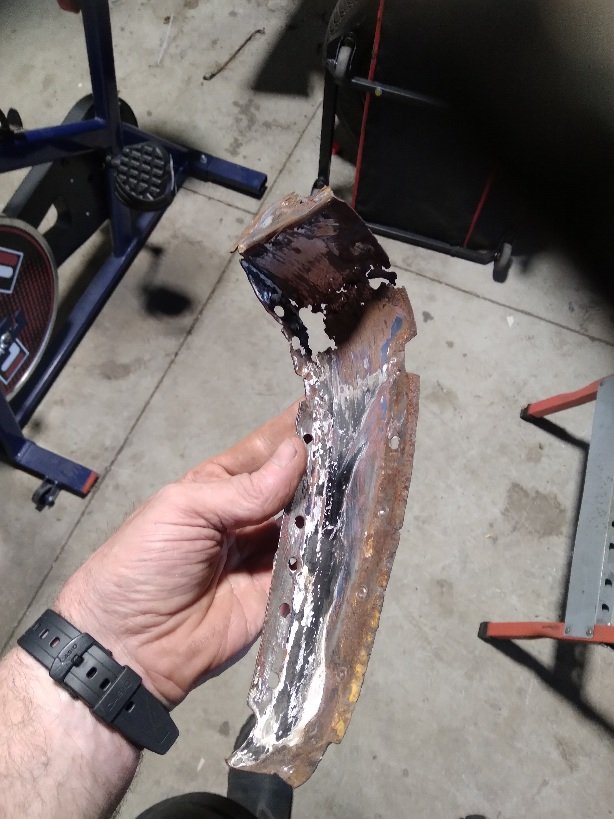
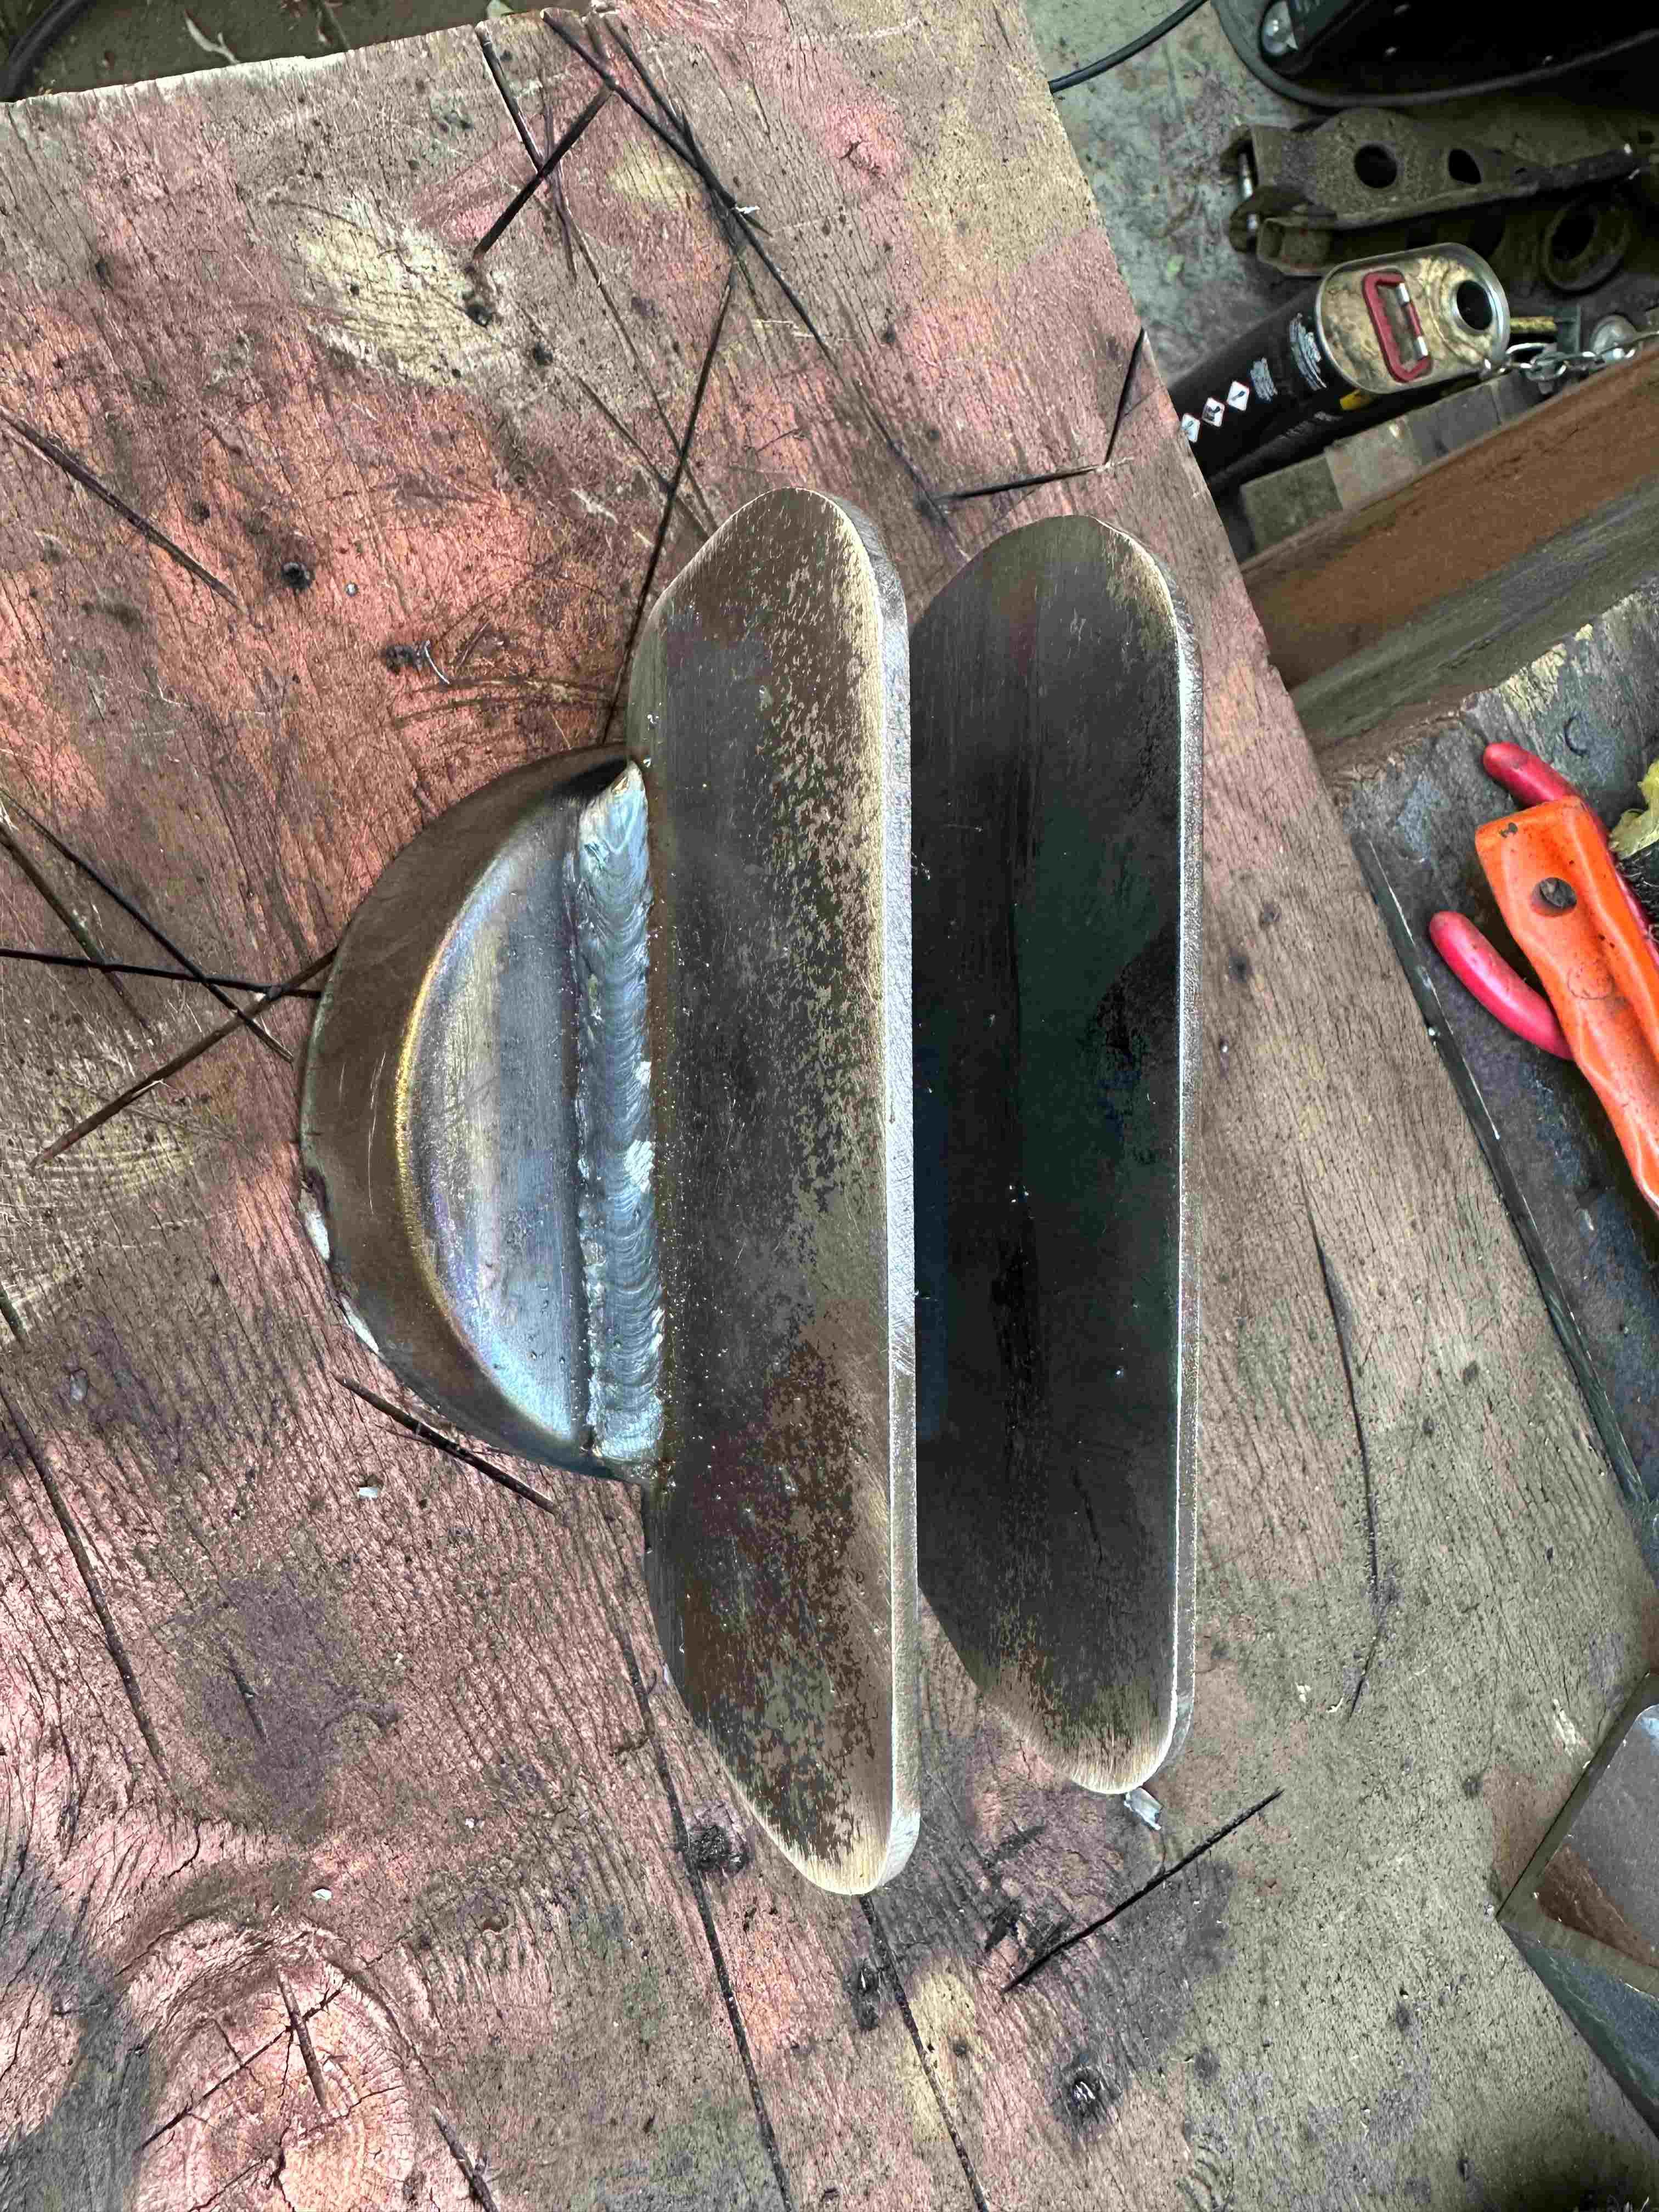
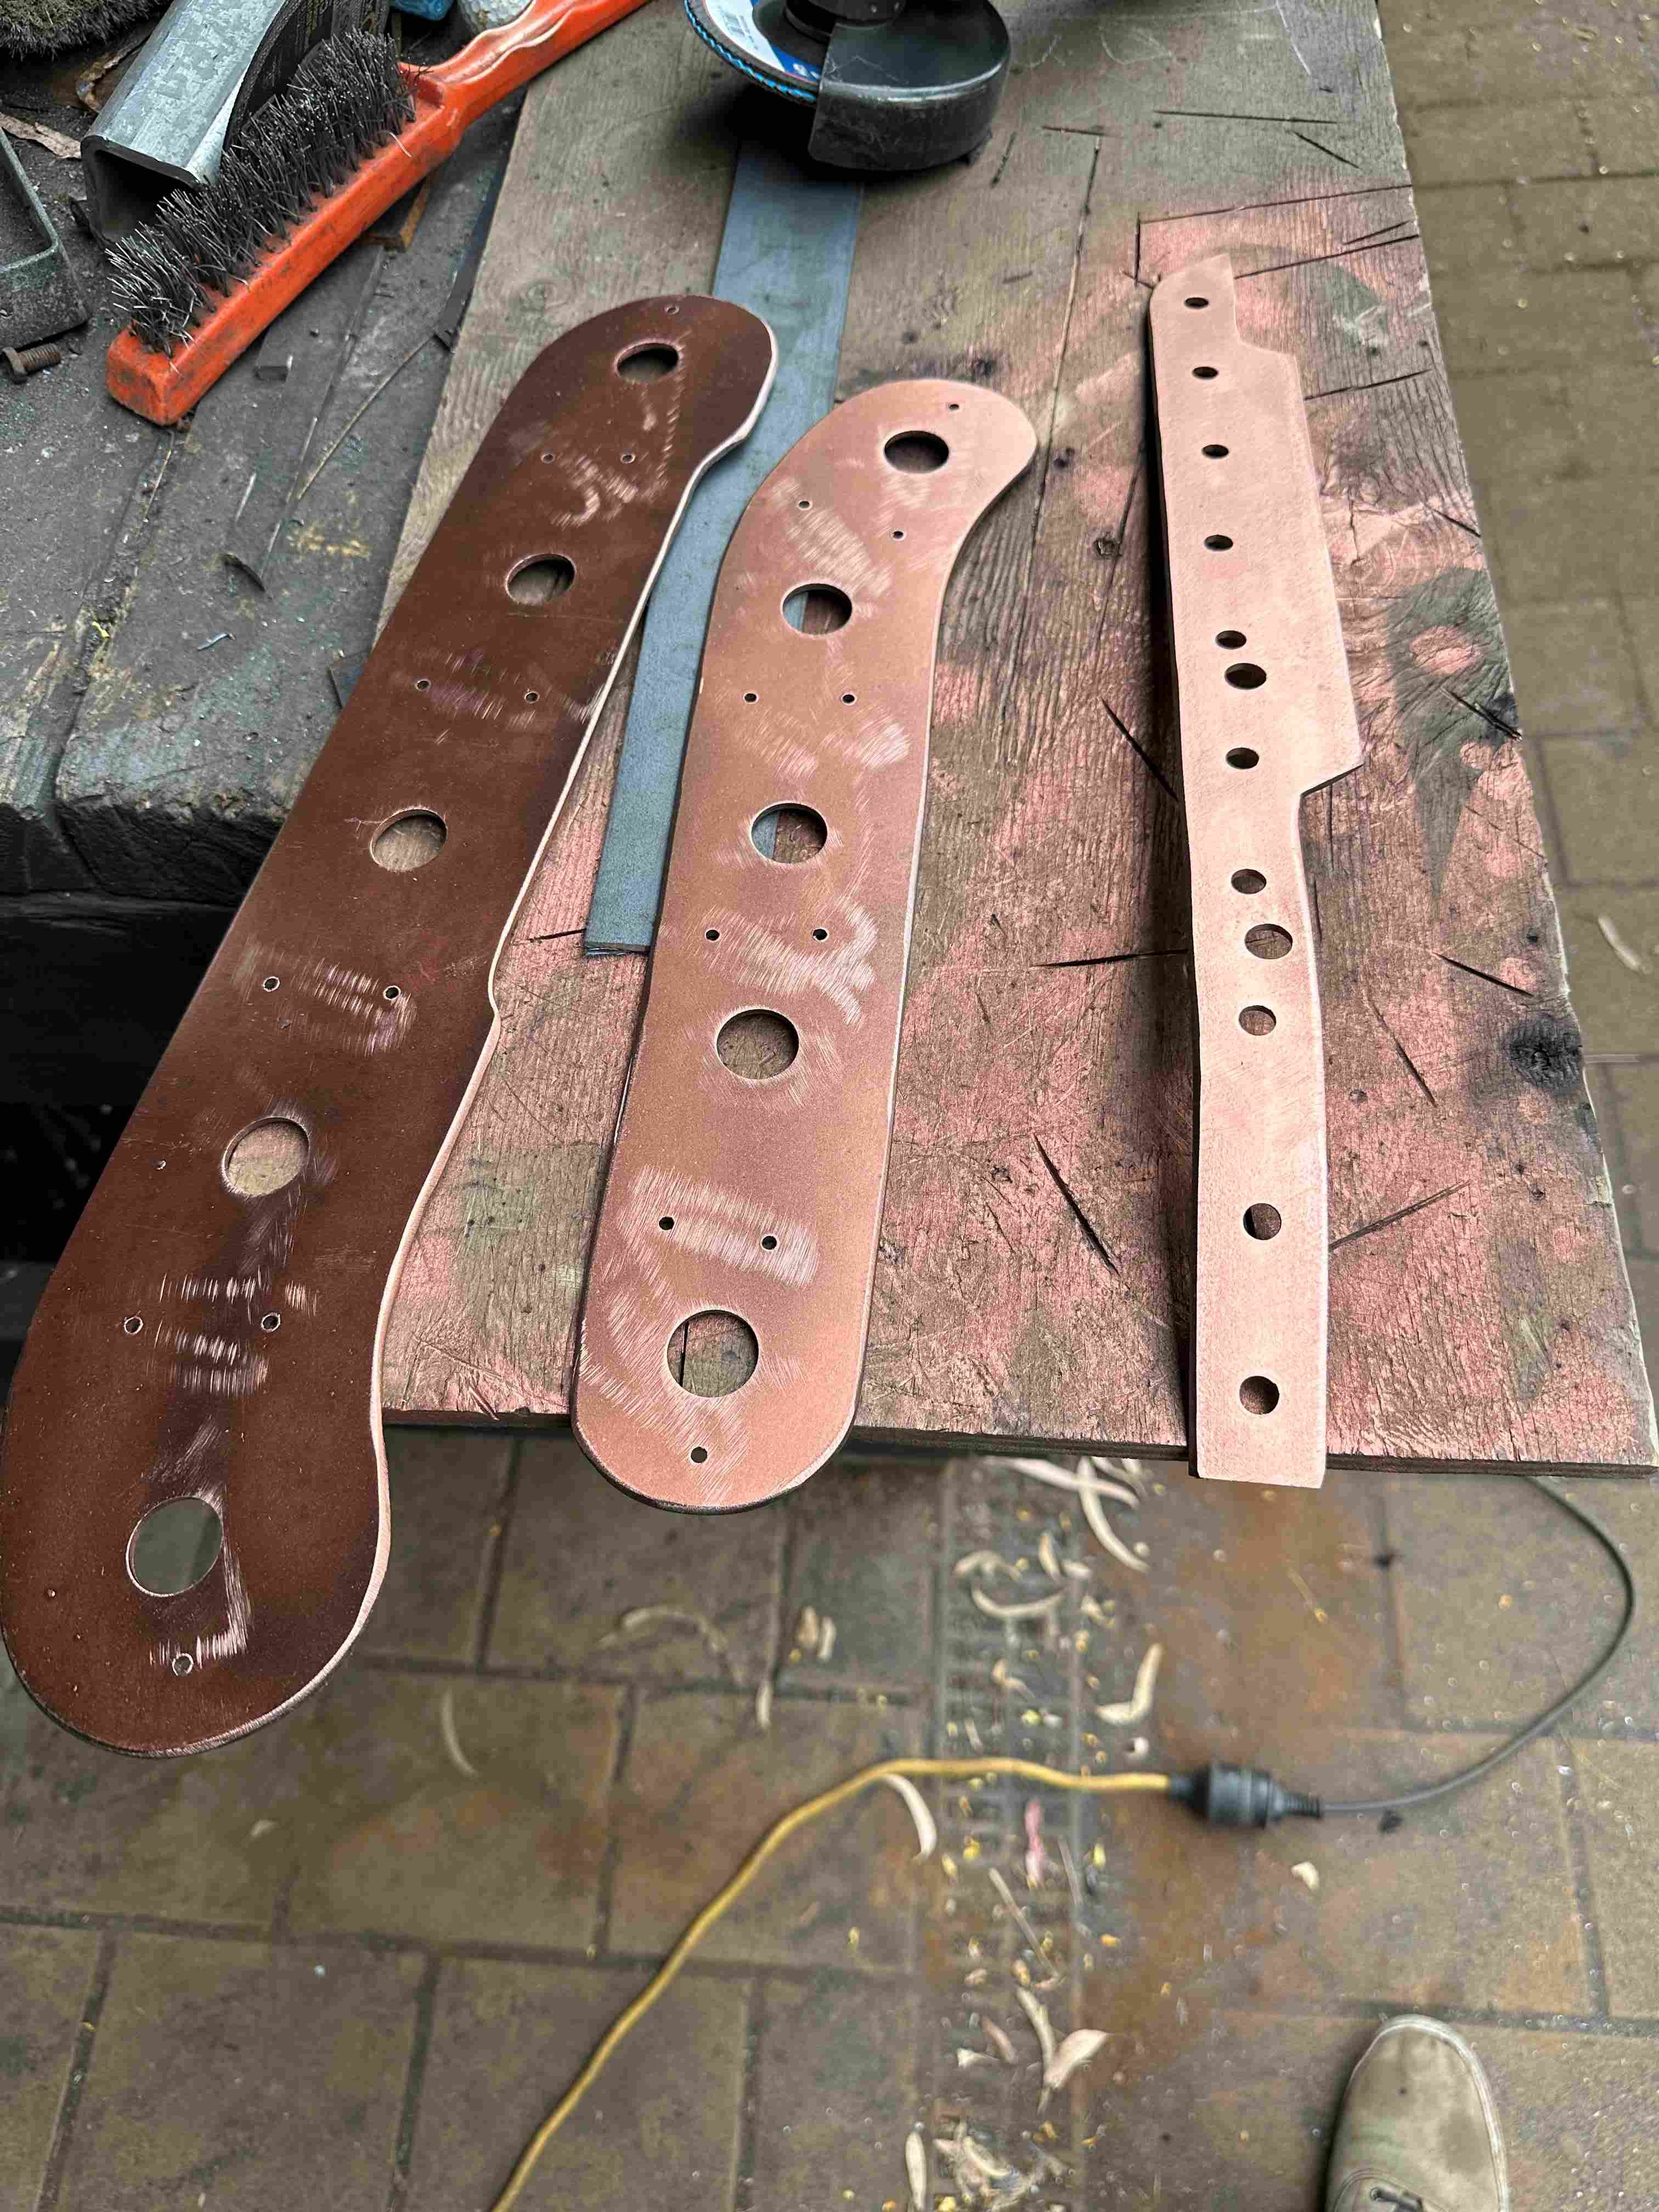
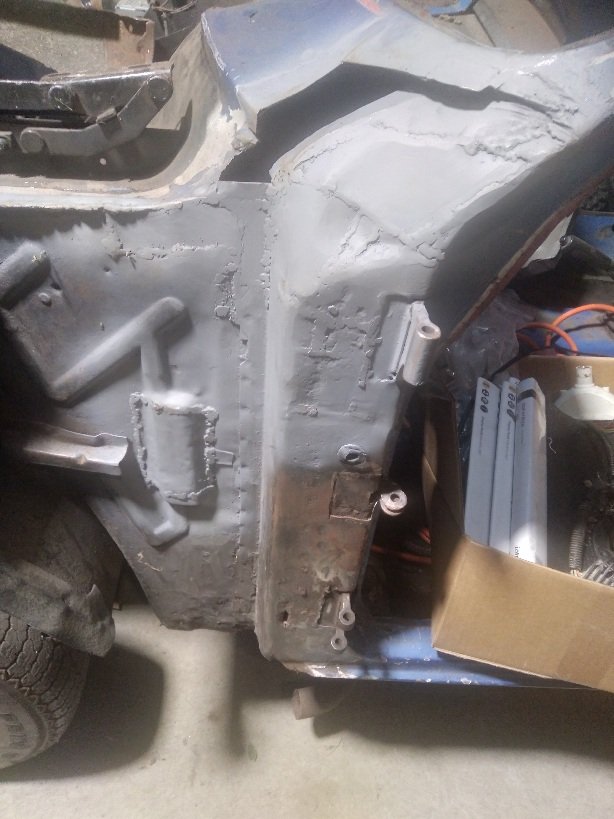
I cut the rest of it out this morning so it will be mainly two pieces. It will be tidier and stronger, I think. I made up a cardboard template which was a little oversize and then transferred it to 1.2mm panel steel and added another 30mm around it just to be sure I won't end up short anywhere. Already glad I did. Slowly bent it into shape but I will need a few more fasteners to hold it in place before the final marking and trimming. Starting to look promising I think.
8 points
-
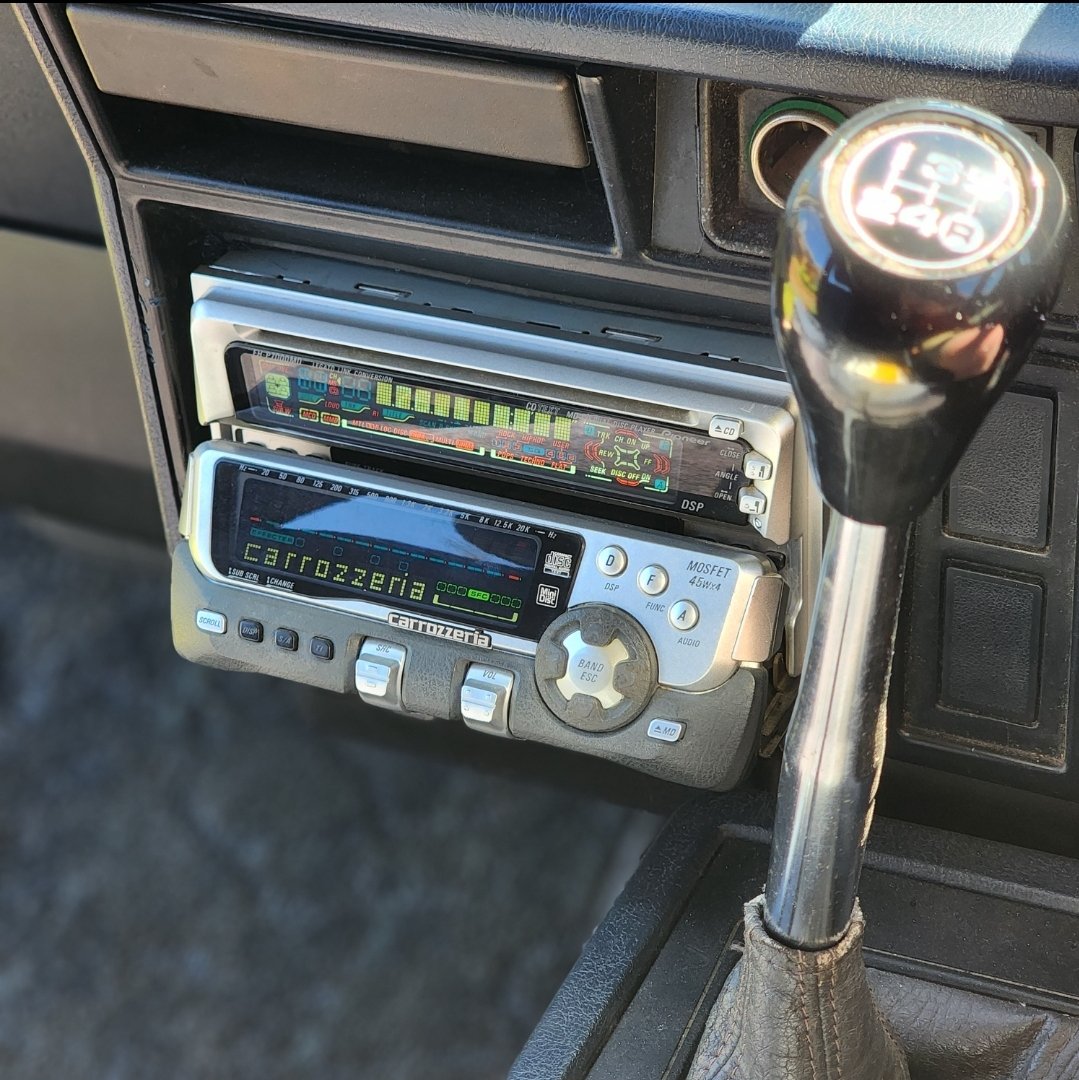
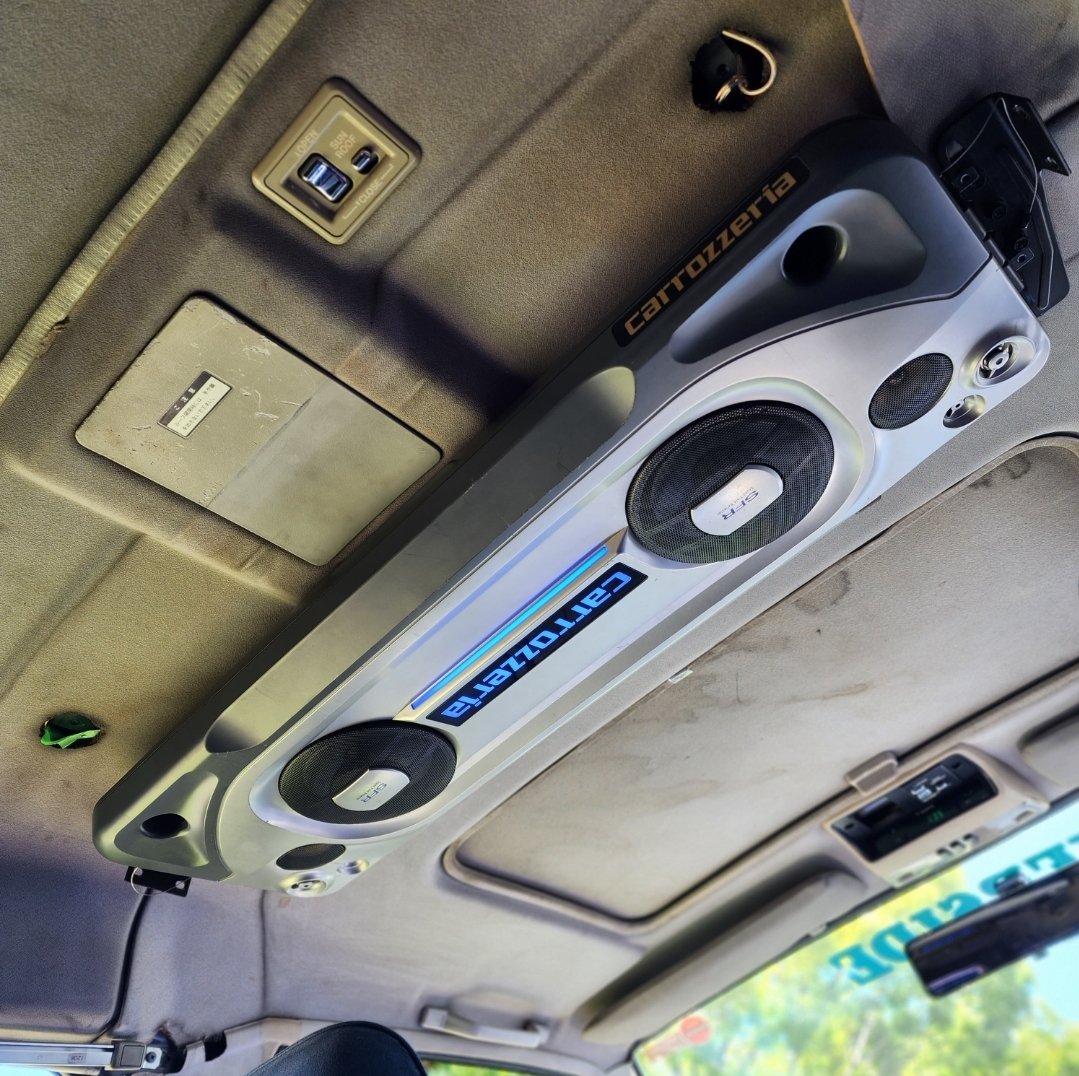
Have somehow done 10,000kms since May! Ignored the rust and installed some Carrozzeria audio Picked up this 1999 FH-P7000MD model with a lower half that tilts which is optimum for van seating height to radio location, I just can't see a thing on the top half. This era of carrozzeria is perfect for adding Bluetooth via the ipbus cd changer control port Paired with the TS-X9401ZY which was a Daihatsu move factory option ceiling speaker. works pretty well in the spot where the missing rear aircon piece is. Mounting to factory holes on the body after I drilled a couple of holes in the bracket the speaker came with and is slim enough not to obstruct rear passengers view out windscreen. I need to pick up the missing end caps for the speaker and that should tidy it up more
8 points
-
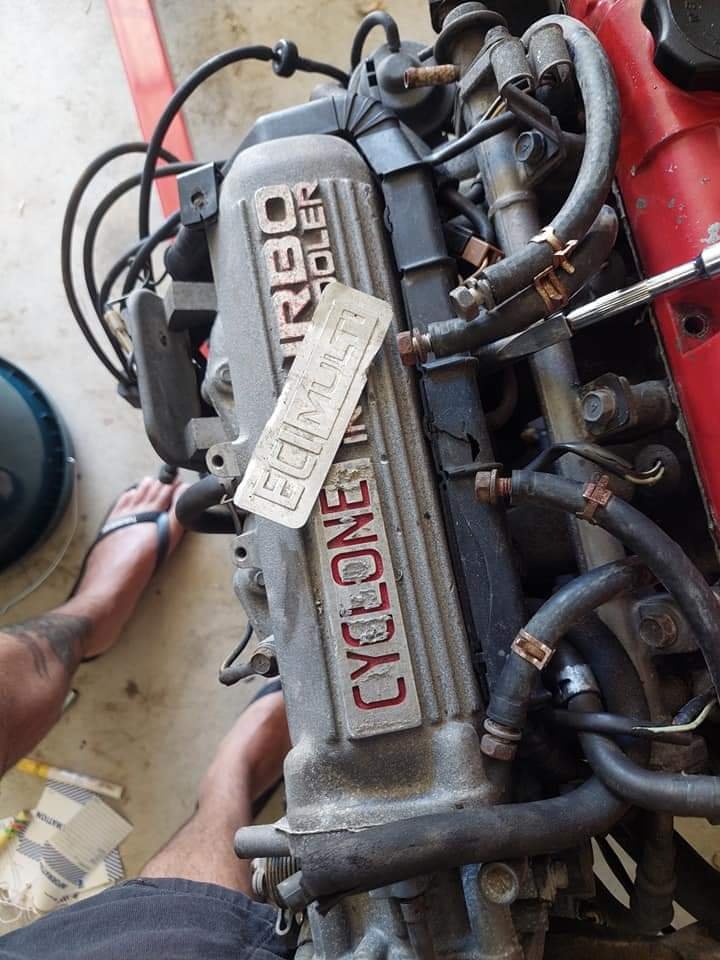
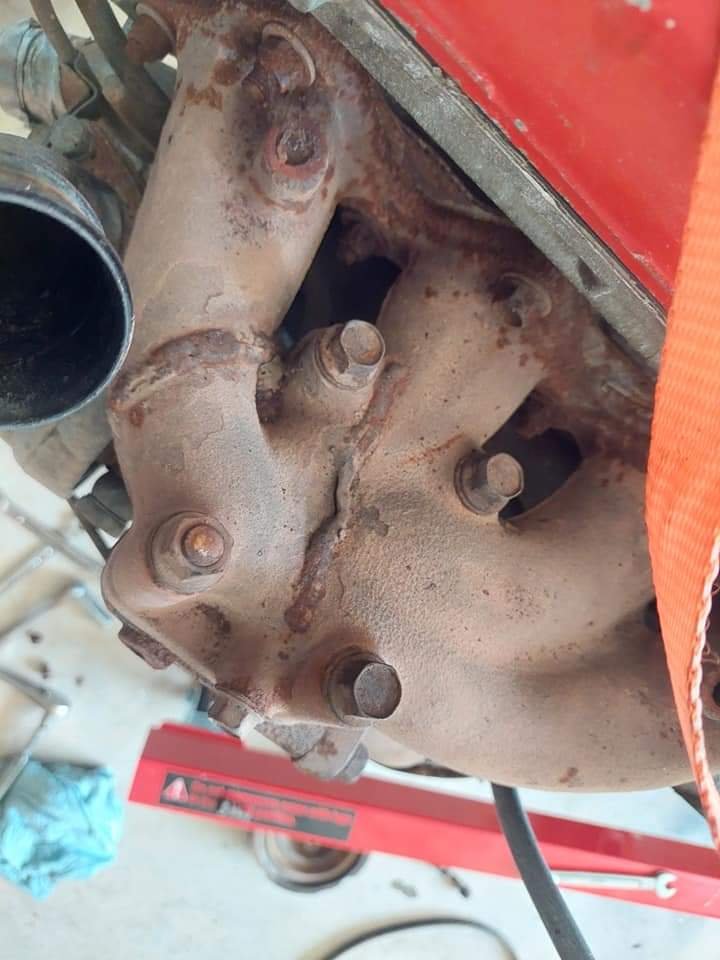
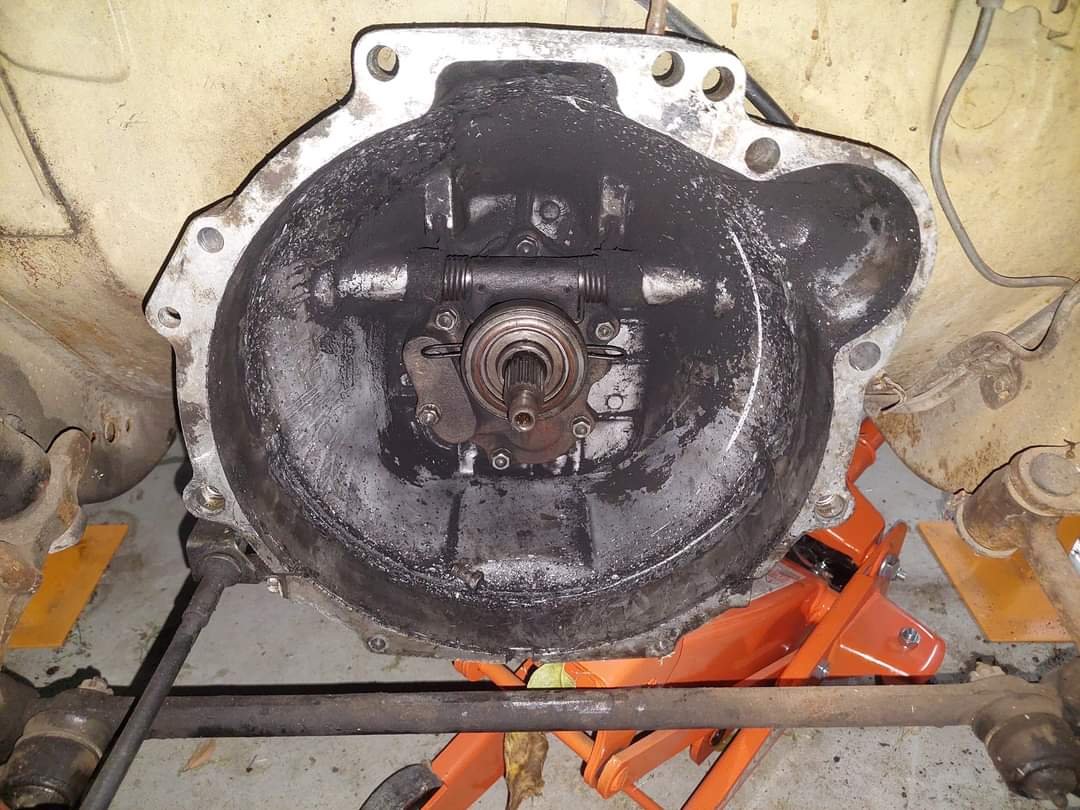
Decided to do some more work on this on new years day. Wasn't sure on what spec the vr4 engine was so decided to see what we were dealing with. Was hoping it was a evo 0 engine so was looking for the tell tales nut unfortunately it fell short, no biggy though. ECI Multi on the intake didn't quite look right, turns out someone had just stuck a plate over the 'cyclone' lettering. Also the turbo is a td05h 14b, as opposed to the bigger 16g. Going off the ecu part number it looks to be from a 1988 vr4. Stripped off the bolt ons and had a look down the ports, no bad signs so far. Timing belt and idlers look to have been done but the water pump is pretty crusty on the inside. Decided to mock up the turbo flipped around for a laugh - Will probably just make up a basic log style manifold for this to keep costs down. Then ripped it off and put on some alloy tape to seal it up for now. Check out the repairs on this old manifold from previous cracks... Later on in the evening I decided to rip the 4g52 out from the bay. Got her all setup and on stands in the front so the engine crane would clear the lcas. Check out the inside of the bellhousing.. The bloke who swapped the 4g52 didn't sort out the right size clutch/flywheel setup and the outside of the clutch pressure plate has been wearing on the inside of the bellhousing - it hasn't driven really at all but when I brought it and test drove it around the parking lot I knew something wasn't right but didn't expect this haha. And here's where we're at. Does anyone know where I can source original plugs/connectors for the engine wiring loom, most of what's on here is old and brittle or broken and I'm keen to repair most of it or even maybe make a new loom entirely. Also if anyone has any suggestions for easy ways to go about the rwd swap please let me know. I have been reading up on project zero g and also a lot of online forums so far. I'll probably be looking at a top thermostat housing delete (to get better clearance at the rear) and run an inline thermostat housing. Have someone modify the inlet manifold to swap the tb to the opposite side. https://oldschool.co.nz/index.php?/topic/88881-tais-1976-galant-goon-discussion/ Chur.
6 points
-
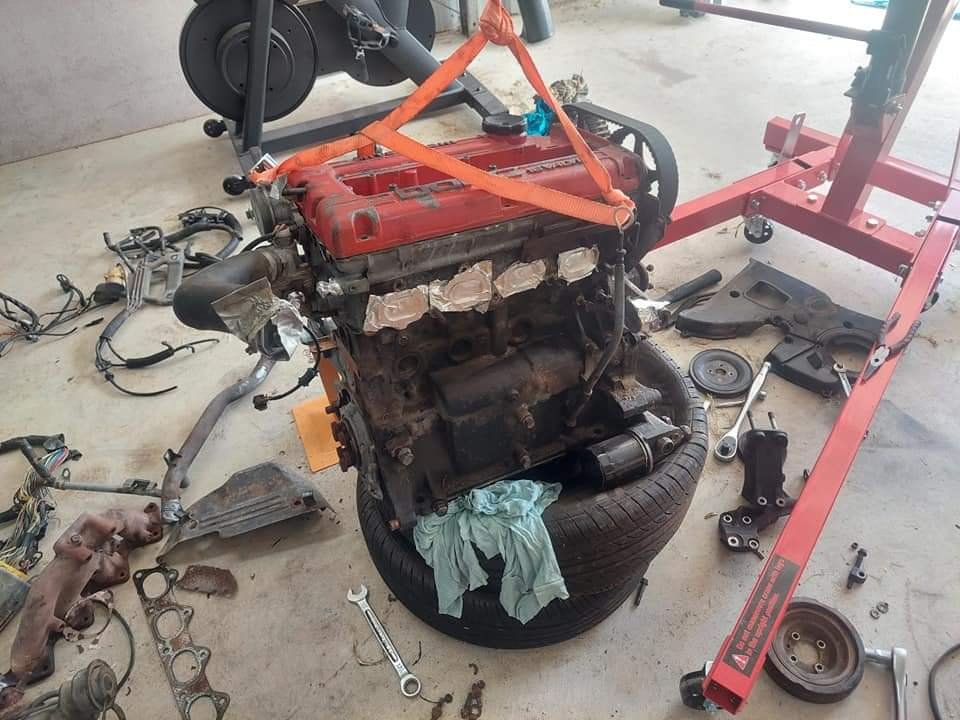
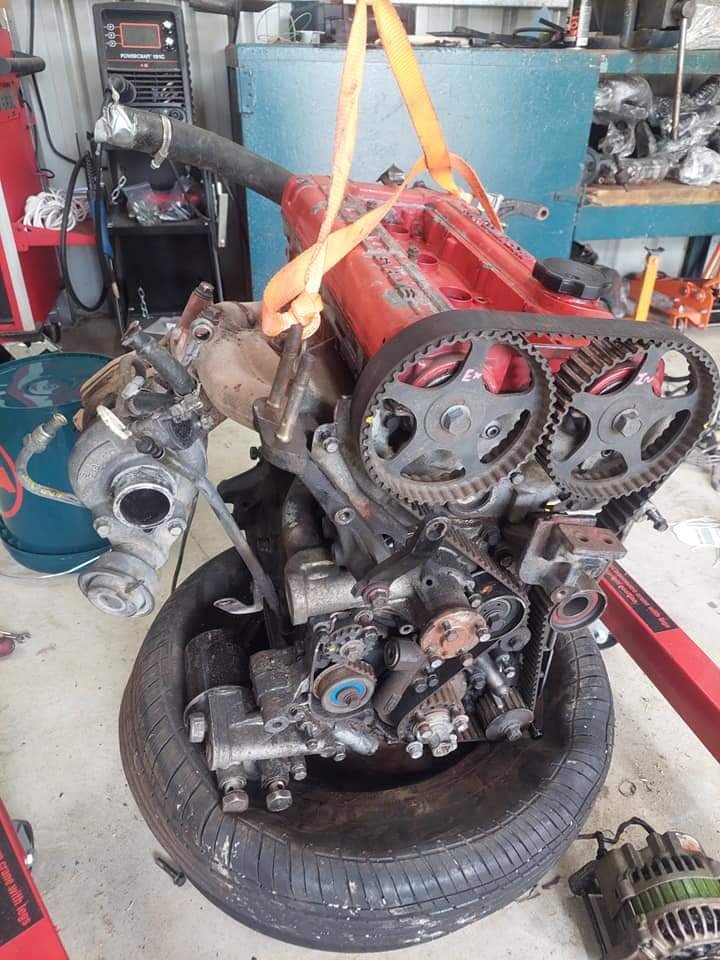
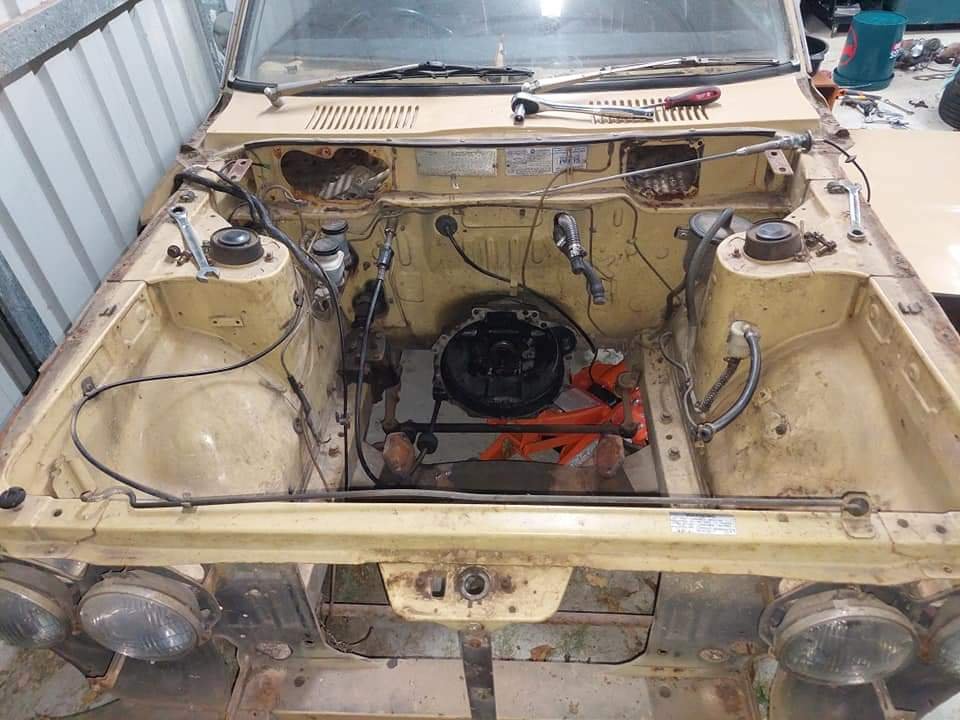
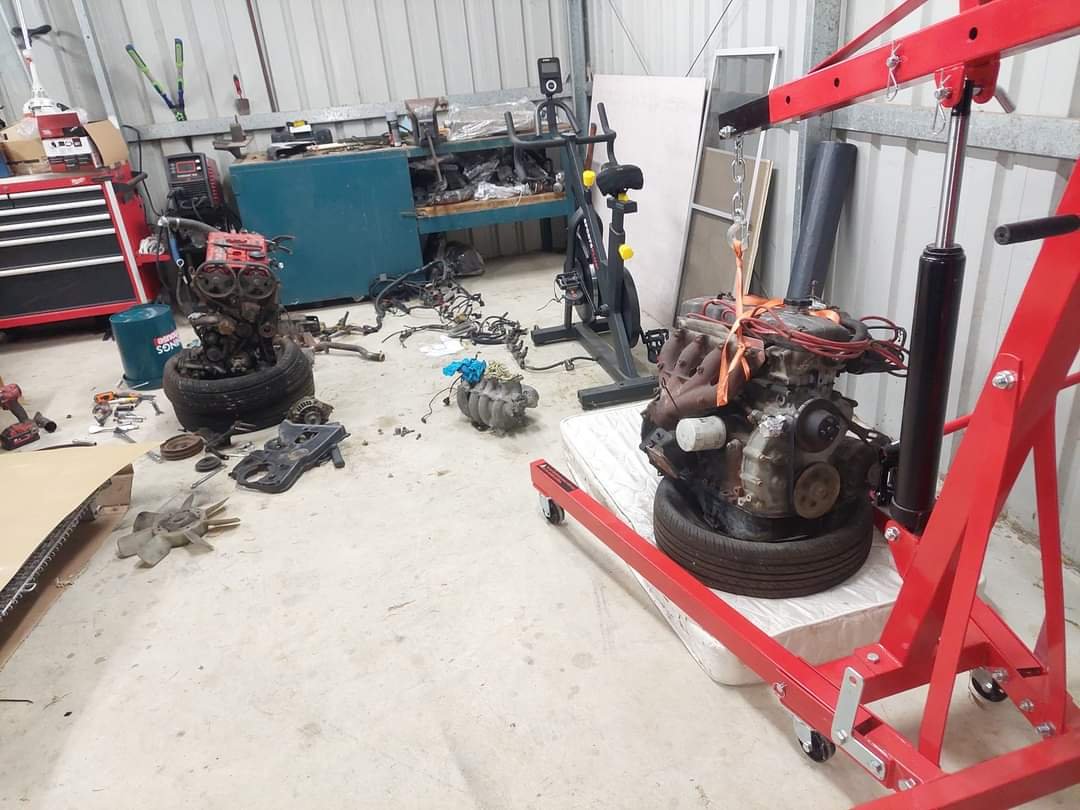
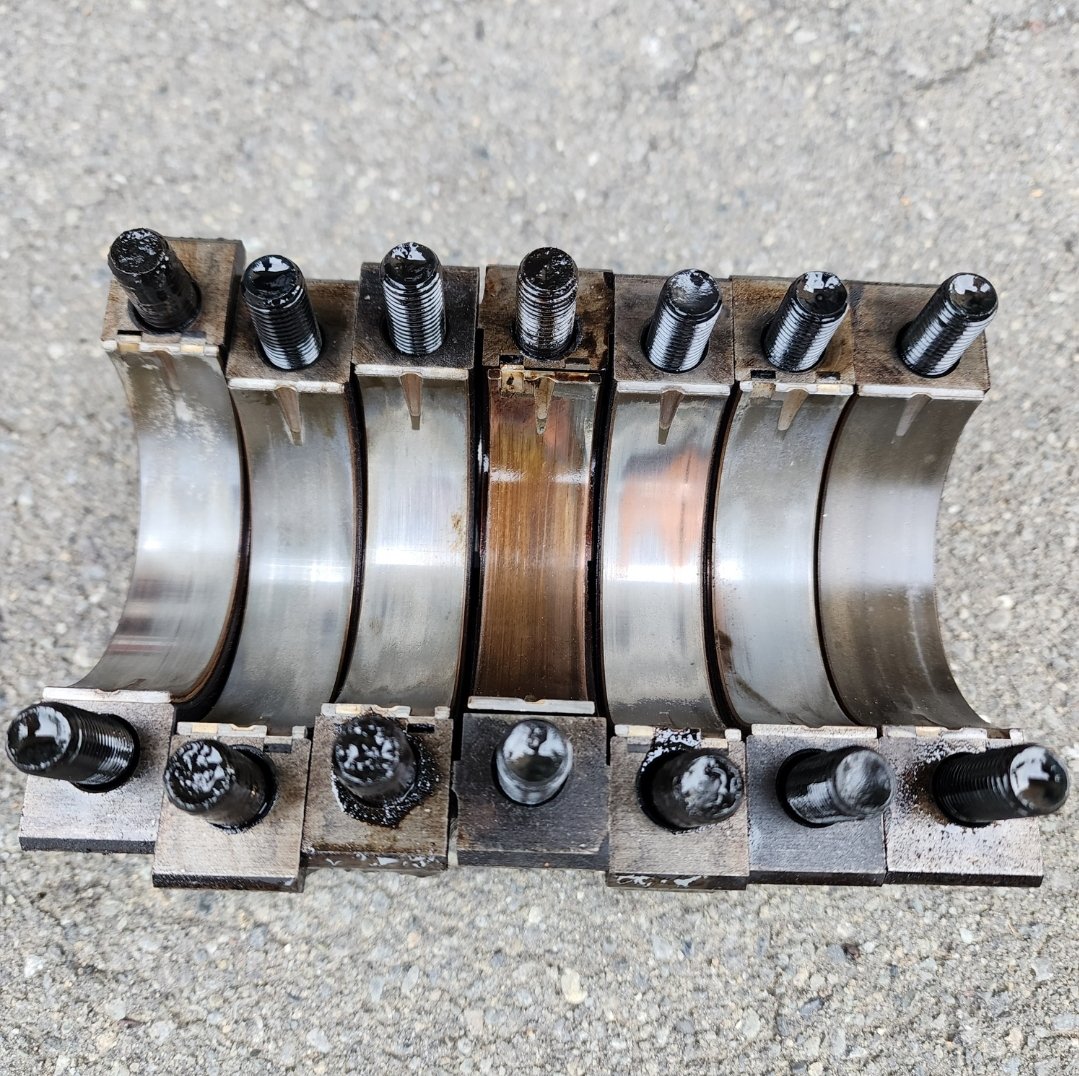
This motor was appealing because it was 100% complete with loom, usually half the stuff is missing from a never completed single turbo conversion or rebuild that never happens it had been in a surf that they had blown the gearbox in and couldnt sell complete so parted out, had the 120kms yarn, some questionable 10mm plate engine mounts, a punched in sump with an extra drain added in on opposite side and the shortened intake pipe on right to clear something. Checked crank bearings which is always first on list with and 1gg pretty disappointed, popped one cam cover off and its pretty gross inside. Unlikely the claimed 120kms new plan is to remove everything from this engine and tidy it up and put on the other longblock. I'd like to do an oem+ style fitment of the engine where everything is vapour blasted and tidied up and fitted to the van exactly as it was to the supra but we will see what state the twin turbos are and if it will all fit. Either way I needed a complete engine to measure up to see what space we have
6 points
-
Southern Hospitality
6 points
-
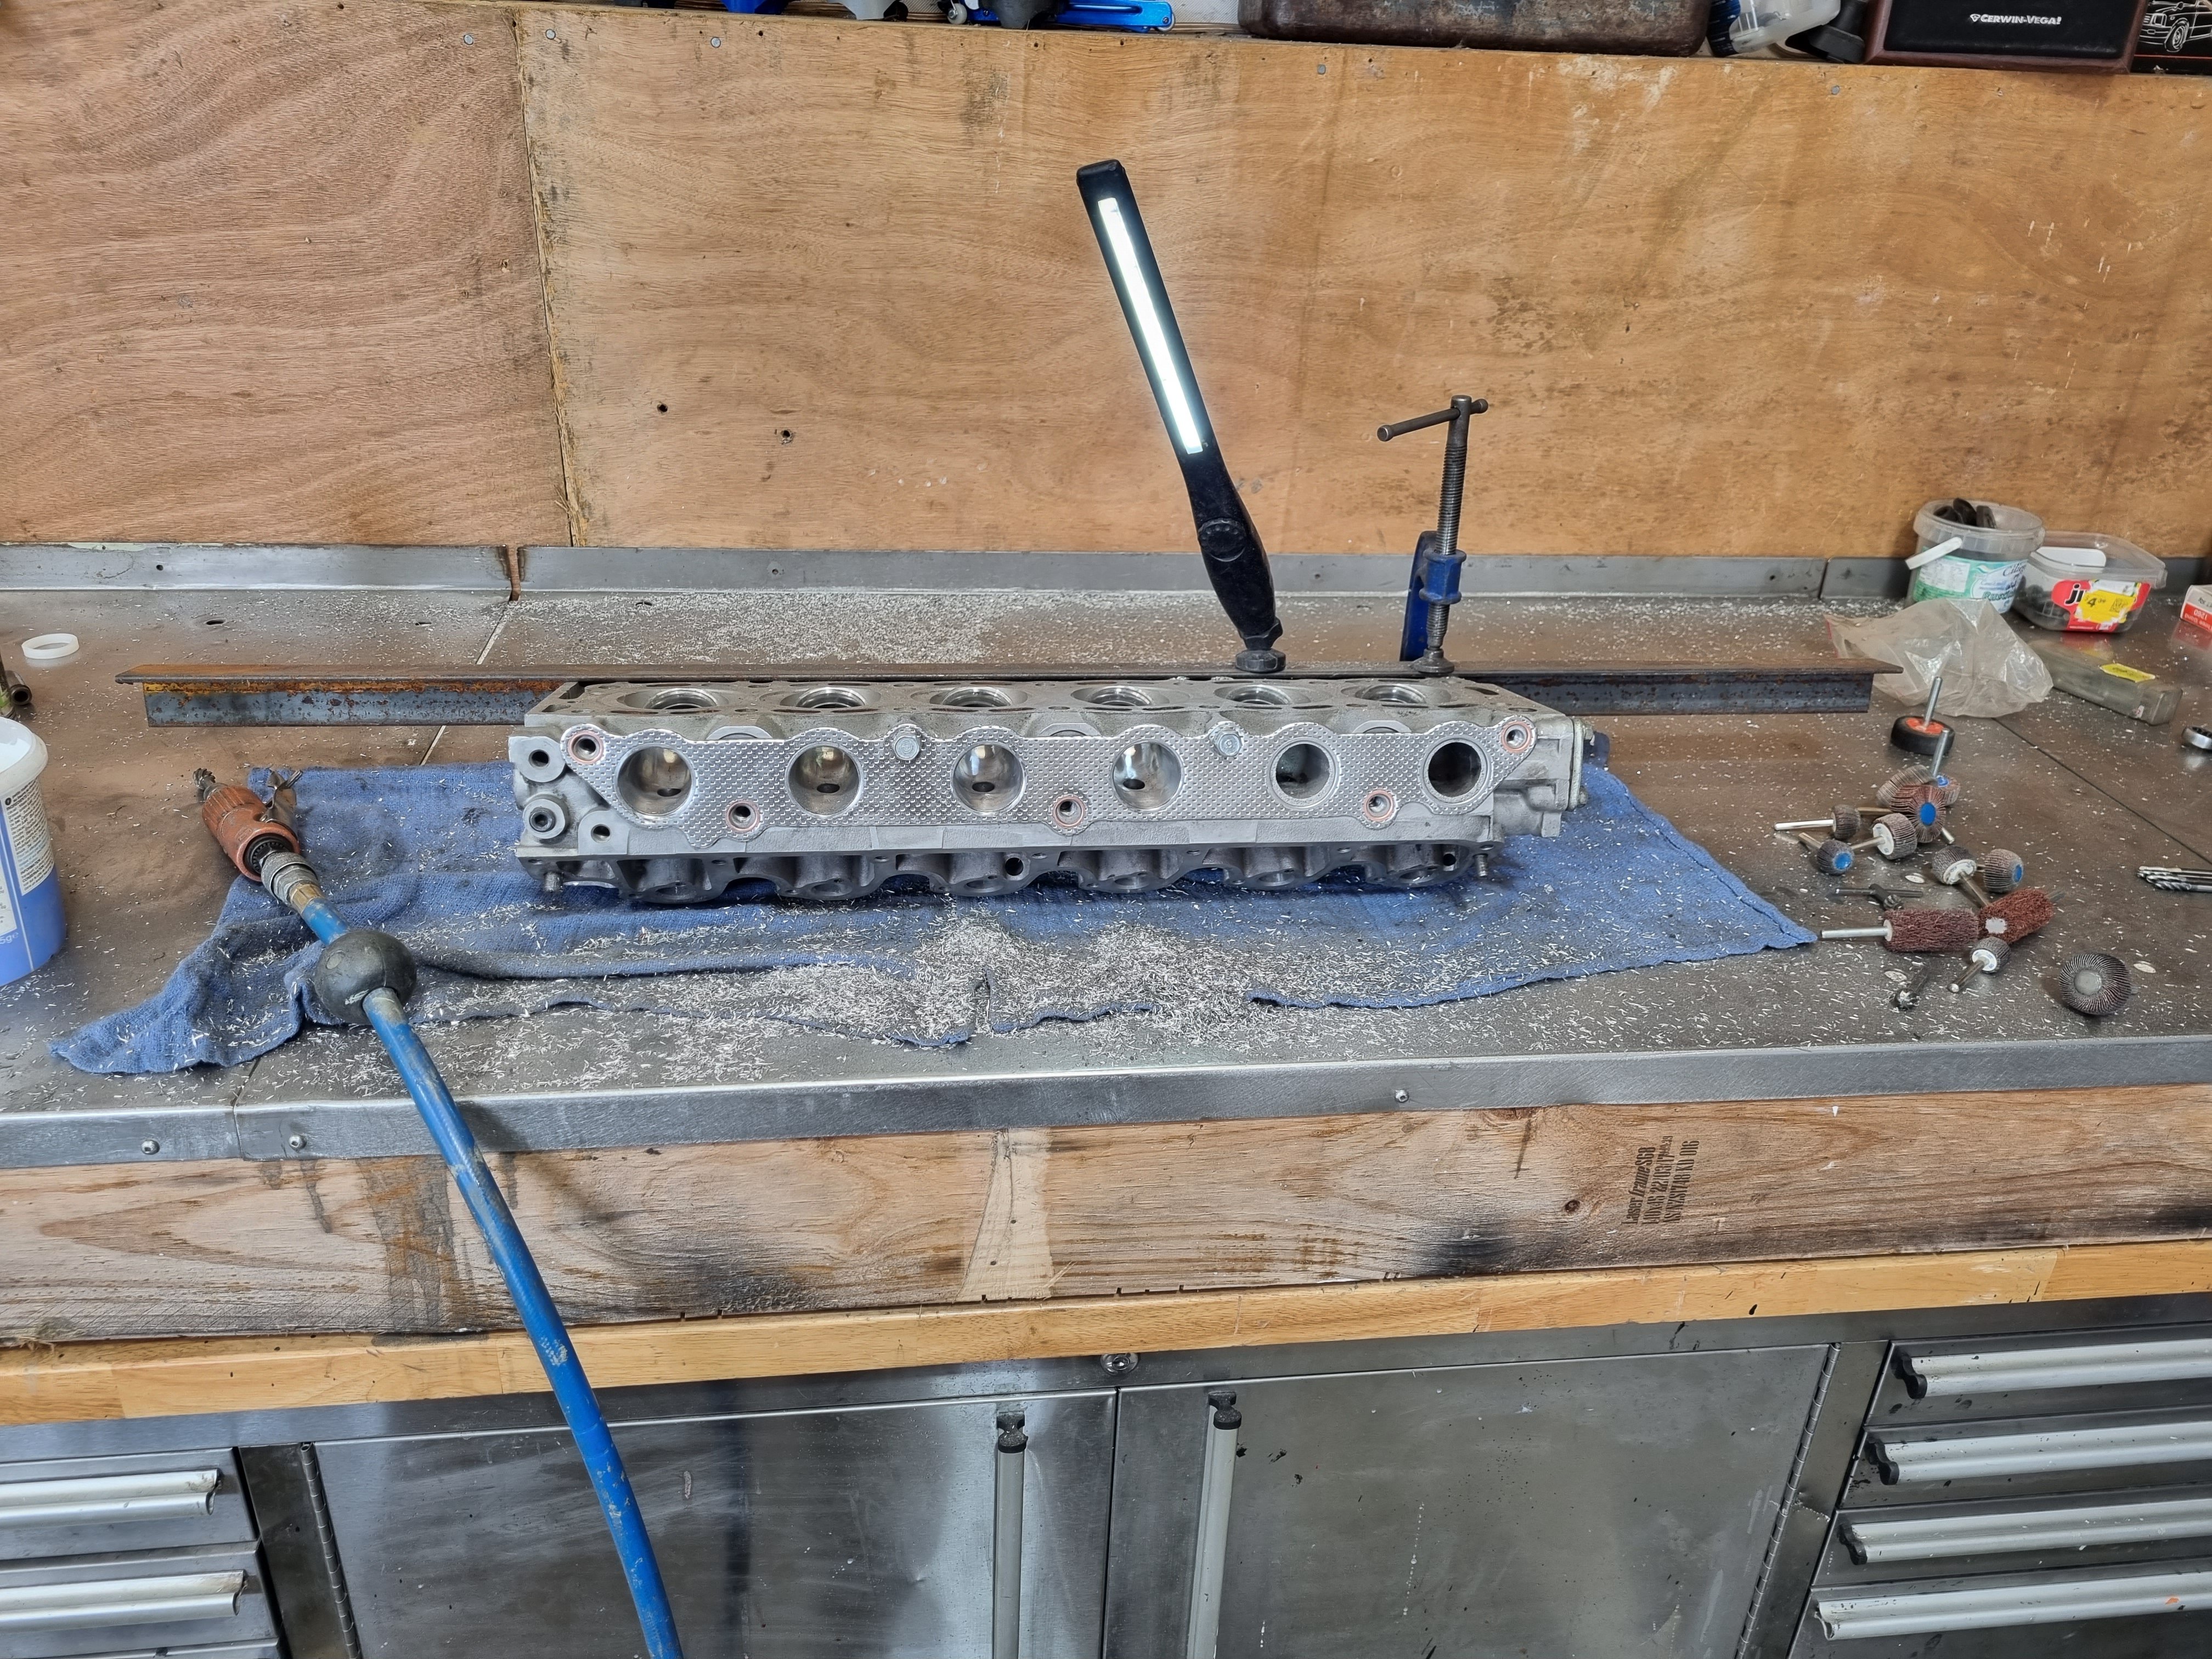
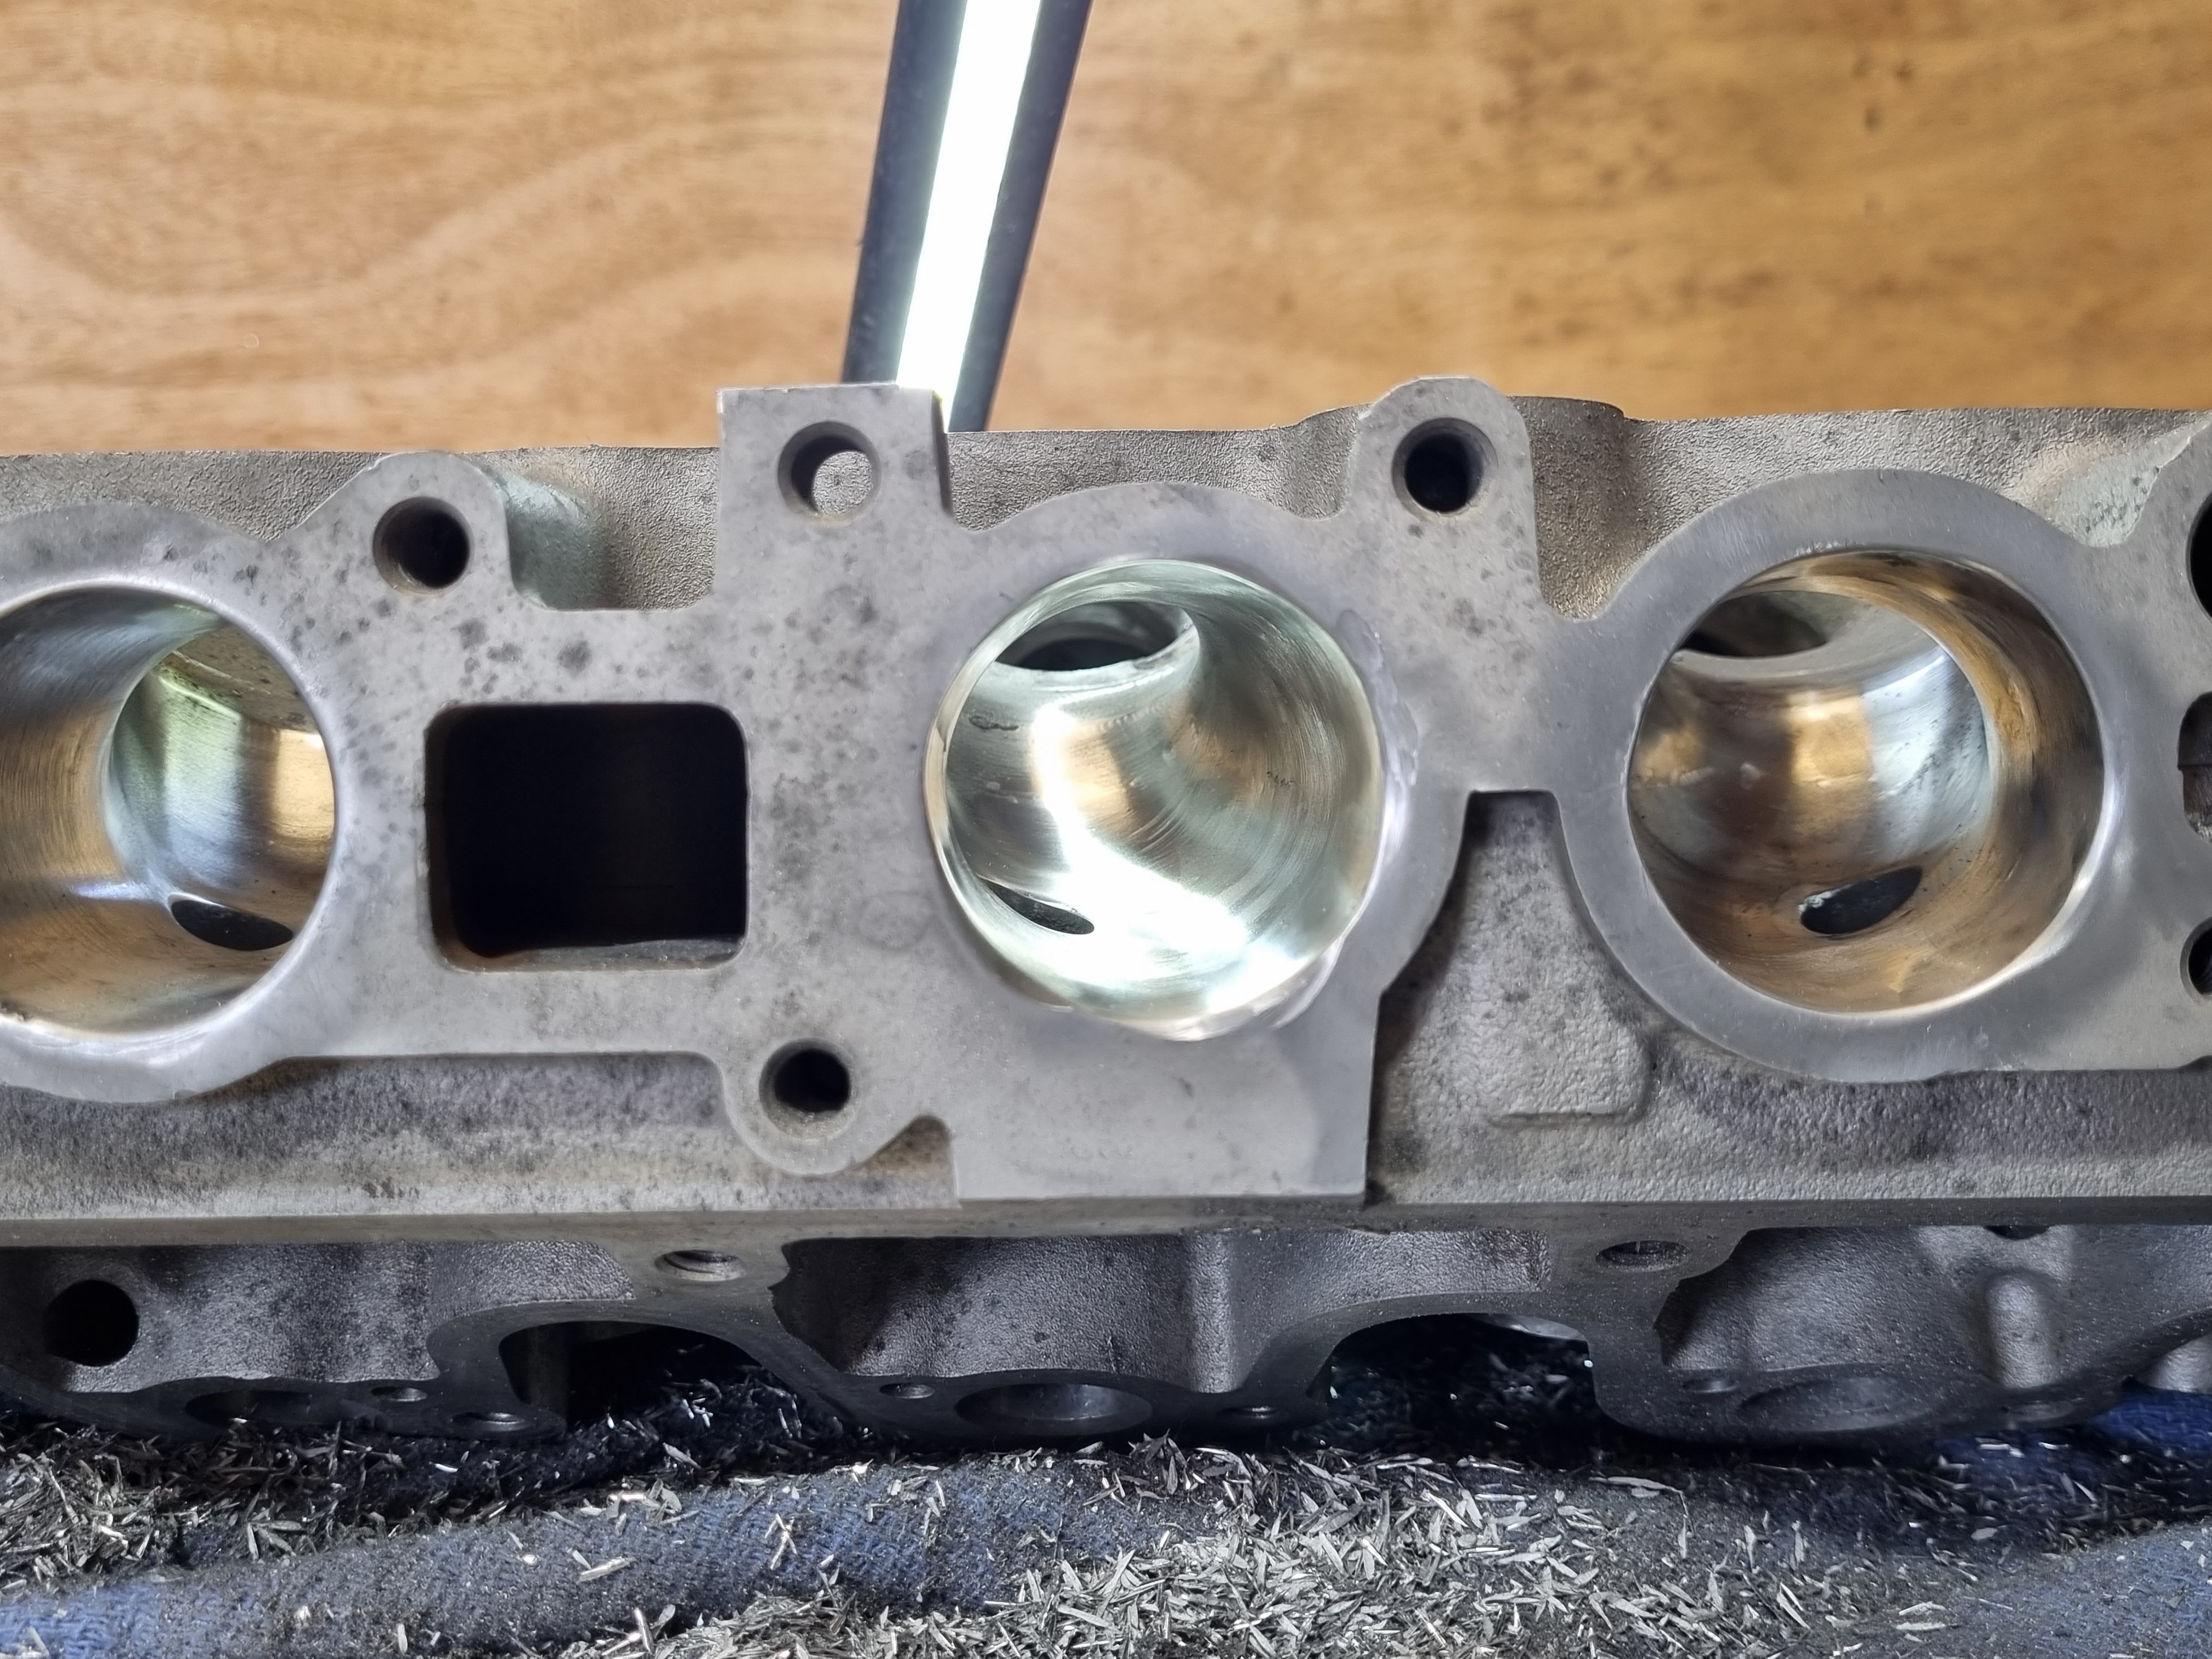
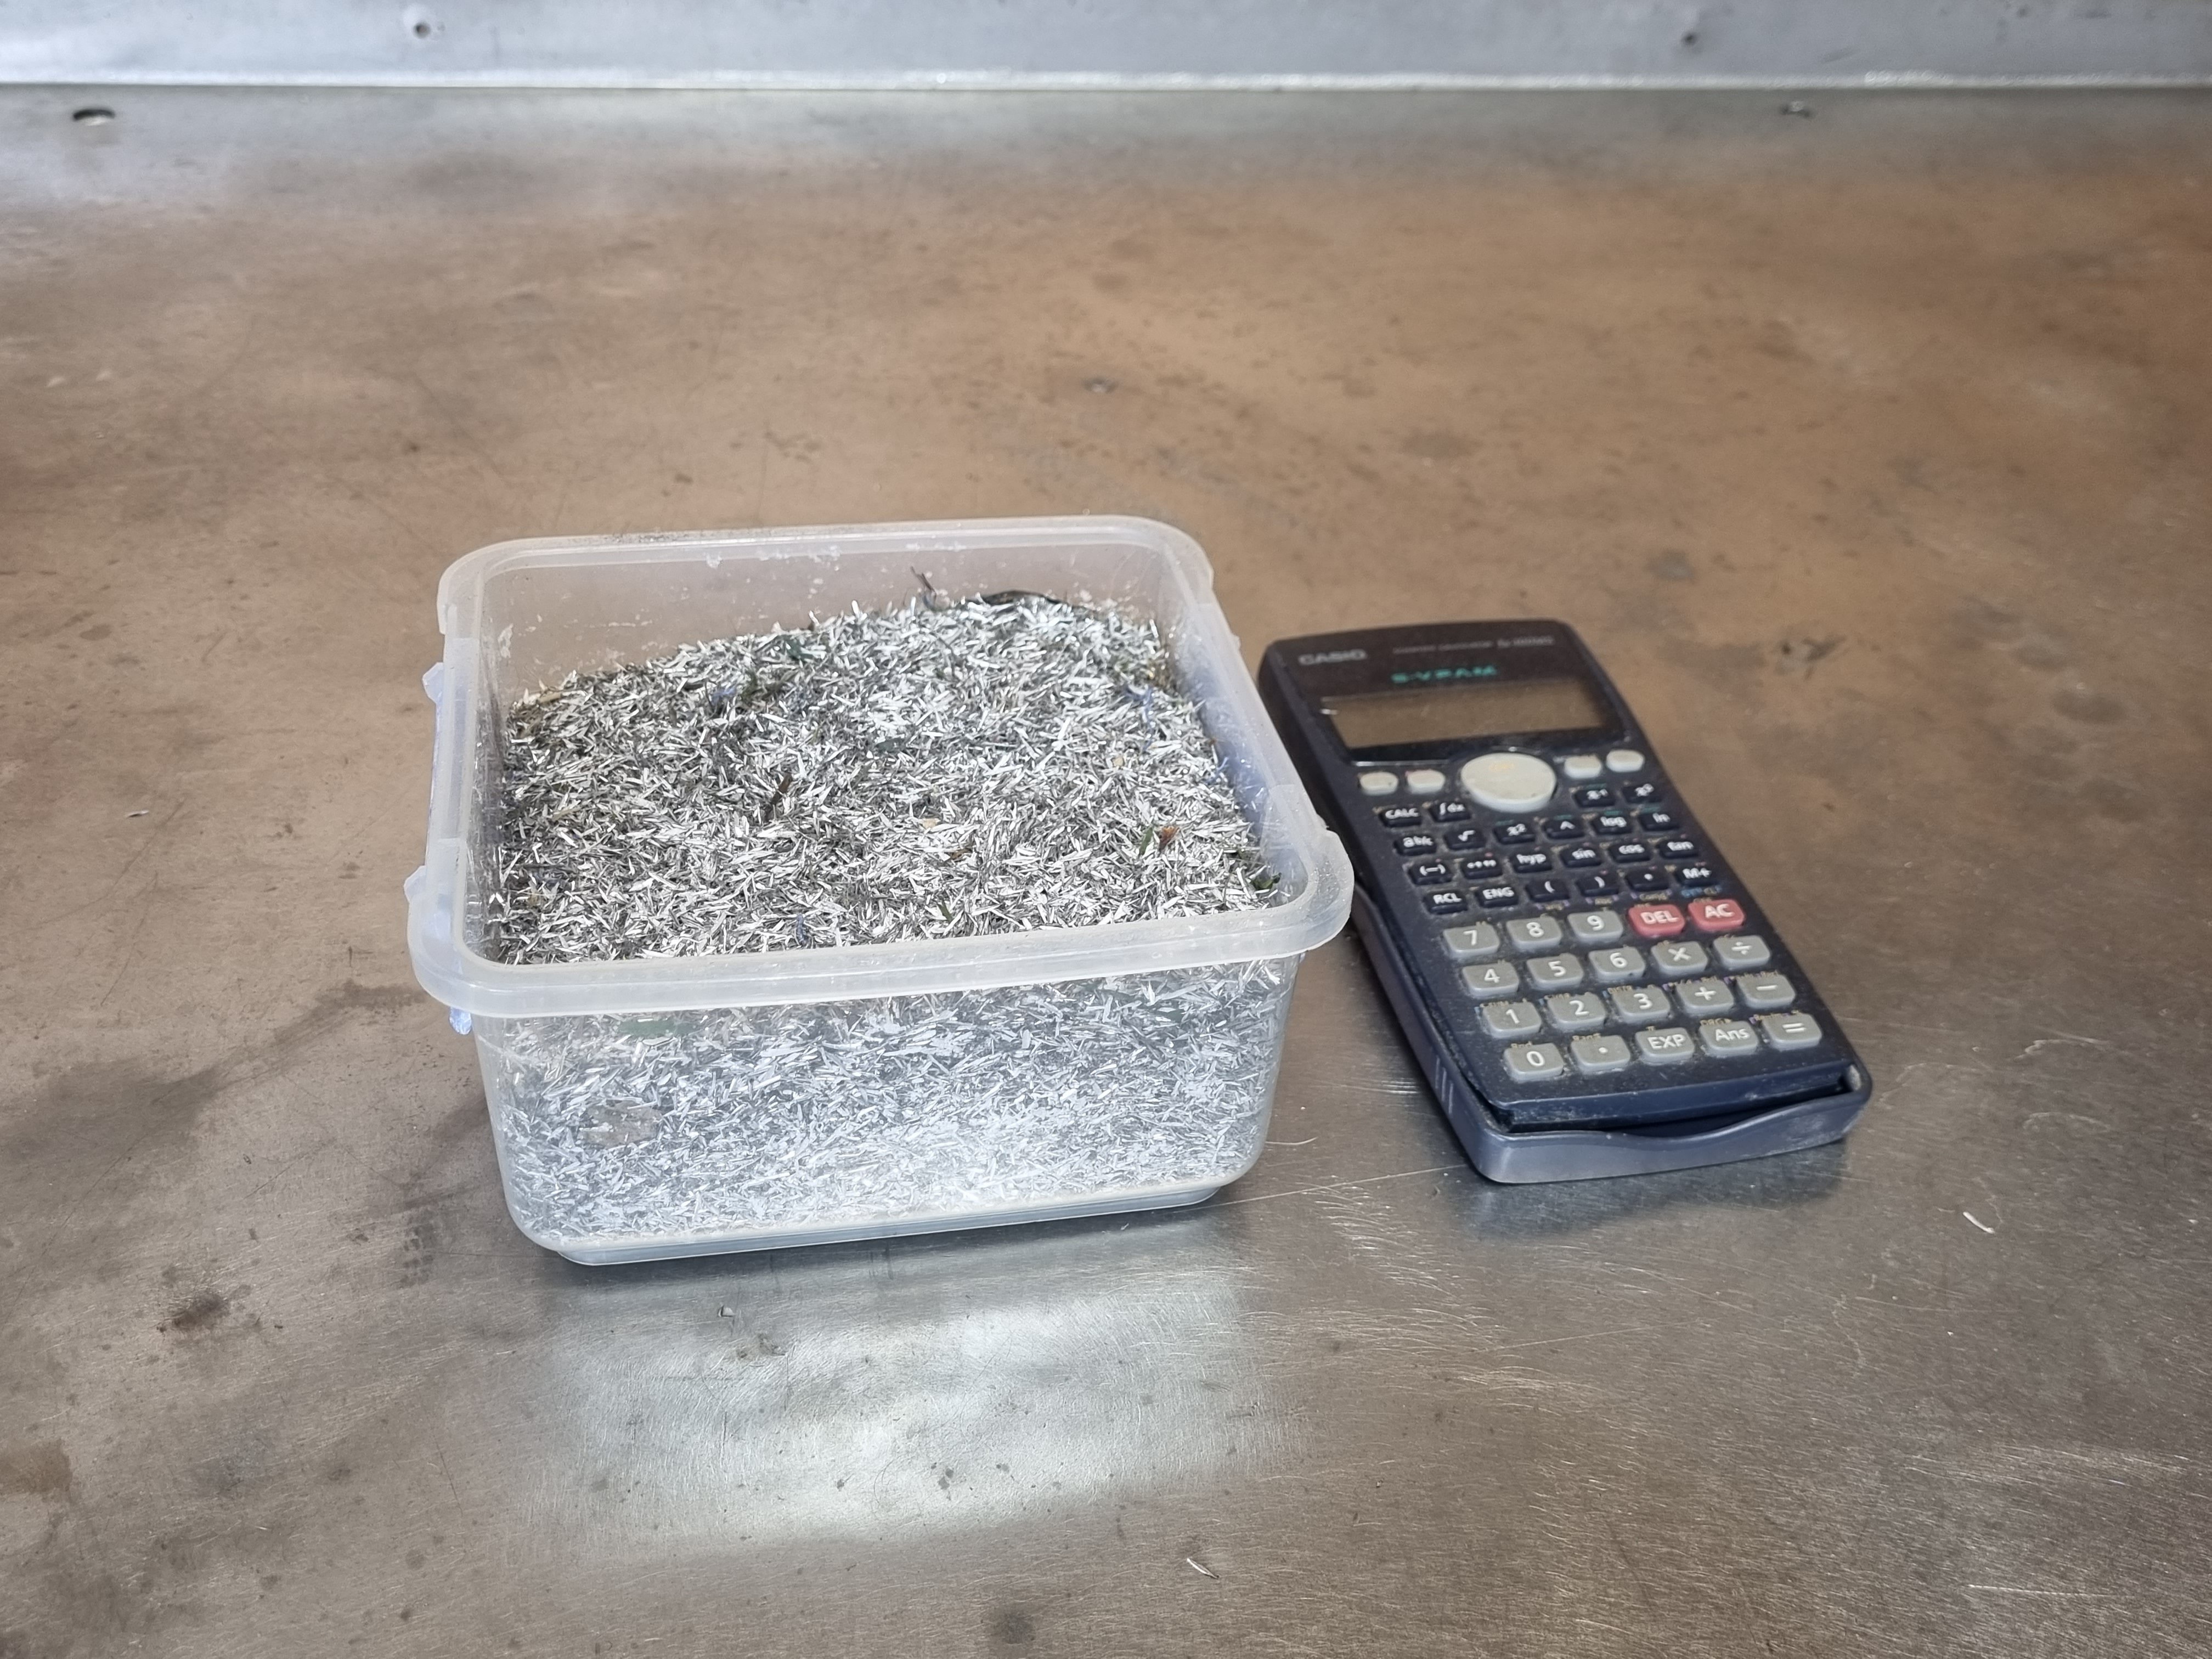
all finished. was a pretty messy job and took two days but its done now. i removed 400g of material from the ports. it will be interesting to see if it flows any better. ill get it back on the flow bench as soon as i can and see how it compares. fun fact, i ported one of these heads about 25 years ago and i cant remember how crazy i went with it (im guessing not very) but it made no difference to the motor at all. tbh that motor was a stock turd with stock intake and exhaust so porting it was a fucking waste of time but that was the style at the time. i think i planed the head to try to raise compression but that's a waste of time too given the stock piston design. ANYWHO, thats done. i took the exhaust from about 31mm to 37mm and removed a fair amount of material from the bowel, the intake went from around 31 to 38mm with the same stock removal from the bowel area.
5 points
-
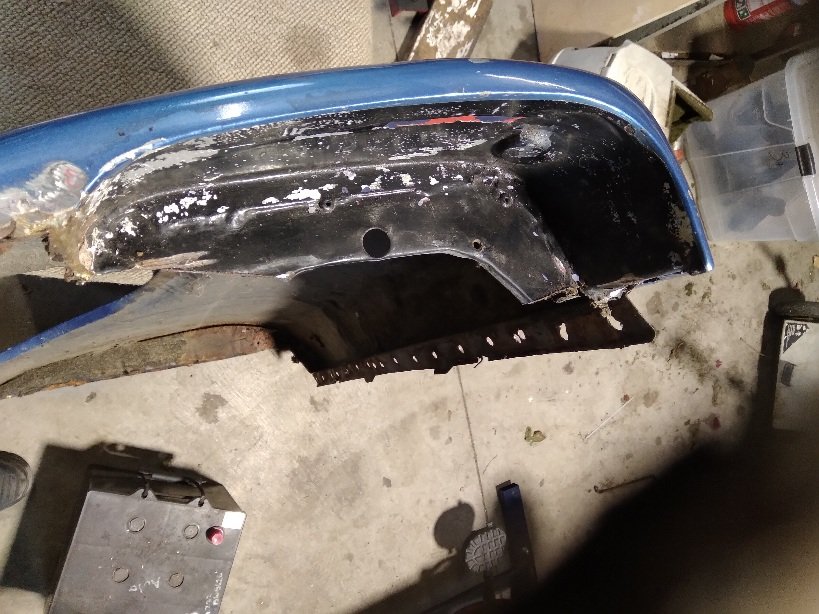
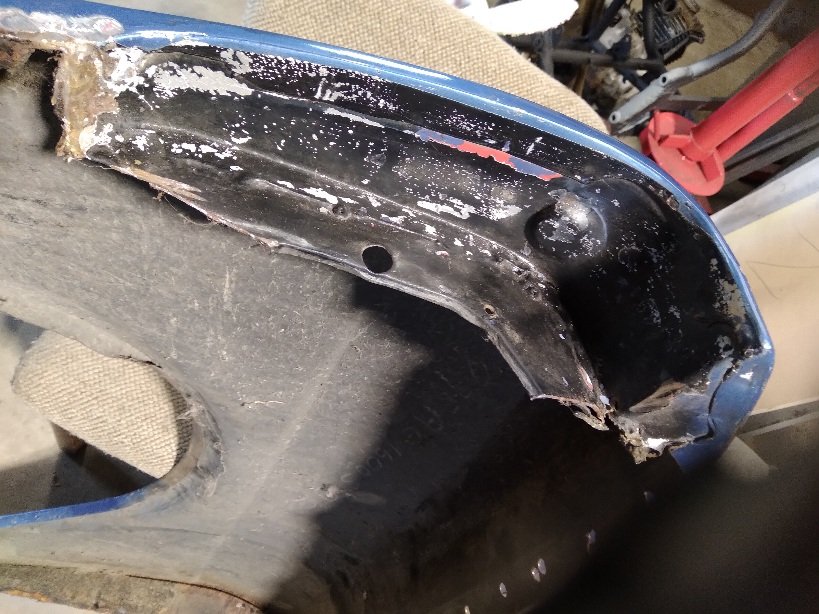
Loving this time off at the moment. Decided I wasn't going to use the flange I made yesterday and decided to make it in two pieces instead. So I spent a few hours in the shed bending and cutting panel steel. I fucked it up at the top and had to weld on a little slither of steel. Super happy how it turned out. Next time I will be welding the flange and the top part on. I included picture of the other guard and what I'm trying to recreate. Cheers .
3 points
-
First trip done. VG tows it better on the open road than pootling around town, no mirrors or power steering or power brakes is a little bit challenging for maneuvering though. Got a bit of a list of things that could be improved/finished
3 points
-
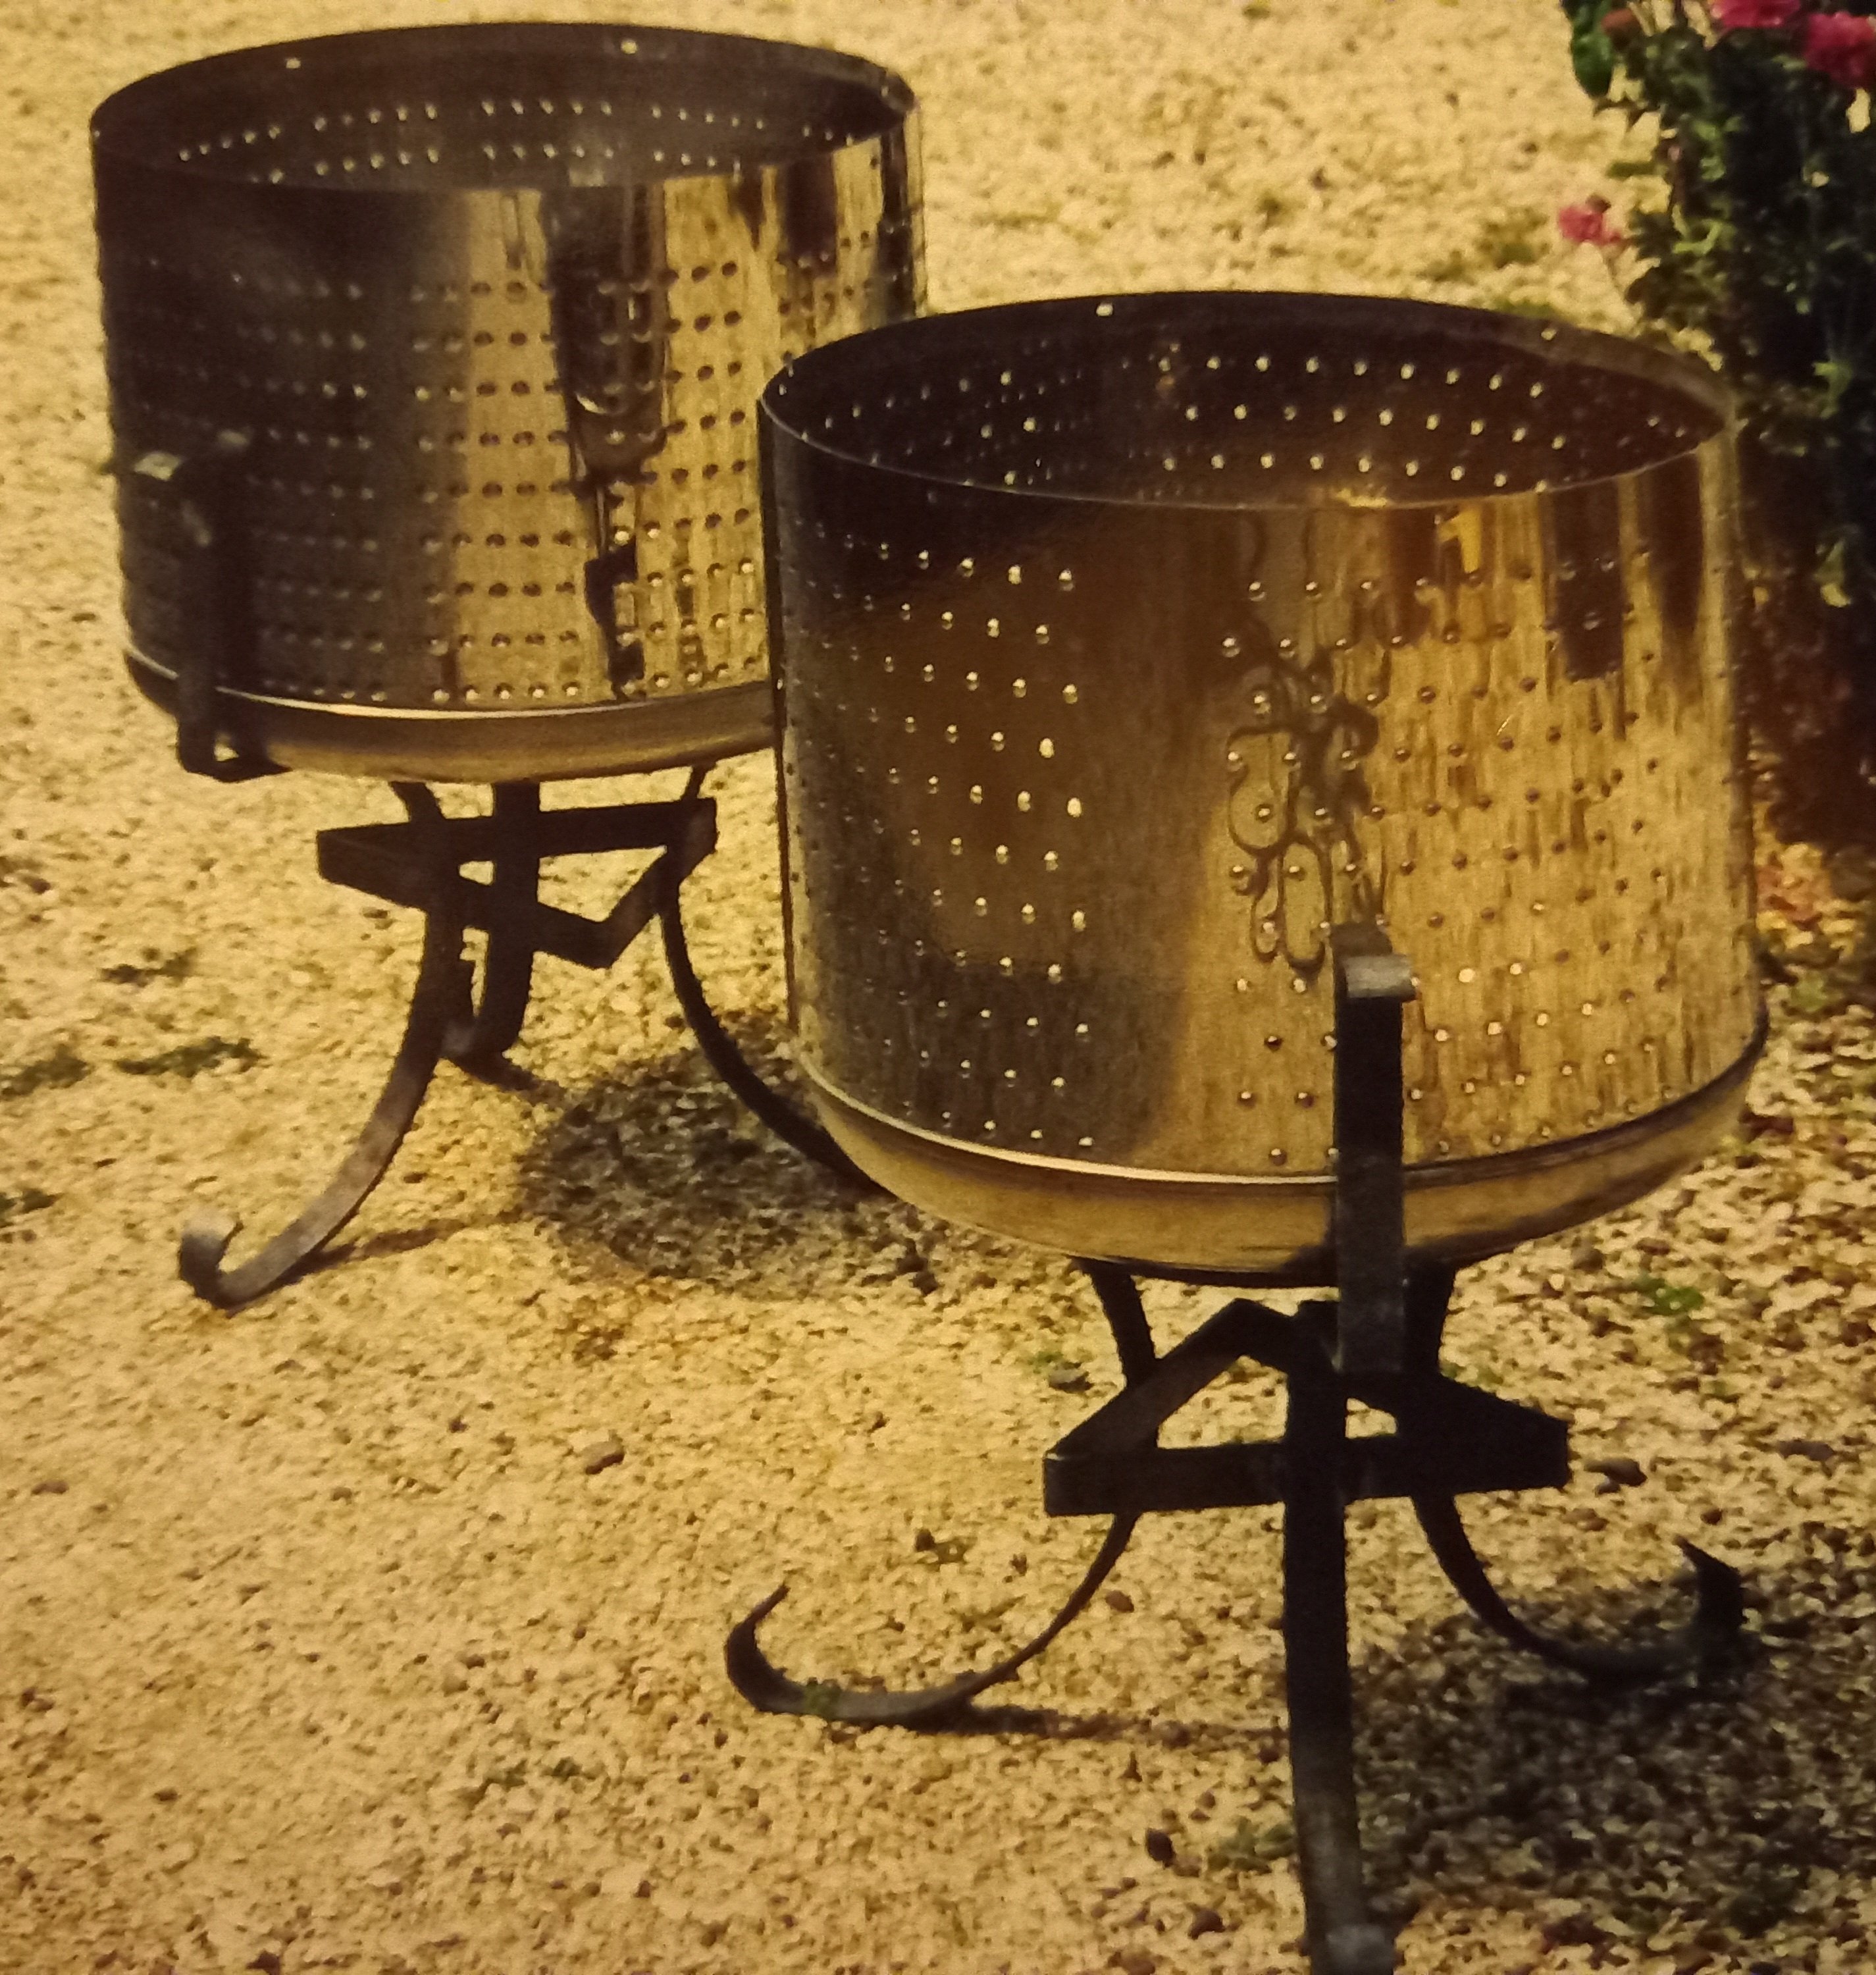
Braziers I made from washing mechine tubs
3 points
-
The Evo VR-4 core engine is all the same as the regular VR-4 engine anyway, the only differences are the bolt ons such as injectors and turbo etc.2 points
-
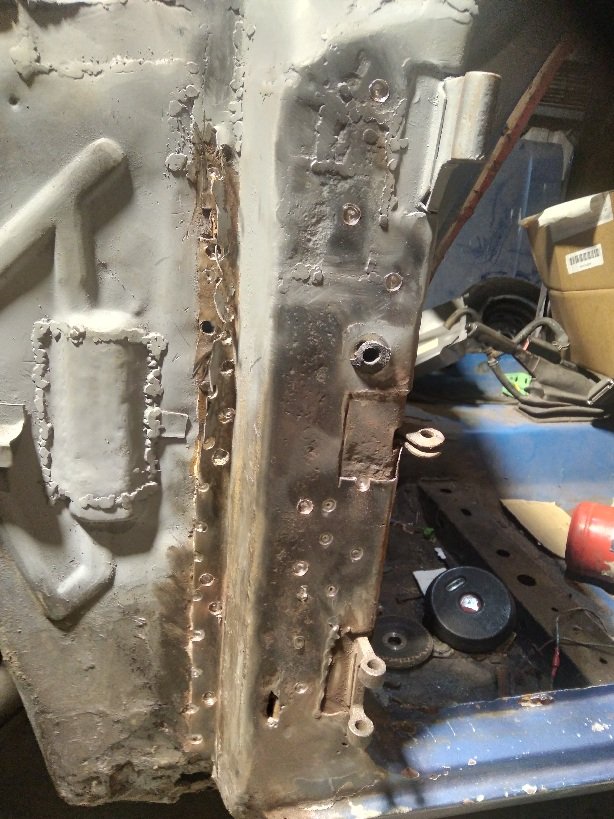
Sometimes you just have to bite the bullet, give yourself a good kick up the butt and redo something that just wasn't right let alone aesthetic. The firewall bugged me and it could have been welded in better. I stuffed up and didn't drop the top piece down far enough and then added to it which didn't go that well. It all started to get a bit out of shape. Fugly really. So today the start of a new year I made a start on a new firewall.
2 points
-
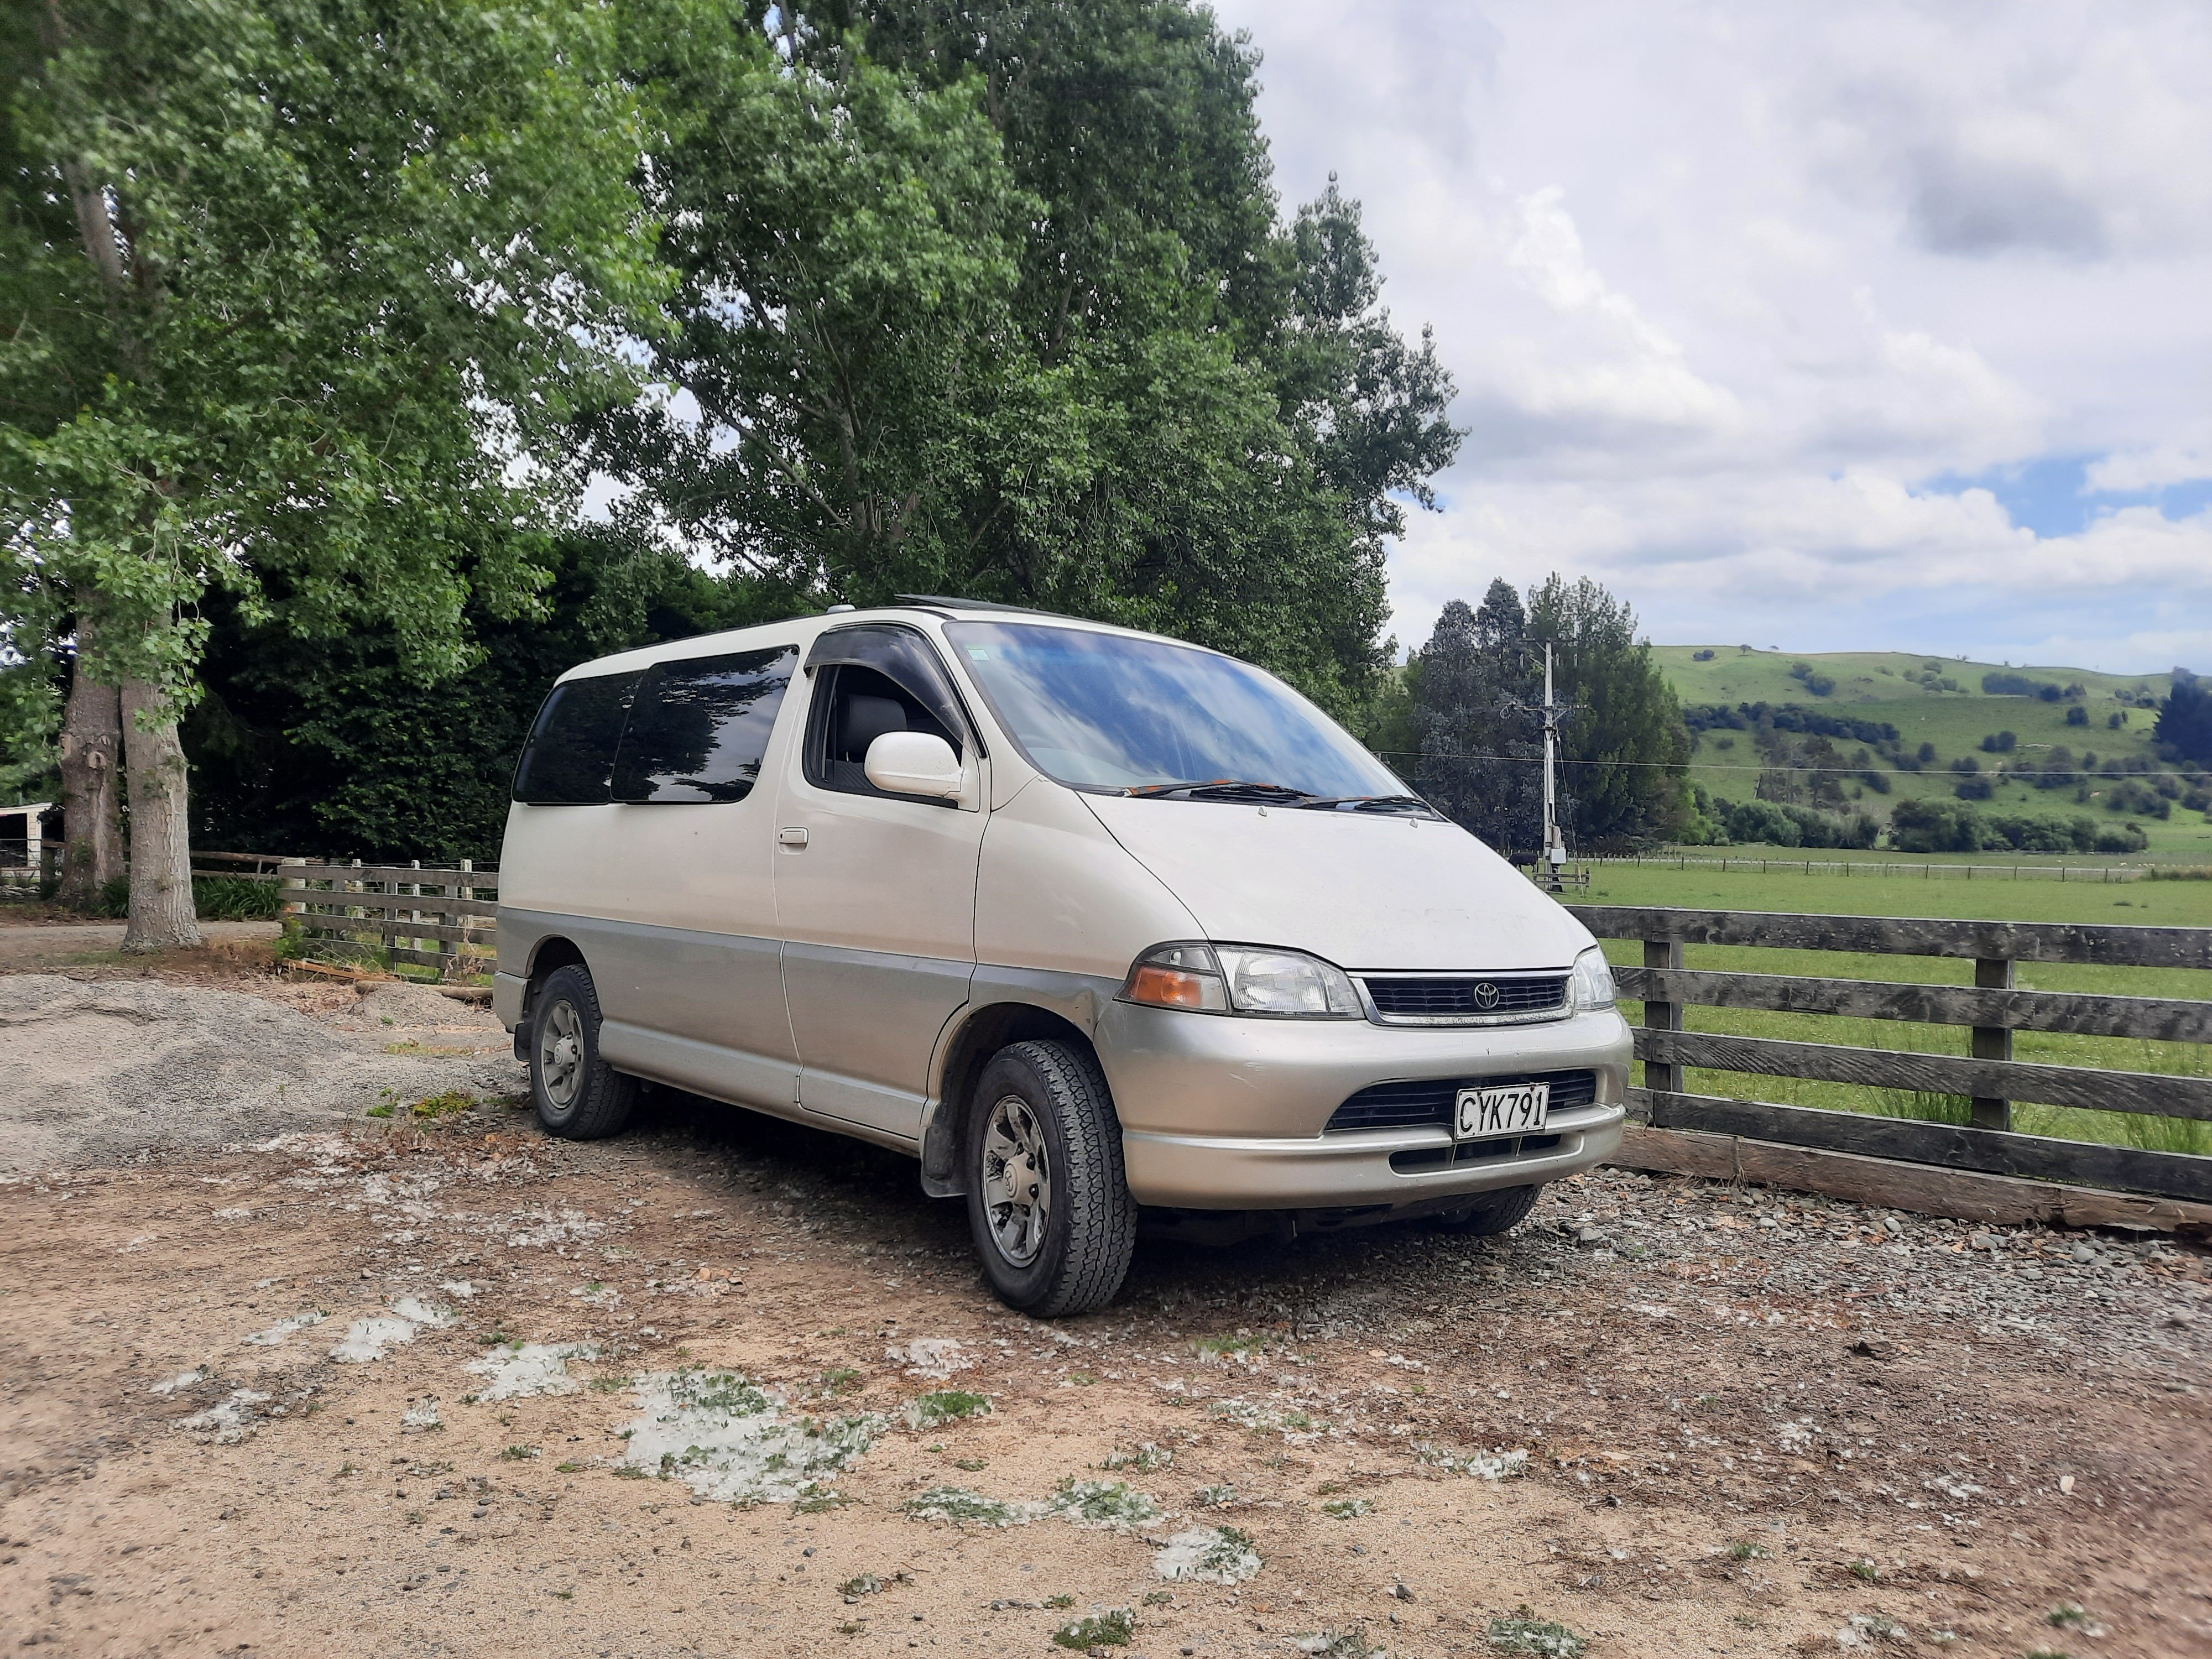
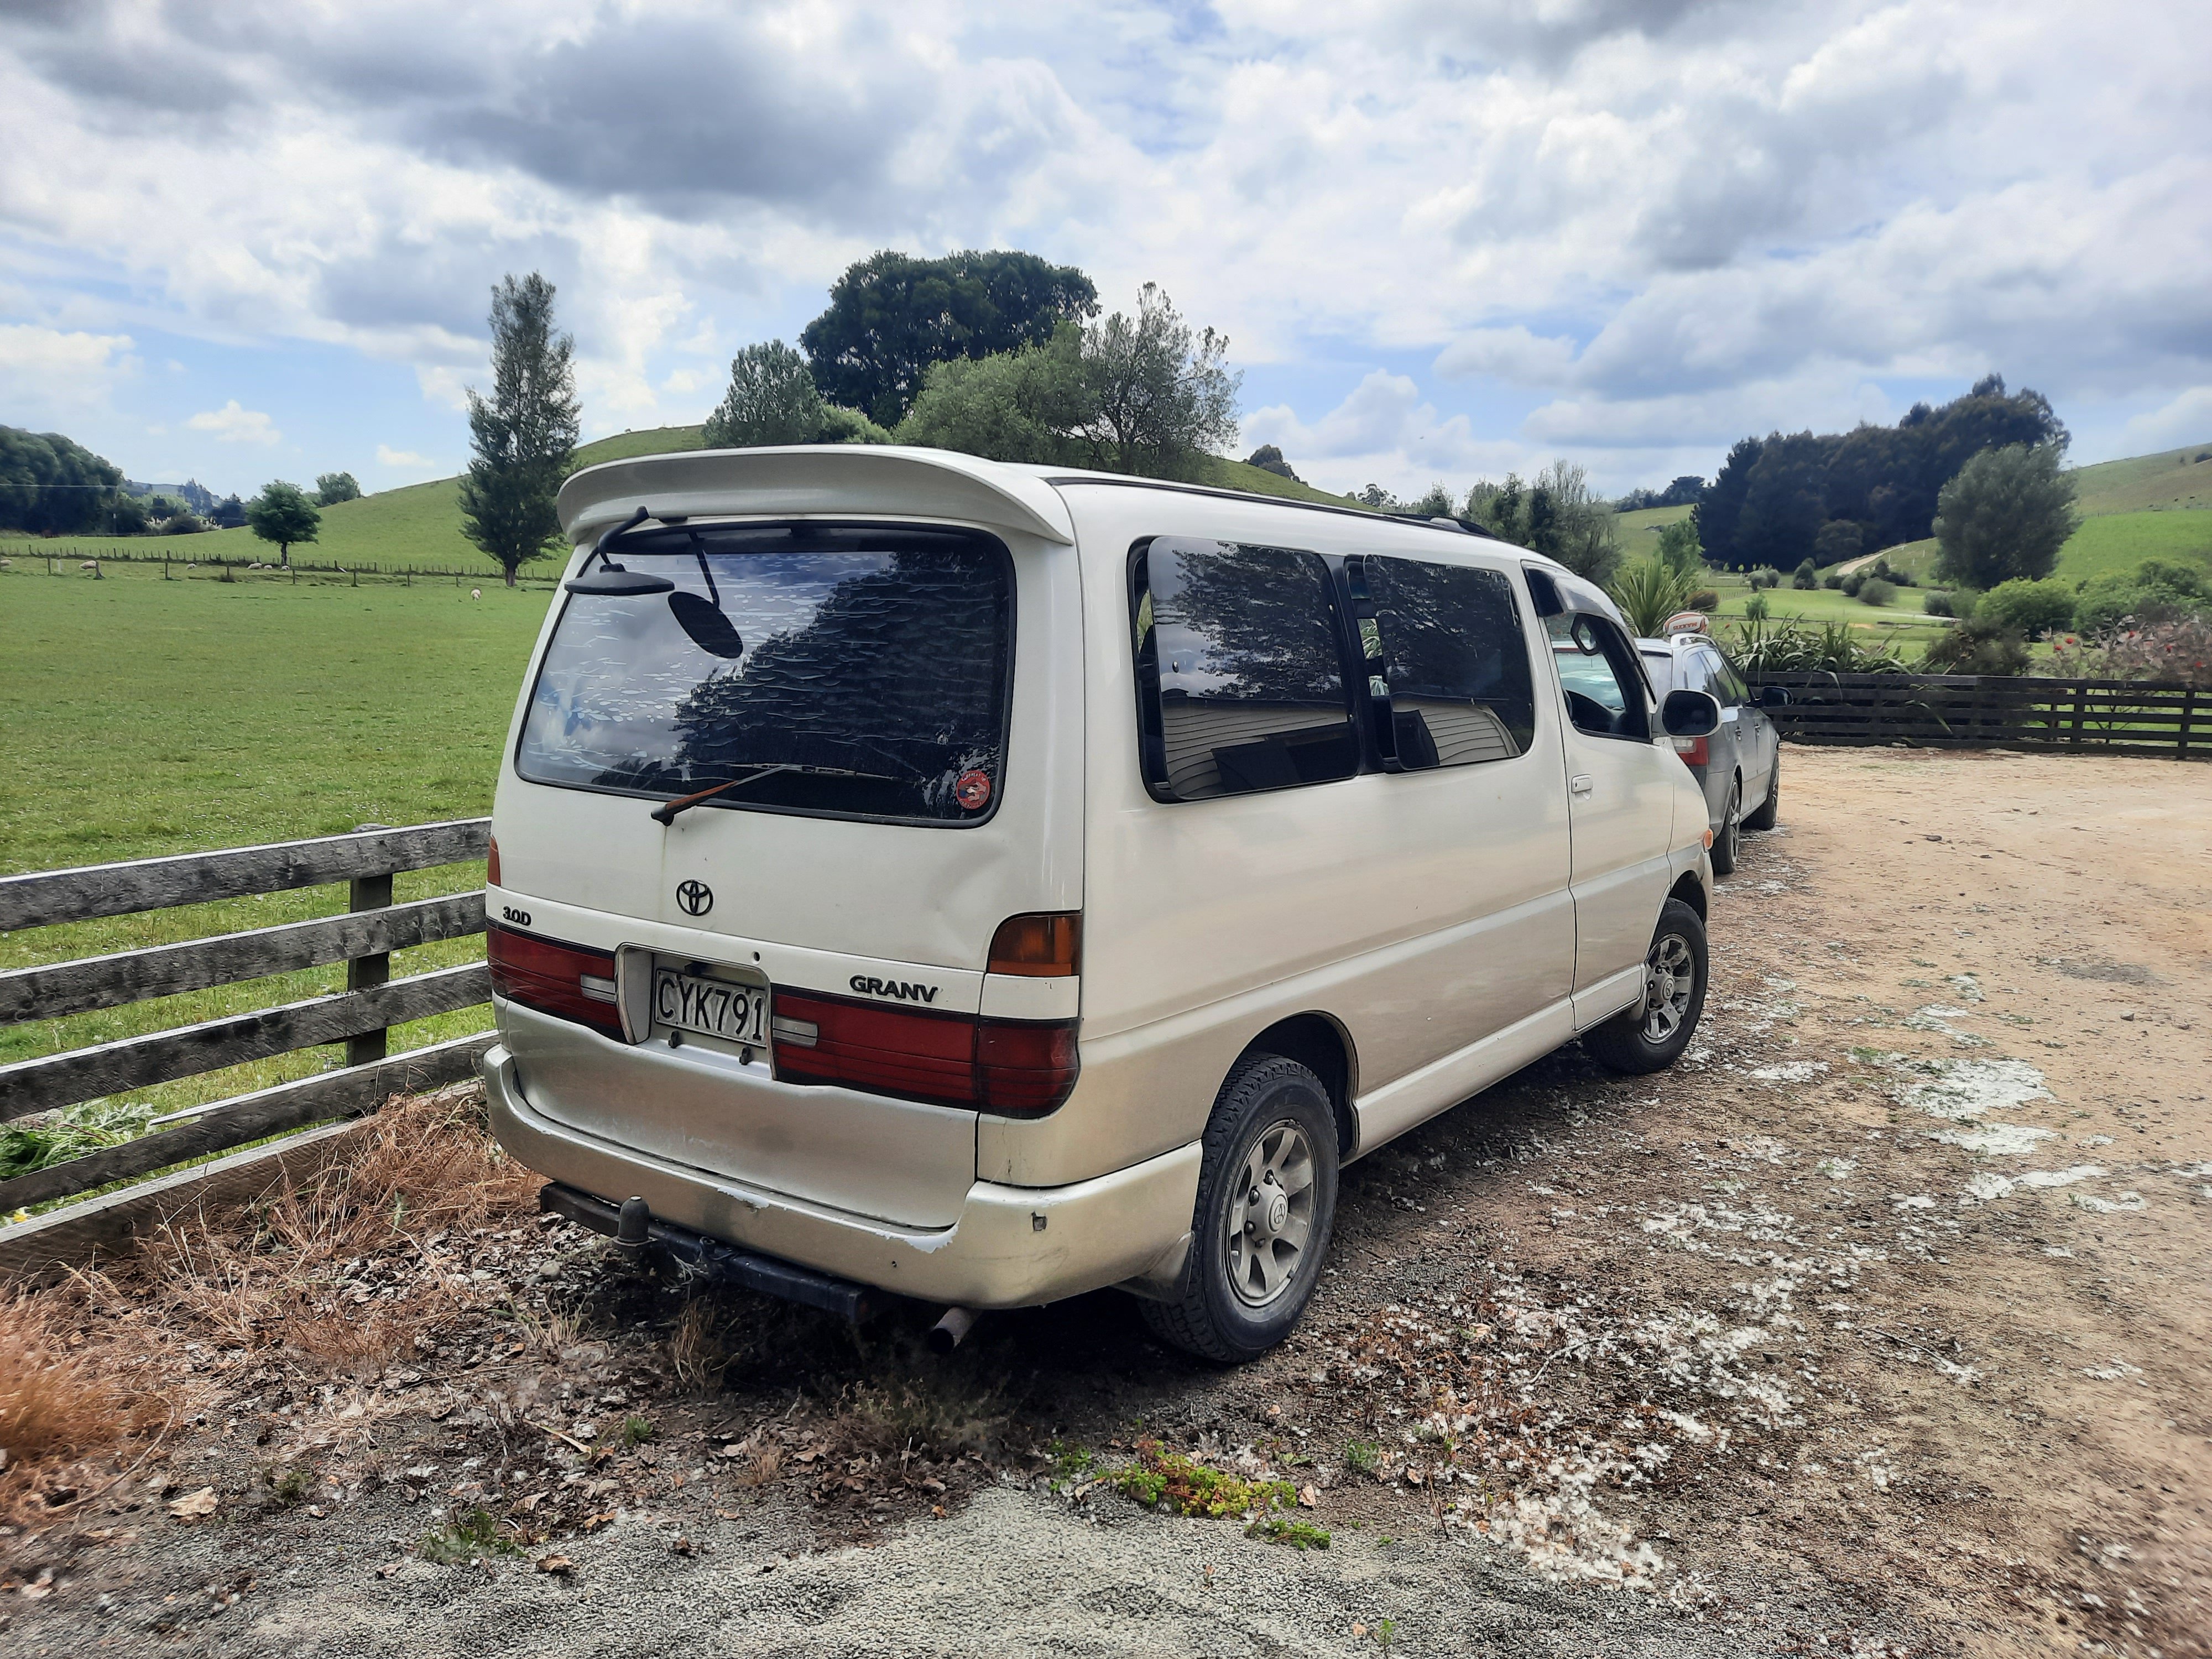
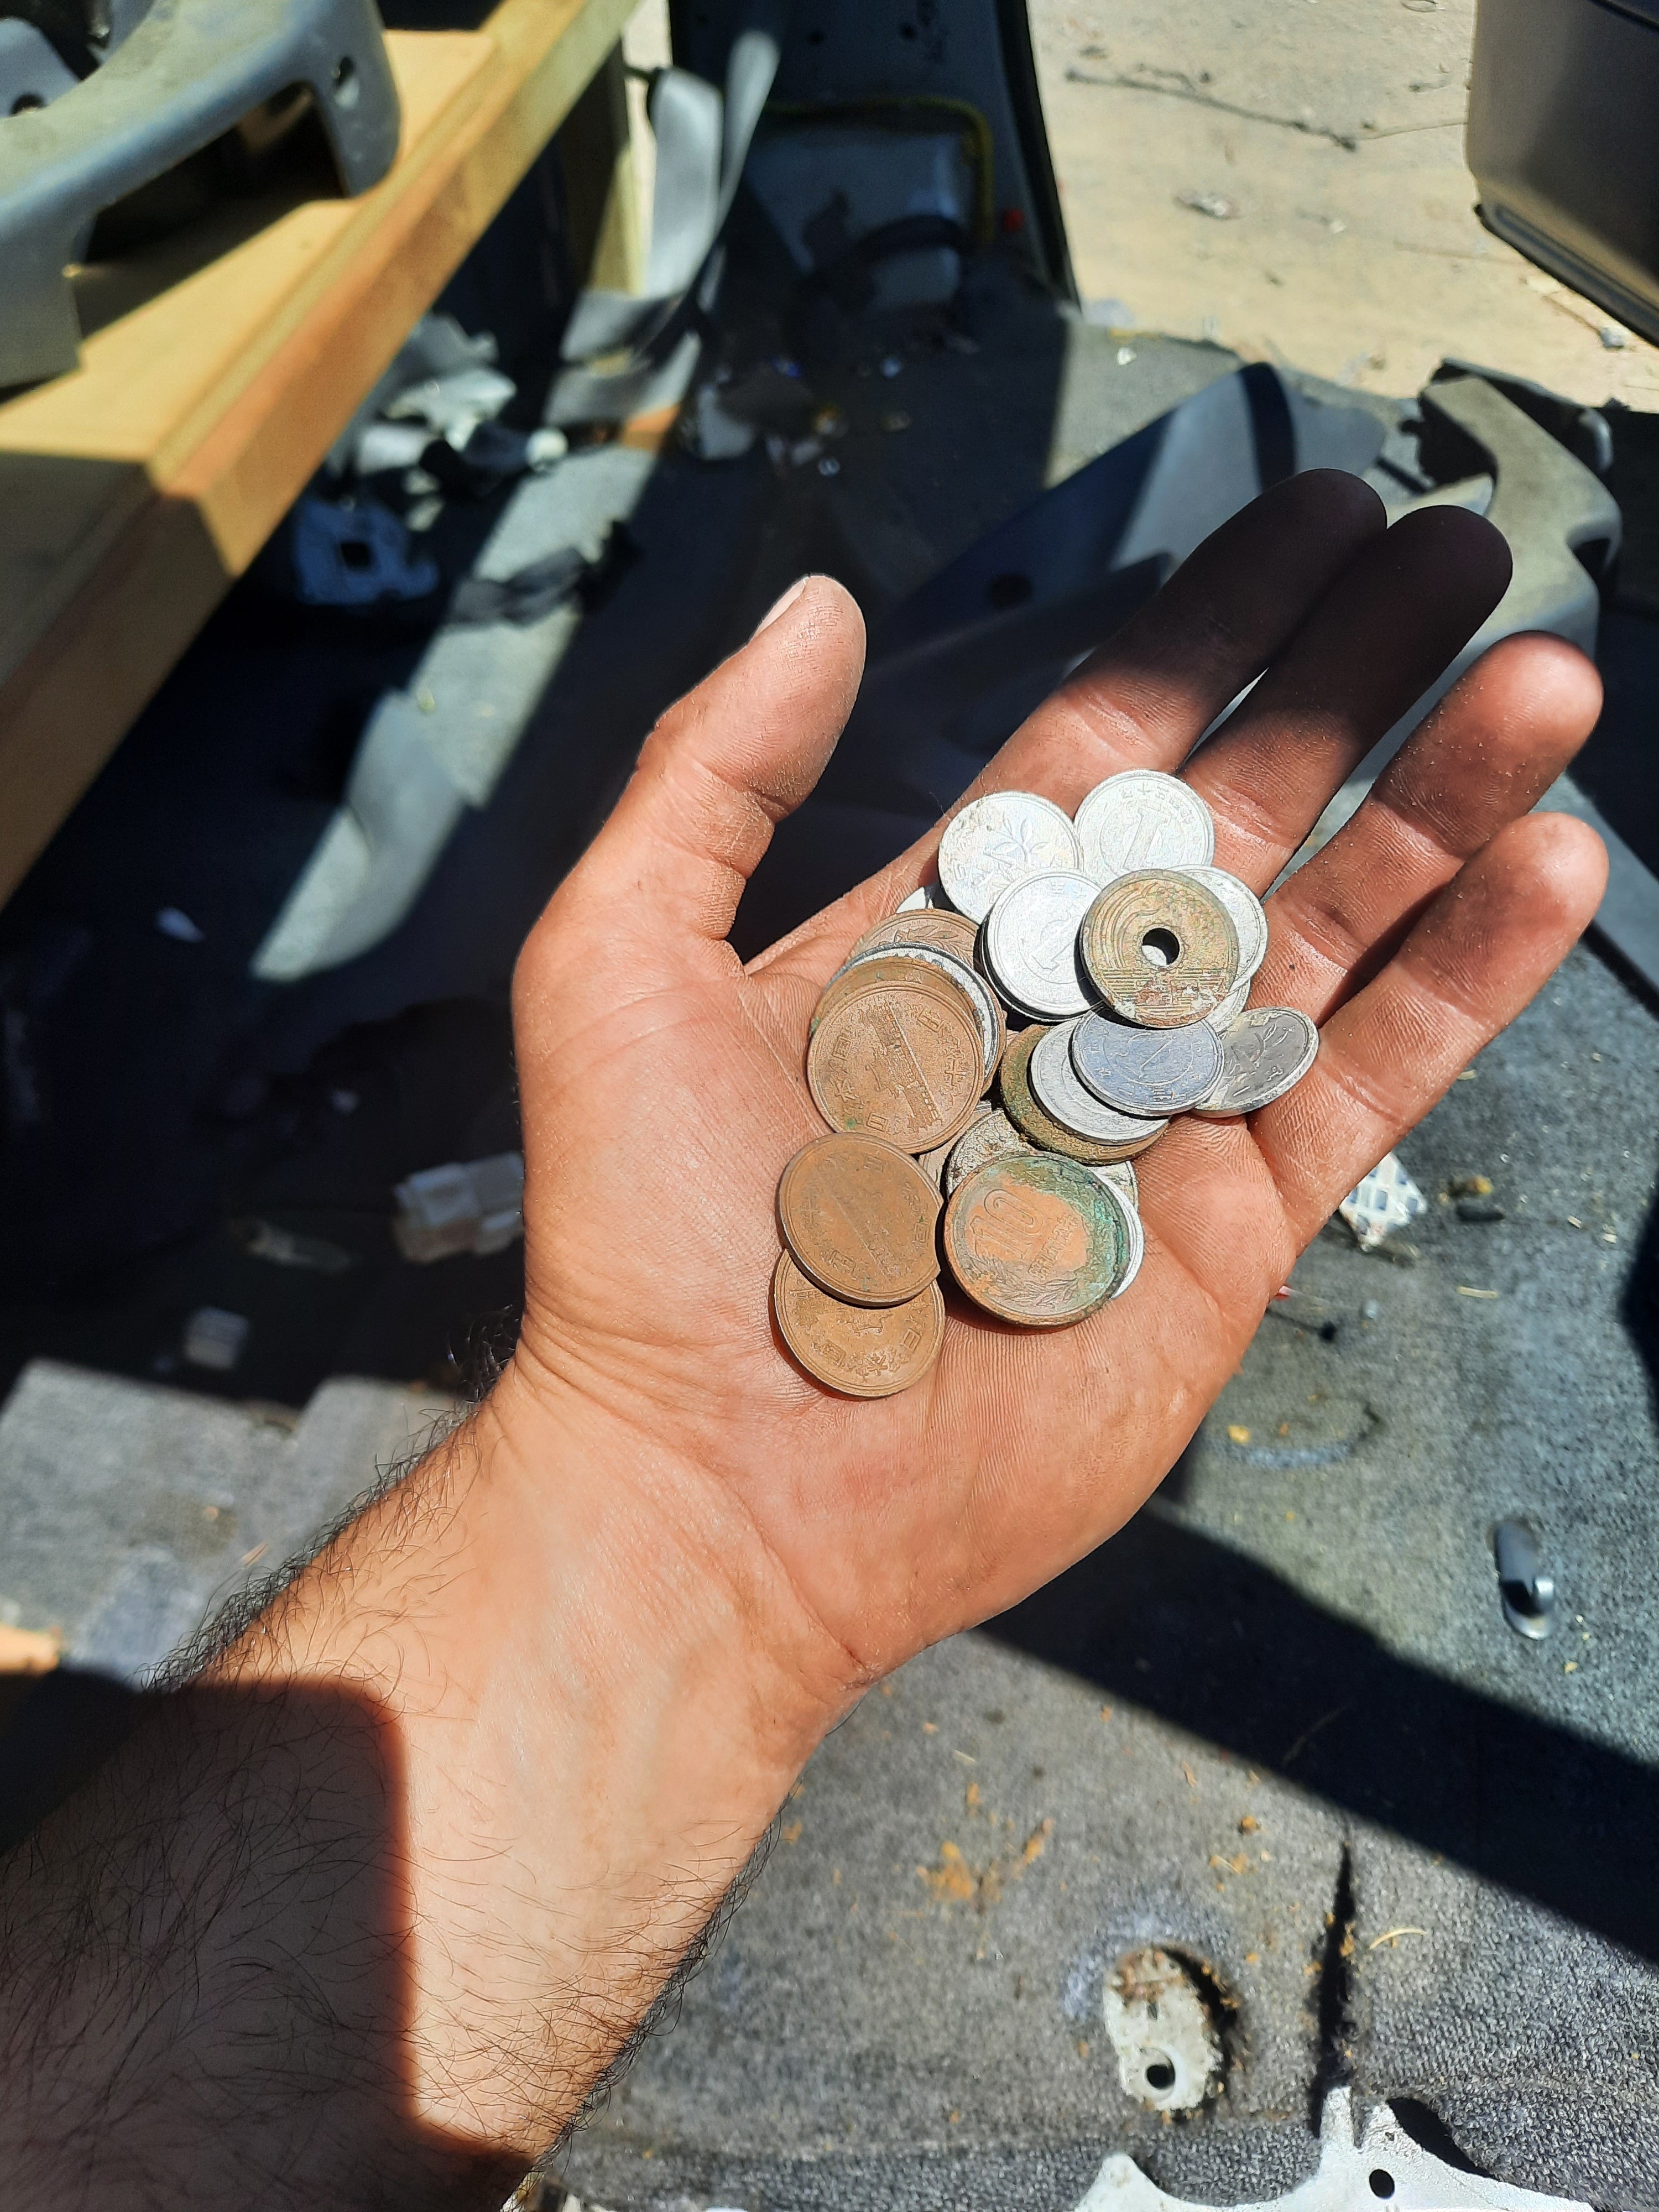
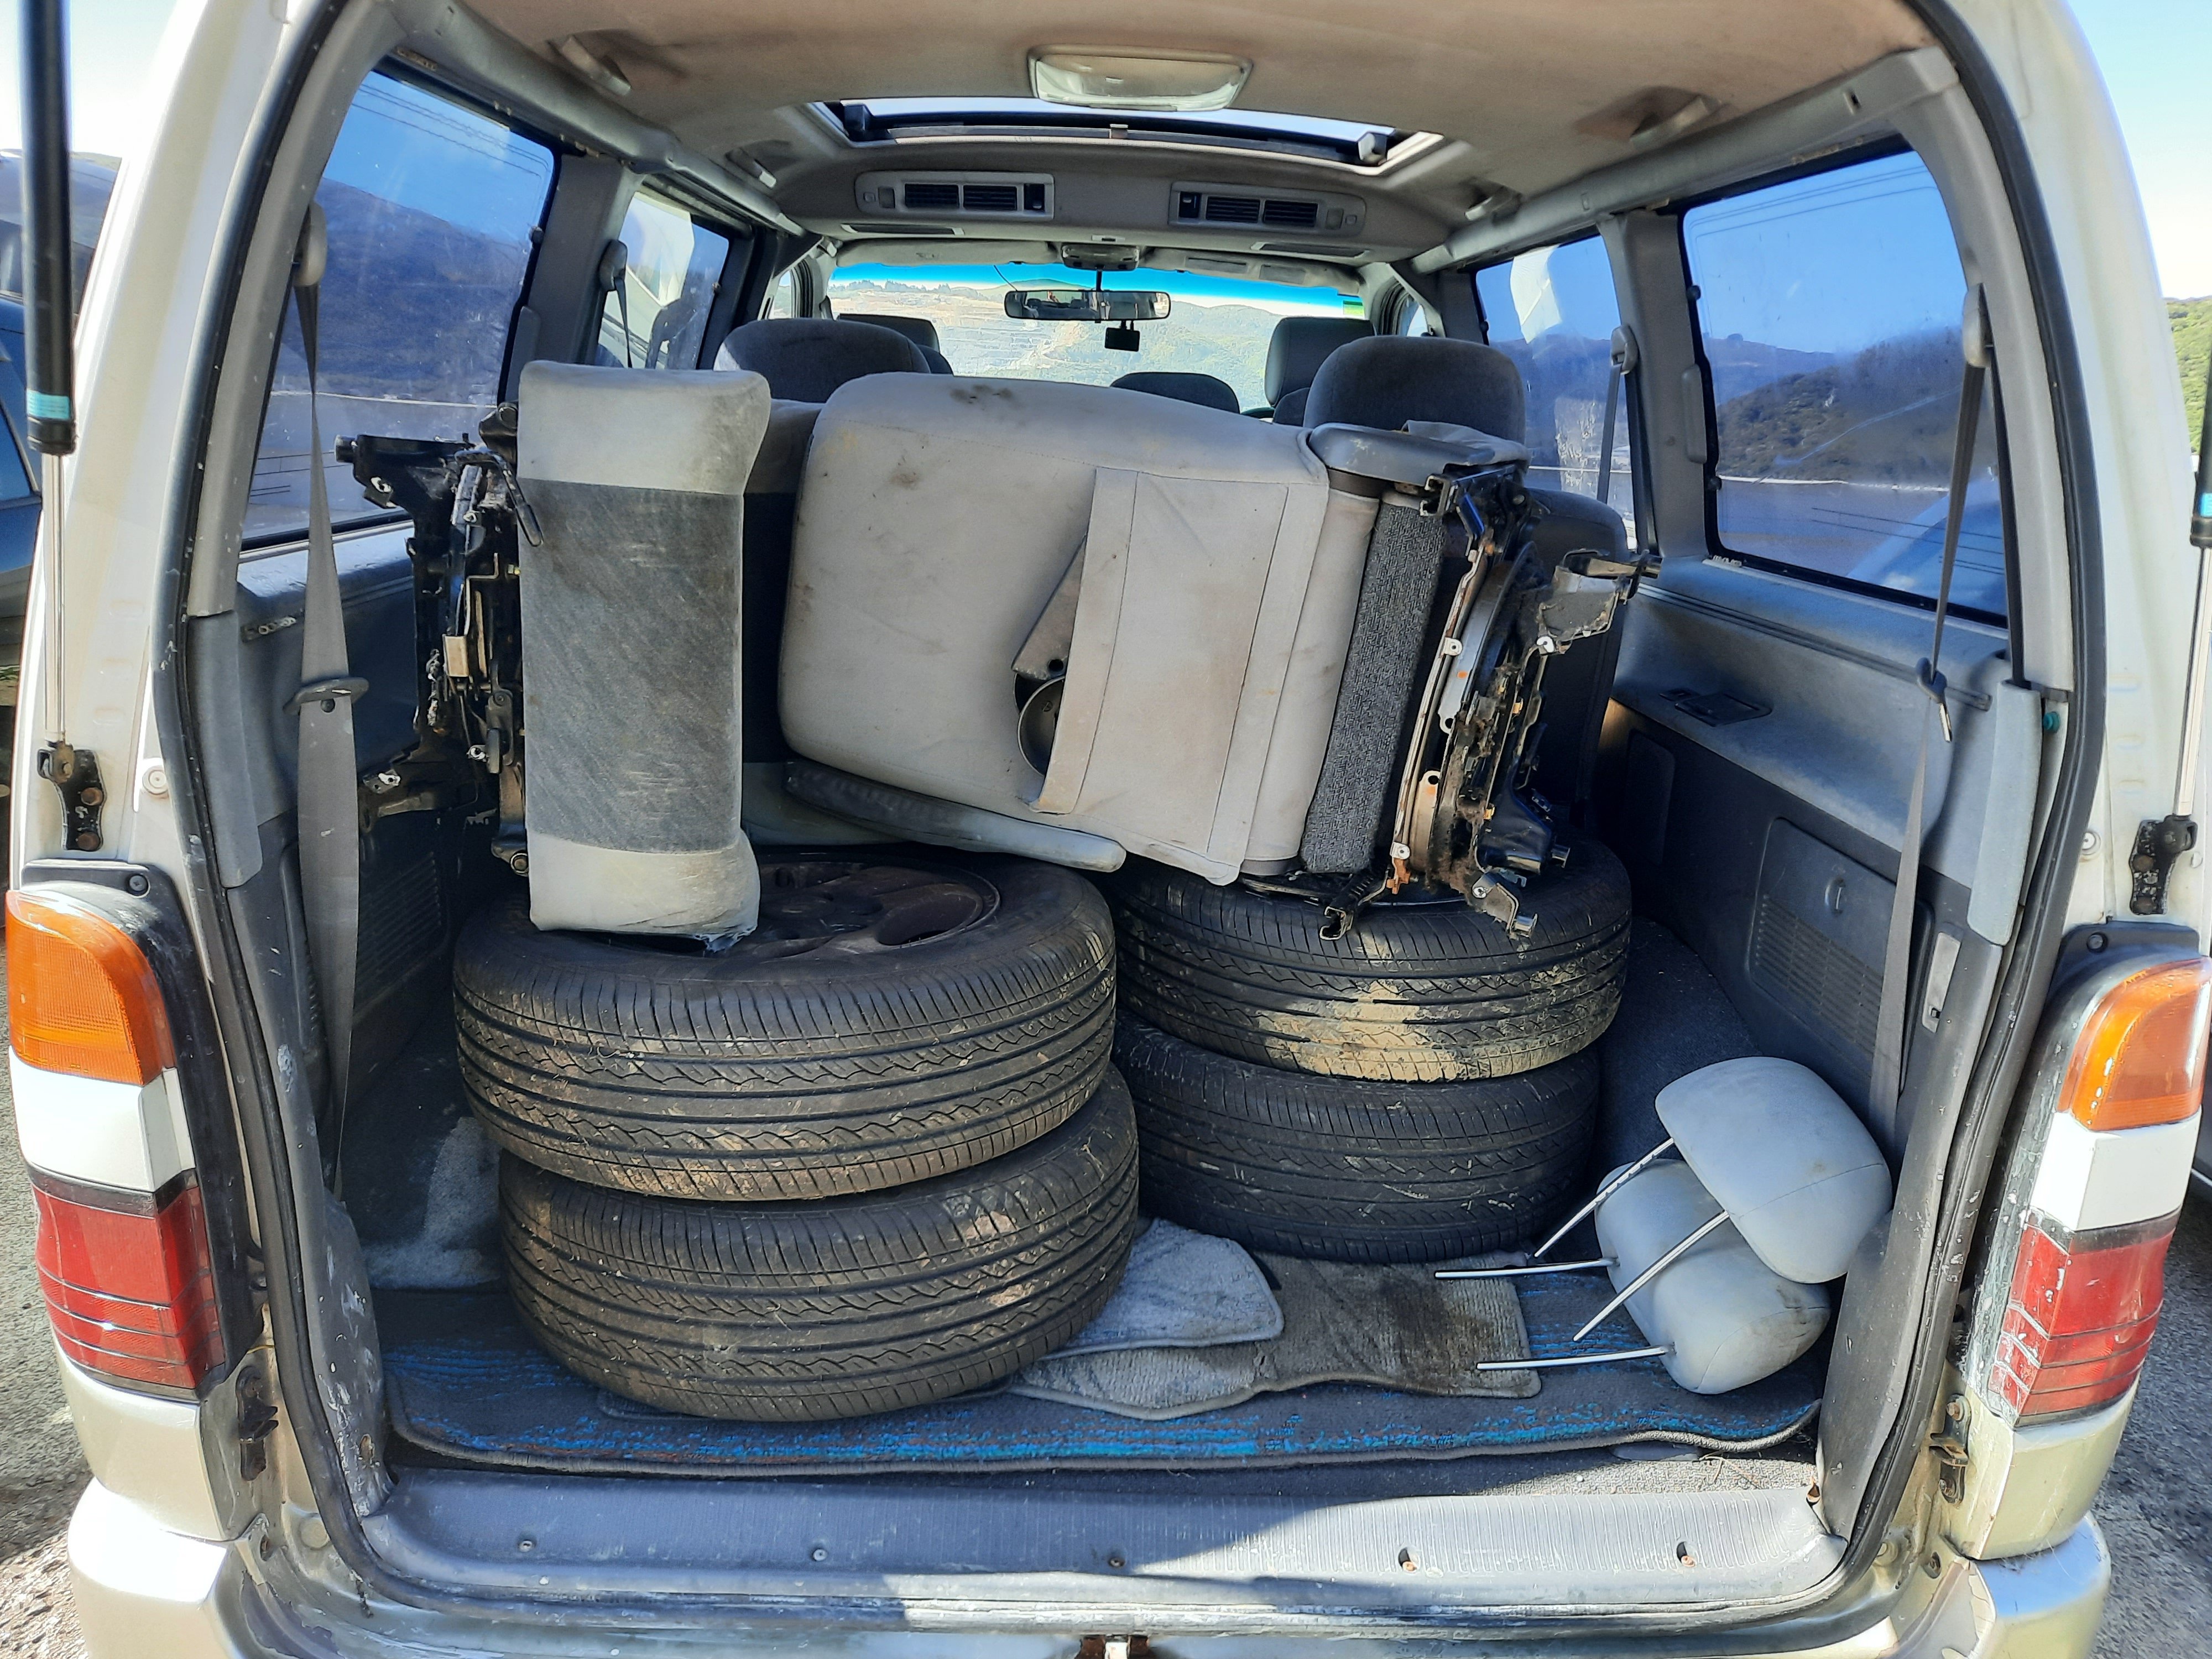
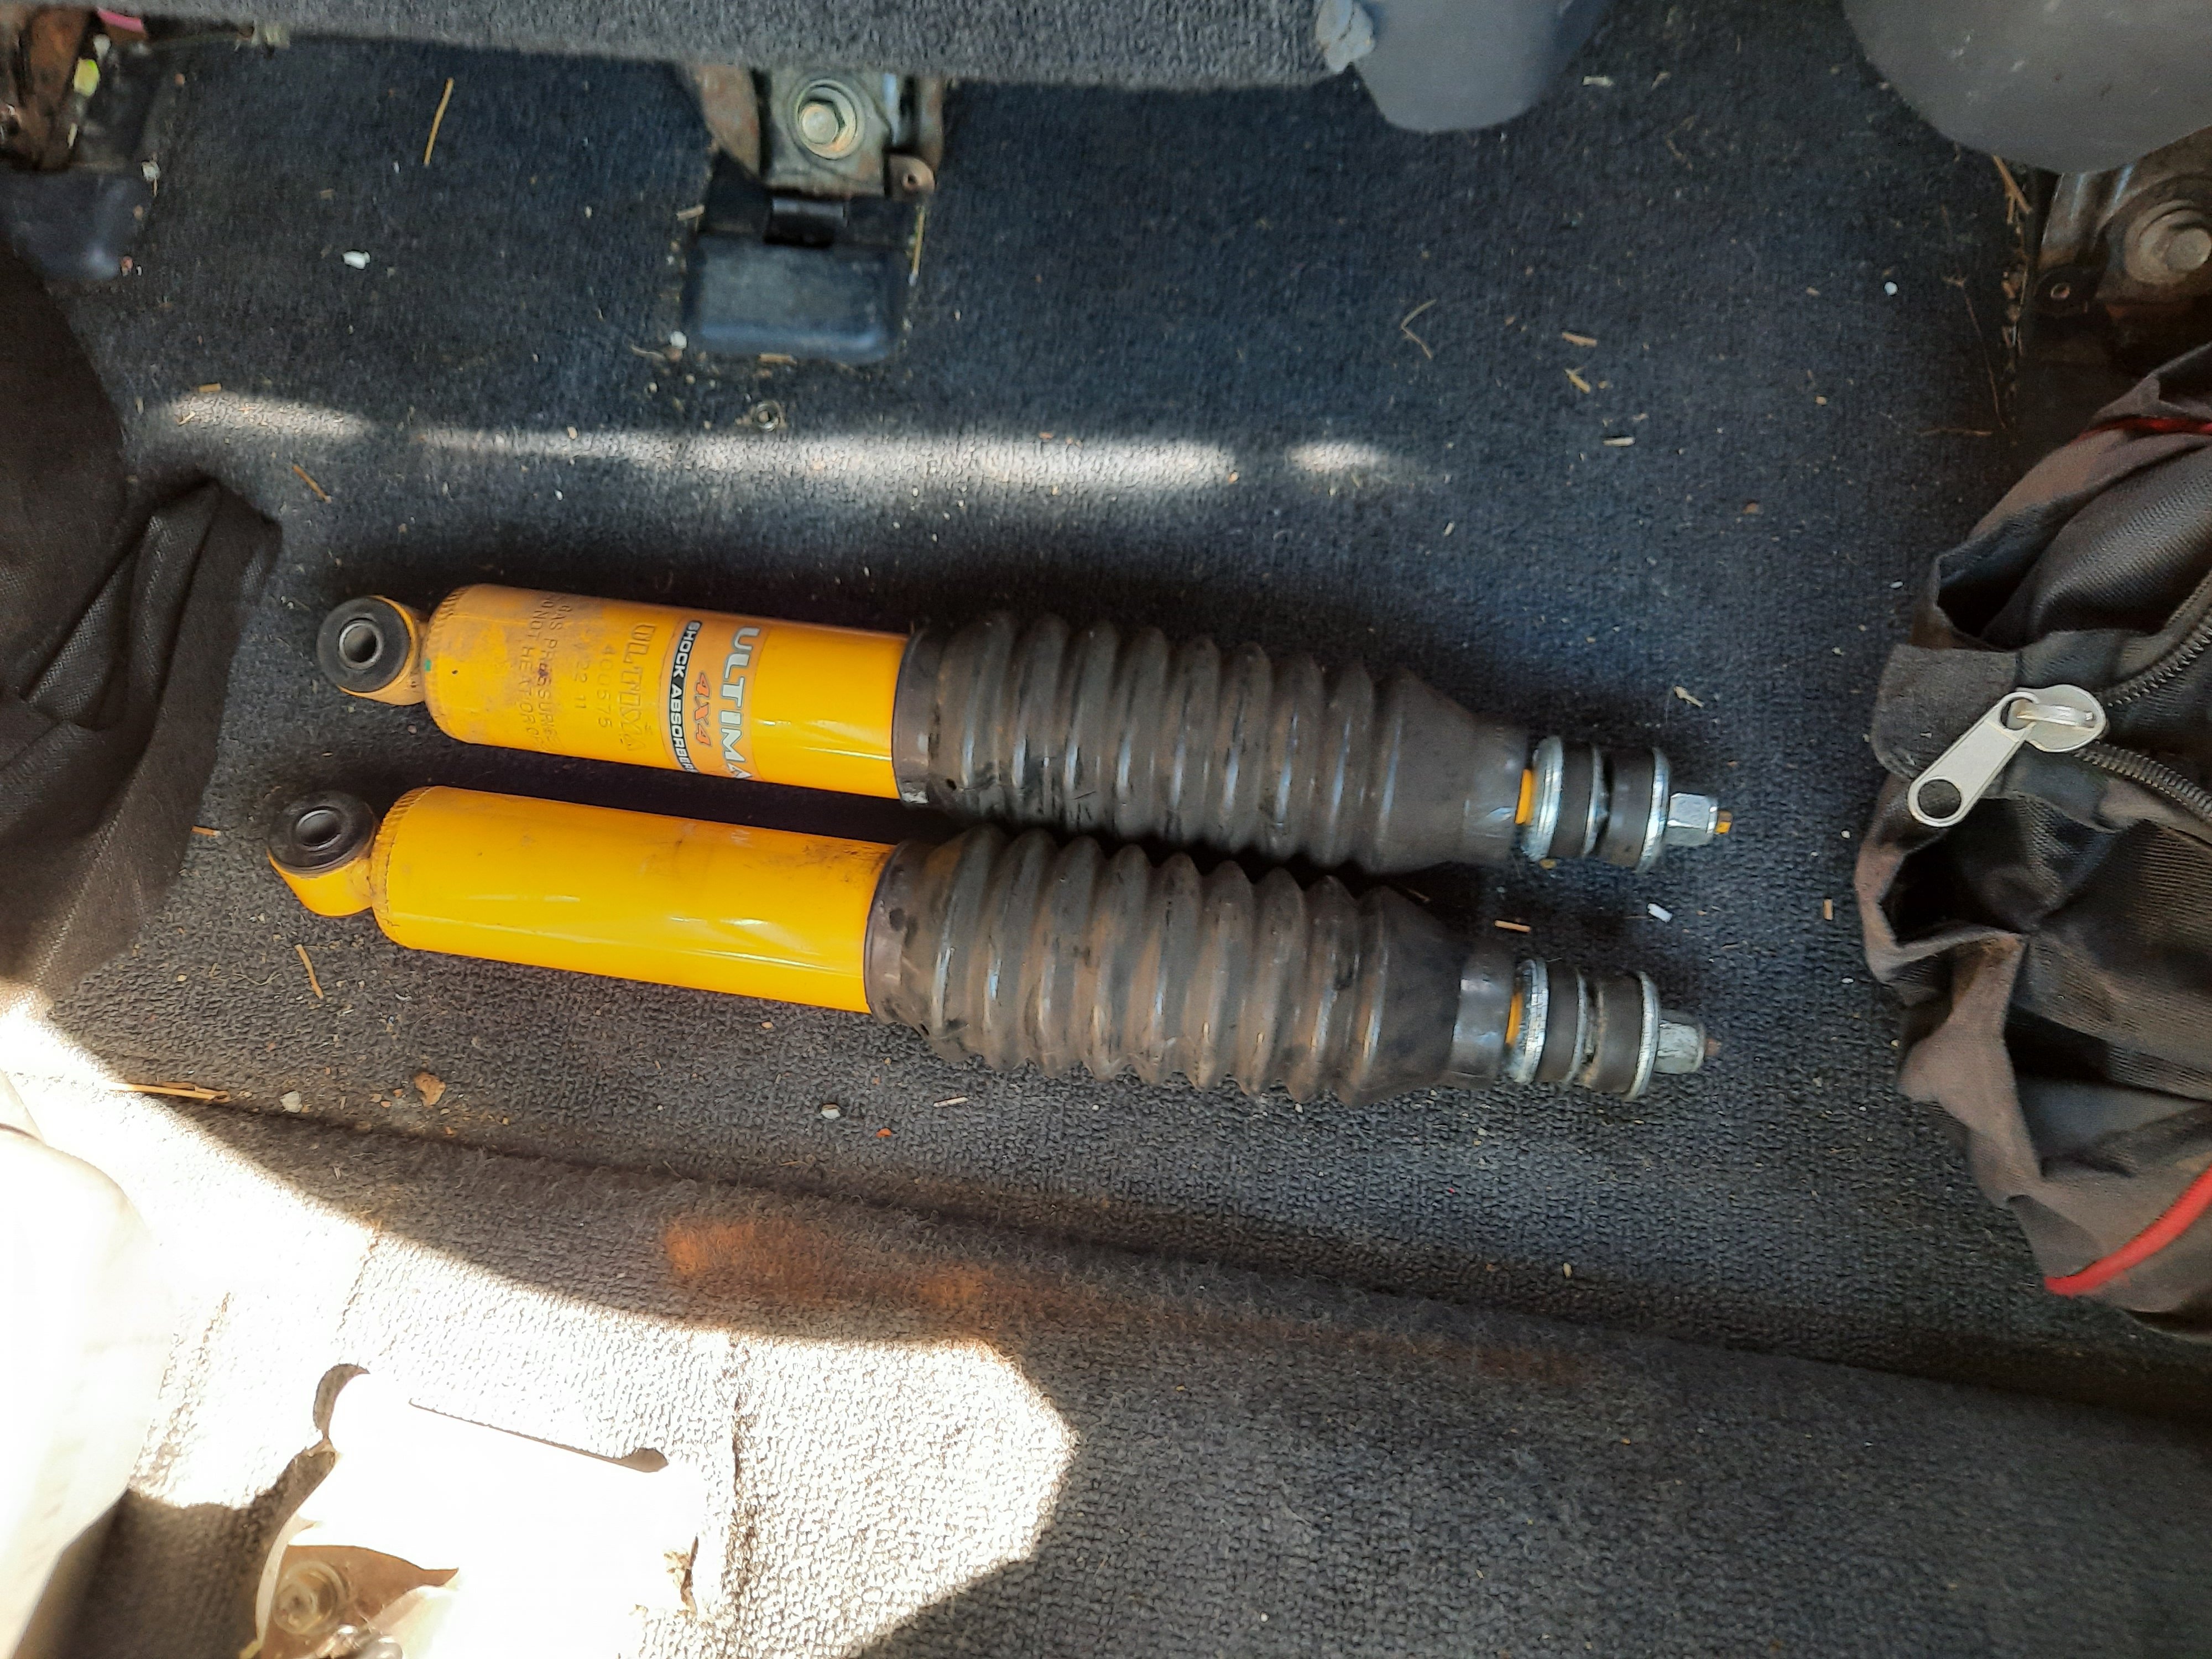
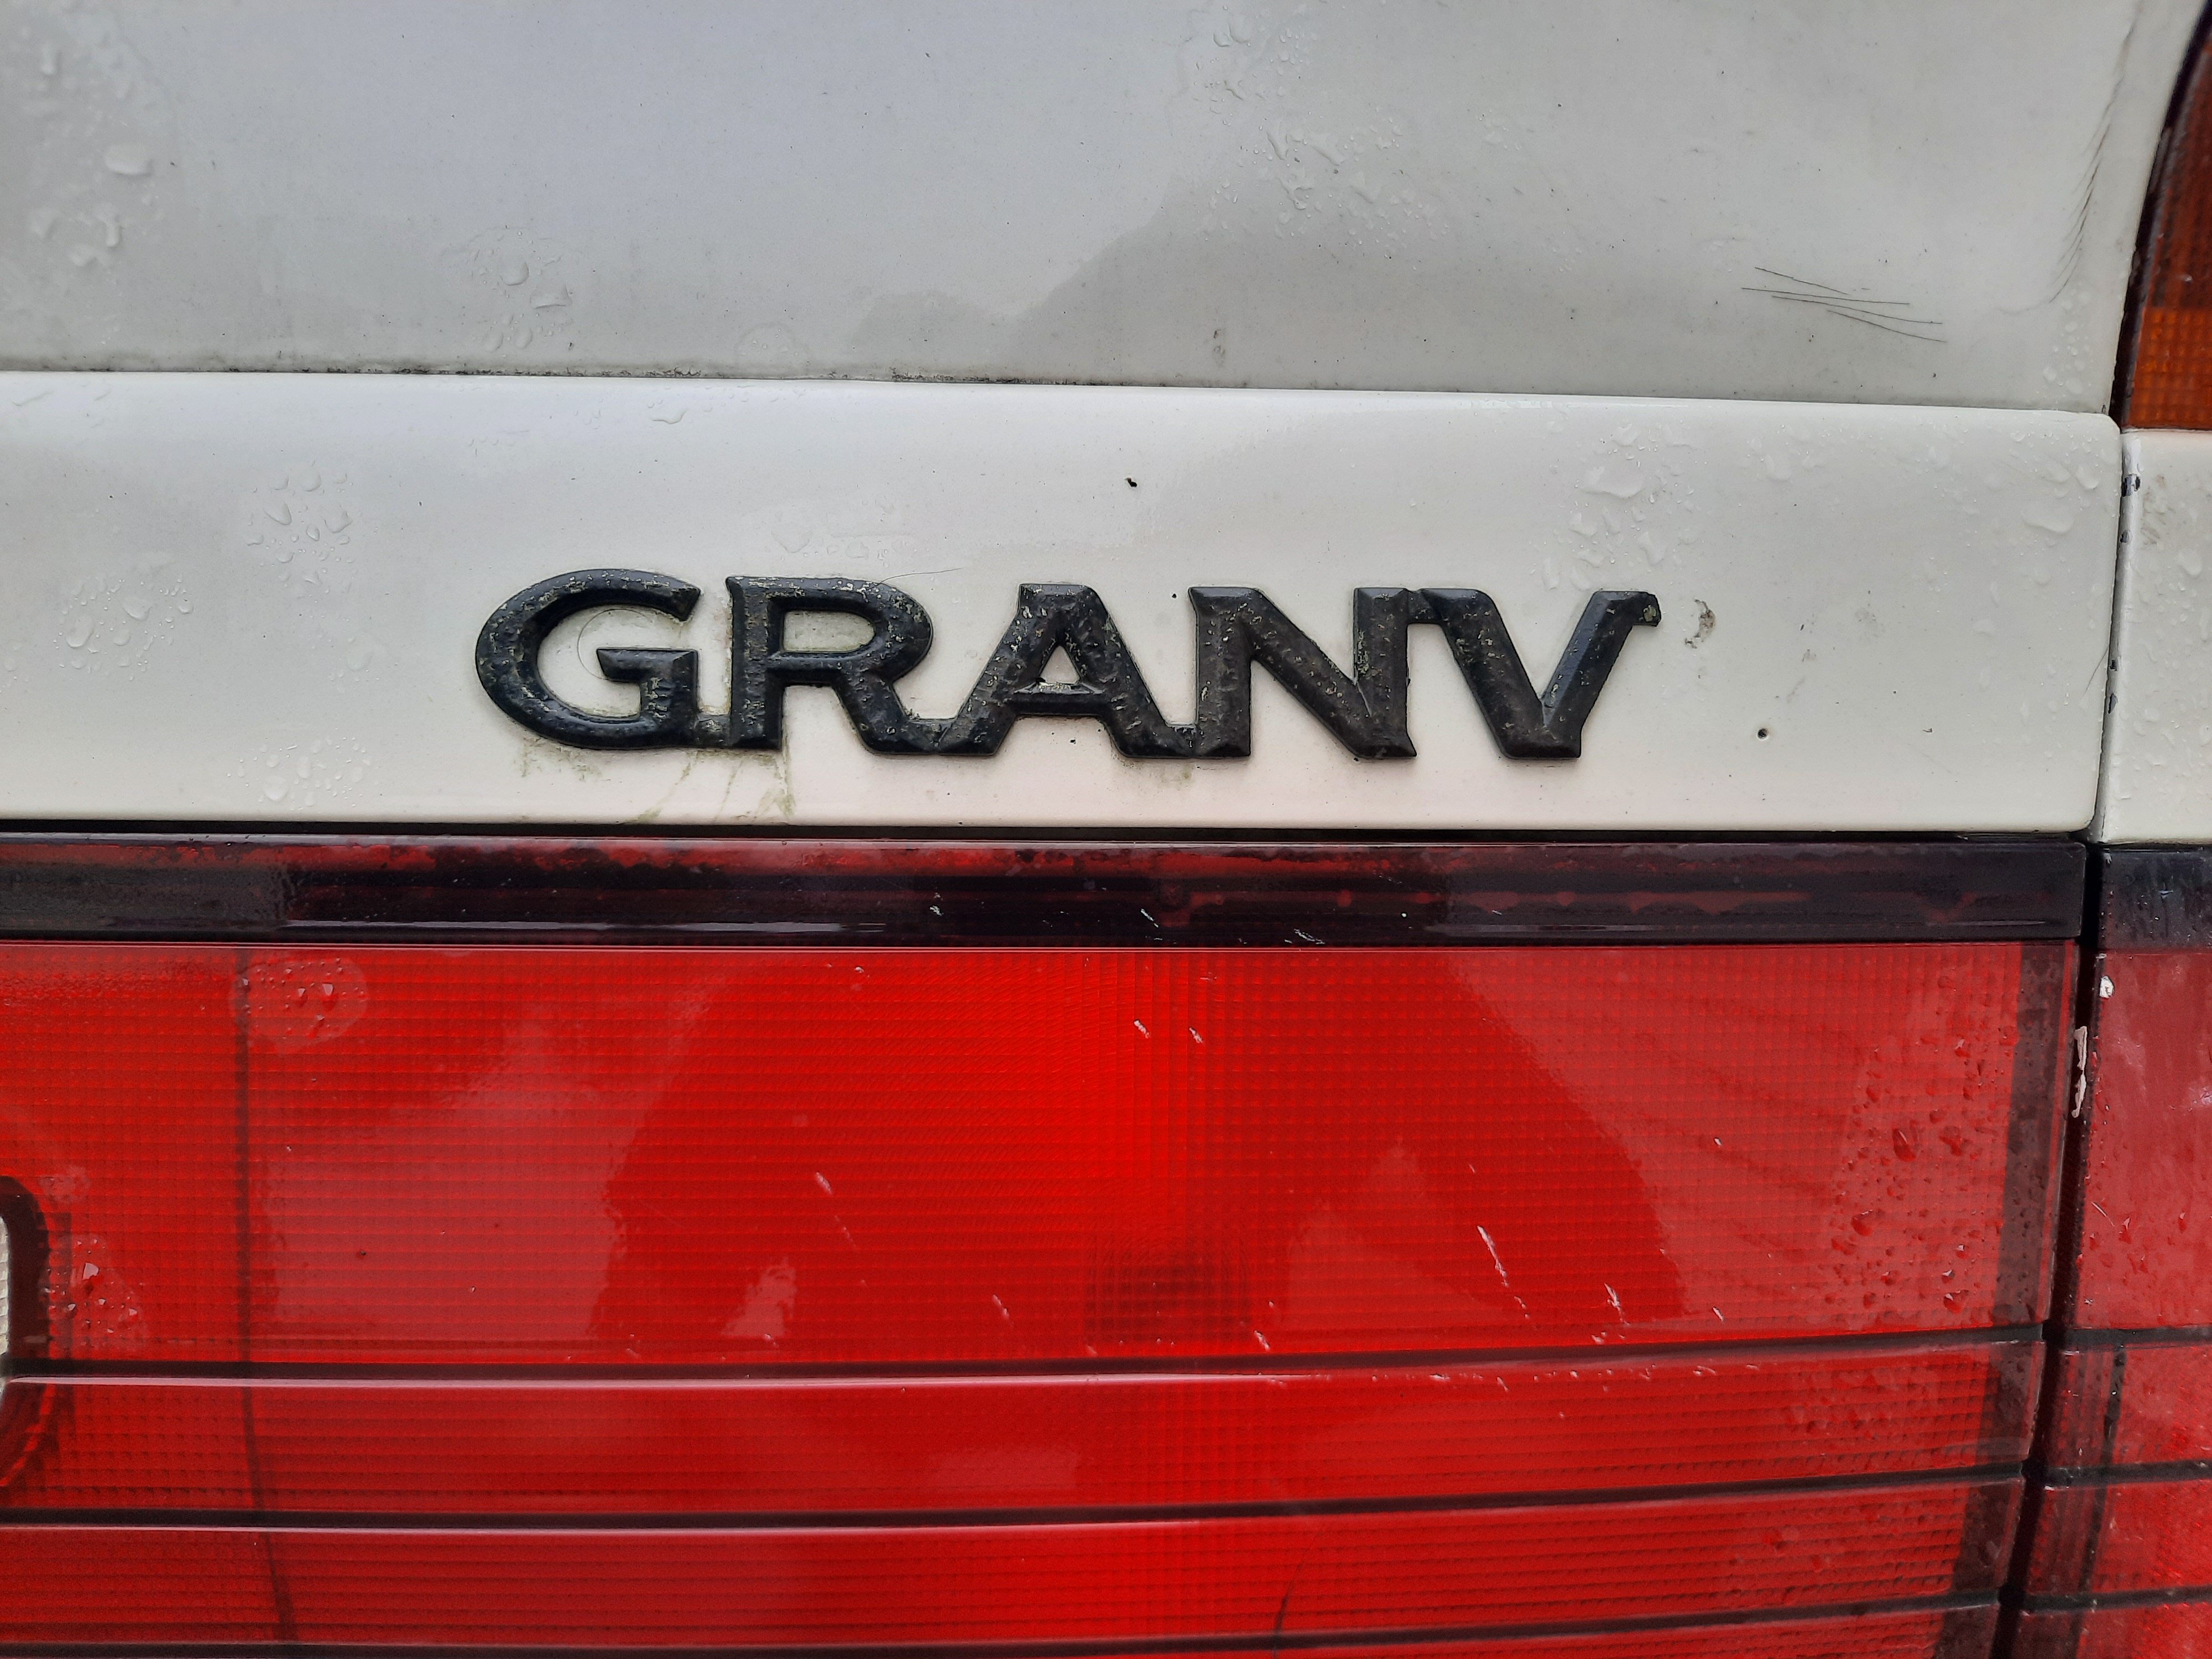
After years of thinking about it, I finally bit the bullet and bought a van! Not just any van either, it's a luxury 1997 Toyota Granvia 4wd with 1KZ turbo deeeez. I've been living in Queenstown for 6 months now and realised a couple of things: 1. I need my racecar in the South Island 2. 4WD vans are super handy for towing and mountain bike missions Being the smooth-brained creature I am, it seemed like a great idea to buy a van in the North Island so I could tow the AE86 down after Christmas. Enter: Francis Jellybean GranV a.k.a the Lizard Lounge. @DodgySam and @Ogre were GCs and went to check it out for me in Rotorua. The consensus was that it's dirty, but mechanically solid. The guy wanted to move it on, so we struck up a deal and I sent him a few macaroons in the electronic-post. @UTERUS collected it for me and my parents drove it back to Palmy North, where it's be sitting until I got here for the Christmas break. Someone marked their territory before it got back to Palmy... I originally wanted a Regius, mostly for the rotating front seats and rear seats that fold into tables, but beggars can't be choosers. Luckily there was a Regius at Pickapart Wellington, so my first job was to shoot down there to investigate if Regius seats could be swapped into a Granvia. The answer is "kind of". The seat bases mount to the floor the same, but the actual seat rails are slightly different. That's annoying since seat rails are $15ea at pickapart and complete sears are $55ea. I bought both complete front seats, even though the upholstery was ripped and stained and figured there would be a way to make them work. I may have got carried away buying things... the front shocks were a score! And the Regius I raided was a gold mine for Yen. This more than covered the $2 entry fee at Pickapart.
1 point
-
I attempted to prime one side of my outback which was dented and dinged badly, repaint, and blend. A good plan, but my then-workspace was 300km~ away and I had to sleep in the car. So I ended up vinyl wrapping the whole thing in Nardo grey. I probably won’t do it again. It’s really cunty, requires a whole lot of prep and then May curl up. I had to do a few sections two or three times over and got 3M tape sealer and primer to help. For the wof Got new brake rotors all round for cheap, new rear pads and a second hand rear caliper, An outer brake pad was missing and in its place the caliper body was functioning as a pad. The wheels, like the trims etc were really tatty so hit them with 2k Matt b in a can, trims wipers cowl grille and door handles etc also got done headlights sanded back and cleared Rear lights and garnish also got compounded Later on in 2023 I got a new storage unit, moved all my other cars and stuff etc with this car lolol also pictured are the new plates, old ones couldn’t be saved with some paint and straightening out done a few mechanical things, Spark plugs, big job with the bigger 2.5 flat 4 than the ej20, it requires disconnecting engine mounts and gently jacking up the engine to get clearance. Slimline tools help too Did rocker cover gaskets and spark plug seals too cos it’s a leaky boi probably is also leaking from rear main seal and a cam seal, oh well attacked a whole lot of wof-listed surface rust on the rear swaybar, fuel filler pipe, and the worst on the front subframe All Coated in brunox and then black, subframe got underseal. Mind my shitty spray can technique. an undertray covers all this Headlights aligned to the best of my ability, hopefully they pass wof, even with an adjustment. The adjustment mechanism in them sucked Also replaced this shitty wiper rack that had too much play in it - the drivers side wiper went right off the windscreen on to the pillar To do.. fix this exhaust leak Finish off wiring in my new keyless entry/push start ignition. this car was stolen and found on the other side of town. I actually found it cheaper and easier to fit push start than to get a new ignition keys and barrels. as a result of the thief breaking my steering shroud my tail lights stopped working. I hunted high and low for the fault. Turns out it was because the steering column switch wasn’t working. Because it’s a common fail point, there are a few YouTube videos on how to bypass it which is easily done and fixed my problem. the thieves have costed me hours in extra work1 point
-
How important is your steering to you? That should answer your question.1 point
-
1 point
-
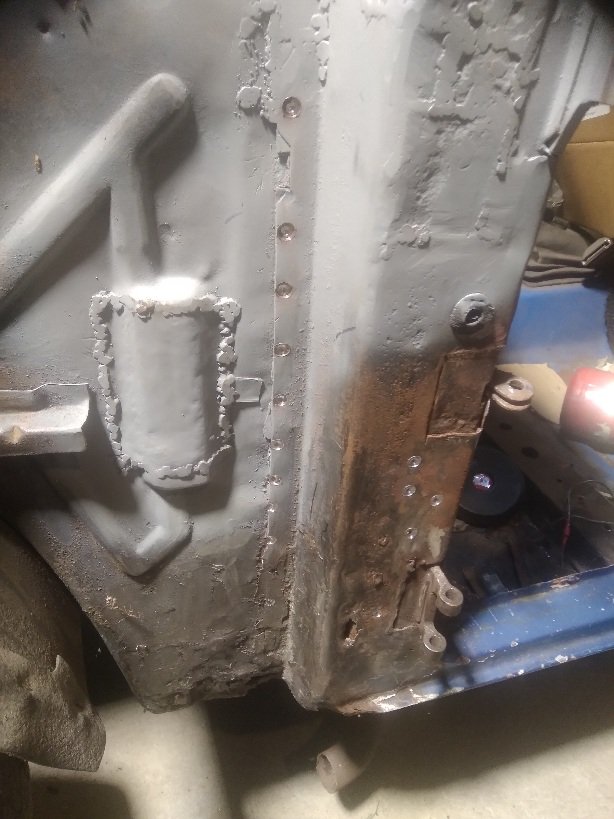
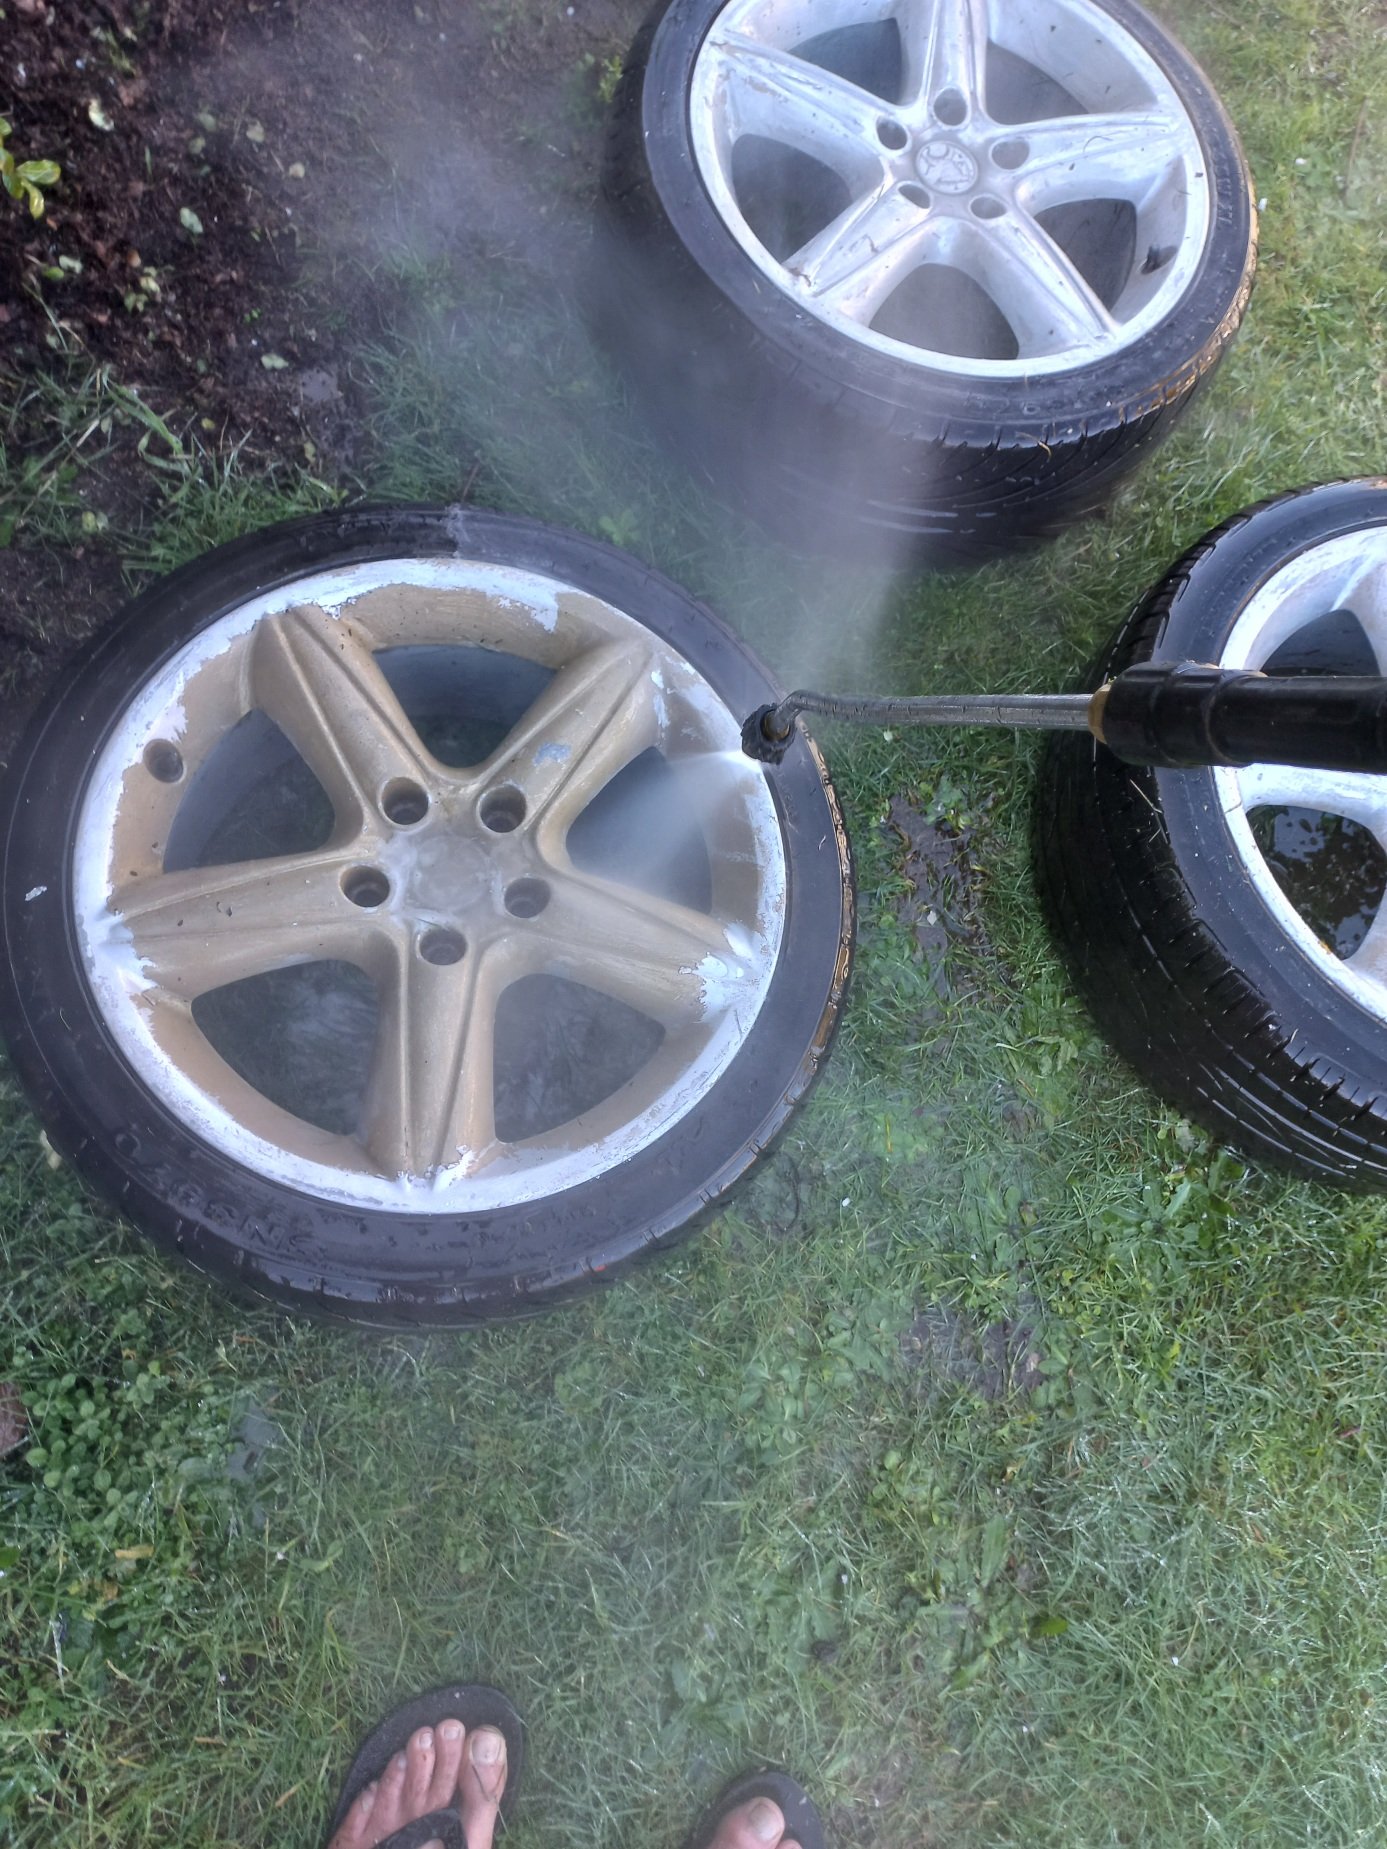
Did this bit. This bit is supposedly where it got a nudge and there was half a tin of bog on there. It was weird because under the bog there was like a 5mm push in that basically wasnt even worth worrying about, but also a 'welded' patch that essentially came off with a screwdriver, and a strip of holes under the back sill that had been completely ignored. Commence sorting; Smashed some more black on those two rims while I was waiting for coats to dry, plus pottered with some other stuff. The tyres are the same ones that were on it when I sold it so I think it will be getting some new feet. Any suggestions in a 175/70-13 ?1 point
-
Bert at repco richmond is a menace for finding parts.1 point
-
Cheers for the tip. That will save a whole lot of hassle with the lid and make it easy to get what I need out.1 point
-
Got to the point of getting a bit of colour onto the front end after a chunk of fettling. I am clearly going to run out of colour before I'm done but we will see how well I can blend it in to the bits that are still there.1 point
-
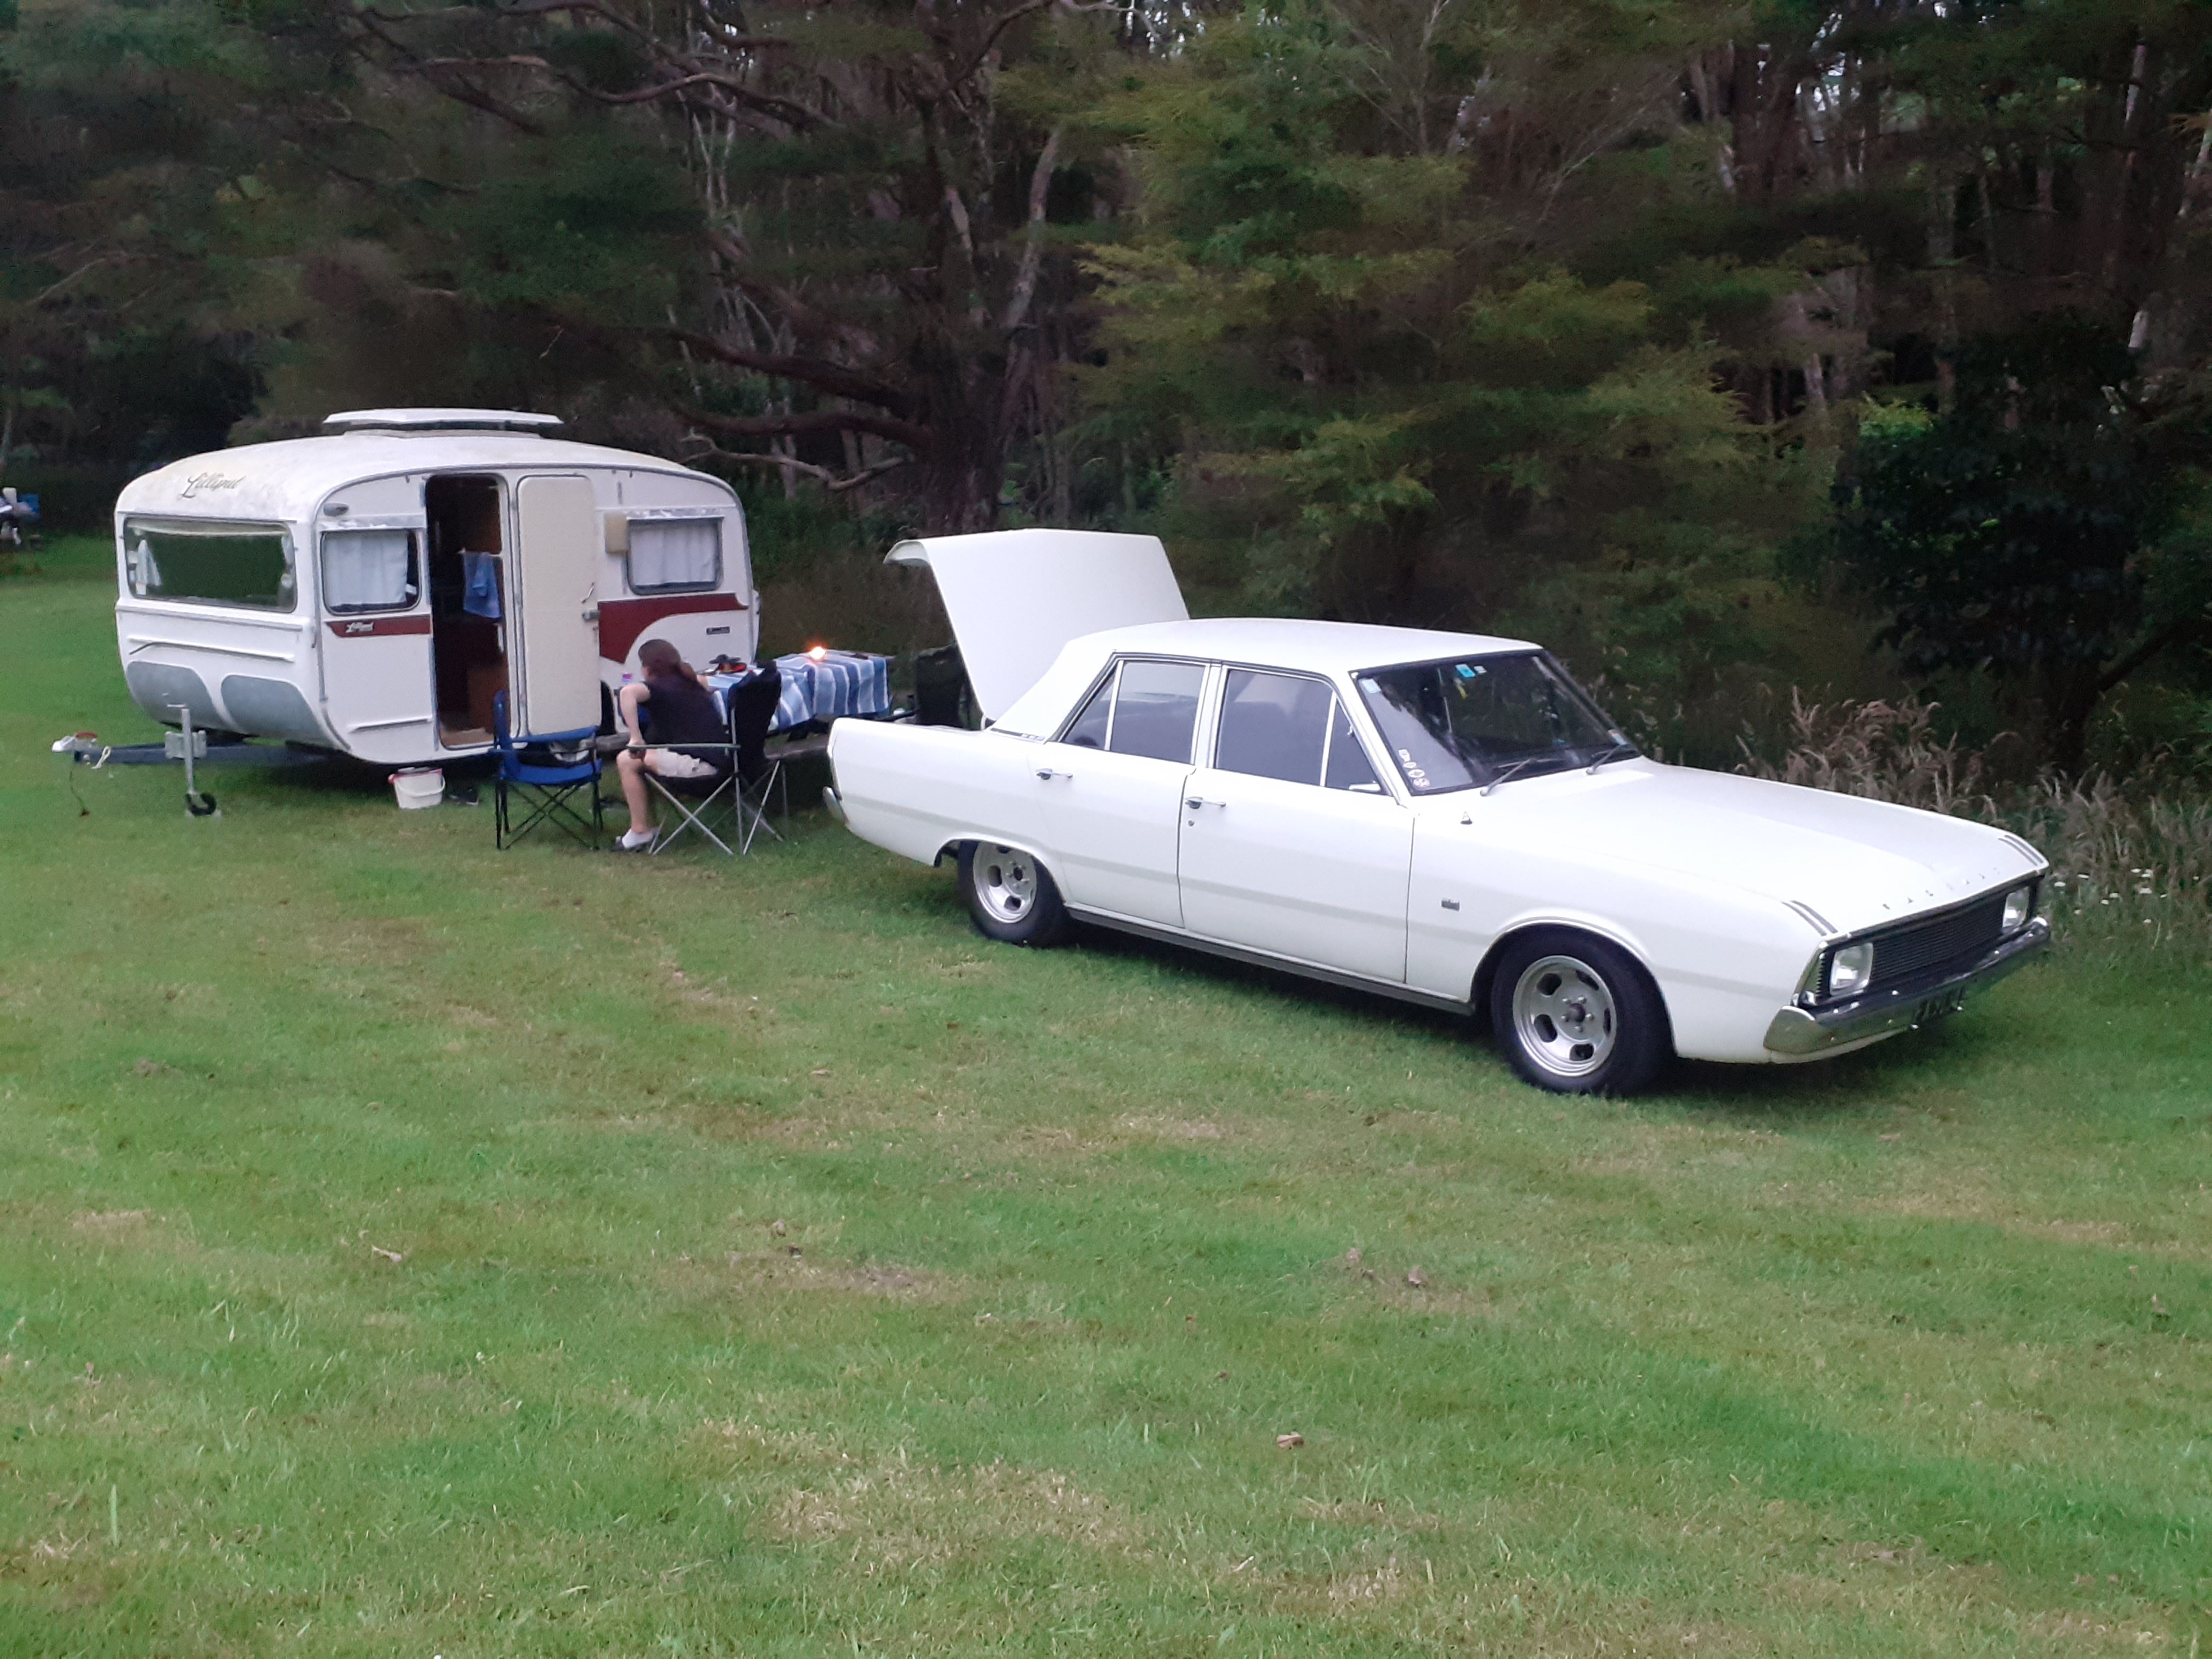
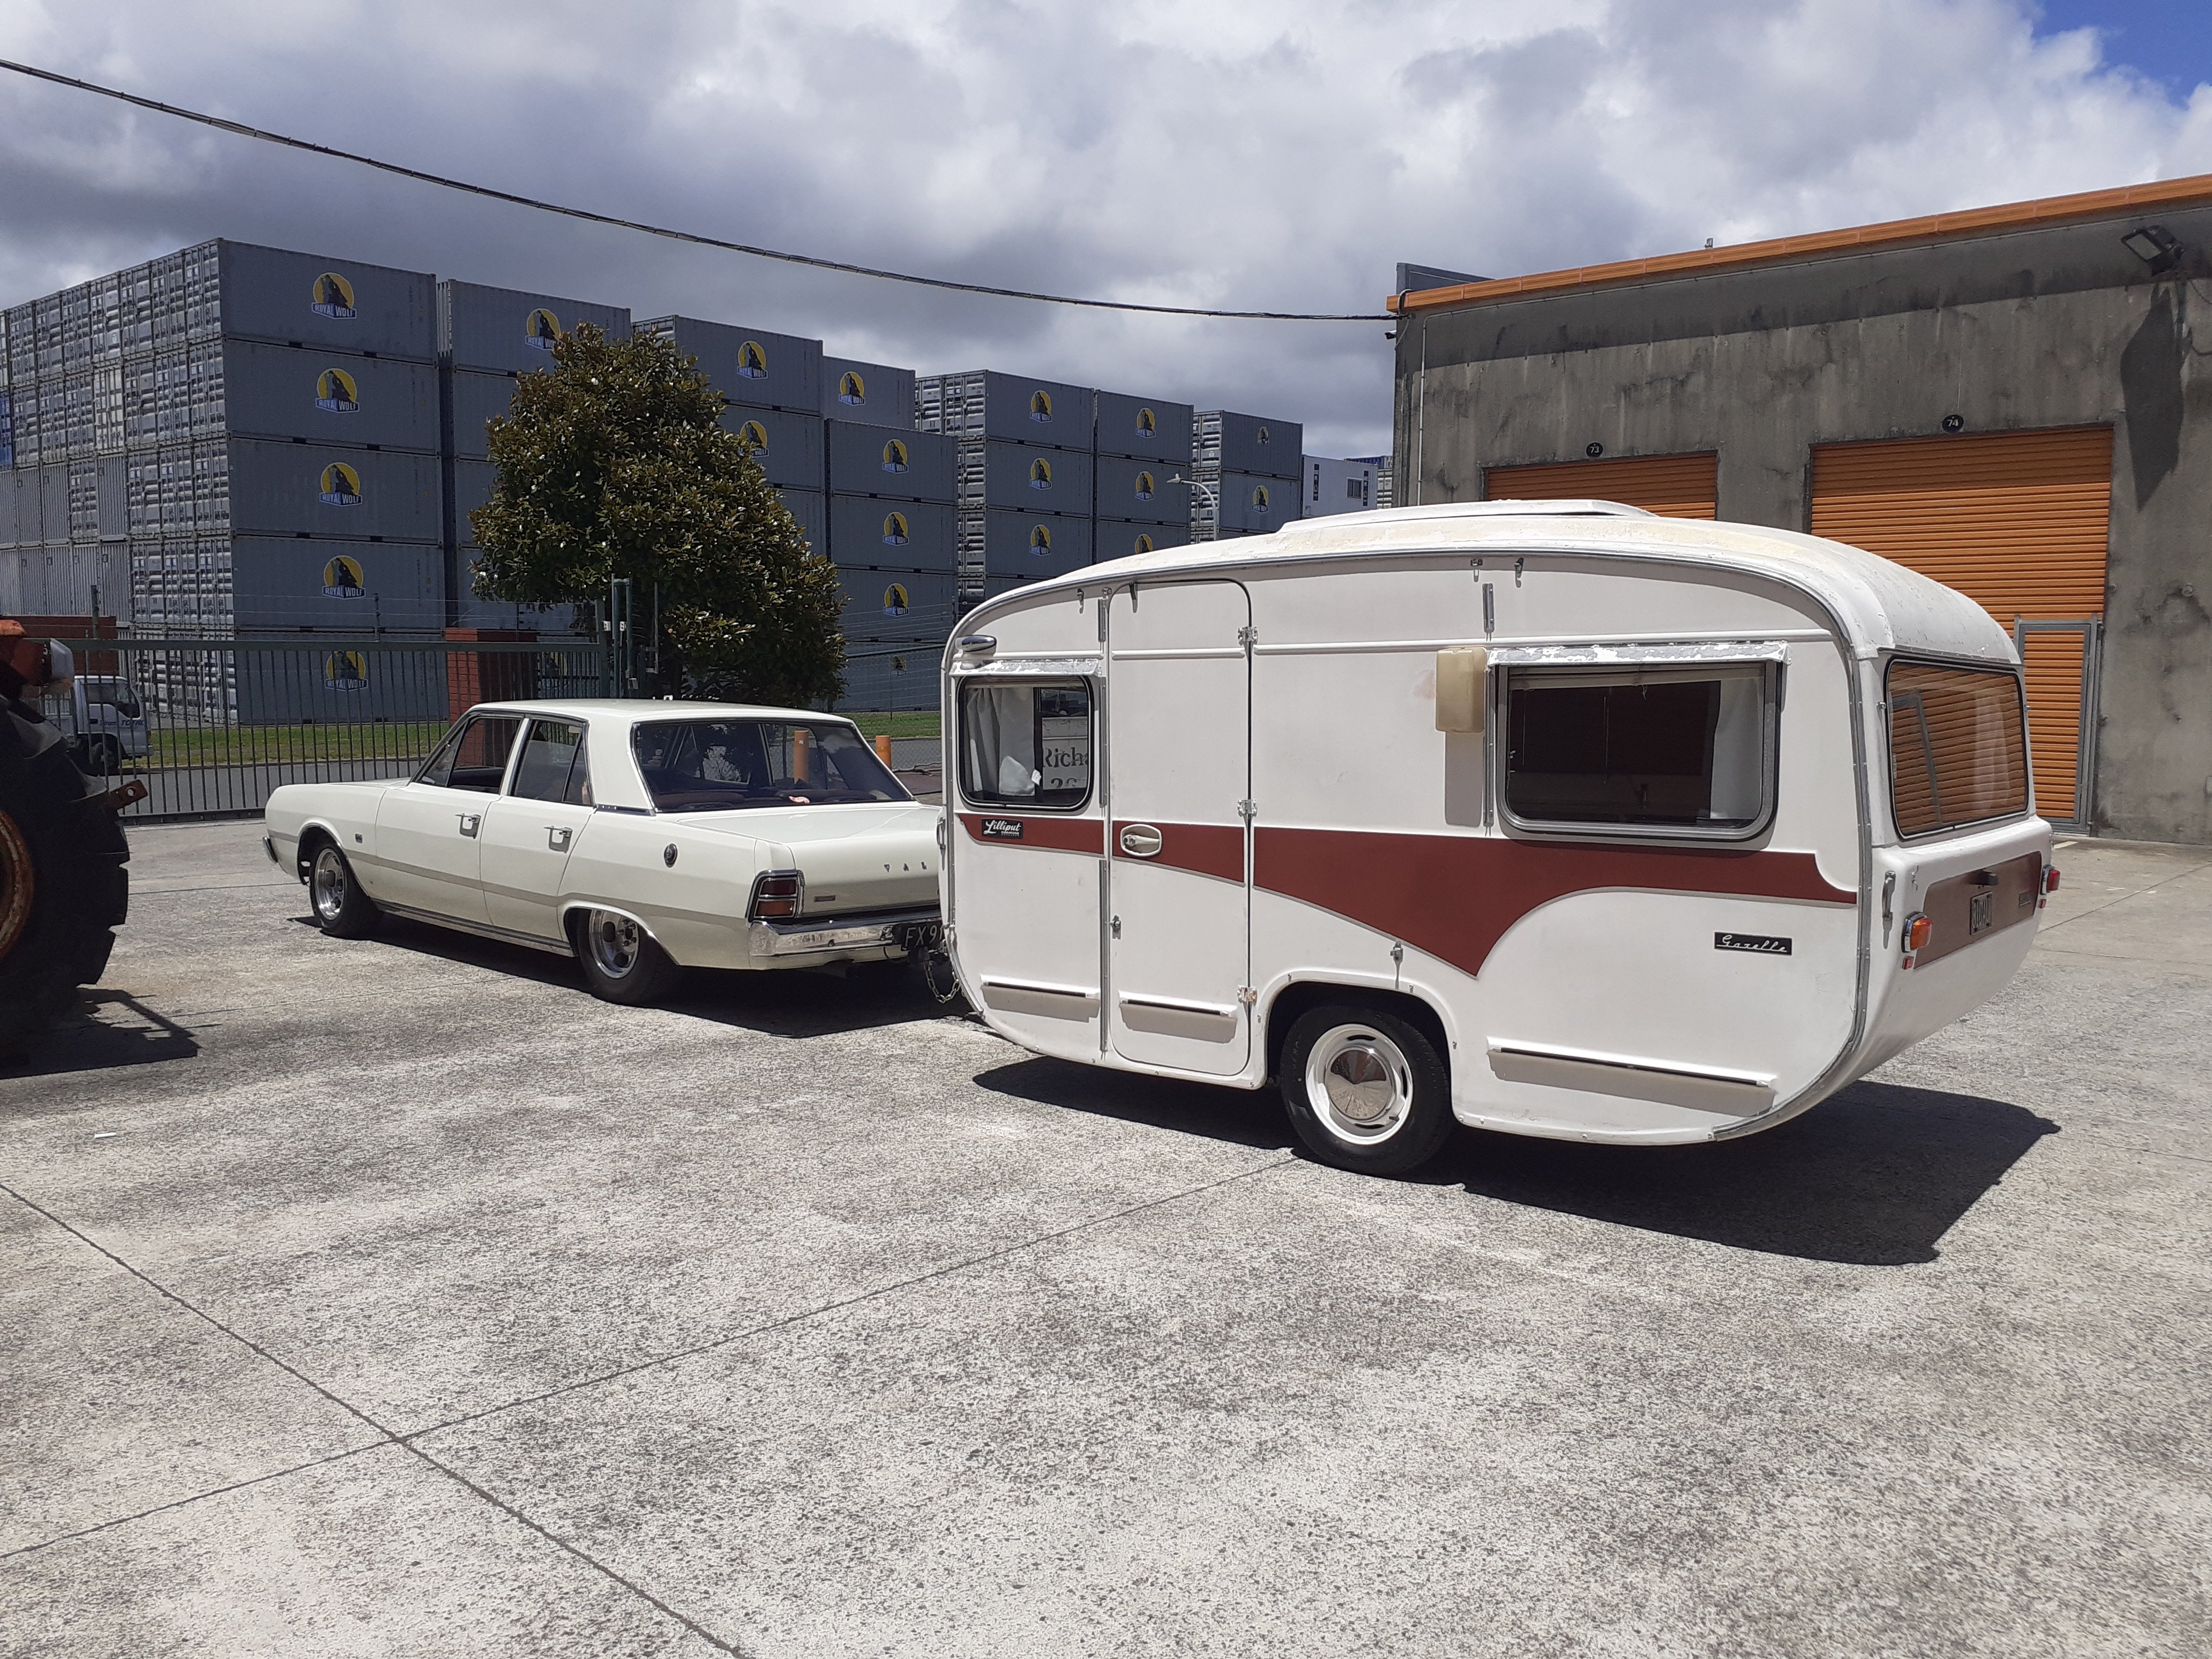
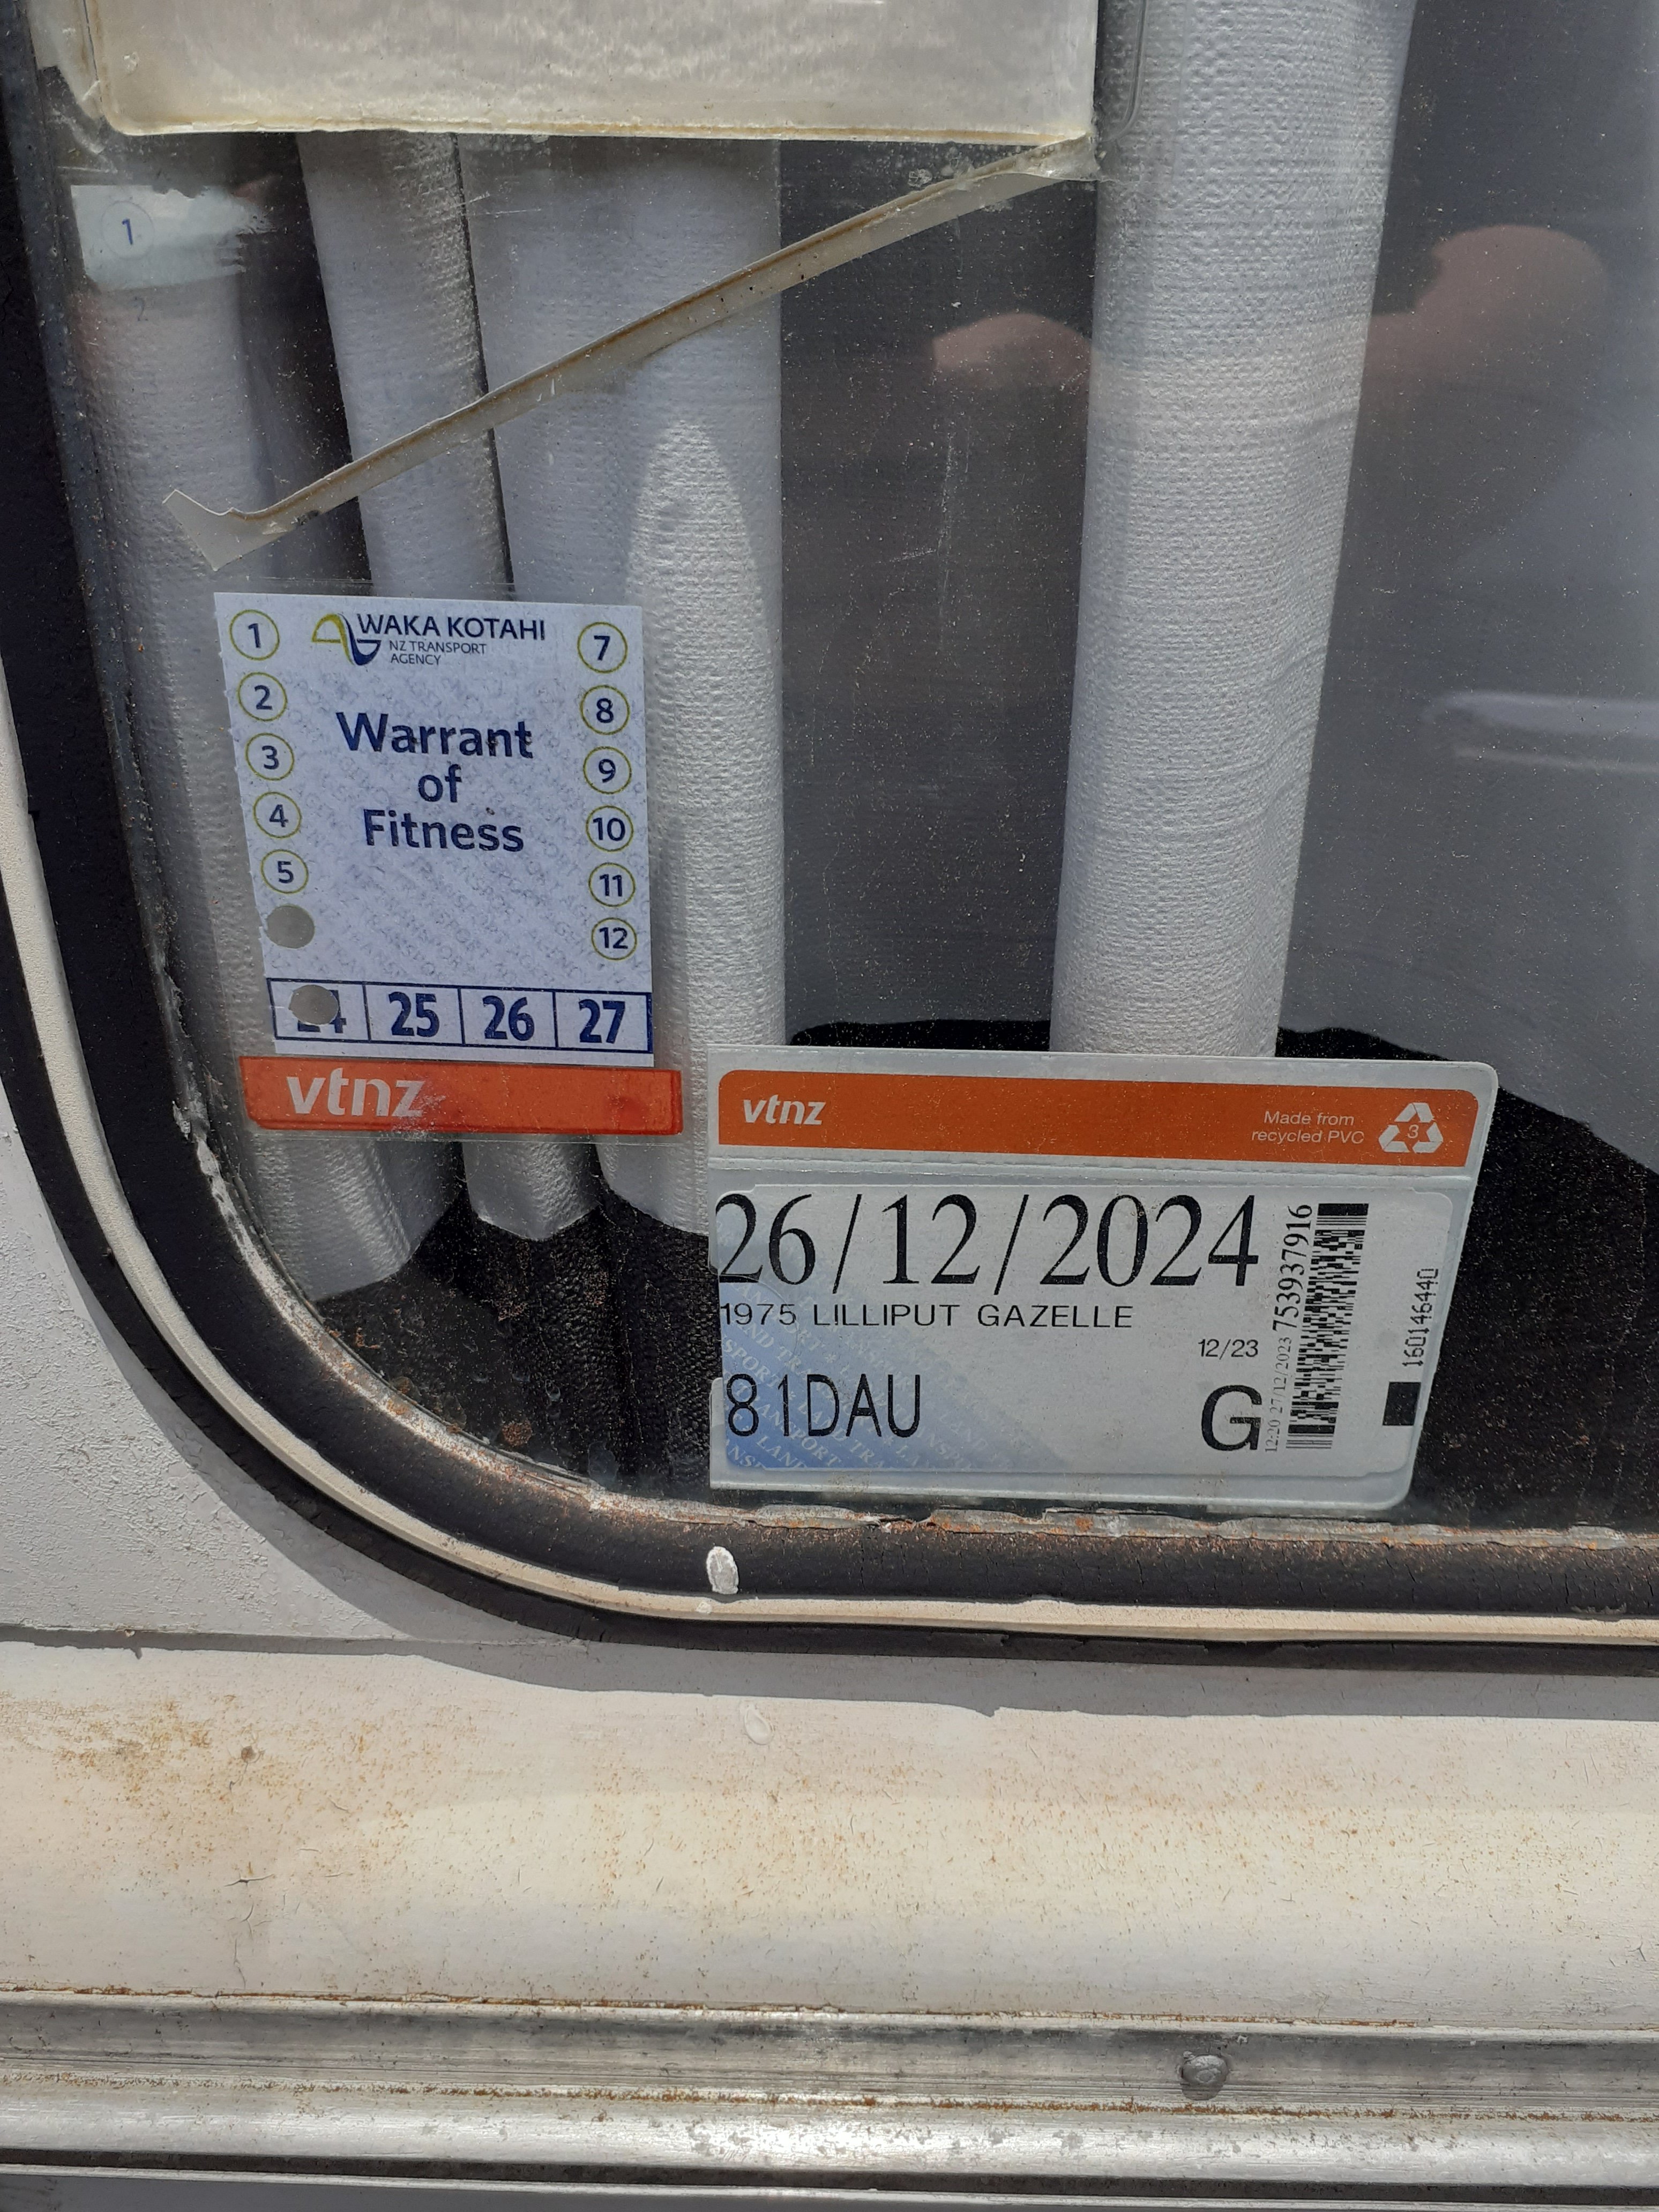
Legalities sorted Got it re reg with the original black plate, emailed nzta with some pics and a bit of a blurb that it was my grandads and was in the Lilliput book etc etc, they replied the next day with "yeah sweet as" Went to VTNZ and they had to ring NZTA to sort it but it was very easy and straight forward
1 point
-
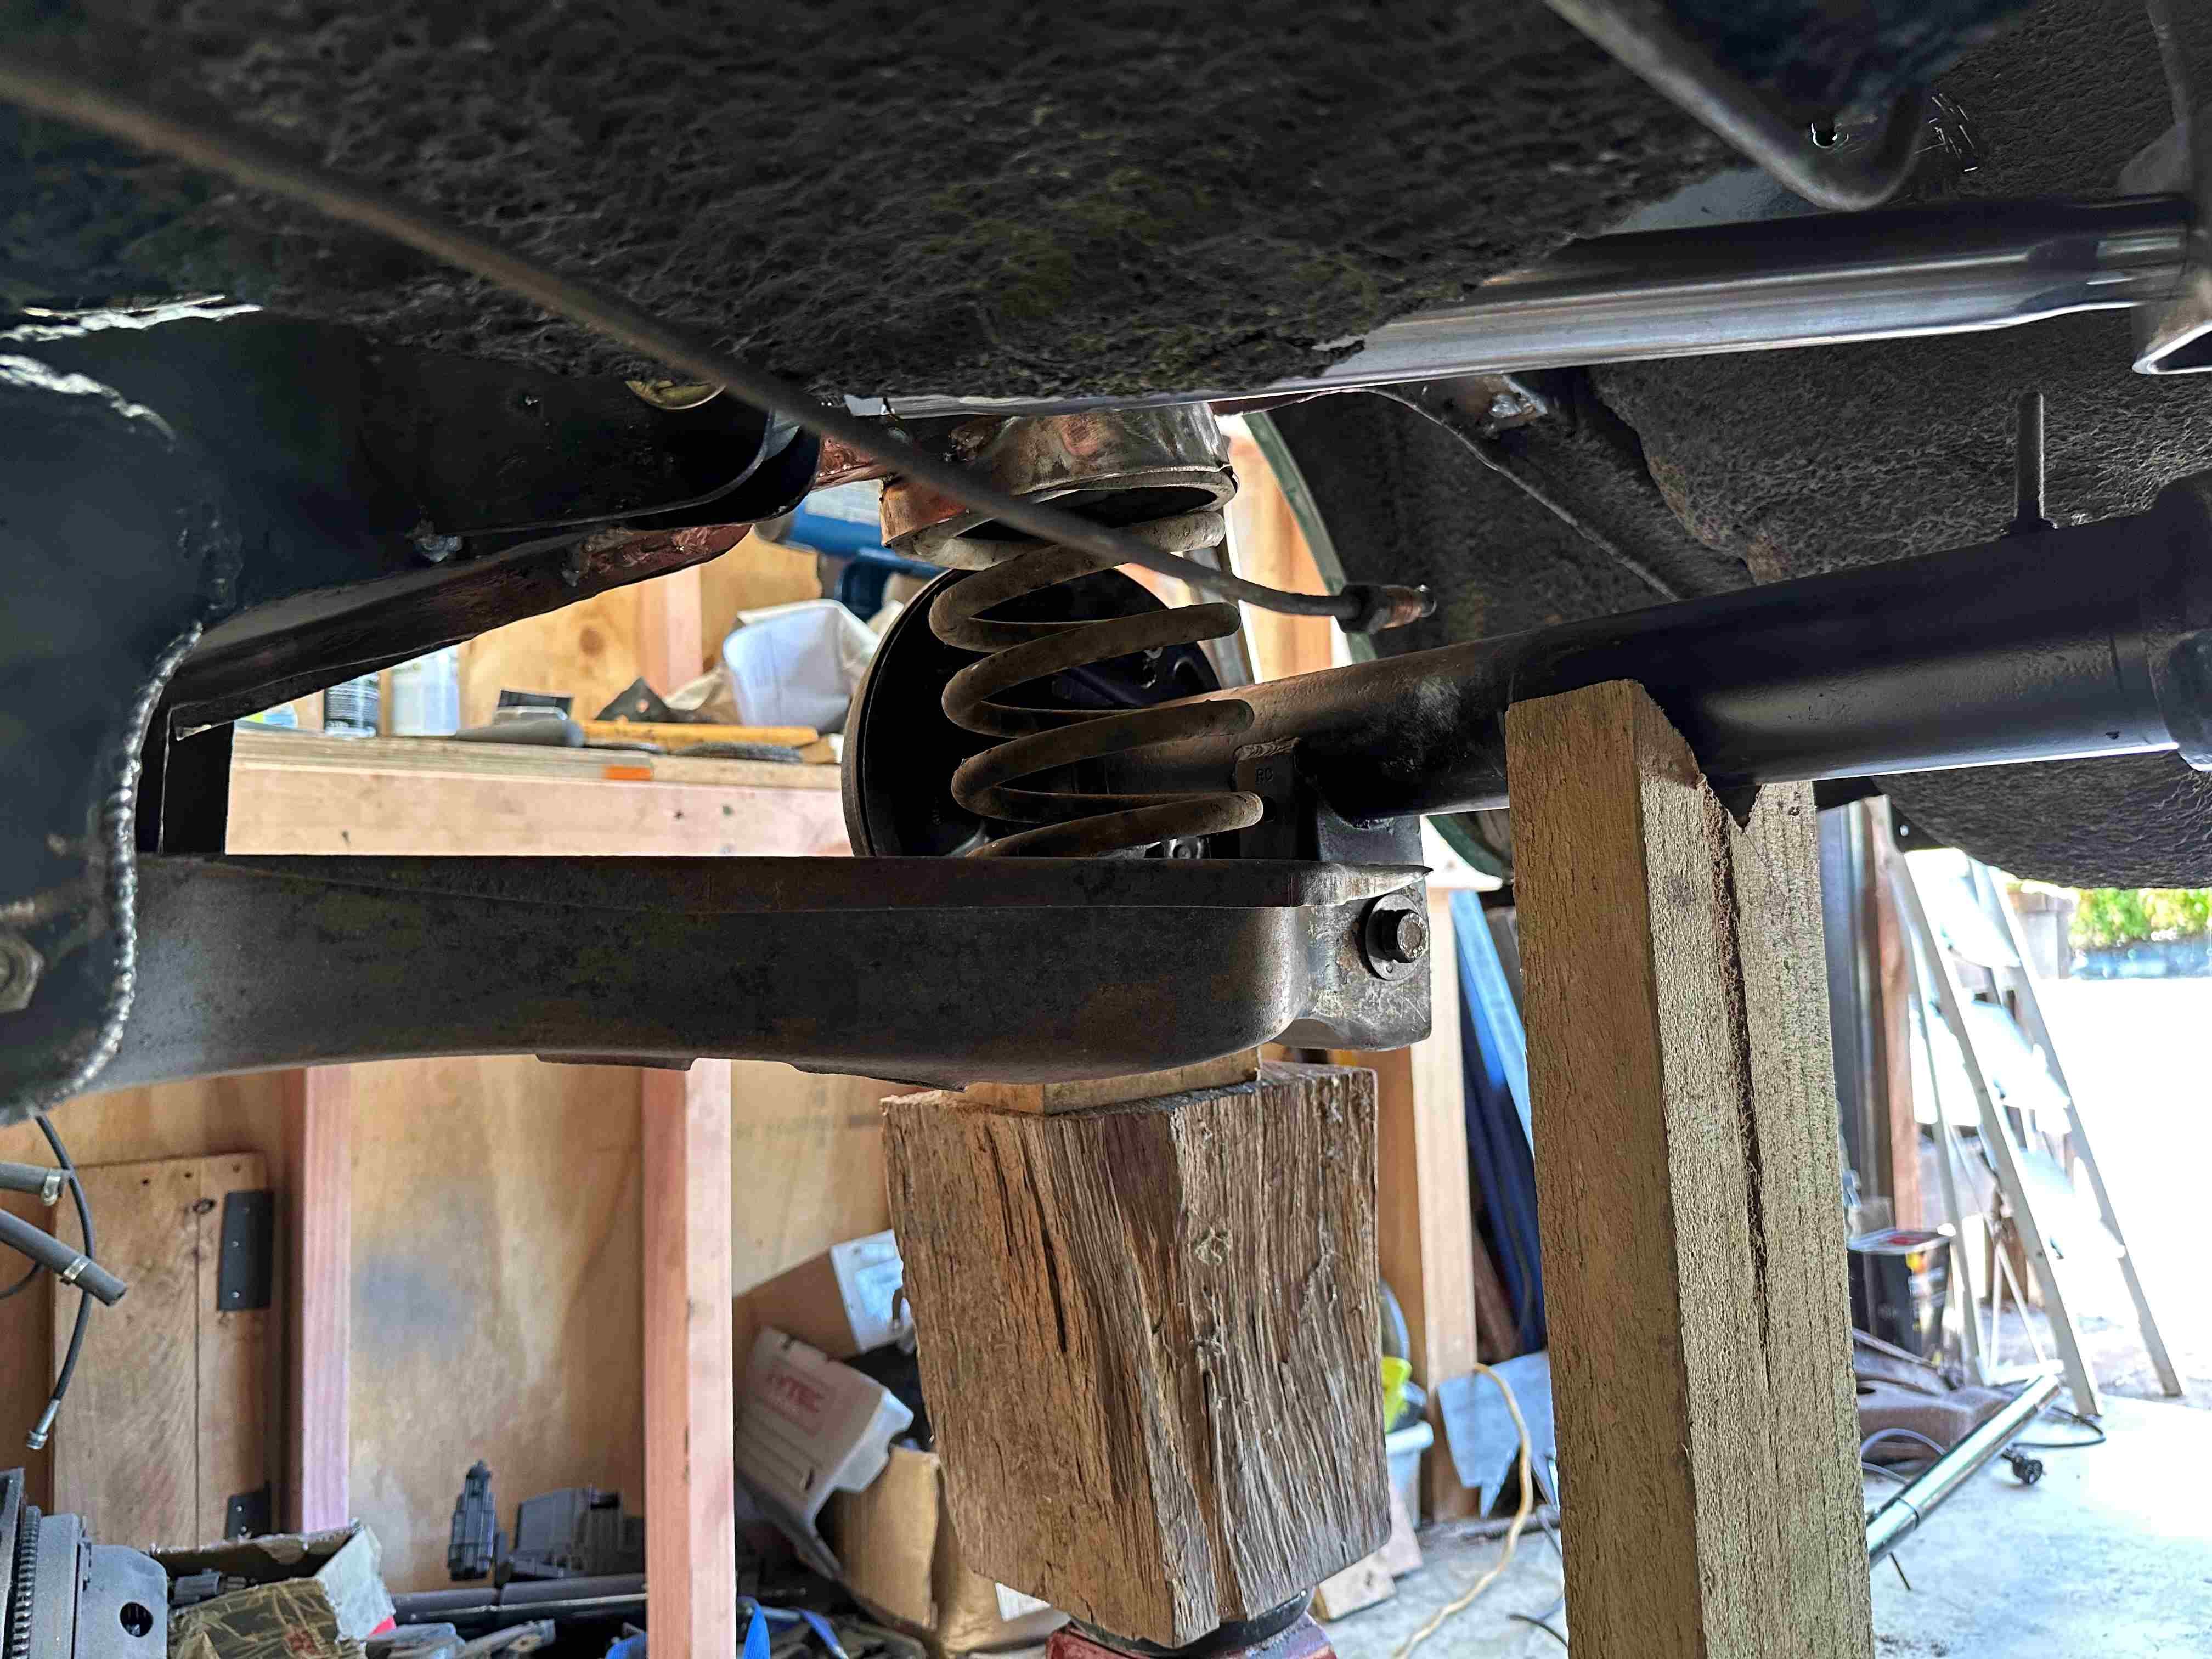
Today I mounted the hand brake cable back onto the Avenger diff and brought it around to the Minx hand brake lever. I needed to make up a bracket to connect it but all else fitted up well. So that worked out well and now I have a working handbrake. I also put the rear springs in and bolted the front X member back in with the springs but without any shocks yet. I wanted to see how it sat with the stock Avenger rear springs and 50mm cut from the Minx front springs. I threw in the seats a full fuel container a battery the intake, alternator etc to try and get it as close as I could to the weight it will be. Still needs fluids, bumpers and a few other smaller items. So this is how it sits at the moment which is quite promising. I might drag it outside tomorrow and give it a bath and have a decent look. If I want it lower it would not be by much. Once I have decided I will get new front springs made and rear if I want it lower. Back on it's wheels for the first time must call for a small celebratory refreshment I would think. Sort of like a roof shout.
1 point
-
I cleaned up the other Avenger spring top spring perch and welded on the plates to attach it to the chassis. I tacked it in place and lifted the diff back up into position and fitted the upper track arms and offered up the springs. I got one side in but trying to fit the other side the car became very unstable being only a shell and being up high. I decided to abandon that side before I wore the car, which is still quite heavy. I think I will wait until the car is down a lot lower.
1 point
-
I made up the plates for the passenger side today and took some pic's. I made a start on welding in one of the plates. I will leave it there for today. It will be interesting to see how it sits with the Avenger springs in. The minx is about 100kg heavier. I think I will need to get some shorter springs made to get it sitting where I want it.
1 point
-
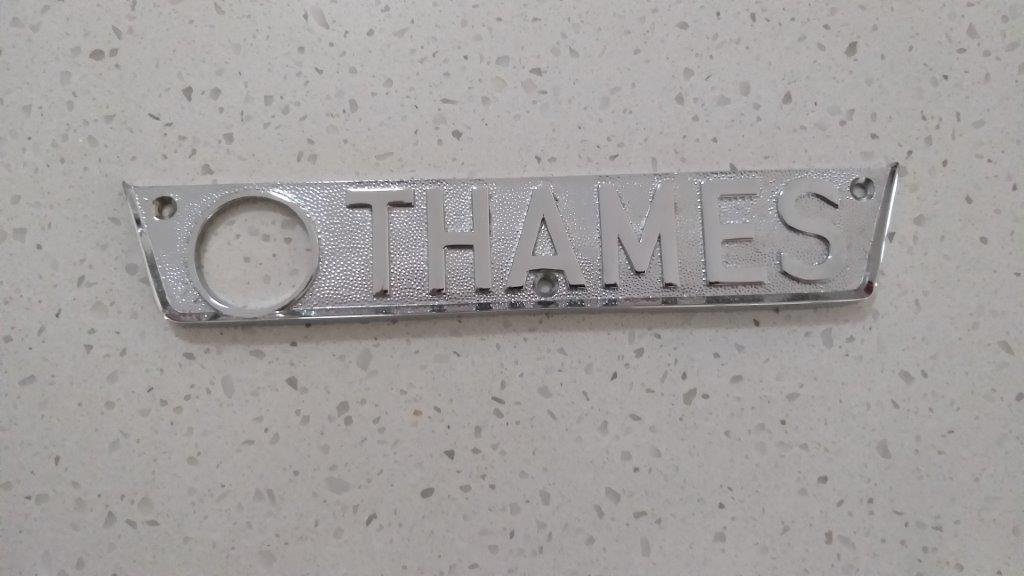
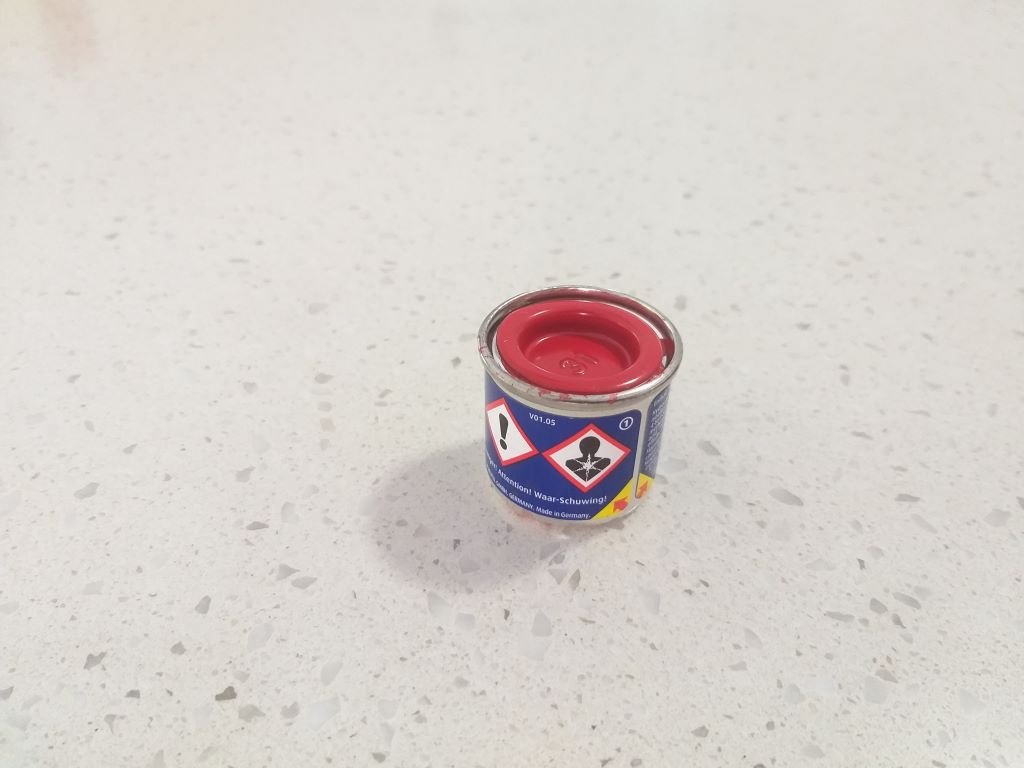
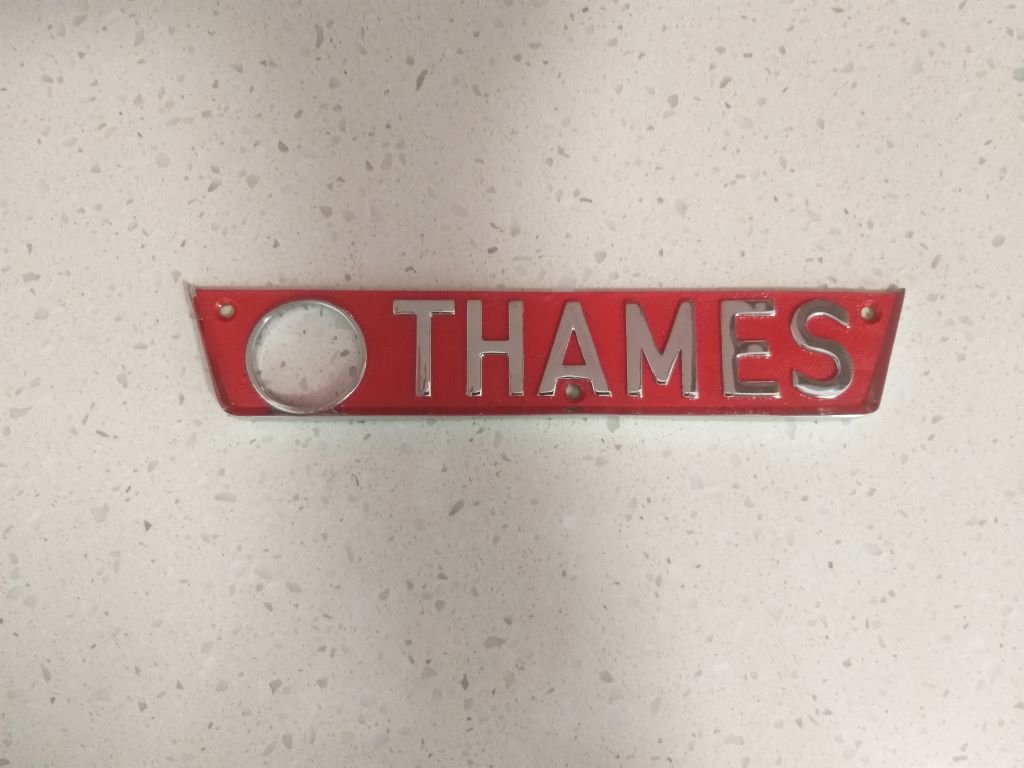
While I was waiting for the paint to dry on the second batch of a/c condenser mounting brackets. I pulled the remaining badges off so that Mrs Flash could give them a bit of loving. The reproduction rear badge that I sourced a while back came unpainted, so it looks a bit bland. We ordered in a little pot of Revell enamel-based model paint (number 31 Firey Red Gloss). Mrs Flash gave it a few dabs with a brush and it came out pretty mint. The shadows in this photo make the chrome work look a bit manky, but in real life it's perfect. A really nice touch is the round hole in the badge that the spare wheel winch handle fits through. Talking about the spare wheel my original winch was seized solid and I tried unsuccessfully to resurrect it. But fear not as I have a cunning plan for a replacement that I'll talk about sometime in the future.
1 point
-
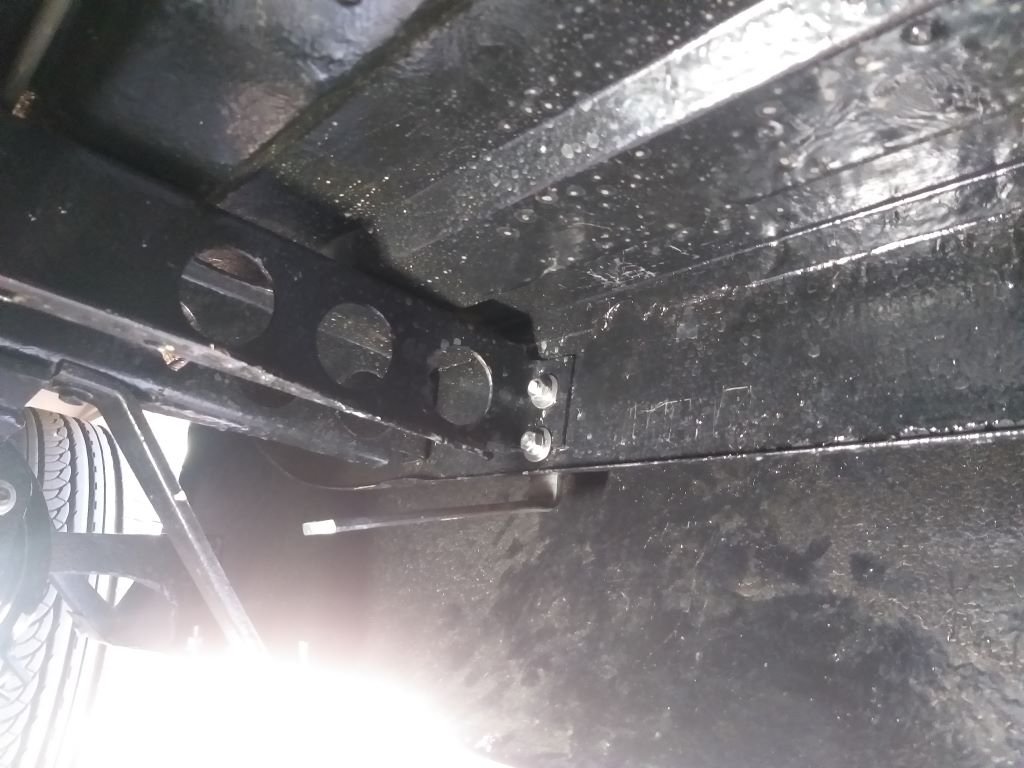
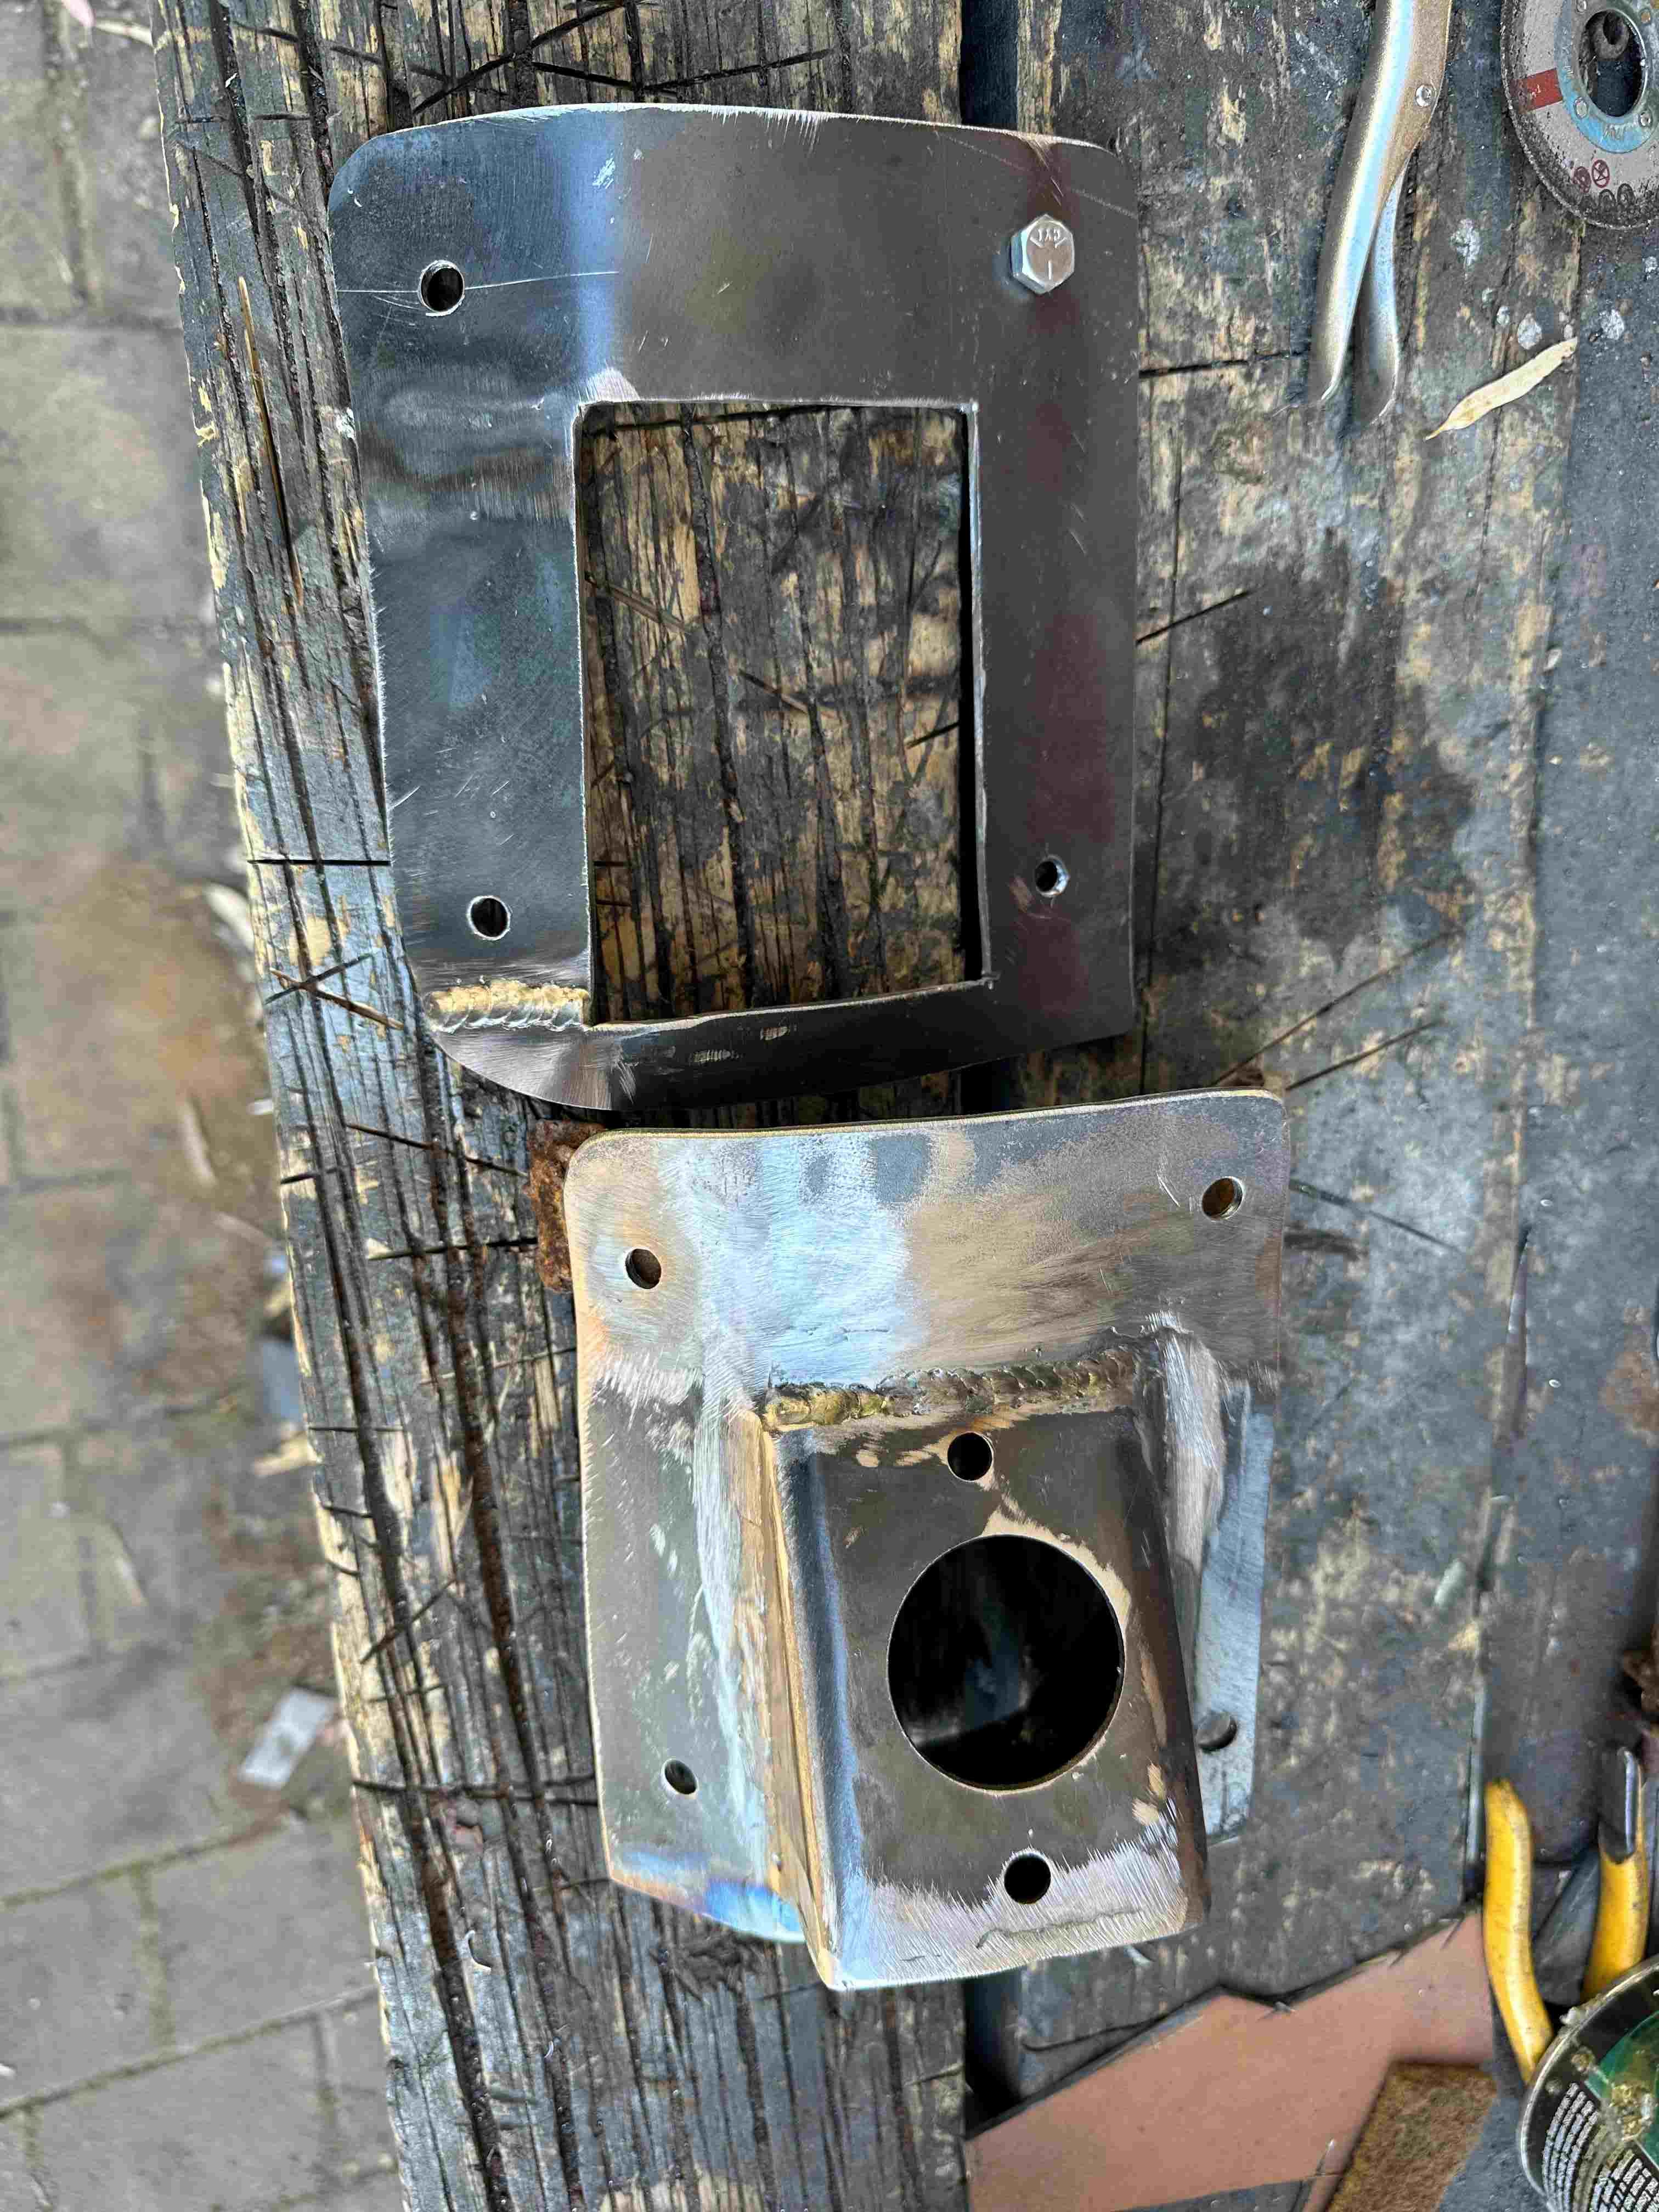
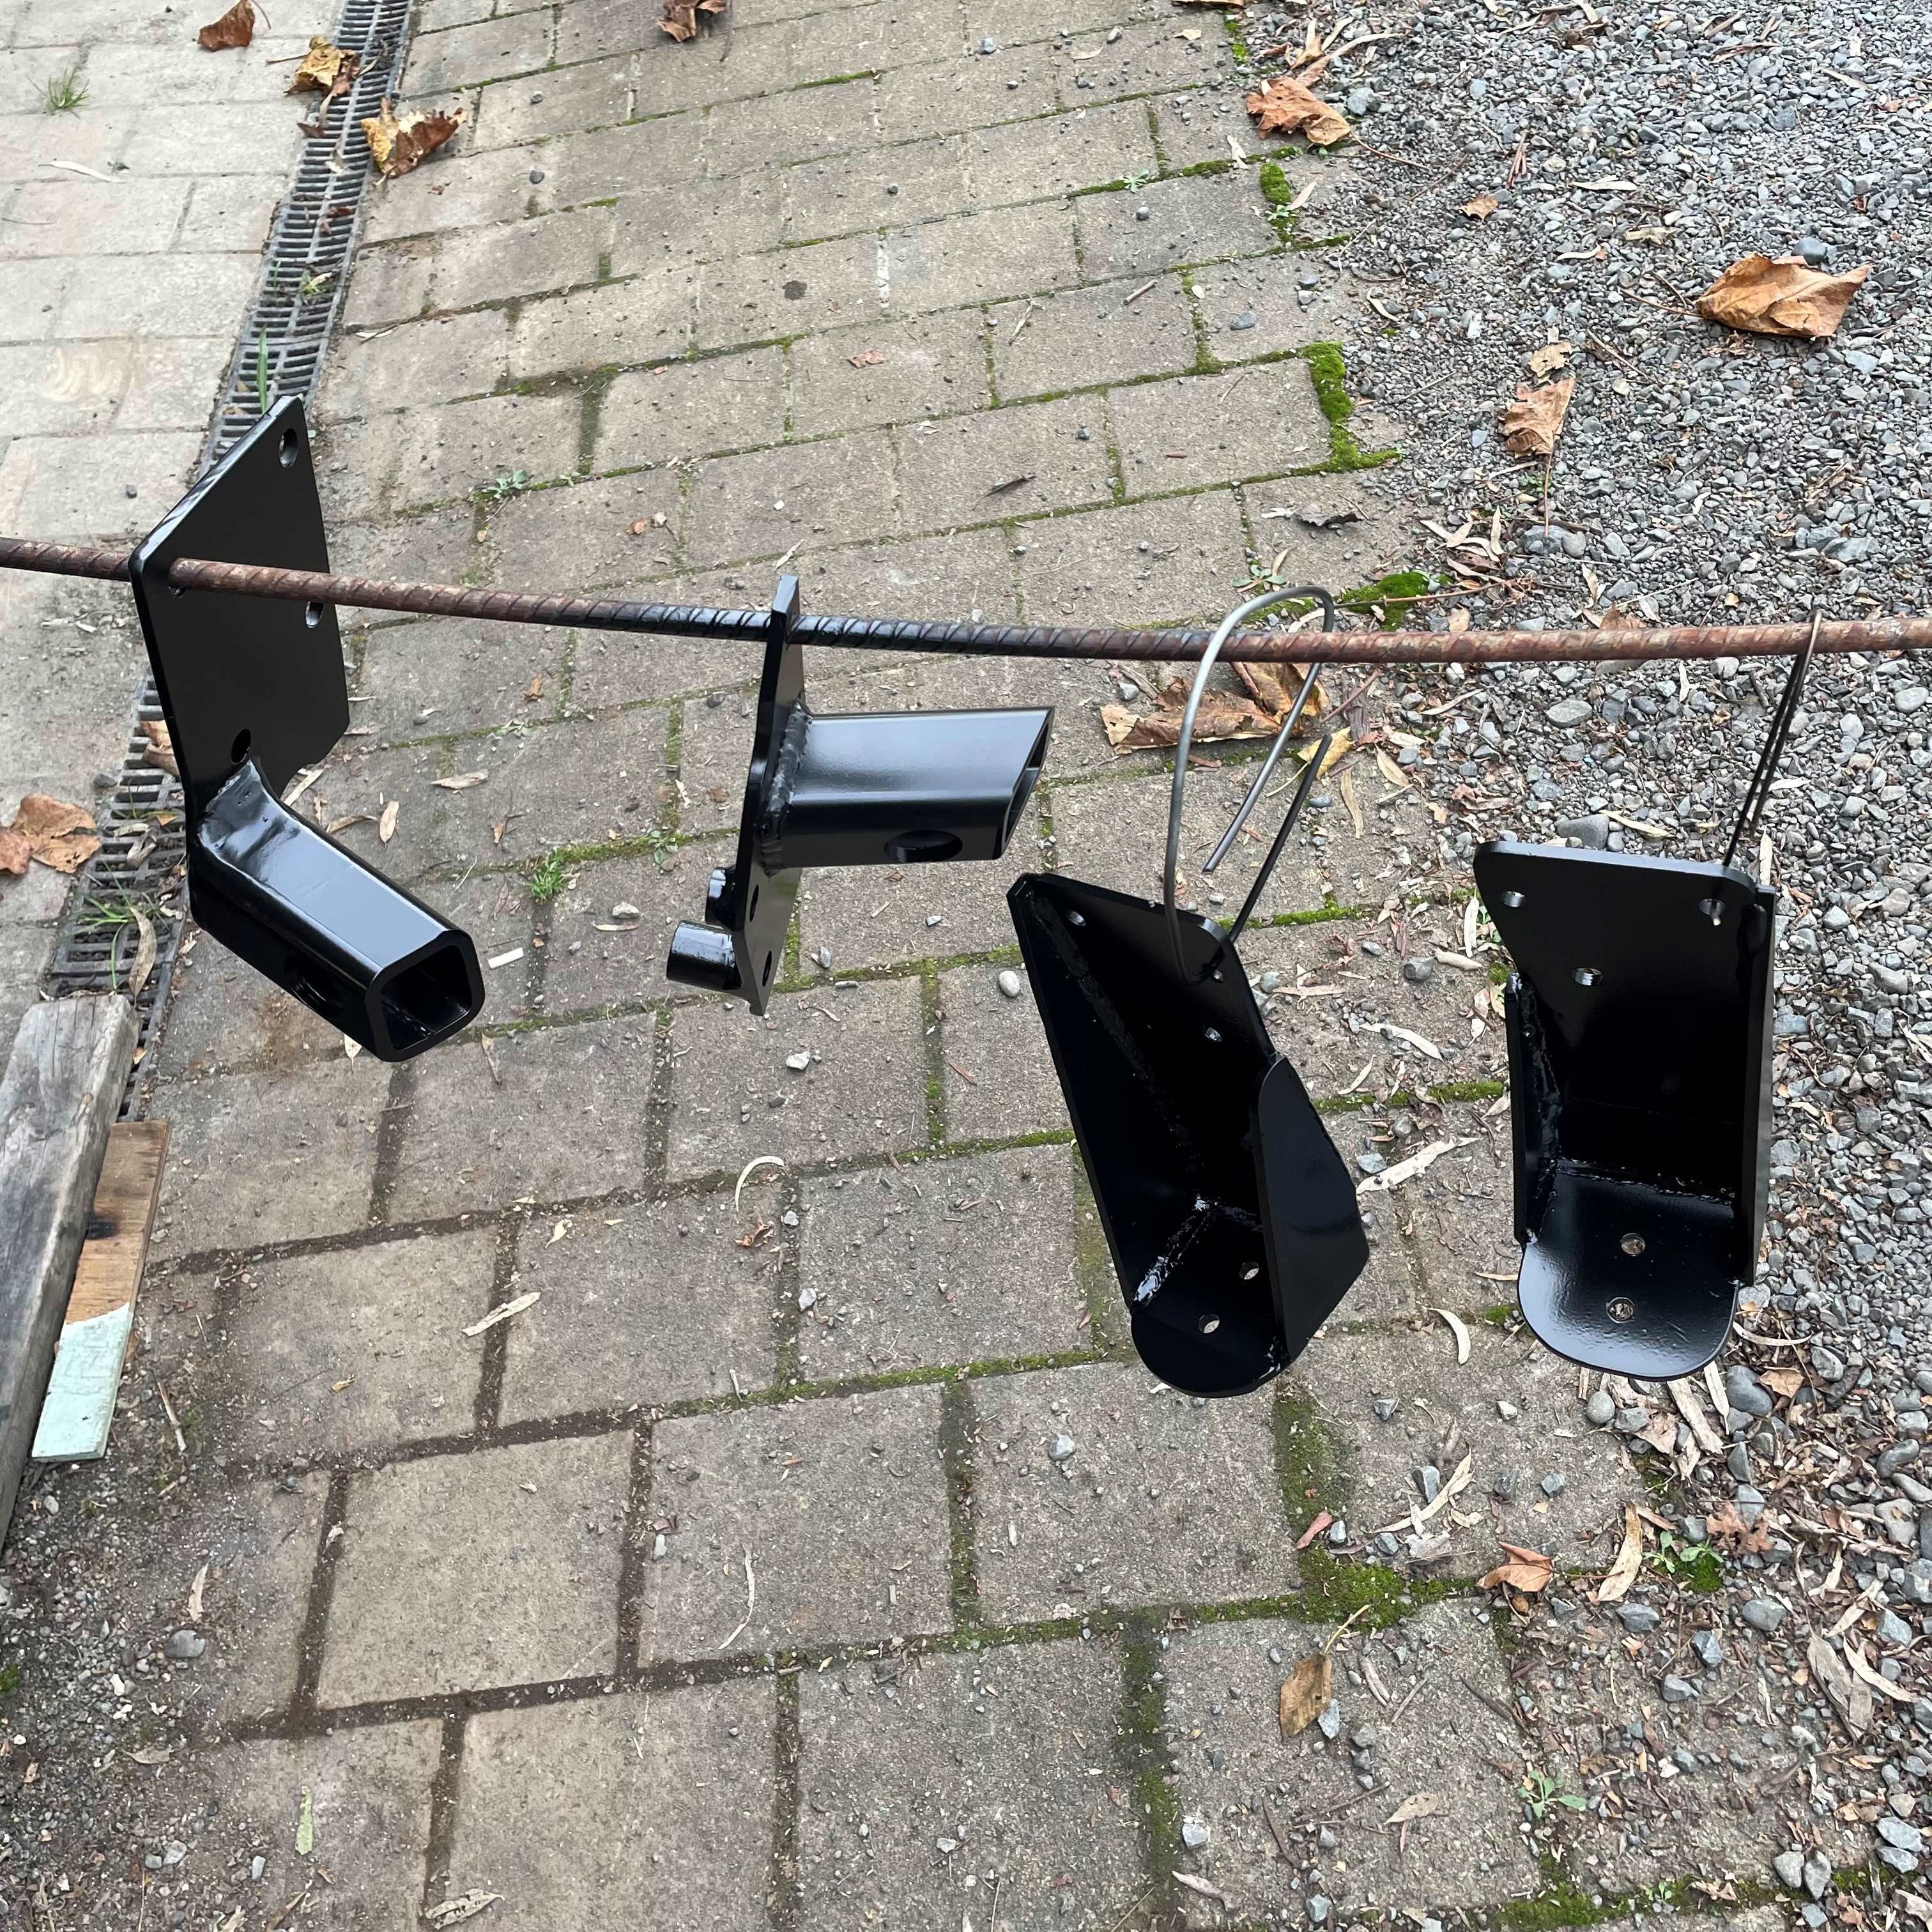
And that's all of the condenser mounting brackets done. Some crappy quality photos of the brackets that mount to the body brace. This is the bracket closest to the rear of the van: And this is the one towards the front of the van: With the test fit successfully behind me, I've stripped everything out once again and the first batch of mounts have already received their first coat of satin black. More tomorrow.
1 point
-
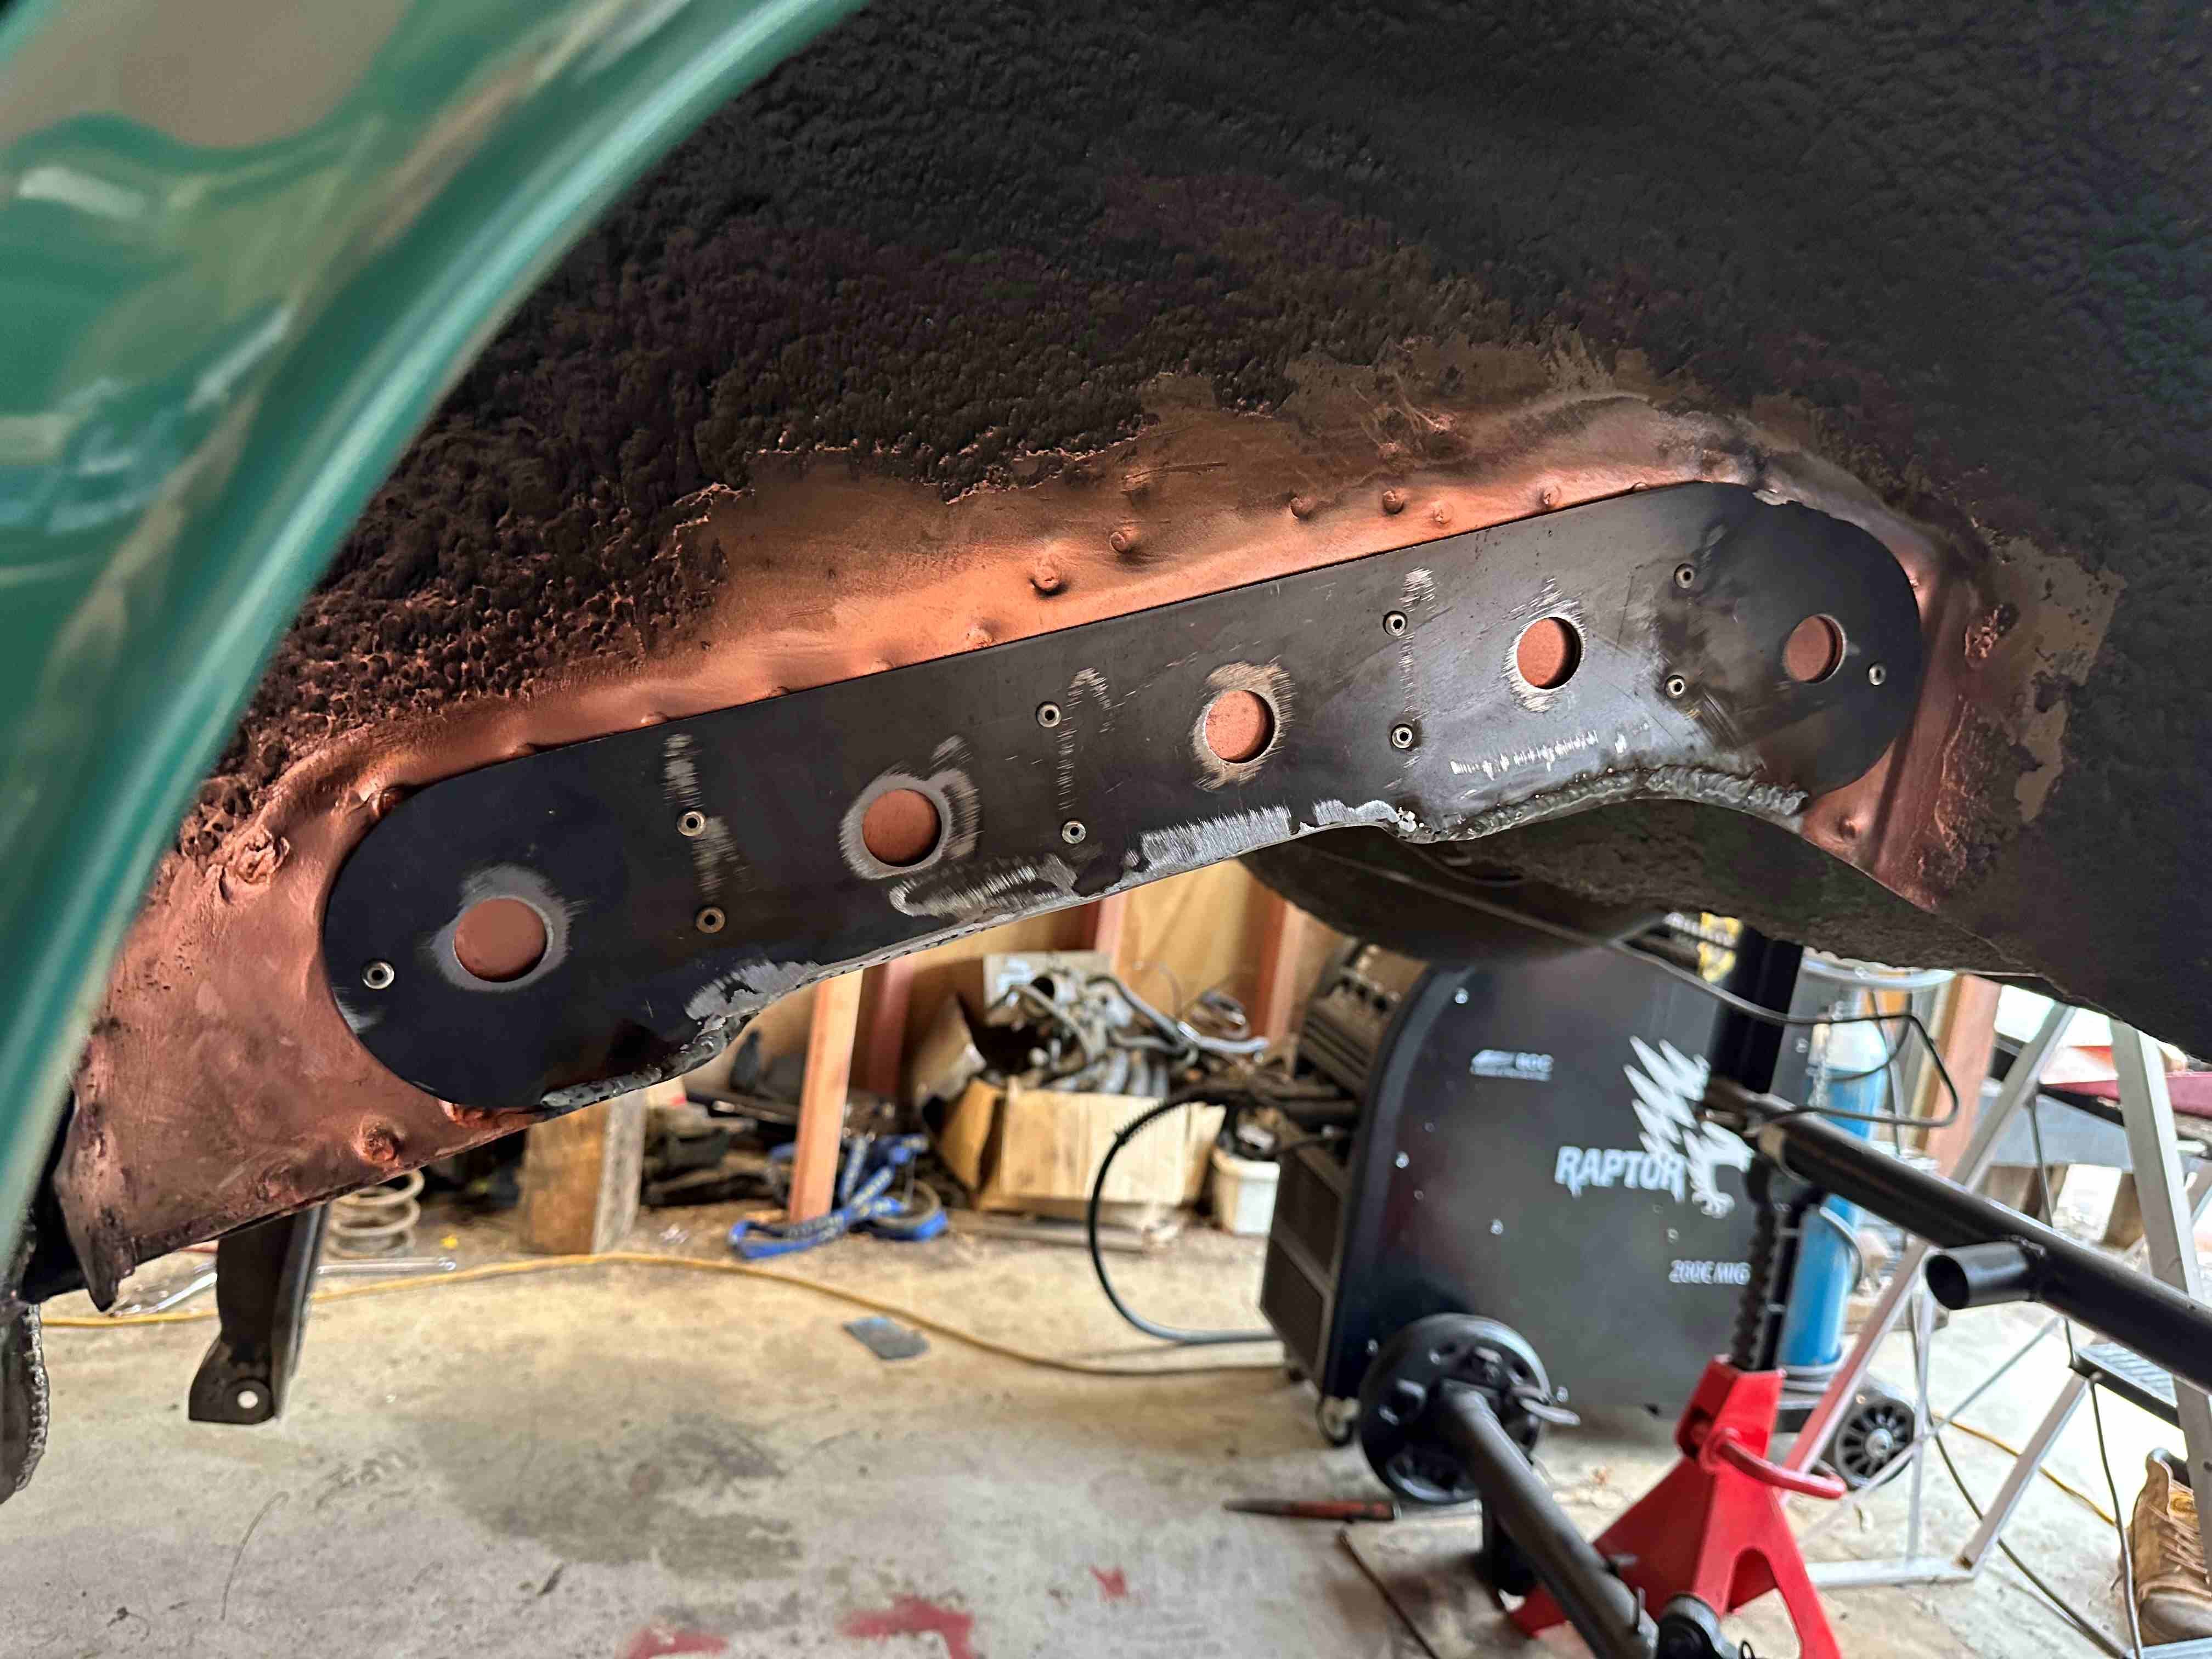
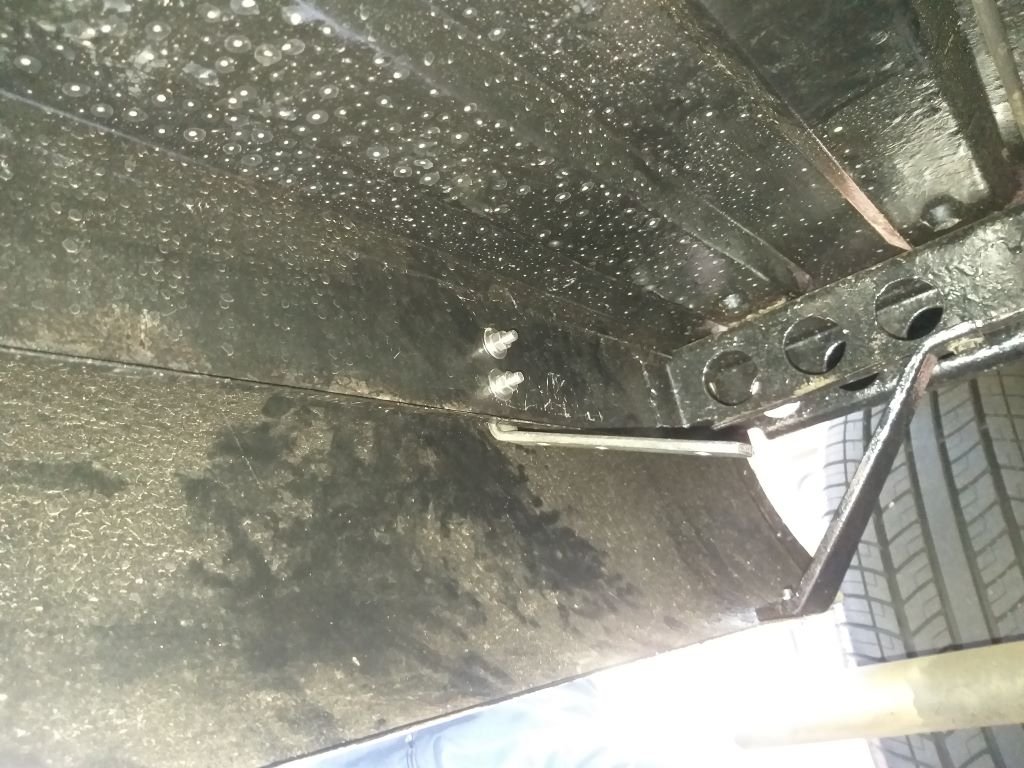
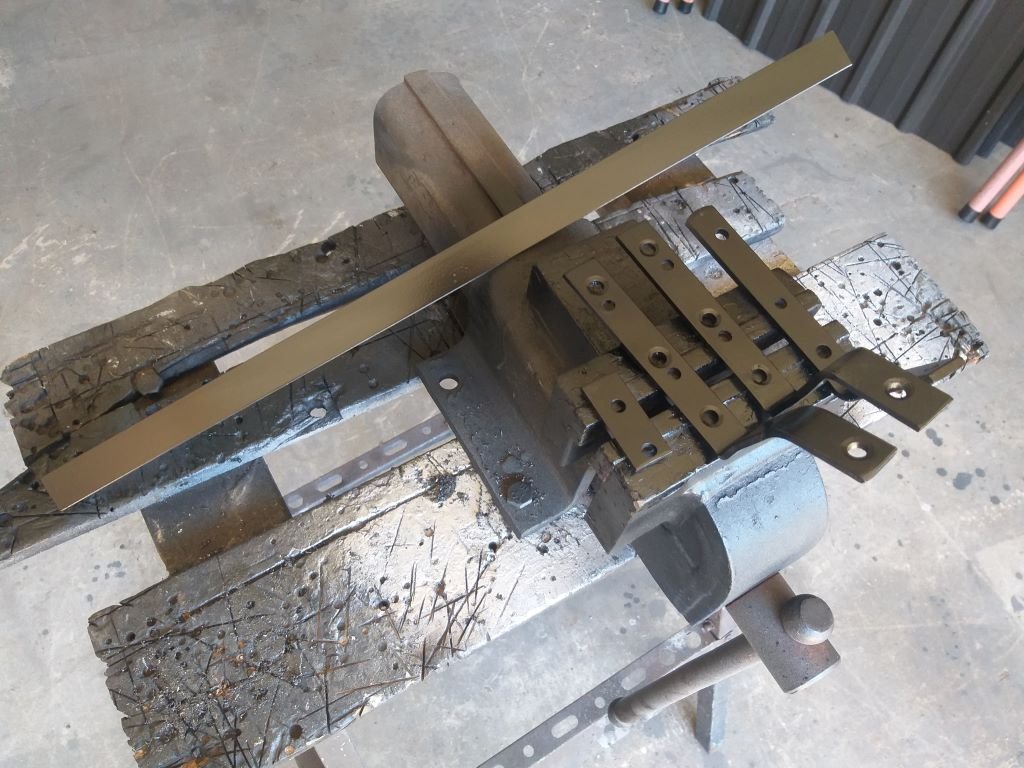
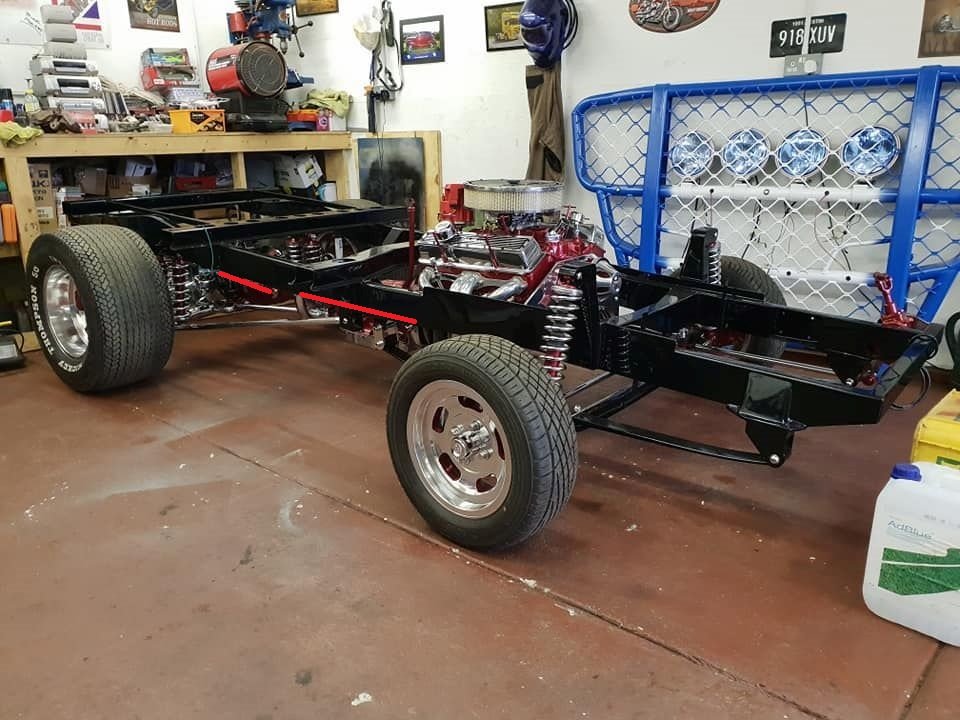
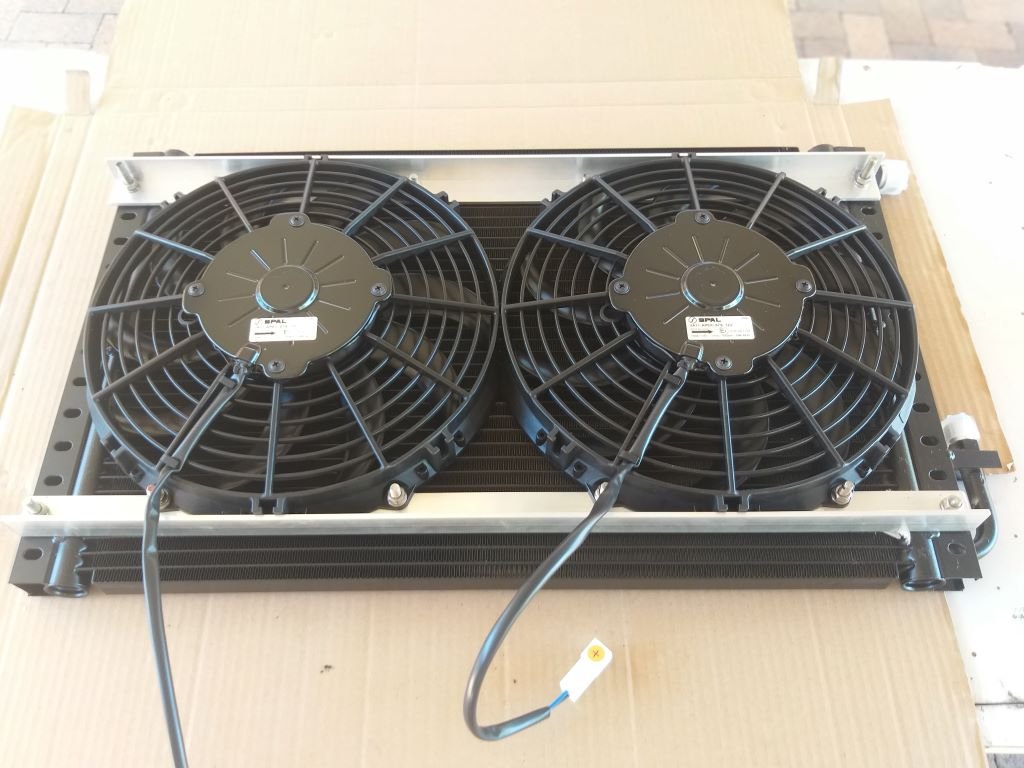
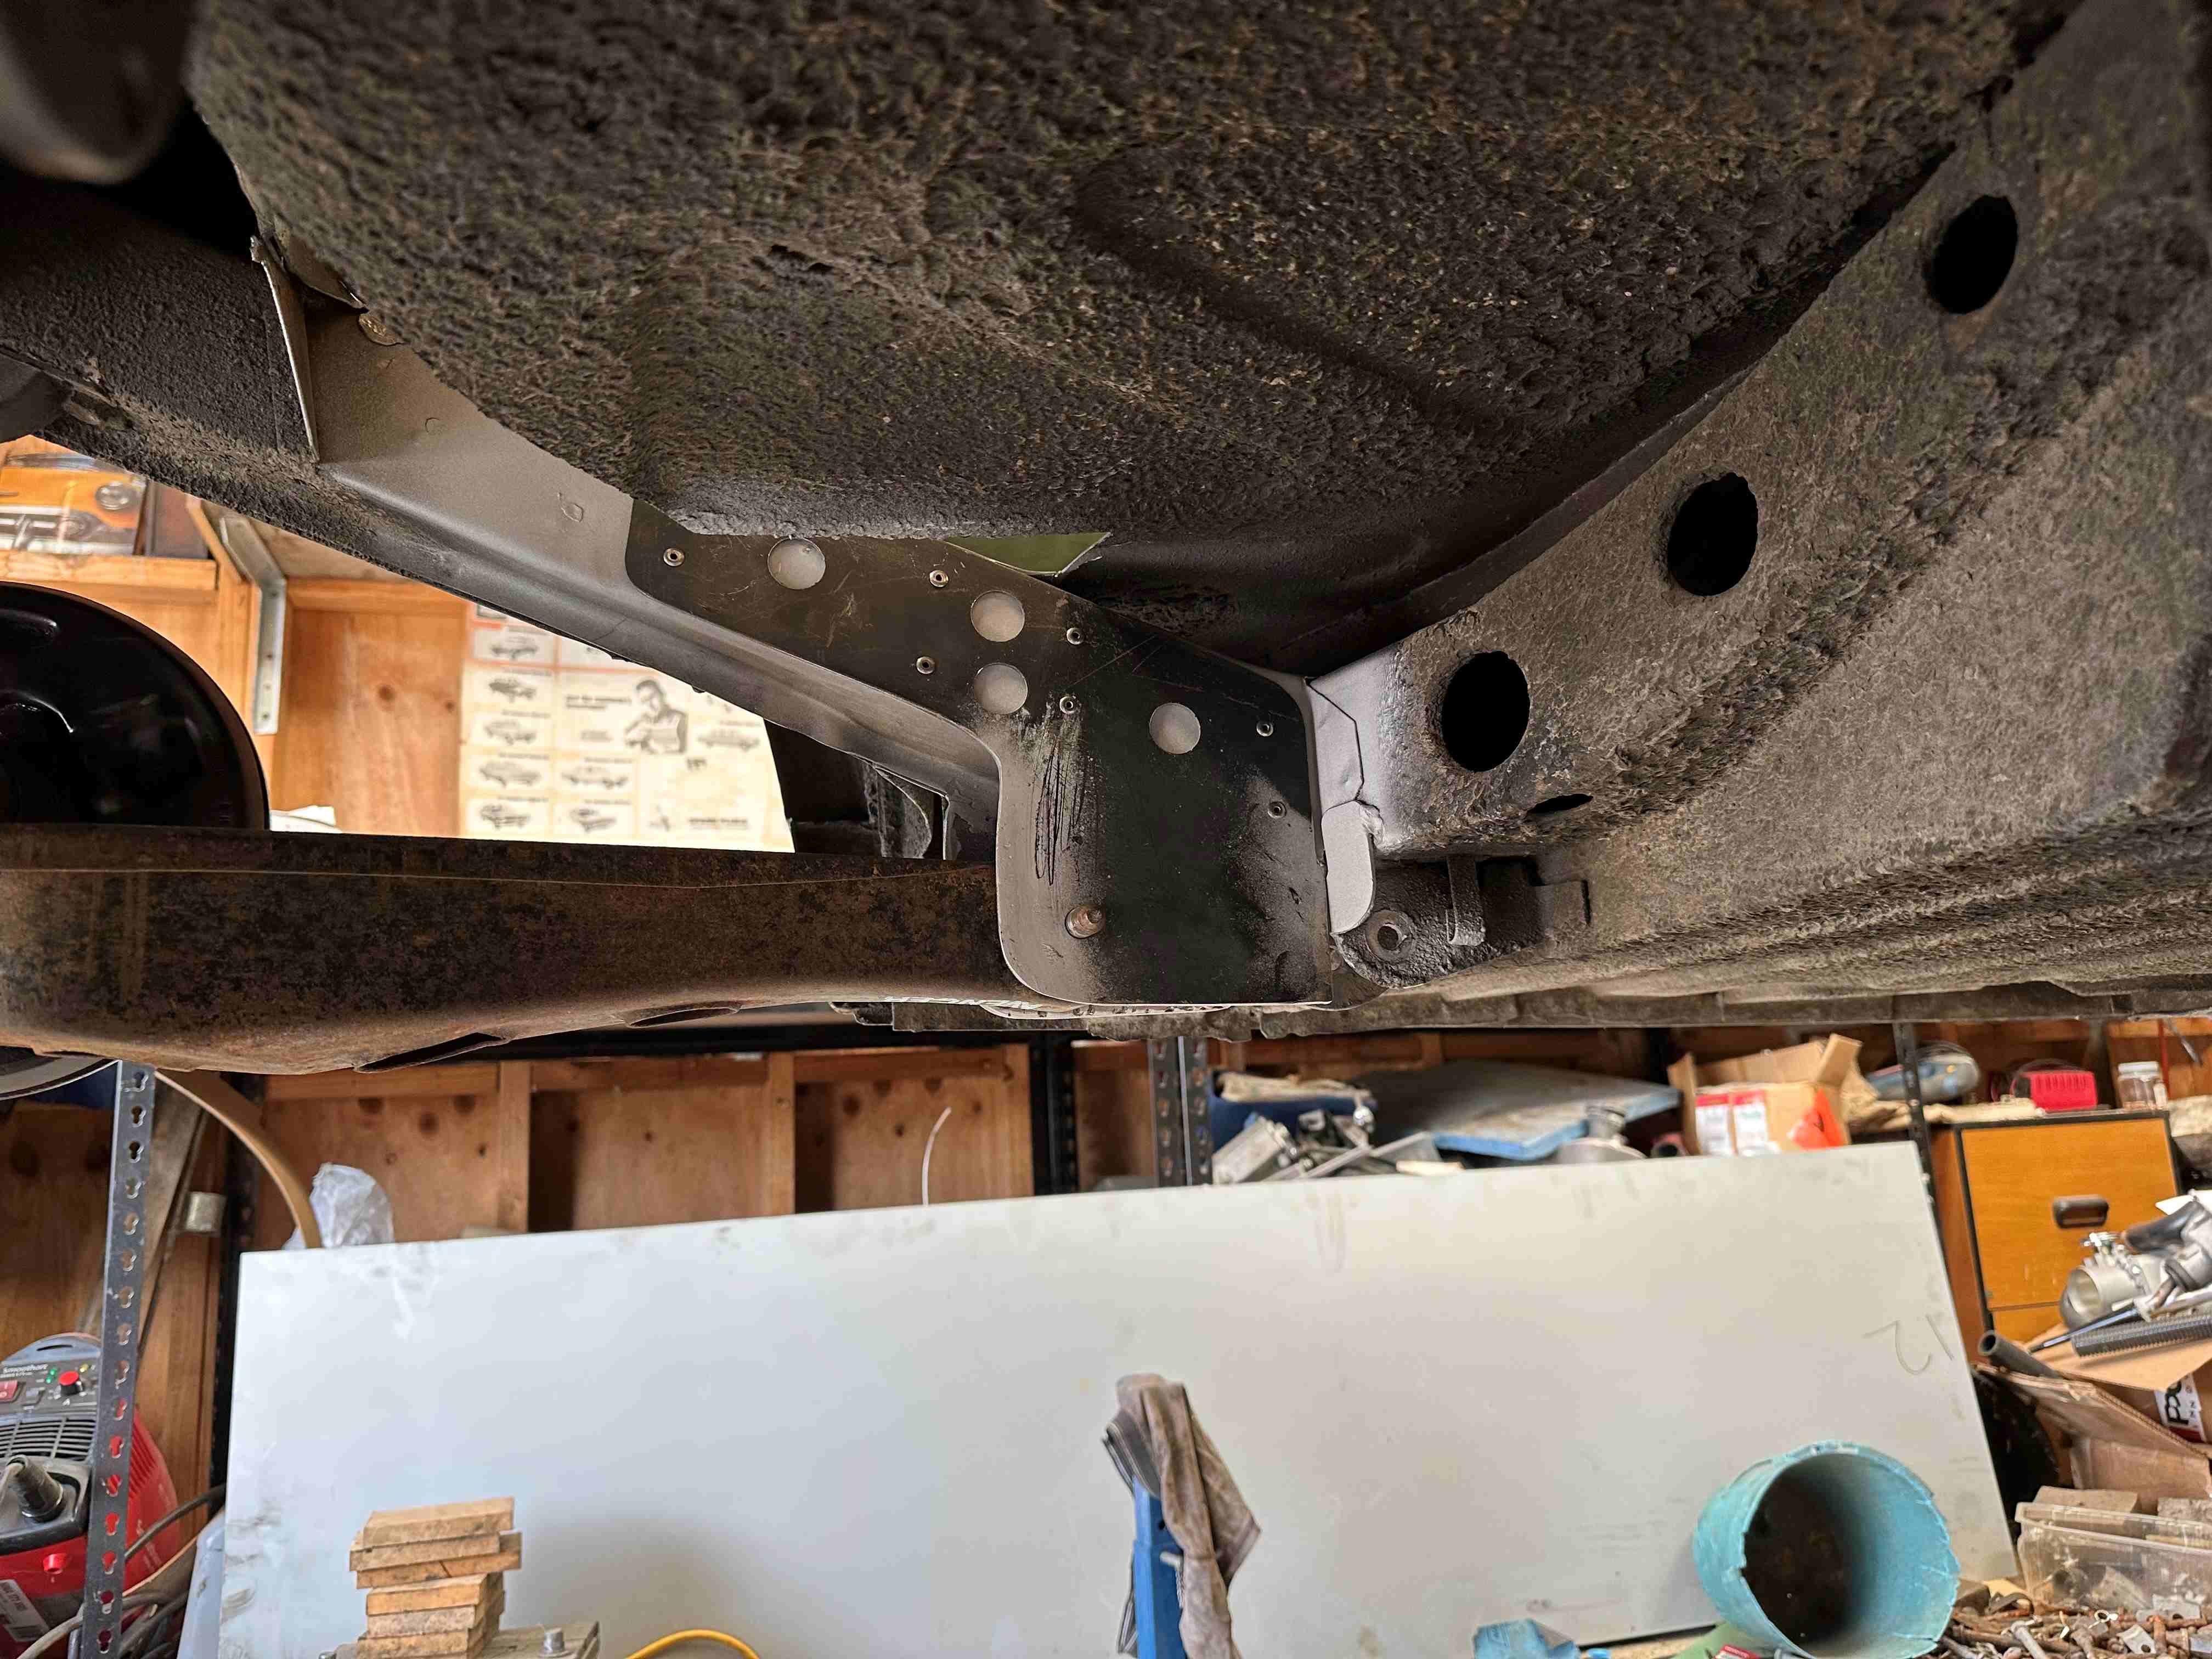
Today I kicked off the a/c install. My intention has always been to mount the condenser somewhere underneath the van and I had previously targeted the area between the RHS main chassis leg and the smaller body brace that runs parallel with the chassis leg under the load area of the van. It's nigh on impossible to photograph this in real life so I've had to resort to using a photo of a highly modified bare Thames chassis that I found on the net a while ago. The red lines in this image depict the proposed location for the front and rear edges of the condenser: The outer brace sits a lot higher than the main chassis leg which is perfect as it allows me to position the condenser at a slight angle - something that is critical to make sure that gravity helps pool the liquid to the bottom of the condenser. First step was to mount the twin Spal pusher fans to the top of the condenser so that I could check clearances between the underside of the floor and the fans. Used a bit of aluminium angle and a few stainless steel fixings to whip this up: I had a 50% chance of mounting these on the correct side of the condenser, but my first test fit showed the condenser tilting the wrong way so out she came and I quickly flipped the fans. Clearance is good, so I made a start on the mounting brackets. More tomorrow.
1 point
-
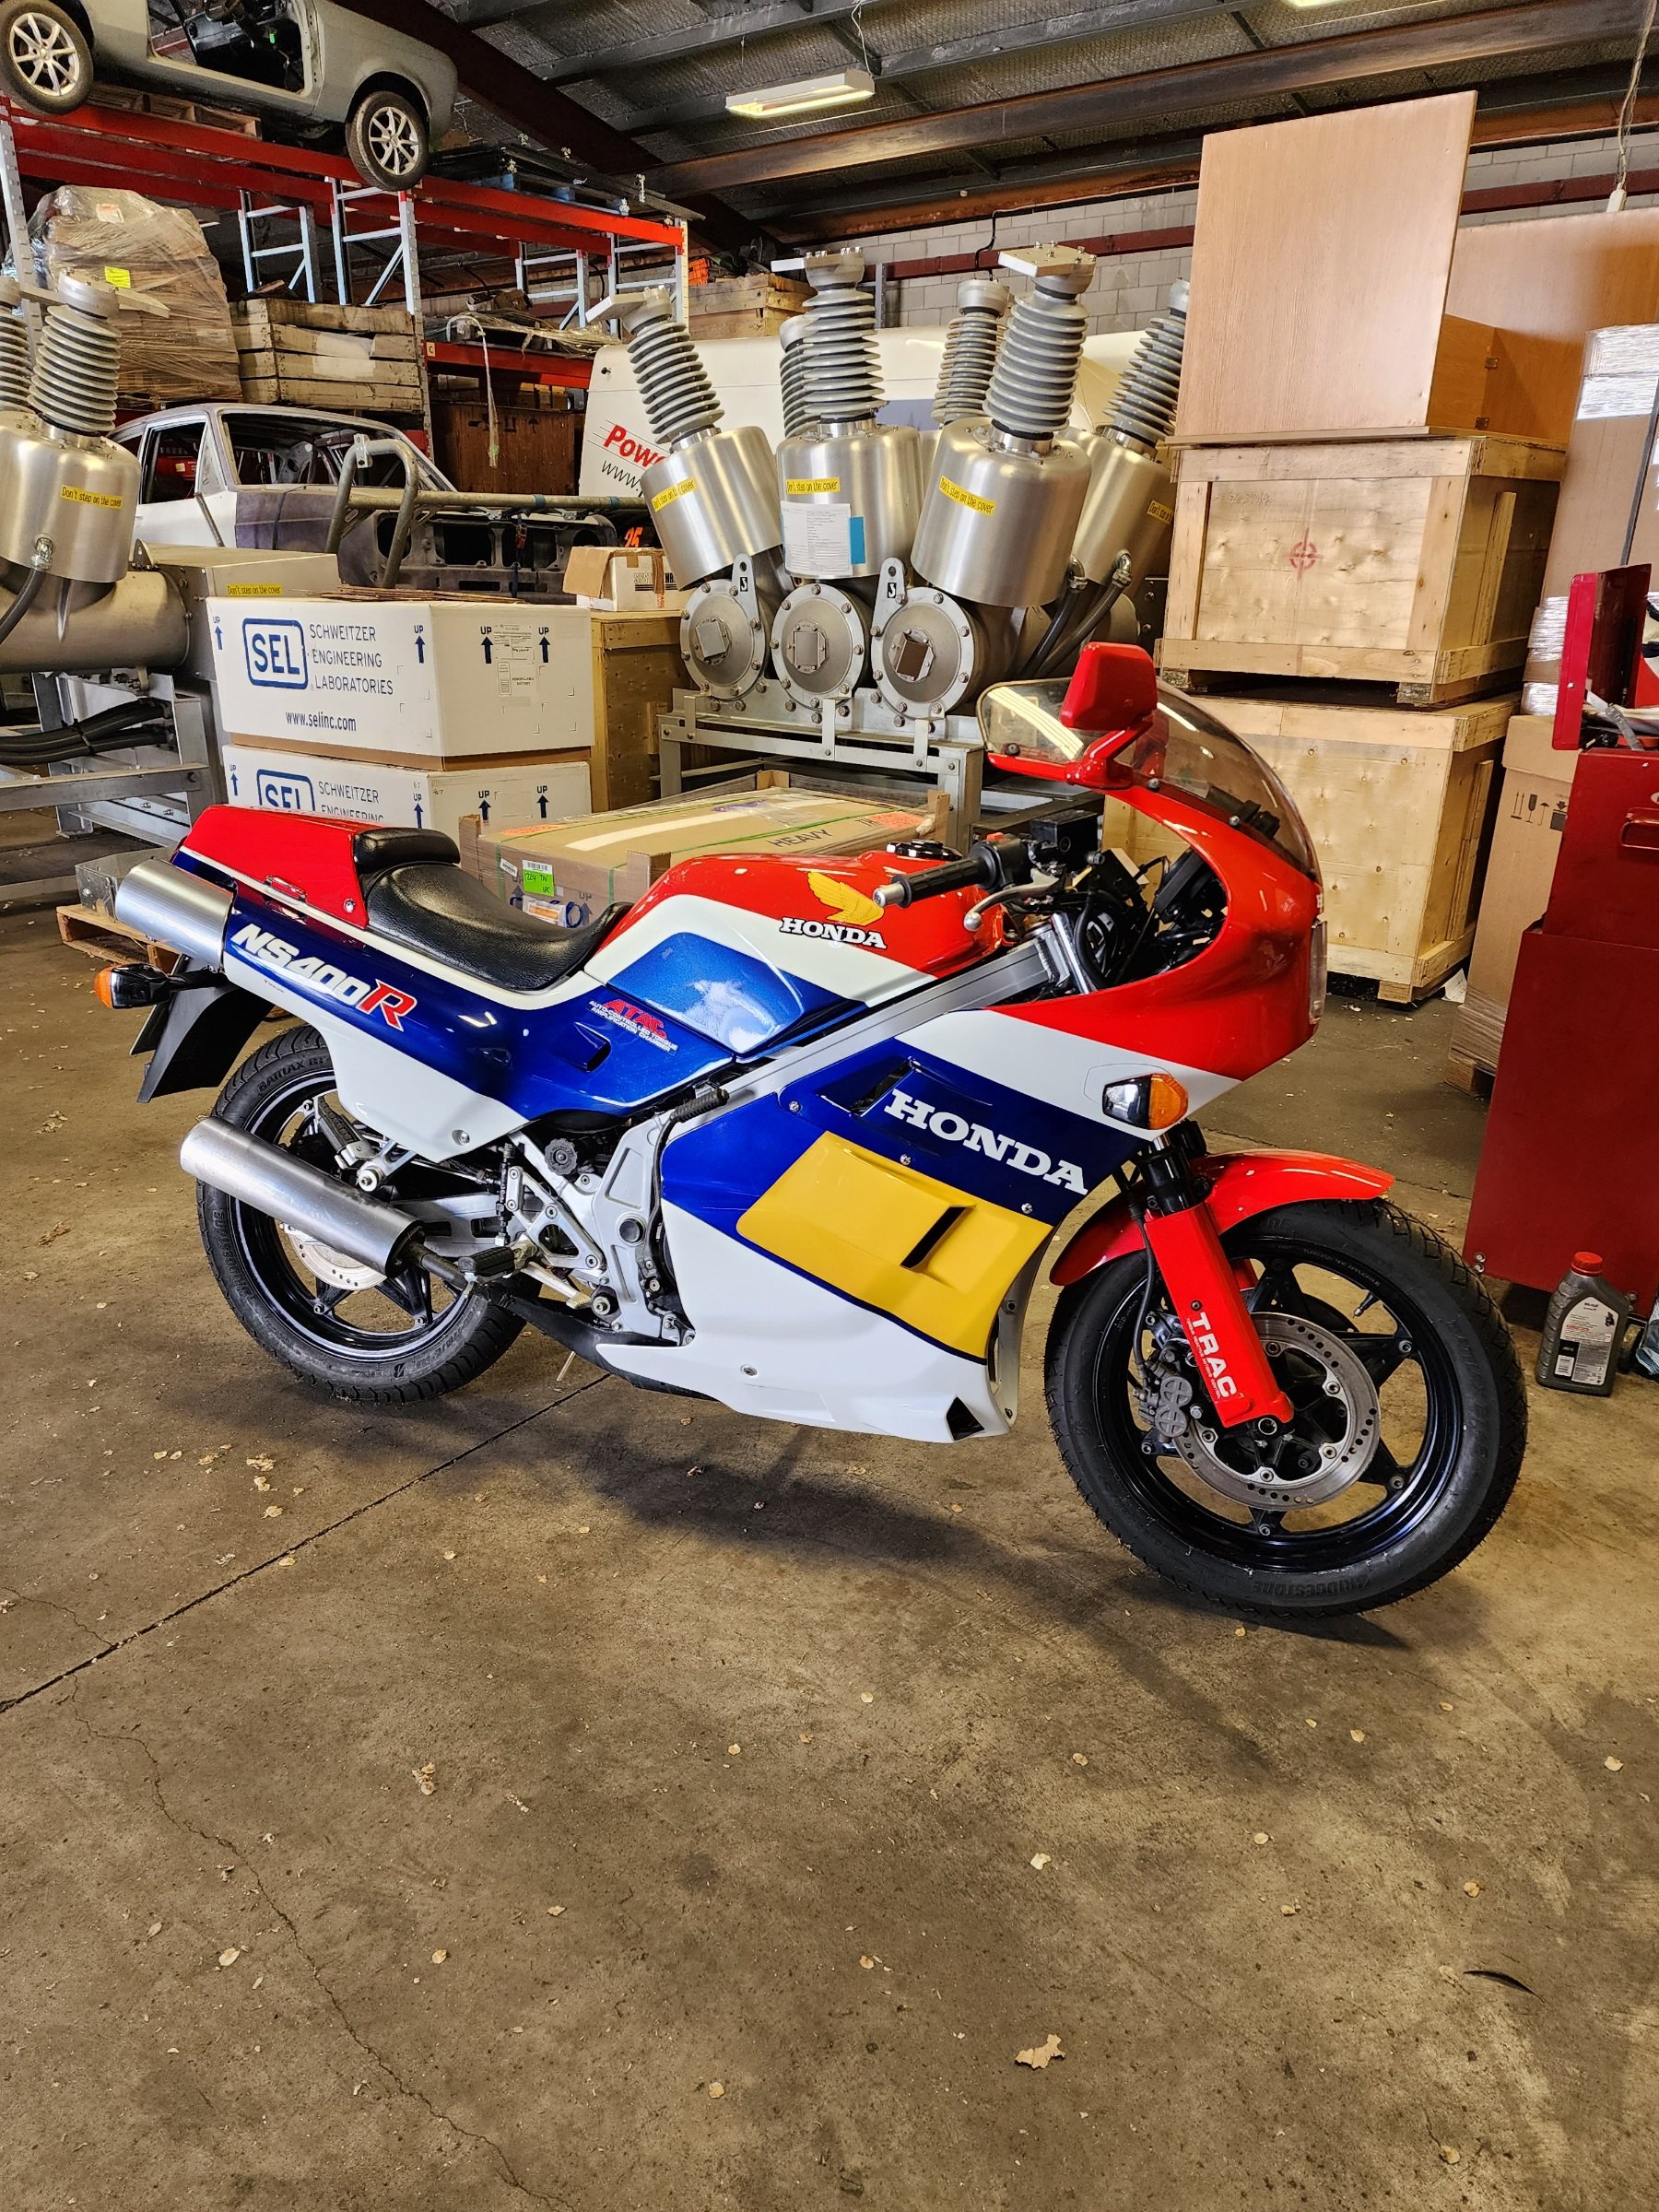
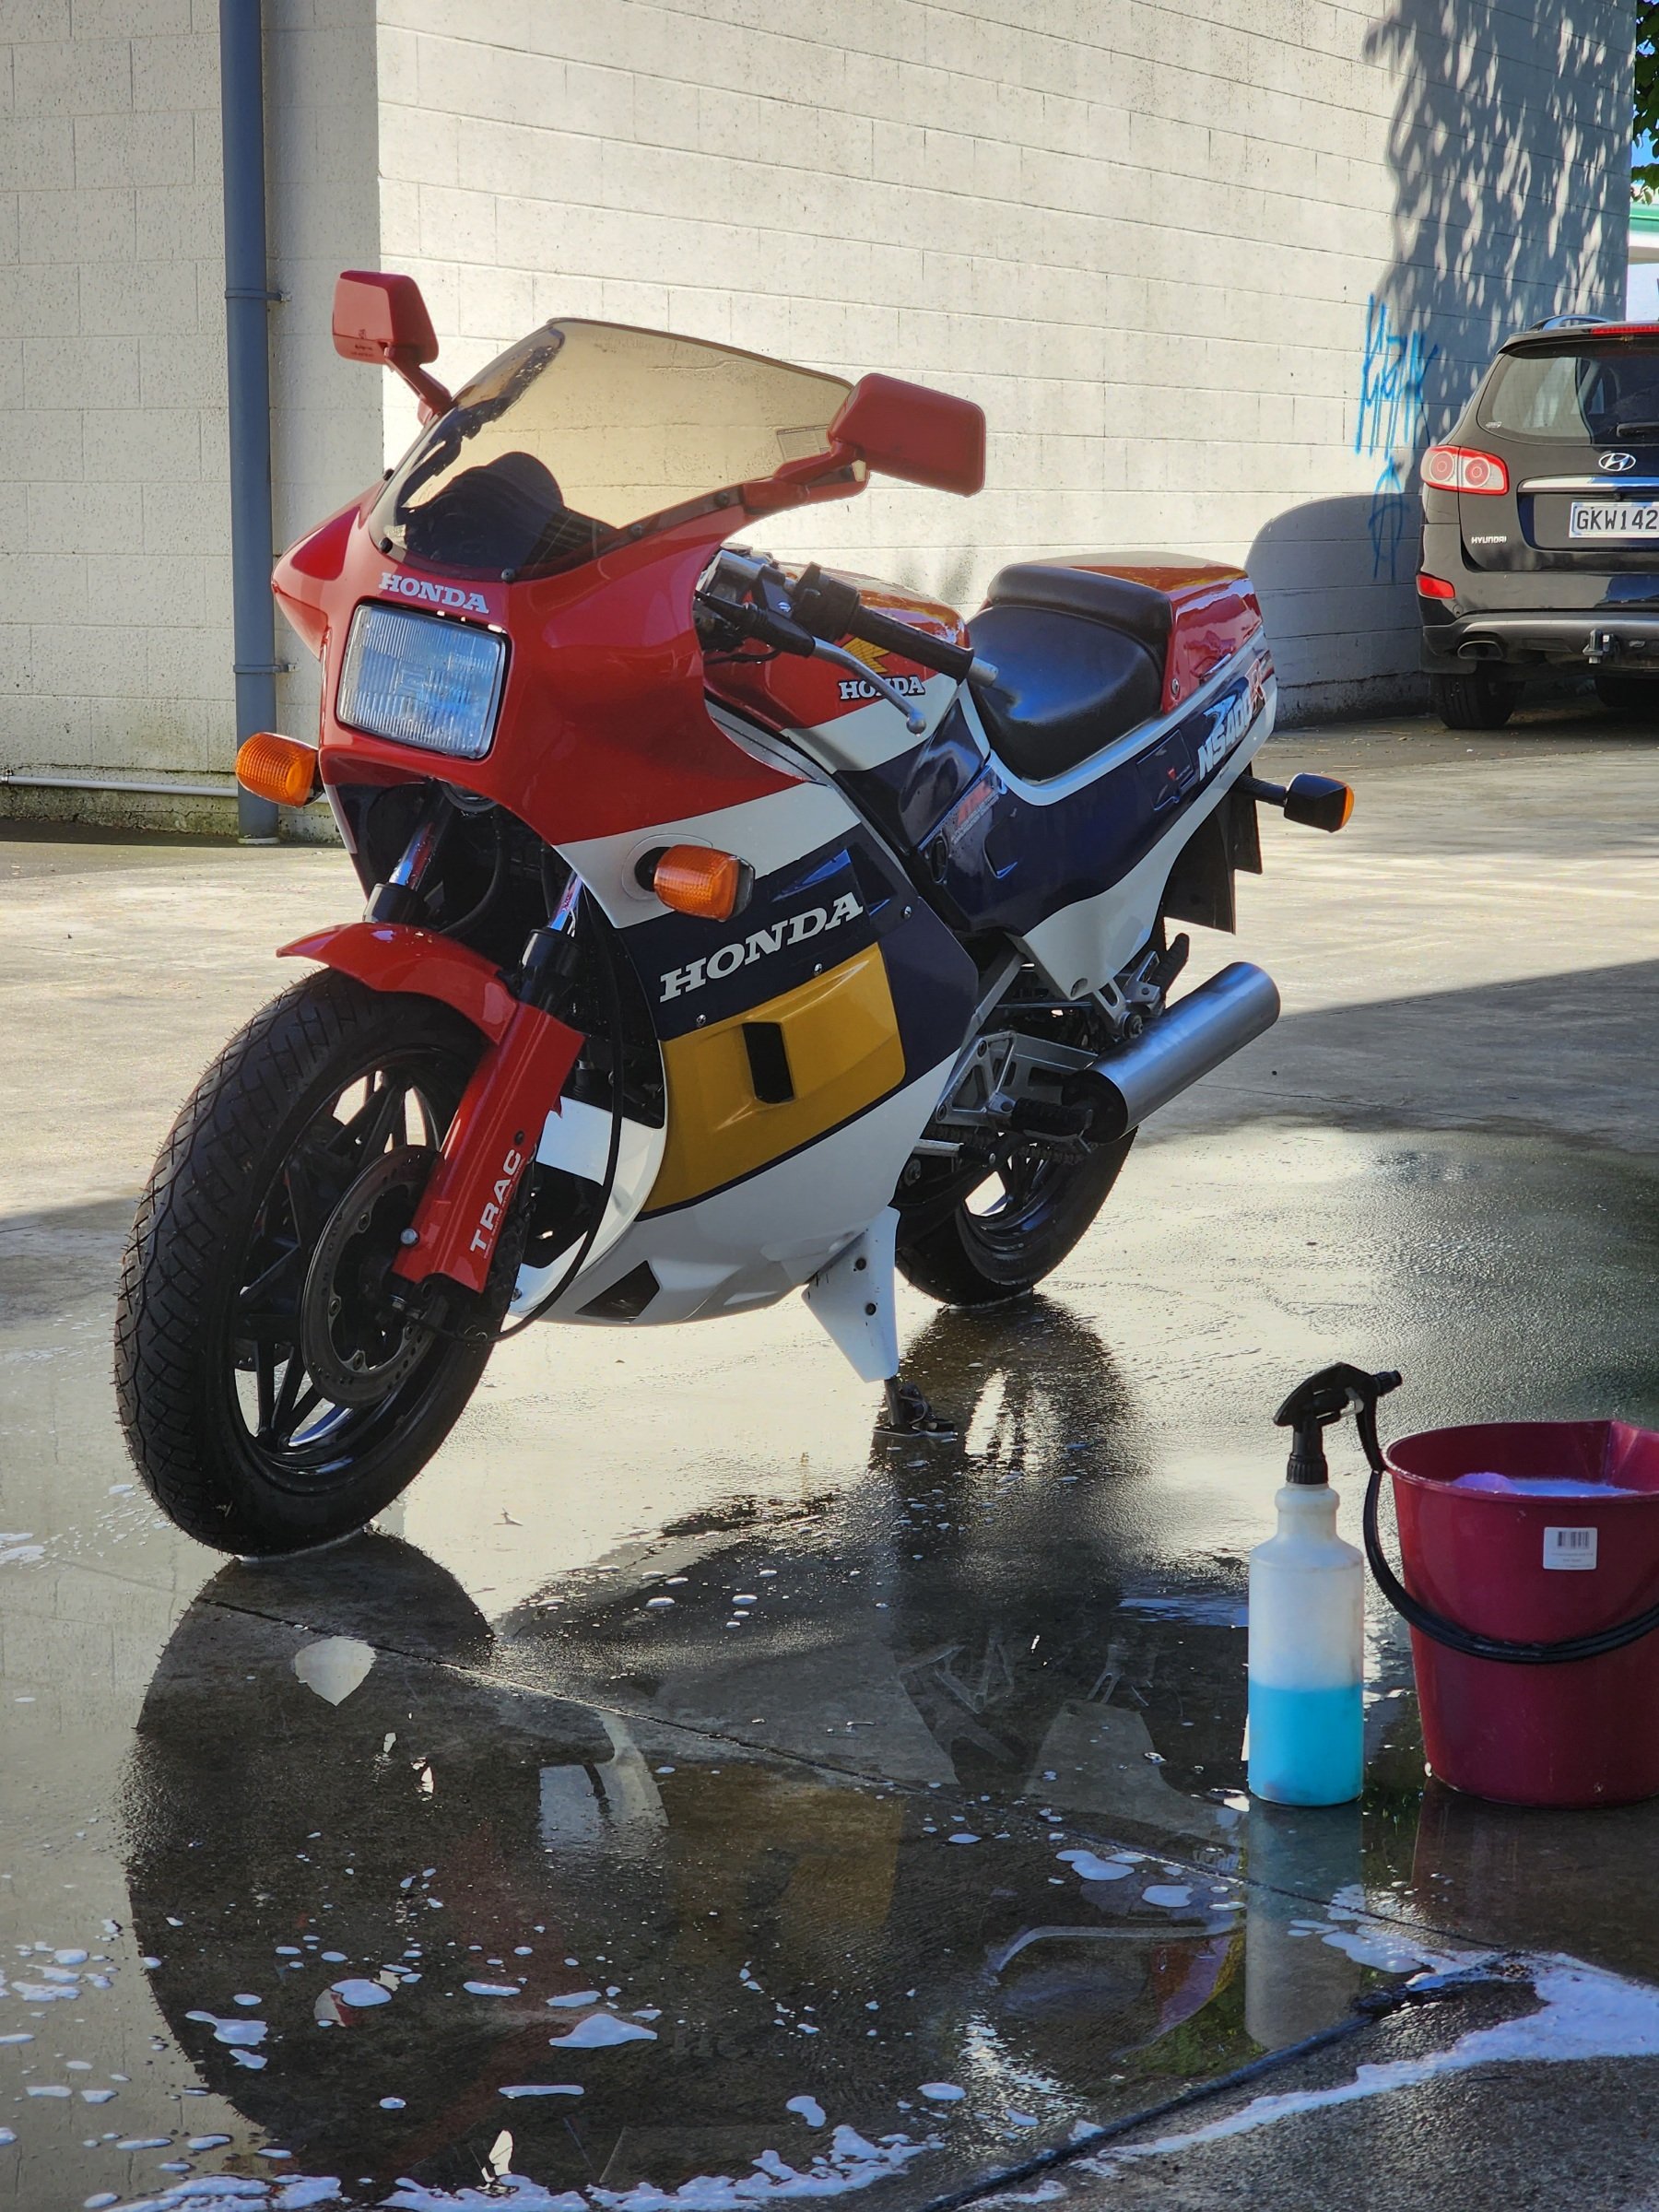
Just finished resto on this neat toy. Belongs to the boss' wife. She had one many moons ago and it was a nostalgic birthday present. Wasn't meant to be a resto, but due to it being a bit of a shed queen it needed a complete strip down. Turns out it had a cracked frame, because early Honda alloy frame stuff. Local bike shop was meant to put it on the road on behalf of the seller, it was legal to ride but was a pile of shit on the road, forks were "rebuilt" wrong, carbs were rebuilt wrong and way out of sync etcetc
1 point
-
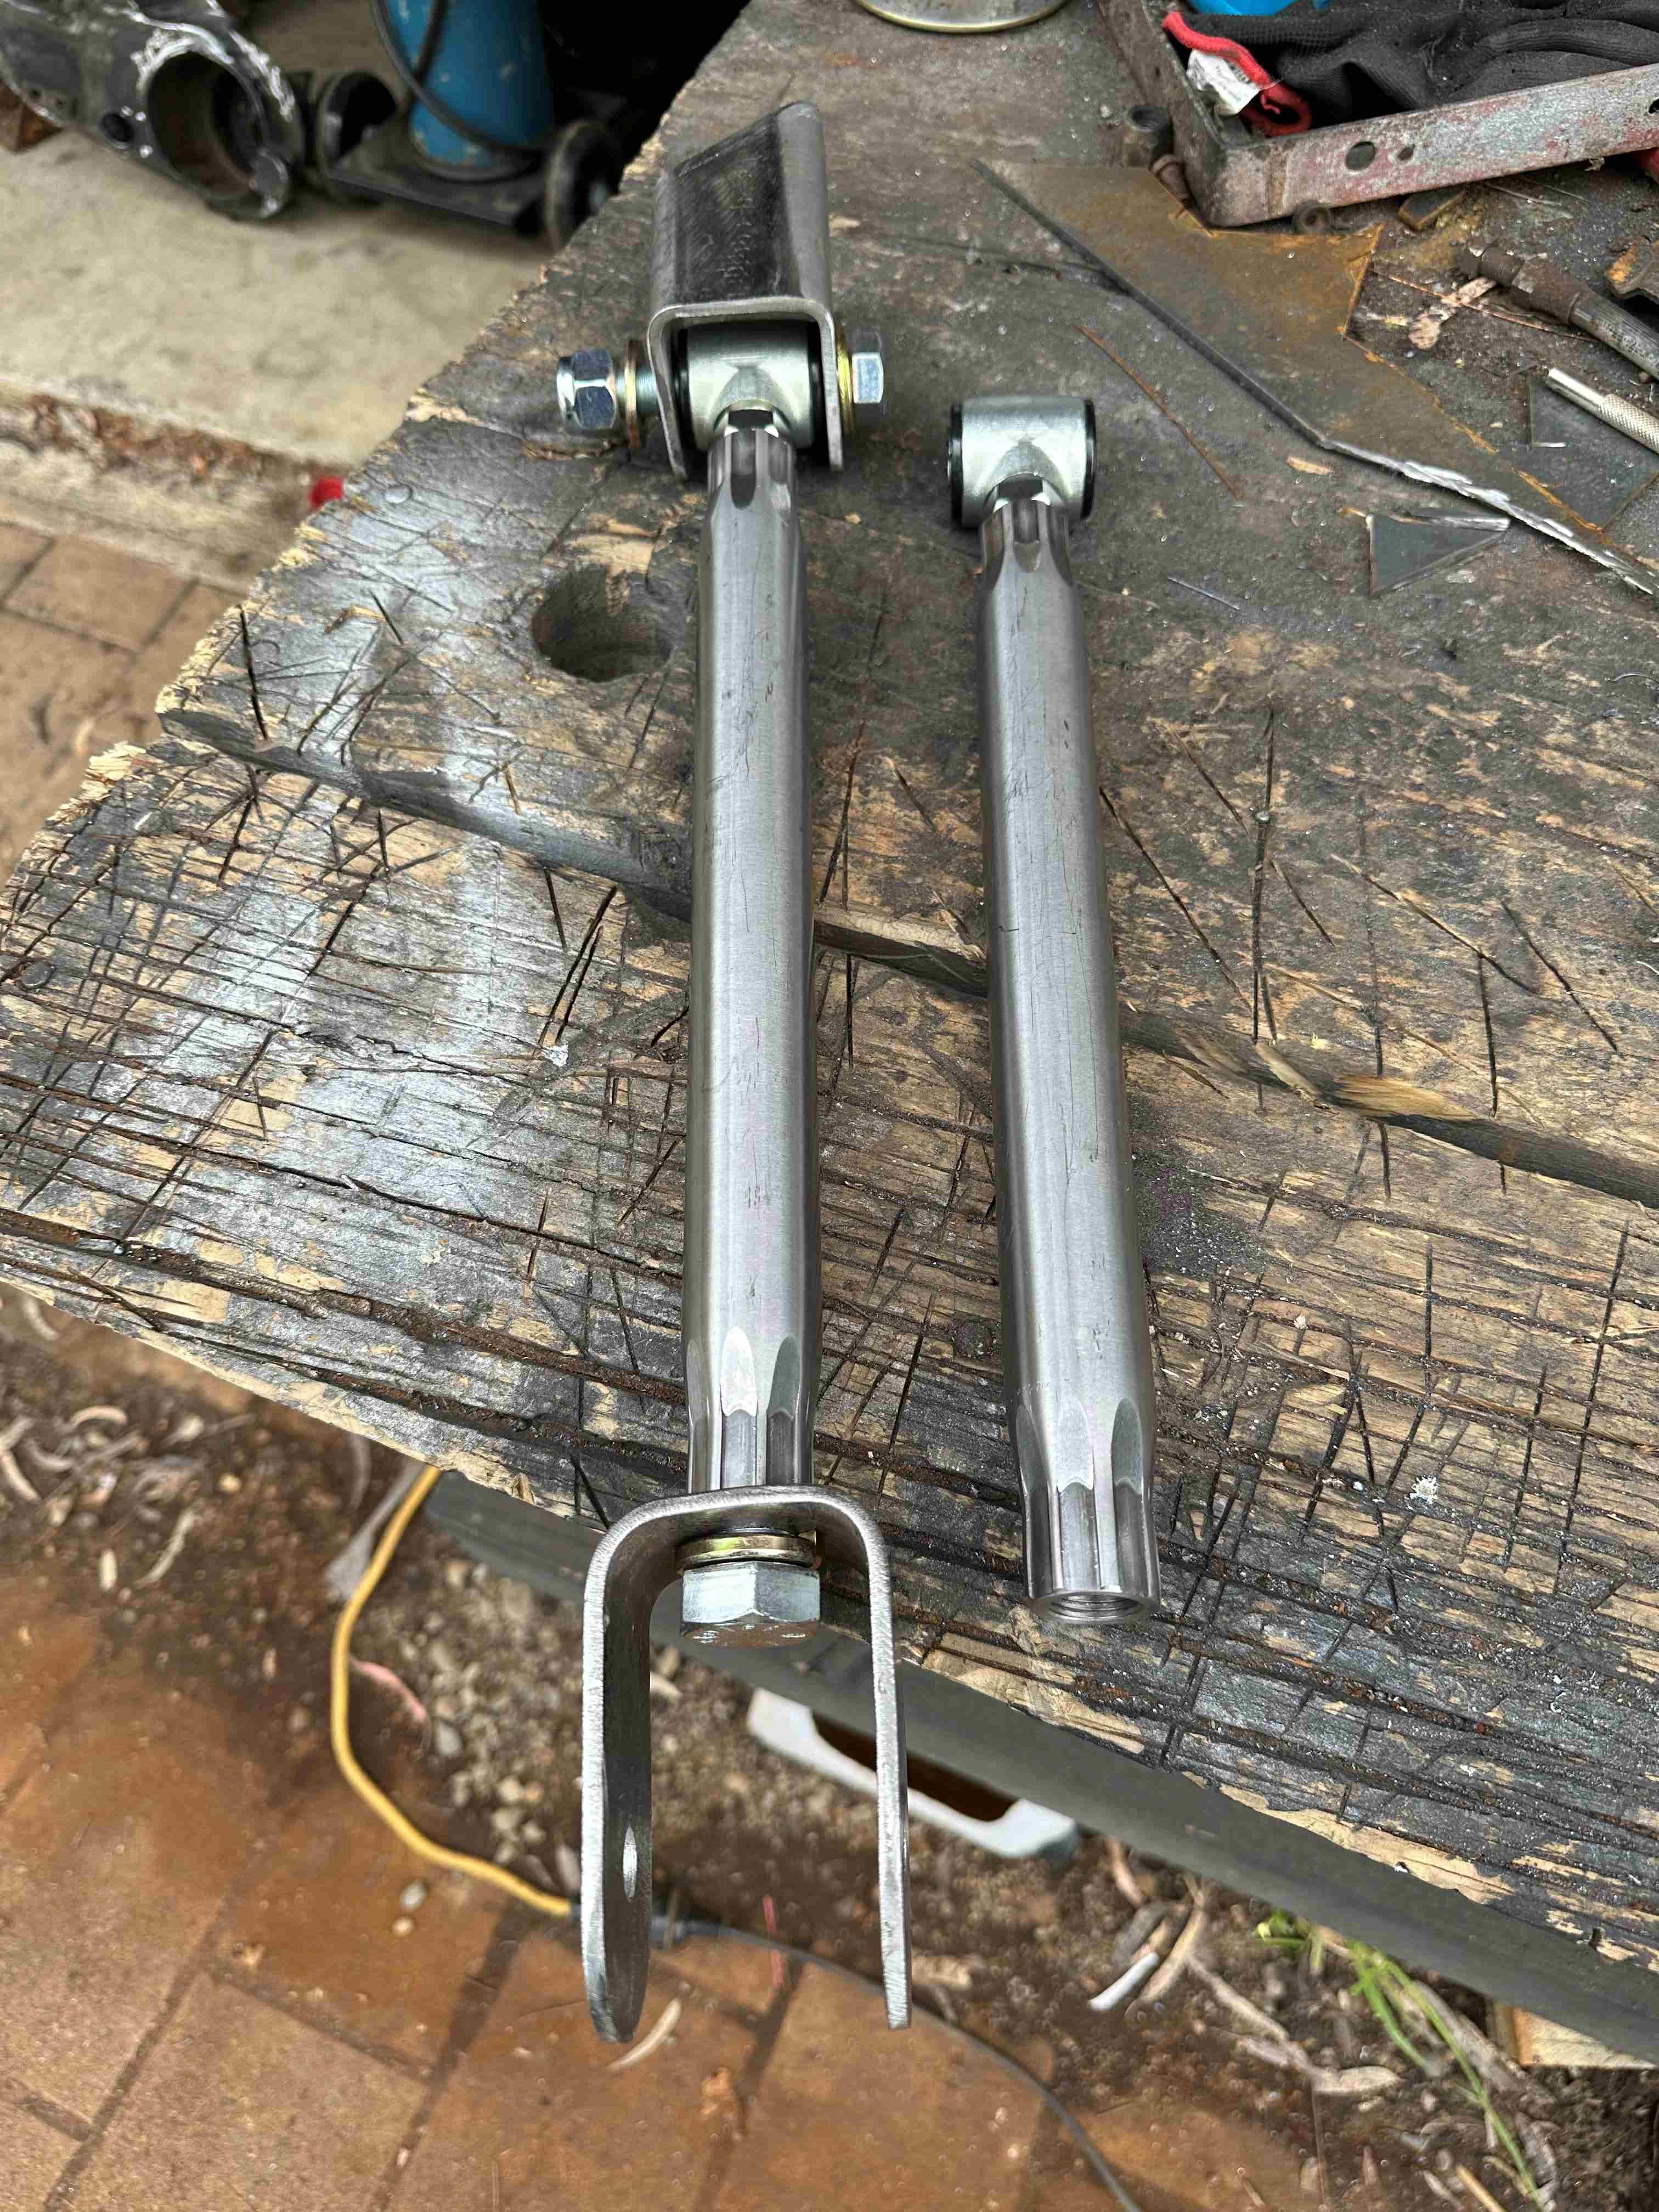
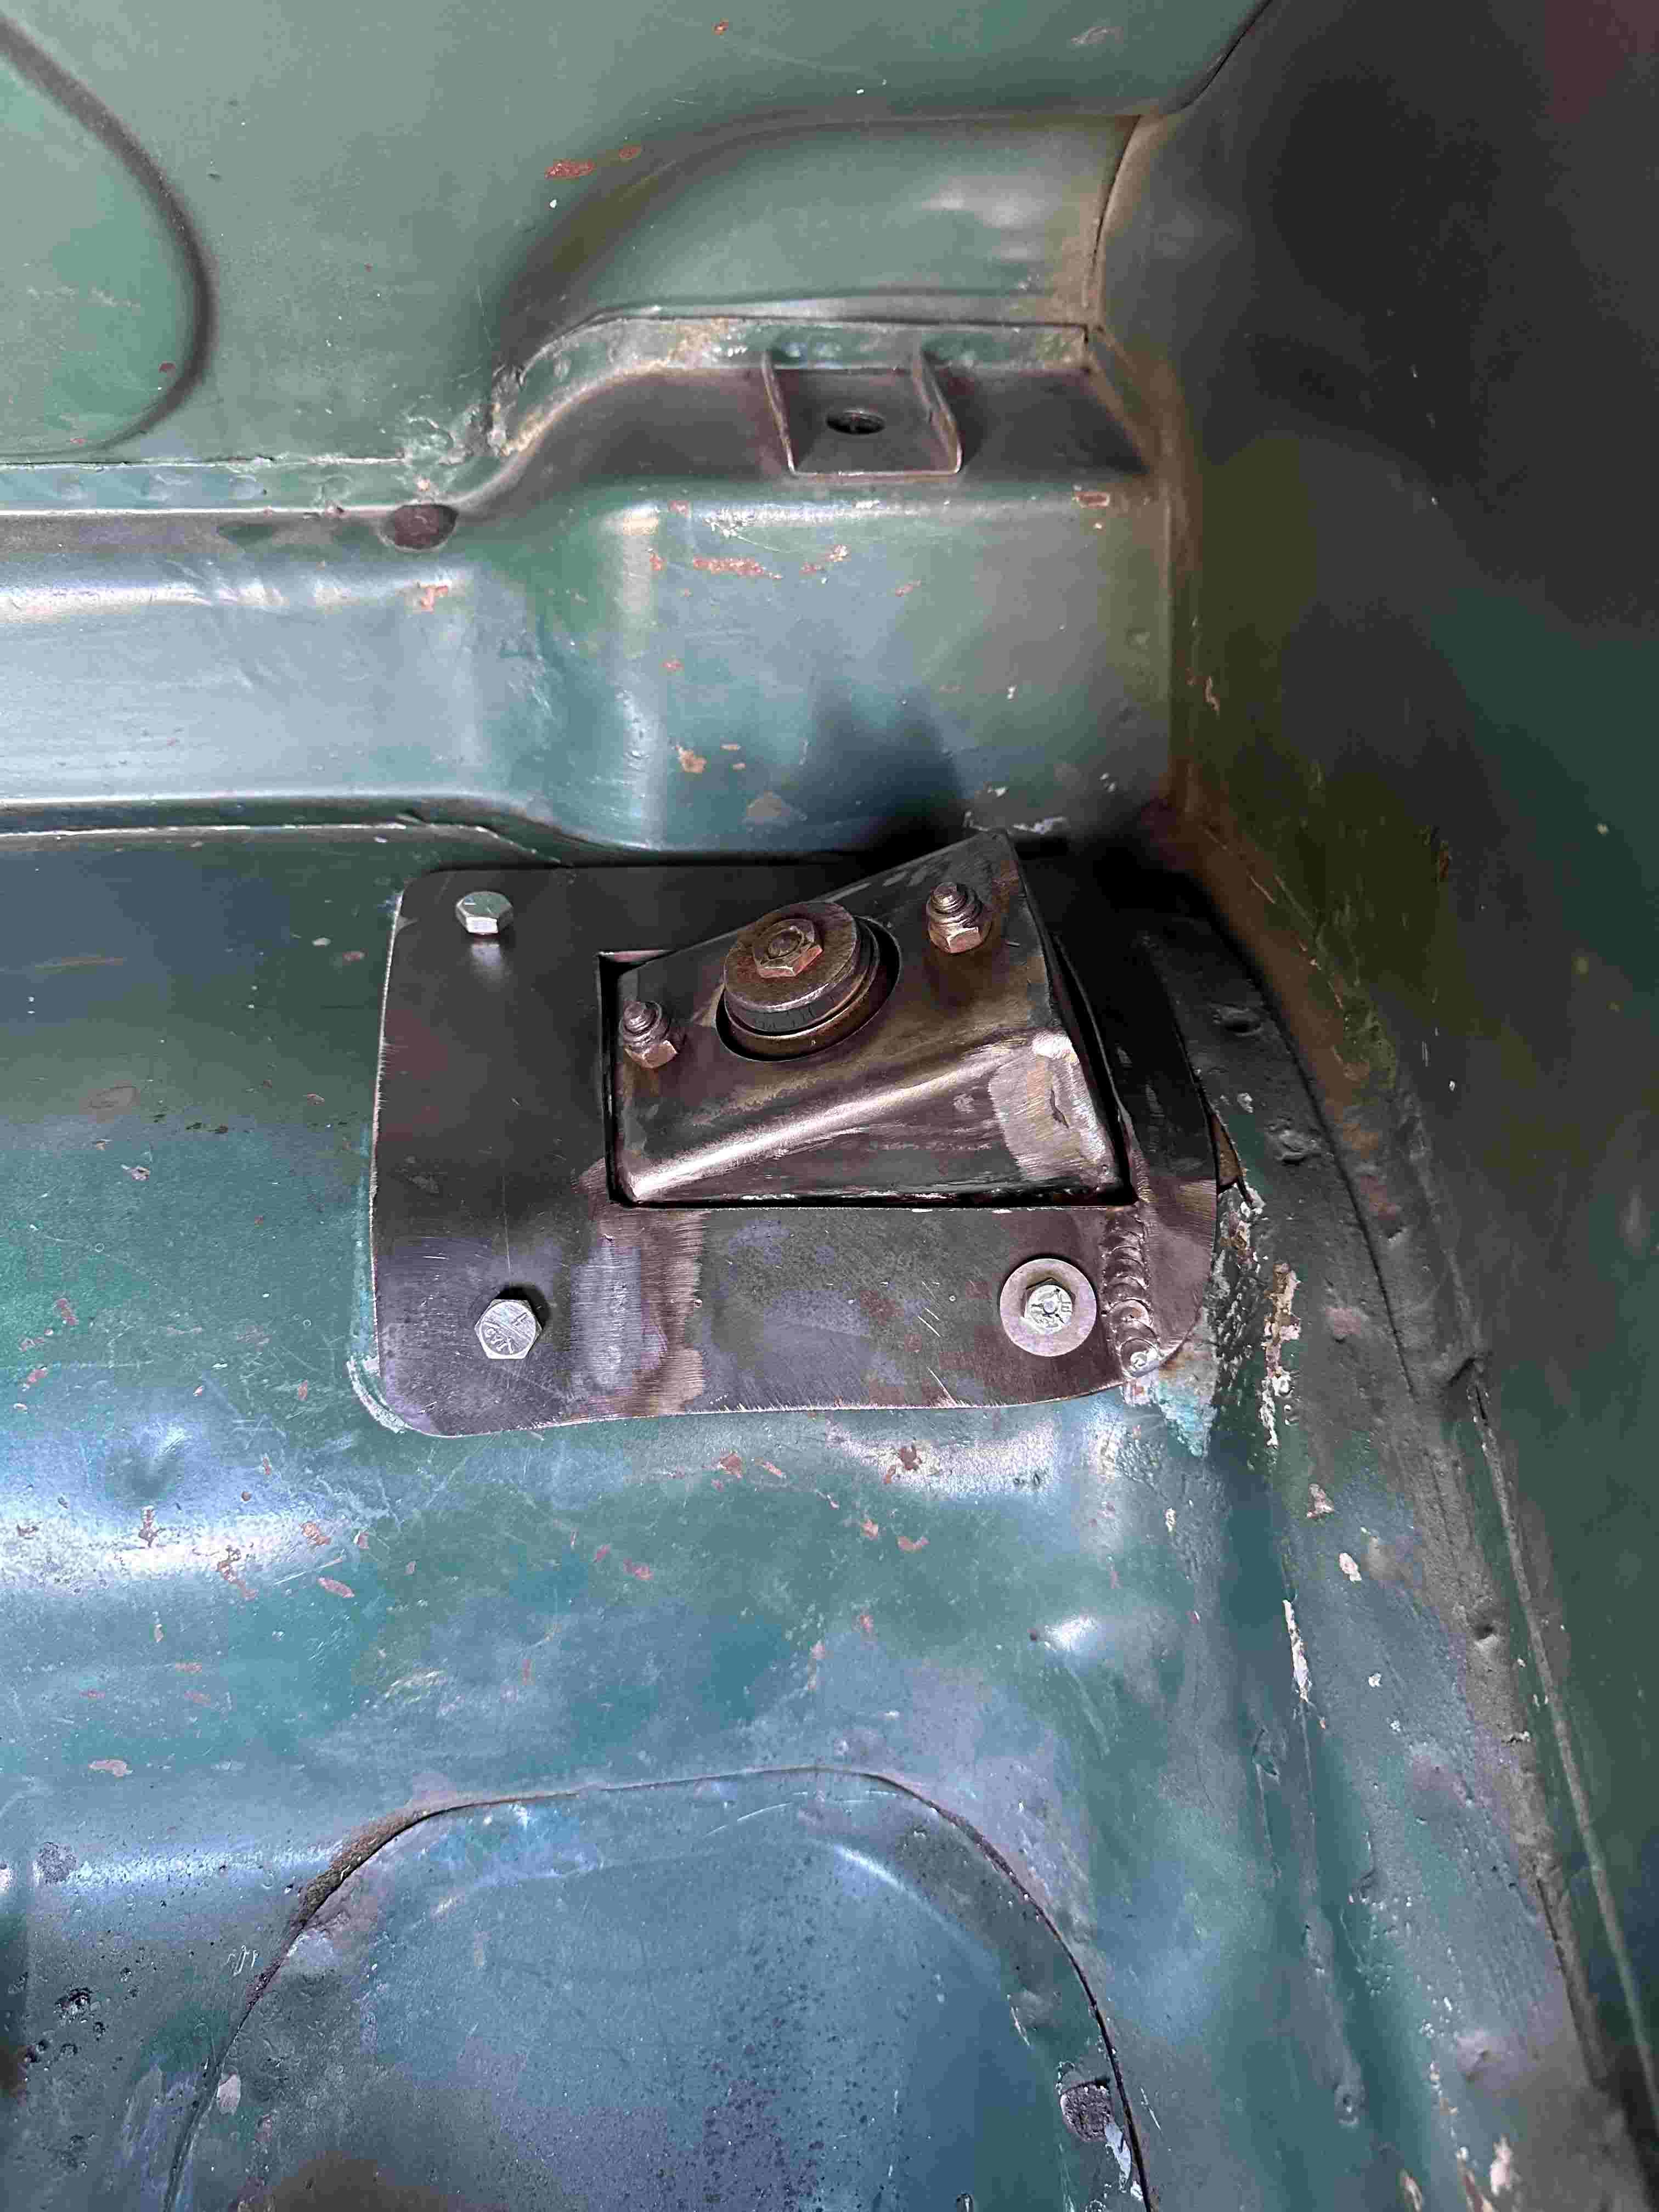
I picked up my upper 4 link arms and bushes from Airride today. He gets them made up to any length you need and they meet the cert requirements. I have also made up the fish plate front lower arm mount and pop riveted them on. The front mount will also have 4mm plate welded in over the 3mm fish plate to provide a good solid mount. The brackets for the upper bars are out of 4mm as well.
1 point
-
Gave it a good nudge to get it off but didnt quite get there.
1 point
-
Then after pulling off the wiper motor and having a look under the scuttle panel I found this! Was not happy at all... tbh I felt pretty defeated at this point. Was not keen at all to be needing to remove the windscreen and unpicking the scuttle panel to access this point. Thought about it for a moment then decided to start pulling the dash apart to see if I could access it from the inside. Still a prick to get to but I think I'll persevere with it.
1 point
-
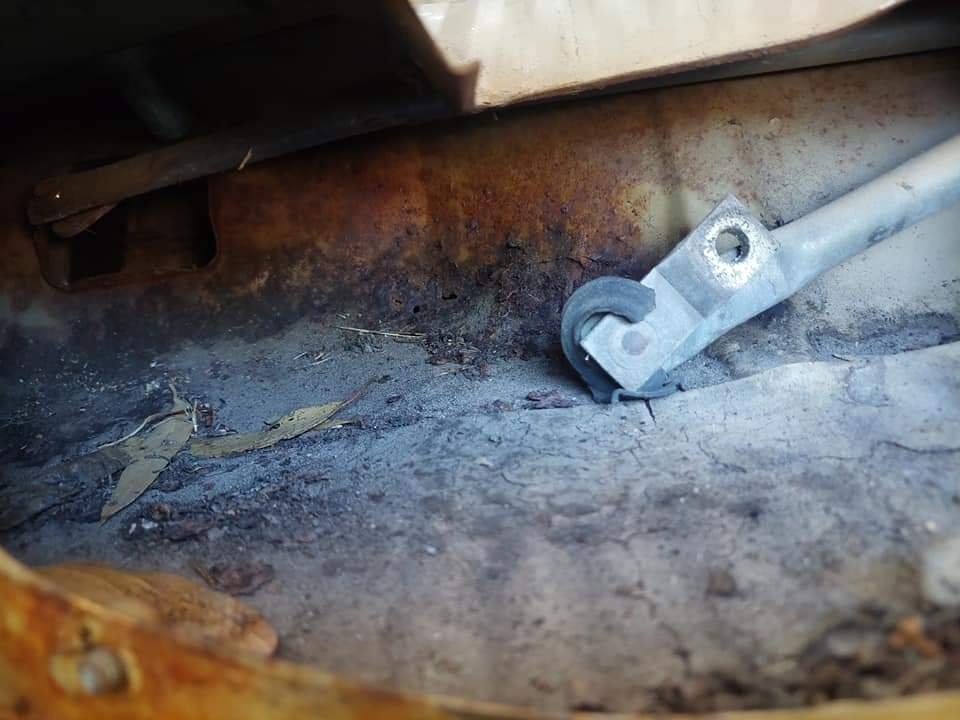
I have spent the last couple of days making up the shock mount for one side. I will send pic's through to the certifier and see what he has to say. So far, it's only time spent and a small hole through the boot floor. I have made it with the boot floor being sandwiched between two 3mm plates. Bolted together for now but will be welded in. I can weld the bracket to the chassis rail on all four sides before the top section goes in. I really need to get the car higher when I weld it in. I have two engine stands so I might make them into a rotisserie of a sort.
1 point
-
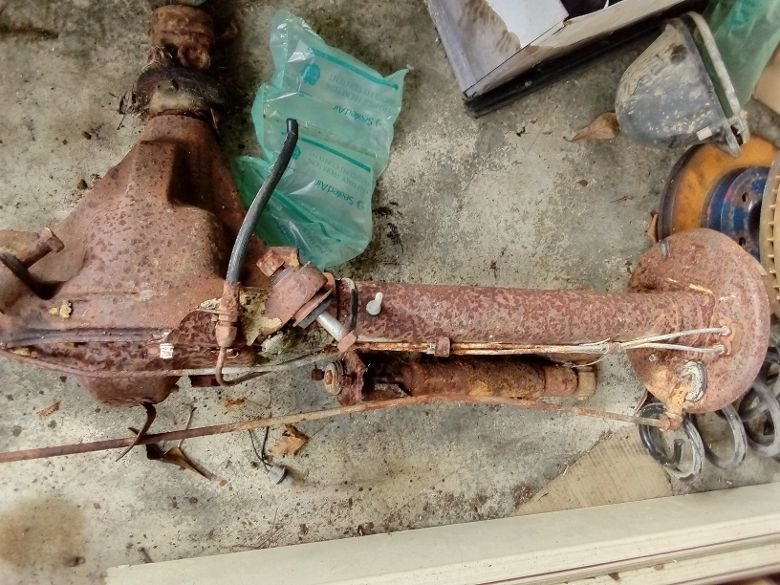
I have the Avenger diff sitting at the same position as the Minx diff was. It's wider than the width I found on the net but not hugely. A pic with the wheels on. Perhaps a little flare will help here as I do like it. I take this as a positive. I contacted Palmside about a Quaife LSD for it and he told me he had asked them a couple of weeks ago as he had had another enquiry for an Avenger diff. They have stopped making them for the Avenger. Well, that's a negative result. Then I found this one on the internet. They say they have it in stock. A positive result. https://id-workz.co.uk/products/quaife-atb-lsd-differential-for-hillman-avenger So, I emailed them but got no reply. Maybe because I am in NZ. Negative result. I do need to do some more research to see they are a complete unit and if I will need to use Quaife axles as well.
1 point
-
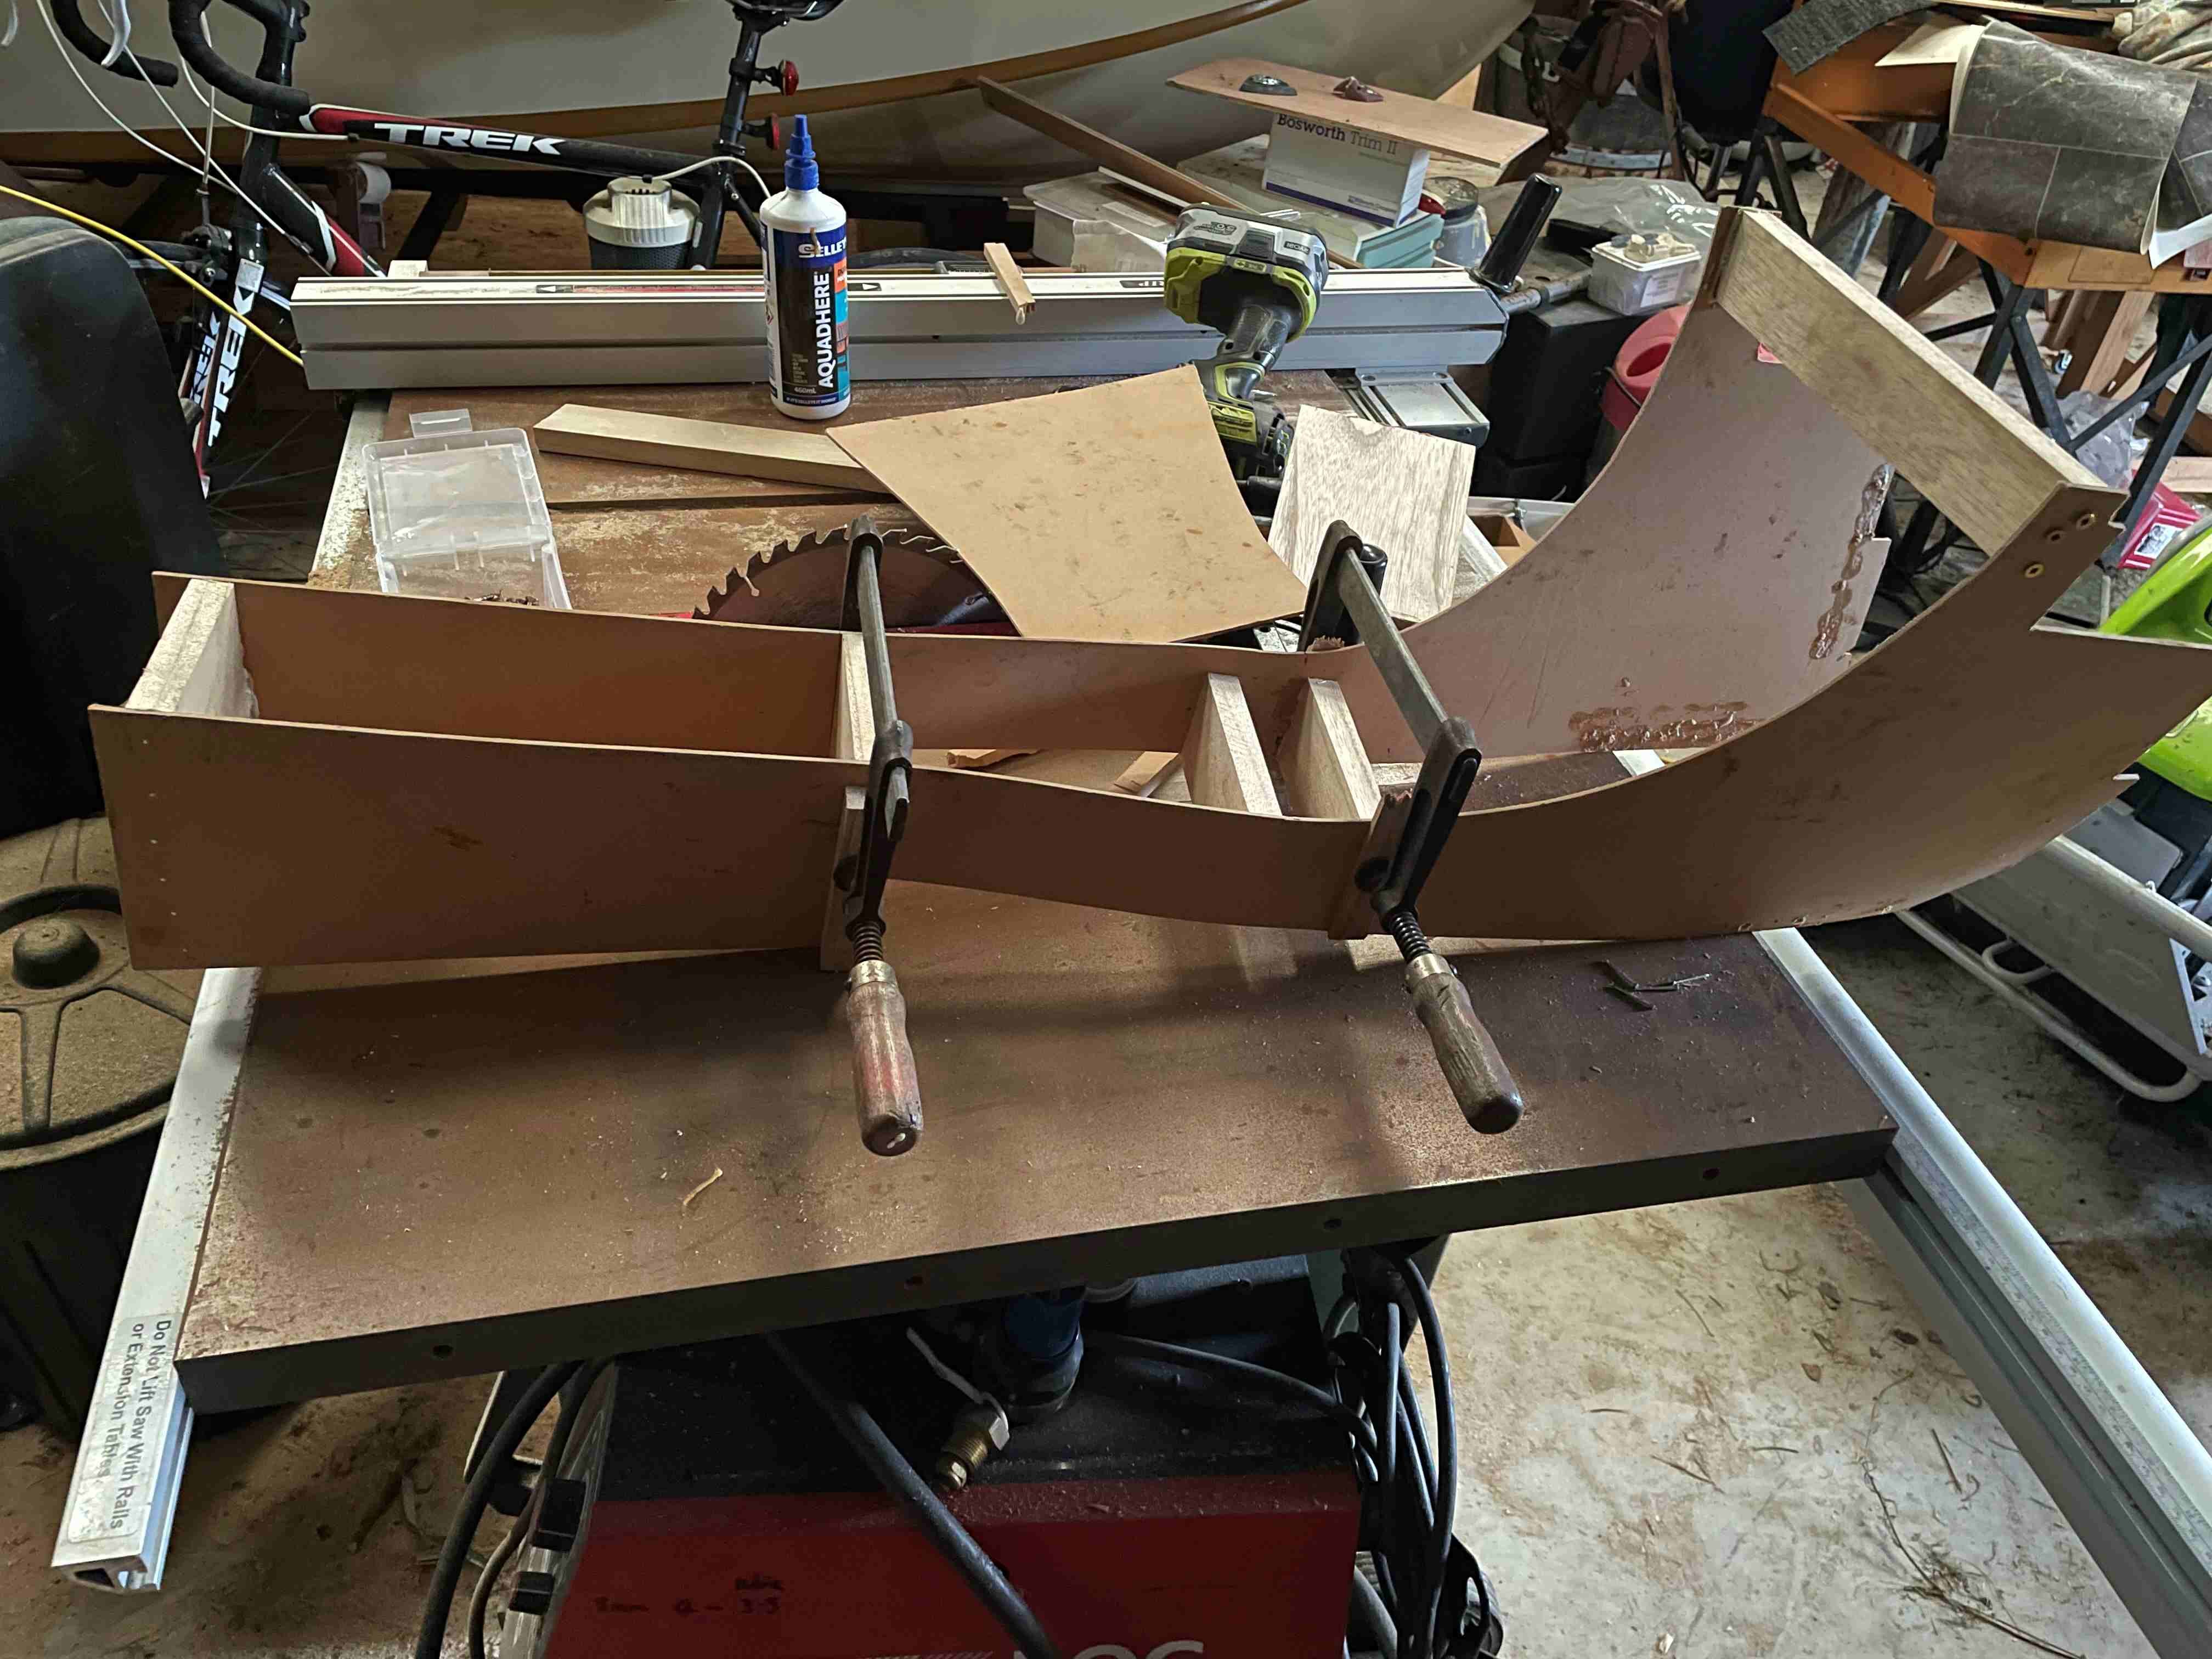
I have been busy working out a consul to place the heater controls, radio etc. I want to hide the ECU in behind it and also, I want to have a storage space between the seats with a lid. I have used some MDF for the side panels and I am using Paulownia timber for the framework. I will cover the sides in vinyl once the frame is complete. I am waiting for the Avenger diff to arrive and the trailing arms. I will see if I can set up the rear with the trailing arms from the Avenger rather than using the leaf springs from the Minx. The Avenger uses coil springs in front of the axle and shocks at the rear of the axle. I think I can use coil overs which would use the Minx shock mounting points on the body and utilize the coil spring mounts in the lower trailing arms for the coil overs. The Minx body shock mounts will need reinforcing to take the load of both the spring and shock. If you think I am nuts, tell me. Anyway a few Pic's, only a mother could love.
1 point
-
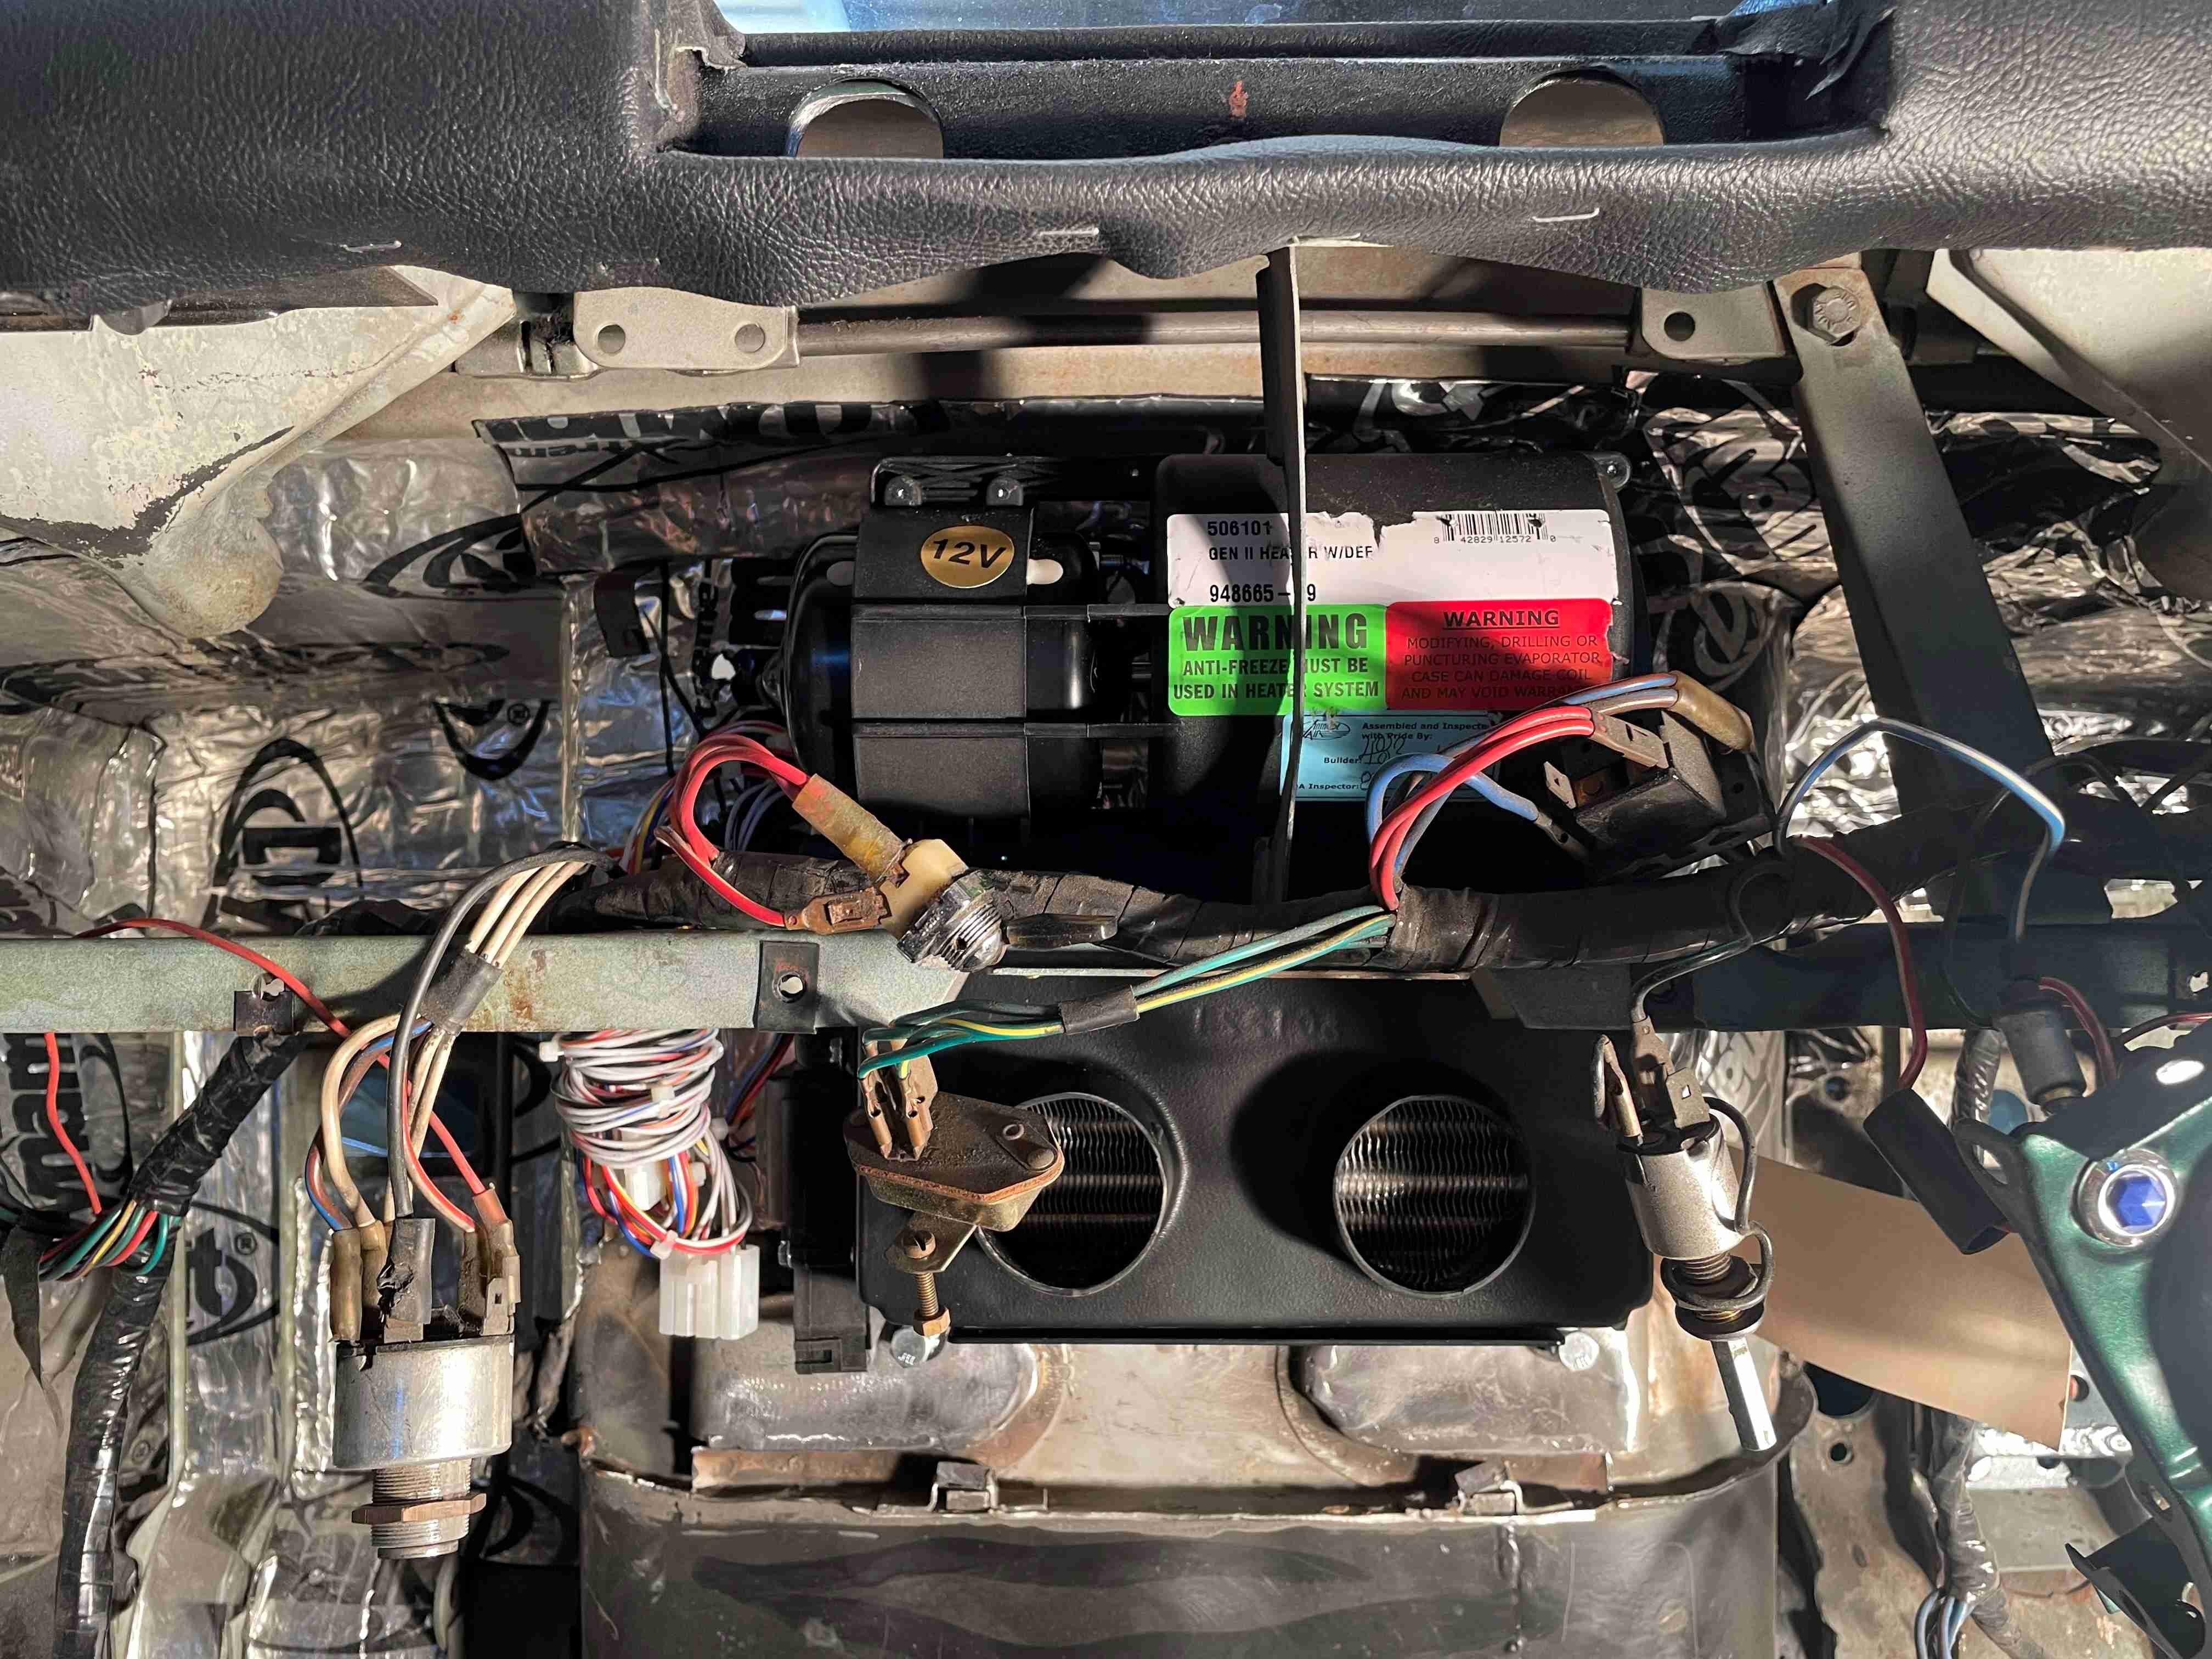
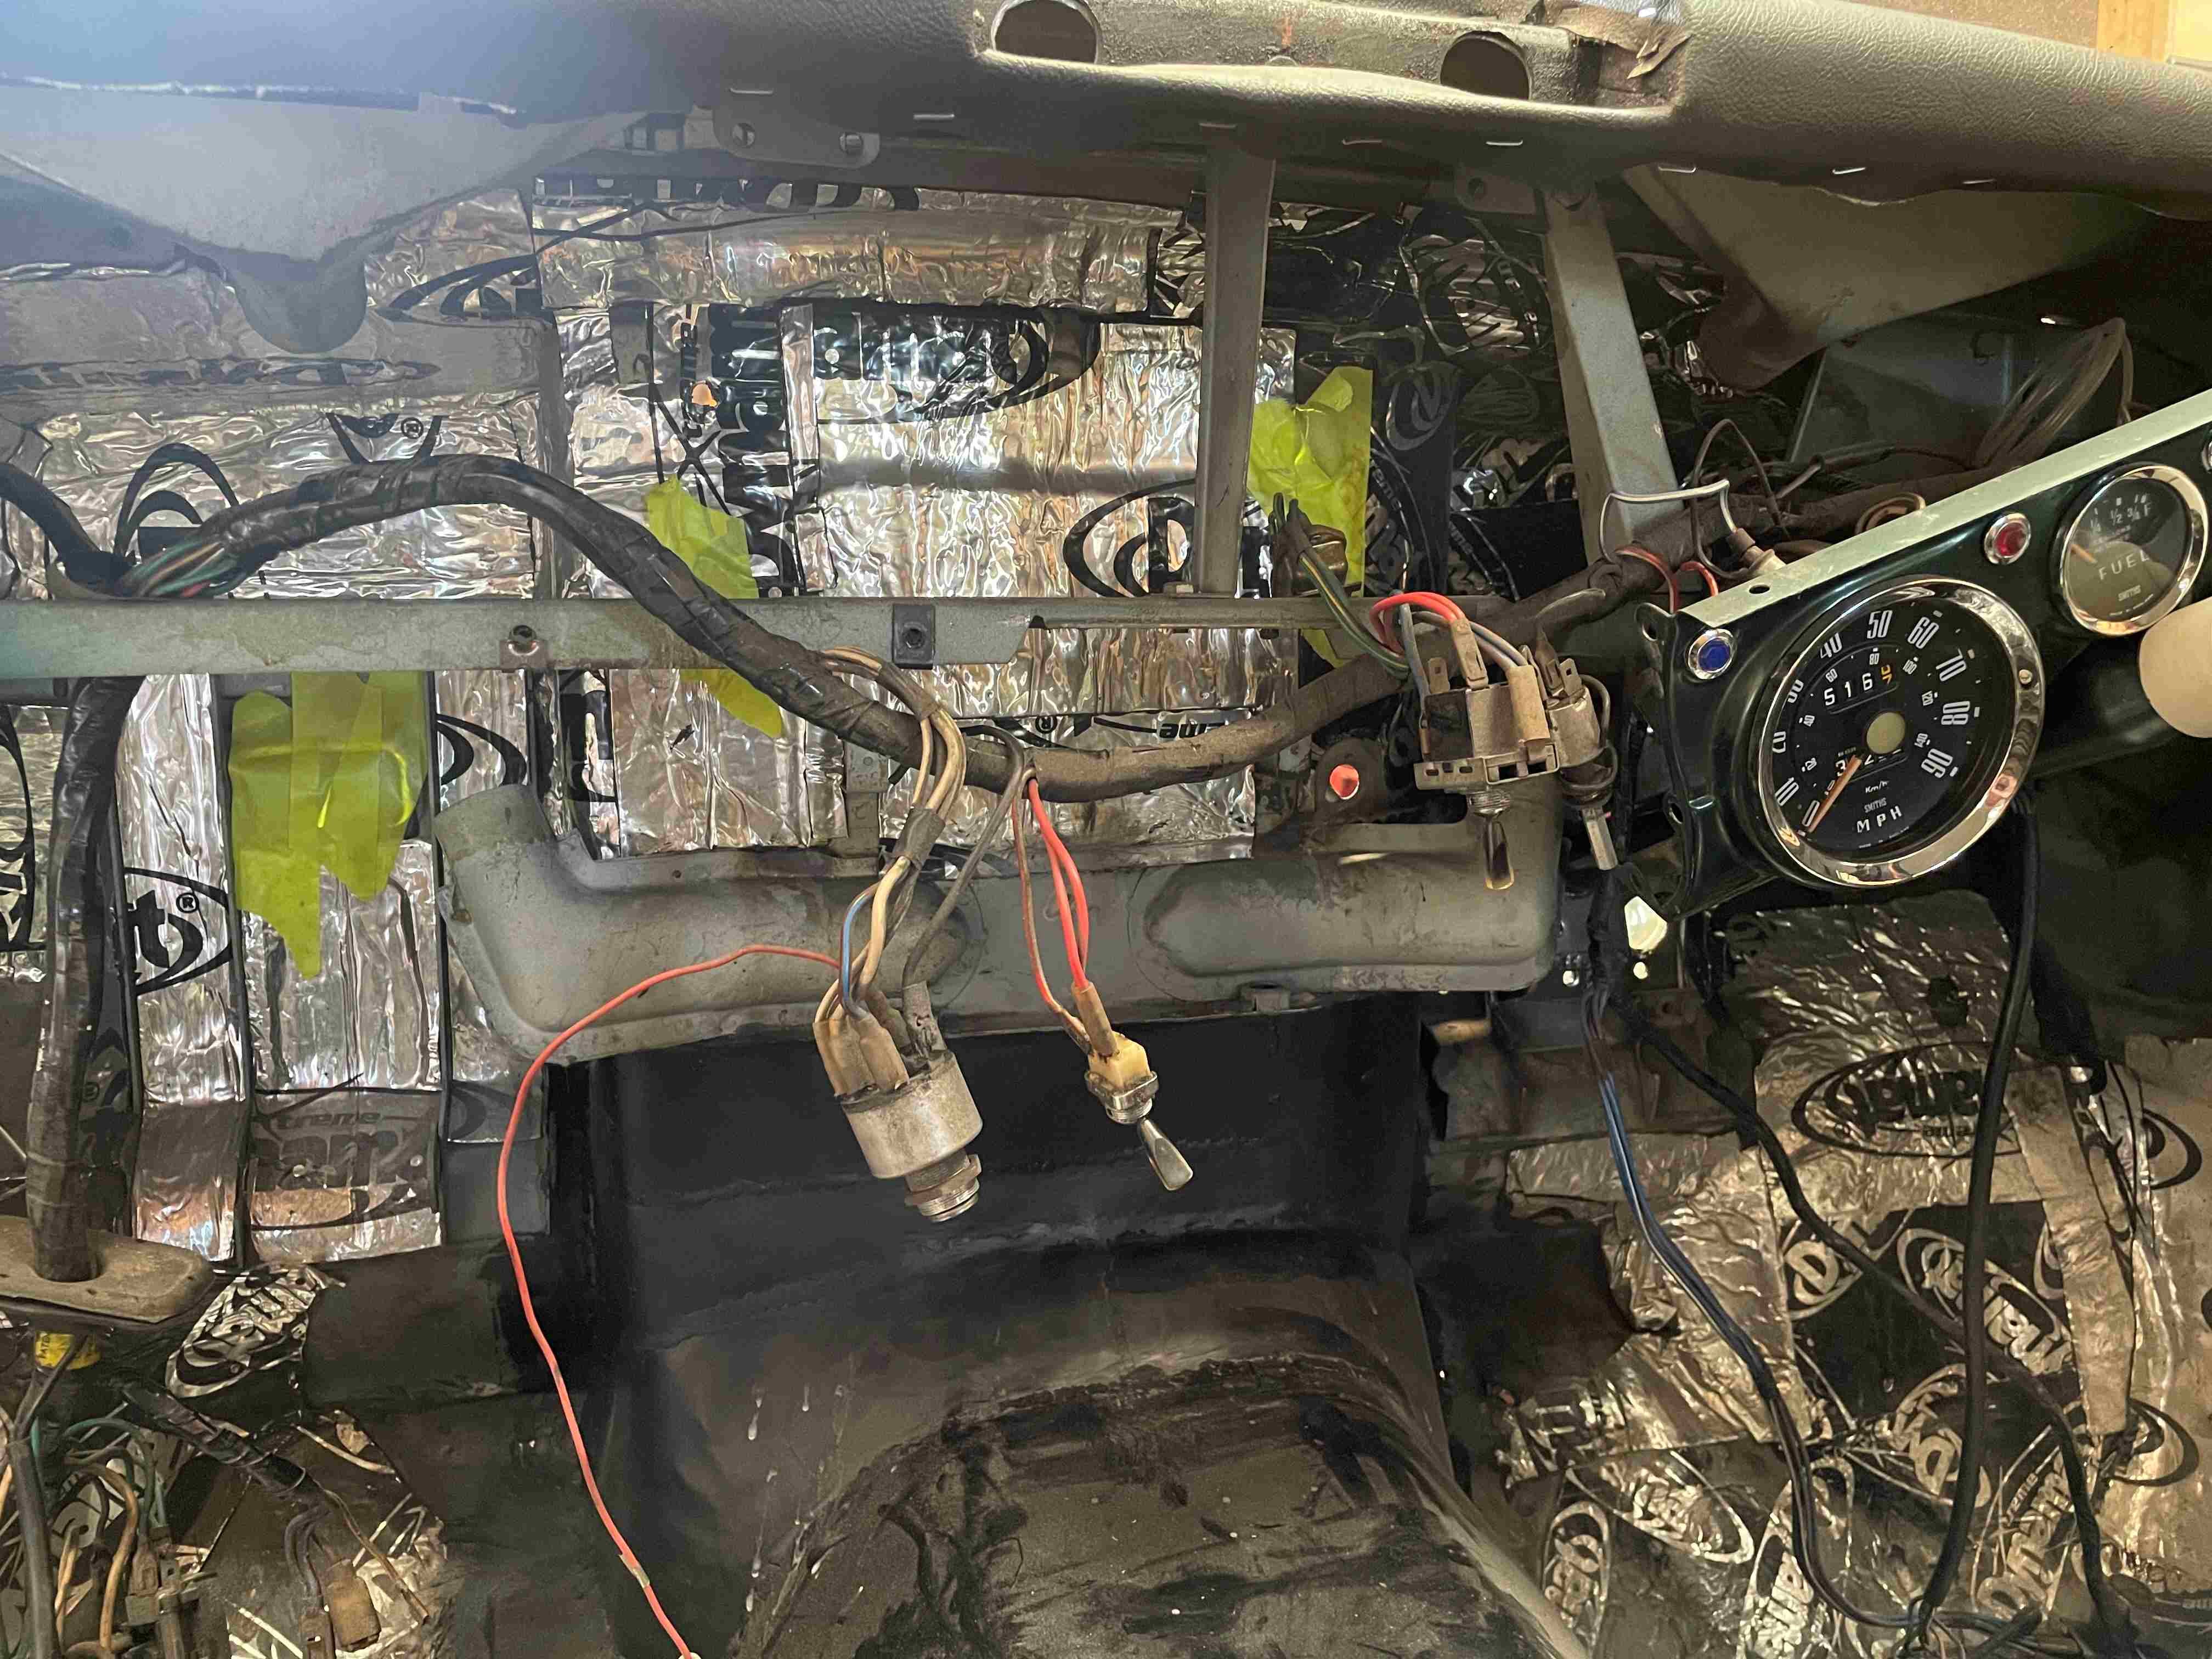
The heater has fitted in behind the dash nicely. I have the dash panel back on with the switches back in and there is still plenty of clearance to the heater. Placed the bulk head fittings in and plumbed the heater to the firewall. I have worked out the plumbing in the engine bay but there is no rush for that. Other news I have found a Hillman Avenger diff. It looks a bit rusty so hopefully it is ok. The reason I decided to go with a Avenger diff is it is the same family, a good width, about 20mm wider than the Minx. Probably not much stronger but Quaife make LSD carriers and axles for them.
1 point
-
I cut back the old metal ducts and welded in a 3mm plate with another small piece of 3mm welded in behind and drilled and tapped it for the bottom mounting holes. Bolted it into the bottom mounts. Next the top mounts which will need to go through the firewall. They will be in full view above the engine so I need to find a fixture a little more aesthetic than just a normal old bolt head. I also need to remove the dash pad and reglue the vinyl down. The dash pad was badly cracked so I removed the old disintegrating foam and shaped up a piece of Paulownia timber. Put a layer of glass over it and used the spray on contact adhesive to glue the vinyl down. I just needed to use more glue and it would have been a good result. Easily remedied now it's all apart again.
1 point
-
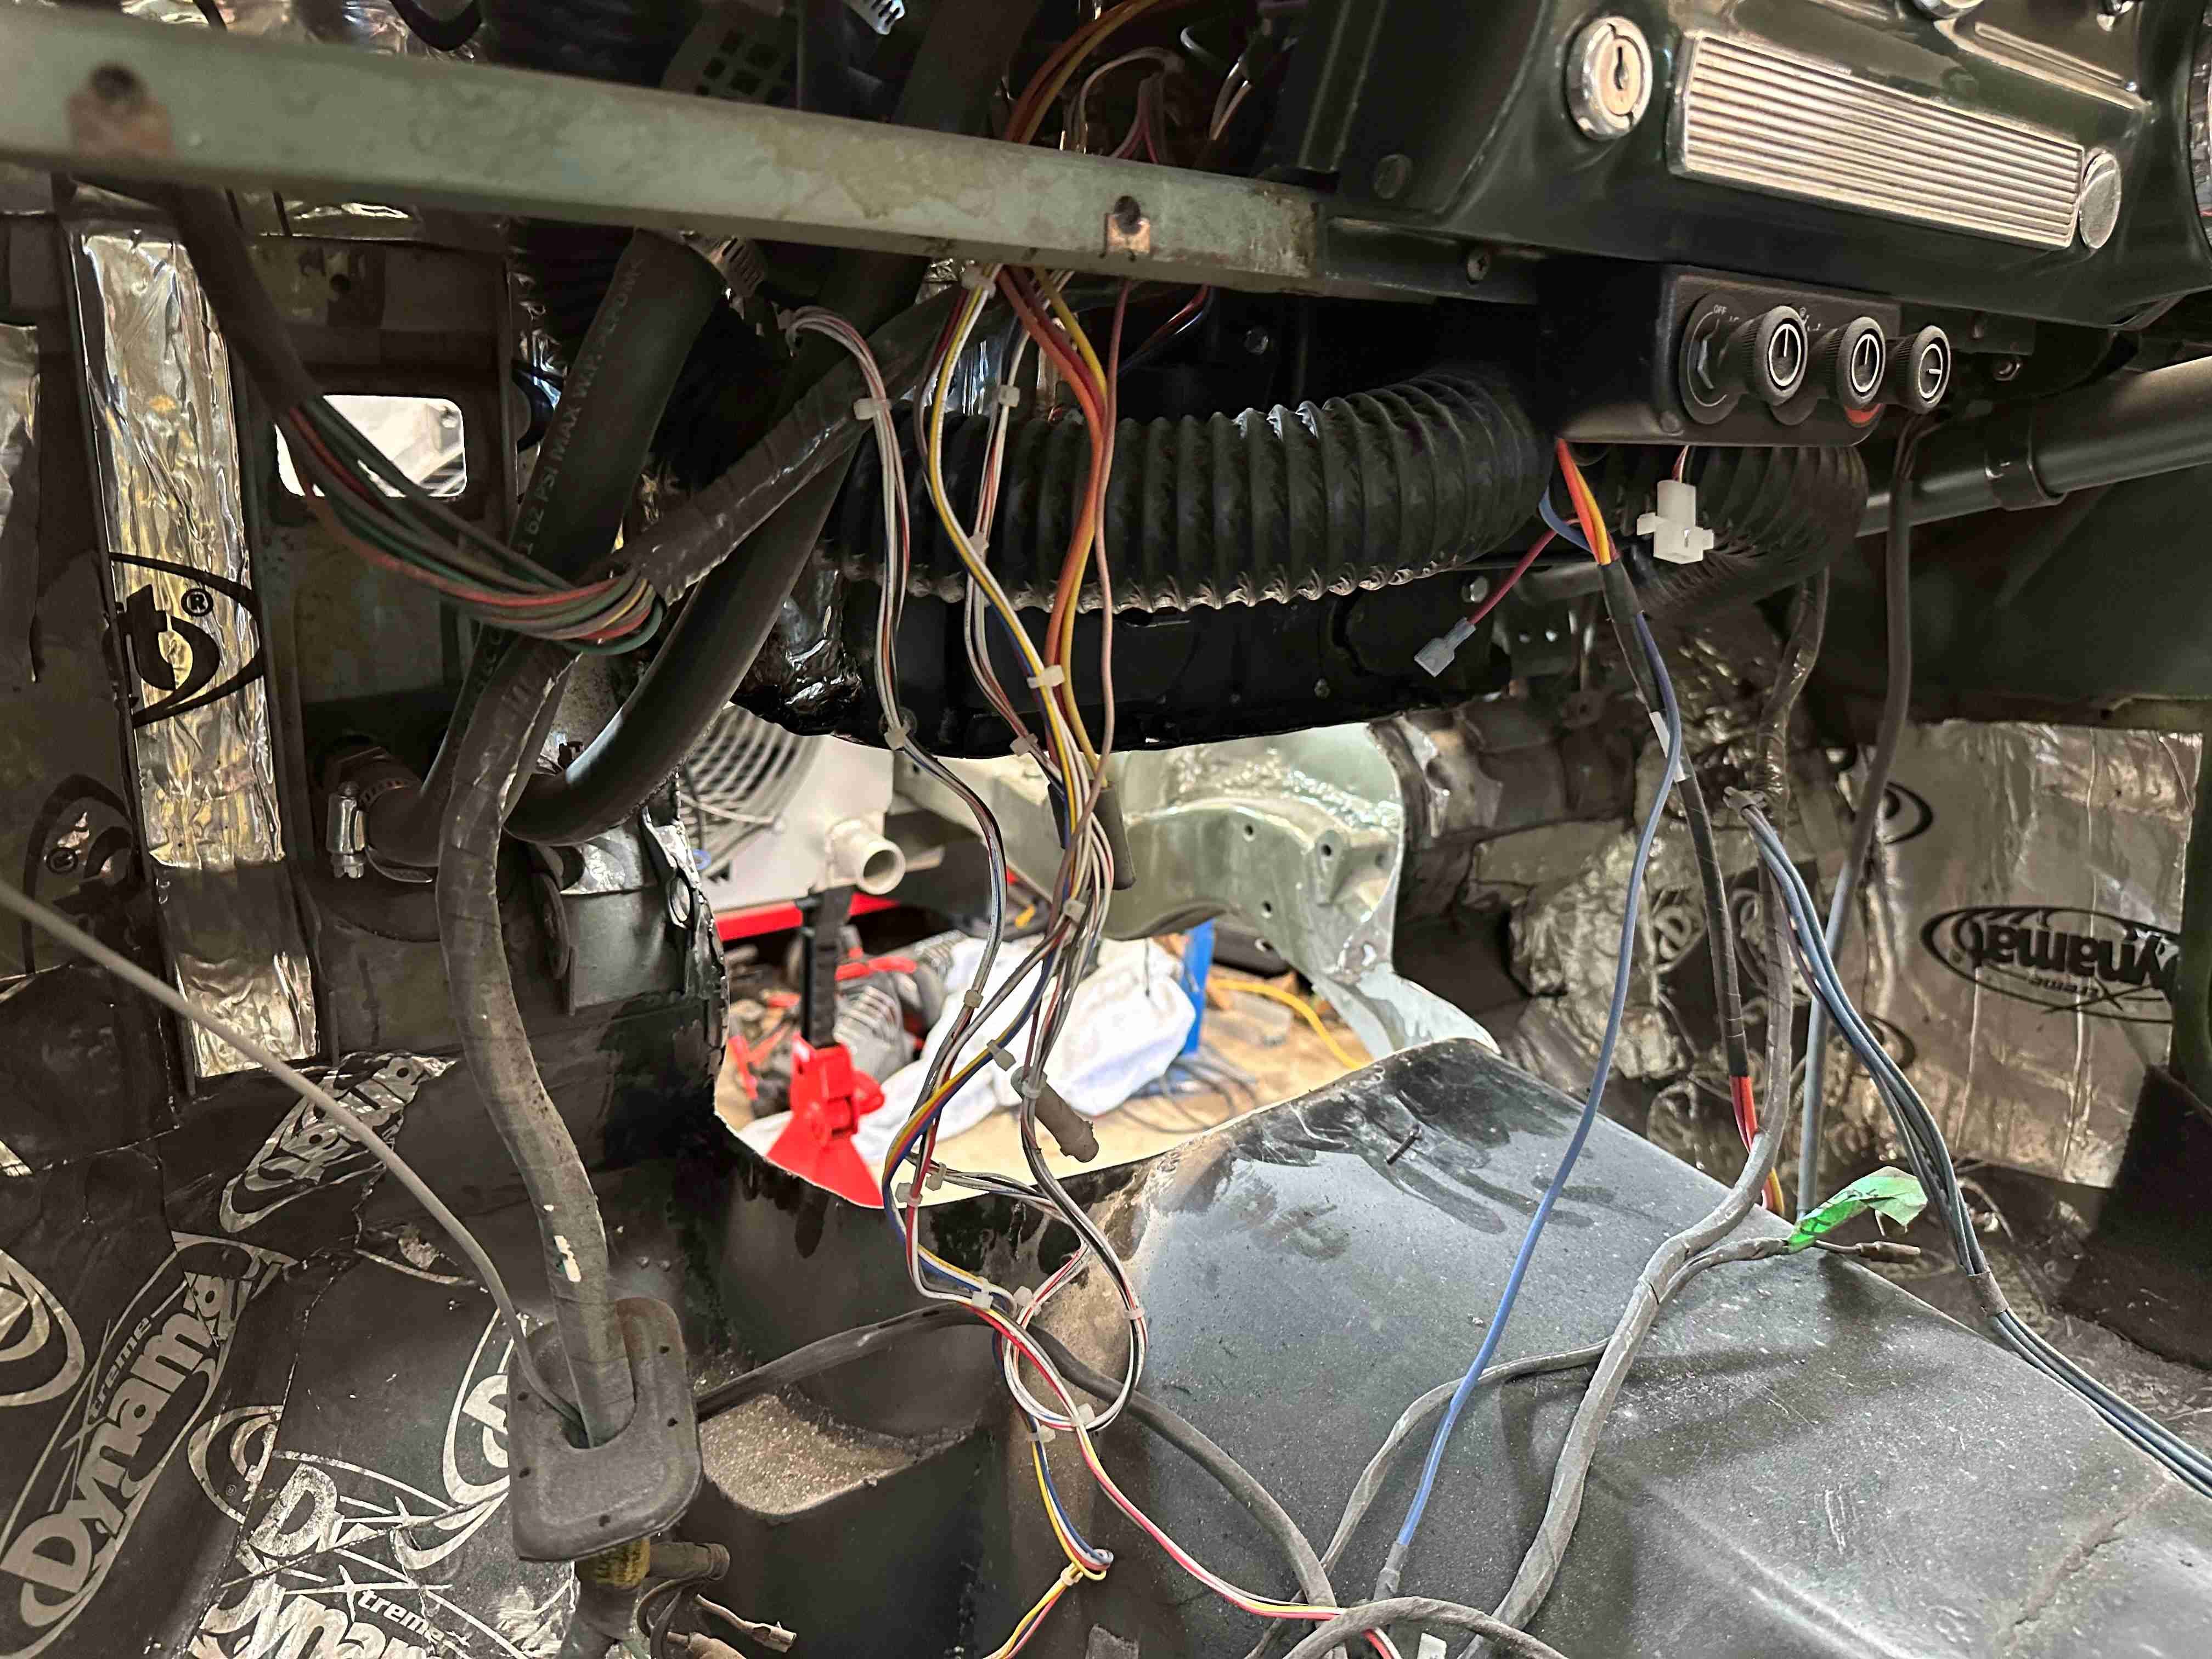
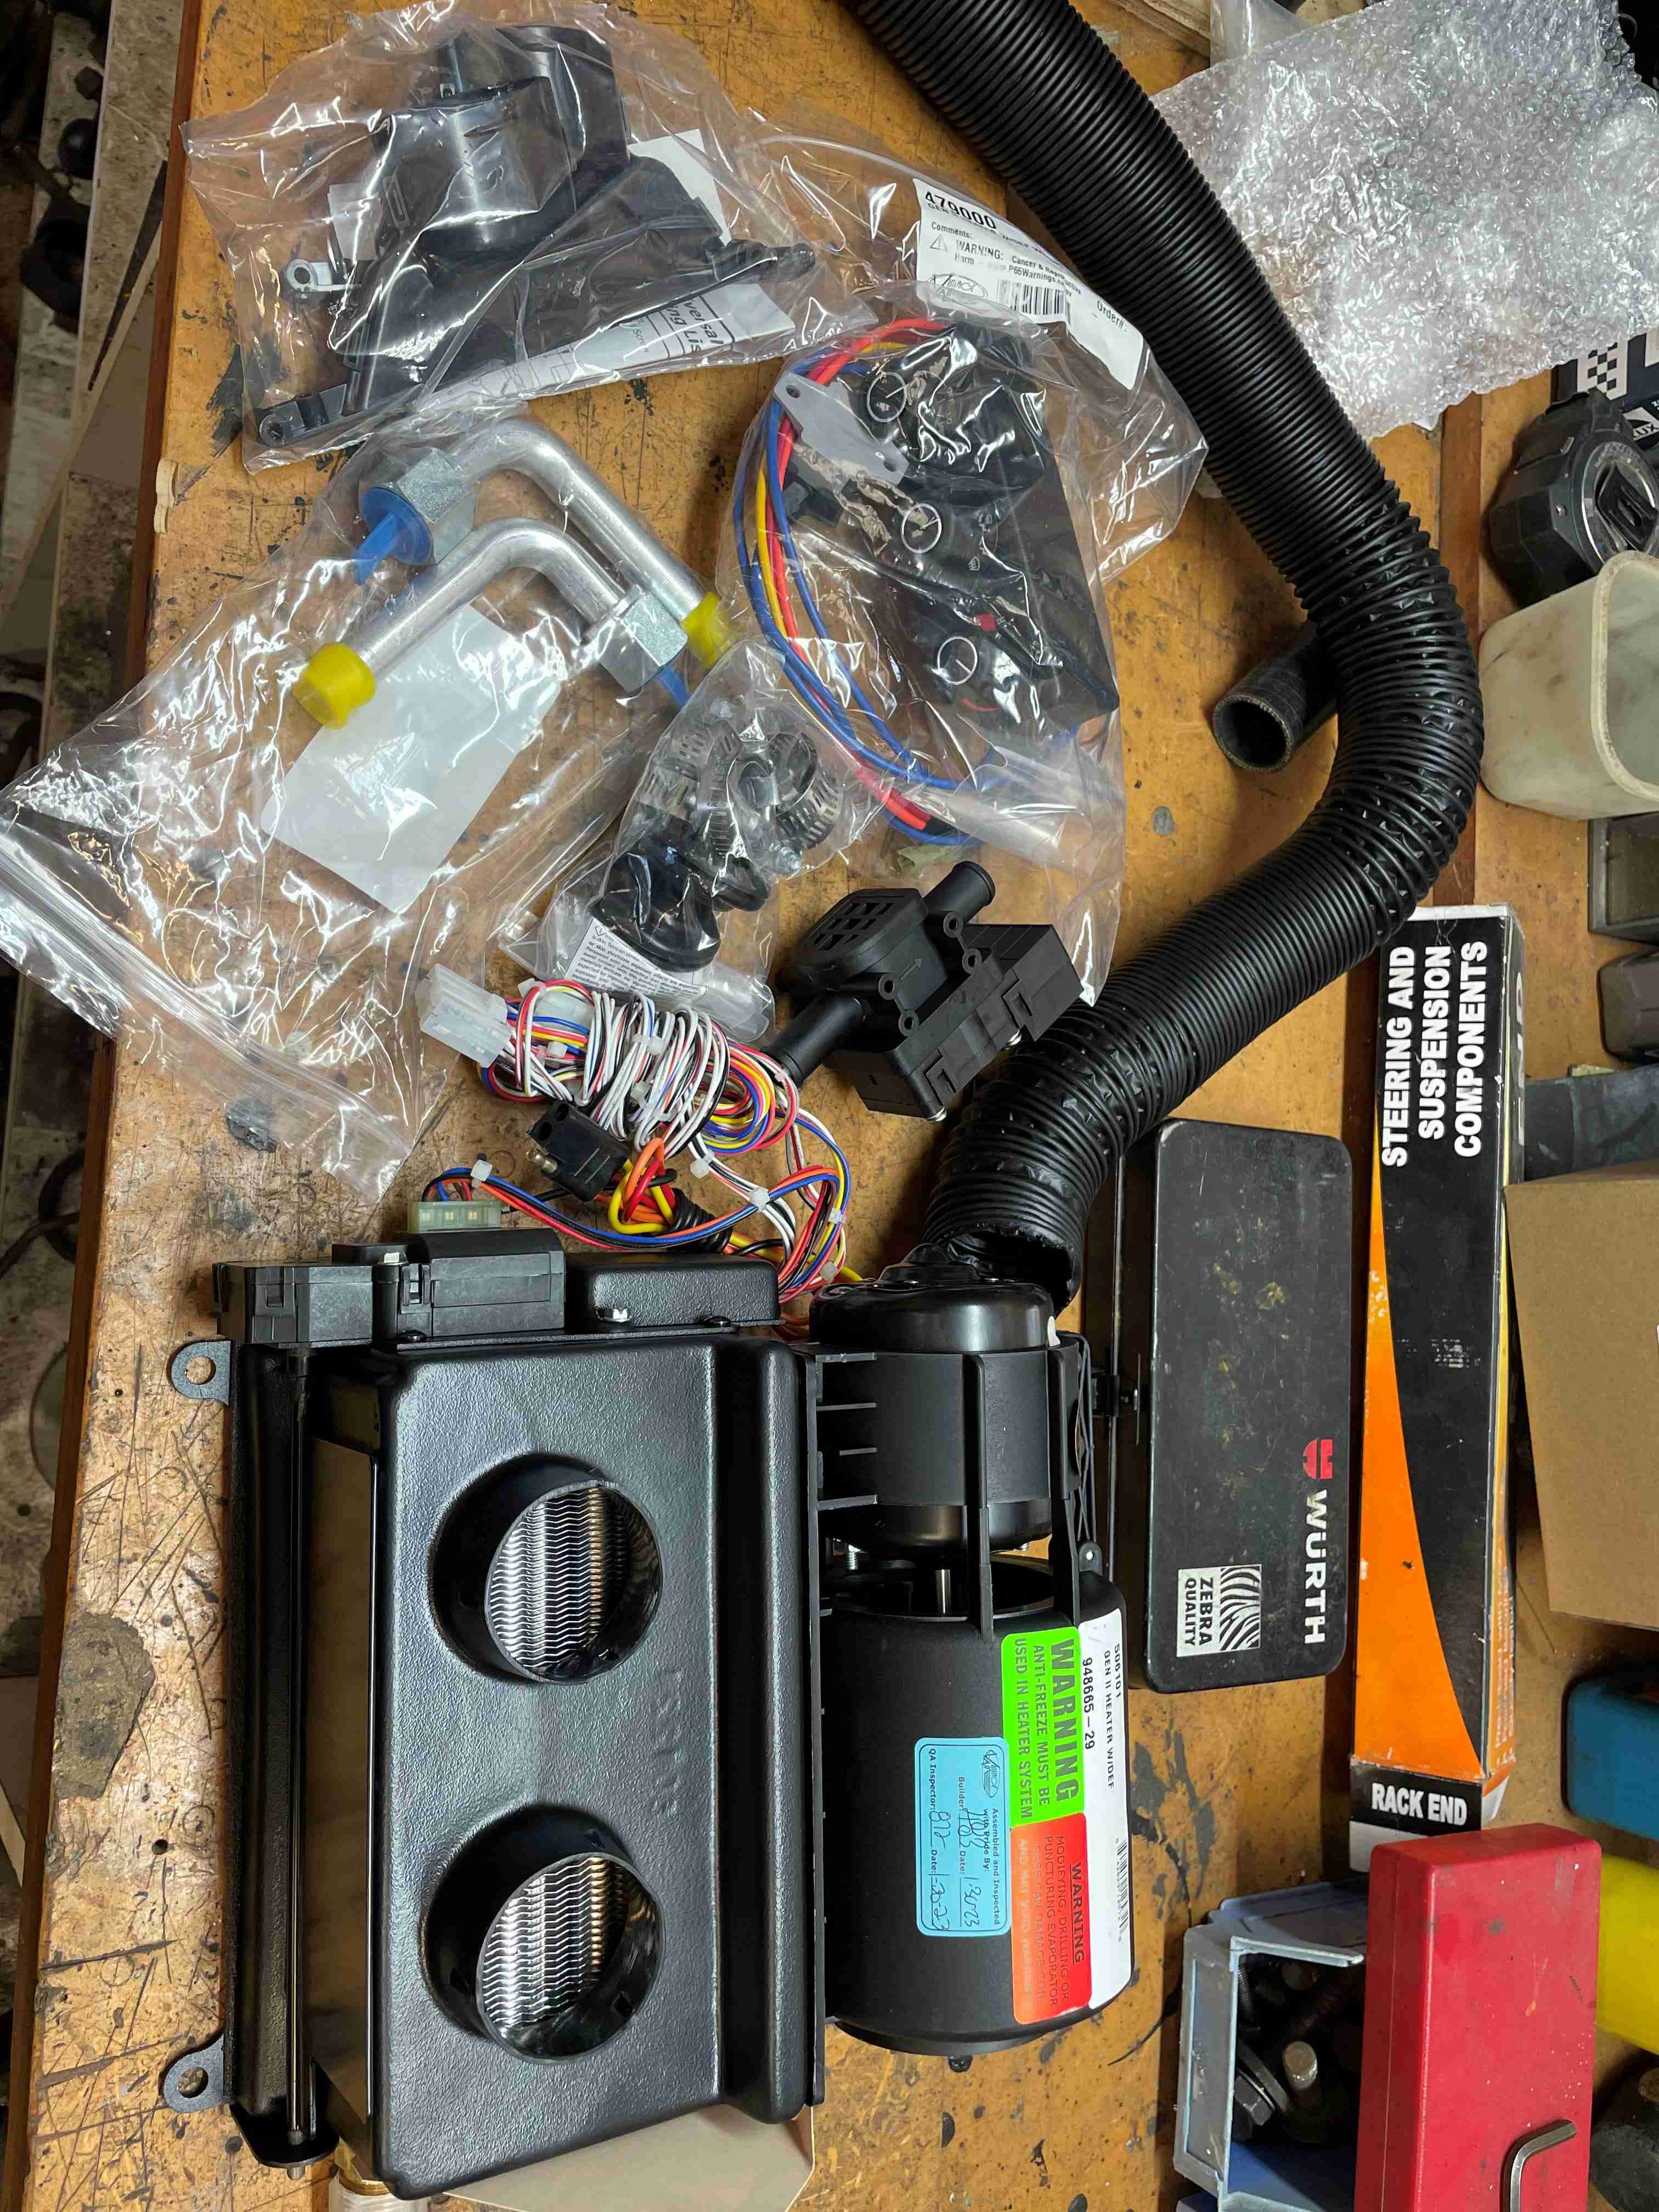
MAN NEEDS HEAT Since I was never going to be able to keep the AC Compressor in the engine bay unless I cut out the chassis rails and had new chassis rails and a new front suspension made up, which would be horribly expensive. I still wanted a heater and windscreen defrost. The original heater sat on a shelf on the firewall which is now gone and been replaced with the engine. I had a few Smiths heaters and fans that I thought I might be able to make something up to work. The fans are mounted up front by the radiator and by the time the air gets to and through the heater there's not that much puff coming through to the cabin or worse the windscreen. It would be nice if I could keep the windscreen clear in the cold and wet when needed. So I gave up on the old crap and bought a Vintage air heater with defrost. Seemed to have good reviews so here's hoping. It would fit ok below the dash, but it would be better if I could get it up a higher and have the fan and motor up in behind the dash. So, I pulled the dash apart to see if it will fit. I think with a bit of trimming of that vertical bracket and the old vents and brackets removed It will sit up there nicely. Anyway, stay tuned for the next exciting episode of MAN NEEDS HEAT.
1 point
-
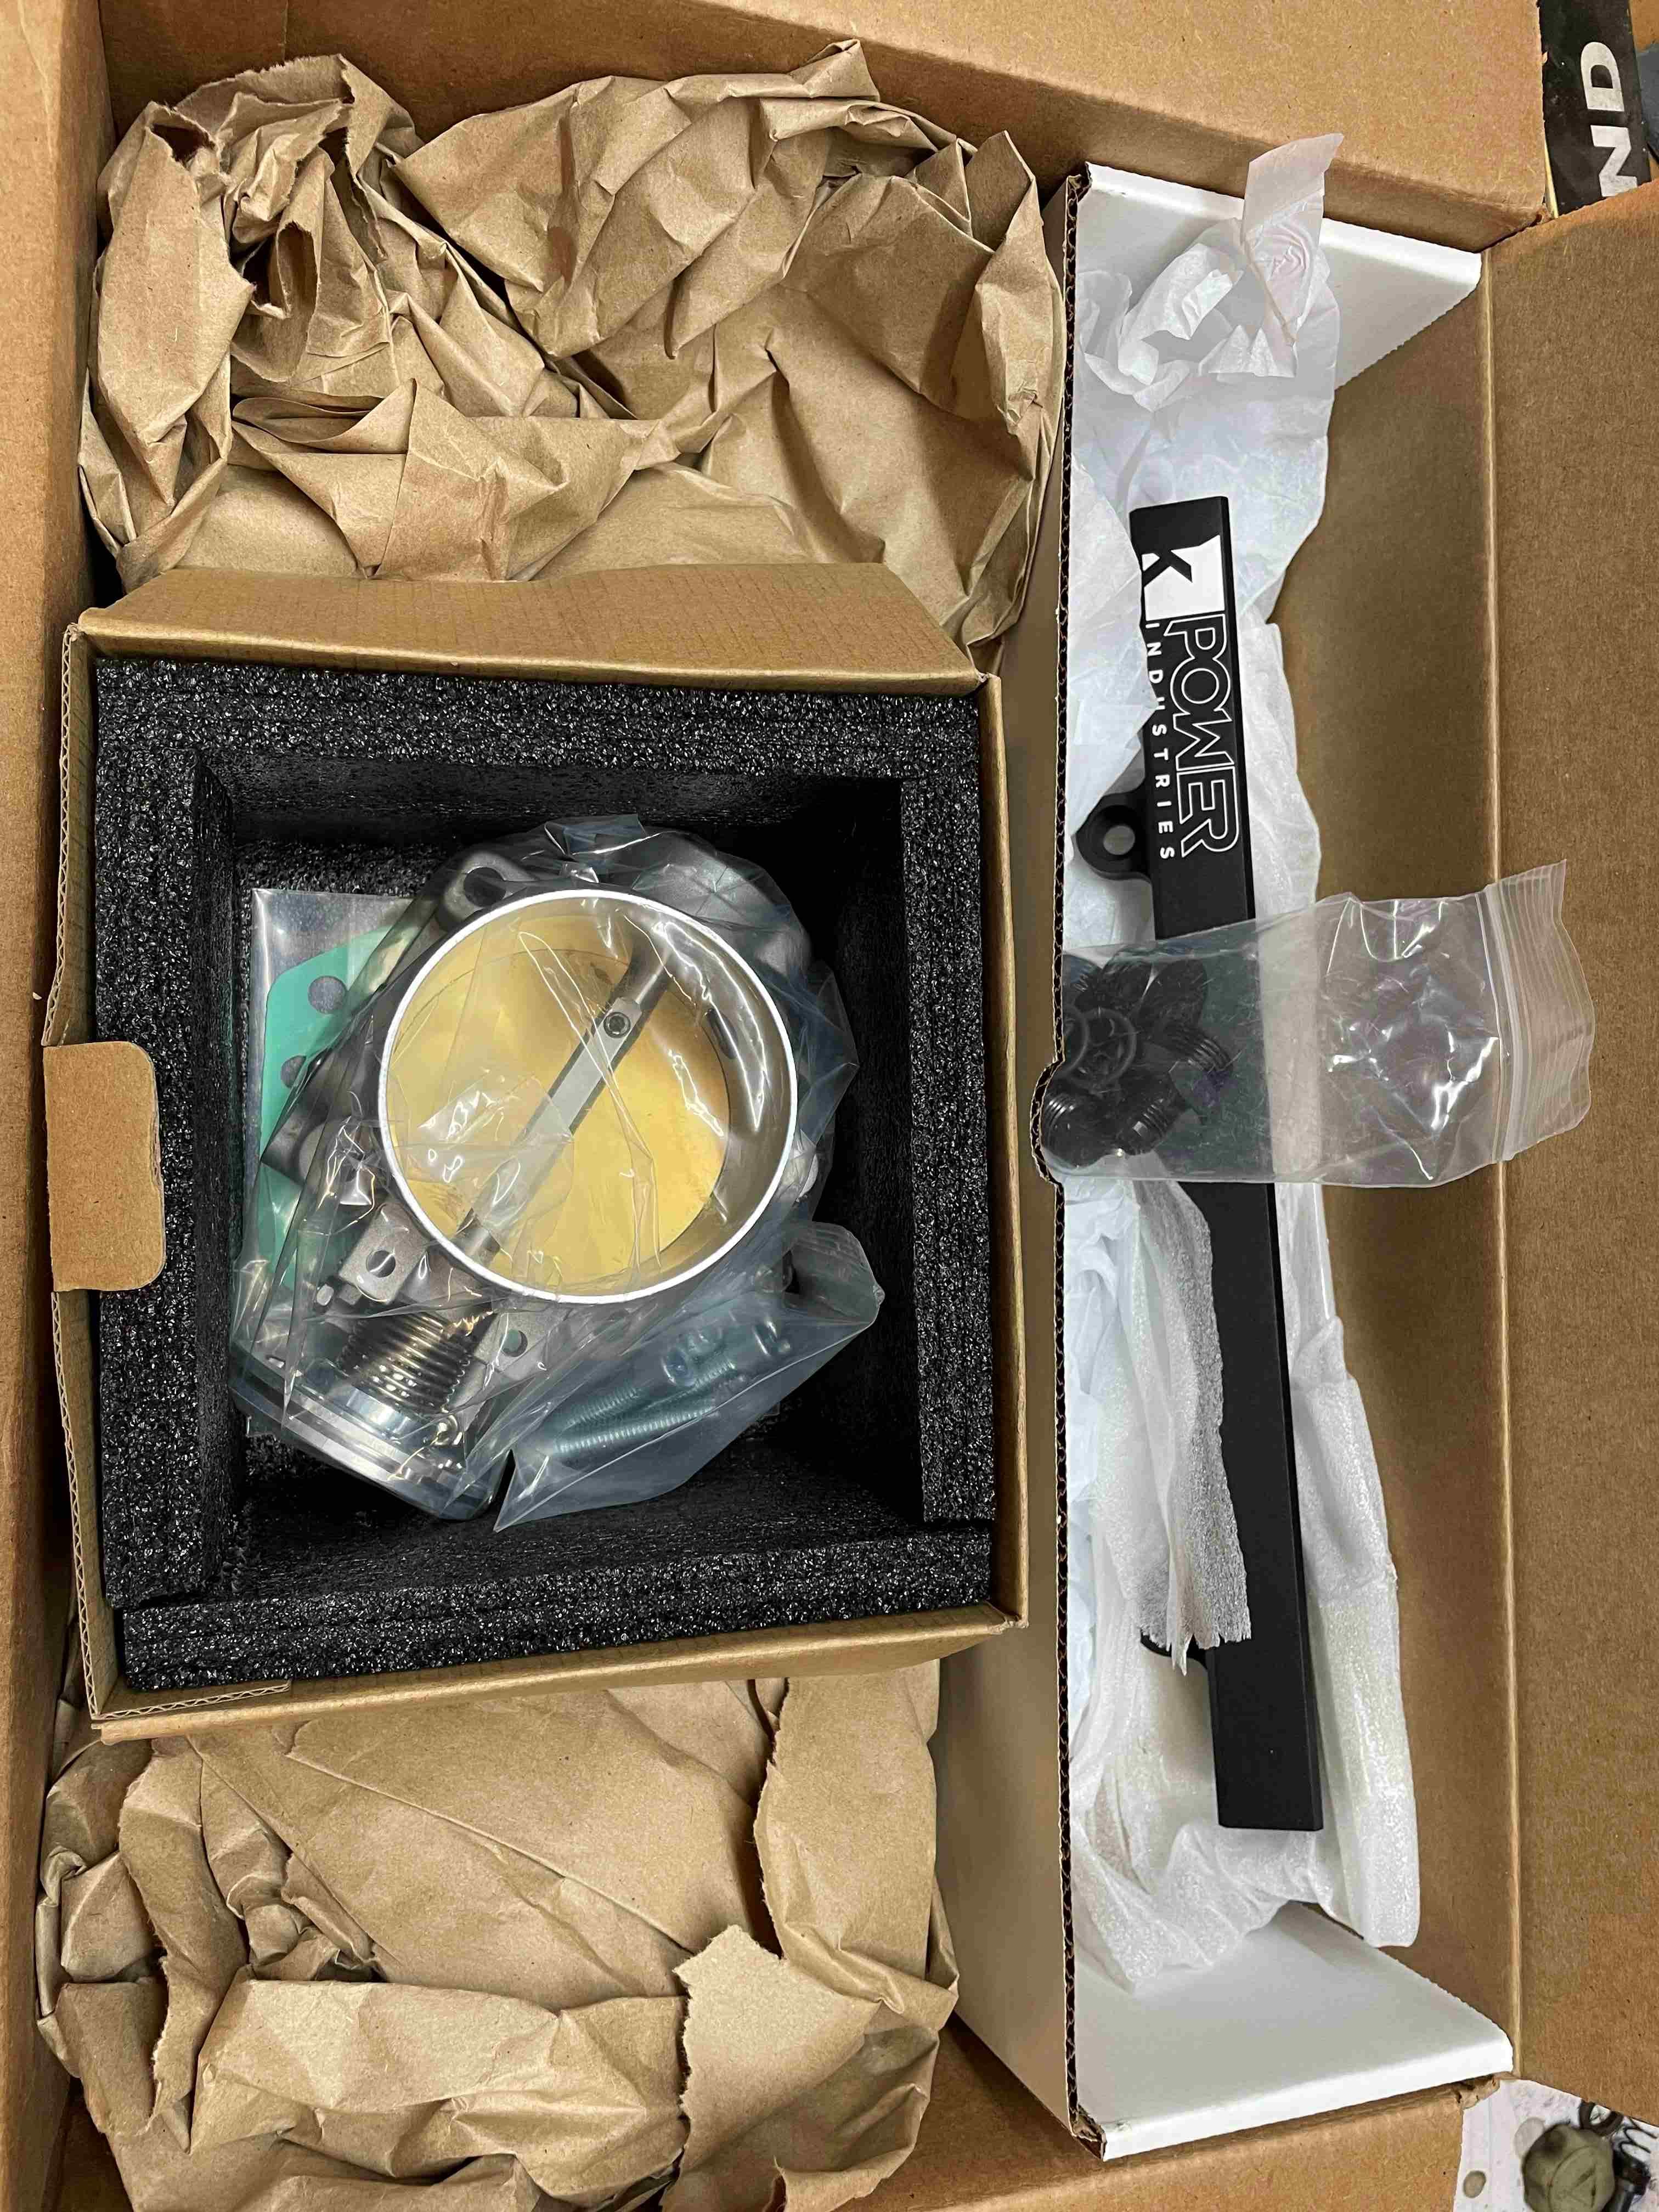
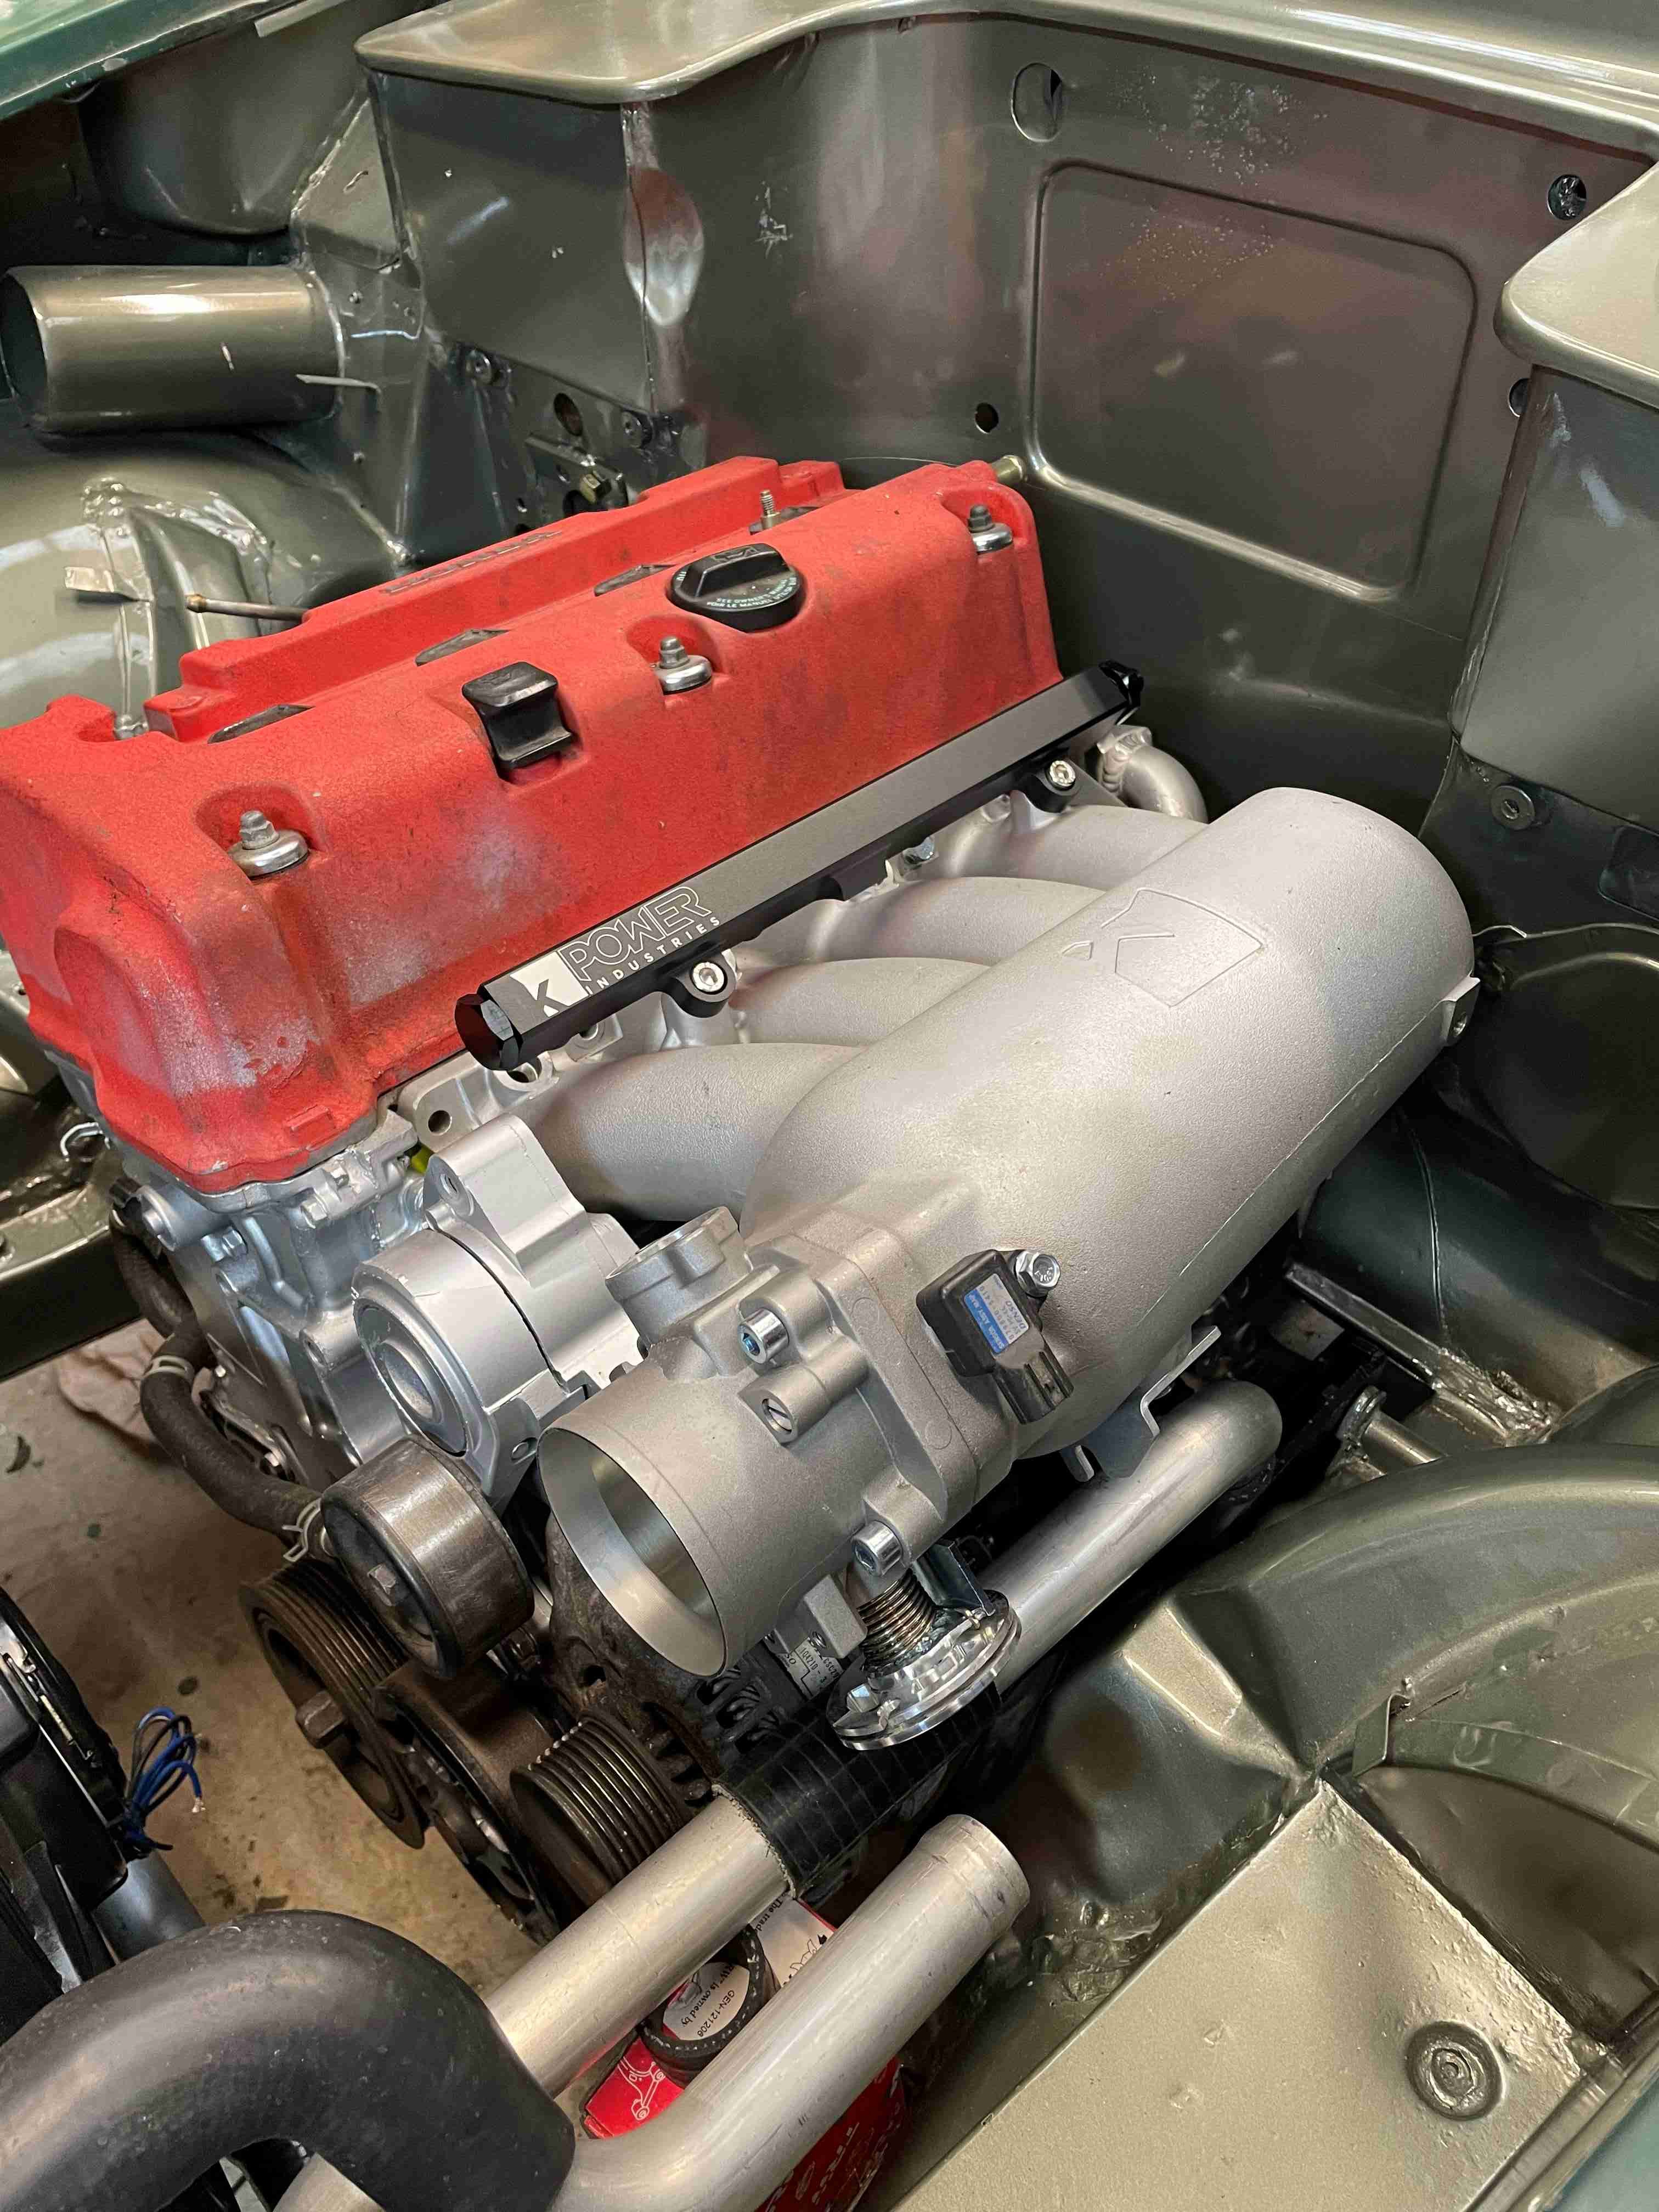
A small update. The throttle body and fuel rail to match the intake from K power arrived yesterday. A quick trial fit to see what fits from the OEM manifold. Injectors are supposed to fit, once I figure out how to get them out. I have the nuts holding the rail off and the clips pushed off which hold each one. I can move it a bit but the fuel rail still doesn't want to let go. May just need a bit more force but I will find out before I try again.
1 point
-
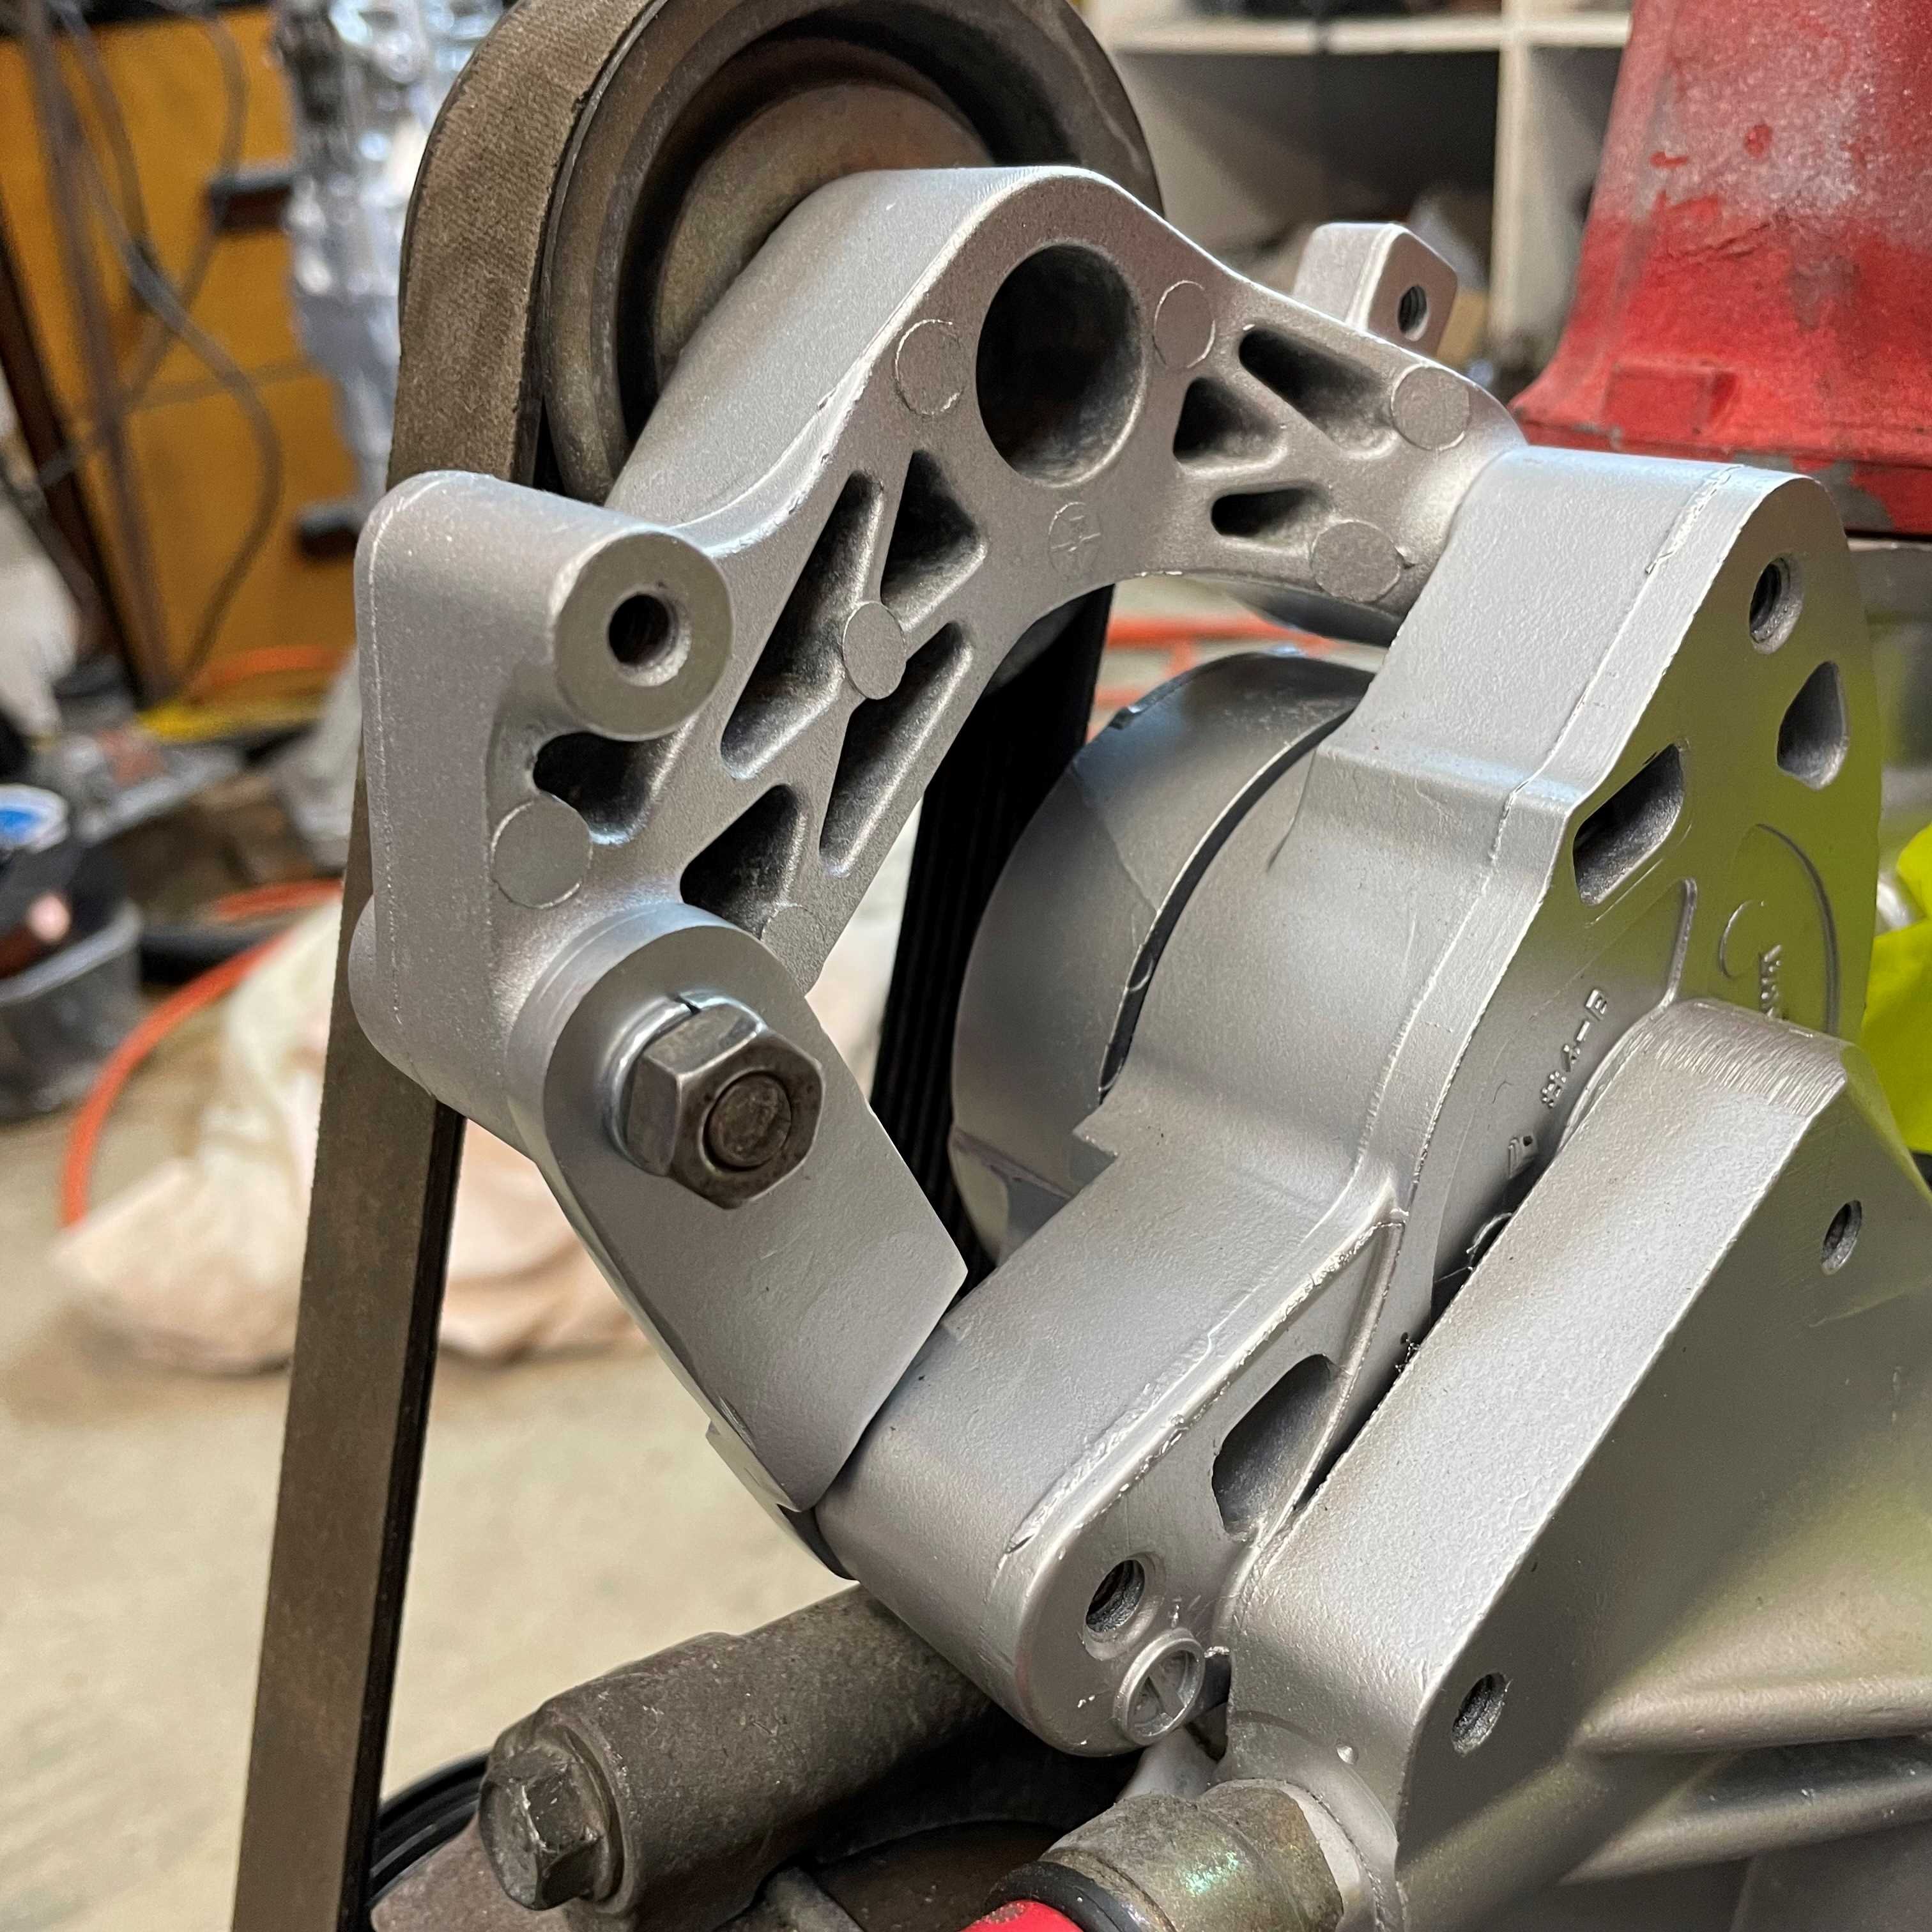
Today I made up a small bracket to lift the top idler pulley up enough so the belt tensioner could get the belt tensioned. I also finished welding up the engine mounts and hit them with some Hammerite paint to finish them off. It's nice to get a few things finished.
1 point
-
After another couple of hours scrubbing the paint went on. Need to repaint the valve cover. It looked fresh but it isn't that well stuck to the aluminum.
1 point
-
Just watched this, half as a refresh half because I do enjoy a bit of Edd China. You may find some good tips in here. He includes a demo of using 0.8mm wire with thin sheet (among other scenerios) Worth a look. He was welding patches into a chassis in another video and showed how to cut and fit, then weld the patch panel in, also worth a look.1 point
-
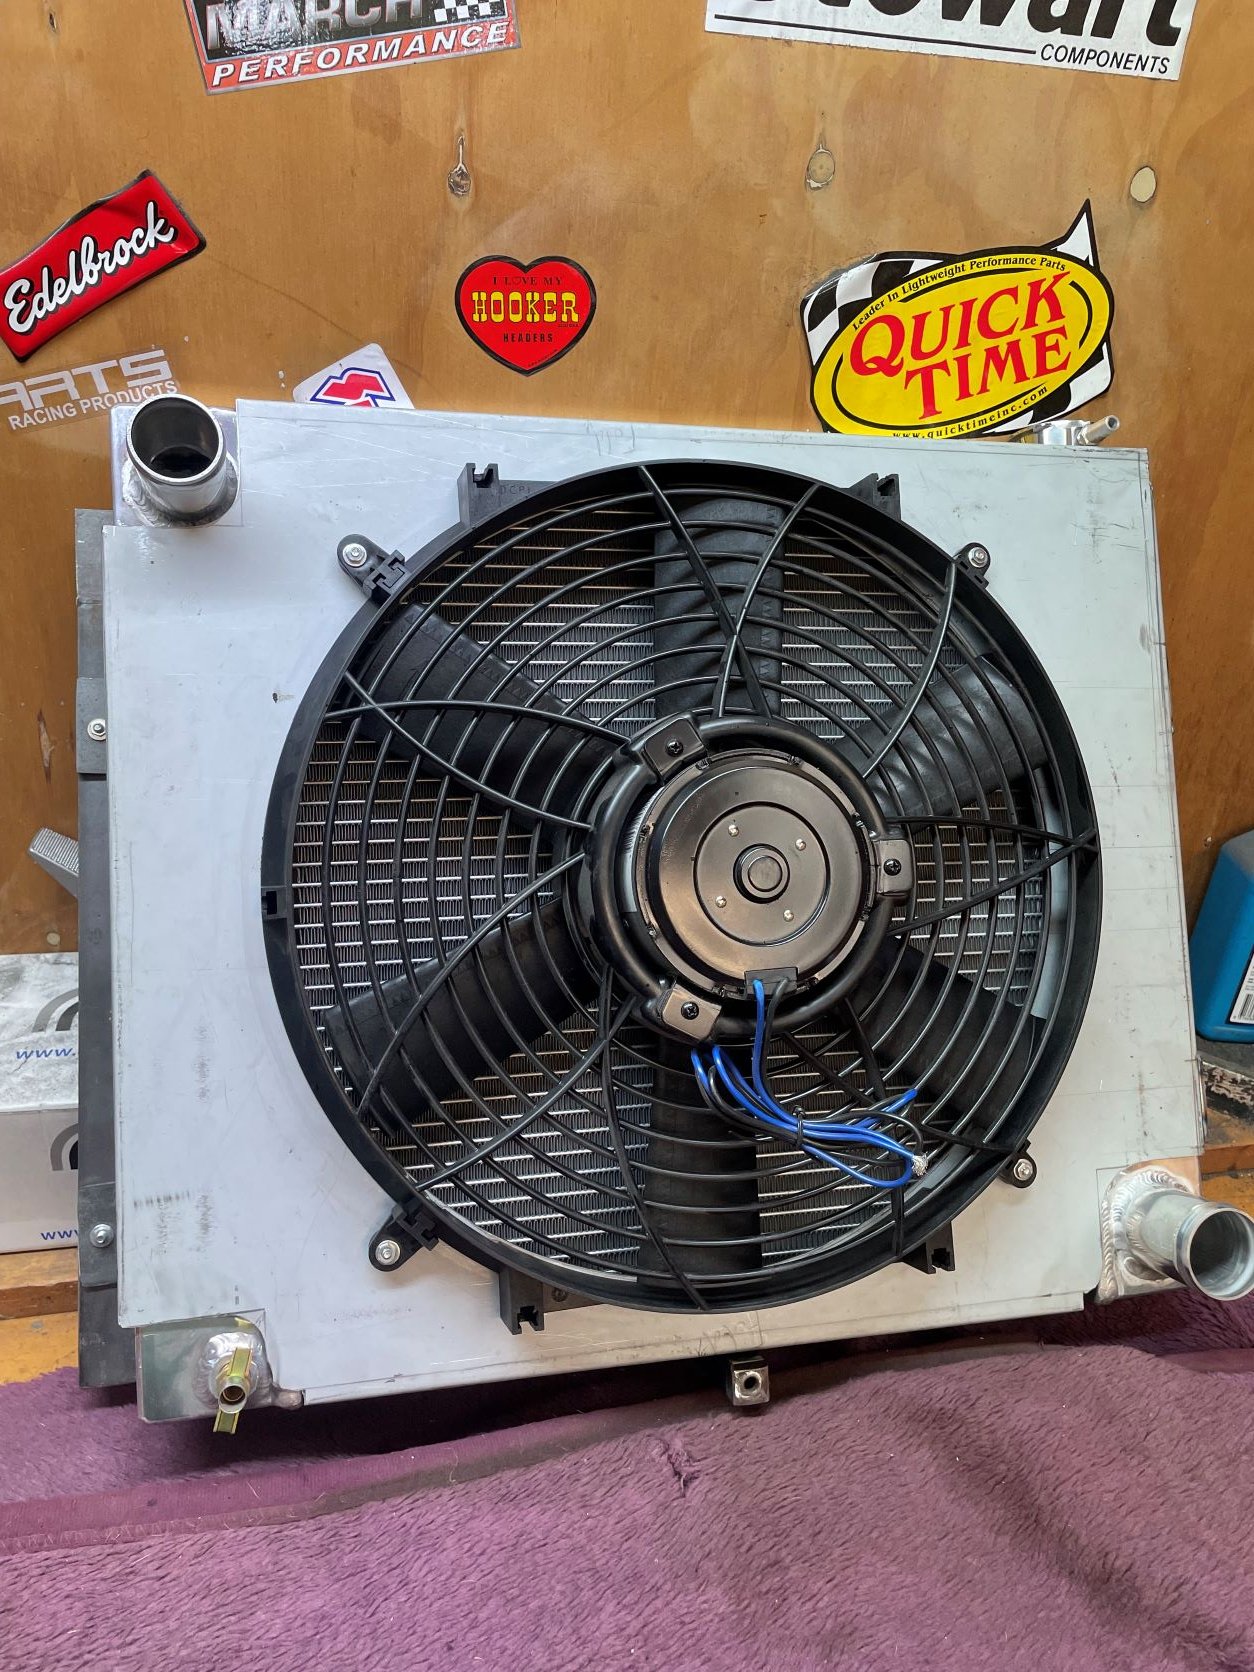
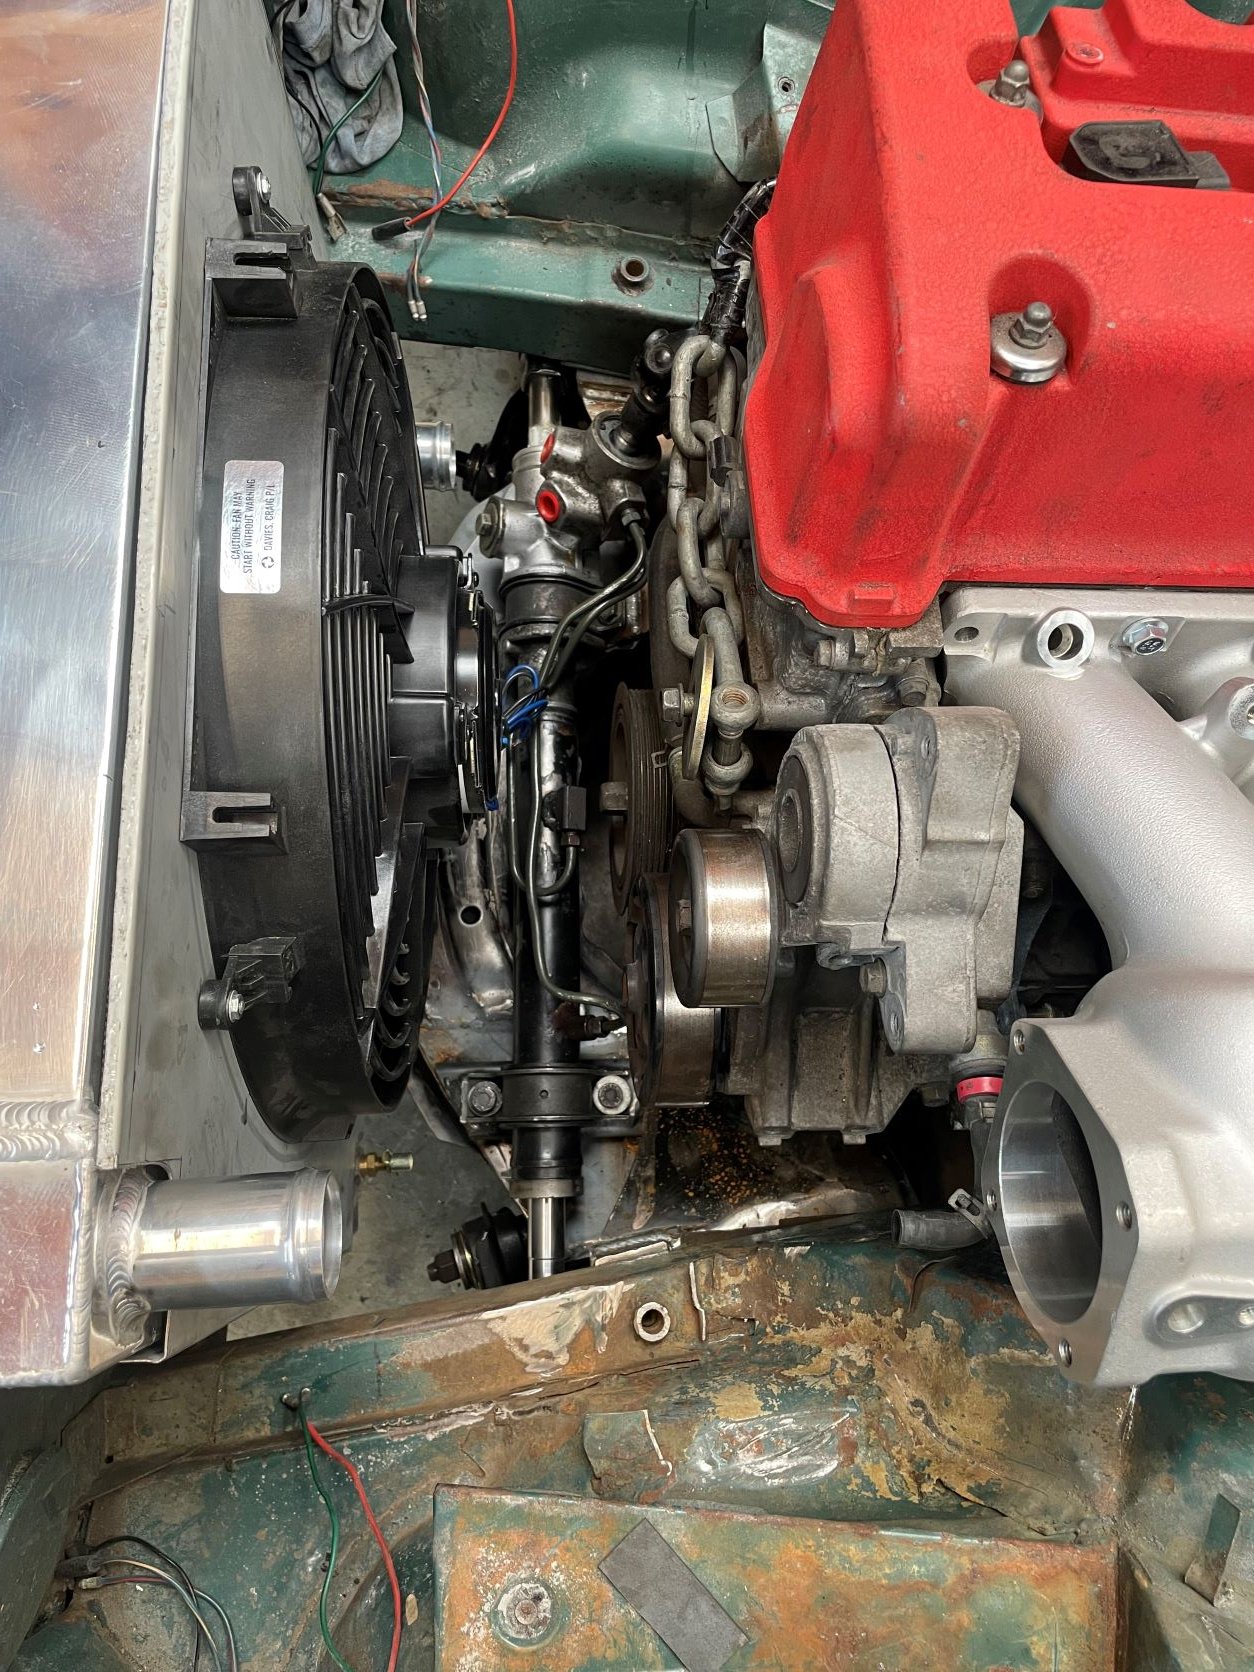
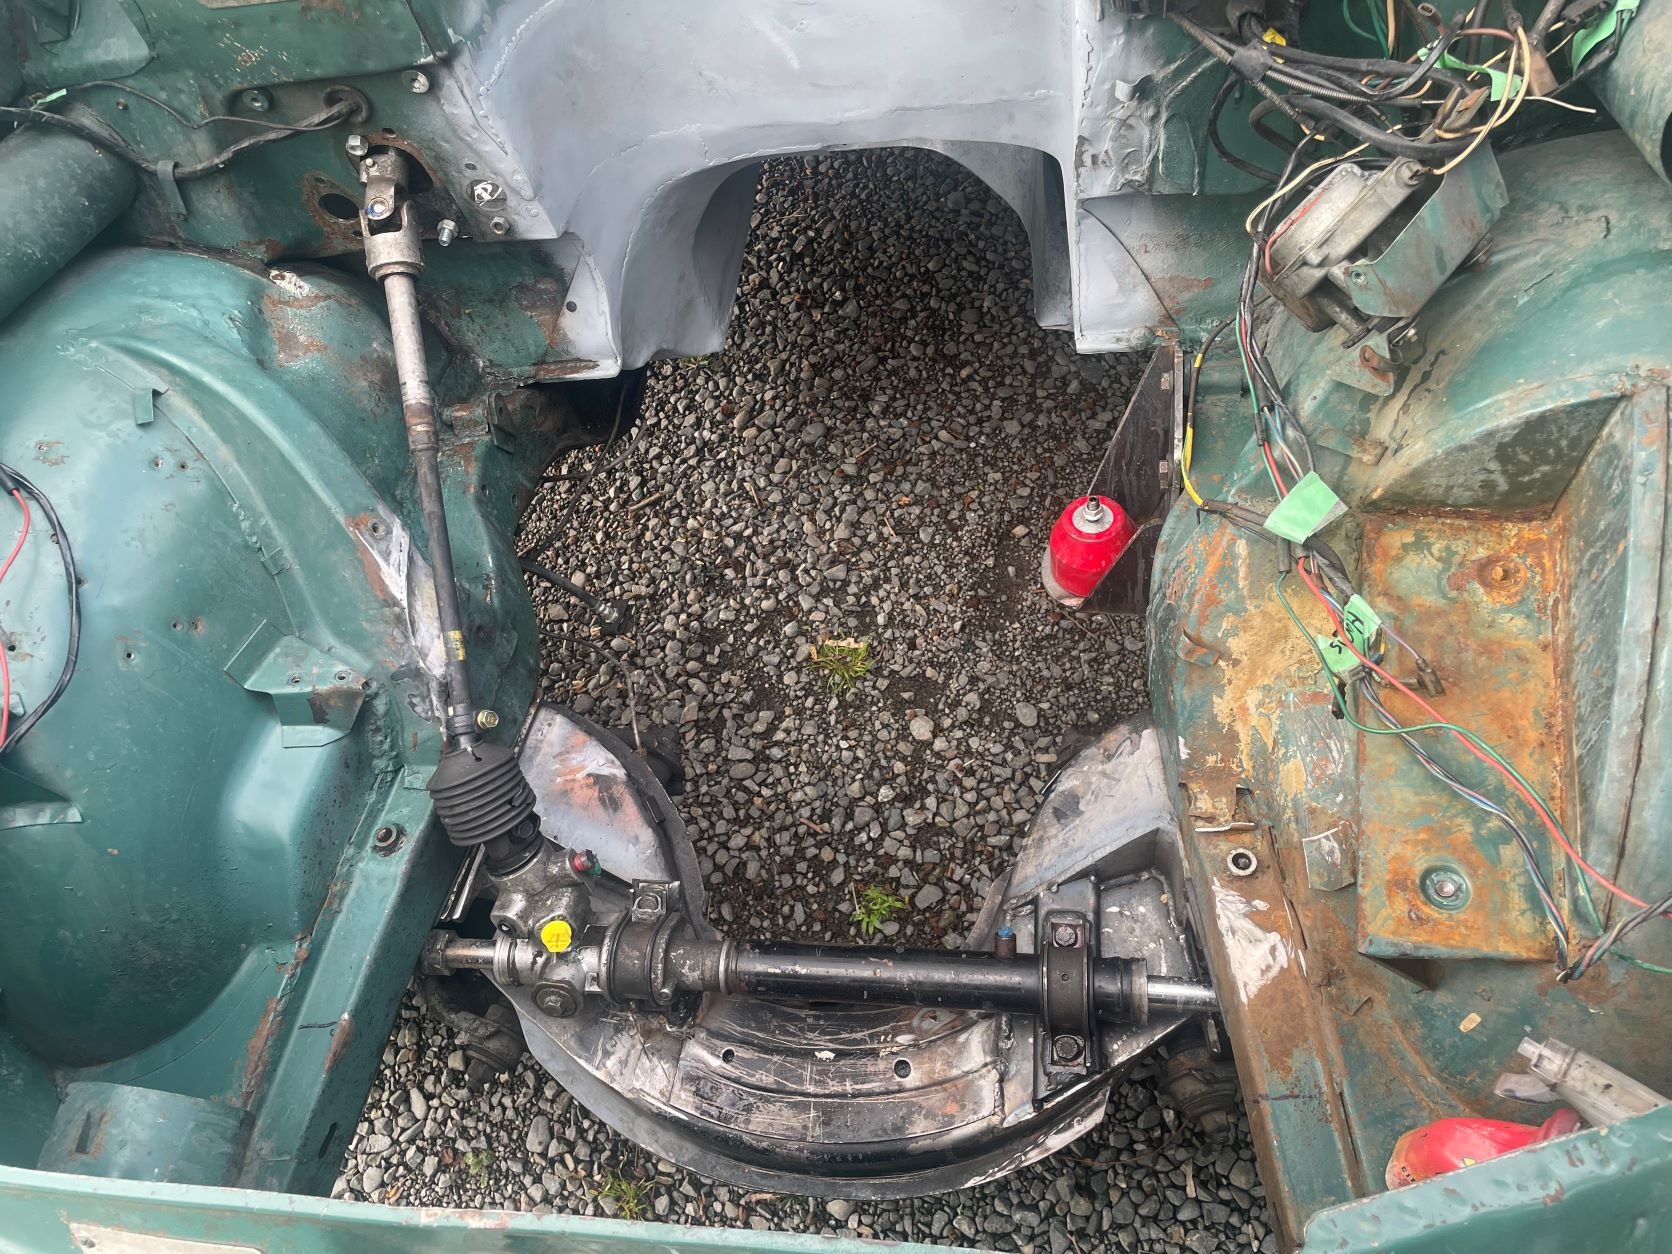
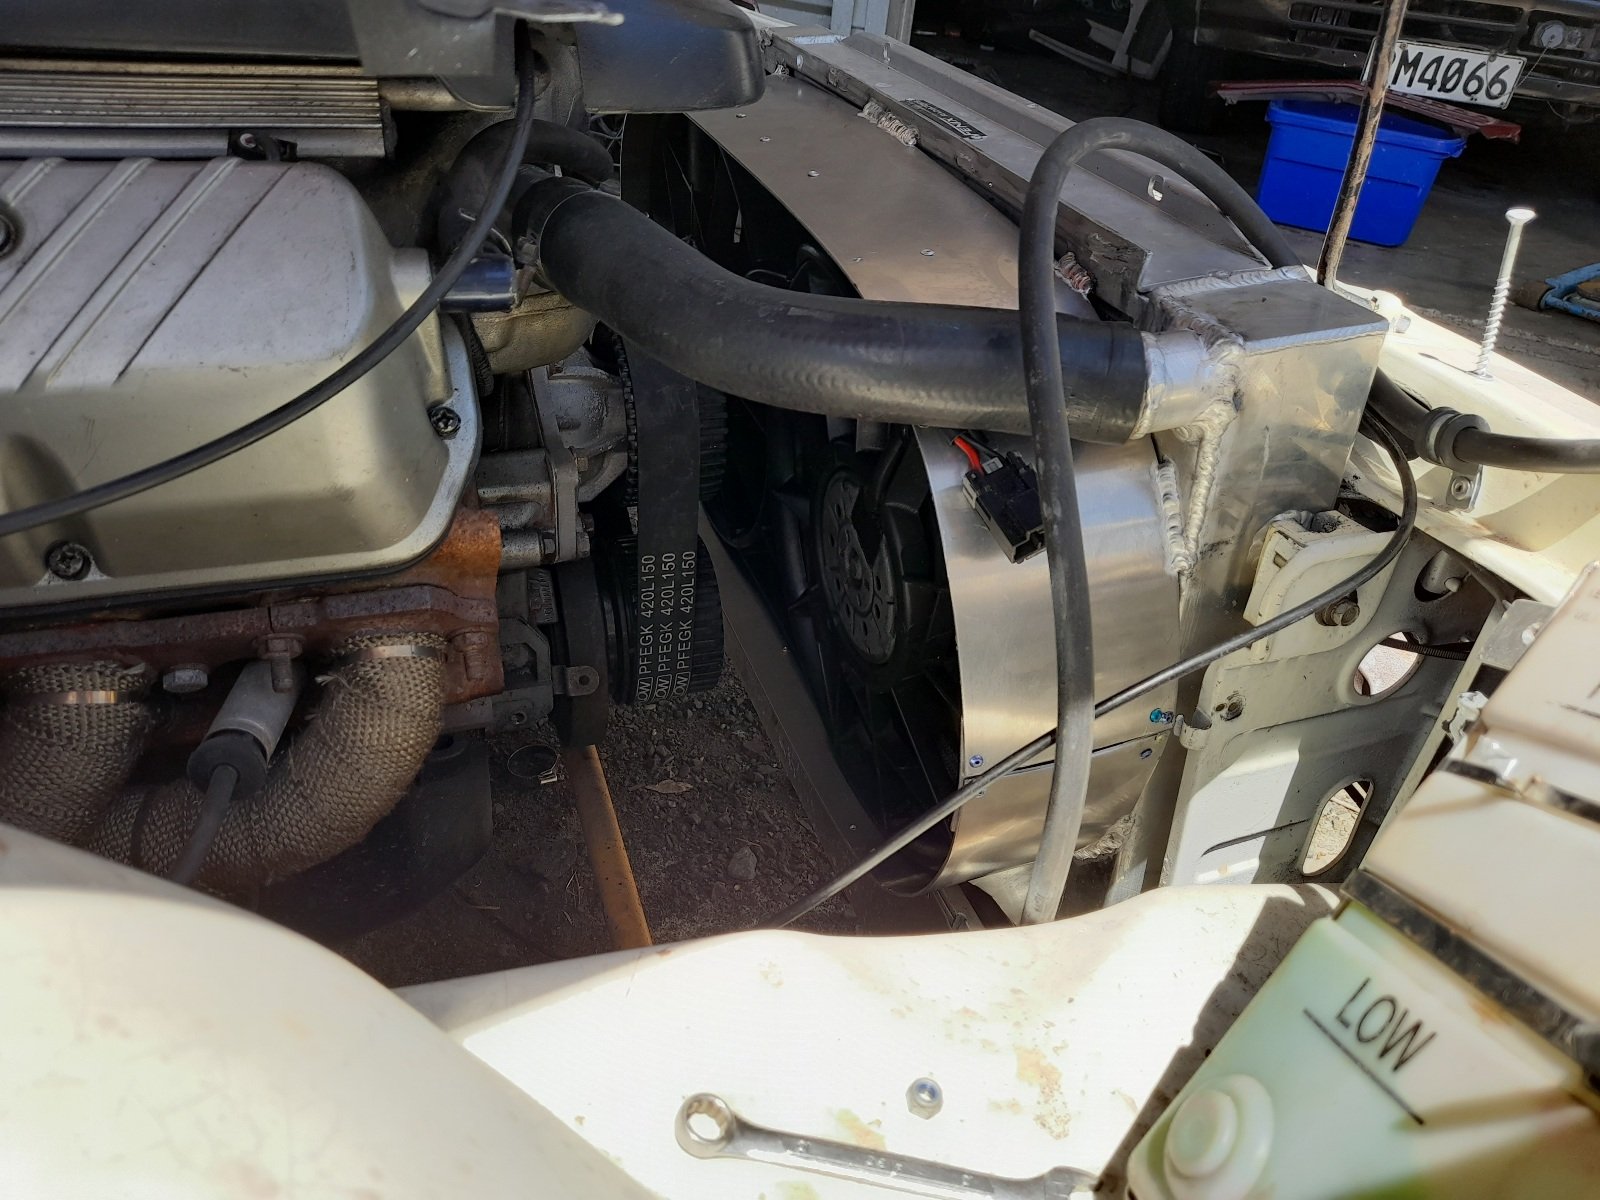
I decided to make up a shroud for the radiator fan which is a 16" Davies Craig so it should provide plenty of air flow when needed. It turned out ok since i don't have a bender for sheet metal, just a couple of pieces of steel and panel beaters hammers. I have also repositioned the center hyd port in the steering rack and had it leek tested and rebuilt. Bolted it all in to check any other clearance issues with the rack and radiator. The aluminum bottom radiator hose is quite long and not giving me enough clearance for the hose to the steering rack. I may get away with it, we will see.
1 point
-
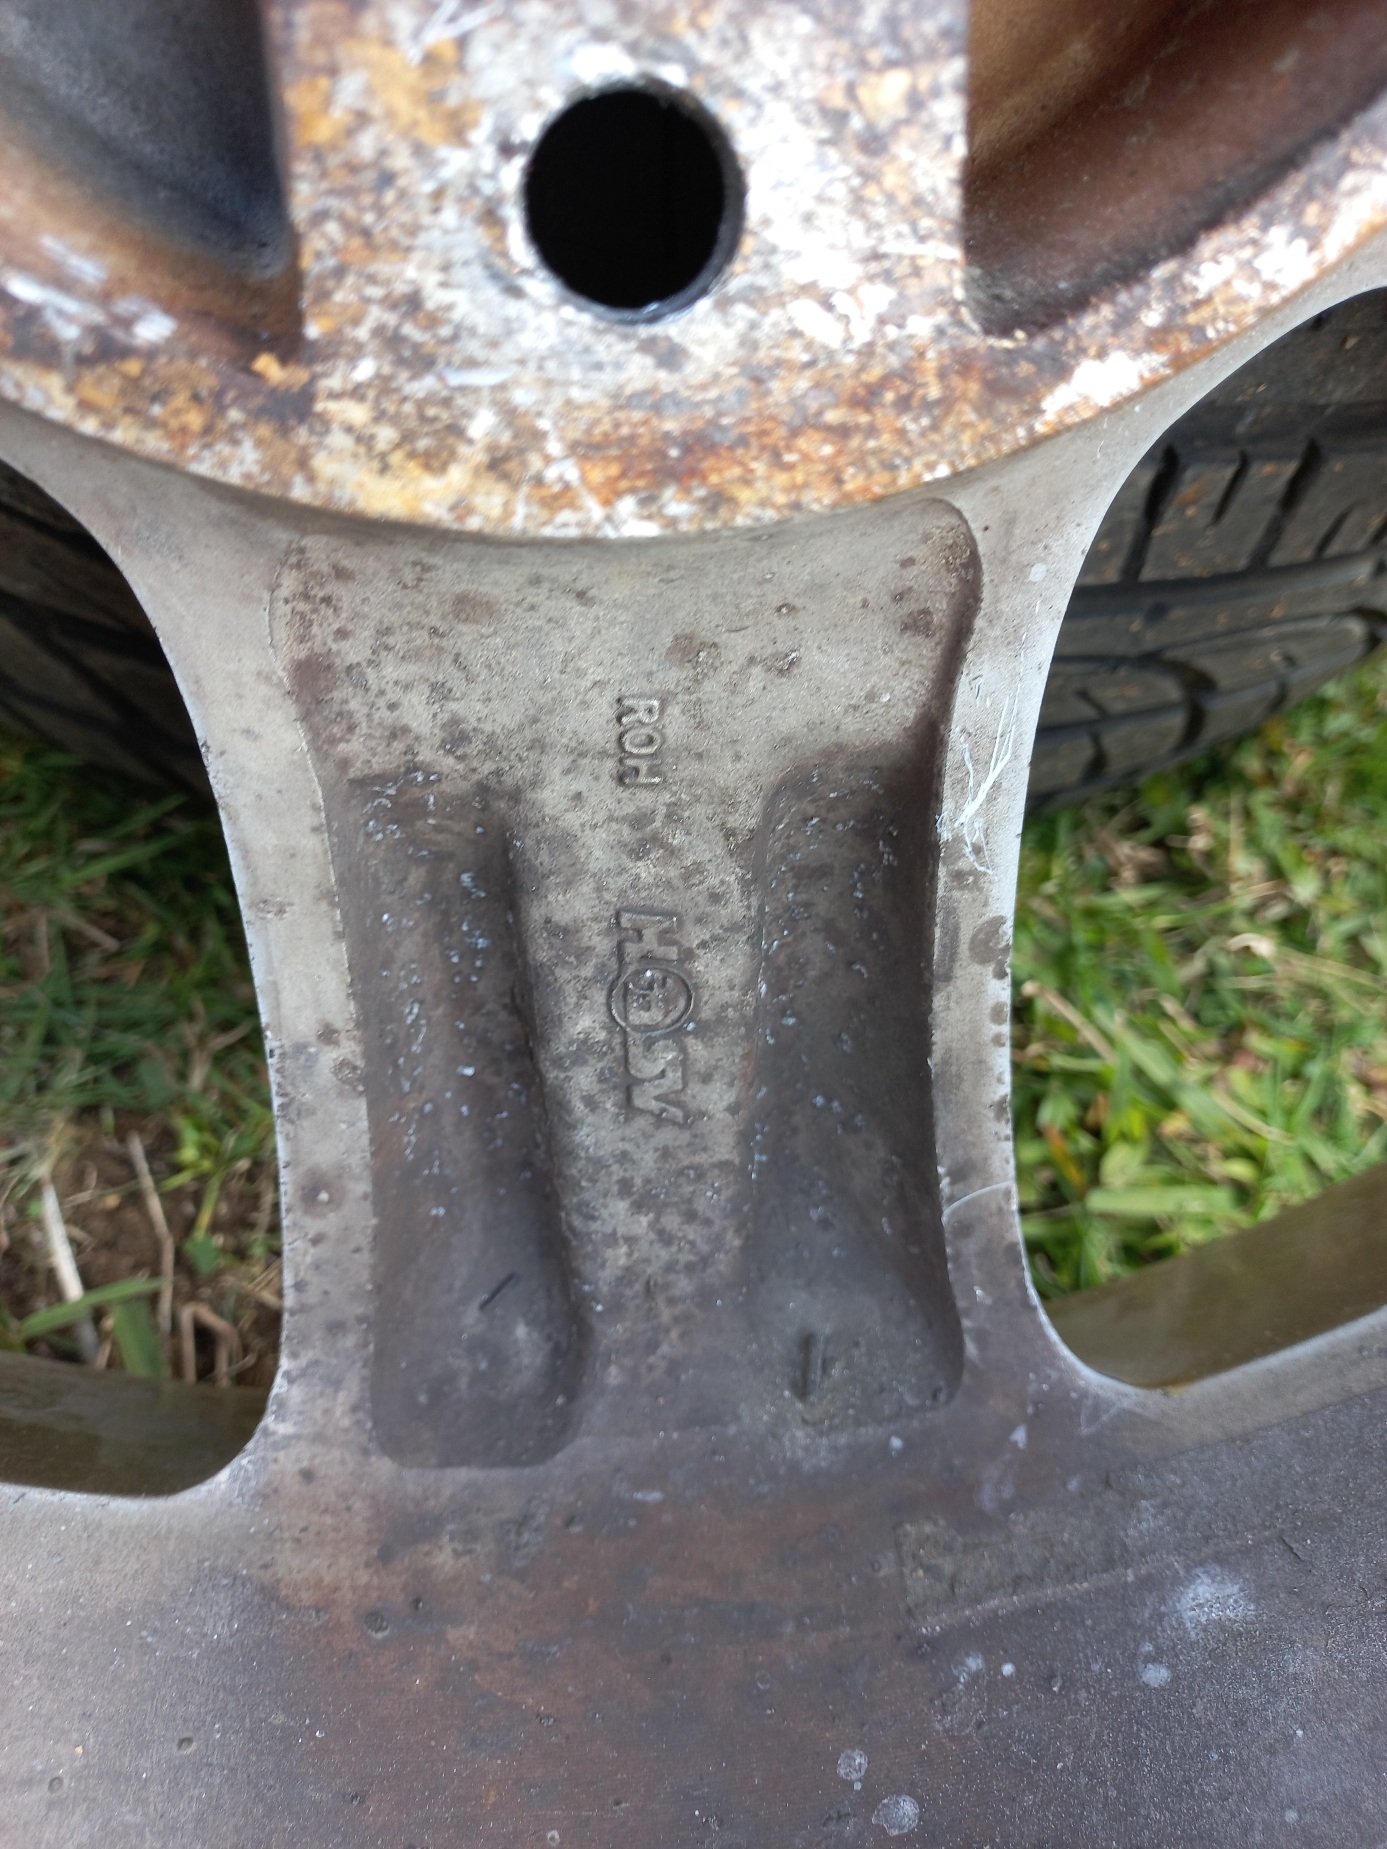
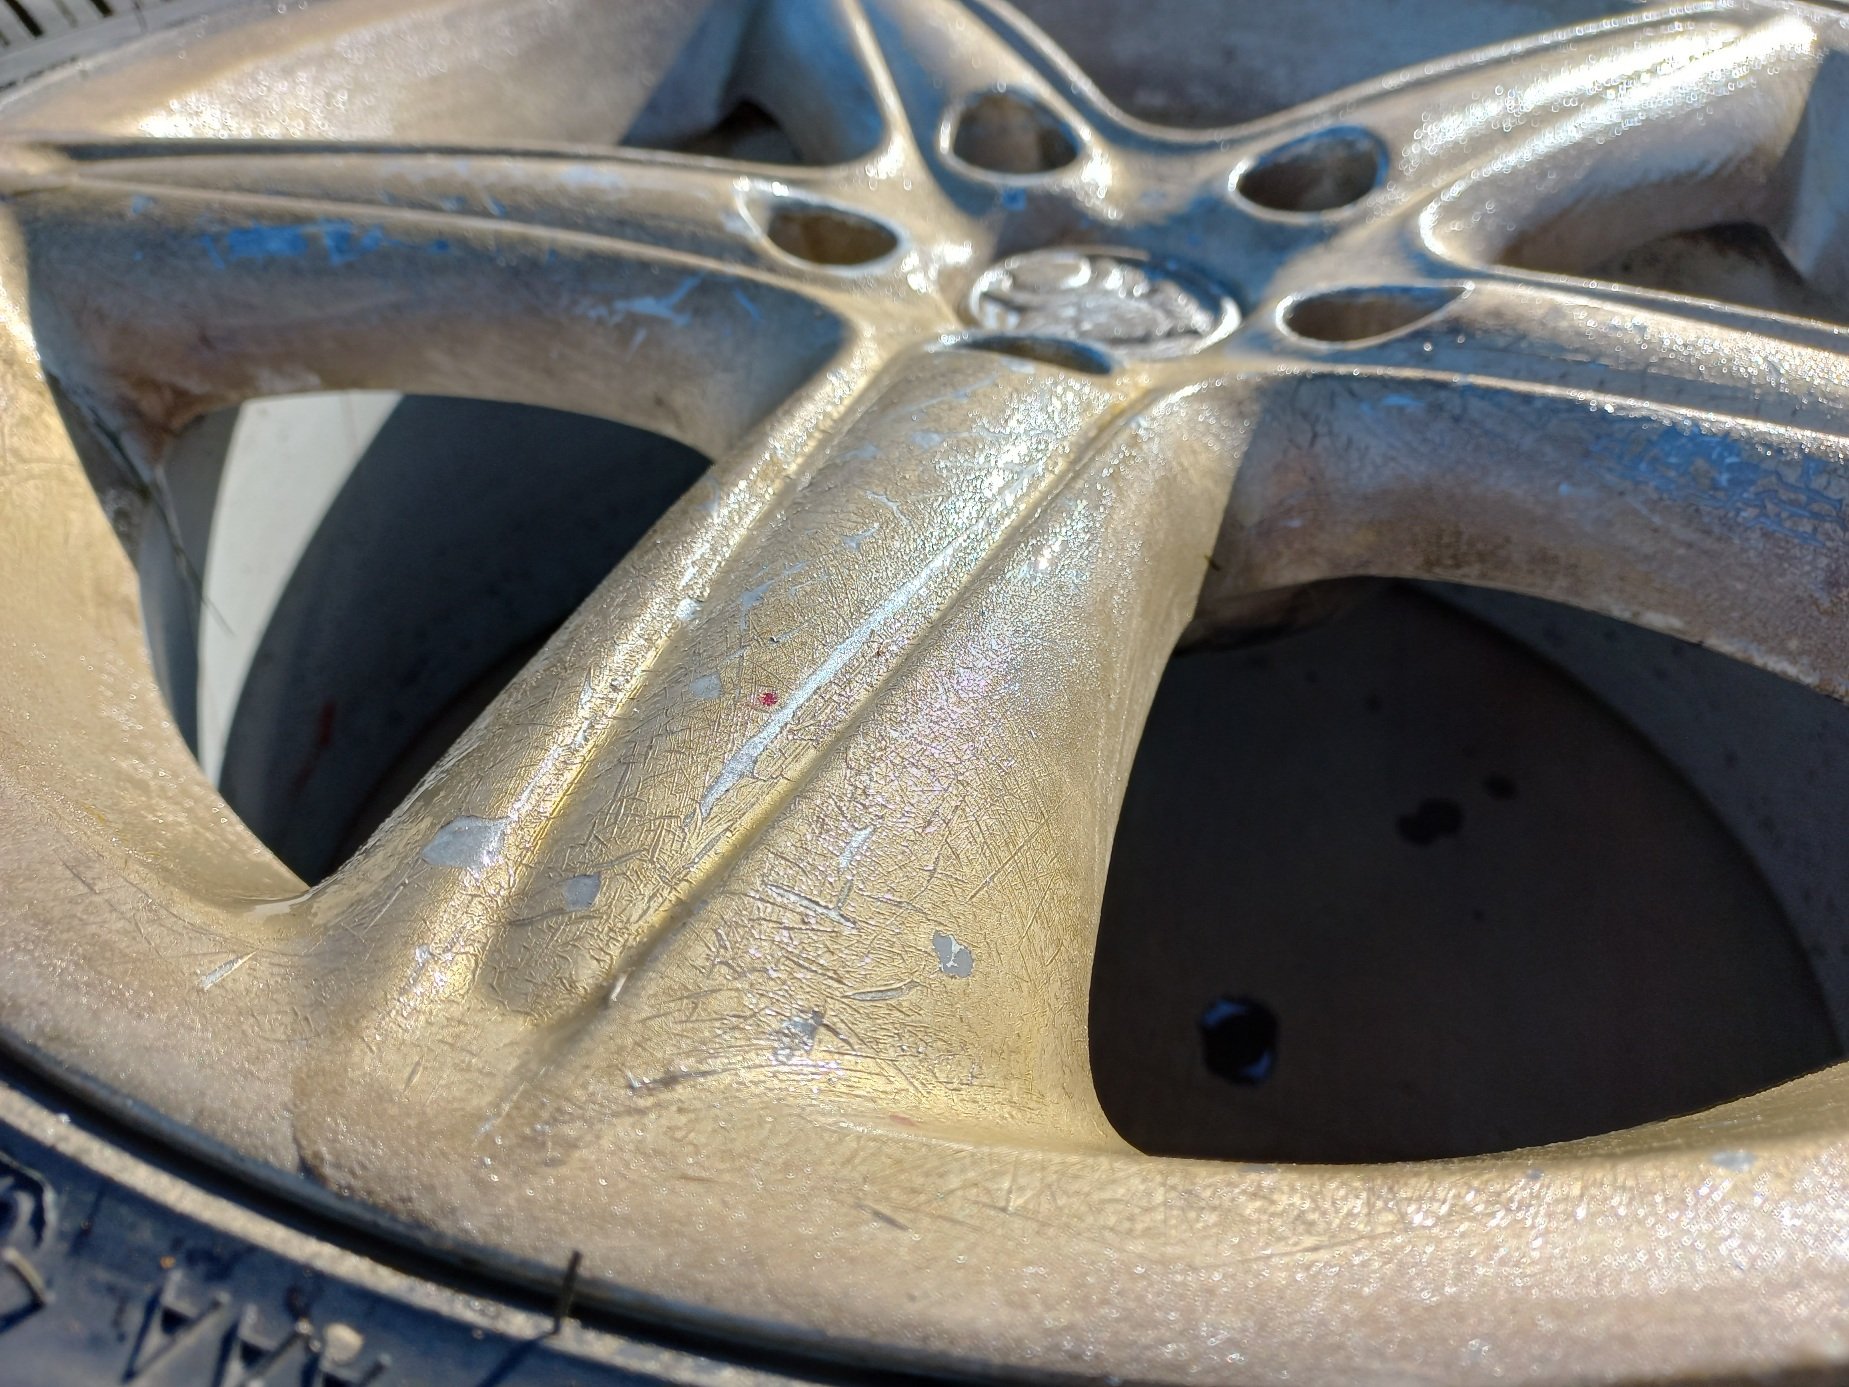
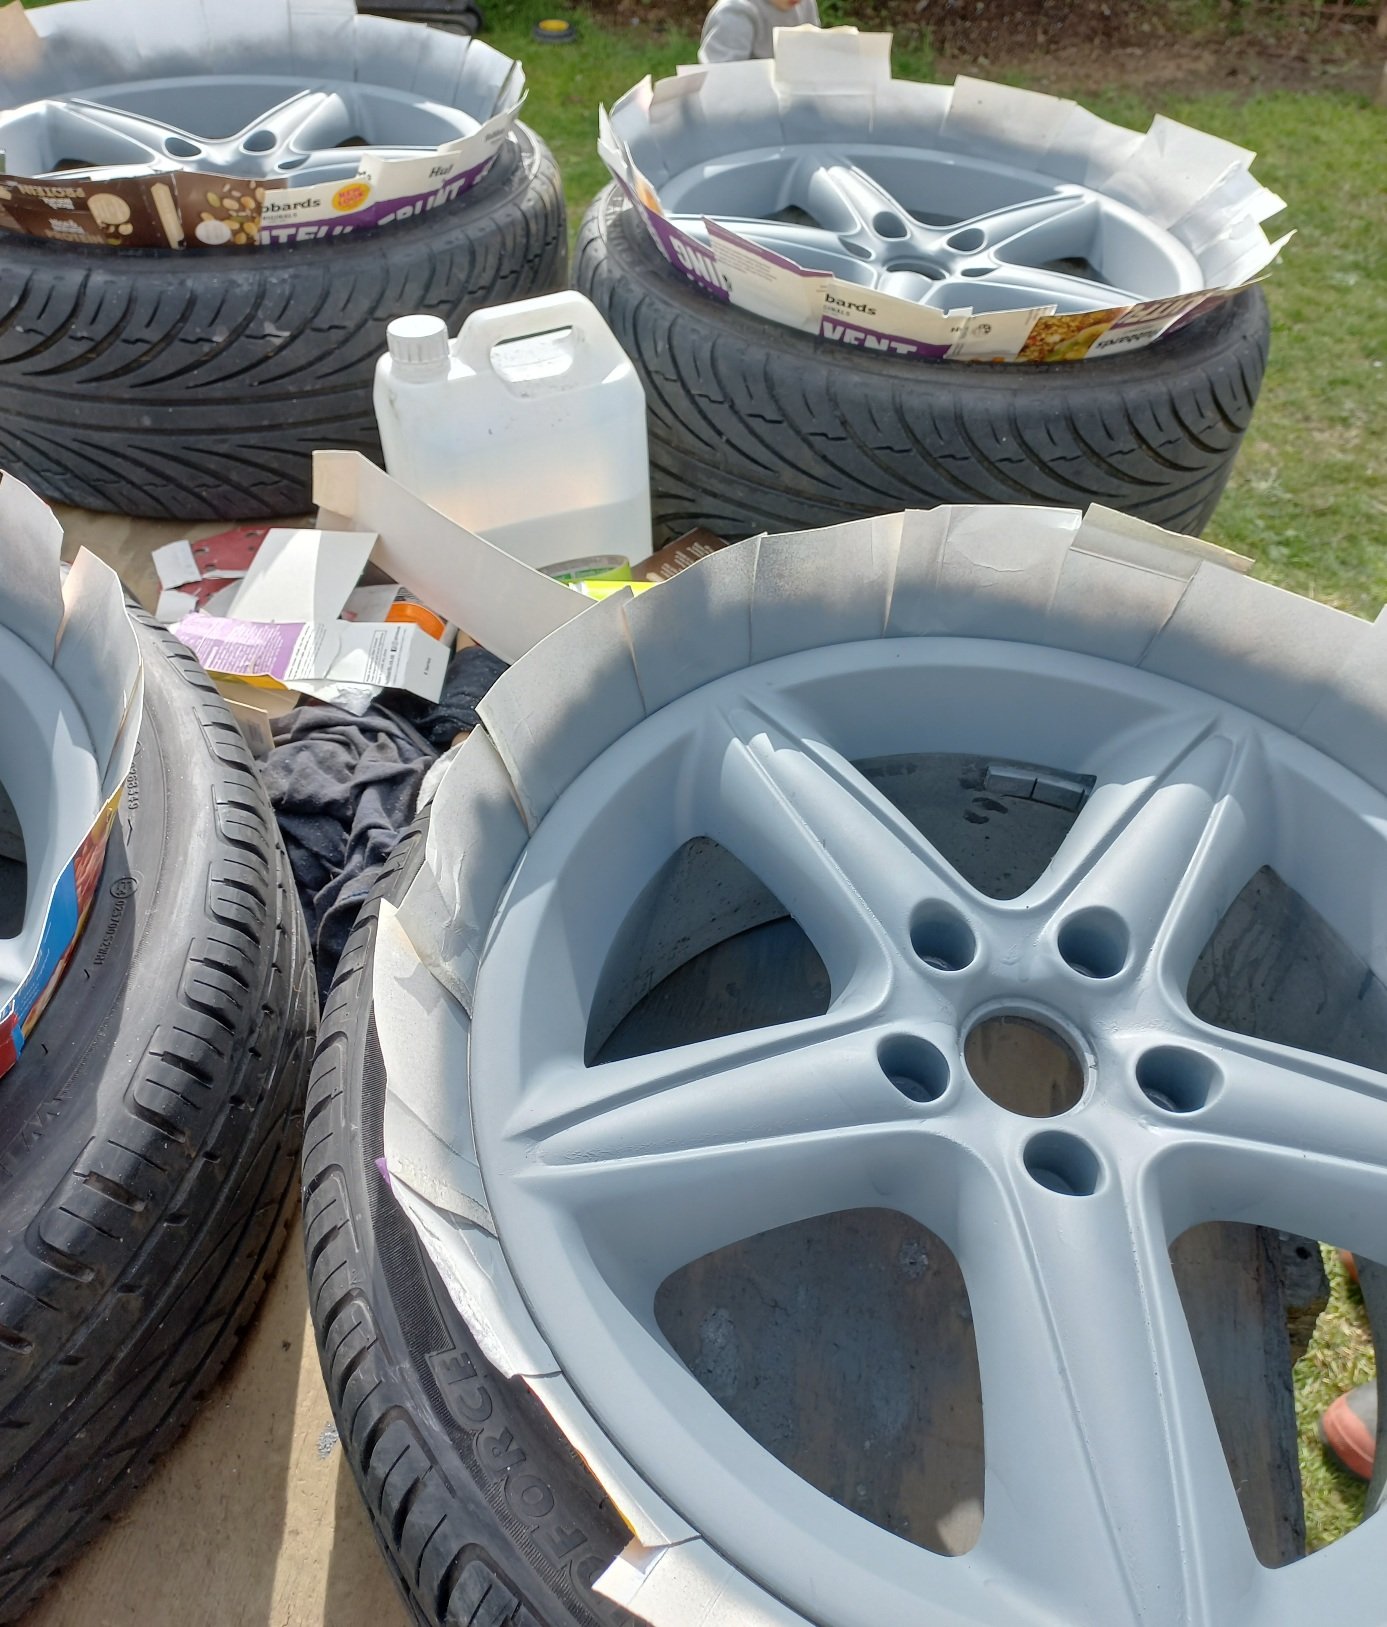
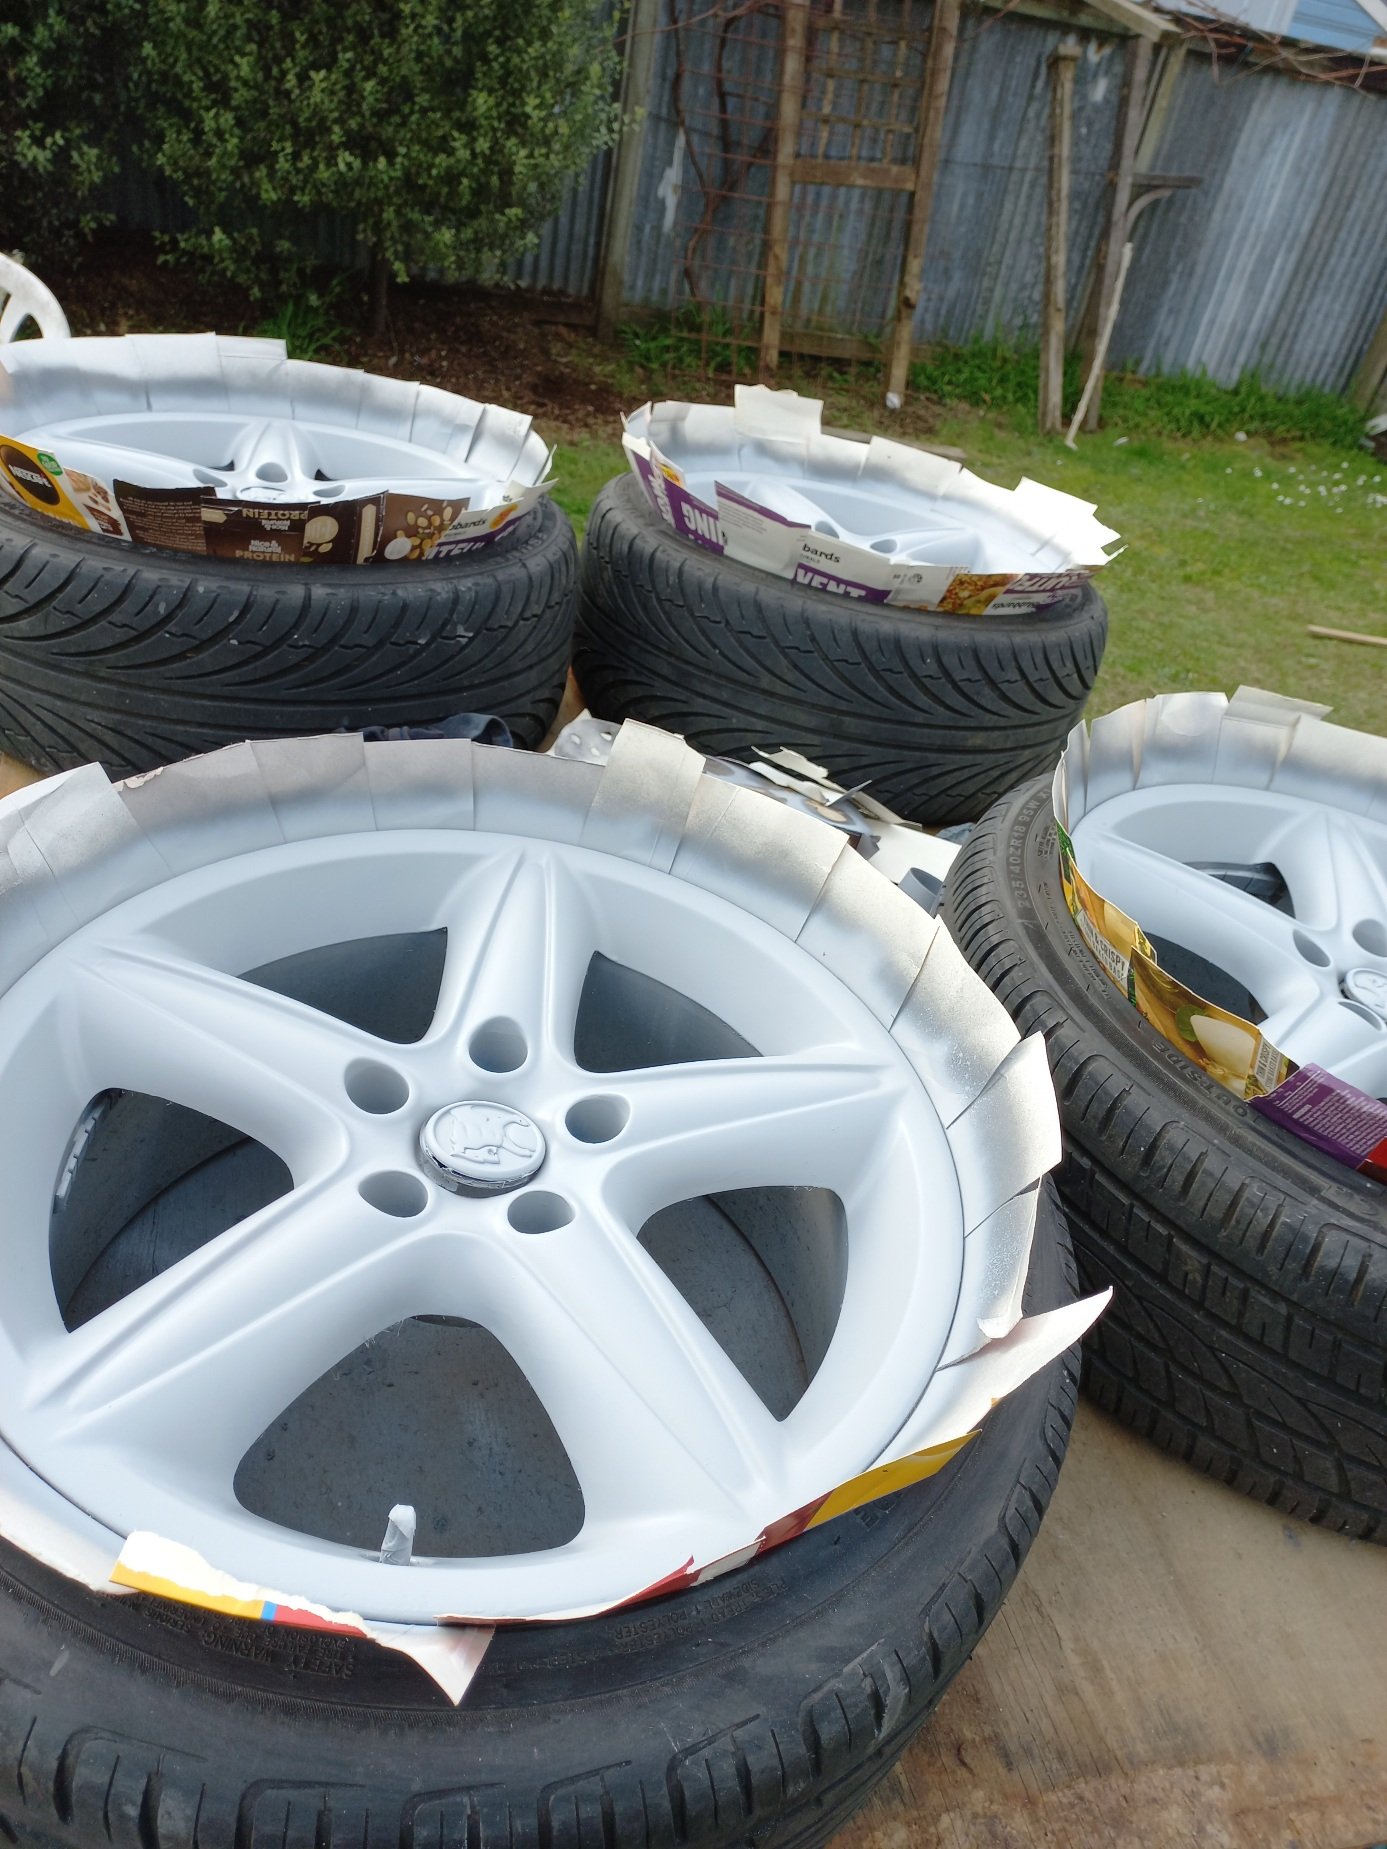
Strip the shitty painted wheels !id painted over the original paint previously, using the colour match cans from ripco, and spray can clear... yea dont do that... lesson learned stripped back to bare metal with lots of paint stripper and tedious work, etch primed and fill primed a couple coats each...
1 point
-
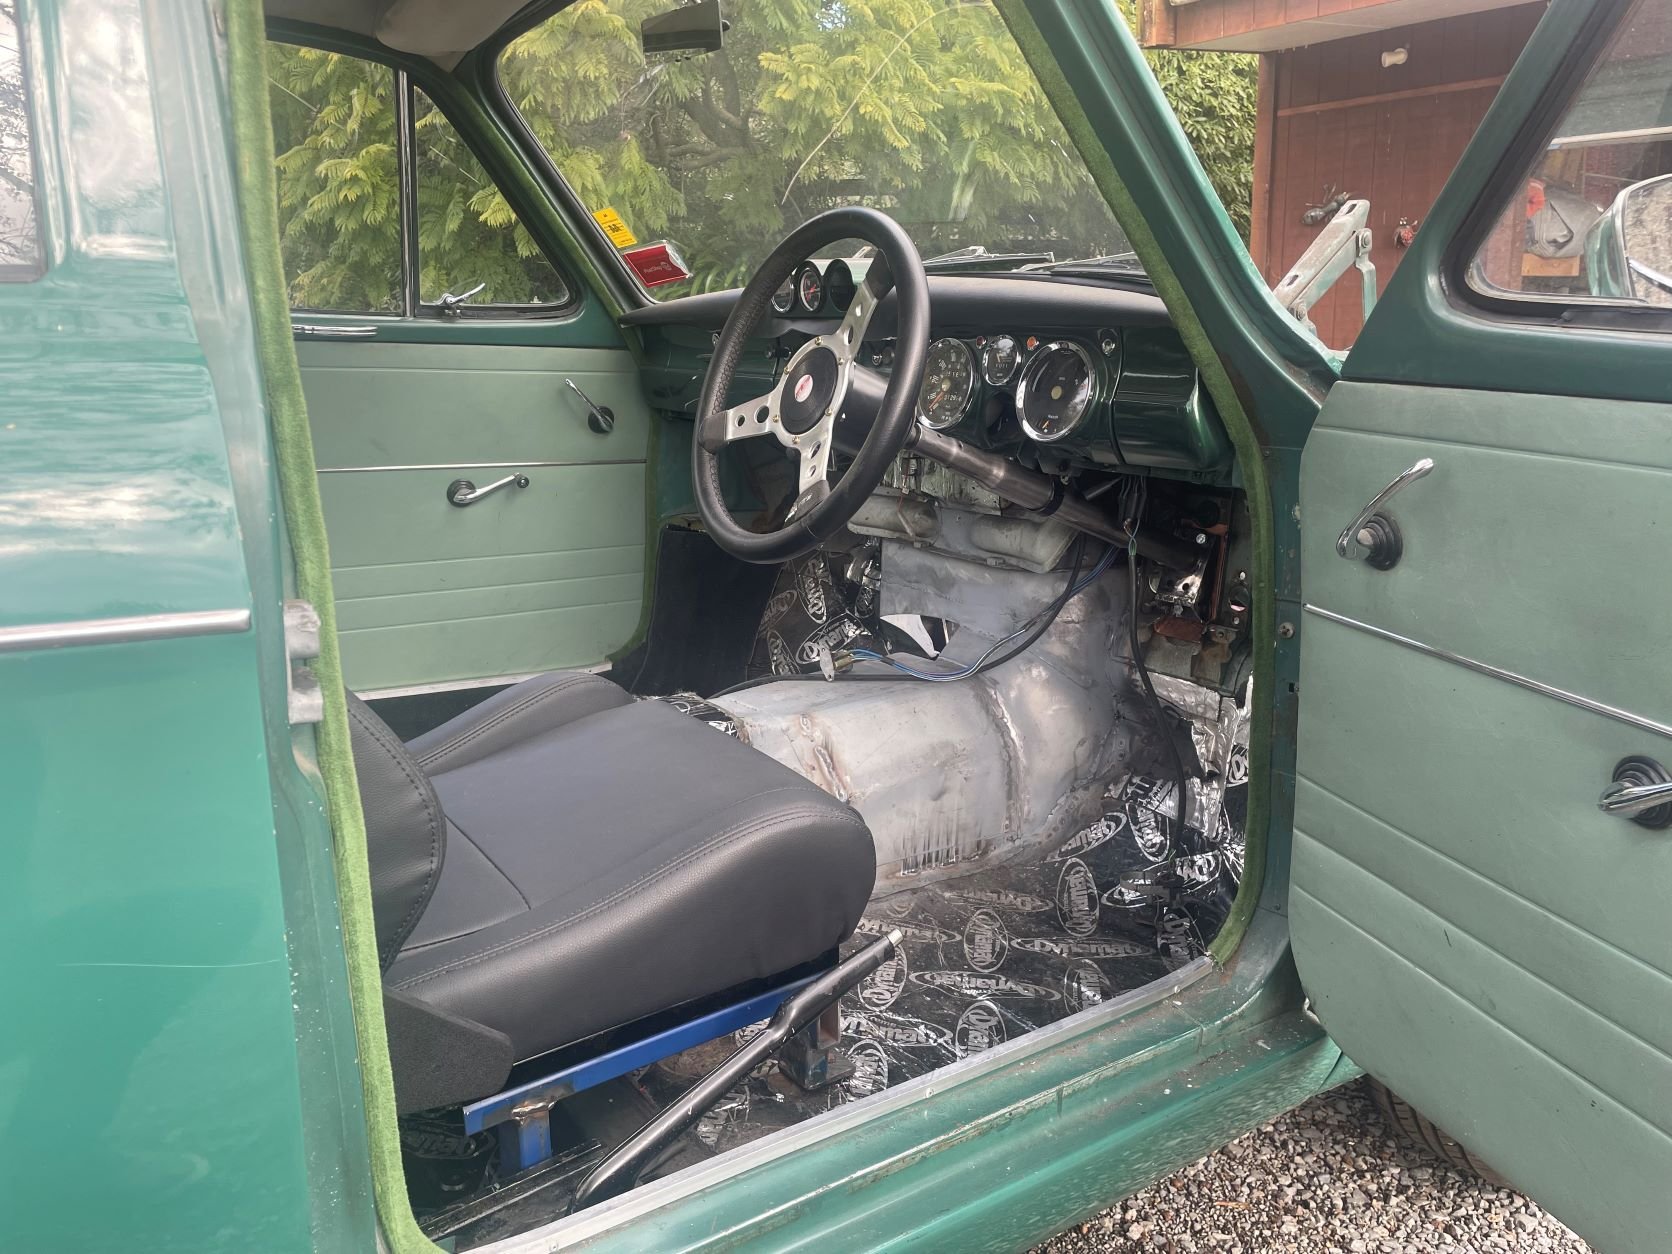
I have the car back on it's wheels for the first time, though all just tacked and cobbled together. I need to space out the steering arms another 5mm as they are just contacting the brake disc. I will probably try and find some Brembo front brake calipers and disc's out of a 406 Peugeot. They share the same mount spacing as the Hillman and give you 4 pot calipers and vented discs of a larger dia. Here are a few pic's of progress so far. This is the change from being a rear steer steering box set up to a front steer steering rack set up. The steering arms are from a MGB and the rack, column and the bit in the middle is all MX5 and I haven't had to shorten it at all. The interior shot shows progress on the gear box tunnel and seat mount frame which uses the Hillman front mounts. I still need to make up the sandwich plates for the rear mounts. I have spoken recently with the certifier and I seem to be on track with what I am doing. I want to replace the front suspension bushings with poly bushes ands then do my bump steer measurements. If all good I can weld it all up and get them officially measured. It was nice to be able to drag it out and degrease the engine bay and give the car a good hose down.
1 point
-
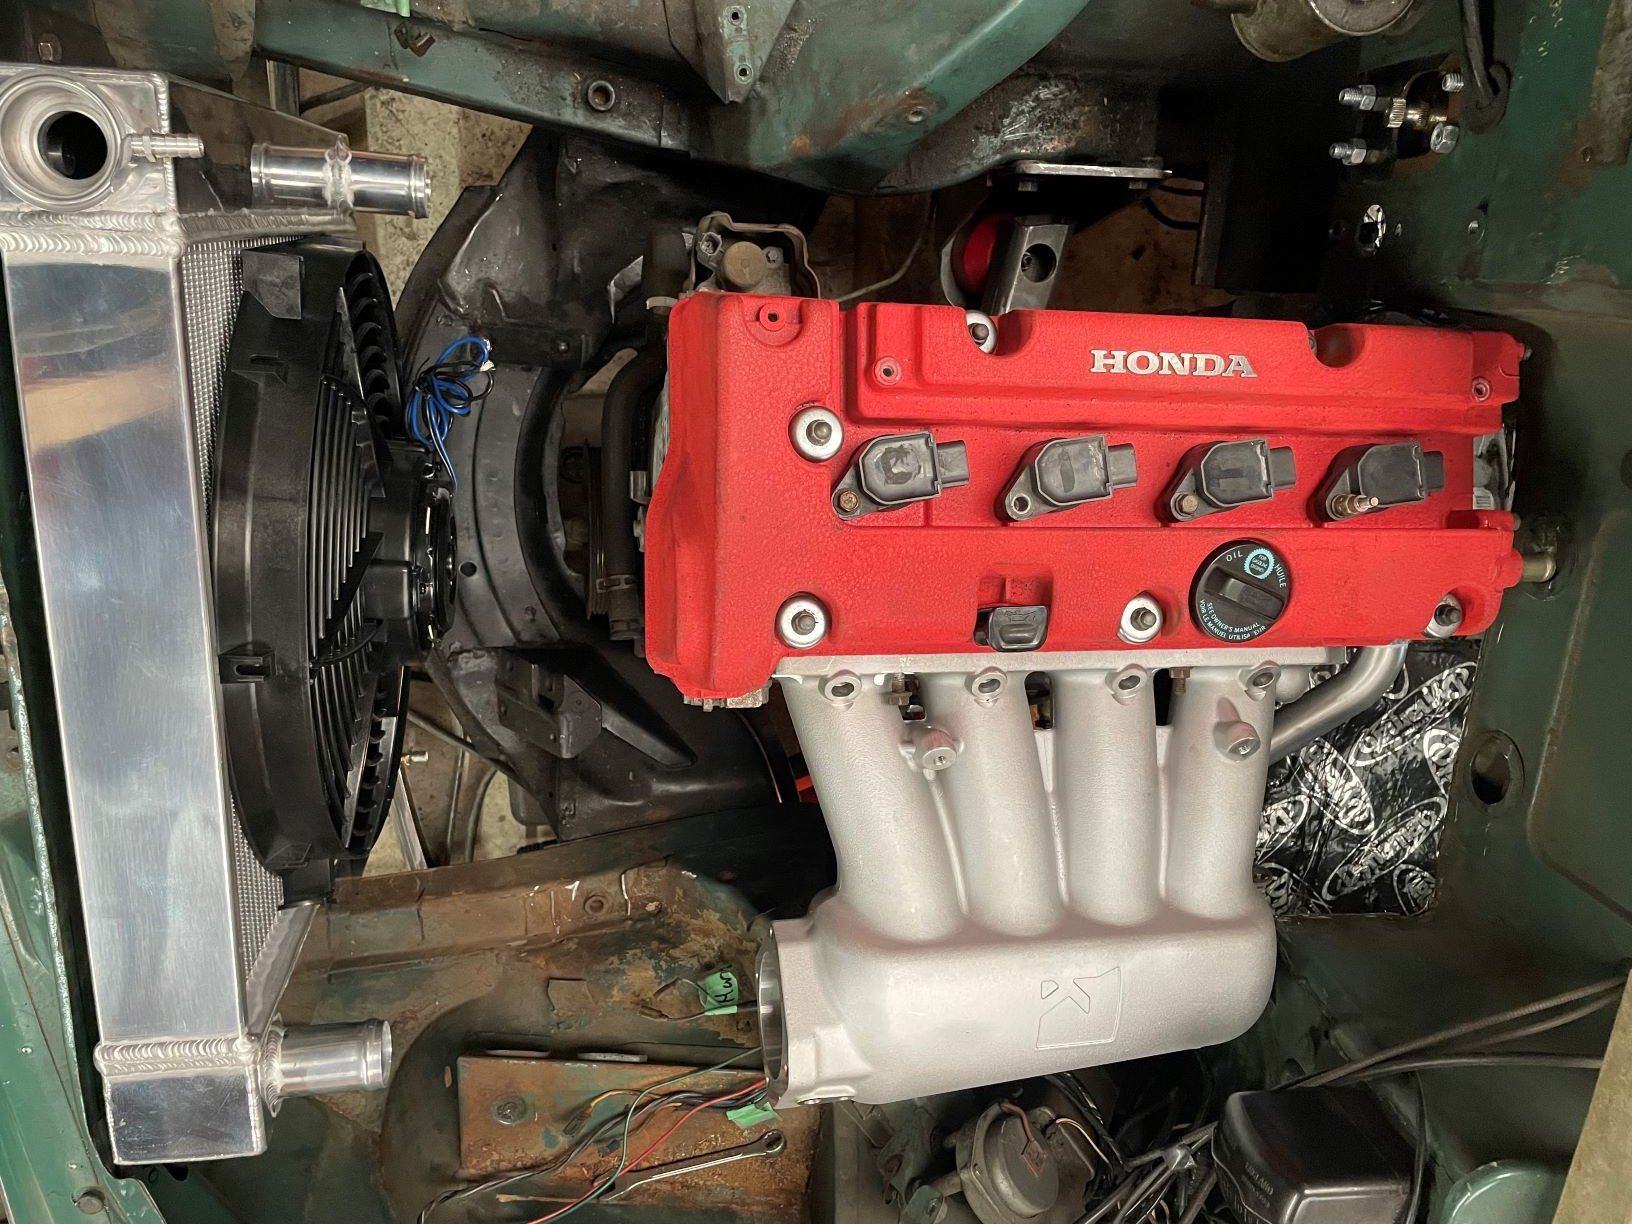
Radiator mount sorted and working on the fan mounts. I need to get back to the steel shop to get some more 3mm flat. Also checking the fit of the intake. It's good that I don't have to notch out any more of the firewall.
1 point
-
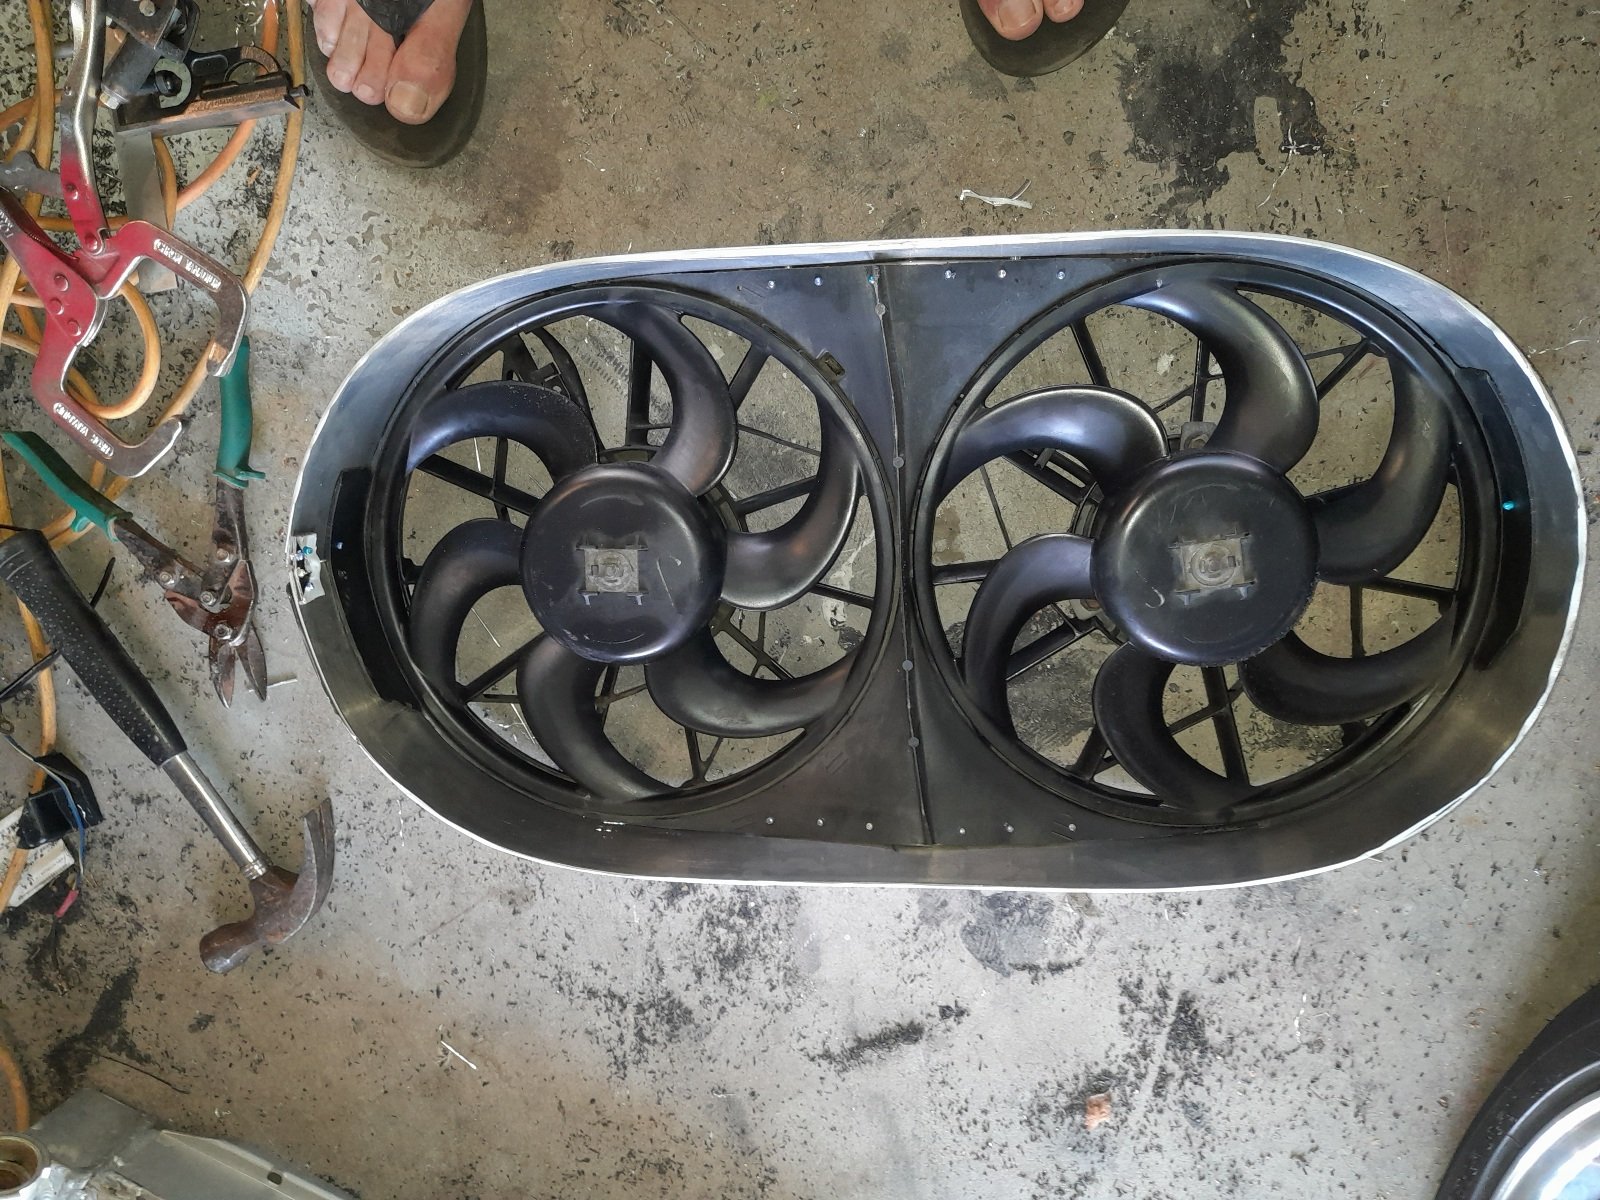
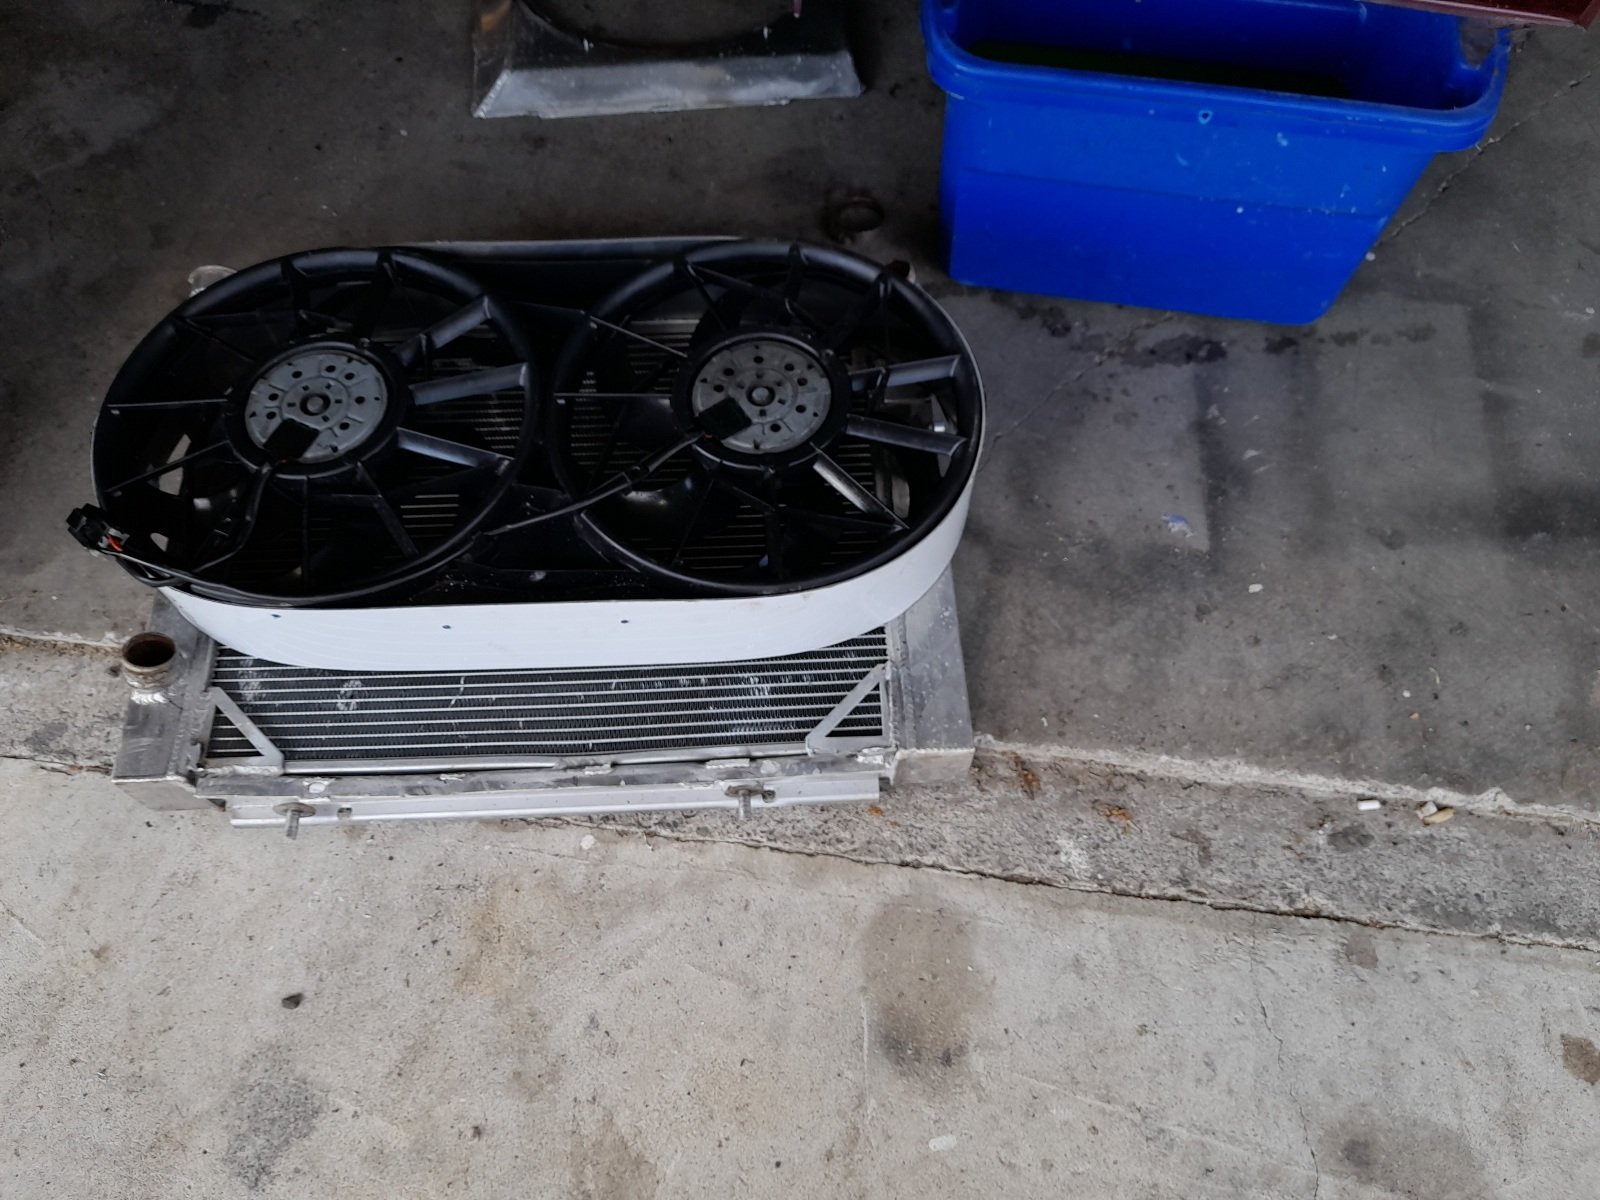
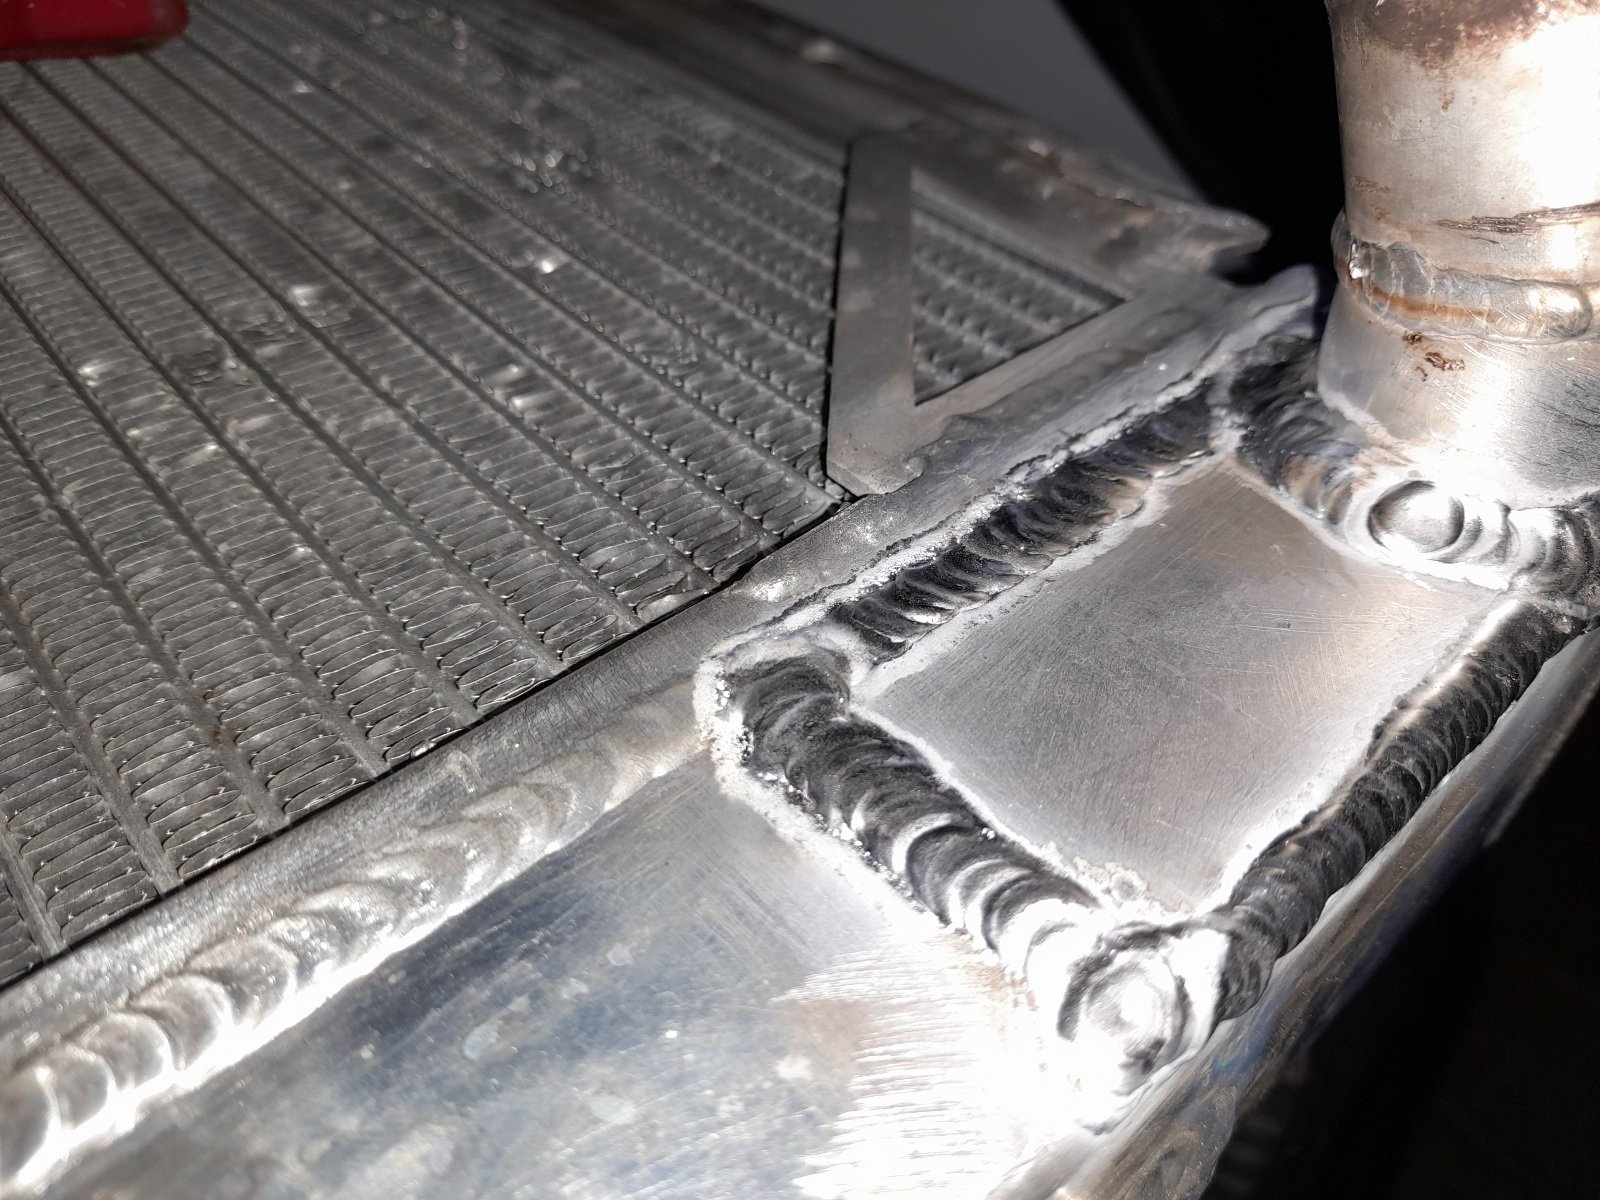
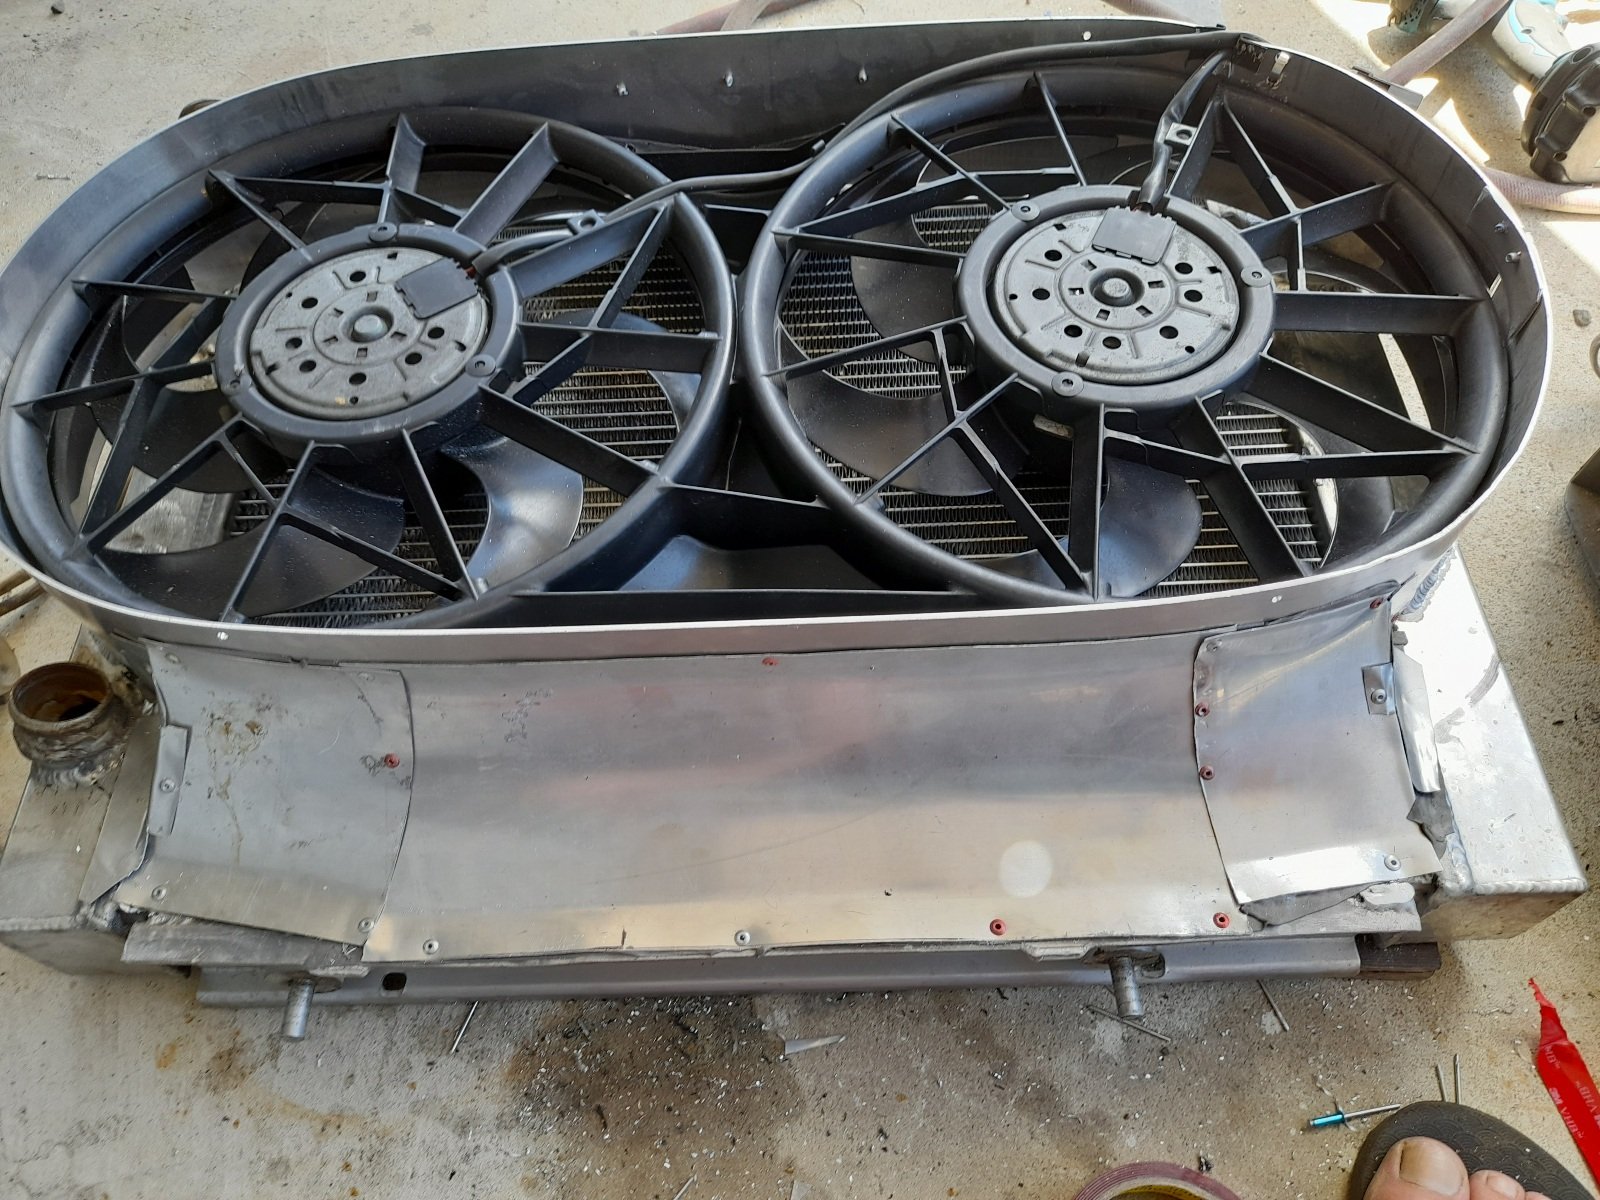
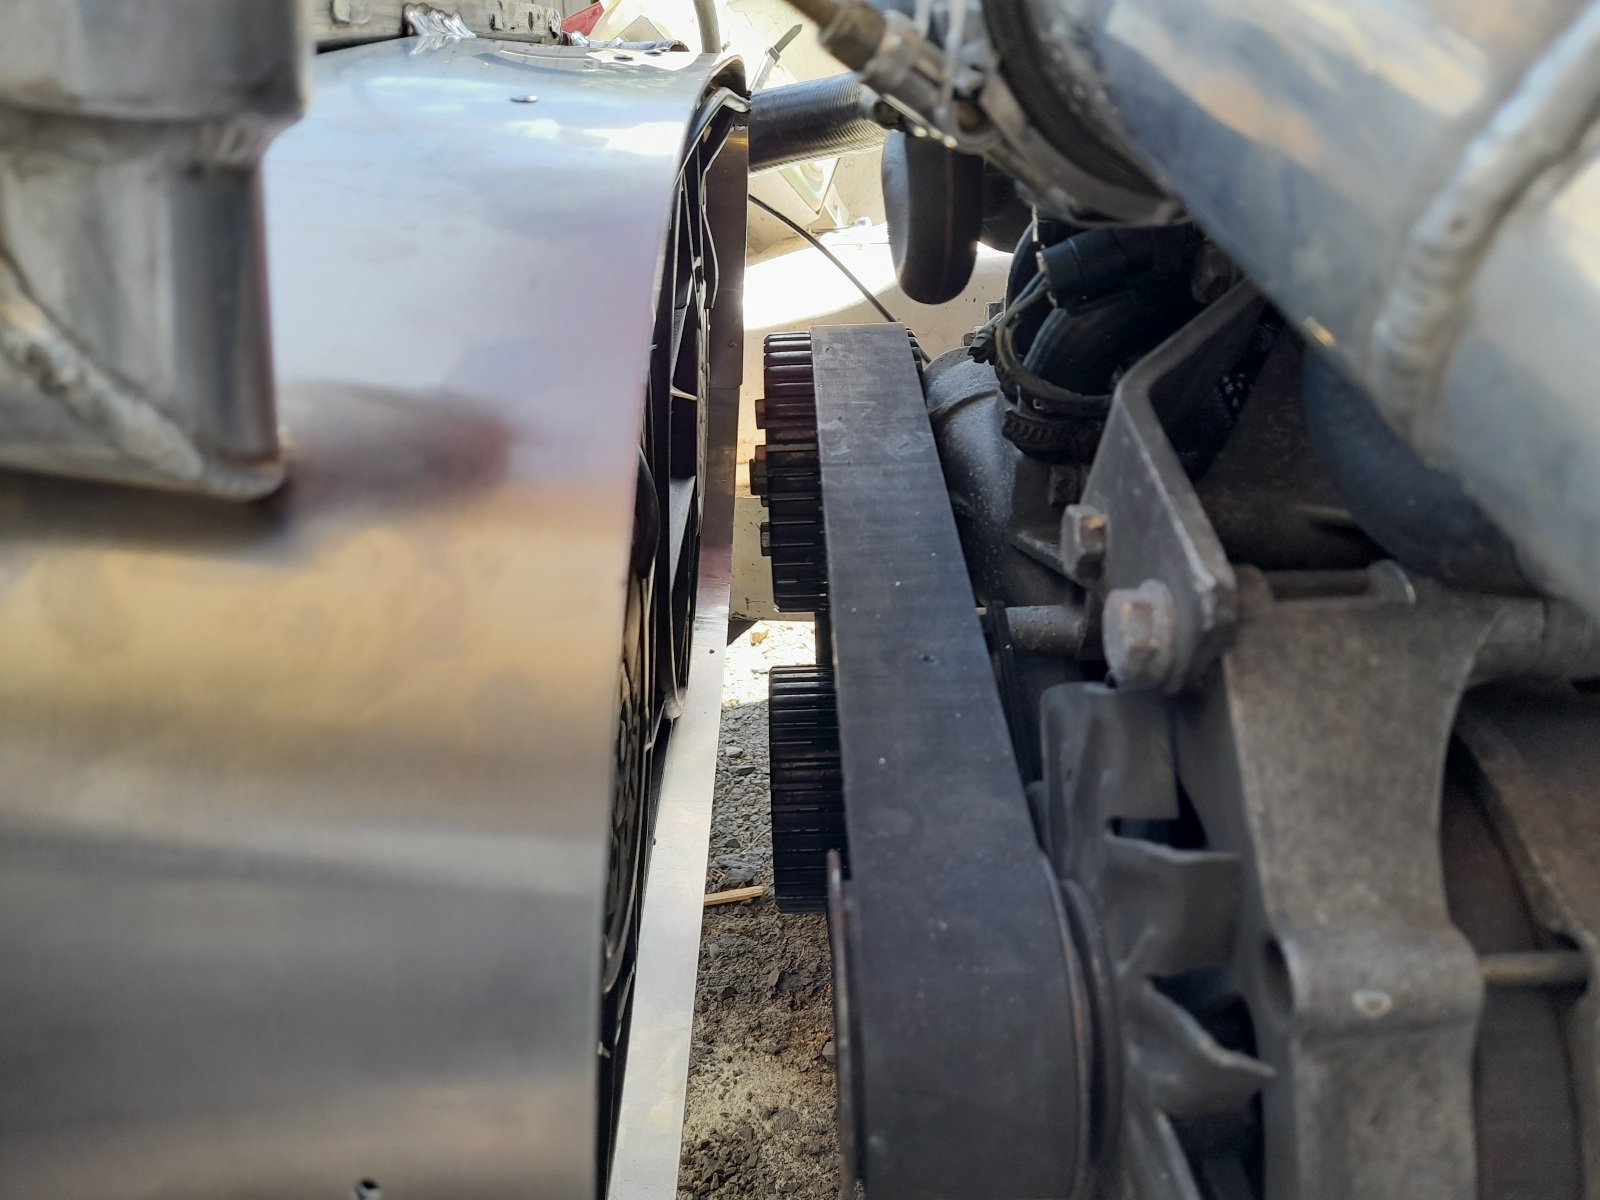
I ended up with a nice oval housing, and had the fans riveted in so that the plastic middle divider between fans was juust about touching the radiator, important because i brought a 2 stage davies craig fan controller, that will activate one fan, then the other when needed, so they arent both going all the time... One fan is sucking through the radiator, not the other fan, thats not going if that makes sense?? some thin alli sheet to attach bottom and miss the cars crossmember, i will be sealing this properly, all around to create a proper vacuum, rivets only go into radiator bracketry not the tanks lol plenty of space yes i welded it onto the radiator, i think itll be fine no need to bolt it on have to modify air box a little bit still getting there, waiting for my fan switch to turn up and install new 82c thermostat, and finish sealing around shroud, pressure test welds..
1 point
-
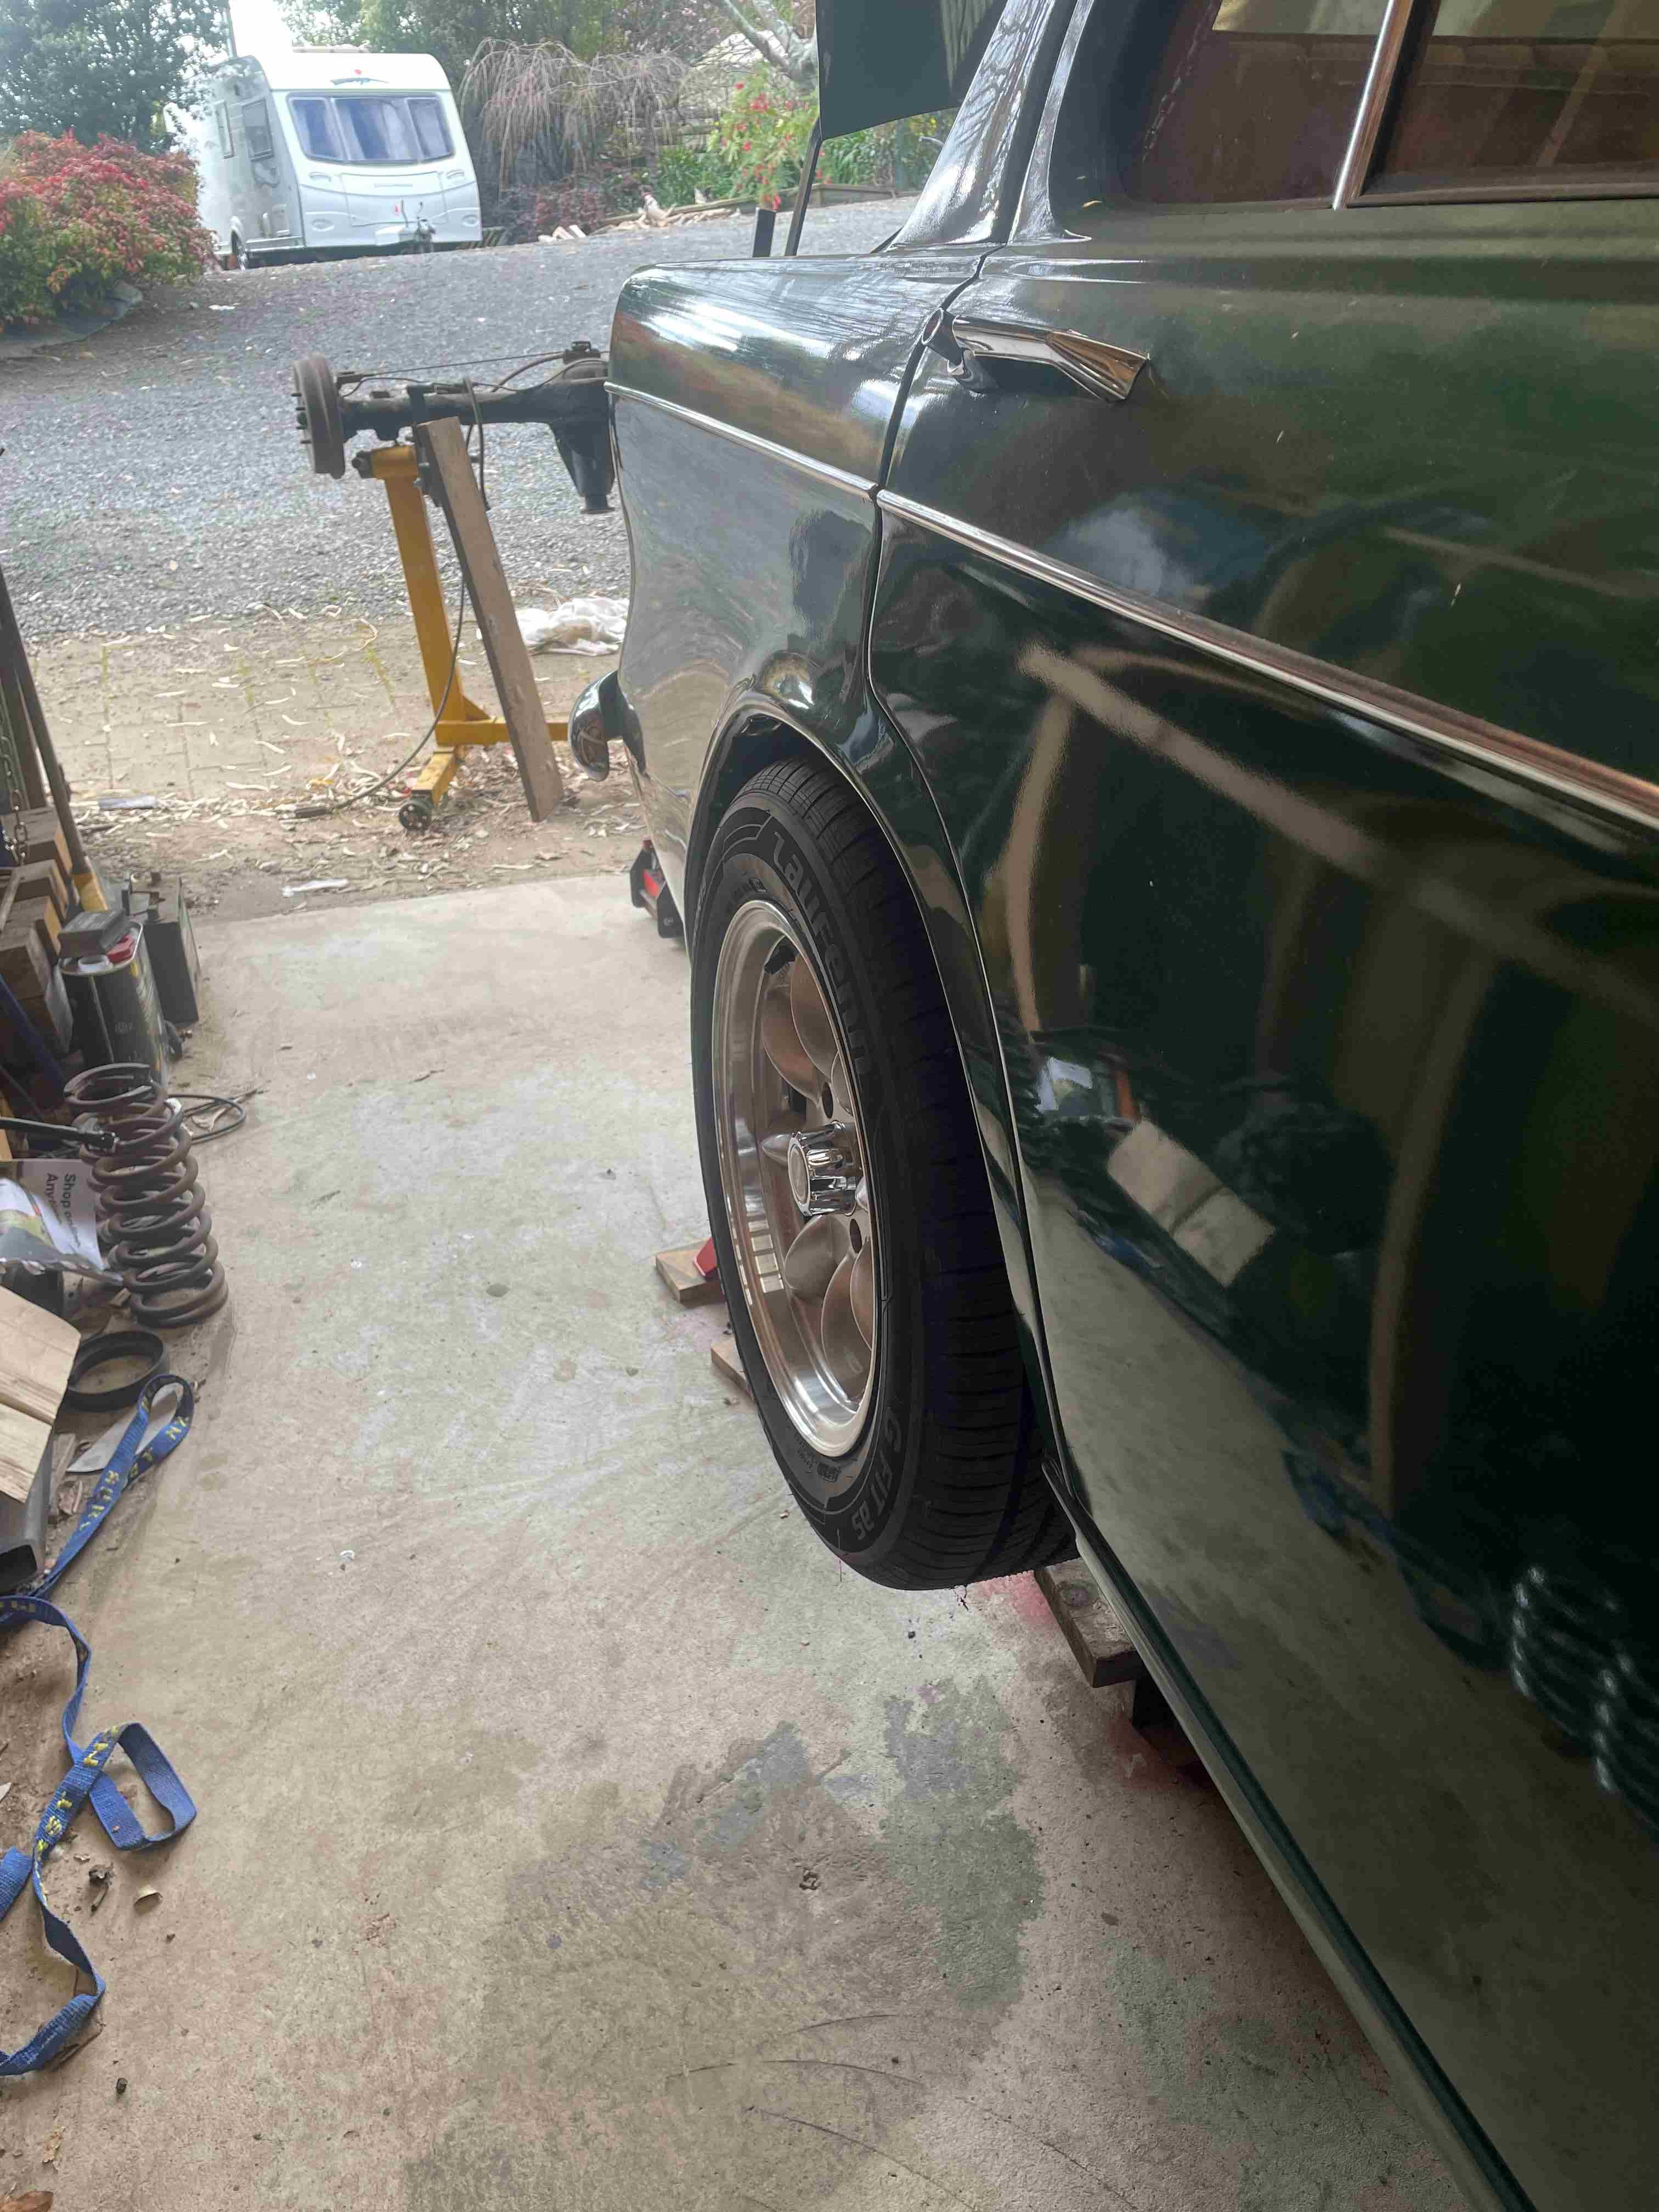
Despite having some paint flaws, which will never make it a show car, i decided to finally fully cut and polish the rest of the car. The front here was dull and covered in rattle can overspray, pretty happy with linkup products, its a lot brighter really brings the colour out ... more to come, takes a lot of time but will compliment the next phase
1 point
-
1 point
-
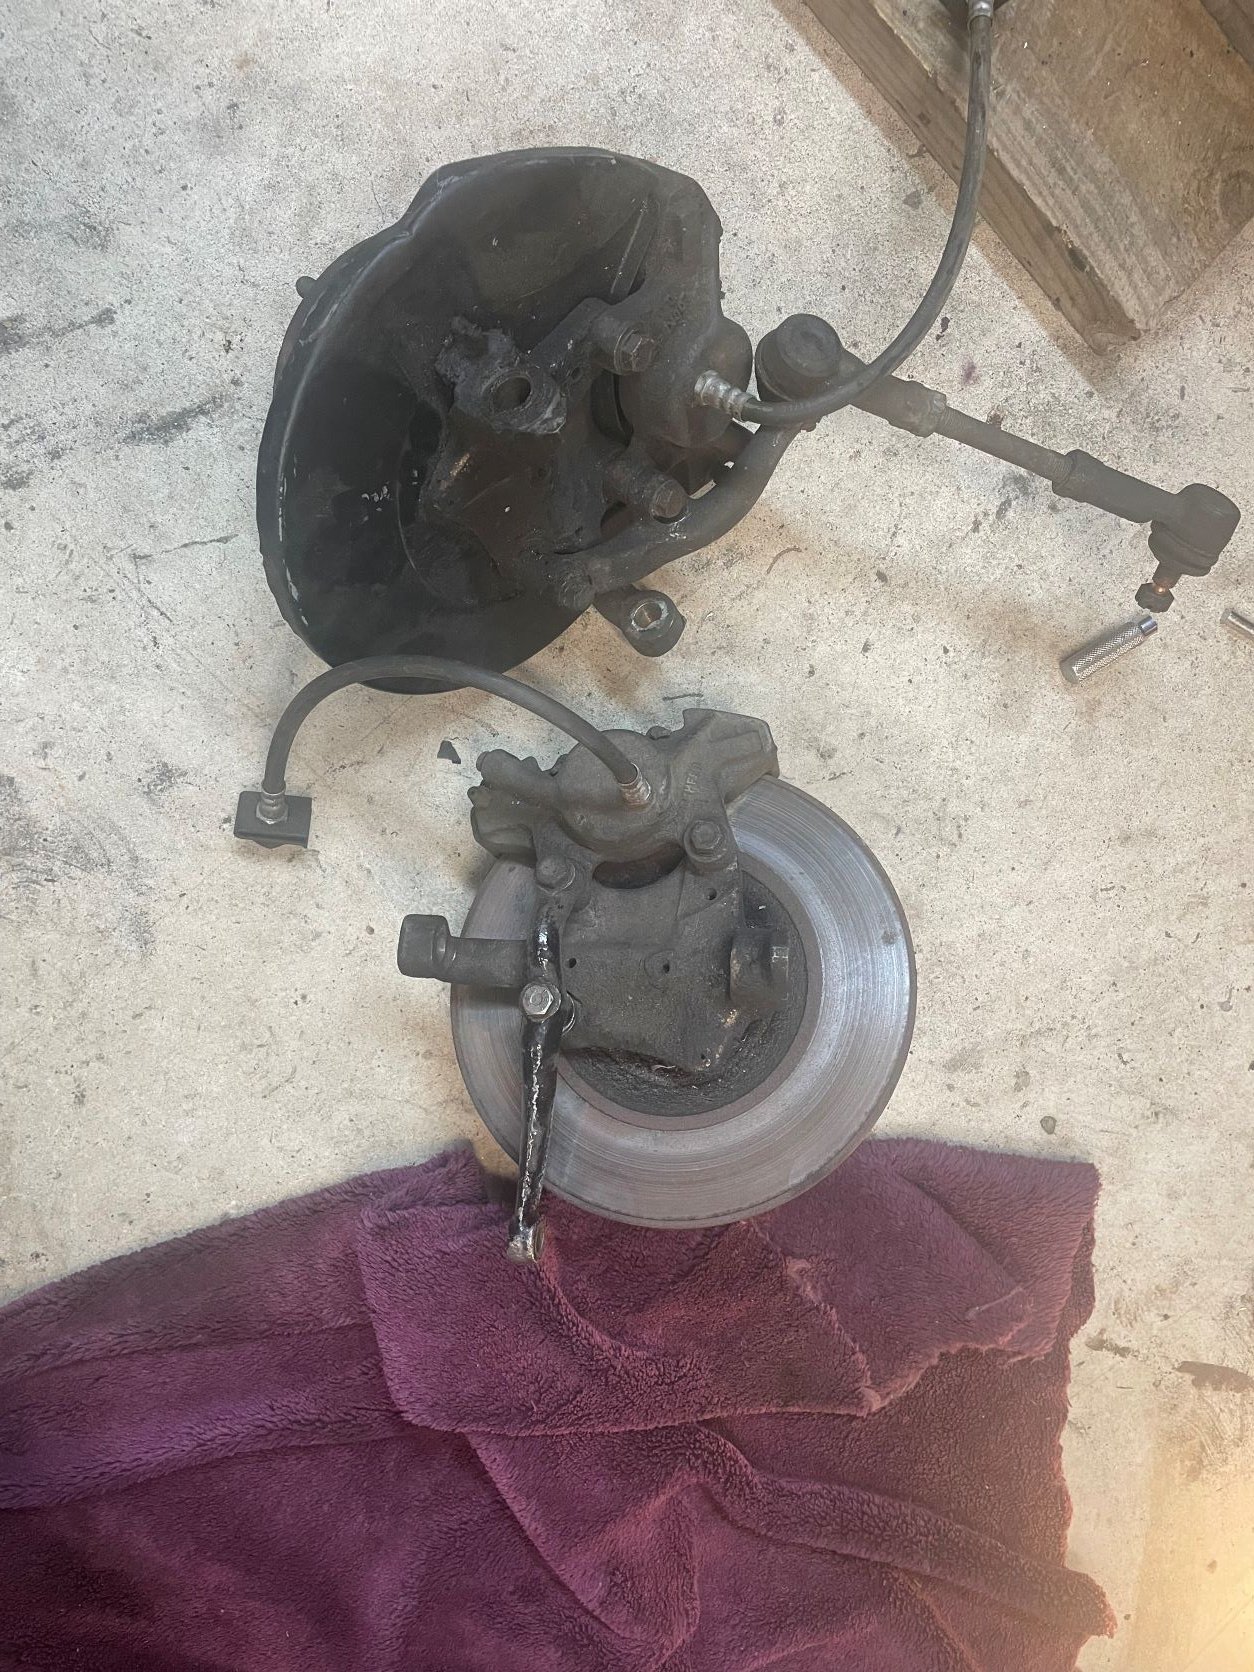
I had a set of brakes from the vs ute, slotted drilled rotors and master cylinder etc, had to buy hub adapters to make it work as well as a spacer for the booster, and now works great, the rotors are a bit bigger, calipers finned, rotor no longer house wheel bearings, mate at work skimmed the front rotors to make for a nice brake setup, that can still have small wheels go over I believe. And got certified, first time around was a fail on speedometer out and a fuel line fastener in one spot, not bad! Fixed those things and all done !
1 point
-
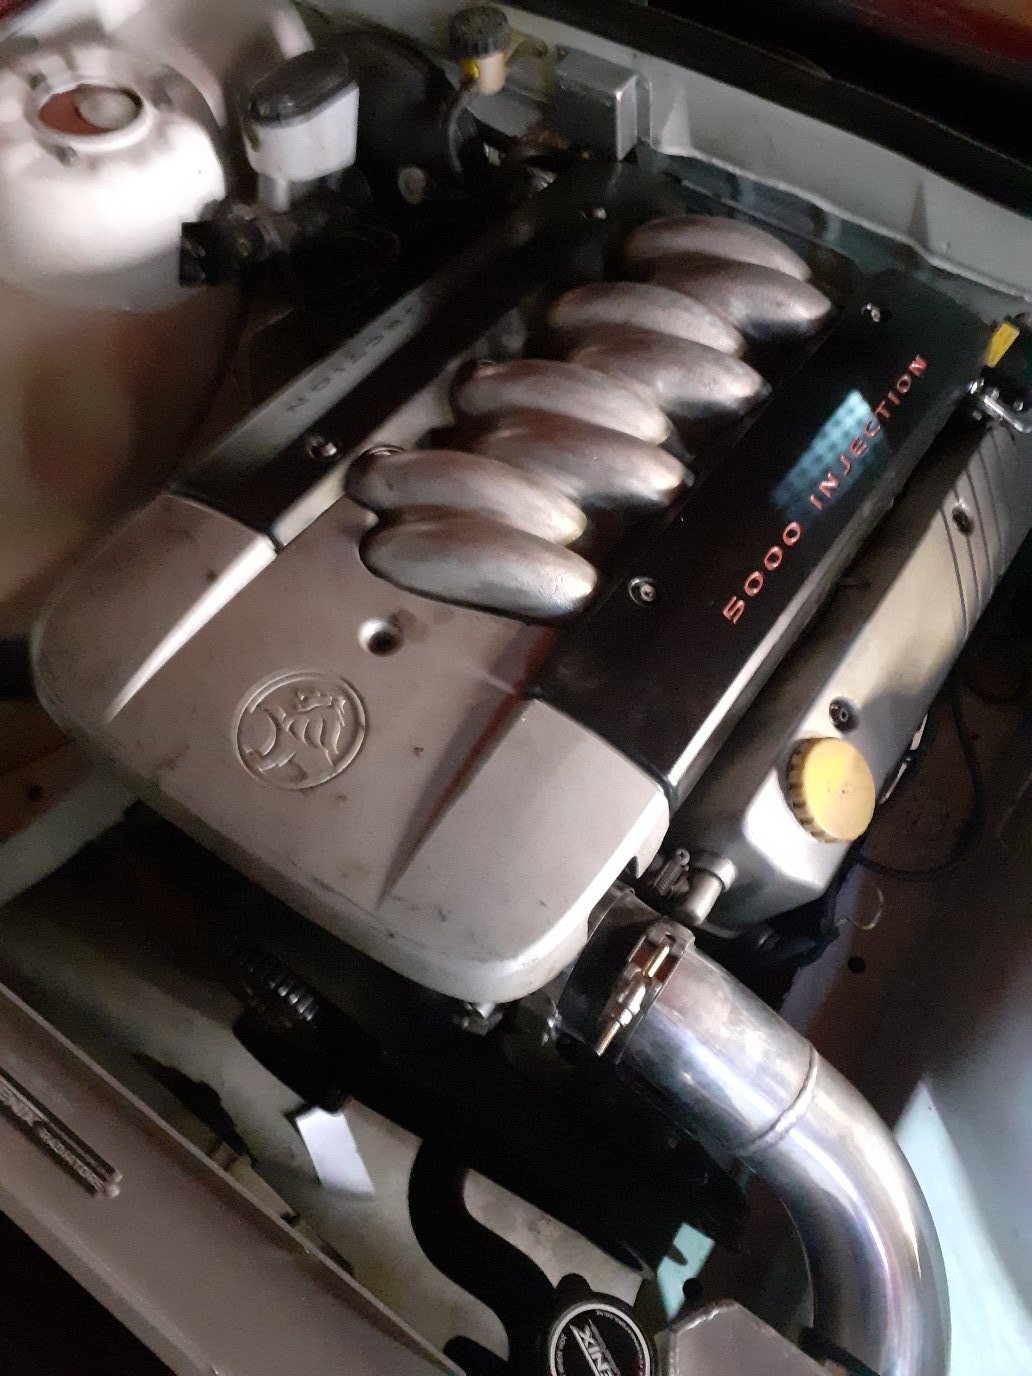
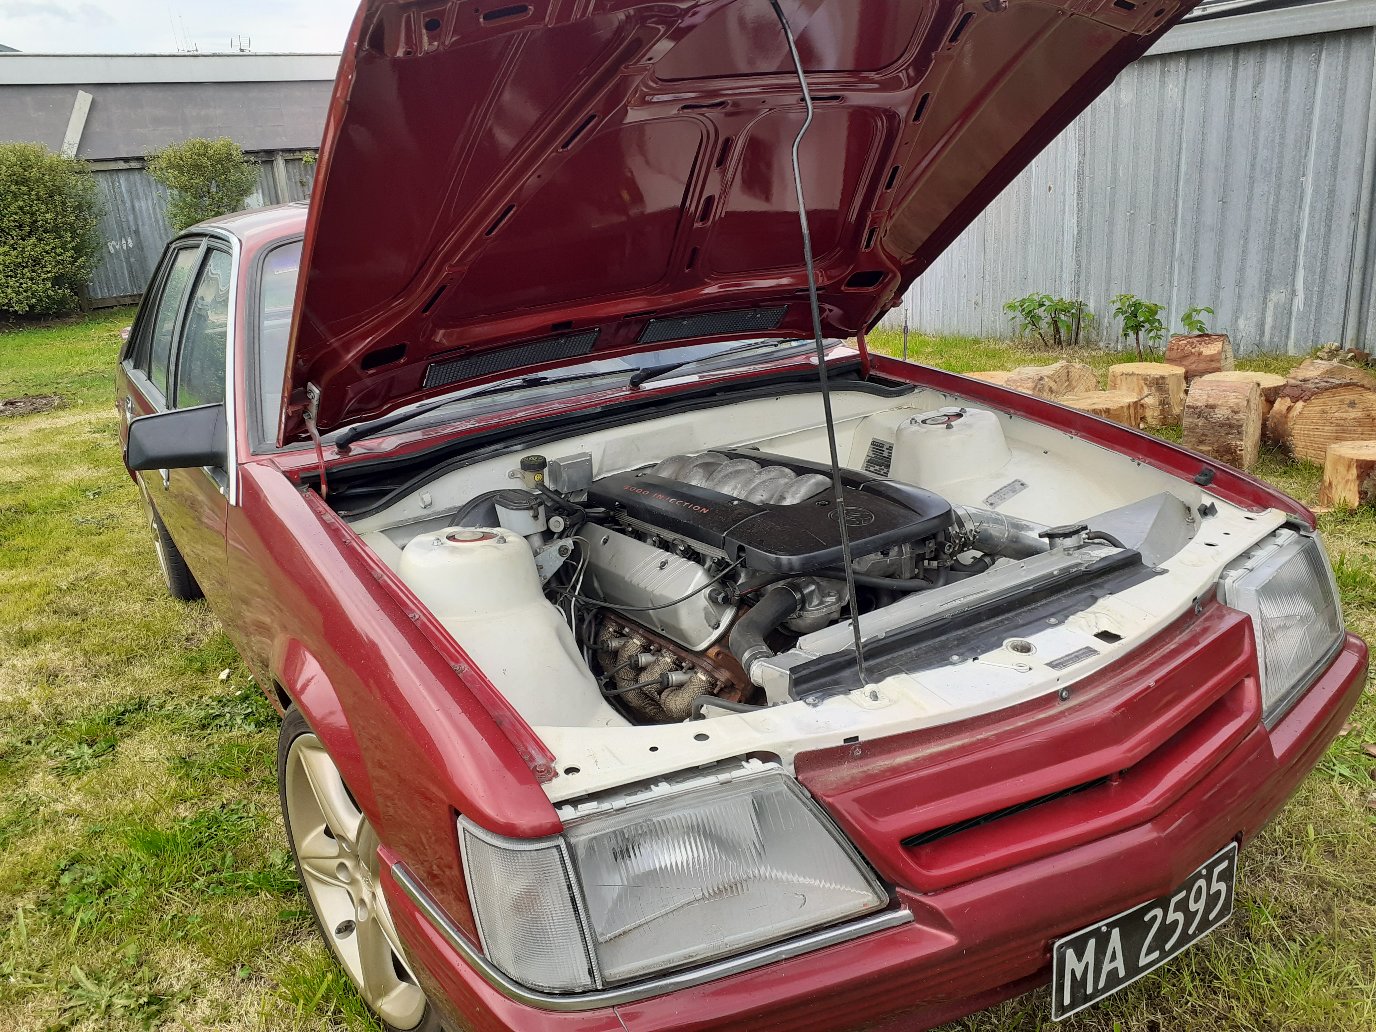
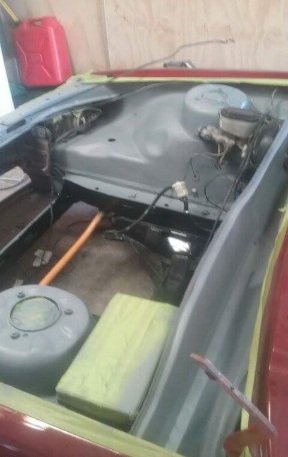
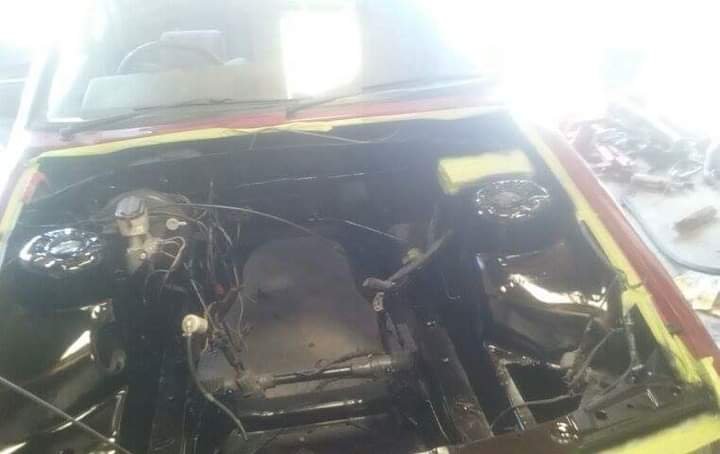
Some of the stages the engine bay went through black- too dark, white gets dirty , my white paint had a reaction or something and though it looks nice on pictures, it cracked horribly all over, so this is now on the to-do list, took me a while to get the proper 5litre vt front cover
1 point


sm.jpg.09a680304a6ca90b0cabdb9c90e61988.jpg)
.jpg.a87835e1361c584f4bb6ae87ce175f09.jpg)
sm.jpg.7682f8bcd1d1471bc9fca385803a5a6d.jpg)

sm.jpg.1484a60c2a73cdb3e84c3e416f9a6e81.jpg)


This leaderboard is set to Auckland/GMT+12:00