
Leaderboard


Popular Content
Showing content with the highest reputation on 10/24/15 in all areas
-
Hey everyone heres some pics for your viewing pleasure.... Cheers8 points
-
Look what I picked up today Just got home from a ten hour trip from Wellington to Tauranga via New Plymouth to pick the thing up More pictures in morning5 points
-
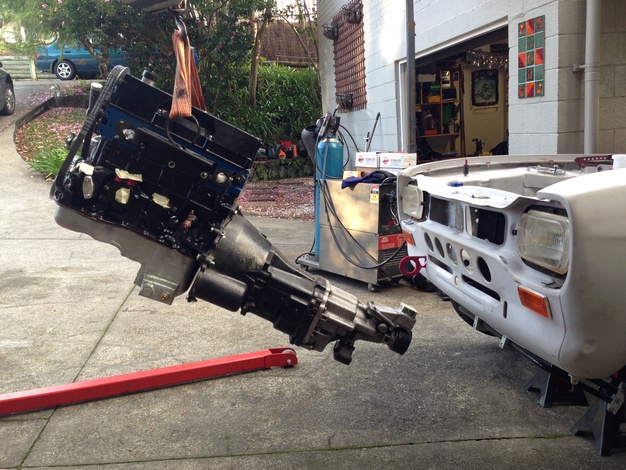
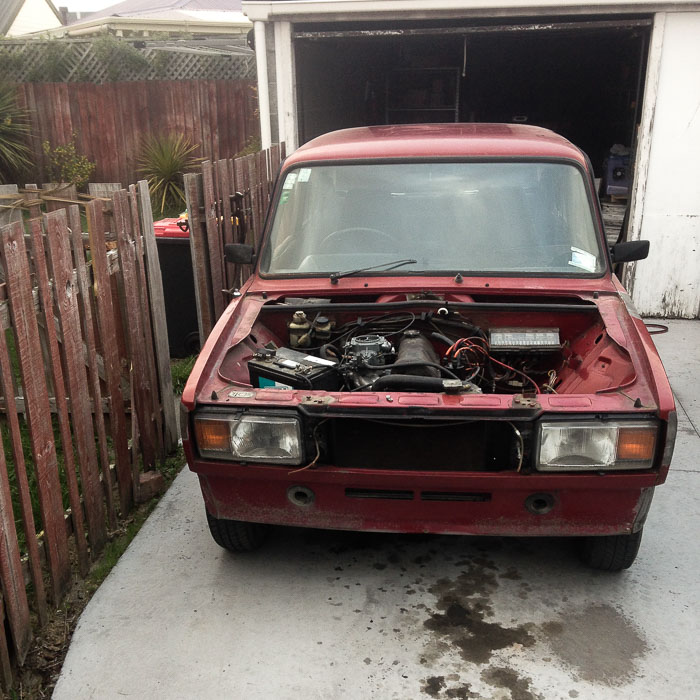
I dug the engine and box out of the hole today. Manual says box out first, so thats what i did 50 years of leaky gearbox sorted with 20 minutes of waterblaster engine bay ready for stripping looks quite bad but its not really, the RH side paint has been affected by leaky batteries, + brake and clutch fluid which has lifted the paint but not rusted very much at all. In contrast the LH side is very good. I thought the gearbox might have been stuffed, as I had not been able to get the box into gear since ive had the car, but once the box was removed it went into gear fine - ive traced the issue to one of the linkages being seized on its shaft, so thats easily sorted and i will be able to keep the column change. I had been investigating, and i think a Lada 5 speed box could work, but thats one less faff around i dont need to do. In other news i have managed to not only find but purchase a parts 2300 wagon and I will collect it some time in the next couple of weeks That means i will have in my possession 20% of all the 2300 wagons that ever existed in new zealand.3 points
-
more progress from the last few weeks, I finally got the radiator in, turned into a bigger job than I had expected but it is all mounted all that is missing is the hose clamps for the radiator hoses that I know I have put somewhere in my stupidly small garage, you would think a small garage would make it easier to find things..... The engine bay is looking pretty full now, which will be the next problem, finding some space for the coils. The other thing I did was sort out an accelerator cable, I got one from a Toyota something that matched the pedal I had then cut it down and got a new end put on it, then tidied up the way it comes out into the engine bay using a rubber grommet thing that I got from Basis, can't remember what it is off or anything, just saw a picture and figured that it might work. the bracket on the carb was from Weber Specialties, it is a pretty cool setup, I put a double return spring setup on but I think the outer spring is a bit heavy, makes the pedal a bit heavy and I imagine will make low speeds a bit tricky. I have also been working on the back part of the exhaust and the fuel and brake lines, the ones I made when the crossflow was in don't fit quite right as now the tunnel is so much bigger so I have had to tweak them a bit, I am going to try and get that finished this weekend though, it would be nice to have it back on it's wheels.2 points
-
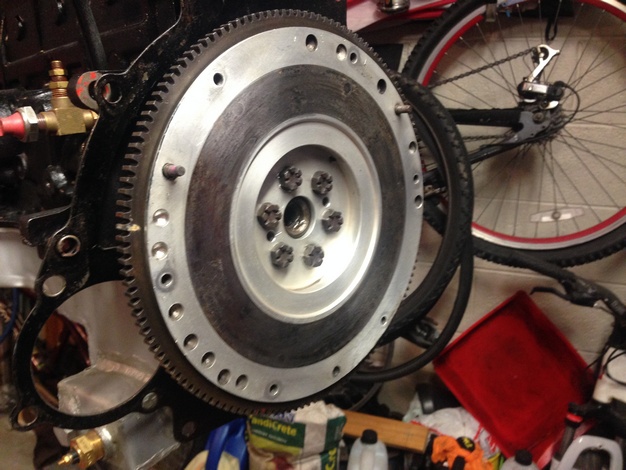
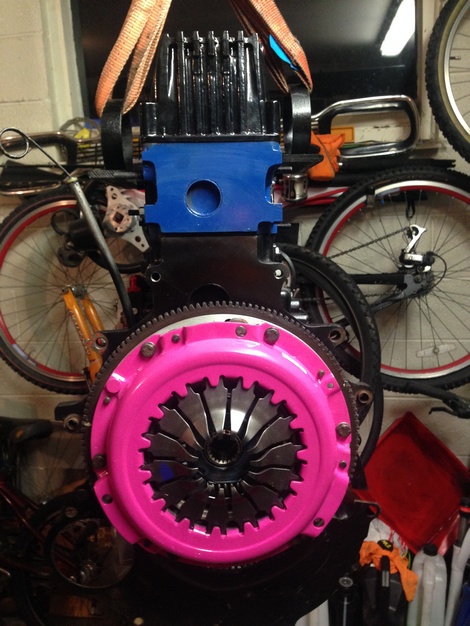
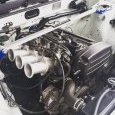
Lightweight alloy flywheel fitted uprated exedy clutch and pressure plate strengthened and fitted clutch release arm and bearing almost ready to put back in
 2 points
 -
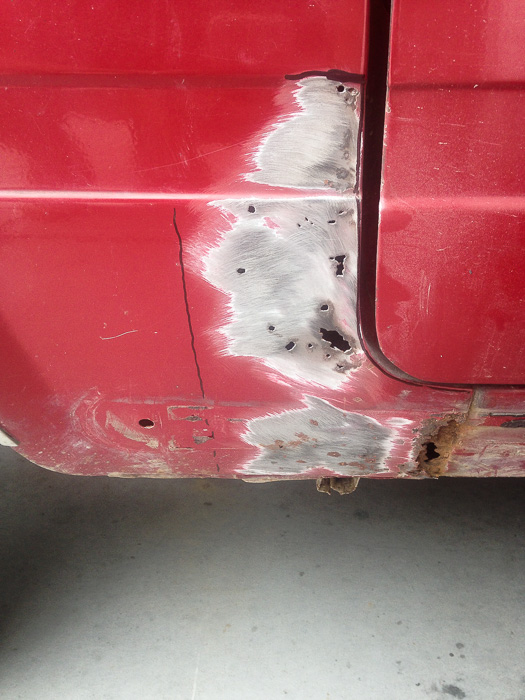
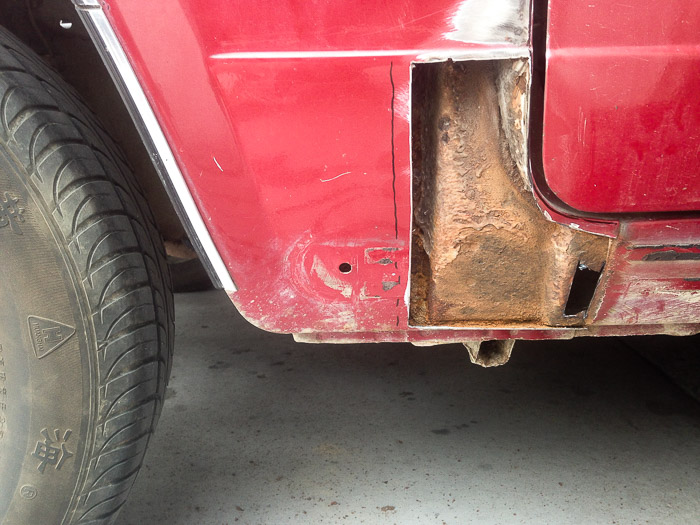
Finally got the balls today to look at the rust on the front gaurd, dug deep with the grinder and was greeted by lots of dust but not as much rot as I was expecting, what looked like really bad scale was just flaky underseal, ripped that off with the wire wheel and found okish steel underneath, will rust treat the lot and spray some new underseal in there before the patch goes on over the top. Before: After: The small hole on the sill had me worried but it still seems to be full thickness, we'll see what happens when the patch goes in! But on the brightside, I've been for a quick drive up the road and back, she's only a few welds away from a date with the wof man Nice oil stain forming on the drive from the niva, almost enough excuse to buy a waterblaster
2 points
-
So not a super exciting update but still progress none the less. Modified the alternator bracket today so that the top water outlet can exit above the alternator. As always I ripped into it and forgot to take a before photo, basically took a semi circle out in the middle so a 32mm pipe will clear its way through. After some cutting and grinding - then add paint and re-fit. Looks factory ish. Can see the water pipe flange sitting in place. Also spot Trumpets now have cap screws. I dont currently have any alloy pipe, so I mocked up basically where it will go so I can get the correct length and bends. ill probably get someone local to cut//bend and add a swage to a piece of 32mm alloy and the weld it to the flange. Things to do before motor goes in: - Remove sump and re-seal windage tray - Refit sump - Fit flywheel, Clutch and Spigot Bearing - Fit Gearbox Not far now!1 point
-
i remembered a little detail called minimum tooth requirements for the hall effect sensor. looked them up this time and came up with a revised wheel design. this will get sent off to autobend next week to be cut out. any recommendations on material? does stainless work, or will i just need to paint the wheel to stop corrosion (do they even work painted?) also contrary to the nice cad designed wheel. i welded up a nice/rough bracket to hold the coil and ignitor. looks kinda rough on its own, but quite good with all the parts fitted to it. also made up the extension to the loom for the wasted spark gear this morning, will just need to be soldered into the plug and suitable rewire on the inside of the ecu. some nice aliexpress HT lead spacers will probably get ordered too to tidy up that side of business. also looking at that photo i really need to get some split tubing or something to hide away the rest of the loom! discuss //oldschool.co.nz/index.php?/topic/30375-flibois-1971-toyota-corona/page-71 point
-
Keen. Like i said I'll meet ya at pizza barn.1 point
-
Needs lots of things - mainly brakes, suspension, larger exhaust and carb to get the most out of the 125, and lights.1 point
-
Did you guys use the kit set speed controller last year? Or something more custom?1 point
-
I stole some panel steel of a mate cos he brought a whole sheet for $60, cheap as chips really1 point
-
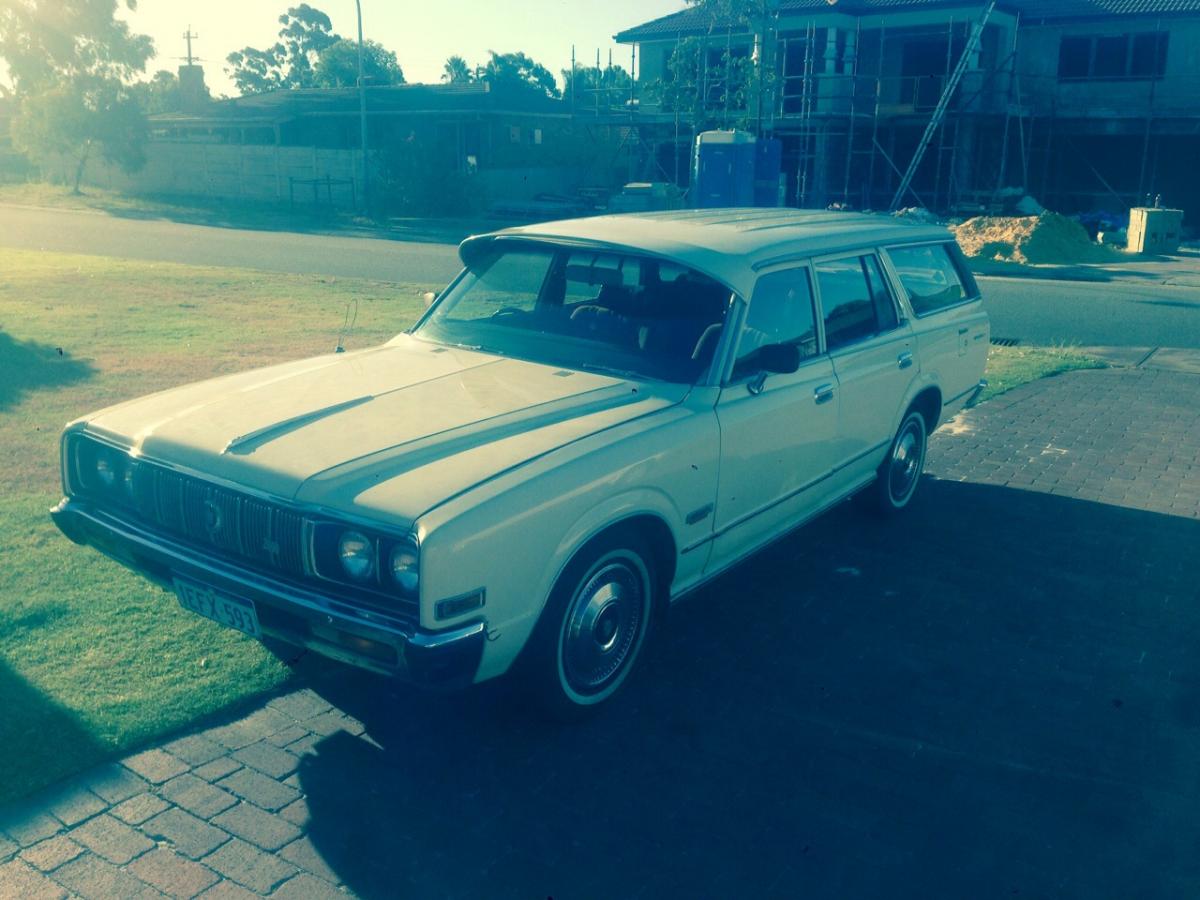
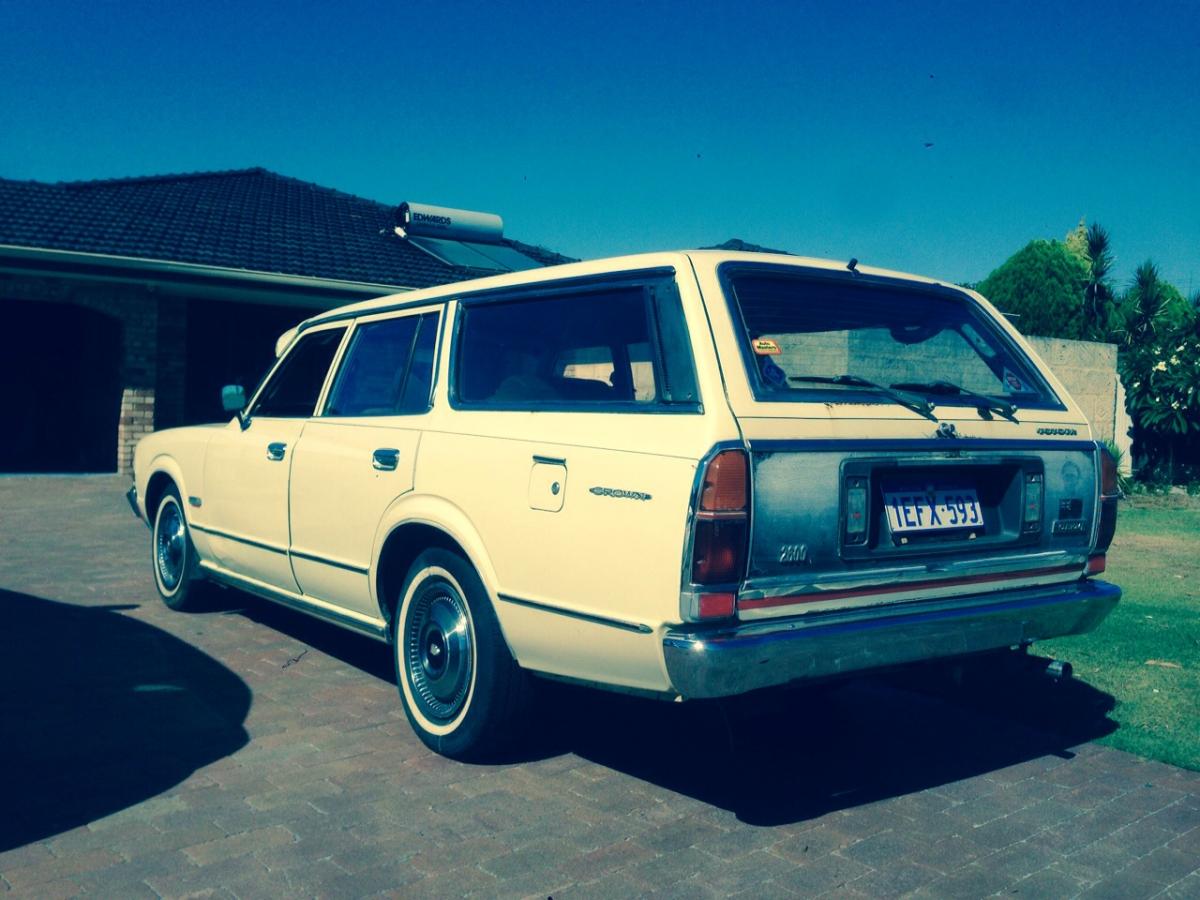
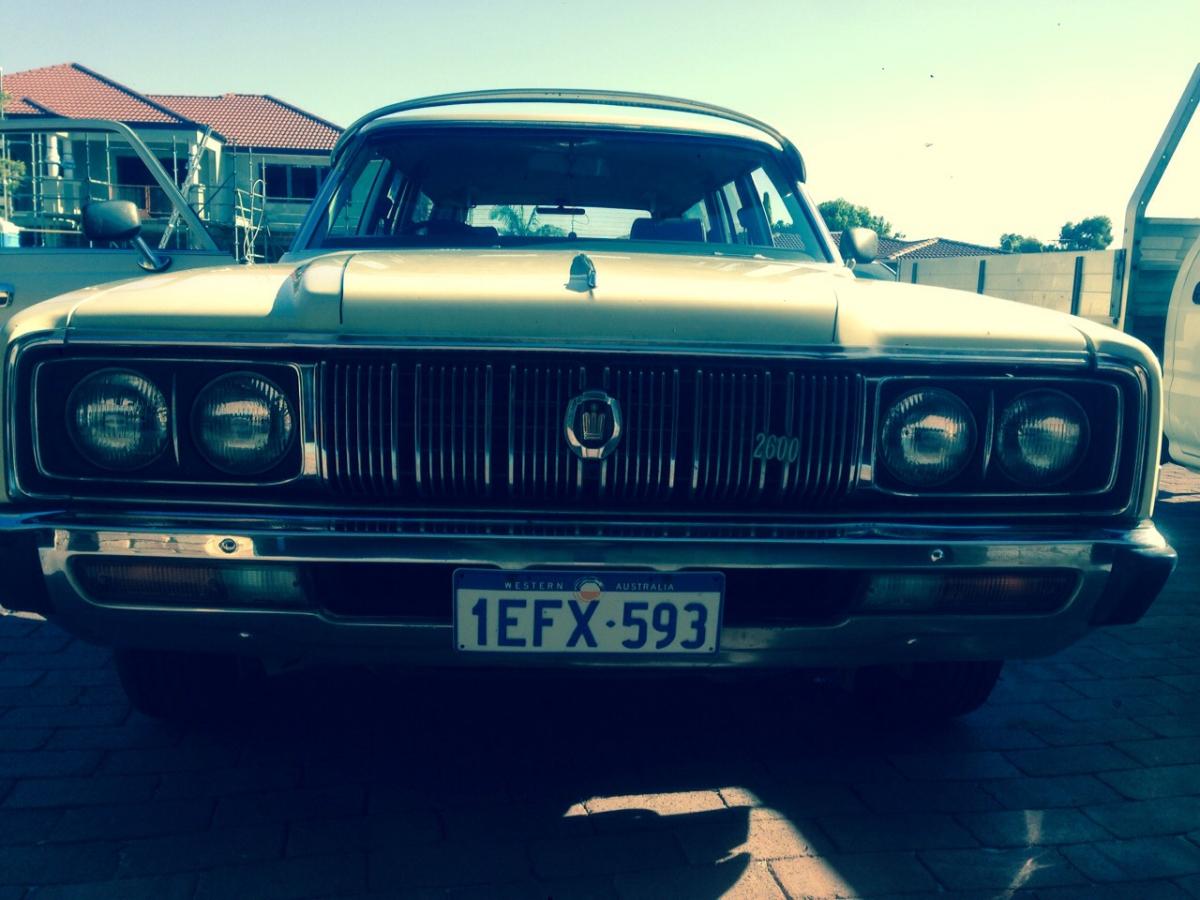
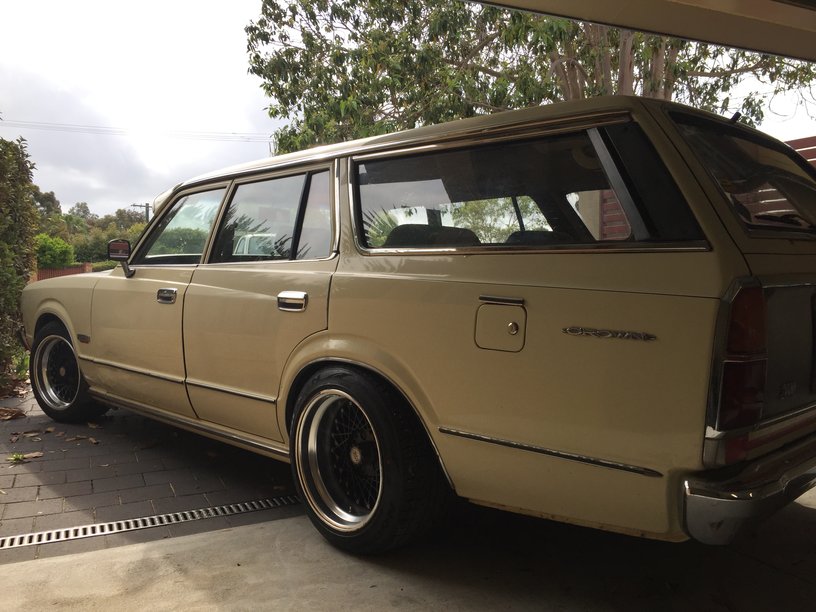
Here's my 1976 toyota ms83 crown wagon. I recently purchased and intend to use it as a cruiser maybe tow wagon later on down the track She's pretty much standard running the 4m and 3 speed auto, Body is in pretty good nick for its age, bit of rust in the tail gate and a few other small bubbles here and there. she's got 85k on the clock, not to sure if it's been round though. - still has the original manual and service log book inc. purchase date, dealer etc although only the first 5k service leaflet has been filled out in it. Interior is in really good condition too with just the carpet on drivers side foot well being a bit worn and ripped other than the porno brown interior is good. list of current mods and how it got it - Head unit and 6" speakers in front doors - Pimp as exterior sun visor - White Walls - 4 extra switches mounted in dash Future mods in the near future inc. - give it a tidy up here and there - Lower it a few inches - does any body know if ms85 springs will work all round? I would deff say the front is the same only the rear I suspect could possibly be different. - figure out what the 4 extra switches do...or are supposed to do....don't appear to do anything at the mo...probably will remove but will need to figure out how to cover up holes or get new panels. - Give the old 4m a tune - Install 6x9's and maybe a sub in the boot. Future mods in long term future inc. - send back to NZ when I move back one day - Panel and respray - Drop in a 1uzfe with ITBs for the sweet sound and also looks....or may look at a UR family v8 (1ur-fse, 3ur-fe, 2ur-gse
1 point
-
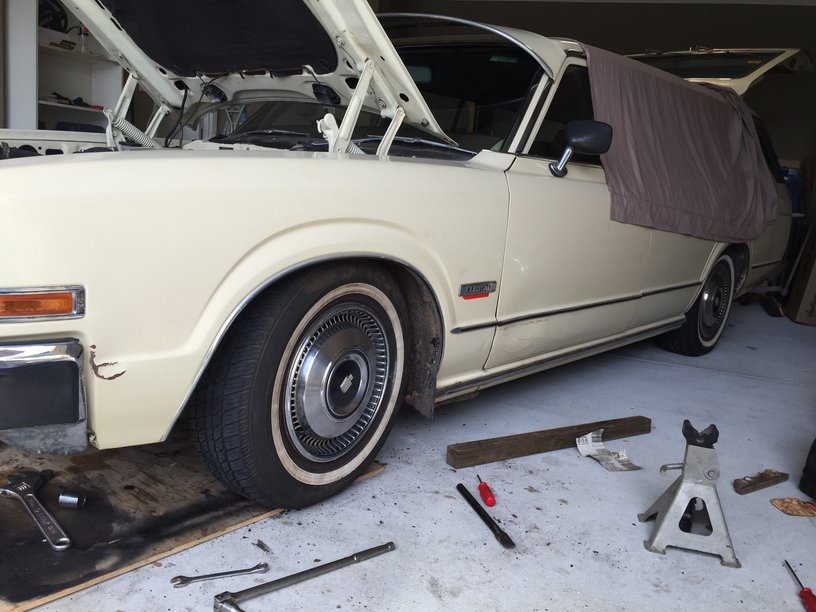
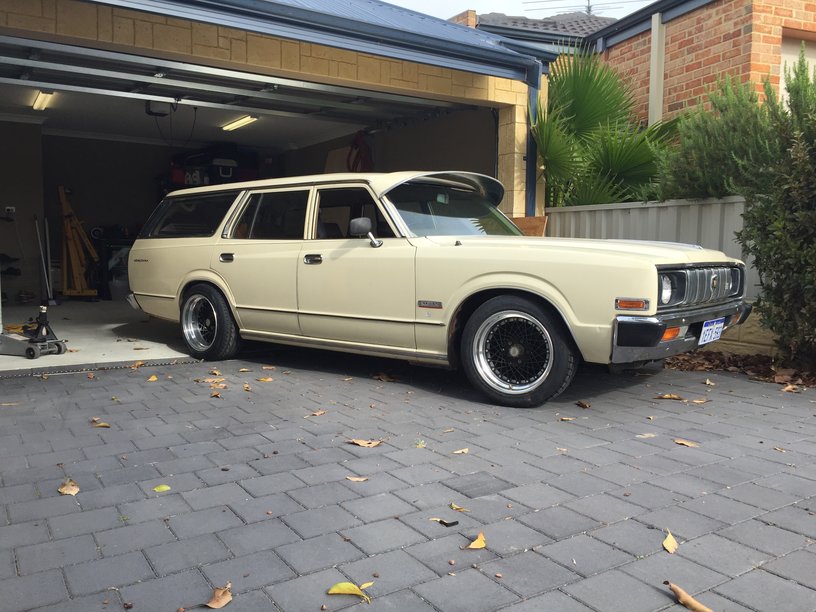
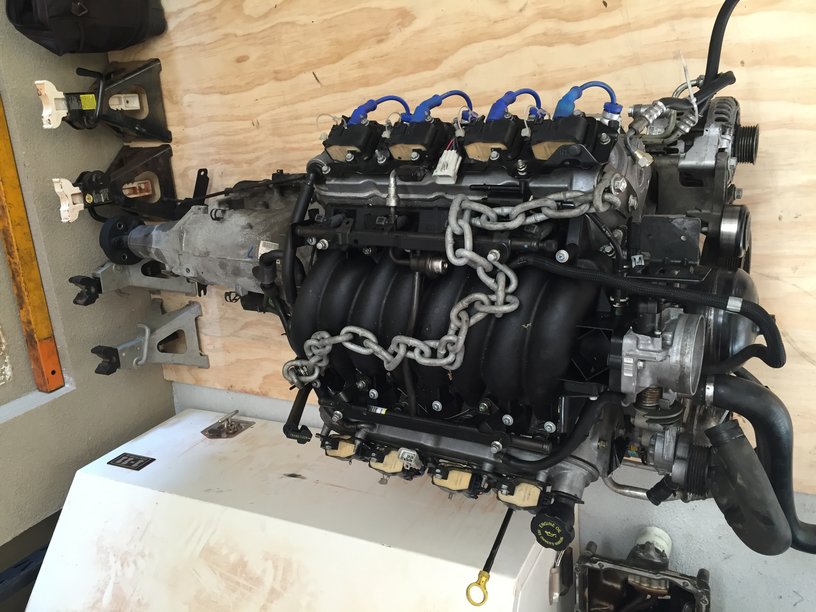
So during my month at work I purchased some King Spring lowering springs for the front, just as well as when I returned I guess the springs must have settled a bit. Tried to take it for a drive again as is but the front Rh tyre scrapped from the garage to the end of the drive (about 5m), reversed it back in the garage and jacked it up...noticed it was scrapping on the inner guard where it's been hammered down approx 20mm from the inside to accomodate for the electric retractable am/fm Ariel that was installed at some stage in its life in the rh guard. Anyway fitted the King springs in the front and also fitted the SSR wheels...i think I like the original wheels with hub caps better at this height...if it was lower (approx 30mm front and 20mm rear) I think the SSRs would look better...will lower it a bit more down the track once I get the rear end sorted - either fit the rn20 hilux diff I have or shorten the standard f series 20-25mm a side. I think the rn20 diff will be to short plus I have already changed the stud pattern to 4x114.3 on the rn20 axles so would need to change back to 5 stud and sort out brakes etc so would rather keep the rn20 diff for a future project. This is how it sat with the trimmed lovells up front - doesn't look that low but the cross member was about 75-80mm from ground. How it sits now with the kings in the front and trimmed lovells in rear So still needs more low, but will do for now to cruise round in the summer before it comes off the road for a repower and some more mods Oh and the repower package will be this Yes yes I know it's a filthy push rod Gm engine and I'll be cross breeding but the reality is I think it'll be easier to fit than a 1uzfe or any other Toyota v8 for that matter not to mention a hell of a lot easier to find than a uzs131 1uz, or uzs131 sump, headers, trans etc. price was also a factor too I guess - got this combo from a crashed Vx series II commonwhore with full log book service history (have the book) and 147,000km on the clock - got the engine, loom, trans, shifter / tbar, drive shaft for under 2.5k so not bad imo. Will just need p/steer pump and computer (I'll get a mafless tuned one anyway) to be complete. Already have a crewman / cross 8 mid type sump too that I managed to find on gumtree for cheap.
1 point
-
Some of you may be interested in this. For $120 it is pretty cool. http://speeduino.com/wiki/index.php/Speeduino1 point
-
Some more new tings. Got some wheels off Cul8r (yes, I got all 4 before someone asks): Stripped the paint: Now I'm sanding: The plan is to polish the spoke faces and lips and paint the center bits around the bolt holes and the spokes sides black. Also put in my Wolfsburg steering wheel. And check my new radio, how's that for period correct? I've got my ticket to the twilight session at Hampton on Wednesday which should be good fun. However the car has had a bit of an idle issue for a while and in an attempt to diagnose it the other day I started unplugging and replugging things and now it's worse. Haha. Let's hope a throttle body calibration at least puts it back to how it was, as that was what I unplugged when it when worse. Bloody new school electrics, I do miss a throttle cable. I'll be going regardless but would be nice if it's running ok.1 point
-
Bit late on the update but the E28 has been going for a while now. When I first did the manual swap I put the flywheel one bolt hole off (orientation in relation to the crank), and since they take TDC off the flywheel I had to pull it all off again. Only took 6 hours the second time though so no big deal. Got a new black lower center console, made the vinyl gear boot, painted the rest of the center console bits black and got the proper gear knob for it. Just need the emblem now. It's so much better to drive with the manual, just like it should always have been.1 point
-
I used to get mine from the Toolshed in Penrose, but I see there's a branch in Hamilton so that's where I'll be going now.. http://www.thetoolshed.co.nz/Stores If I remember I'll take a pic of the stuff I get - can't remember the grade off hand1 point
-
I really like your project, I'm confused though, why one side draught when you have a pair?1 point
-
Also for anyone that didnt realise, this car is small.....1 point
-
Got a bit more done over the weekend, first up I reinforced the chassis rails where the engine crossmember mounts up, I folded up some plates and made up some crush tubes then welded it all into place A bit of paint and it can go back together Then I put the front suspension back together, ne steering arms in New hubs fitted up And all the brake lines etc connected You can see how much I have had to offset the strut tops in that photo to get the camber right, that just gets it back to zero (or thereabouts) so no massive negative camber for me..... I aligned the wheels as well and checked the amount of bump steer I was getting as well to make sure nothing had gone amiss between my prototype steering arms and the finished ones and it is all looking pretty good, hopefully the cert man will agree. And the last job was to put the radiator back in, I made up some mounts a while back to attach the 2 x 10" fans that I hope will keep it cool but I hadn't painted them or anything so I welded some nuts to them to make my life easier if I ever have to take them off and gave them a quick paint. I had hoped to get the radiator back in but sometime between taking the radiator out of the other shell and putting it into this one I have managed to lose all the bolts so I will get some more tomorrow and get it all mounted up. Oh yeah and one last thing, this photo shows a water pipe that sits at the back of the motor, it is the take off for the turbo I think and when the motor was stripped I didn't block it off, problem is now I want to so if anyone has any suggestions for a neater solution than a bit of hose with a bolt in the end I would be keen to hear it. Cheers1 point
-
Progress has been a little slow over the last couple of weeks but things are still happening, most importantly I got these My new steering arms, all CNC machined and up to LVVTA spec so that is pretty exciting, I will slap some paint on them then get them in the car as soon as possible, this also means that I can finish off the other small jobs and finally get the car down off the axle stands. I also got a new speedo cable made up (no pictures of that though) by Parrotts in Chch , it is kind of long as the rx7 gearbox has the speedo drive on the passenger side so I have had to run the cable around the front of the motor and back down to meet it but once the radiator is in you won't see it anyway. And I also finished the hoses for the oil cooler and got it all bolted in for the last time, I have run the hoses through a hole next to the radiator and down through the front end sheetmetal, keeps it all hidden away nicely, the only thing I might add is some hose separator clamps to keep the hoses in position although they can't really go anywhere so maybe not necessary. And finally I was able to put the grill and bumper back on, I am pretty happy with how this has turned out, you can't really even notice the oil cooler behind the grill. So the next job is to reinforce the chassis rail where I have attached the motor mount crossmember, I have made up some crush tubes and an additional plate to go on the top of the chassis rail, just need to get it all welded into place now.1 point
-
Heres the paint pics Painted more bits tonight will put em up in a couple of days.1 point
-
Some more progress from the weekend, I needed to do some tests on the plastic steering arms to make sure they are right before I get them machined. First up I bolted the arms in place Then I made these I bought some cheap laser pointers and mounted them to a bit of SHS, it is hard to see in the photo but one of the clamp plates holding the laser is bolted so I can adjust it and get the laser pointing parallel to the mounting face. I only made 2 of them so I have to do each side of the car separately, so one gets bolted to the rear hub and the other to the front, then I put a board out the front of the car to shine the lasers onto then I can just measure the distance between them, well that's the theory anyway. So first I set the alignment by making sure the distance between the dots was the same at the front hub and on the board which was about 3m in front of the car. Next I pulled the springs out of the front suspension and measured the distance between the dots at ride height, max compression, and max droop. Then with a bit of trigonometry I can work out what the angle change is, seems to work ok, in that last photo you can see the marks I made at the 3 measured suspension heights. the arms are pretty good but I am getting toe out as the suspension changes and I think it would be better if it was going to be going the other way (toe in) so I have some fine tuning to do. I ran out of time yesterday to get it finished so will hit it again after work today. I also had this turn up last week After leaving my $20 cage in the car for the last month or so I decided that I would put one in but seeing as it is a bit of work to do figured that I should start with one that was up to spec. Anyway it is a fair way down the priority list at the moment but I will get to it eventually.1 point
-
Ok more progress from today, I got my calliper mounts back last week, this is how they ended up There was a bit of mucking around getting the step machined as I had a couple of goes to get it right, didn't want to take too much off, then I got some 5/16" threaded rod and cut it up to make some studs for mounting the brackets to the diff, the mount holes in the diff are tapped so the threaded rod is screwed through then I have nuts on one side to hold the calliper mounts and on the other side for the axle retaining flanges. Once that was done it was a simple job to fit up all the lines etc I just want to make up a couple of tags to hold the bundy tube, I will do that this week then the diff can go back in. Then next job was to get the crossmember all mounted up, I used urethane bushes in the end but now I am wondering if they are going to be a bit hard, there isn't much movement in the mounts so it is probably going to be a shakey ride when the car is sitting at idle pulsing away, ahh well I guess I can change to rubber mounts if it is too bad, or more likely just not even worry about it, anyway here are some pics of the crossmember in position. From the bottom and from the top don't look too closely at the paint job, it is pretty rough.... So once I get the diff in I will start on the wheel alighnment and checking the bump steer, Fletch had suggested using a cheap laser pointer to set it up and measure the bump steer and the more I thought about this the more I liked it so I bought 2 and will build a little rig this week that will allow me to set both the alignment and the bump steer. And just to finish off here is another shot of my prototype steering arms, they are pretty cool, 3D printing is awesome.1 point
-
I haven't updated this for a few weeks but there has been quite a bit happening in the background, my rear calliper mounts have been made, they are getting a small bit of machining done but I should have them back this week, my 3D printed steering arms have also been done and are due to arrive in the next couple of days but this is a picture of them I have a plan for checking the amount of toe change which I will work through once they arrive. I have also made new engine mounts and a new crossmember that sits a bit higher And how it will sit I have test fitted it and it is all looking good so I will get some paint on it then get it all mounted up and finally I had some new wheels arrive old one on the left, new one on the right they are Koya BN-Teks, pretty much look identical to the ones I had but without all the bolts. So these ones have a load rating on them so are good for cert. Bit of a shame that I can't use the old ones but there were some other issues around those anyway which these fix as well.1 point
-
I have some bad news about this. After almost 2.5 years of pretty much completely reliable service, the Auto gearbox has decided to retire. This car has far outlived it's cost and I'll always be grateful for how well it run. But, unfortunately, it looks like I will be calling Zebra this afternoon. Just kidding. Picked up a manual conversion last night for it, once my Mk2 is going I'll be making a start on that. Just picked a bad time to happen but that seems to be how life goes.1 point
-
Engine went in today. Just need to do the intercooler piping, some coolant piping and some other small bits. Downpipe is also being made by a friend of mine. Was hoping to have it going for Wednesday but it looks like end of the week/early next week will be more realistic.1 point
-
This has been my working environment for the last few days: It's much tidier now though, wiring is almost done. Just need to connect the DBW pedal and a few other wires. The main parts are done. Once my new engine mount arrives the motor and gearbox will be going in. Need to install the shifter box as well.1 point
-
Decided the low life wasn't for me, would rather drive my car hard. So I raised it and got some decent sized tyres. Found an Mtech 1 steering wheel and got offered a full set of Mtech vinyl seats and door cards at a price I couldn't refuse, so got those and put them in. Now it's like this: Plans for now are to just drive it. Using it at the moment while I do yet another engine swap on my mk2 Golf (with make a thread shortly). Eventually I want to do either an m30 or m50 turbo with manual gearbox of course, but that will be long term. If I'm fortunate enough I might be able to do an S motor or M88, we'll see what life has in store. Right now I need to fix the fact that it's using way too much fuel, around 15-16 liters per 100km. I've checked everything and reset the throttle cable, tps, idle mixture screw etc as someone had messed with all that but it hasn't improved it. Need to see what's going on there. But it's been going reliably for the 2 years I've owned it and for how much I paid for it, it's far outlived it's cost so I hope I can do something cool with it.1 point
-
and then the wof man will say "I am not a fukn retard, nor was I born yesterday, your springs are obviously chopped as the end is not formed". Inserting actual use full info here. Escort you ideally want 3 inch + drop in rear and about same front. It will scrape on guards if not lipped. Rear the only way to achieve this is to reset leaves. I would reset and still use smaller blocks. fronts anything more than about 2 inch lowering you will loose captivity.. shocks machined costs about 150$. Chopping your springs is relatively gangsta. .. do it to set your ride height and then take it to a spring maker and get them to make a custom spring to suit. If you measure your shock length at full droop from inside top hat to inside spring seat and also tell them this and the spring rate you want then they will make a spring that will sit the car at same height as the cut one but with proper formed ends and will remain captive.. I. E no shortening required. Cost... Rear = 300-400 Front = 4001 point
-
How else do you expect to hear the stereo with the blow dryer on full bore? /top down.1 point


This leaderboard is set to Auckland/GMT+12:00