All Activity
- Today
-
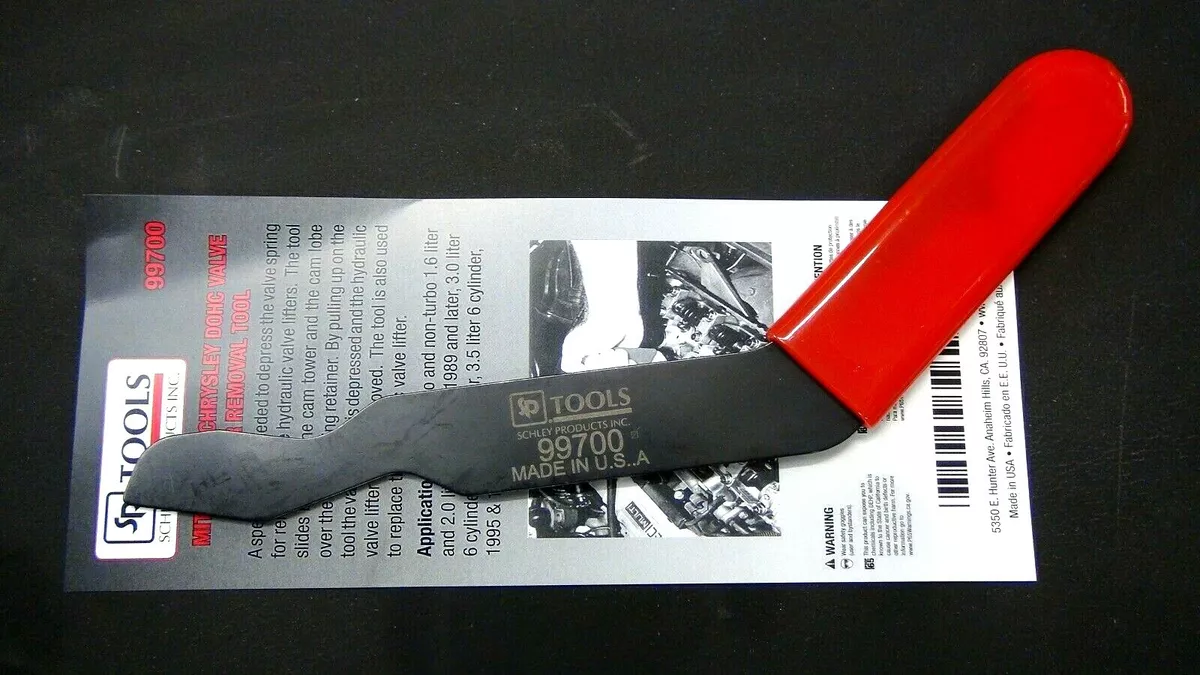
Does Toyota have a tool to insert rockers without removing the cams? For the older Mitsus with rocker arms there is a tool you use to slip them in without having to remove the cams

-
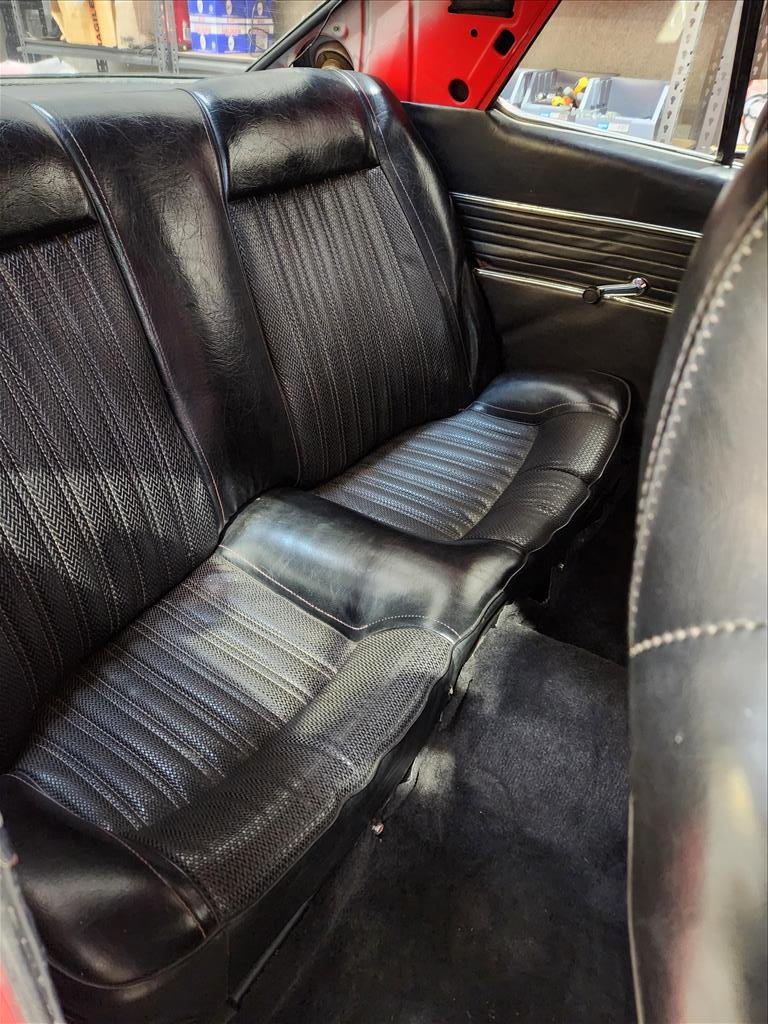
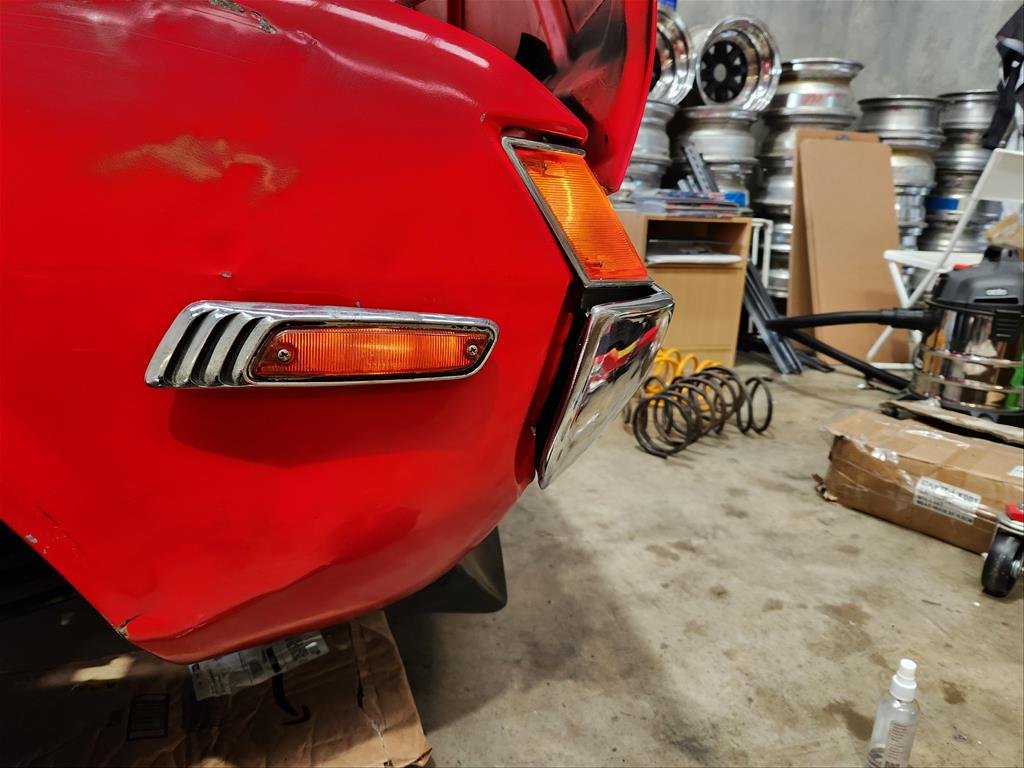
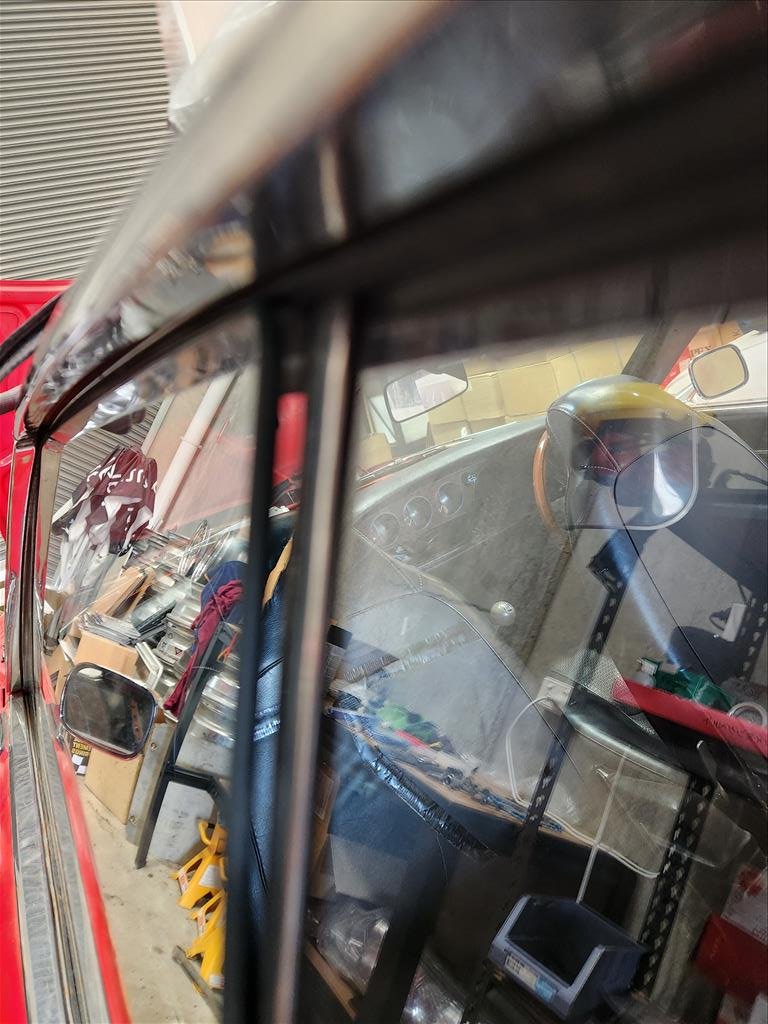
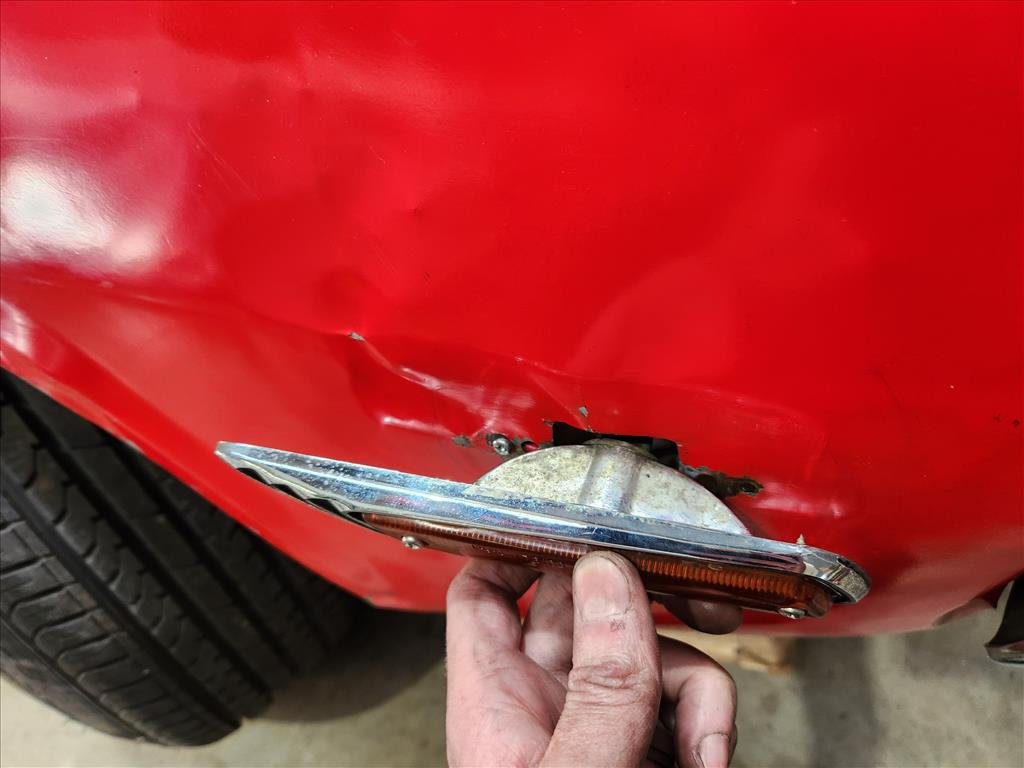
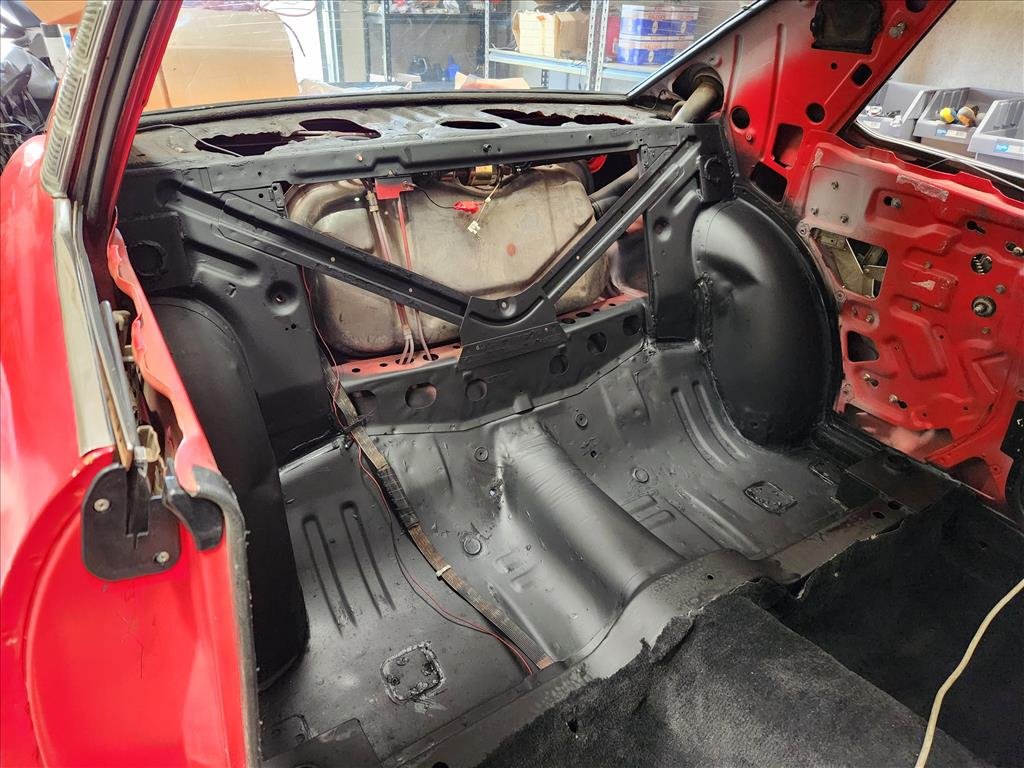
I'm on the home stretch for the first part of the interior freshen up. The painting went well as you can see, much improved over the crusty red which was there before. I didn't bother to clean up or dry ice anything just scuffed and spray with my favourite Rustoleum 2x. I also tidied up that little bit of fuel pump wiring as well before putting the seat back in. Why didn't I paint the upper part and the sides? Basically I got lazy but also realised there would be scope creep of doing the roof at the same time so I'll take care of that in the near future. Problem is those upper side panels (called sail panels in some places) don't exist anymore. Any that I could find are brittle/fucked or fibreglass/metal which I don't want. Ideally I would like some super good condition OEM ones so I can have them reproduced.. if anyone has any let me know. I also thought it might be interesting to get some Butaketsu (C130) Laurel front winkers and see what they looked like. Seems like they're a little large I think for the small front of the Celica. Oh well. I will likely replace the original Celica lenses with clear ones as well as clear front corners in the future. I was trying to avoid dealing with this disaster, and still mainly have managed to avoid doing anything but I did try to file in some grooves to make the winder work, maybe it worked a bit better as I was able to get the window up. The window frame or regulator (is that what you still call it if it's not electric?) must be bent because it's quite difficult. Eventually this will need to be addressed I suppose but not today Satan. How's the weather tightness
-
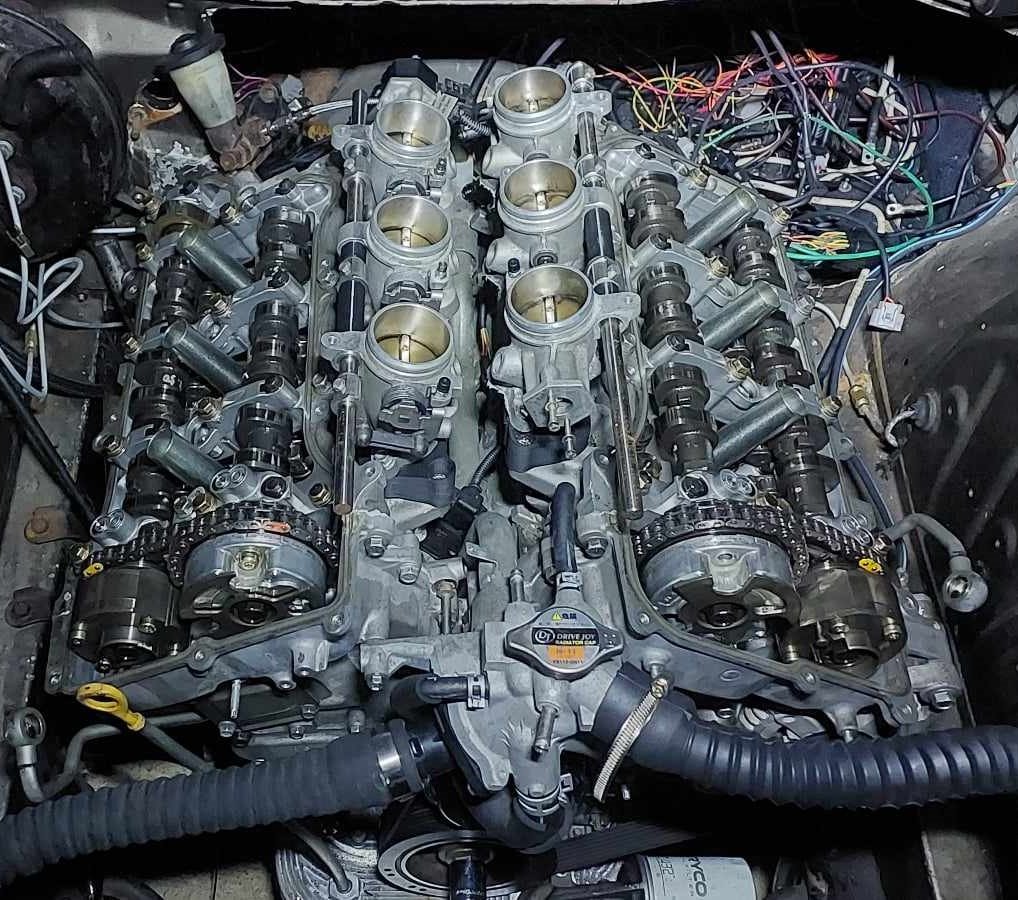
It turns out the crank sensor polarity was indeed the right way around, but, maybe the shielding could have been better? So I remade the wiring, and rerouted it away from the alternator. Still flames out the intake... hmmm. Everything was looking good on the trigger scope so it didnt make sense. So maybe time to start checking for mechanical issues. I run a compression test, one bank is getting between 130-150psi... However the other bank was zero zero zero. first thought was that I must have bent some valves, or the valves arent seating correctly and need lapping in or something. I pulled the rocker covers off, and found that all of the rockers underneath the intake cam on that side had fallen off... Not 100% sure why yet. It may relate to me doing a half arsed version of bleeding the lifters before installing them. As I only found out the proper way after I'd put it together. You need to stick a needle down the hole until air stops coming out, while the lifter is soaked in oil. So maybe it was the combination of starting a motor with no oil in the VVT pulleys, no oil in the lifters, and then the extra heavy valve springs making things whip around more than usual, and flicked things out. Not what I was expecting. I will triple check the cam timing next. If that's good, I'll see if I can manage to pop the lifters back in without removing too much stuff. One thing that sucks about this motor is that the front timing cover can only come off, by undoing some bolts that are inside the sump. So hopefully that's not needed, but see how I go. In terms of removing everything to get the covers off, the motor passes the serviceability test for the most part. The only annoying thing was having to disconnect the clutch MC in order to have enough room to get that side's cover off. I think once I've got a rear firewall in though, some tasks will be a bit harder.
-
In the early R06A engines like in my Alto, the crank thrust bearing issue is well known. I decided to preemptively replace mine. From 2016 to around 2019, when they changed to the Type 2 cars (which basically just incorporated all the changes made through the production of the Type 1 cars), the crank thrust bearings have an issue where the metal was too soft, and the bearings could wear prematurely. The issue is so prevalent that Suzuki Japan issued a warranty extension/recall in Japan for it, extending the warranty to 10 years/200,000km. Unfortunately this doesn't carry over to imports in NZ, and I've also seen reports that getting Suzuki to actually cover the work means waiting until the engine is basically toast from the bearings failing. Their "solution" is to replace the crank, block and bearings; a full rebuild. My friend Tom @tomble with the blue HA36S, who unfortunately had an engine whoopsie on track earlier in the year, happened to order a spare pair of thrust bearings with his order of bits to rebuild his engine. Knowing my car was in the VIN range of affected cars, I obtained the bearings from him, intending to replace them before things went bad. I was doing this preventitively, not because I knew mine were stuffed, keep that in mind. I had been ignoring the niggle at the back of my mind knowing my car could be affected by it. The usual indication that the bearings are starting to fail is a knocking when engaging and disengaging the clutch, as the force of the clutch causes the crank to move due to excessive runout. My car was what I would consider quiet, for what it is. No noises out of the ordinary, but the other day when I drove the car to work my Android Auto was a bit slow to connect and the first couple of minutes of my drive had no music... and what happens when there is no music, you hear EVERYTHING. At one point, I thought I heard a slight tapping when coming on and off the clutch in traffic. It was quiet, and I couldn't be sure I wasn't just hearing things, my car does buzz and vibrate a bit at low RPM due to the inserts in the rear mount... That day after work I picked the bearings up from Tom. I couldn't risk it. Last night, after work, I put the car up on stands and set about replacing the bearings. Unfortunately they are inside the engine, so not a "simple" task, but overall very doable in a garage on stands, with standard tools (with the exception of a torque wrench and angle gauge, both of which are easy to obtain). The biggest issue is that the sump needs to be removed. To do so, the front pipe of the exhaust needs to also be removed, so there is space for the sump. My bolts were a bit rusty, so with a lack of fire-making abilities, I aimed the heat gun at them on full blast and got them as hot as I could (pretty hot, really). With a crack, the bolts came free. I completely removed it, but I guess you could probably just drop it down and leave it hanging if your rear bolts were unable to be removed I also drained the oil and removed the filter. I did this with an engine that had sat overnight, so as much oil would be in the sump as possible, so I wouldn't have it dripping on me when the sump was off. Next, I removed all the sump bolts and tried to get the sump off. The sump is sealed on with goop, and I battled for a very long time trying to break the seal. In the end, and I wouldn't recommend it if you have other options, I used a claw hammer to pry it free. It worked well with no damage, but you could easily break the sump if you aren't careful. There were two points on the front edge of the sump that were perfect to pry from With the sump off, I had access to the guts. It was very oily, so photos will be limited, but I removed the cap in question (second from the flywheel). With the cap removed you can see the bearings. Thankfully both of mine were still in place; when they get bad one, or both, can slip out and drop into the sump leaving the crank free to move back and forth. The bearings are curved and wrap around the top of the crank, one on each side of the main bearing cap. Using a pick to carefully push on the end of the bearing, you rotate the bearing around the crank so you can slide it out Well, it appears I was on borrowed time This is what the bearings should look like; the old ones are the inside pair There was no sign of any metal in the oil, or in the bottom of the sump, so I guess it's just been slowly grinding itself away over 100,000km. The new bearings (and the "good" old bearing) measure 2.5mm, the bad bearing? It's lost almost half a mm of metal You can tell if they are the original bearings (or at least not countermeasure parts), as the markings on the back will be different to the new countermeasure parts Old New Thankfully the crank bearing itself looked great, plenty more track days left in it The crank also appeared to be in good shape. The "bad" side had some slight ridges in it, but was smooth and still looked polished (some looked really chewed up when the bearing failed) I cleaned and lubricated the new bearings, slipped them into place on the crank, and reinstalled the bearing cap. Of note, was that before I removed the old bearings I could move the crank back and forth in the block by hand a small but noticeable amount. Now, I can't. The bolts are stretch bolts, which means they stretch when torqued correctly. Normally you would consider them one-time use, and replace them, but since I would be waiting over a month for a pair of new bolts from Japan, I looked for an alternative. According to the workshop manual, there is a spec that allows the bolts to be reused. You measure the thickness of the bolt at two specific places along its length; A, where the bolt would thin when stretched, and B, where the bolt should be original thickness. Subtract C from D, and that leaves you with a value that needs to be less than the 0.12mm limit. My calipers wont be amazingly accurate, they're ancient and weren't that expensive in the first place, but the main thing is that regardless of what the reading is, the value still needs to be consistent and less than 0.12mm. Because I didn't want to be left with no bolts that are in reusable tolerance once I pull the bearing cap off, if mine were over tolerance, Tom was kind enough to supply me with his old bearing bolts, since he used all new ones in his rebuild. I went through every bolt and measured them All of them were within tolerance, some more so than others, so I picked the three best ones and knew I could at least rely on them if mine were no good. I checked the two bolts from my engine, and one was 0.10mm, which is closer to the limit than I liked, so I swapped that for one of Tom's bolts and reused the other. Using my torque wrench and angle gauge I started torquing the bolts up. The spec is 30nm to seat the cap/bearing, undo it to zero, and then 20nm, before turning to 45 degrees and then a further 50 degrees. Both bolts torqued up fine, and the first one went to the two angles fine. Unfortunately when doing the first 45 degree angle on the second bolt the little lever that holds the angle gauge in place slipped, so I lost the accuracy of how far I had gone. I ended up removing this bolt and replacing it with another of Tom's bolts, which went fine this time. The sump was pretty clean after draining the left over oil out of it, so I scraped all the old sealant off and cleaned the inside with brake clean I then cleaned the sealing surface on the engine block, which is super fun upside down under the car. Permatex Ultimate Grey seemed to be a good replacement for the Threebond called for in the manual, so I slathered some of that on the sump and fitted it to the engine The bolts need to be fitted in a crisscross pattern from inside out, and were the perfect chance to use my little 1/4" torque wrench as their torque is quite low. The sealant needs overnight to cure, so I finished by installing the exhaust front pipe I wanted to make it as obvious as possible that the engine had no oil in it overnight Today after work, the sealant was cured, so I filled the engine with oil and fired it up. After a quick check that nothing was leaking, everything looked and sounded fine. It appears I dodged a bullet this time. I took the car for a drive, and it was noticeably quieter. I didn't think it was particularly loud beforehand, but there is less "mechanical" noise from the engine now. The two main noises that seem to be gone are the knocking/clunking when I back up my driveway from a stop when cold. I attributed this to the gearbox, as I had to slip the clutch a bit and it wasn't too happy doing it. Now that noise appears to be gone. The other noise was at high RPM, off boost, particularly when decelerating, the car would have a kind of buzzy tapping noise. It wasn't a bad noise, but it was there. This also seems to be gone. Over all the whole engine just seems quieter. I guess the bearing failure was more obvious than I thought. It's a good timely reminder that anyone with a Type 1 Alto (Works, RS, NA or Lapin), Wagon R, Hustler, or Jimny with the R06A engine is on borrowed time with their bearings unless they have been changed. Some of them go fine for many thousands of KM, and some don't last to 50,000km. My car has had a very hard life, and at 100,000km the bearings were stuffed and probably had one more trackday in them before it fell to bits. I'm very happy to know they have been done now, and extremely relieved to have caught that before it wore further and grenaded the engine.
- 52 replies
-
- 10
-

-

-
Oh I got too excited there!
-
Whilst I don't disagree, this is just an A50 lol
-
The mysterious off idle hesitation in ours was fixed with a distributor rebuild. Incl the correct number of springs...
-
Everyone needs a GT50!
-
Yeah the airflow meter is at throttle body so no dramas there. Turbos just hanging out blowing leaves off driveway at moment.
-
Couldn't wait changed an old map I used at drag day then tweaked the injector flowrate using an online calculator. Measured in Ms/gram very confusing for me.... Flashed a good Bin file in then flashed the Calibration in and it bugger me it fired straight up! Let it run for 30 seconds that'll do it's really loud! Don't want to piss neighbours off. And im unsure if my turbo was getting oil so will confirm tmrw then do a video after checking if anything is resting on exhaust. Fuck yeah!!
-
Shouldnt factory base map off load/boost be ok? surely turbo/intercooler/piping shouldnt change things too much ?
-
She actually suggested going out in it the other day, she must have forgotten how scary it actually is. I might make an action vid in the weekend so you can appreciate the goodness.
-
Do a skid. I like that you have seen fit to ensure your wife does not ask for a ride
-

Advice required: Making complicated brake duct out of aluminium sheet
Hyperblade replied to Hyperblade's topic in Tech Talk
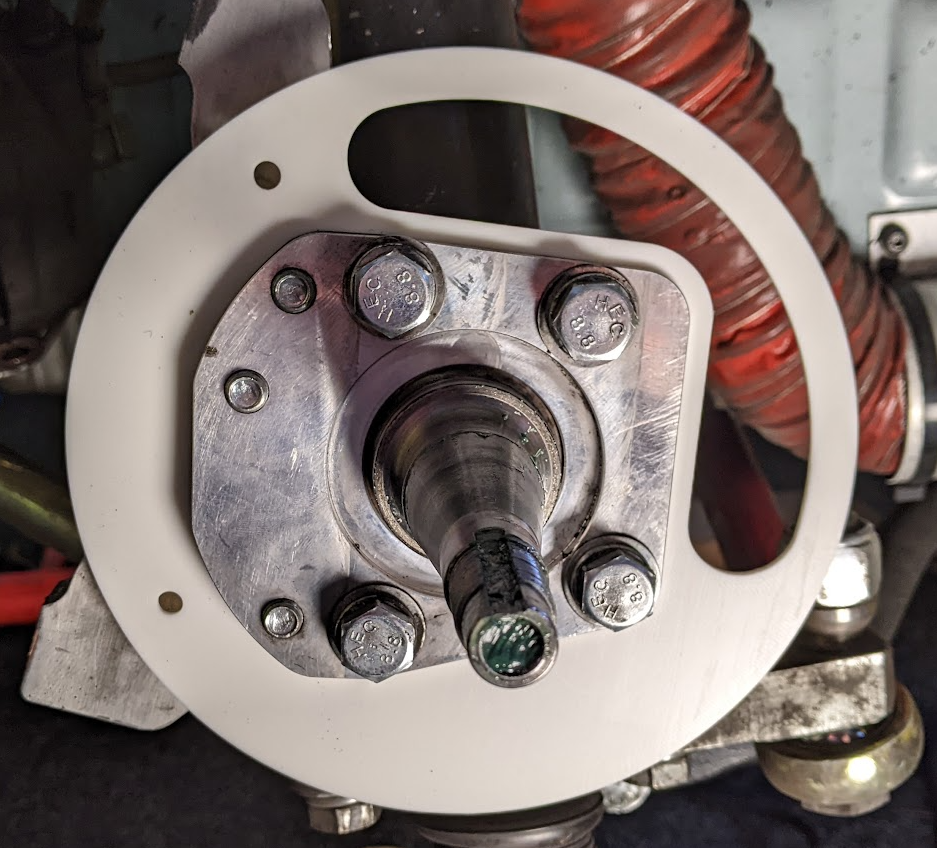
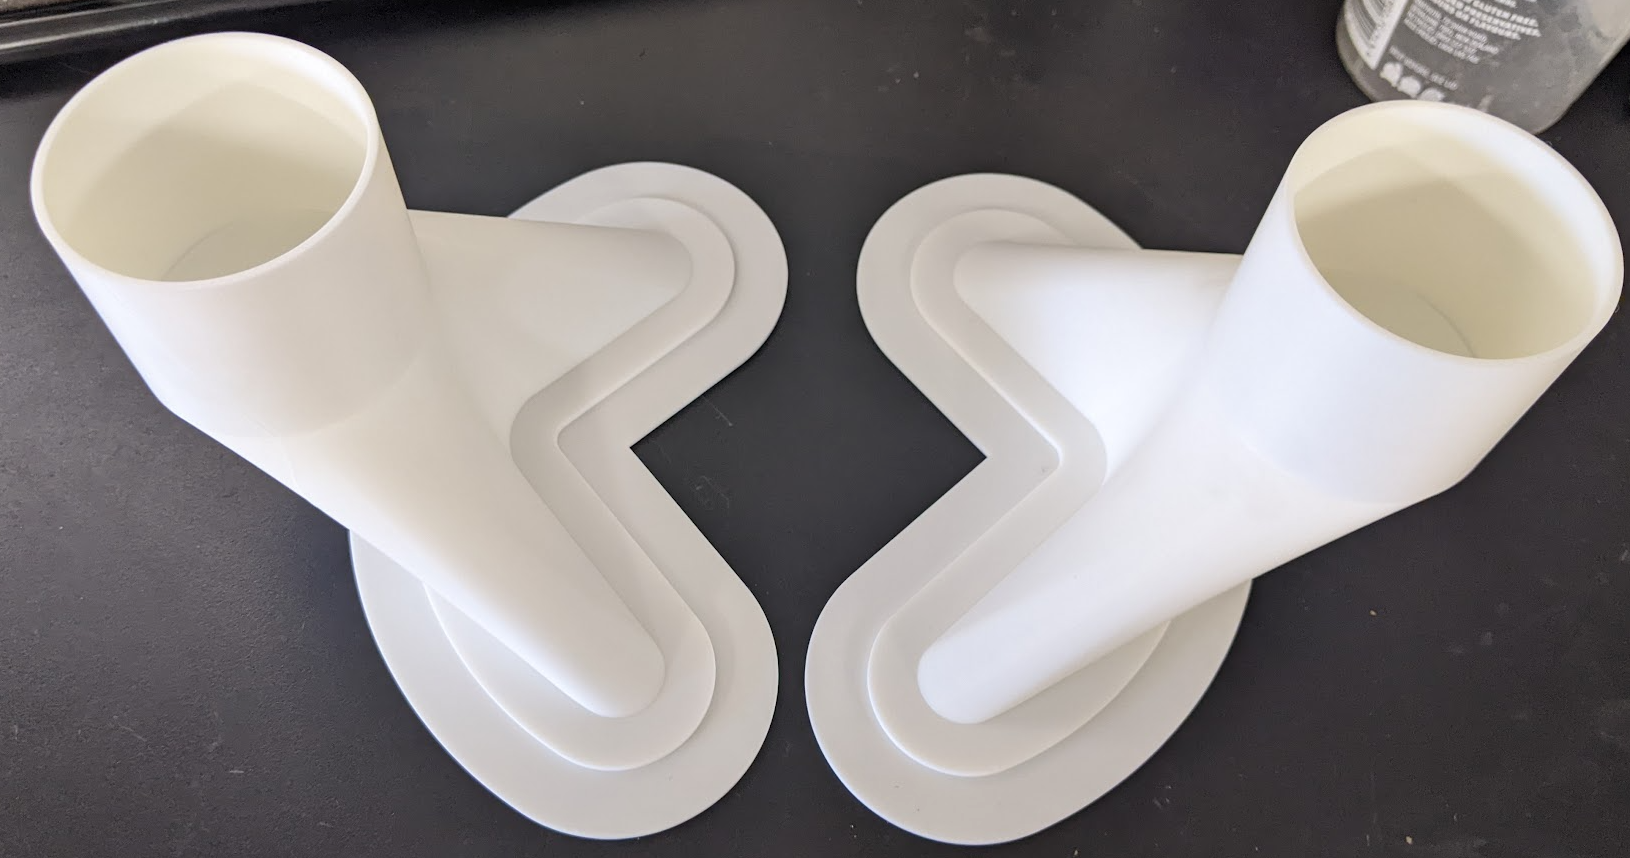
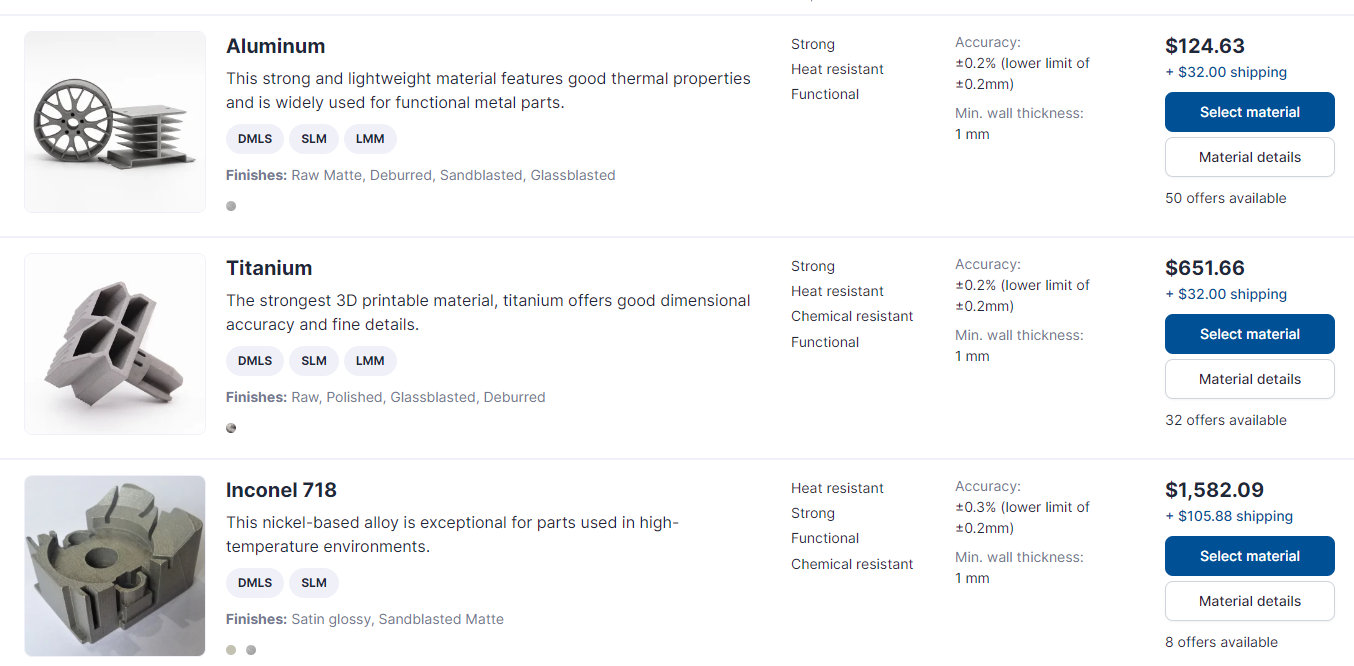
So after some reflection on this, I decided to make my life easier by going for 2.5", while I could have fitted 3" in, it just wasn't worth the effort at the moment. This allowed me to thicken up the outer edge of the plate, and move the air more inwards which is better. So plate ends up as this. For the ducts themselves, trying to get aluminium around them was proving too difficult for my skills, there was a couple of compound curves making life really difficult, even when I altered the ducting to be as simple as possible. I looked at casting but they would have been minimum thickness of 4mm and $1000 odd. I got a quote for 3d printing them in metal from https://craftcloud3d.com/ (min thickness 1mm) Actually not to badly priced $262nzd delivered for the 2 of them (in ali). But the current plan is to take these moulds in PLA and just wrap them in fibreglass, then melt the moulds out (found a friend willing to try it).
-
Did last of wiring to get running tonight Kicked it in guts crank no start kept cranking got fault code no crank signal did the Nintendo terminal check undid ignition module blew on it tried again, sputtered and coughed out intake fuck firing order out fixed that. Cranks mint splutters runs for 4 seconds dies massive clouds of black smoke. So she's way to rich I was hoping for a start before reflashing to take one variable out in case it won't start. So let's build a base map in bed Iater tonight was given one that has correct specs but turns out isn't compatible with my ecu. will copy over the injector info into my current map flash in and try again on weekend.
-
Yeah seems to be reinventing the wheel abit. I would emulate something like you see in most EFI drag cars, heaps of data logging, driveshaft speed, accel meters etc, then usual stuff like wideband and tune it for the track/day/change in parts.
-
Woops. How'd that fall in there
-
Just make sure the fuel tank is at the same level, and use the accel meters. Going for relative gains, yes?
-
@Muncieshould do a roadtrip to see KPR :p
-
Other than ignition timing changes. All you need to look at is afr and injector duty cycle, same afr and more injector duty = more power. isn't many cases when this isn't true.
-
Would be interested to see if they are stocked. When I picked up my tubing from Autobend they told me those straps were unavailable
-
I can't fucking fit under there anymore! Hahaha
-

!!!!!!Hanmeet 2024 23rd-25th August - Entry Form is up now!!!!
RUNAMUCK replied to JustHarry's topic in South Island Region
Bring the HQ! -
The correct tie rod end arrived a couple of days ago thankfully before the wof grace period ran out; And so this just happened; And I was greeted by a complementary bit of even leakier wedgieness which was an irresistible photo op; So fucking excited.
- 122 replies
-
- 20
-
-