
Leaderboard


Popular Content
Showing content with the highest reputation on 02/12/20 in all areas
-
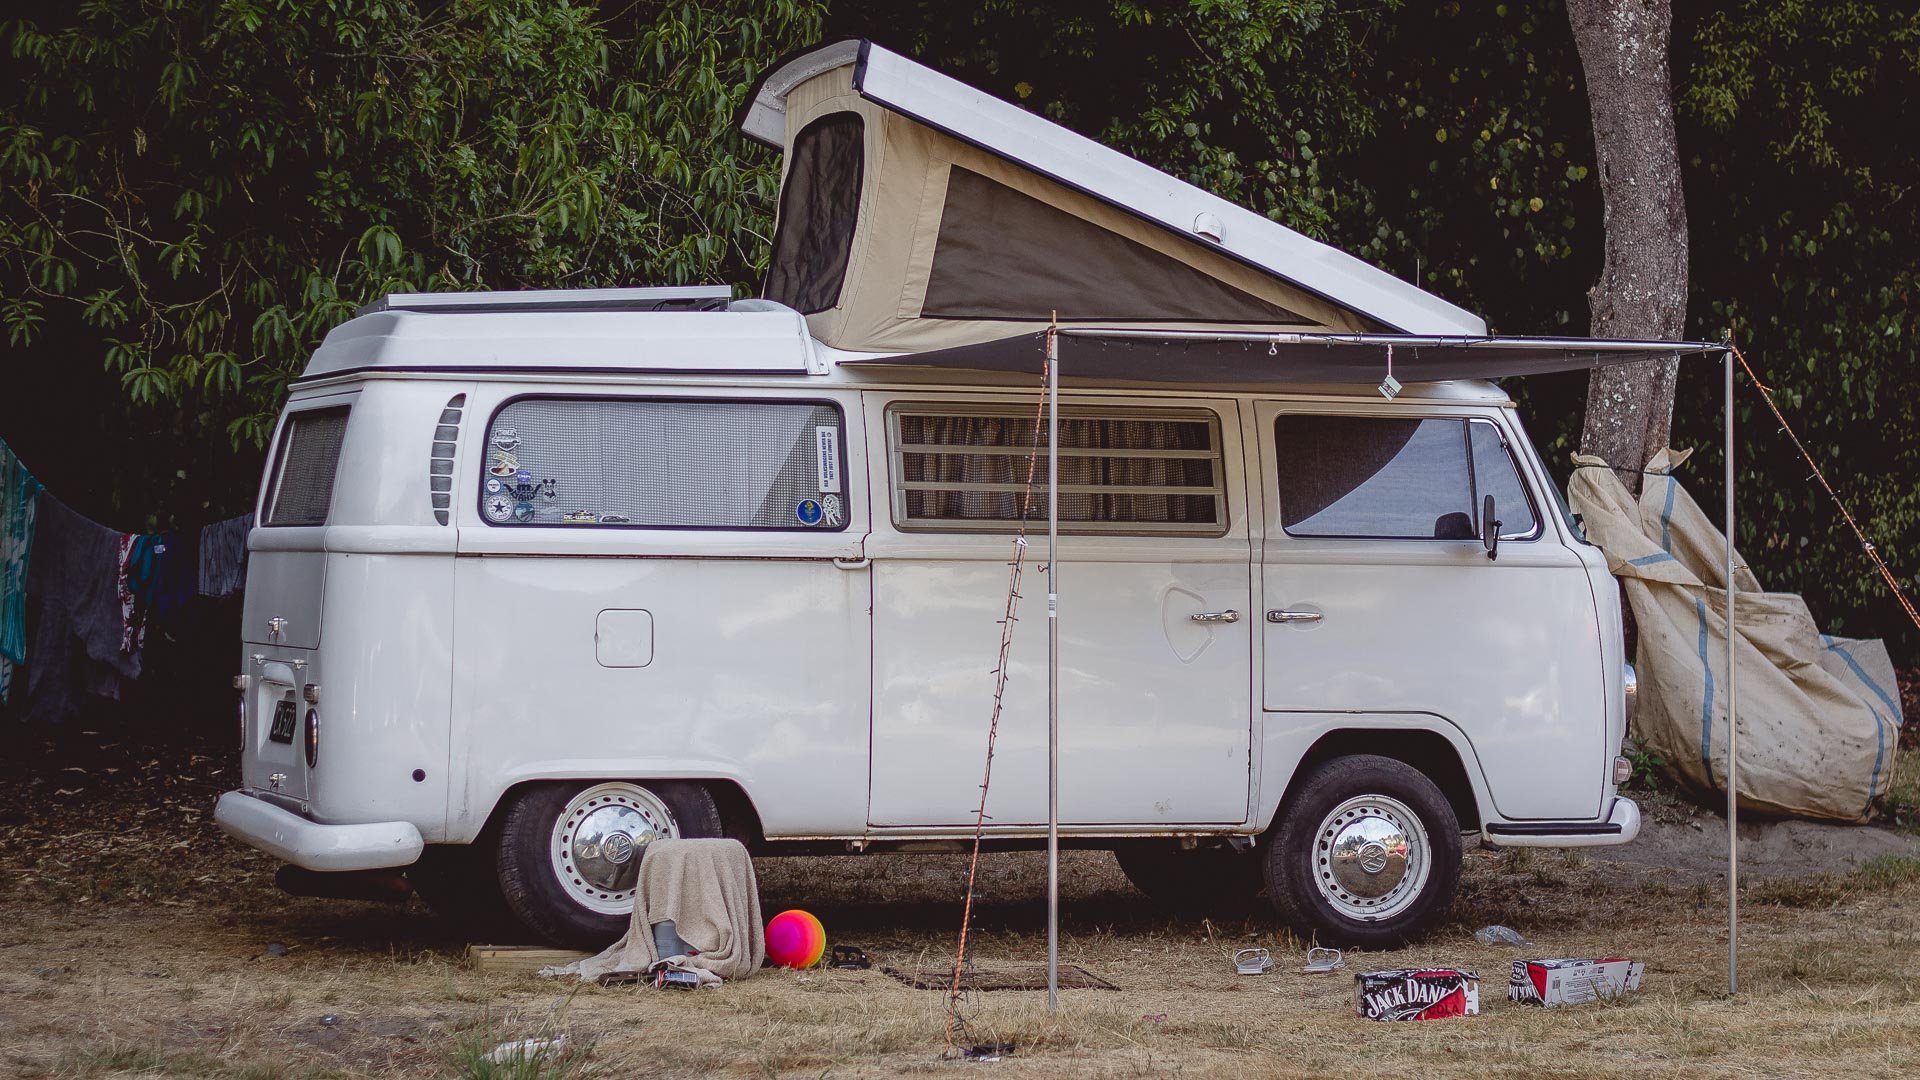
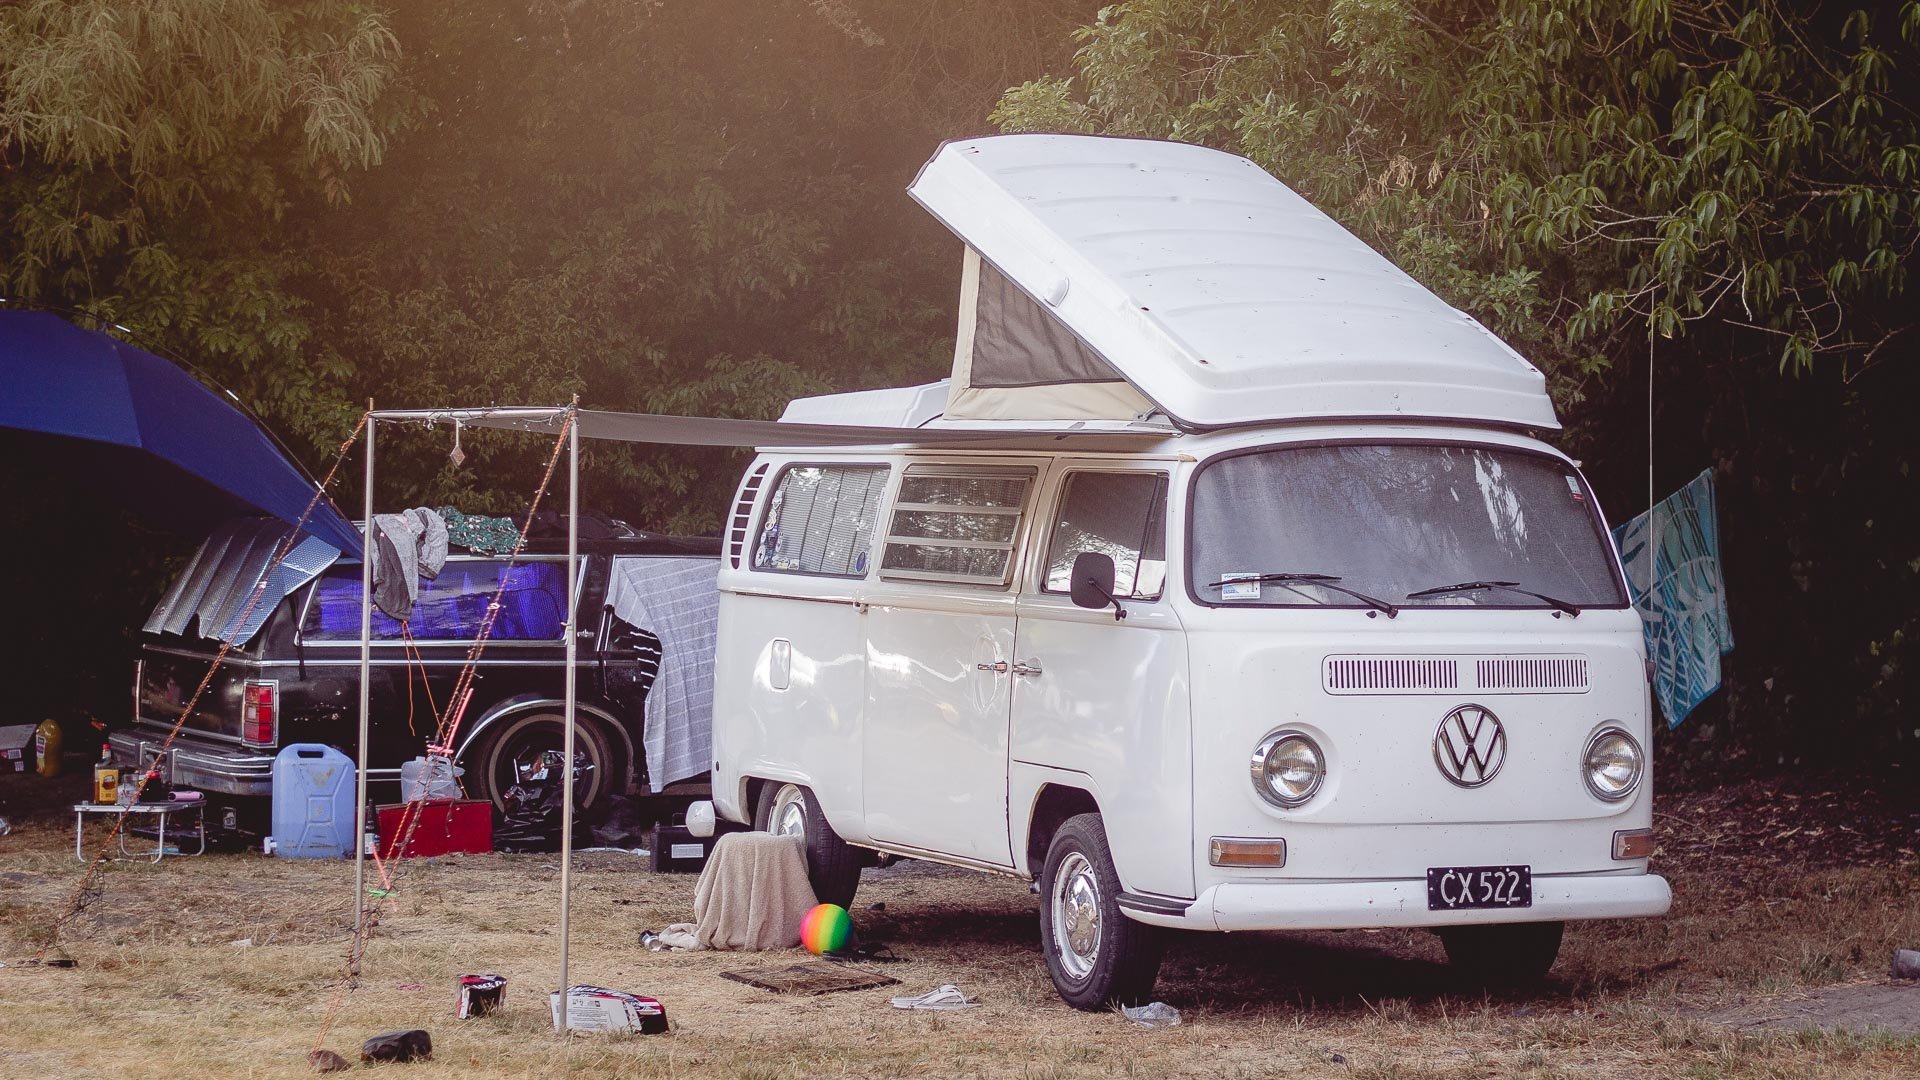
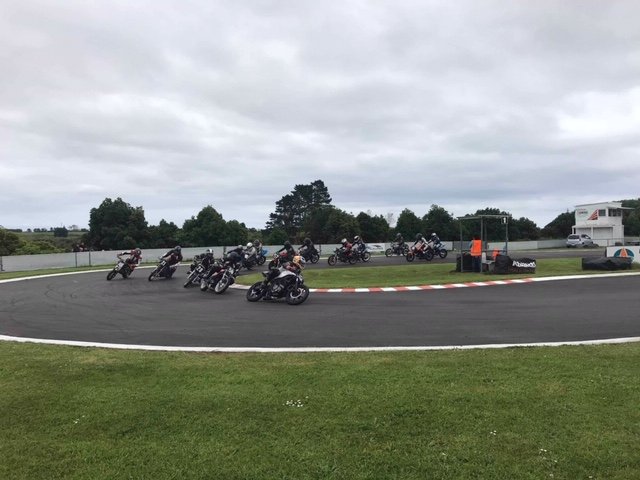
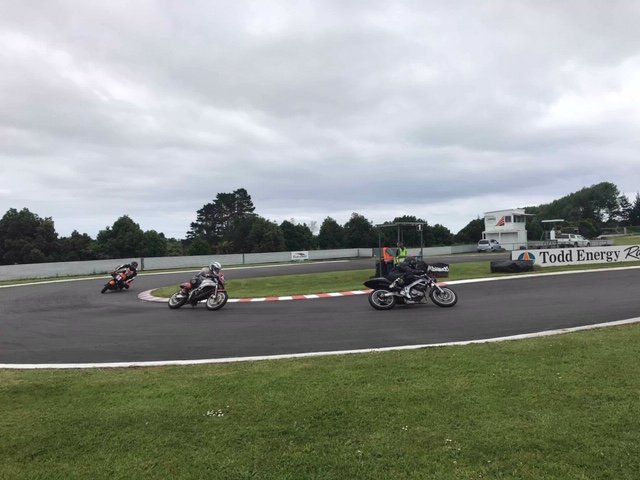
Hi team. me again. So we left it with i brought a solar panel for the bus. Well i wasn't to sure on how to mount it up so i called in for assents of @Geophy and @mark105. we all got busy and made some stuff work. kombi roof racks do not hold a greg that well, but it was the only way to get up and put the rivnuts in. all mounted and ready to go. we ran the wires down and through the roof and popped out under the back seat to the unit that sends the power to the battery. for some reason i dont really have any pictures of this but ill post some next time. the following day i parked it out side and thought id see what the solar panel would actually do, in over cast weather it was still pulling current and you could see the current change from different light. if you cant tell i was excited and had to share my news with @Ned as soon as the sun came out to play you could watch the voltage go up. this app im using is from a ABM2 Bluetooth Battery Voltage Monitor. which i needed to tell @UTERUS about. so that was all done and it was pretty much time to go to wagnats. so i thought with 20 hours before my little holiday i should really remove the engine. i had been meaning to do this for a long time to put the correct tin wear on the back of the engine so it would seal the engine bay. see how the current one is tapered, we yeah it was letting air in. so three hours later and replaced a rubber seal she was back in and running ready to go. the following day we got up and headed to wag nats. 1st stop was in te kuiti to drop off some seats to a friend. Leaving te kuiti there was some road works and everyone decided to pass me around 80-110kmph and showered me in stones managing to put 2 large chips and one crack into my windscreen and another into a fucken headlight. all for me to fucken follow all the assholes for the next 2 hours....... can you tell how happy i am about this situation. any who made it to wagnats wagnats was the best note, good old Jack Daniels boxes floating around haha Shout out to @Brimmy for those last two great photos and the solid amount of even better photos in the wagnats thread. we are off camping again this weekend and maybe to a vw gathering in tauranaga. we will see how we get on. till next time.
 10 points
 -
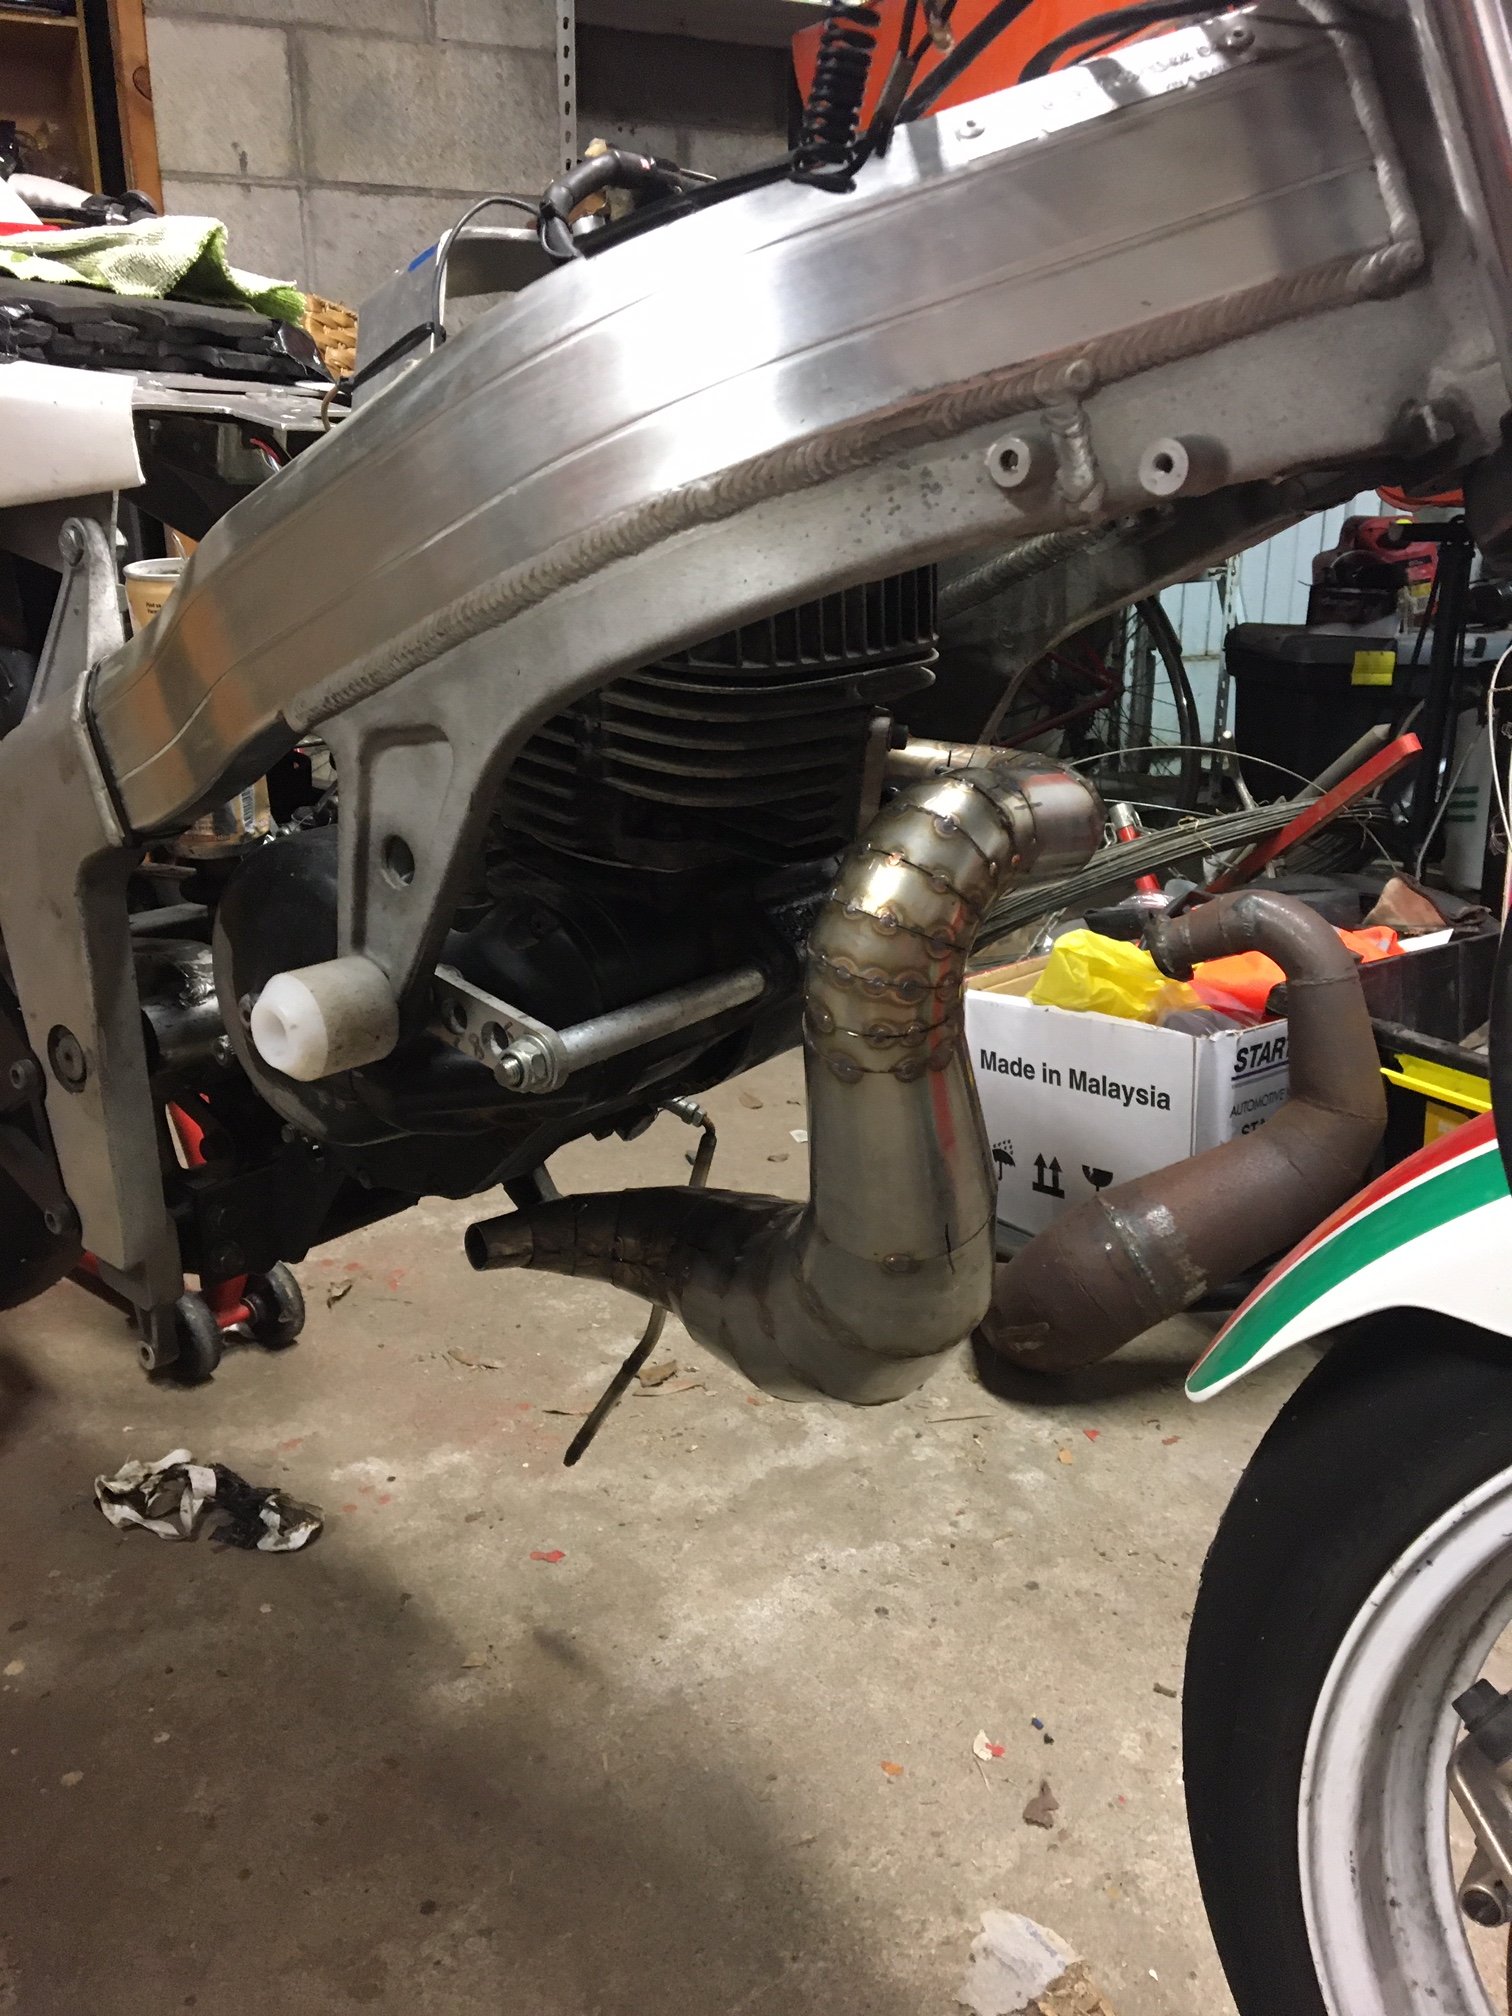
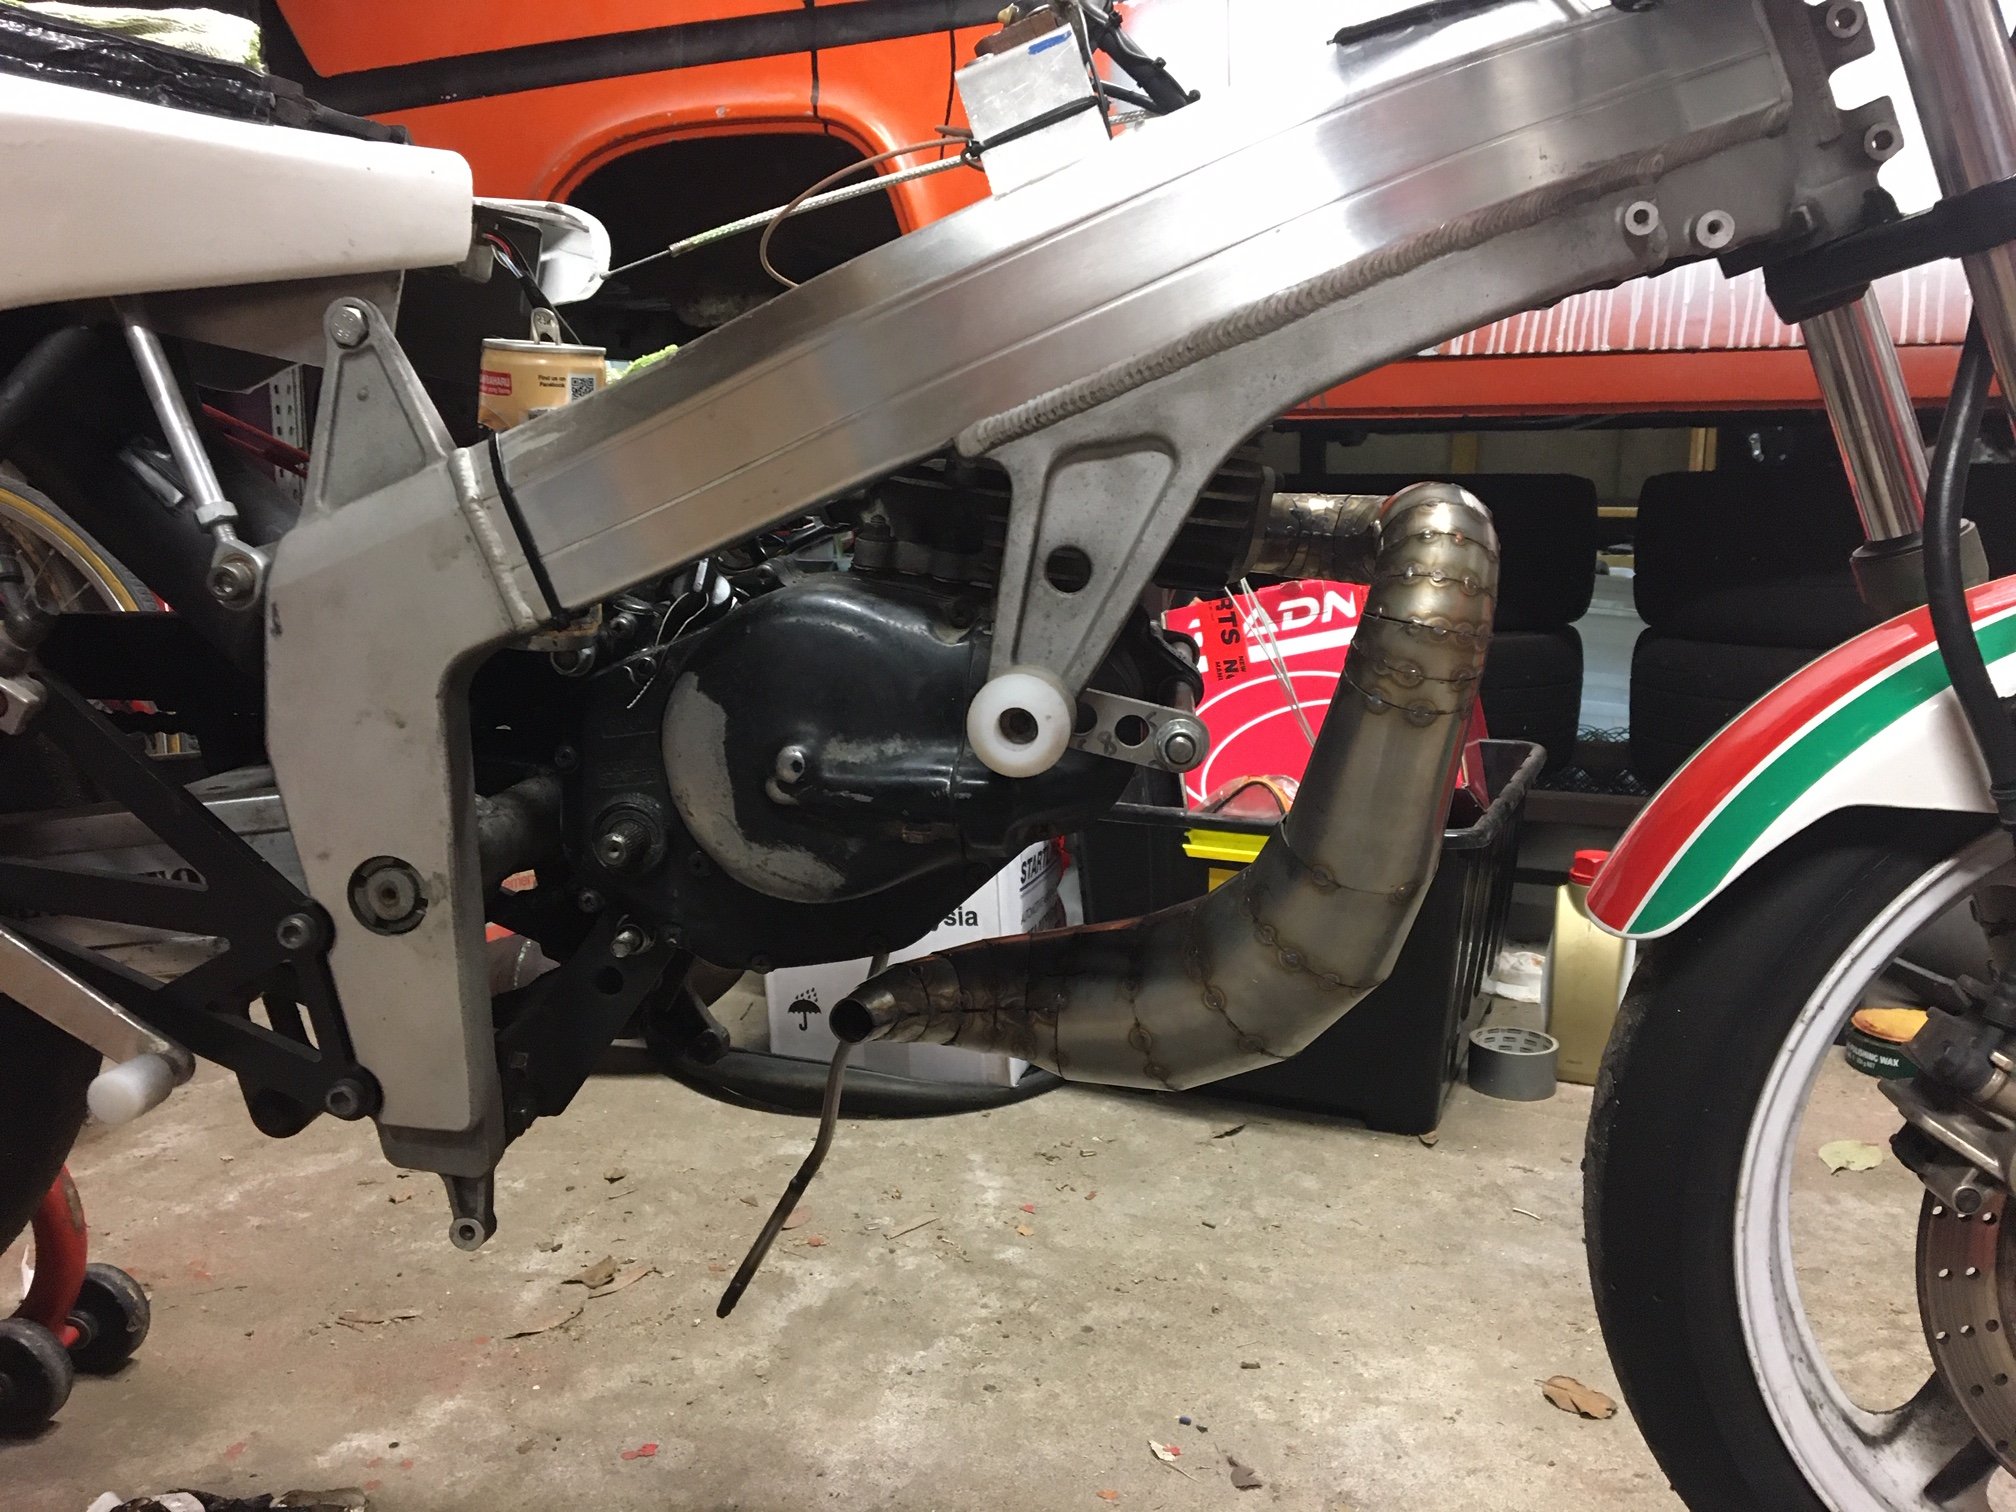
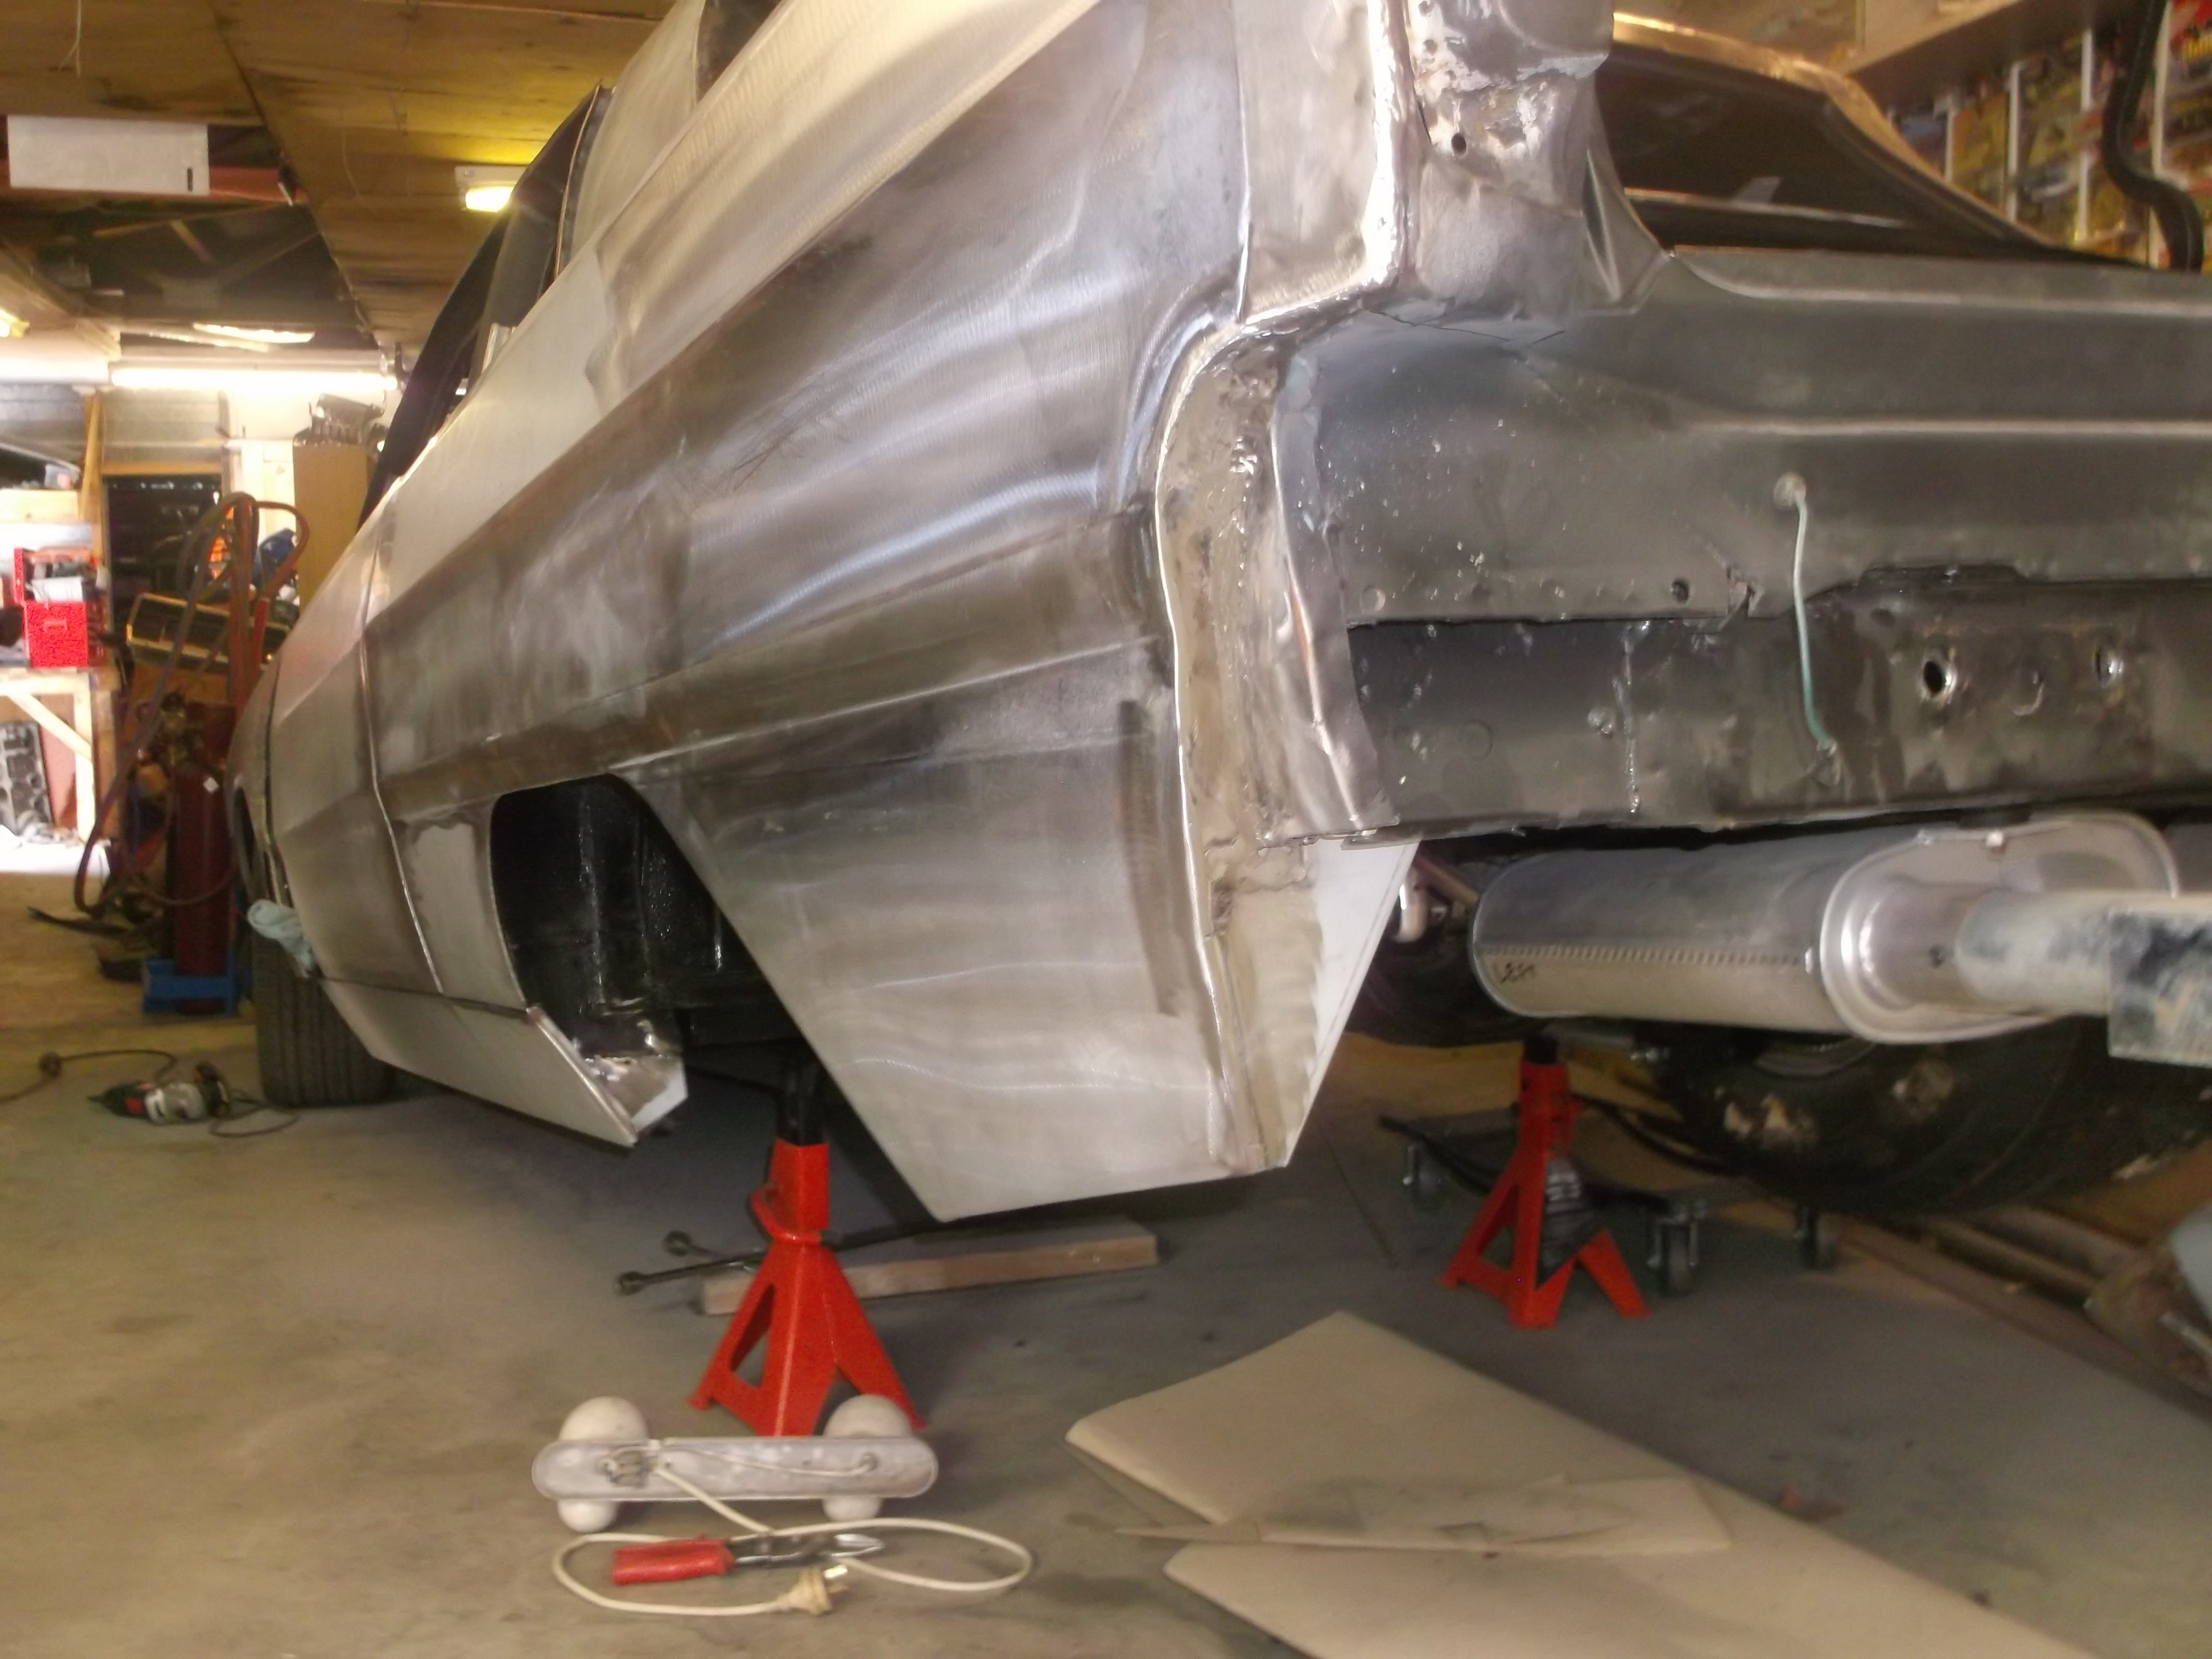
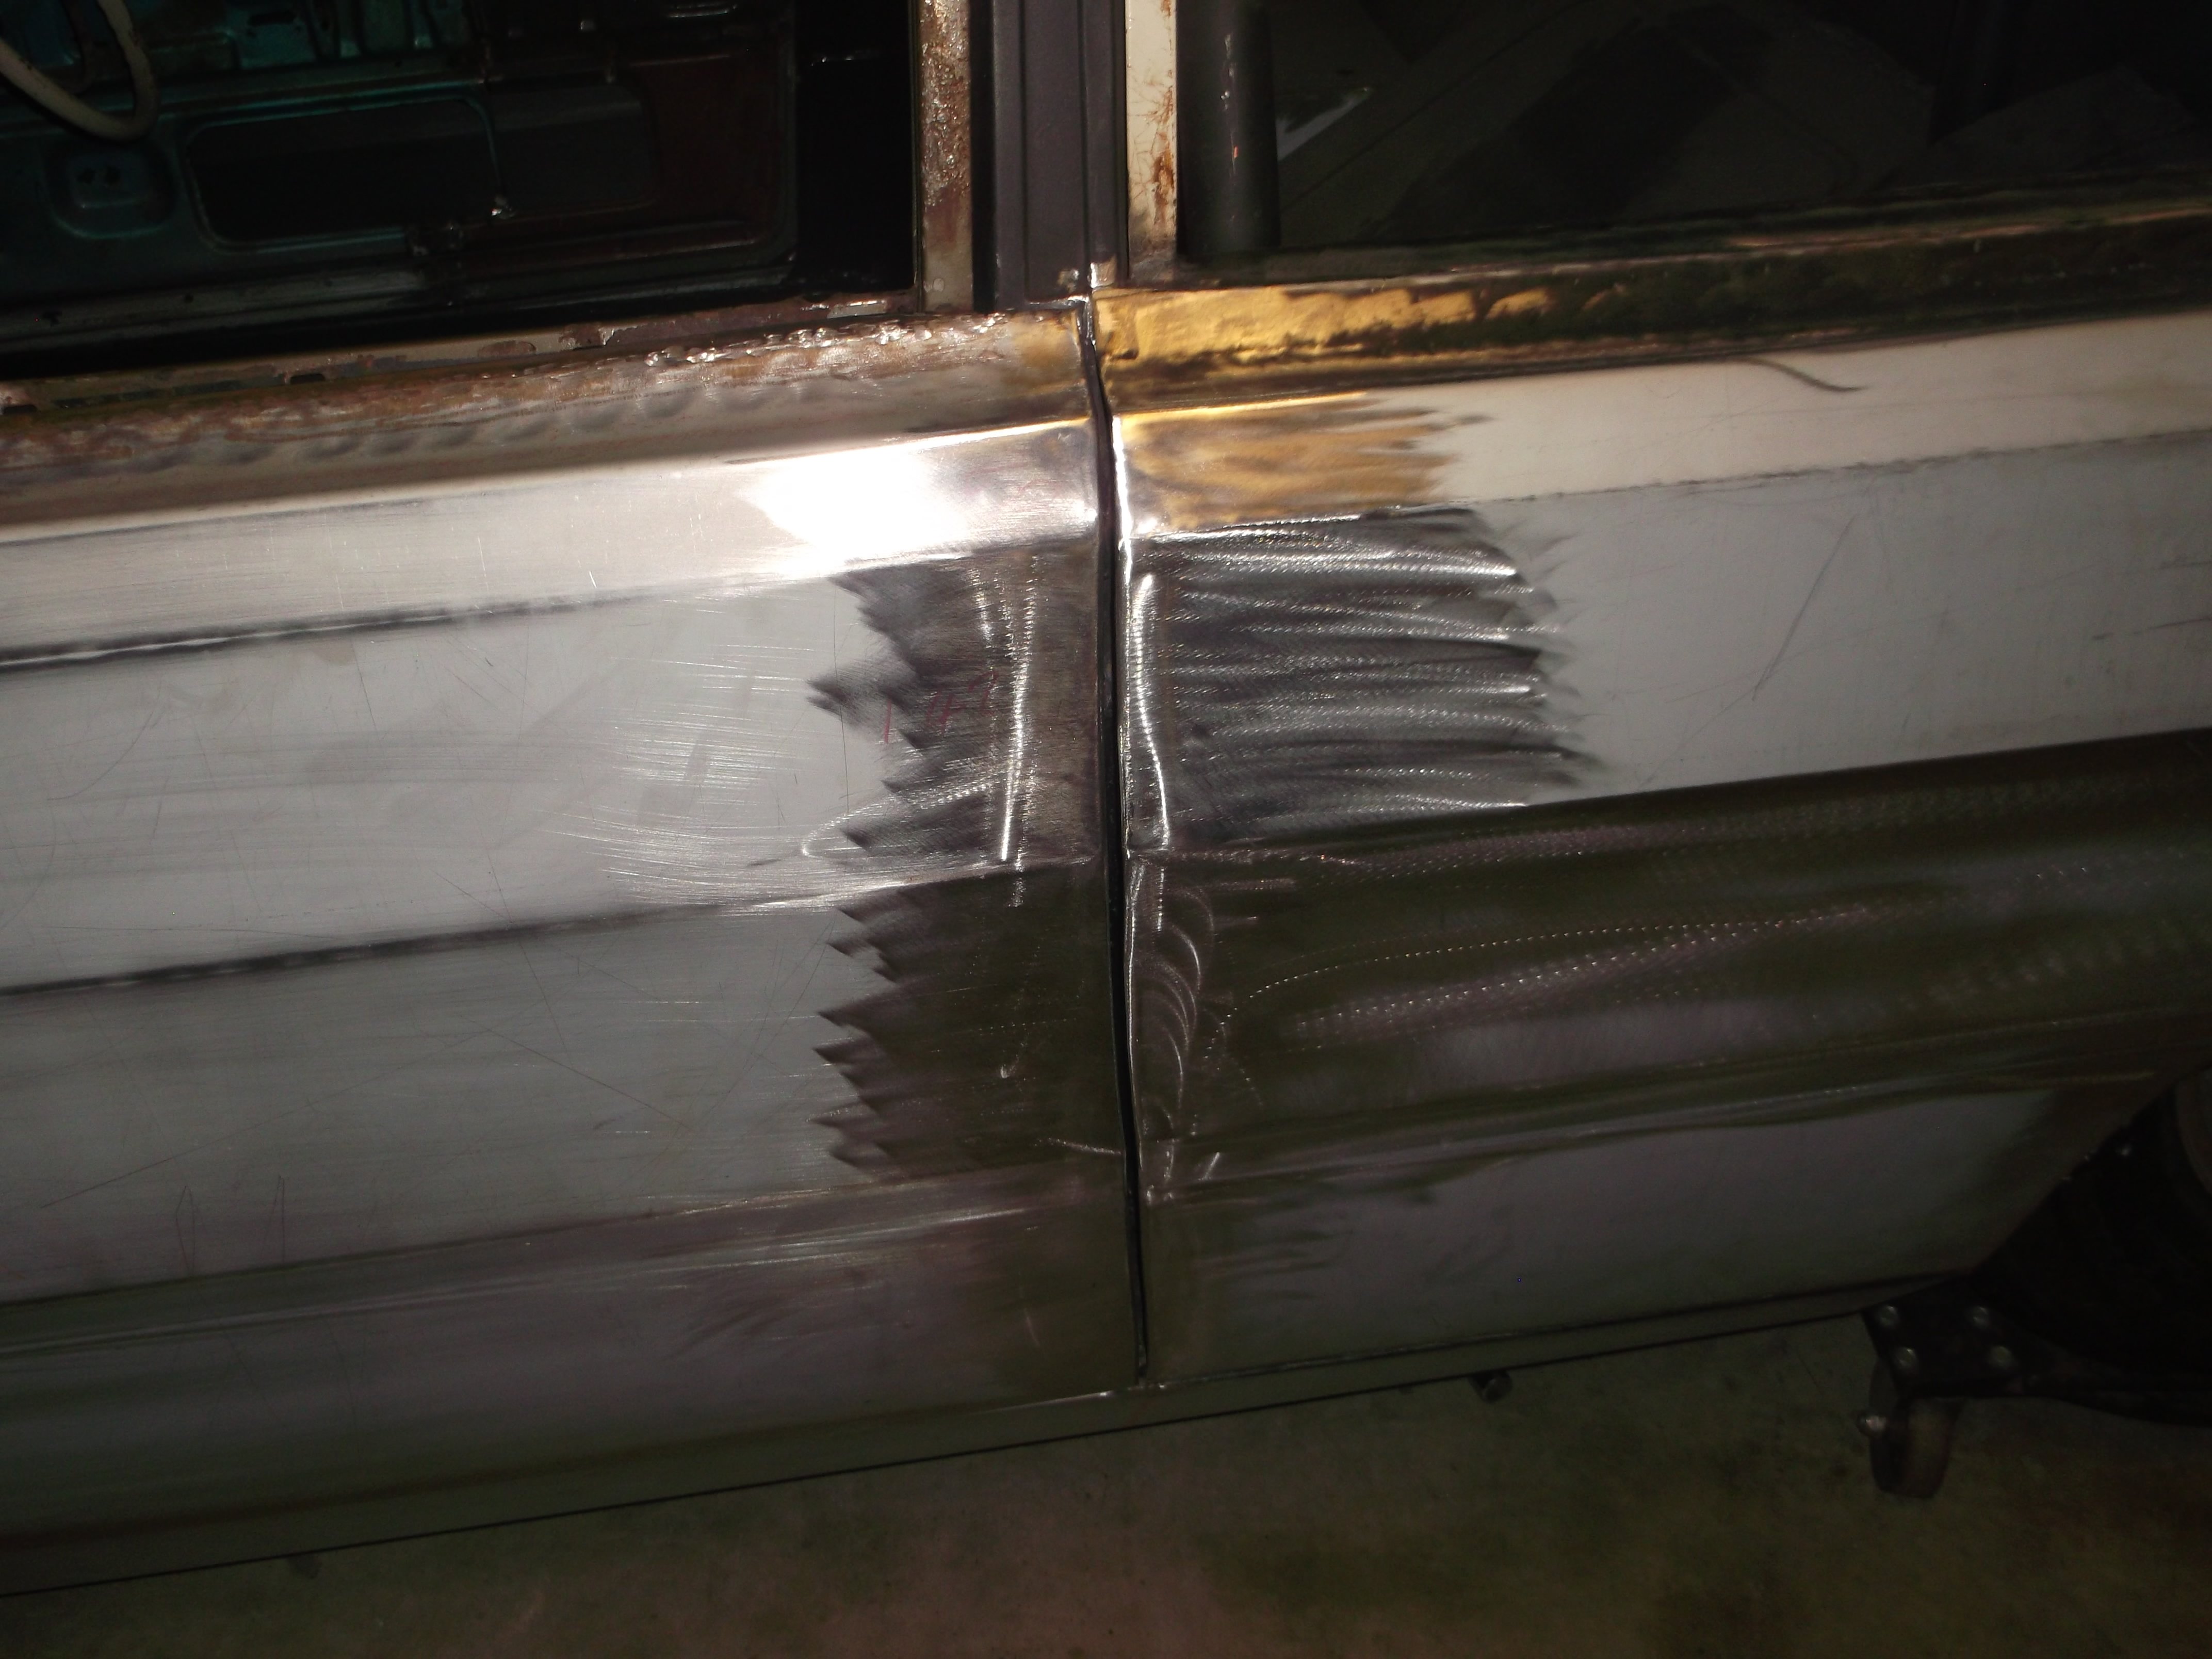
Now I just have heaps of welding to do...
9 points
-
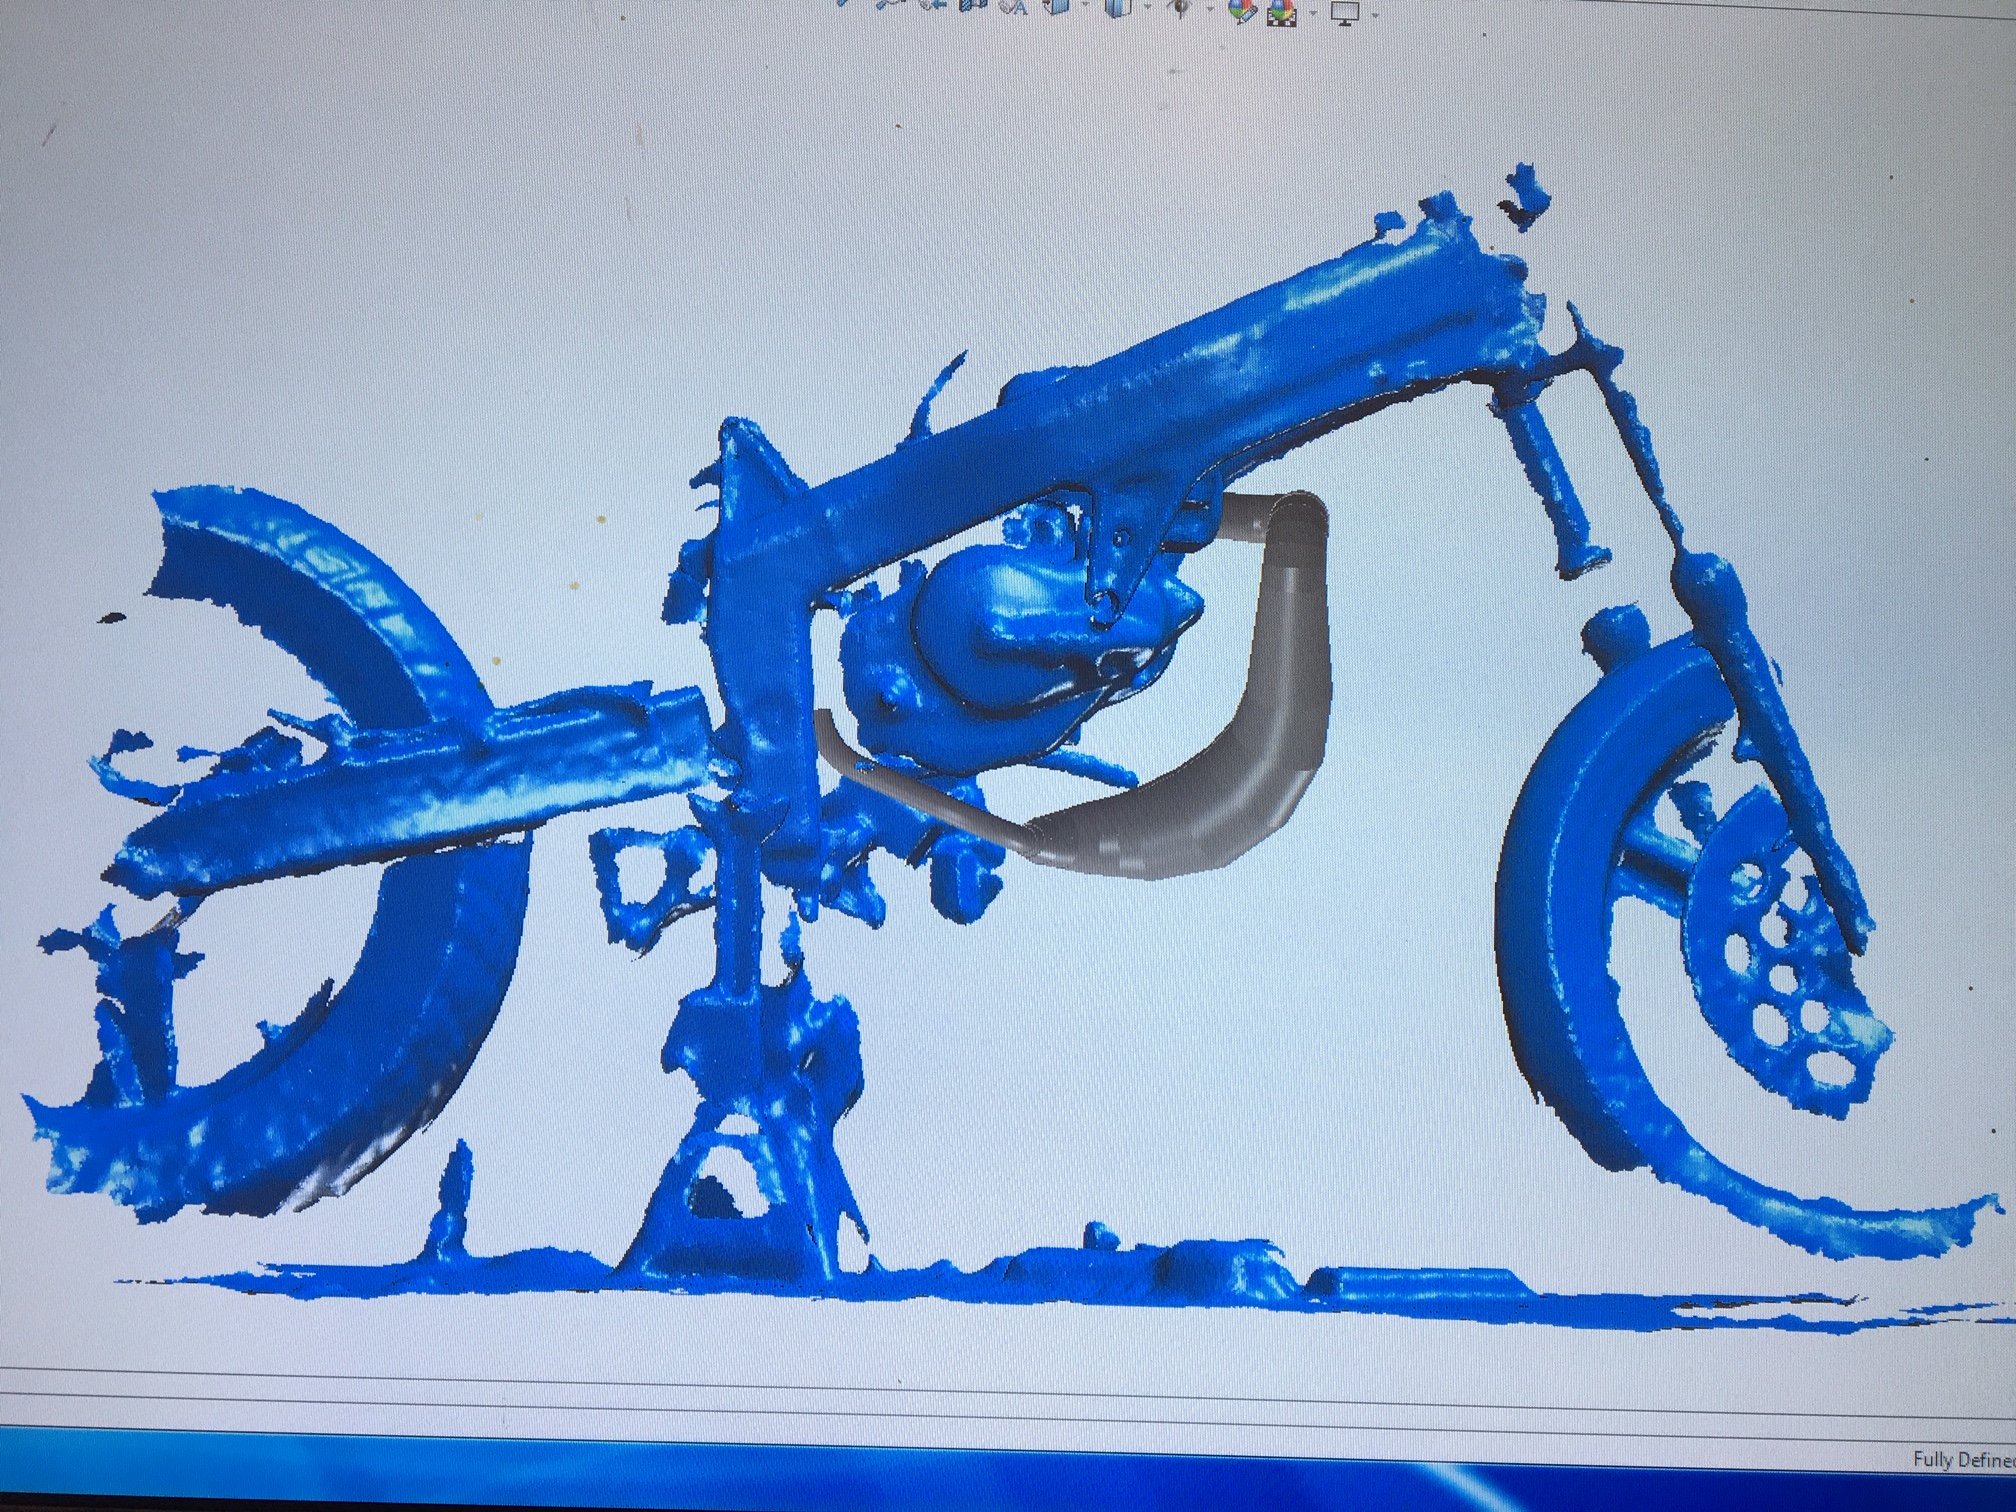
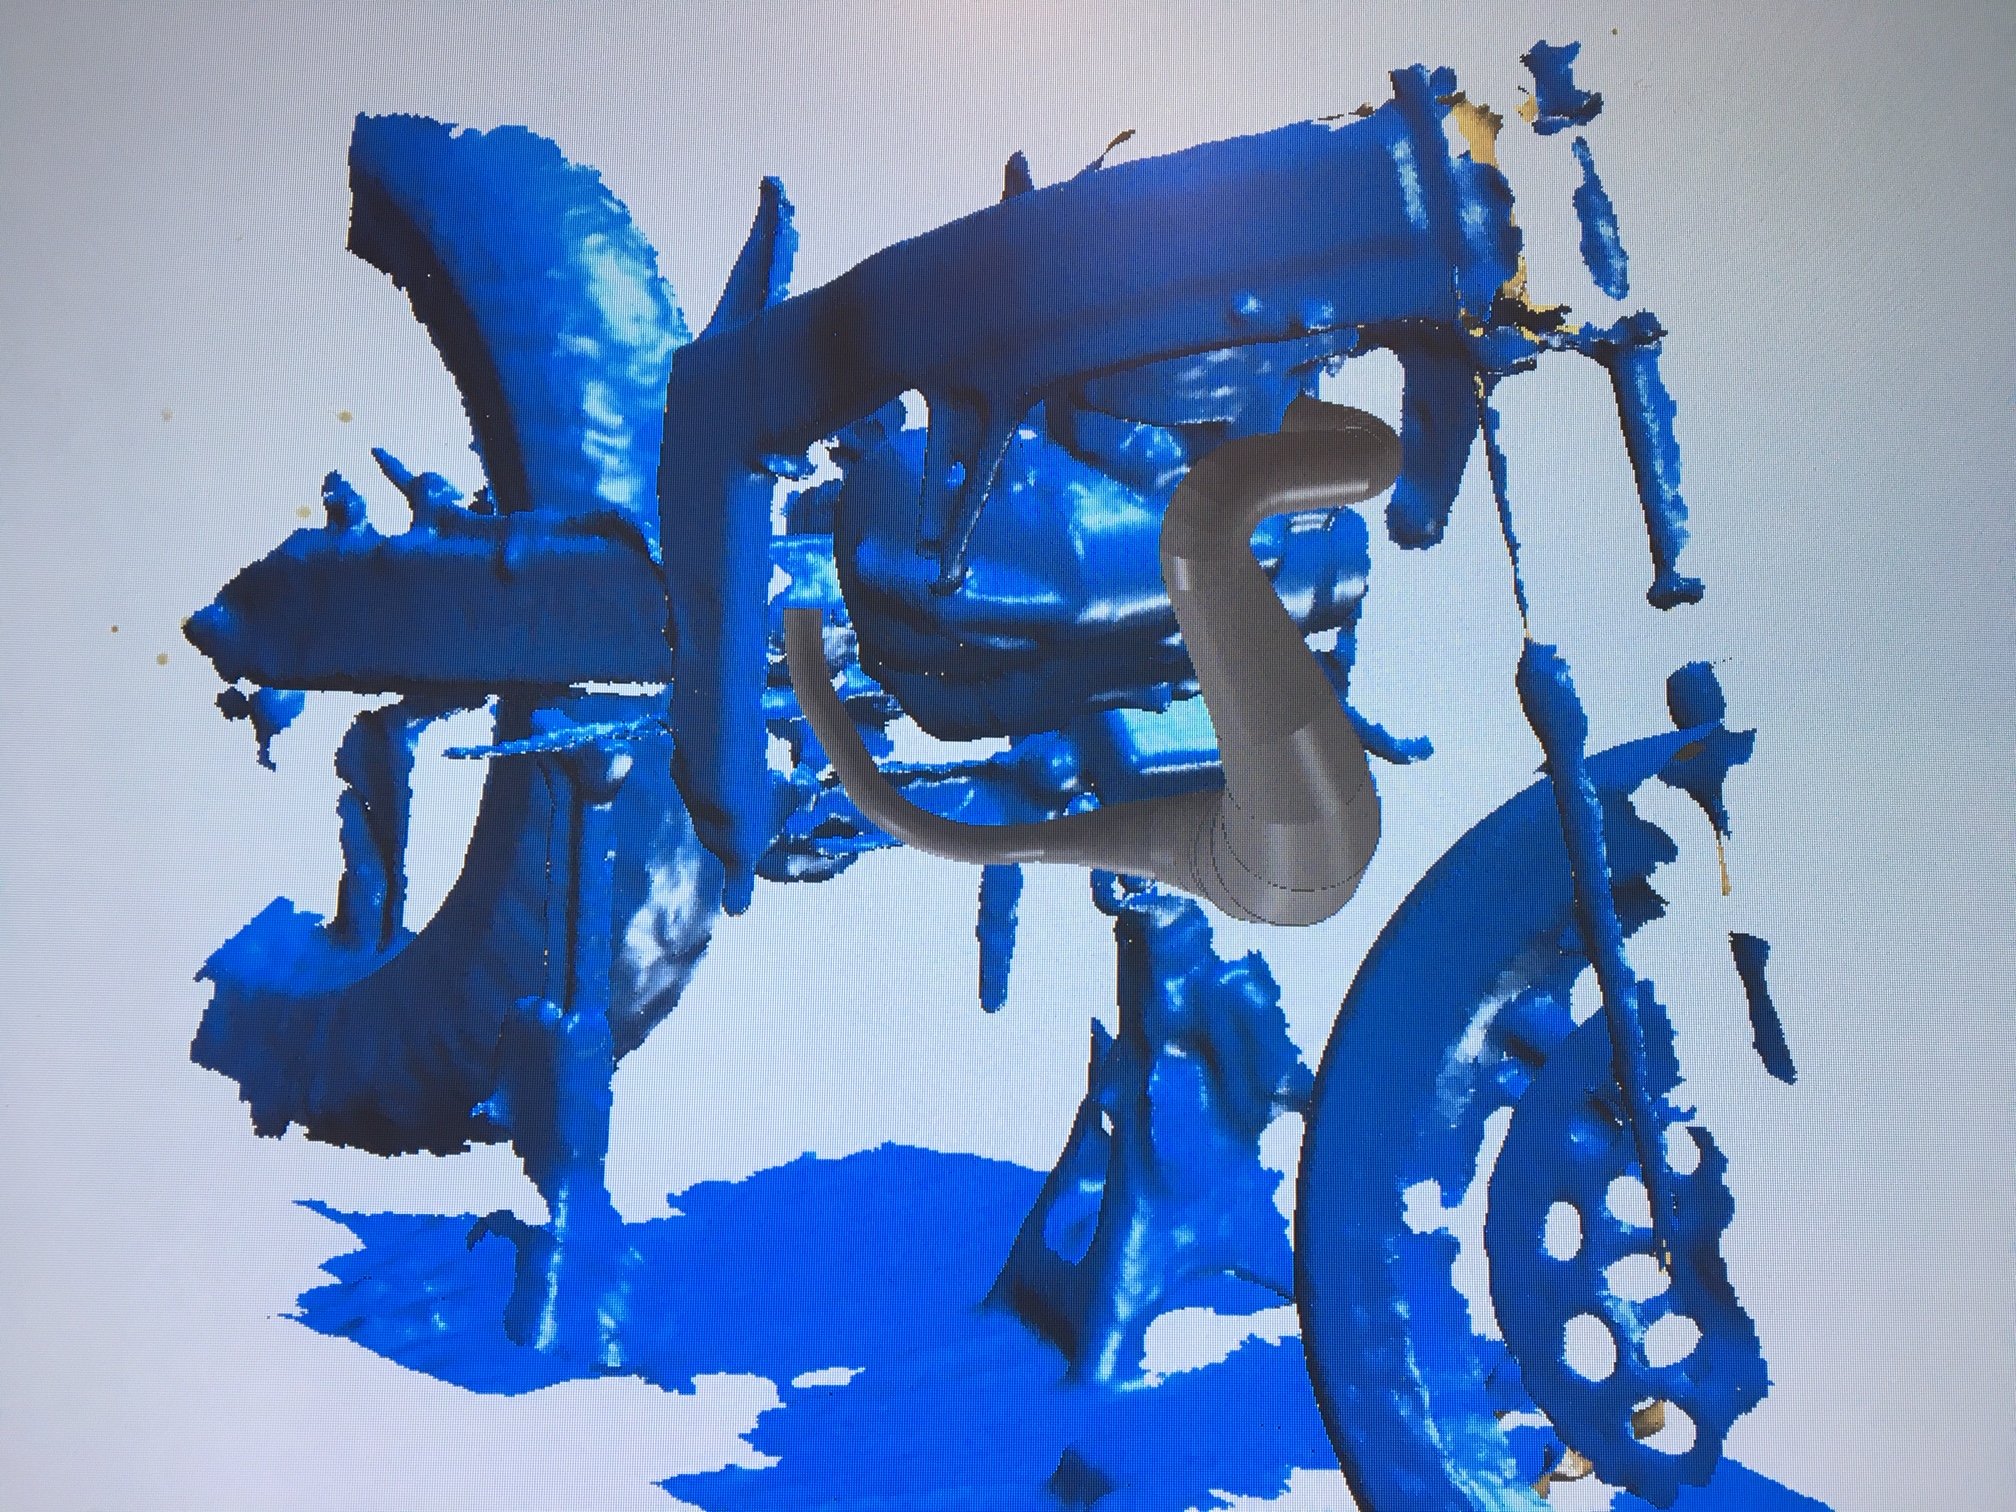
3D scanned with an xbox kinect 3D camera and then modelled using solidworks sheet-metal
7 points
-
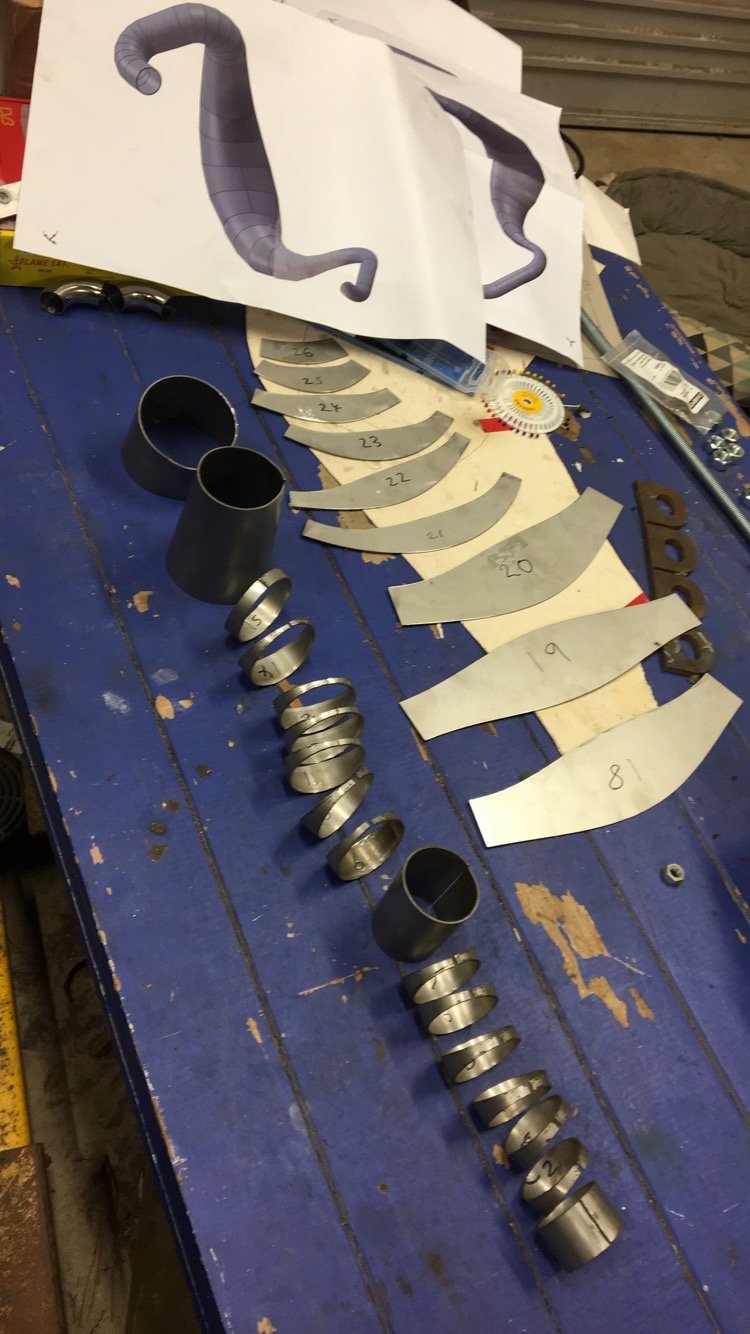
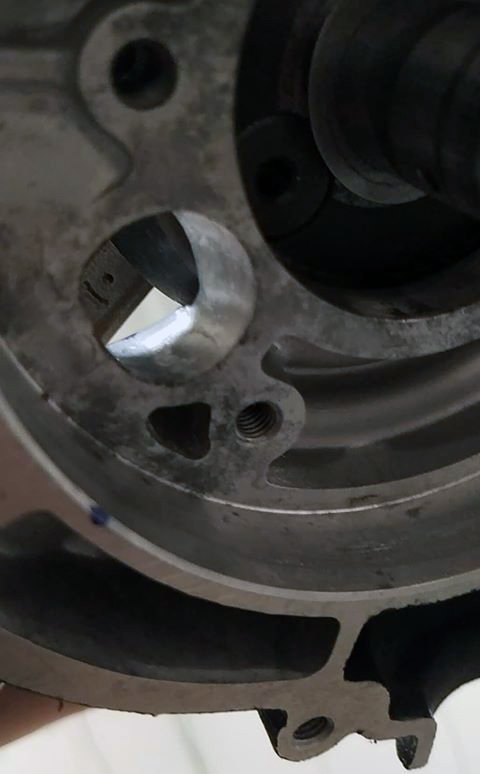
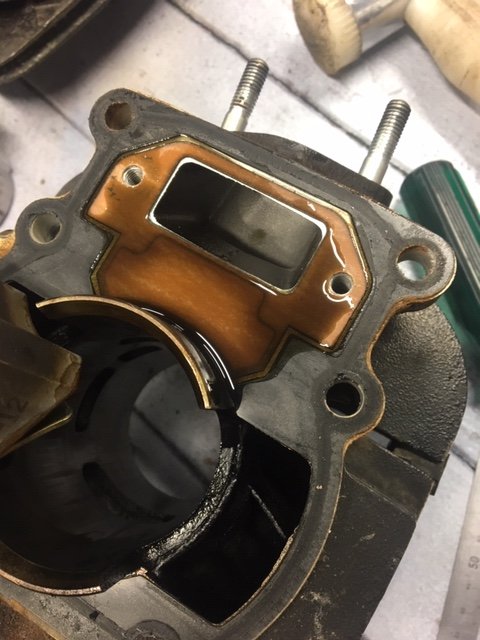
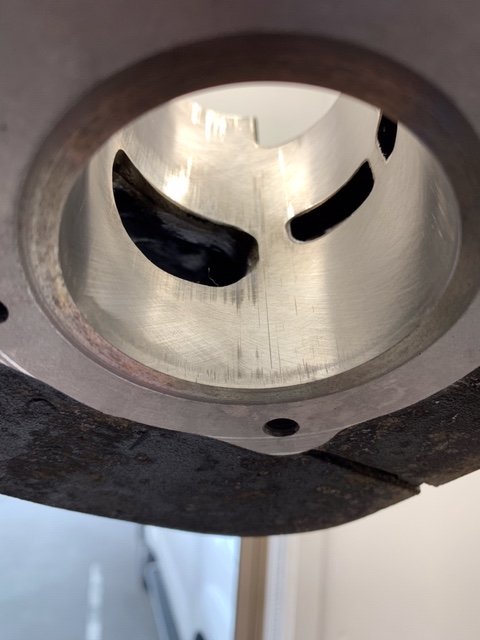
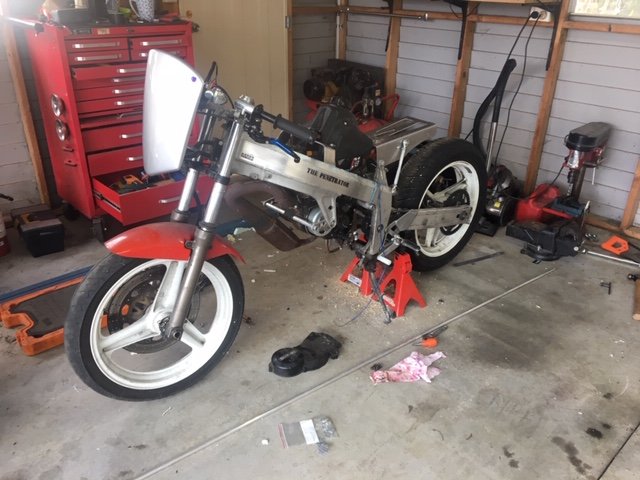
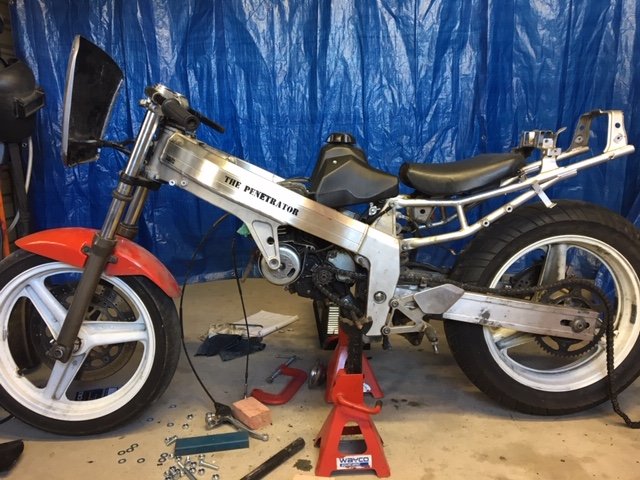
Roughed out the porting, N.O.S outer plate, port matched to the manifold and shaped according to Graham Bell's 2t performance guide Inner disk plate Case port Just about couldn't get my little finger through there before! Crank web doesn't shroud it as badly as I was worried it would Jonny told Andrew he tapered his crank to clear the porting and I have since seen a few guides that say to taper that web a bit more for max flow, may yet see if I can get some lathe time, but I dunno if it'll be worth it though as it looks to me that the port should flow more than enough? And it was hard to bring myself to do it But I just couldn't run a silver engine lol
7 points
-
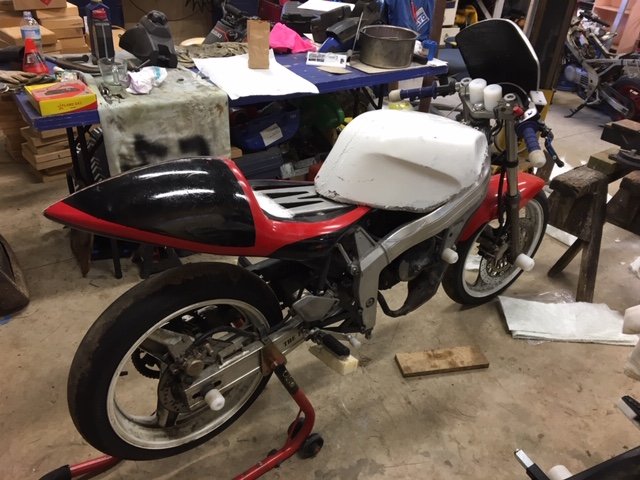
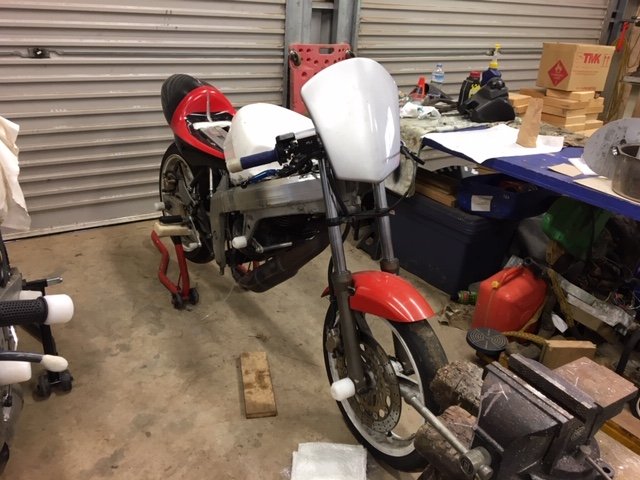
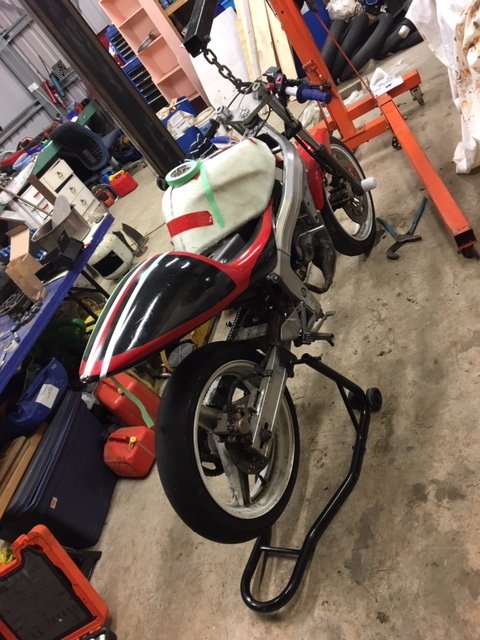
Spacer: So after all those drastic mods I was at this stage running the final version of the bastardized random unknown pipe and now on a 24mm PRC Maikuni Flat Slid Carb. After a chunk of trial and error tuning I observed a massive increase in power, and the rev limit went from topping out at 7k to zipping past 11000rpm (where I sook out and change gears). Unfortunately, these are only balanced for 6000rpm... so now your hands go numb and every bolt on the frame comes undone in seconds. Its also still painfully slow compared to the stadard FXR150's. So for now its back in the laboratory while I finish welding up the pipe and pull the crank to balance it. While I've got it apart I will take some more off the barrel to get the squish down, and if funds allow, I'll re-bore it and might look at fitting a new piston to get better ring options, RG500 thingy's look like they might be a good fit. That's the whole story up to date now. Edit: you can see in this photo how pissed the piston is sitting on the barrel. This is because of the 10mm cut from the skirt on the inlet side with my precision 5" grinder.
6 points
-
And then, this one time at band camp... I pushed it around and around and around the dummy grid wondering why it wouldn't start, only to get back to the pits after watching the race and find this sitting on my toolbox...
6 points
-
I also made it look heaps better, cos if its gonna be slow its gotta look good doing it.
5 points
-
Since I had the wheel apart I thought I'd paint a bunch of stuff... Stripped old bits... And sprayed with Durepox primer, a mix of grey/black depending on the final colour, when they chip the undercoat of epoxy should be similar in colour... And just top coated with VHT wheel paint. Will be interested to see how this goes... Brake plate was quite pitted but seems sound, smoothed out quite well with few coats of primer and paint... And spokes look as good as possible I guess, seeing it's only silver paint... And lower triple clamp looks pretty sharp. Had some drips on this from spraying too heavy but wiped them smooth and the wheel paint seemed to recover itself... Sort of waiting on Ali new rear rim to arrive now to give me some enthusiasm to start rebuilding shit, paint will harden in the meantime...4 points
-
Then we ended up with a little munchkin on the way and decided to move back to New Plymouth. In the mean time dad and my brother were getting into the idea of bucket racing as well, so we approached the local kart club who were quite open to the idea so long as we executed it properly and above all, didn't damage the track or their reputation. A couple of months of organizing and planning and we had access to the track for a shakedown. I hadn't managed to finish any fairings/tank at this stage, so the bike was totally bare bones. It went really well, and fantastic fun to ride.
4 points
-
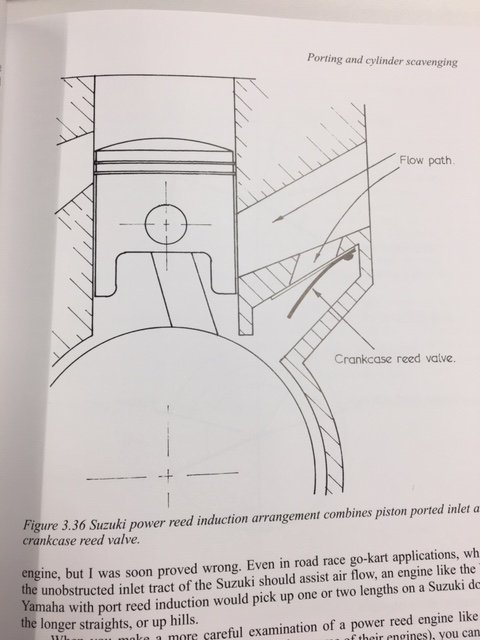
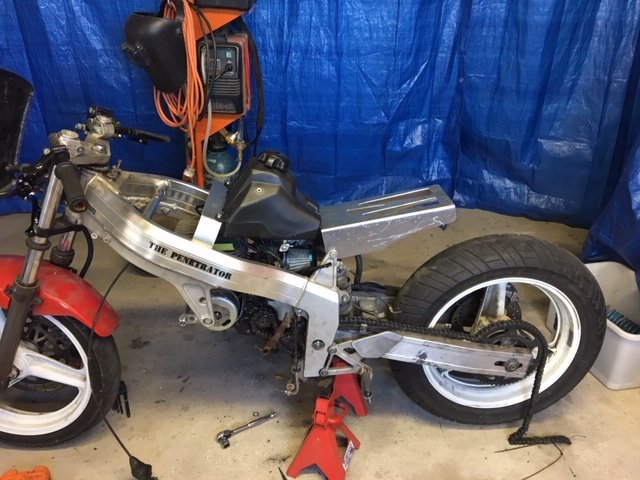
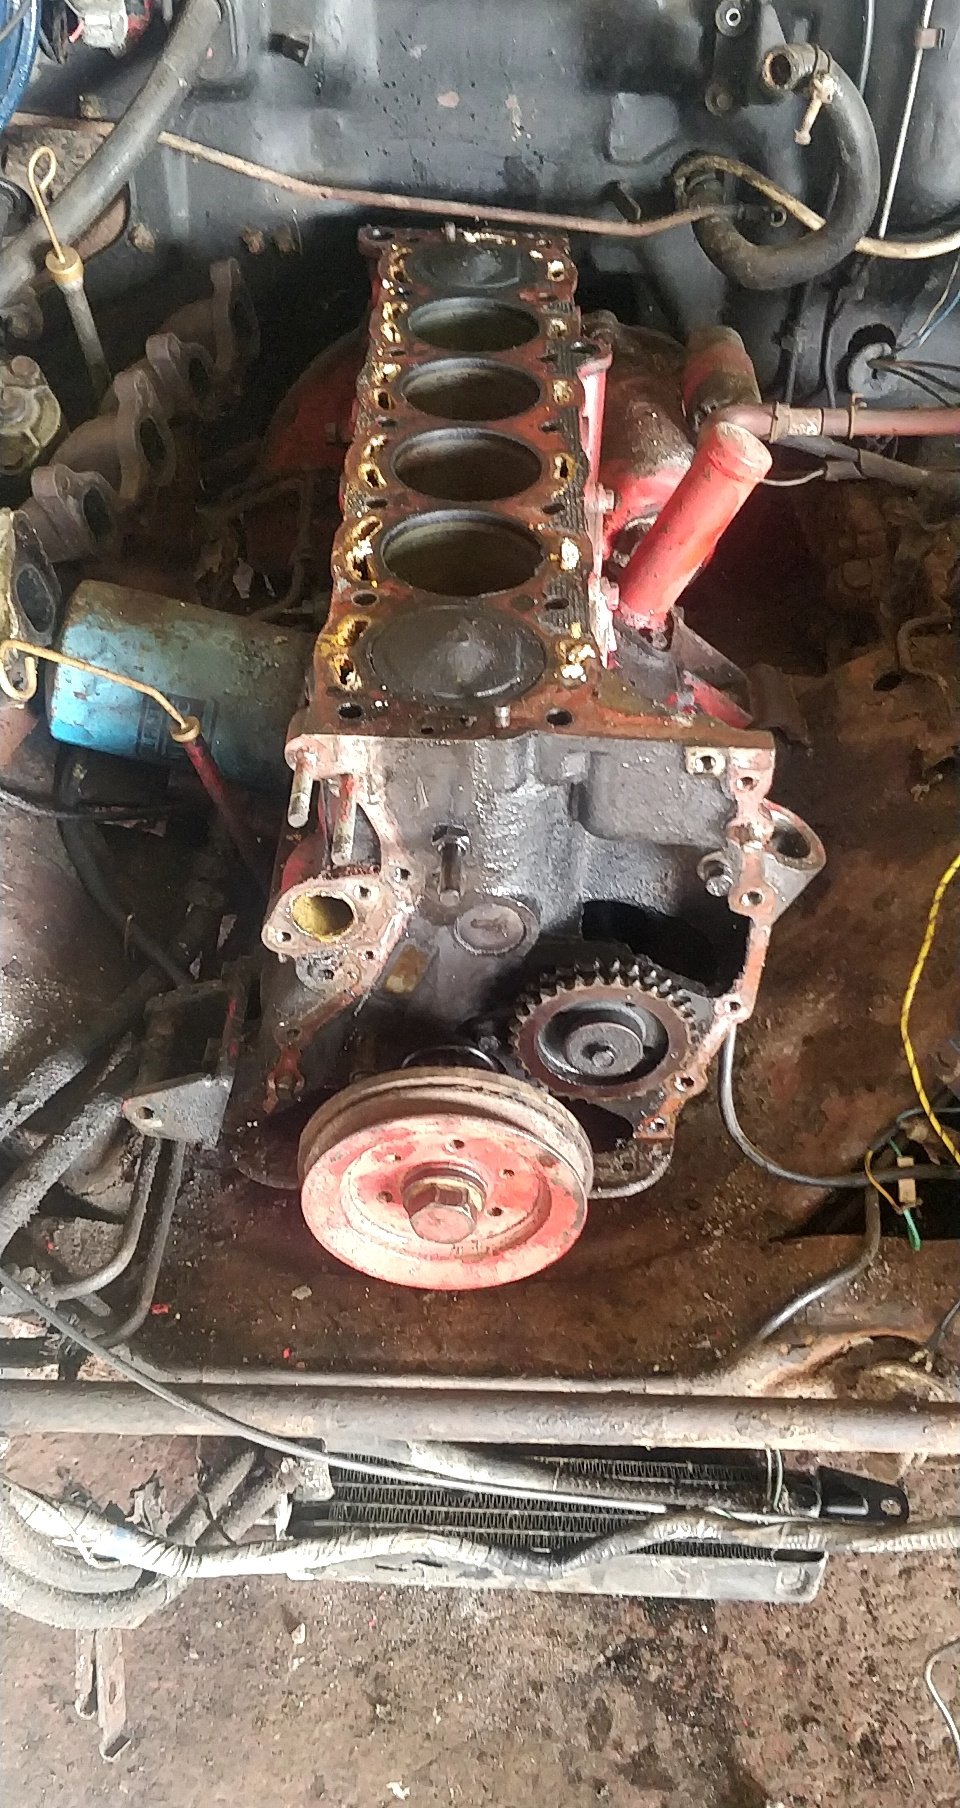
The last piece of the puzzle to date has been the engine itself. My search for that elusive horsepower led me down the rabbit hole of port timing. I raised the barrel 1.5mm Raised the exhaust port roof 6.6mm (+ the 1.5mm) Lowered the floor of the inlet port 10mm Cut the inlet side of the piston skirt 10mm This theoretically results in port timings of 195°Ex/128°Tr/185°In, however I haven't checked it with a degree wheel yet. Originals were 155.5°Ex/118°Tr (didn't bother to measure inlet because of the reeds). As well as taking the 1.5mm back from the top of the barrel, I machined the head about 1.1mm and used a thinner gasket to get from 17.5cc to 13.7cc (8:1CR to 10:1CR - Uncorrected) This gave me a squish band of about 1.8mm, which is about 0.8mm higher than I would like it to be. These engines have a bizarre piston port/reed inlet system that suzuki trialled in the 70's. Basically it just ends up being shit at both. So I've blocked up the reed port and massively adjusted the piston port to make it a piston port engine only. Comparison of before and after inlet port sizing: Have you ever seen someone precision machining their piston with an angle grinder? You have now!
3 points
-
ive been doing a bunch of wiring tidy up stuff which is pretty boring really. i did manage to wire 4 coils round the wrong way and fry them. 2020-02-11_11-24-07 by sheepers, on Flickr which meant i needed to buy some new ones. 2020-02-11_11-23-59 by sheepers, on Flickr coils are from a 1JZ-FSE direct injection engine, a couple of others too. they required modification via a sanding belt to fit but what doesn't need sanding. what now? well, most systems are go and ive been trying to start it. it almost went, gave that phut phut im trying noise but no actual running yet. i have some weird things to sort out regarding how it was set up vs how it should be set up (cam triggers are not making sense at this point, was only getting LH cam triggers but the computer was configured to RH cam trigger, its exactly the same as it was in this regard but it still dont make no sense) but ill keep plugging away and in theory it should go.2 points
-
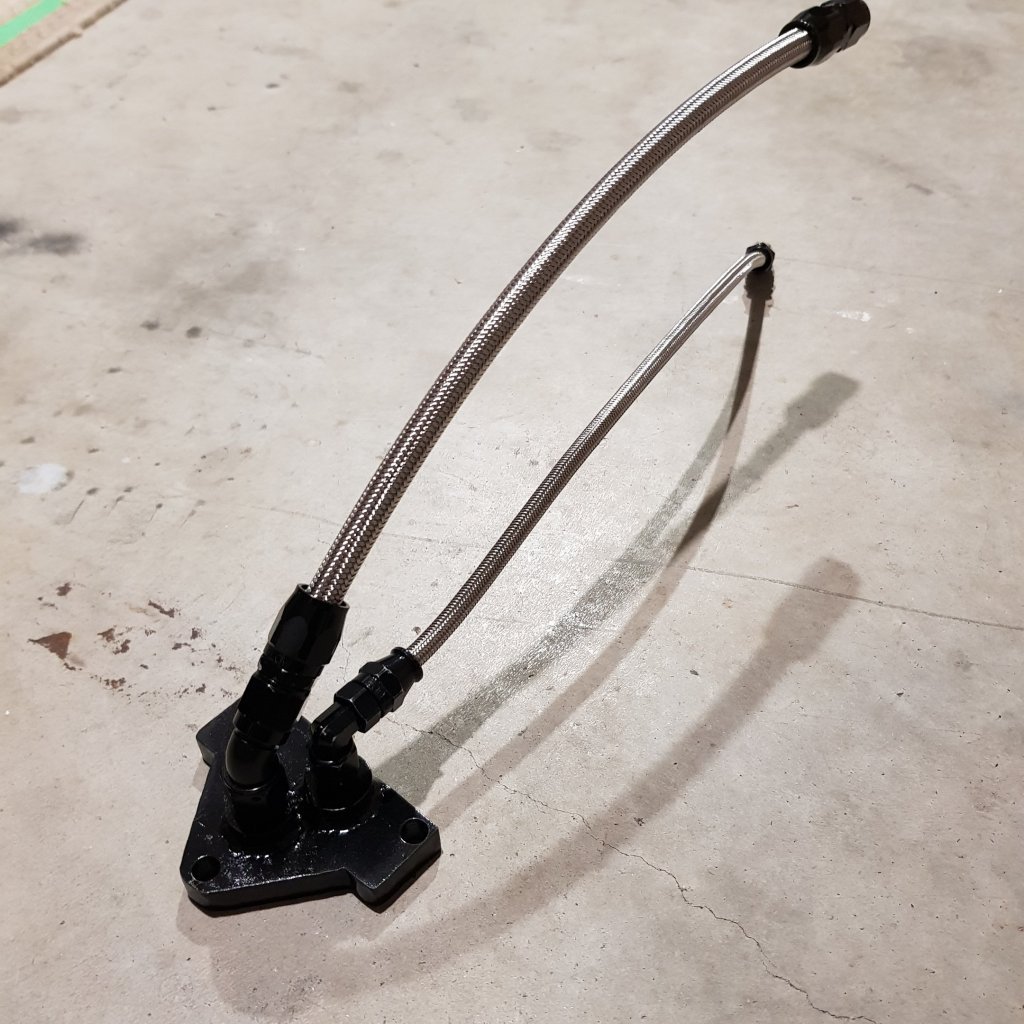
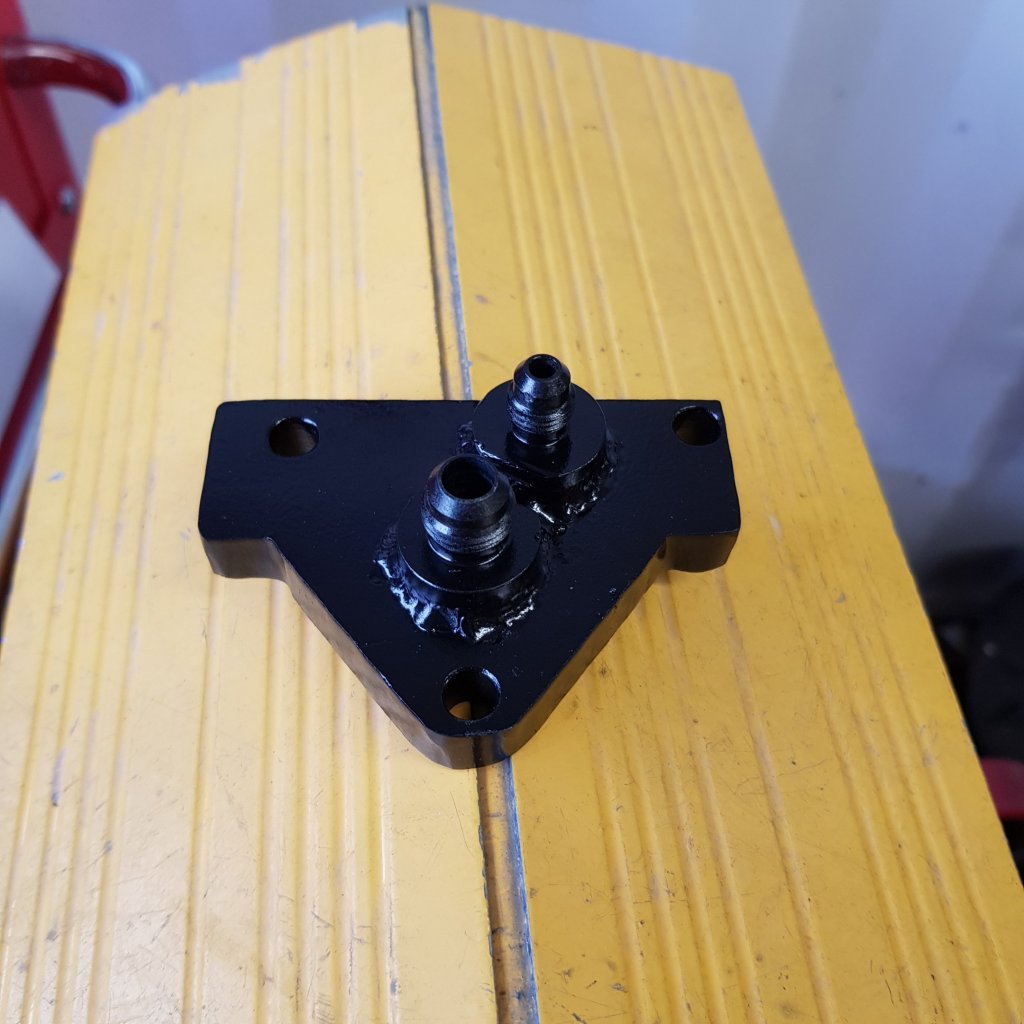
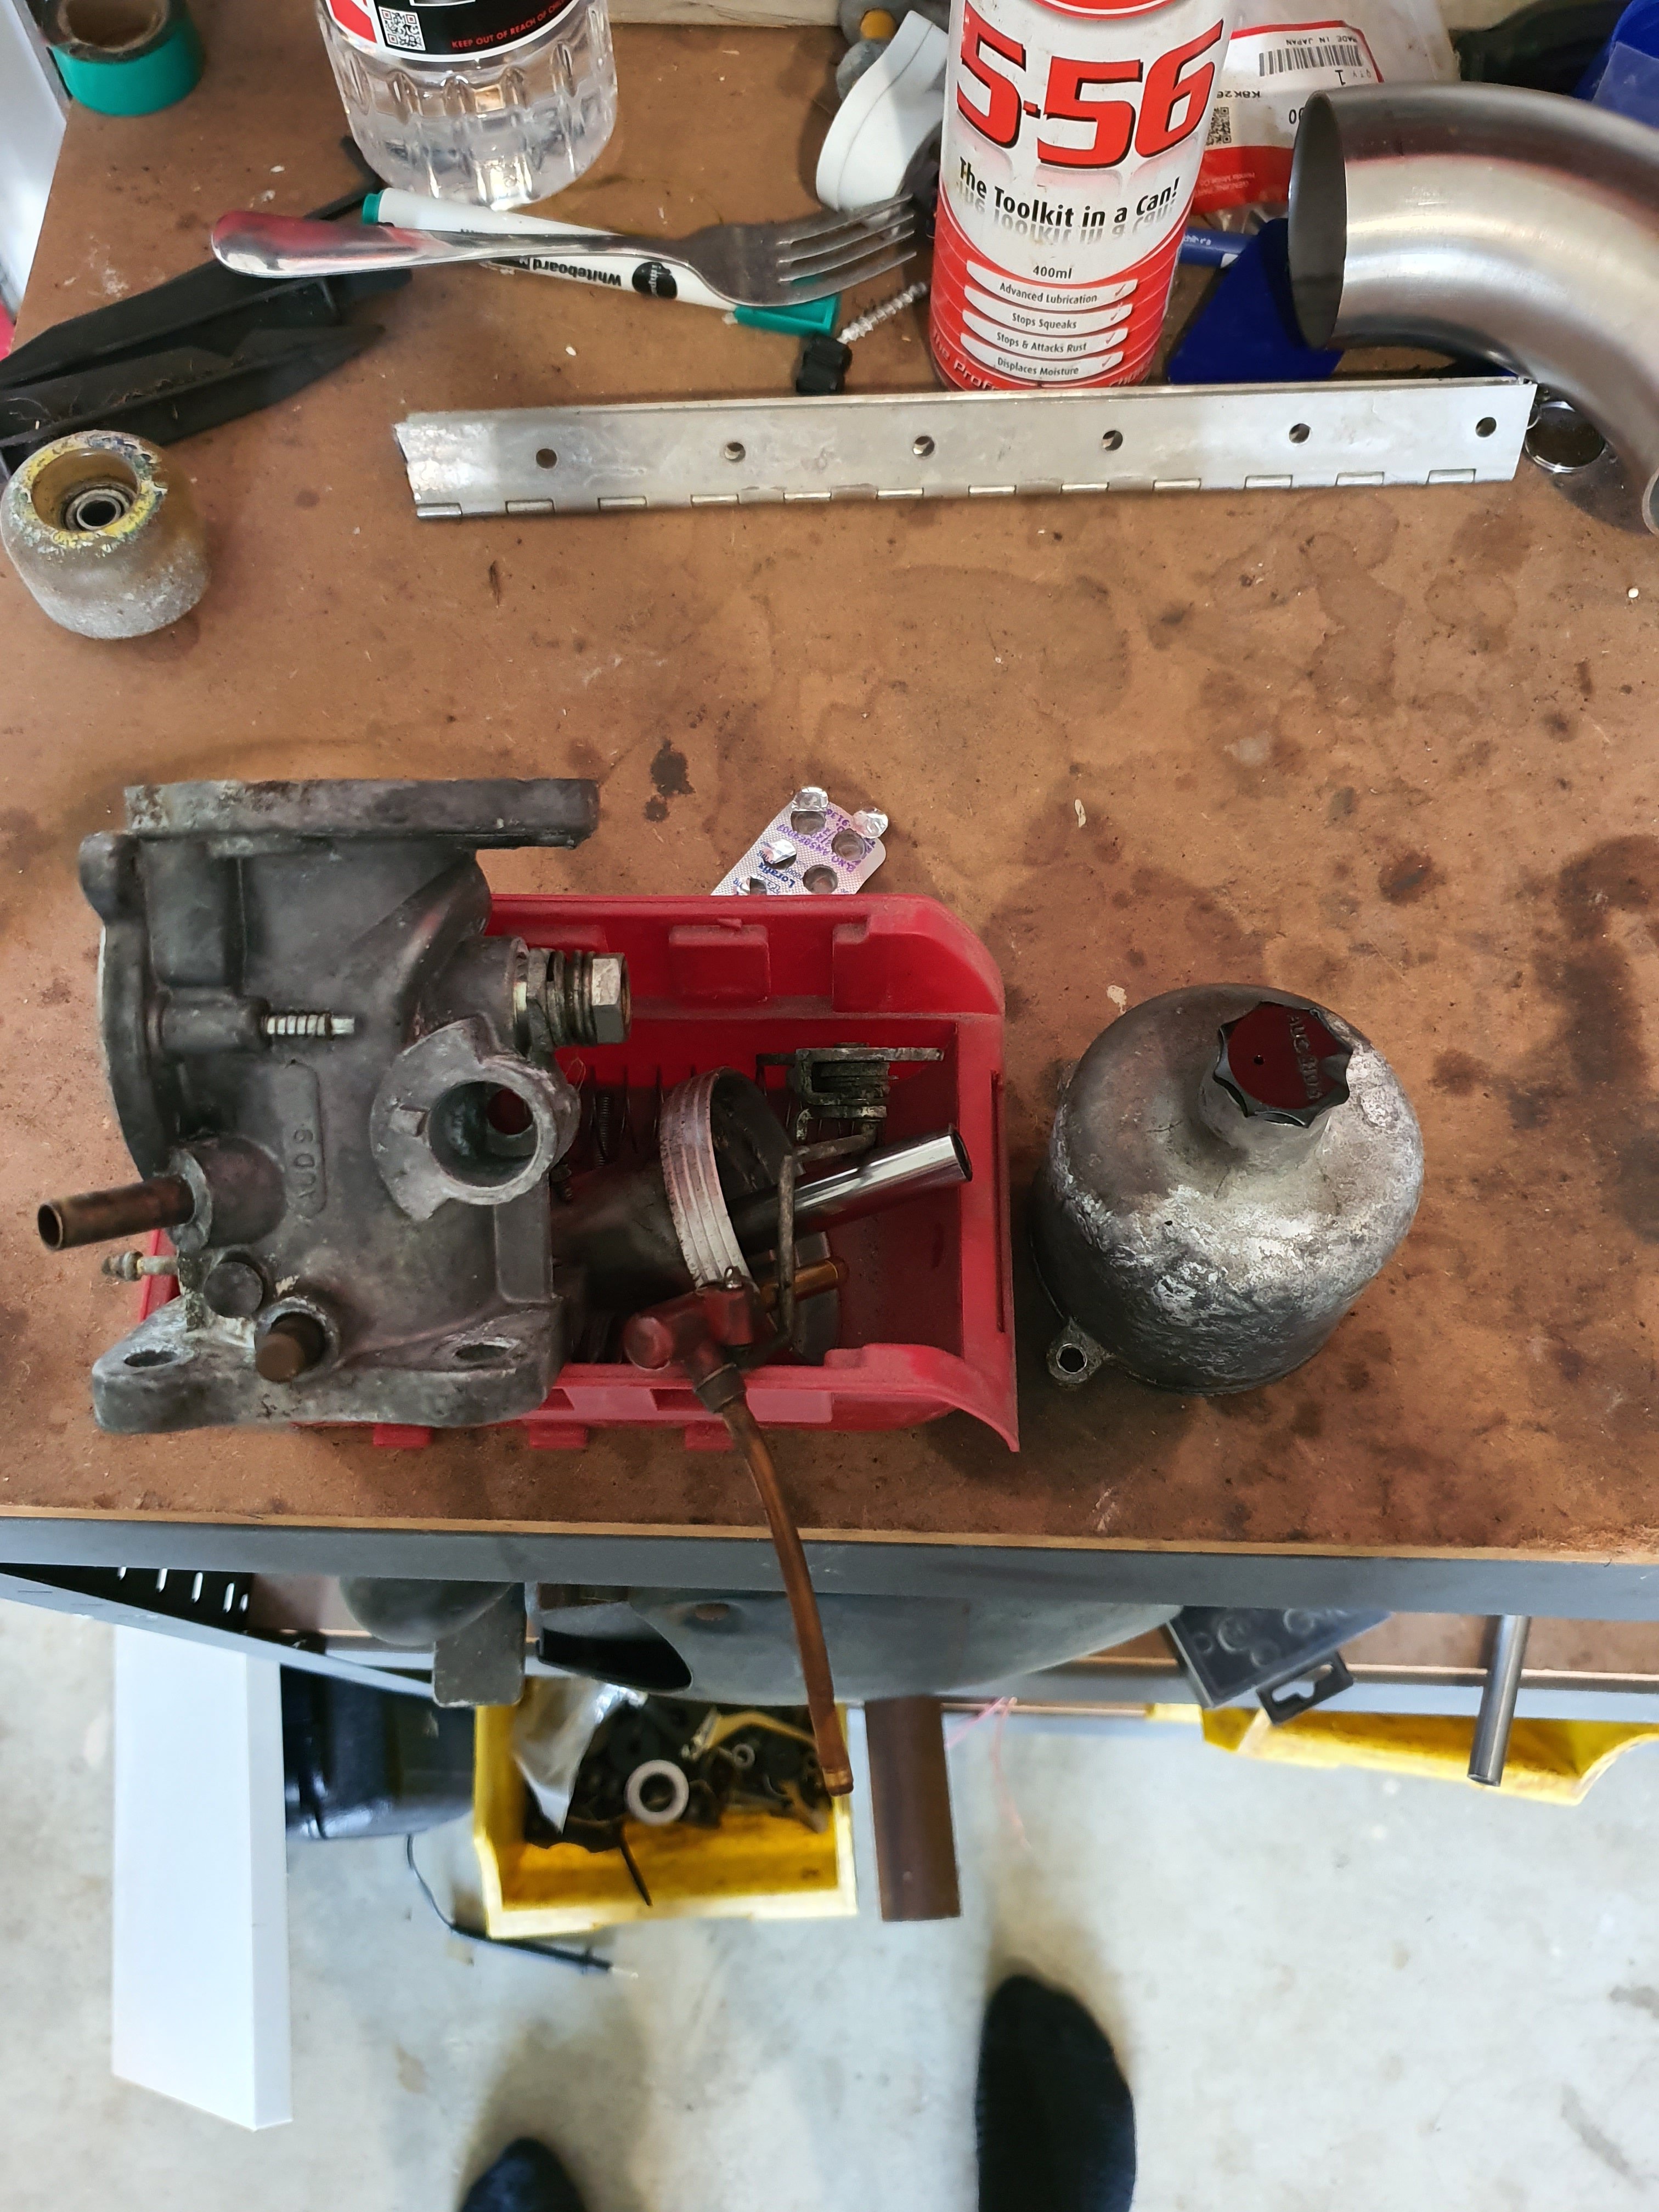
Yeah mate these twins have full presurised oil systems both are fed under turbo not really visible to well.AN4 feed AN 6 Return, Return might be too small once turbo is spinning in anger time will tell no smoke or oil puddles yet.
2 points
-
That 1984 YZ 250 I use to have had a rotten front rim, I dont know what they make them out of but when it corrodes it goes deep down into the alloy structurally fucks it, I had to cut where the tire bead sits off with a cutting wheel, looked fine once the tire was on but wasn't much rim anymore.2 points
-
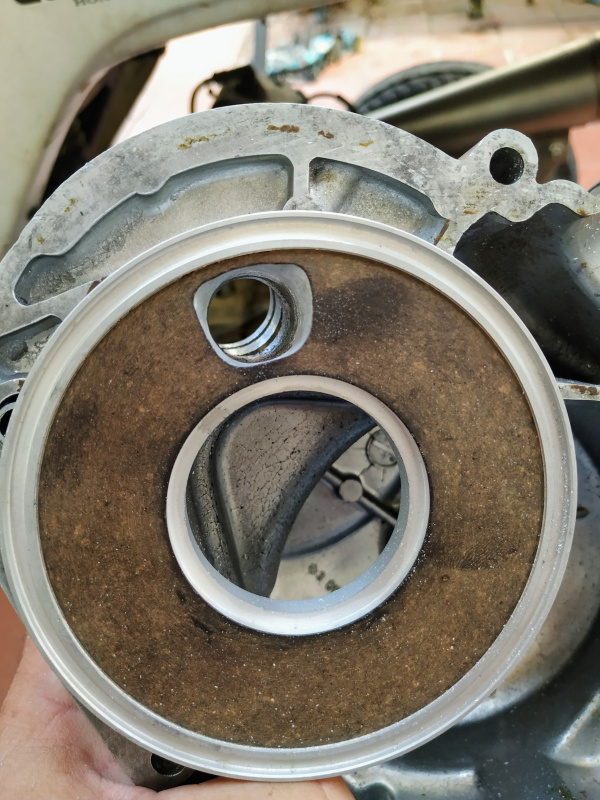
Reed valve hole that I filled: After a bit of a hone to take the worst of the marks out: Freshly skimmed barrel:
2 points
-
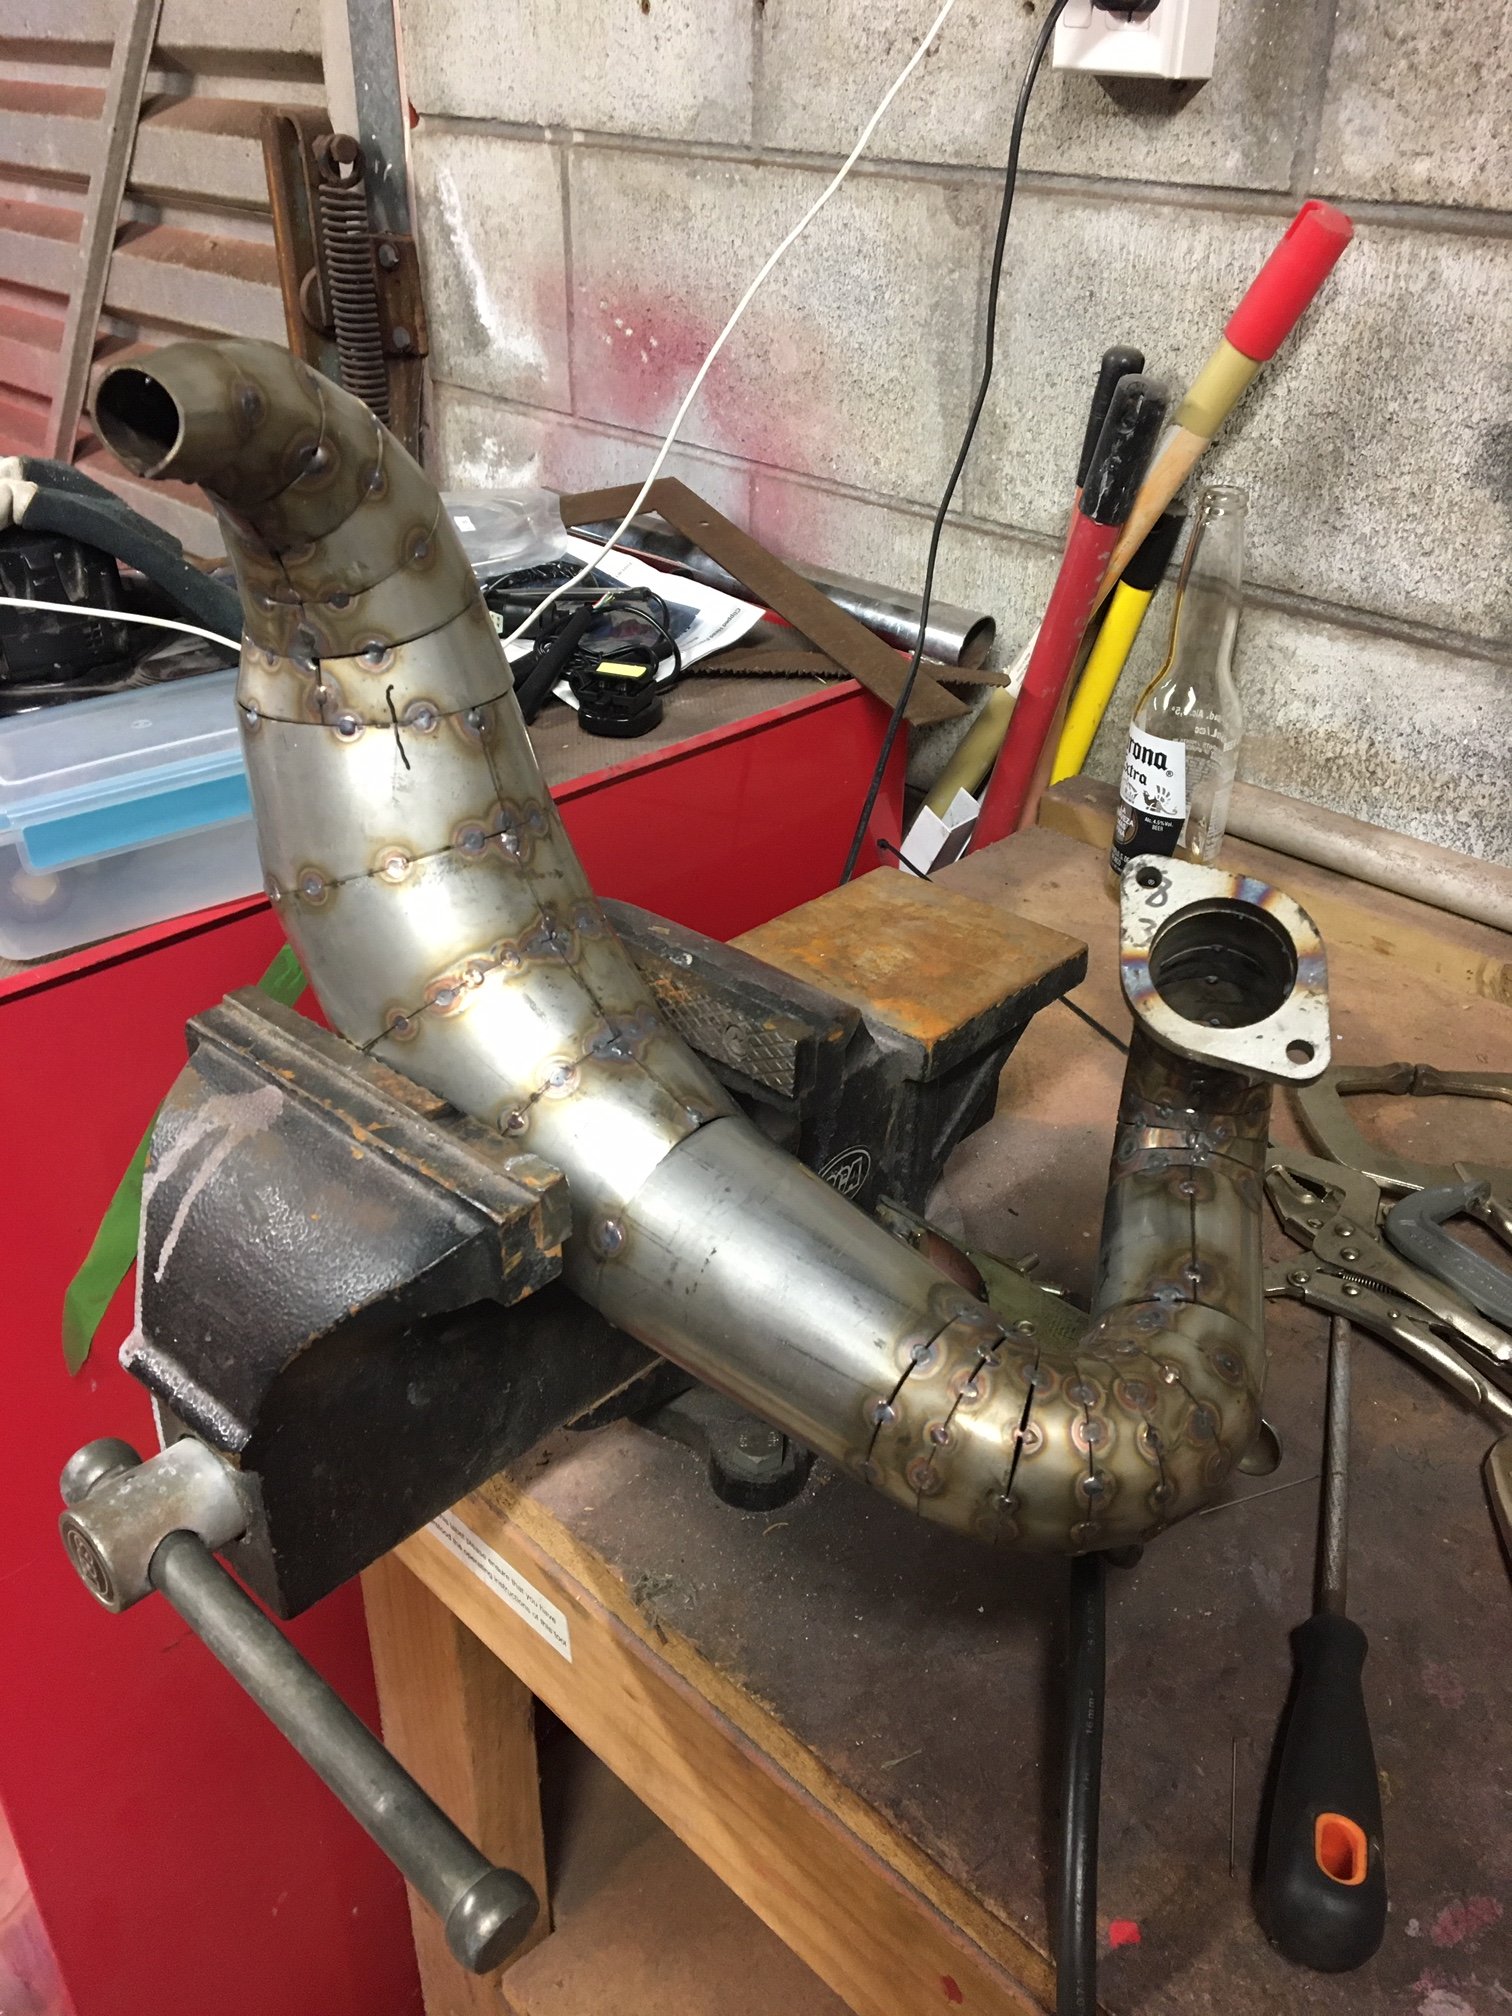
Pipe wise, initially i made the most bastardized hack and weld job of the original TF125 pipe just to get it going. I've read a bit on 2-stroke tuning in recent time and knowing what I know now, what I did to that pipe would genuinely have been quite an improvement over standard i think. Unfortunately though the bike has always been horrendously down on power compared to all the other F4 bucket bikes so I started playing. First up was a spare chamber that we had floating around in a box of parts. Completely unknown origin, looks home made. I made it fit, again using the bastardize technique. Its got a massive mid section diameter and was horrendously long with a looooong header. So it had wicked pull off the corners to about 4000rpm and then wouldn't rev past about 6000rpm... not exactly race winning stuff going on here... So I took some length out of the header and shortened it up by quite some margin. This made the bike rev to around 7000rpm, with little to no improvement otherwise, and I couldn't for the life of me get the carburetion to work. From the book I've read and some software that the internet gave me, I've applied some technology and started on building a pipe that is actually designed for this engine and application.
2 points
-
Some bits of development have happened along the way. Firstly the pegs were a little low, we have to have nylon under them so we don't damage the track when we bin it. My nylon was a little thick and the pegs a bit low and they would drag on the track through our sweeper... One race I cut a bit close to the inside of the corner and the peg dropped off the rumble strip and promptly vanished from existence. So I hand made some new ones which are all nylon over an aluminium center. With skateboard grip tape on them they have better grip than any other pegs I've used and they're great for the track protection.
2 points
-
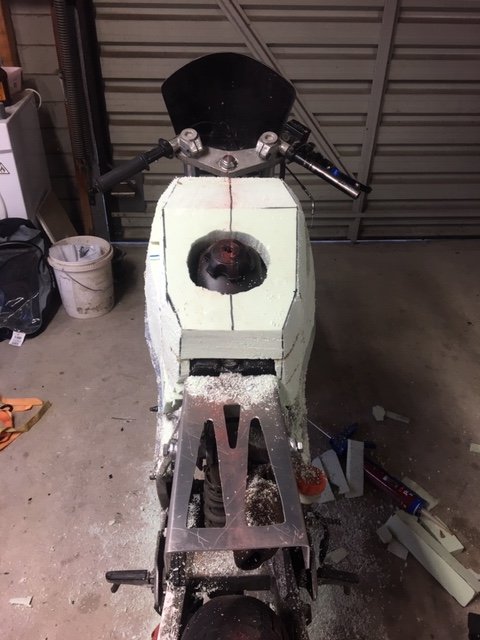
Next up was to get onto some fibreglassing. As I had moved back to New Plymouth and was much closer to Blackwood manor and hence the original MC19 tank, I stuck the glued foam abomination on the top shelf in my workshop and took a mold off the original tank. Not having done any fibreglassing before, I massively over did it, its about 10mm thick in places where the sheets folded over themselves and weighs nearly as much as a steel one I scored a TZR250 race tail section off the buy and sell but it was massively wide, so I cut about 125mm strip out of the middle and glassed it back together. This left it with a cool pointy tail thing going on. About this stage we got the racing off the ground. Our first real event we invited the bucket racing guys from wellington and had an awesome field of about 15 bikes, this was awesome as it really got some hype going for us and we built numbers very quickly. We have a solid 9 or so bikes turning up most club days now and only a year in. We had a roll of red duct tape that was nearly a perfect match for the existing red paint on the tail and front mudguard, so for most of its racing so far the bike has been liveried with tape. Great from afar but far from great.
2 points
-
A bit more shed time had a racey light weight tail frame made and Ali-expresses finest pit bike tank mounted. I then started shaping some foam to make a tank cover as the Duke had other plans for the original CBR tank and it was on the northern island. This bike has been treated to only the finest of chinese components. Fork seals, levers, brake pads etc. The brake pads are actually bloody brilliant!
2 points
-
put a headlight relay in to take the load off the wiring in the headlight switch. Toyotas switch the negative at full current through the headlight switch and after a while they like to set themselves on fire. so Nick the sparkey wired in the relay. put the front back on and did more tidying of the wiring inside the car. which was such a mess that im to embarrassed to show a picture of how it was. ill put the headlight back in the drivers side too. so its better now, still not finished but there's not much left to do then the wiring is finished and i can have a go at starting it. oh, its got oil pressure and fuel pressure without leaking anywhere. 2020-02-02_01-43-52 by sheepers, on Flickr 2020-02-02_01-44-14 by sheepers, on Flickr2 points
-
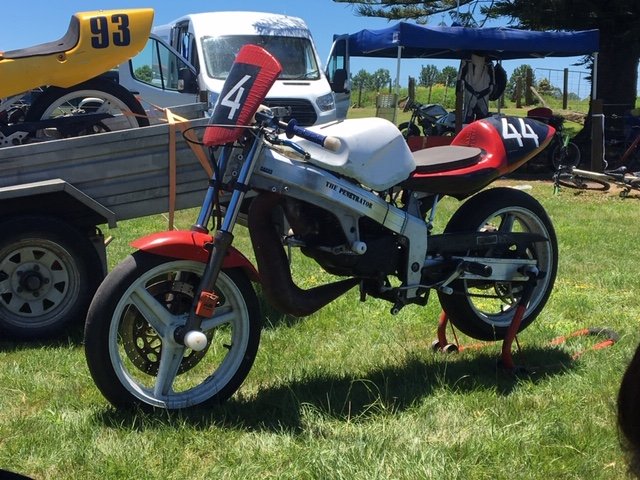
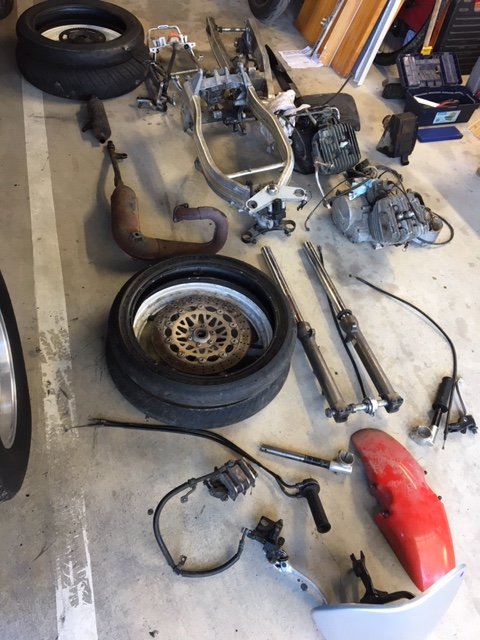
I've been meaning to start a build thread for this for ages. When we were living in Nelson I decided to get into Bucket Bike Racing. @Duke Blackwood was parting out a CBR250RR, and @Bellicose (I think) was selling a TF125, which seemed like it might be a good combination. So some deals were struck, Blackwood picked up the TF and stripped it down and put the lot on a pallet destined for Nelson. According to the timestamp on my photos it arrived on the 14th of September 2017. It didn't take me long to start mocking things up and get the motor mounted, it was a very easy fit in place of the 4 cylinder donk!
1 point
-
Lock it in, I'll pop it outside so you can collect sometime on your way through Richmond.1 point
-
Its always easy to push haha thats why I didn't notice1 point
-
Swell, I'm struggling to think of a logistics solution that doesn't take significantly more effort than just riding it out, parking in the cars for sale section, barrying with your good self and riding home when full to the brim of barry.1 point
-
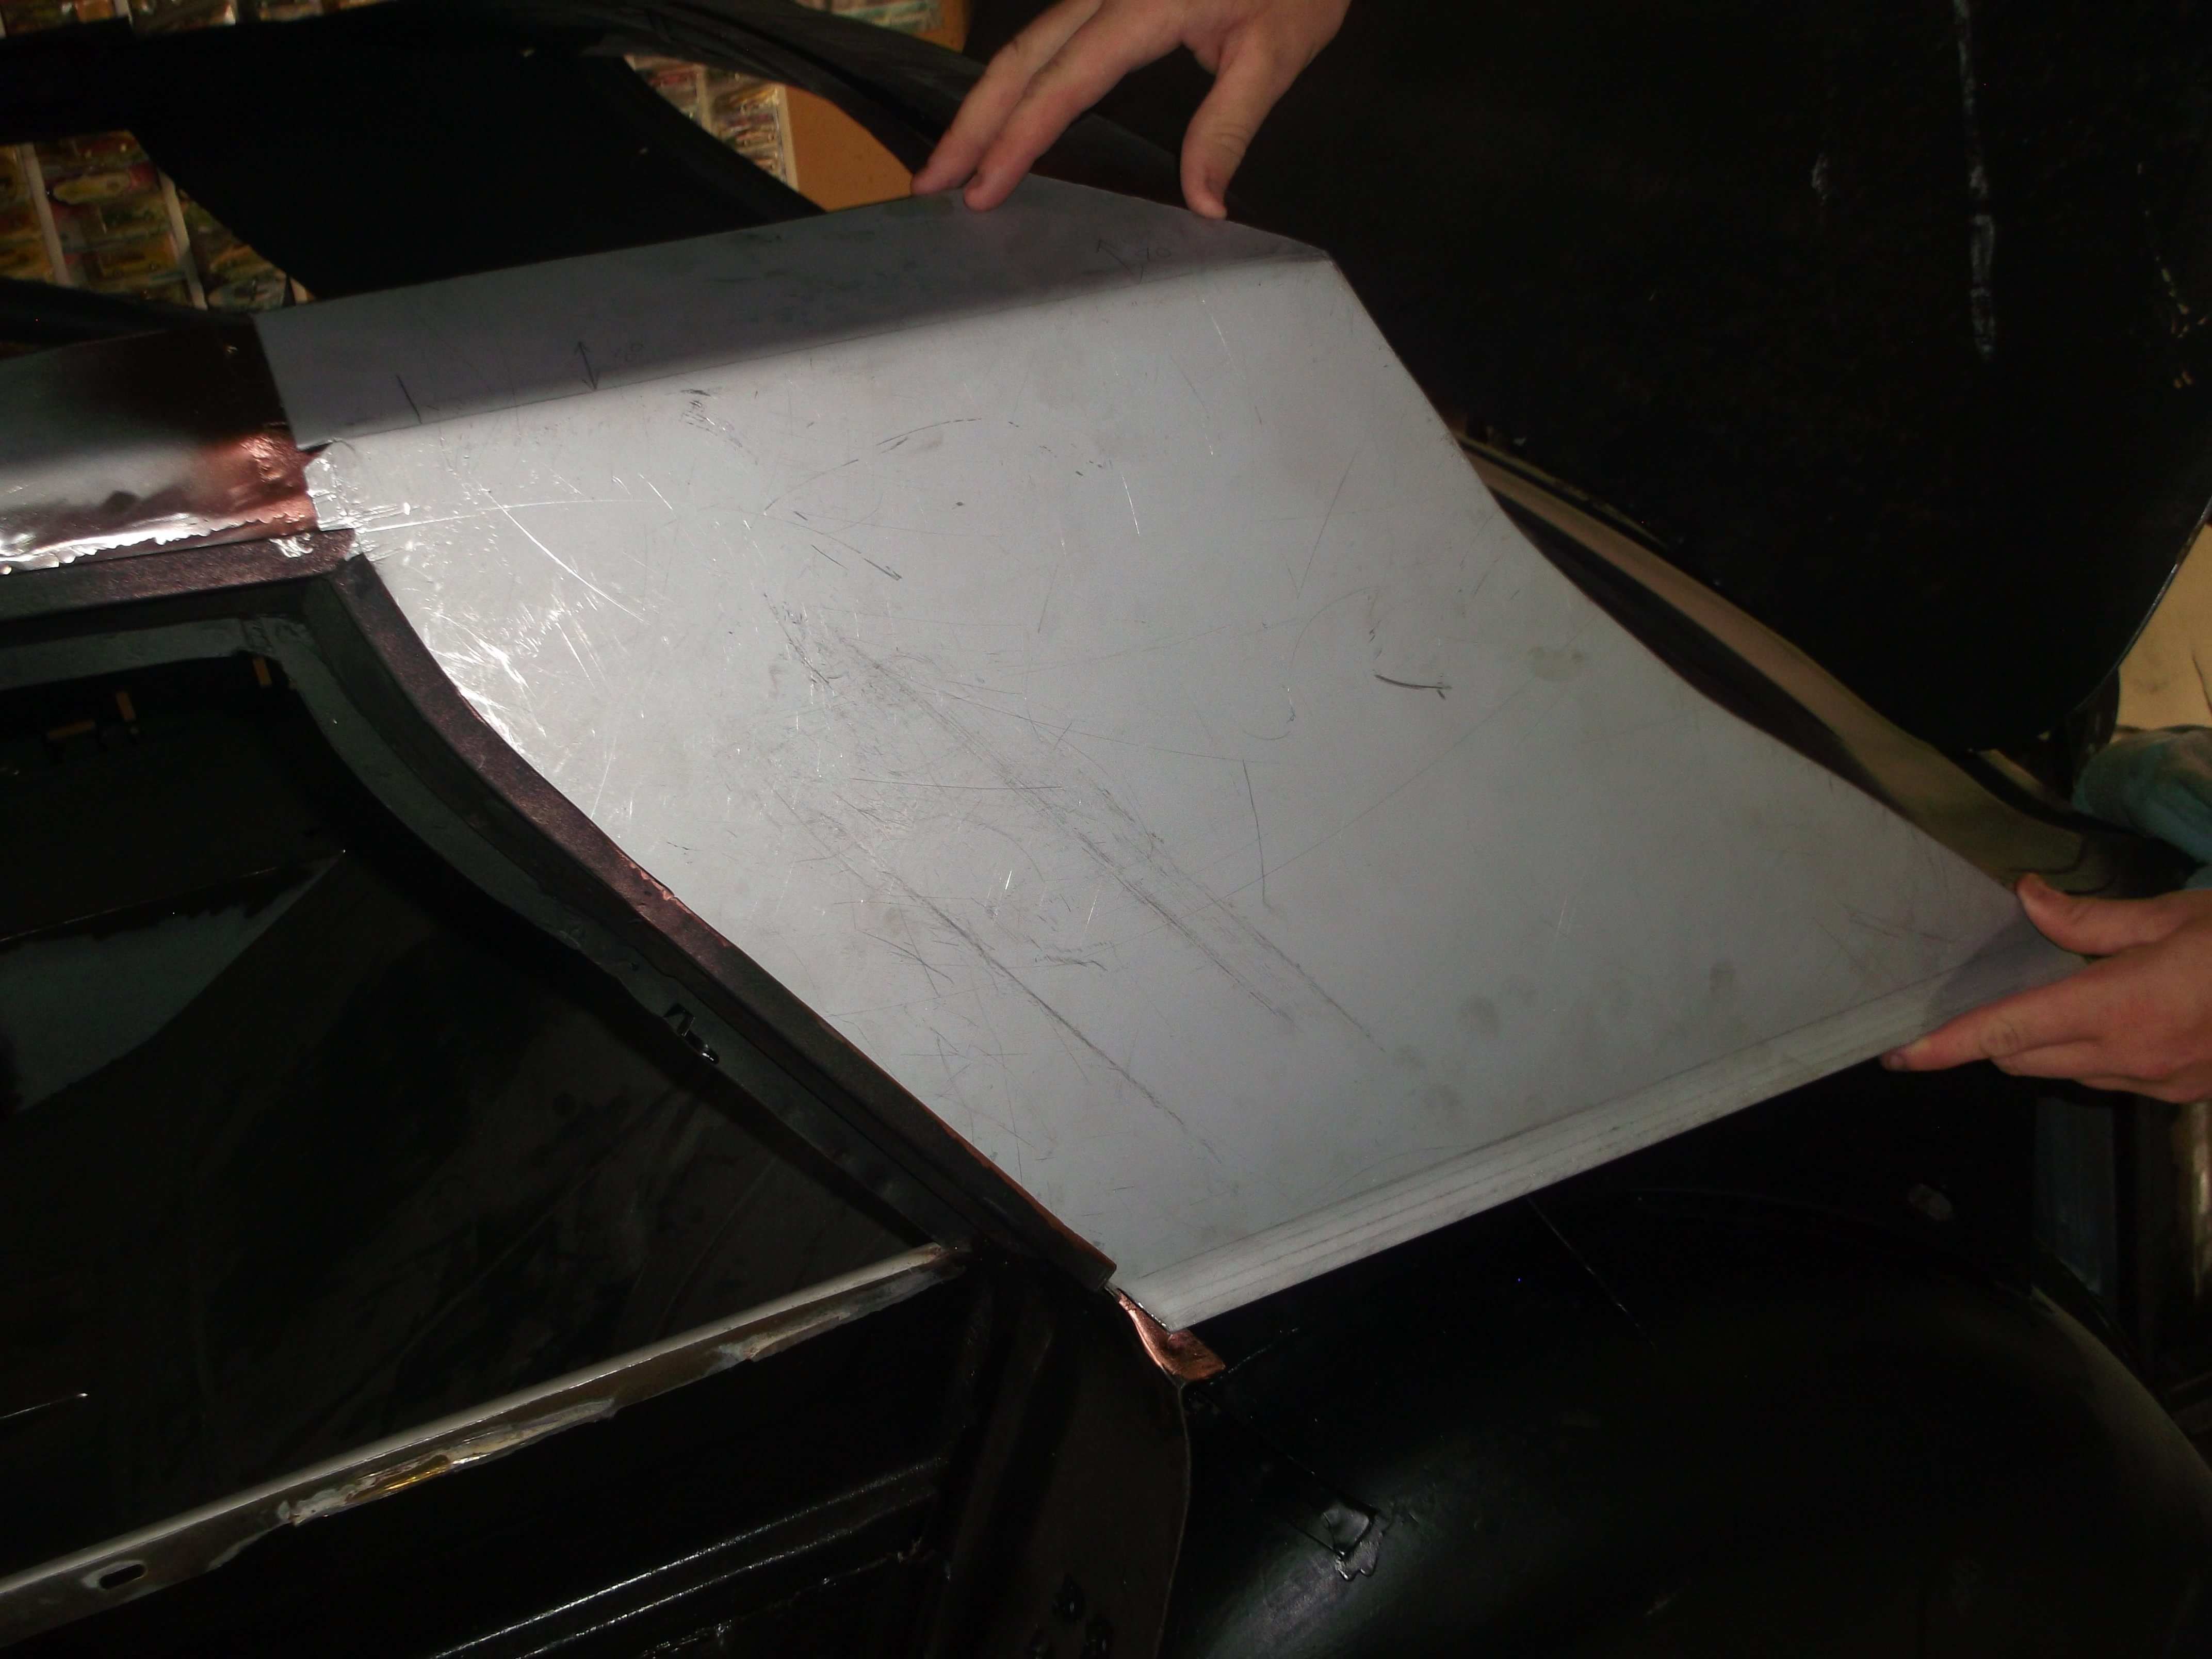
took front guard ack to bare steel
1 point
-
1 point
-
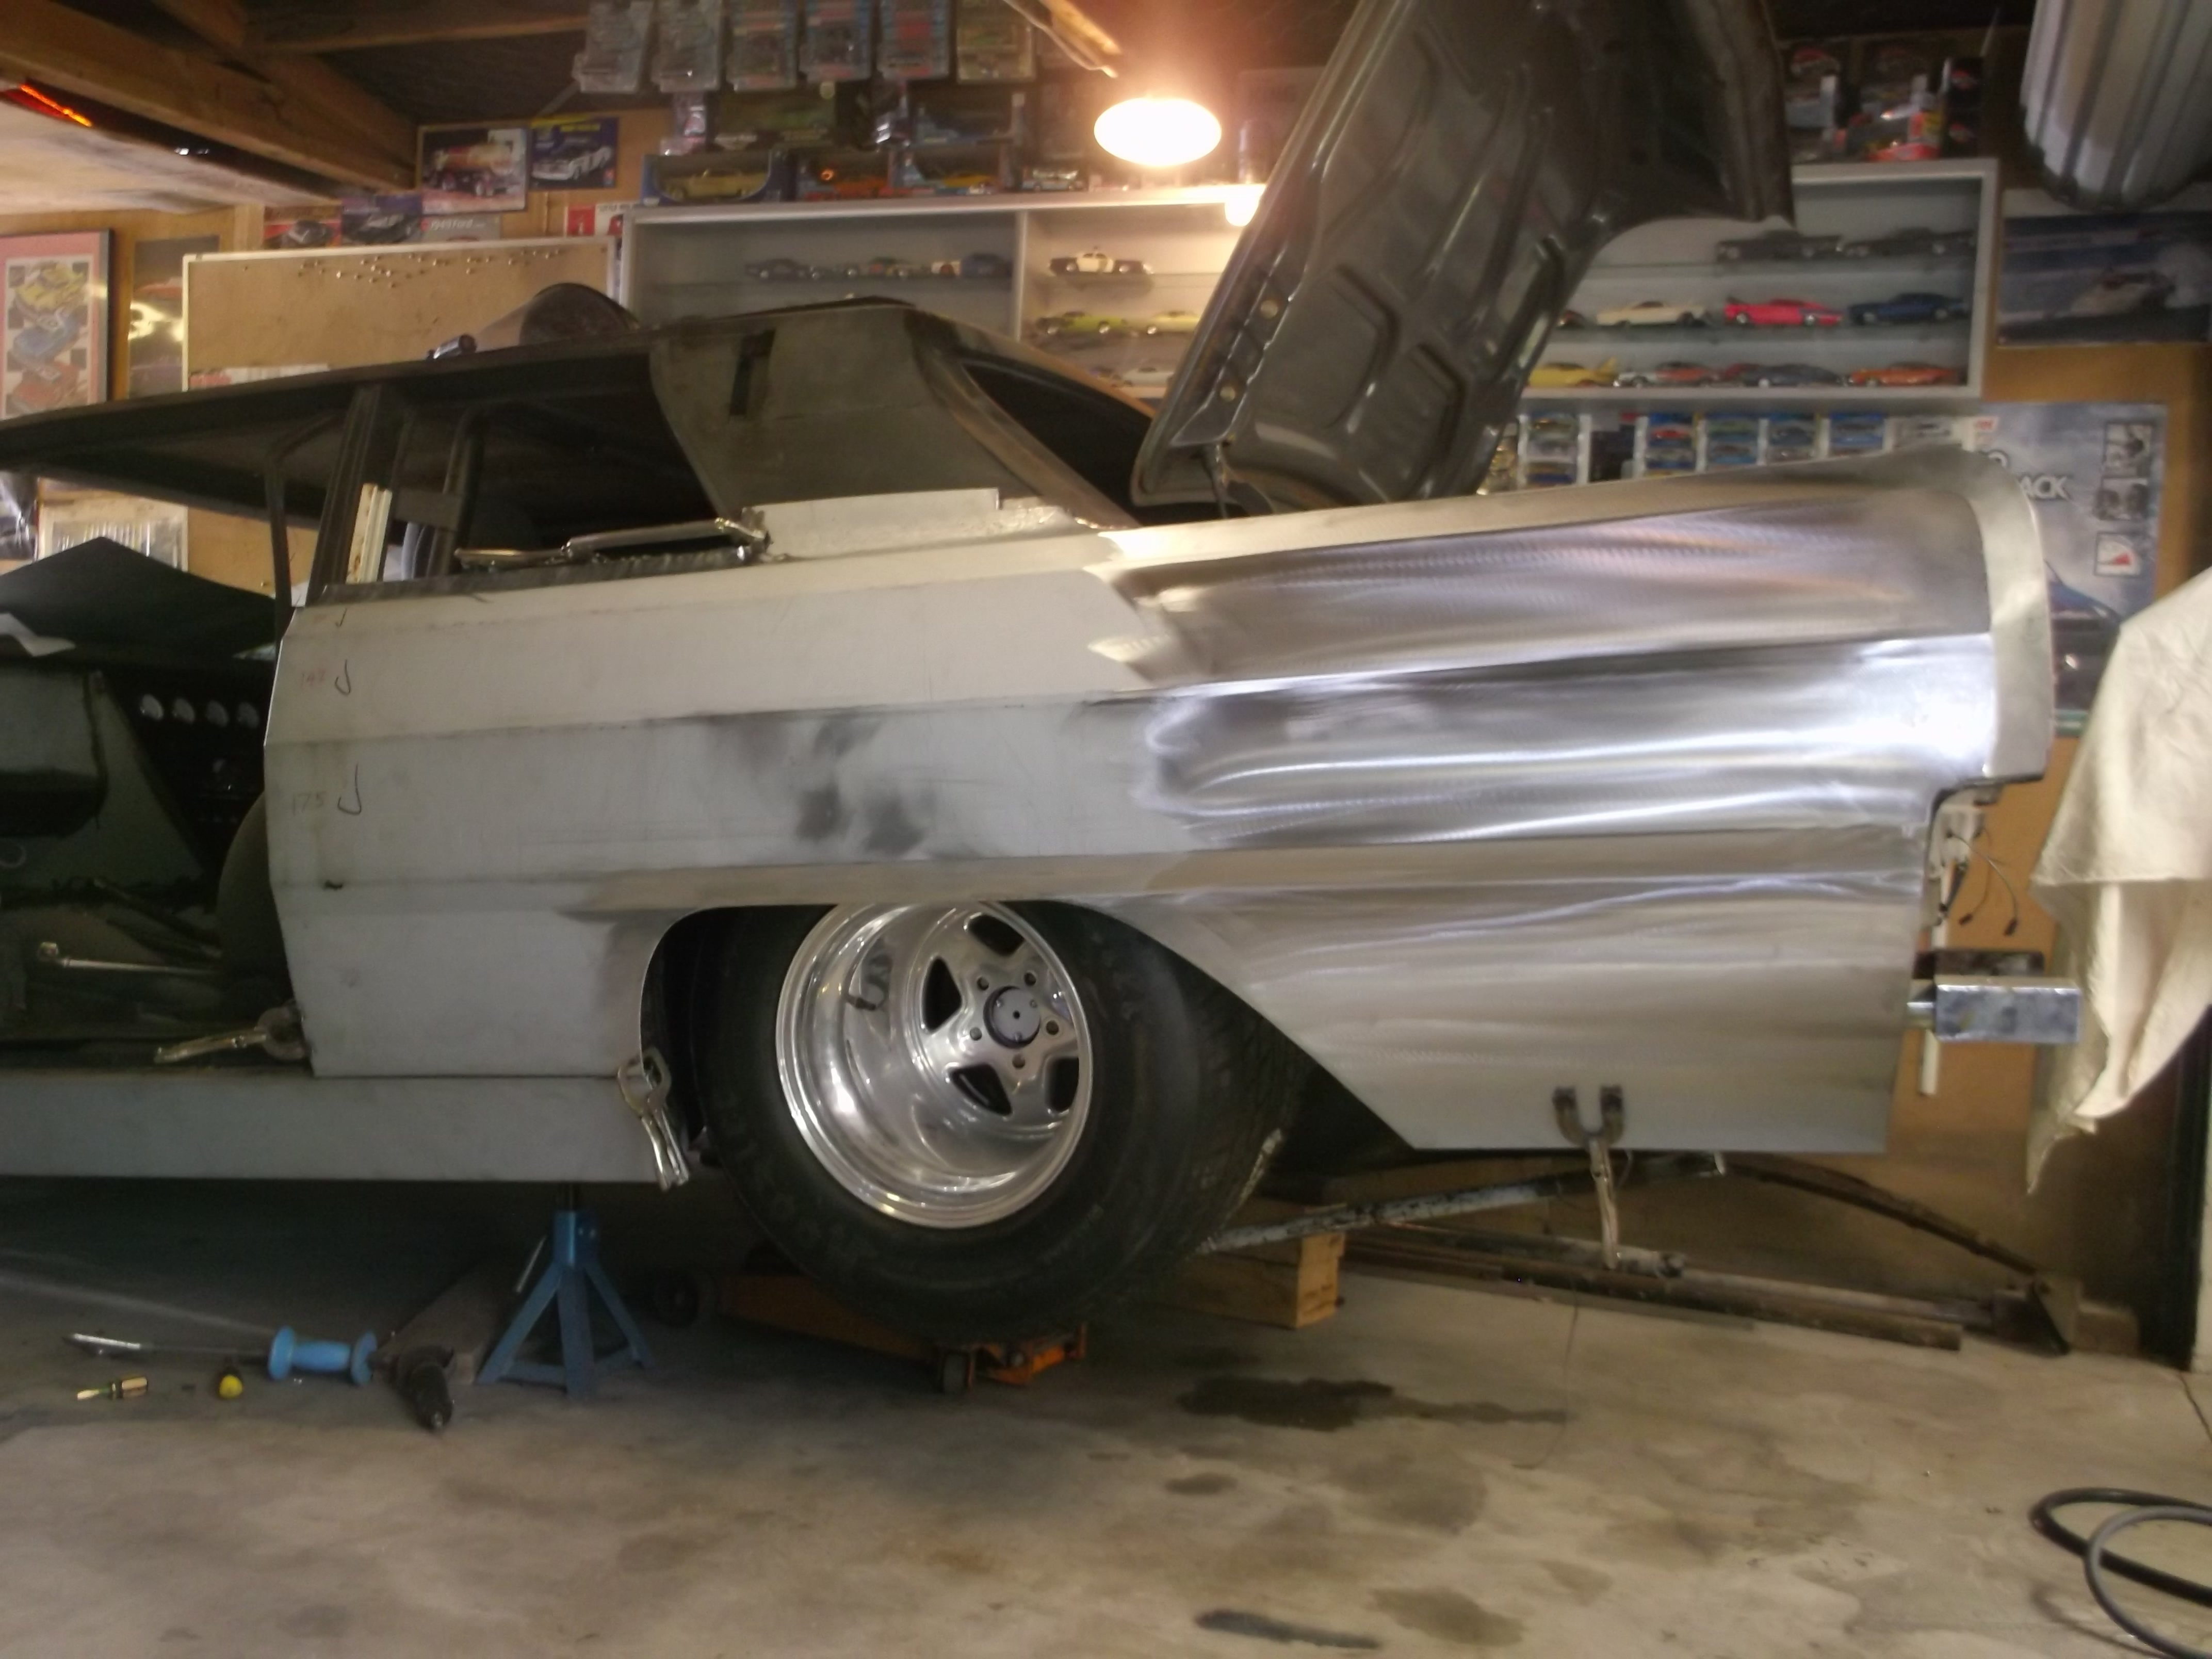
back on the ground now , its 50 inches from ground to top of roof .
1 point
-
Ran it for a bit longer today to get heat into everything exhaust and turbo. VGT is weird when you muck around with the vane control it goes from silent to fucking loud! Turbo is doing its thing but engine has got an electronic rev limiter so cant give give it berries to see what it can do, will disable it. Need to get the SU on and some plumbing done1 point
-
Like all my previous previous projects I've cut it in half and made it longer and lower. Turbo has plenty of room but the exhaust will need a guard over it to prevent skin grafts been needed.
1 point
-
I have finally sorted gearbox with a stock ctsv cadillac tune for the trans, it is like butter now... Will attempt to get to a night speed dragwars meet one night see what she does down the 1/4. I have put 4000 ks on it so far and back to daily driven...
1 point
-
Further engine stripping today, still doesn't turn. Next job is pull the engine out, sump off and see what's siezed.
1 point
-
guard all done ,on to the front guard and door frame next
1 point
-
Have decided to make a more conventional style plenum to try on this, will make it with runners slightly shorter than the blue run. maybe some magic will happen, maybe not. when i tested the current plenum on the starlet it really didn't like it, so that was pretty good sign somethings not right. Made a vid on the same thing a few days back1 point
-
Yup home has been found. Going to need a bit of lengthening to fit turbo and free up room for a jackshaft. It would work as it is though.
1 point
-
1 point
-
rear guard welded on fits great
1 point
-
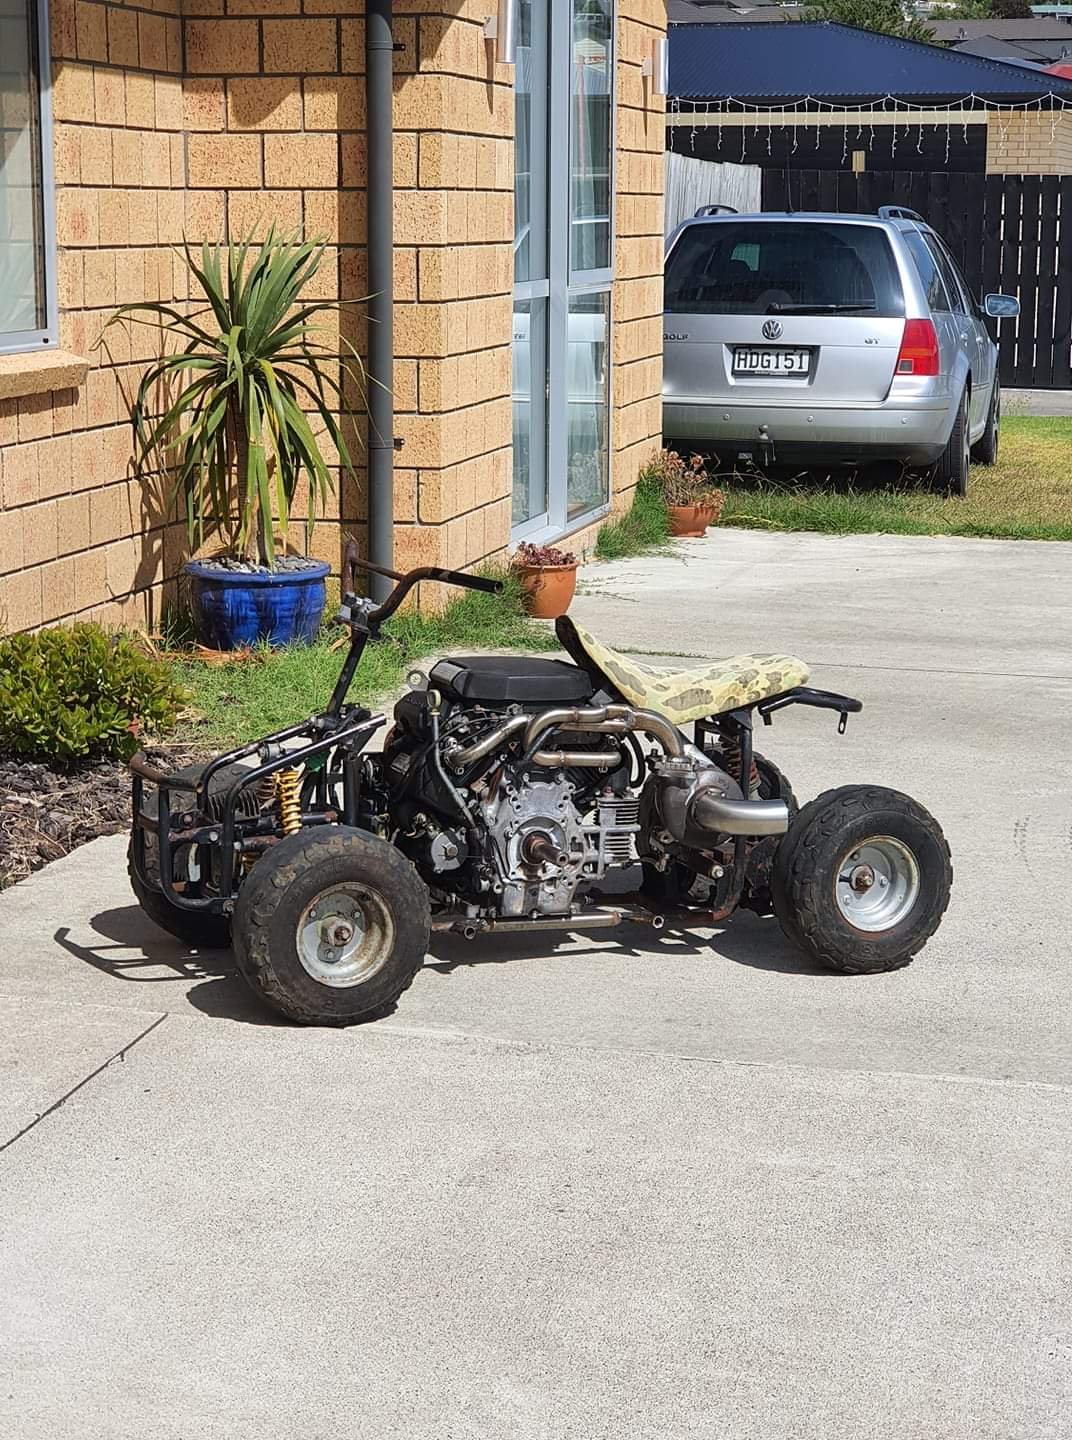
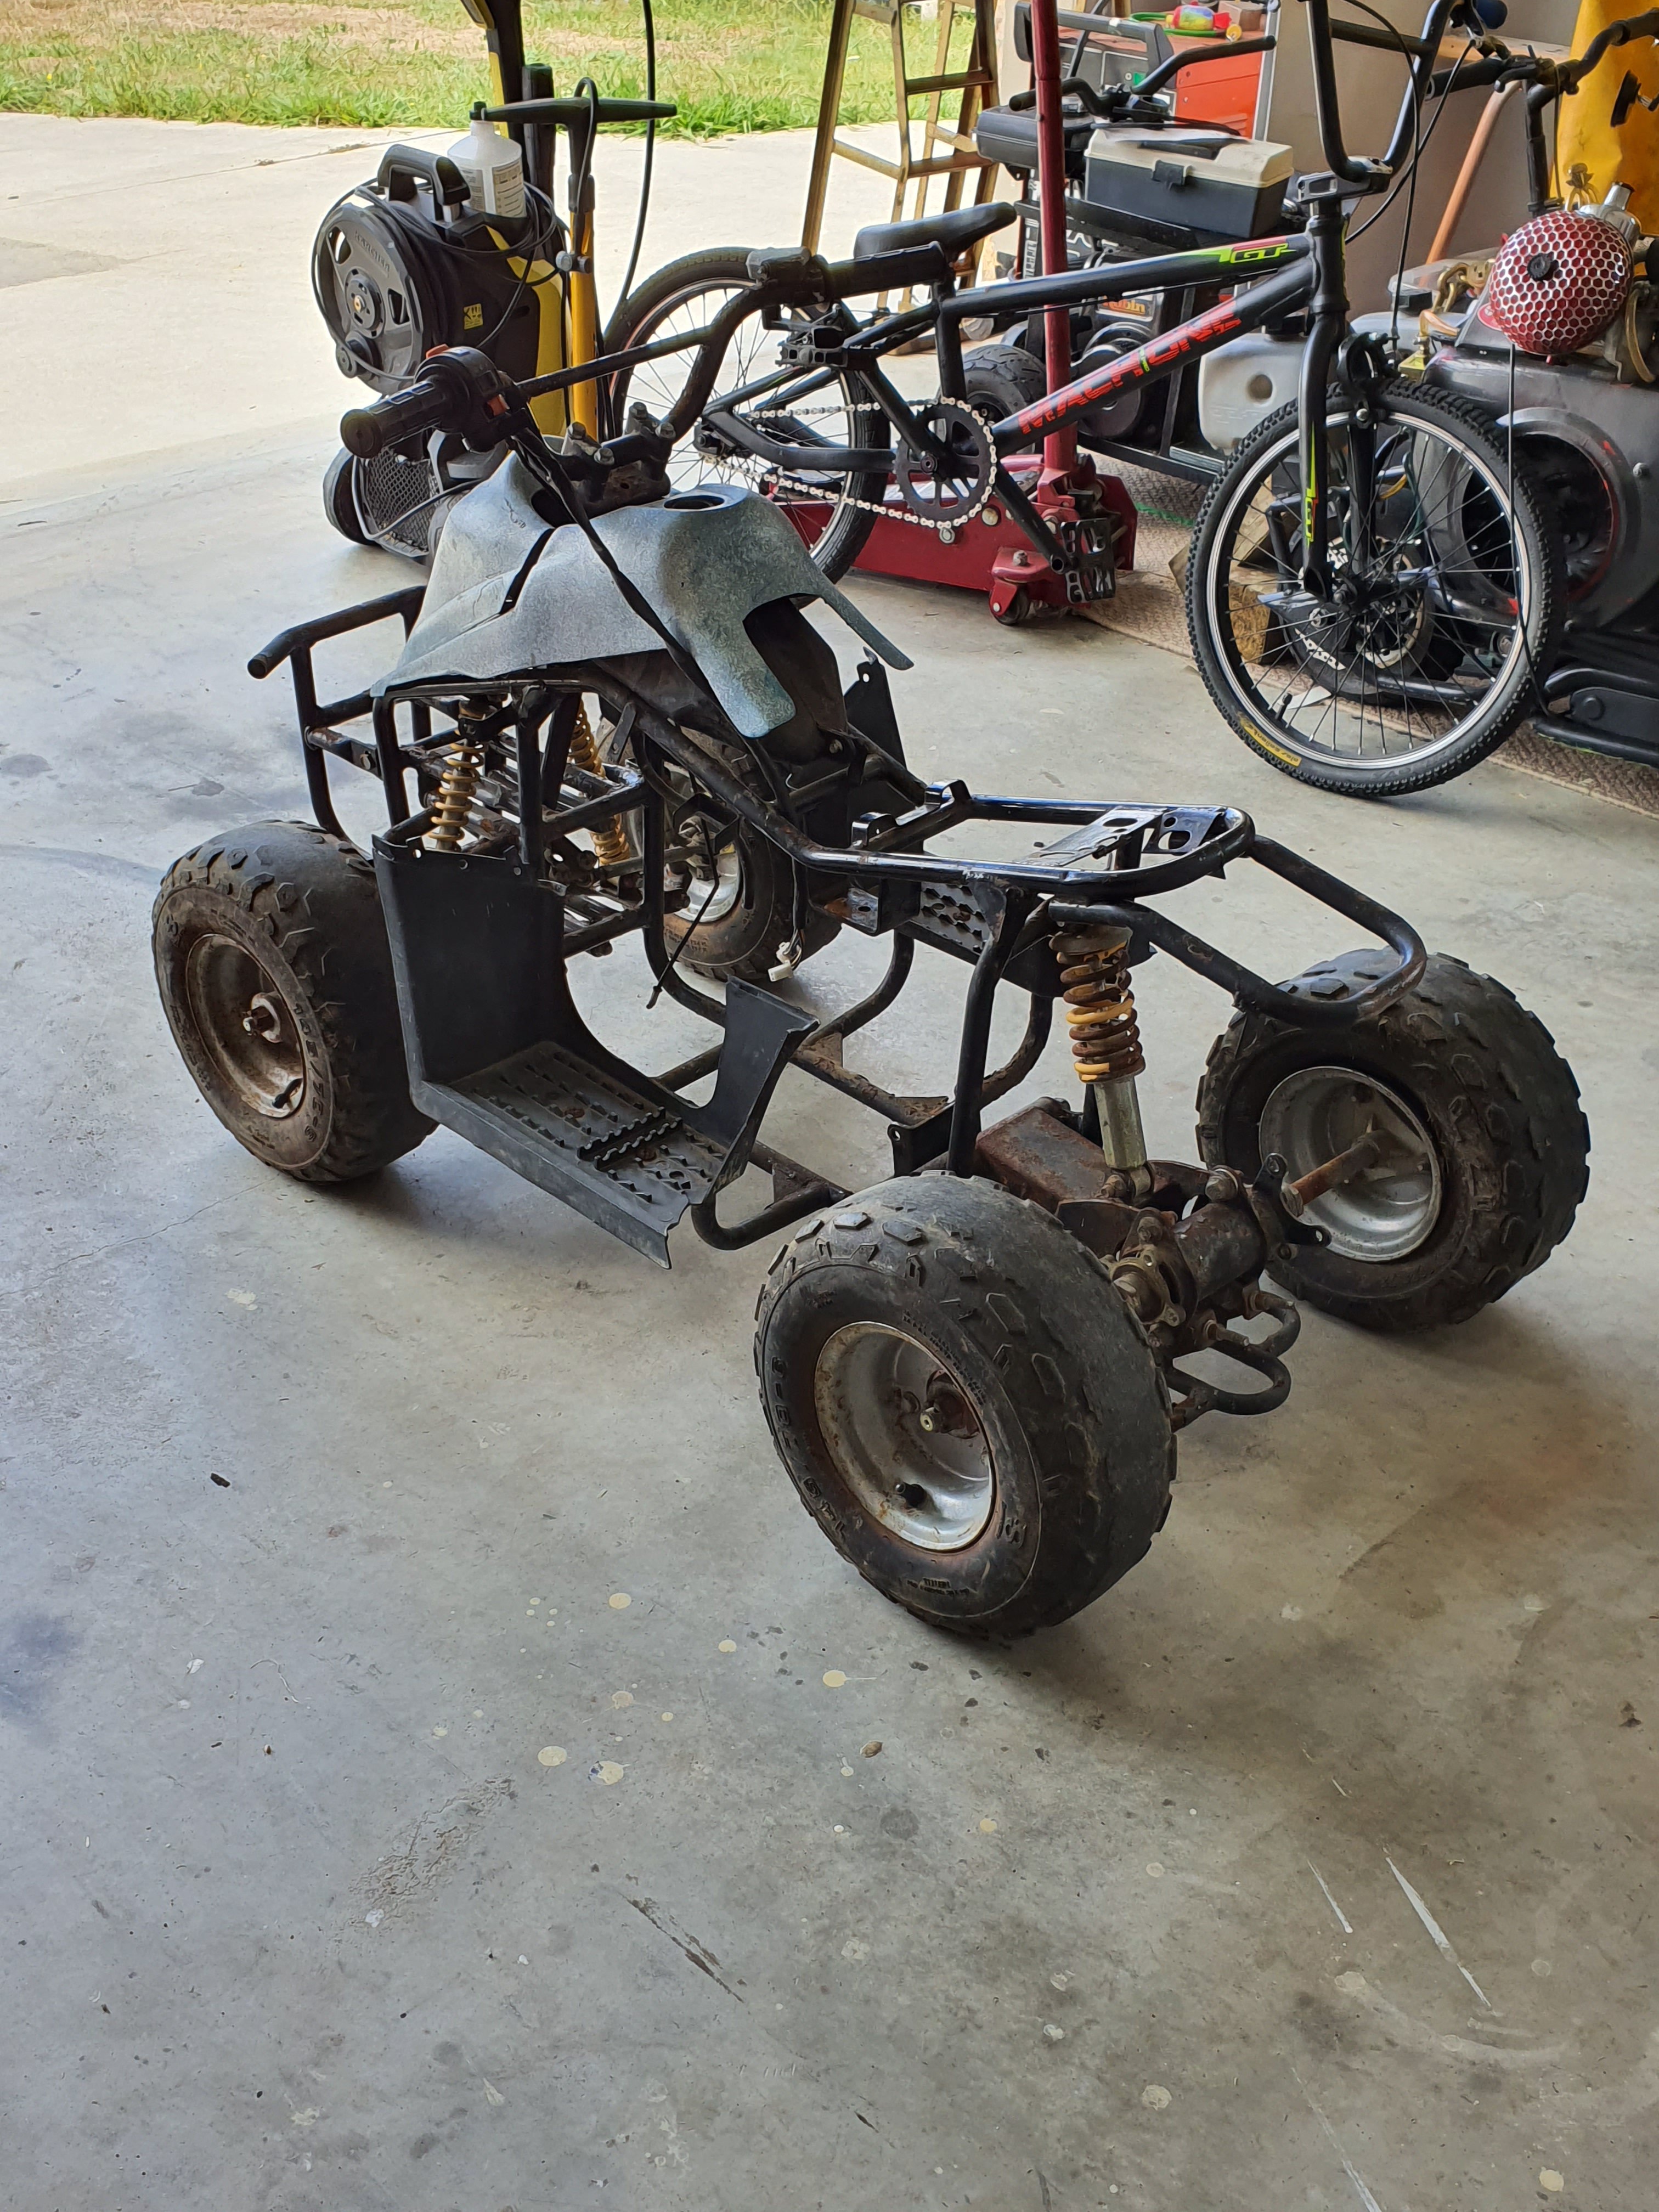
Also bought a $50 Chinese quad today.....
1 point
-
got the roof welded on to day
1 point
-
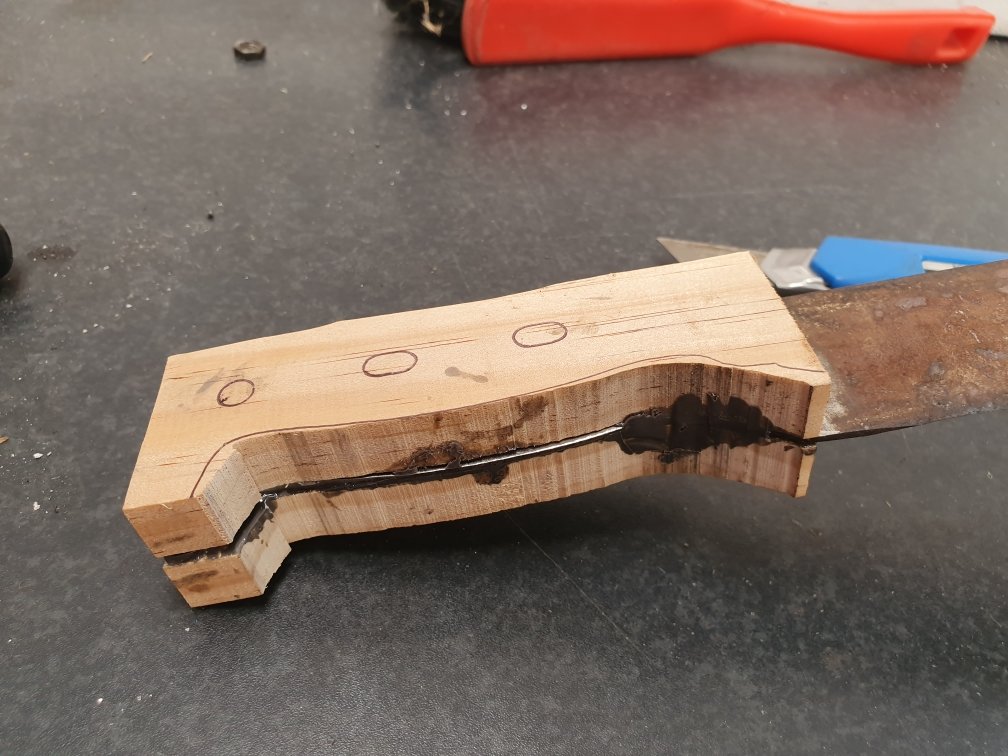
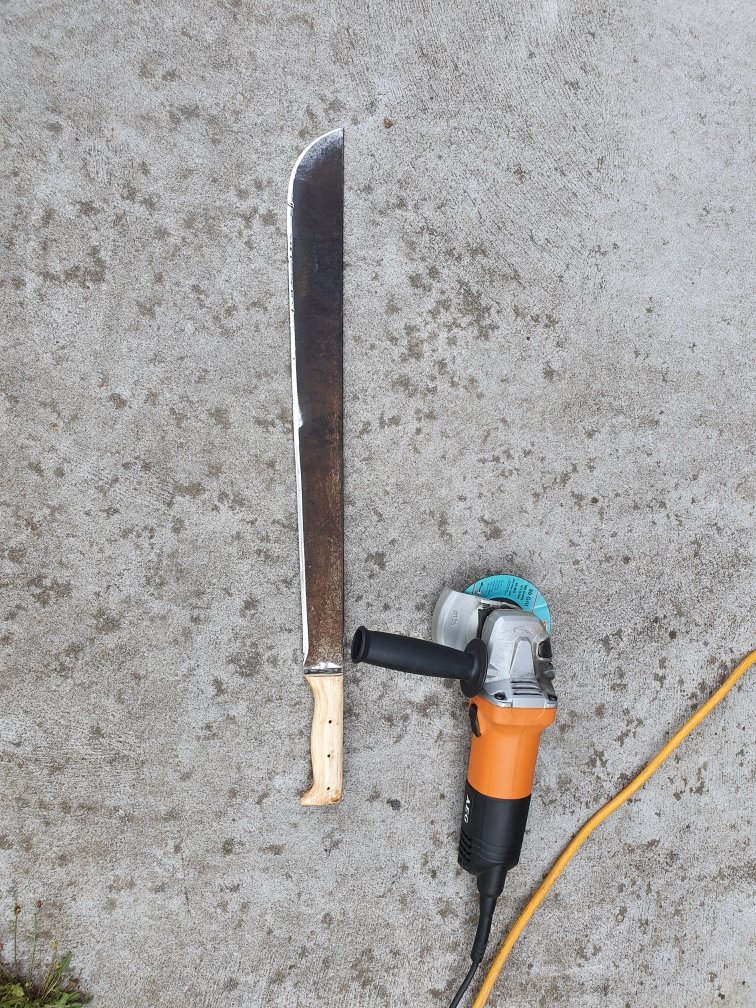
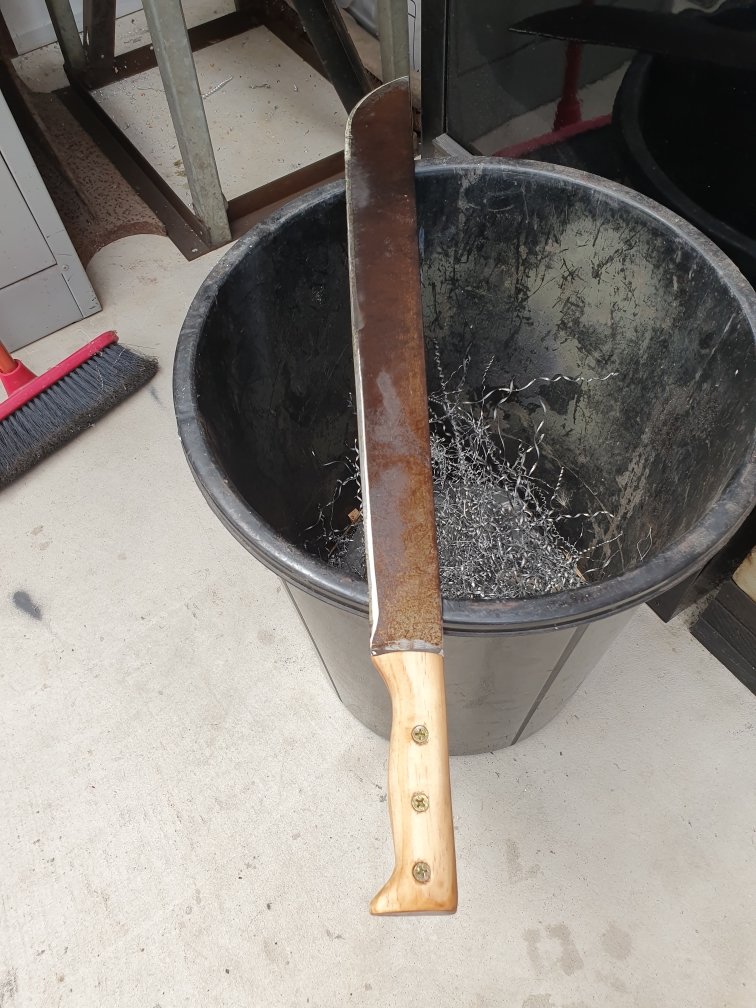
I've had this for over 30 years. Its had 2 other handles in that timeframe and on Wednesday the last handle broke again after 20 plus years...so onto No3... Took the time to reshape it a bit more this time. When I say "took the time" I'm talking 5 minutes to glue it together and then leave it overnight...and about 10 minutes tops to shape it with a flap disc.
1 point
-
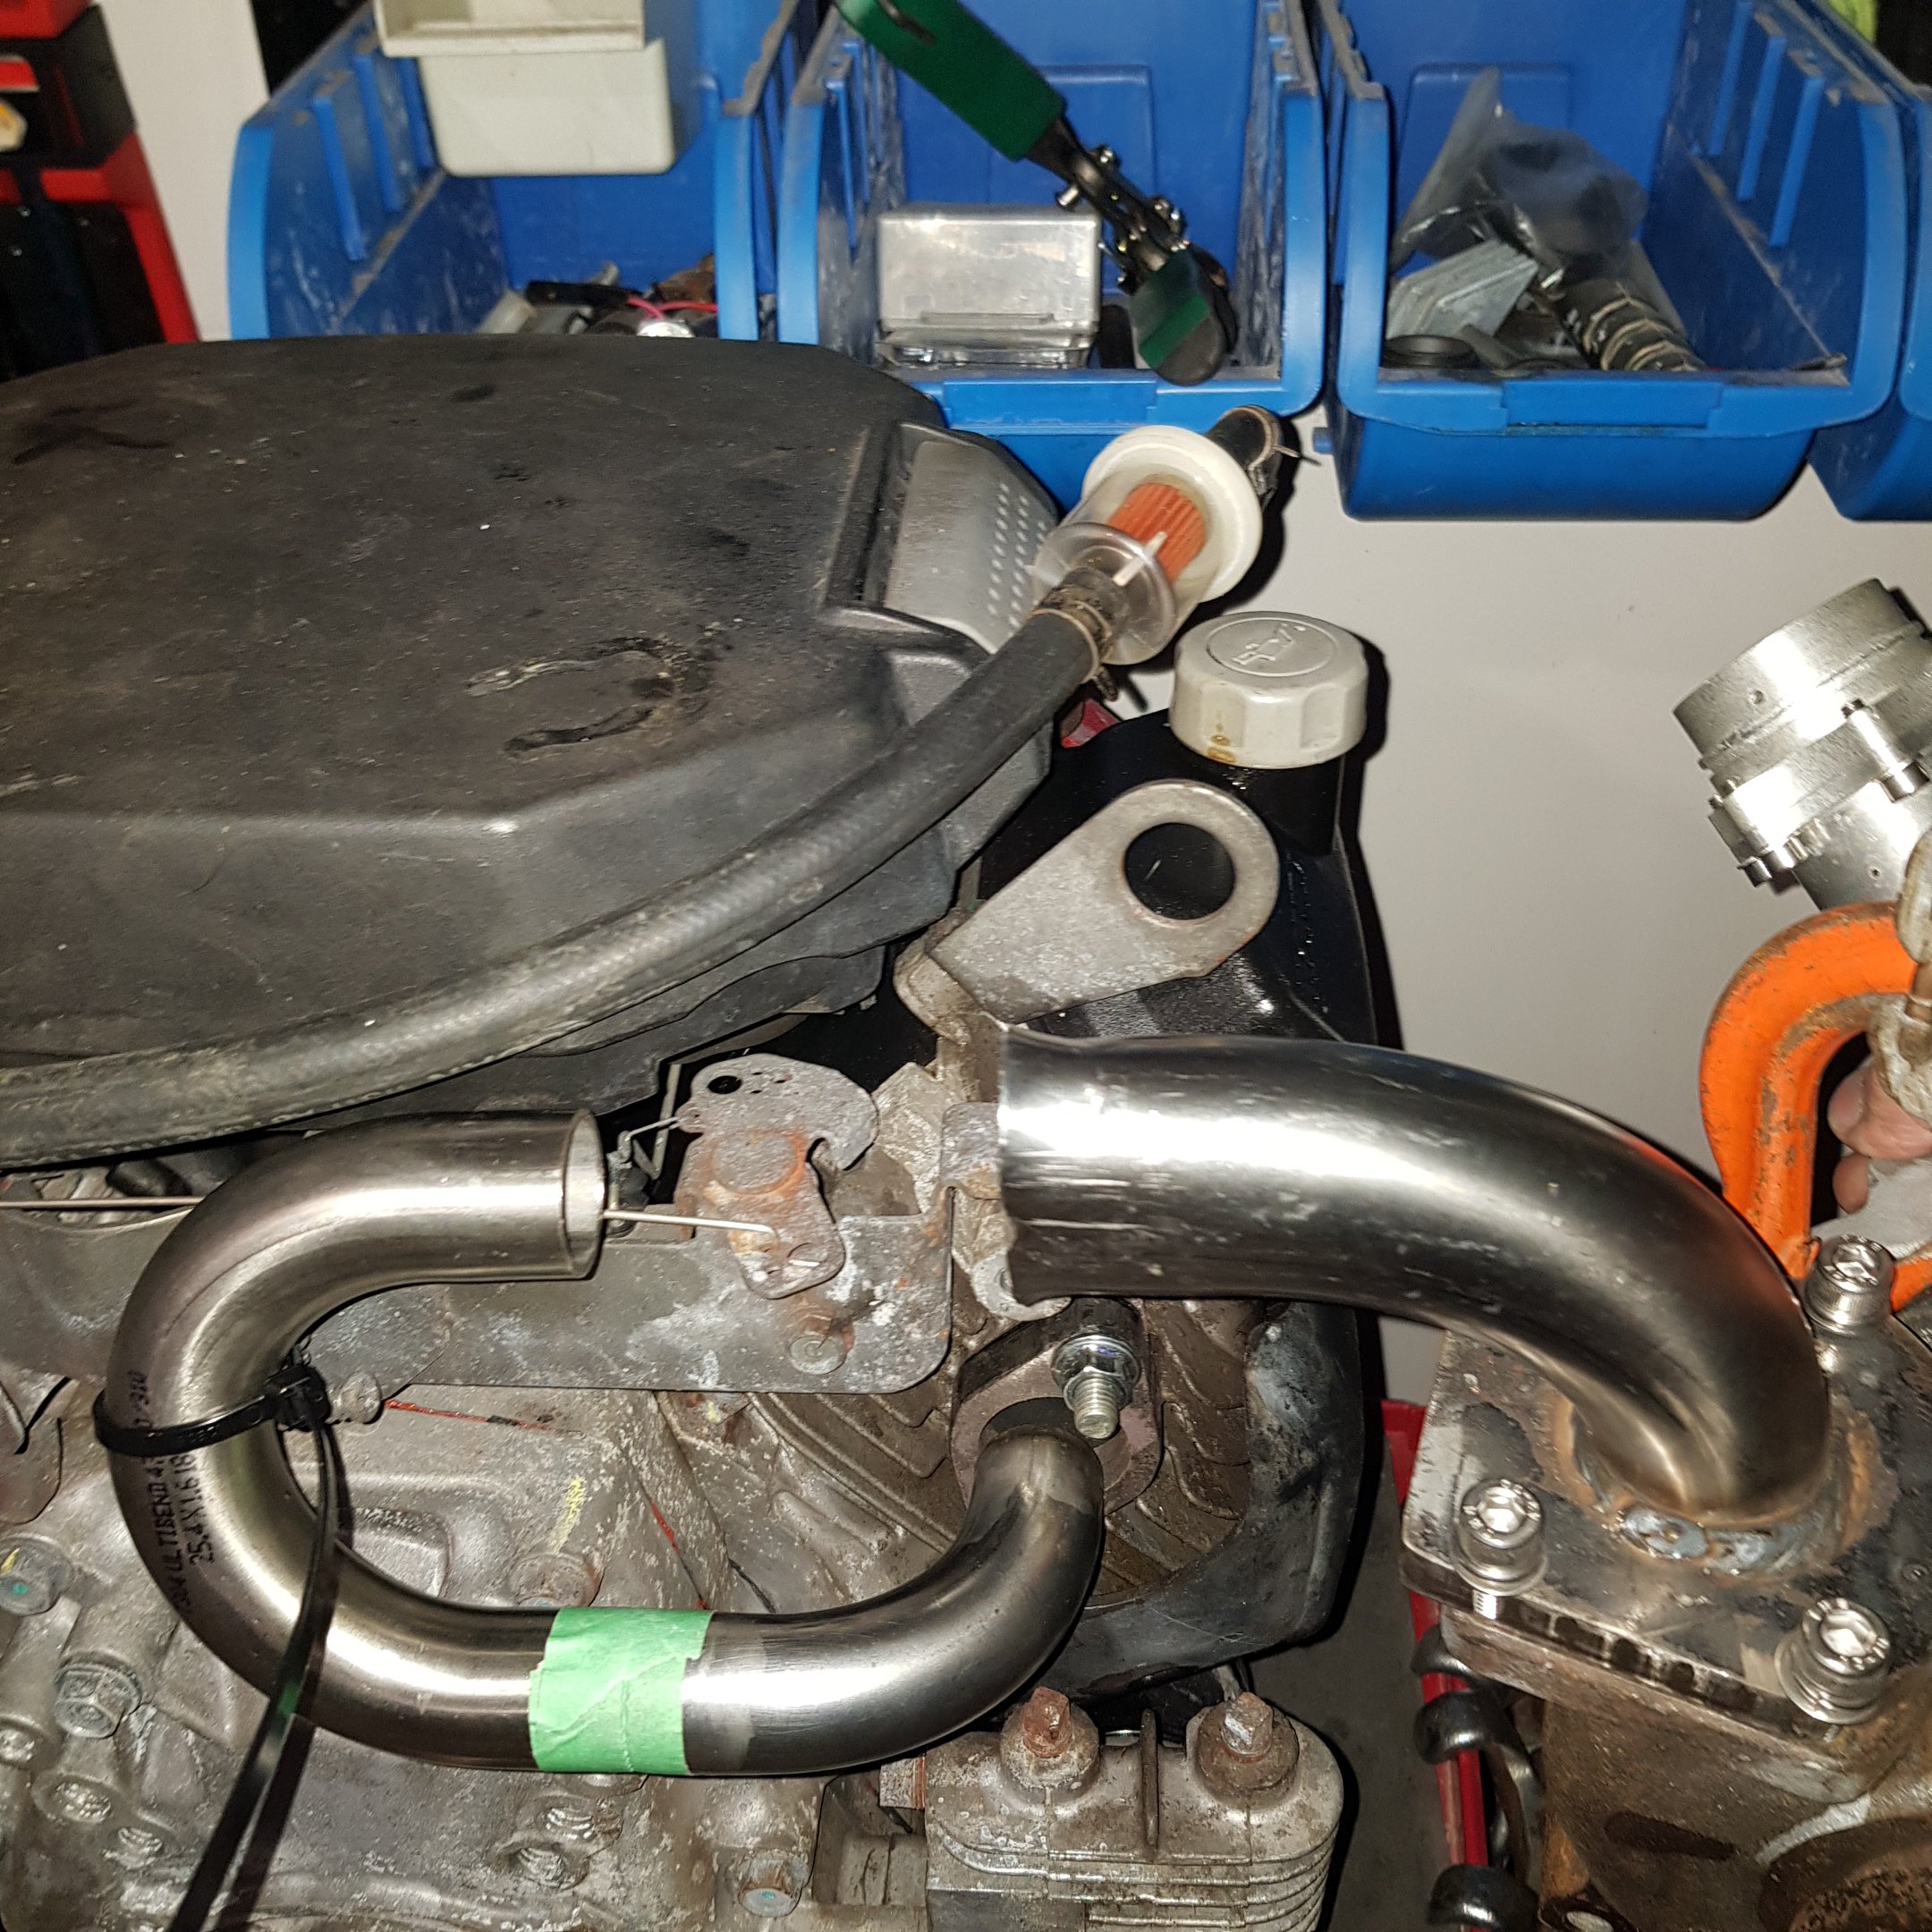
Started it with my zoomies..... sounded terrible oh well better start on some spaghetti headers. Hung turbo where i wanted it and started sitting bends in place going to be easier than i thought.
1 point
-
more stuff. exhaust is all back in. all the plumbing is done, it has a clutch, oil in the motor, power steering fluid all over the floor and save one radiator hose that i cut the wrong end off it would have water in it too. all the wiring forward of the fire wall is finished as well. i had to notch the chin spoiler to accommodate the oil coolers and hopefully it doesn't look to stupid when its all back together. tomorrow i should be able to crank it and get oil pressure up and also test the fuel system at pressure. good. 2020-01-31_06-25-47 by sheepers, on Flickr 2020-01-31_06-25-28 by sheepers, on Flickr art. 2020-01-31_06-49-13 by sheepers, on Flickr1 point
-
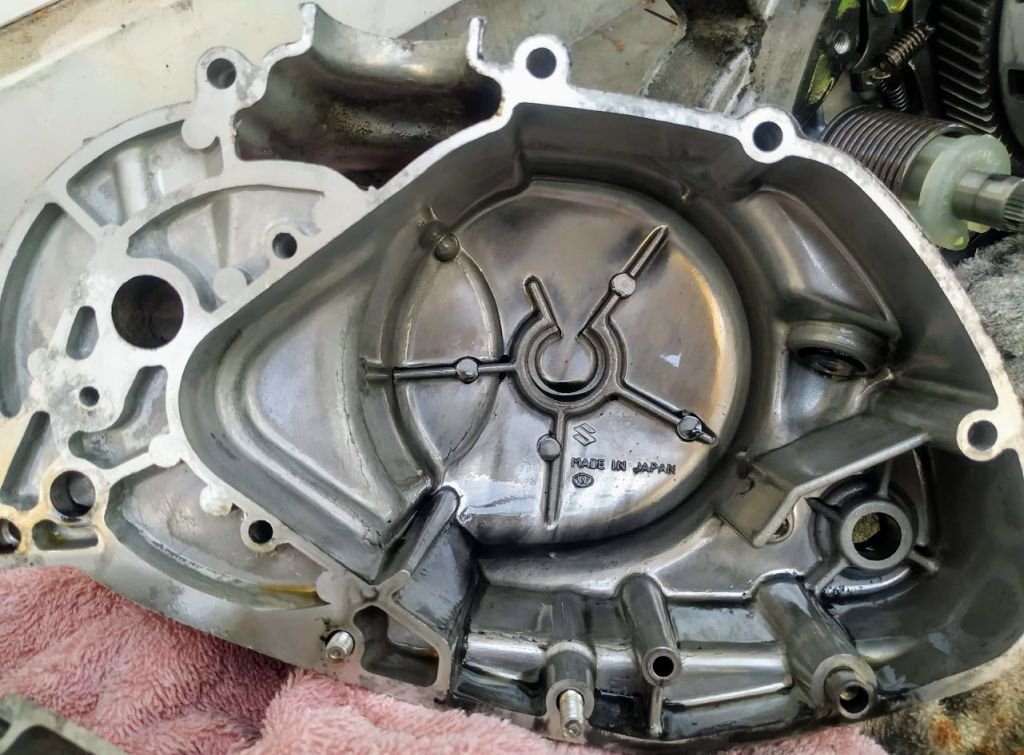
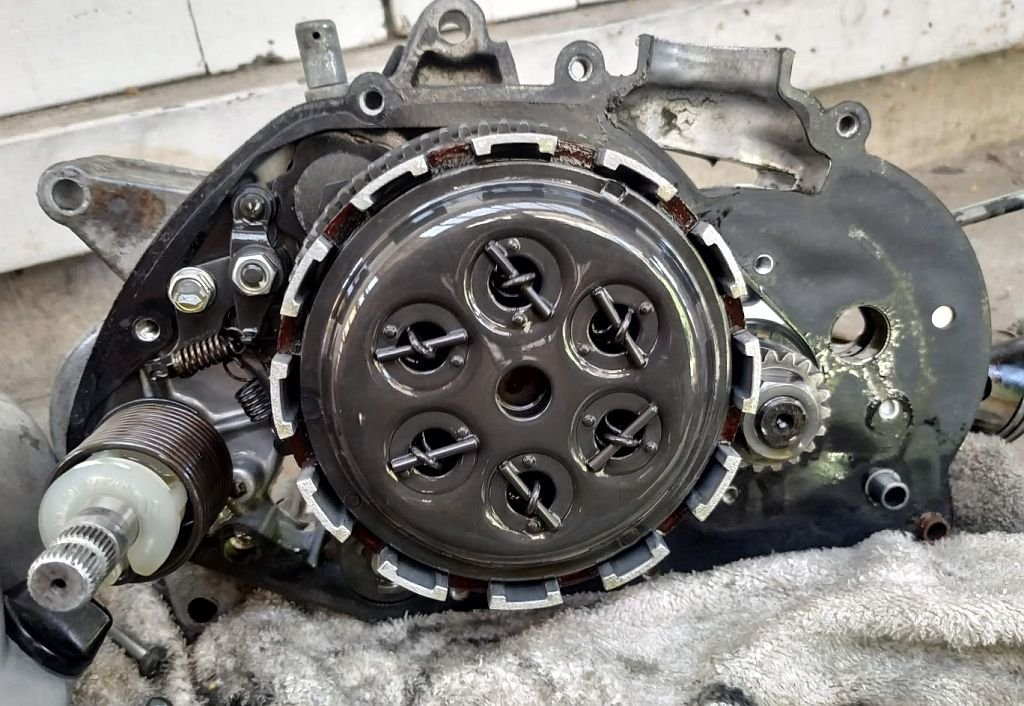
Starting to think this engine has never even had the clutch cover off in it's life! Screw heads showed no sign of having a Phillips in the JIS heads and I even had to use the impact screwdriver on them to get them loose (why didn't I buy one years ago?!) Everything looks to be in perfect condition, and other than what I believe to be clutch dust/gunge covering a few things it's even clean inside! Bit more stripping and another degrease and the cases will be ready to go in my new toy
1 point
-
1 point
-
Started testing some more intake stuff yeh nar didnt run them that long ^ but made this abortion Red line is one of the best runs i could find from the itb setup Blue line is the run from the setup in picture above Green line is the same as blue, but runners cut down 25mm As can see cutting runners down the 25mm moved the peak higher in the rpm range. and starting to push the big loss off the end of chart Cant cut the current runners shorter due to tower clearance. so awaiting some tighter bends to carry on testing. Goal is to try get it to do the same thing as my na setup. get that peak to sit between 7000 -8000 rpm and gain about 15kw up top. depends if the sharp radius bends are an issue or not1 point
-
one more
1 point
-
Nothing to lose so had a crack at it, remembered to measure offset beforehand., just with a ruler from a flat surface.. And a combination of heat, penetrant impact gun and force got them moving... Until I broke my favourite old spoke tool, was a bloody good one too... So out with the vice grips for the last few stuck nipples... And success. All spokes out without breakages. Should be able to clean them up and re-use with new nipples on a new 32 hole rim... Pretty pleased with that as I've already bought bearings etc for this hub...1 point
-
To do list: Radiator hoses 34mm 16571-70040 top 16572-70040 bottom ordered Igniter wiring Install water bypass/ lower outlet Clutch slave install and bleed Bleed brakes Wheel alignment -1.5° camber max 4mm vacuum hose 1m intake to charcoal canister. A few things will be revisited once going/legal. The block I used had been sitting for about 15 years so had quite bad corrosion in water galleries which even after being acid dipped and blown out is still present. For this reason I've chosen not to rebuild radiator untill ivd run it hot and flushed it as many times as possible. You'll also see a horrid top radiator hose made from two with a shoddy joiner. This came in parts bin with one of the three engines I had and after trying about 10 places to match one up I'm not suprised. Have ordered new genuine top and bottom hoses from a tc24 gx61 via amayama but there is 18 day wait time - if they dont come back as NLA. Getting pretty close to start up!
1 point
-
Am going to attempt to install an interior plus some kind of noise insulation so I can hear myself think, Jesus Christ its loud in there! Also fancy new reel up seatbelts and see if I can get the ragtop to actually work.1 point
-
All broken down for its date with the ultrasonic bath at work. And polishing of the external bits. This engines getting an SU as well will have some cool shit done to it
1 point
-
Goes again, everything seems to work a lot better so far. Main power feed from battery and fuse box now in passenger foot well. pretty much the only place it would fit Made catch can that fits where fuse box used to be. some fresh spraycan paint even1 point
-
So had a moment. Will it ever go again? Maybe As said somewhere up there. ^ Was having some electrical issues. I done a half assed fix, which made it better but look even more shit and still had issues. Short version. All the power feeds go around the truck about 6 times before ending up where they need to go. putting the battery in the back made things worse as i just re-fed the main fuse box. beside the rad overflow bottle. I was actually trying to find a spot to put a new oil catch can. Janky wiring was annoying me and in the way. fixing it moved up the list.. Plan is to move the main fuse box into the cab. This will shorten the main power feed from battery. Can then grab power for all the efi stuff & fans directly off the battery feed. Have managed to drag most cables back into the cab that ran to fuse box, just leaving the wiring for the lights running under the guards. most of the main feeds look to be the correct length to plug straight back into fuse box without cutting. so thats a win. Fuse box that needs to be tidied up and installed in cab.1 point


This leaderboard is set to Auckland/GMT+12:00