Taistorm
-
Posts
2,102 -
Joined
-
Last visited
-
Days Won
2
Content Type
Forums
Downloads
Events
Gallery
Everything posted by Taistorm
-
Jesse's 1981 corona mark ii grande discussion
Taistorm replied to Jeffs_Emporium's topic in Project Discussion
Advanced seals are awesome to deal with -
The last 5 cars I've owned ranging from early 80s to 2010s have passed WOF first time with about a 50% strike rate, only failures have been actual issued I've missed (e.g loose tie rod end, rust on a support panel). Most of the time this was through vtnz in Browns Bay who have been very reasonable. The old south African bloke there loved the old mitsis that I would bring in.
-
My old work had a small pneumatic double diaphragm pump with presslock attachment to various fittings depending on the engine. Was cheap and worked.
-
Check the terminals. Make sure the battery posts and lead clamps are clean and tight. Check the earth and the contacts at the starter. Probably not the issue but these get overlooked so easily, often.
-
https://www.wish.com/product/upgrade-41pcs-auto-terminals-removal-tool-set-car-electrical-wiring-crimp-connector-pin-extractor-kit-for-car-repair-car-crimp-connector-pin-extractor-5dbaa48b0b61670deb7c4ed0?hide_login_modal=true
-
You can get a 'good enough' keychain of depinning tools off wish cheap as chips.
-
Awesome build man! Turned it super clean.
-
Man this build just blows me away Everytime I read through it. On another level!
-
DABUZZ'Z 1971 MAZDA CAPELLA RE + New 74 RX4
Taistorm replied to dabuzz's topic in Project Discussion
How good man! I saw Choppers post yesterday on insta, looks so sweet. -
I'm pretty sure @OSM Garage specializes in torque wrenches. He might be able to help you out/sus you a deal.
-
Give Luke at Advanced Seals in Silverdale a call. He might be able to provide other alternatives that might help the issue.
-
Could just knock the studs out so it sits flat and use a softish punch to whack em on easy or prop it up on something between the studs.
-
Has he looked at rebuilding it? I'd take it to AES off paramount drive in henderson. Probably cost more than rock auto but much less than $500
-
Not sure what the seals are like but with most seals if you can get a sample/dimensions/bring the housing and shaft in your local seal shop will probably have something. Advanced seals in Silverdale are awesome to deal with, also the likes of ABD are also on to it.
-
Cheers for that man, will have a read through and forward it on. Might be worth having them speak to another accountant for other opinions/advice as it sounds quite similar. Definitely gonna keep an eye on this thread as you're doing an awesome job!
-
Are you able to pm me with further details in regards to the taxing side of this. My parents are going through a similar process but (selling one section to me for under market value and selling another for full price) for a recent subdivision (only 2 sections). They've been advised by an accountant that the sale is included as a second income/income tax, addition to their standard earnings so the sale price less costs to do the development will be the amount they're required to pay tax on, pushing them to pay 39% on that final figure. Interested if there are other ways they can go about it (not trying to avoid tax but this is essentially their retirement safety net so the more they can keep from this the better obviously).
-
Sounds like a charging issue now haha. I'd check the alternator belt and make sure it's tight, then jump it and test it's charging voltage.
-
Yeah definitely sounds like battery. Check the battery posts/terminals to make sure they're clean and tight. Also check the main earth lead and terminals as these sometimes get missed. If these are sweet, jump start it and see if it goes. If it does then check to see if the battery is charging right (should be around 14v while running, if not could be a faulty charging issue or even a loose alternator belt). Also if you can, remove the battery and take the battery in to your local repco or garage and ask them to test the battery (high load test), this will determine the batteries life pretty quickly.
-
Check voltage drop across the battery and also at the starter and also voltage to both main 12v lead to starter and Exciter wire. If these are bad then either your battery or your starter could be cooked (could also high load test your battery if you have access to a tester to rule it out). As you've mentioned as well also check terminals and wires (as well as Earth's) if these are good bridge the starter wires and see if it starts, if it does then it's probably Exciter wire/ignition wire related. If not common symptoms like the starter solenoid just free spinning or only throwing out and not spinning, or not throwing out at all means that your starter motor is probably gone.
-
Damn that's cheap
-
Chopper at Choppers auto body shop in Riverhead can custom make coilovers to suit whatever application with everything required to pass cert.
-
All tech in wairau usually carry pump kits. Alternatively if you're just after seals to suit, remove the seals and take them in to advanced seals in Silverdale, they're awesome to deal with and cheap as.
-
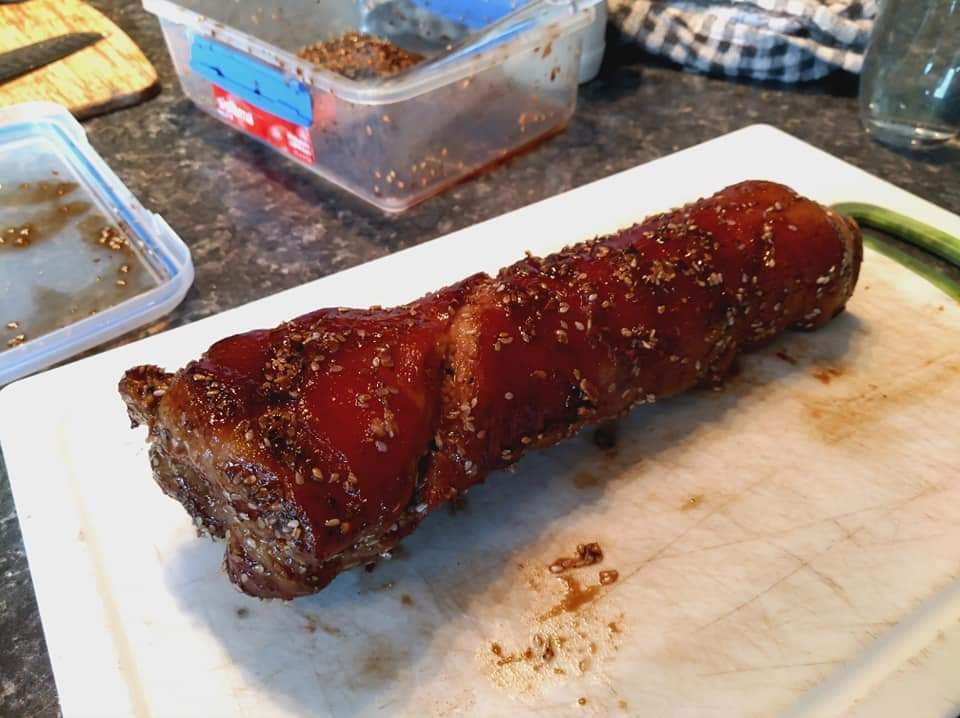
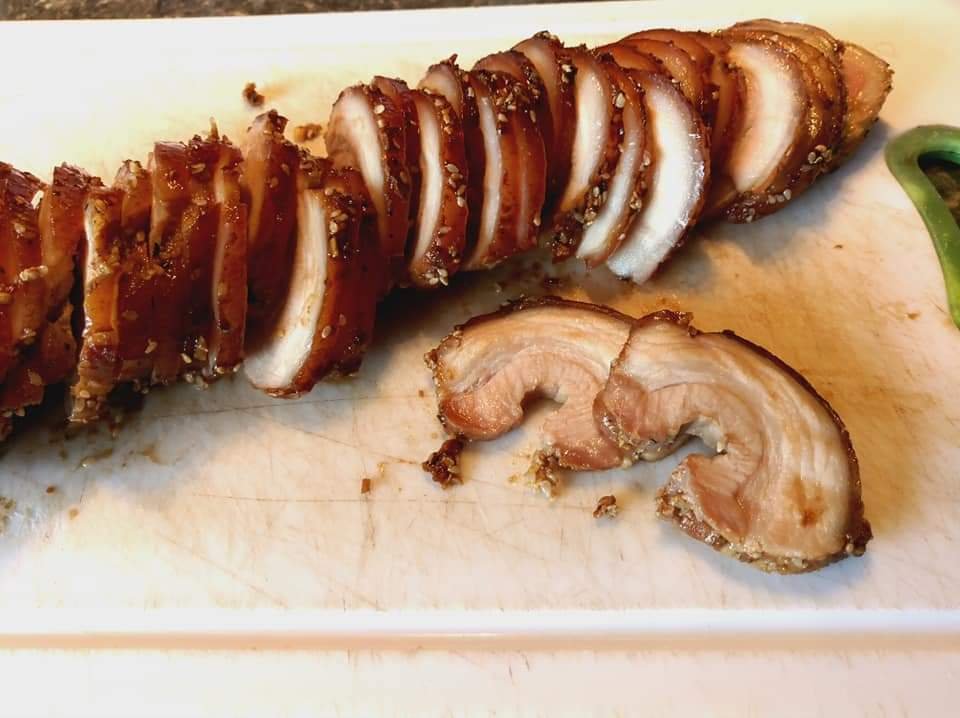
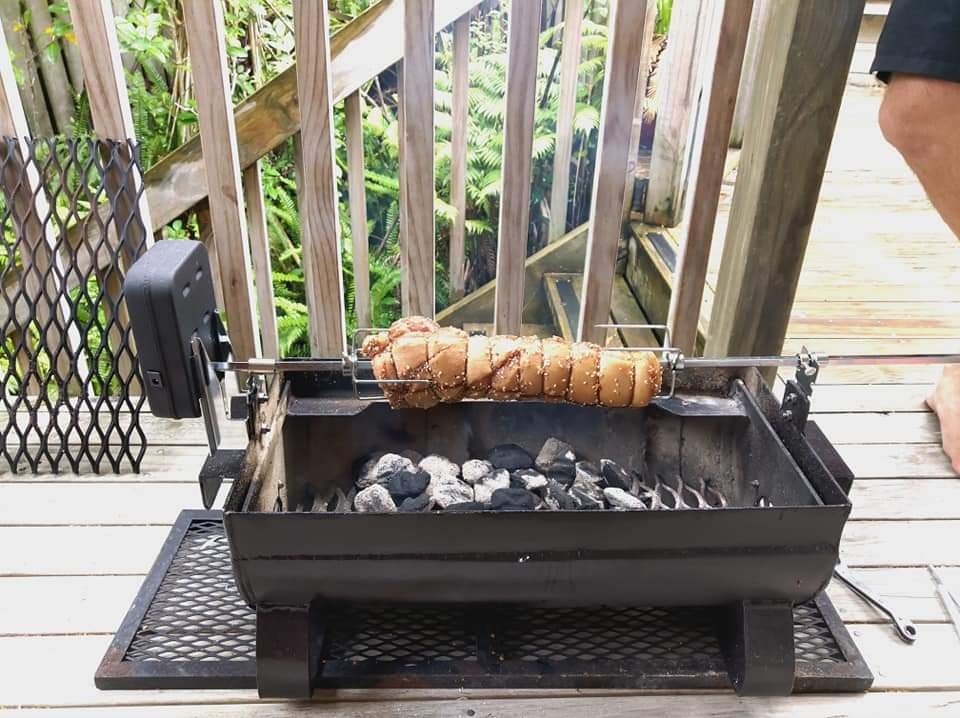
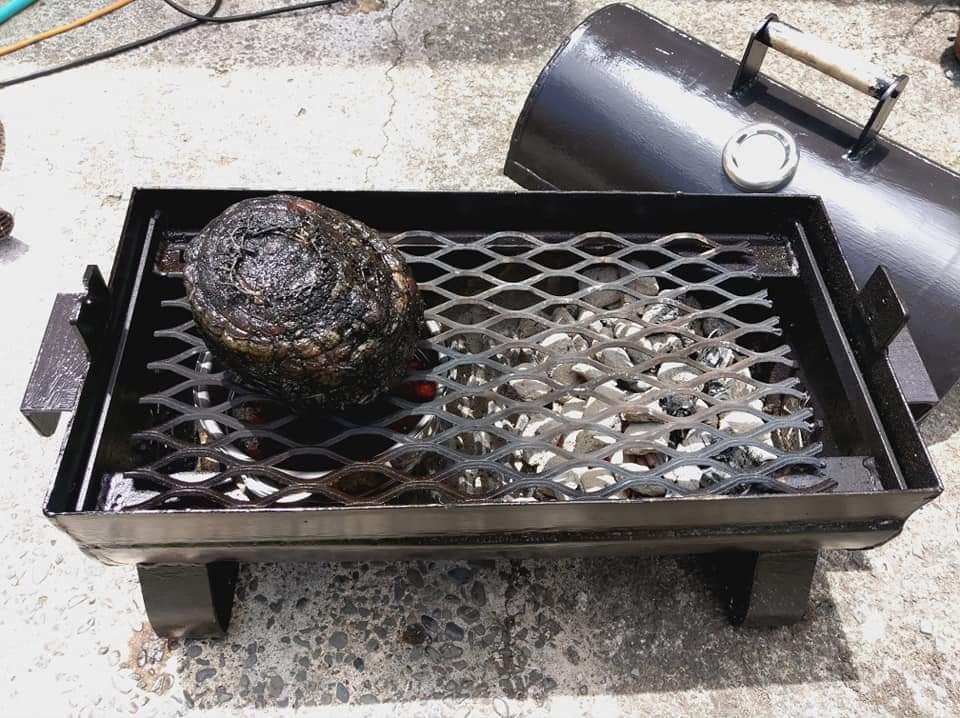
After 2 hours on the rotisserie and the internal temp to just over 60 I took it off, wrapped it and let it rest for about 20mins. Removed the string and cut it up and damn, not too bad. Juicy and tasty as, sticky on the outside. Made a quick sandwich for a snack and will be using it in noodles tonight. Probably freeze some of it for future ramen.

- 14 replies
-
- 17
-

-
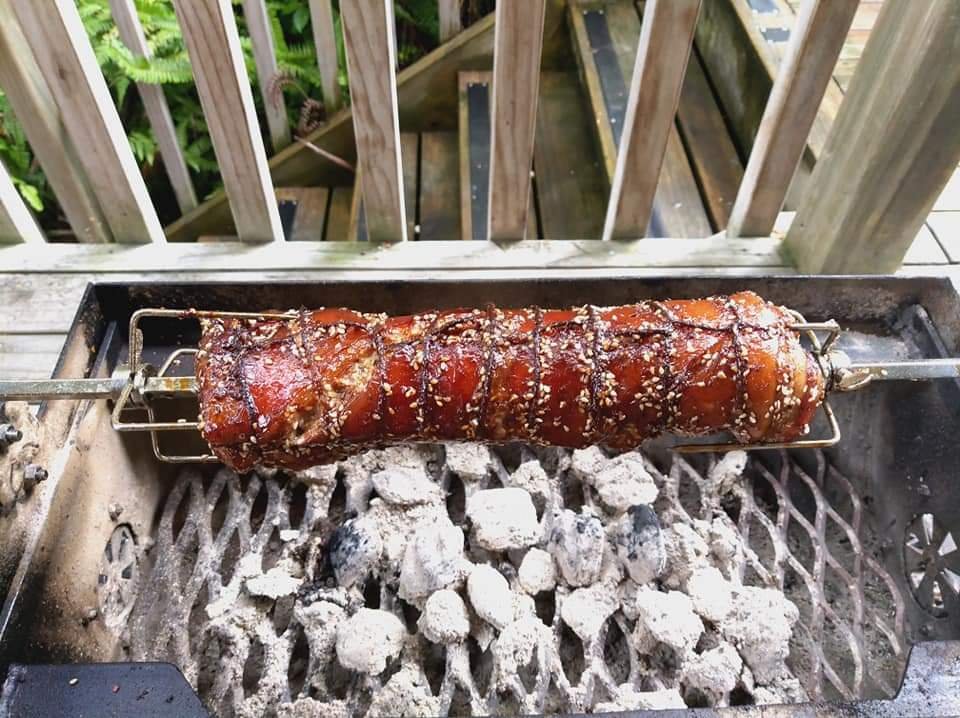
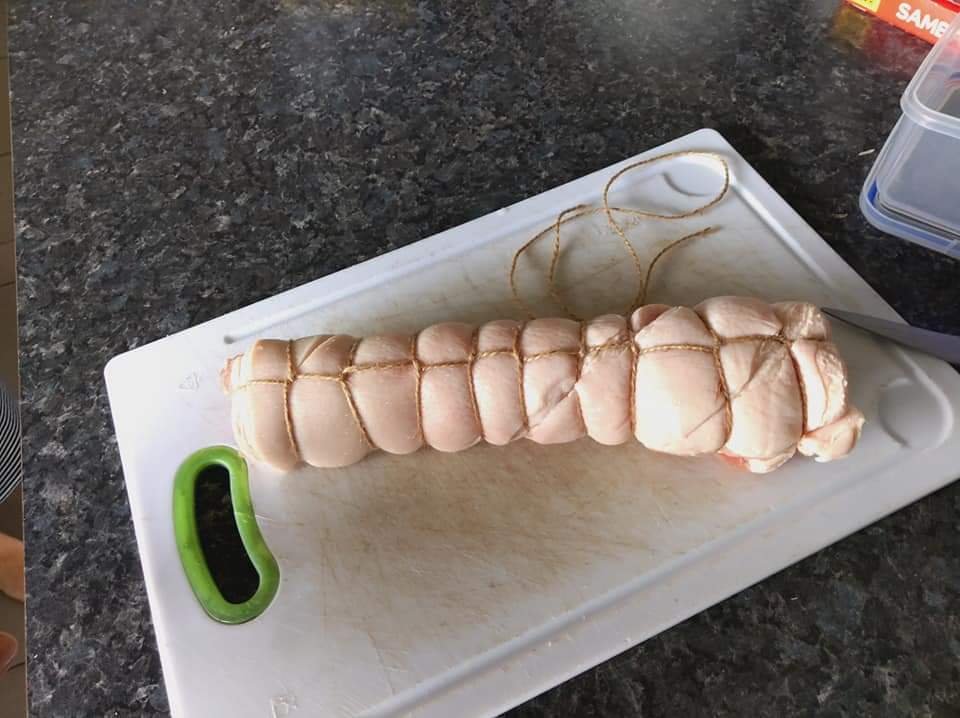
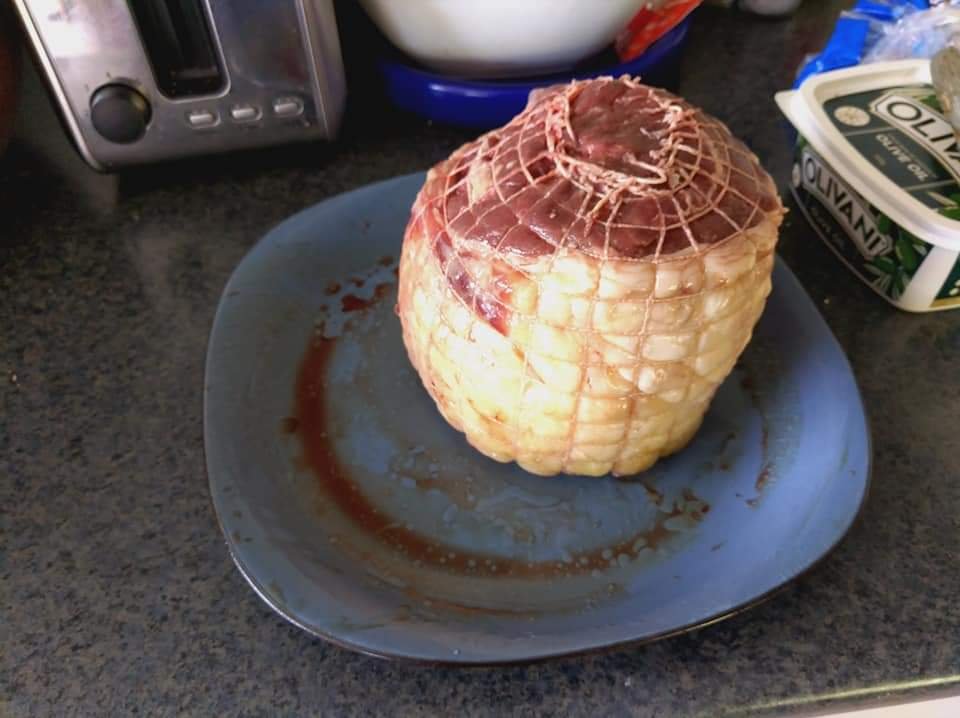
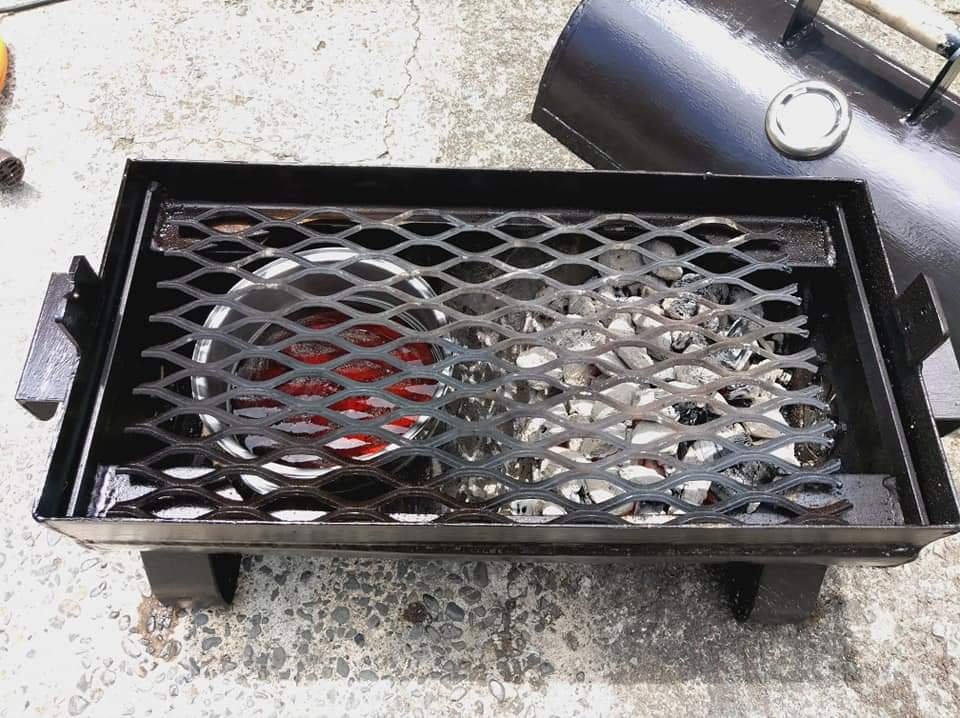
We've got some mates coming around tonight so decided that we'll make some Soba noodles, and thought about doing some chashu pork on the rotisserie to break it in. Picked up about a kg worth of pork belly, had a crack at rolling and tying it up (one end had more meat than the other and I didn't want to trim it). I salted the meat and let it sit for about an hour. After I made a Japanese style marinade using soy (light and dark), mirin , sake, rice wine vinegar, sesame seeds, garlic and ginger. Let it marinade in that for about an hour and a half then setup the bbq. It's been on for about 45minutes since that last pic and tbh it probably doesn't need too much more. Will keep you guys posted shortly.
-
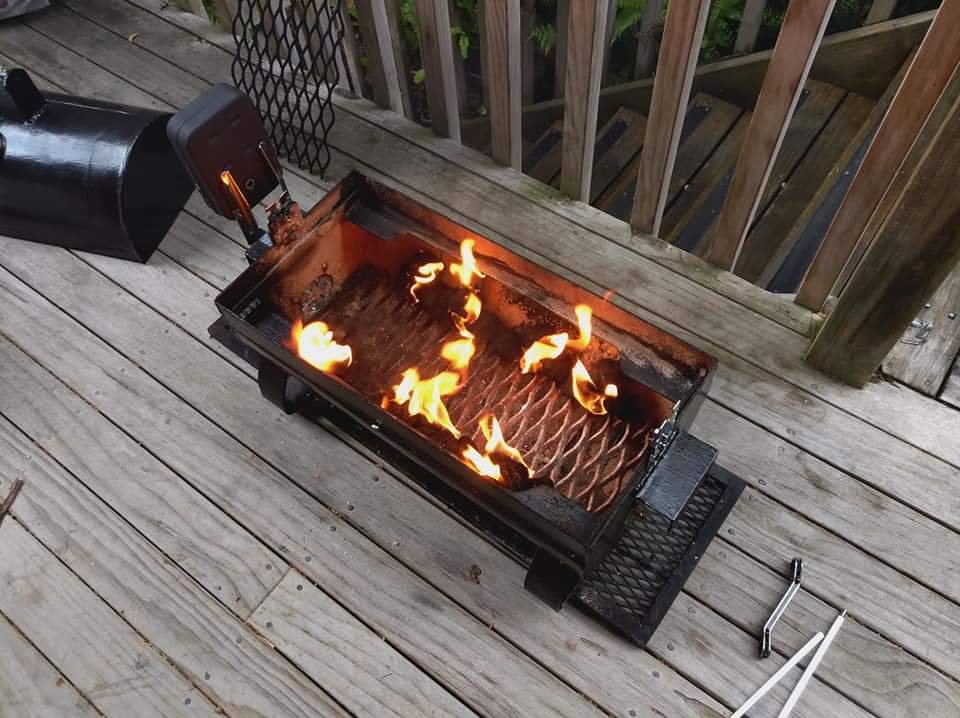
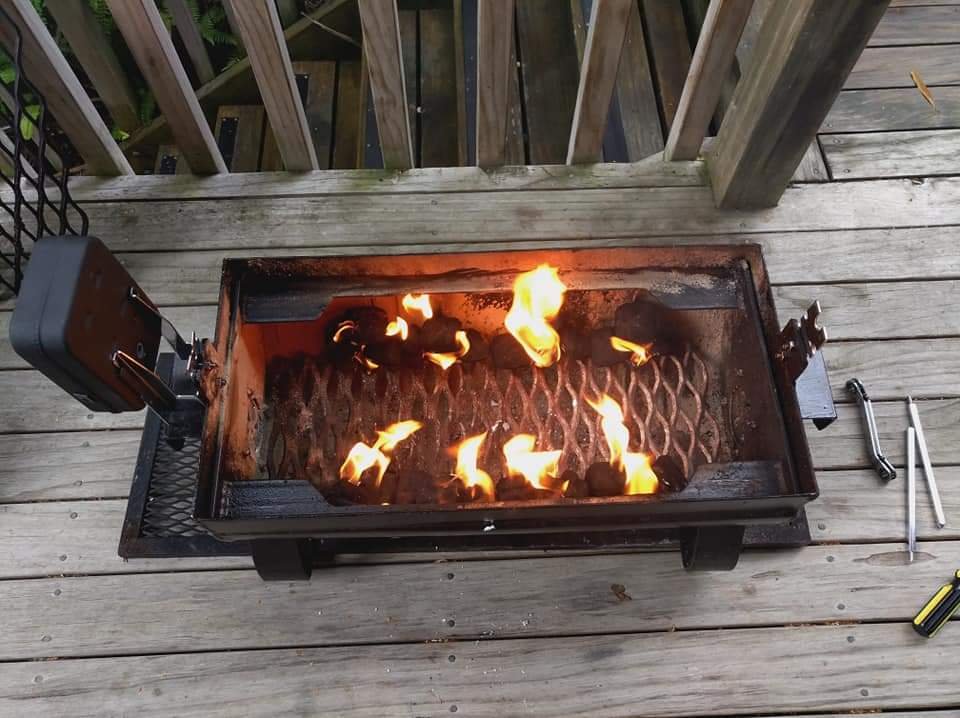
We had people coming over for a late lunch so we had to get cranking asap. Let the paint sit for 10 minutes then quickly fitted the vents and assembled it for another burn off. Only had about 2 hours to burn it off and cure the paint before I needed to get some food on. Got it up to about 500f for about an hour and a half the tried to drop it off in preparation for cooking. Random home kill rolled beef roast I found in the freezer. Approx 3kg gave it a blackout rub. Really wanted to get it on the rotisserie but it was too bloody hot to fit it up haha. Got the temp down to 350f and threw it in, couldn't really wait for it to drop anymore. Ran it at about 350f for 2.5hours indirect with stout in the driptray. Combination of Kingsford briquettes, applewood and some Manuka we had lying around. This is absolutely winged and rushed, for the first cook and I had no probe for internal temp. Let it sit for about 20mins wrapped in foil, when served it was about medium, slightly rarer in the middle so not too bad considering (forgot to take pics). Held temp well, I think if I start off with less coals (i.e not doing a burn off) I'll be able to get the temp right where I want it and also vent/damper controls will work a treat. I'll look at cutting the cooking grille so it's 2 piece for access loading up coals. Chur