
Leaderboard


Popular Content
Showing content with the highest reputation on 15/07/25 in all areas
-
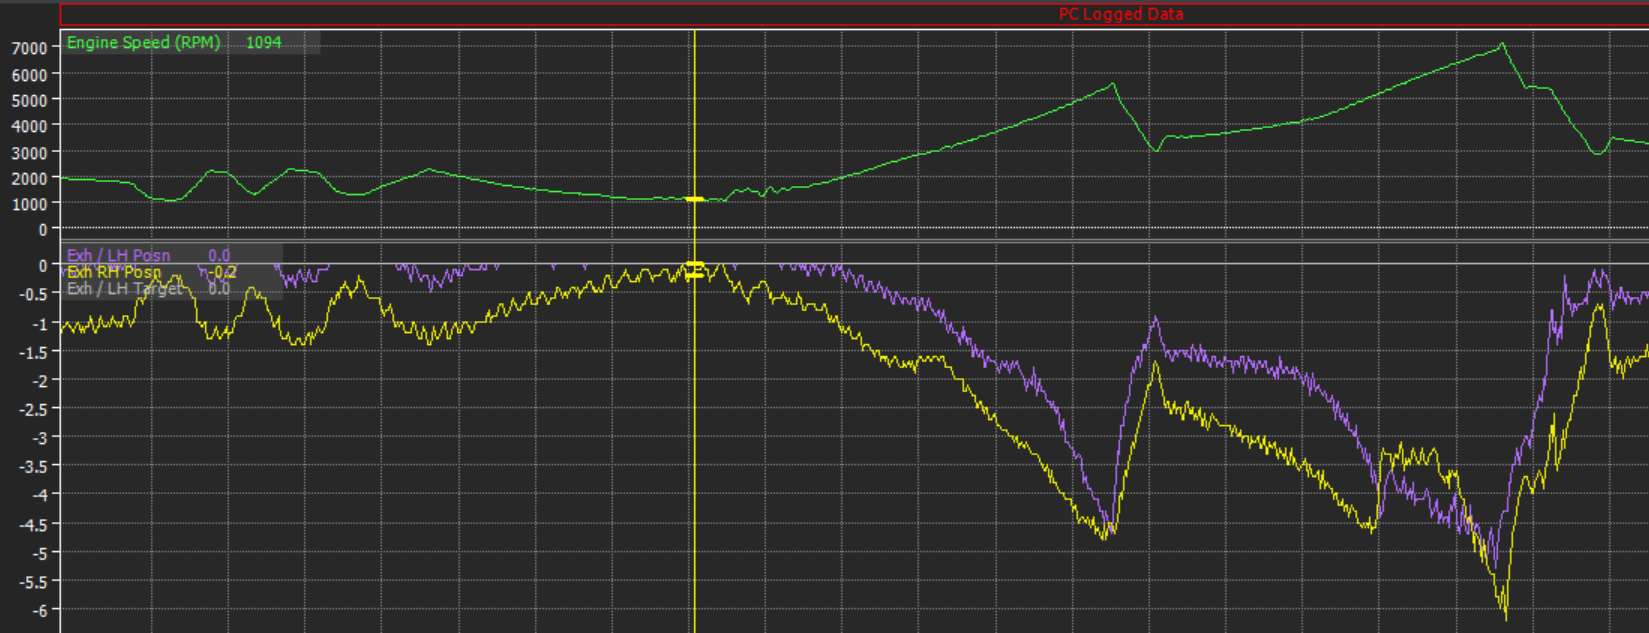
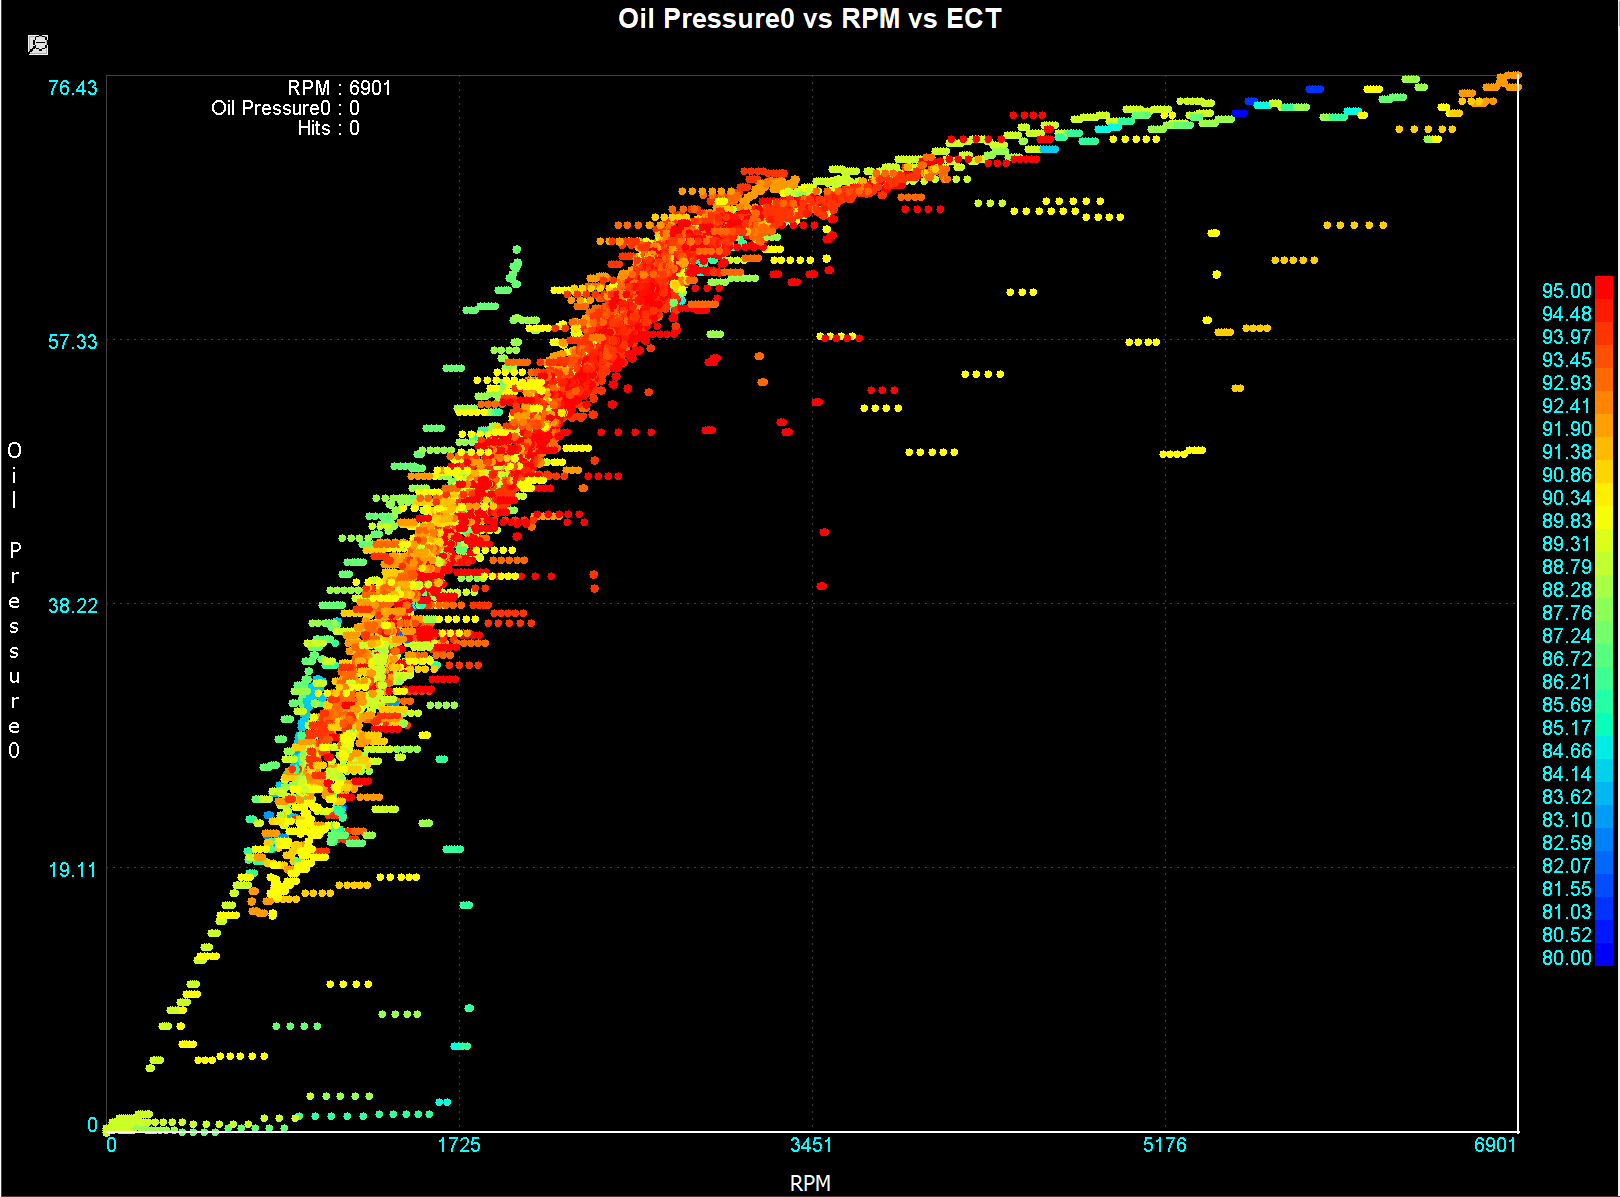
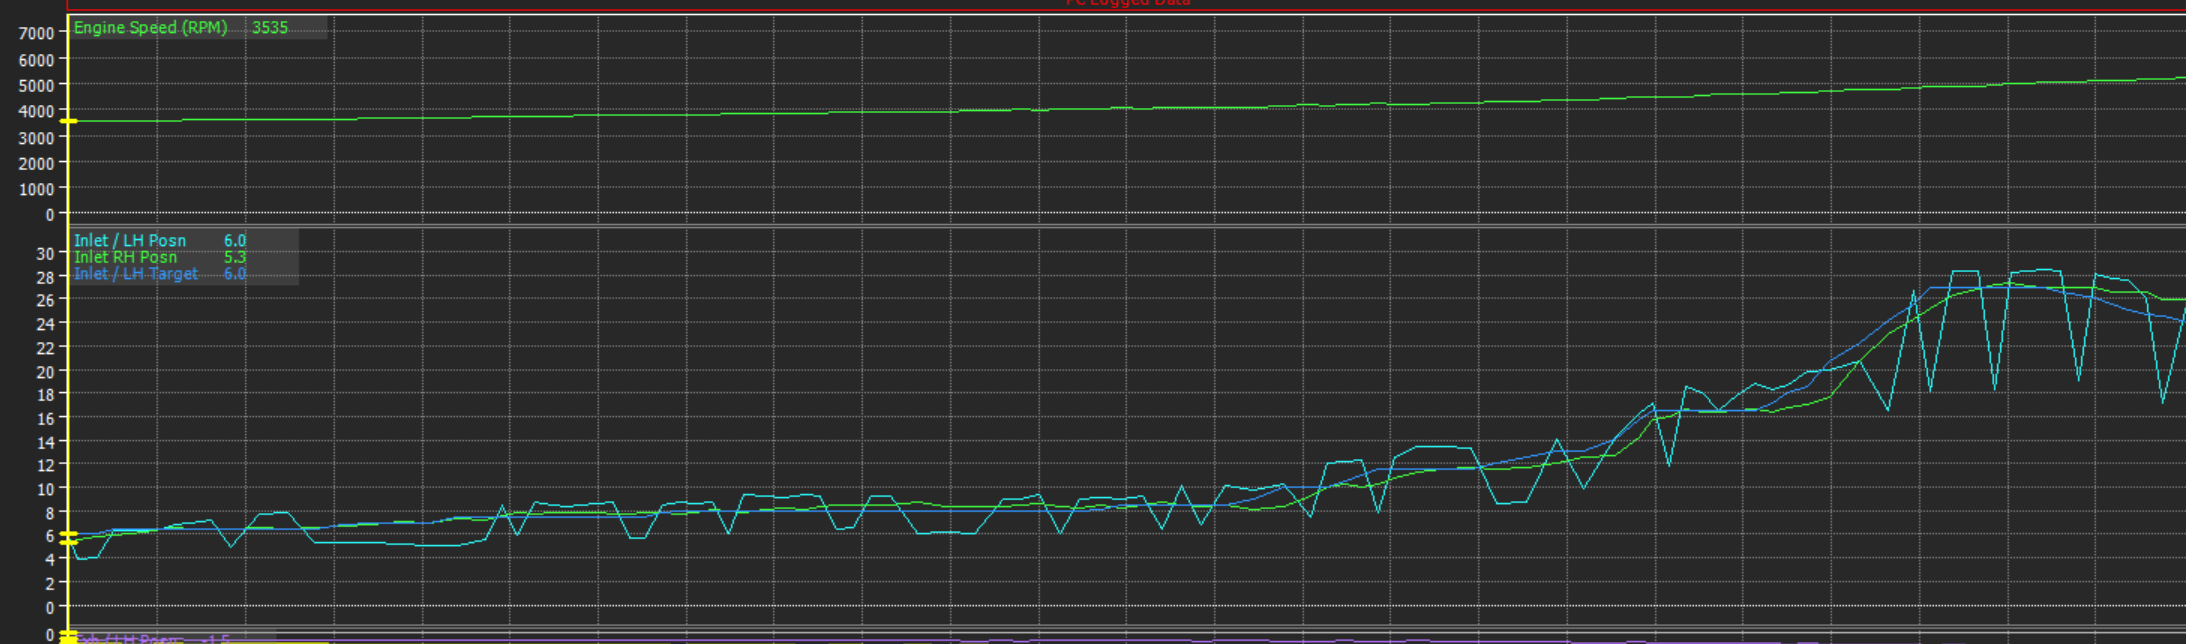
My ethrottle motor turned up, finally! I got everything as well balanced as I could then went for a little bit of a trundle up the road. I have got a few issues to sort out. I've been stupidly sick with Influenza B though so everythings been happening in slow motion recently. The exhaust VVT pulleys end up floating away from target even when there's no duty applied to the solenoid. It's unlikely to be an actual problem as people say it tends to like 10+ degrees of exhaust retard anyway. But it's interesting that there's probably no way I can force the pulleys to 0 degrees at high rpm. It's likely just because of the stiff valve springs, or maybe with a thicker oil it would stay on target (using 5w30 currently) Maybe the chain stretches, or the cam chain tensioner that goes just between intake and exhaust pulleys starts to get pushed in. I'm not sure why the signals are so jiggly but I can add some extra smoothing to it so the PID isnt going crazy trying to get to target. Not a huge problem, but interesting that it is a problem EDIT: A 2GR guy on facebook told me that it helps to set the minimum duty cycle to the solenoid, greater than zero. So will try that. General engine health: Fuel pressure stays dead flat, and oil pressure is looking good, at least to ~7000rpm. As expected, pressure drops off a little when engine is running hotter. But I've got enough of a shape there to start adding in some oil pressure alarm / shut down features. I've got a bit of an AFR imbalance between banks still. However at least now I can trim each motor independently as needed. It looks like part of this is caused by the VVTI PID settings for the intake pulleys not quite being right on default settings, causing airflow differences. Again, this is likely due to having much stiffer valve springs fitted rather than junk PID values by default. Interesting it looks like left and right banks will need different PID settings. I suspect that this is because on one bank, that cam angle sensor is assigned as trigger 2. Then the other bank, its a regular digital input. I suspect that they get treated a little different and with different priority perhaps. It will take a little bit of mucking around to adjust the settings per bank and get them tracking nice, but hopefully not too bad. I didnt do much in the way of full throttle stuff, as was mainly a bit of a shakedown to test a variety of things were okay. With the exhaust leaks at the collectors fixed, the car is sounding MUCH MUCH better. Today is the first time where I've driven it, and come back with a smile on my face because the overall experience was fun and it sounded cool. It will still sound better with an X pipe and so on, but I'm at least happy enough for now. Not much full throttle or high rpm activity so far, however the indicated power figures from virtual dyno seem about right for a healthy standardish engine. More of a health check indicator than full on performance indicator at this stage. Still need to optimize fuel map, VVT settings, and ignition timing. So should pick up a bit everywhere once all that's dialled in. No trumpets fitted at the moment either. The 4GR usually makes around 212hp at 6400rpm and 179 ftlb (at engine) Hopefully we'll be sitting somewhere around the 250whp mark with the big cams in and a bunch more rpm. so, yeah! On the whole, super happy that things are finally getting to the fun stage of the project. Where I can road tune it (to make graphs) and take it to the dyno (to make graphs) and then take it racing (to make graphs) And now I can add the cruise control switch back in, which is bloody excellent. EDIT: I had a reply from one of the 2GR tuner guys on Facebook, who said its normal to need different PID values for each of the four cams. Even when cams and springs are stock. So will just carry on setting that up and treat it as normal that they're a bit wonky currently.
 13 points
 -
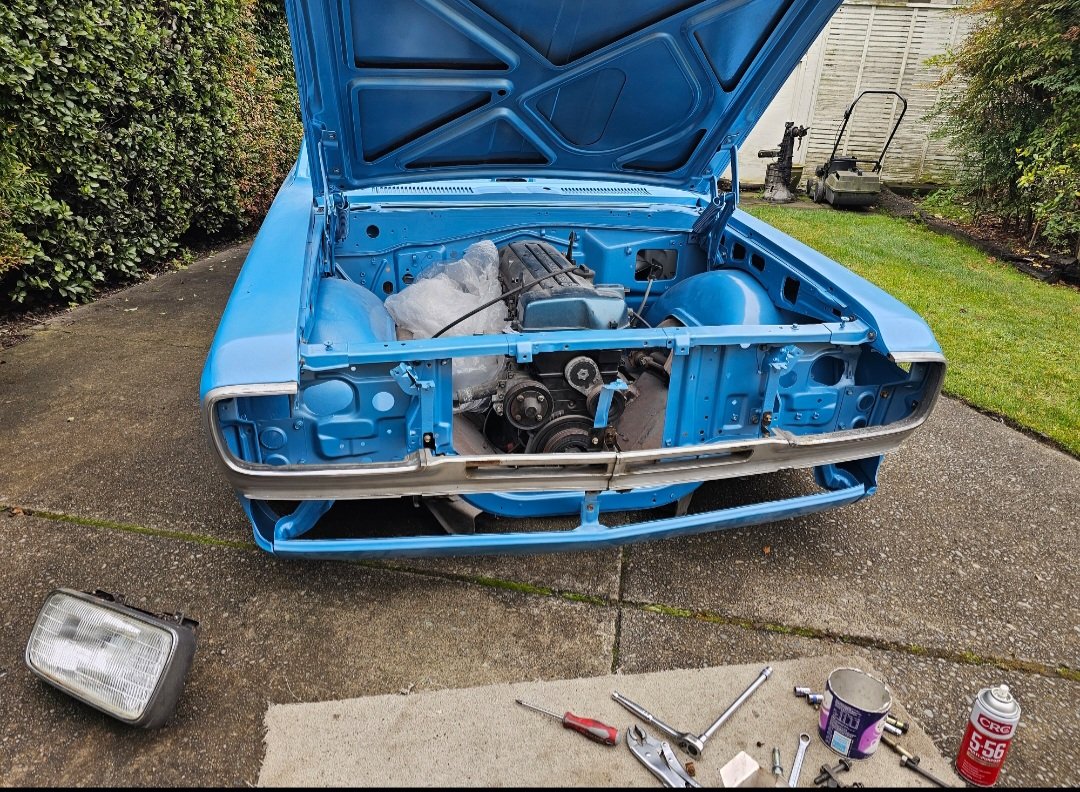
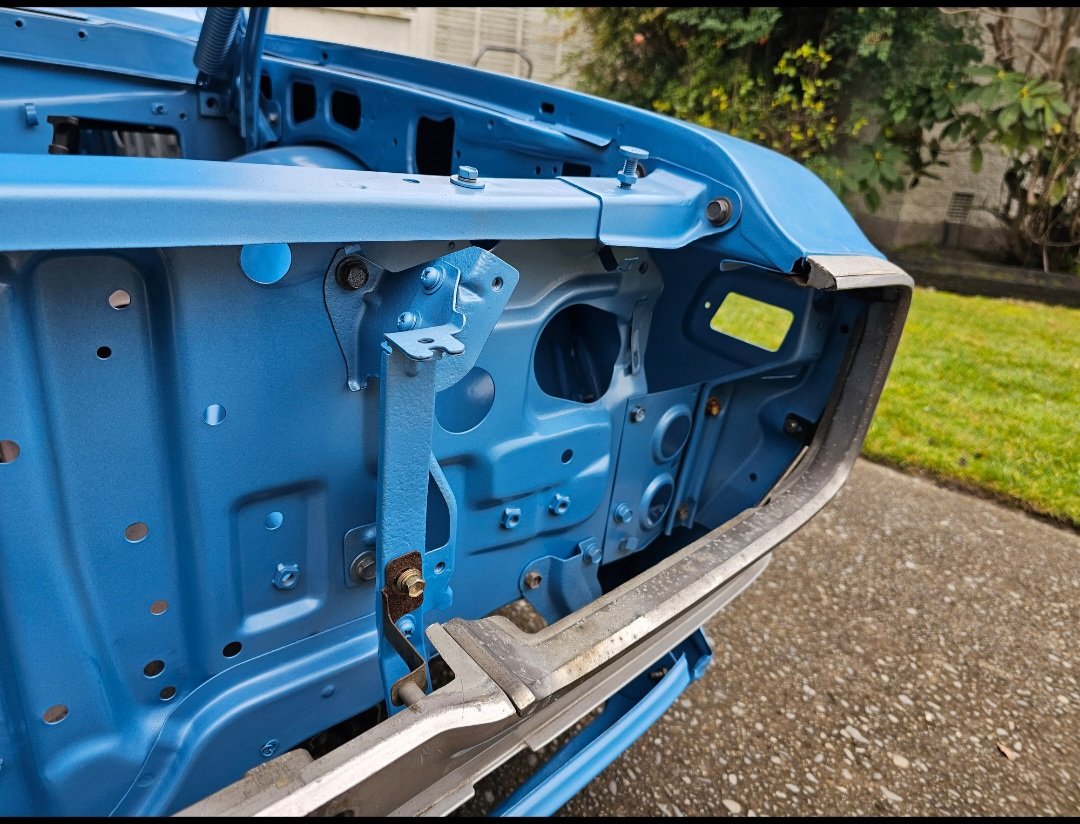
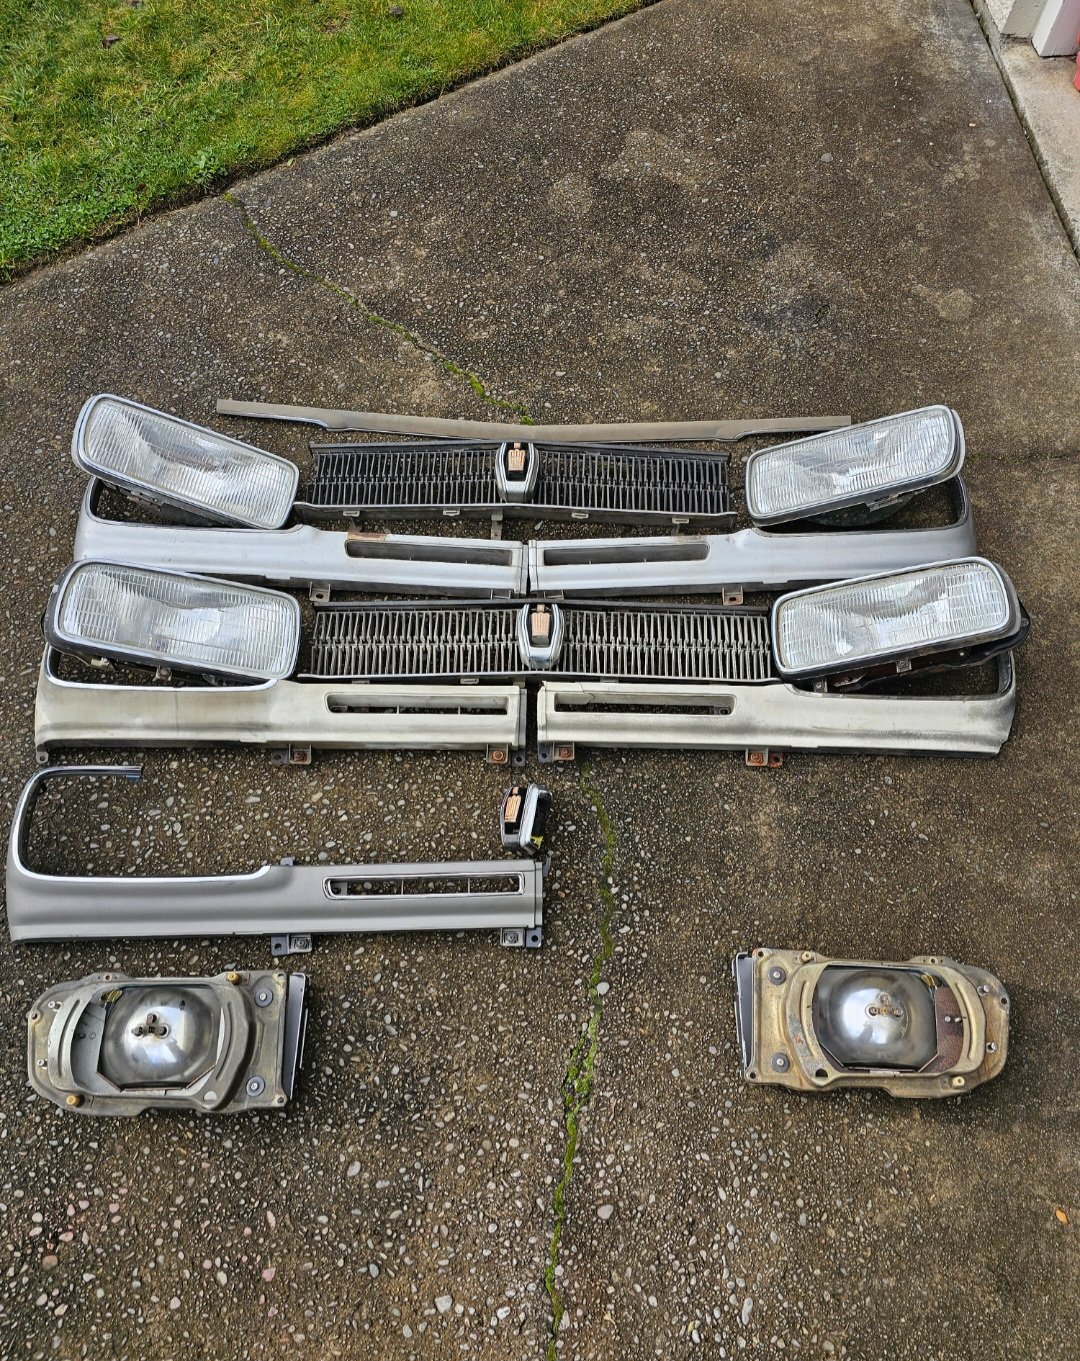
Starting to assemble the front
4 points
-
Have ordered gaskets and ARP head studs from Mace engineering so will get this thing set up and ready to drop in ASAP. I've got a set of spare pair of Ecotec heads that look good but think I'll give them a valve grind and new stem seals. I'd like to give them a tickle in the ports remove some casting marks and reduce the protrusion around the the valve stem. Exciting times but it's been 20 years since I've swapped a car engine and not one with so much ancillary shit sure I'll be fine as long as my garage roof doesn't fall down.3 points
-
Maybe I should cut the other muffler off and since I have the grinder out cut the back half off2 points
-
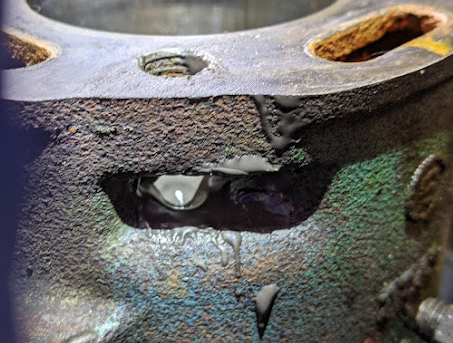
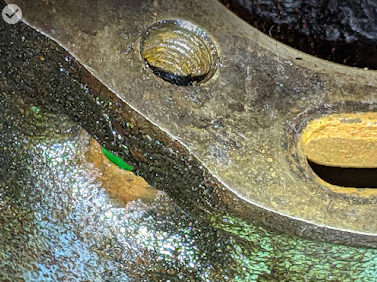
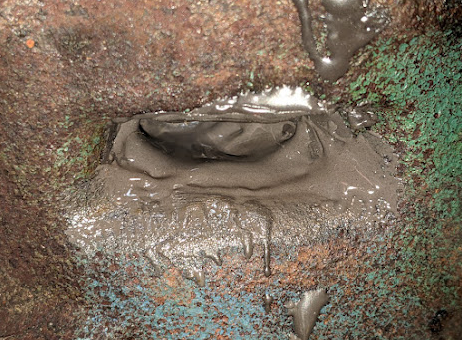
.. and sometimes bodge'em cars: JB-Weld the water jacket on a car motor? Job done (dusts hands). <still holding fluids in, years later>
2 points
-
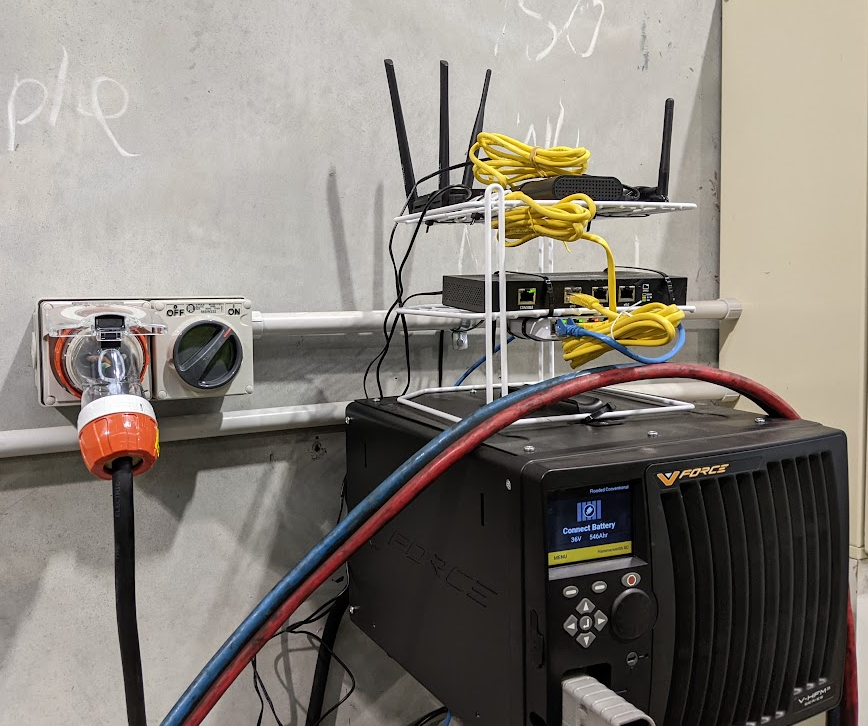
No! keep the IP99 storage container lid please2 points
-
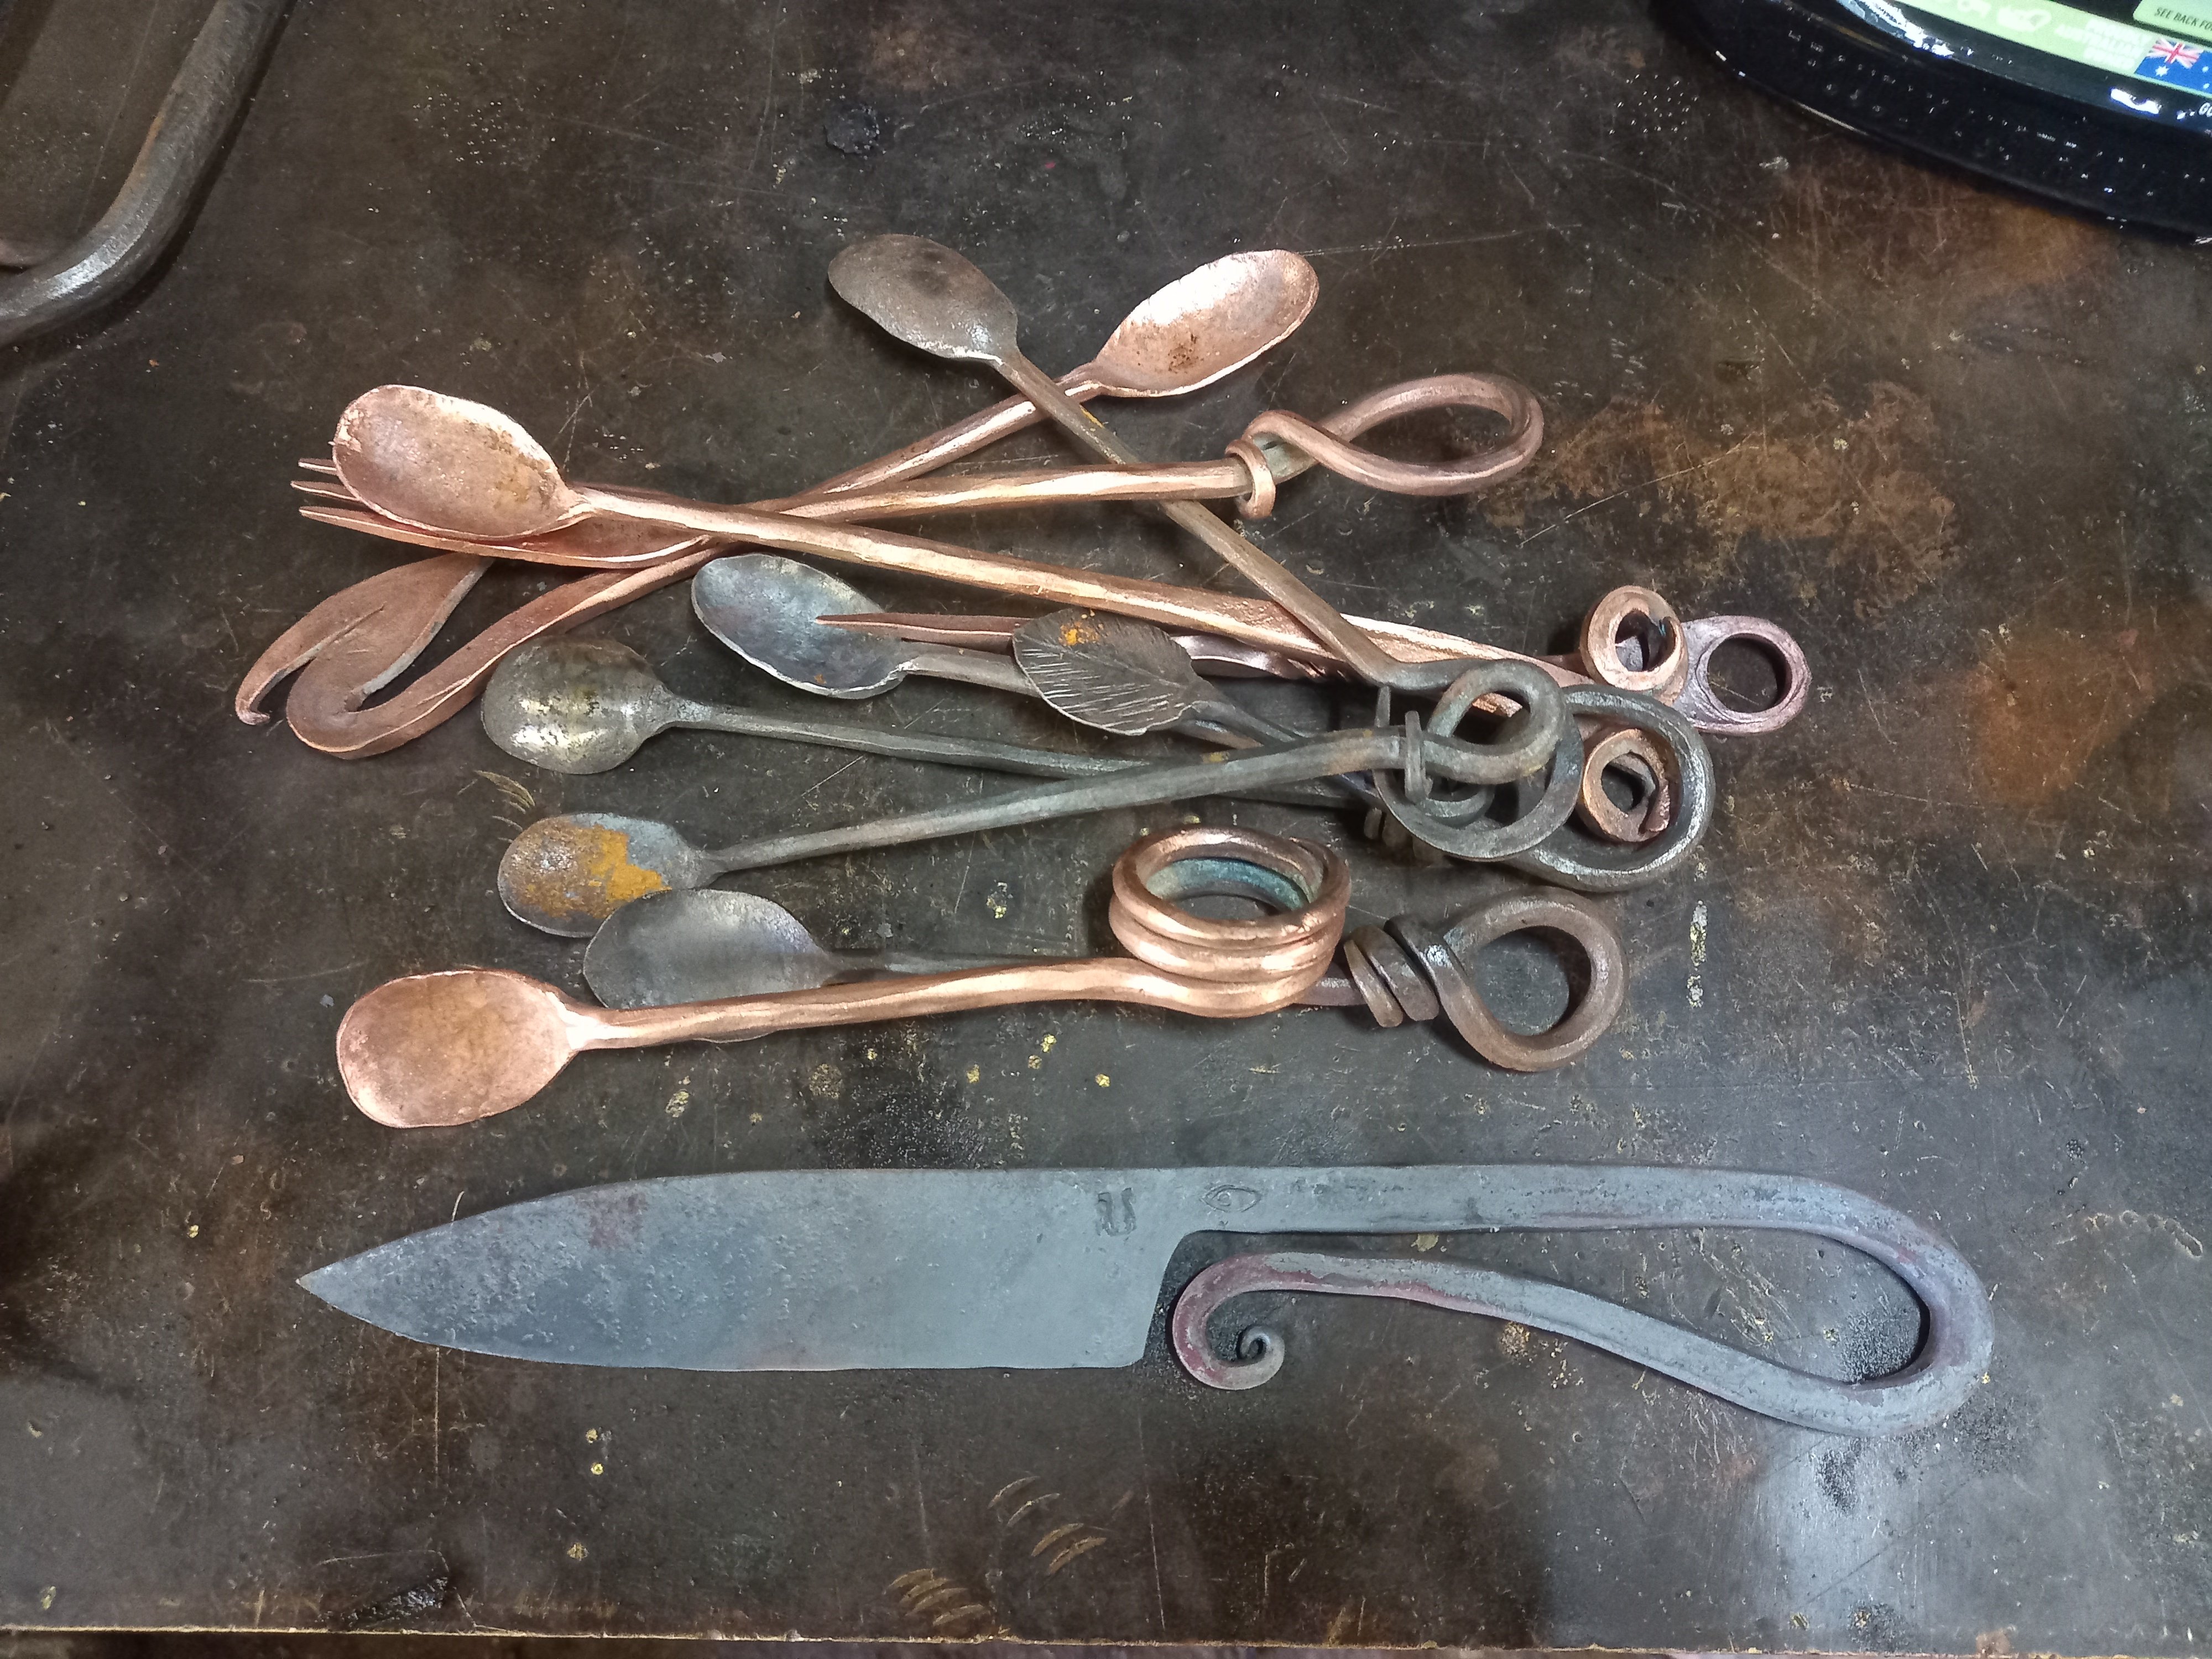
Someone wanted me to make that knife but then never got back to me, still needs hardening and grinding, also made a few spoons
2 points
-
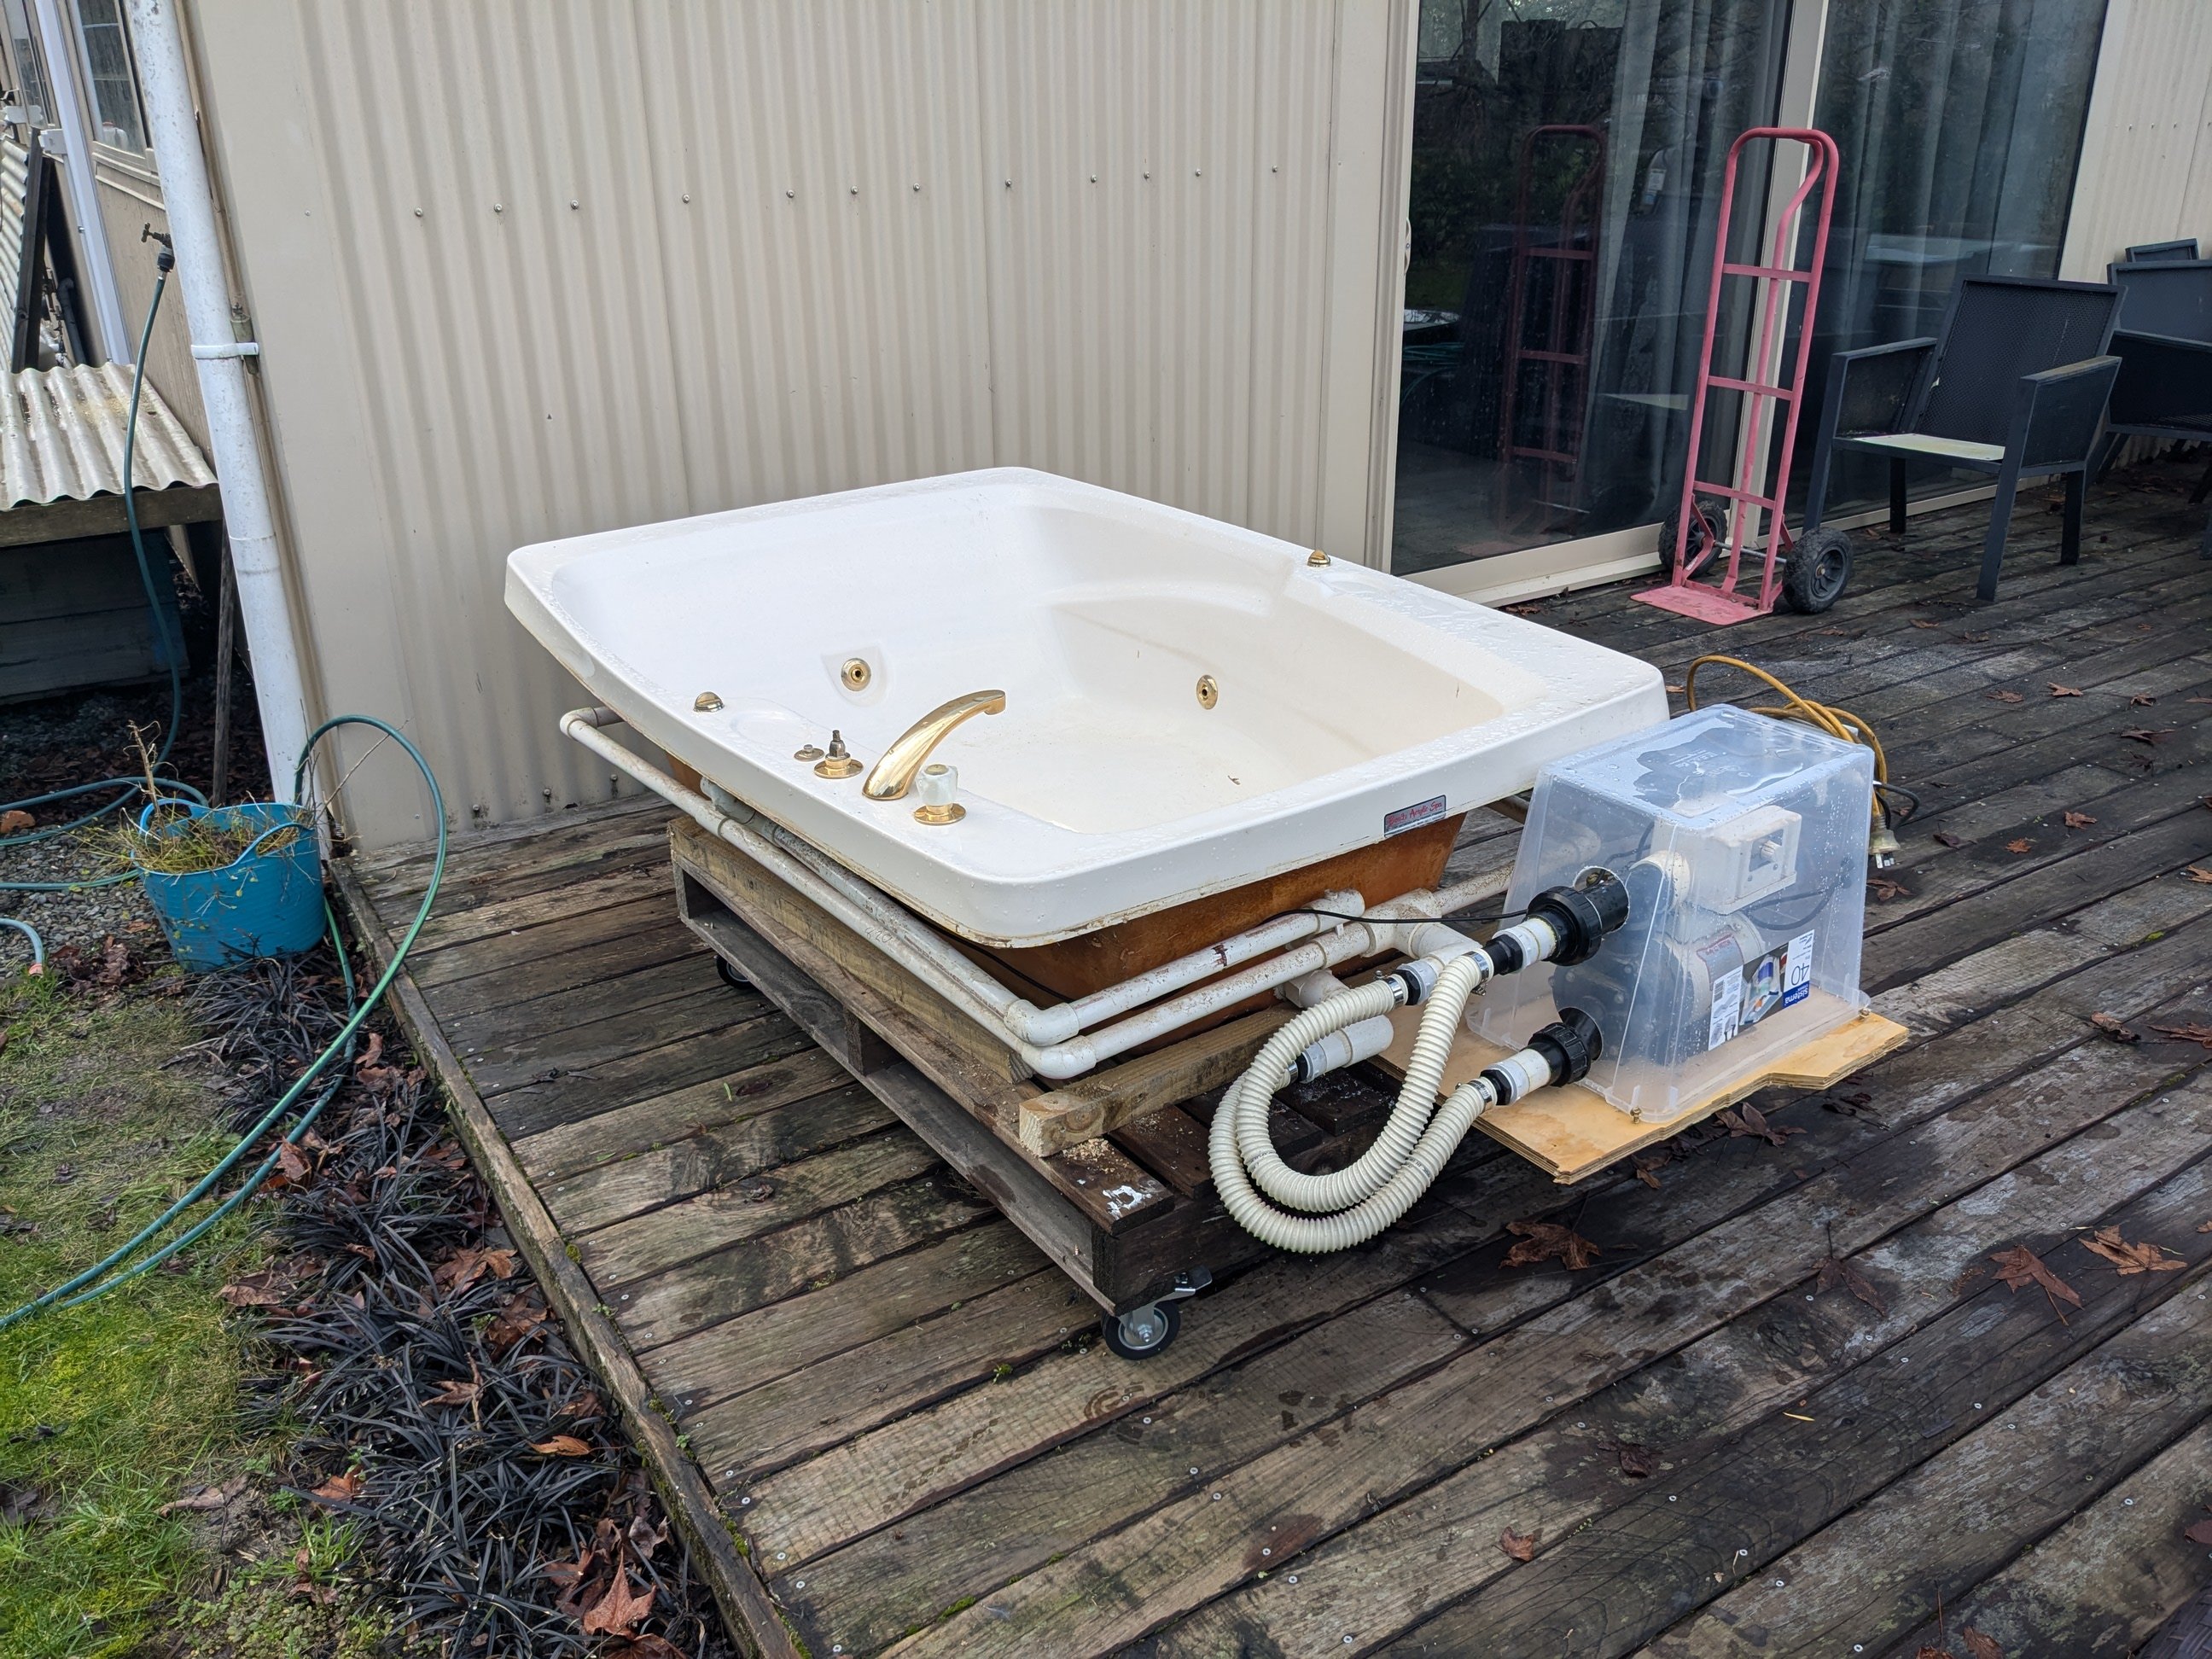
Was going to put this in the random cool stuff you built thread but in reality it is a fucking rough as bodge and probably not cool at all. However I often make things like this for a laugh and probably so do you, so now there is a thread for that stuff. Extra points for repurposing worthless shit. Like this redneck spa I smashed together over the weekend; Unfortunately the gas ran out for the califont in the shed so couldn't try it out, maybe tonight. I might put that pump on its own trolley so it can live out of the rain...
1 point
-
I too play bodge'ems, sometimes with shower racks and network investigation gear:
1 point
-
Well that shit is fully designed, engineered and certed by me, so yea maybe.1 point
-
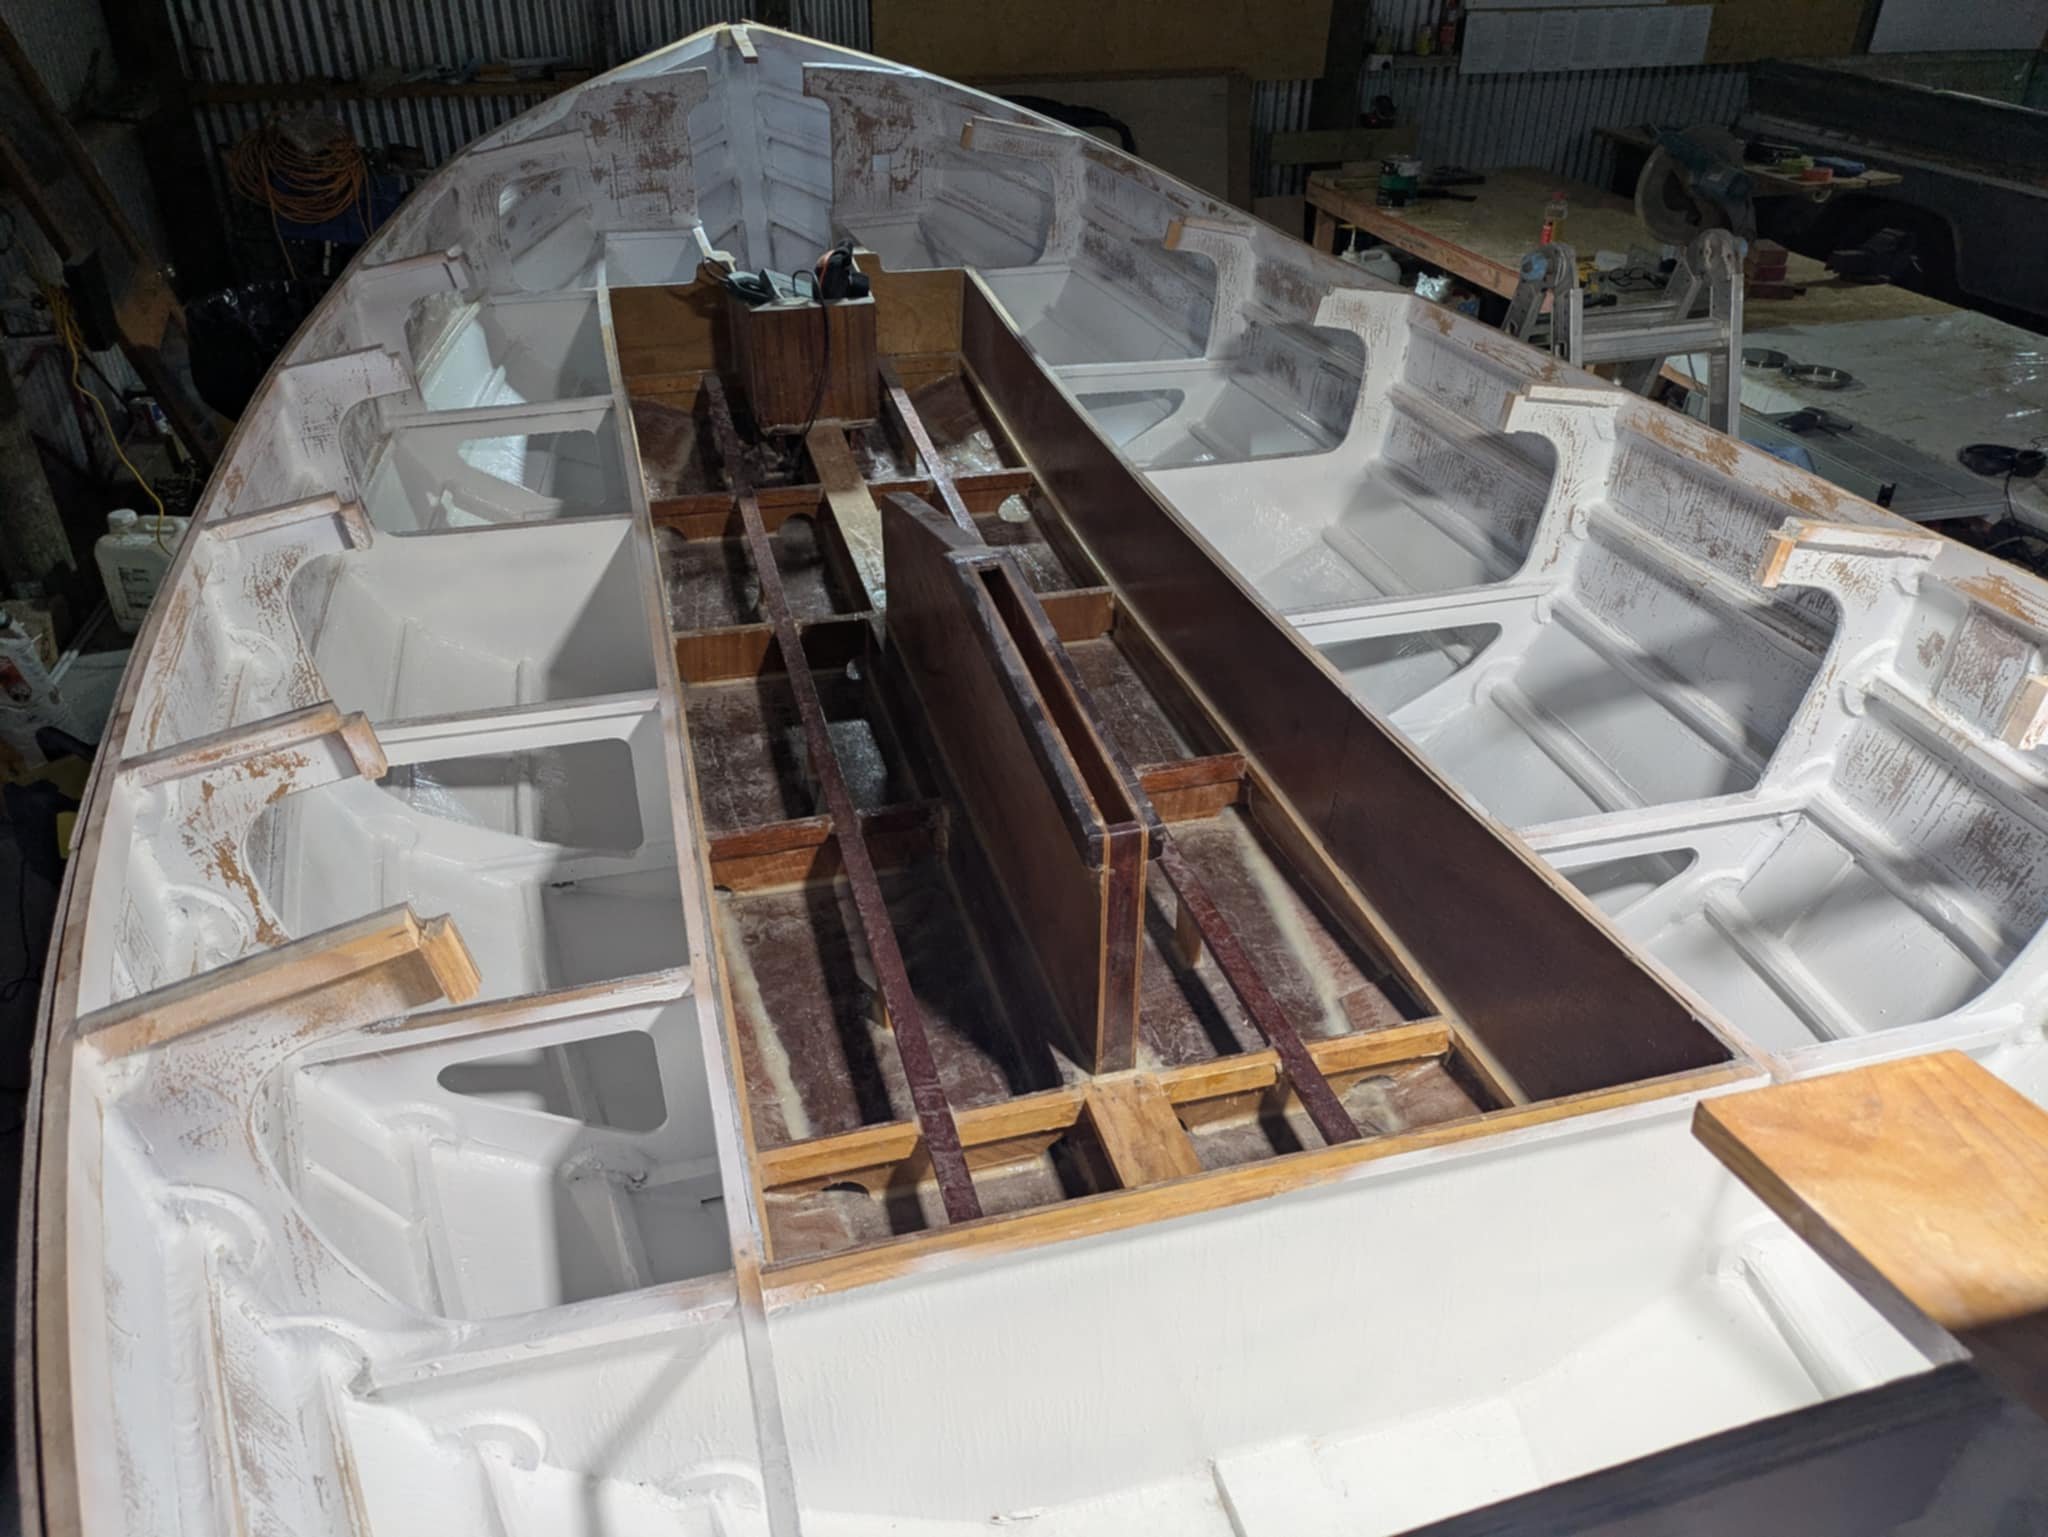
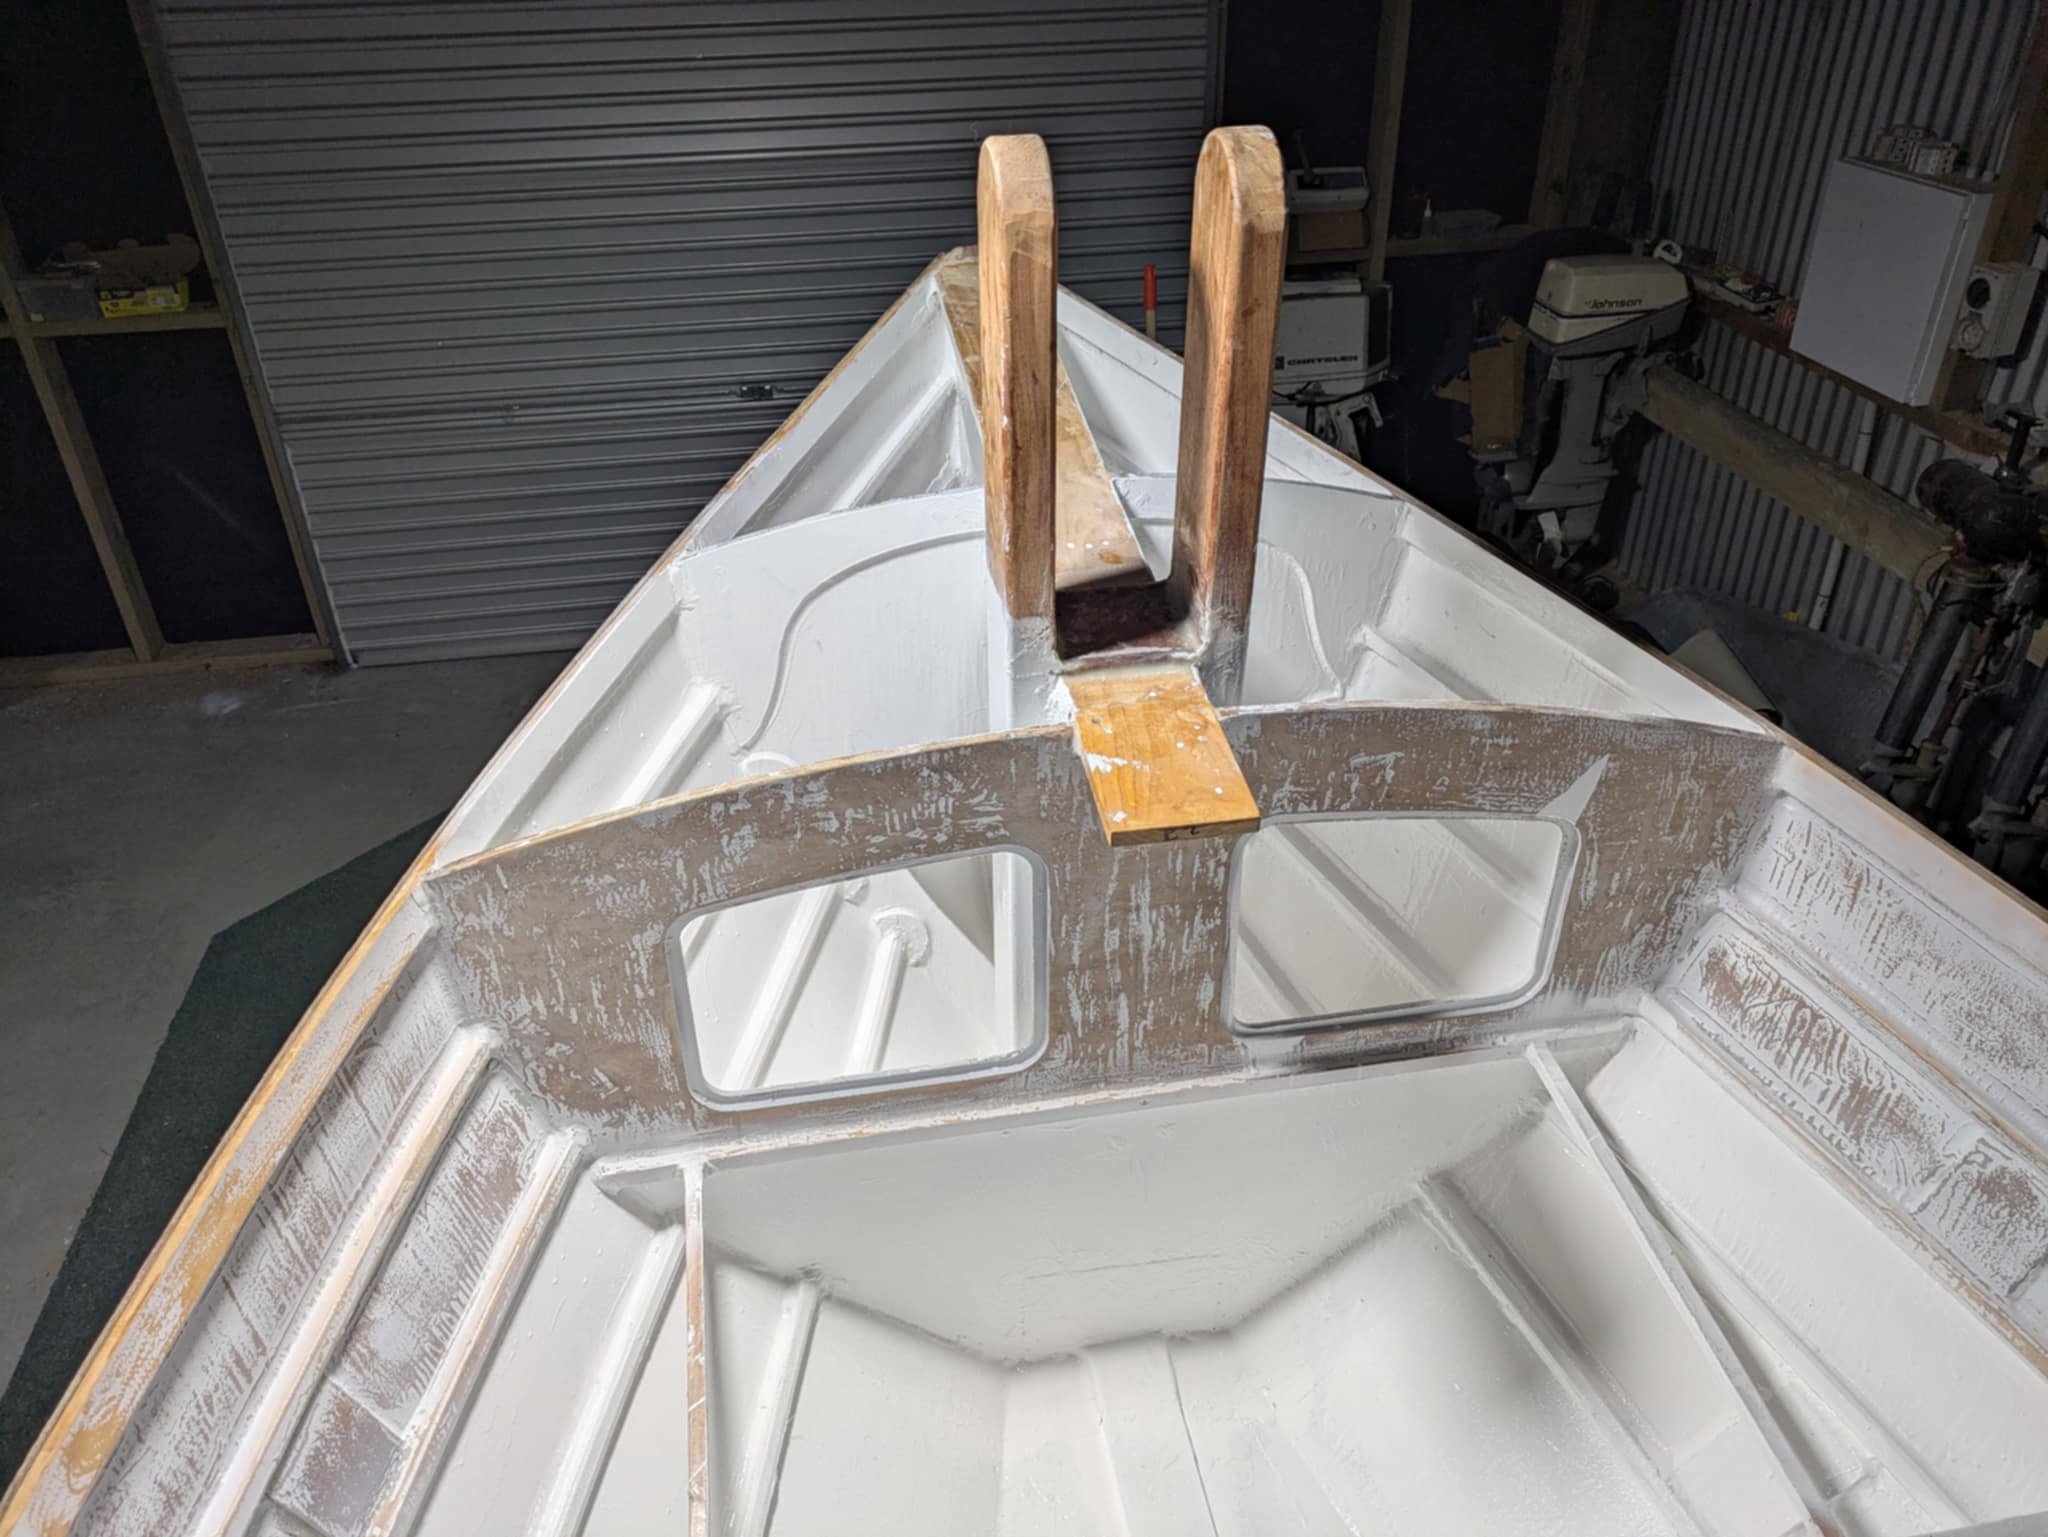
So as predicted it was a long weekend of sanding. I have a few sanding tools but the one that got the biggest hiding was the cordless palm sander. For some parts that will be seen I'm not entirely happy with them so I'll wait until the next nice weather day and put some fairing filler over the top to make smooth. On the sides I'm not sure what will be visible under the coaming and above the cusions so I'll just sand as best I can and forego the filler. If it looks shit I can always redo it. Anyway under the lockers has been done and as I had a bit of paint and time left, I redid the entire bow area. I used some exterior oil based enamel house paint and a long brush. A 4l tin is $50. It's for storage areas or lockers so I couldn't justify a 3hr round trip and extra $300 or so for the gucci boat paint. Not for a boat that will live in a barn for 99% of it's life anyway. Above decks I'll use the nicer stuff. Hoping to get the seat tops screwed and glued on this week and the access hatches at least cut out. I really dont like the plastic ones so have got a 316 stainless steel one I'll use as a template then when I'm feeling rich will buy the other 7 or so. Whilst making the seats I can take the time to think if I want an anchor locker or a solar panel up front.
1 point
-
When you forget over 10 years what parts you already have and just keep buying more.
1 point
-
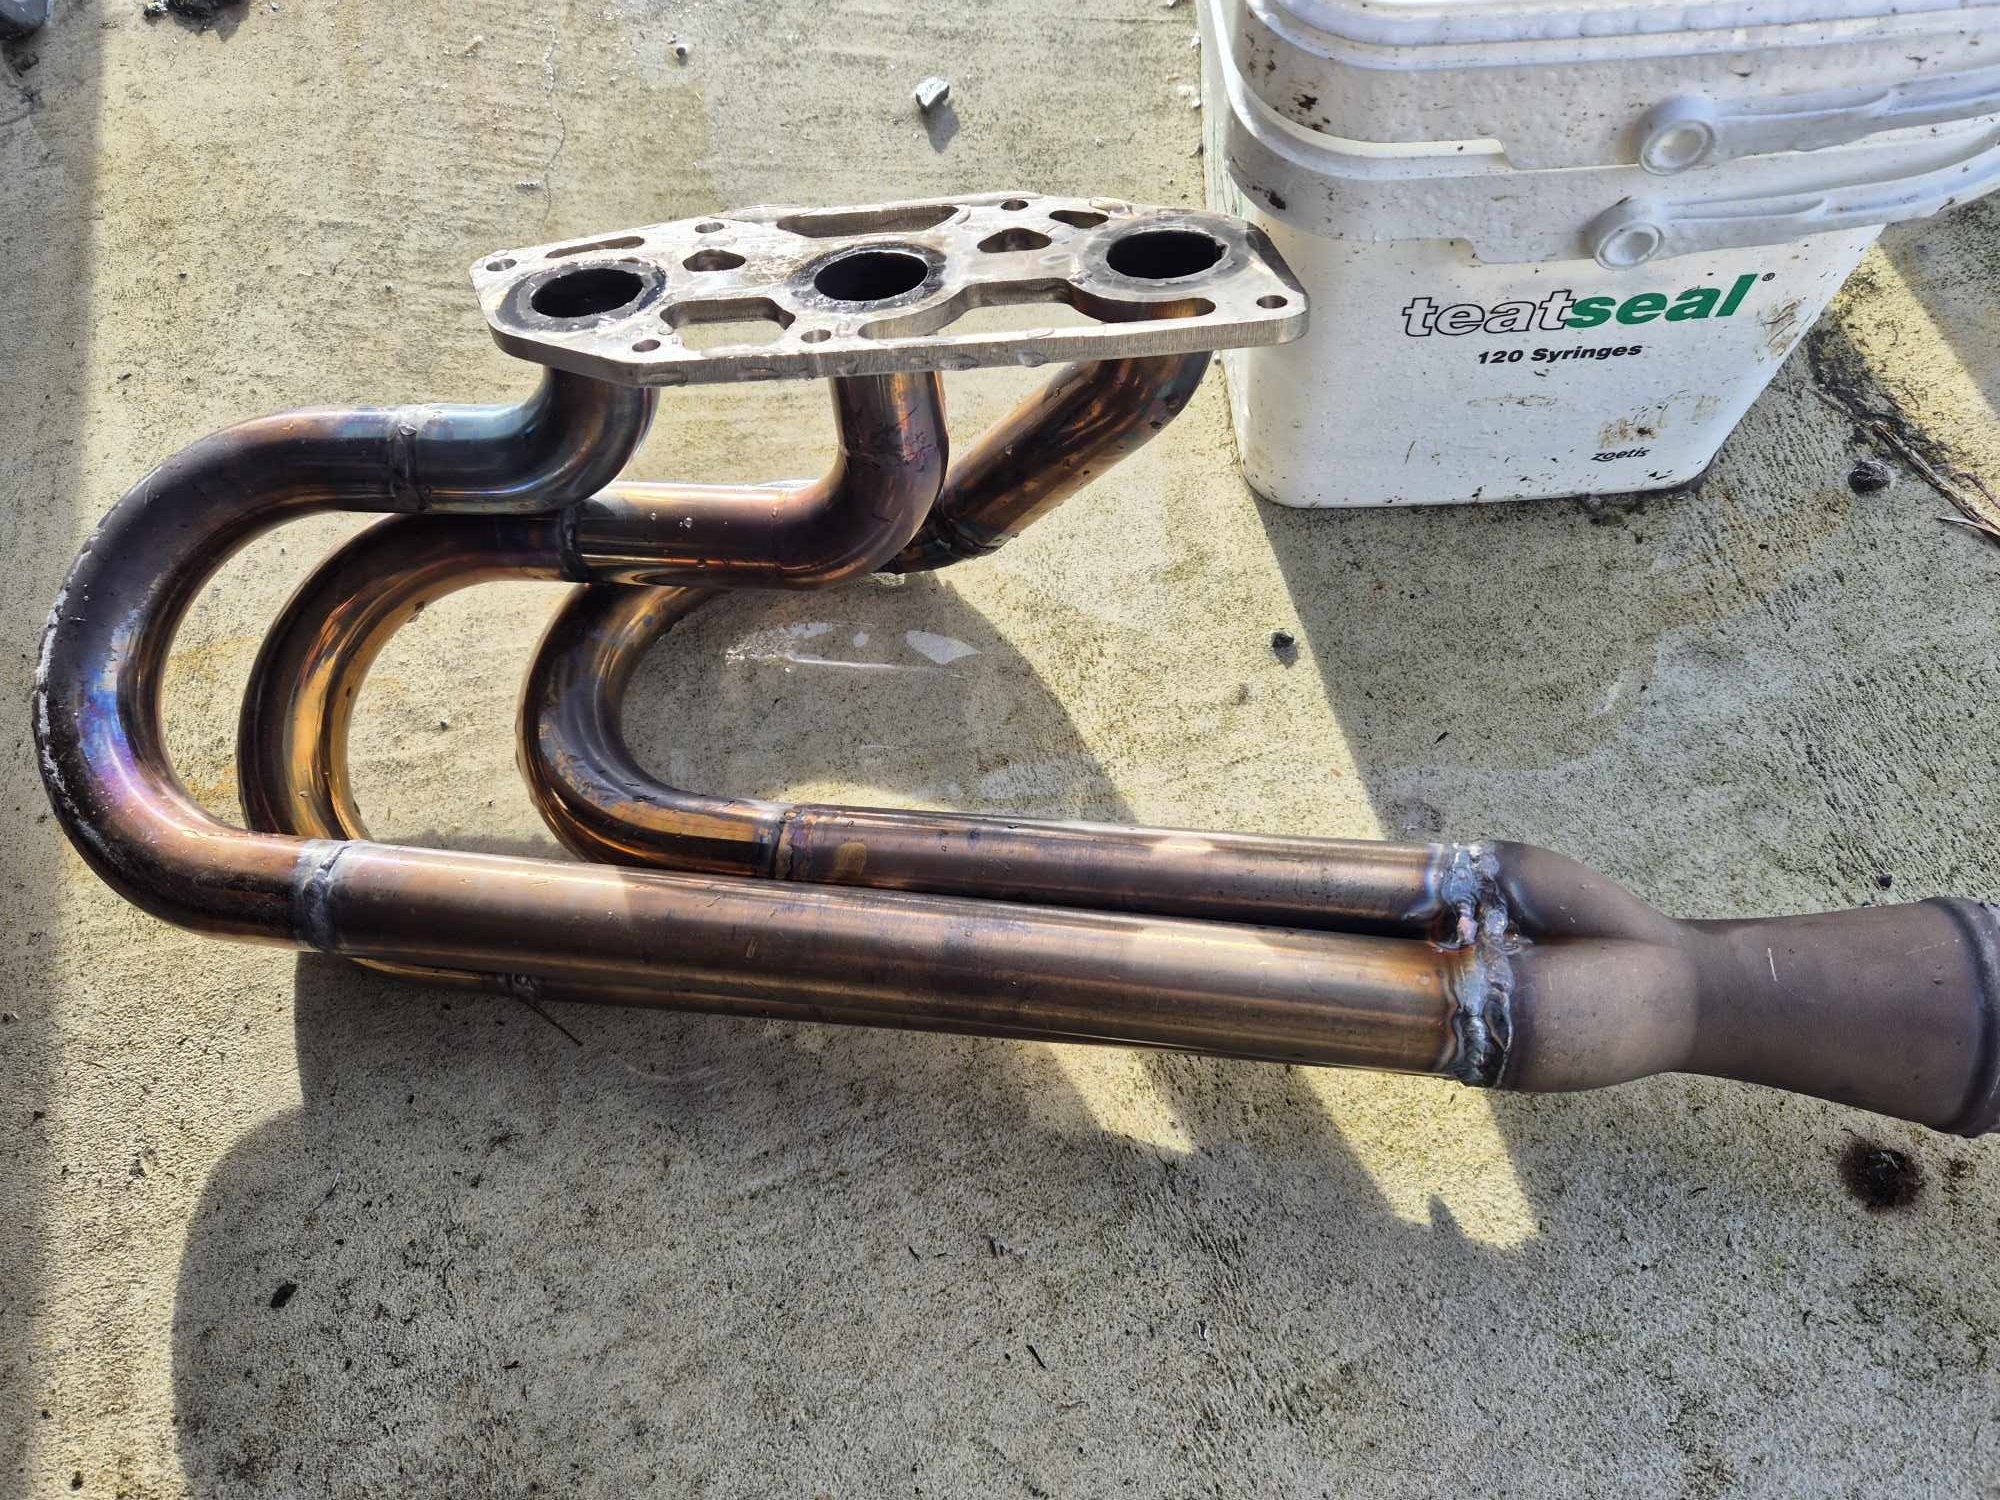
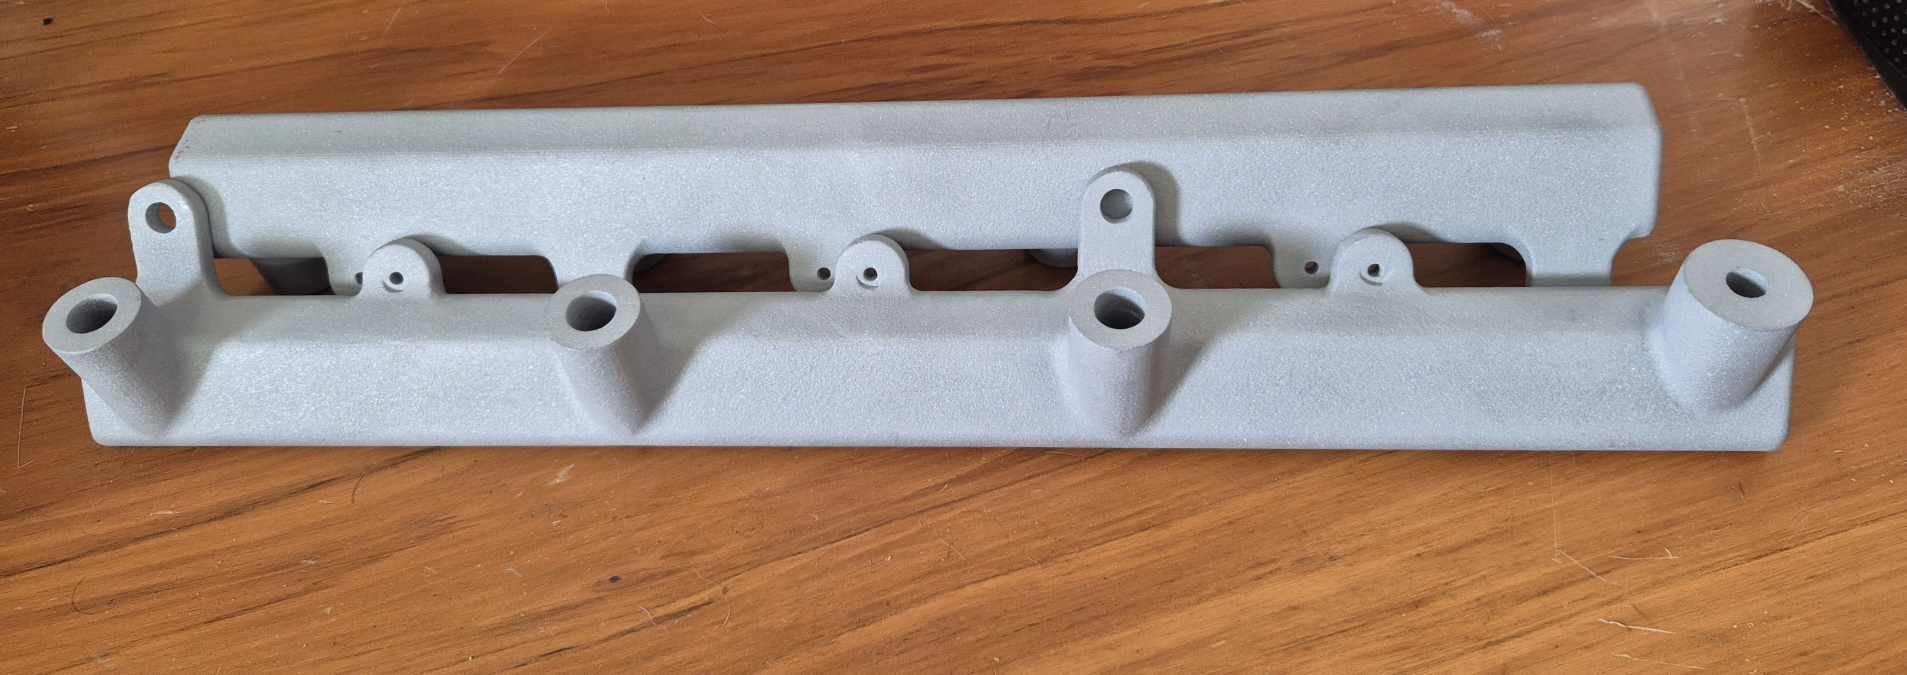
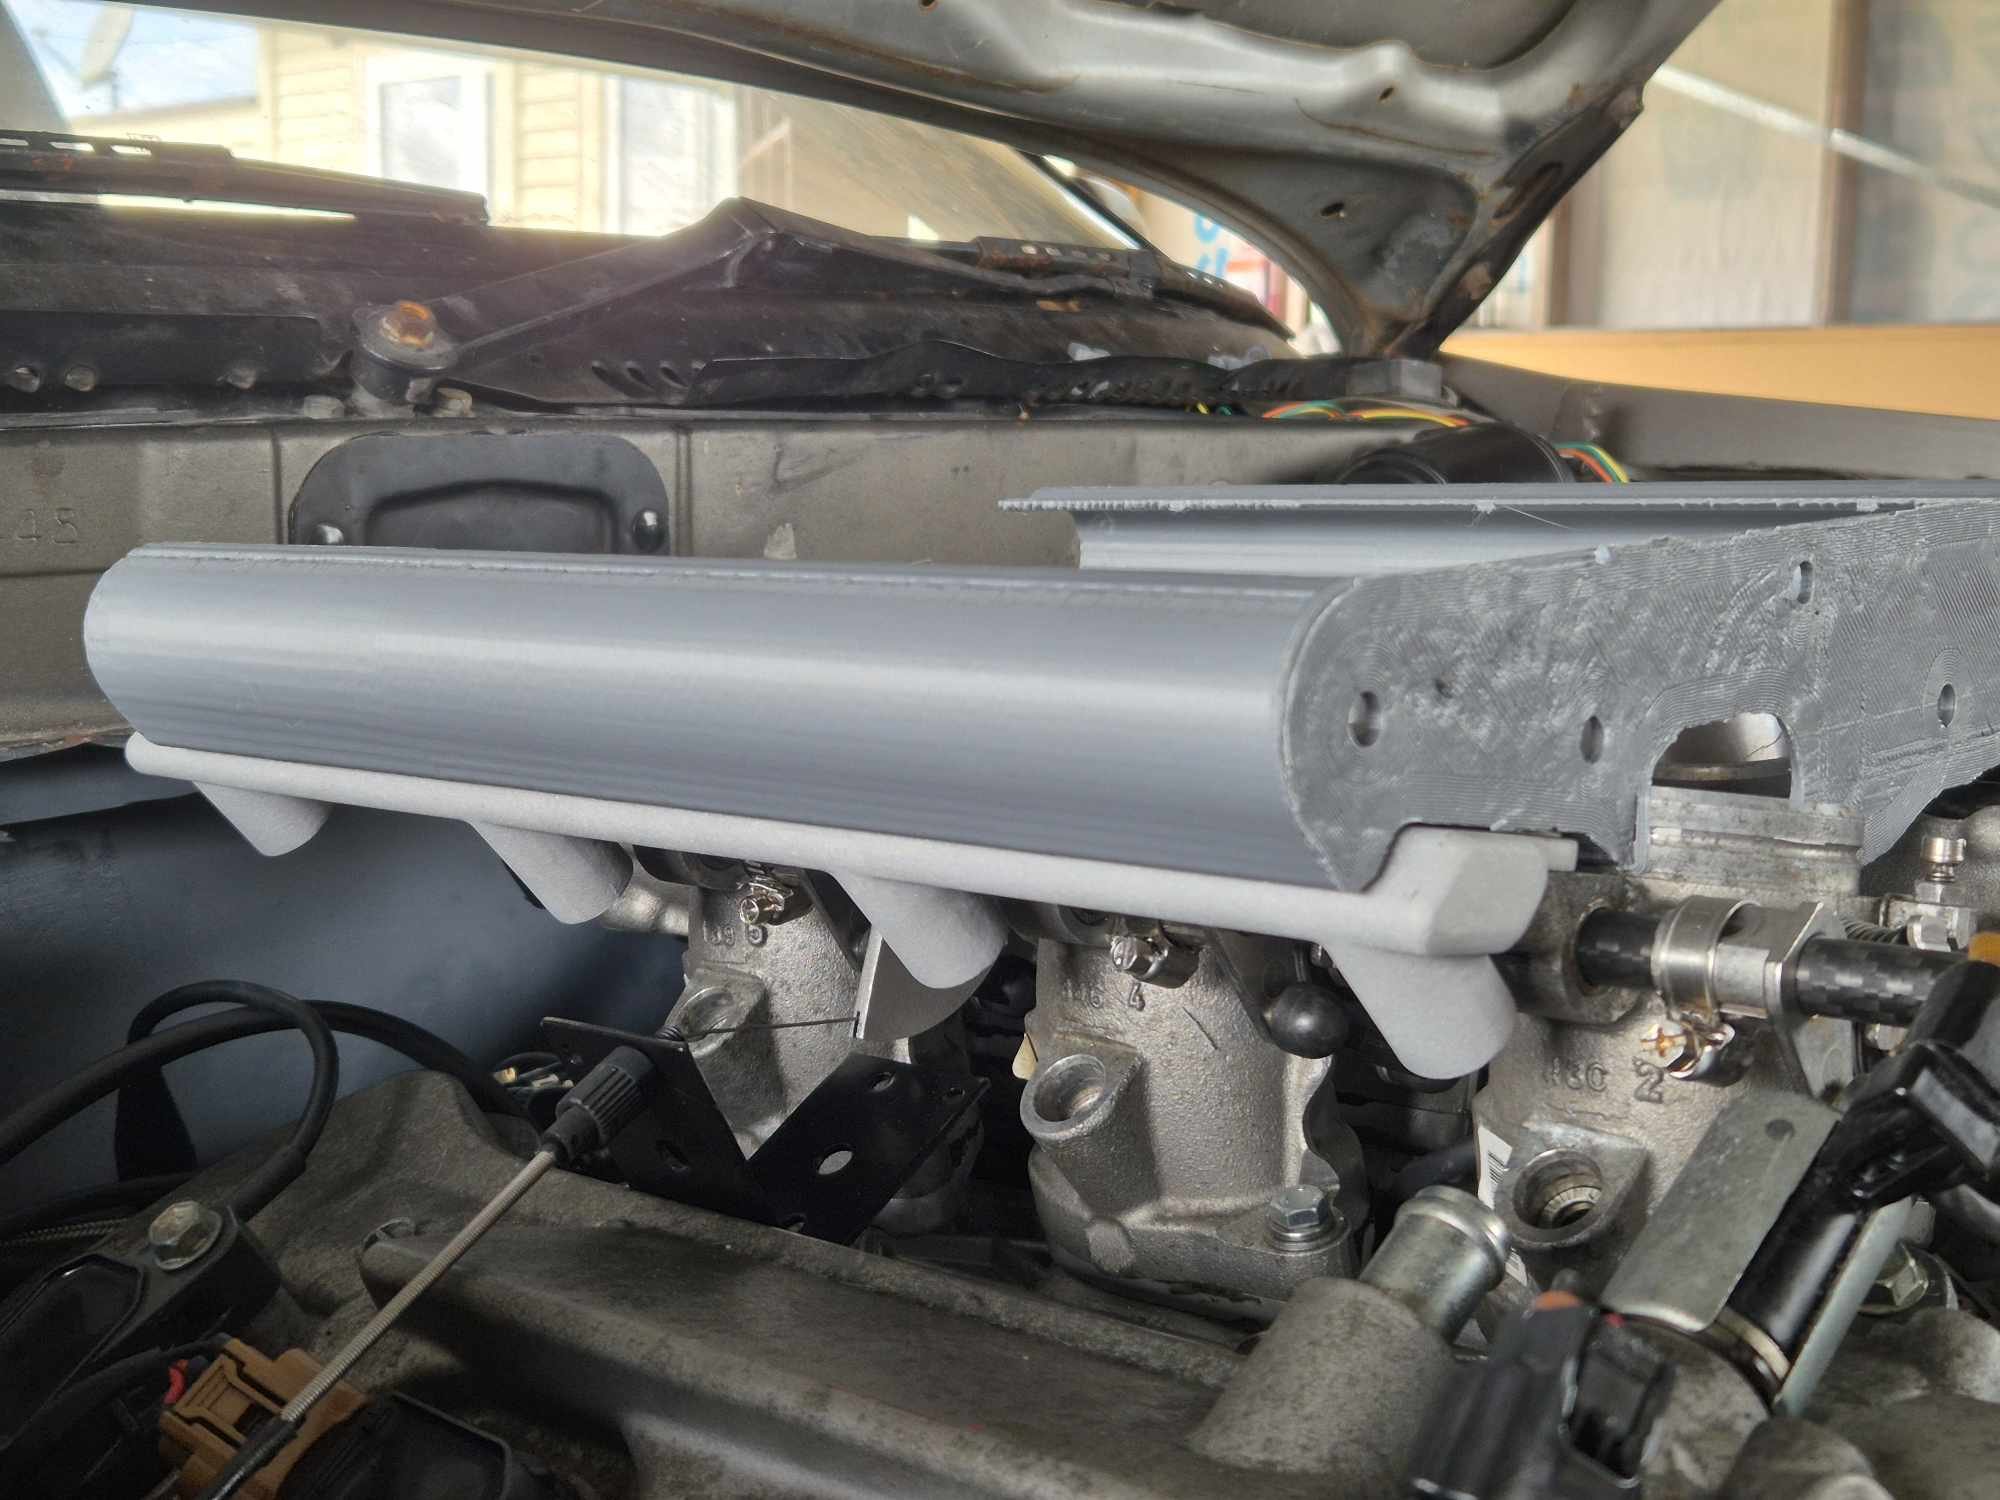
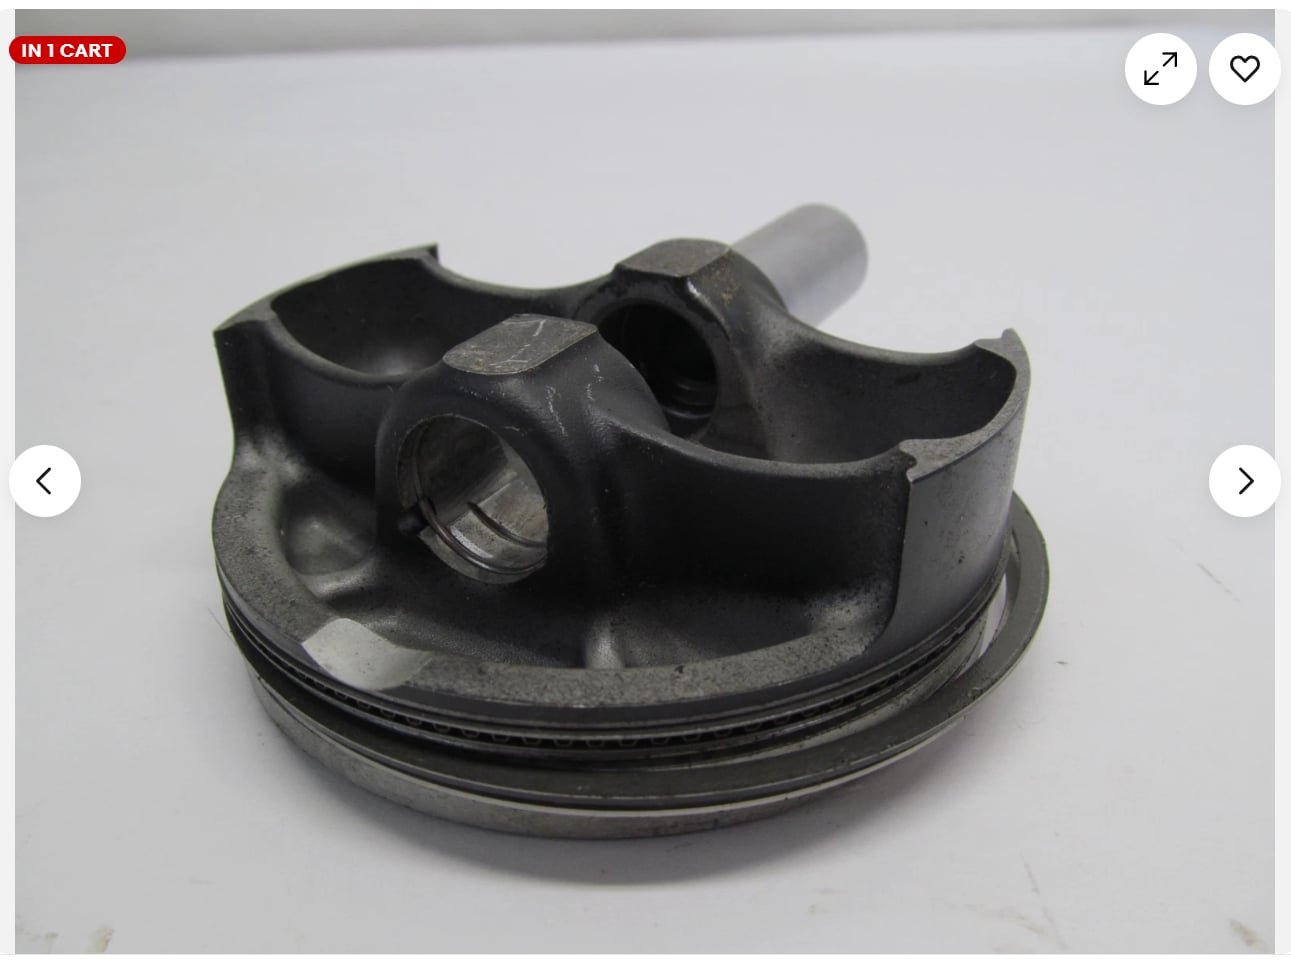
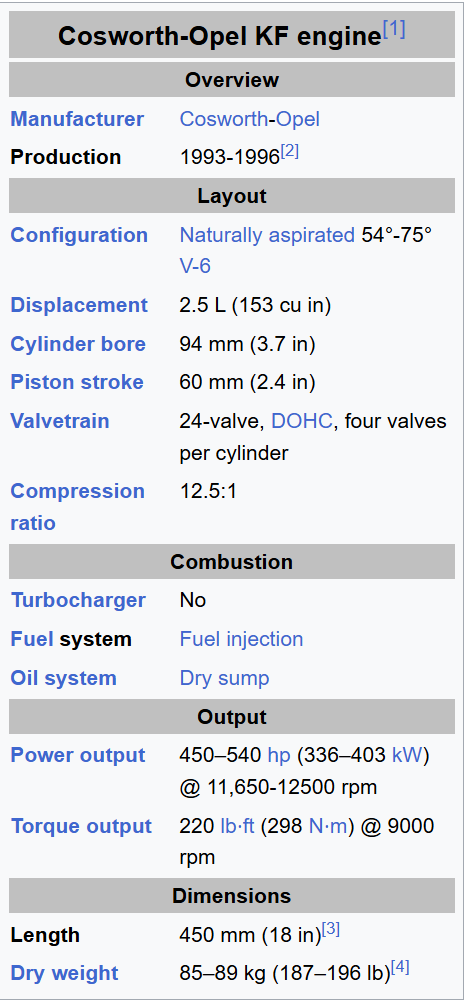
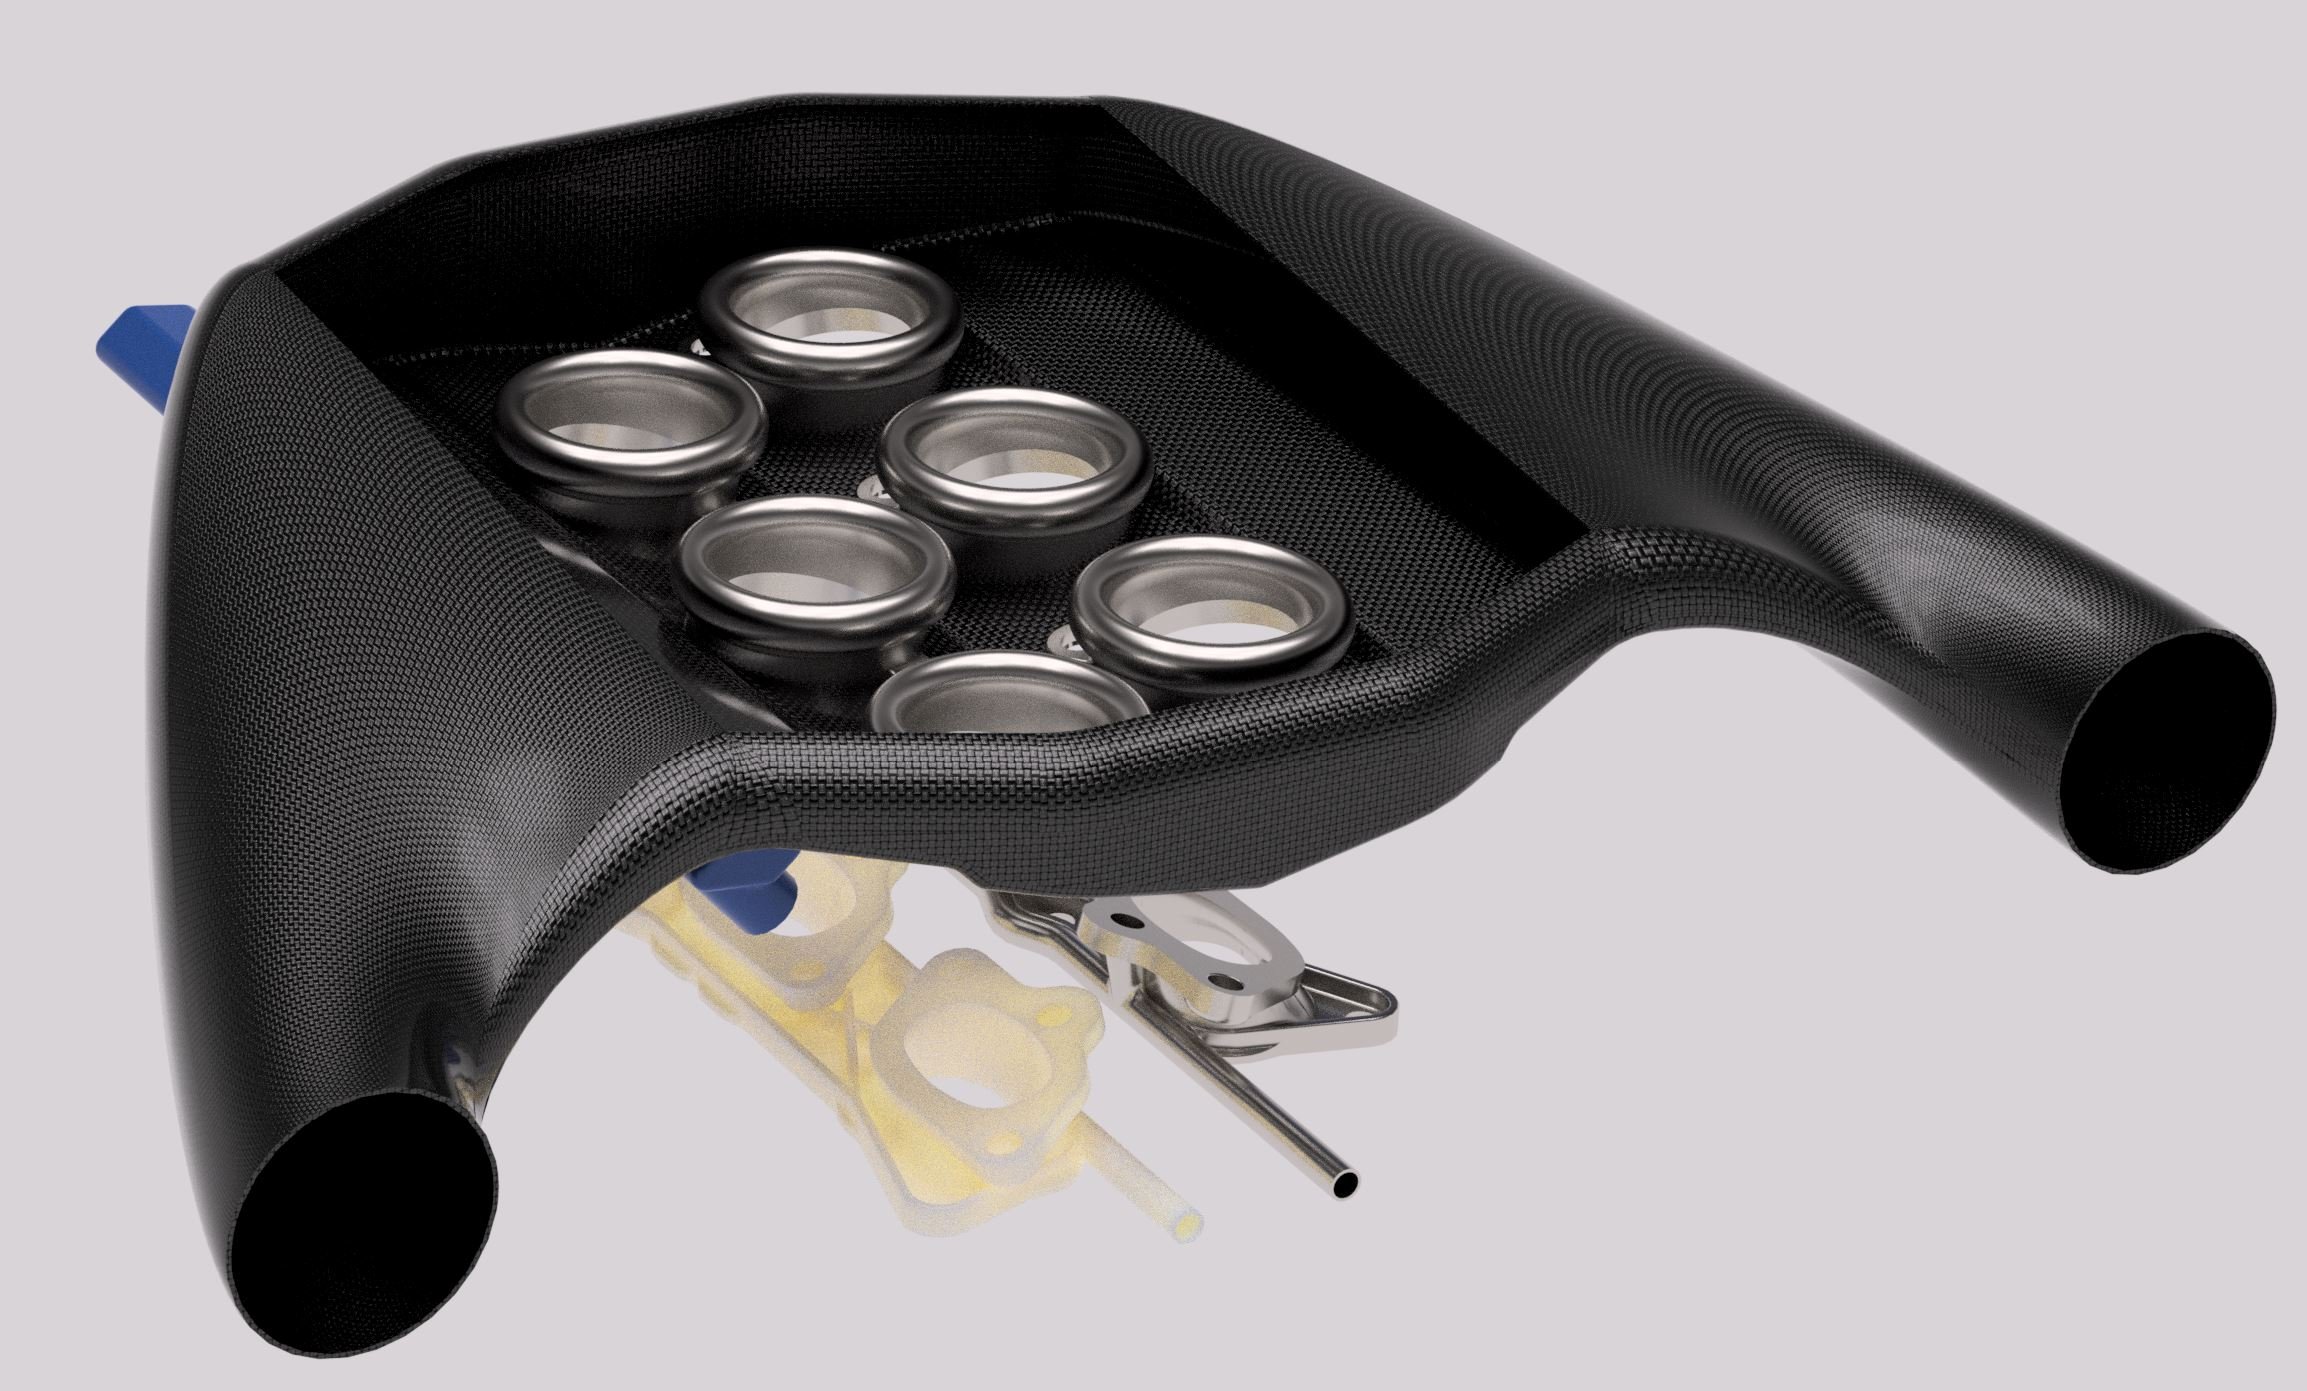
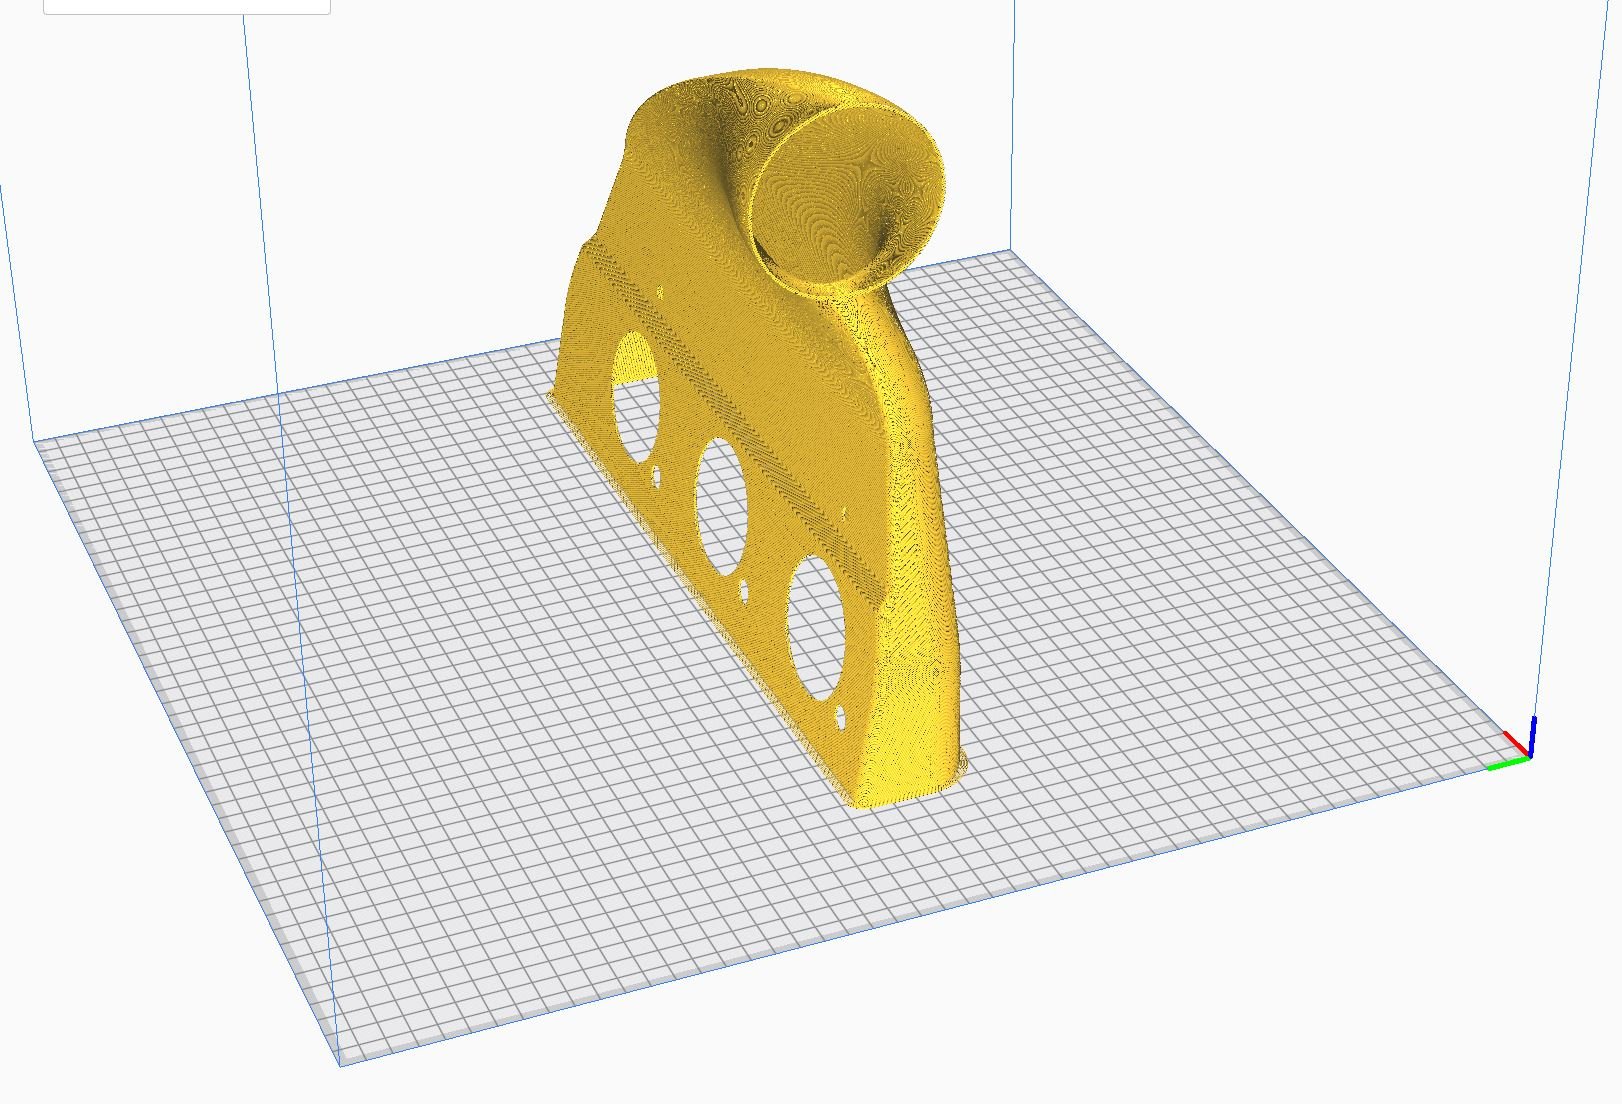
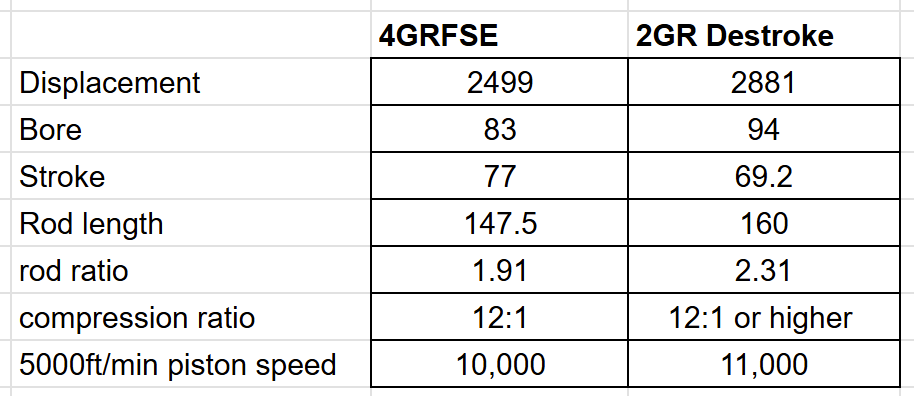
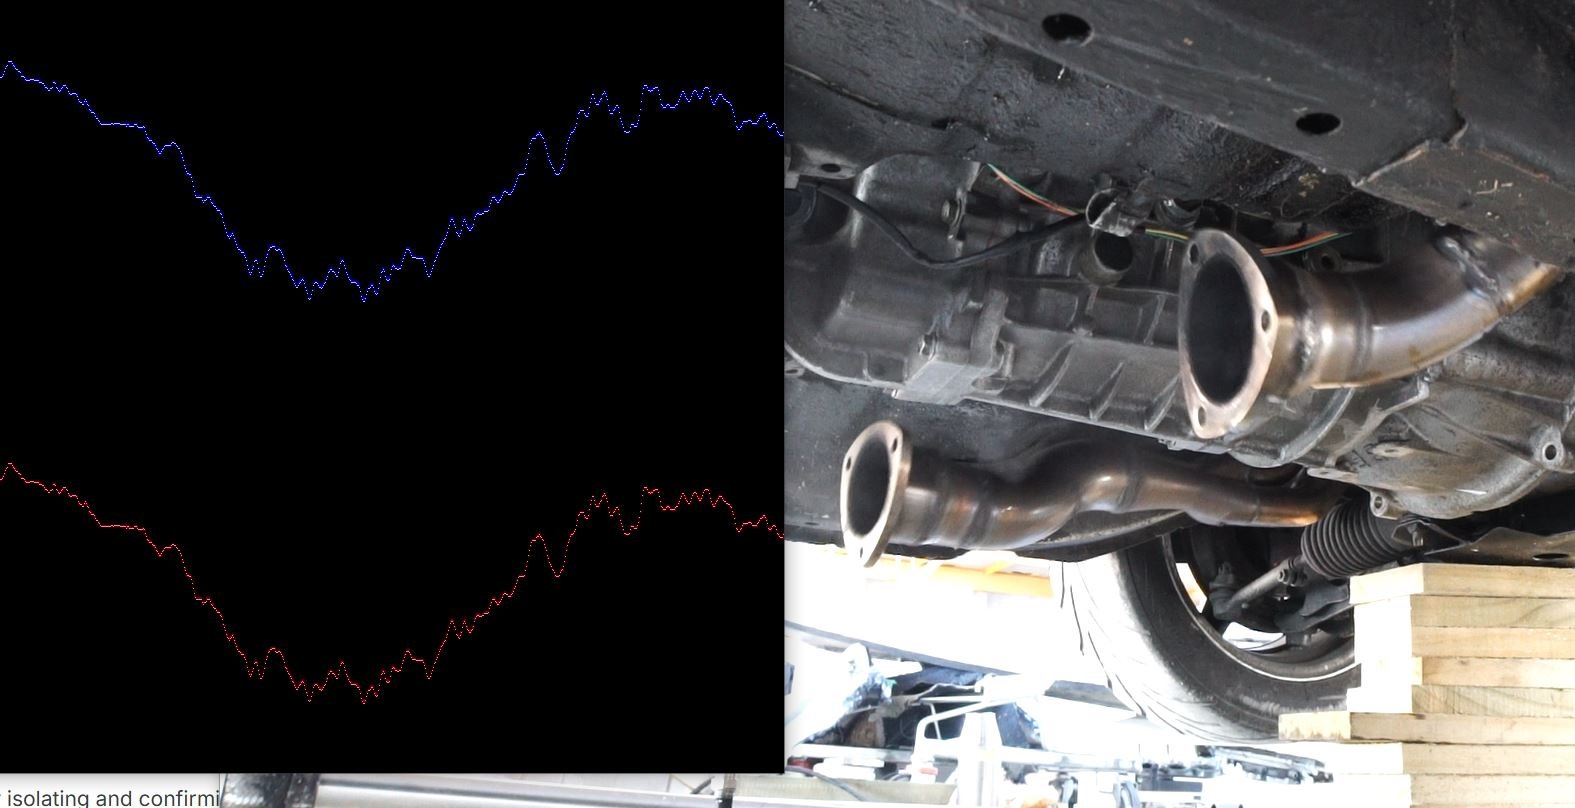
I got my throttle pulleys machined down to a smaller size, so they can open the throttles all of the way (Thanks Dad!) So this is all now working GREAT. and it's super snappy. So I started doing some tuning to try figure out the area just off idle, and why its such a bag of crap. I found that adding considerably more ignition timing helped a lot, and increasing injection timing to around 600deg (usually 400) However, at a fairly early stage I managed to blitz one of my ethrottle motors with about 100 amps too many haha. It still worked, but smelled funky. Well, it ended up crapping itself. So I've ordered another one but it's still a few weeks away which is annoying. Since I couldnt do anything else meaningful for that stuff, I figured probably a good idea to take all of the exhaust completely off and check it. I found a worst case scenario leak for my extractors on both sides. There were signs of a small leak coming from somewhere between the 3 pipes, up the middle of them. Blargh! Impossible to get to this to fix it without cutting everything up. I was fretting about it for longer than it actually took to fix. I cut off the collectors just slightly up past the 3x pipes. Then fully welded both halves, flattened it off, then welded back together. No more leaks and it solved what one of the ticking noises from the motor was. Even if these extractors eventually crack or something. I'm still absolutely stoked to have made these myself. My new fuel rails turned up, but I havent had them machined yet. But fits a lot better. Given the available space I think I'm gonna give up on having a front feed airbox. So thinking dual sides instead. I guess these could both rejoin around the front and grab some air from on top of the radiator. Or I could have air intakes behind the headlights, and go back to a full height radiator. Which probably isnt a bad plan. I cant fit the entire thing on my printer but I can do half at a time. So just banging one out to test fit. 2GRFSE Scheming "Since I am doing this, may as well do this" Since I need a custom rod for the 2GR destroke scheme. Has made me consider piston options. The factory piston is typical Toyota stuff, fairly big and chunky/strong. But for high rpm the lighter the better... No point in reinventing the wheel if something else already exists? I found a 94mm piston from a 400cc quad bike that runs 10k rpm from factory. Cheap and easily available, and nice and light! It has a 22mm pin so might even fit the 2GR rod (apart from that the rod is too short) So I've ordered one of these to test fit and see what sort of compression ratio will be achievable. A destroked 2GR doesnt end up tooooooo far off the geometry of the Opel Calibra DTM car which was absolutely hectic. I wonder if you could grind the journals down to lose another 9mm stroke out of it... Would only need 4.5mm taken off one side I think? Just to be 100% clear though, none of the above are detracting from getting the car onto the dyno ASAP! Once my ethrottle motor turns up, its ready to go. 2GR Destroke comparison for future scope creeping:
1 point
-
Recently got a bit more done on the trailer. Made sure it was about the right size etc, and made the up rights/sides. For ease of use and simplicity, the front and back tailgate board things just slide into slots made from angle and flat off cuts, Then I figured out where the axle needs to be, then whipped up said axle on the BIL's lathe, made some mounts and welded it on, As you can see in the background of the pic posted above in the last update, the alloy wheels were very oxidized (they have been outside for years) so I gave them a water blast, spray painted them black, and then buffed the paint off the face of the wheel to make them all shiny again. Slapped some tyres on that match the cruisers, and good to go. Then I whipped up some mud guards. Decided just to make them out of 3mm thick steel and not bother with mounts, and just weld them directly to the frame. Found an off cut of steel, cut the desired shape out, removed the rust, and put them in my fancy press brake and bent them into shape. I don't know why, but I find the little mud guards soooo adorable! Now I just have to cut and mount the wood, paint everything, and its done. Regards VG. P.S. Say hi to your mum for me.1 point
-
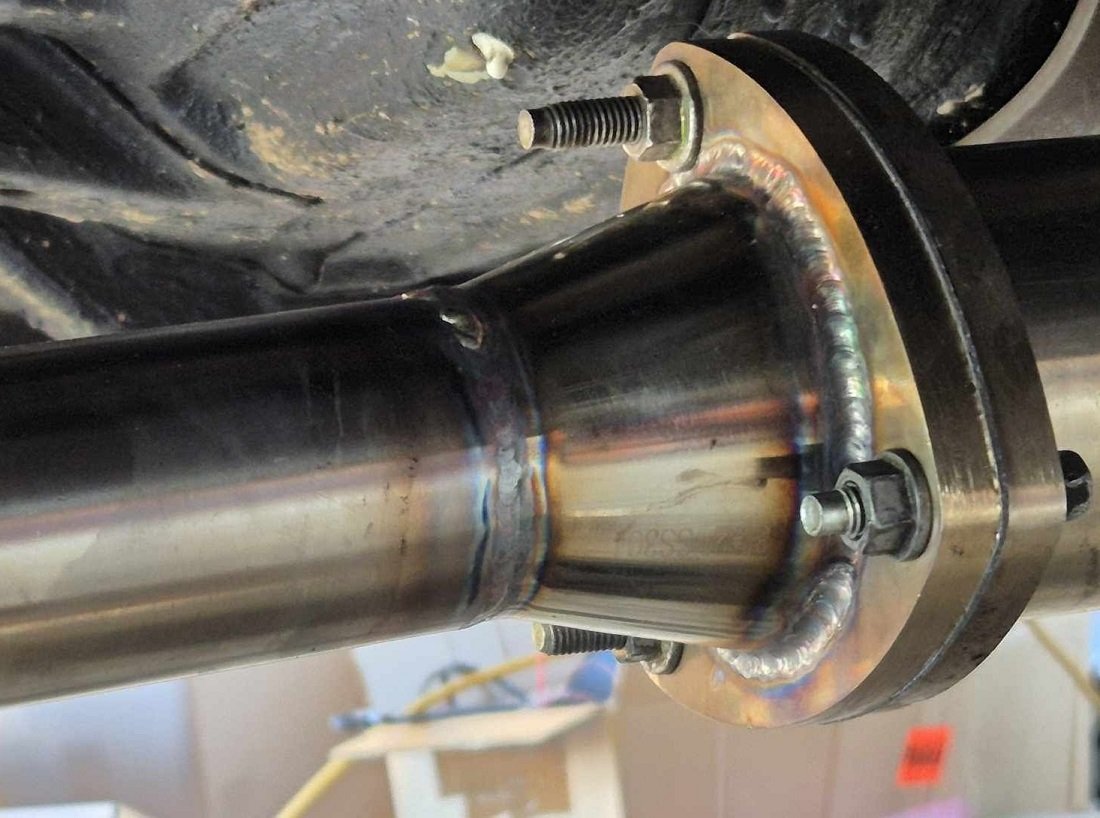
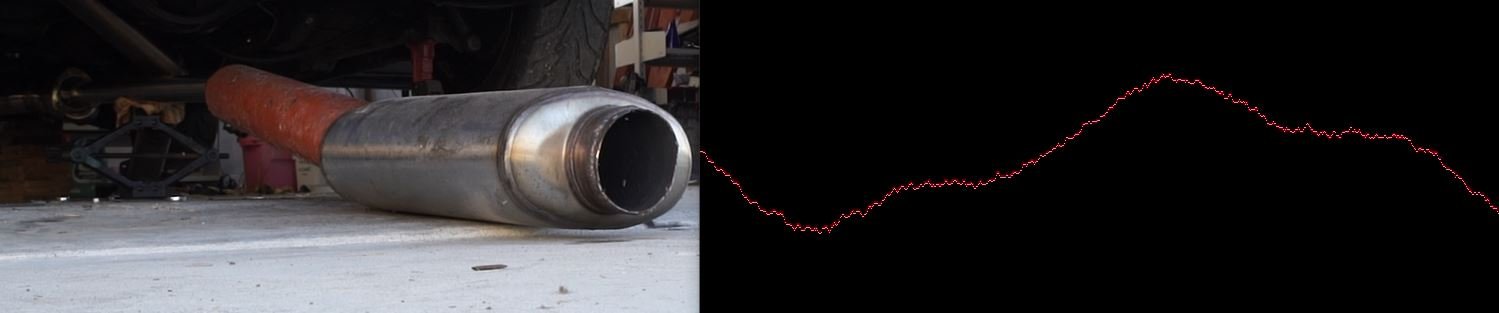
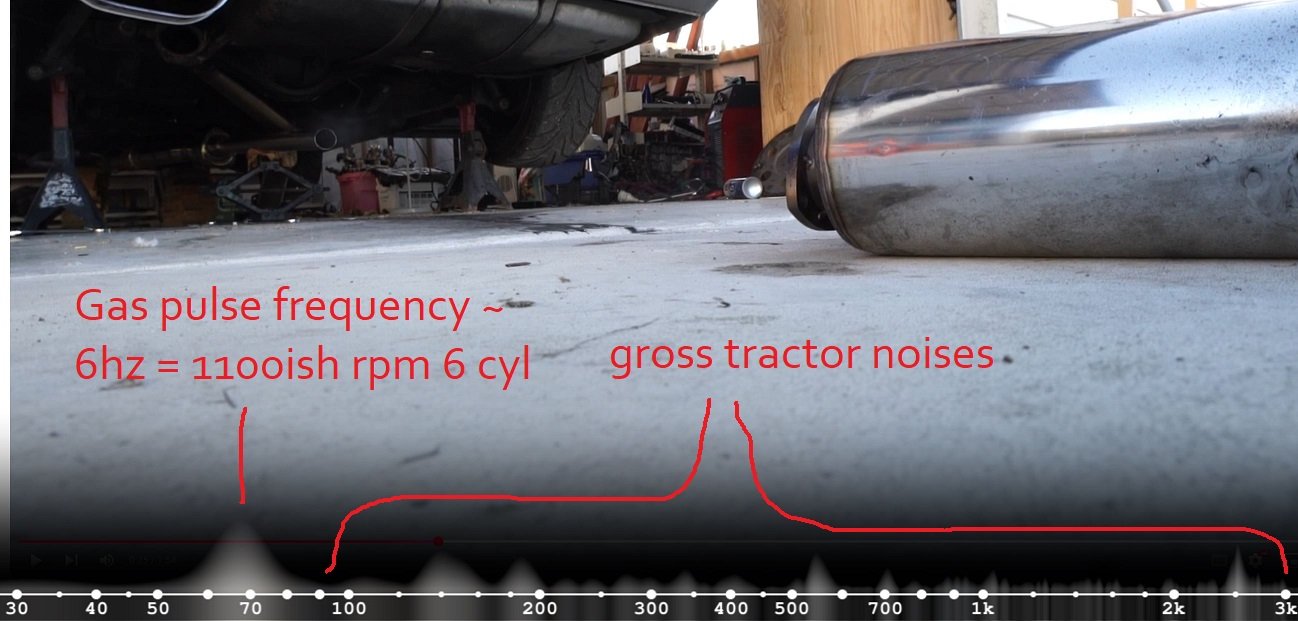
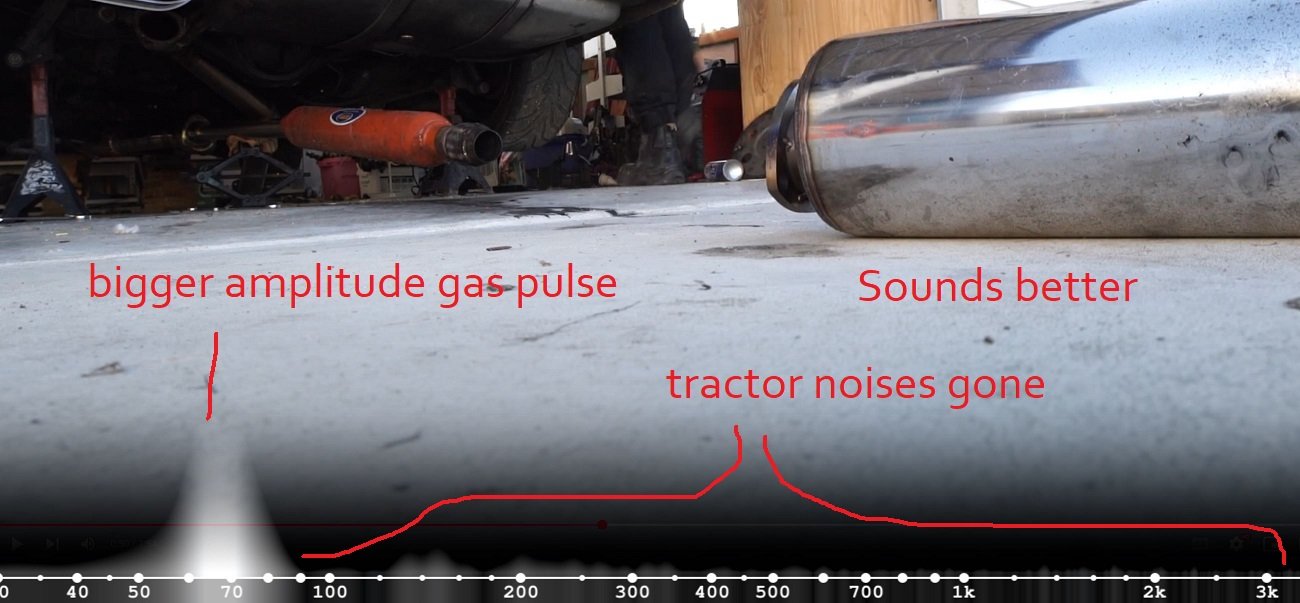
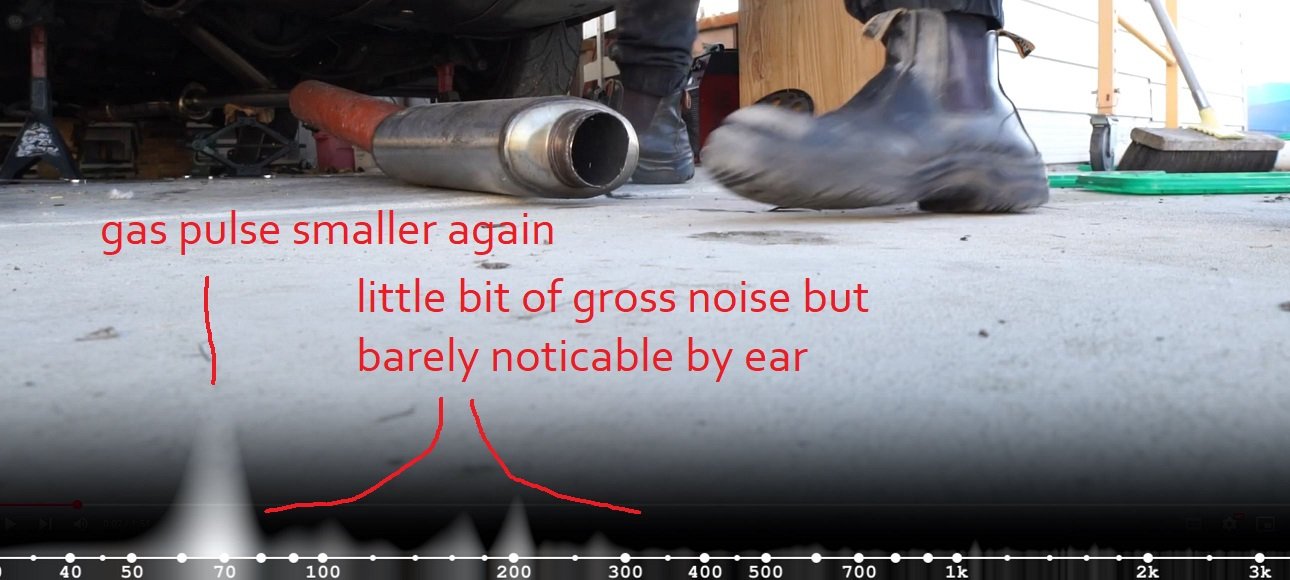
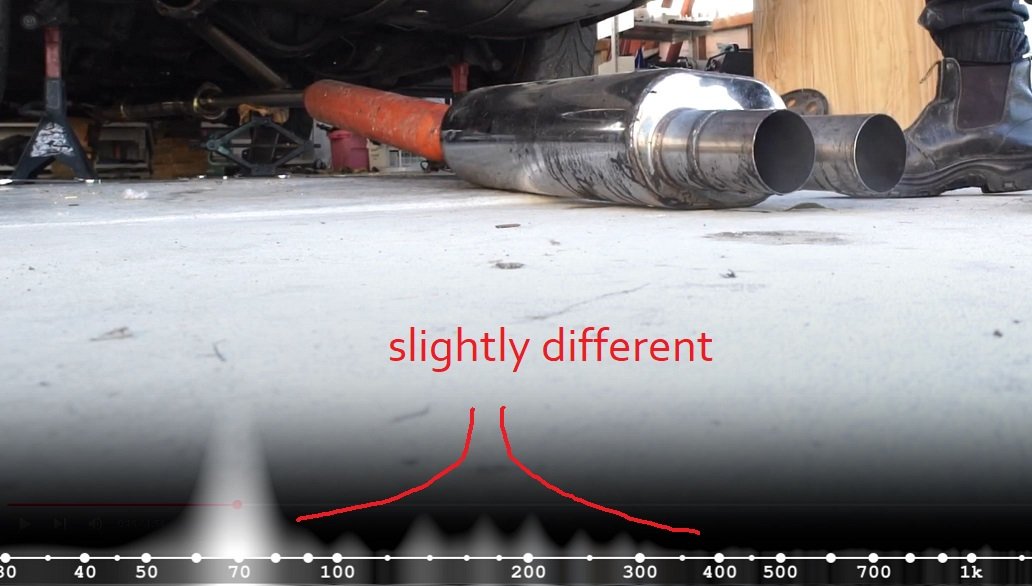
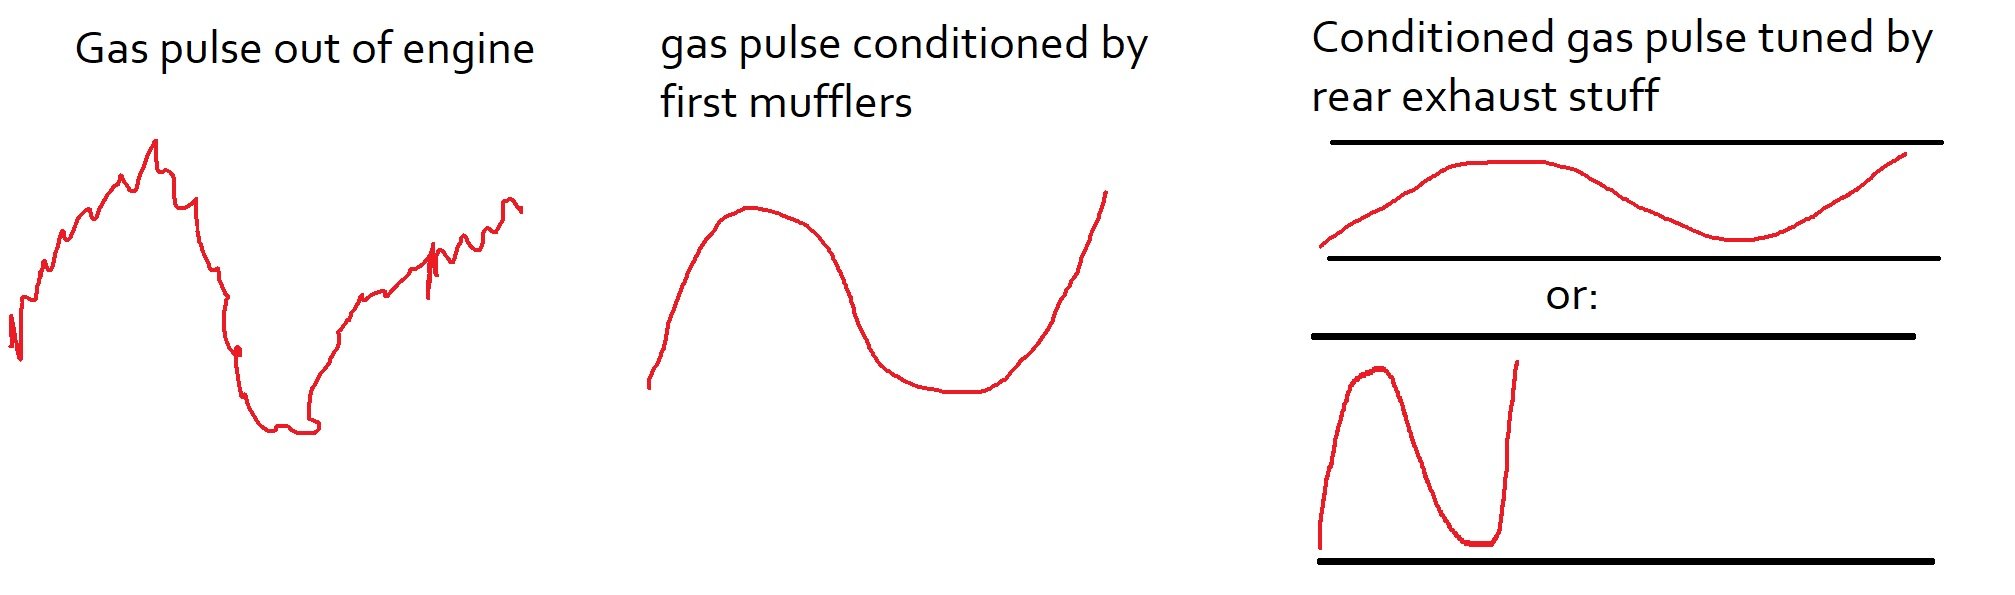
2GRFSE pull down I finished pulling the 2GRFSE to bits, and found that the total sum of damage was: 1x exhaust VVT pulley starting to push its guts out 1x chain tensioner broken 2x big end bearings damaged 1x big end journal on crank looking damaged So the great news here is, all of the damage is confined to bolt on stuff, or, relating to the crank/rods that I am planning to bin anyway. Perfect! If anyone has a 2MZFE motor kicking around, or just the crank, let me know. Keen. Exhaust noise rambling part 2 I thought I would try come up with some practical testing methods for further isolating and confirming what "good noise" is, and isnt. So I can quickly make some iterations and see if they meet objectives or not. Keeping in mind that this is nothing to do with what makes best power, just sounds "better". At this stage this is just testing at a constant idle speed. Which obviously isnt indicative of full throttle performance, or noise. However I'd prefer if it does not sound like a clattery bag of dicks at idle too. So its a relevant test. I will do some medium and full load testing once my ethrottle setup is sorted properly. For a TL;DR version of this considerably overlength post. Here's a video of me just putting a Coby hotdog muffler on or off the back of a 2" exhaust pipe. It sound different with it on or off. The end. Rest of post here:
1 point
-
Well, I made the fucking deadline! I didn’t have time to tune it properly, the rear tyres rub and the brakes need bedded in but those arefuture problems1 point


This leaderboard is set to Auckland/GMT+12:00