All Activity
- Today
-
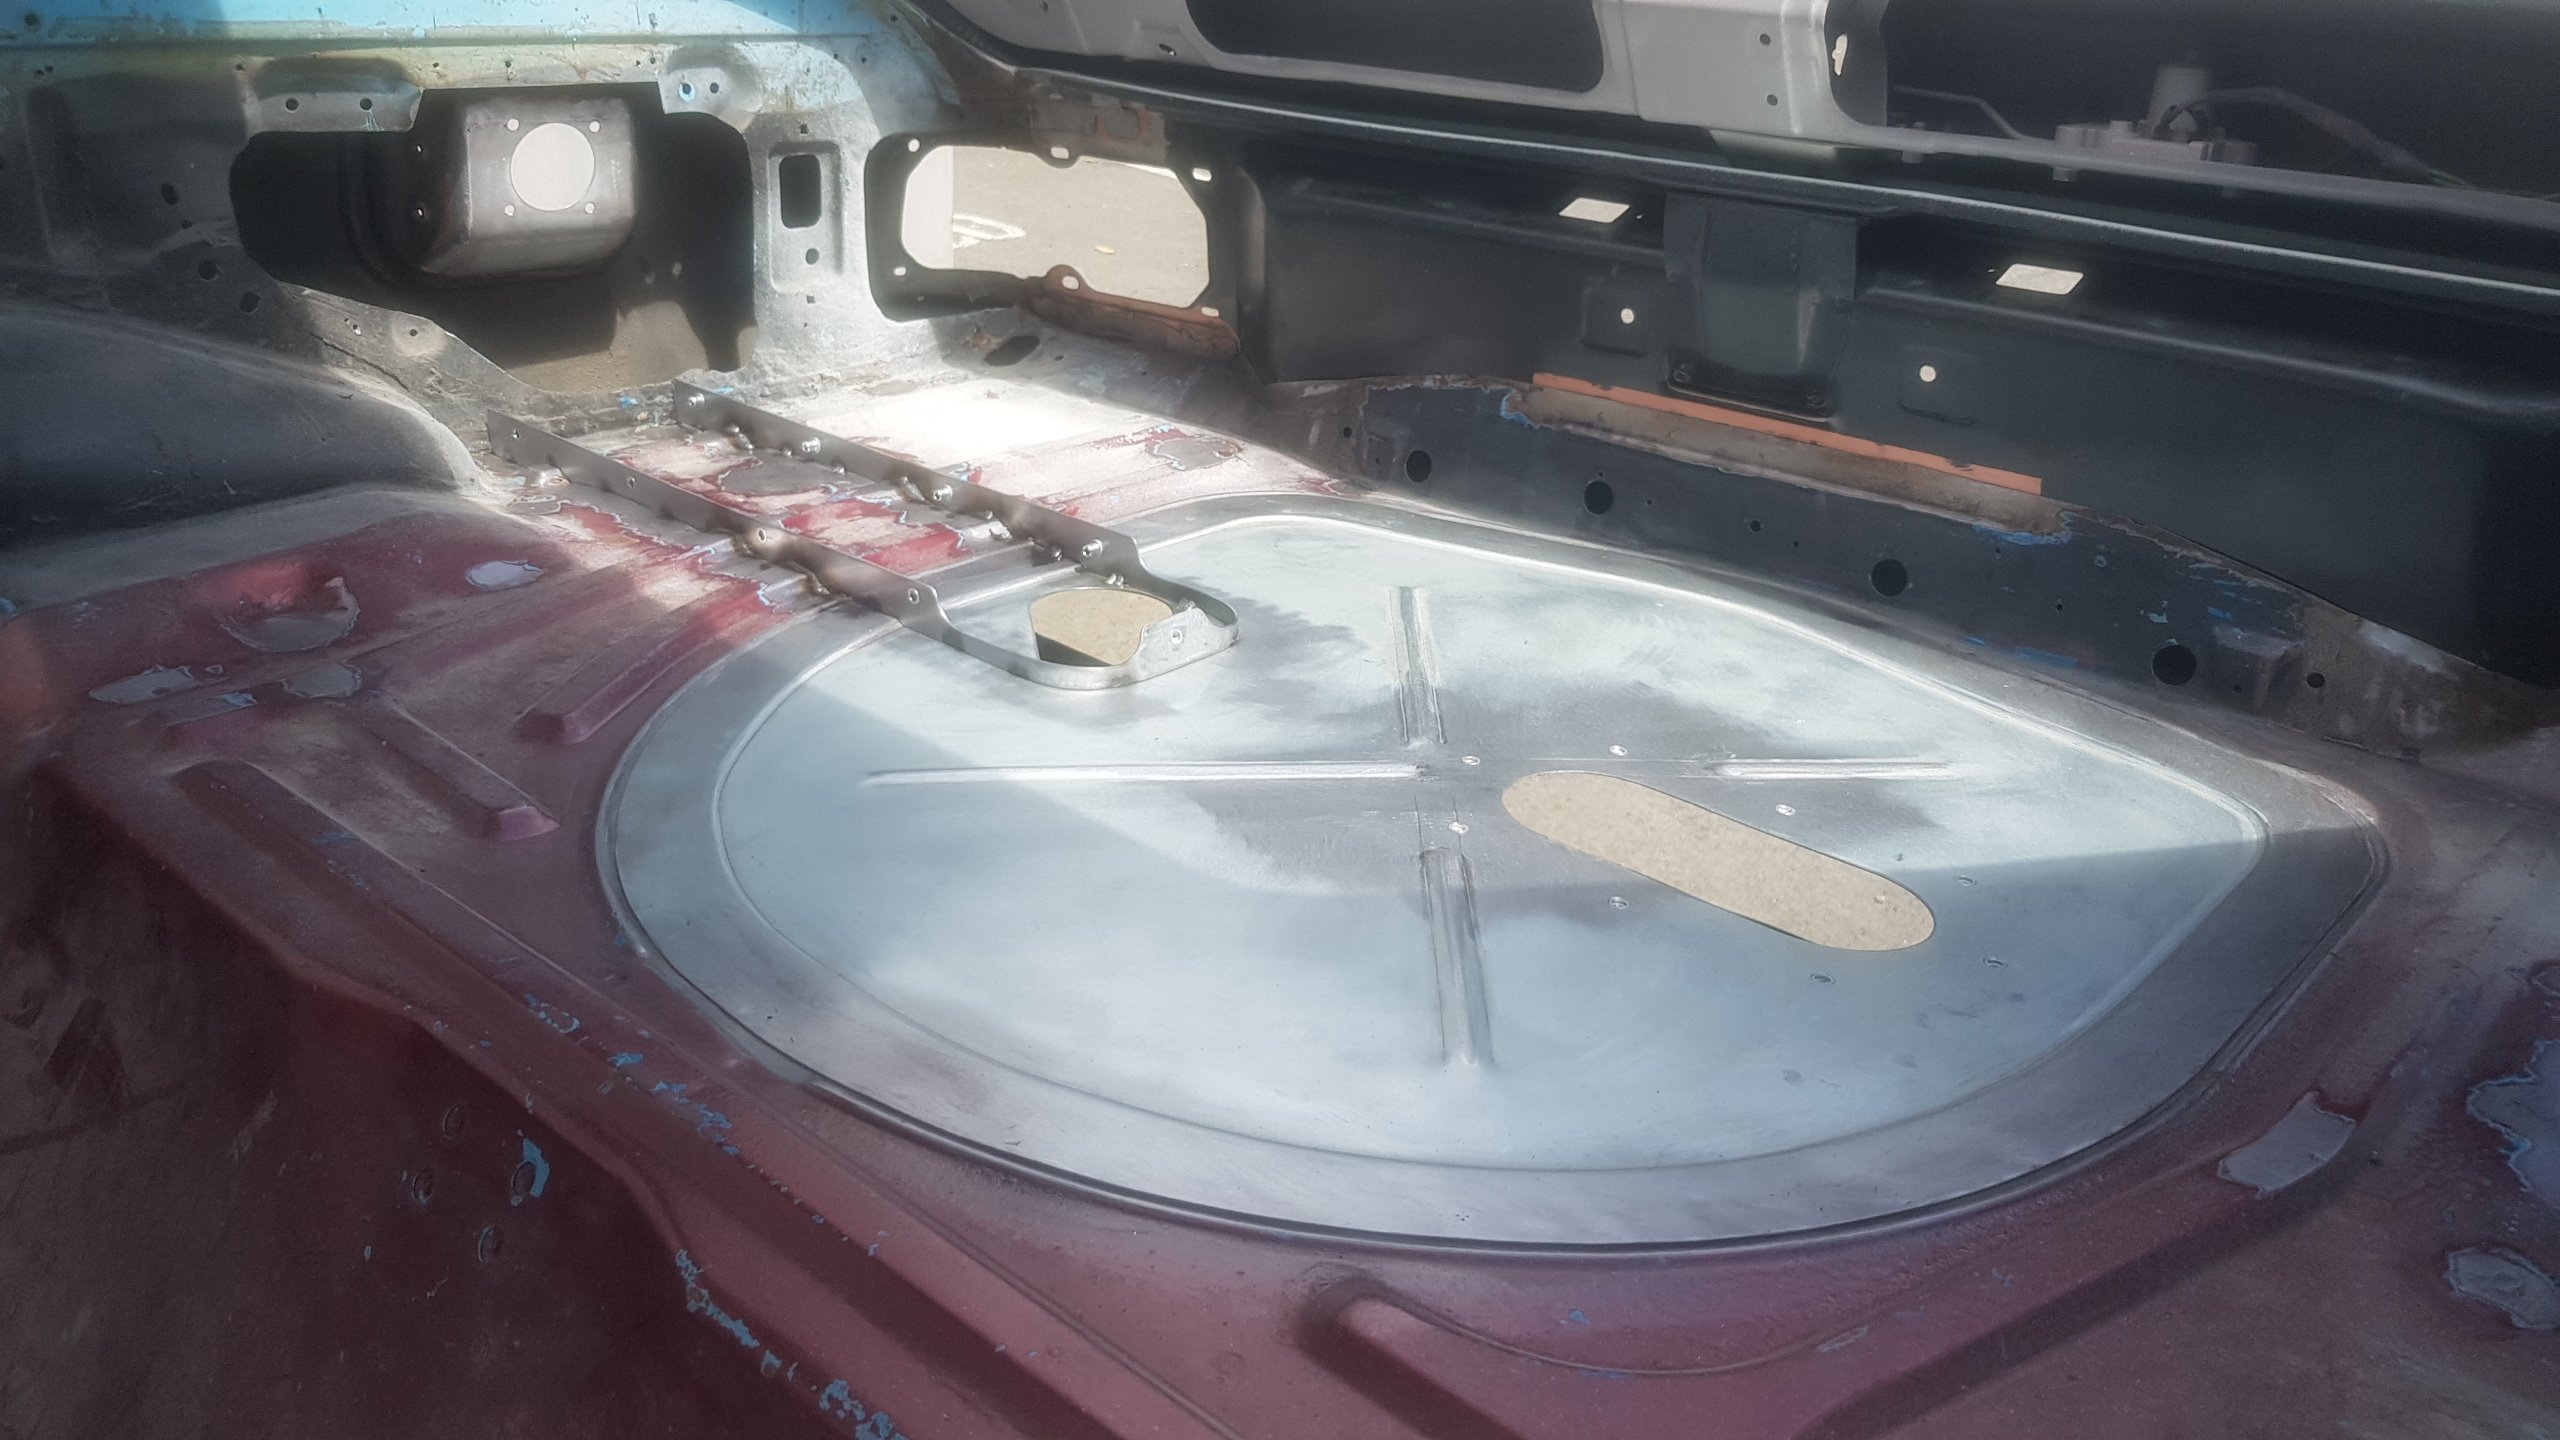
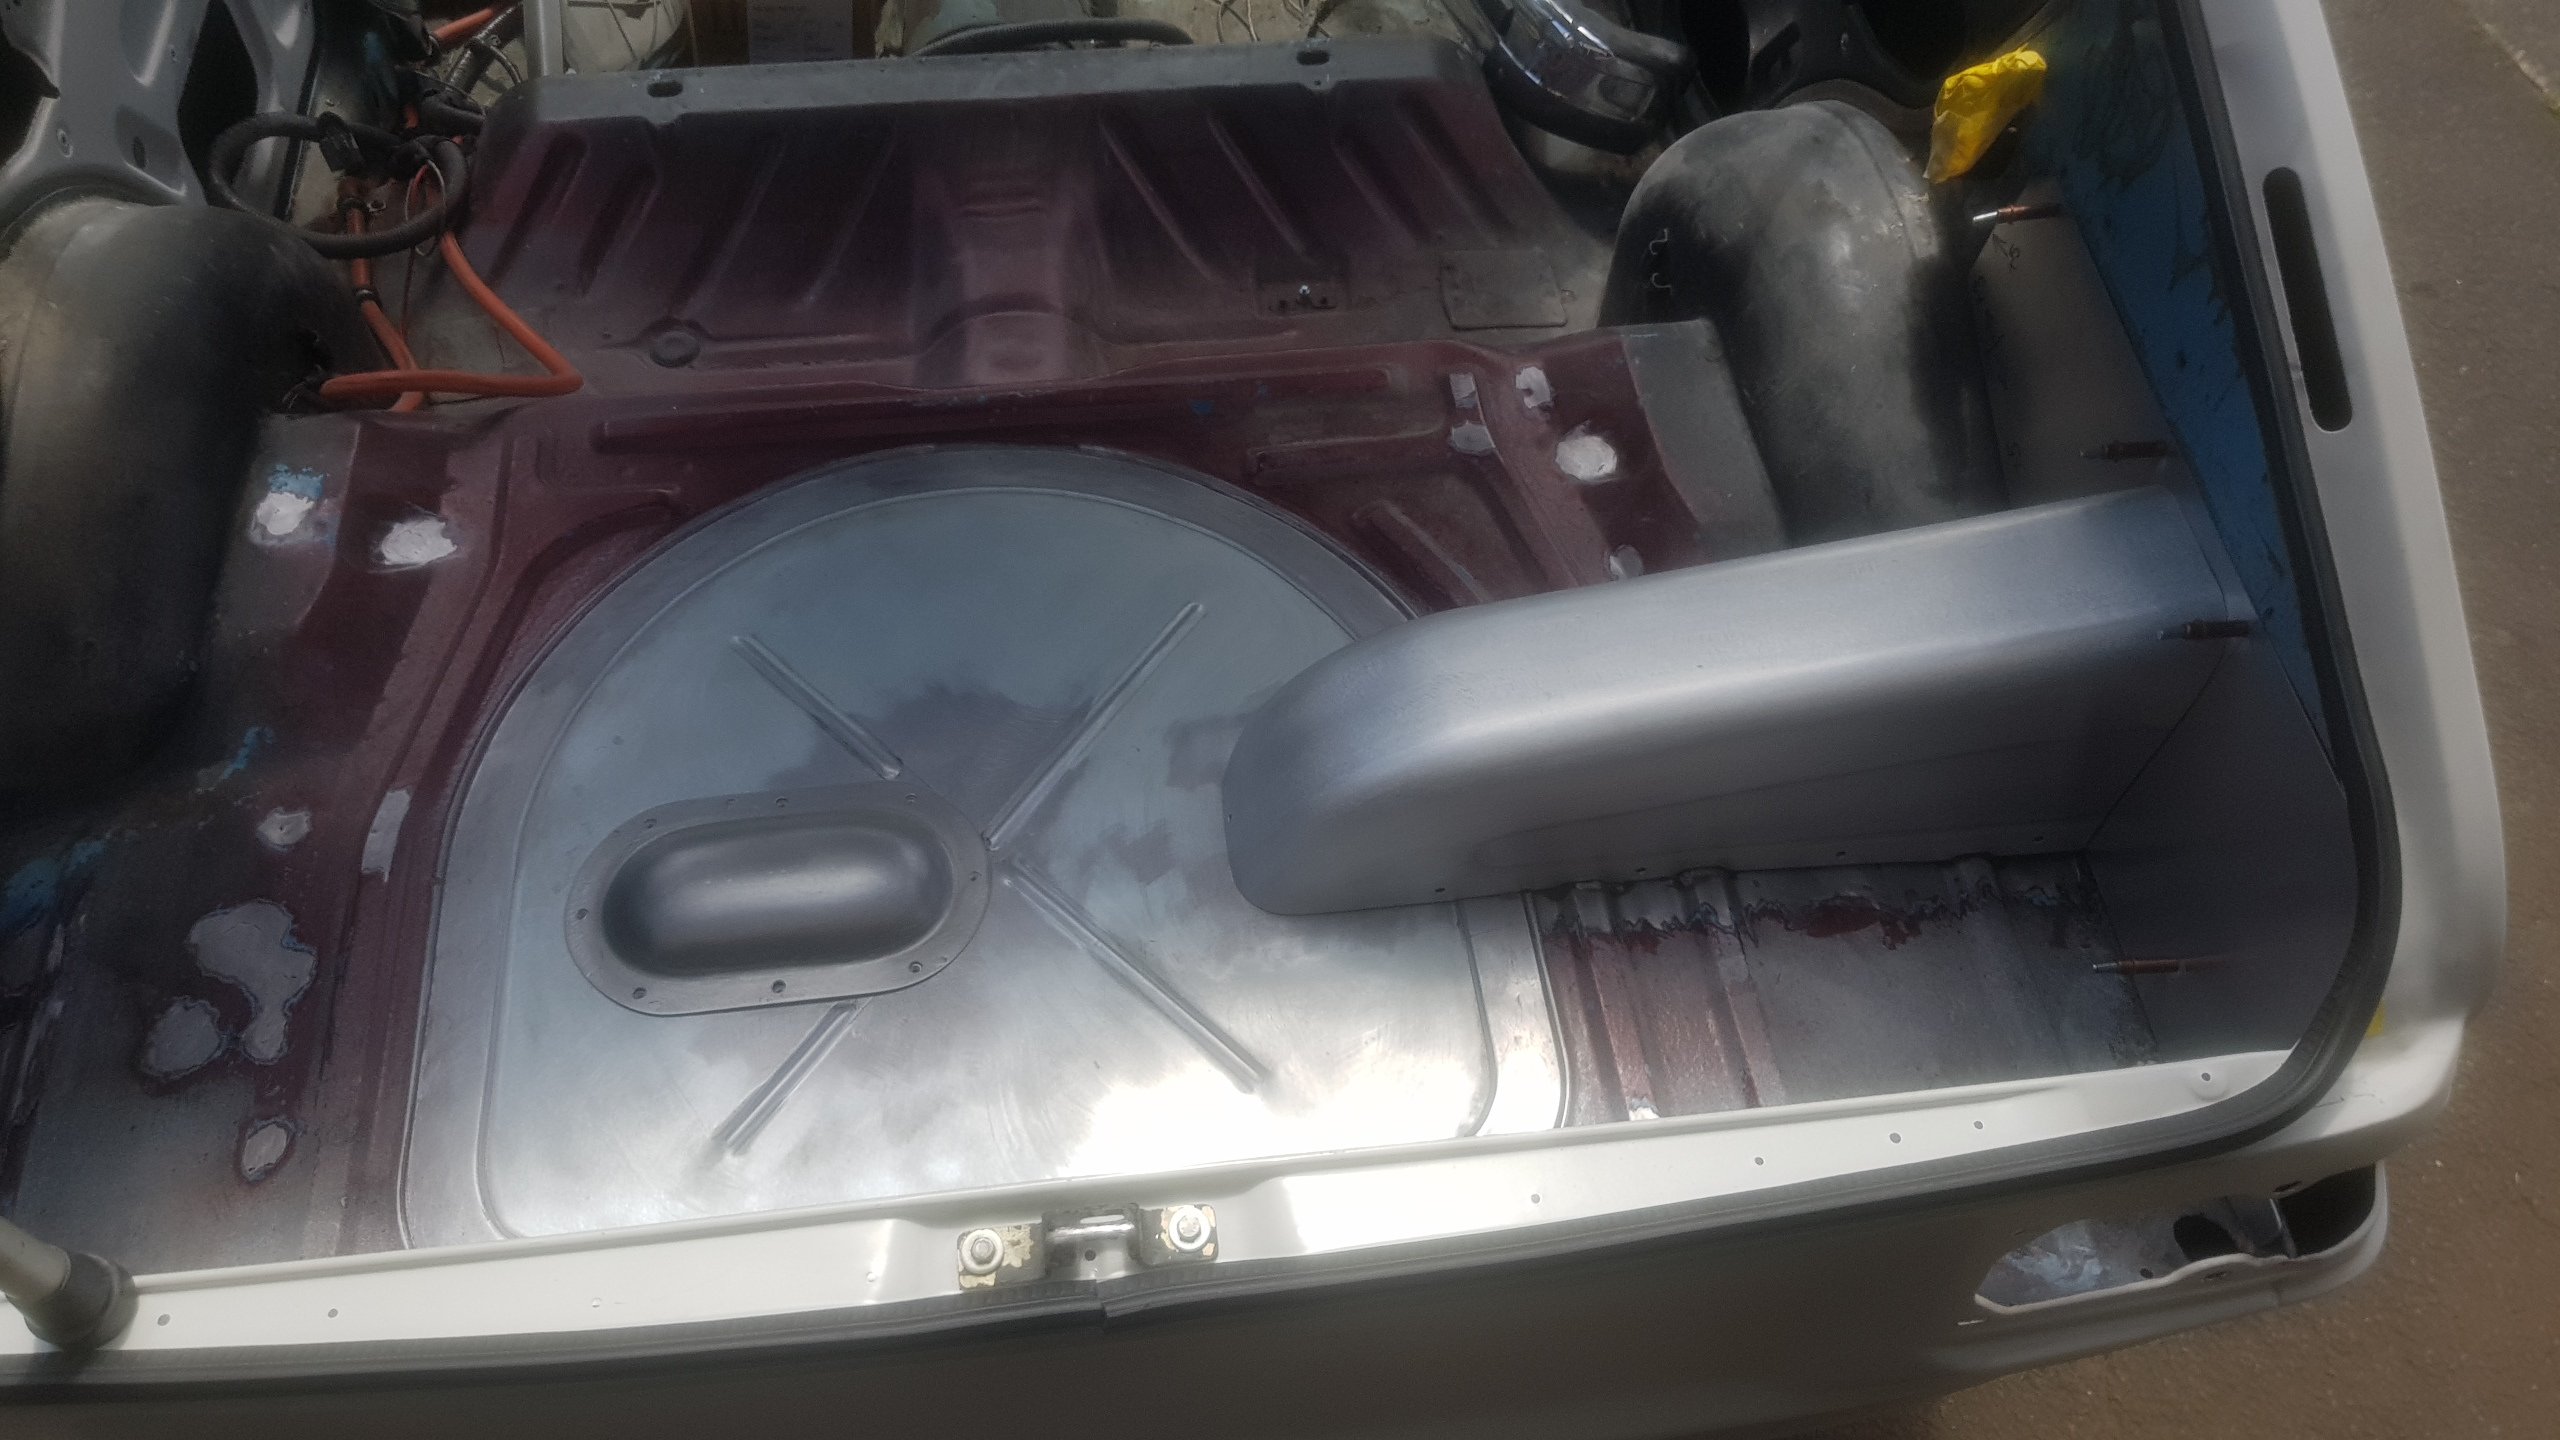
I did some work on a 323 hatch last year. Spare wheel well delete, underfloor Ali fuel tank and modified the filler neck to suit. As the neck passed through the passenger cabin I had to do what Clint described, so I put a flange on the floor and made a cover panel to seal off the filler neck. Also had to do Ali side panels as they are just carpeted from factory. You could do something similar. Its a bit of extra work but gotta do what ya gotta do really.

-
The Por15 and Kbs tank sealers are decent. Have used them plenty. Its best to get the tank acid/chemical stripped first, but short of that, chucking a heap of clean shingle in there and shaking the fuck out of it will get any loose shit off and key the surface. A wash out with thinners will give it a good residue free clean, then you can go through the coating process which usually have a phosphoric based metal prep as part of it.
-
Cool, Will have a look into that, thanks for the advice
-
Not necessarily, in your case a sealed box, around the surge tank, with a drain outside and possibly reroute the hoses might be an easy ish fix?
-
In my quest to not spend any money and do nothing on the Leaf, I spent money and did stuff on the Leaf. Yeah. In my defence, part of it is maintenance, and part of it is stuff I had in the garage already. A local EV part supplier was having a sale on a "Leaf Bundle" so I decided to grab one. It included a cabin filter, two front strut caps, and a LeLink OBD2 dongle for Leafspy. The strut caps were pretty easy. I removed the two covers on the cowl Which gives access to the strut tops. One of mine was in good shape but drowning in water, so I dried it out, buzzed the rust on the top with a wire brush, coated it in WD40 and fitted the cap The caps are nicely shaped and 3D printed, designed to snap into the lugs in the center of the top mount. They completely cover the whole top mount, so there is little chance of water pouring into them The other side was a bit crustier, so I dried it out and gave it a good scrub with a wire brush, before again soaking it in WD40 and capping it off. Next, since the bonnet was open, I moved on to fitting some LEDs. On this car, the low beam is some fancy and really good at night LED setup, which is very crisp white. Nissan paired these up with normal yellow park light bulbs I had some T10 LEDs already, so popped the big cap off the side of the lamp Which gives access to the park light bulb holder This rotates counterclockwise to remove the holder and bulb The bulb then just pulls out. After test fitting and checking the polarity of the LED was correct, it was refitted The results are rather obvious. They blend in with the low beam LEDs much better In theory, they should use a little less power too. So, you know, savings. Eco. The interior was treated to some LEDs too, for more eco-savings The one in the boot didn't miss out either Serial killer cold white, of course, for maximum SPACE AGE feels (not just because that's what I happen to have). Moving along, next up was to set up the LeLink adaptor and fiddle with Leafspy Pro. So my SOH is 71.56%, a bit lower than the 75% I was hoping it was, but shouldn't be an issue. The battery seems to be pretty well balanced too, with a low voltage differential of 17mV. Obviously previous owners haven't done a lot of quick charging either, as in 108,000km it's done 173 of those. The other thing I wanted Leafspy for was to convert the language in the dash display to English from Japanese. The media unit was already converted by the previous owner. A quick and easy change in the advanced settings and everything was in English. Very easy to do, and almost worth the cost of the Pro app alone. People charge $80 for this service. Finally, I had a nice replacement cabin filter that needed to find its way into the dash. This was a real pain in the bum, to be honest. I had seen a couple of videos about replacing them, so wanted to try the through-the-glovebox option first. There is a little door at the back of the glovebox, that is removed with a gentle tug With it removed, you can access the filter cover. This doesn't line up with the opening you just created, it is further back in the dash There is a clip on the top which I lifted to remove the cover With the cover removed, I grabbed the filter and started to manhandle it out of its home. It liked its home, it really didn't want to be removed. It turns out, that the filter is much bigger than the opening, and needs to be crushed to fit through it. I got the filter half way out, but then the glovebox was in the way. Only one thing to do then. Remove all these screws Remove this panel by popping it free and wiggling it out towards the rear of the car. The fusebox lives here btw. This might even be an optional step, I'm not sure. And then with some wiggling and jiggling from both ends of the glovebox, pop the clips free and remove it. Dont forget to unplug the glovebox light from the top, if fitted This gives ample room to access the half-removed filter Once removed, this is the front door to its house The new filter goes in the same way the old one came out, with brute force. You kinda squish each end to fit it in and then it pops out to fill the cavity inside the box The cover then pops back into place The old filter wasn't too bad, based on service stickers, it looks like it was replaced a couple of years ago, but it did have a kind of earthy musty smell which I'm glad to get rid of Refit the glovebox, and all the screws, and you're done. So far I've been really enjoying the little Leaf. It's a funny little appliance. It can be fast, faster than people expect, but it also likes to be driven around sedately without a care in the world. The Bose audio is great, nice and clear with some punch from the sub in the boot. Bluetooth works well, as do the steering wheel controls. The media interface is looking a bit dated these days, and I'd love an Android Auto option, but from Googling, it looks like hard work. The heated steering wheel is LUSH. I've never had it before, thought it was a naff idea, but it's already won me over. Heated seats, not so much. They're VERY good and get real toasty, but I can't get over the feeling you just wet yourself and you are sitting in a "warm" seat. I'll keep trying it, as it's more efficient than running the heater over winter. Speaking of, I tried the climate timer out before work this morning. Set to 21c, which might be a bit low (it was on 24c but I thought I knew better), but it's quite nice getting into a car that's not cold inside. I didn't need to run the heater this morning because the interior was already up to temp, and the glass didn't fog up as bad. This is another thing I'll play with and see what my best options are. I bought a Type 2 to Type 1 adaptor so I could take advantage of being able to charge my car at work. Seems to work well, nothing like having a full tank of juice at the end of the day. Our chargers are only Type 2, hence the need to adapt it to the Type 1 Leaf. The adaptor I bought was Projecta branded, and the build quality of it is impressive. It's solid, made of nice sturdy plastics, and works with no fuss. I feel like the cheaper ones, with no branding, probably don't feel as good as this one. Other than that, I want to change the reduction gear oil shortly, so I'll need to grab some Redline D6 ATF for that, and then I'll just keep zipping around, being a pest and using all my instant torque to win traffic light drags whenever possible.
-
Okay thanks for feedback @HumberSS To be fair I dont weld very nicely either. Is it a case of, it doesnt weld nicely so it's brittle or weak or something... Or it just looks like crap? As it's easy enough to add some mechanical strength to it by having the pipes slot in rather than relying on strength of a butt weld. If I can weld it together enough to not leak, then it's fine if it looks a bit so-so.
-
Want to sell the pumps and tank? (too soon maybe)
-
Nope, you have more time and money to spend
-
Onleafans.co.ng
-
In my experience the 3d printed stainless doesn't weld that nicely. I've had a fair few bits out of Shapeways over the years but there is better pricing around these days out of the China.
-
So what I'm hearing, is I wasted my time and money....lol
-
My budget tank pumperouterer This only worked averagely as the pump kept getting blocked with all the clag coming out, and the results were displeasing. The dark stuff is rusty water, time to pull the tank I reckon, i can see a layer that is obviously where water has sat and rusted shit up. Pah.
-
If anyone has a spare bed I'm your guy. Fucking hate admin/booking shit.
-
Somewhat off topic but I'd totally contribute to a leaf thread. Swapping leaf engines into things is a thing. Swapping non-leaf engines into leafs is a thing. Upgrading leaf components and hacking them to go faster is a thing. They also work great for riling up your backwards racist uncle at the family bbq
-
Keen, it'll be my last hurrah before heading Stateside.
-
Dredge from many pages down. I hit 25000kms the other day, I was wondering how many scratch builts actually get used that much.... Anyway, 25k seemed to set off a run of fuckery with the old girl. On a trip back from a job it started to make a rattly noise around 3k revs, so I nursed it home and did some investigation without many results. Then someone suggested replacing the harmonic balancer so I figured why not and ordered one. As I was walking down to check the mail I thought to have a quick look at the condition of the existing one. When I looked I saw that there was no nut on the crank..... I guessed this was probably the cause of the rattle. I fitted the new balancer and decided that the wee bit of slop that now existed in the keyway was acceptable enough, and the shaft seemed ok. That worked fine and it runs quite a bit smoother now, unsurprisingly. I found another spare nut in case the new one falls off... Then almost immediately it started to dump oil from somewhere. Like half a cup per trip dripped out once stopped. I suspected the turbo as this seemed to be on having a crisis, there seemed to be a certain amount of oil getting into the inlet tract, and the bypass valve that I welded up to stop it rattling had come loose and was rattling again. Further investigation seemed to confirm that was the issue. A year or so ago @fuel gave me his old TD05 that was significantly nicer/newer in all respects and had a way better bypass design, this has been sitting on my shelf awaiting fitment. So this weekend I cracked on with the swap, it was surprisingly time consuming, just cos things are tight in there and I have ham hands. Obviously I had to set the rotations to suit and mod the actuator lever position, you can just see this below. Different valve designs. The inlet was a little bigger so I had to mod a pipe and find a new silicone joiner. That was pretty much it, but it took the whole weekend plus another evening, I wasnt rushing tho. I also tidied up the catch can situation while I was there, changing shitty bent/kinked tubes for hardpiping, then bolted it all back together. All seems well now, but I have a trip over to Mot tomorrow so that will tell me some things. Next time I guess it will be the 50k running report....
- 799 replies
-
- 11
-

-

-
Yeah it will need to be sealed from the passenger compartment, either by sealing the boot 100% (harder than it sounds, rear firewall, parcel shelf, and up inside the rear 1/4 panels and pillars) Or, you could put it in a sealed box Or mount it outside the boot, under the floor a car that has a factory tank in the boot ie rx3 , if it's all factory then you don't have to change it. But if you made it efi, with a pump in the boot, then it would need to meet CCM requirements Pressurized fuel in the passenger compartment is the issue
-
My tank is under the floor so probably can't get away with that
-
does on the back of a trailer count?
-
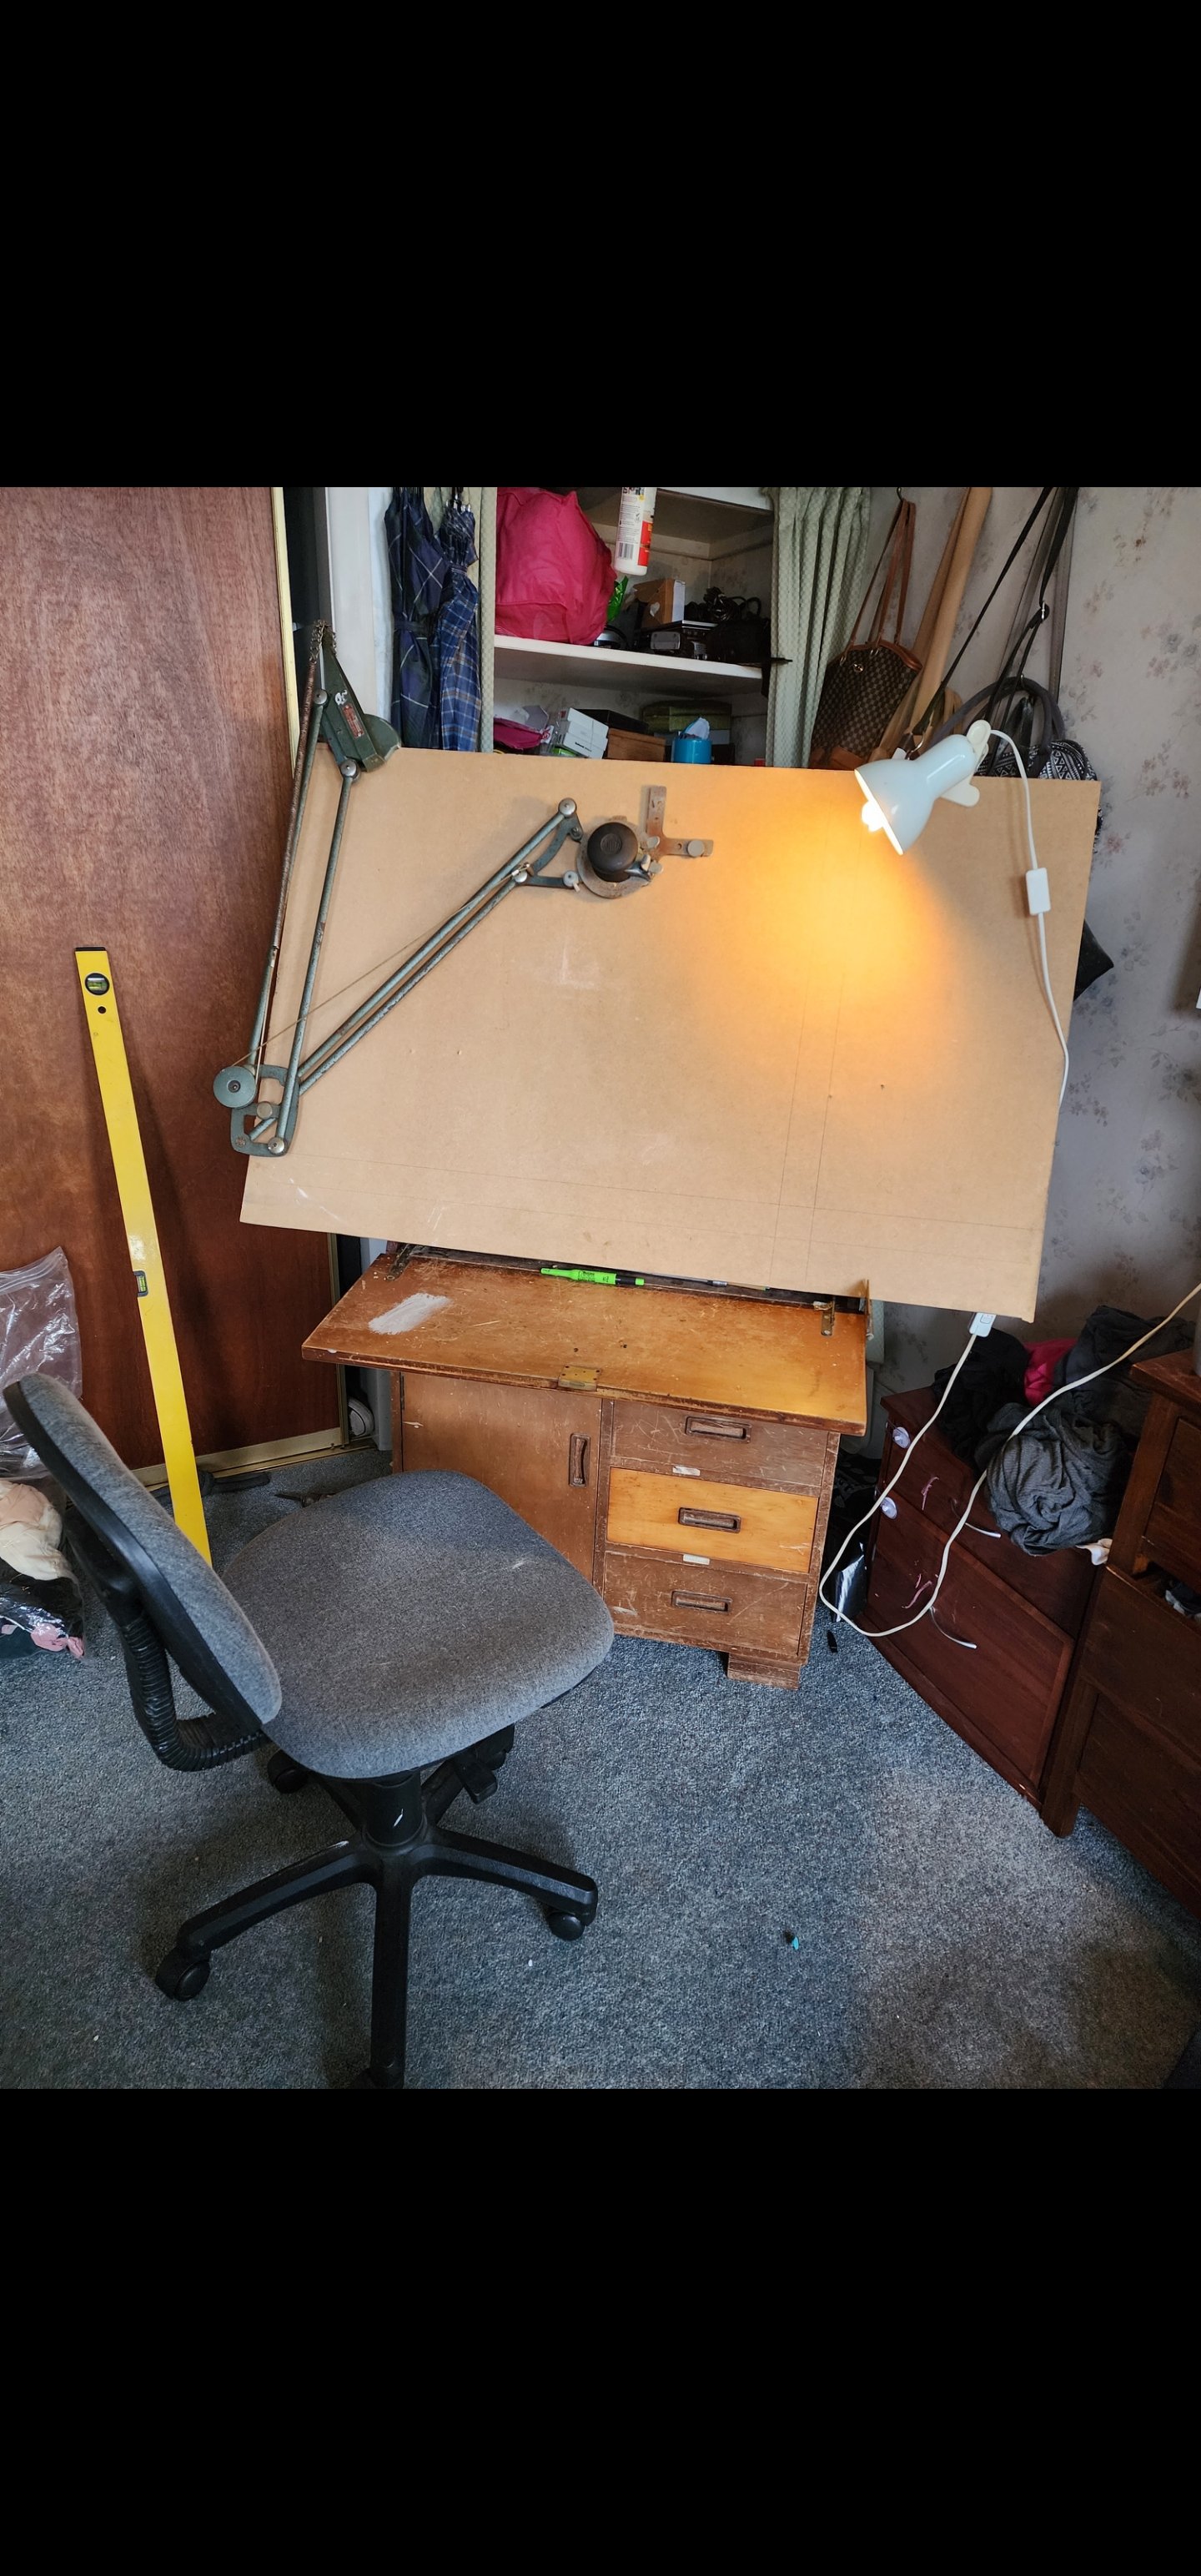
Mk1 seems to work. Board is hinged, will flip up horizontal to give access to where I can hide my lollies from mimi-me. The lower horizontal board can be folded up behind the drawing board, but is very important for holding cups of tea. Figured out the fine adjustment knobs (angle indicator has a vernier scale) and the overall alignment. Will need a disasembly and good clean up. I will need to find suitable rulers, will probably just make some moubts and epoxy them to a 500 and 300mm clear ruler now I can hide in the spare room like a loner
-
To be honest I don't know, I did speak with a certifier before buying it, I explained that it sits right next to the factory fuel tank behind the seat, essentially you're not changing much, just adding another pump and reservoir into the system in similar locations. I'm not sure he quite understood how these were built 50 years ago though, because he started talking about then the boot must be factory sealed away from the cabin if the fuel tank is there, I explained they were not built that way back then. He seemed to be ok with it from there, but ill guess I'll find out at cert time. Maybe our resident Guru @cletus might have an opinion? Hope I'm OK though, hate wasting my time and money..
-
What is the legality of mounting in the boot? I might need to do something similar in my lancer
-
Somehow found some room to sneak 3 inch tubing between radiator subframe and chassis rail. Snug fit but wiggles in piece of cake if I move the power steering cooler lines 30 mm to passengers side this doesn't really cause any issues but they could be moved completely with some flexible hose, so will do that at a later date. Passengers side is easy not much in way I could even possibly sneak inside chassis rail like this.
-

!!!!!!Hanmeet 2024 23rd-25th August - Entry Form is up now!!!!
giddaymate replied to JustHarry's topic in South Island Region
All done and paid. Me +1 and she can go to the hot pools. Ain't nobody want to see me broiling in human soup. -
T5s break fairly easy.