flyingbrick Posted February 7, 2014 Share Posted February 7, 2014 The main thing with ali is to just clean the the crap out of it. brakeleen and a rag until it's not oily then scrub it with a wire brush. When welding my cast sump is get contaminants coming to the surface. I just fed in heaps of filler then ground the weld back flush and did the weld again. The first weld was always full of black shit and porosity. The second weld was always beautiful like welding clean plate. probably won't find that in a text book but it worked for me and others said the weld would be impossible. Also I find the small electrodes way nicer to use than the fast ones unless doing heavy stuff. I'm not sure on the science behind it. If learning I'm not sure if a foot pedal is the best thing to start with. It might be fine or you might find that is just one too many things to think about. The hardest thing I had to learn was self control. If you blow a hole just stop, let it cool off a little then try to continue. In bursts till its closed. edit lol blow a hole Quote Link to comment Share on other sites More sharing options...
ta63-1uzze Posted February 7, 2014 Author Share Posted February 7, 2014 sweet, was thinking more along the lines of basic settings on the machine, I am proficient in tig welding steel , have done a fair bit of stainless but am yet to do any alloy, so more or less don't know what knobs to turn and where about I need to turn them. I haven't got any material yet , will do on Monday, but just for now I want to at least know where abouts I should start with some settings. Quote Link to comment Share on other sites More sharing options...
evil_si Posted February 7, 2014 Share Posted February 7, 2014 Do not use brakeclean to clean before welding, The fumes fuck you up. There was a big article about it a few years ago, basically the guy had always done nearly died and ended up in intensive care for a month 1 Quote Link to comment Share on other sites More sharing options...
flyingbrick Posted February 7, 2014 Share Posted February 7, 2014 disregard that then! iv always used it for all my work related cleaning.. Because it works and because I was not paying for it Quote Link to comment Share on other sites More sharing options...
SOHC Posted February 7, 2014 Share Posted February 7, 2014 Do not use brakeclean to clean before welding, The fumes fuck you up. There was a big article about it a few years ago, basically the guy had always done nearly died and ended up in intensive care for a month Argon and what ever is in carb cleaner and brake cleaner makes nerve gas, I think its carb cleaner. Quote Link to comment Share on other sites More sharing options...
Llama Posted February 7, 2014 Share Posted February 7, 2014 Do not use brakeclean to clean before welding, The fumes fuck you up. There was a big article about it a few years ago, basically the guy had always done nearly died and ended up in intensive care for a month Yeah, the fluorine makes phosgene when combined with ozone from the welding arc. I'd pretty much avoid any cleaner with lots of chemicals. Isopropyl alcohol works and is cheap and safe. Acetone is OK in small doses too. Quote Link to comment Share on other sites More sharing options...
cubastreet Posted February 8, 2014 Share Posted February 8, 2014 +1 on the Miller digital elite helmet, they're really good and have a 3 year warranty. set the ac balance towards the penetrating end of the scale unless your alloy is old and cruddy. more cleaning means more heat going into the torch which can overheat it pretty quick. I find a foot pedal real handy for ali. it conducts heat so fast that when you start the weld you need a lot of amps to get the pool going but toward the end of the weld the metal is getting saturated and without a pedal you have to keep welding faster and faster. being able to back off makes it that much easier. Quote Link to comment Share on other sites More sharing options...
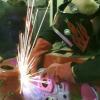
ta63-1uzze Posted February 16, 2014 Author Share Posted February 16, 2014 well I've been in the garage all day today playing with welder, I have discovered that I don't understand what a few knobs do, I have been messing around with them but I feel this is too illogical and I cant replicate welds . so time to ask people what's up . and perhaps try there setting out to see if I can improve the welds I am currently producing . my welder doesn't not have these labelled setting "arc frequency" or "ac balance" . I've been on "welding tips and tricks .com" his videos are very helpful . but the settings on his machine are different than my machine so I cant copy his settings outright . how ever , I do have arc force, pulse frequency and pulse duty cycle and clean area width. at this current stage in my learning process for alloy I have everything turned to 0 or if not 0 fully to the left, I have my gas pre flow and post flow set ok and I feel these setting are fine, I have my peek current set to around 12 o clock and its producing good weld and penetration looks good, I have my ac clean set at 12 o'clock , weather or not this is to much or too little I don't know. and to be honest i don't really know what i am meant to be looking for in the weld regarding this setting. so my questions are , what is arc force and do you use it on alloy welding? ( sheepers i read your message about it and i am currently running with a pedal so i am wondering if i just ignore this setting on my machine?? ) pulse frequency and pulse duty cycle , what do these do ? i have adjusted these knobs and i can hear that the welder sounds different but i can not yet feel any difference whilst welding . do i even need to use these setting if i can readily change the heat with foot control ? i dont know i feel quite noob with ac welding , steel was very easy to analyze the weld for faults but with this machine the setting don't yet feel like they are doing much . here is a picture of current setting and current welds produced, any help or recommendations please let me know Quote Link to comment Share on other sites More sharing options...
cubastreet Posted February 16, 2014 Share Posted February 16, 2014 the peak current is your main heat control, the clean area width is your ac balance. turn it to the left for more penetration and right for more cleaning. of those four switches on the right, the bottom left one turns on and off the pulse. this makes the power pulse hi-lo-hi-lo... the base current sets the low power setting, it's usually a percentage of the peak current. the duty cycle is the percentage of time on the high setting and the frequency is how fast it happens. if you want to play with that turn the duty cycle and base current to about 40% and the frequency to about 1s, it might help to give your welding a bit of rhythm. the arc force is for stick welding set the post had to about 1 sec per 10a current. the down slope helps avoid craters when you finish the weld Quote Link to comment Share on other sites More sharing options...
ta63-1uzze Posted February 16, 2014 Author Share Posted February 16, 2014 ah, duh the switch , the switch . . . . I was wondering why I wasn't getting any noticeable difference, I had the switch set to not pulse, hahahah. thanks for the heads up , that was just the information I needed to hear. I think another couple hours and I will feel confident enough to make some radiator modifications thanks you very much mate : ) Quote Link to comment Share on other sites More sharing options...
ta63-1uzze Posted February 16, 2014 Author Share Posted February 16, 2014 sweet turning the cleaning around to the left , and pulsing has made vast improvements, the weld is no longer to high much nicer penetration . but I have found that the weld its self is very wide though, how do I adjust this ? thinner tungsten and a heat to match that size tungsten ? or is it much simpler and I just have it to hot and its melting a huge spot ? Quote Link to comment Share on other sites More sharing options...
flyingbrick Posted February 16, 2014 Share Posted February 16, 2014 Good work man!looks like you have it sussed Quote Link to comment Share on other sites More sharing options...
cute wee gem Posted February 17, 2014 Share Posted February 17, 2014 Yep, thin tungsten, less heat. grind tungsten to a point then let it ball up for aluminium Quote Link to comment Share on other sites More sharing options...
cute wee gem Posted February 17, 2014 Share Posted February 17, 2014 What tungsten are you using? I find 1.6mm zirconiated (white tip) does the trick nicely on ~5mm Quote Link to comment Share on other sites More sharing options...
ta63-1uzze Posted February 17, 2014 Author Share Posted February 17, 2014 the set up I have is gas lens, stubby number 8 ceramic . 2.4 thick , gold lanthanated tungsten. (was recommended from weld tech east Tamaki ) ( i have no previous experience to know if its any good or not, seams to weld so must be ok ): ) material is about 2/3mm wall thickness, the thickest I will be doing is 3mm at this stage. . will be dong a filet weld once I am happy that I can achieve a good weld , basically removing and blanking the ports on my radiator and moving them to the side and extending them ,as dumb 1uz has both the inlet and outlet in the middle at the front of the engine ( sigh) Quote Link to comment Share on other sites More sharing options...
cute wee gem Posted February 17, 2014 Share Posted February 17, 2014 I'd give 1.6mm a shot and see what you think. The amps needed for 2-3mm alu doesn't really require the bigger tungsten but if it's not causing you trouble then stick with it I guess (arc wandering etc). When learning, using thicker filler wire makes life easier also. I'd drop about 20 amps and try that weld again, how thick is the piece you're practicing on? Quote Link to comment Share on other sites More sharing options...
downtrail Posted February 17, 2014 Share Posted February 17, 2014 If you sit and look at that diagram for a bit you will under stand what all the knobs do. peak current is the height of the square wave. basically how far it shoots up before it changes direction in amperage. this will be set to material thickness porosity etc the base current is how far the square wave shoots back the other way. also known as the cleaning part of the wave. basically how much current is needed in the -ve section of the wave to clean the surface. pulse frequency is how quickly the wave alternates between +ve and -ve the pulse duty is how long the wave will sit in the +ve or -ve region basically squeeses or stretches the peak current in or out. clean area with is basically a frequency setting where the lower you set it the wider the arc will spread and clean more of the area around the weld crank it up and the arc will narrow but have less cleaning effect in the -ve region. this is the white region around the weld when you are finished. the white is the hard layer on top of the alloy you are trying to weld burning off. you will notice if you dont clean it at all and try weld the hard layer of oxidation is very hard to penitrate and the alloy underneath it super heats and melts away from you. and looks poo too. down slope the time it takes the welder to go from full throttle to off if you dont have a foot pedle you can use it to assist you to keep the weld temp under control. you have probably noticed how hot alloy gets so if your current is set to 80a and you are doing a fairly long run the more you weld the hotter the material gets around it because alloy is such a great heat sink and it requires less energy to weld as it heats from your welding so less current is required. this is where a foot pedle is great. set the switch to 4t so click on click off and when you notice it getting too hot click off then on etc hard to explain but you'll figure it out. you can also use to to fill the crater at the end of your weld by bringing the heat down and filling it etc. I use the light blue tipped tungsten cant remember the name of them but much improvement over the standard white tipped tungsten you would use for alloy. Hope this helps some what. but its only practice. weld something together. cut it apart weld it back together keep going till you get it sused. The easiest welds to practice are edge welds where there is 2 pieces butted at there inner edges then you run a bead along from the outer edges. well thats what I practiced on any way lol. start will like 3mm plate or something then go thinner and fine tune your skills and movement speed etc. keep them all even with your dabbing and the heat under control so the material dosent run off on you and you'll be a pro in no time. A guy a learnt alloy off told me that if you started tig with alloy it wouldn't be hard because you don't know what hard is. as you will know with steel its very easy to get into bad habbits ie cleaning you can almost weld through anything with dc tig lol. get away with a shaky hand and heat control isn't really an issue. Cheers Quote Link to comment Share on other sites More sharing options...
sheepers Posted February 17, 2014 Share Posted February 17, 2014 i dunno out your particular welder but on my one (which looks identical in the control panel bit) the arc force is sill active when its in tig mode. the arc force will change the amount of penetration you can achieve. i really only use it when im welding really thin stuff or things that are corroded, you can set the amps to zero and set the arc force to zero too then just bring the arc force up a bit until you get a controllable heat. my welder is really unstable at zero/low current settings and i find that using the arc force rather than the current setting is the way to get a controllable weld. Quote Link to comment Share on other sites More sharing options...
ta63-1uzze Posted February 18, 2014 Author Share Posted February 18, 2014 choice, that's a great explanation, I looked at it for awhile when I first got it and it really just looked like nothing much. the more I have been told about what the setting do the more the controls look like what they are . who would have thought I have just about run out of material to weld , all I have is 2mm 2inch pipe about 400mm long . I have a few of cuts and a chunk of 6mm plate which is not really any good for anything I intend on doing but none the less its mine now so im sure I will make use of it at a later date. so far I have not found anything hard at all, the only thing I have found is that I didn't know anything about welding alloy, but I knew that in the beginning . to be honest its not really any different to welding any other material other than the fact you need to set a few more settings. and it feels a bit more like liquid when welding it . anyway I want to thank you guys for all the information, I will be back later with some pictures , now its time to practice with the last bits of ally I have left over : ) Quote Link to comment Share on other sites More sharing options...
cubastreet Posted February 19, 2014 Share Posted February 19, 2014 ^^ nope. base current is the low pulse setting, it works on ac or dc. pulse width and frequency are also ac or dc, that diagram never goes negative. clean width is the % time spent in the negative (electrode positive irl) when you're on ac. Quote Link to comment Share on other sites More sharing options...

Recommended Posts
Join the conversation
You can post now and register later. If you have an account, sign in now to post with your account.