ta63-1uzze
-
Posts
475 -
Joined
-
Last visited
Everything posted by ta63-1uzze
-
So I have managed to find some nankings ns20 in the 225 40 14 size. which I was very surprised at finding them, I had assumed that they were going to be the hard size to get. they are on order now. recons about 4 weeks. 600 bucks (ouch) for 2 off, but its what you got to do to keep cert man happy. so next is the 205 40 14 . and then a cert modification just for the wheels and tires. hopefully that wont be a drama
-
So I got some 14x8 and 14x9 wheels for my car supper happy with the wheels, cant wait to get them on the car. going to look awesome ! I have had a look at this chart and spent a bit of time google searching sizes. I have come to the conclusion that I should ask the community. as you lot have probably already sused the info I need to know. 225/40 14 on the 9 inch wide rims. 205/40 14 on the 8 inch wide rim. these are probably the best solution?. but proving a little hard to find . and recommendations/advice welcome. or if you think I should be looking at a different size please let me know. thanks lads.
-
So I did this in a rush a few months ago, I used BMW e36, or E46 rear camber bolts. I cant remember what ones specifically, but I do have spares so I can measure them for you. that way you'll get the right ones first time round. I got some box section to make my insert plates. I think it was 40mm from memory. and it was a prefect fit for the eccentric washers. Using the perpendicular walls of the box as the guides for the eccentric to run on. I cut the factory bracket locally; just where it needed to allow my plate to sit flat on the bolting face. I welded it all around. And I filled in the old factory holes too. I also fitted some triangle inserts at the bottom to fill it all in. add some strenght . The way I did it works , its fast. but its not that pretty. I did it with scrap I had in my shop and some second hand bolts. Just another way to go about the job. saves from having to make a jig, or buy premade brackets.

-
was the other guy old mate "NaN" What I actually came here for was to say, you should talk to kelvin from car tune company. he has allot of videos on you tube, has a wealth of 1u information. Seams happy to help anyone.
-
Lets drag this thread up from the dead ! its been about 4 or so years since this project had any love. Carina has been in 3 different storage locations. And in this time I've moved house 3 times. finished a qualification . and managed to buy a house !! After so many years, and moving so many times, and everything changing so much. Its hard to get started ; some times when you look at it all, such a huge daunting project full of half finished jobs and ideas, things start looking like a insurmountable task. So what do you do ?? you just look at it for awhile, look for one little job you know you can do, you break it down, ah, you make a list. and start from the top! Great idea ! So I made a list and then in my typical fashion, I just did what I do. . . I did none of the things on the list at all. hahahah I just picked something I didn't like and decided that I can do this better .I think , and with that thought I finally started , it wasn't long till I was right into it again . but ah, anyway Ill shut up now, and show you heaps of the pictures. this was how I left it, and I didn't like it, because the hoses are under allot off stress to make the bend, I can see this being a failure point. I tried to find some silicon hoses , that have sharper 90 bends at the ends, but they all have short tails and the long side here is 350. So i just decided to start again. because this all ties into the water bridge and the clearance issues there too. you can see the blue marker where the belt is going to touch. The idea , is I make the flats better ,first and then, tighten up the angle. and hopefully there will be more clearance. I was very nice here and just softly tapped it down with a panel hammer. making sure not to distort the other side, it worked better than I though it would Now I just have to tighten up the angle at the top of the water bridge . this was a bastard , its just kept bubbling up this black spotty stuff and making dirty as welds. eventually I ground enough away and welded it again then I got a nice puddle , and it flowed much better. (I'm only at home fabricator my welds are very average) here you can see that huge angle change First part done, now for the piping small adjustment has added allot of change, I hope its going to be enough clearance at the end . More supplies ! here my angles aren't as accurate as I wanted , it was meant to come out further and also parallel to the timing cover, I think I cut it a little short. and on a slight angle but it is what it is. will have to make use of it . this fit up, is not tacked, just sitting in place no tension, a lovely fit up. couldn't have done it better if I tried this is so damn hot, no one tells you when you start tig welding, just how obscenely hot aluminum gets to weld I had to hang it like this cause I couldn't touch any of it even with welding gloves on. Trusty block of wood, third hand, weight, prop, holder thingy and that is the cooling system update. seeing as that was going so well I decided to redo some more things. Some of this stuff when I do it I don't really have a end plan as such , some times its just trial and to see what its like . and then if it looks like it'll work then ill do some more research and ill make a plan later on. So the bonnet was one of these idea. where later on I would work out if it was going to be fiber glass, or I leave it to the panel and paint shop to make it look mint. or just who knows I have to cover this spinning thing with something ah shit I lets chop it up and see if I can hide it. Yeah that sounds like a good plan . . . . and then we have this monstrosity But as of now I think I can make it better. I never liked how I had left it and well now is a better time than any to give it another nudge. this is a hack job at the back of the bonnet, at the time I had no idea how to blend it all in, so I just did this, to get a feel for it. and as you can see it was a mash of a job. if I had been a little slower I could have made all this nicer right from the beginning. But its a lesson learnt. pencil line is how much i am going to trim off, this is al the way around destruction ! Tacking it all back in, but welded. back edge trying to keep it flat. this was going fairly well here. So much tacking, this took like 3 hours to weld up. do a weld., blow it down with compressed air. do this over and over. Another thing I learnt is I should have finished the extensions, completely. whilst it was off the bonnet. because effectively welding 3 strips the whole way down the entire bonnet added a shit load of warpage and heat. so much grinding !! almost there. out side done had to re trim the inside to give it strength again. i am unsure of the level of grinding i will do on the inside, i want it to look nice but i am also going to seal it all so there is no point of going hard out if the seam sealer just covers it all anyway. all metal , no filler yet......... but. yes its very very not flat. and it will need filler for sure, I hope it wont crack . time will tell. Now if I had to do this again I would go about it completely differently. There is so much i would do differently. I learnt so much doing this, and one thing I now know is warpage lol . I can make shit warp hard out ! I learnt this the hard way, so this was a valuable lesson. I will take this information forward in my next welding project. I cant do anything about it. I don't have another bonnet, so this is just going to have to be it. until I learn how to fix it, or what ever will come in time. so some of this is up loaded in the wrong order. the pictures get out of sink. but anyway , i hate the stupid rod bonnet stand thing. Its useless and it has to go ! here is it going. now I know it looks weird. but with the charger and throttle body, no gaps in the guards or on top of the strut towers. this is the only place they could go. and well for the convenience , I choose to have these and not have the bonnet hit me in the back of the head again. the first 3 times was enough Next is guards , front, and indicators, head lights, why wont it all line up? you can see here how much has been cut of them, that and no lower front valance, leaves no support for the out side of the guard or headlights. So i measured heaps of shit, found out the guards I started with were all beat up., and the mounts were all pushed back in. so I needed to make a slide hammer attachment to slide hammer the mounts back into place. This meant I needed to bend some 10mm by 50 flat I have kicking around. which means I get to play with fire ! and its a great excuse for me to use my new to me Oxy set ! shit yeah I love this stuff. ! finally the indicators fit well, the guards are where they need to be, and I got to play with a some new tools yay , no what else needs forming !?!? ah yes I need to add a support to the guard as its still pretty weak on that outer edge. heat up some 8mm flat bar, its super soft so will be mint for supports. strong, but they'll bend if then get pushed. smash flat. welded some nuts to the car. this will get finished welded on later., they just tacked there for now. this is the drivers side inner guard, you can see the guard support and the mount for the front bumper. So now the front is on , its all bolted, its firm, it has strong proper mounts, the bonnet is looking a bit better. we have a upgraded water bridge. and some bonnet stays. ! Fuck yeah I love finally having a shed again, I have been waiting for so many years to get stuck back into this project. ! This is my happy place making stuff in the shed at home!
- 29 replies
-
- 17
-

-
nice there is more of us now! looks good to see a complete carina ! aa60, so is it a solid rear , t series?
-
oh man i can totally relate to the back issues i have a herniated L5-S1 disk , causes me nothing but pain. some times it livable but if i pinch the nerve cluster i'm fucked for months! i need to find the motivation to get work on mine too, its been moved a few times, set up in a new shed. but i just haven't touched it in years . i cant even remember what i was doing on it last time. my build thread is lost in oldschool somewhere. probably gone its been so long so like ah , do you have any spare ?, like motivation , where do you find it ? is it expensive ? how much for a gram ?? looking like a cool rebuild, are you going to do any other head work ? how many limbs were the cams ? if you don't mind me asking
-
i don't have any of his details , i just knew him through a mate of a mate type deal, and it was just a first name thing. i looked over the car, it was good, i gave him money , that was it done. i haven't been successful in finding out anything else or where he has moved to . yes its still on car jam, but that doesn't give me any of the last owners details . i haven't paid for the report, if i buy that will that give me the last registered owners details ?? ?
-
so what do i have to write on this? just that i am the legal owner now?
-
hay guys, so i have read through some of this , and it does make me a little worried . . . so story is i bought a car about 15 months ago. was only going to be a track hack, but have found its in better condition that i originally thought. so i have decided to go down the track of looking to getting it re registered. Now i have no idea who the guy was i got it off, i didn't get any form of paper work from him, i don't know if he was the last registered owner, and hes moved and i cant find him , i have tried every avenue i can think off with no luck . i have the chassis code and the original license plate details. on the police web page search under stolen vehicles it comes up as not stolen. and on car jam it has the details of the car, vague details but they are in there. so this is good as i can prove it was registered in nz (yay) . but i am no where closer to proving ownership?? i just called the police station and asked about getting a "of no interest statement" , they told me that they don't do that and i have to "go look at car jam , or something " . ?!! i'm not sure what i have to do next. can someone please give me some advice on what my best plan of attack is , thanks
-
oh that was fast response, i have a clubman gt 3 gauge dash cluster . is there an easy way to tell what it is ? im not familiar with rvi or rvc at all.
-
hay all, so having a bit of a brain fart with this. looking for some electronics people to shove me in the right direction please i have upgraded to an electronic dissy in my mini, its bloody awesome, no more points yay. but the down side is my tachometer now doesn't work. well it moves ever so slightly but no where near reading rev's so in my mind i am thinking i have removed the ballast resistor thus changing the was 9 volts to the coil to the now full supply voltage of 14.2v . so i was thinking if i put a resistor going to ground in between the gauge and the negative terminal of the coil where the tachometer gets its signal from . that i could successfully burn up a few volts making the signal to the tachometer back into the correct scale of 9 volts ? now in my mind if i put it is series it would draw more current through the gauge and that would cook it, so if i just splice it in before the gauge and i used the correct resistor i could burn up some of them extra pixies making my signal back down to 9volts ?? so all this is just an idea, i dont know if i am on the right track with this. if i am wrong and there is no easy fix i will change my plan of attack , ill go and destroy and new aftermarket rev counter and make a mini/aftermarket mash up of sorts. i would in however like to try and get my head around this electric pixie stuff cause i do find it rather fascinating . and i do quite like these little battles thanks in advance . chur
-
on a roll this weekend, moved the mini to my new house, welded up the an fittings on my power steering hard lines , welded up the sump. made some trap doors . I made some out of hinges and welded them off , but I couldn't stop the heat from twisting them up. I tried 2 different sets, all moved so much the hinge would bind up. so I resorted to using nuts and bolts, I don't think they will cause any issue like this, I may drill and lock wire them, but for now this will do. . . . now just to wait for the sealant to dry so I can water test it. make sure it has no leaks !!!!! and now I'm caught up with what I was doing like a year ago its time to write a new list of things to get done.
-
Ah yes that is them the little buggers !!! , shit I love the look of them in gold, fantastic looking wheel . a shame I couldn't find any 3 piece ones for sale, would have made life much easier for myself hahaha
-
re linked : ) //oldschool.co.nz/index.php?/topic/32064-ta63-carina-with-a-twist-discussion/#comment-849236
-
So its been a year again. and well shit I ain't achieved much at all . not really sure where to start. 2016 was a absolutely miserable year for me , I've had allot of ups and downs, and well all I can say is ; I am fucking glad to see the ass end of 2016 !! continuing with my typical fashion I haven't finished anything that I was doing ; well nothing completely, but I have done heaps of random shit in no apparent order . . . And so its now 2017 and I have to find a new place to live, I'm now a single man, and I have got to get this beast moving under its own power!! sump stuff , was good fun to weld up. tig welding is the bees tits ! AND HERE IF YOU LOOK HARD ENOUGH YOU CAN SEE MY EPIC FUCK UP !!!!!!!! but its ok cause I made the flange area to small , I was going to mill the weld off where the head of the screw would sit, but seeing as I completely made an entire fuck up of the whole thing it doesn't matter any more . so here I am starting again, I learnt allot about welding stainless on the other sump, so this time I am bolting it down to a massive bit of steel. should help to stop it from warping so much , and I gave the weld more clearance to the screws . with the sump on its way again I looked into the high pressure power steering hoses. This was always going to be a battle, and it didn't prove me wrong at all, I started out with 3 meters of 10mm of 8mm id heavy wall pipe ,I broke 2 hand benders, stuffed up 1 fairing tool ; and with allot of mucking around to get them to this stage, I scrapped allot of pipe and spent allot of time to create these, and once again I haven't finished anything, all that is needed now is to weld on the an fittings, make a clamp block to clamp them to the cross member, and buy the braided ptfe high pressure hose and that is the last of the plumbing done! all of this just because there is no room to get braided hose with an fittings to clear the exhaust/rack/clutch hose/cross member/sump. its all very tight , but this was the best solution something that has taken me a long time to figure out, trial and error . but I'm stoked that its going to work and I can keep power steering. never really liked manual racks to be honest. all that other shit aside, this is the cream of my year, and whilst it doesn't look like much at this stage this has been a huge driving force for me. and I cant wait to get some more operations done on these !!!! and this is my model that I drew up from pictures of the internet hahah, I like work equips 01 , and I really like star sharks , then I came across these, I cant remember what they are called but I nabbed a few pictures and went to work modeling them up. and now finally I'm making chips , just got to dig the rest of the wheel out of all that stock : ) and that's me all caught up. merry fuckers new years !
-
as always, thank you for your advice. We all here appreciate that your always helping this community out . i wil be getting stuck into some more plumbing joyfulness today : )
-
I have just about finished my project’s fabrication work and I am currently doing all the plumbing and routing of hoses, making the brackets and fixtures, so that I don't have to drill into new paint for my p clamps and mounts. This is how I have come about this ask this question. I plan to mount my high pressure power steering hose to my chassis rail.i have a 82 carina, so monocoque chassis system. I would like to use p clamps and I intend on mounting the hose the entire length of the driver’s side chassis rail. I plan on drilling some 2.5mm holes and using sheet metal screws and p clamps about every 200mm. so my question is ; is this acceptable to drill into the chassis rail for said screws ? And is the distance apart sound about right, good for certification? , I am not sure if that is enough space or if drilling is acceptable. Thanks for your help : )
-
so , here we are again , a new year, and time to get back into the swing of thing, I have been getting side tracked allot . need to get focused . i went hard out on the mini project, and its so close to being finished, but then i got a bike. . . . 12000 rpm sounds so freeking sweet !!! so any who, this is what i have been up to on the carina front sump , its now real , just need to get the walls folded up so I can weld the sucker up. then make some kind of baffling I guess. . . this is the 3rd one of these I have concocted (water bridge) and yeah its not super great, shit as welding, the flat bit to miss the belt didn't go according to plan. it has been a pain in the ass trying to figure out a nice and clean way to plumb the front water bridge, the entire design from factory is very out of the norm. so this has and still is so far my biggest challenge. I may even do this again and try find some oval pipe and pie cut it . my ocd isn't happy with the out come thus far . . did some more plumbing, got all the vac lines done, booster done, here is a pasanger side picture of engine bay . and started doing some cad . . but not with a computer, haha, this intake pipe is a monster, its cause I chose to keep the m112 throttle body . and I couldn't find a 4.5 inch 45 degree bend and a reducer all in one. so I just thought fuck it, just stay at that size , I have the room for it, and hopefully it will make a sweet roar and awesome dort type sounds . . this is it in panel steel. I ran out of card board for the day. so tomorrow ill get stuck into it some more. got some other shit done , finally got some material for my wheels, and I made a sold works design of the wheels I want but cant find. the elusive Riverge . kind of like work equips but with a bit more style . so once I have a bit more things completed I can start milling them . I figure ill get the sump done first other wise I cant stay focused enough to do to big chunks of the project at once . I always end up getting of task and starting some other half pie idea but yeah I still have completed a few little jobs like making the heater control panel work properly, made a clutch hose up. sold some shit to buy a bike, got a license to drive it, then I got some beer, and I got a new bbq. . . . shit getting side tracked again . mmmmm bacon .
-
ta63-1uzze's1972 mini clubman Discussion
ta63-1uzze replied to ta63-1uzze's topic in Project Discussion
Hay matt, sorry I didn’t reply I totally missed this comment, yeah so there is a bit of trickery to get the metro shit to work, * get the mini disk brake hub keep ball joints, steering arms etc. all mini , this keeps the right suspension angles and keeps you safely on the road. *get metro outer cv, the one that goes into the hub . I cant remember if you keep the mini or metro wheel bearing, mmmmm, ill get back to you on that one. * get the conversion bolts from mini spares, the metro caliper is metric and the mini hub thread is imperial so you need this special caliper bolts to make the to fit correctly and become great friends * get a brake hose conversion kit, also from mini spares, this makes the standard 2 hose (metro) into a single for mini. It looks funny as but it’s the easiest way to get past this problem. * You need the metro drive flanges as this sets the offset for the metro brake rotor; this sets the rotor in the right position for the caliper * depending on your wheels you may need to have the face of the drive flange machined as the metro flange has bumps to locate the wheel that is in the way (wheel won’t sit flush against the flange) I have been slack over the last month and I haven't finished my mini so I can’t tell yet if I need to much around with the brake bias from front to back, some say I will and some say it will be fine, easy to just go to a local mechanic, throw the car on the brake rollers and let them tell you if they are ok for the road. They will know because they will or won’t pass wof standards If you are going to do this conversion its actually very easy, sounds like a lot of stuff but it’s very simple once you get all the parts in front of you , makes allot more sense . Let me know if you want more info I can take some pictures or some shit, help you out: P -
i have used them, best to set your gun on low/1, give it some nungas nungas , then set your torque wrench on like 80 nm, check it and wind it up till you find where its actually torqueing the nut to. and adjust your rattle gun setting to the best position. I did find when I went to a much better quality rattle gun I had to dumb it down to the lowest setting to get the right torque i went away from using them in the end because for my own peace of mind knowing that you torqued the nuts up helped me to sleep at night. especially on them long as days were your doing 14 jobs and you cant get of to dream land cause you cant remember if you did up the nuts on the last rush wheel bearing job. thankfully that has never happened to me, but as i said peace of mind knowing its right was worth the extra 2 mins . I do things the same way every time , so if I haven't put the torque wrench back in the draw I know I haven't torqued the nuts, its a good system, same goes for sump plugs, and brake caliper bolts, all ways put the spanner on the drainer, or ring end on the hub, if the spanner is on the drainer/hub then the plug/bolts aren't tight. I may be a little ocd but I have never left wheel nuts loose or fucked an engine cause the plug fell out . my 2 cents , got a little of topic sorry
-
good work. we are an ever-expanding group. but in reality we are actually crazy, they don't build them like they use to . . . . but that's for a good reason. but I still love them . tiny we little lovable guys .aw
-
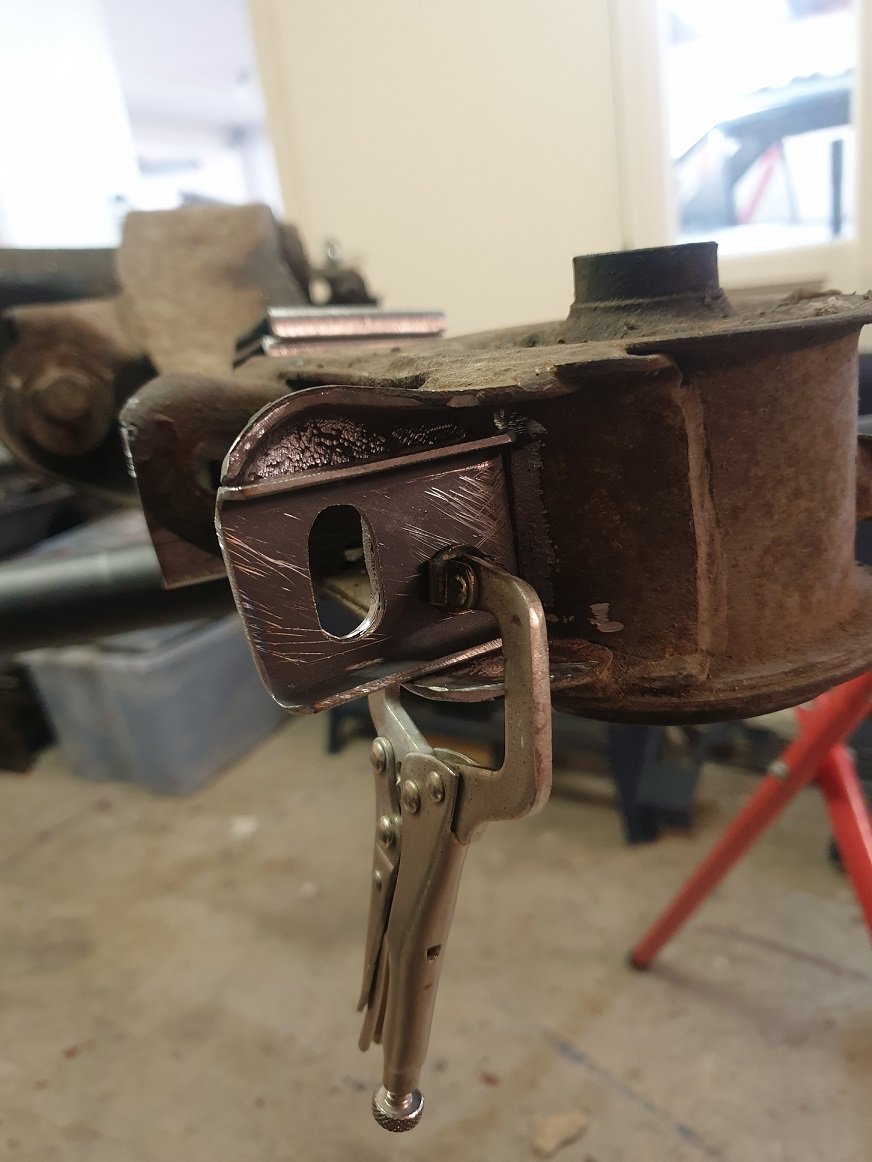
machine part welding? get it welded with heat treatable filler wire and get that shit treated afterwards so it wont wear out again .
-
just cause it only takes a few minutes to happen doesn't prove anything . try disconnecting the amp completely and see if the fault still happens . even if I am wrong, now you know its not the amp. this is a logical first place to start because other than the starter motor and the cigarette lighter the amp is going to be one of the next highest current drawing devices , and in a old car not designed for high current loads its defiantly the first place I would start looking . save yourself the heart ache and stick a fuse in it, car fires are almost impossible to put out .