All Activity
- Past hour
-
Yeah was a bit nervous cutting the carbon up... but they'll use some black epoxy or similar to make the repairs and it won't be noticeable. They key is that if I want to make another one, the mold can be used again with some small post-molding mods.
-
Driveshaft adapters are currently a no-go without TAC approval If it was to be approved you would also need drive shaft loop And a lvv cert because of driveshaft modifications = spend 2k to avoid replacing a $80 part I don't know why driveshaft adapters are not legal
-
 Getting the VIN plate was pretty straight forward. I believe there had to be some proof of ownership, but that was pretty vague. Mostly they just needed to site the vehicle, check it's details (chassis number etc) against records. The car had been in the system till ~2015 with the same plates so it was still in the system with the same details. As the VIN plate replaces the chassis number as the vehicles primary form if identification it was largely a bureaucratic process. To the best of my knowledge, the rest of the process goes as follows. After this once the structural work is done, (both repair and further mods to support the new components etc) it has to go to a structural engineer to be signed off, Next it can go for a WOF, where it will fail on the appropriate parts which require a cert, Next to the certifier to certify those parts (EG engine, gearbox, suspension etc etc, Back to get the WOF signed off In theory then, it's just a matter of paying for registration as per normal. There also a point where we'll need to contact NZTA to apply to use the old black plates.. Markku sent me this about that. Dead Black Plates renewal process. Do Not Get your car vinned or attempt to re-license. Follow this process first: To re-use your old Black Plates you need to ring this number: 0800366988 Email: reuseofplates@nzta.govt.nz with the following information: They want photos of the plates Photo of body tag Proof the plates are from the vehicle like a photo of wof sticker or receipts for work done to the car with plates listed. And or ownership papers or bill of sale like a declaration etc. Your contact details 10 day process time or sooner. IMPORTANT: Do not start the vin process or the plates will be disallowed for ever ie unusable forever. Wait for LTSA to send you the ok with a number you are to give to the VIN agent like VTNZ or VINZ.
- 1 reply
-
- 1
-

- Today
-
It used to be, as was straight t6. But it has been a few years since i'd been involved with it now. Be interesting to see where the market is at now.
-
That's a good point, had just been coming across plain 6061 in large round bar in the quick look I had last night. But yeah T6511 would be likely easy enough to get hold of.
-
 That looks pretty tidy! What was the process with VTNZ to get the VIN plate assigned without putting it through the whole VIN check vehicle inspection? (or have I misunderstood). I'm thinking it would be a good idea for my to get my Austin 7 an identity before I go taking the ancient number plates off it for the rebuild.
- 1 reply
-
- 1
-

-
i made something almost identical the other day on mine in mild steel, you just need earmuffs and stone the tool occasionally
-
Thats pretty cool. Is there any muffling in that pipe or does it sounds awesome? <3
-
Why not just buy T6 or is it not available anymore? is T651 OK or not acceptable for LVVTA either?
-

Gibbon’s 1971 GT6 bothering - comment here
gibbon replied to VitesseEFI's topic in Project Discussion
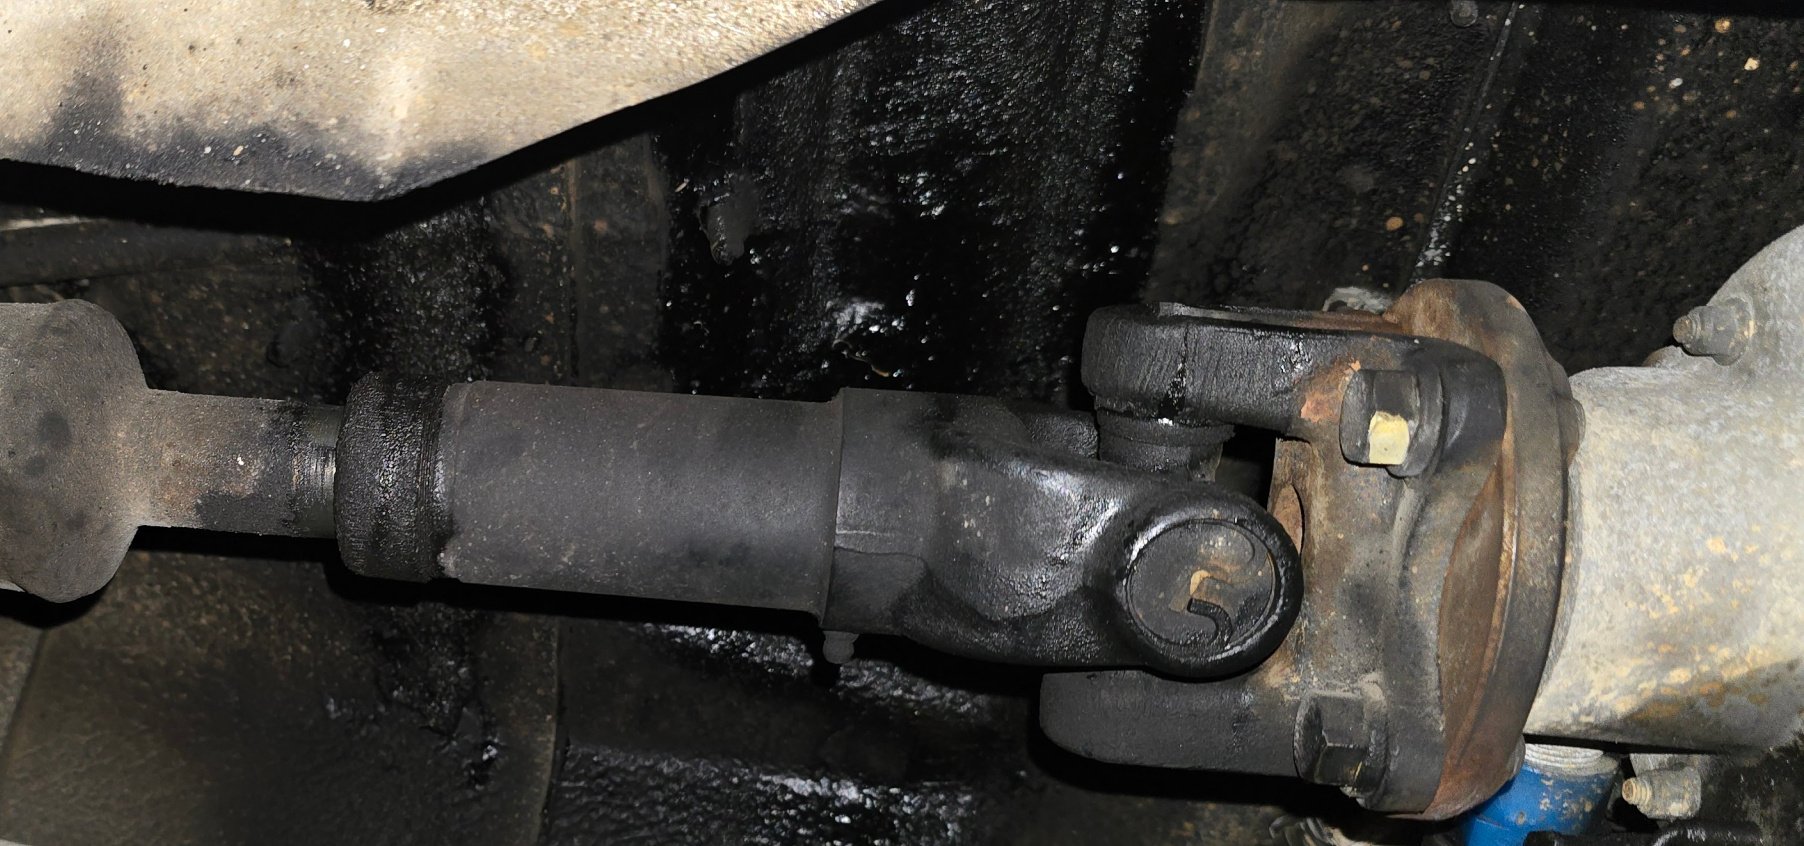
I had heard that they were "non-replaceable" - didn't know if that meant you couldn't just cut behind them and join the tubes, but then again i appreciate not having to have a new driveshaft made if a u-joint wore out That gearbox and it's variants got used in a few other cars, I wonder if any other models were lucky enough to get replaceable u-joints, did Ford use them as well? anyway the long story short - so there's no reason for me to buy an mx5 shaft? -

Gibbon’s 1971 GT6 bothering - comment here
VitesseEFI replied to VitesseEFI's topic in Project Discussion
For both of ours we had new propshafts made from new parts. The mainly because the factory MX5 units have staked joints making re-using the yoke problematic. -
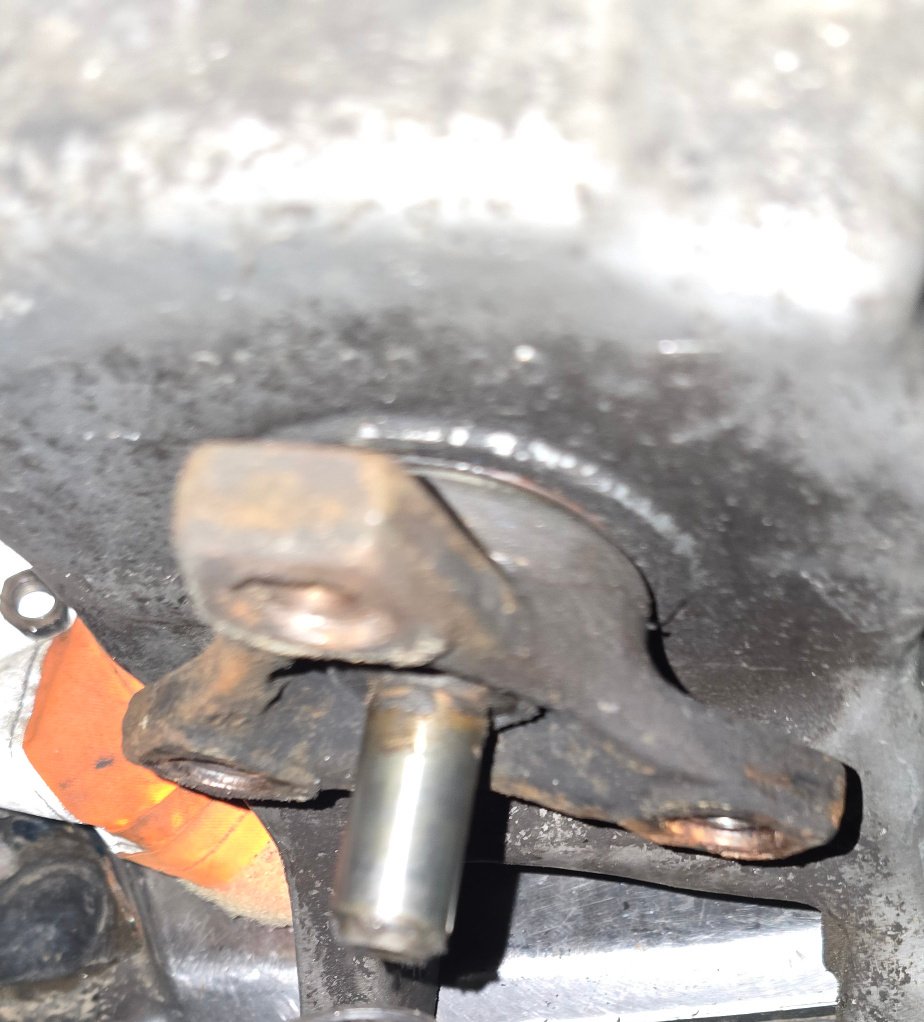
On the gearbox side the adaptor can be located with the centre and also can have 3 small dowels around the bolt holes (either m8 or m12 depending on what engine the box was fitted behind) 4x m8 bolts to mount the uni flange, with slip fit locating recess. I offered to make one, 6061 would be much easier on my old lathe, pretty sure I'd be able to send it out and get it treated to T6 spec, but steel would be an option, just slow going.

-
I did one a few years ago for a customer to adapt a hilux uni to a navara pinion flange so we could run a surf slipjoint rear shaft section. It hasn't gone for a cert check yet though. I can't fully remember the outcome of the discussion with Clint at the time was, but I think it was a grey area as its not something commonly done. If sure he will chime in I made this one from steel to avoid any issues with internal threads Lvvta have with critical stuff made from Ali. You might need approval to make one from Ali if its threaded and would need to be 6061-T6. As long as its hubcentric and you follow the Lvv fastener requirements for shank then itl be decent.
-
Somewhat related, if that 6061 spacer/adaptor is acceptable would it need to be heat treated to T6?
-
So.. When you have too many projects..... An old mate has had a Mk1 Cortina since 1997. Started as a run about, turned into a project, then along came life, so it was parked for ??? years. The time has come to bring it out of hibernation and see if some life can be breathed into it. Disclaimer: This is not my car, this is not my project, but I'm involved and connected and figured some of your might enjoy the thing. Also disclaimer, the owner and chap who's restoring it are 100% happy for me to share the project here. Step 1: Unbury The light of day for the first time in ???? Load 'er up Delivered down to the (Hawkes) Bay and ready for revival. Since the car was imported pre 19?? it doesn't have a vin. Annoyingly the rego had lapsed with an address change, so it required a trip to VTNZ for us to tell them how to do their jobs and get the car a VIN. Tow vehicle activated. As we'd researched the process and let VTNZ know what to do we got through this pretty easily so the car was back to the workshop in good company. Some tidy up required. Throttle body was pretty well stuck, fuel tank has a leak, oil was ??? years old. Some remedial work and.. Gotta love that toyota reliability and a link ECU with an good link base map, albeit a bit rich. The body looks pretty straight, it's had some repair in the right rear at some point in the distant past. There's some re-work to do on some questionable mounting that was done in it's early mod life but nothing that can't be fixed etc. Other projects have been moving in the right direction so there will be some more movement on this coming soon. Further disclaimer, Projects are fun but take time and I have little of the latter. I'll try to keep the updates rolling as they come in but don't expect them weekly. P.P.P.S. I'll get an engine bay shot next time I'm there. LeftChevronThree.
-
- 22
-
-
-
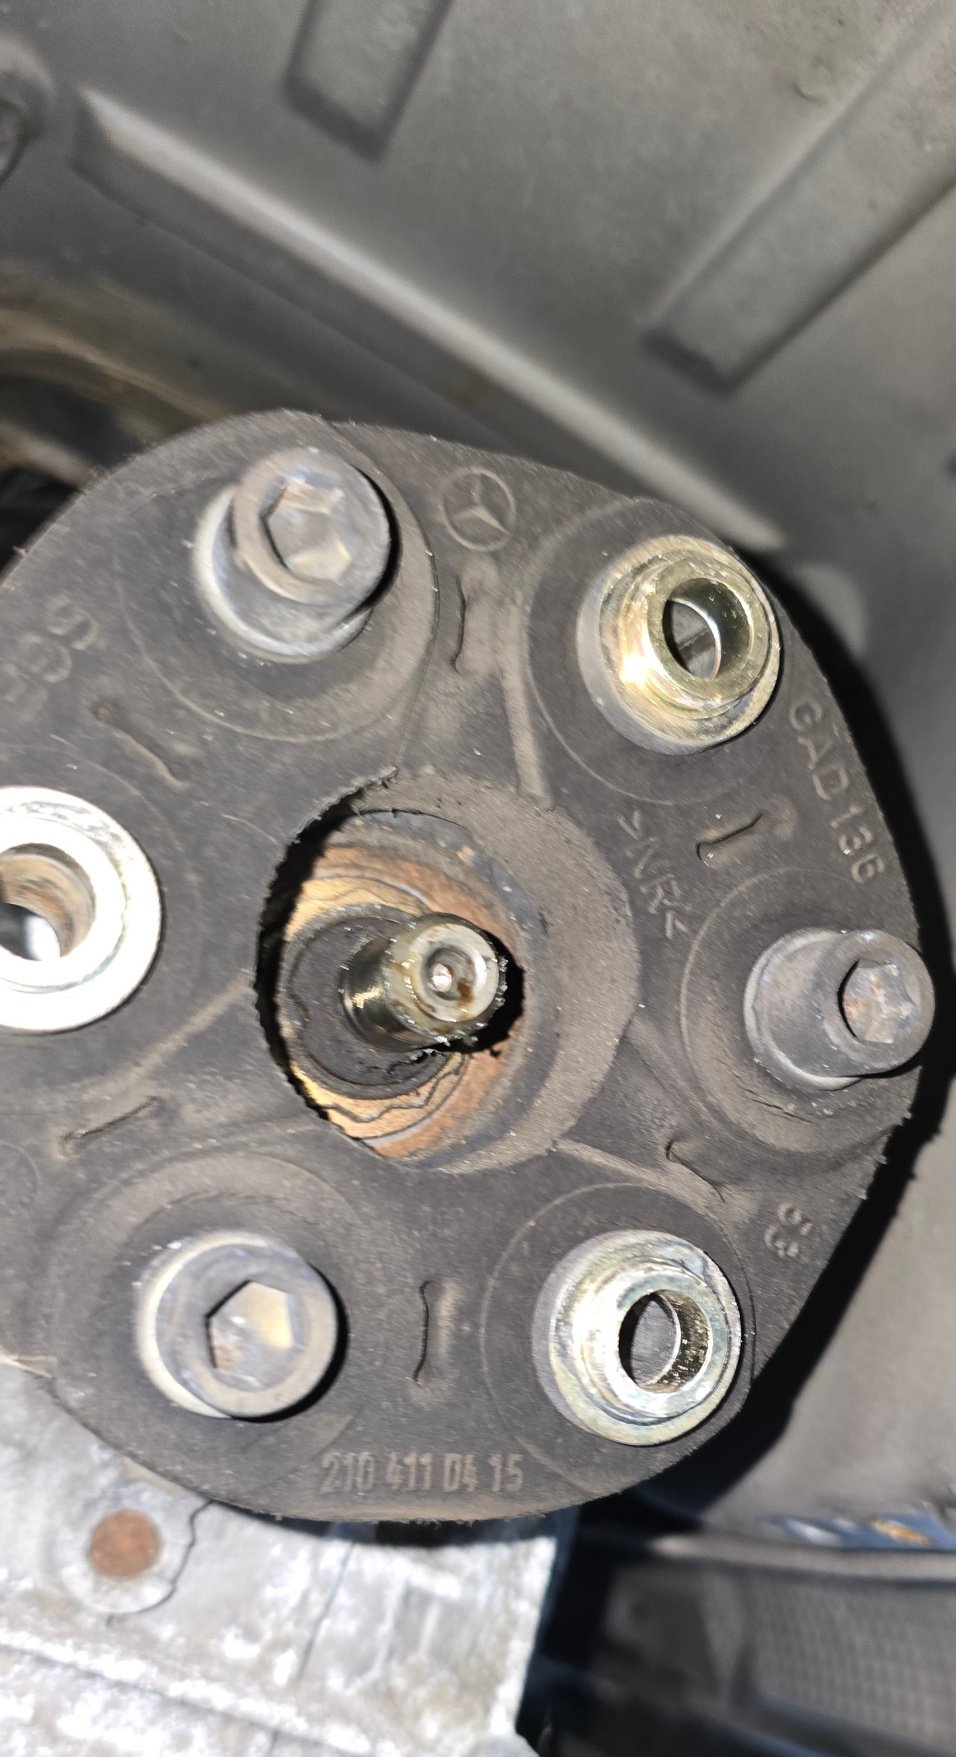
What's the go with Driveshaft adaptor flanges etc? I had a quick look through the construction manual and only saw driveshaft spacers Would something like this be okay? https://www.benzforce.com/products/mercedes-90-100mm-transmission-driveshaft-adapter?srsltid=AfmBOoqloi4WlYsehMEd6kHQtVsoaNVMtH95AAI0gLs2meChwdjSY3s6 Stock trans has guibo and locating shaft Would be nice to ditch the guibo and have this style uni and slip joint shaft in its place bolted to a adapter on the back of the gearbag
-
Rant update I'm afraid. Accelerator pumps still not working on either carb which means idle doesn't work properly and any throttle coming off idle at all just stalls the car. Additionally the balance of the carbs is now way off and the ignition timing has gone super weird. At one point the car wouldn't even crank over at all which made me think did I somehow cause some catastrophic damage while messing around with the disitributor but that doesn't make sense as it was just changing ignition timing. So basically I was just getting frustrated and turning screws and fucking about without a proper plan which is not good and not helping. Taking a step back I really can't proceed without working accelerator pumps so this needs to be resolved first. If the car cannot even idle then I can't do anything else. I'm tossing up getting the next size up idle jets too, 50/50 on it. If I can't fix them somehow then perhaps I will need to send them out to get checked over by someone who knows a thing or two about a thing or two. Another option is to get some other carbs like webers or something but we'll see, not at that point yet.
-
So.. I got a bit distracted... Short version. I picked this up with a carb issue and dead reg since 1990. Have now fixed the carb, and working on re-reg with black plates. I'll pop in some updates as that progresses. Bit of a side quest but I'll pop in some updates. This is a catch and release so if anyone's interested in a 1983 GSX550E with 25k's on the clock, fire me a line. It'll be road registered with classic reg and ready to go. Anyway, back to the subject.. big box of parts for the RD 50 has arrived so I'll be getting stuck into that in the next few weeks. Leftchevronthree
-
Anyone here in Auckland do ultrasonic engine parts washing or even a turbo parts wash? I have a pair of Aluminium cam covers and 2 plenum halves that I have cleaned by hand and then smoothed out/shaved for polishing. They need another good clean to get all the Ali filings out of before I send them to Rkm. If theres nobody on here doing it I'l go visit some engine shops.
-
5 more psi should do it
-
Hi @Beaver I ordered an R tank from aussie 5 min ago. Thanks tho. They are subtly different frames so the tanks attach differently https://www.pro50parts.com.au/fuel-tank-assy-z50j-or-z50r-red-colour
-
Gibbon’s 1971 GT6 bothering - comment here
gibbon replied to VitesseEFI's topic in Project Discussion
hey @VitesseEFI, what's the best bet for a custom propshaft, just a MX5 front and GT6 rear somehow mated together? -
Does it need to be an r tank? I just found this on AliExpress: NZ$93.37 | Colour Steel Gas Fuel Tank For RM Mini Trail Monkey Bike Z50 Z50A Z50J Z50R Motorcycle https://a.aliexpress.com/_mMsQyUT
-
It's going to look amazing once that radiator shroud is powdercoated! Annoying to have to cut the airbox again but at least its on the underside.
-
Shopping list.. Wheels (3.50x 8" 1 pce) Hubs for above Handle bar clamps Switch block Carb cable Brake cable Loom Possibly handlebars Next month a longer swing arm. Chinas finest marketing site has provided guards, brake pedal and linkage gear lever, kick start, headlight, speedo, speedo drive, cable, tail light and indicator.. pretty sure I Got some other bits. I am struggling to find a z50r fuel tank. This is the big concern