1vaknd Posted June 15, 2011 Author Share Posted June 15, 2011 Easier and stronger to weld bottom link bracket to the chasis rail I can get four 5mm welds on there nicely plus the extra welds on floor pan. I have seen way to many cars breaking these link brackets. Throughout this whole build my main motto is do it once do it right. I know it's enevitable that I will always have to do more work later on down the track but I want this to be mainly maintenance free when finished! Quote Link to comment Share on other sites More sharing options...
Truenotch Posted June 15, 2011 Share Posted June 15, 2011 Have you checked to see if it's binding? Quote Link to comment Share on other sites More sharing options...
1vaknd Posted June 15, 2011 Author Share Posted June 15, 2011 On??? Up and down movement? Quote Link to comment Share on other sites More sharing options...
Truenotch Posted June 15, 2011 Share Posted June 15, 2011 Up and down through the arc and side to side articulation. You want to be able to have one side at bump stop height and the other at full droop, otherwise you're getting bind and unpredictable things will happen + you're more likely to rip mounts out. So it will do this shit from side to side without binding up. Ideal 4-link is parallel like d.p.n.s's Quote Link to comment Share on other sites More sharing options...
fuel Posted June 15, 2011 Share Posted June 15, 2011 is that steering rack placement final? it just looks like it's on the piss in one of those photos, and also don't you want the steering rods to run parallel with the lower lower control arm/steering rod? Quote Link to comment Share on other sites More sharing options...
Jase Posted June 15, 2011 Share Posted June 15, 2011 looks to be an eyelusion chap^ awesome work man this is a serious undertaking not just an engine swap here , a lot of this sort of stuff happens in the u.k and its great to see a few kiwi's putting the yards in to build what they want how they want, reminds me i have to get back to a certain couple projects (simple engine swaps) and finish that shit. Quote Link to comment Share on other sites More sharing options...
fuel Posted June 16, 2011 Share Posted June 16, 2011 dunno bout that mate, you can definitely see the unparallel-ness of the steering arms in relation to the lower control arms here and the on the piss-ness of the rack here Quote Link to comment Share on other sites More sharing options...
ryanfels Posted June 16, 2011 Share Posted June 16, 2011 He will be using shorter steering arms so it shouldnt be a problem Quote Link to comment Share on other sites More sharing options...
fuel Posted June 16, 2011 Share Posted June 16, 2011 ah, right, I missed that bit. Quote Link to comment Share on other sites More sharing options...
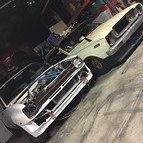
1vaknd Posted June 16, 2011 Author Share Posted June 16, 2011 Look closer in the pics above. The rack is held in with cable ties at the moment. Have to tak a notch out of cross member on drivers side bracket to square it up. Also castor arm brackets arent bolted down in those pics so nothing will be lined up properly Quote Link to comment Share on other sites More sharing options...
Truenotch Posted June 18, 2011 Share Posted June 18, 2011 Quote Link to comment Share on other sites More sharing options...
1vaknd Posted June 18, 2011 Author Share Posted June 18, 2011 Tose centre arm are parallel with the chasis rail as it is dude. Hey didn't you have problems with your mounts beaking free from the chasis Quote Link to comment Share on other sites More sharing options...
mjrstar Posted June 18, 2011 Share Posted June 18, 2011 looking good, If you don't have your heart set on the brembos as a hydraulic handbrake set-up I'd suggest the series 4 rx7 rear calipers with the handbrake mechanism built in as a much simpler option. Quote Link to comment Share on other sites More sharing options...
Truenotch Posted June 18, 2011 Share Posted June 18, 2011 Yes, I had issues with the mount ripping out after we slammed the car + lifted the front mount up a notch. The mounts were only stitched onto the floorpan and centre brace of the chassis. To stop that they really need to be tied straight back to the rear somehow. Mine now has a brace between the two links and two more back to the rear well, along with strengthening plates. I'd say yours would benefit from similar treatment to make sure it won't tramp or tweak anything. Quote Link to comment Share on other sites More sharing options...
spanners Posted June 29, 2011 Share Posted June 29, 2011 Ha thanks for doing the ke70 front arm thing - now i know its all good so shall copy. Did the ae86 sway bar line up 100% or did you need to change body mounts for it? Quote Link to comment Share on other sites More sharing options...
1vaknd Posted June 30, 2011 Author Share Posted June 30, 2011 There's alot to it dude! Don't attempt unless you are good at overhead welds( or have rotisserie ) pm me when you are going to start it and I can give you the full run down. It is not as easy as just drilling holes and bolting it up, I'm warning you! Quote Link to comment Share on other sites More sharing options...
1vaknd Posted July 6, 2011 Author Share Posted July 6, 2011 Have done a massive photo dump on facebook (Oneofakind toybaru) Off to panel beaters today so shal be interesting to see it all come together. Quote Link to comment Share on other sites More sharing options...
1vaknd Posted July 9, 2011 Author Share Posted July 9, 2011 =) Quote Link to comment Share on other sites More sharing options...
johnnyfive Posted July 9, 2011 Share Posted July 9, 2011 Woooahh, Awesome! How would one get those kind of shapes? Quote Link to comment Share on other sites More sharing options...
1vaknd Posted July 9, 2011 Author Share Posted July 9, 2011 the gaurds? Quote Link to comment Share on other sites More sharing options...

Recommended Posts
Join the conversation
You can post now and register later. If you have an account, sign in now to post with your account.