
Leaderboard


Popular Content
Showing content with the highest reputation on 19/07/25 in all areas
-
Completed the main tailstock end. Onto the final long plate now. Its working out well. I have a Renishaw probe on the mill thats a game changer for datum setup and tool height setting. Really accurate. Not like the good old days when I used a wobbler and a cigarette paper borrowed from a work mate!!8 points
-
Tactically acquired some copperish nail polish from one of the daughters last night.... Sharpie and paint make the 3dprinter i aint! Nearly a perfect fit too.
 2 points
 -
51 Chevy Kustom moving along slowly (as it should). Weather's not so great over the weekend so might get started on the paint. *edit Looks like the back seat needs to come out again, that's a big glue filled gap....2 points
-
Thing with pre existing repairs like that at wof time, if they look like they are done right then it doesn't really matter for a wof imo. Do a nice job and fly through. Eye appeal is 90 percent of the battle.2 points
-
So once I got it started again I was able to drive home but had to keep the revs up I had to use the method of using my right foot I learned in my youth. but I got it back to my new garage where hopefully I can work on it more
2 points
-
Get the whole car!1 point
-
Still no new pics. but it runs!! then the box got pulled out to be resealed as it was leaking from the split case joints. Doing shaft seals while theyr at it. internals looked good. wilwood master was sent to sterling to be sorted out. Stealth ride have been absolute homos and not even offer warranty at all. but now the brakes have pressure!! fuel tank now has a rollover valve thing located inside the wellside side panel. not much left to do now. handbrake cable will be shipped out next week, then the box will go back in. ive ordered 15x6 rims for the front cos for some reason the drivers wheel sits at -0.3 degree of camber while the passengers is -1.5 degrees with no shims. The drivers wheel pokes by 15mm more than the left. very odd, so well fit a +3p 15x6 to help this. once all of that is done it will get a wheel alignment and get road tuned. then it’ll come home to get the deck floor finished off before cert. soooooo close now
1 point
-
Started preparing the deck surfaces for new gaskets good scrape with a blade then a thorough rub down with 600 grit on hard foam block shows machining is pretty course. The dowls took 2 hours to get out what a pig of an idea. Anyway looks like Alan Millyard has been here before me with his eprinet cloth as there are some swirly sanding marks its coming out easy enough think ill just keep going till everything is uniform. All looking good oils a bit black so will flush it all out while it's open no nasty surprises so far.
1 point
-
16 year old me is happy with this plan. Edit: Obviously you will need the 12,000 rpm version though.1 point
-
Only relevant info you need is if your oil filter is on the car or in some farmers paddock?1 point
-
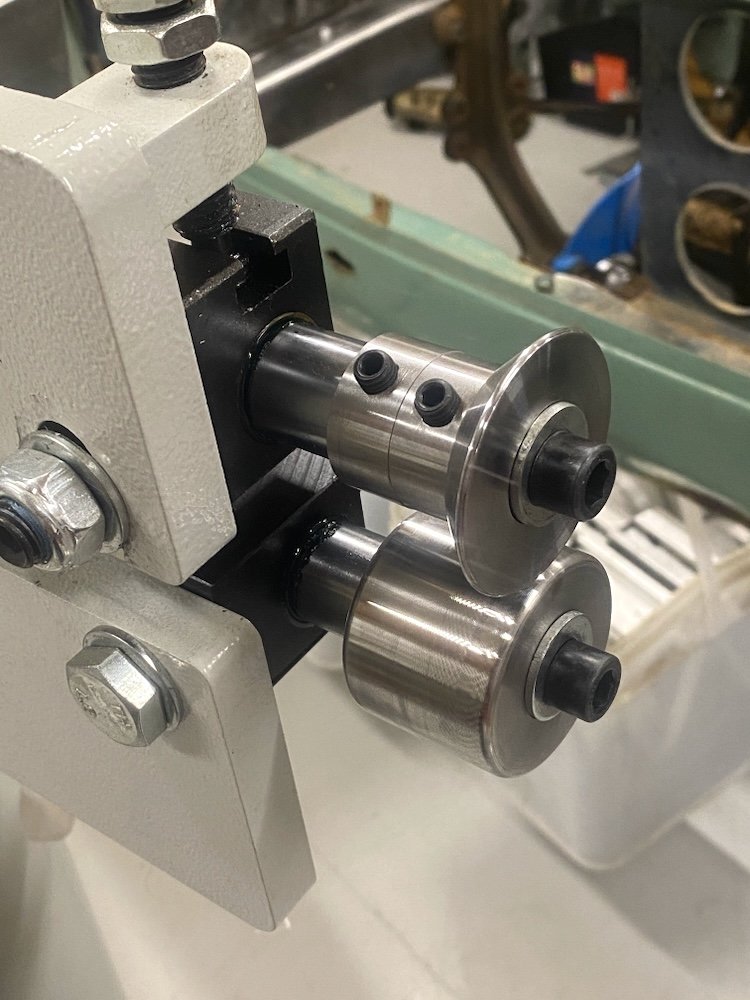
Wanted a tipping die on the bead roller and while digging out some steel had an idea for a modular version to cover all bases rather than turning multiple dies 3 pieces, the two collars can stack either side of the die to place it where needed, had planned to drill a roll pin between the lot as there is no drive feature on the die, but so far it works a treat. Next up, some nice radii and Datsun related profiles
1 point
-
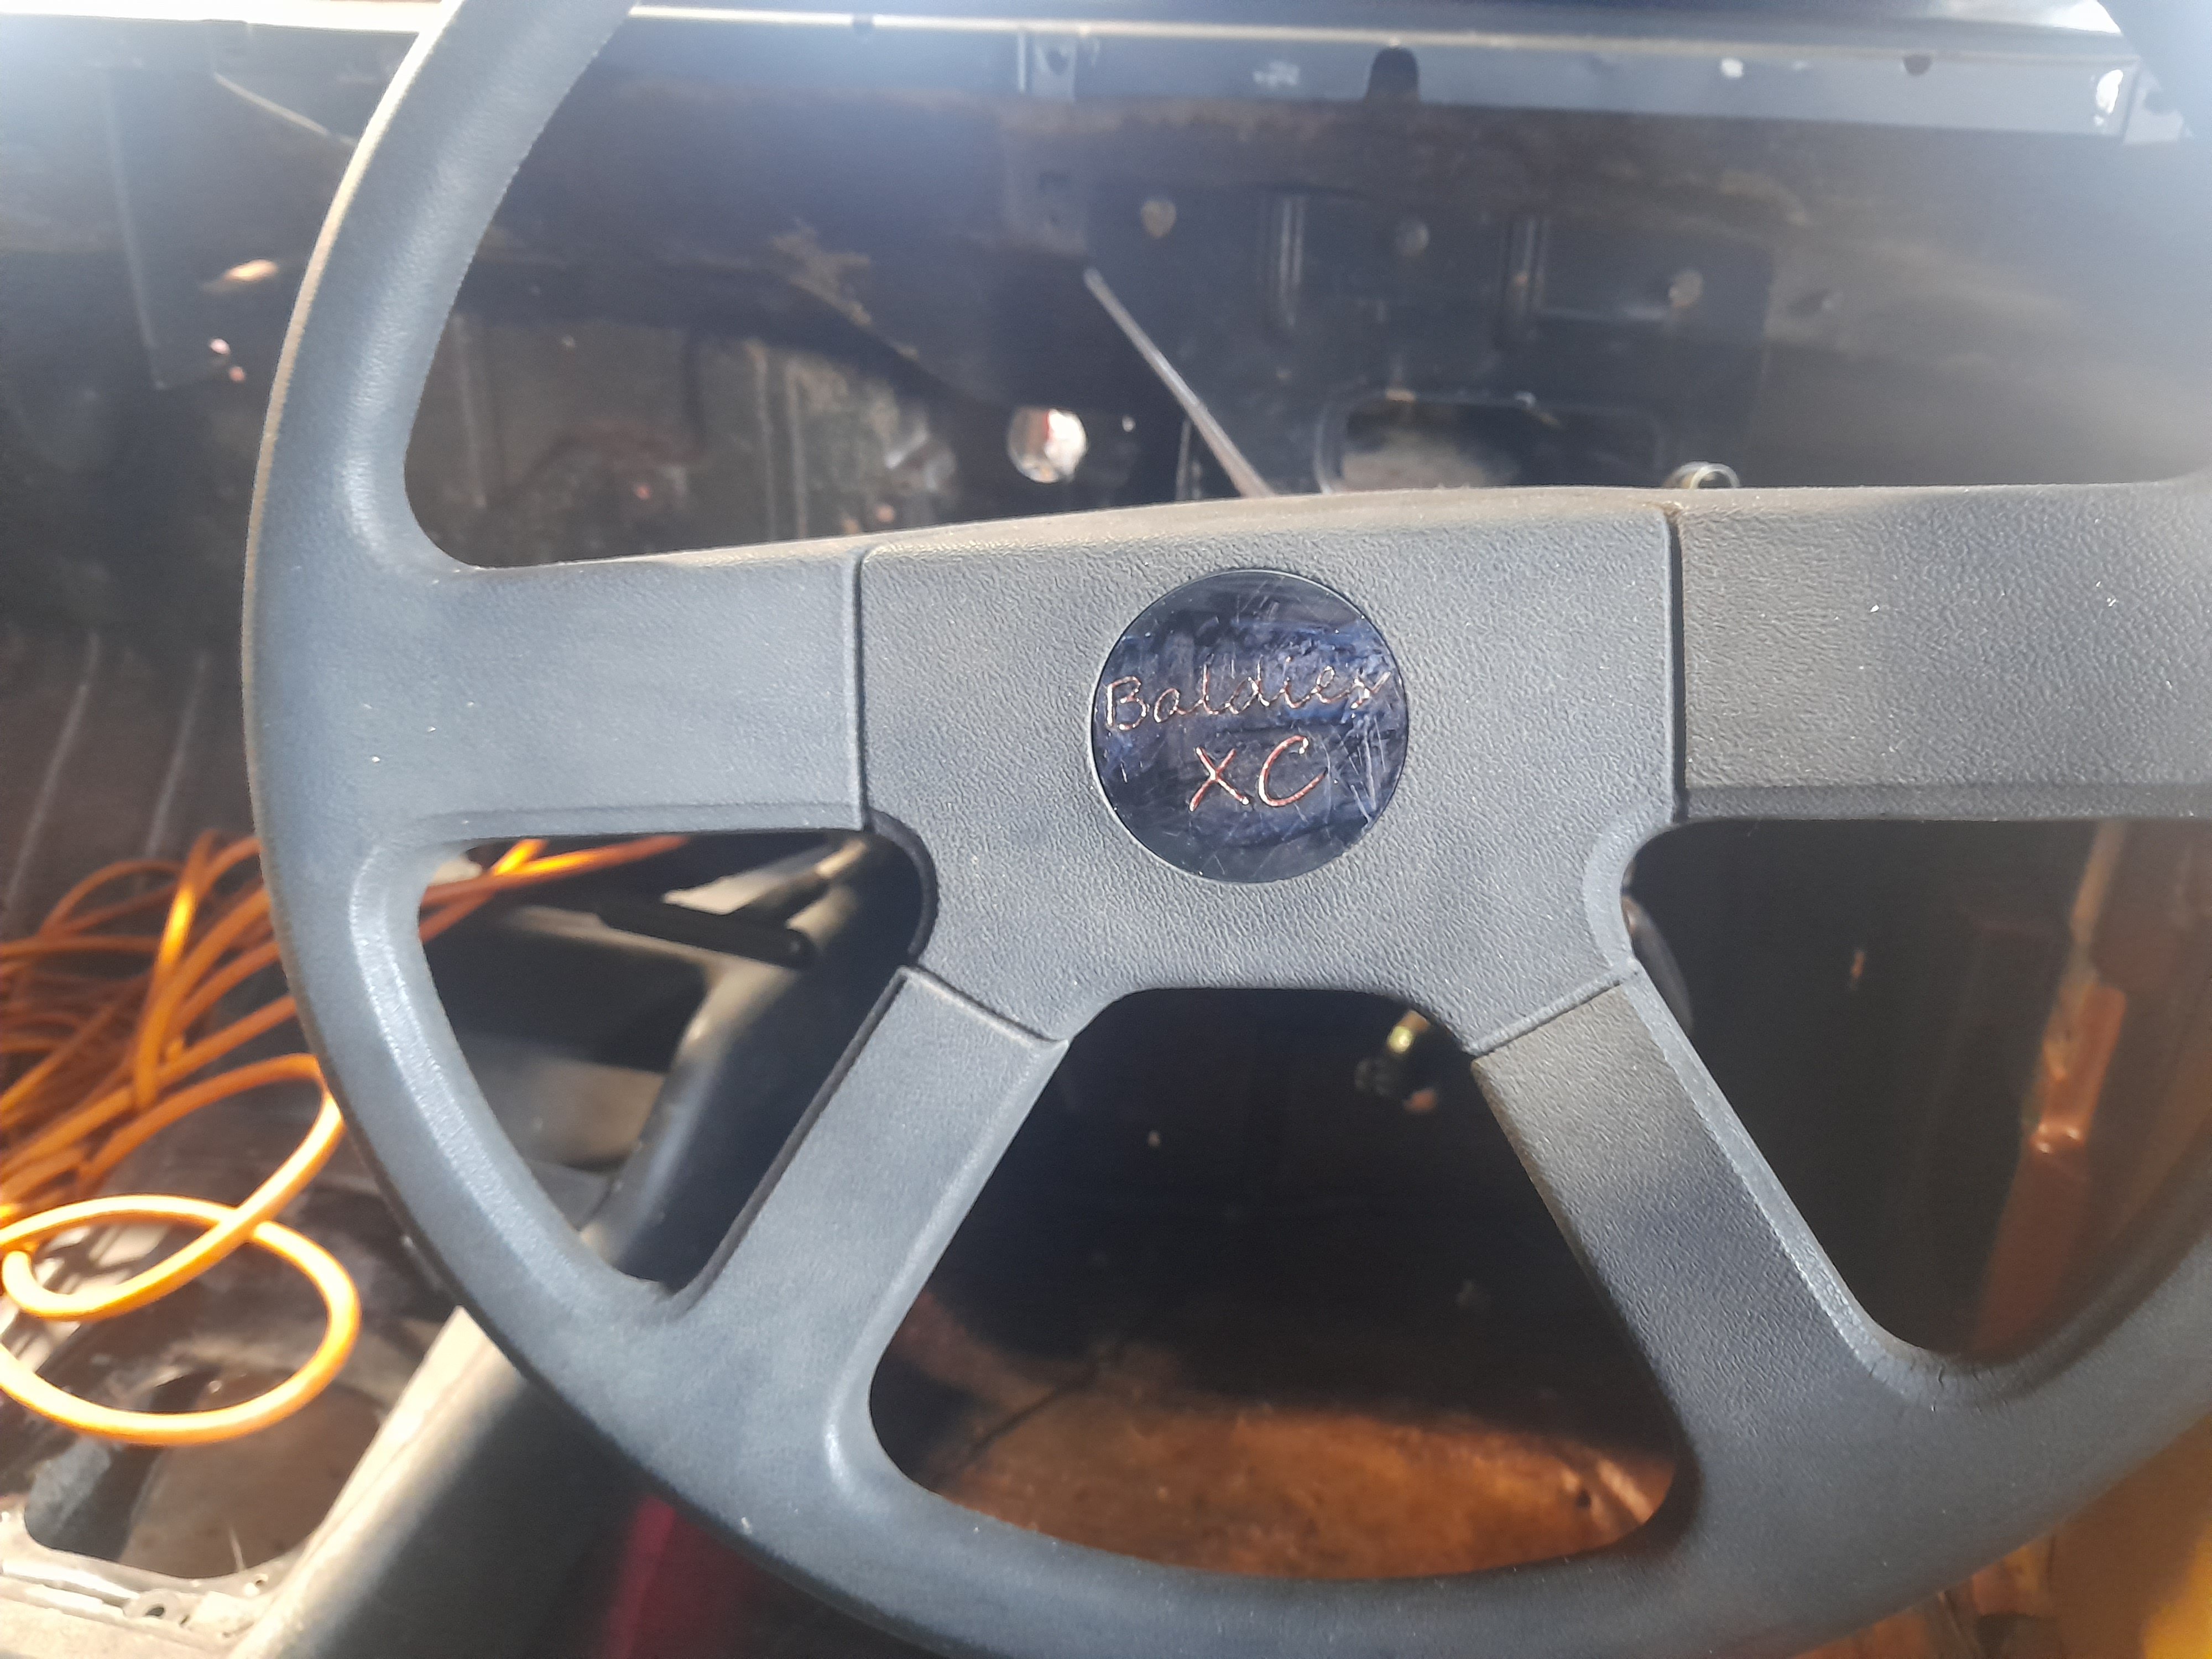
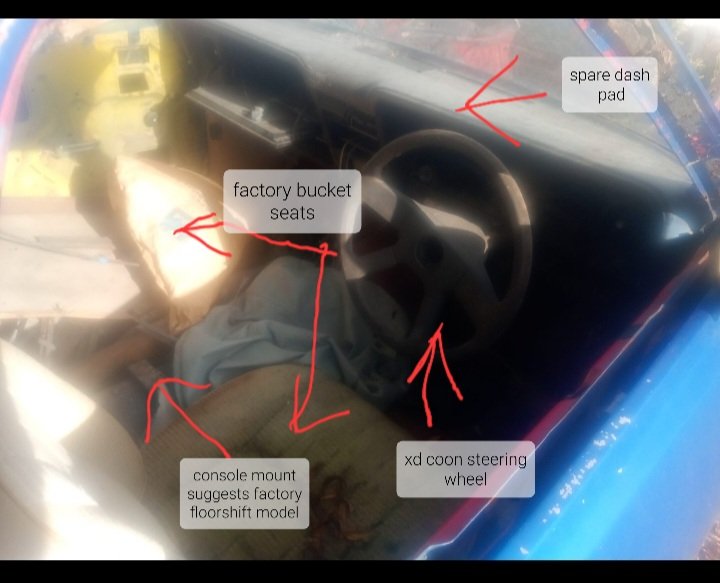
Pulled the dash out of the ute over the weekend, found another skink, got tired of rusty screws so left the heater box for another day. Neither the xd steering wheel i put in the sedan nor the xd wheel in the rotten ute have the centre cap. Started playing with freecad and learning the ropes to suss out some ideas now i have a 3d printer. I prefer the option on the left so far, i think in black with copper inlay should look sweet. Will do some more mucking around during the week.
1 point
-
if you have an abundance of lap belts that are date stamped 67, pick the best 2 for the front the rules state that a post 55 vehicle should have lap and diagonal belts in the front as a minimum (tbh this is a good idea, a lap diag belt is many times safer than a lap belt) OR the oem lap belts if they are in good condition a lot of people get caught out by fitting a nice new pair of repro factory style lap belts but once the factory ones are removed, any replacement belt has to be the correct lap diag type which means in a lot of cars, having to make anchorages and getting lvv cert1 point
-
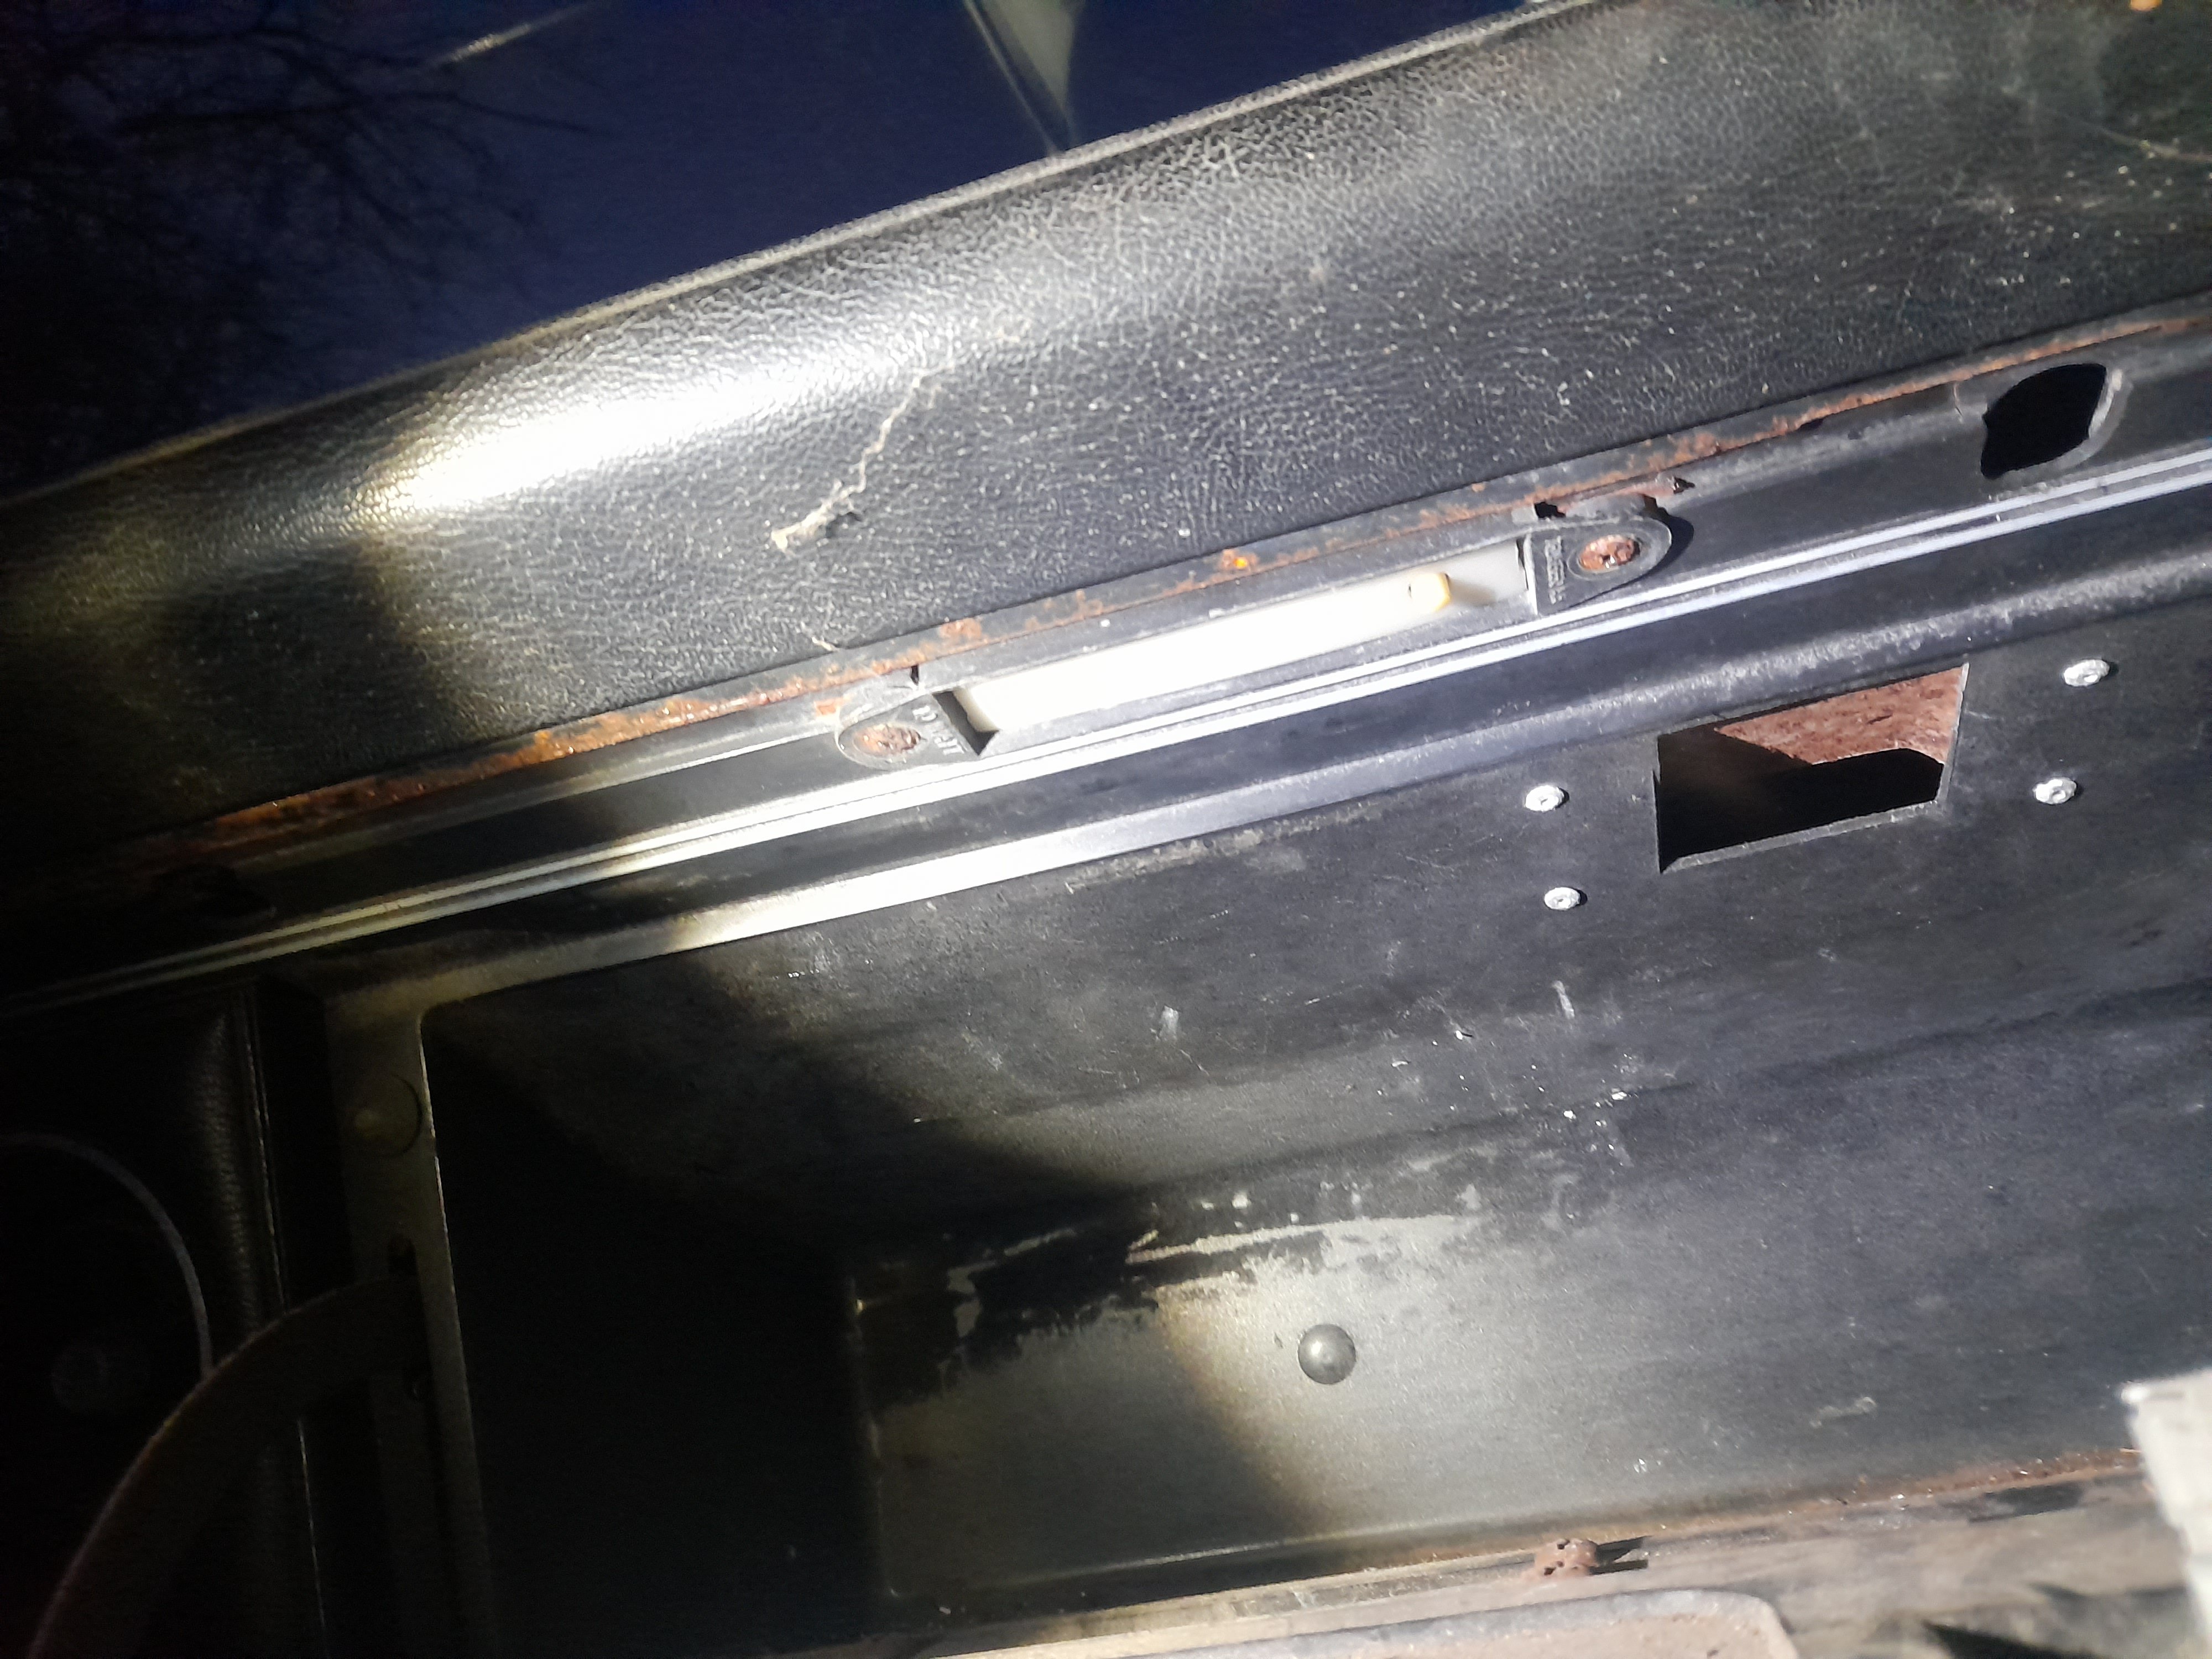
Tonights episode of hoarders brought to you by trademe. Was warmer when i got home tonight than it was all weekend so i took a torch and some screwdrivers outside and started pulling the dash apart. This ute must have been well appointed in the 90s, upon taking the glovebox screws out i found it has the 'glovebox vanity light' option fitted. This coupled with the padded dash panels and 5 position wiper switch makes me think that someone must have stripped a fairmont and fitted all the option parts to the ute, or it was the fanciest tradies ute sold in 1979.
1 point
-
Things wifey didn't notice when i showed her the listing on the tard. Or she didn't care about. Not sure which tbh. Still. Could have blown $200 on booze instead, worst case here is i get my money back in scrap value.
1 point


This leaderboard is set to Auckland/GMT+12:00