Goat
-
Posts
5,063 -
Joined
-
Last visited
-
Days Won
13
Content Type
Forums
Downloads
Events
Gallery
Everything posted by Goat
-
Shit yeah beave! Saw this on marketplace. Even though small bikes are so punishing, there is some amazing charm about them. I've got a few a100 donks in stock if you need when the time comes. Also, you don't want the RD back do you? hah, it really doesn't like Broadmeadows hill! Haha.
-
Any of you Mitsi foamers know anything about 4g41 donks? Early 70s OHV engine in early colts. Specifically, if the bellhousing pattern is the same as a 4g32. @fuel @DoBro Jesus
-
Talk about living the dream. Shovelhead in the tray. Shit son. You are winning. Build thread of shovel plz.
-

Tomble's 1983 Starion GSR-X fumbling / hand-holding / discussion
Goat replied to tomble's topic in Project Discussion
Awesome to see some progress. Such a entertaining build to watch! -
I was looking at this a few years ago with my 240z. Assuming Volvo is inductive loop setup like the Z. I found a few guides on how to do it (i just did a quick search but couldnt find any that still had current pics etc) There was a really good guide on a toyota forum of how to do it yourself. I ended up just getting a MSD tach adapter. There seem to be a few other players on the market for tach adapters these days, so the may be a cheap magic box you could use.
-
I don't think it controls the pulley. It just controls the regulator. But no idea if Suzuki does that though. It was just the/a solution to the problem i would never ever have considered or got to by myself. Battery was fine, car started well. Everything was good until it wasnt. Then it would be good again after a day or so.
-
I had a similar problem with my volvo. It had a ECU controlled alternator, and it had been replaced with a slightly different alternator at some point prior to my ownership. Apparently it would overcharge and the car would shut off the alternator. So every now and then, the car would light up like a Christmas tree and be bricked, with the wipers running on full hah. (My only car ive ever used AA+ on, twice!) All modules would throw a code, and it was to do with canbus connection being dropped. The guy i sold the car to found this out (i sold it bricked as i had no idea what was causing it). Fitted the correct alternator and it was all hunkey dory.
-
Most 70s japanese stuff? I'll have a look this weekend, might have a suzuki fronte one in stock. Will get pics and dimensions.
-
HumberSS's Datsun 240c coupe of irrationality yarns
Goat replied to HumberSS's topic in Project Discussion
Shit yeah, Saw this on facebook and had to apply some restraint. Hope you can bring it round! These have a nice side profile. -
Shit yes
-
Im really enjoying this build. Awesome work!
-
Love your work.
-
CRC evaporust is pretty good at making rust disappear. Non corrosive too. May need multiple applications, let soak for a few days, waterblast, blow it out with air, repeat. Should eventually leave nothing but unrusted metal.
-
Good shit dude. Chalk that up as a win. Kickstarting these is fun. Its actually super easy once you dial in the technique. Mine starts 2nd kick after months of sitting. Its fun offering others to start it and watching them struggle as its such a different process from "normal" kickstart bikes. I see you're still running factory master cylinder. I just put a trademe chinese one on mine as it was always an absolute shit to bleed up. Bled up in seconds and has a had rock hard lever since. Too easy. Can get caliper rebuild kits and discs pretty cheap. BMI carts in the states has a lot of really cheap vintage harley parts. Shipping can be brutal, but even taking that into account, its still really cheap. You wouldn't want to sell your old clutch springs would you?
-
Could be a poked starter. One of my ironheads would do exactly this, wouldnt crank, but would spin up outside the bike. Wanged a new (second hand) starter in there and winds over like a champ. I've never had any luck rebuilding starters on japanese bikes. They never seem to work after ive opened them (the bench test fine but dont have the minerals to crank). But these prestolite ones might be so archaic, they might respond well to a rebuild kit??
-
An inspiration to us all. So rad its finally legal! What a relief
-
Yep, for sure. Can store cars and trailers in masterton. Send me a message.
-
Can get 1200 kits for them pretty damn cheap from the states. 883 is enough for me at the moment. I've got other bikes for going fast. Not that i can ride fast... hah.
-
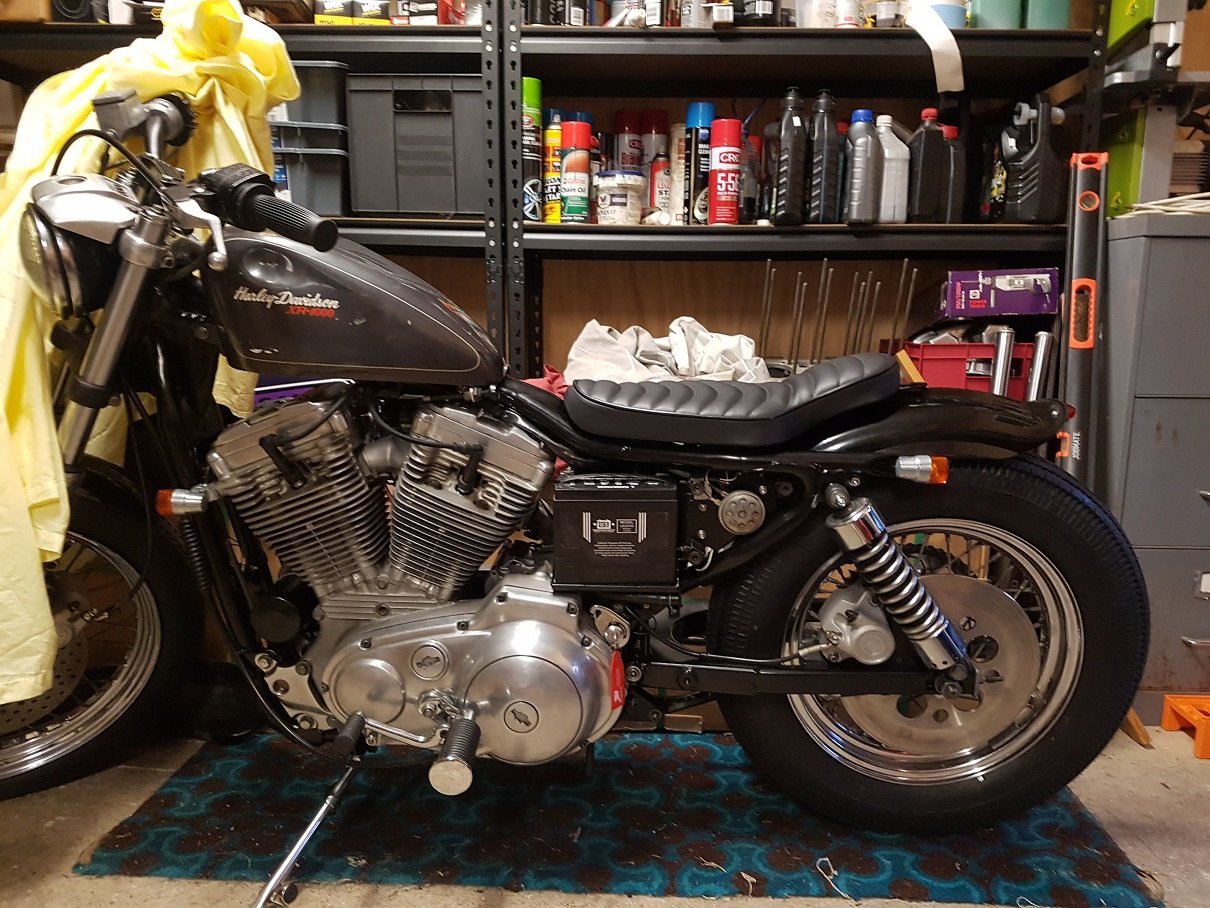
Yeah, primary cover gaskets are the same. I'm sure you could fit the primary cover on a later model ironhead and vice verca. Clutch has alternator behind it (they only did this for the first few years of the evo as it was a bit of a sucky setup). And has a pull release instead of a push. Quite a lot nicer action. And its easy to select neutral when its running! Still havent taken it for a ride yet. But should be a blast. Will do some laps this weekend. Have taken 50mm out of the forks, and dropped the back 50mm too. Feels like a tiny and compact bike. Plus there is nothing to it either. Just an engine and 2 wheels really. I relocated the key to under the battery and cleared all the VOES and other wiring, hid the coil behind the oil tank and setup all the wiring there. To keep it clean under the tank. Will get some propper pics soon. But i actually put in quite a bit of effort doing subtle things to keep it looking as clean as possible, but also looking retaining an OEM look. Want to keep it minimalist too so need to figure out where to tuck the speedo to keep it clean. I've tried to do this build as cheaply as i could. The most expensive thing i have done was getting the frame blasted and powdercoated for $400 and that was worth every cent. The shinko tyres were from a 15% off at motozone, and the seat was spendy at 350nzd landed. The rest of the bike is just elbow grease. This has really been a budget build. Reusing all the fasteners (after wire wheeling them), cutting front springs, 2nd had trademe shocks, and lots of autosol. Pretty happy for how this has turned out. It looks like a very tidy wee bike. Especially considering the condition it started with. Has been a very rewarding journey.
- 14 replies
-
- 13
-

-
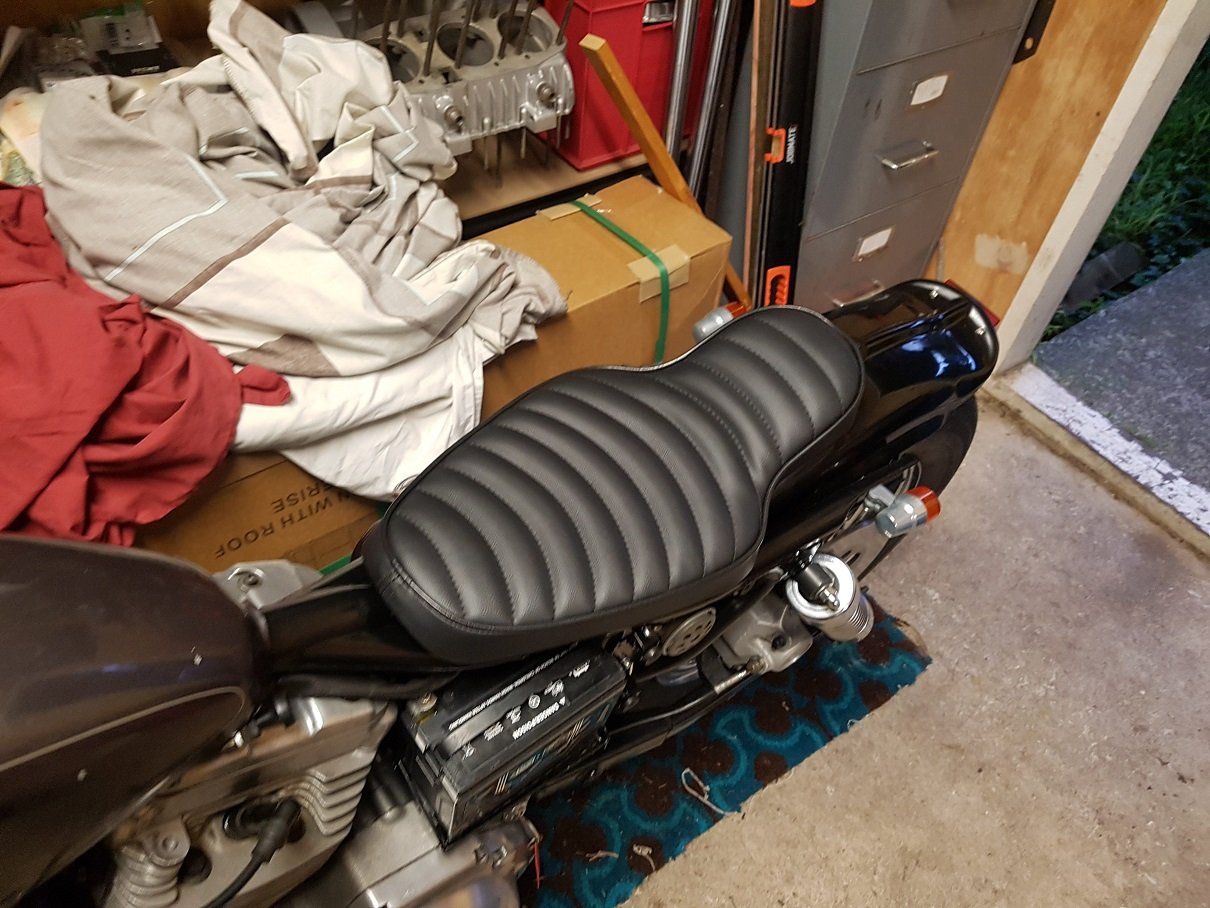
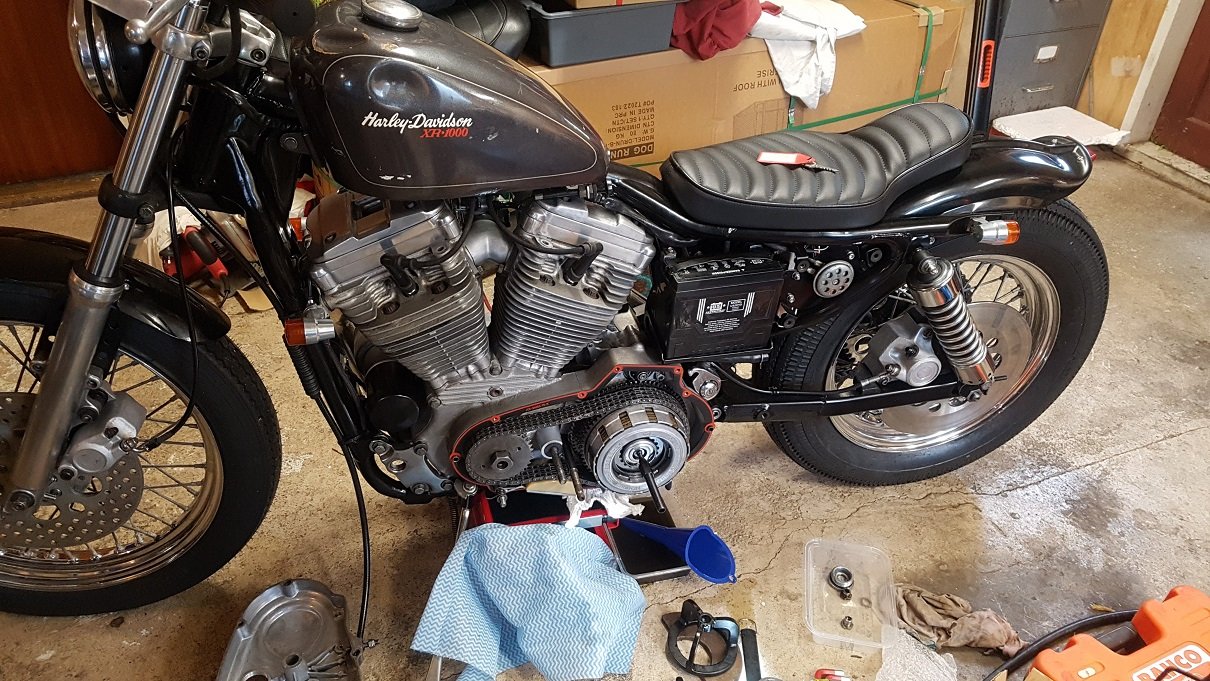
Small update on this. New seat turned up in August. Looks great. Fitted a micro tail light which you can see under the rear ducktail. The bike starts and runs like champ. Starts first pop even after sitting for ages. However the clutch had been stuck. The mechanism works fine, but i assume the plates have stuck/rusted from it sitting for the last 10+ years. I tried freeing it by doing a burnout with the clutch in, but it was proper stuck! So pulled clutch apart. Cleaned, and put back together. Clutch works a charm now! All i need to do now is mount numberplate, and fit a speedo and then its ready for a wof! Just intime for summer. This should be a lot of fun. Its actually a tiny wee bike, should be great for ripping through the wellington hilly streets!

- 14 replies
-
- 18
-
-
This is so fucking rad Greg! So awesome its been in the family for so long. Cool that you can keep the story going! Looking forward to updates
-
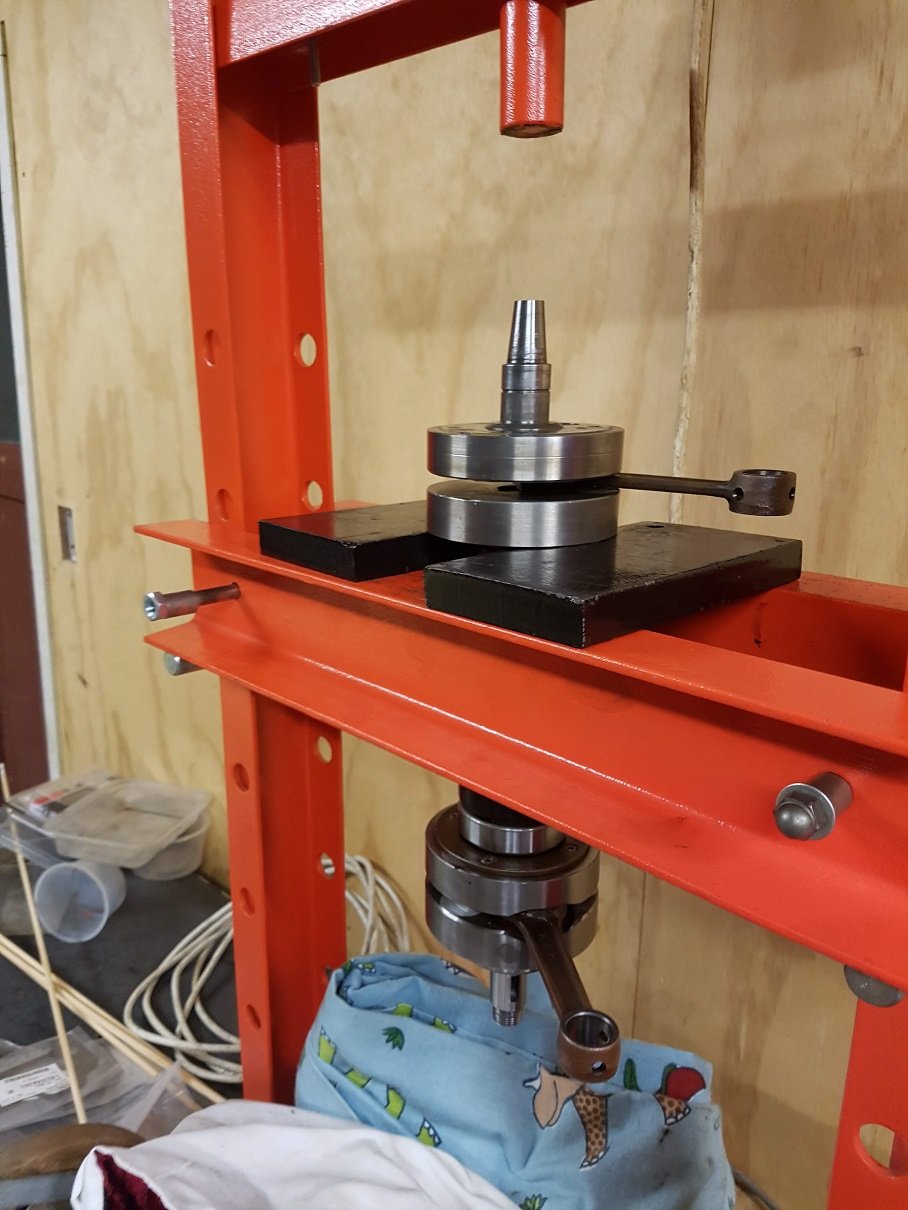
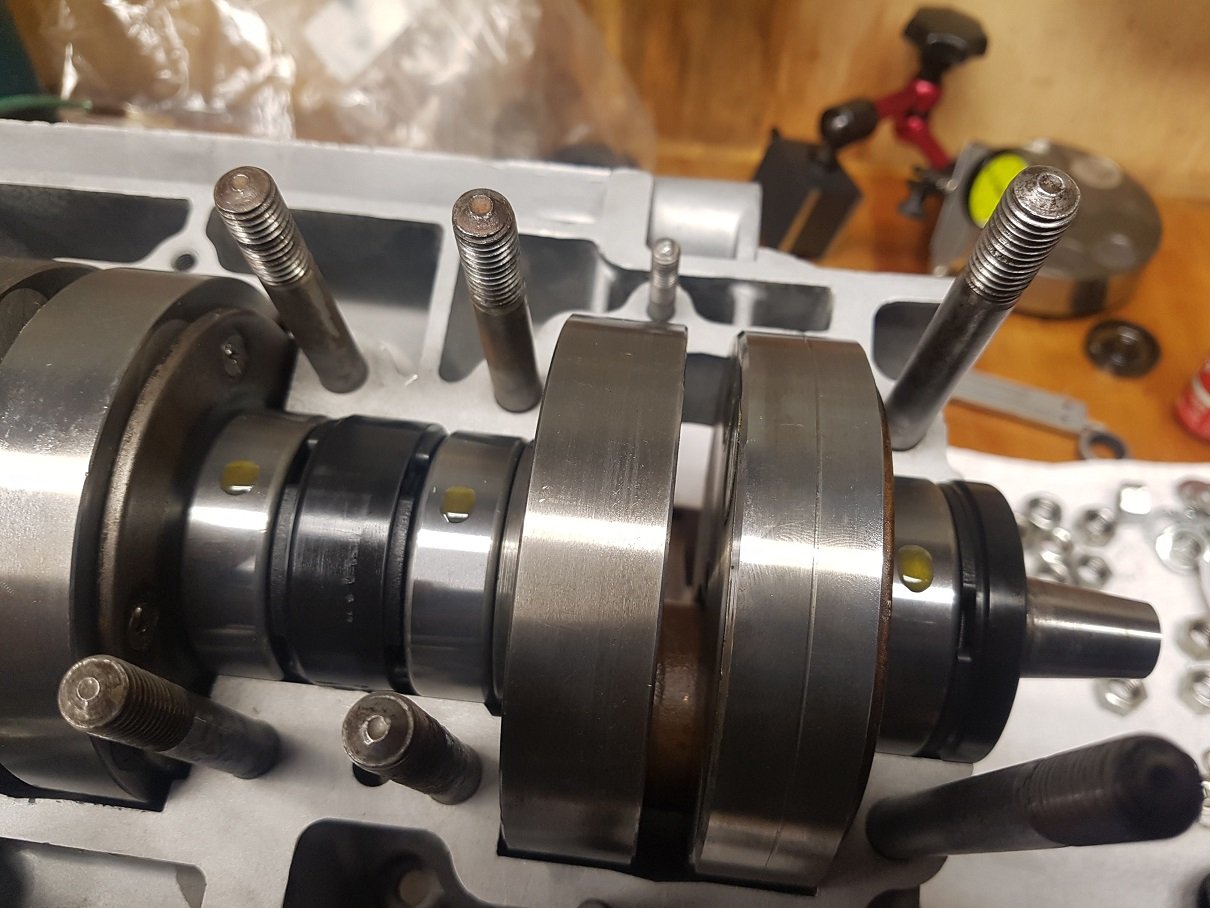
Thanks! Its all learning. Definitely learned some lessons already. And have a more robust plan for the other H1 rebuild. Biggest win is I'm no longer scared of pressing cranks apart, pulling bearings, and truing. Was pretty good towards the end in knowing where to hit to get desired changes. The actual only pain was these mallory weights, it looks like they were cast in the crank, they weren't press in slugs. Every web i had to give the bash to true, the slugs came undone (very slightly). Loctite seemed to firm them back up, and they couldn't actually fall out. Next crank I rebuild, I'll take the cast weights out, and press in some equal weight tungsten slugs. That should remove this issue completly.
-
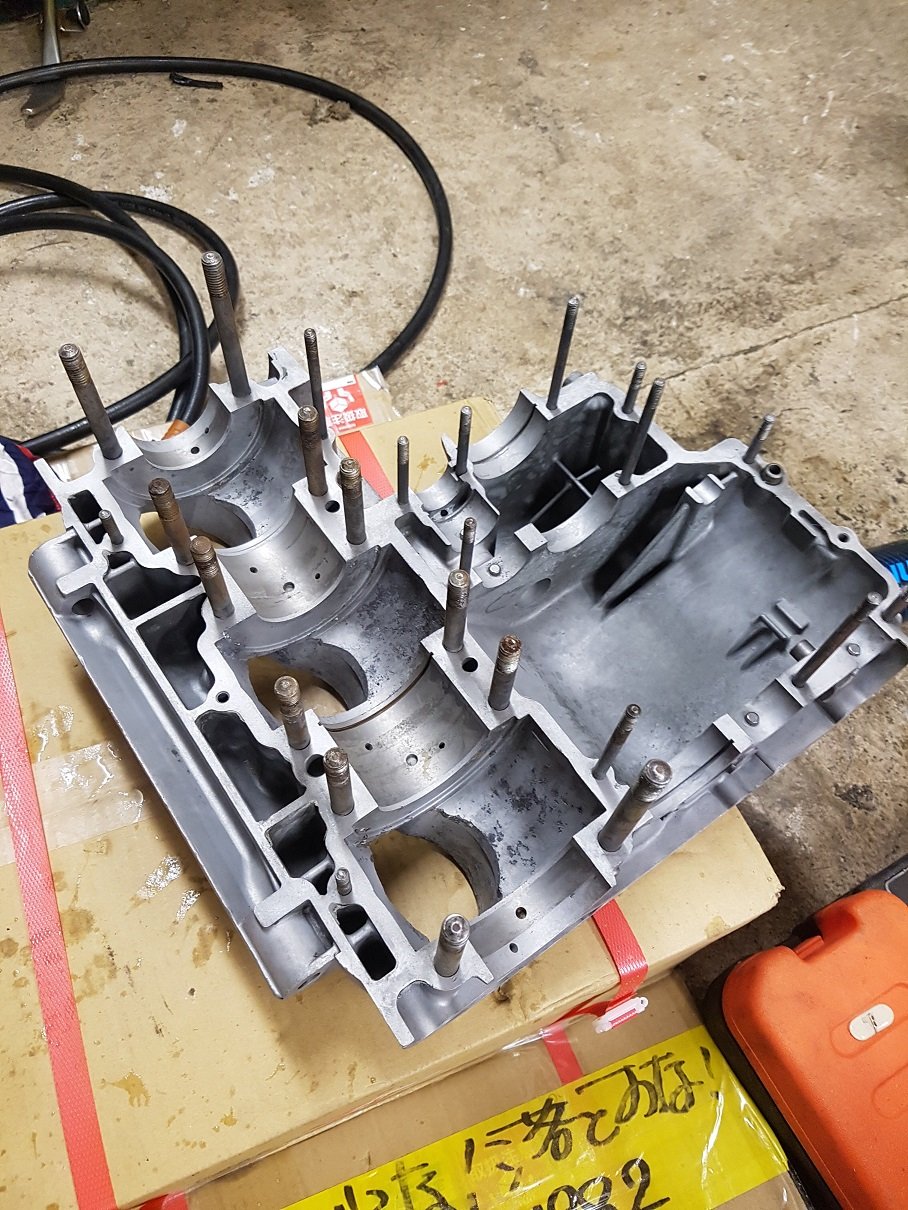
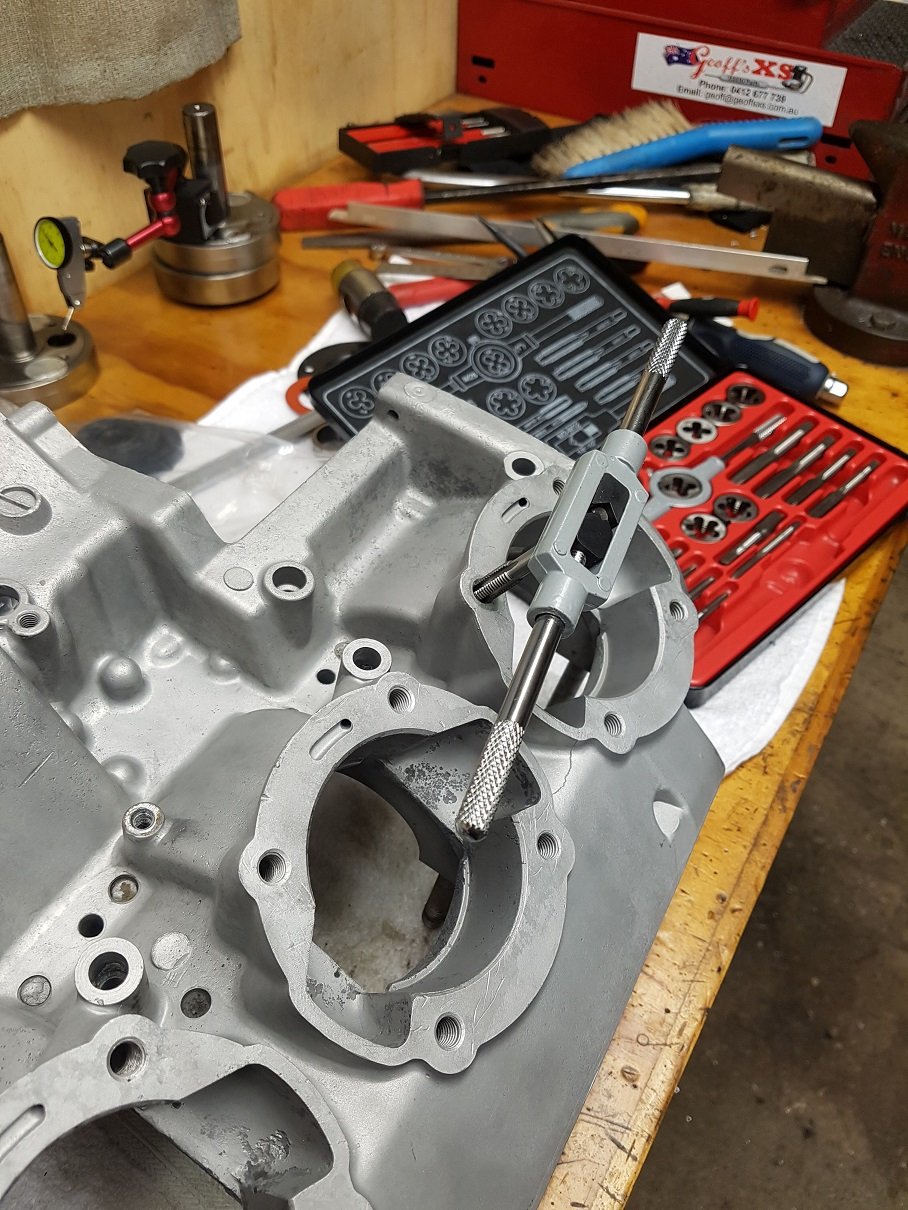
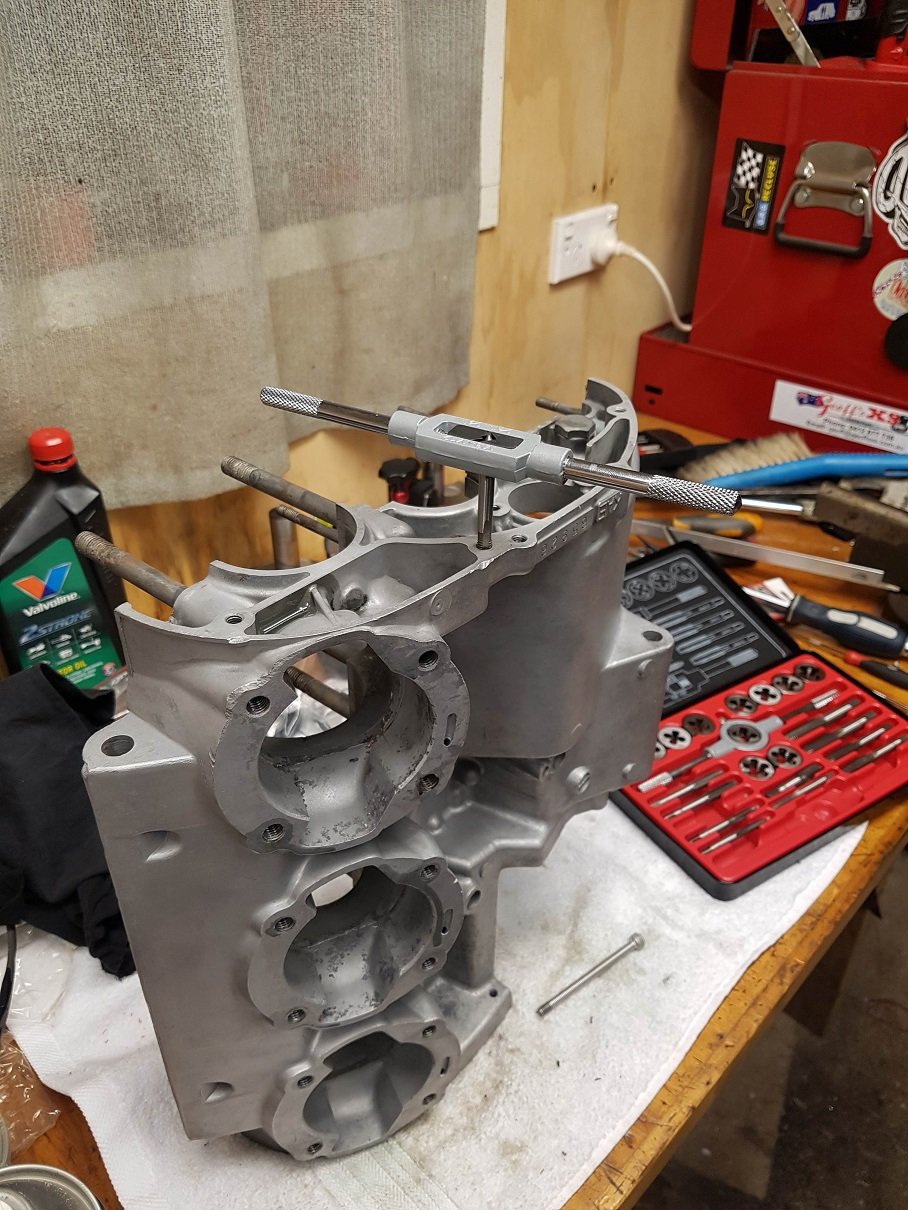
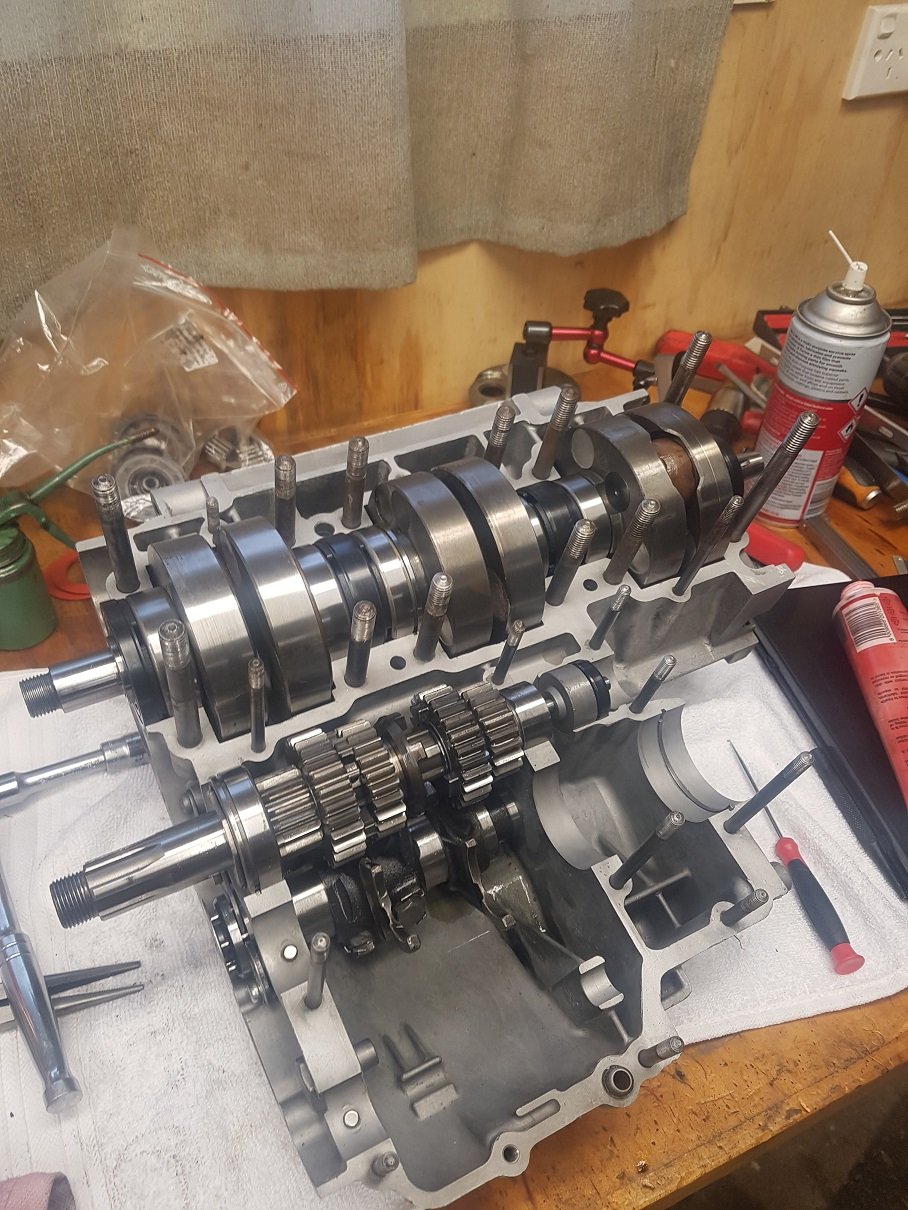
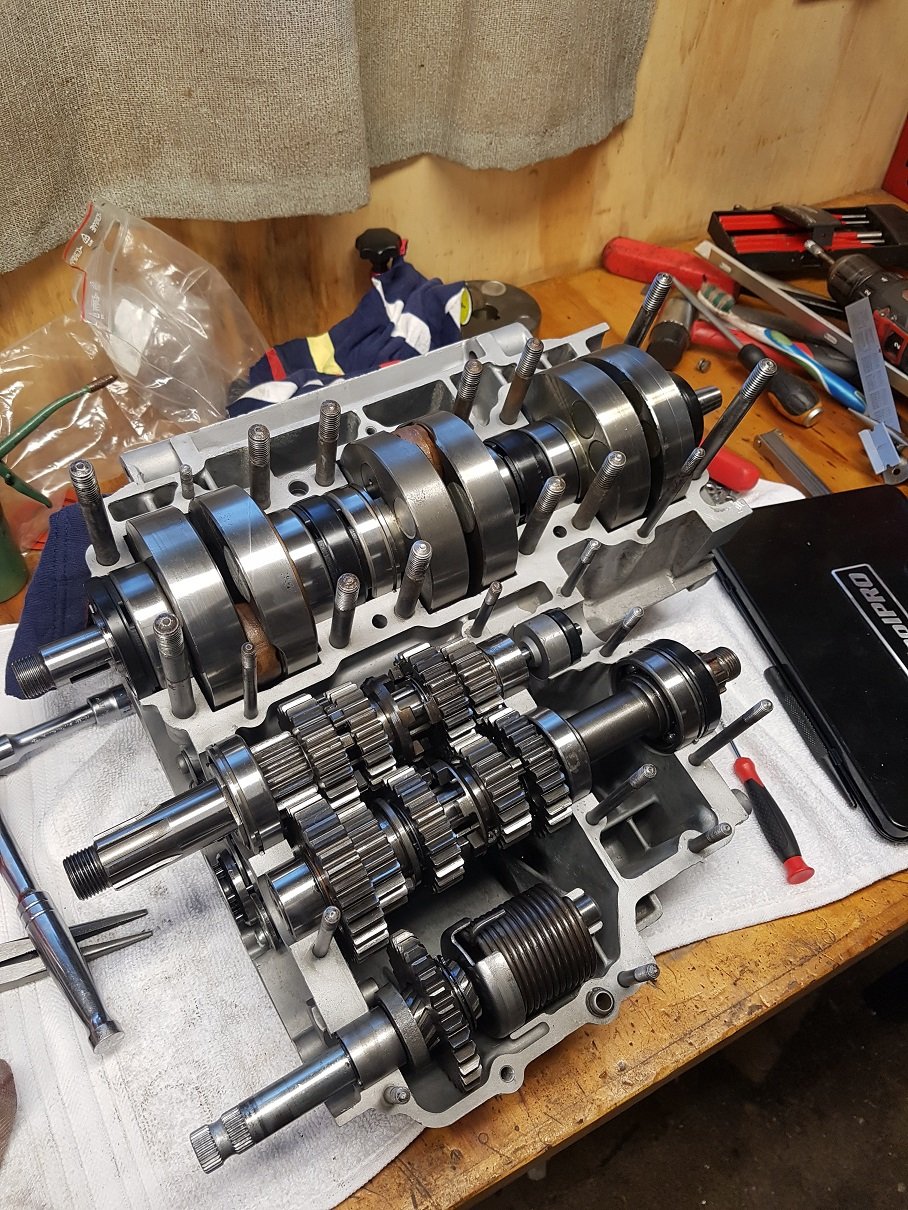
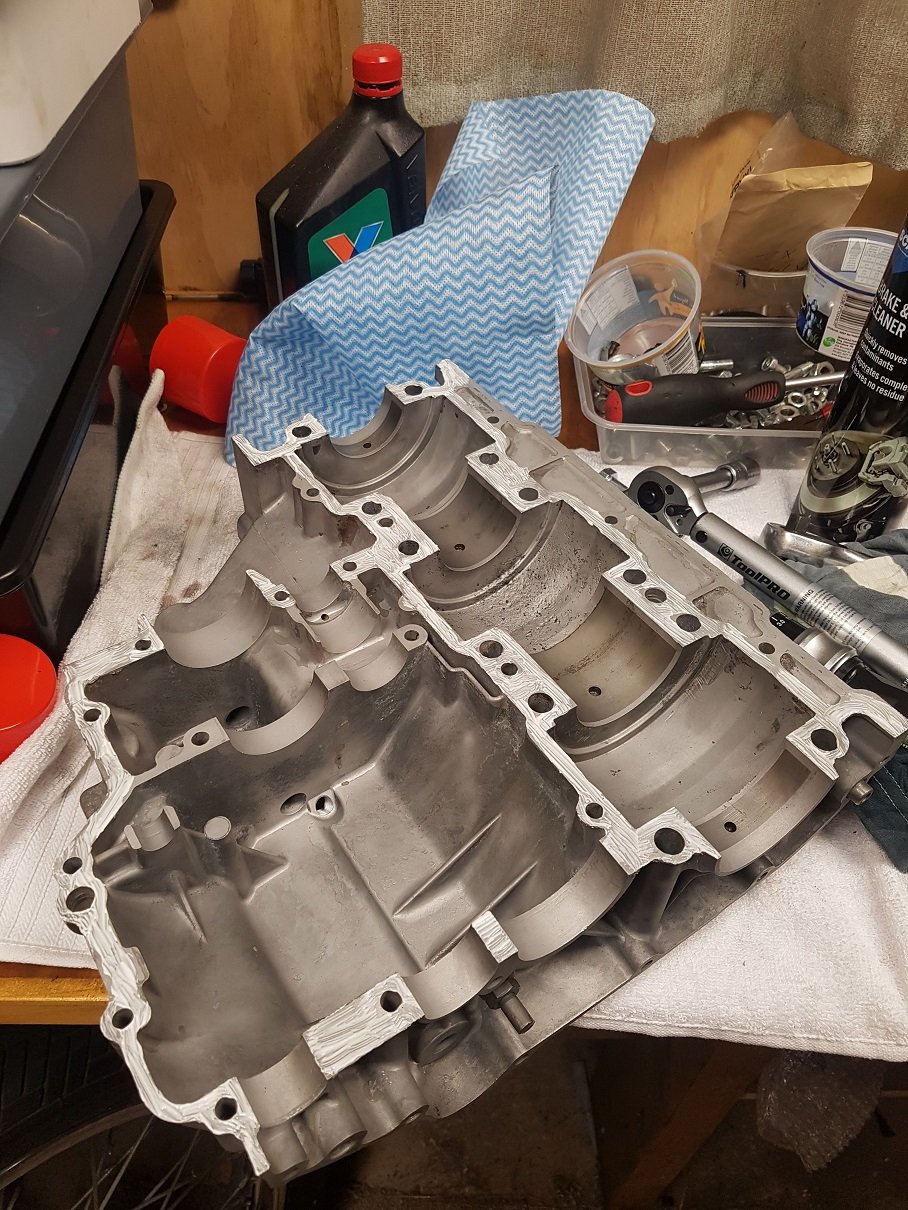
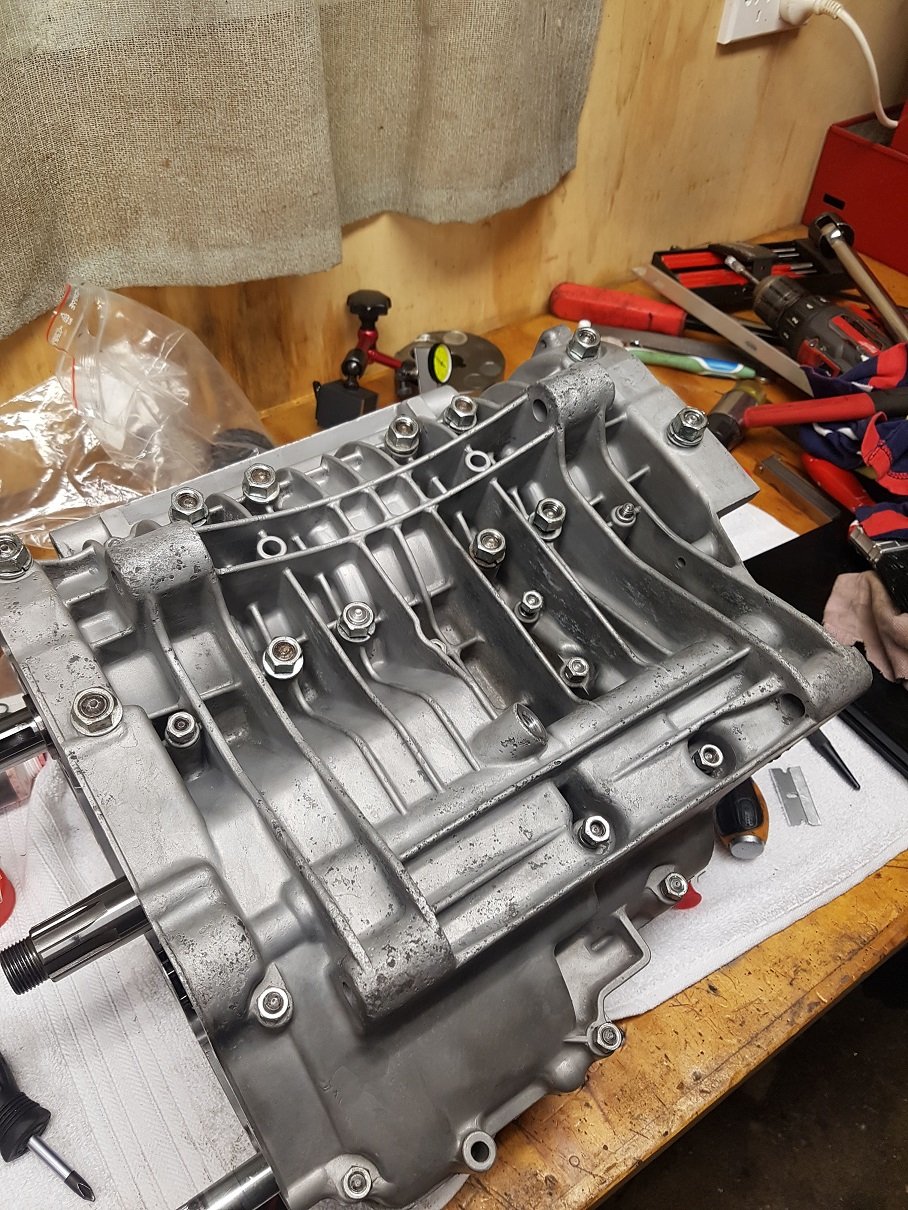
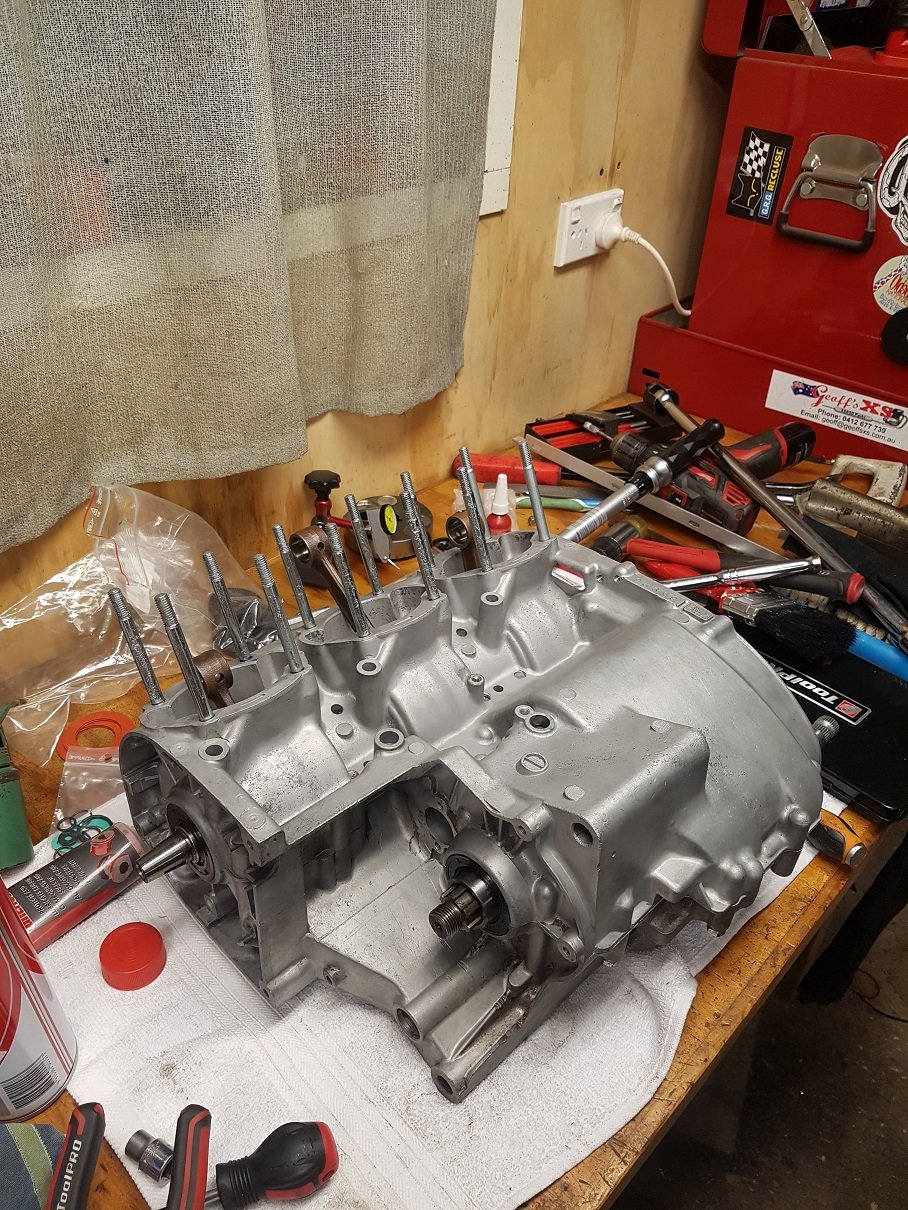
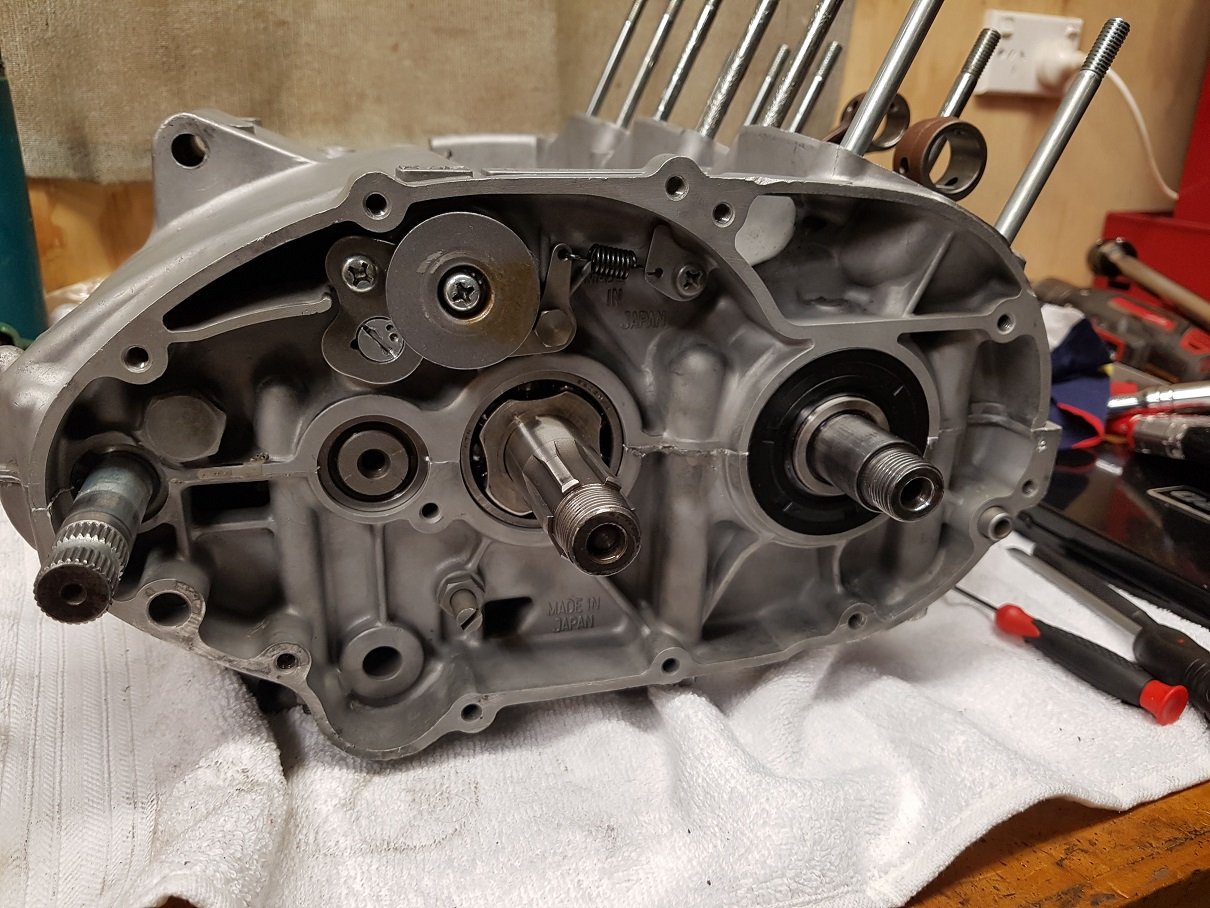
Making progress. I ended up using the original crank web and just used bearing retainer to hold the bearing on. Worst case it will spin and damage the already damaged crank. Consider this practice. I also used retaining compound to hold in the mallory weights. This seemed to lock them in good. Note that although loose, they couldnt actually come out, so even if they come loose again they won't fall out. With the crank all true within 0.02mm. It was all ready to nip up the bottom end! Setting final bottom end clearance on the last web: Prepping cases, Cleaning, cleaning, chasing all threads and more cleaning: Now I could sit the goodies in the case checking for function and binding as i go: Couple of dots of bearing retainer: And a fuck up on my part, who can spot it: All together ready for torquing: All nipped up: Goes through all the gears, crank spins freely, and kickstarter works. Polishing up sidecovers as they go on. And need to assemble the clutch etc. But that should all go well. Next step to pick up freshly powdercoated frame and start reassembling the bike. Might be on track for some summer hoons!