
Nominal
-
Posts
37,205 -
Joined
-
Last visited
-
Days Won
344
Everything posted by Nominal
-
Good news. Sounds like the new WOF shop is happy to look at an older vehicle and not judge a book by it's cover. It's nice to get something back on the road, I managed it with the Morris Oxford Traveller and it was quite satisfying.
-

Daves new school holden shambles. (Is this project oldschool yet?)
Nominal replied to Muncie's topic in Other Projects
Best next step would be to weld two more cylinders on and fit a V8 crank. -
Stock FC would be boosted right? You'll need a smaller M/C bore, or different pedal ratio, or maybe both to make them work unboosted, even then I dunno if you'll get there.
-
VGs Little FJ40/Off Brand Power Wheels & Trailer
Nominal replied to Vintage Grumble's topic in Other Projects
How good does the paint need to be on something that will get crashed into the nearest tree/fence/hedge in the first 47 minutes of use? -
I presume you saw the bulldozer option ?
-
Been down to Bulls for a thing, good trip mostly. The new Ripco spark plug lead didn't last long with a misfire after stopping at Taupo, so spent some time at Pro Parts getting one with a right-angled connector made up. That should be a permanent fix. Only real problem as just on leaving Bulls heading back north. That nice black Chevette that was posted in the Spotted thread was up ahead, so I accelerated out of the 50km/h area only to experience a sudden loss of power and a floppy gas pedal. So pulled over to the side and checked the pedal end. All good there so had a look under the bonnet. Turns out the crimped on end had decided it didn't want to be attached any longer. Luckily I had some basic tools with me, and there was enough length available to get it back in action by poking some strands through the mounting hole and tightening the bolt back up. I left one of the return springs off to reduce the load. Looked at a few options for a permanent repair, there are some aftermarket cables available with a nice pivoting end, but they are $$. I've ordered a knockoff from Ali, but in the meantime I drilled a 6mm bolt and welded that to the head of the other bolt like so I had to trim the rough end of the cable a bit to get it threaded through the hole, so adjustment is a bit short, but I expect this will be a medium to long term fix.

- 111 replies
-
- 16
-

-
Been honing your skills eh?
-
A replica maybe? Body looks to be fibreglass.
-
65 Bucket seats...
-
Lol I assume you have looked through @ProZac's thread.
-
K-Trips 1982 Holden Commodore VH Discussion
Nominal replied to KKtrips's topic in Project Discussion
Excellent, that was pretty quick shipping. Hopefully the legal side is easy - in my experience 20+ years ago it was a piece of piss. Also -
Worth getting for the hoard I reckon.
-
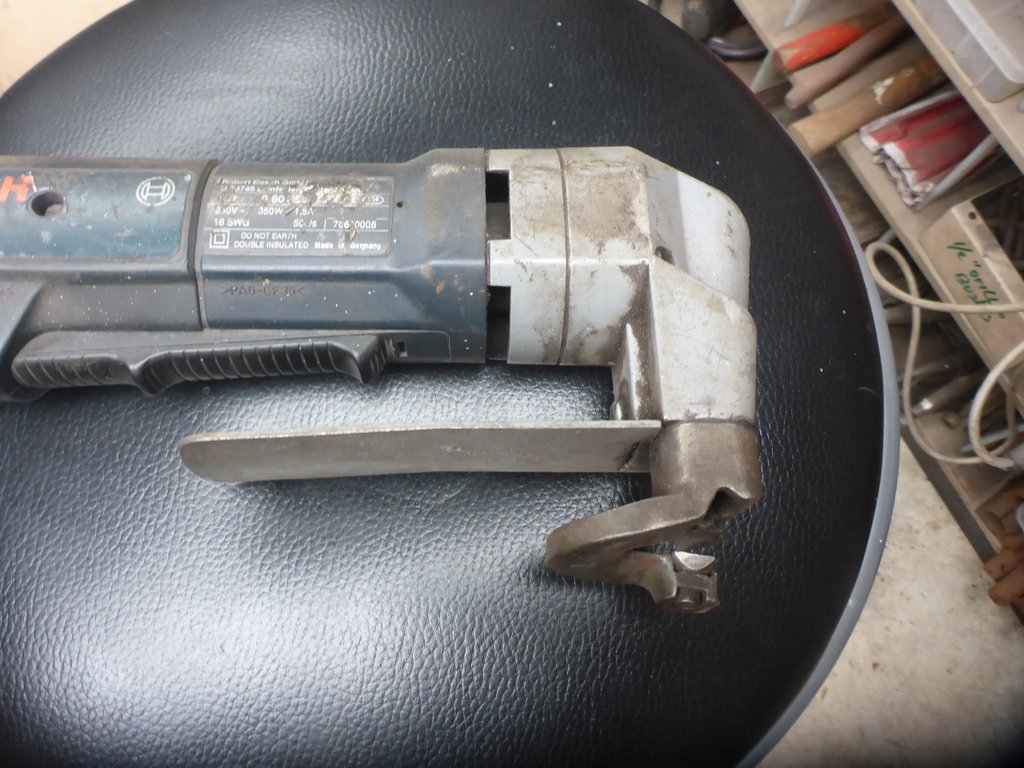
Shrinker/stretcher, I got a lot more use out of that.
-
Pity they 'upgraded' Minor diff which has separate hubs and bearings from the axles
-
The hand snips I use most often are the offset ones like this, way better than the straight style ones. These work well even though they are old and a bit shaggy. For cutting steel out of larger sheets this tool is great, I have a powered nibbler/punch thing too but never use it now as it makes such a mess with all the little punchings. These are good too I think, but I don't one. HS2S Throatless Hand Lever Shear - Machineryhouse
-
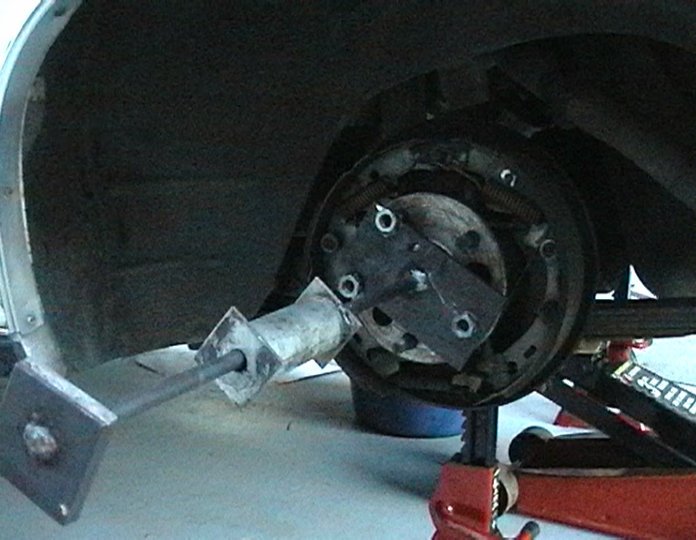
Heh, I made an axle puller from some random bits of steel plate, bar and pipe, alter upgraded with a sledgehammer head with a broken handle. Worked fine. I finally bought a proper one from a bnt sale but have hardly used it. (2002 called and wants its lofi camera back)
-
There are ways to tinker with the settings, but I haven't done it, just turn the knob right down for sheetmetal works for me. https://images.tgaabrasives.co.nz/wp-content/uploads/20200916150005/User-Guide-BOC181MIG.pdf
-
I haven't used it much recently, but I don't recall any issues. A bit like you I had an old one but got a bit annoyed with it's behaviour so I donated it to SeedyAl and got this one.
-
A+ on British, Australian, and American rust.
-
Pretty happy with this one from boc, just one knob. https://www.boc.co.nz/shop/en/nz/boc-smootharc-181-mig-welder-boc181mig-p
-
Discuss here about Yoeddynz's little Imp project...
Nominal replied to yoeddynz's topic in Project Discussion
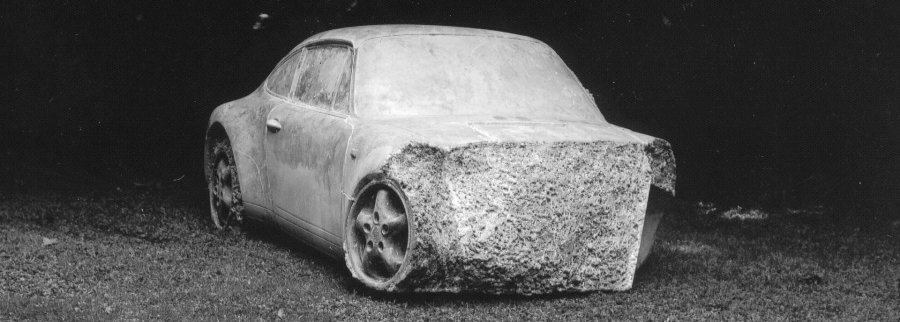
What happens when you crash your concrete porsche?
-
I have used these things in the past, they are kind of spendy though, I wonder if something similar available from Ali?
-
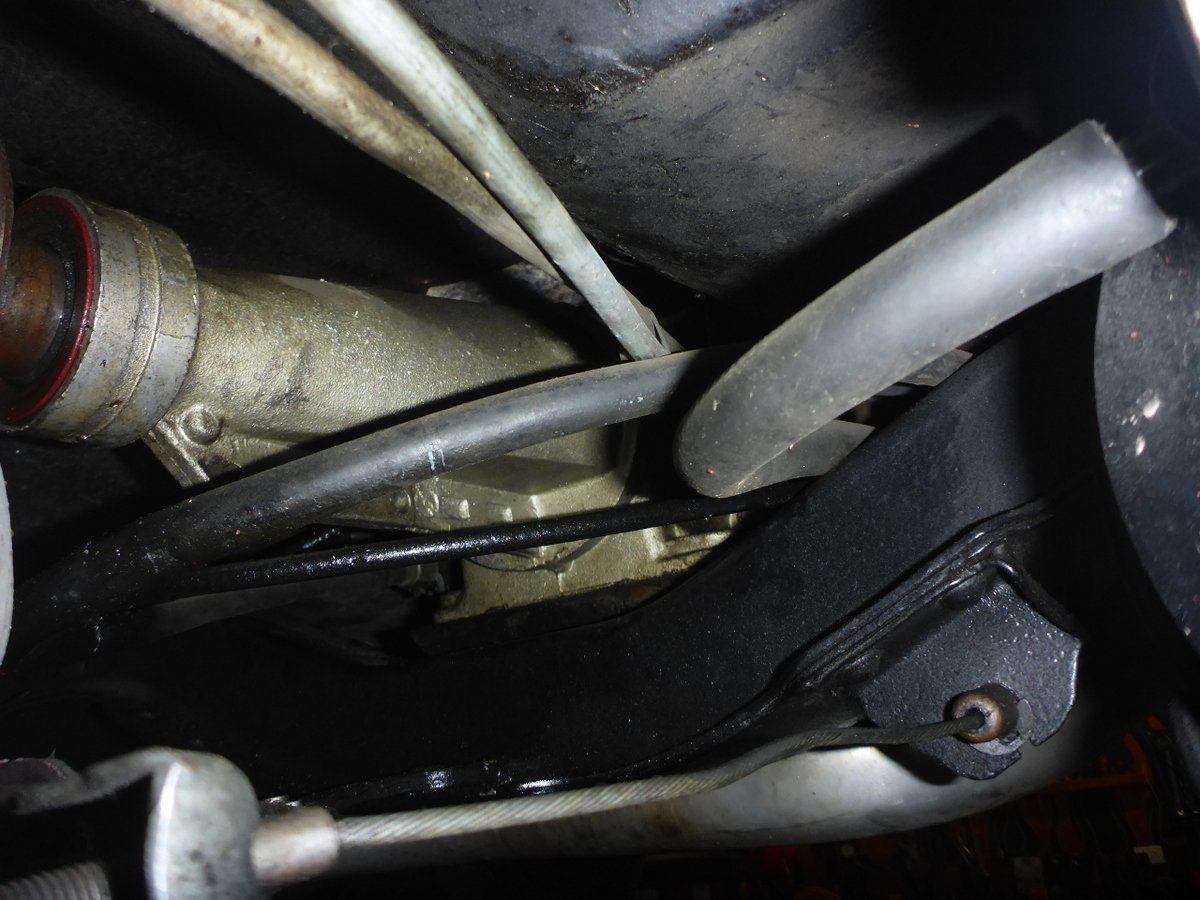
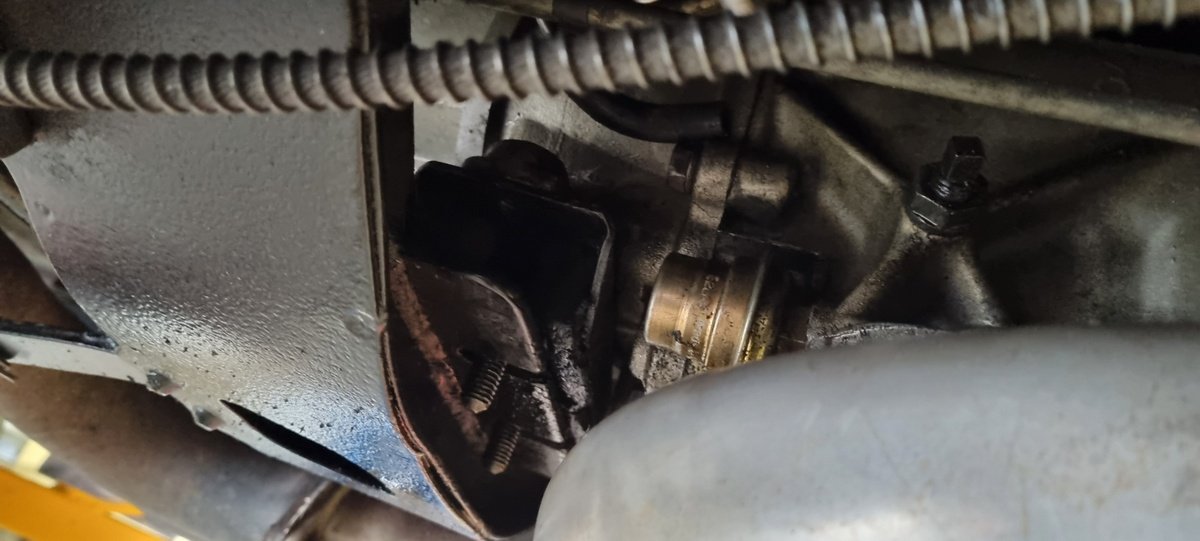
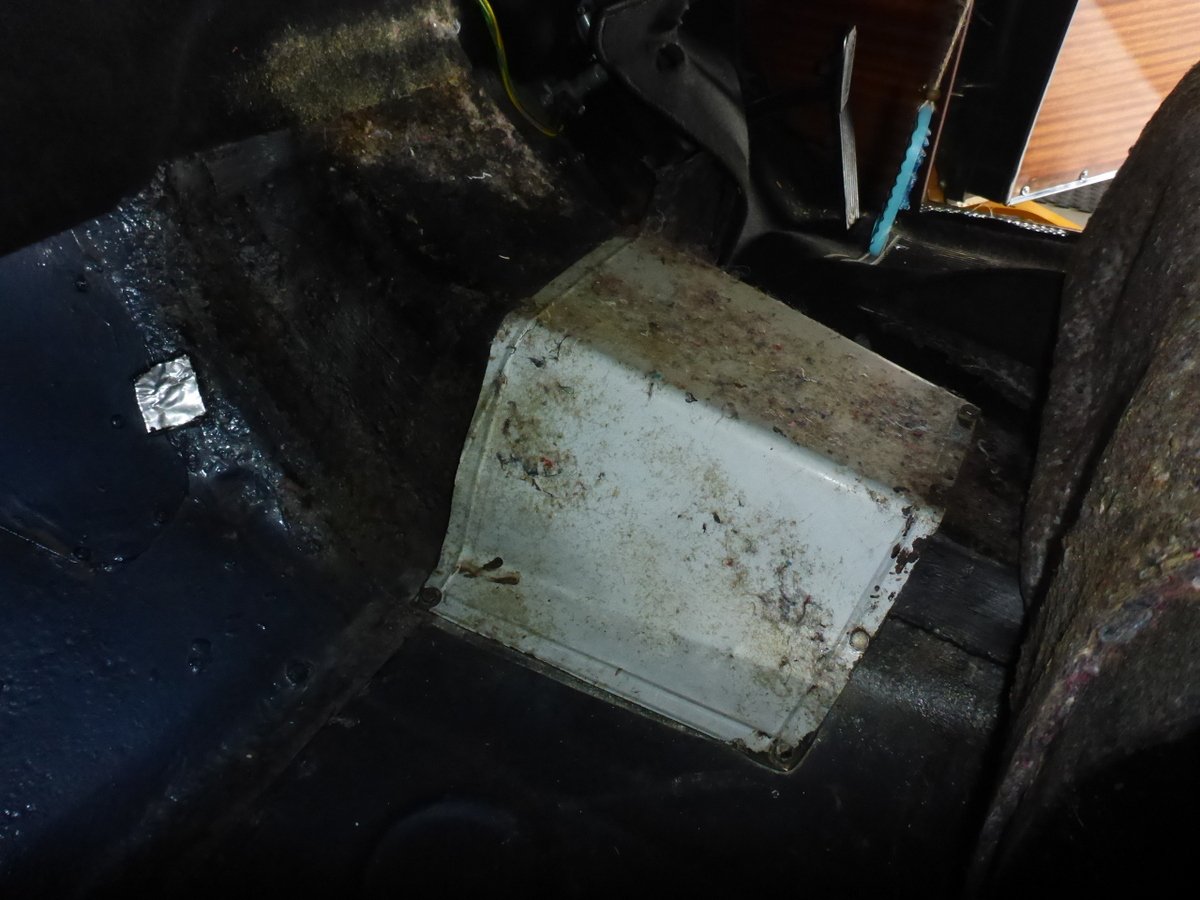
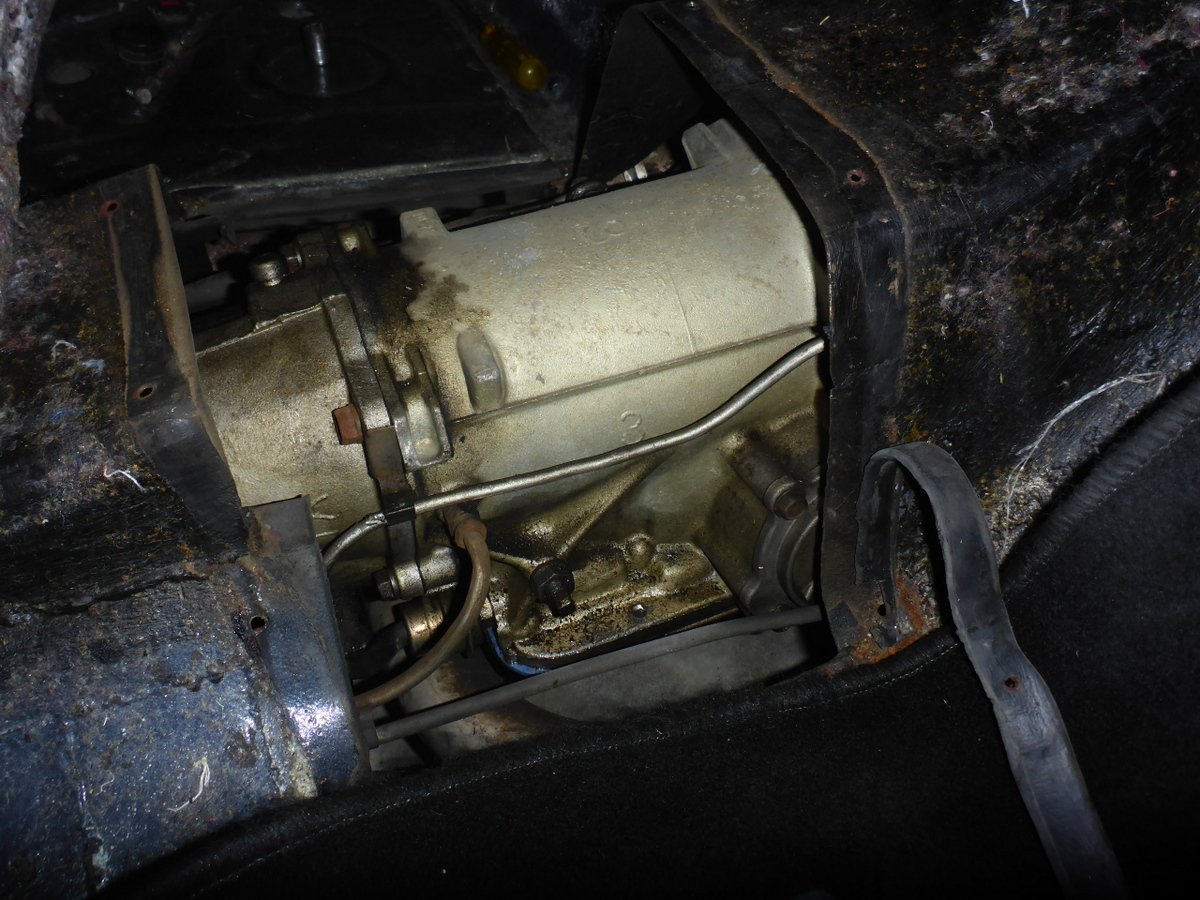
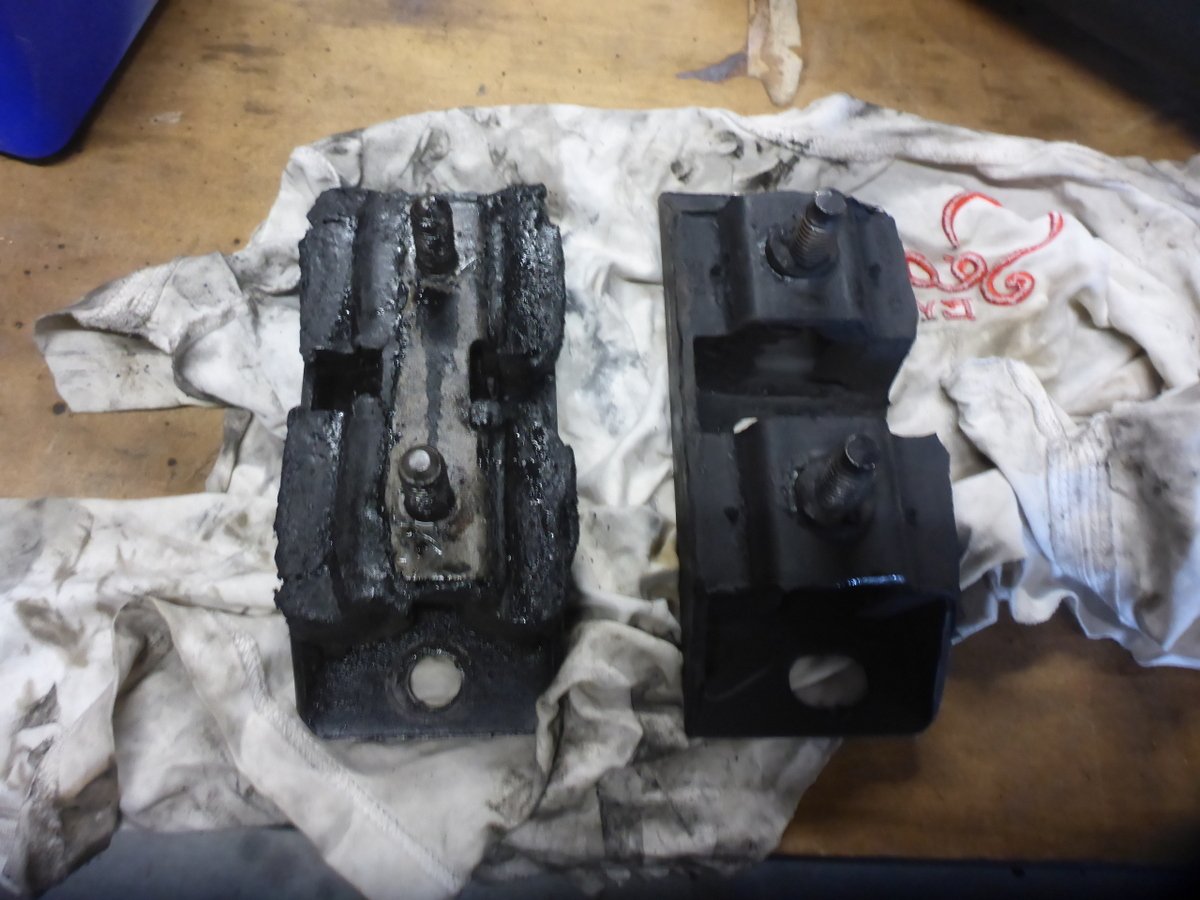
Last on the list was the transmission mount - the one there had gone a bit squishy over the years. How hard could that be? I ordered a generic Ford C4 mount - this seemed a good risk as they didn't have many different ones and it was only $30 or so and shared shipping with the fuel pump. Once it turned up I crawled under the car (still jacked up with the coilovers out) and it seemed roughly similar. Now luckily we have met a neighbour up the road who has some hot rods, and most importantly a 2-post lift in their shed which wasn't currently in use. After finishing up the fuel pump boondoggle last Saturday I arranged to take it up on Sunday, then proceeded to have some beer and G+T. Sunday rolled around and I was feeling a little dusty. We pottered up the road and arranged the car on the lift. Due to the chassis shape it took a couple of goes to get it well balanced and up in the air. The mount was easy enough to unbolt, just two lower studs though the mount plate (welded to the crossmember) and a couple of bolts up into the transmission. So far so good. The big problem was getting it out of the space it was in - not enough room to slide it forward due to the trans casing. Not enough room to go backwards due to the crossmember shape: No problem, grab a tall adjustable stand and life the rear of the transmission up, right? Well, wrong, it wouldn't move up far enough before the linkage hit the floor of the car. Even unbolting the linkage wouldn't give much more movement. At this point I was a bit over the whole thing. The crossmember is bolted in, but uses cap screws and some of those looked pretty inaccessible. Also the body is bolted down to the crossmember through the front floorpans. Rather than continuing I called it quits for the day and had a couple of beers with the shed owner. He was good enough to let us leave it up there so I went back on Monday after work to attack it again. First thing was to lift up the front carpet and deal with those body mount bolts. Hello? What's this? Hmm, a removable panel in the transmission tunnel! Well, that could be handy. I unscrewed it and chucked it out on the floor. This looks promising Now there is more room to lift the rear of the transmission up for clearance. So, back up in the air and give it a go. I lifted the trans as much as I could but still no dice, hmm what is hitting now? Oh the front UJ? Well I could get that out of the way by removing the driveshaft so that was the next step (and mess on the floor). Now I had enough clearance to get the old one out, and (with a bit of a struggle) the new one in. Pic of the old and new, I was a bit greasy so not the best on the camera. The new one had an extension piece out the back which I cut off, otherwise it wouldn't fit into the crossmember shape. After that it was mostly a 'reverse of the removal' process. I did tweak a radiator hose clamp around a bit as it was rubbing on the balance making a weird noise. So WOF acquired later in the week! I need to replace a spark plug lead that is burn on the exhaust, and put some coolant in it instead of water, then it should be good to go for the next few months.
- 111 replies
-
- 21
-
-
Sheesh, I reckon you need a better WOF man.
-
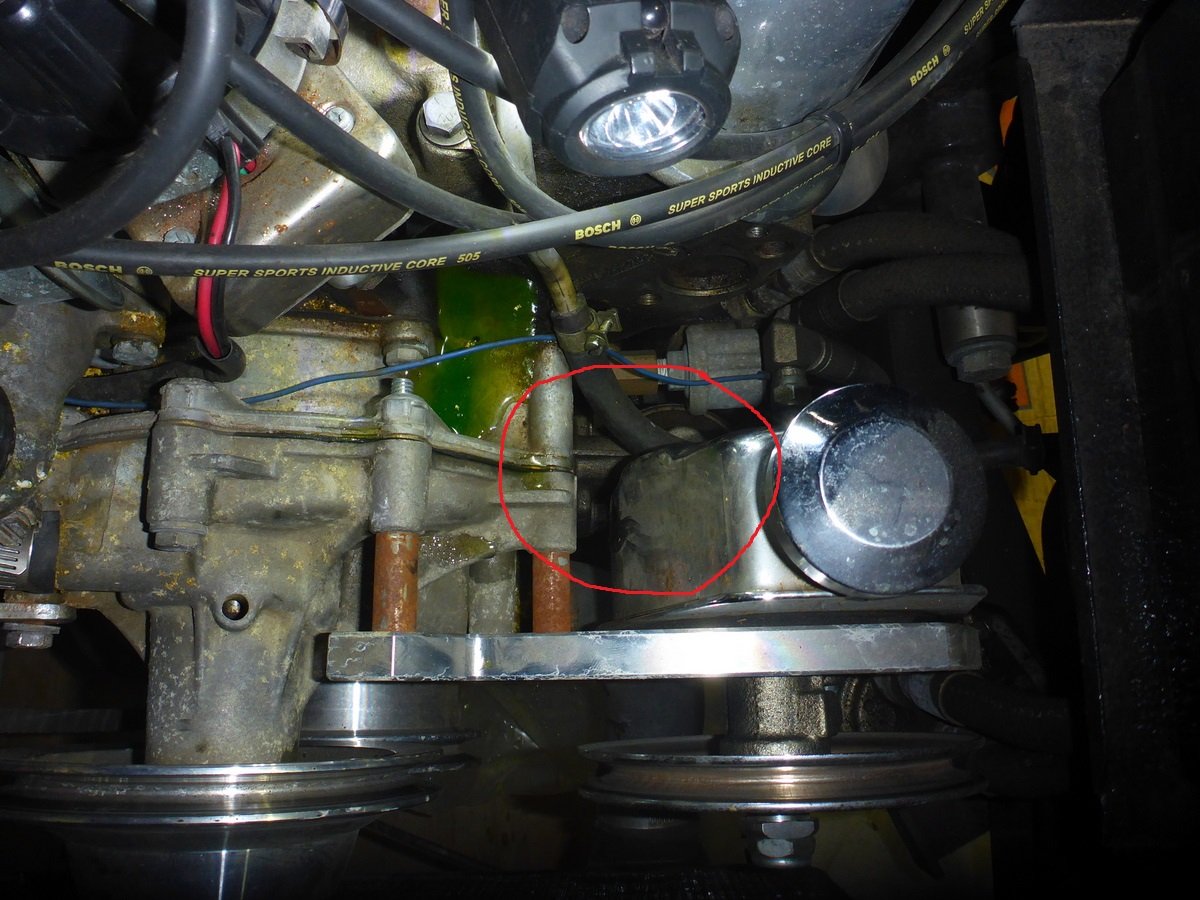
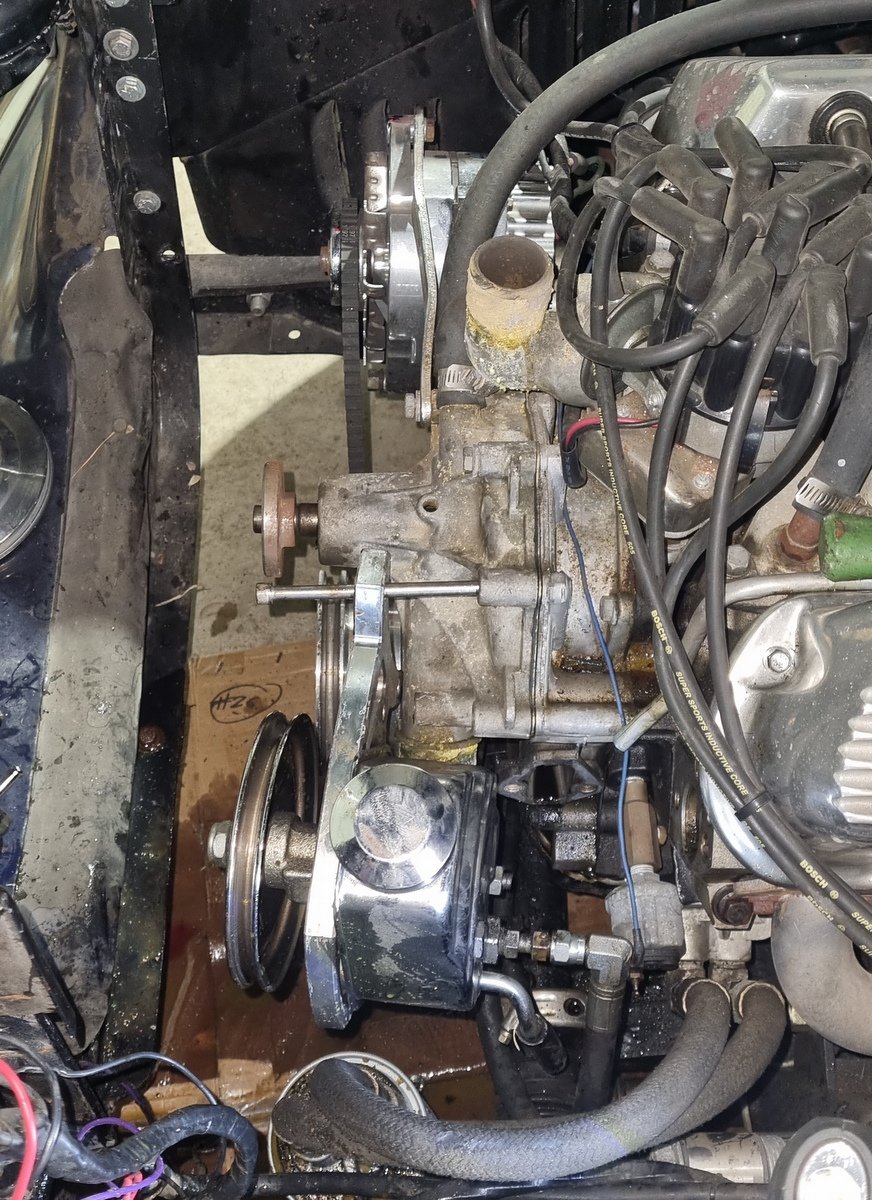
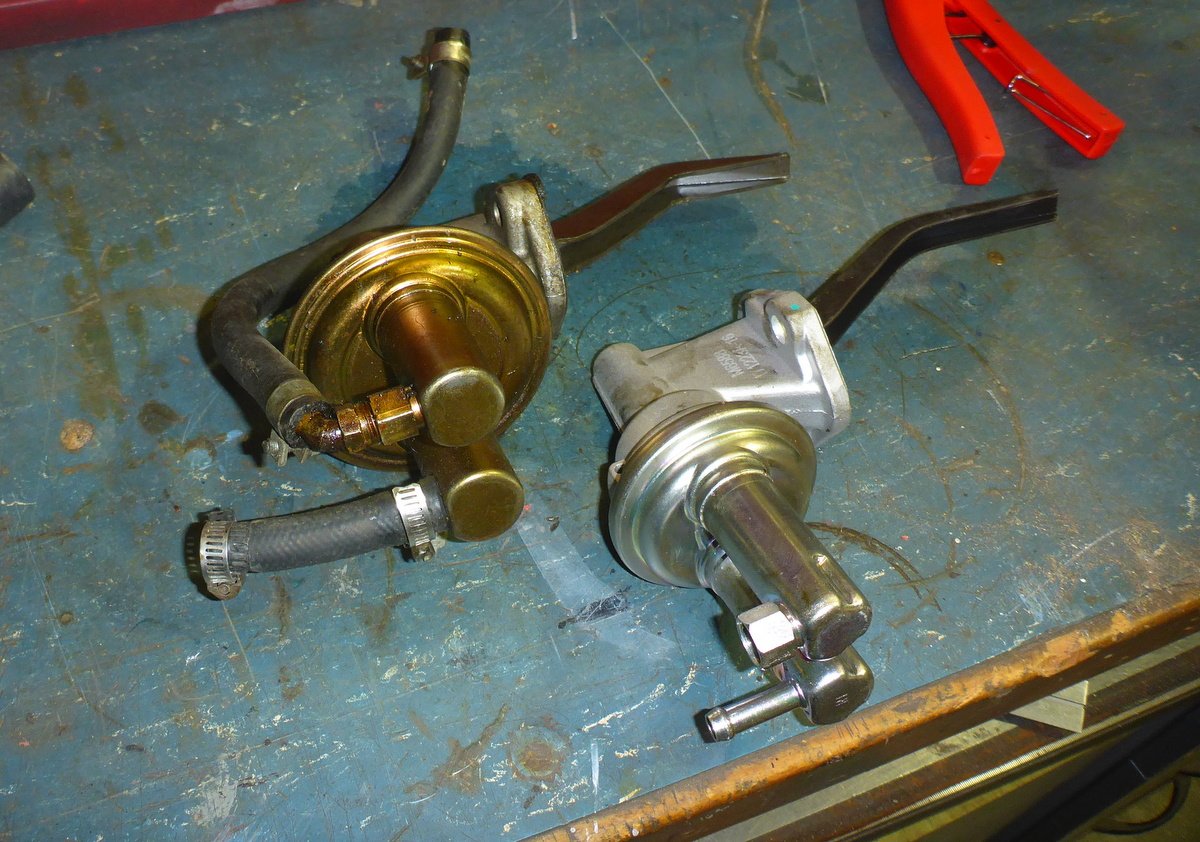
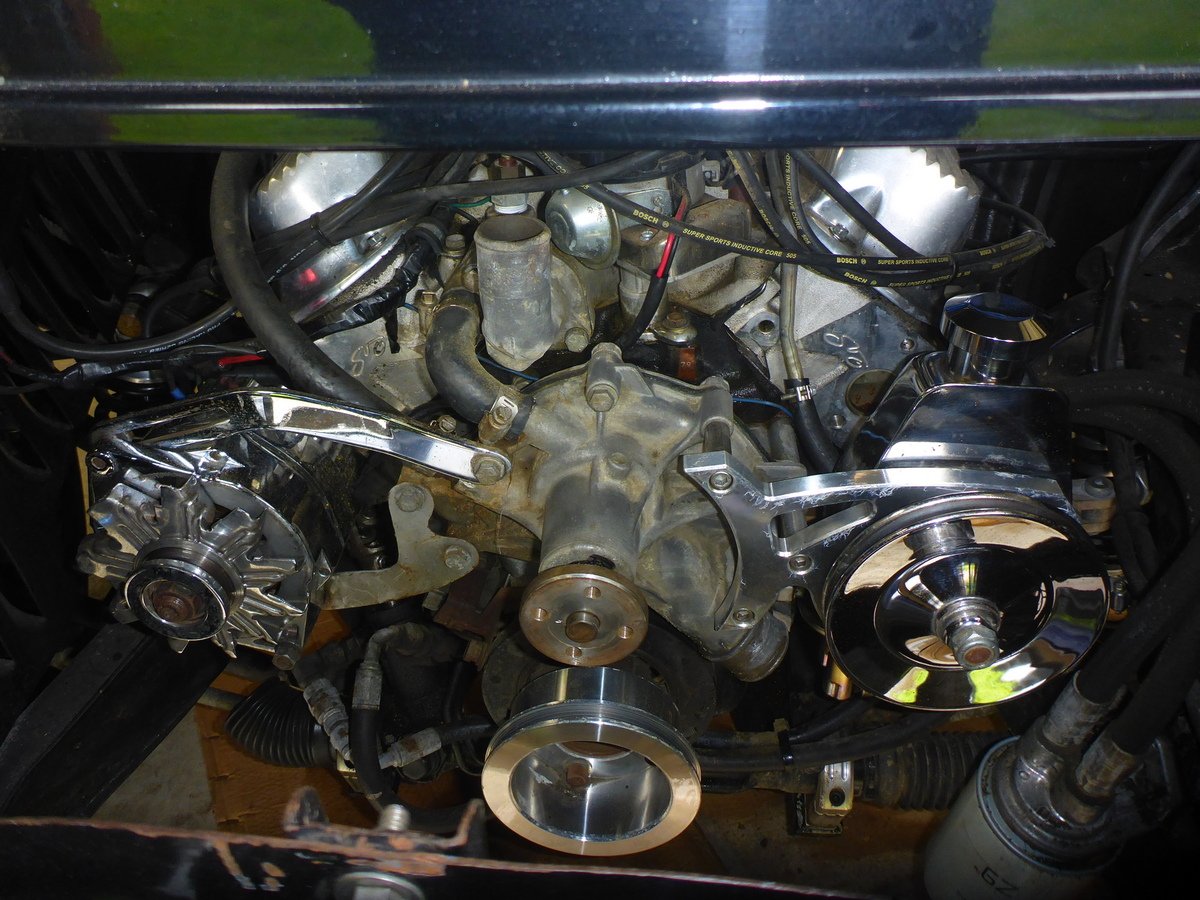
Repost from spam: Replace the fuel pump the WOF man says, right, how hard can that be. Hmm, things are tight there, need to remove the power steering reservoir Oh the long capscrews that mount that also hold the water pump and coolant leaks when you remove them So, move the car out and drain the coolant. Now one of the long capscrews doesn't clear the water pump pully. Oh, to get that off I'm going to have to remove the radiator. Better take the battery and battery tray out first. Oh, need to remove the overflow reservoir to get to the radiator bolts The radiator retaining bolts are out except one, why won't it come out? Ah, there are some radiator bracket bolts that stop it lifting out, remove those. Now what? There is one retaining bolt that won't push back to provide clearance. Right, there are another five radiator bracket bolts, the heads of which prevent the radiator moving towards the engine. Unbolt those, after removing the two earth leads that are also connected which double nuts. Haul the radiator out with difficulty. Now I can remove the crank pully Now I can remove the PS reservoir, which leaks PS fluid on the floor. Now I can remove the fuel lines crammed in below the PS reservoir Now I can remove the fuel pump. Hmm, the carter one I got to replace it will work, but the body is smaller so I'll see if can get something better. Might as well replace the fuel lines and fuel filter as well. Radiator hoses probably need replacing. Better do the water pump bypass hose too. And better get some brakeclean spray. OK so got it back together, cleaned a few bits up in the process and managed to get some hoses that could be cut to work. This was still not the worst job.....
- 111 replies
-
- 22
-