Stu
-
Posts
1458 -
Joined
-
Last visited
Everything posted by Stu
-
Ah the pain, I remember it well. Three of them on the Jaaaag was a ballache to keep in tune.
-
For your brake line clamps etc I think I have a box of these floating around if they are of any use - I made a heap of them on the CNC. If those dont work might be able to make you some custom ones if needed - might just take a couple of weeks to slot into the schedule as all my routers are running double shifts at the moment trying to keep up.
-
Evidence of burnout capability please. Mad envious of such a sweet rig, much want. Engine bay photo also please?
-
Just slap a 4bbl on it
-
Plus with a 52 inch lightbar or three you are guaranteed never to get stuck
-
Update time: So insurance eventually processed our claim and lumped some cash into our account to pay for the repair with as the repairer isnt in their system. I headed to Hamilton very early in the morning a few days before Christmas to collect which was good timing as we needed most of the gear inside for our new years camping trip (with the camper trailer, not caravan). Dave had the old panels inside his shop which was interesting seeing how they are made. We had a good chat about all things caravan and I paid him some money and went on my way... however the first mistake I made was not pulling the caravan into the sun to take a look at the new panels. In the darkness of his workshop the new panels looked super straight with only a bit of workshop dust on them. However by the time I got back home and parked the caravan in the sun I realised that the paintwork is a bit patchy... Im annoyed at myself for not checking this out closer when I picked it up. It wasn't obvious in the workshop but yeah... silly me. Ive emailed Dave and he said it might need a cut and buff. In my mind its not my job to do having paid for a repair, so trying to work something out with him to get this sorted. In the mean time I took it for a long overdue wof and it sailed through with a clean sheet again. We took it away to Kauri Coast over anniversary weekend and we had an excellent time - we even won a campground competition for best setup. I still need to get the water tank out for a good clean and setup the electric pump so will hopefully get that done before summer is out. Away to Raglan for Waitangi weekend.
-

Random slightly cool stuff you built but not worth its own thread, thread
Stu replied to h4nd's topic in Other Projects
Awesome! Stacked firewood photos please /boner I can get you a used billboard skin to hang over the front if you would like to protect from rain etc. -
Cool, well 600 should be pretty sweet, might just need to dial that screw back a bit if it is getting hot. I havent had a 1hdt but from my understanding the fuel screw is on the back of the pump - there's a metric shit ton of videos on them on youtube which will help. I was a bit the same about putting an intercooler on mine with space in the front not all that plentiful, but I got one on in the end and it was a game changer to drive.
-
Thousand Dollar Supercar's vintage radiogram drinks cabinet
Stu replied to Thousand Dollar Supercar's topic in Other Projects
Fuck this is most excellent - can't wait to see the video. Awesome work! -
With the EGT's and depending on how the fuel pin has been profiled you may need to either wind the delivery screw back a little bit or wind the boost up so the mixture leans out a bit to cool things down. It looked like 600 degrees or so in your photo but what sort of temps is it getting up to at peak load and where is the sensor ie post or pre turbo? I used to have my TD42s at 600-650 degrees pre-turbo and it seemed pretty happy. Such a weapon of a van, keep up the awesome work!
-
Because Im a starlet tragic I am intrigued by that small turbo given that alot of 4e's end up with tdo4's on them. Is there a part number on it so I can look up some specs?
-
Thread dredge... For the last 18months or so this has been flat packed ontop of a container at work as it wasn't really needed with the aquiring the caravan. But with the caravan being out of action for repairs and the holiday break looming I dragged it all down and put the trailer back together. I timed it and it took me 25mins to setup which is pretty sweet. Unfortunately its got some overspray on it from some painting that went on, but overall its still in pretty good condition. As mentioned above I wanted to put something on the front to hold the water tanks and wash down pump etc. As luck would have it many years previously I had made a simple aluminium box from some left over treadplate that I was using as storage so that got repurposed and fitted to the front. I didnt want to drill into the draw bar so made up a clamp system from bits of ali off the offcuts rack at work. Its not flash, but it works and 2x 20litre tanks fit perfectly with the pump and room to spare. I cut and folded a piece of ACM to cover the draw bar which acts as a bench for doing the dishes etc. I also swapped in a Victron solar controller in place of the Powertech one which was inefficient by comparison. We had a great trip away with it - it tows well and it makes life super easy at camp grounds plus having the nicety of the fridge & freezer and light etc. Will probably leave it together for a while then flat pack it again late summer as I will need the trailer for collecting building supplies for some house projects this year.
-
You have probably seen them but there are a couple on Trademe at the moment and this one is pretty slick https://www.trademe.co.nz/a/motors/caravans-motorhomes/caravans/17-20-ft/listing/4500180760?bof=QEGN65WP
-
Sadly I don't know of any for sale - not unless you want to offer me lots and lots of money for our one - we love it. You could call Dave @ Motorhome and Caravan World in Hamilton, he's got a few caravans in his yard but don't think he has any Trackers specifically. WIll update this thread soon, we have the caravan back so will be sorting a few things before using it again this summer.
-
Thousand Dollar Supercar's old piano
Stu replied to Thousand Dollar Supercar's topic in Other Projects
Very cool! We have a Squire & Longson also made in London that looks very similar. -
All this tech talk and not a single MS paint graphical representation in sight? You've changed @Roman
-
I havent forgotten about this thing but at this time of year my workload always goes a bit mental and with the summer kid activities also in full swing I don't get alot of time. Saying that I have finally moved the car home which has made things alot easier. Its been a bit hard to get motivated but I have been sneaking the odd hour in here and there to work on it. The parts car has now made its way off to the scrap man which is one less headache to deal with - it surrendered heaps of small bits and pieces that I needed and I still have an Si interior to sell which are super hard to find these days. I should have kept things like the aircon, pedals and shifter cables but how much stuff do I really need to horde taking up space? First up was rear suspension change to the new coil overs that I got through my mate at Speedscience. There are a few small differences in the rear suspension/brakes on this car as its got disc brake rear that no EP71 had - even the Turbo S was drum brake rear. Its a common misconception that the EP82 disc brake rear bolts onto the EP71 stub axle, but while the outer bearing is fine the inner bearing is tapered vs flat and different size with no off the shelf bearing able to solve the issue. Plus the handbrake mounting/cables are different etc etc. The one bolt on disc brake solution is from a EL31 Corsa GP Turbo which are rare as rocking horse shit - this is what is on the blue car. I have the idea that whoever built the car originally has swapped in an entire EL31 beam or something similar as the lower strut brackets are further appart than any of the other EP models. Also the brackets have been drilled out to an M12 bolt for some reason. Im not exactly sure but it all works and was certified so it doesnt really matter. As the new coil overs are for the standard EP M10 lowerbolt and I didnt want to drill them out incase I ever sold them, so machined up some new insets which are also slightly wider to make everything work. Super easy and now fitted. Along with what I scrounged off the parts car I also picked up a few bits and pieces off a guy that should hopefully mean I have everything I need to finish the assembly. Some facelift tail lights got a bit of a clean up - they still need a polish but have come up pretty good so far. They're not perfect but its not a show car at the end of the day. Also got another parcel tray bracket to replace the broken one I then spend a fair bit of time cleaning up the back end of the car - swapped in the above, ripped out all the boot carpet and put it through the washing machine, remounted the battery box and made a basic battery clamp, made up a spare wheel cover, rewired the battery ground so its hidden and instead of going to the strut top, and then refitted everything. Theres a few more things to do like I'm missing a parcel tray but have the one from the blue car to copy so will get onto that at some stage, and also fit the spoiler to the top of the hatch. DaveScienceTM aka @Roman is printing me some trumpets for the quads so will be making a start on engine bay tidy ups soon. I took it for a quick hoon and its pretty funny to drive but the tune needs a few tweaks which I will sort once the trumpets are on. Tucked away again untill the next time I get some spare time.
-
^ This. Don Jessen runs the page and his Dad started Liteweight so its fair to say he knows a fair bit about them. Dave @ Motorhome and Caravan World in Hamilton worked at Liteweight too so is probably the guy to talk to if you need anything
-
So with selling our old place and moving house, the caravan got parked at a mates place and unforunately one of his rams took exception to its new paddock intruder Insurance is covering it all so Ive dropped the caravan to be repaired at Motorhome and Caravan World in Hamilton. Dave there worked at Liteweight for many years so its in the best hands to get fixed in time for summer. Will udpate when its back!

-
It sure does, will consult with the Liteweight bible when its returned from some friends who are currently reading it. It looks like a Liteweight 1500 to me. Watching this thread with anticipation
-
Yeah DaveScience and Hunter (The Durp) are now friends
- 652 replies
-
- 13
-

-

-

-
Yeah welding something onto the top wouldn't be difficult - 5mm plate or something then drill them both.
-
Yeah we cover the vac bed to increase the suction and sometimes use tape to help seal up any gaps. Its more OCD and being overcautious than any real risk of even small parts moving on the bed - old habits really (ask me why). Masking tape doesn't seal completely, but its easy to apply and more importantly clean up compared to other tapes, plus we have seriously kick ass vac pumps so there is usually zero risk of anything moving on the bed. Plus the bed is broken into various size sections with valves to suit standard sheet sizing - the vac gauge was almost pegged off the dial. #cncbarry
-
Discuss here about Yoeddynz's little Imp project...
Stu replied to yoeddynz's topic in Project Discussion
I've got solid clear acrylic rod here in range of diameters if you were feeling adventurous - I'd assume it would handle the heat. -
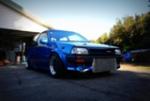
Yeah thats Shane's KP. It has a 2J in it now.

.jpg.31088bc63bd8362845cb7c3ab9104a76.jpg)
.jpg.9b00059b3345eafe6dfc1e210fe9787e.jpg)