flyingbrick
-
Posts
11,673 -
Joined
-
Last visited
-
Days Won
2
Everything posted by flyingbrick
-
PS. The good news is that 4wd Fiberglass in Hamilton sell pretty much EVERY body part for these things- from fiberglass so no rust to ever worry about again. The bad news is that one of the few parts they don't supply is the chassis.
-
Acid dipping that is a terrible idea. He could buy a decent chassis for that price.
-
 Lol. How much wood would woodward lift using a wooden woodlift if woodward could use a wooden woodlift to lift wood.
 -
I'm so sad that its not a wooden wood lift. That would have made that sentence so much better
-
Where to buy steel for panels in Auckland
flyingbrick replied to Pepo1's topic in Project Discussion
Exactly. A full sheet for 45 is better than a few offcuts for a box of piss -
Car trailers are usually horrible. Why not save the bodykit and cut the rest up into pieces small enough to fit into a stardard trailer (then take to scrappy)
-
that split ring is actually a genius idea. Hardest part would be keeping motor square and clearances good during tightening (and it wouldn't be easily repeatable). I vote turning your bracket into a clamp though.
-
This is all very good advice! But to just add something on the end for ya: You are nearly always better off sending your components to a shop that specializes in whatever task is required. You don't want to pay for a shop to learn how to complete your task. While previously based at a machine shop i was asked countless times about re-splining of axles and would refuse- We simply couldn't do it as cheaply (as quickly) as a professional axle shop could. Another reason is that i'd seen that machine shop pump out some horribly poor fitting spines!!!! unfortunately if you go a little heavy on each cut it can be hard to know until the very end when a test fit shows it up- and by that stage its too damn late.
-
well you said that it came in out of a bro's car. I figured you were either A, saying it came out of a mates car or B, being racist, lol.
-
How many spline was that twisted axle?? Looks huge.. or does it just seem thick because its so short? Pics of the rest of the car??
-
I'm amazed by that- wouldn't have thought it was possible to destroy a discs integrity that much by drilling a couple of holes. Will be upset if that is my rear end fucked, ford discs re drilled to chev, multi drilled axles etc etc
-
bonkas tired old Lancer EX - Engine Swap/Build Thread
flyingbrick replied to bonkas's topic in Project Discussion
David is right as usual. Run a nice new sense wire over to the battery positive and check volts again. -
Fb me.
-
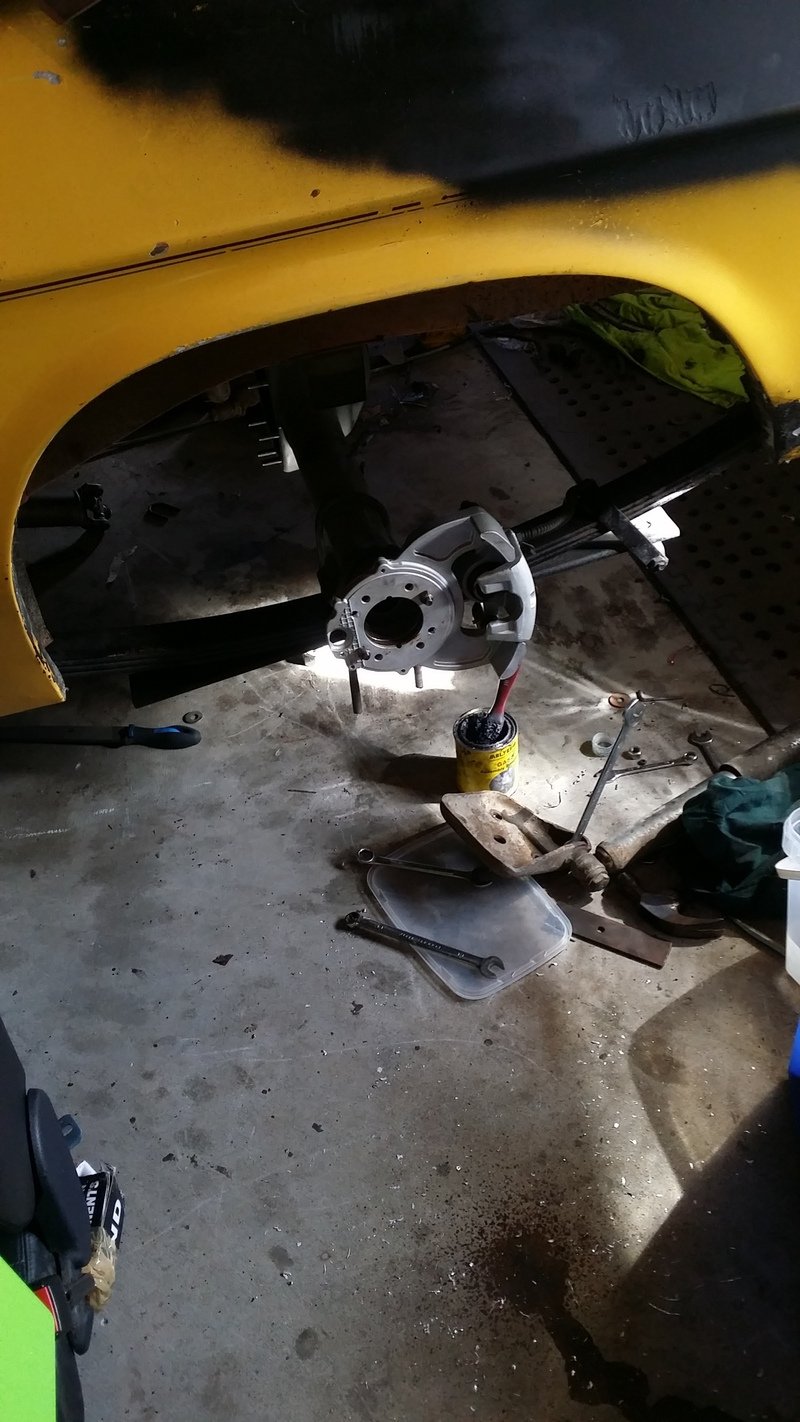
Hey man. I feel like you may be reading between the lines a little to suit yourself. I cant find the bits (i have shit boxed all over my home and hanging all over the shed) but the spacers are just that, spacers. They have 4 holes in each plate. They are part of the factory drum braked 9" axle assembly. If i get a splurt of enthusiasm later i may go digging (i had them gold nickel plated because it looks nice) . If you think those holes and this brake swap cause reason to fail cert then BITCH YOU CRAZY* Made a quick video. *Lets be honest, ill probably drag this out so long it never makes it to cert anyway
-
Daves new school holden shambles. (Is this project oldschool yet?)
flyingbrick replied to Muncie's topic in Other Projects
lots of tq though Good reading up there about BHG's and overheating. Ours has done a few funny things over the years- my sister also had one that would randomly overheat and then be fine for the next few months. -
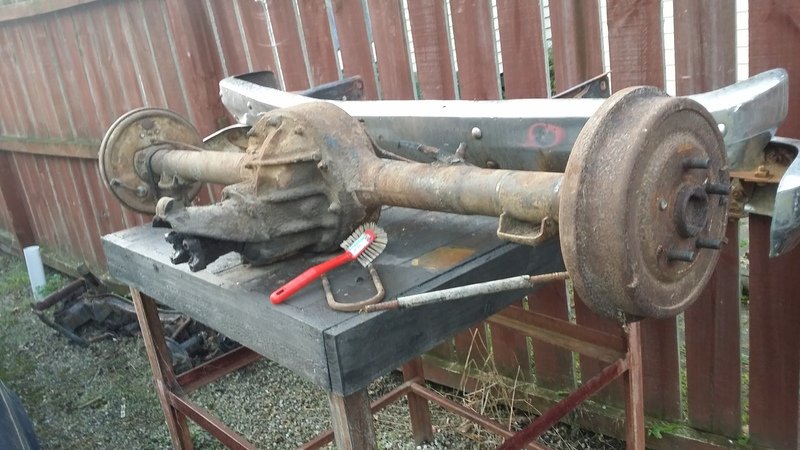
Well spotted, has a laugh when i read ya post, had been that long ago. Holes were only re drilled to rotate the bracket 90 degrees so that they weren't mounted directly above or below the axle. I do not recall any offset problems may need to check that one later!
-
No idea.. bought and rebuilt them so long ago.
-
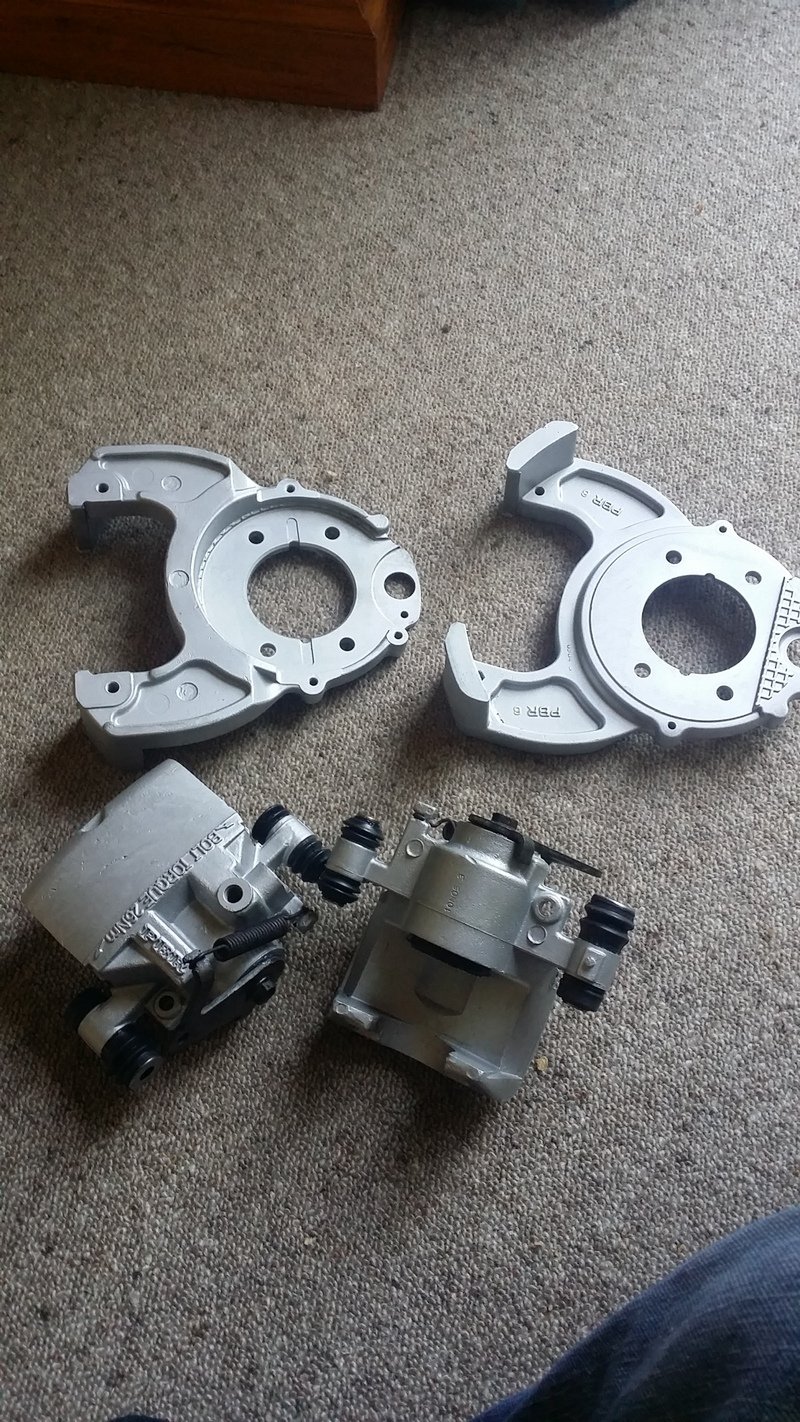
I only threw it together to make sure it all worked.. hope i didn't miss anything. These the only images i have

-
I must have got lucky? My coon calipers/ brackets/everything fit fine on my 9"
-
@64valiant keen to see how much more of the old roof you can cut out Was super cool seeing how excited you and @Mrs 64valiant were during pickup.
-
Choice. Didn't realise so much of that van was factory standard.
-
Fibreglass, Carbon Fibre, Paper Mache - The composites chat thread
flyingbrick replied to Roman's topic in Tech Talk
you need to accept that 3d printing isn't part of the solution- use an air bladder or a vac bag rather than a 2 part mold. Literally done over and over for parts like these. Do you need someone to share the youtube videos again edit: Sounded real shit. Love your work xx -
It must just be UV that it doesnt like.. but if you have the choice between good primer and average primer...? Durepox wont budge no matter what you do . Short of blow torch.
-
Yup. I used pa10 on something i left outside and after not long iy had cracked and started curling up off the surface
-
you can see the filters in that trademe setup.. far smaller than what i remember the 3m ones being though. I see all these kits seem to have the filters etc on the belt- the one we used to use had the filter/main regulator sitting on the wall and the belt only carried a light weight regulator that varied the already low pressure flow rate. Definitely would still have compressor somewhere away from the paint fumes. yes @kyteler i called it the wrong thing.