RXFORD
-
Posts
1,187 -
Joined
-
Last visited
-
Days Won
1
Everything posted by RXFORD
-
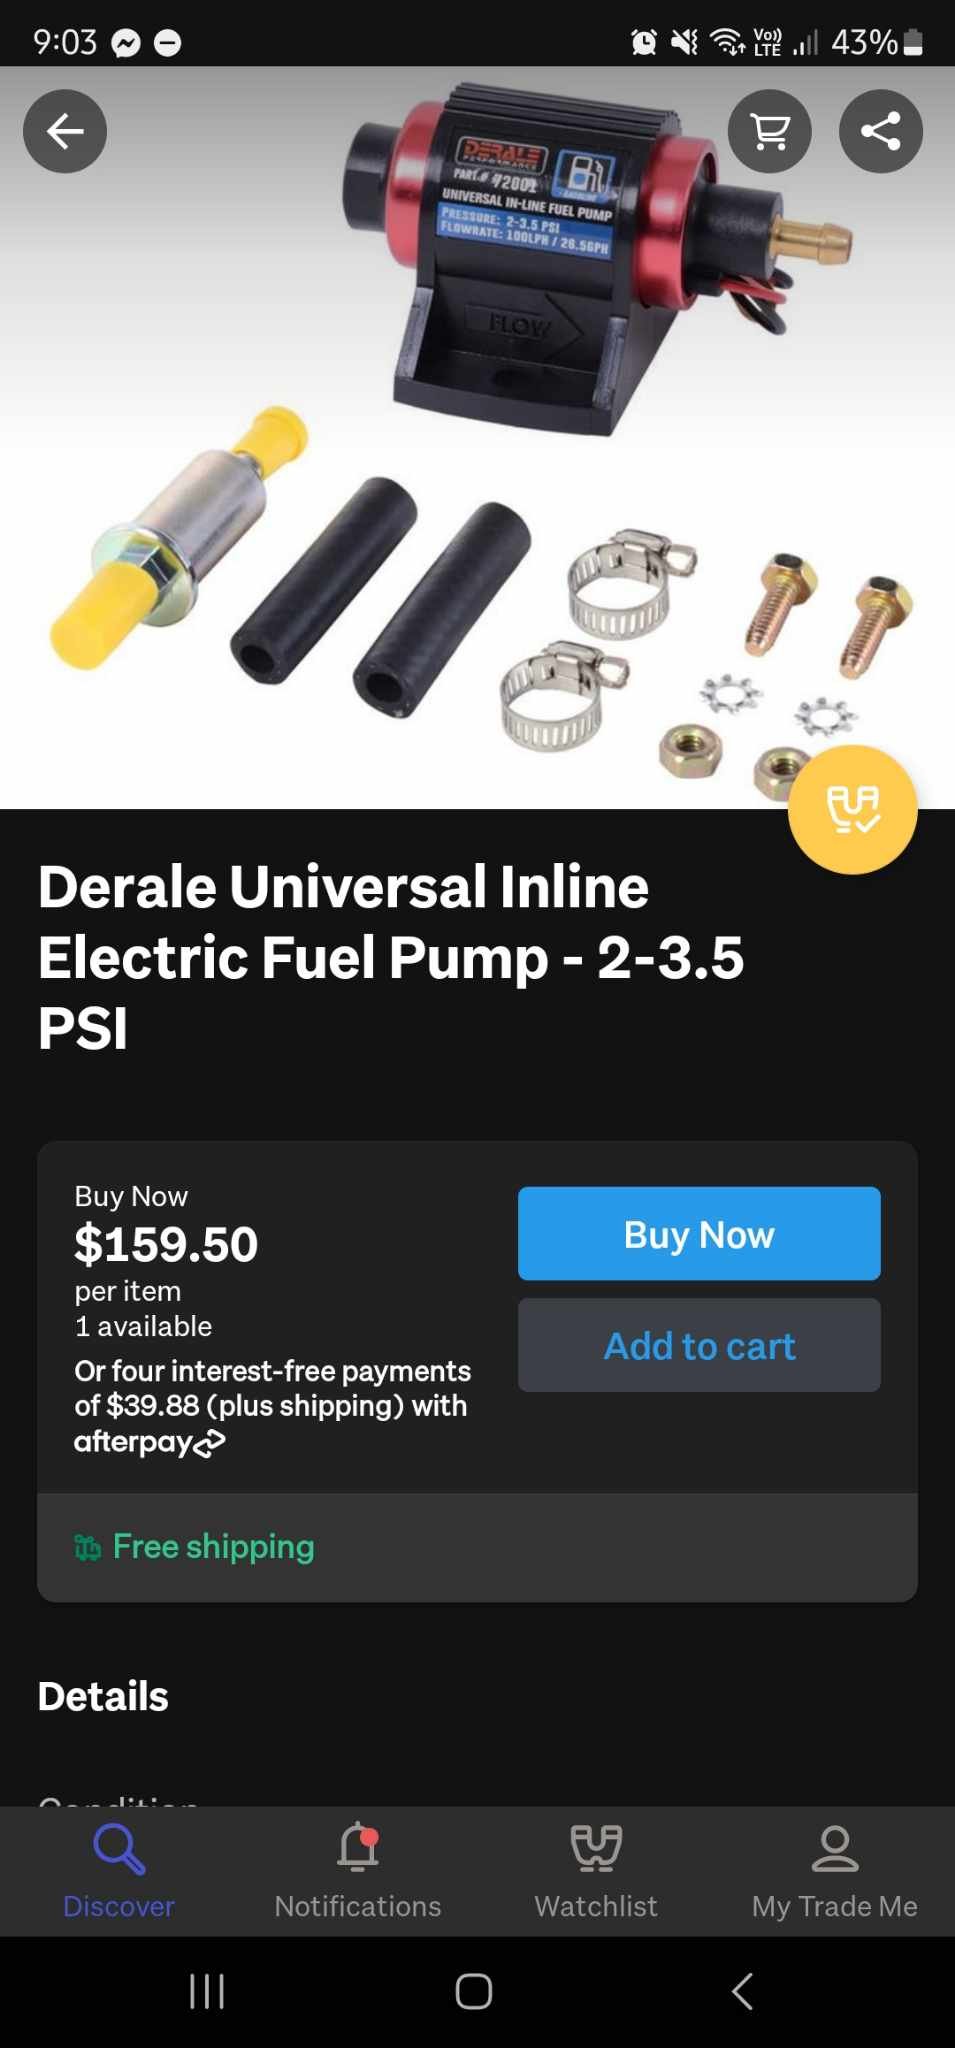
Fitted a Derale 2.5-3psi pump in a mates z24 Navara a couple years back as the elec pump someone else fitted was overfueling. Can get them from CDL in Auckland.

-
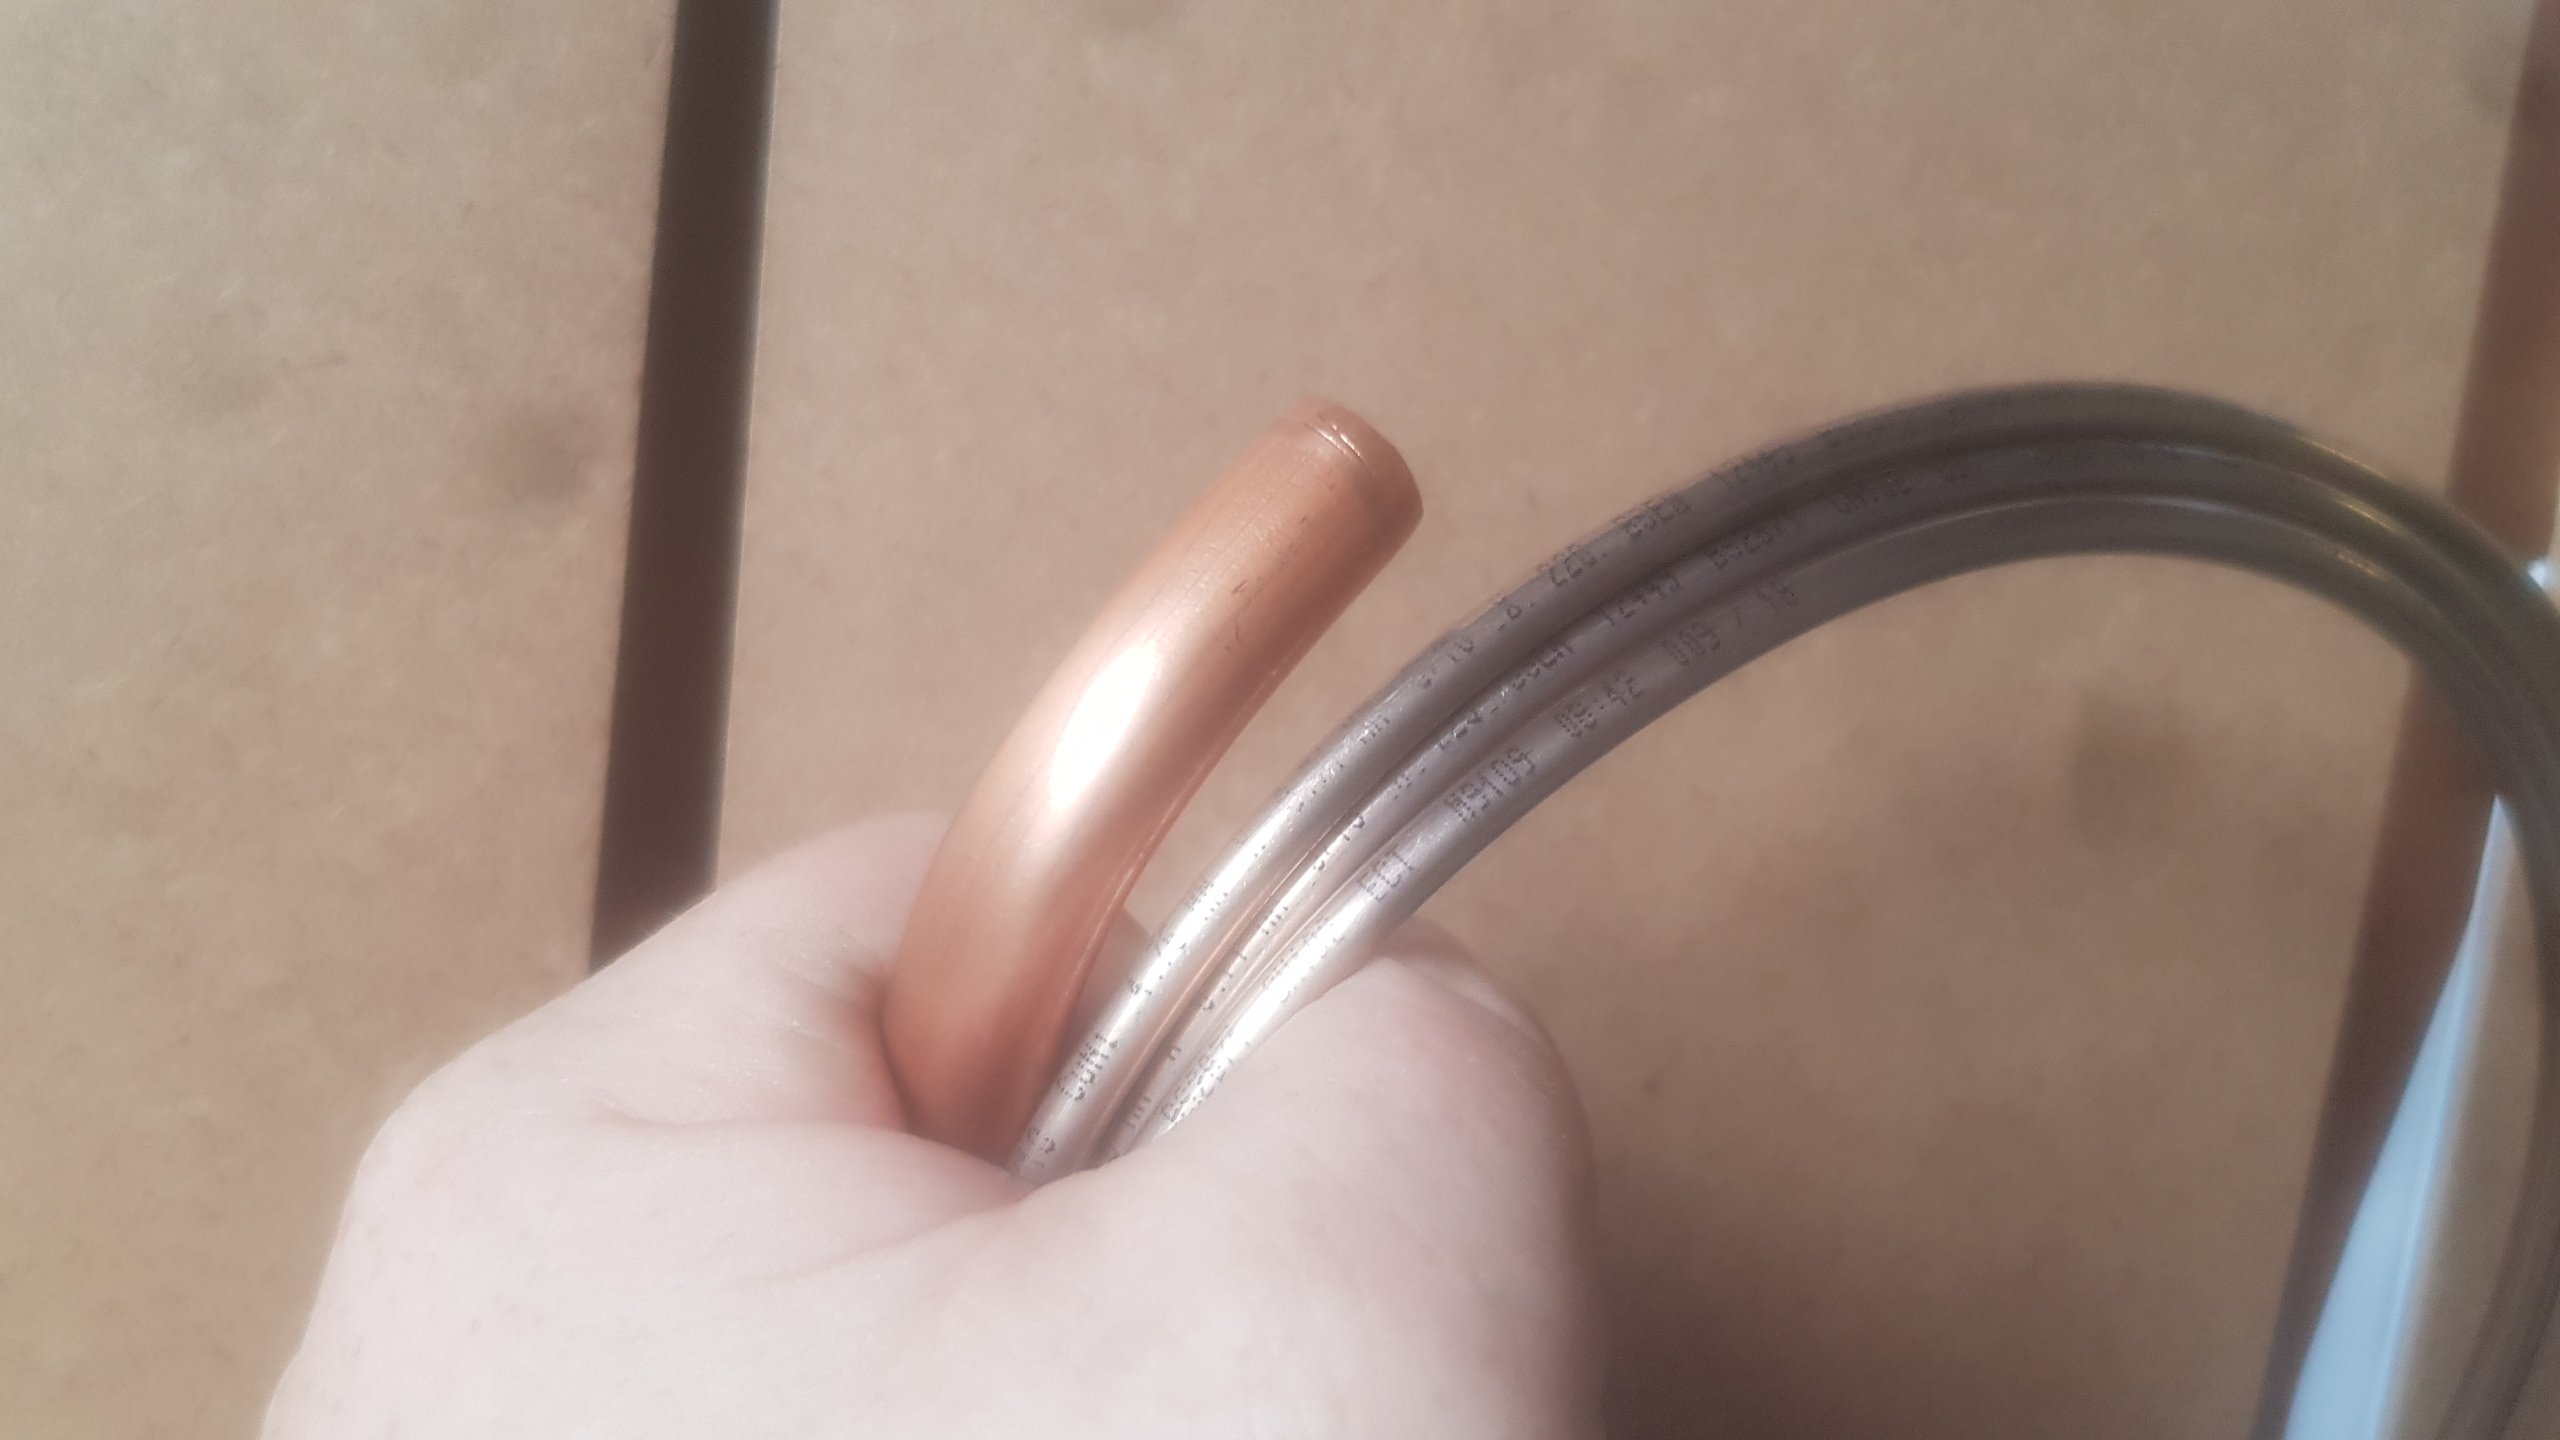
Some of the Ali Express stuff I've seen people post pics of just looks like straight copper from the colour of it. Theres a noticeable colour difference. Copper is more orange and really easy to bend by hand with minimal effort. Cu/Ni is more gold/brass coloured like the smaller tubing in my pic and takes a little more effort to bend. Yeh possible its all comes from China like most things these days, but the point is, if its cheap as fuck ya gotta wonder why. I don't buy it if I can't put eyes on it to check the printed numbers. Should say Cu/Ni 90/10 and have the standard numbers on it. If it doesn't, Certifier probably has grounds to question/reject it.
-
We run cut/welded toyota axles in the stockcars I crew for. Havn't broken one yet despite all the clutch dumps with welded diffs and mismatched tyre sizes. I also have Carlos at Steel Surgeon in Ngatea weld the cut/weld the axles when I get a narrowing job in. I just do the housing. Its like $80 per axle from him and a weeks turn-around if that. Certing them is fine and its less hassle for me and cheaper than sending them around the country to be re-splined.
-
Need to replace oem hardlined sections with hardline. Steel bundy or Copper Nickel, and not that china copper nickel from Temu. I think you can run all braid if you have logbooked vehicle. Any Braided hose you have made for the flexis need to be tagged because china.
-
Why not boost it?
-
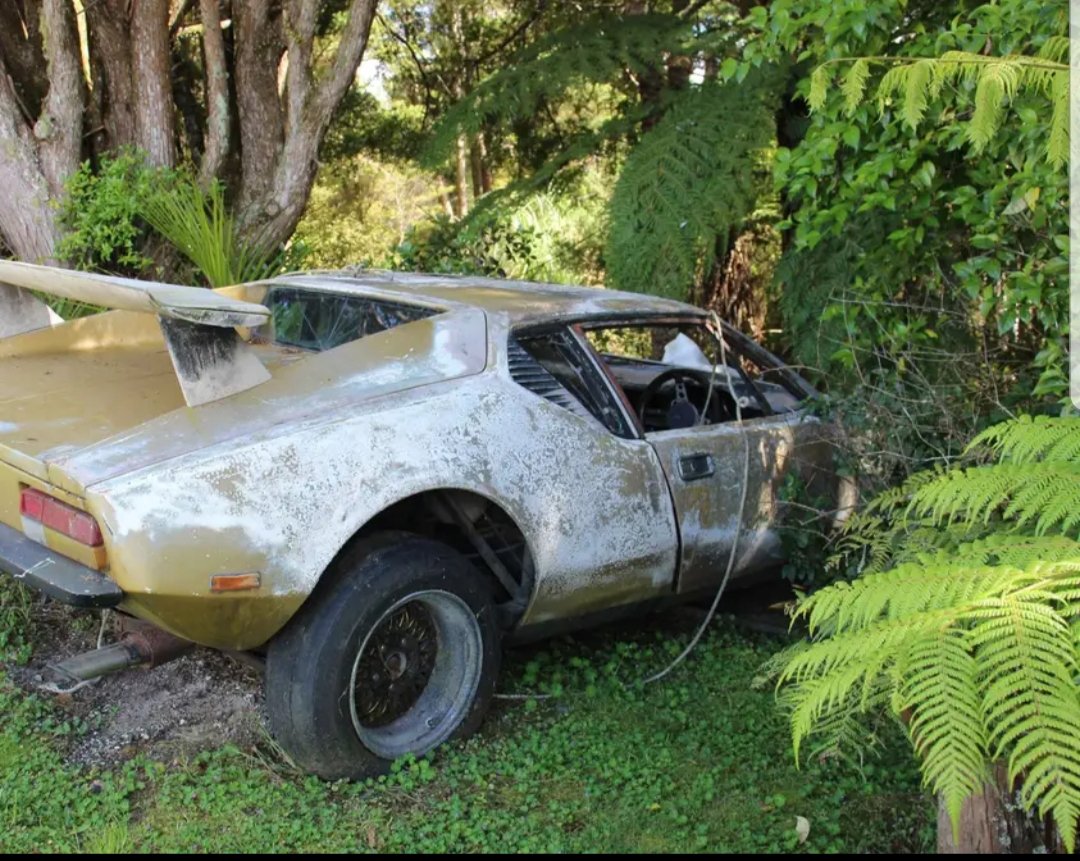
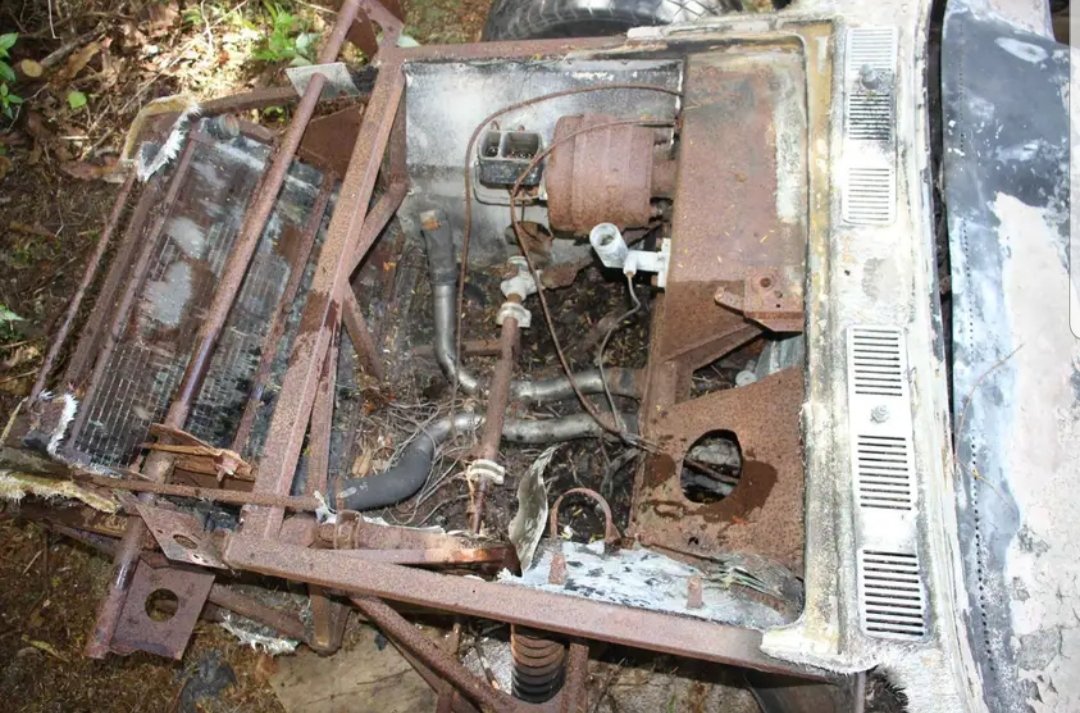
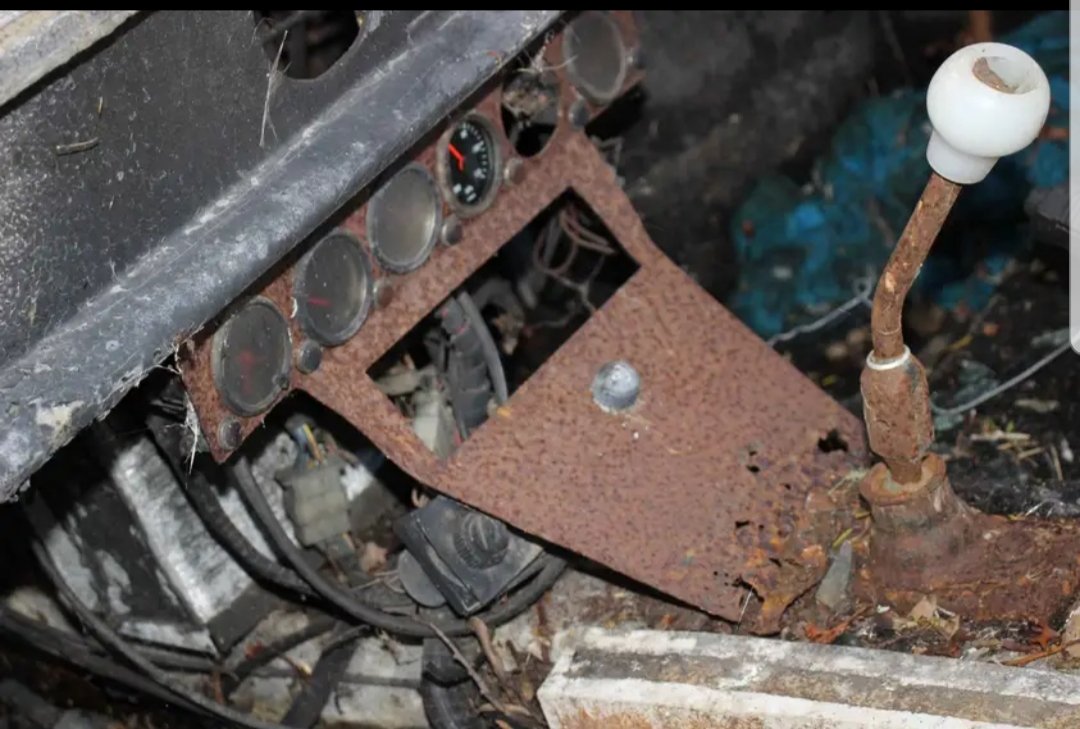
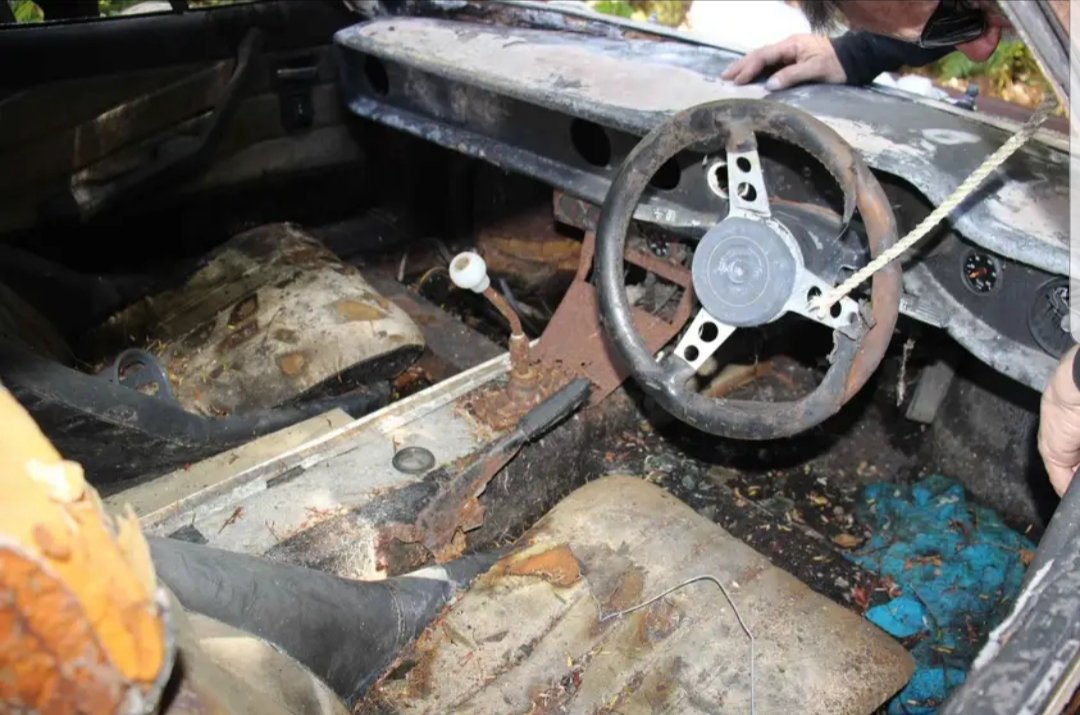
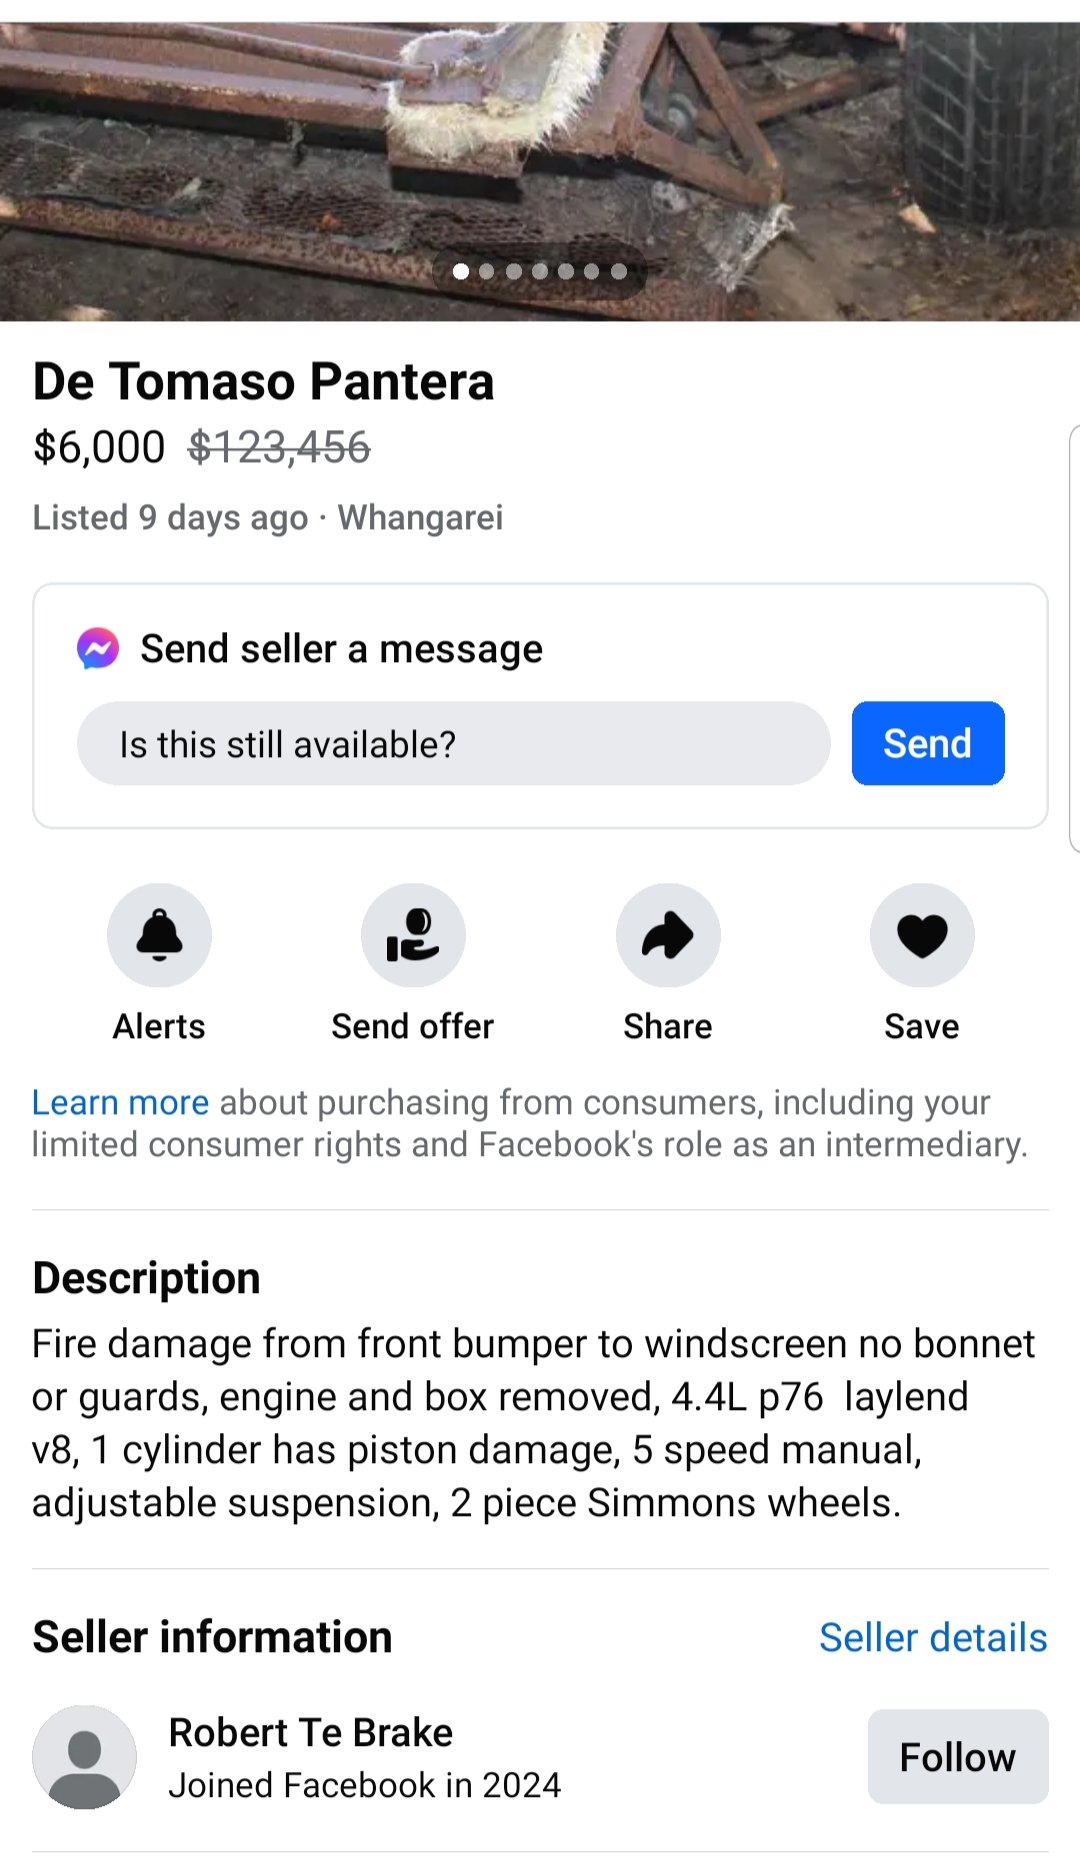
Spotted on Marketplace. Profile looks pretty suspicious being started in 2024. But its Rhd and the ferns look like its NZ. https://www.facebook.com/share/14M1LGgMag/
-
Yeh just kick it back to the right spot. This is one I did a while back for an L200 ute. Bit overkill with some of the material thicknesses but I had it on the shelf. I split it for user-friendlyness plus it incorporated some spacers where it mounts to x-member to lift the carrier bearing and I angled it to suit driveshaft angle.
-
The Virm has actually been updated recently and made it illegal for Yellow Rx7s to have oem turbos. So only way you will get a wof is if you fit a single BorgWarner 300sxe.
- 82 replies
-
- 17
-

-

-
Yeh once upon a time pick-a-part and Zebra U-pick had plenty of Surfs/Hiaces to pick through but not so much these days. If you join up to a speedway or 4wd page on facebook I'm sure some folks will have stuff lying around.
-
All G-series non-abs is the same 6308 bearing right through. Even my '69 Hiace has the same. I'm not 100% sure about that 2001 truck in your link as I don't deal with that later stuff but the 90's one will have the correct 30 spline axle shaft you need. If you are unsure just ask them to pull an axle and givenyou the bearing number. I think the only oddball is some of the Hiaces may have had different bearing housing flange pattern. If you get lucky, some of the 4x4 shafts don't have the undercut past the spline, so they are better for re-splining. I don't know why Toyota did that. Must have just been different process when making the 6stud axle vs the 5stud.
-
Yes, but the CCM says that Rotarys are only allowed to use missile switches for everything and the switch panel has to be covered in camo material.
-
Scratched lens filter
-
Sheeeit, how about that, I did one of them scenic pics too on Sunday.
- 528 replies
-
- 10
-
-

WTD: Potential wheel pickup - Henderson - AKL
RXFORD replied to Goat's topic in Upper North Island Region
If @Corbie or someone can collect asap then I can try meet him somewhere in the next couple days and grab them before I head to Taupo on Friday. -
^ I heard of a guy having that done but had to weld centre back in after chrome which seems pretty retarded to me. Bumper Replacements do a nice job but are expensive. Progressive Electroplating are also decent
-
I don't believe anywhere in Nz is able to it for a less than a crazy price. If they would attempt it at all. Something along the lines of the cost to build the anode jig to be able to throw current deep enough inside rim and spokes to get an even coating. Thats if they have the power capabilities to do something that size aswell. That was what the owner of Progressive in New Lynn mentioned anyway, but its been a while so my memories probably not super accurate. I've had things like pulleys done and the insides always turn out a bit shit because they weren't jigged. Probably best your mate just rings a few places to get the more accurate yarn on it.
-
Nek minnit windscreen washer systems have to comply with efi fuel system requirements because rainx and other wiper fluids have meth in them lol.
-
Would depend on the mixture ratio as to whether its flammable I would assume. Fuel/surge tanks can go in engine bay provided they are behind the wheel/suspension centre line and meet the usual fuel system requirements.
-
Have a chat with Mark Haynes at Revolution Engine Services. Hes big into water meth.
-
It was a while ago since I got the last set done, so my memory might not be too accurate, bit I vaguely remember Nicholai saying the Hipercoat can reduce temps outside of the headers by up to 60% or something along those lines. It definitely helped our application and stopped the paint discolouring from the heat.
-
I feel like this needs an added element of danger to it, so gantry injection would be quite fitting.
-
ProCoat arr local to me in East Tamaki, but hes really difficult to deal with and never delivers in the timeframe he says. HPC in Manurewa are worth the money in my opinion. Nicholai is a good sort and always helpful. I'm not sure about any others sorry.
-
Prob depends how slammed you are and the size of rca compared to amount you are lowered. Not sure how bad the bumpsteer gets on those cars. Would be something cert man decides on at time of road test.
-
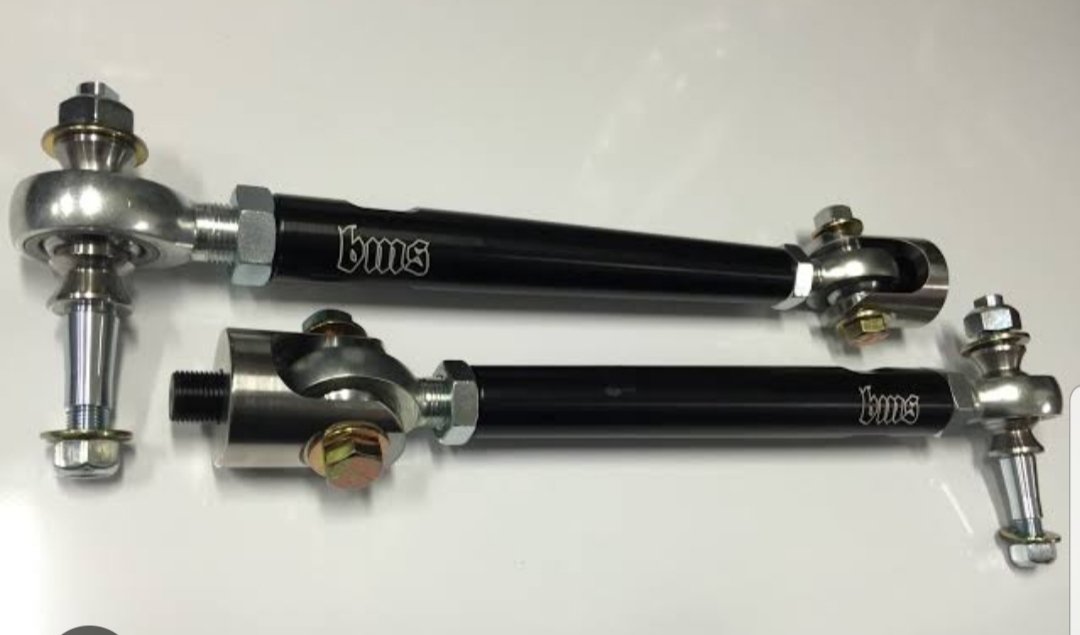
This kinda thing. Would need a mis-alignment spacer to stop it from binding throughout suspension travel. Have to check that it would actually help your situation by the time a mis-alignment spacer is fitted though.
-
If you want to get crazy, and you are certing it regardless, you could possibly replace the tie-rod end with a heim/rose joint. Either drill/ream the taper to be straight for a snug fitting bolt, or have a tapered adaptor machined to suit. But yeh, would need to discuss with cert man first, and its a bit of work.