tortron
-
Posts
64,640 -
Joined
-
Last visited
-
Days Won
646
Everything posted by tortron
-
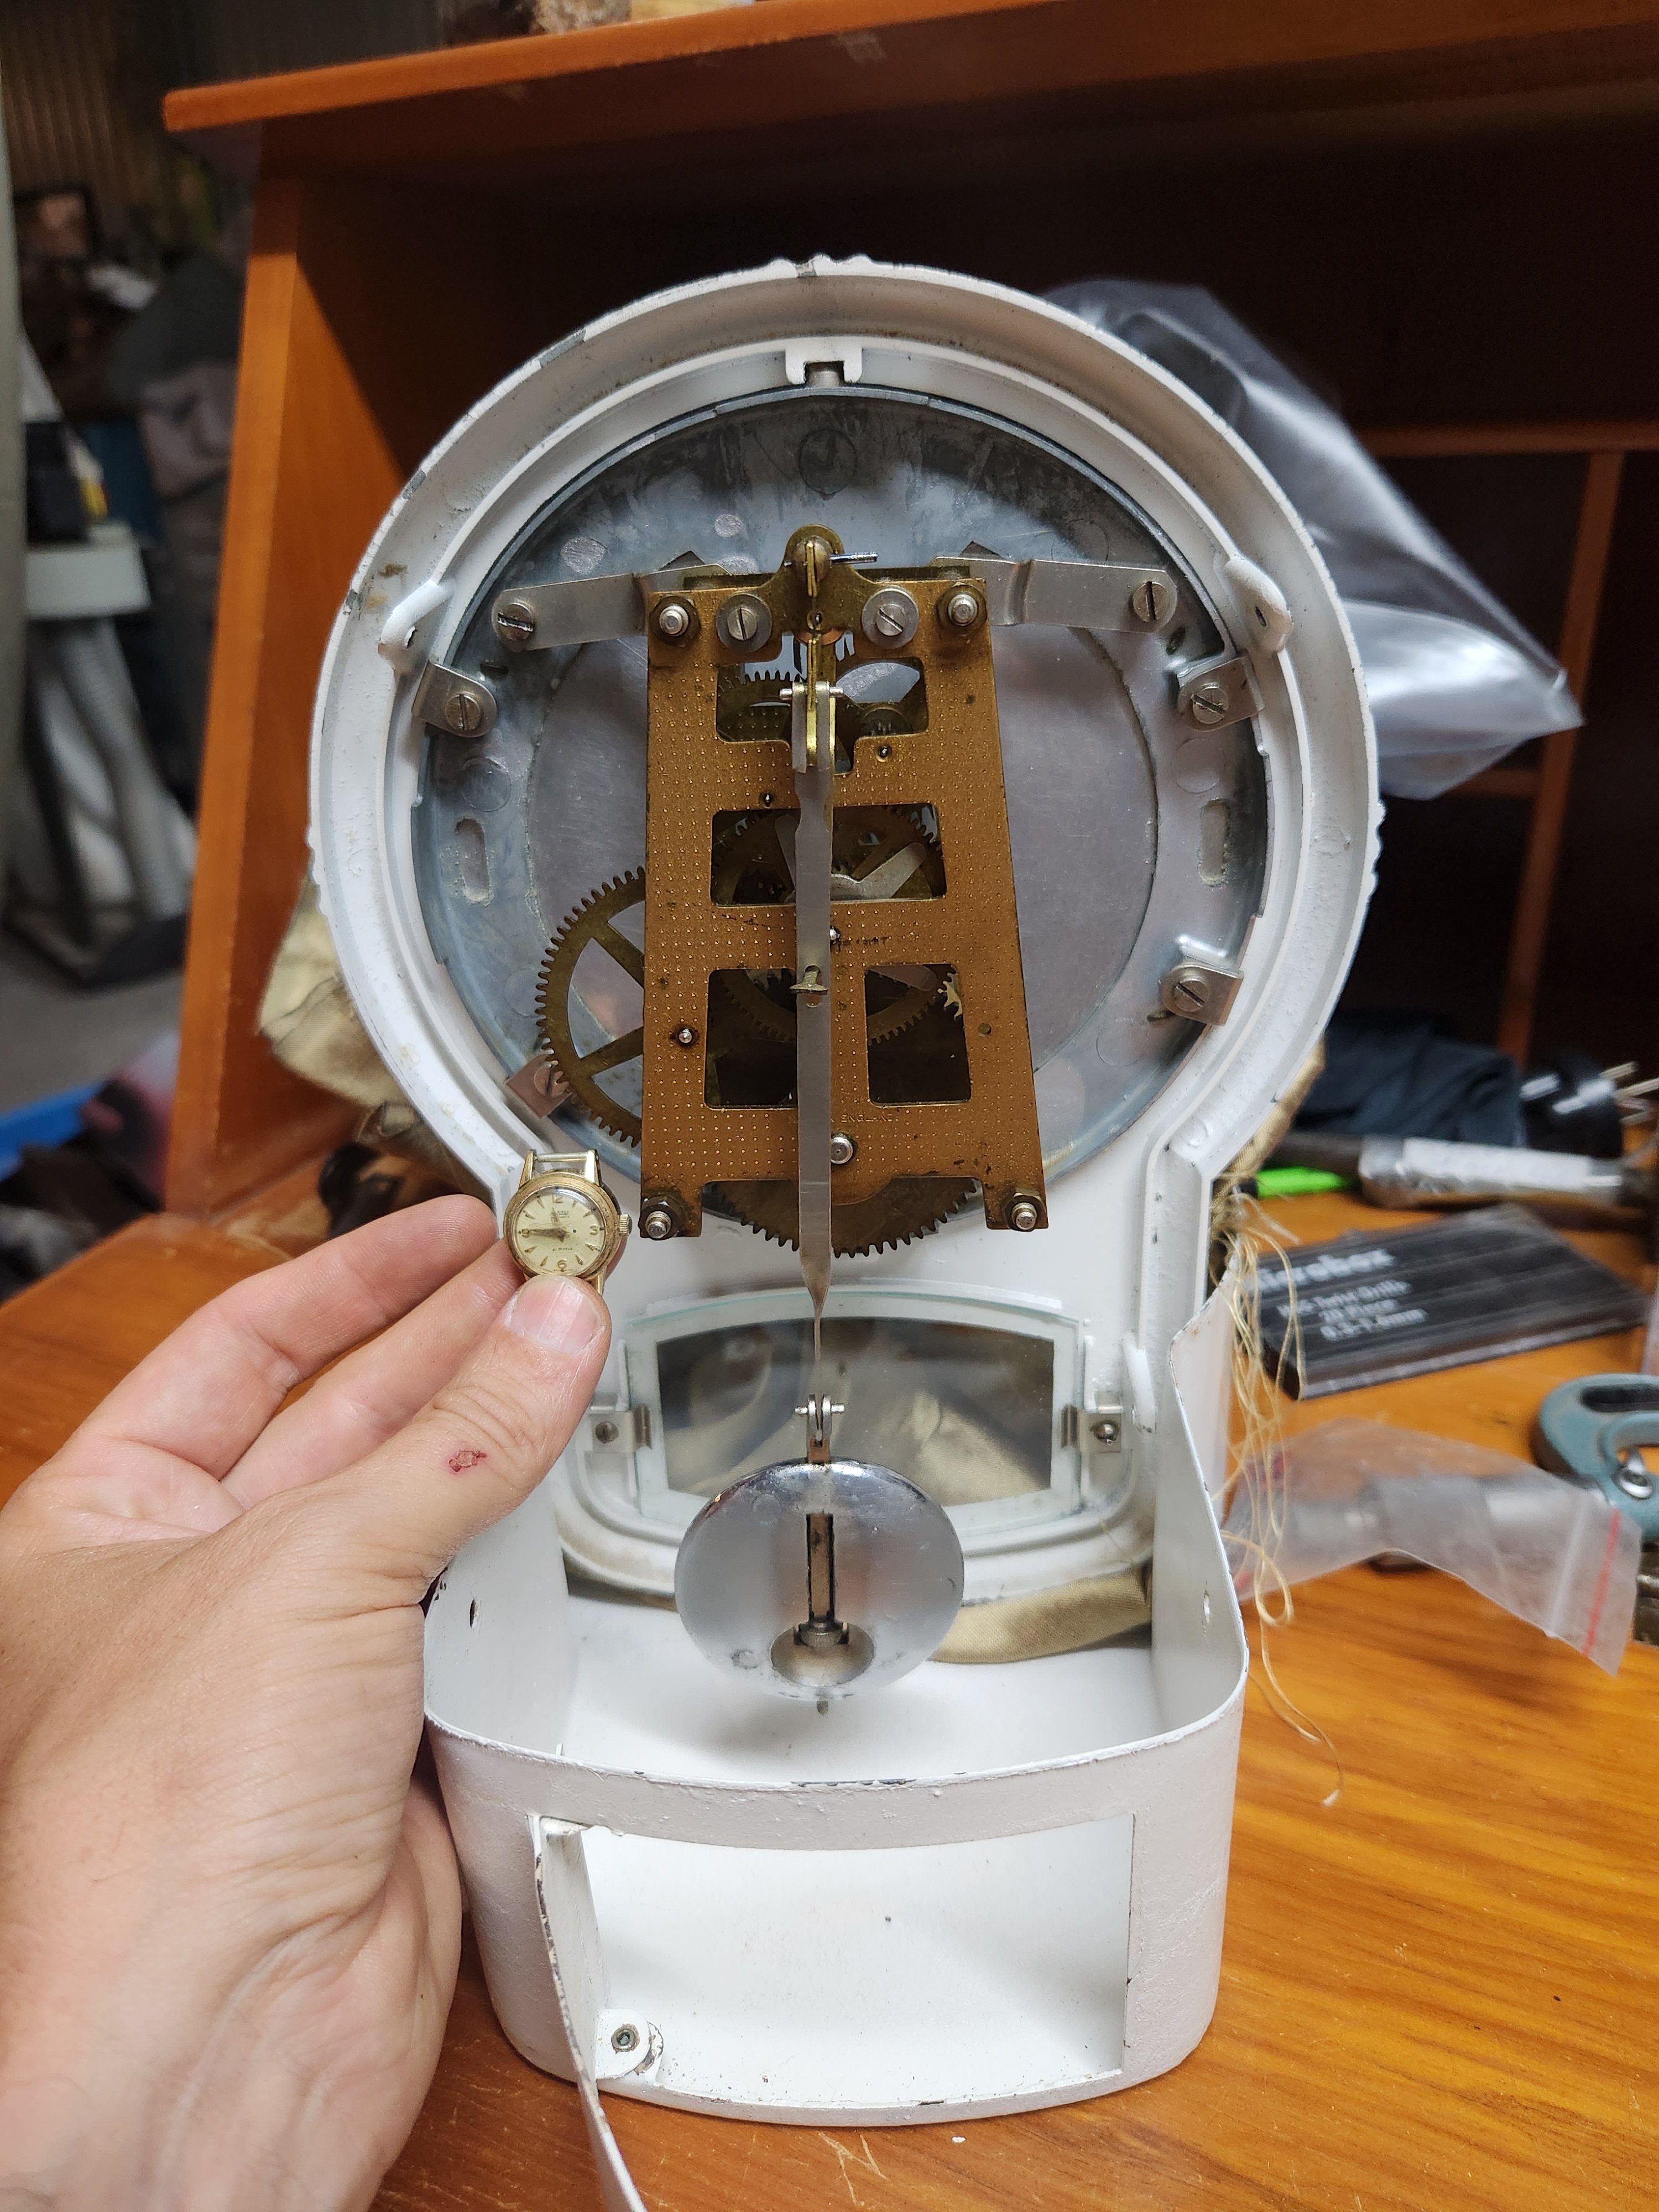
Made a new one From what I can see online, the minute hand is held on by a threaded cap. Mine has a square shaft with no threads, but does have a hole drilled through it (which probably hints as to what year it was made) This is, or was common on clocks, there will be a cupped washer which will press down over the hand, then with some tension on it you poke a rod through the hole and it all holds together

-
And here's a thumbnail sized ladies automatic for size. Wow so easy to work on something you can see with the naked eye
- 88 replies
-
- 11
-

-
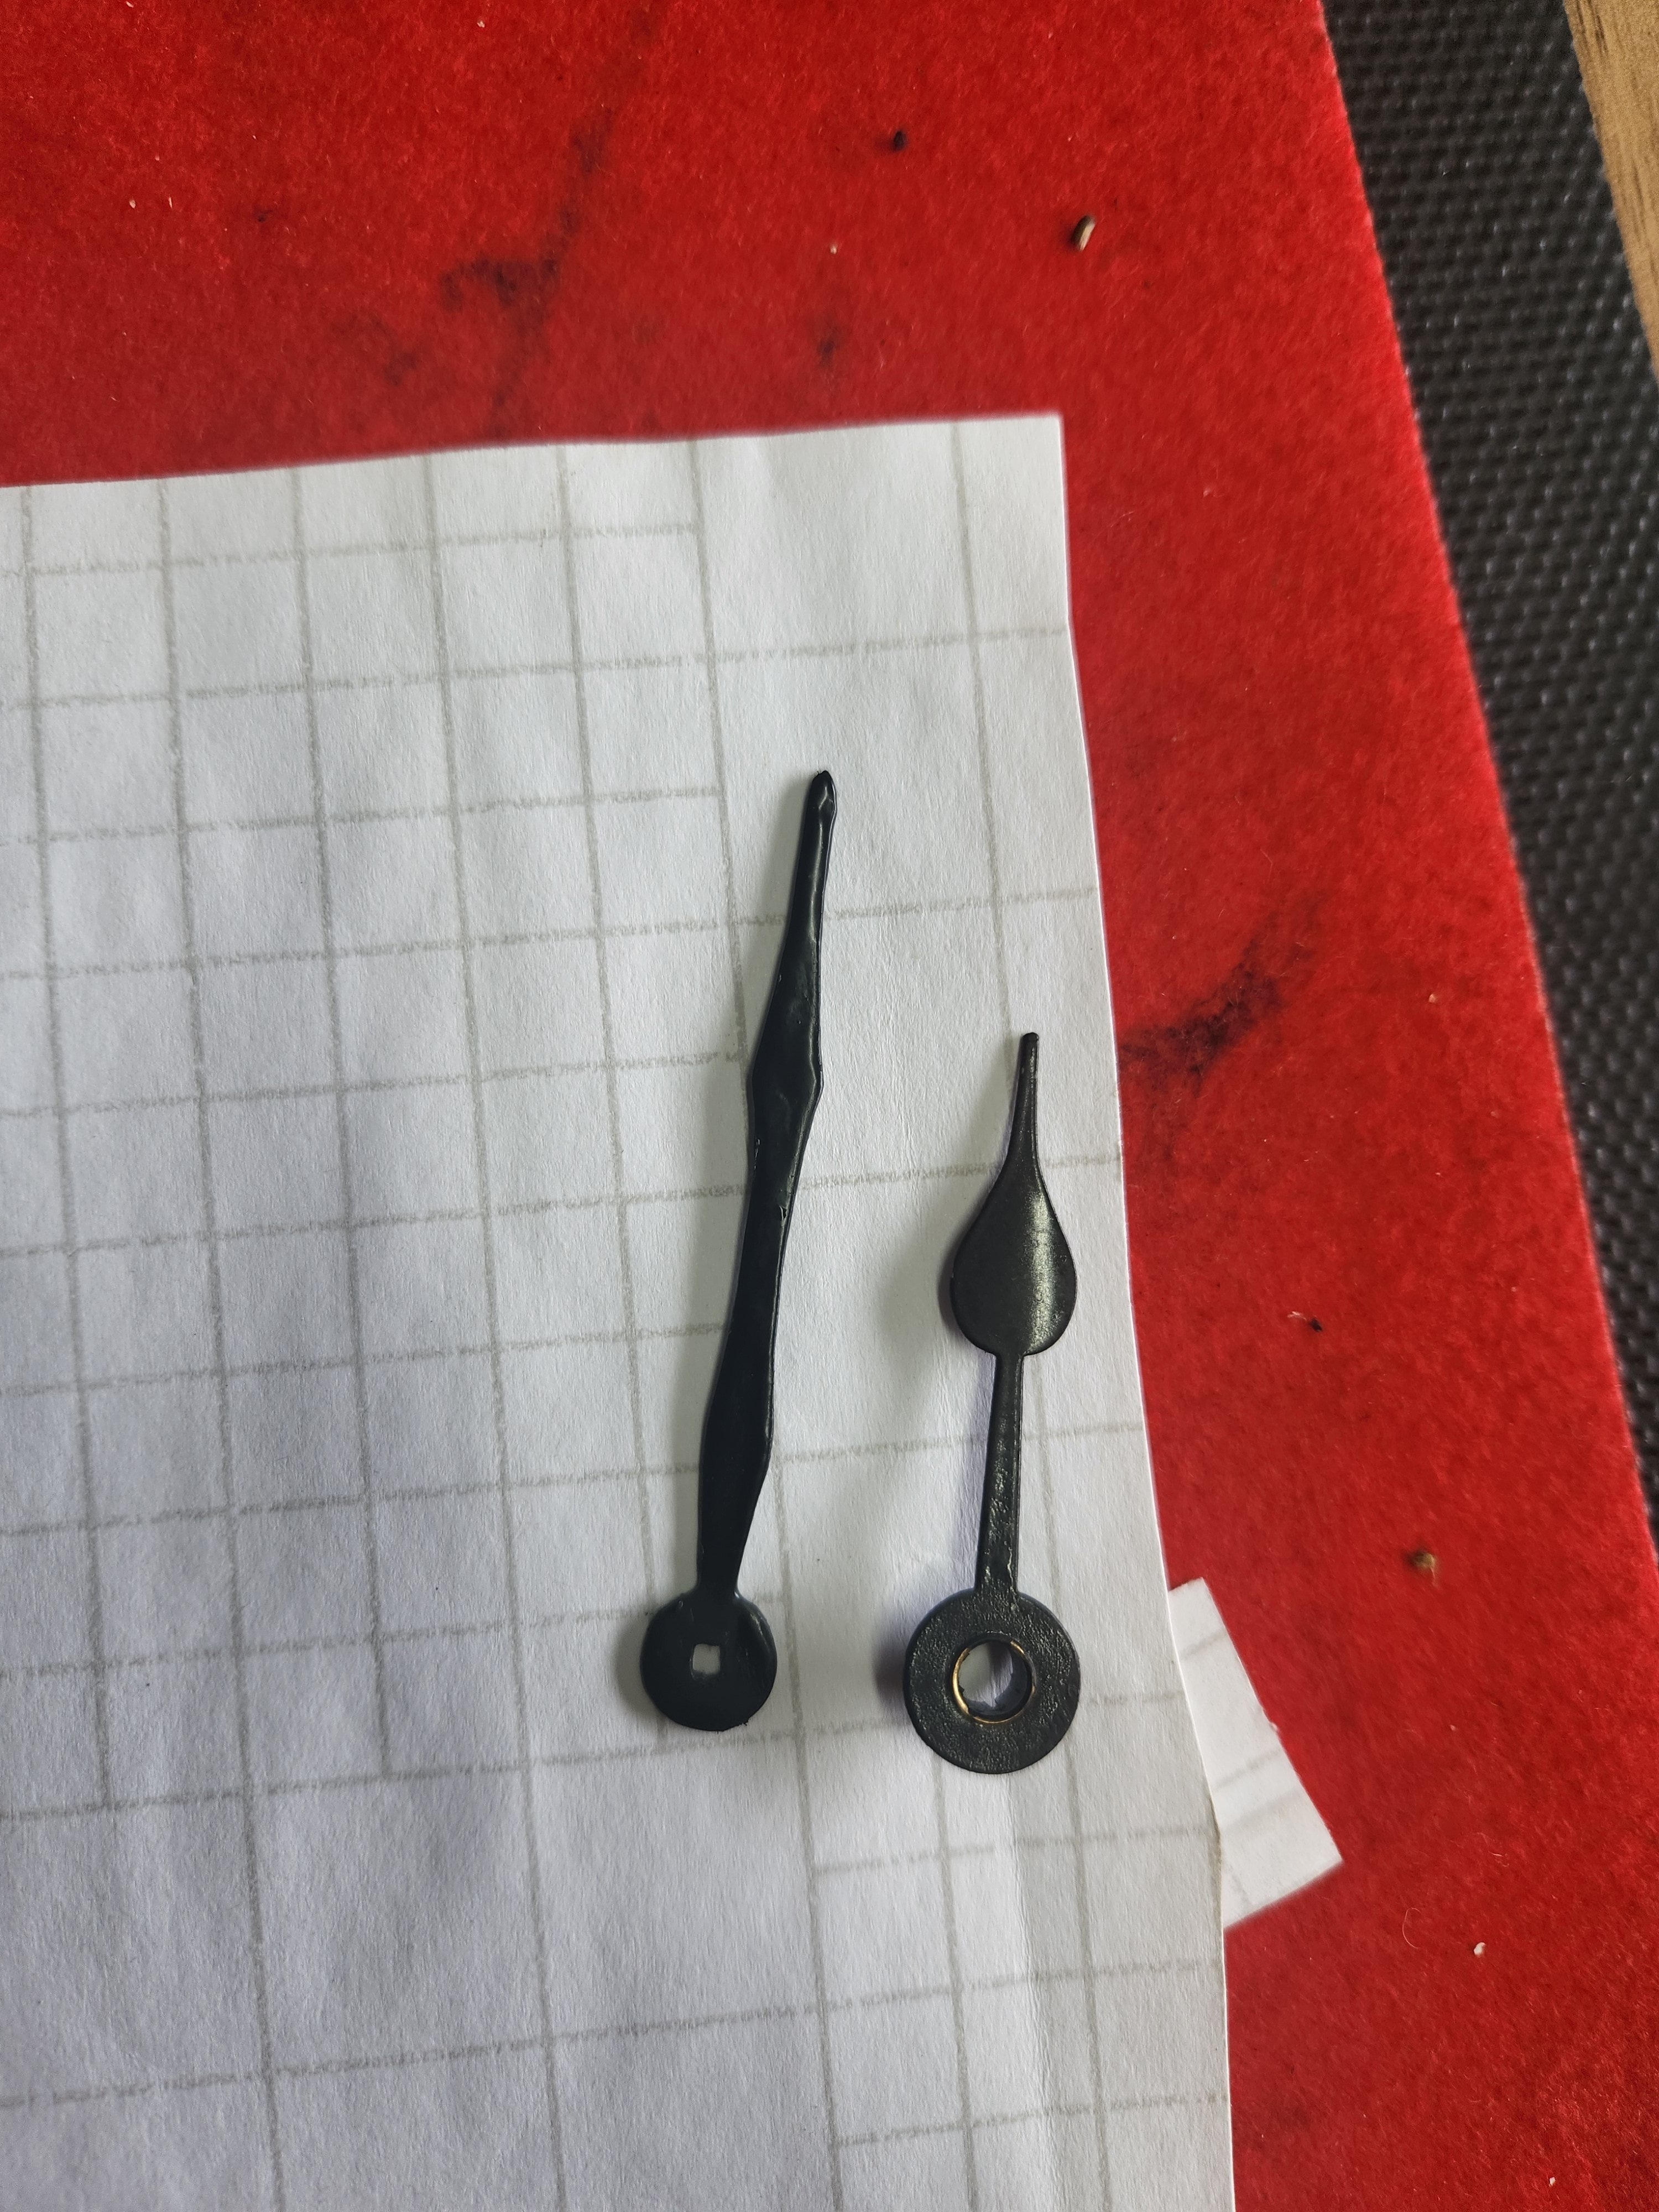
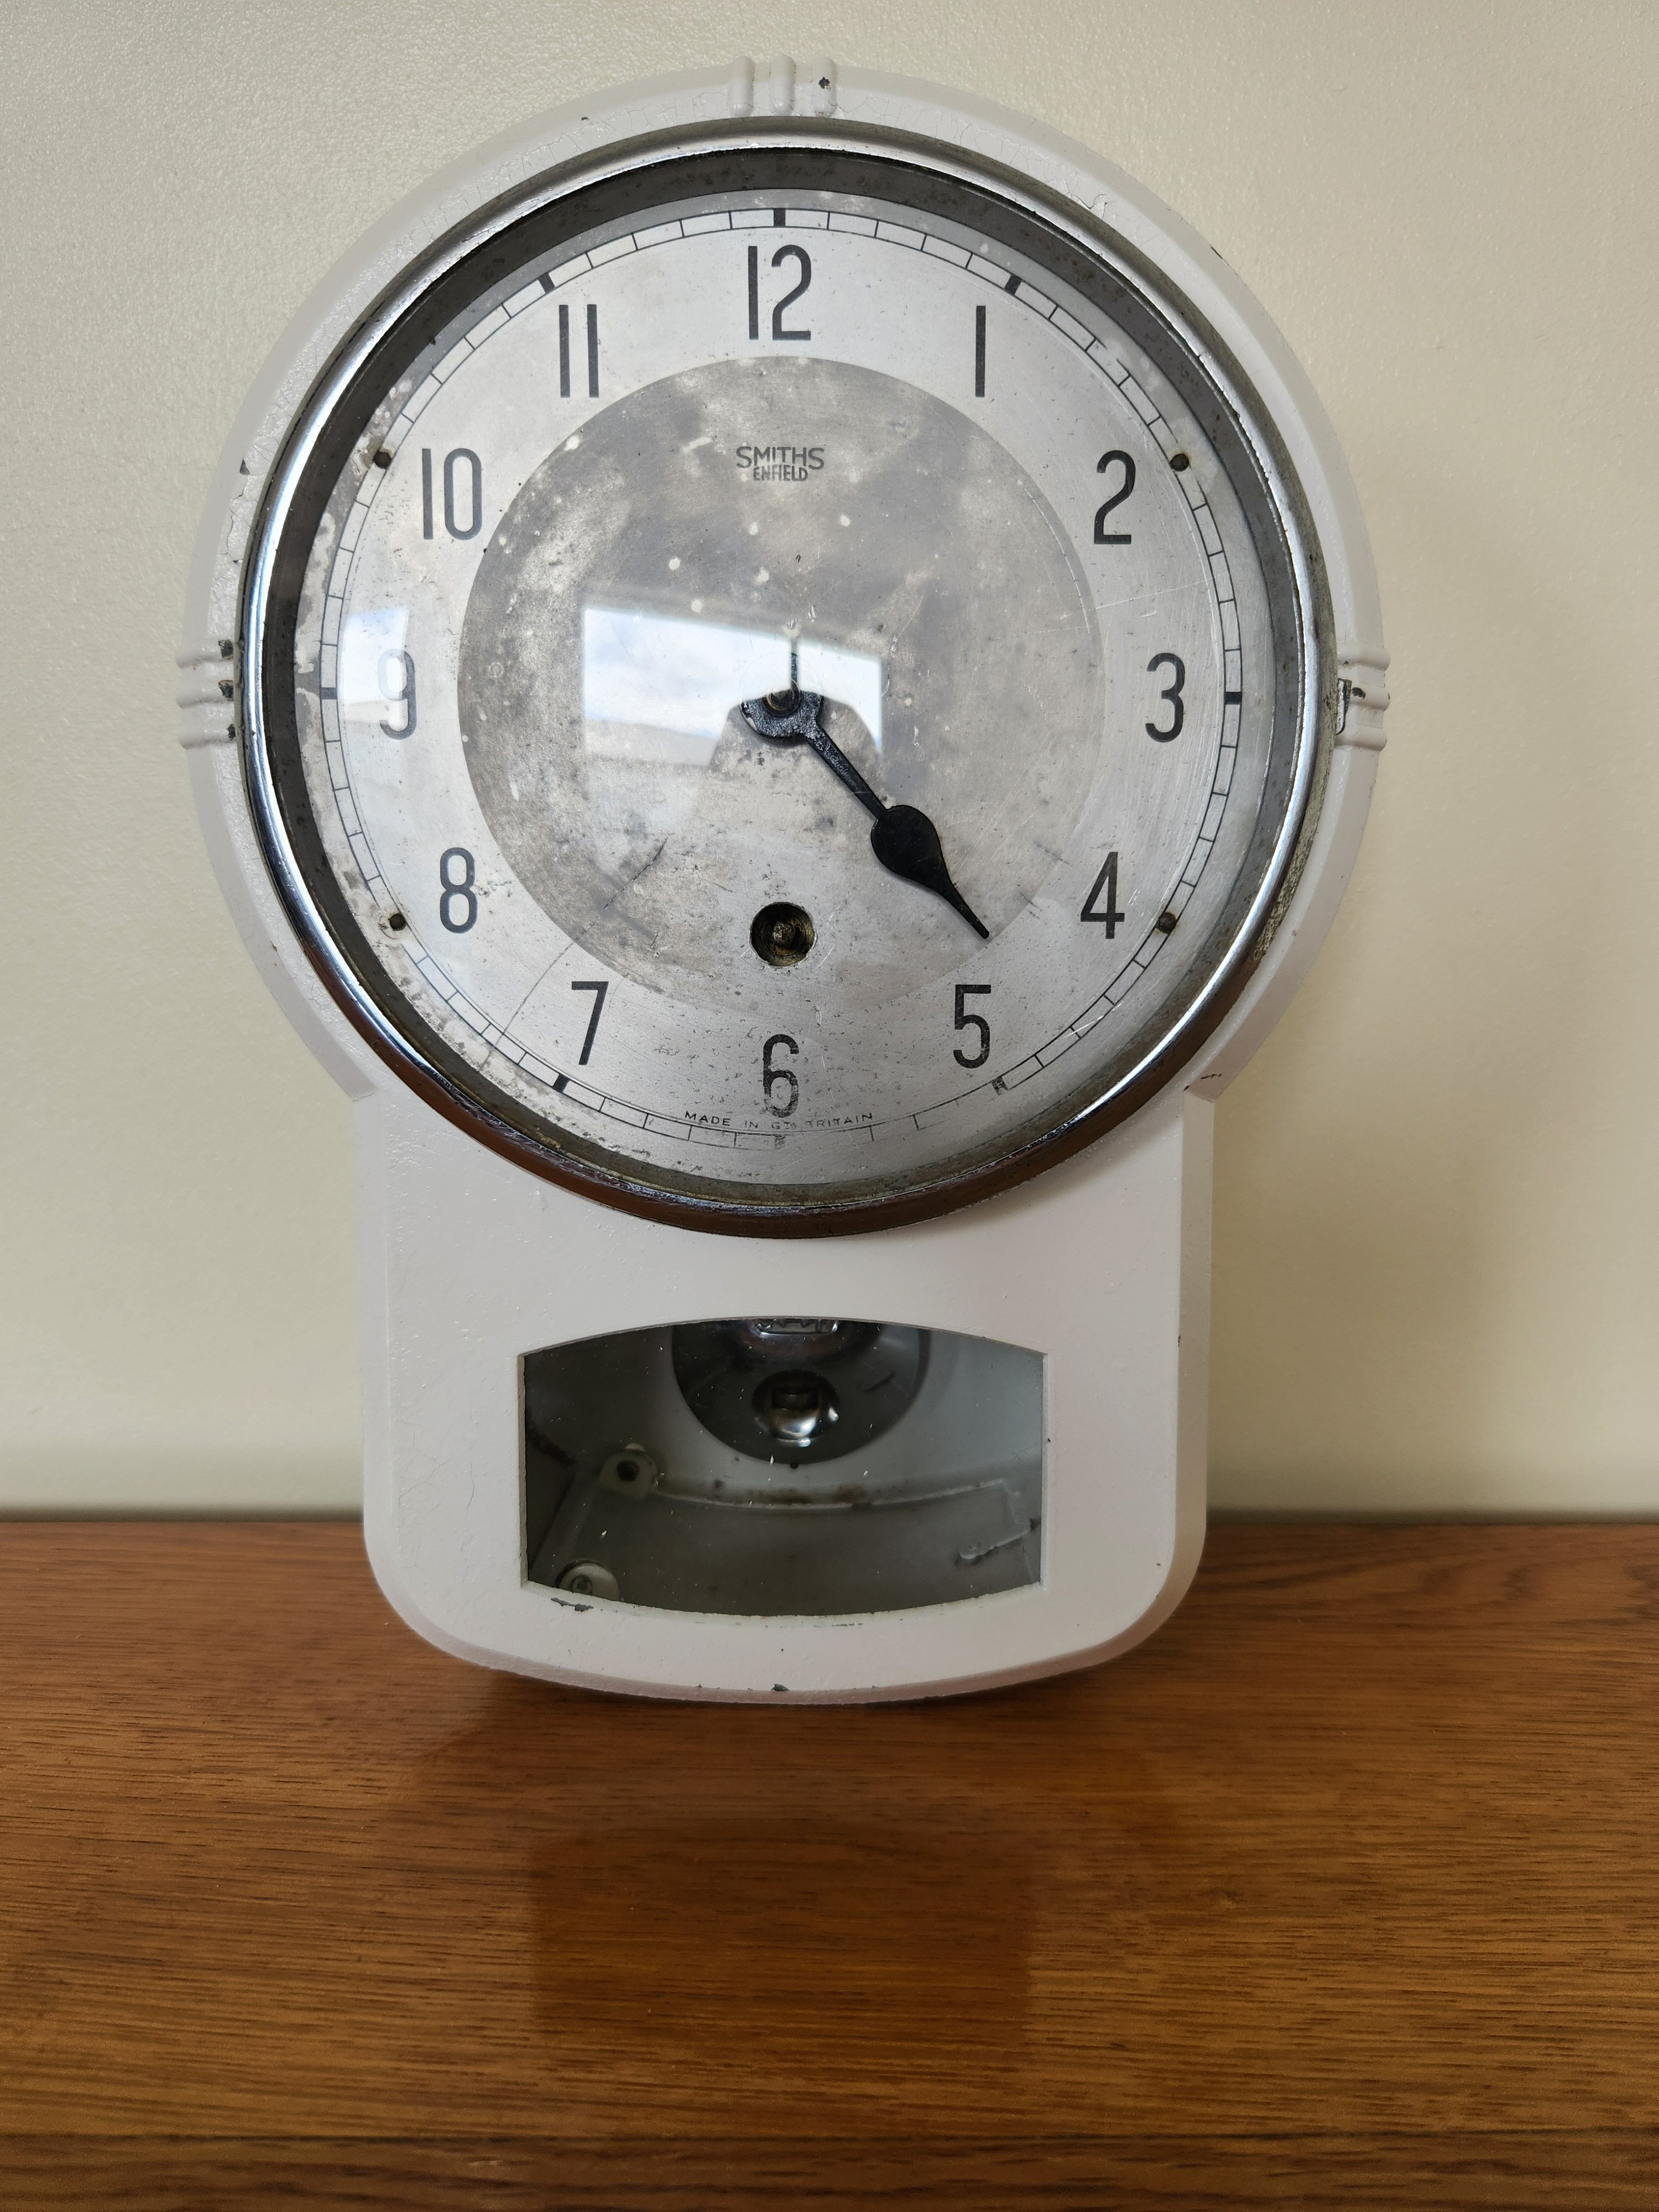
I'm confident that this is a piece of low importance, it just has to exist basically, and not impede the pendulum from swinging too much. Some of french clocks use a bit of string there. It needs a good clean, I think that is why it's broken. The mainspring was fully wound up, and there's a scratch in the face and a missing minutes hand. I have a feeling someone tried to gorilla it into working with just a bit more wind... The spring will have broken when it was chucked in a box and knocked around, although did show darkening around the break. Will order a key for it. Had a look on a clock parts site and I can get new hands for a few dollars (postage probably lots as it always is for small stuff), might order a new hanger spring as they are also cheap, now that it looks viable
-
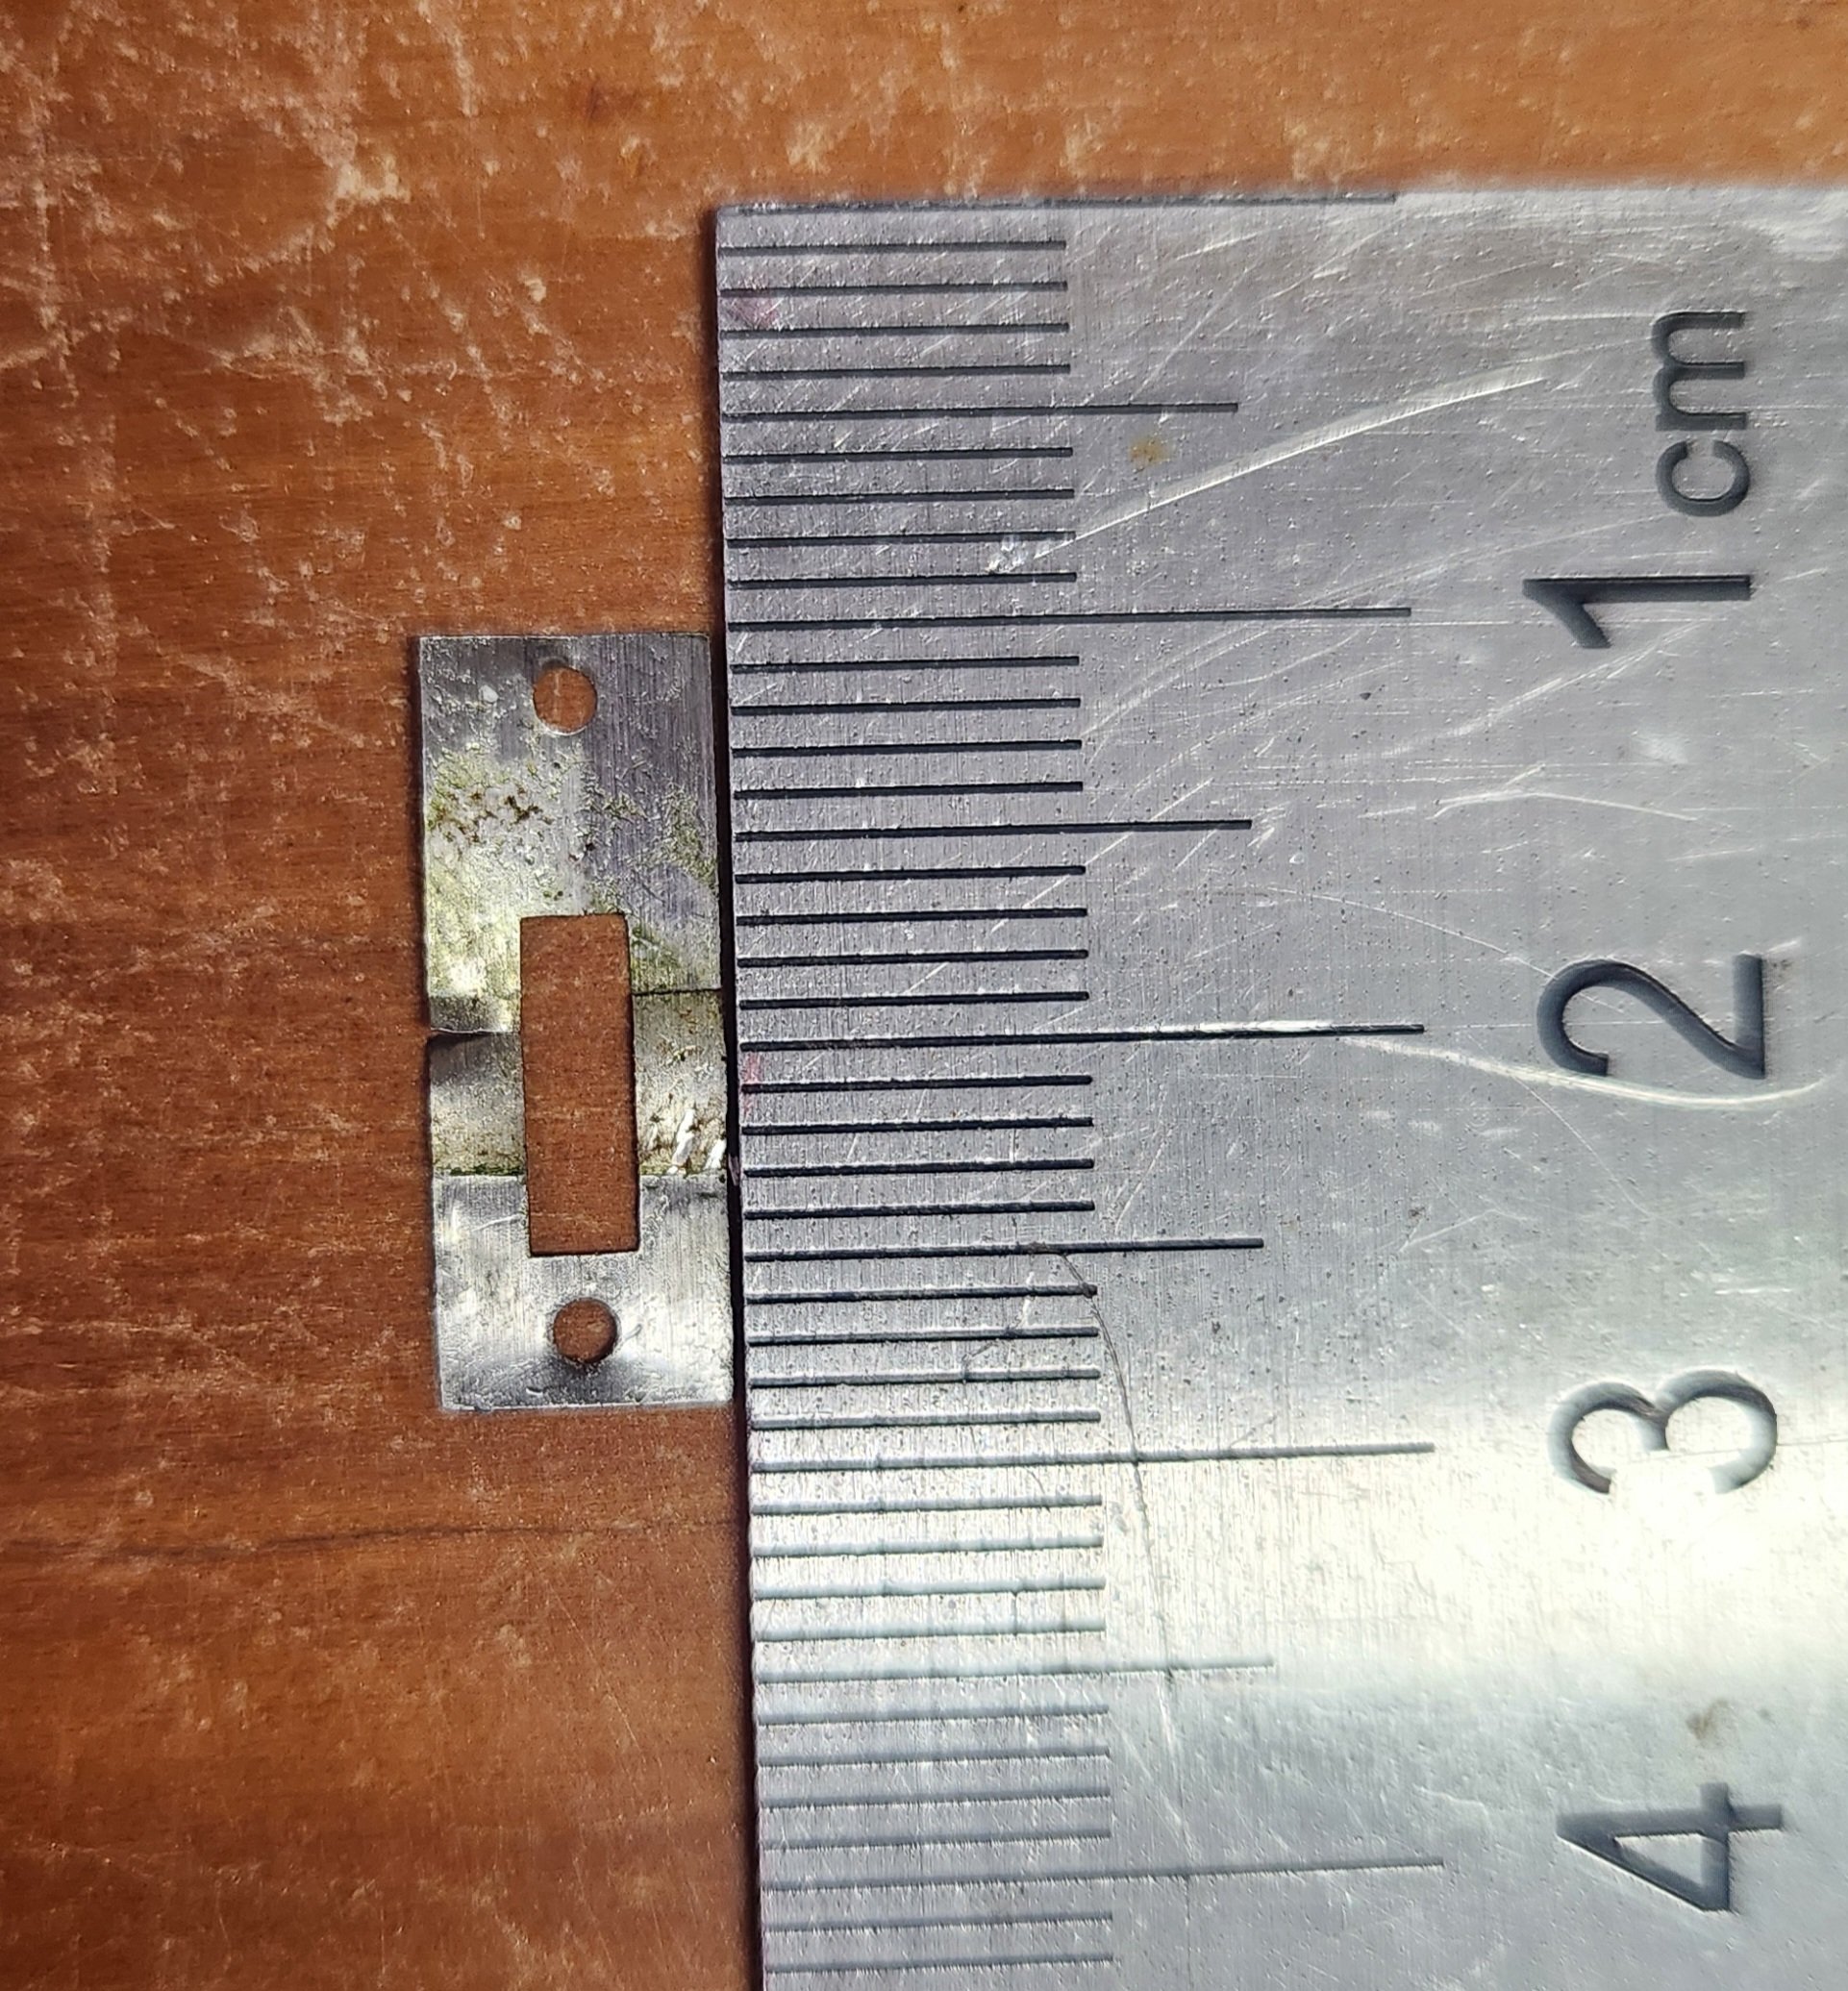
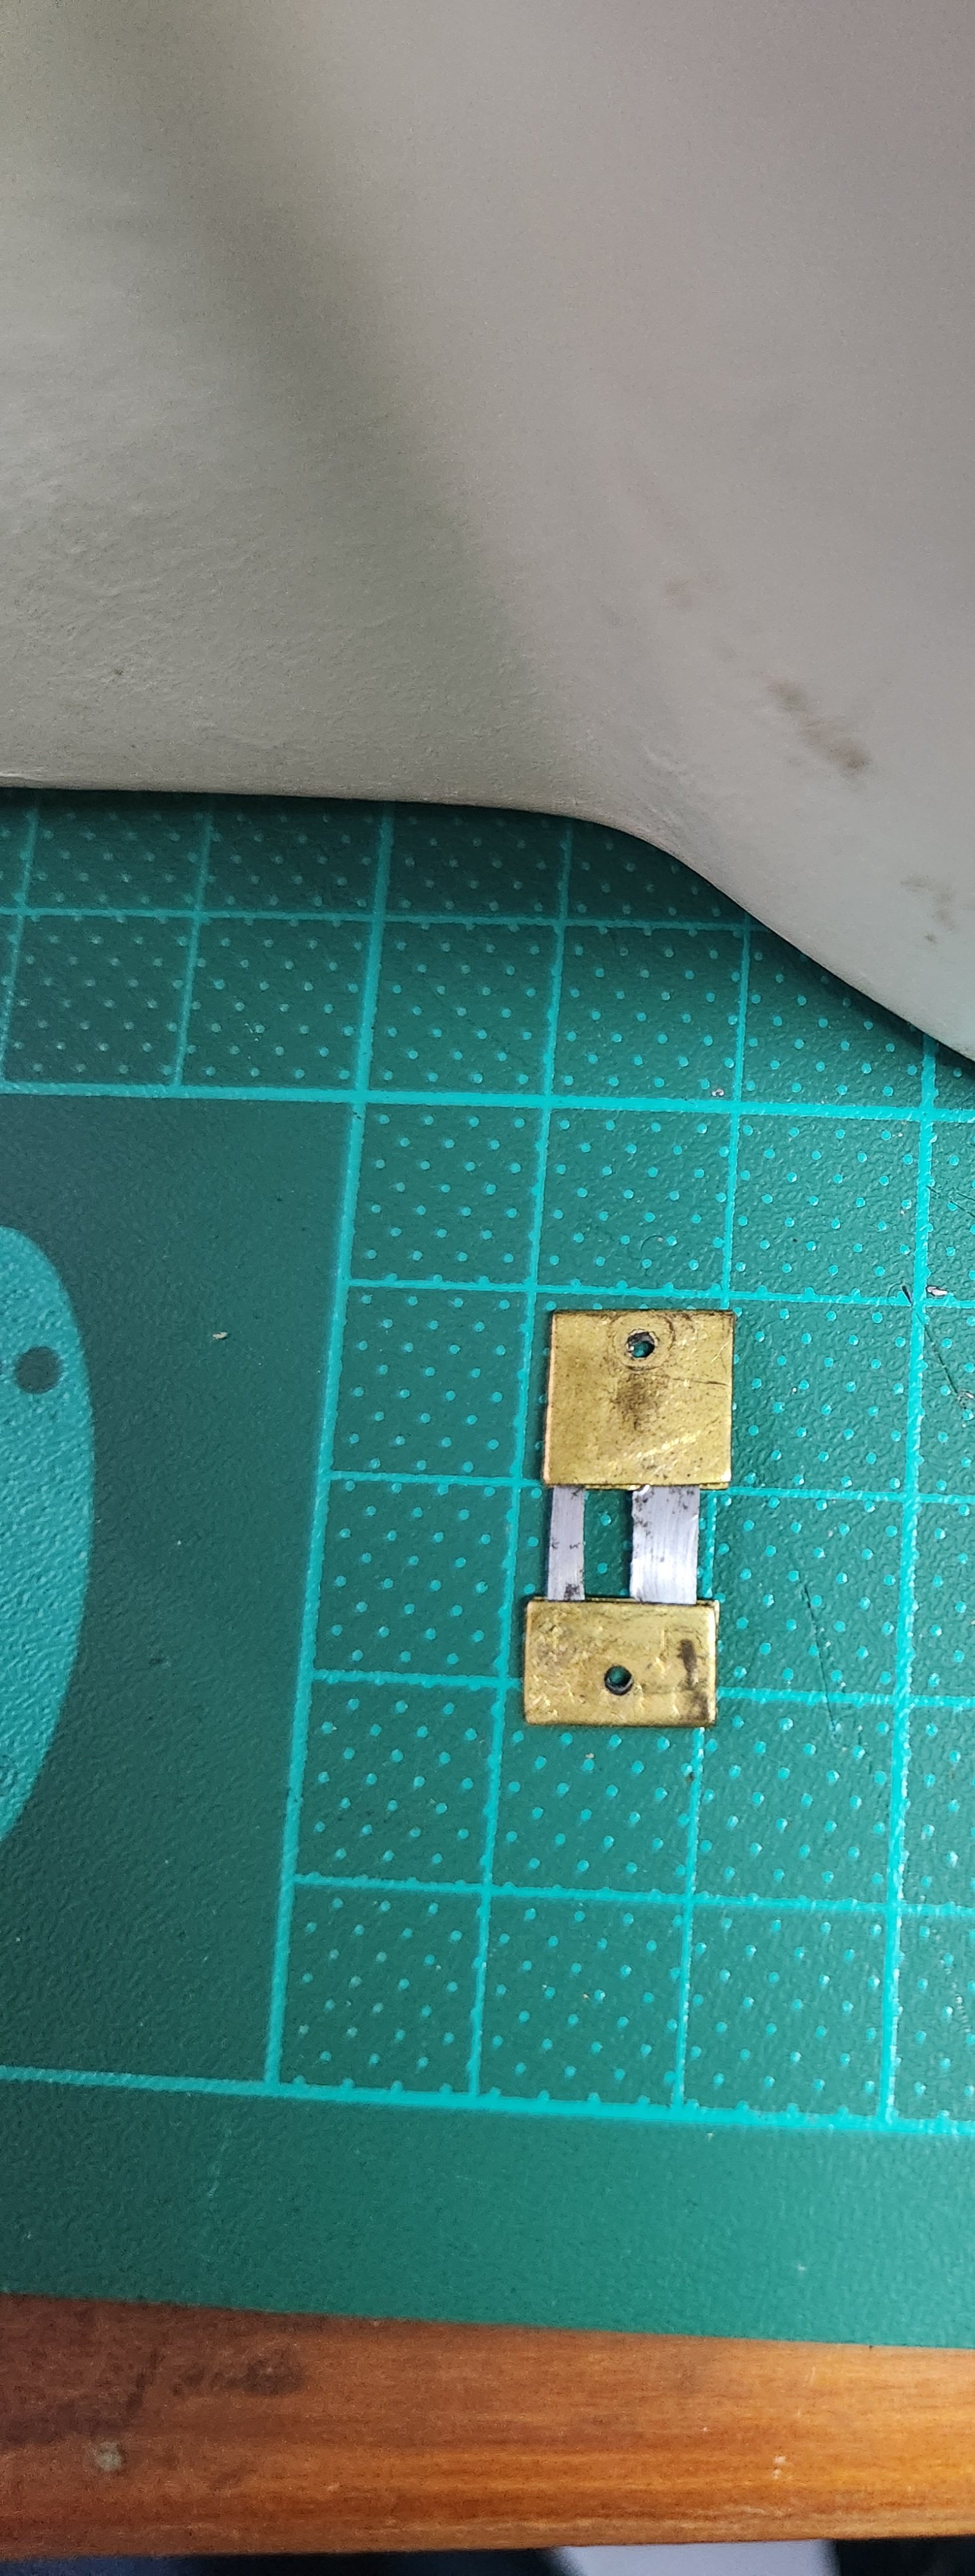
This is the pendulum hanger spring. It sits right at the top of the pendulum shaft and is more or less just a pivot for it to swing on It turned out to be about a 0.7mm feelergauge
-
Hows this for a hunny Circa 1940,50,60s smiths Enfield kitchen clock This one has a cast body, I think the movement has a serial I can figure out the date from. Wants some work, it didn't come with a key, but I think I have one. Missing the minute hand, and the pendulum hanger spring is broken. These are available new for not that much, but could probably make one from a feelergauge as the pendulum has heaps of adjustment anyway. Minute hand I should be able to get one, these days you could laser cut one faster probably. Or you can buy a quarts movement with a fake swinging pendulum for about $14
-
100% do not do this
-
The Weber swap for an l200 is pretty well received. Lots of discussion on www.mightyram50.com. Lol
-

Random slightly cool stuff you built but not worth its own thread, thread
tortron replied to h4nd's topic in Other Projects
-
Daves new school holden shambles. (Is this project oldschool yet?)
tortron replied to Muncie's topic in Other Projects
The Holden requirements are that you drop a "water pump lubrication" tablet in the radiator every time you work on the cooling system It's literally one of these https://www.supercheapauto.co.nz/p/rislone-rislone-radiator-stop-leak-tablets-50g-pack/681095.html?srsltid=AfmBOoqQHPLrnGHoq-xadBA4aP4Pkt4V68eGyMm-mLLcJFToGZmEpNCS But with a Holden part number
-
Random slightly cool stuff you built but not worth its own thread, thread
tortron replied to h4nd's topic in Other Projects
Didn't realise this book had all the flaps torn out It's not painting the house weather today. Found a yourube video of someone reading the book
-
I have that same regulator water/oil trap at approx 1ft from the compressor outlet, then 10m line, then I use a disposable filter (the red ones that screw inline) at the gun. I recently changed to rubber line as my old blue one had gone crunchy and full of holes. Rubber line is nicer. Also got a regulator with gauge to go at the gun (I had one without gauge only on my good gun for clear etc) which is also nice Without the filter at the gun I would get water coming through on more humid auckland days (normally I would aim for a nice day, spray in the morning and if I drained the compressor before hand it wasn't an issue) Compressor runs almost full time spraying a whole car, it puts out just slightly more air than I spray. For home job it's fine I think, no real issue I'd like to run some black pipe up and down my back wall of new shed to make multiple water traps (the reg at 1ft is literally.hust because that's how much extra line I had, it should be further) I do probably more painting than an average shed wombler, but less than someone who paints I guess, and current set up has been fine, with room for improvement
-
Hired out an old bakery for the ovens, had some big concrete culvert pipes and fired the heat through them I believe. Then layer the acrylic over those to let them bend into the tunnel sections (first in the world)
-
Can do it the Kelly tarlton method
-
Daves new school holden shambles. (Is this project oldschool yet?)
tortron replied to Muncie's topic in Other Projects
Give her a rev just before you shut her down to clean the plugs out m8 -
My mig had the same symptoms Was the wire inside the machine where the earth lead connection is, had comeaway/worn away or something. Was enough to unwind a little and redo
-
3d print a retro cover for modern engine
-
https://totalbodyshop.co.nz/products/4m-butyl-rubber-sealant?omnisendContactID=637b04700db2c000172638f5&utm_campaign=campaign%3A+Nice+Products+Priced+to+Sell.+(674688566a5b613c235d7fde)&utm_medium=email&utm_source=omnisend On sale today
-
When it comes on pipe
-
I was getting it from mitre10, but it looks like they no longer have it. It might have been relabelled as their Heavy Duty degreaser but best to check the tds against the purple one (still available overseas it looks)
-
Engine turned aluminium Can buy online or diy with a drill and some scotchbrite
- 1 reply
-
- 1
-

-
Random slightly cool stuff you built but not worth its own thread, thread
tortron replied to h4nd's topic in Other Projects
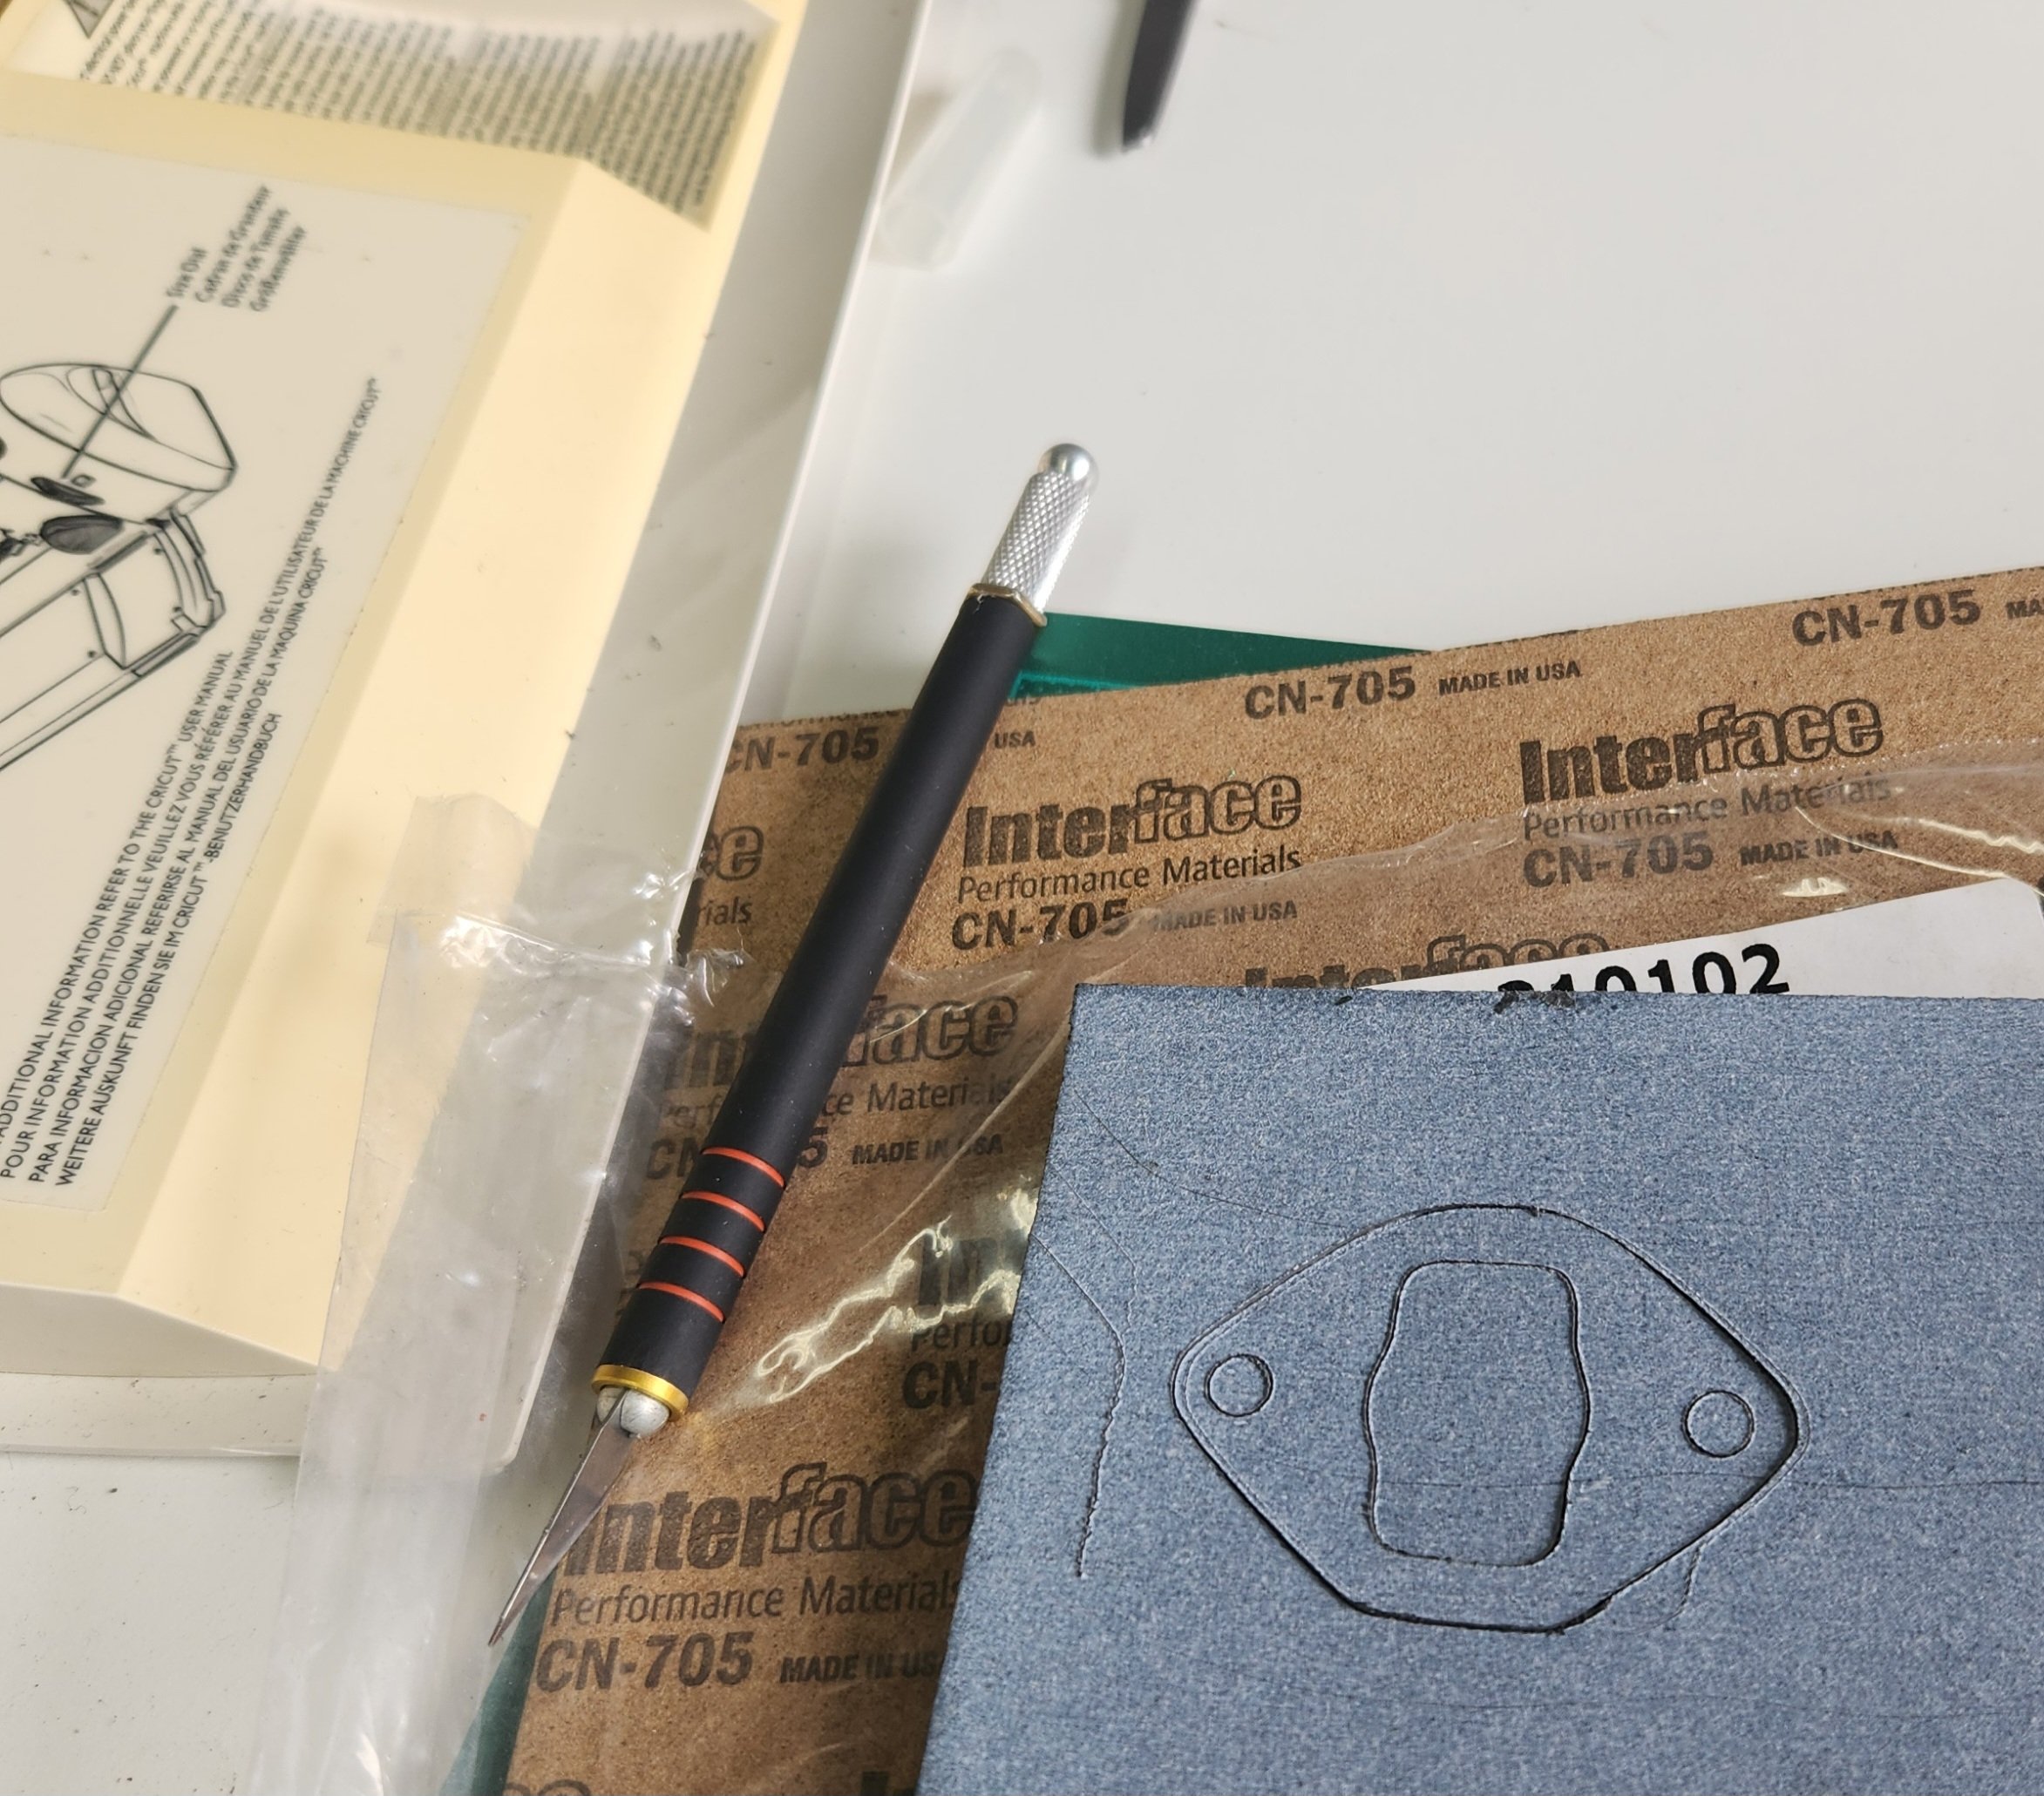
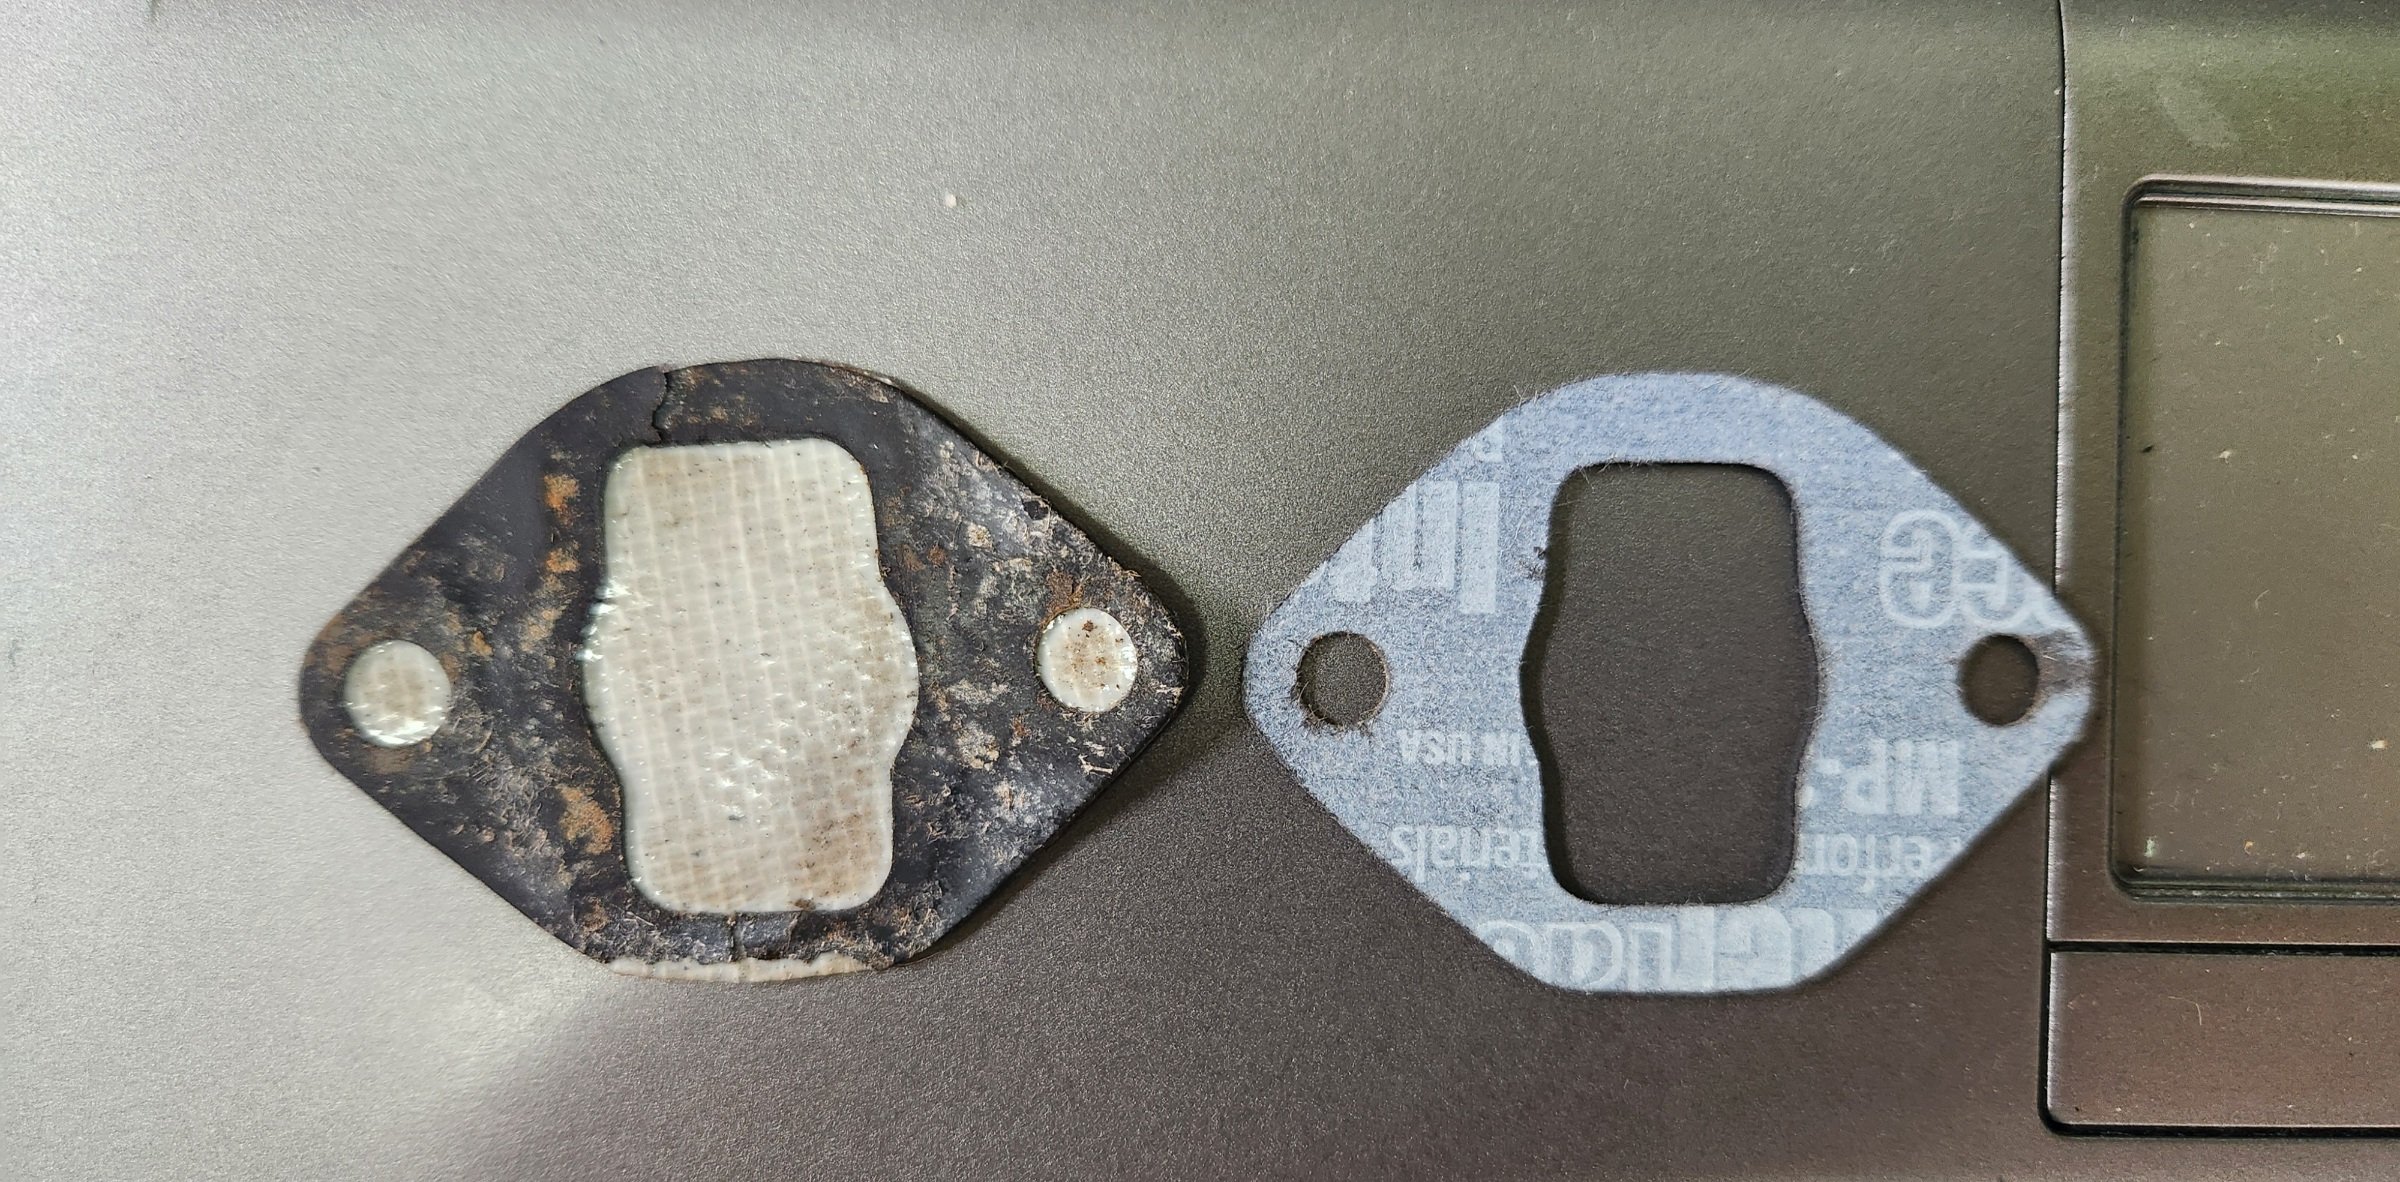
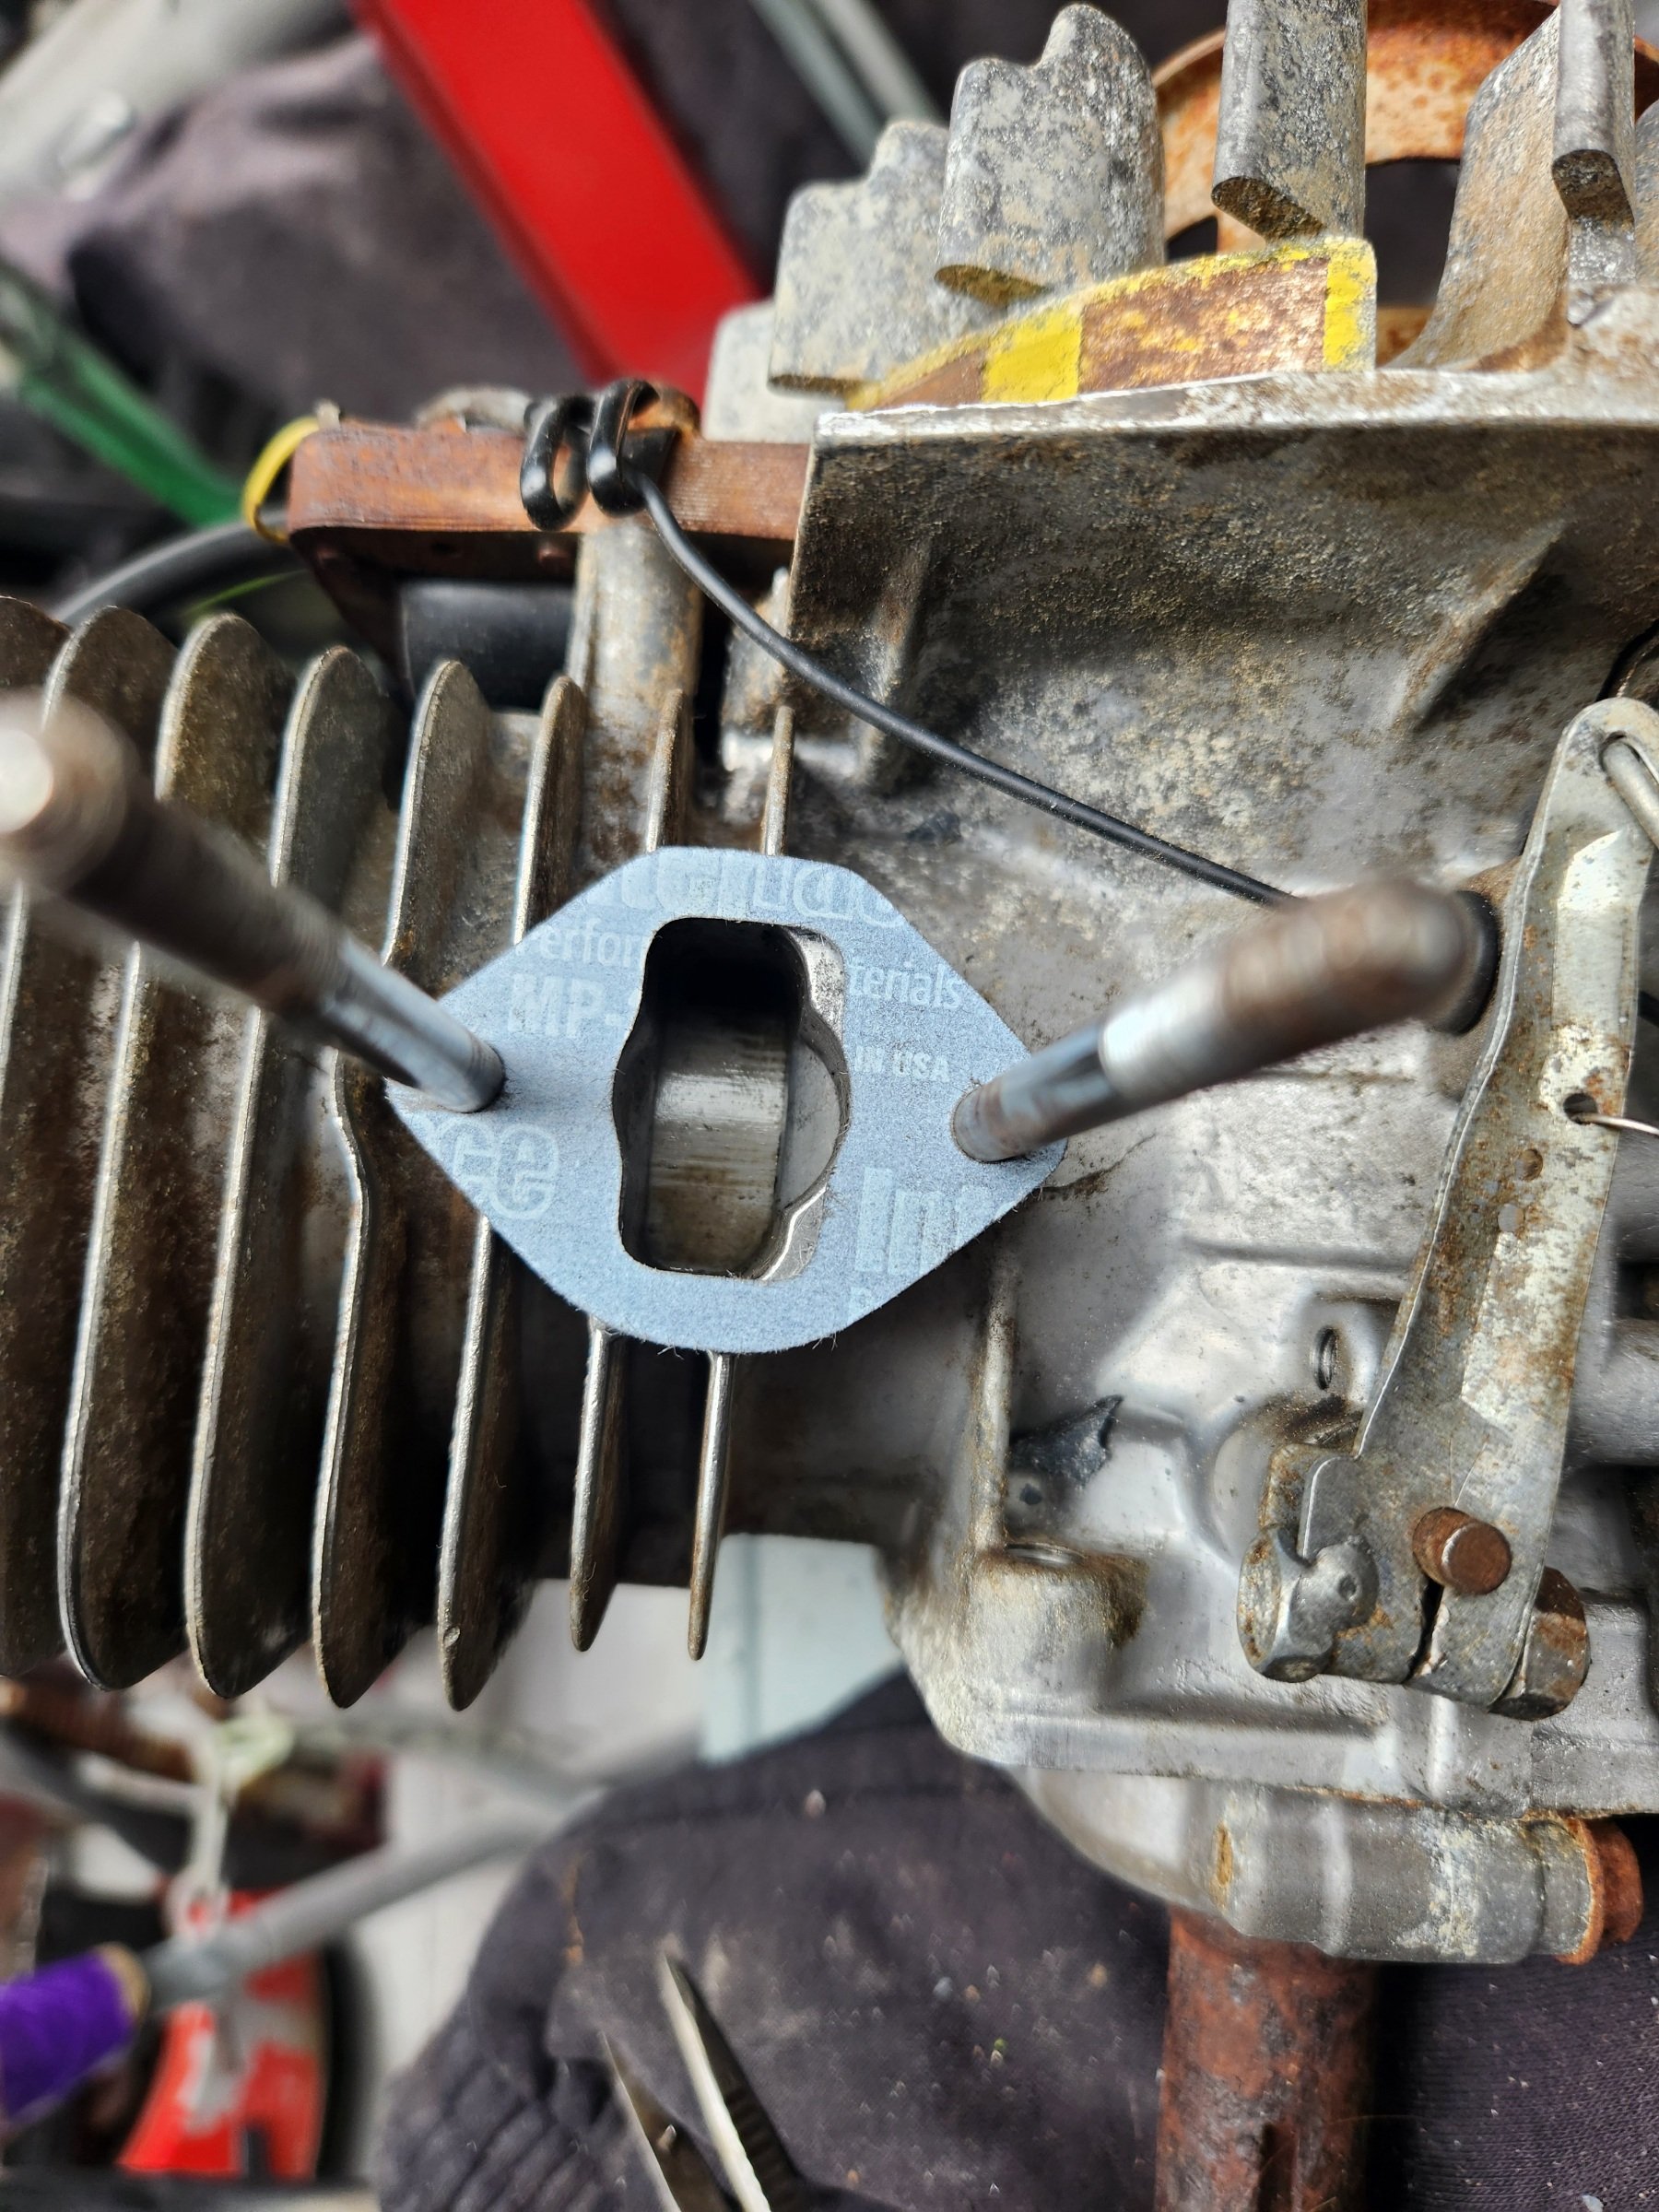
Cricut has its limitations, I tried a few different gasket materials, and that's the first to cut fully through (99.9% so you can just snap thr bits out easily. Ideal outcome) the others were about 95% cut, so could go through with a quick zip round of the scapel blade. Standard oil jointing paper/an old wheetbix box, is more within its limits, but very happy. A proper desk top cnc or laser would be real nice. Cutting exhaust gaskets would be a dream For general tinkering, can't beat it. No more dirty finger smearing the outline, hammer and punch for me -
Random slightly cool stuff you built but not worth its own thread, thread
tortron replied to h4nd's topic in Other Projects
Yeah that's pretty handy
-
Mikuni main jet? What size?
-
Has he considered a 2zz
-
Discuss here about Yoeddynz's little Imp project...
tortron replied to yoeddynz's topic in Project Discussion
THE REFLECTORS ARE SUPPOSED TO BE MOUNTED ABOVE THE BUMPER, I CANNOT BELIEVE HE OVERLOOKED THIS IMP DETAIL