dmulally
-
Posts
1,413 -
Joined
-
Last visited
-
Days Won
3
Content Type
Forums
Downloads
Events
Gallery
Everything posted by dmulally
-
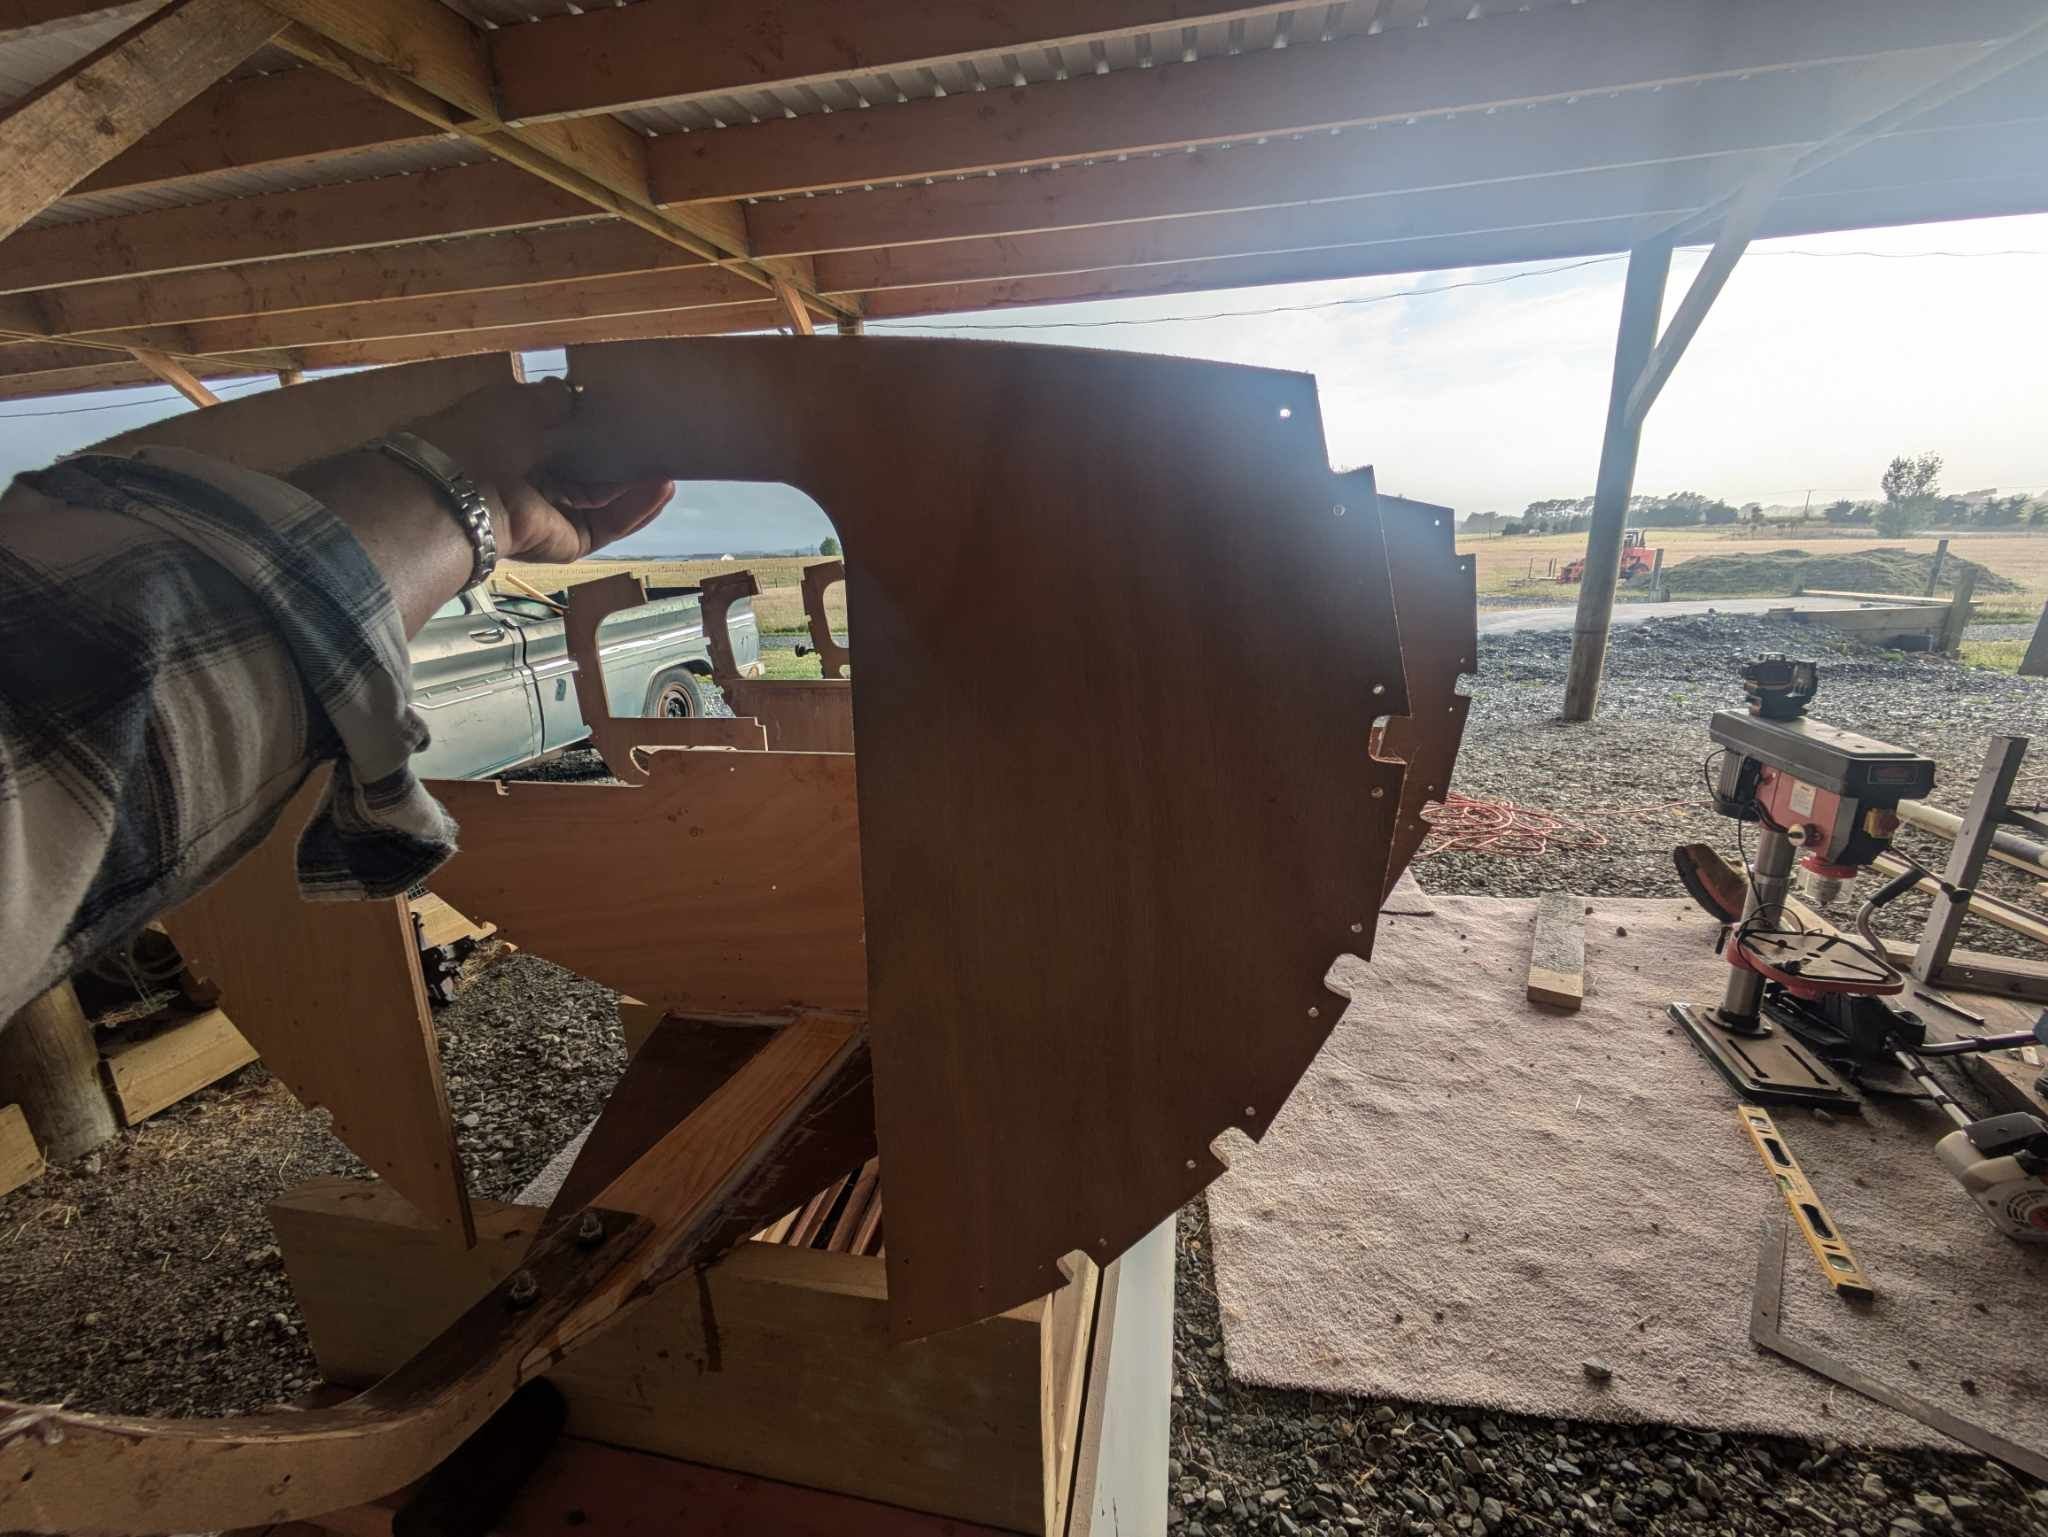
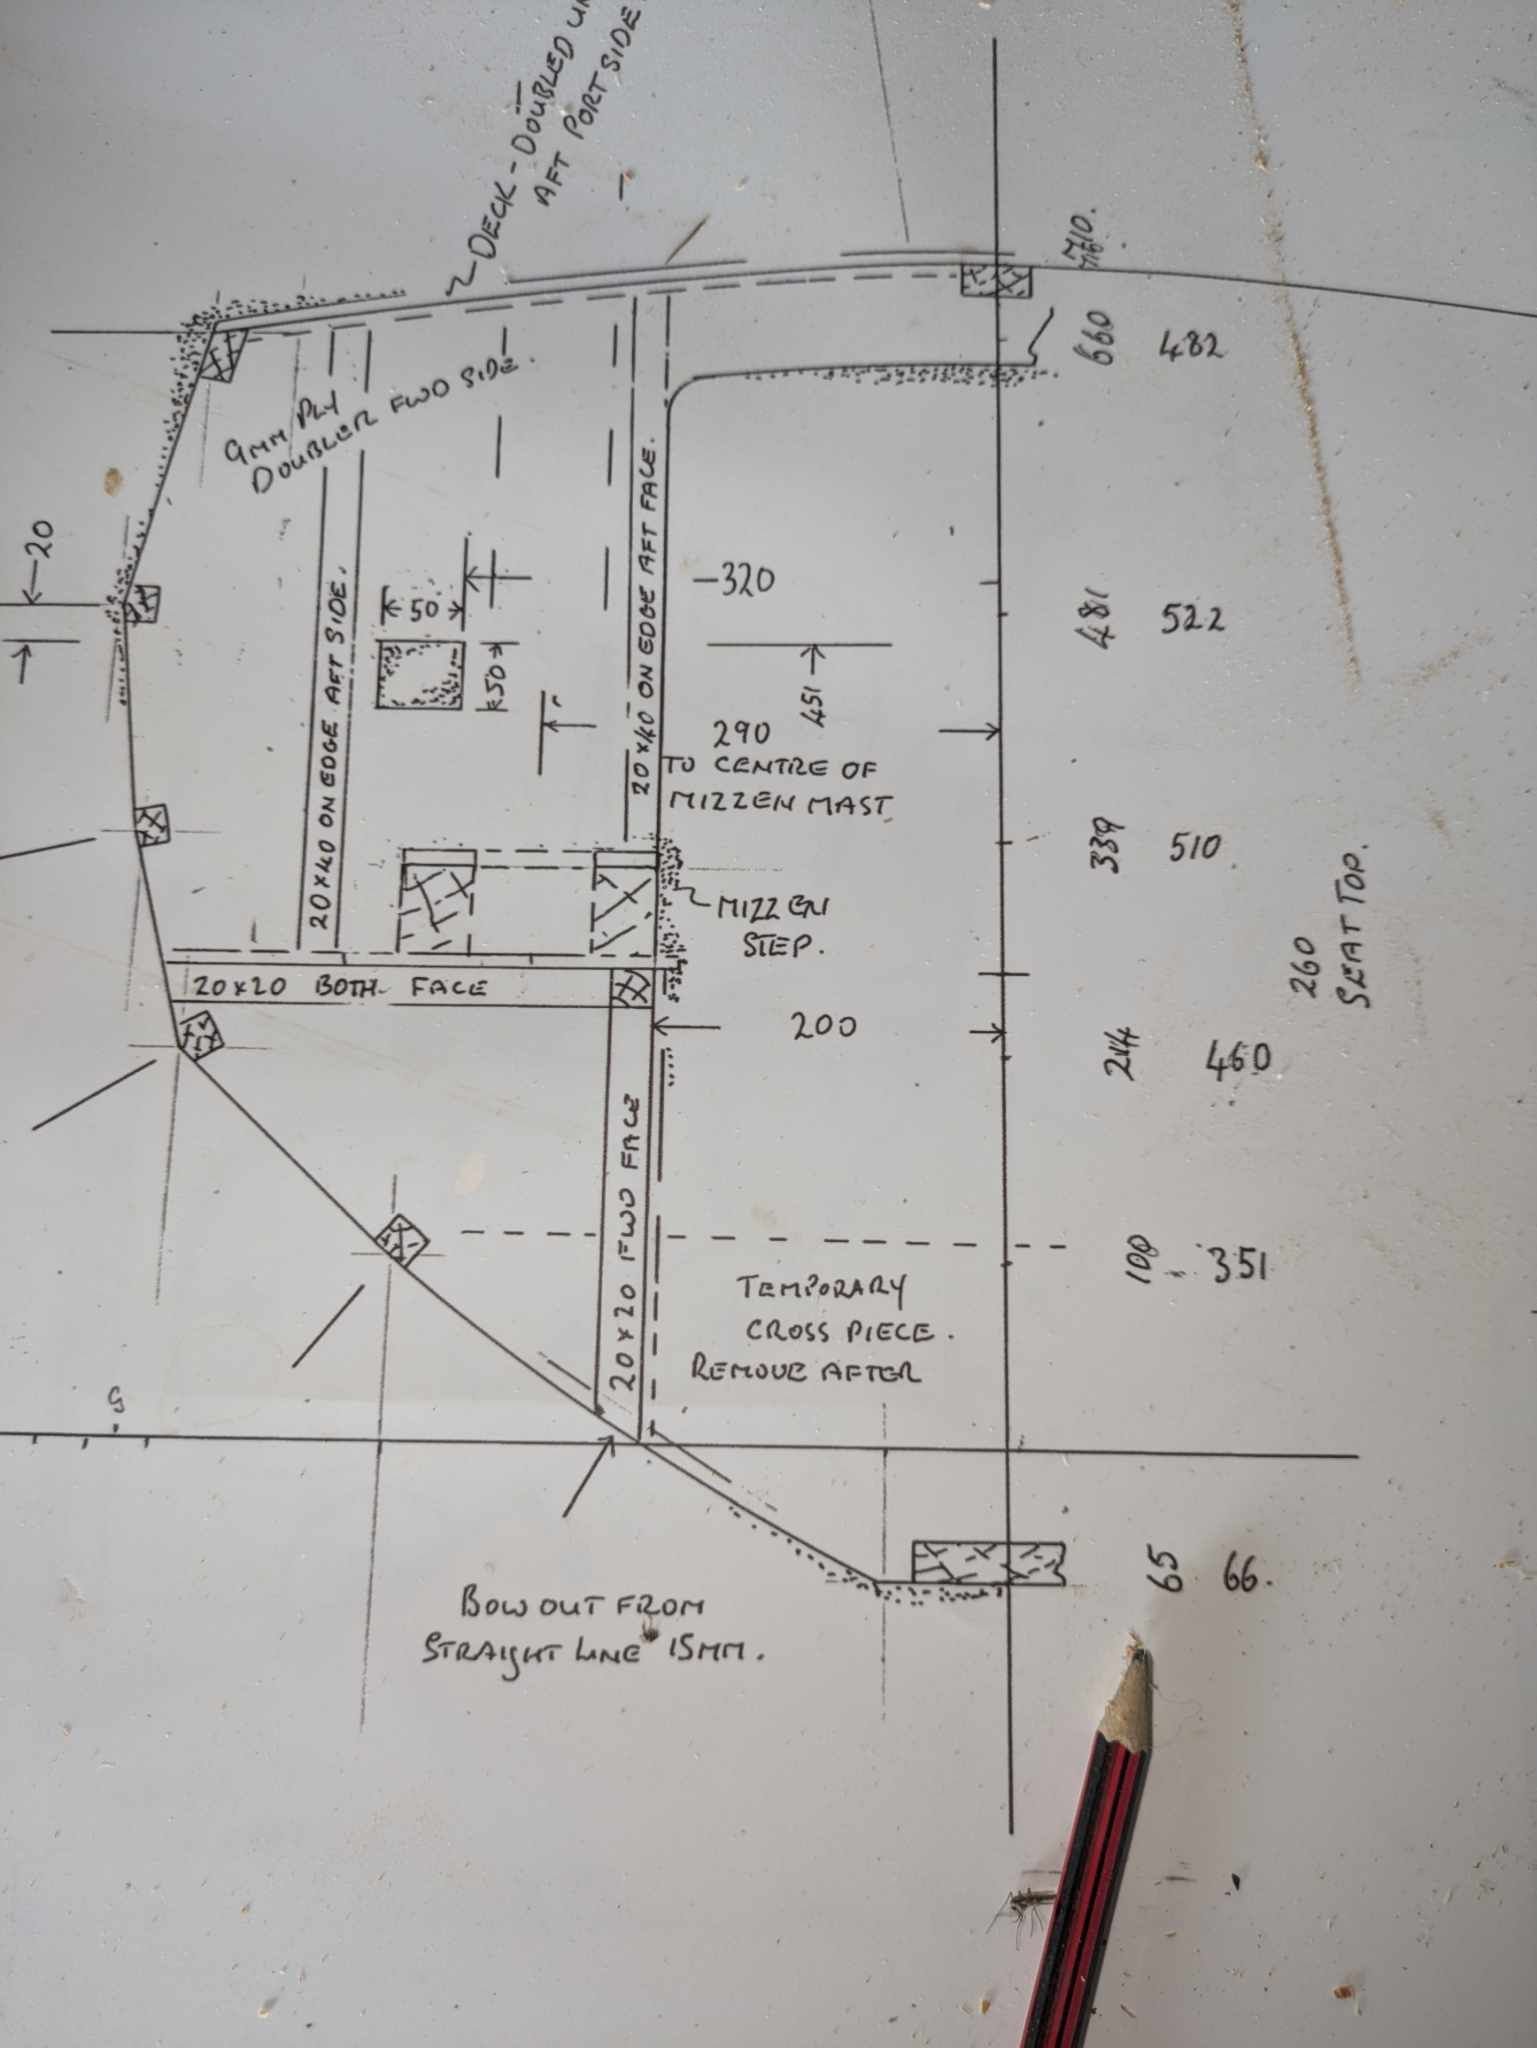
I'll give you an example of why I'm struggling with the plans but a seasoned boat builder wouldn't think twice about it. I'm trying to put in the final bulkhead and it doesn't rest on the keelson/bottom panel like the rest so has to hover in the air until stringers pass through it. q Problem is being a canoe stern it is quite a steep angle and it doesn't really just line up easily. So turning to the plans if you look at where the pencil is pointing to, that 65 stands for -65mm below the water line. Oh which I already have marked on the cb case so to fit it I can just make a temporary brace to hold it in the air and use a laser level from the water line across the whole frame. Frustrating for me but I'm sure somebody knowing what they are actually doing would laugh.

- 82 replies
-
- 10
-

-
Since getting my hands on the Whaler plans I have found a whole bunch of other plans that are so cleverly done and easy to follow but I guess it's better to learn the hard way. They are great plans but for the experienced boatbuilder so It's very much about the journey and not the destination with this one. Just today a whaler came up for sale on the west island for $8k. I'll be lucky to come in under double that when it's all done. Looks a nice rig and set up for a full compliment of crew.
-
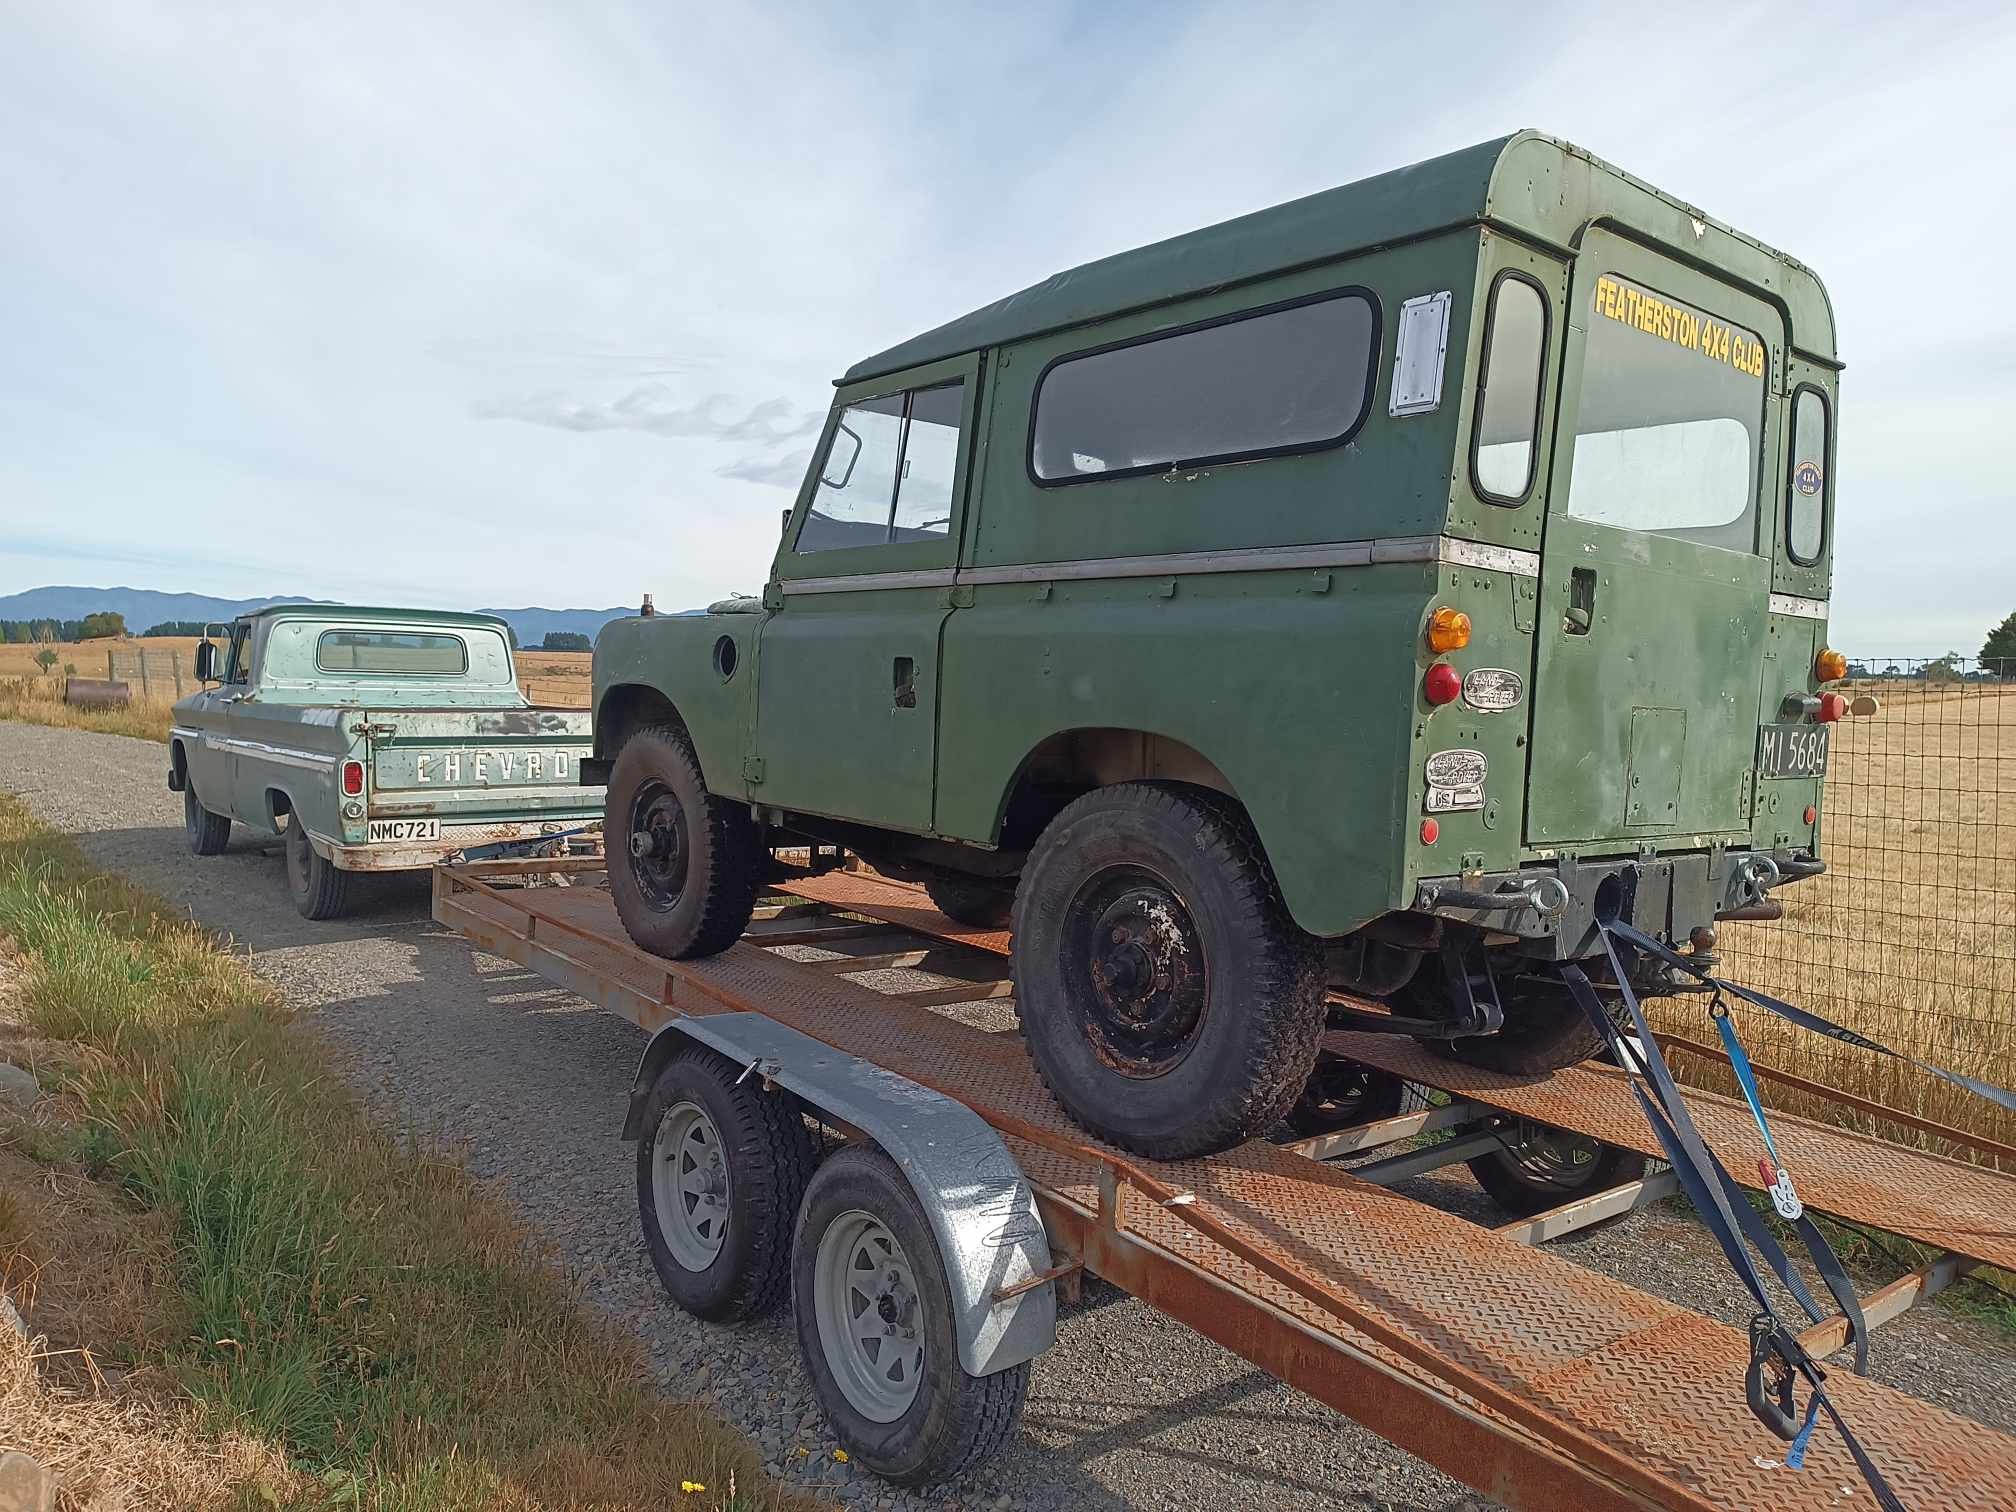
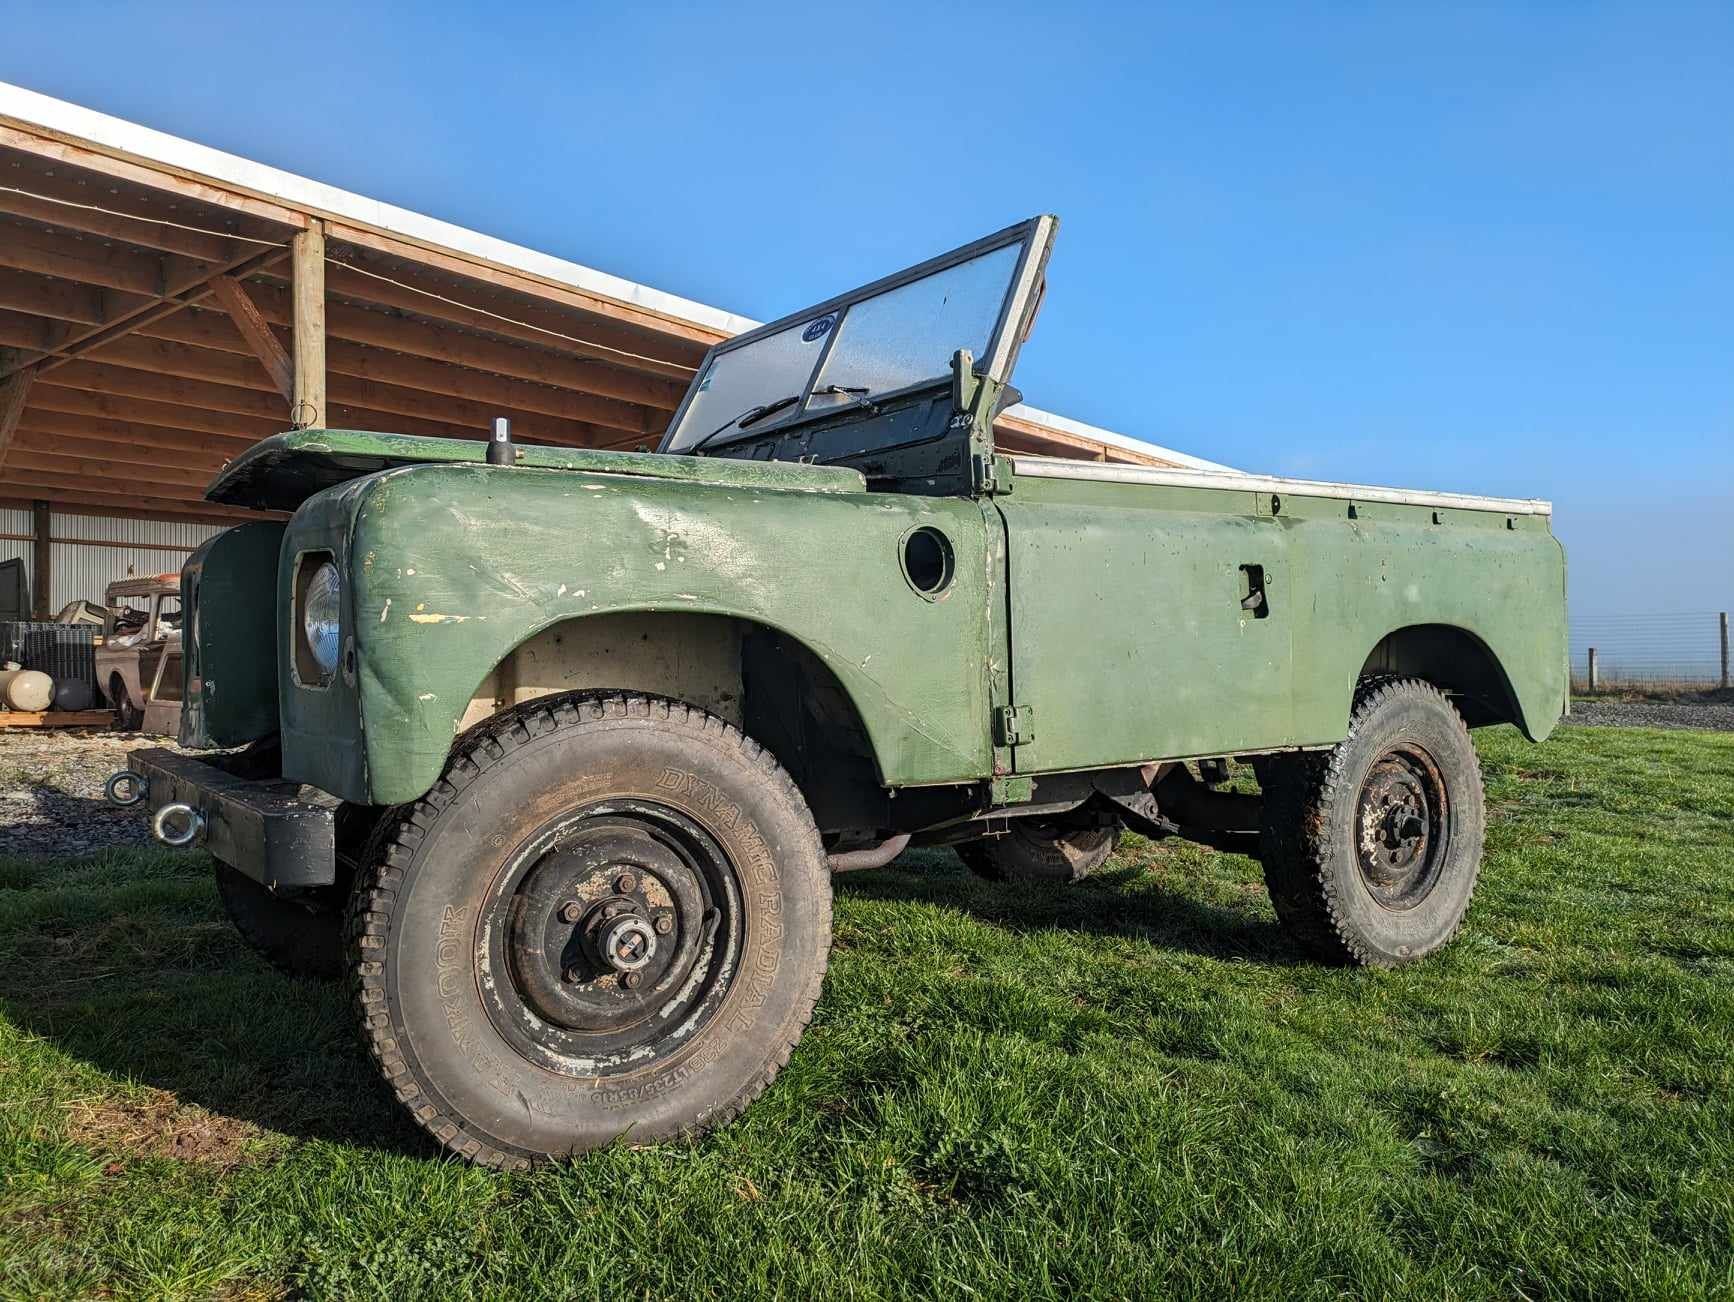
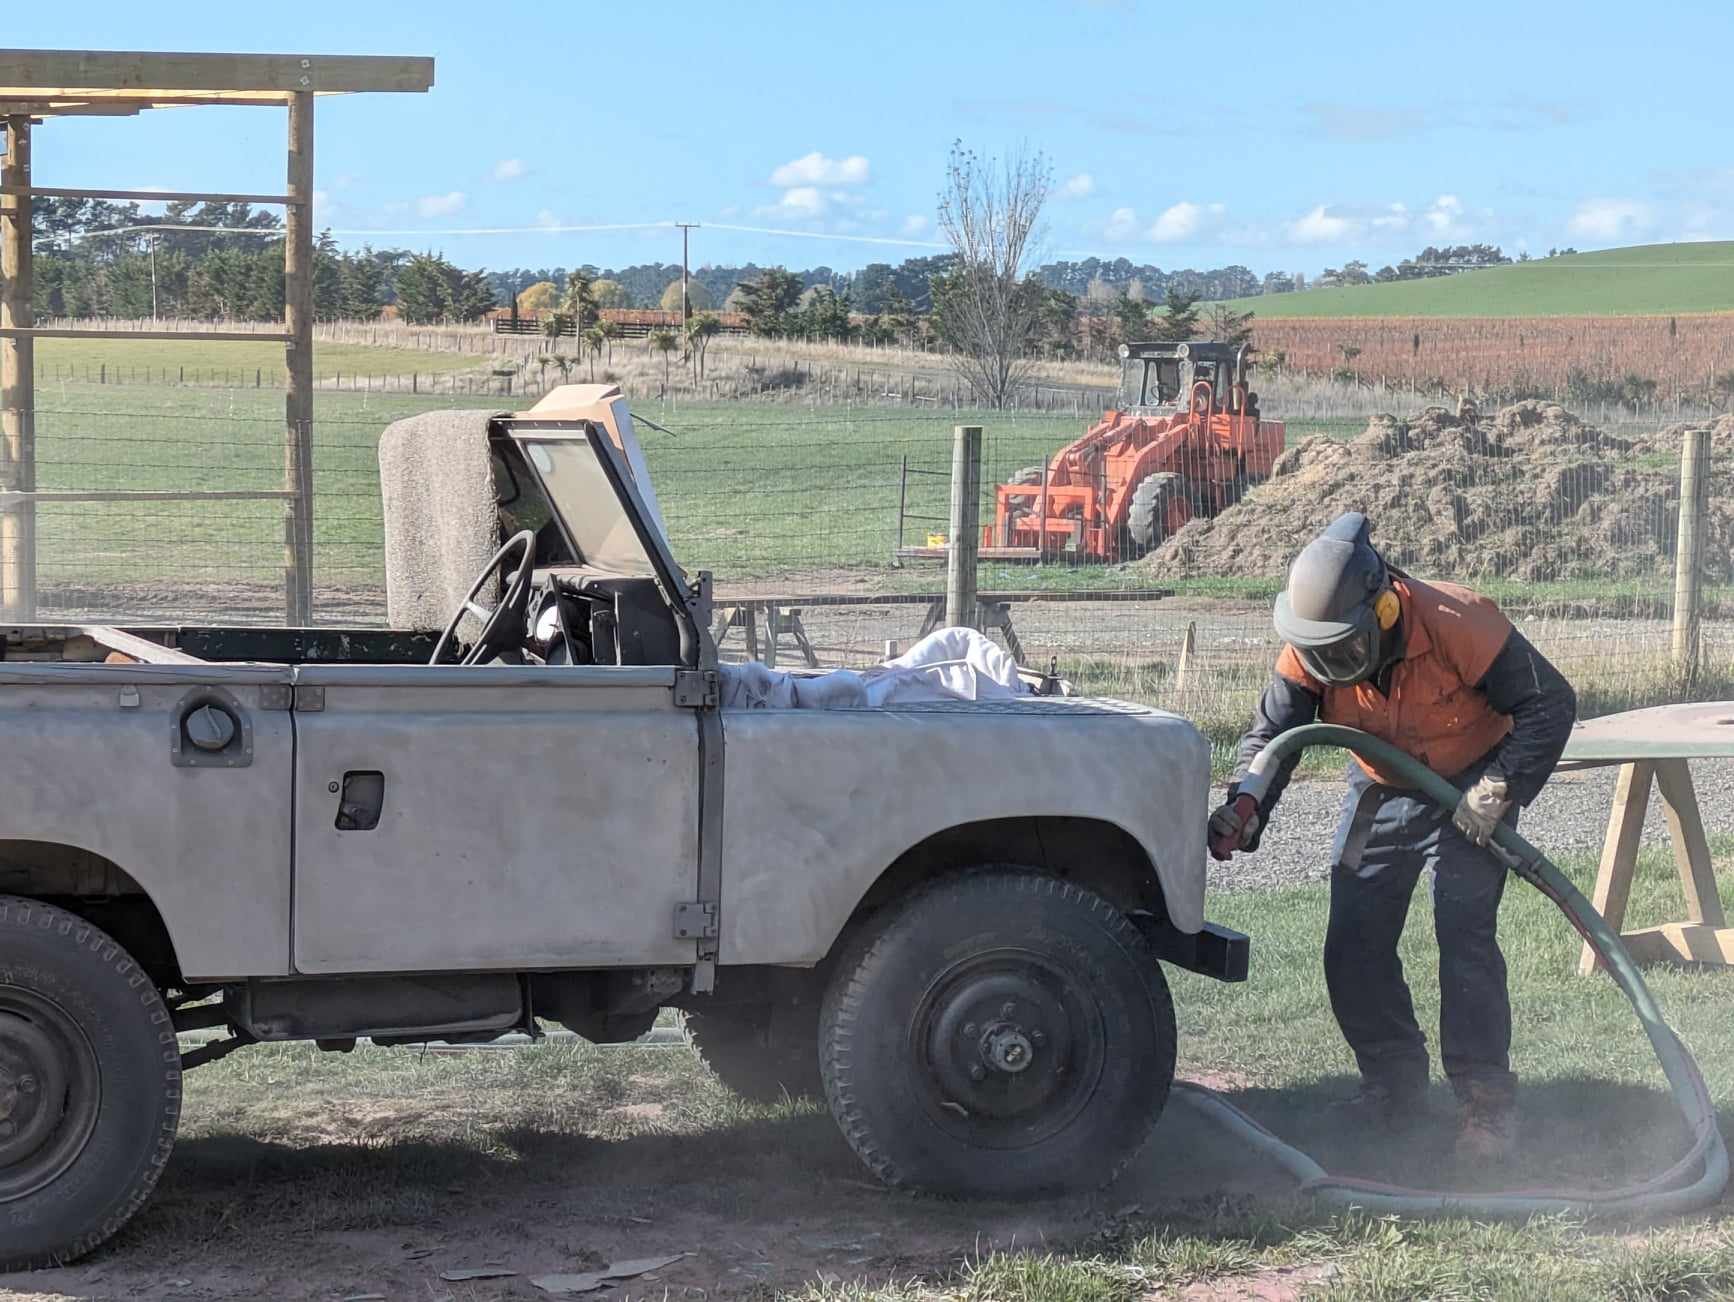
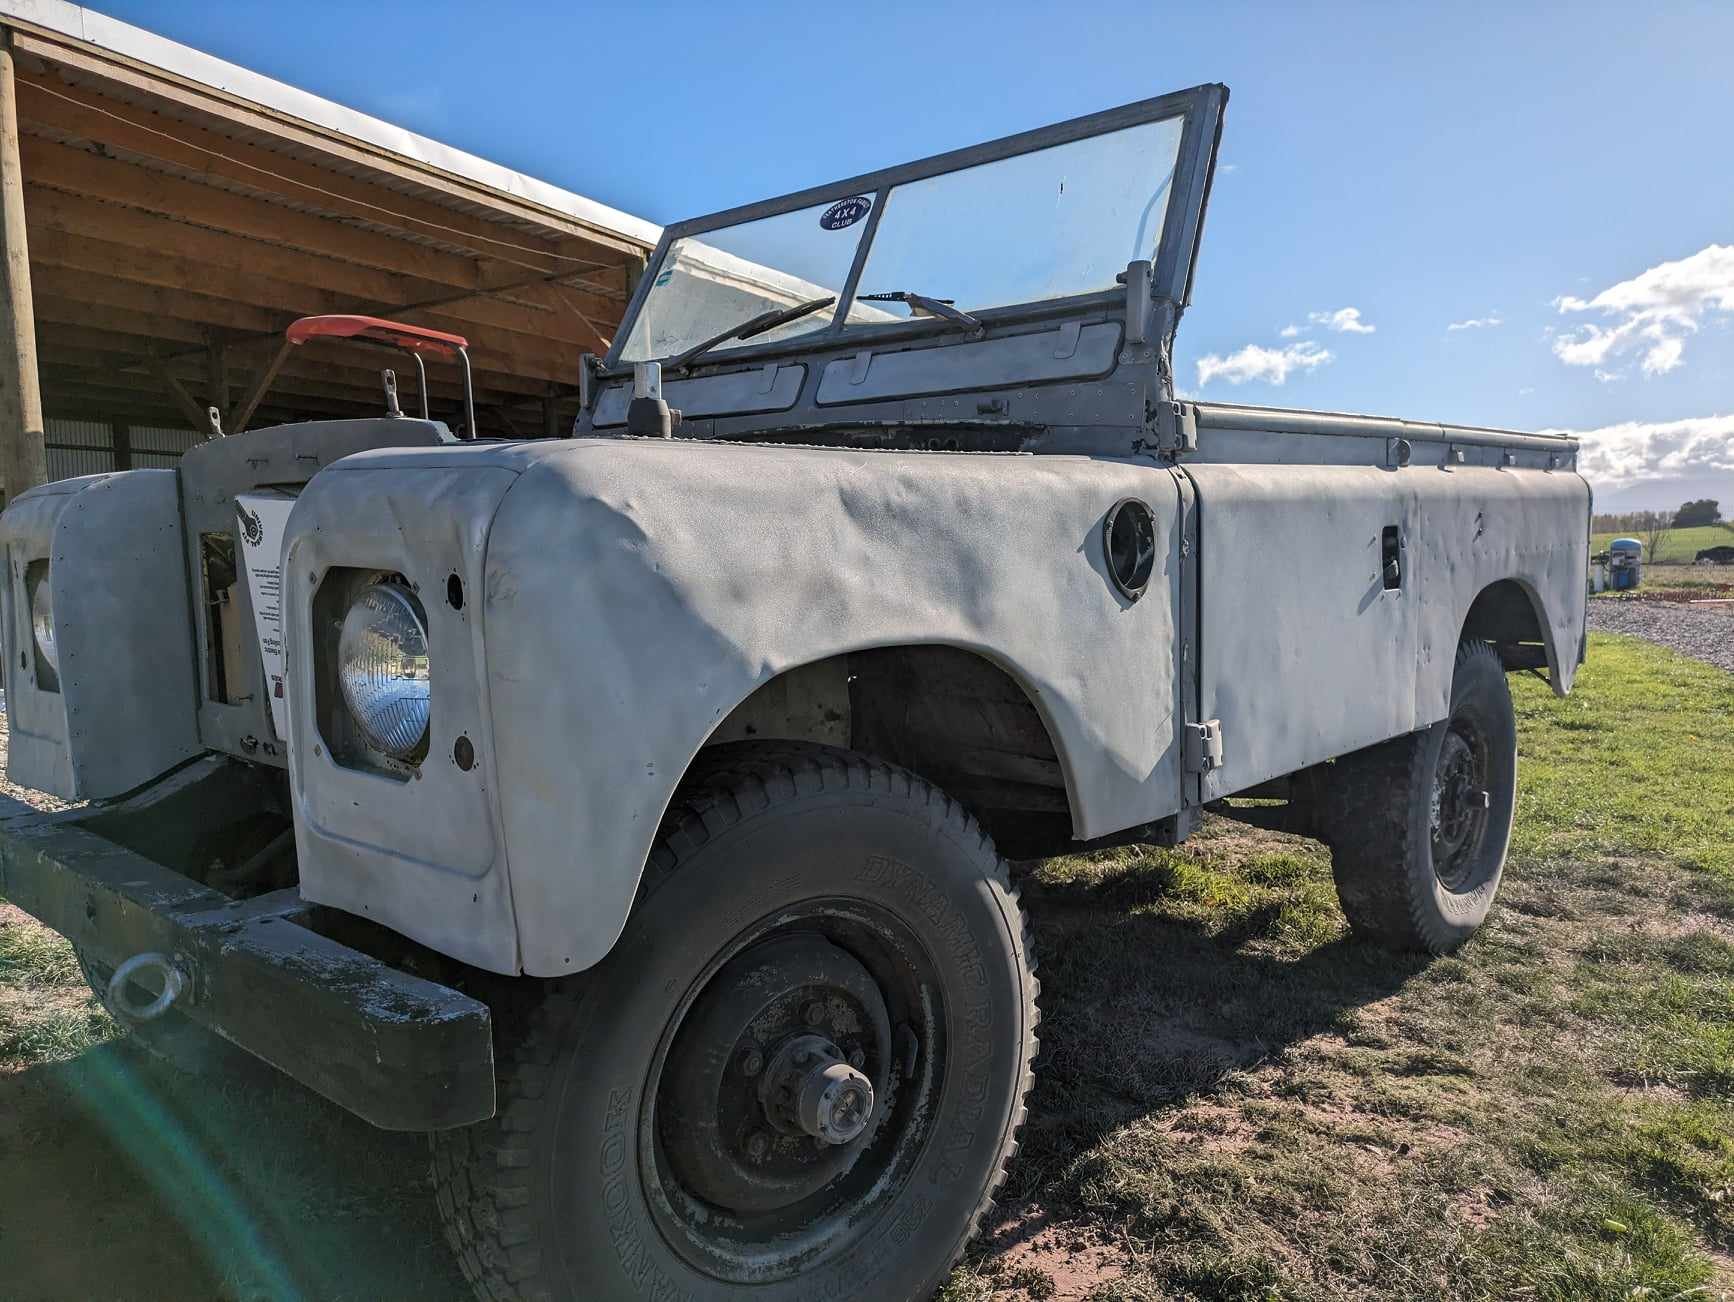
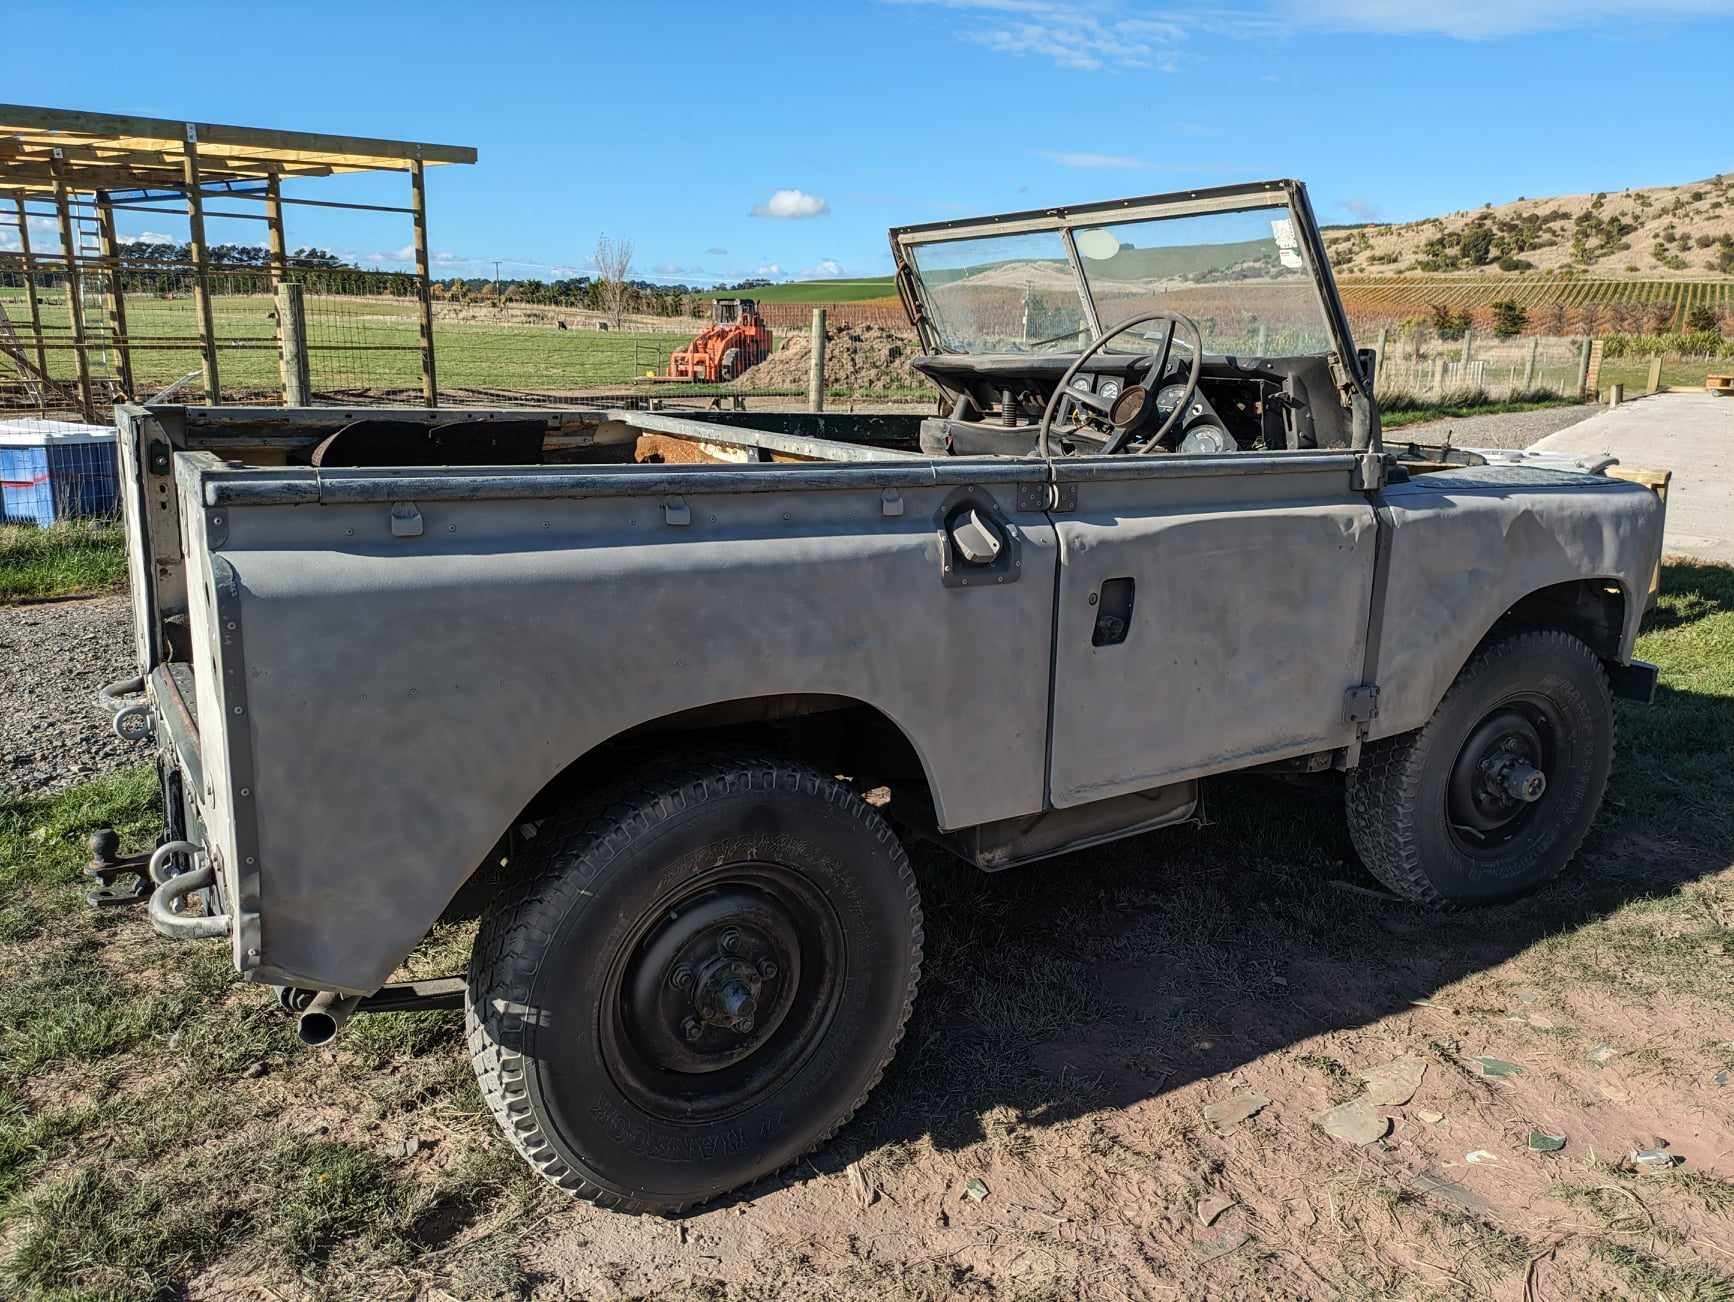
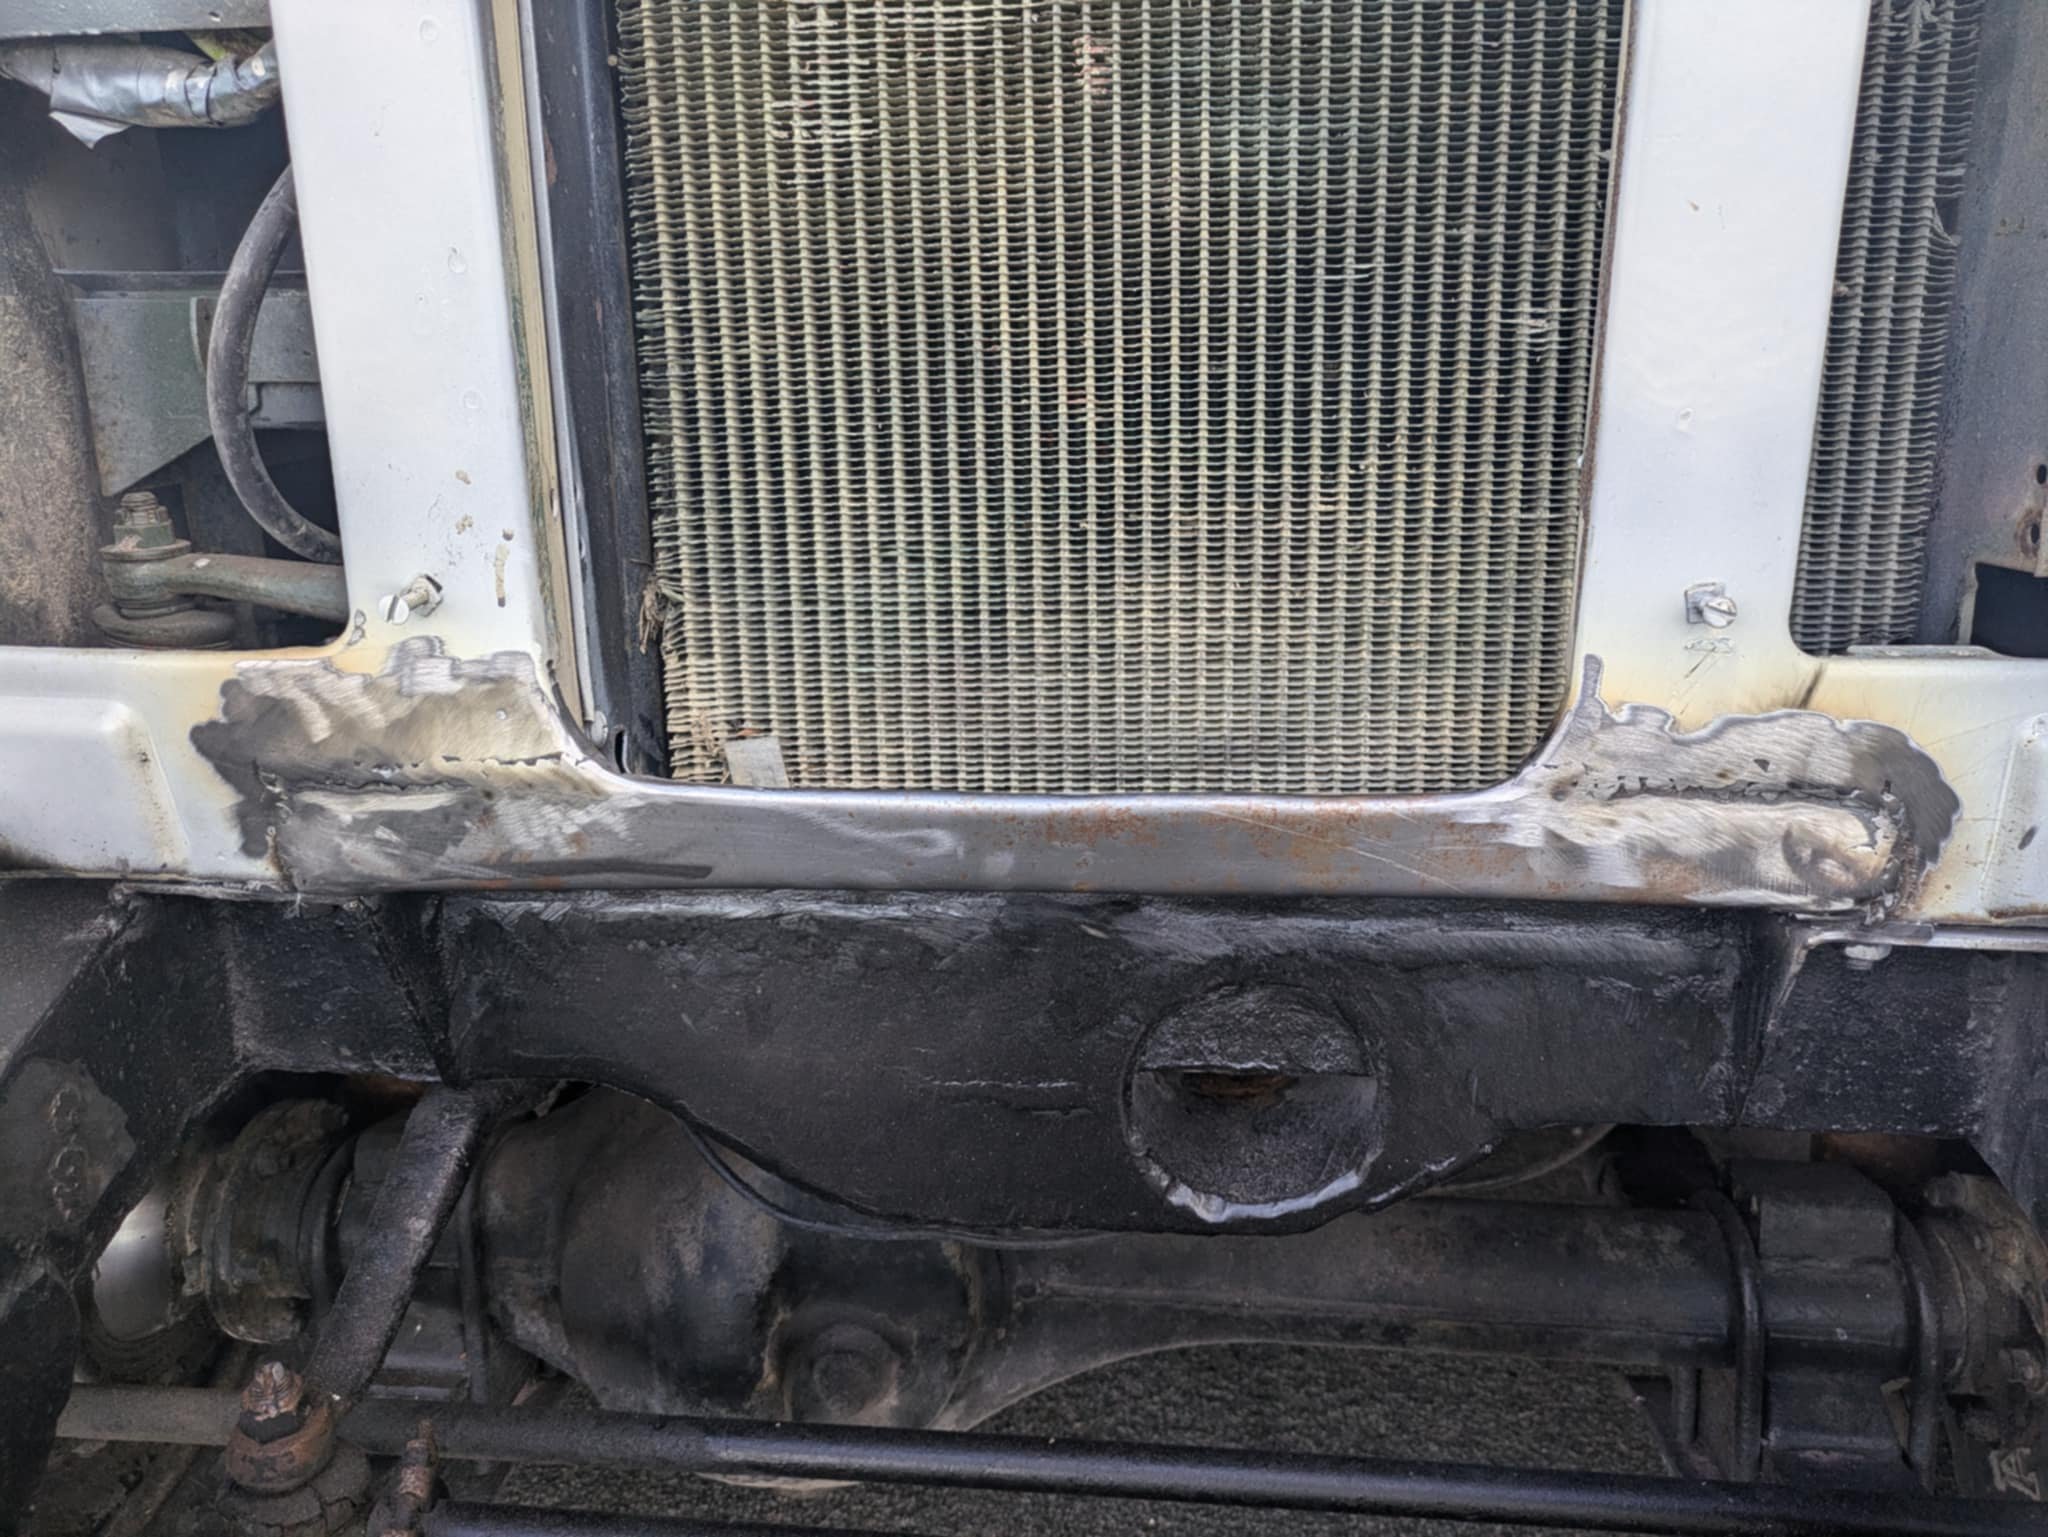
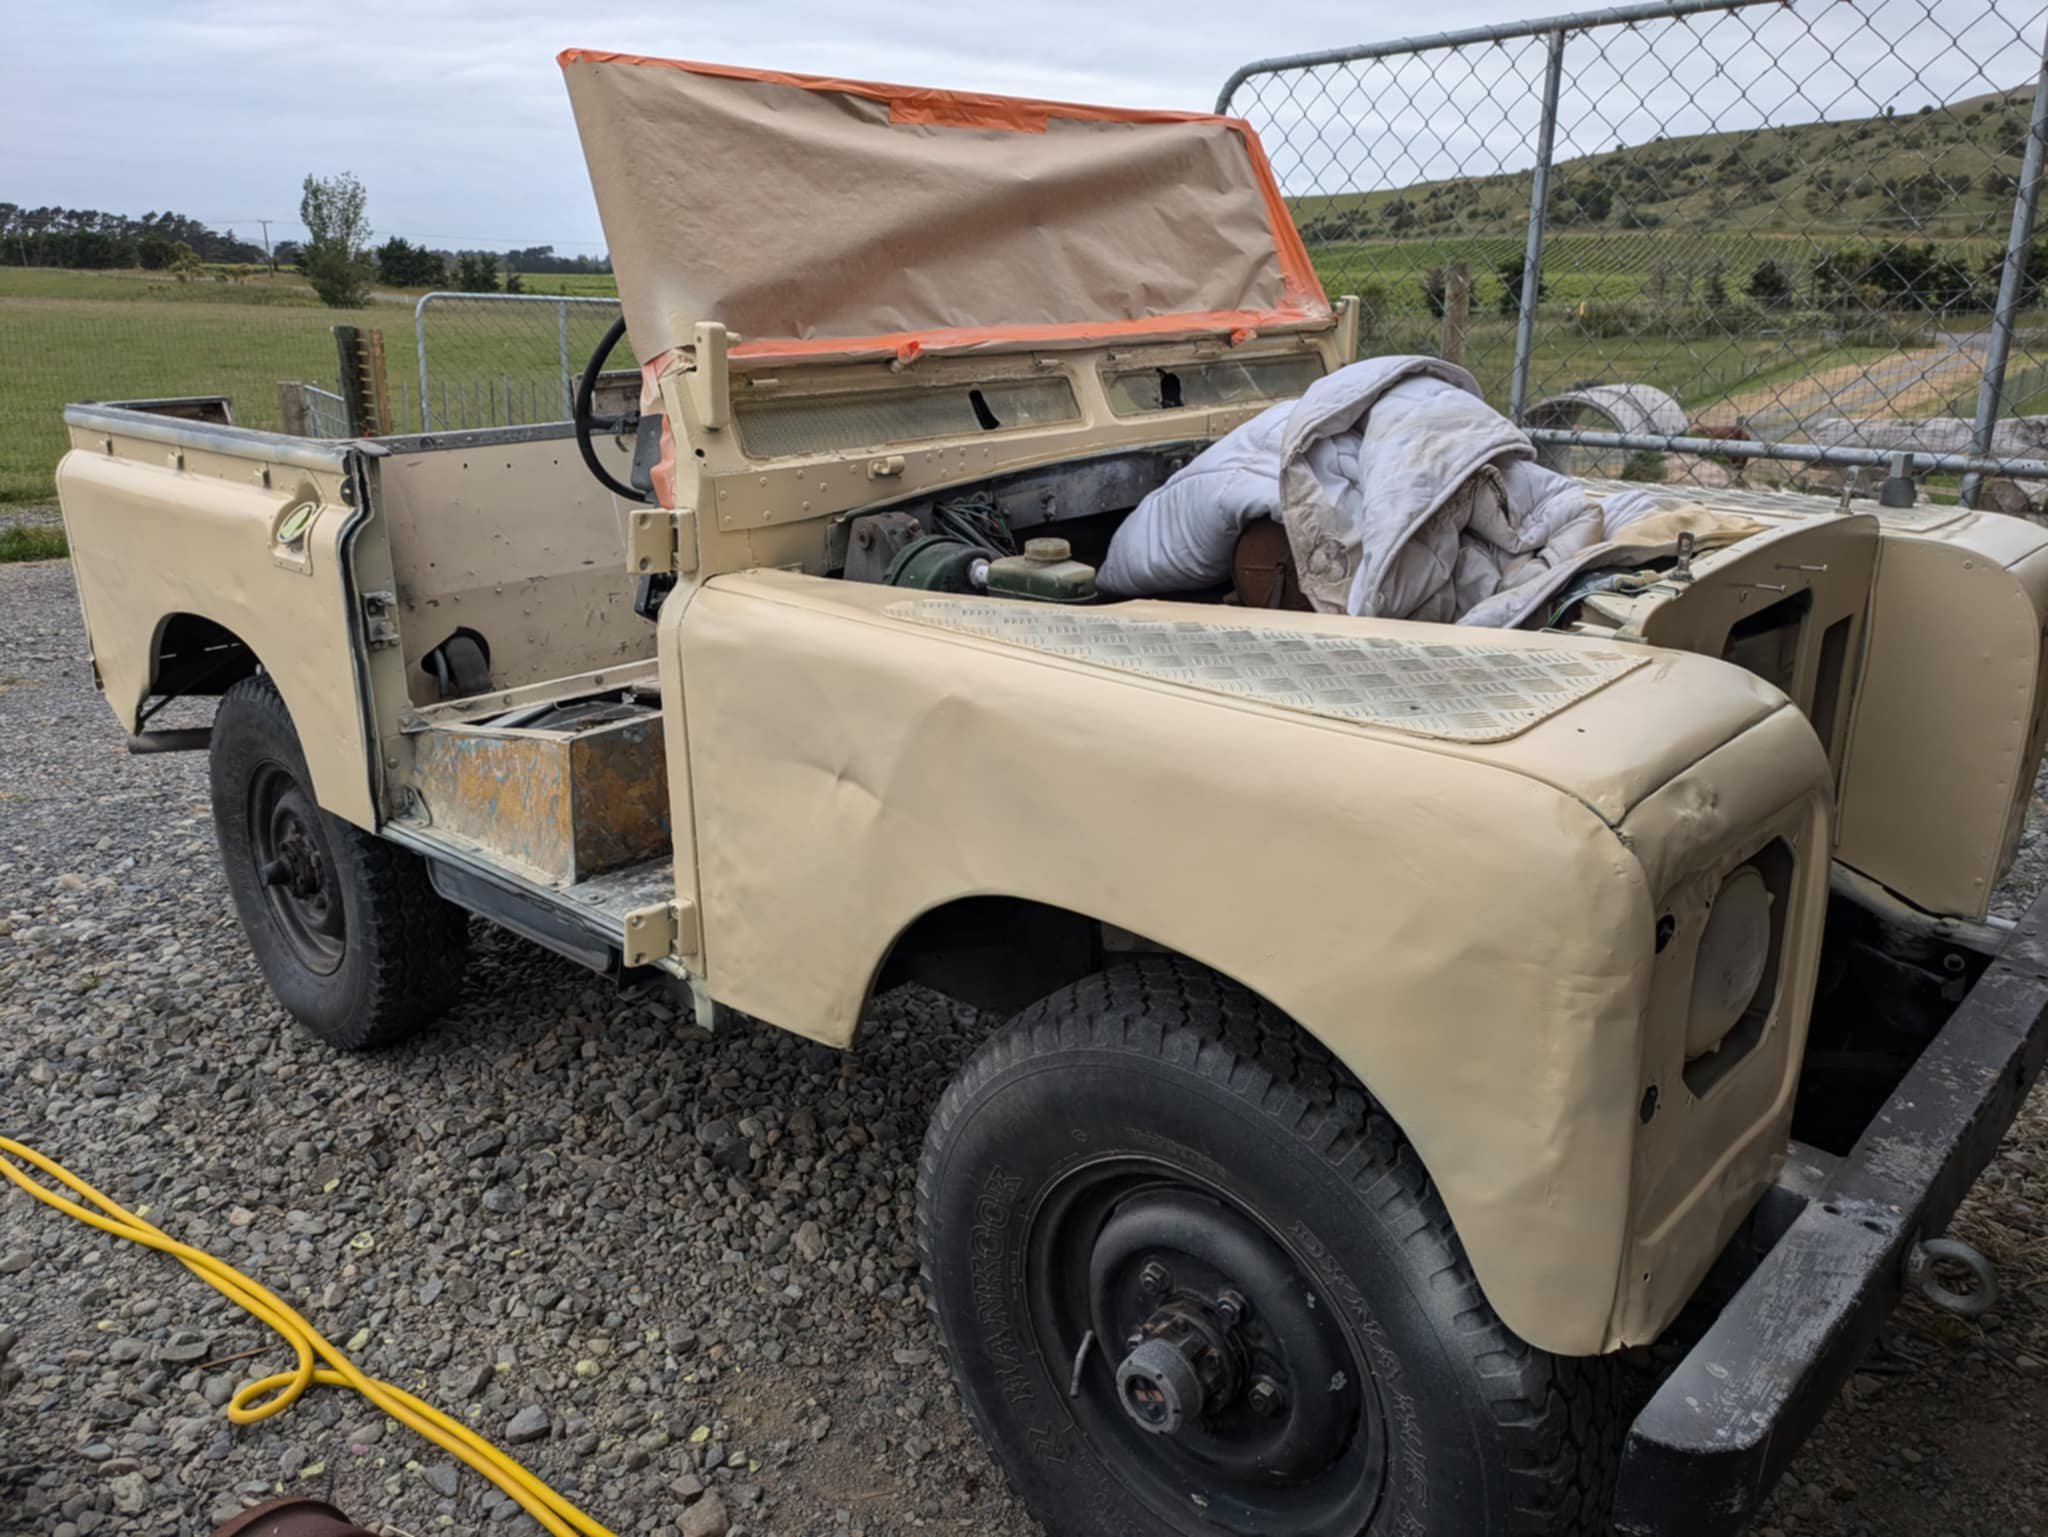
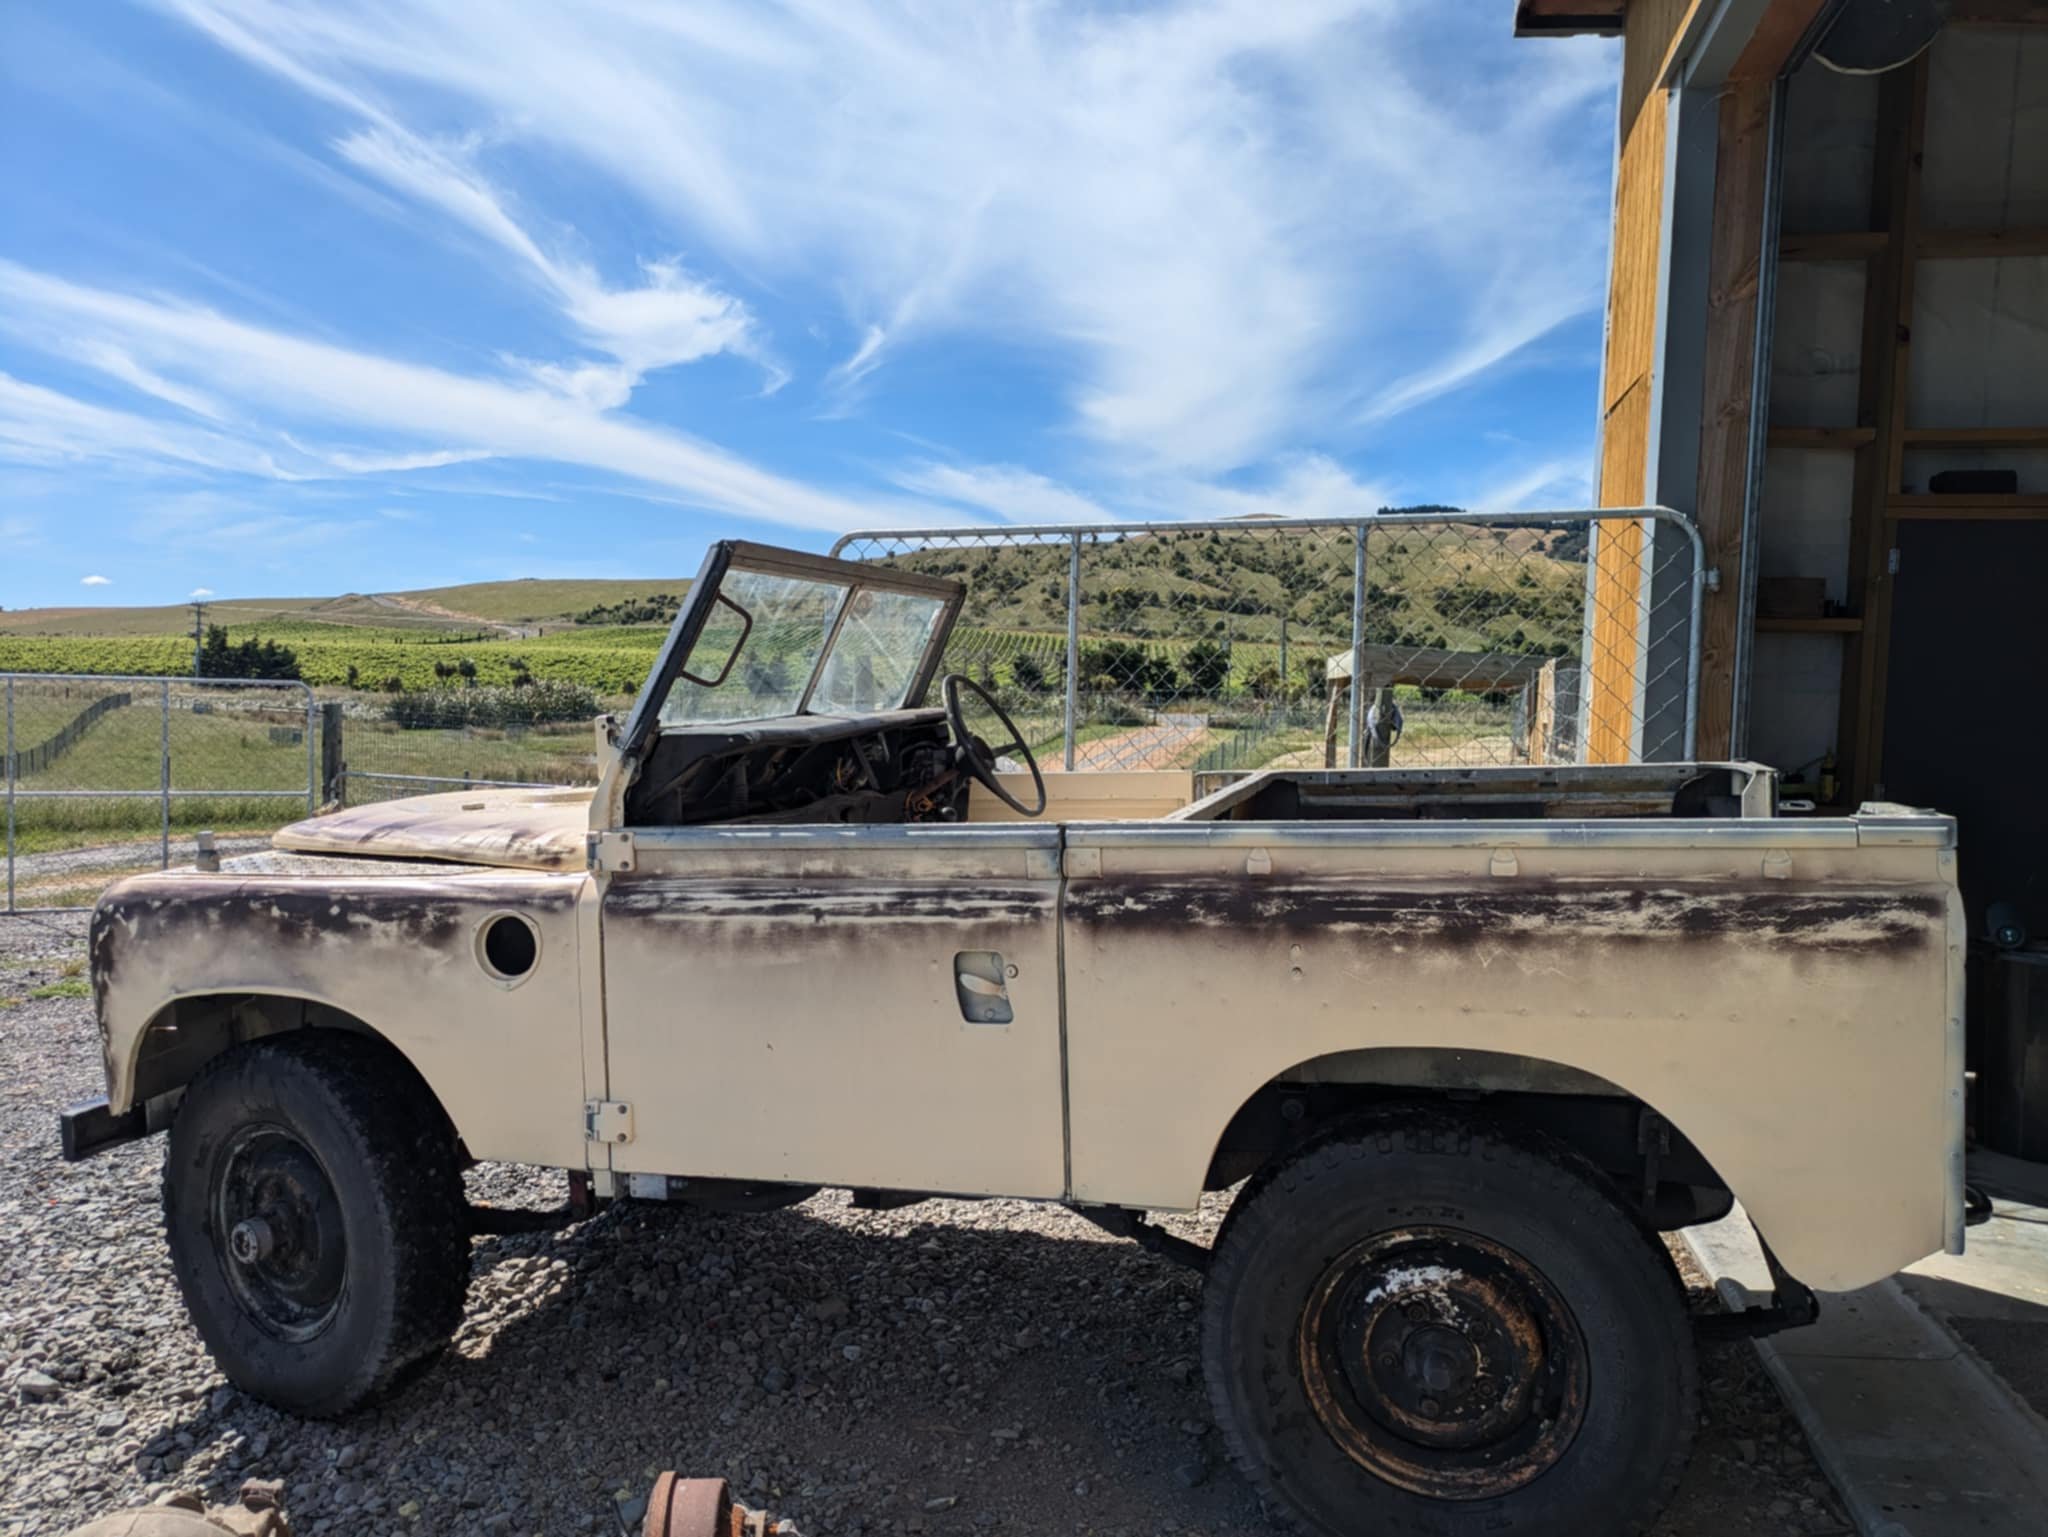
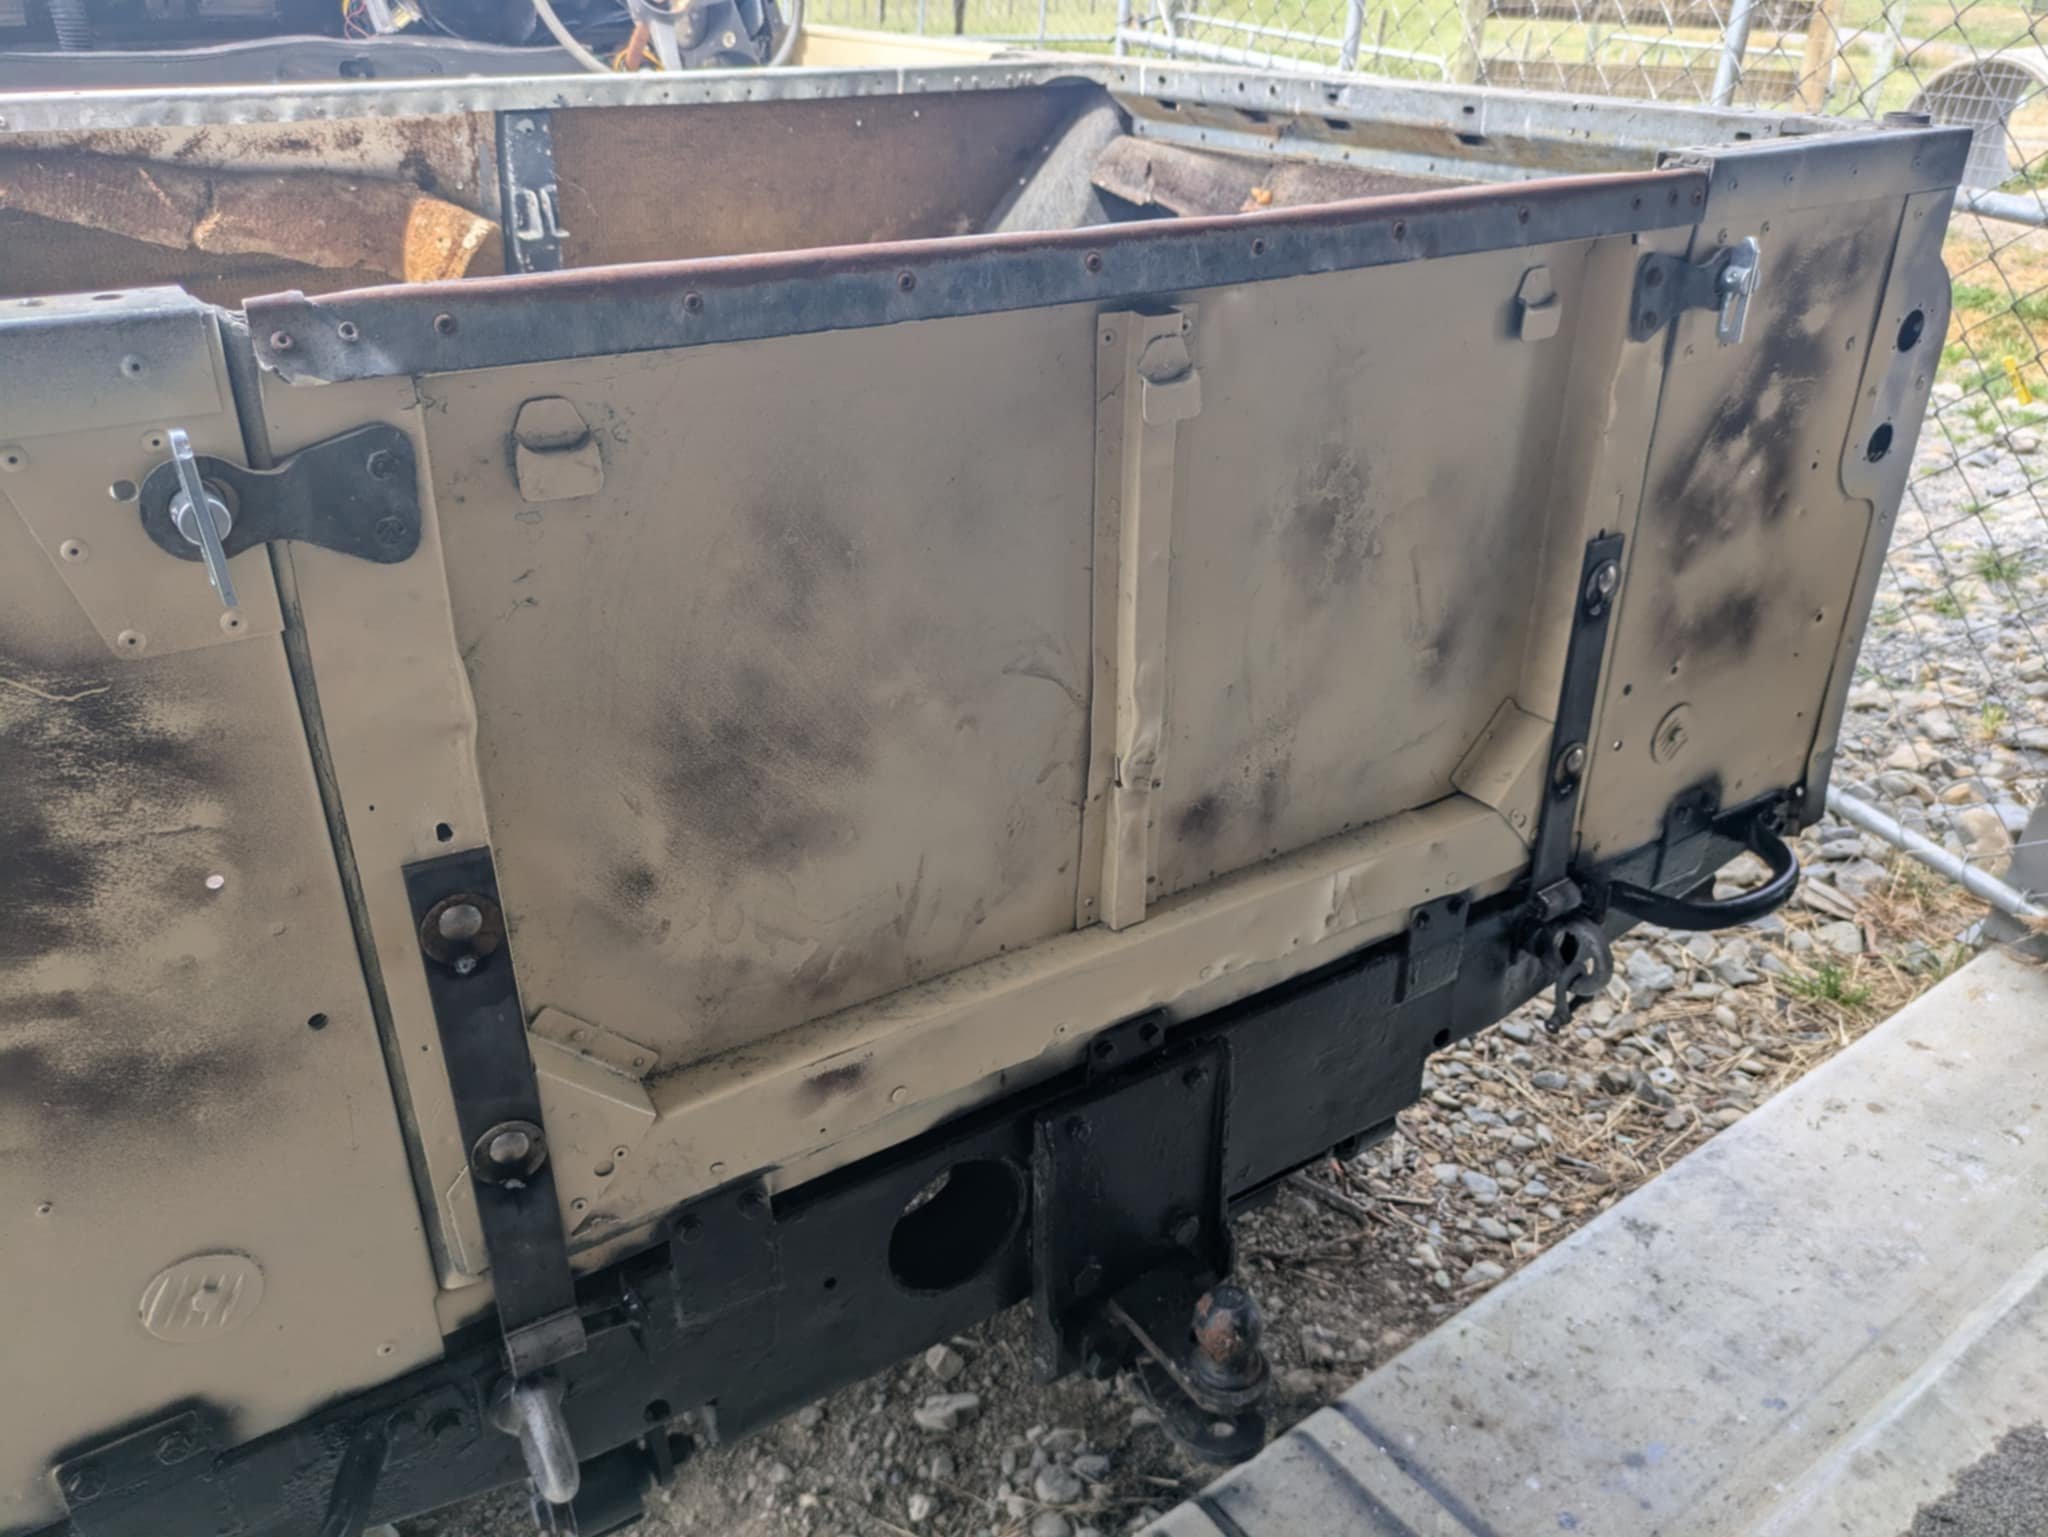
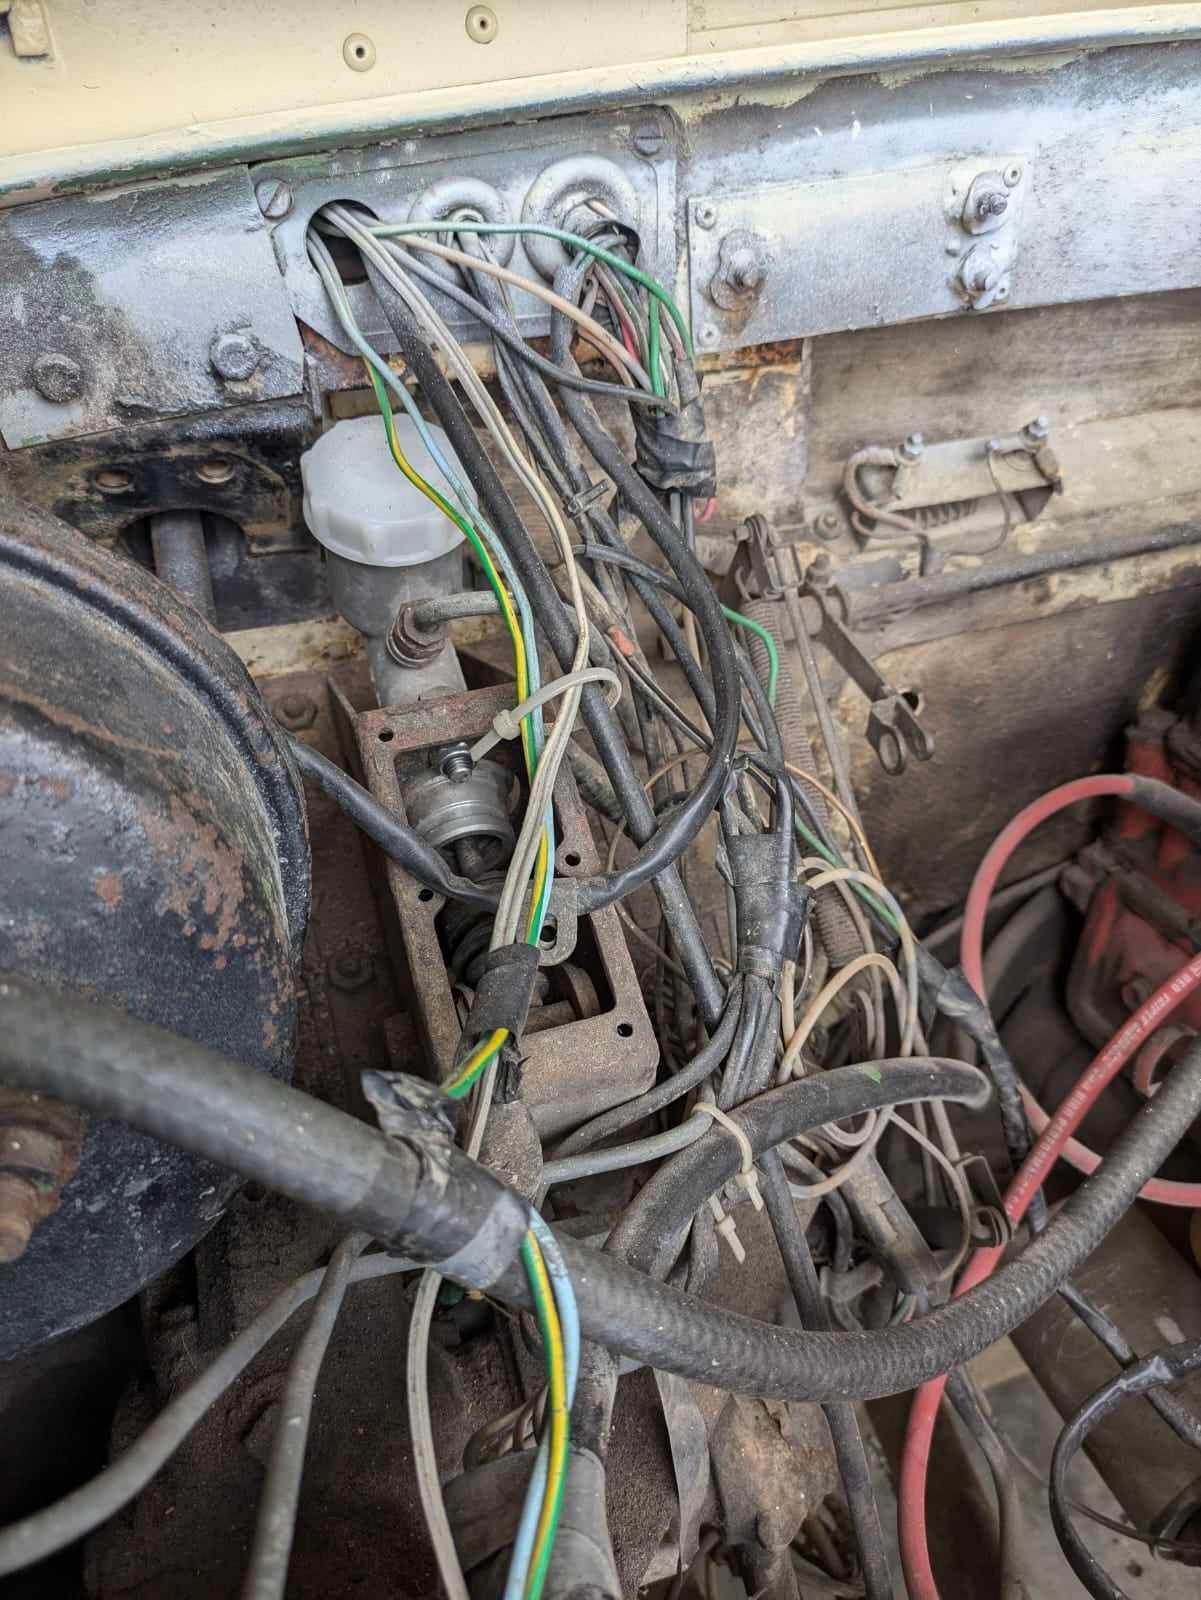
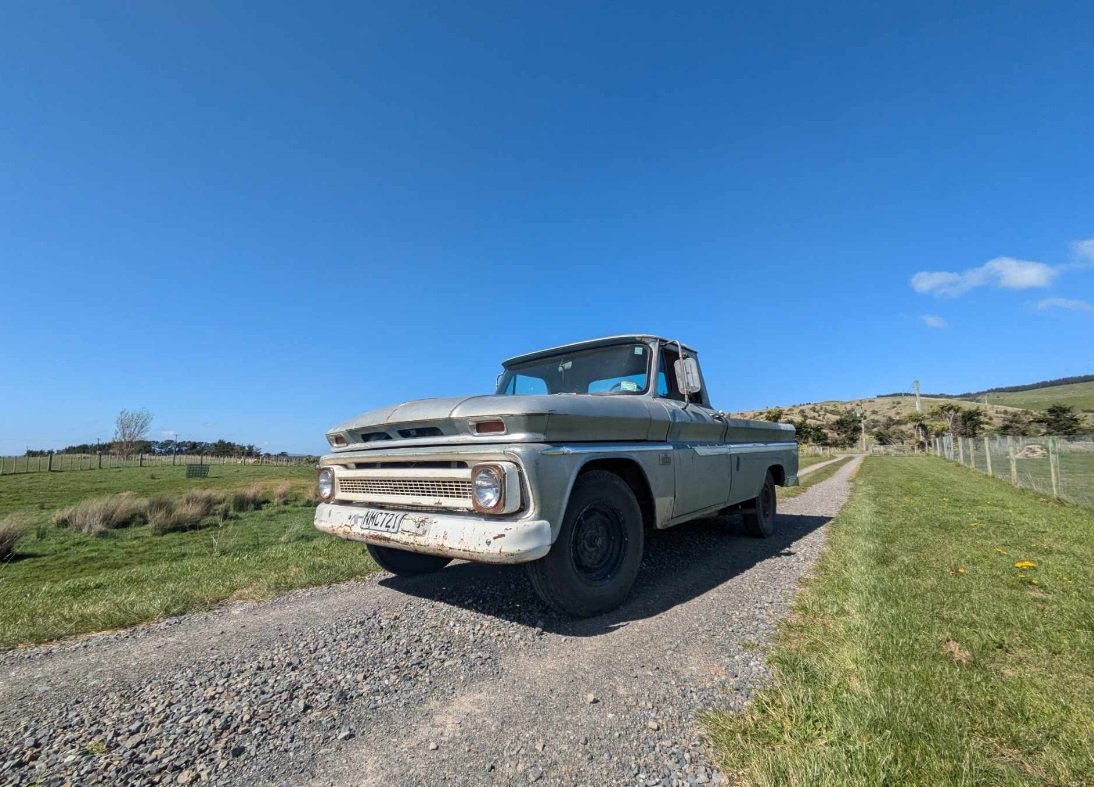
So the tow car is going to be split into two. Mostly because one will be ready before the other and by the time the boat floats (if it floats at all) I'm not sure which one I'll have. One is a series 3 landy for crusty boat ramps and the other is a 66 chev ute which is getting a BMW M57 swap. The landy was found locally in Featherston from an older chap who's son owned it and from what I could tell was no longer among us. Didn't want to pry. It has a 186 red motor in it and like all good things it came as a non runner and dragged it home behind the C20. The engine didn't need much to get it to run correctly. So that involved a new electronic dizzy and a rebuild of the strommy carb. The clutch was rooted but thankfully a trailer master bolted right in and a quick bleed and we had gears. Brakes were reasonably good and gave them new fluids and a bleed. Haven't driven it out of the gate yet so aren't sure if it needs a balance yet but that shouldn't be hard. Spent quite a bit of time working on the body and that was about as fun as it sounds. For a mostly alloy body there sure was a lot of rust to cut out. To get to that point however the first thing I did after taking the roof off was to get the whole thing blasted. It was covered in about 10mm of bog around the entire vehicle and it was starting to crack and peel in places which I hated. After that was done I had to start cutting the rust out and weld in fresh steel. Thankfully it's getting the weatherbeaten look to match my face so I didn't have to worry about making it look nice. Once that was done, it was covered the etch primer with some satin 2k top coat. Went for the limestone which was the original colour this car was going by what lay underneath. It looked awful being so bumpy and having new paint so I "weathered" it with some brown oxide primer and then sanded that back. The compressor died during that activity so I'm not sure if I'll put on a matte clear coat over the top or just get on with my life. I was very lucky that @CaMpylobacter gave me a free tailgate that matched the rest of the snotted body and fitted on well. I have a truck cab in the shed I'll eventually put on it when it gets a little cooler. Was able to weld on some trailer latches I had laying around and got some locking pins button it up. Present activities are to do with a full rewire. The old loom seemed to have 1.5 looms in there and when I waved the idiot light in the engine bay or behind the dash it lit up everywhere. I have no idea how it didn't short before but I assume that rust wasn't a good enough conductor. I am putting in a new relay and fuse block and will run everything from/through those to keep things reliable. I don't mind wiring and am lucky that there are so few circuits that I actually need.
- 82 replies
-
- 19
-
-
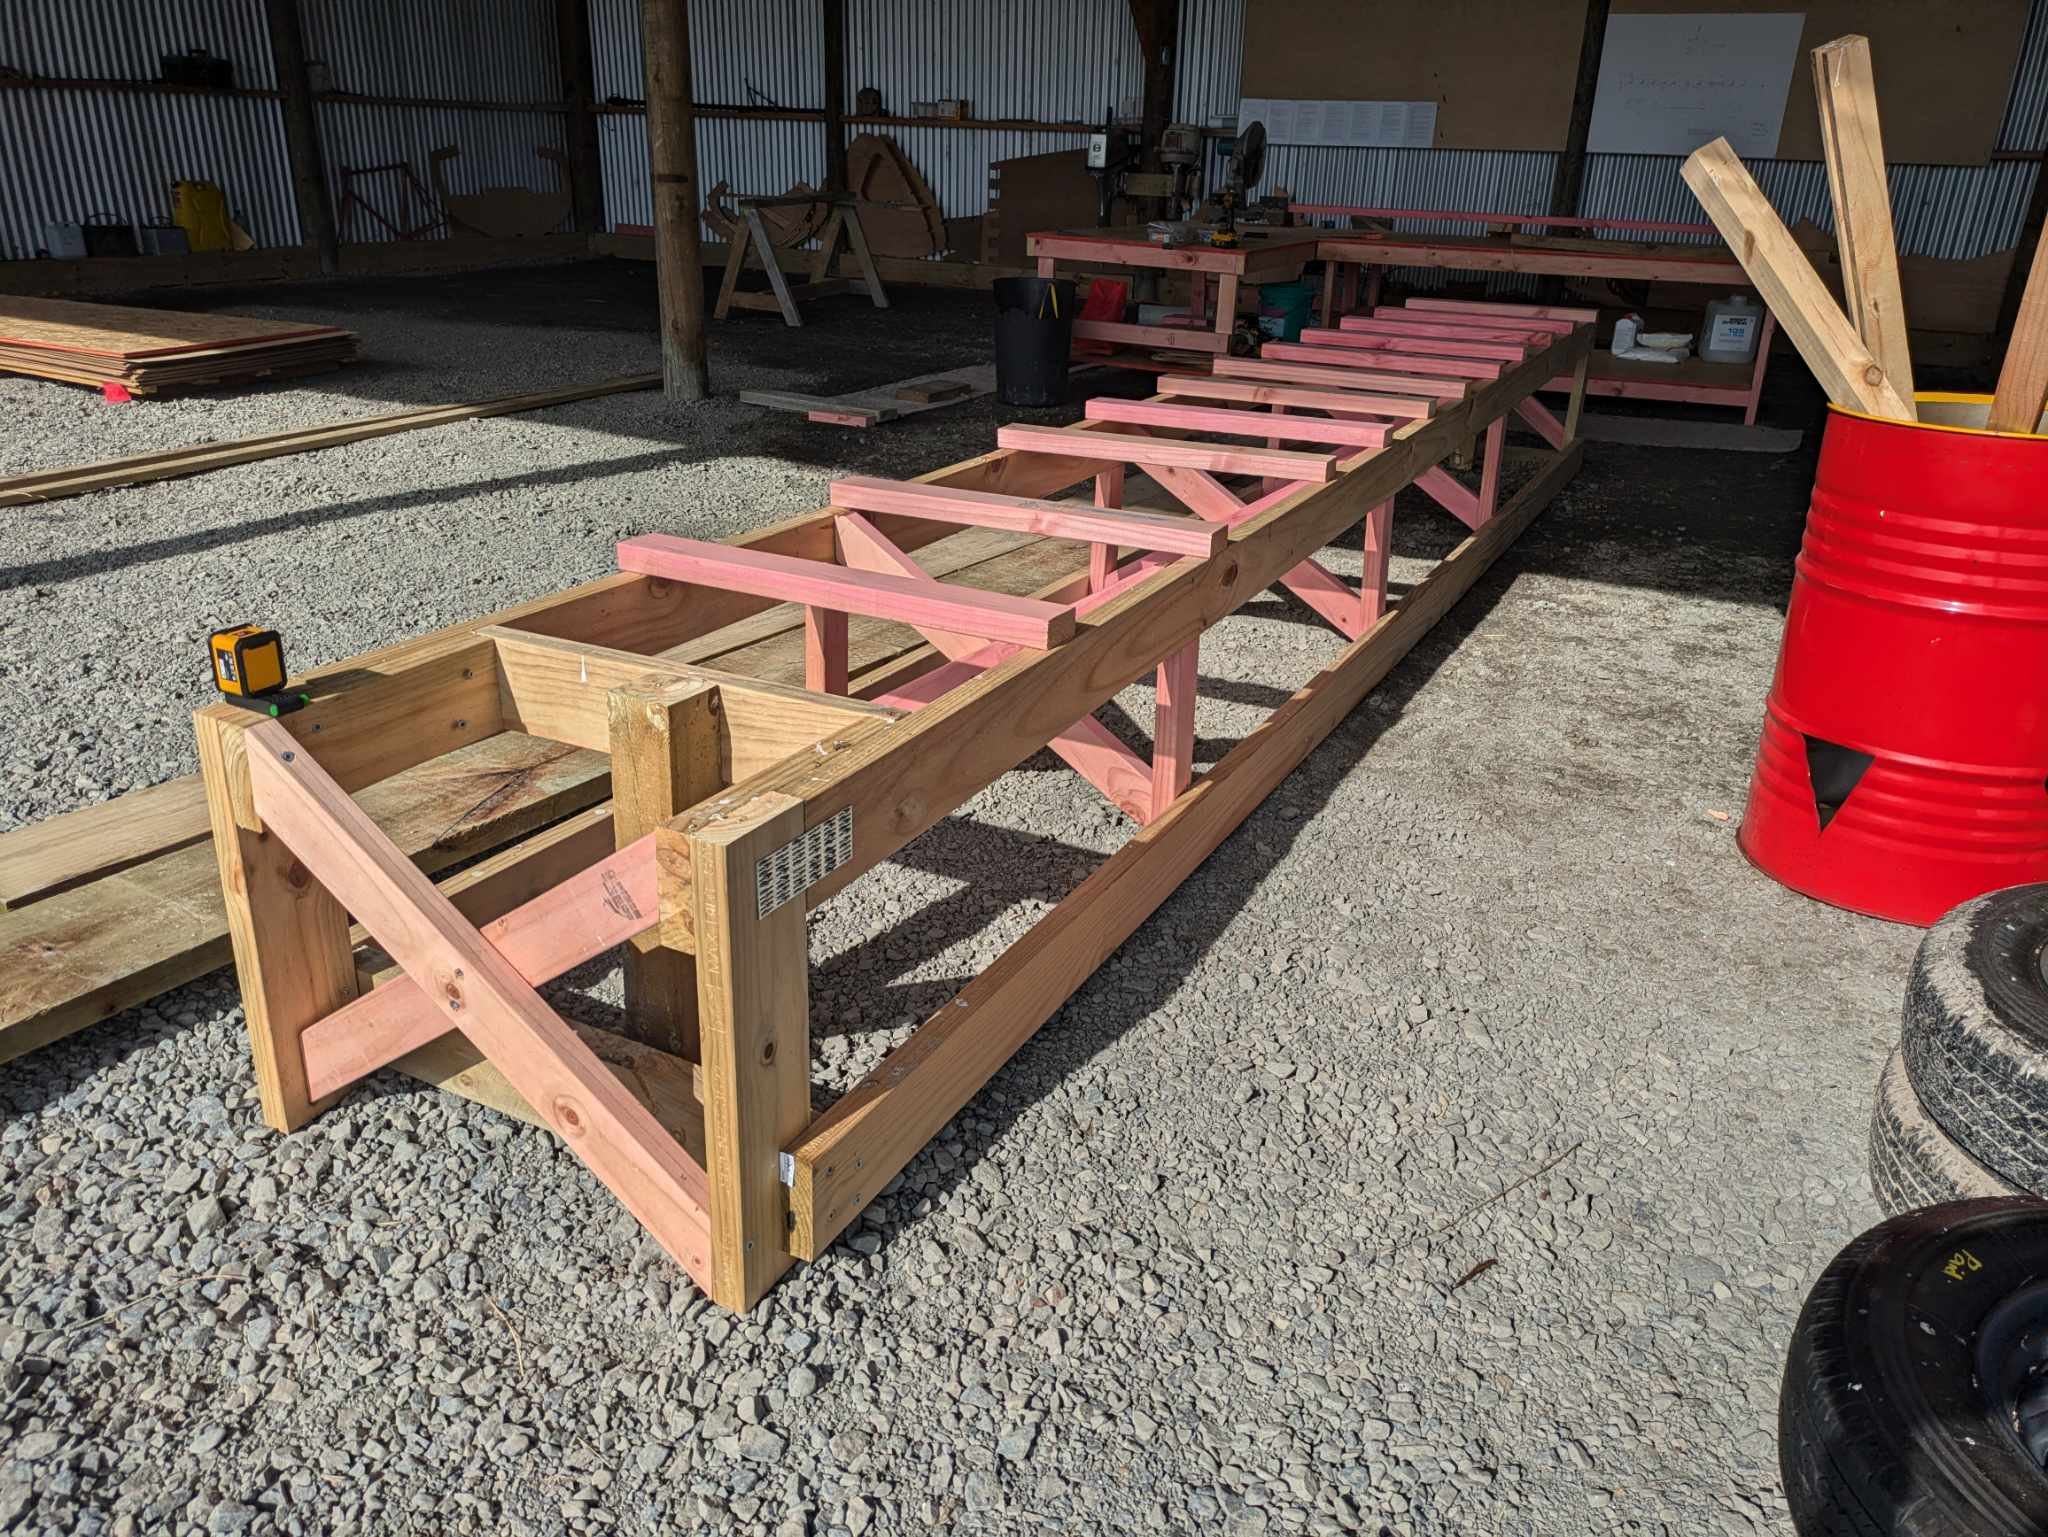
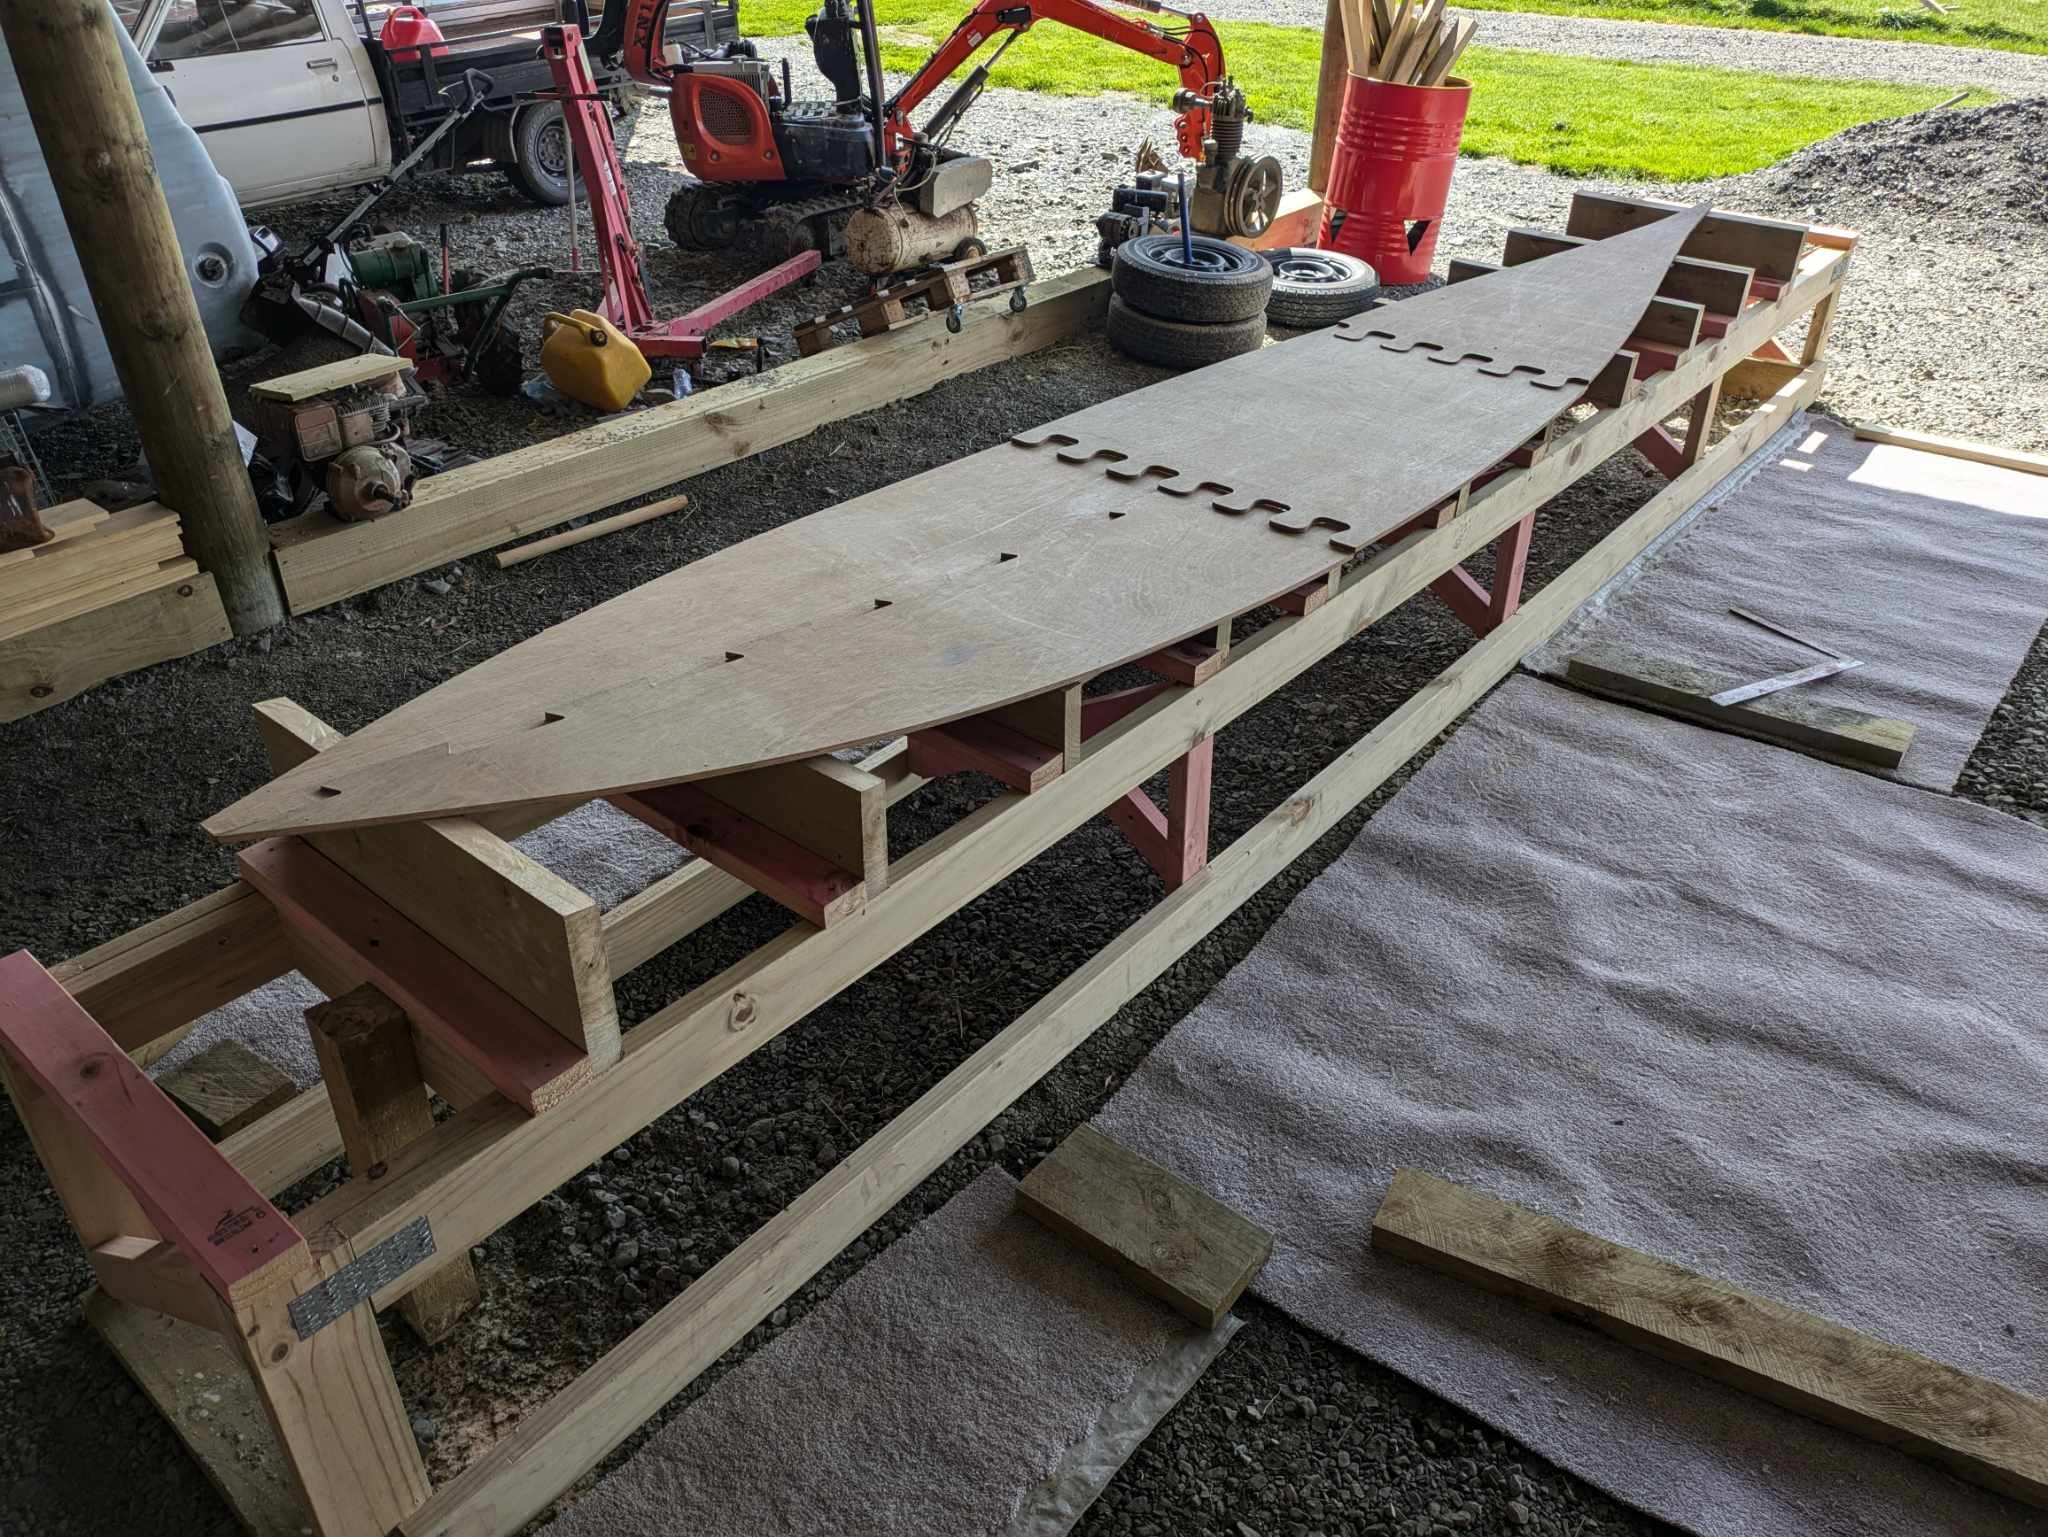
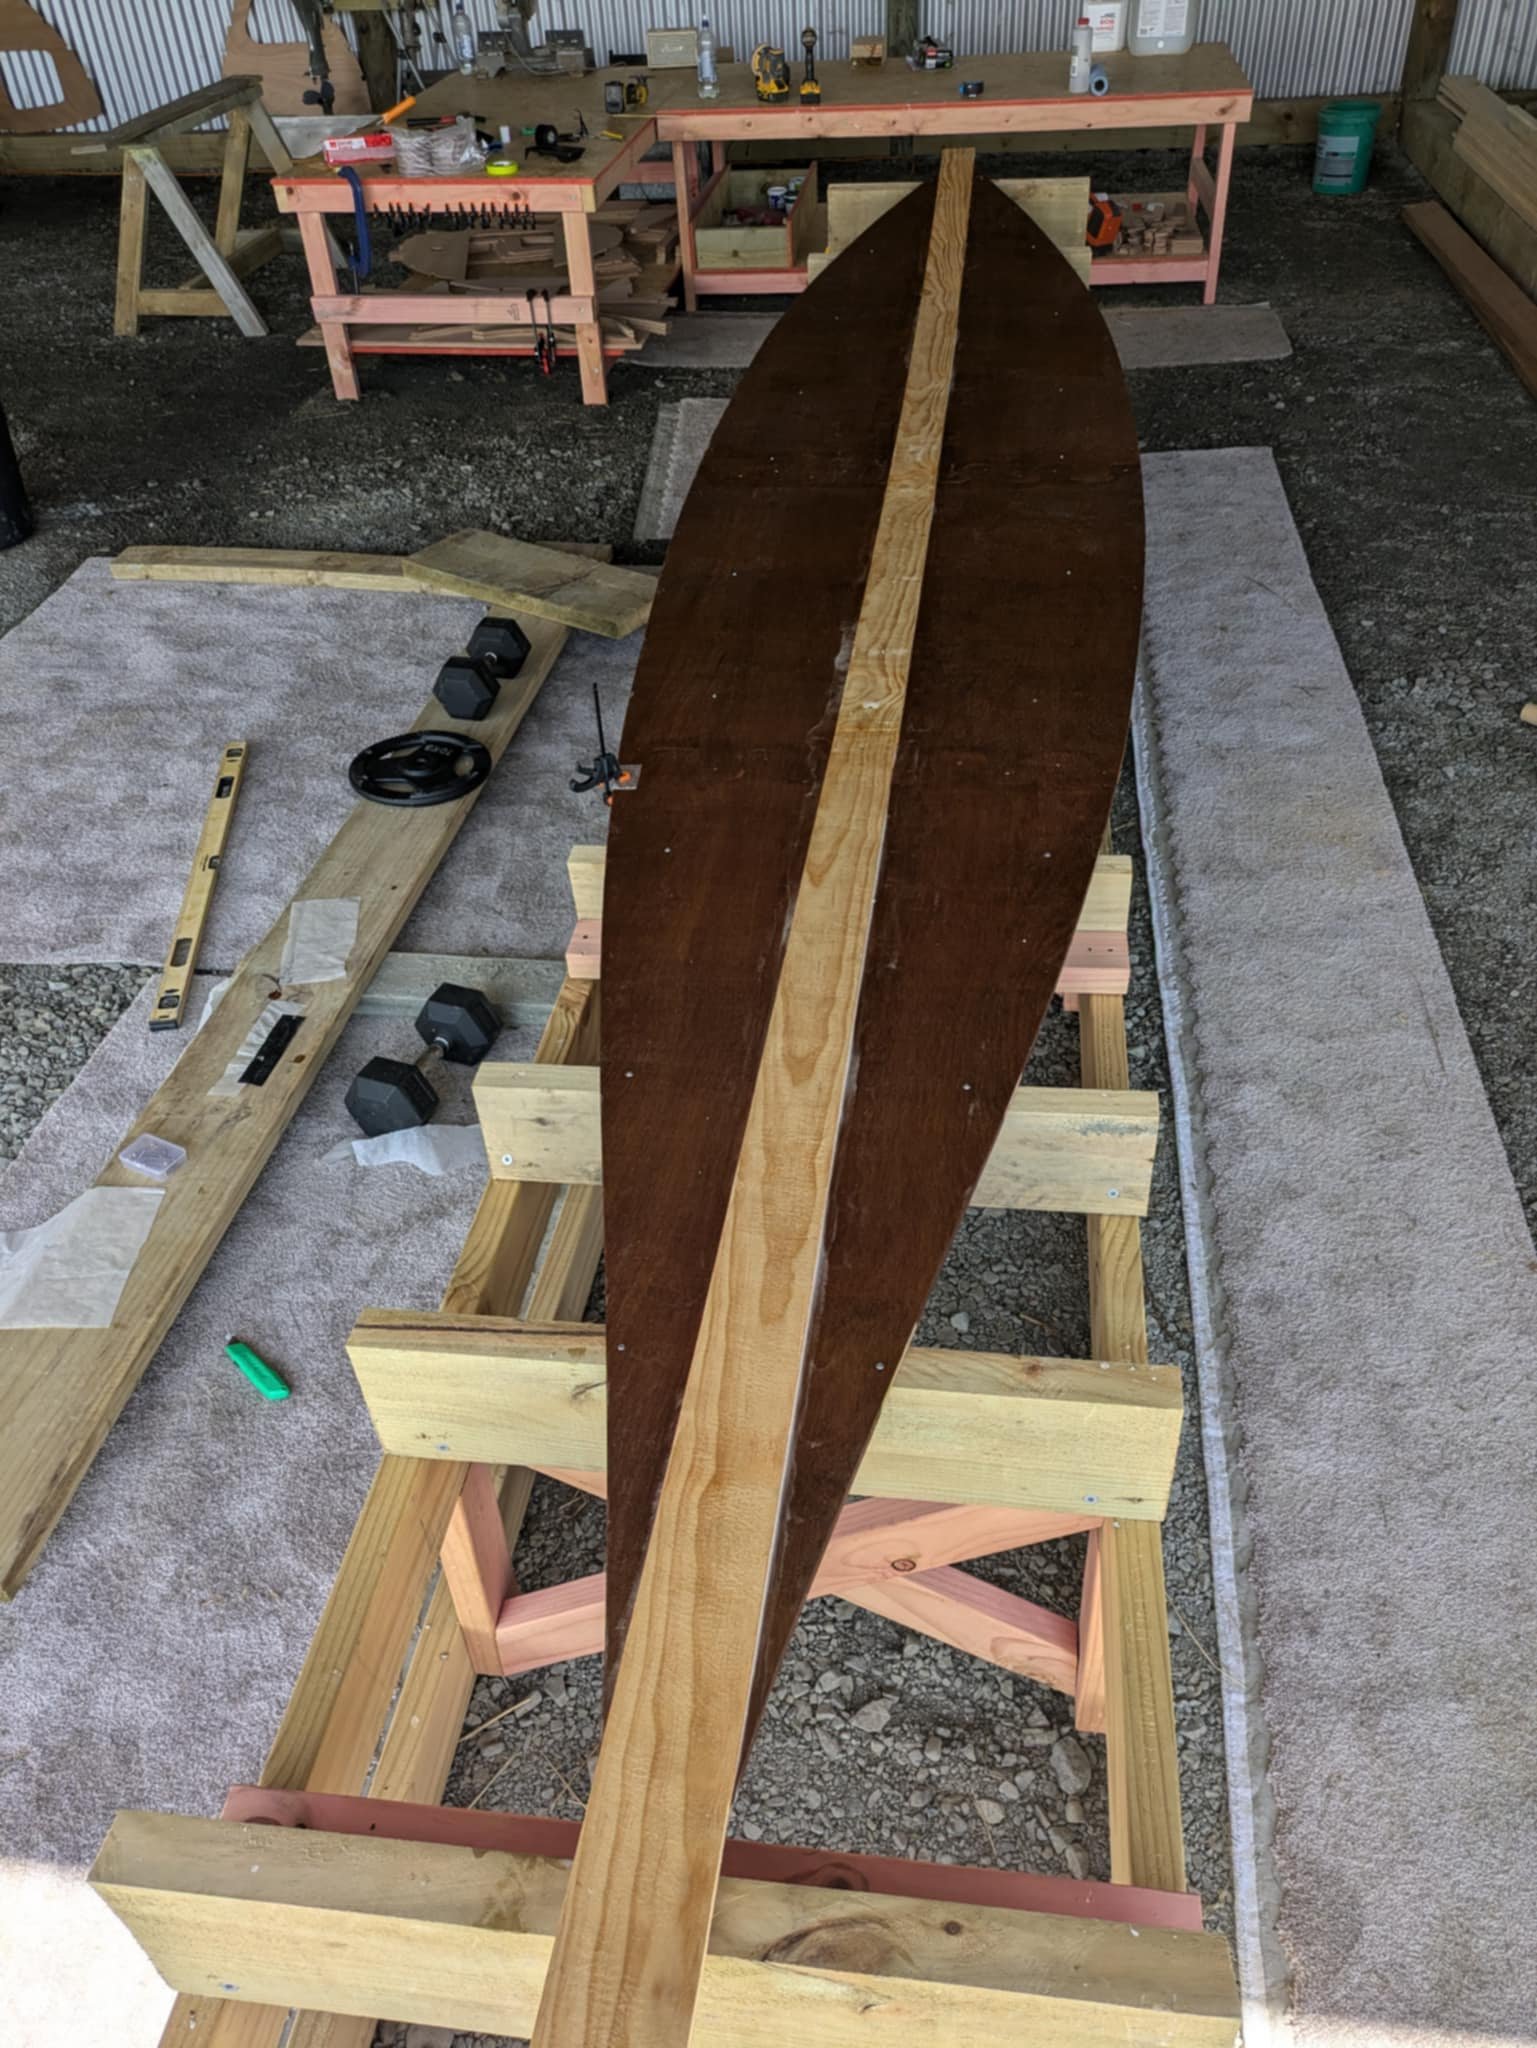
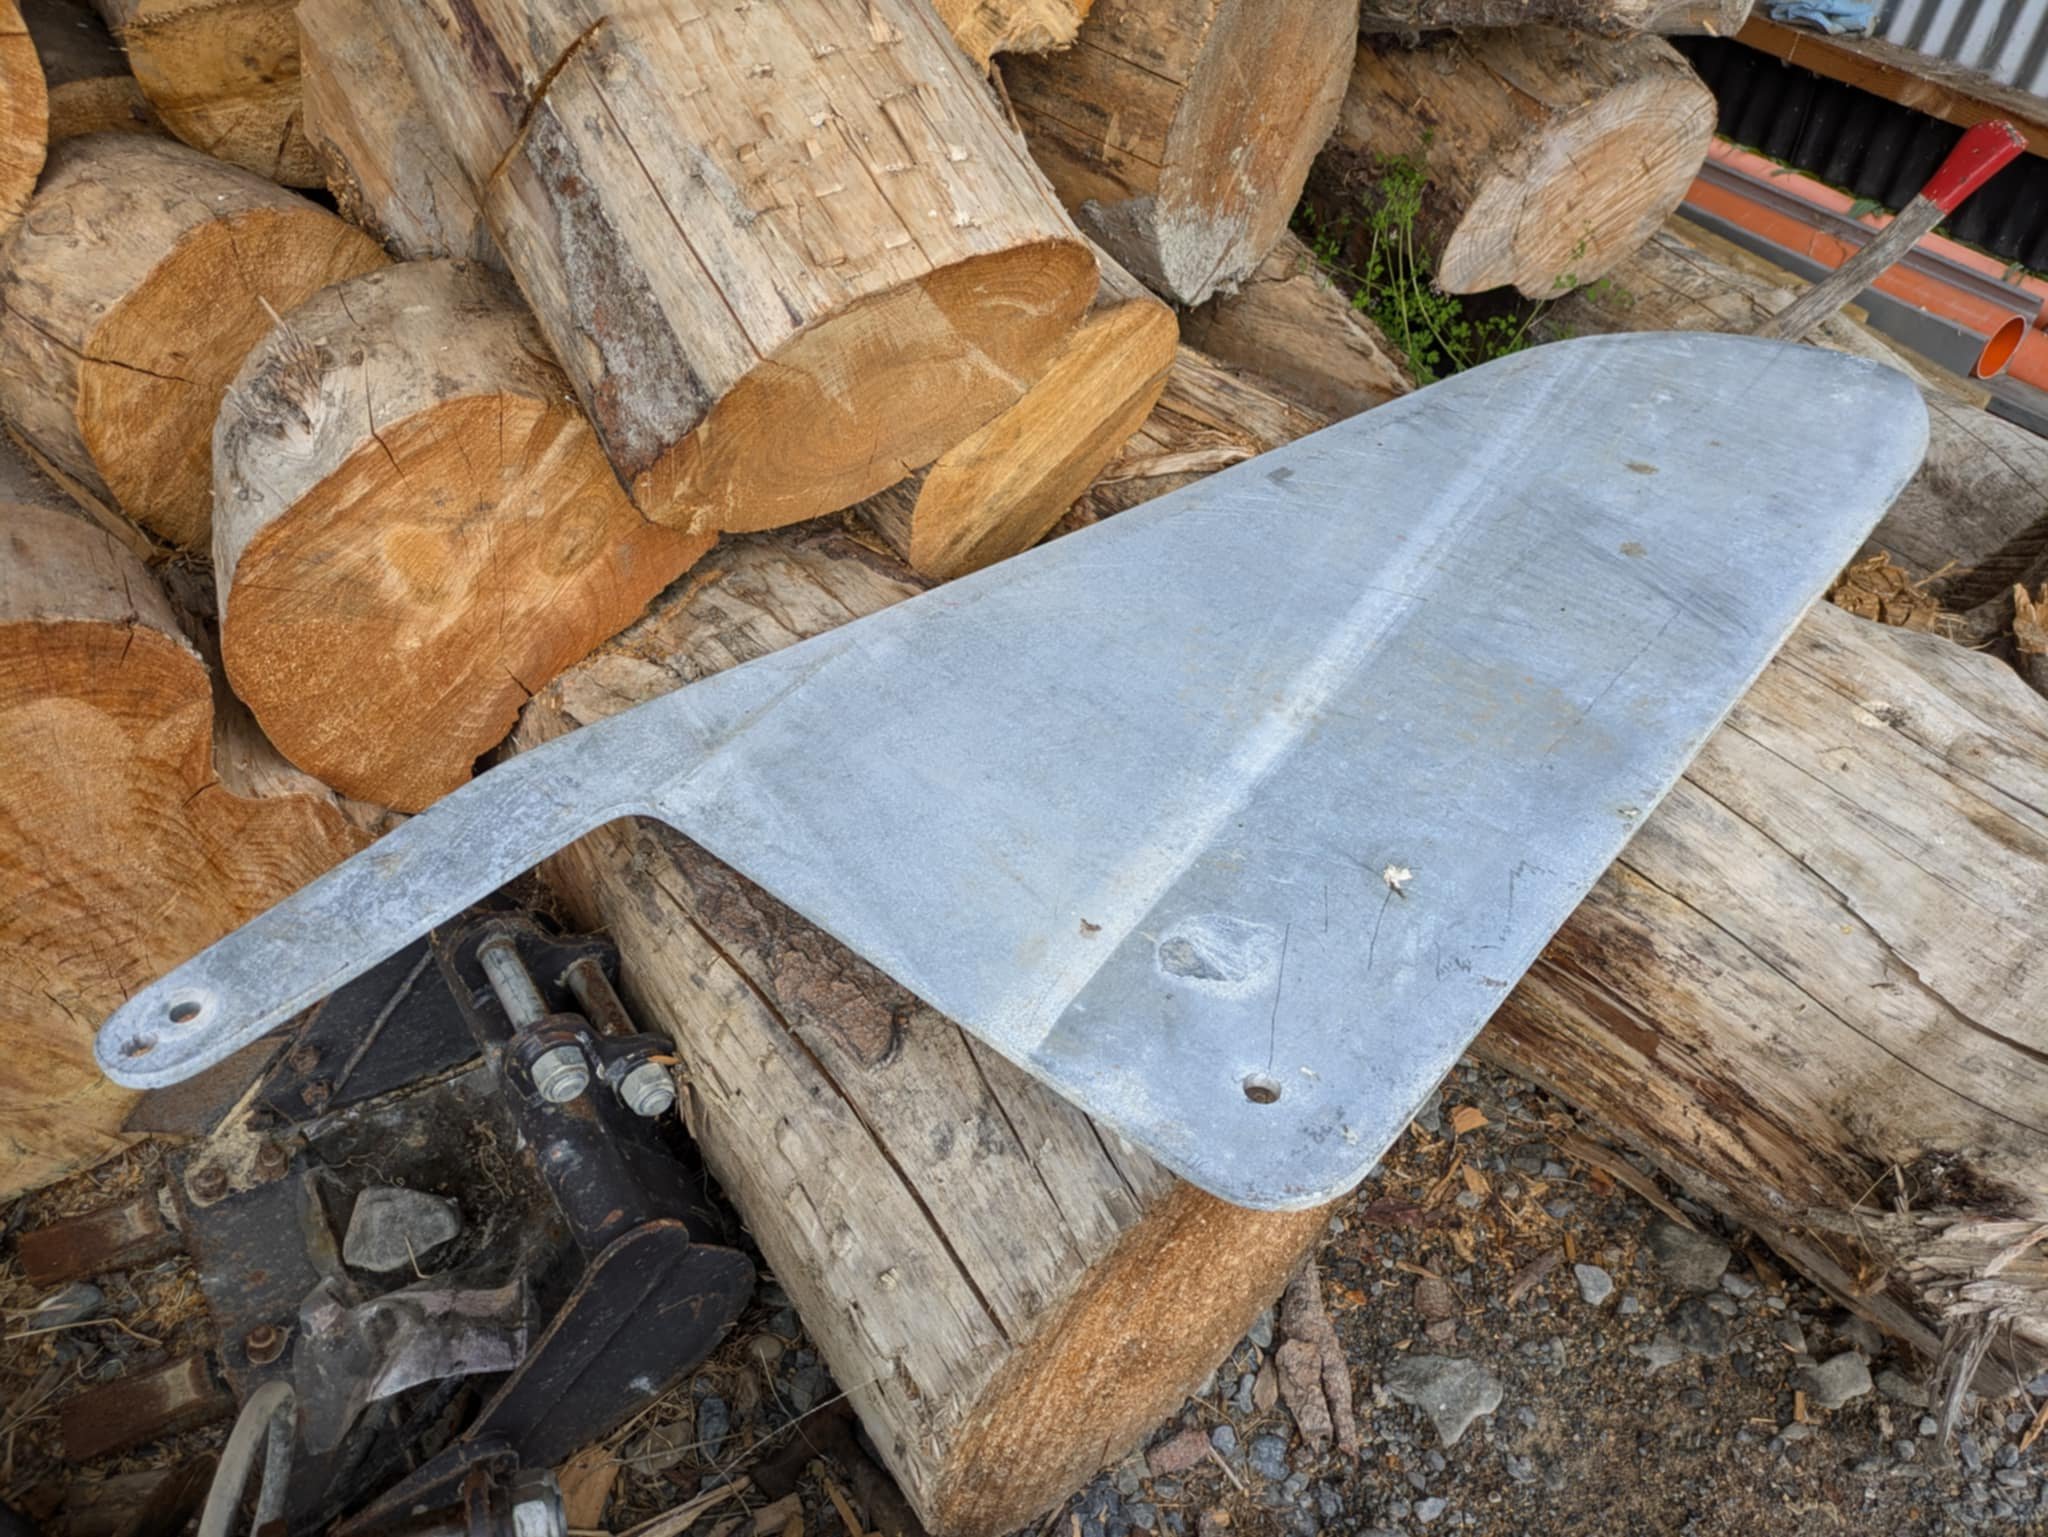
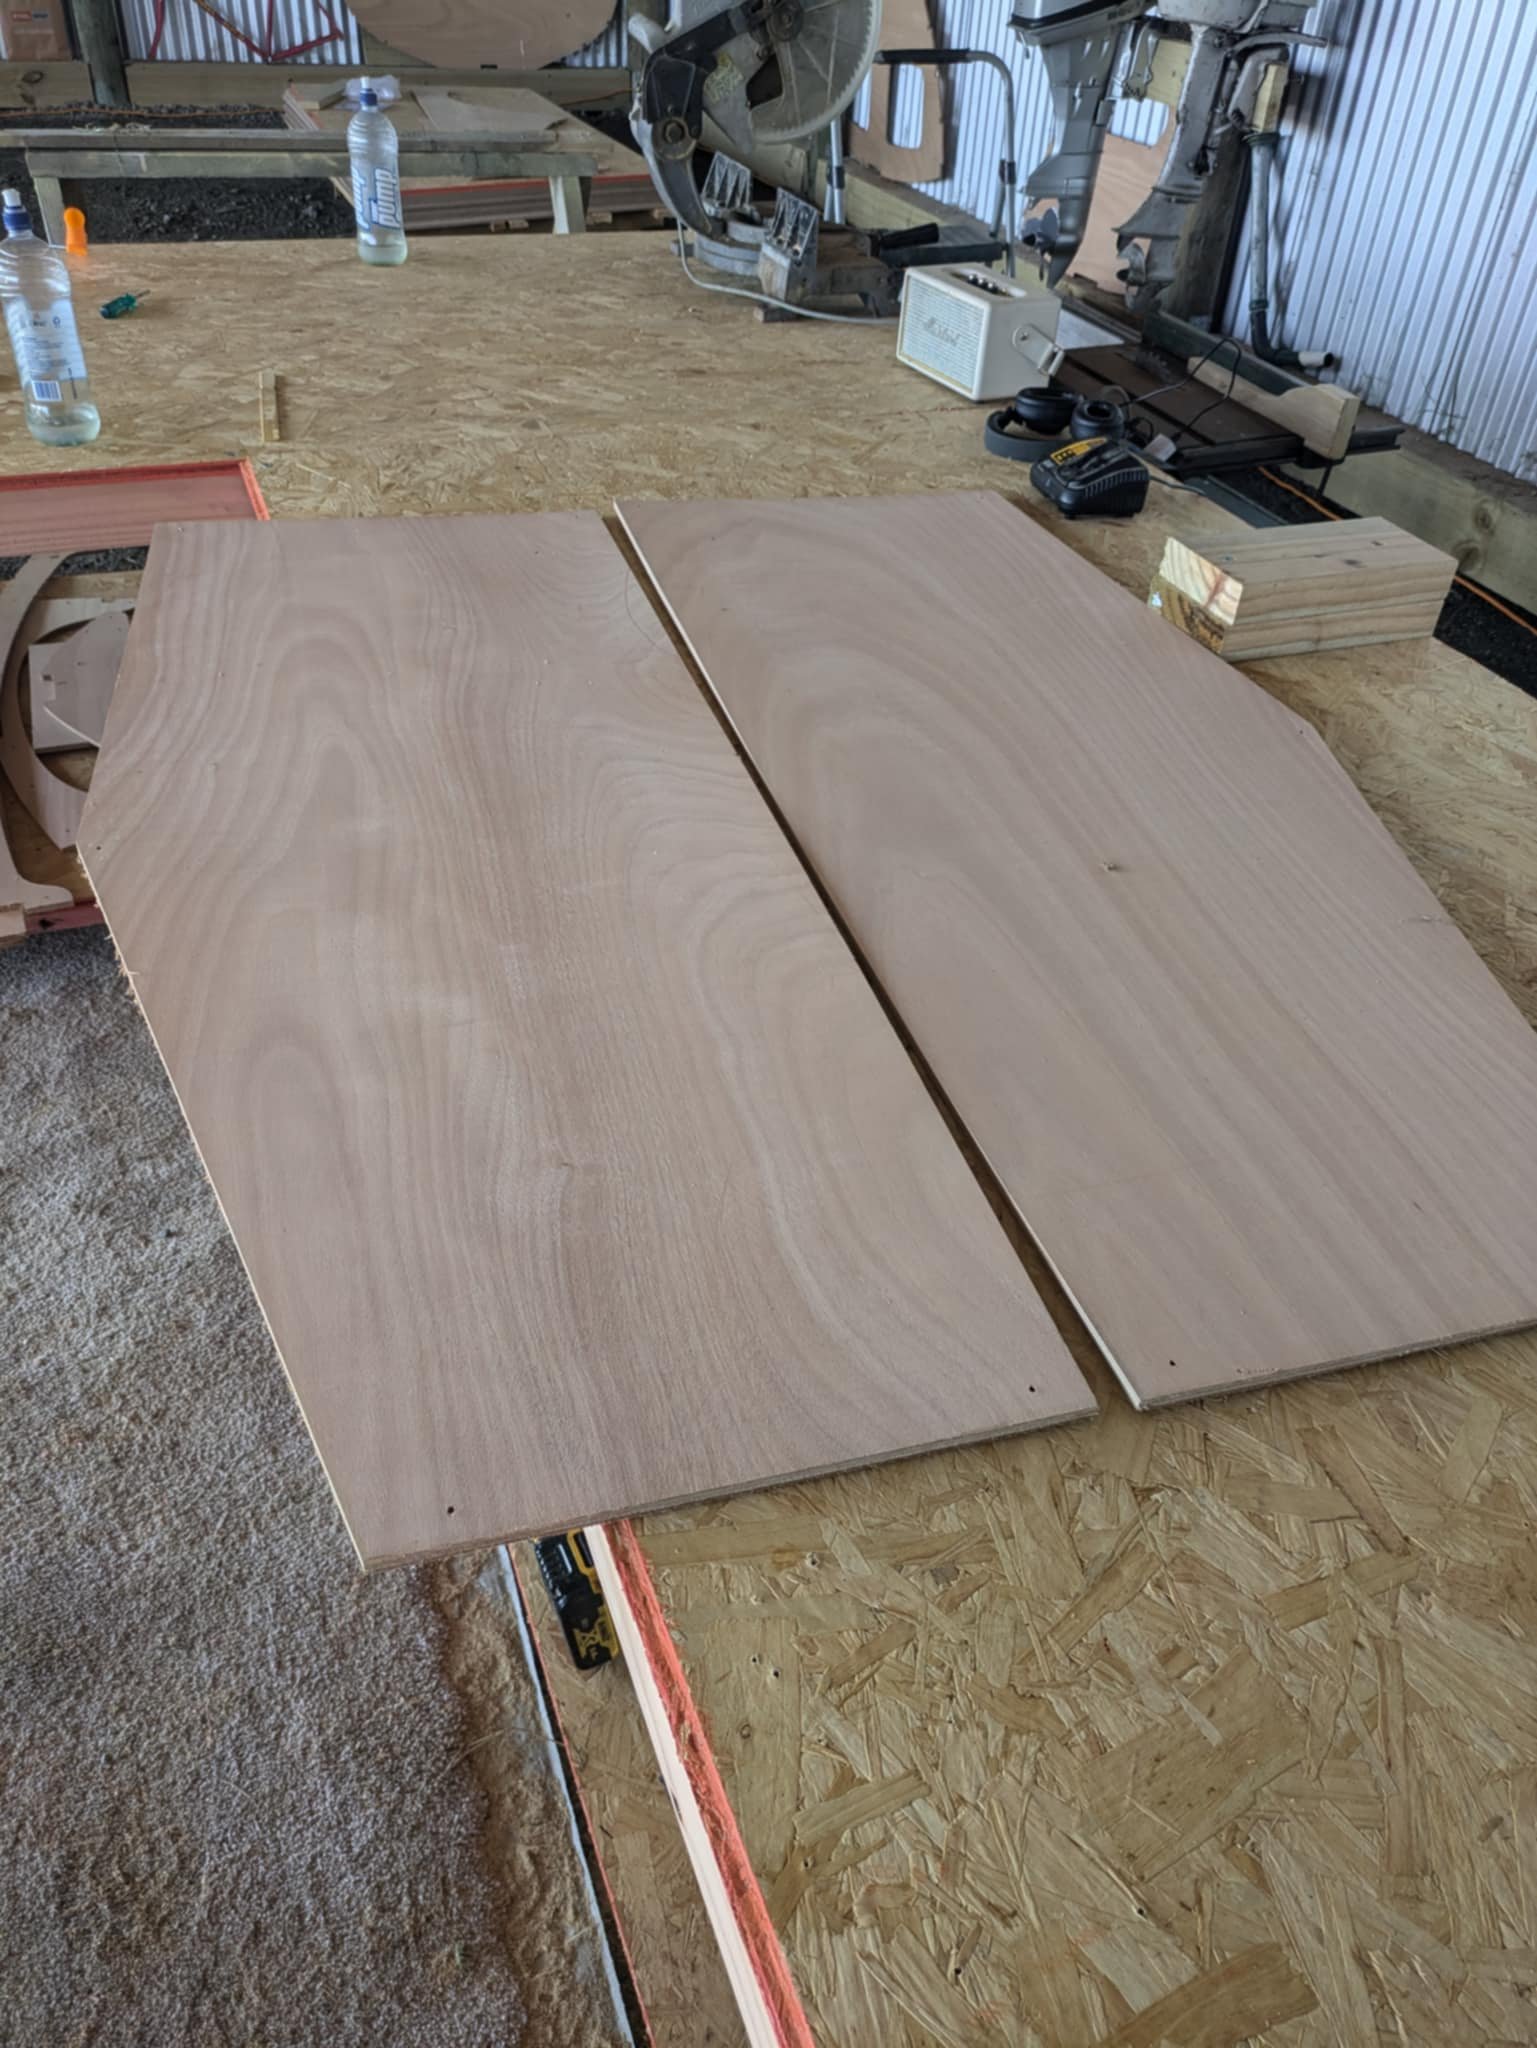
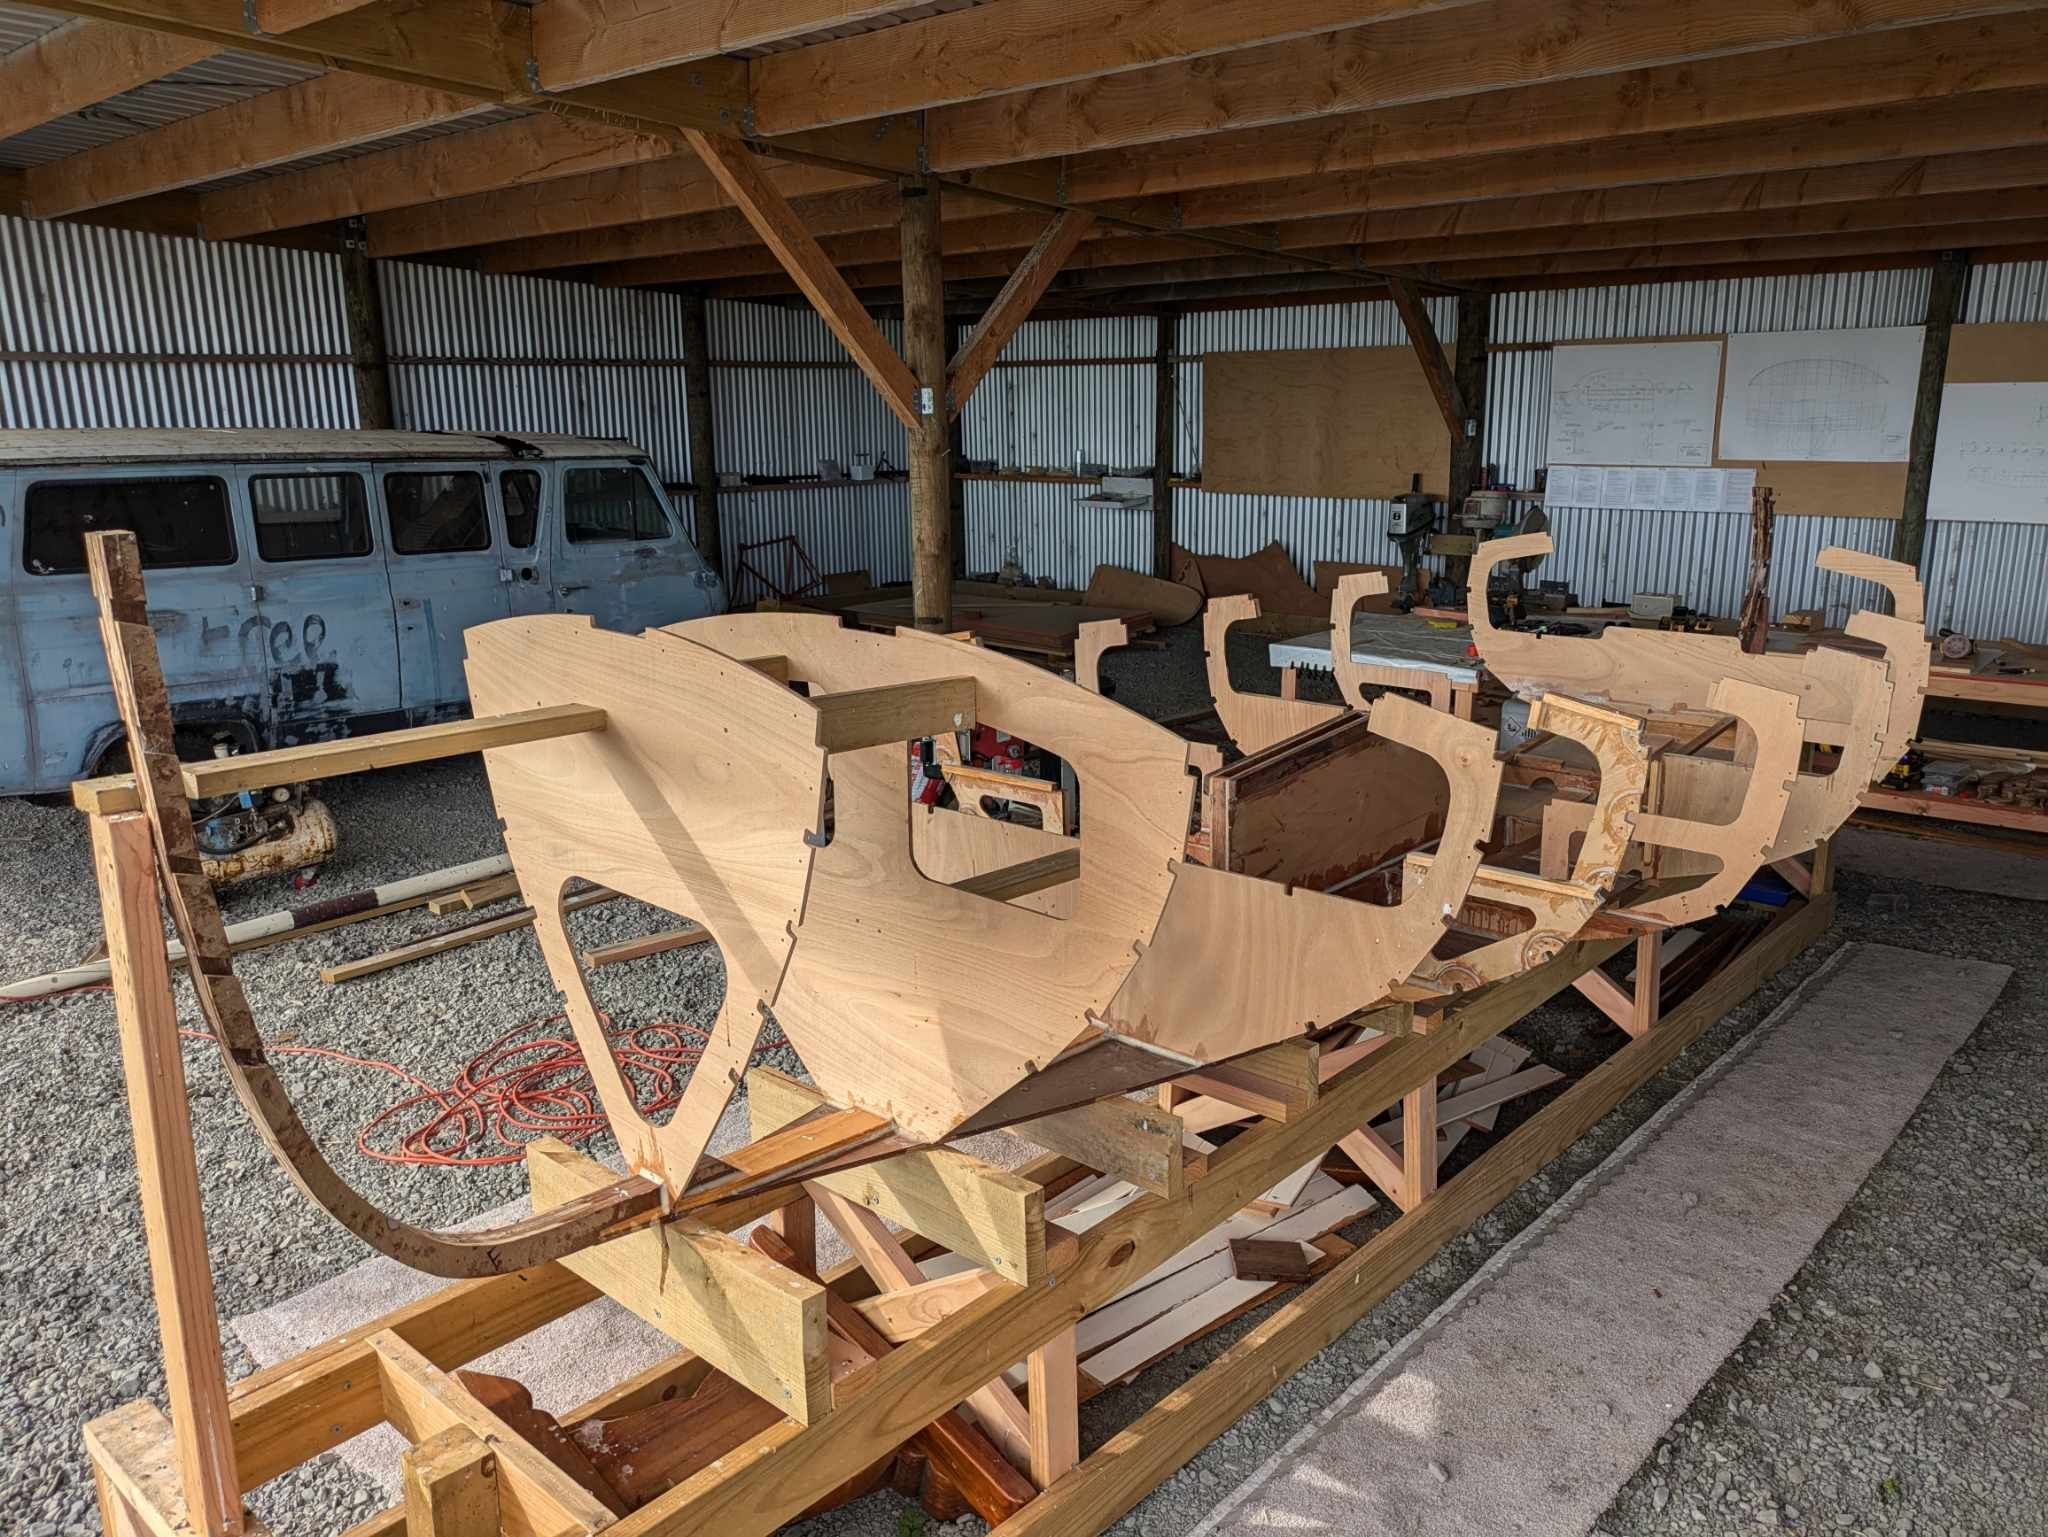
Hi All, I've been working on both the car and the boat since August but know I'll regret not having a build diary. I'm really enjoying it so far. A quick recap of where I'm up to: The boat is a John Welsford 6m Whaler design. I did my apprenticeship in wood machining as a teen and my goal was to complete that and get into wooden boat building but life got in the way and a billion years later I'm ticking this off the bucket list. Thing is I have never built a boat before and have no idea what I'm doing. But that's never stopped me before. When I decided on the Whaler some time ago I actually found a similar design for sale with a hot dipped trailer for $500. I thought I might be able to get away with an easy project for once but the hull was completely rotten so it's scrap. But thankfully a lot of the stainless and brass fittings are usable and the trailer is spot on for what I need. Just needs a birthday. I ordered the study plans to see what I was getting myself into. That was a few drawings and 6 pages of high level sequence steps and tips on building. It didn't make much sense to me but I figured the full plans would. What I didn't realise were that the study plans were the actual plans. The full plans just contained more detailed drawings but the steps were exactly as in the study plans. Yikes. Thankfully a nice chap in Australia was very kind to send me the CNC drawings for the bulkheads. I used a small outfit in Porirua called Matt Makes Objects who was a pleasure to work with. I was very fussy about the type of plywood I wanted to use and he didn't bat an eye at my diva like demands for meranti ply. For hardwood in the construction I'm using kwila decking I had left over from the deck and rose wood for the skeg. For soft wood I'm using dressed pine and whatever wood I've managed to scrounge from the tip that looks semi straight. The first step of the build was to knock up a jig. I was on a gravel floor which was leveled by a mk1 eyeball. So it was a lot of trial and error to get it vaguely straight. One thing I haven't even bothered to strive for is a semblance of perfection. So it is what it is. To ensure it stays fairly rigid I dug some post holes and concreted in some posts fore and aft. Turned out to be a bit of a waste of time as with the sun hitting it for a few months it has slightly warped anyway. Let's hope it warped it straight. The next part was putting on the bottom panel which was the first part I had to epoxy. I am using West system and they have the handy measured pumps. So to get 5:1 you just pump one of the resin and one of the hardener as as the pumps are different sizes it is 5:1 off the bat. Once that was done, I gave it a coat to protect it and set about putting the keelson on. That was my first scarf joint and I would do it better next time but it is what it is. I did it at 3:1 and I should have done it at least double that. It's glued and screwed to the bottom panel so not hanging in the breeze so probably doesn't make a difference. After that the next part to work on was the centreboard case. I got quite lucky in that a gentleman from the South Island ditched his centreboard for an inboard motor on his so I got it for a song. It weighs over 80kgs so got it transported up no dramas. The centreboard case was quite complex and there were some bits I didn't understand on the plans so I decided to go my own way with a lot of it. I get the feeling that will be a common theme on this project. I built it much stiffer than the plans called for whilst deleting the rowing seat stays. Where the pin holds the centreboard in place I made twice as thick. On the inside where the c/b rattles around I put in a few layers of glass sheets to protect the hardwood packers inside. I'll never be able to get to them again so I didn't want to leave it underdone. The pin is 316 stainless and has a threaded hole through the middle to screw down a large washer. I'll glue said large flat washer (after I dress the area since drilling took a chunk out) and hope that will keep the water out. It's under the water line so will need it. Where it's up to at the moment is that bulkheads 1-8 are in place with only bulkhead#9 to go. That kind of hangs in the air not touching the bottom panel so I'll have to think about how to do that. This weekend I'll do the flooring support stays and put some more doublers (pacman looking things that the stringers pass through) and seat holder thingies on the bulkheads. Each bulkhead has about 15-20 things to get glued on it, sanded smooth, then reglued and filleted whilst wet. Then the fillet needs to be sanded. It's the white toothpaste looking stuff below. I've run out of filesize on this post so I'll make another one on the tow vehicle.
- 82 replies
-
- 24
-
-
So 900nm of torque...what is that like with the camper going up hills? Is there even a slight uptick in revs or is it like it's on the flat still?
-

Kaiser X4.. Oldschools most ridiculous project ever?....
dmulally replied to Bombsquad's topic in Other Projects
Are those cables holding it from slipping tied to a Landrover 2.25 short block on the ground? -
Mental! I couldn't stand mine. I built a sidecar for a bike build off and the stress of needing it to start in front of the judges was almost unbearable. I sold it to somebody about a km away and pushed it most of the way there because I didn't think it would survive the journey without something else breaking. IIRC I swapped the brakes for Honda sports bike ones and they were the only good things on it.
-
That is a sweet ride. I've had a few evo's over the years and they have been proven to be bulletproof. Ironheads on the other hand...
-
Will you get a custom one made for the rear? I looked at the one on LMC Truck which looked pretty cheap but shipping was around $1200 so I'd rather keep that money on shore.
-
They came with saddle tanks? Keen to see how @Brennan handles the tank situation. I need to relocate mine from the cab of my C20 and don't want to remove crossmembers like the yanks do all the time.
-
Fair enough cheers. I have a couple of spare switches floating around so will just have to have one labeled as park I guess. I already have the floor mounted switch for high beams.
-
Hopefully a simple question but can't seem to find the answer here with park lights (position lamps apparently). Do they need to be on a different switch setting to main beams? Wiring my Landrover from scratch and only have a two way switch for the lights and getting a three way switch will be worth more than the car when completed.
-
Michael14's 1959 Dodge Kingsway Discussion
dmulally replied to michael14's topic in Project Discussion
I've had a couple of dodge flatheads over the years. Really solid engine and there are still bits for sale that aren't too hard to find. I recall getting a lot of parts out of Turkey when I rebuilt my last one about 15-20 years ago now. Dusting off my memory bank if you want a quick way to ID your engine just measure the length of the head. If it's 23 inches it'll likely be a 218 or 230. If it's 25" then it could be a 228, 237 or a 250 iirc. Most common I found were 230 and 250. -
Good move in deleting it.
-
New year. Different shitbox. I've just completed a diff swap and the speedo is way out. As I want to piss the running gear off for something more farm friendly, rather than pull the gearbox back out I might as well do the speedo nonsense now. Does anybody happen to know how to set up a VSS from a hall effect sensor reliably? I was going to use this. Which takes a GPS or VSS. In fact it looks like it needs to GPS initially to calibrate. For the VSS it says: Acceptable signals range from 1-100V. 500-250,000 pulses per mile. For two-wire speedometer sensors: connect either wire to the Speedbox’s VSS wire, and connect the other wire to common ground. The two wires can be reversed. A quick google and I found a three wire hall effect sensor. Anybody got any tips or tricks for getting this to work? Cheers
-
Dmulally's 1985 Mitsi L200 Discussion Thread
dmulally replied to Bearded Baldy's topic in Project Discussion
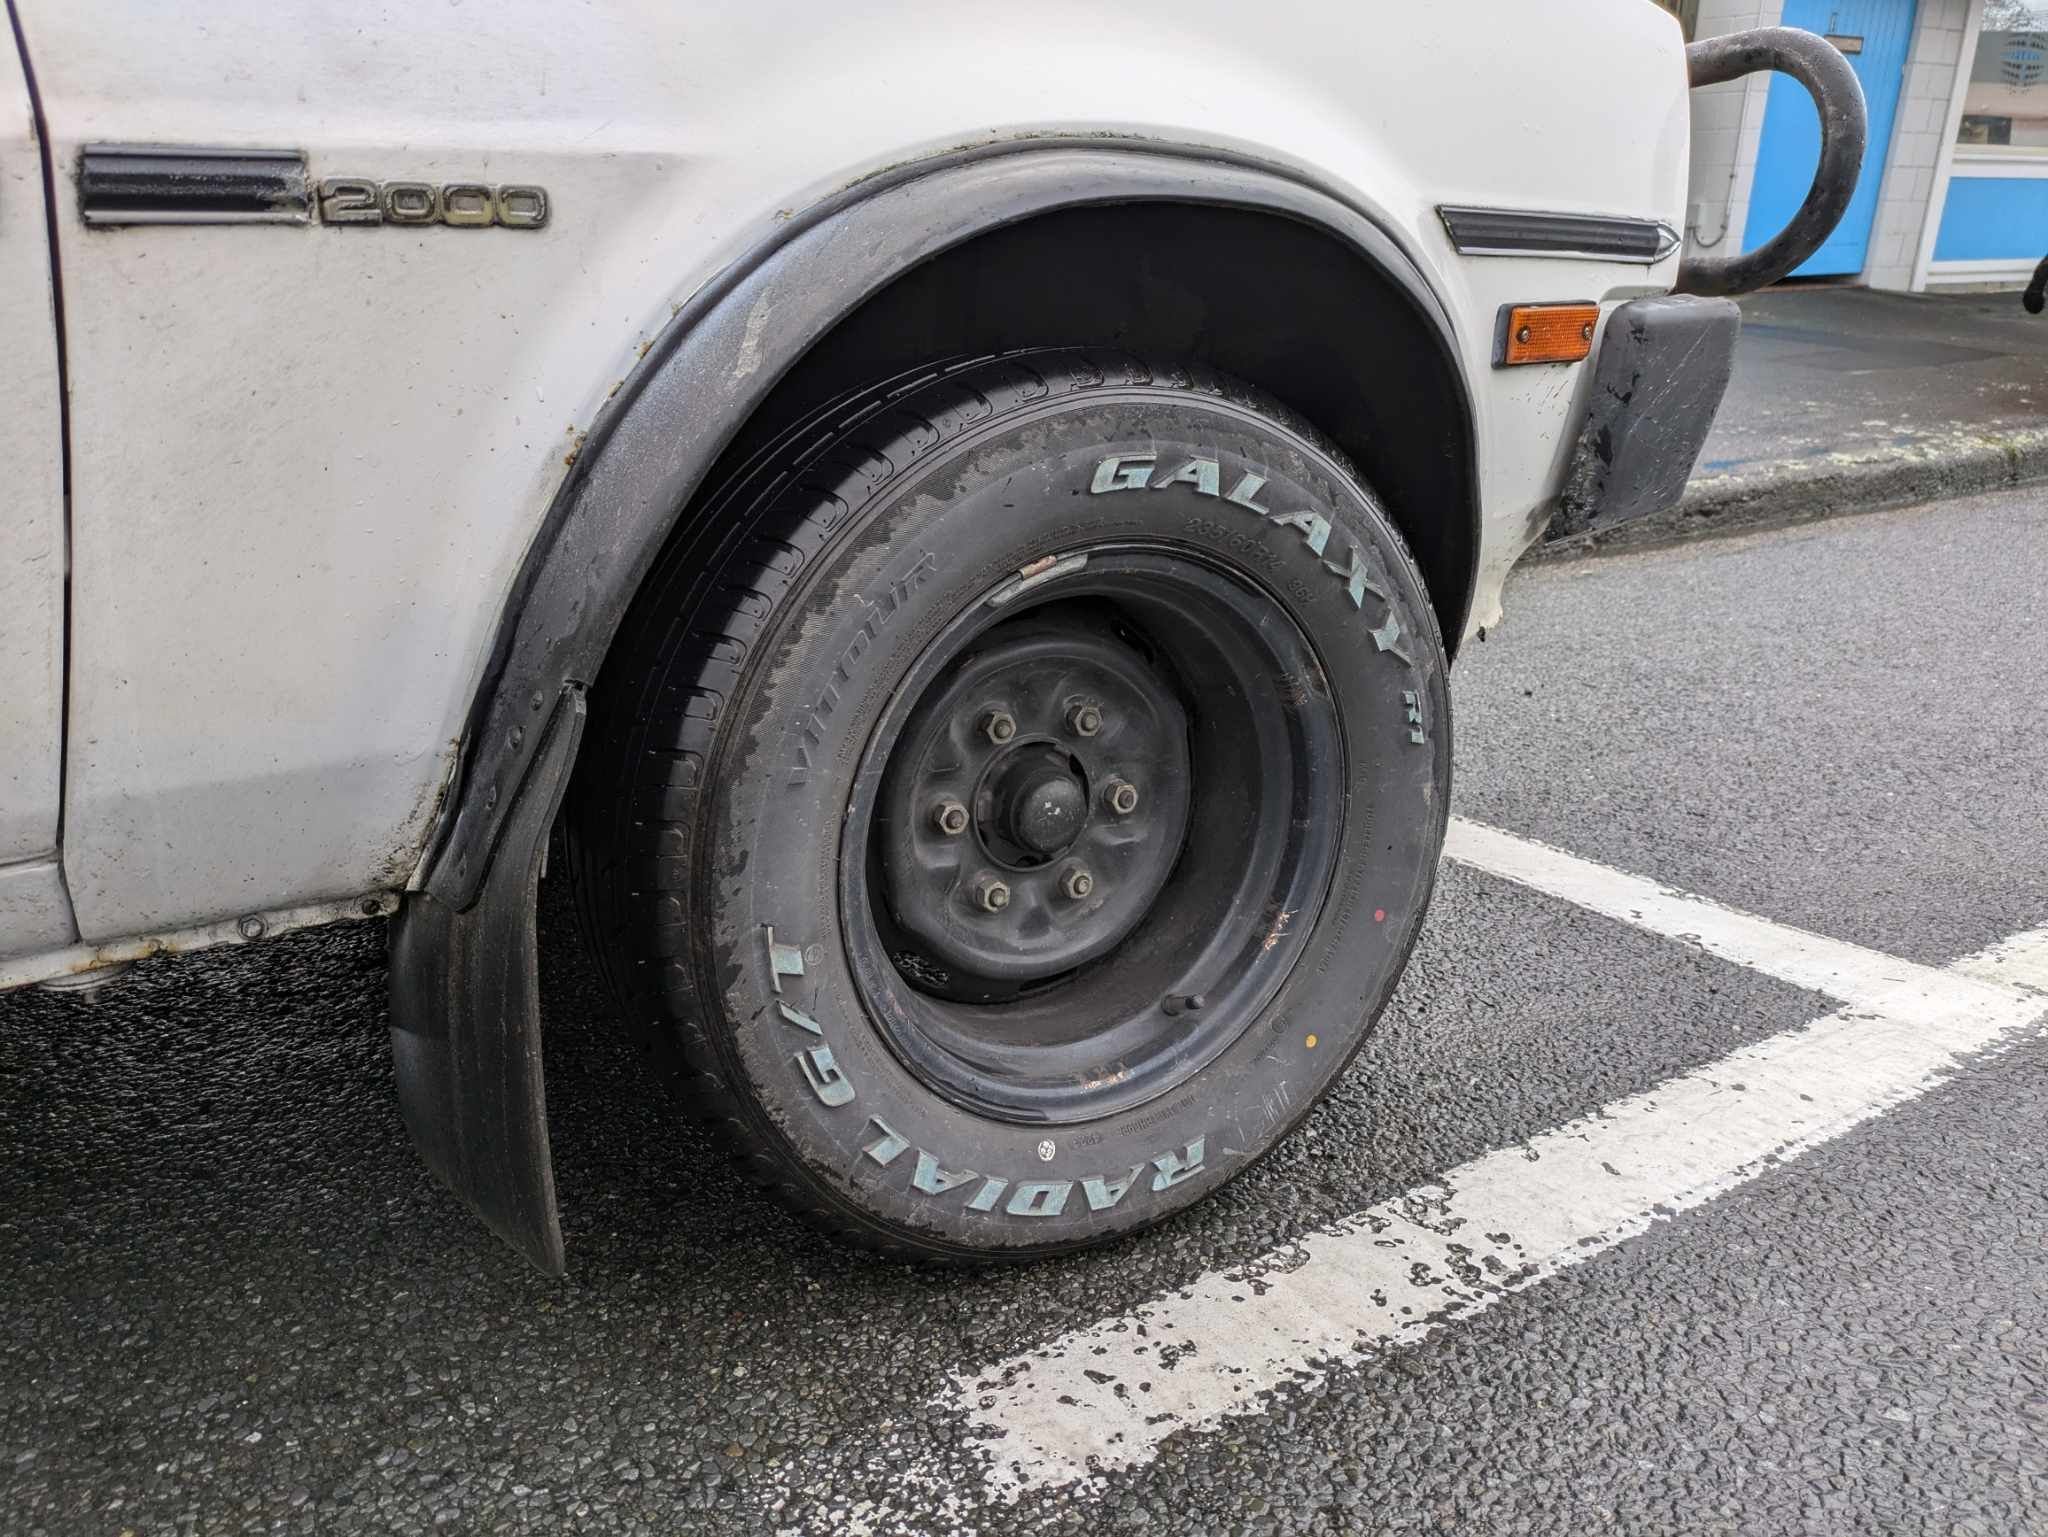
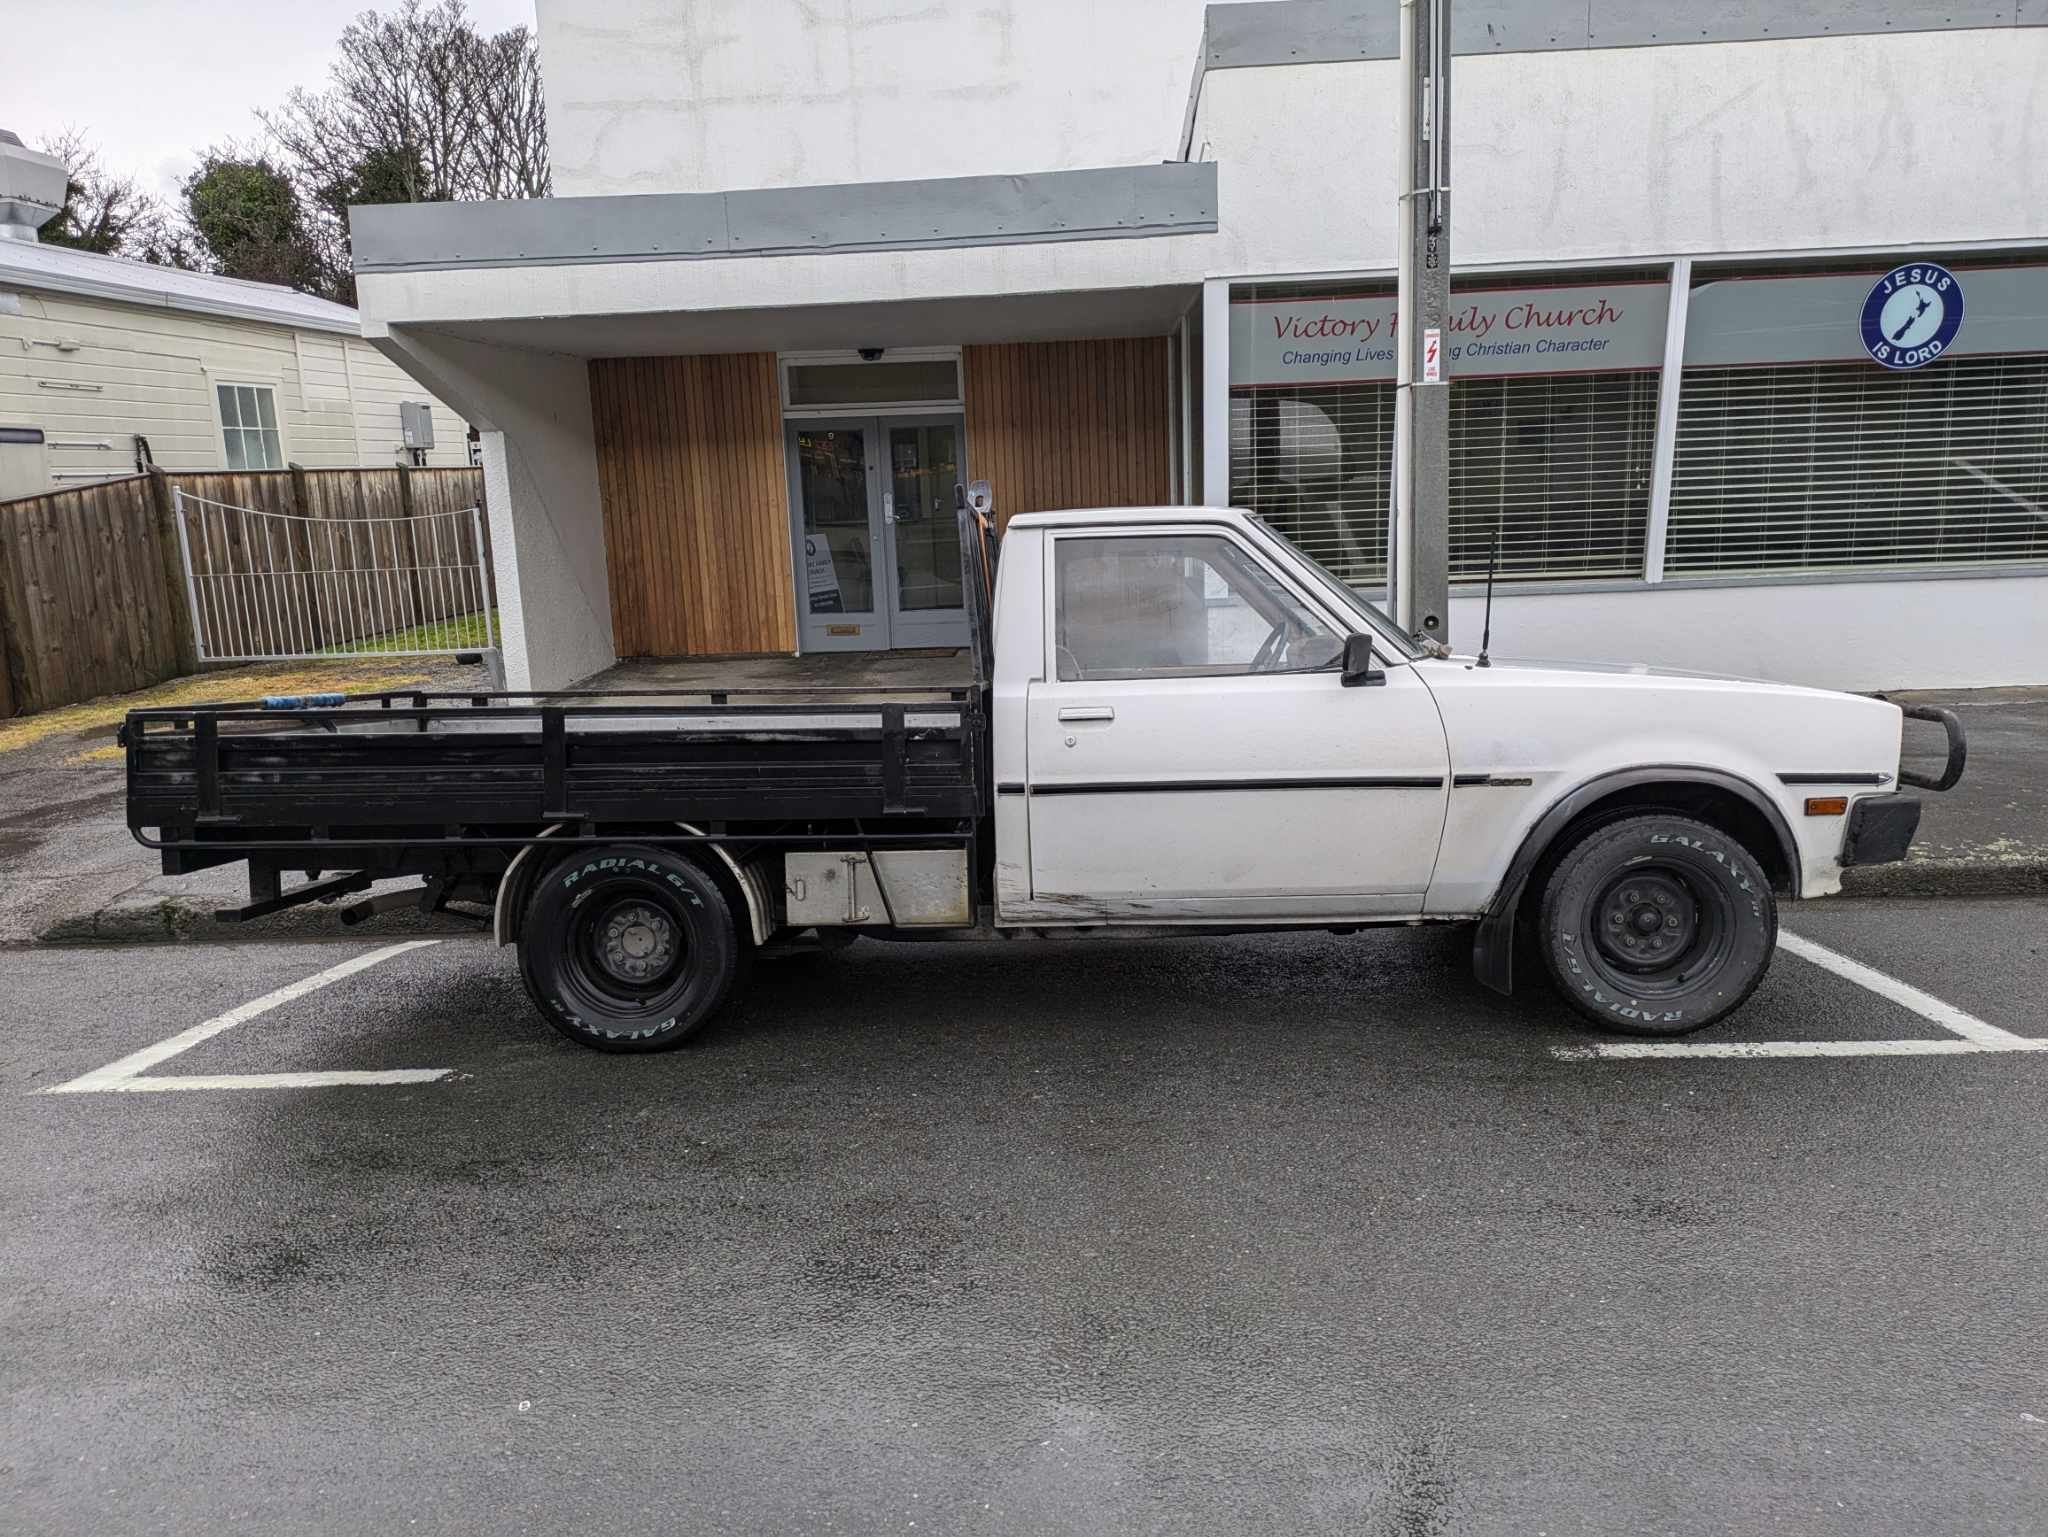
So I think the vibration drama may have been solved. I got some Urvan wheels from a car yard for $25 each and swapped the rears over. Vibration gone. Super frustrating as they got balanced 6 months ago when I got the tires put on. Now I'm wondering if the Imp vibration is the same thing as the same place put those on. I've spent so much money trying to dial it out of both cars so if that's the Imp's issue then I'll get my tyres done further afield. The worst part is that until the tyres are rebalanced I have to drive around with skinny Urvan stockies. My social points in Martinborough have taken a dip that's for sure. But seeing as I'm Aussie and under the age of 90 I was already tanking.
-
This is my Lister L and the noise is hard to describe. The below pic has the original exhaust but I swapped it for one that ran up and out the shed wall then down to a barrel of water. It sounds like an old washing machine on spin cycle rather than exhaust banging. It has a priming cup that is that small brass upright before the head. If that uses petrol to crank it, it'll run on most anything after that. With petrol it runs the strongest but with stale fuel or kero it just misses a few beats and the momentum keeps it going until it can ignite off another kick. That machine there ran Wellesley College in Wellington during WW1. It now runs a simple alternator. I haven't experimented with my diesel lister which is roughly the same size and runs a lot stronger. It's a lot more modern being from the 1930's. The L above is from 1912 iirc.
- 20 replies
-
- 10
-

-
-
= I have a few of them. One I run as my backup generator for my off grid setup. I have a petrol and a diesel lister that both seem to run on just about anything combustible.
-
Dmulally's 1985 Mitsi L200 Discussion Thread
dmulally replied to Bearded Baldy's topic in Project Discussion
So you're saying to cut off three coils. Gotcha. -
Dmulally's 1985 Mitsi L200 Discussion Thread
dmulally replied to Bearded Baldy's topic in Project Discussion
Took it for a drive into town this morning and she was a peach. Thankfully I didn't have to rev the engine to stop from stalling at crosswalks with concerned pedestrians hurrying to get across. I think the front springs could lose an inch or two. Thoughts?
-
Dmulally's 1985 Mitsi L200 Discussion Thread
dmulally replied to Bearded Baldy's topic in Project Discussion
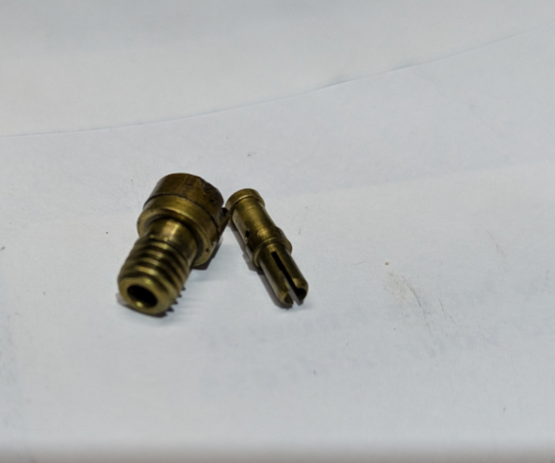
I think I solved it but will need to take it for a good run tomorrow. Looking positive so far though after a quick lap up the road and back with no dramas. I took out the primary idle jet (I think) and blew it out a few times and cleaned it out. Back in and idles nicely now.
-
Dmulally's 1985 Mitsi L200 Discussion Thread
dmulally replied to Bearded Baldy's topic in Project Discussion
It has a new filter on it too. Zero issues at full throttle so Im not sure it's that. It's behaving like a vacuum leak. -
Dmulally's 1985 Mitsi L200 Discussion Thread
dmulally replied to Bearded Baldy's topic in Project Discussion
It has been working like a champ for 6 months though. I'll give it a crack however. -
Dmulally's 1985 Mitsi L200 Discussion Thread
dmulally replied to Bearded Baldy's topic in Project Discussion
Hi All, Still chasing down that vibration and I'm up to getting the wheels rebalanced. They were supposedly balanced when I put the new tyres on but I'm running out of things to swap over. Anyway I'm having a more immediate drama with the 4g63 at the moment. I'm having problems with a really rough idle. I have bumped up the idle screw to help but it's not a fix. It will cut out when coming to a stop in neutral and cough and fart at low rpms. Driving is fine. I used some wd40 and when that didn't work I tried the laughing gas to check for a vacuum leak. Couldn't find anything apparent. I took out the idle screw out of the weber 32/36 ( @Bearded Baldy is that what it has?) and cleaned it and put it back in and no joy. I haven't touched the timing but when it's out it pings it's nut off at revs. Another thing which may be of note is that it has pretty bad run on/dieseling. I know how to fix that in a small block chev but not on this. Happy to take a video if that helps. -
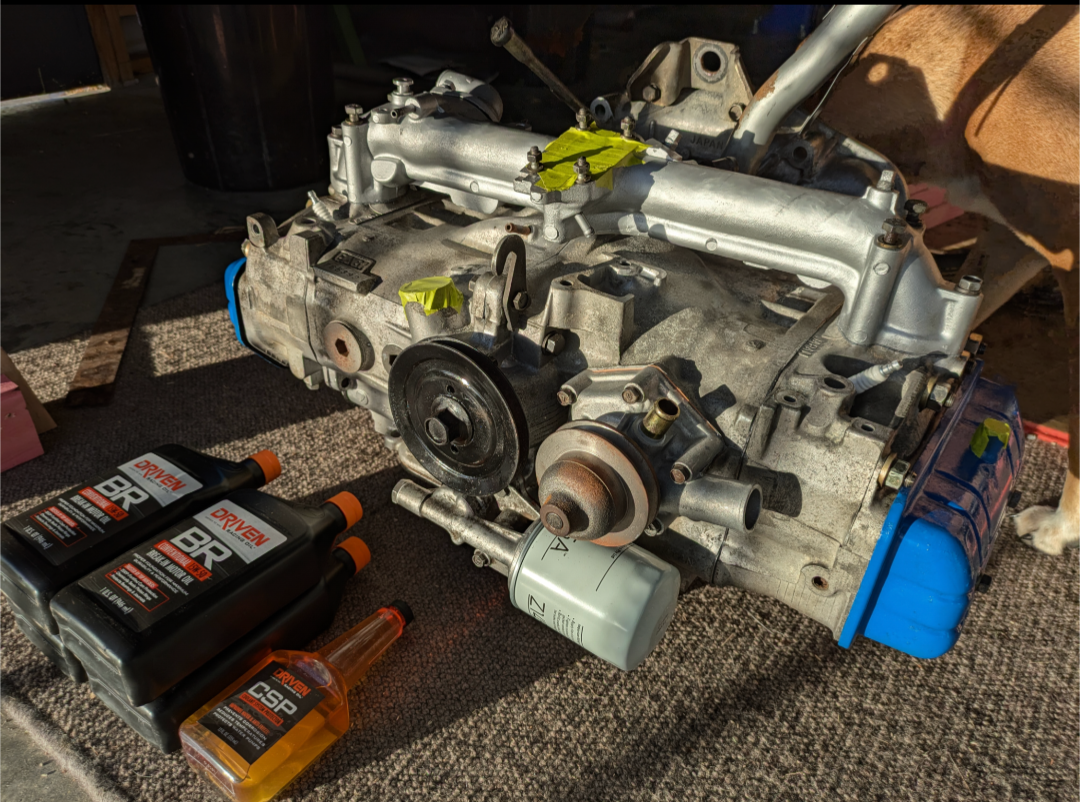
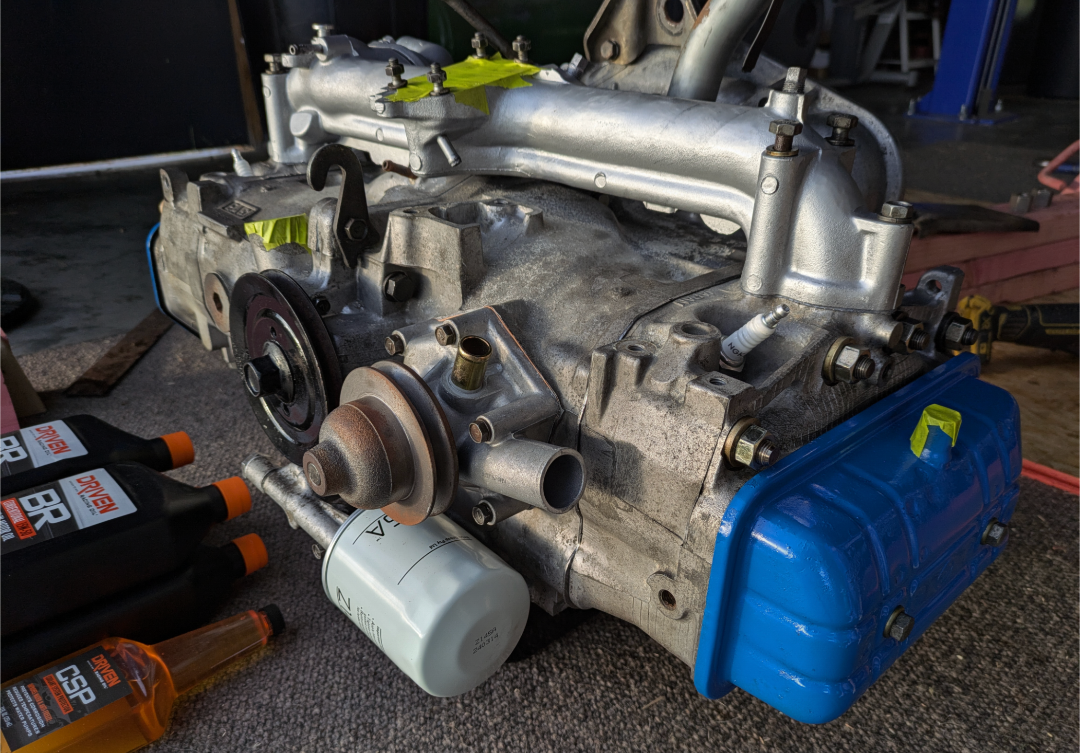
Been a while since I updated this but there have been a couple of things done. The brakes got sorted. Turns out I had to adjust them so there was quite a bit more drag than I would have normally done. I had to swap over some components too but I forget what those were. Probably a slave. I had it all booked in for LVV so I could at least get the list of works to do whilst I am not working and after a long and comfortable drive I thought Id check the fluids. Blown head gasket. Typical. So I cancelled the inspection and parked it in the shed to stop bird shit from landing on the gravel. The ea81 I picked up from @cubastreet just got finished being fully reco'd and I have grabbed that. Seems a waste putting such a nice engine in such a cursed car. Anybody have a gen 1 brumby or baja bug floating around they want to offload? Anyway when I cbf'd Ill drag it into the workshop and switch the engines over. It was diabolically fast with the 1600cc so with the ea81 it should be a lot of fun. Because I'm going to forget, the engine builder said I need to run the break in oil and plain water for 500kms then oil/filter change with 20w/50 semi synthetic or mineral oil with fresh water and the additive he gave me.
- 119 replies
-
- 21
-