NickJ
-
Posts
3405 -
Joined
-
Last visited
-
Days Won
1
Everything posted by NickJ
-
Likely larger capacity though Weirdly the car is registered as an 1800 in the system which is one of the options
-
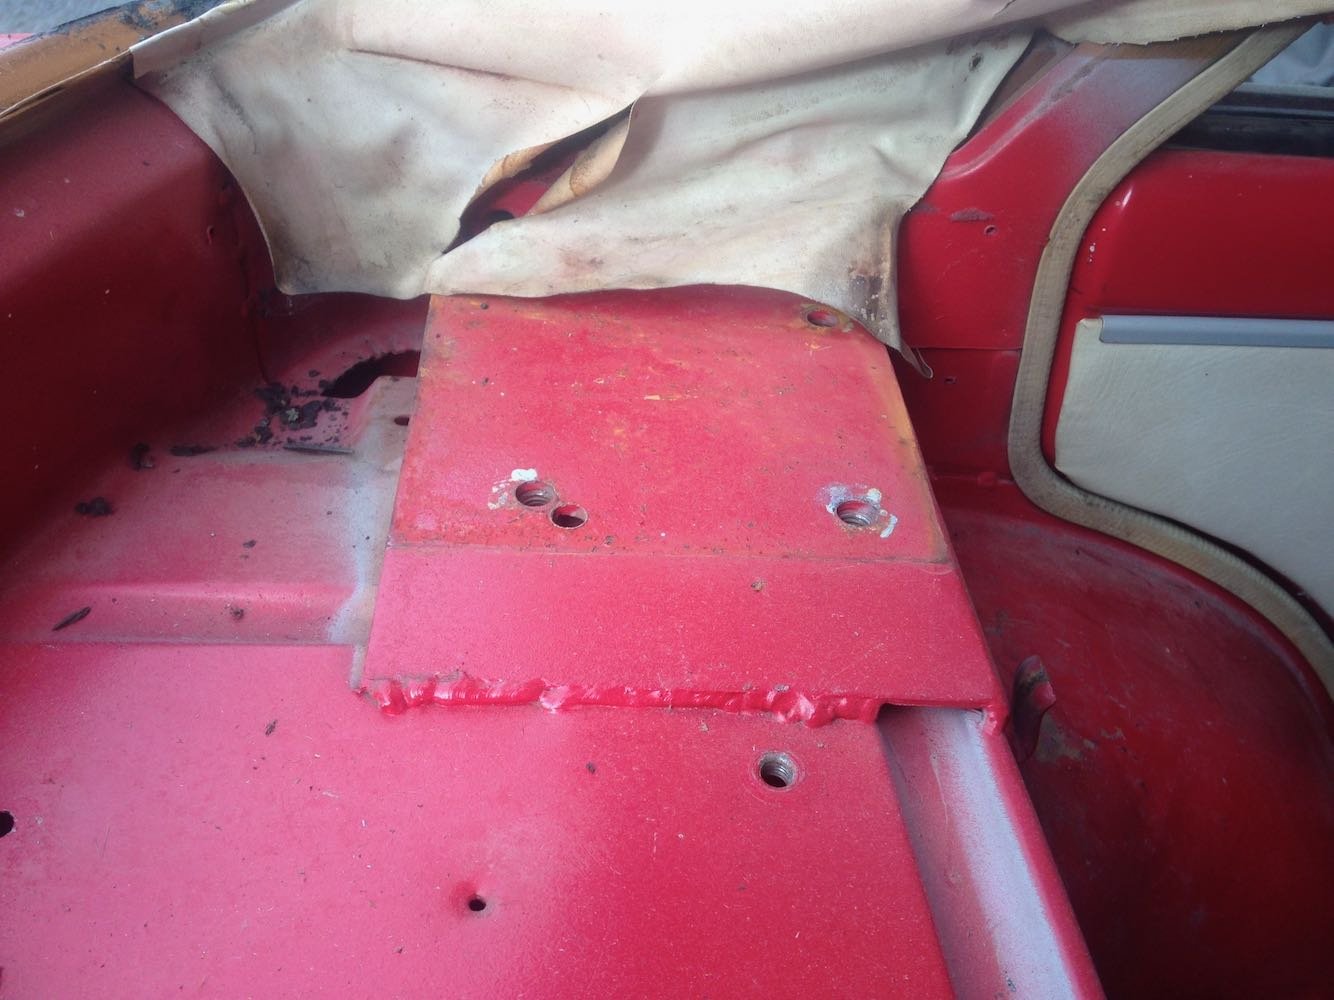
Currently stripping the Datsun down and can see a cert needed in its future (EFI conversion) Because of its past life as a racecar, it still has the cage mounts, are these likely to cause me any grief come cert time? mostly hidden, but if you know what you're looking at, they could be obvious. It only had a half cage so plate each side behind the front seats and two plates under the rear screen on the parcel shelf. The floor ones make a handy jacking/axle stand point so kinda handy if I don't need to carve them out!

-
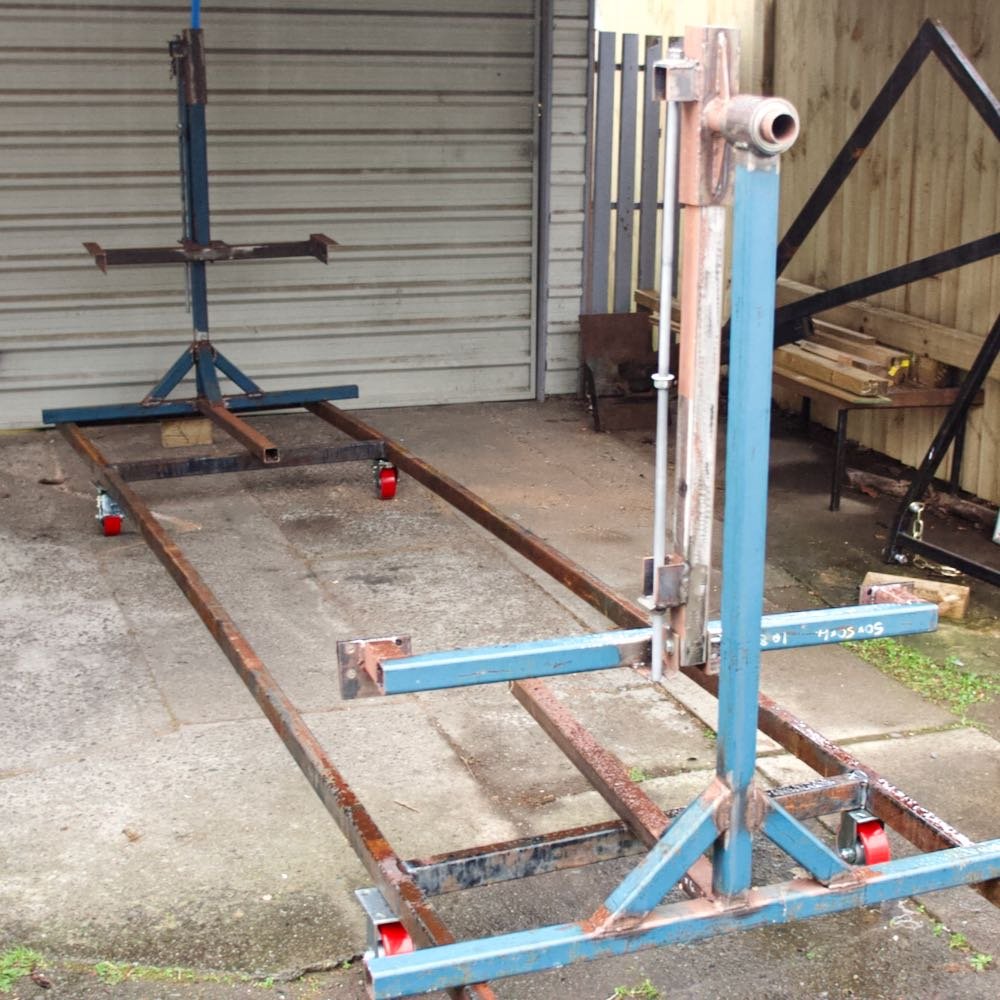
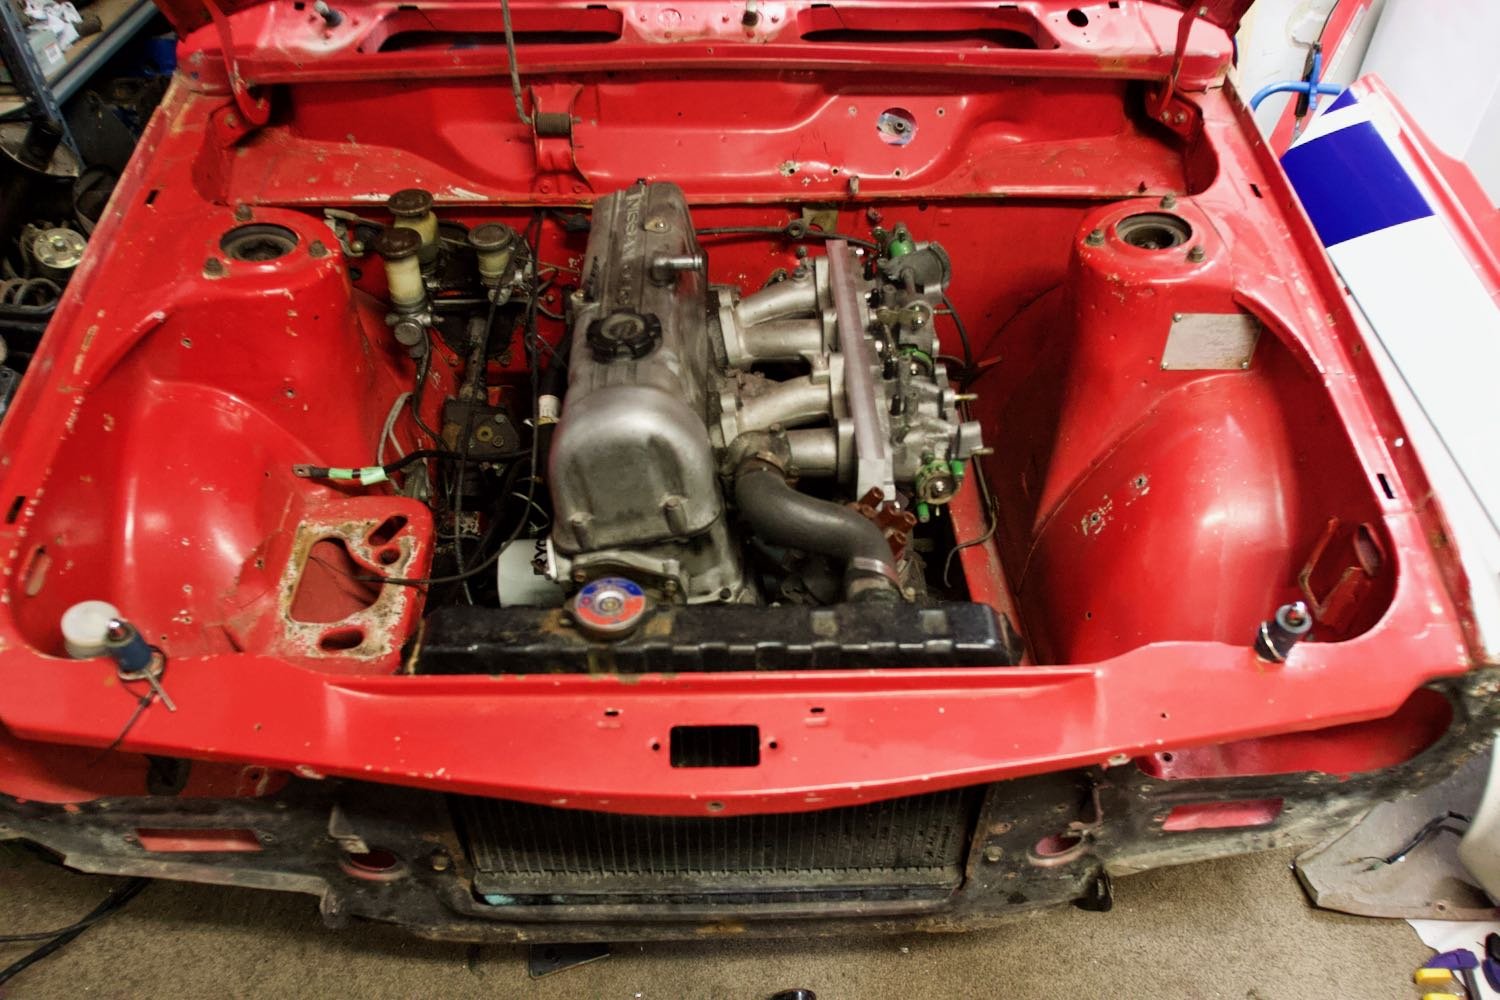
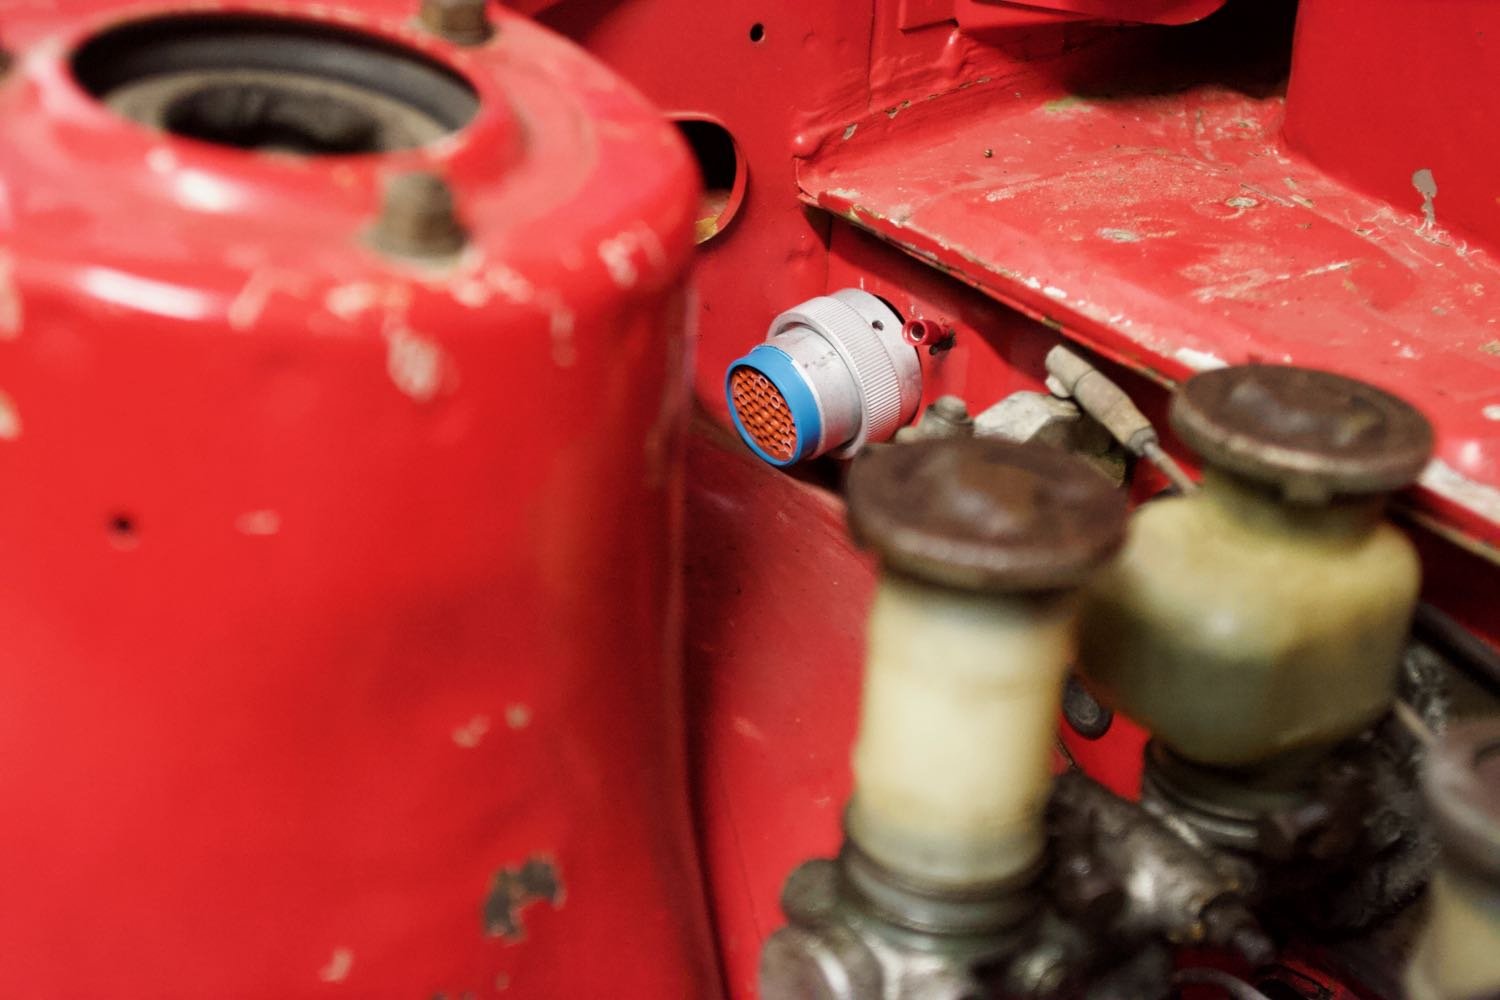
Annnnnnd i've got totally off track with cleaning up rust, Went down to machinery house and picked up some castor wheels on the word of @cletus way over what I wanted to spend, but with a few hundred kg rating per wheel, I could hang the whole car on them if needed. Blessed with another calm day I fizzed up a trolley for the rotisserie. Wheels are just poised for the pic, too lazy to drill some mounting plates so will get some profile cut. Pivot point is mad high so I might give it some makita one way action. Last few nights i've snuck out after dinner to slowly pull parts off to assess the rust, rumours that the Japanese assembled cars had better rust protection must have some truth as i've not much more than factory paint everywhere! The rear screen put up a fight (which the rubber lost) pretty stoked to only find more factory paint under here, happily buy new rubbers if it means less rust to fix! With the guards off I found the light surrounds are quite crusty, thankfully the drivers side is much better, will use this as a template to replace. Managed to extract most of the engine bay parts and have found myself quite taken by the cleaner look, good prompt to put some thought into the engine bay wiring when it comes to the time. A while back @Hyperbladehooked me up with a circular connector to use to check fit, bloody glad he did! What wasn't clear when the loom was in is the shape of the inner guard, while I think the socket will fit in the factory hole, it leaves very little space for the connector, hmm, rethink this one or just go all in? Next step is to get the trolley finished, if i'm cunning I should be able to use the rotisserie to lift the body off the motor and box, time will tell..... Whats become quite a blessing is i've bartered sufficient off site storage for all the bits while I complete the build, keeps my workshop far less cluttered!
- 53 replies
-
- 13
-

-
Do you know what happened to that car? There is a surprising number of them still registered, must be even more hiding away, hopefully its still alive? I'm expecting to revisit the urethane cross member bushes when I remove it, no doubt they won't look too healthy! So many options with the heads, did you put the larger valves in or were they standard larger in that head? Still haven't got a clear idea on the engine build, have put it to one side as I focus on the body work..... For future reference, we have discussion threads for builds, this one is here: Keeps a good flow of builds and we can spam the daylights out of each other with plenty of space! (Hopefully a mod can shuffle these over?)
-
Another warning... Careful with that approach, you still won't have the airflow to do the work. Small compressors often don't have high duty cycles, the instructions state not to use air while running/filling etc. Pumping up a larger tank will give you more work time, but the compressor might get too hot getting there. I recently found a 2.75hp compressor that I was keen on, good flow etc, but it was only rated as low duty cycle, unfortunately had to increase my budget
-
As chief engineer of wheelbarrow alignments, I take my role preserving even tyre wear very seriously!
-
I currently spend a substantial part of my working day reviewing documentation for building quite complex machinery, this is not only for our assembly team but also to satisfy various directives and certification standards from around the world that we are subjected to. Biggest learning is not to do the usual human response and try to control every detail, the art is in conveying the design intent of each particular assembly without constraints, be that tooling, process or parts. For example, if I put down 'torque fastener to 200Nm' I then need to ensure there are torque wrenches available at that station, they are then subject to quality control, periodic inspection and calibration, Additionally, I will need to justify why that torque is specified so that the next engineer understands why that is stated. If the above fastener is not structural and once loaded could fall out with no il-effect, the effort above is quite wasteful. Whenever i've tried to be fancy with describing a process, it has backfired, not in a physical failure, but in restricting movements without rewriting existing documents. I would say it is clear to everyone here that in an effort to define a mudflap (noble intent) this is rearing up to be quite an own goal. While arbitrary rules also hurt, in the case of the mudflap, what is the intent? is there real harm from lack of full coverage? Your pics Cletus seem to shut down the whole discussion quite visibly, unless rally flaps for all?
-
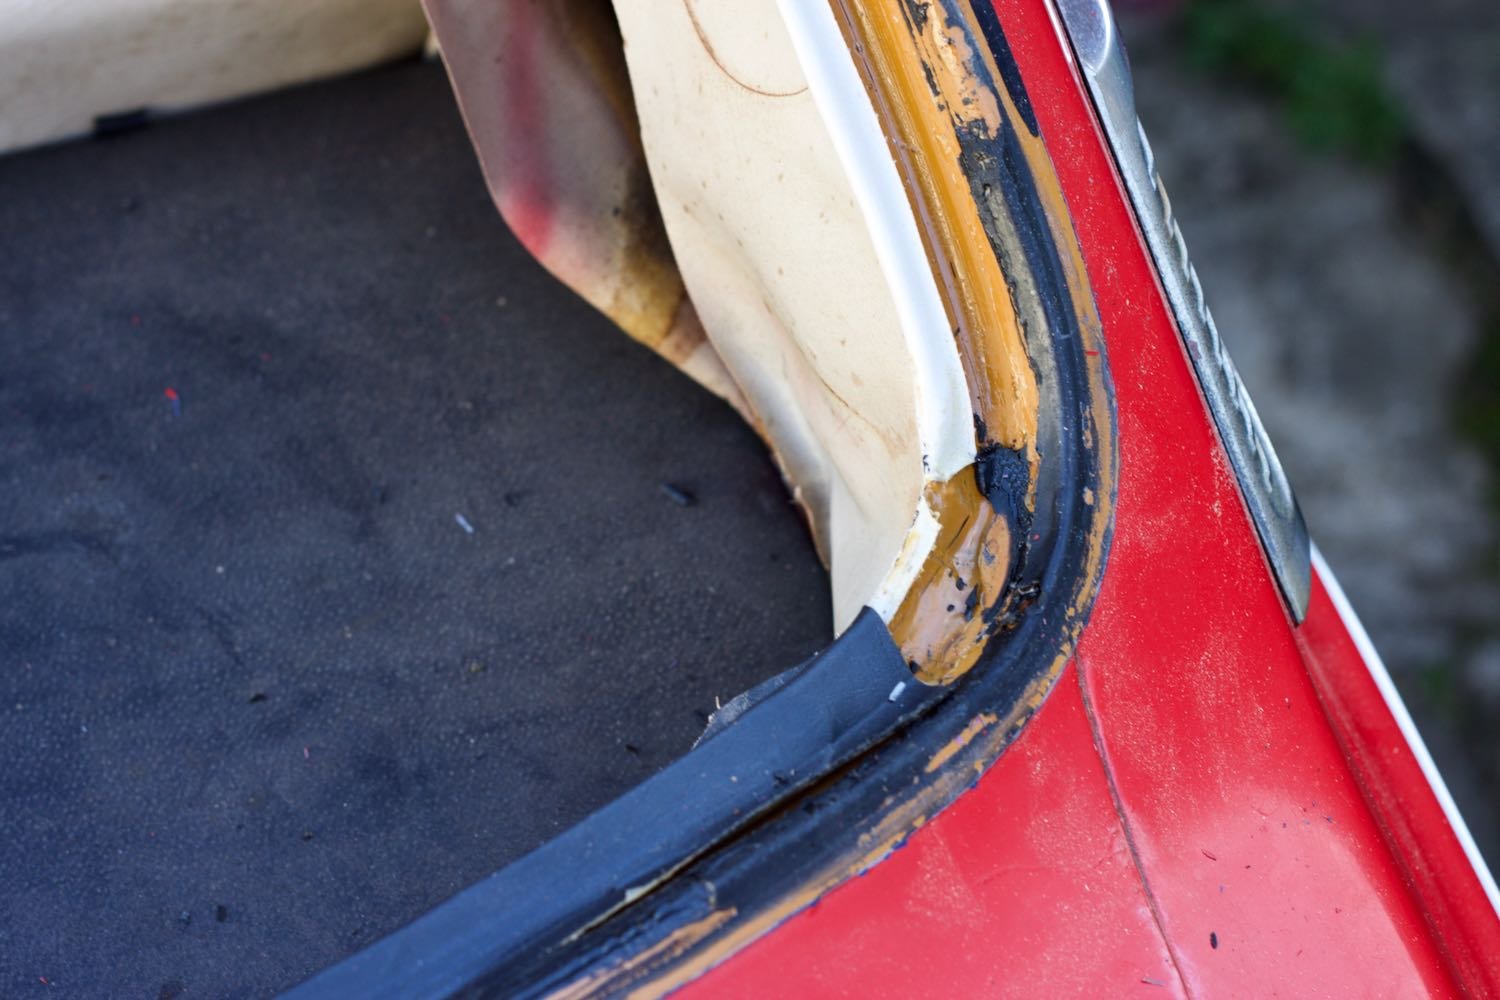
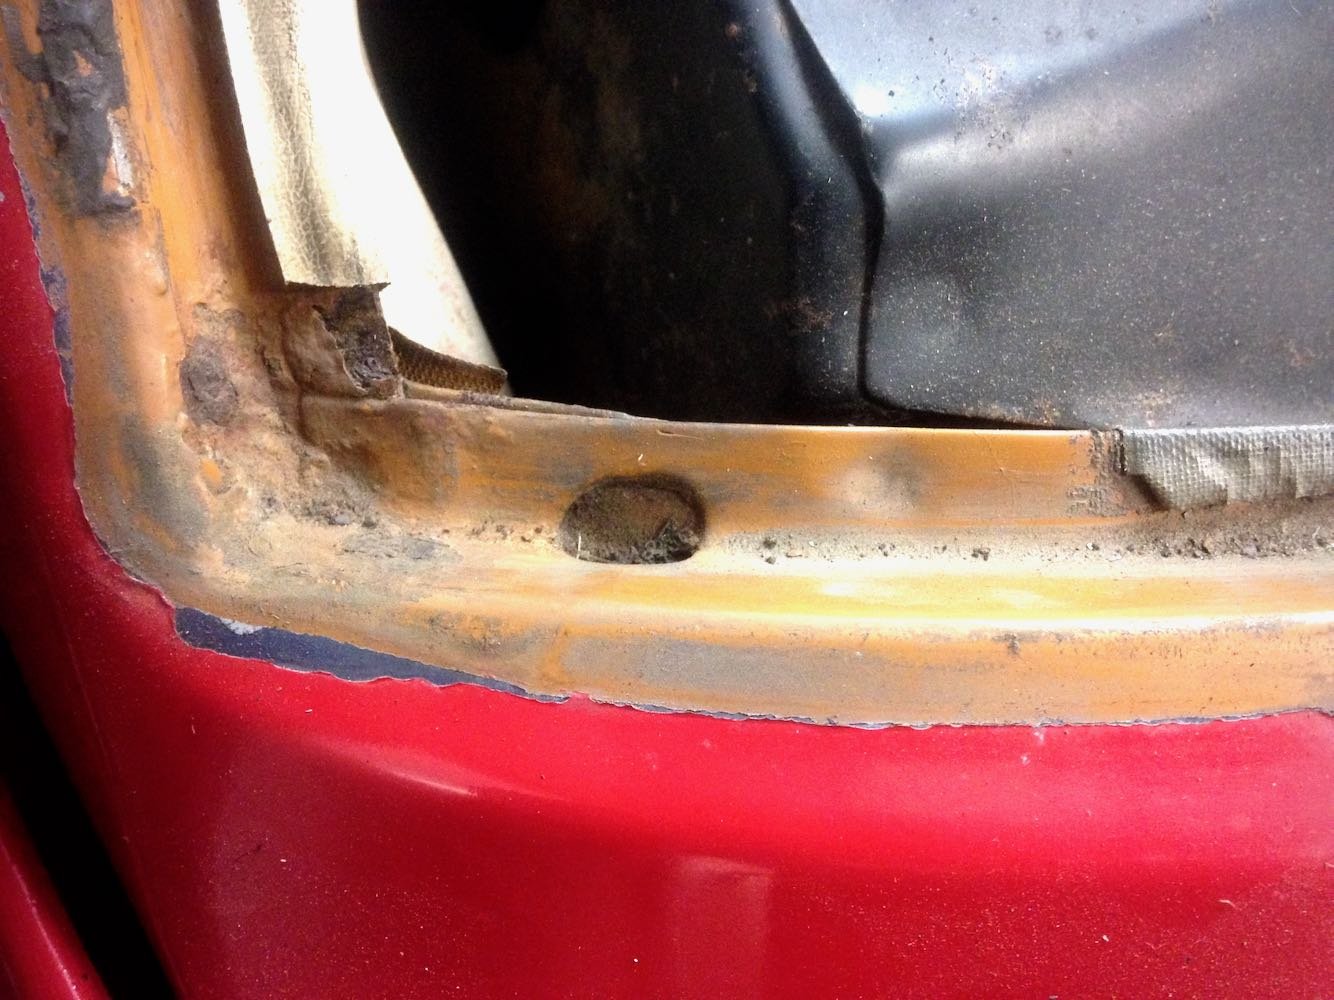
After asking about castor wheels to build a chassis dolly, ol @RUNAMUCK fires me a message "I have a local mate with a 510 rotisserie he might loan you" #projectcreep Quick drive across town with a box of beers and this was in my possession Did I mention custom fabricated for a 1600! Will need modification for wheels to allow moving it in and out of my shed, but all the bones are there and legit, down to ball bearing pivots! All this has as expected pushed any chance of a quick turn around to be a very hopeful proposition, but i'm not giving up just yet, will dive into stripping parts with fingers crossed. First job down, got sidetracked while throwing a some epoxy about on another project and popped the windscreen out, gotta say i'm pretty happy with what was found. The only rust under the seals and it barely qualifies as surface rust (even for a Datsun!) Also shows the three colours the car has been, factory tan, dark blue and the current red. Next move is strip the interior to store away safely and then drop the drivetrain.
- 53 replies
-
- 18
-
-
A+ job mate, massive milestone down!
-
Shit, they are way cheaper than the last time I looked! Might grab a set for the table saw as a test run Thats actually not a bad idea instead of locking castors
-
Estimating the body to be ~300kg so will need 100kg+ castors to be safe which are $50 + area. Getting up to that price range I figure the wheel dollys leave me with options later on.
-
Not far from my daily rounds, could take some pictures? Technically I could take it for a hoon too, but i'm not really qualified to assess anything other than what the cab smells like.
-
Getting my hands on ~60m of scrap 35x65 rhs with the plan to build a chassis dolly/rotisserie for the Datsun. I want to be able to strip the suspension and still push it in and out of the workshop for the dusty/muck work. Cos i'm a cheap c&*t, whats the most cost effective solution to getting wheels under it? While i'd like to have large locking castor wheels, that would far exceed the current investment of $0. Best idea I have come up with so far is a set of tyre dollys because they will be useful once the resto is complete.
-
+1 for decent welding supplier and they will be able to crimp the lugs for you. They have the hard wearing double insulation cable, most electrical places don't.
-

Discuss here about Yoeddynz's little Imp project...
NickJ replied to yoeddynz's topic in Project Discussion
Yeah poor guy is one cog short down conrod so just pulls over and lets them pass, then takes it all back under brakes, so cool! -
Discuss here about Yoeddynz's little Imp project...
NickJ replied to yoeddynz's topic in Project Discussion
I was sent this by a mate a few weeks back, something about the shame of being passed off the grid by an imp.. Sounds good though -
As expected from any man well versed in the intricacies of British motoring engineering, I was asked to park on the street.
-
DAD's 1984 Hino fire appliance house truck pikey project
NickJ replied to DAD's topic in Project Discussion
Awesome start! Can you buy the raw extrusion and corners for the expedition style wholesale? surprised to hear the parts are that expensive. -
Alex and Hannahs bushblock shinanigans. Look at my deck..
NickJ replied to yoeddynz's topic in Other Projects
Love the work as usual, especially Kevin's ramp! Word of warning, the mixer looks suspiciously similar to the budget friendly version we purchased during our reno which I just replaced this week due to a crack in the cold water hose. We couldn't justify the cost of a fancy one during the build 2 years ago, but the upgrade is definitely worth it in hindsight. -
That looks like the ticket, cheers! Had a look at mil-spec ripoff sockets on aliexpress, coming from working with Amphenol mil-spec daily nothing on there looked moderately capable of surviving so something legit is welcome! Actually keen to have a look, the original loom comes through this boot, not excited about making additional holes in the firewall where possible so if I can get an idea of size/bulk and get it to fit in, thats a bonus! I already have a good selection of crimp tools and plenty more at work, no worries if I need to buy another pair, I convinced myself years ago tools are a totally different budget........
-
Look forward to hearing every detail of making an agent squirm, dealing with them was the worst part of house buying for us, they all came off as openly dishonest without even trying to hide how much they were ready to rip us off.
-
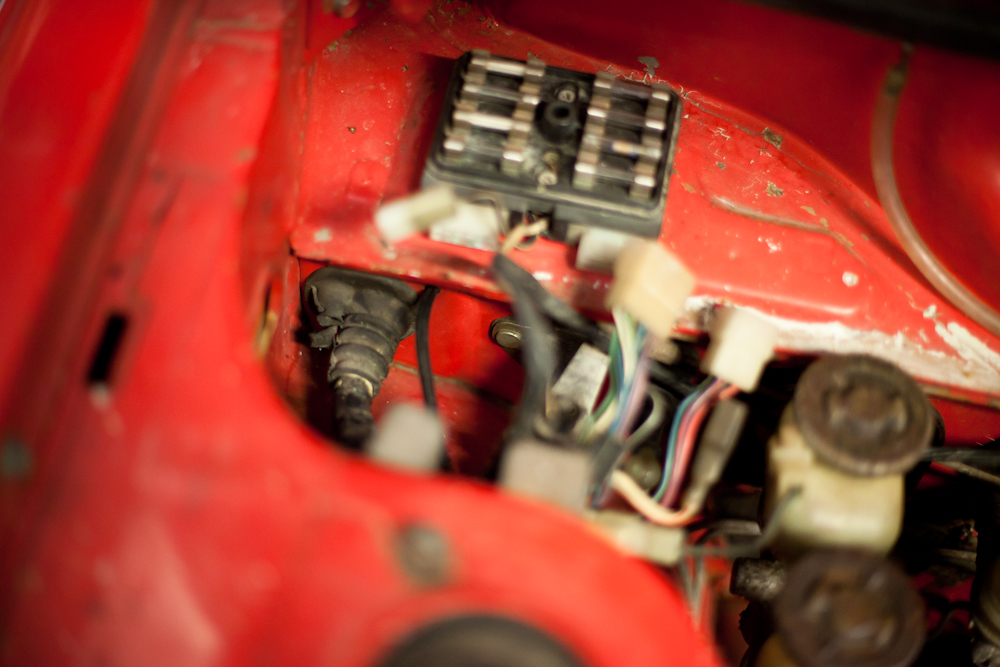
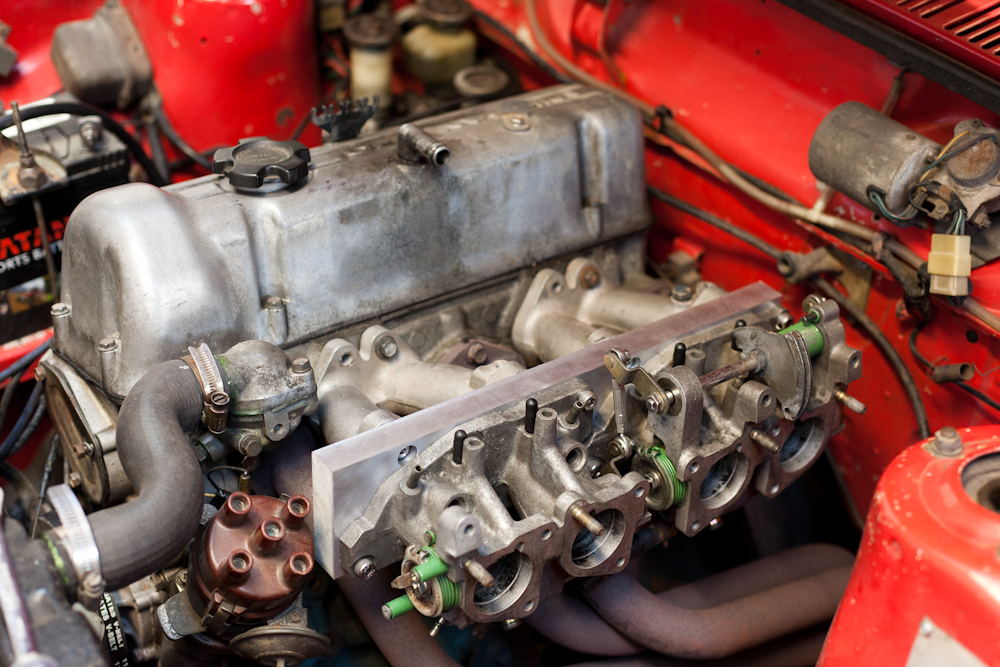
Finally got the throttle body adapter plate port matched and dropped it on the current motor for visual motivation Started a quick spreadsheet and have rapidly worked out I need ~45 individual wires running through the firewall to operate the motor and the usual electrics (lights, wipers etc) most of these are because I wish to move the fusebox and relays into the cabin. A quick estimate and this looks to be about 55m of cable.... For ease, putting a 50pin connector on the bulkhead looks to be the way forward. Rather than threading each wire, I can wire the loom on the workbench, any suggestions for a bulkhead fitting thats not $200 mil-spec?
- 53 replies
-
- 13
-
-
Awesome thread mate, so good to see these old cars with a story getting rebuilt. Out of interest, do you know what flavour Datsun pistons they are?
-
Cos agreeing on a date is next to finishing a project for difficulty, I'm gunna open the bids with Thursday cos its next on the list after Wednesday
-
Another +1 for enjoying keeping up with your Fiat talents, passed through dunners on the weekend and was hoping to spot them from the main drag! Keep up the A+ restos!