piazzanoob
-
Posts
1247 -
Joined
-
Last visited
-
Days Won
1
Everything posted by piazzanoob
-
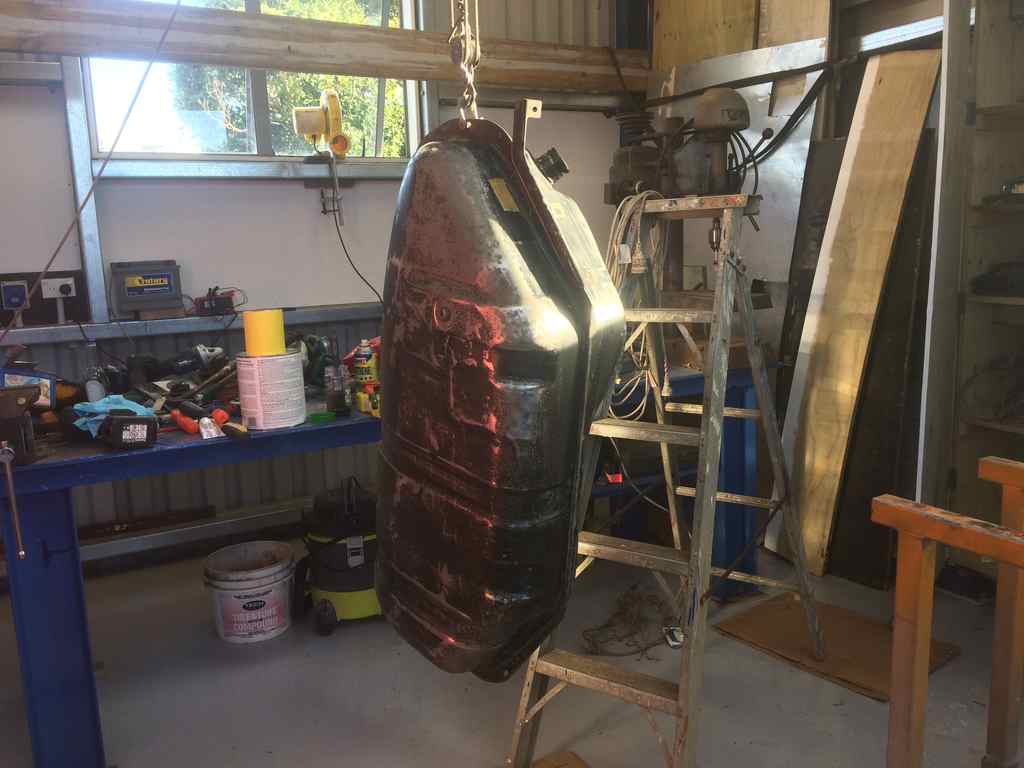
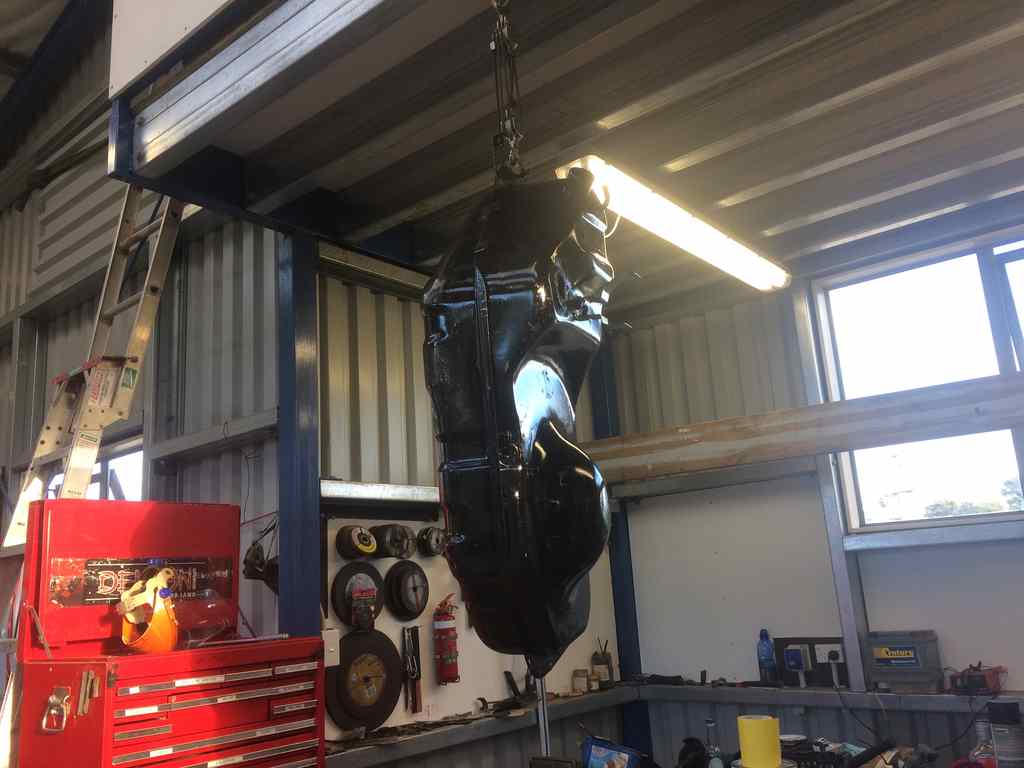
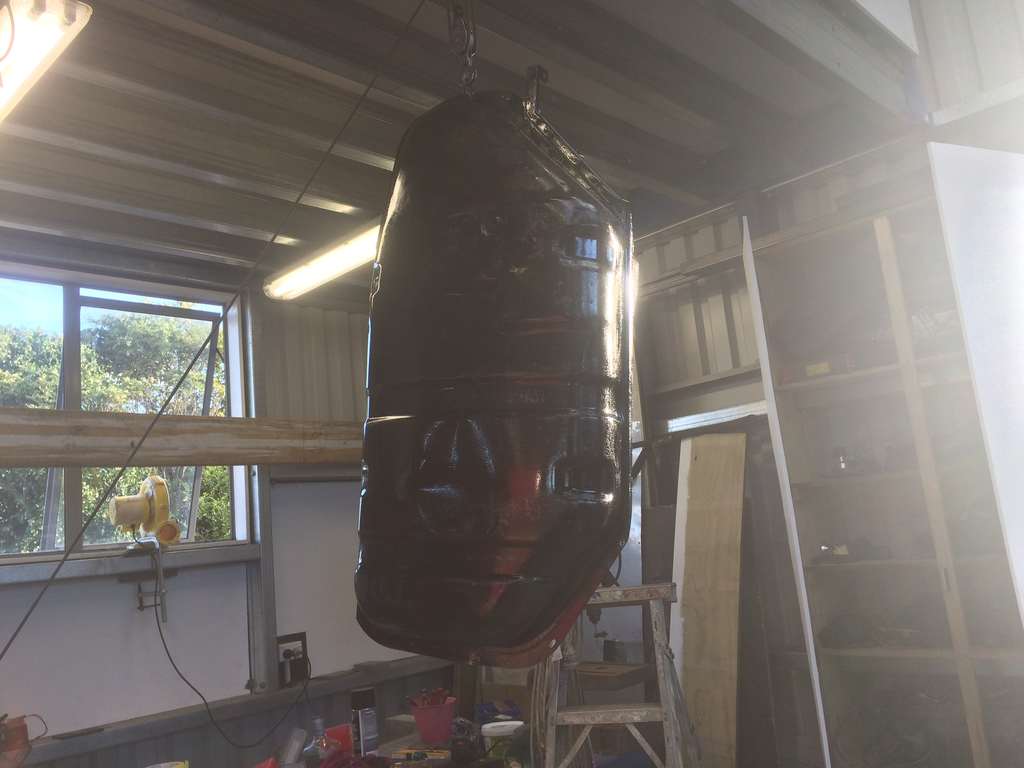
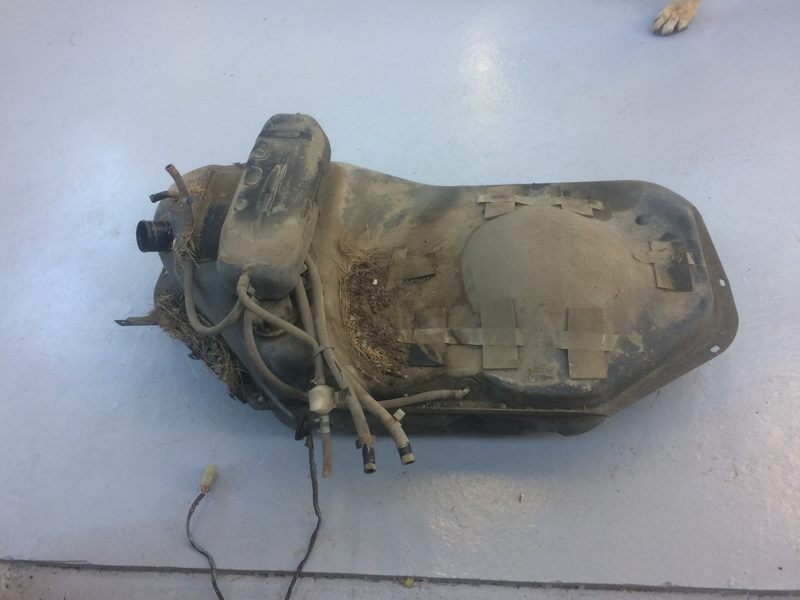
Right with the rust patches all done the next step was to put the fuel tank back in Easy job right! Well heres where the next job started opon removing one of the fuel hoses off the tank fitting the fitting come off the reason this had happend is that the tank had a dent on the bottom which had pushed the fuel pickup tube so it wasnt left with much strength to hold it in place. A few hits with the handle of a hammer sorted most of the tank dent issue so now i needed a way to fix it welding wasn't really an idea we wanted to do as fuel vapors etc so we went with the idea of a fuel sealant and some pop rivets to hold it down with that done i figured with the tank having some surface rust in places i should give it a lick of paint gave it the hand sand treatment as it didnt need much sanding one coat done Number two coat Also got my fan setup going on in the background which is a blower pump for a bouncy castle etc blows hard for what it is ended up coating the tank in POR 15 found it a great product as only used a brush to apply and when it dried the brush marks didn't come through only in a few places it did where i didn't do a great job with the brush just don't get the shit on your hands took me about 7 days to get it all off And that's when the tank went in also gave the tank straps a coat also along with cleaning all of the breather box and hoses then bumper went on afterwards

- 15 replies
-
- 10
-

-
for the ones that live on the south side would it be worth us all meeting at the monthly meet location then going as a convoy to kiwibirdmans shed? that way everyone knows where we are going and dont get lost
-

KustomKreeps 49 Hudson - Discussion
piazzanoob replied to KustomKreeps's topic in Project Discussion
cool build you have here i can see you will run onto issues with wheel removal if going tubbed and bagged but you know that already perhaps you could have a cut out for the rear wheels as other cars from that time had? and hid it with some chrome trim or stickers/wrap or your wheel choice may need to include massive negative offset -
mate come call down to my work and grab the right die ill most likely have one just let me know when you coming down
-
Tumeke's 1962 Humber Super Snipe of Tu Meke!
piazzanoob replied to Threeonthetree's topic in Project Discussion
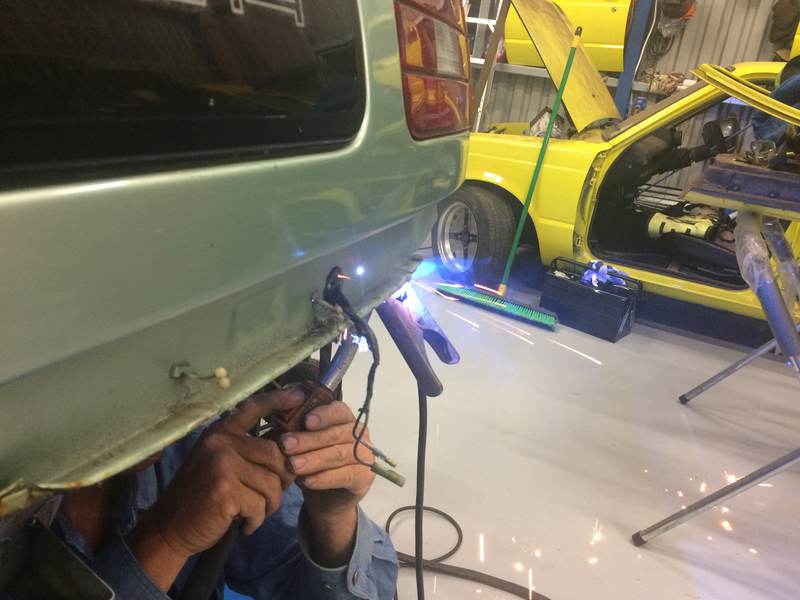
what type of welding was done on the patches? they look great only thing i would do is keep going and doing spot welds all the way around but trying to keep the heat to a minimal to pervent panels warping great stuff -
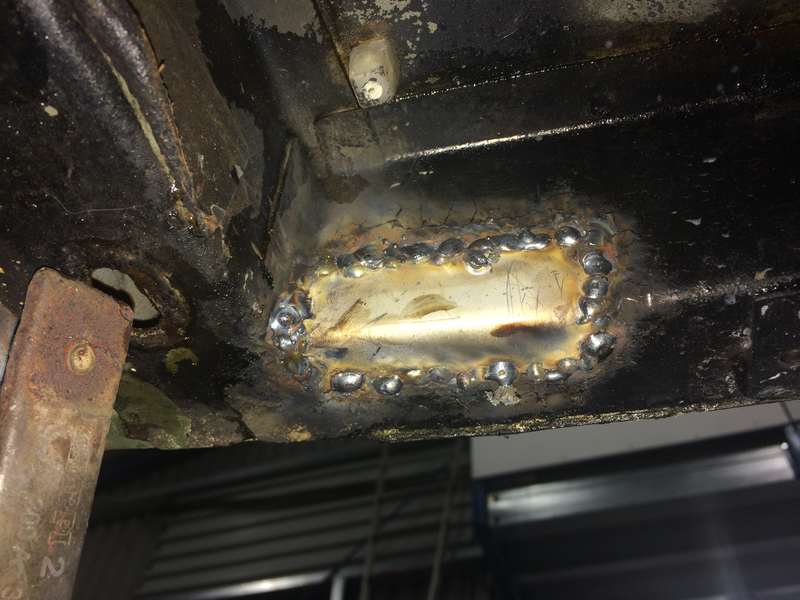
i then mixed up some body filler to tidy the job a bit more as you would notice the patch with just some paint on it i then applied some coats of POR15 over the patches to cover them and pervent rust coming back in the end the patches turn out okay wasnt 100% happy but that couldnt be helped as the replacement patches ended up being high than all the other steel around it and i also had some holes still there from where the welder burnt through so had to fill those but not to worry as you only see that corner if you take your time with a light and take a look. as i never knew in the first place it had rust there until the wof inspector took a close look in there but he had only noticed the rust on the L/H side and said he couldn't see any on the right.
-
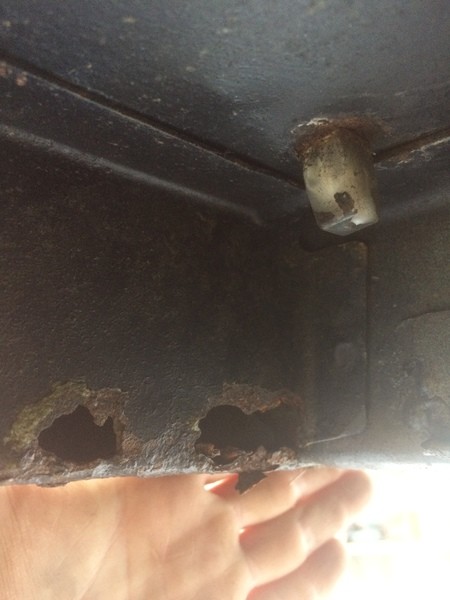
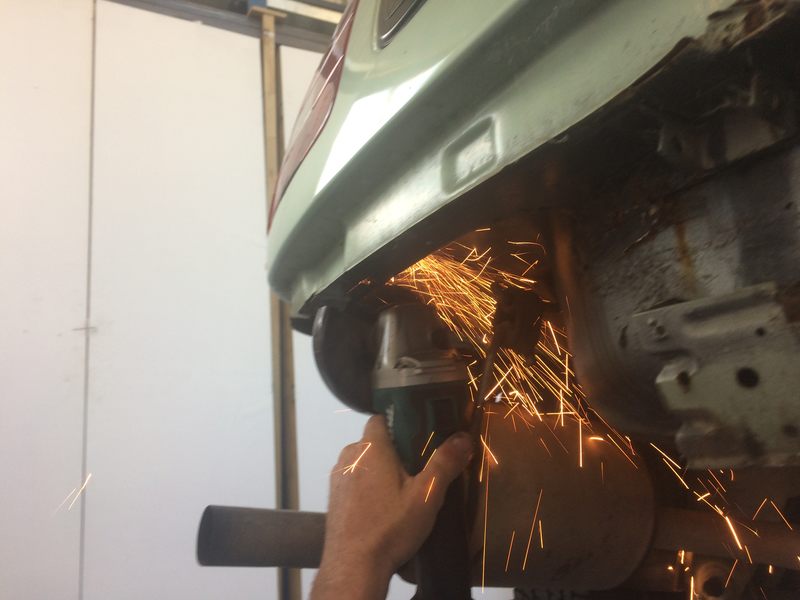
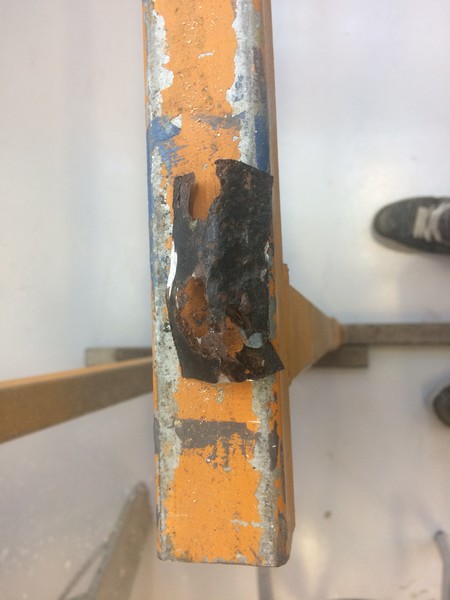
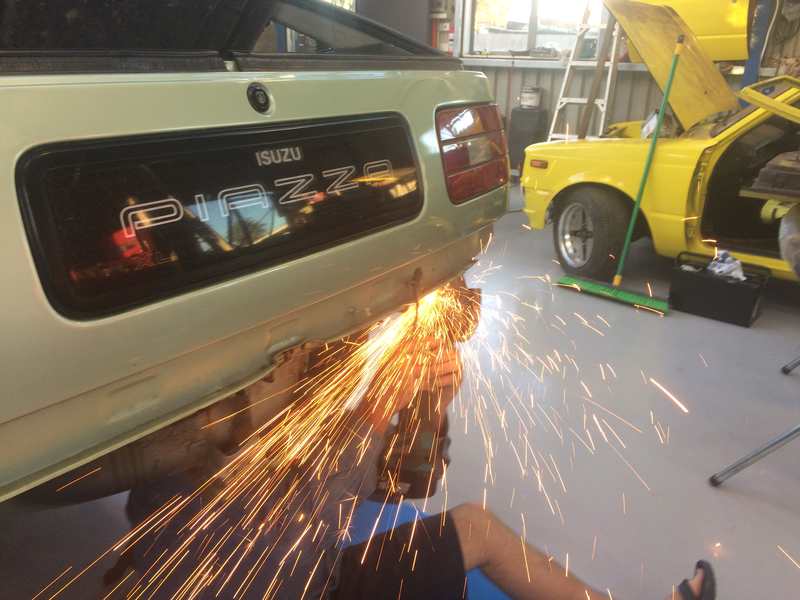
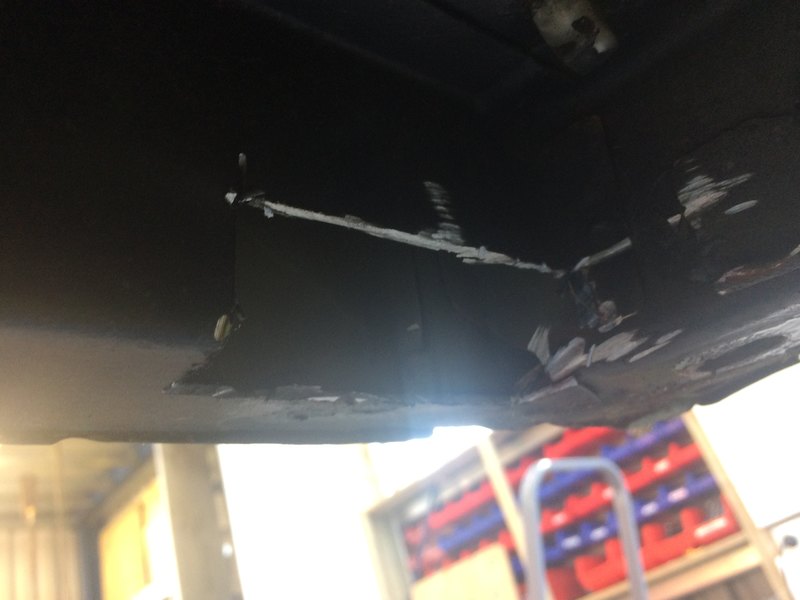
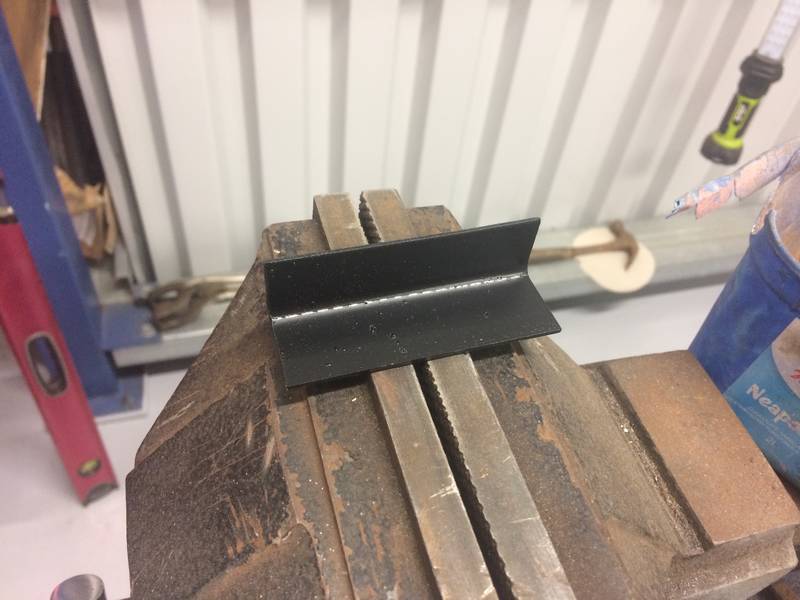
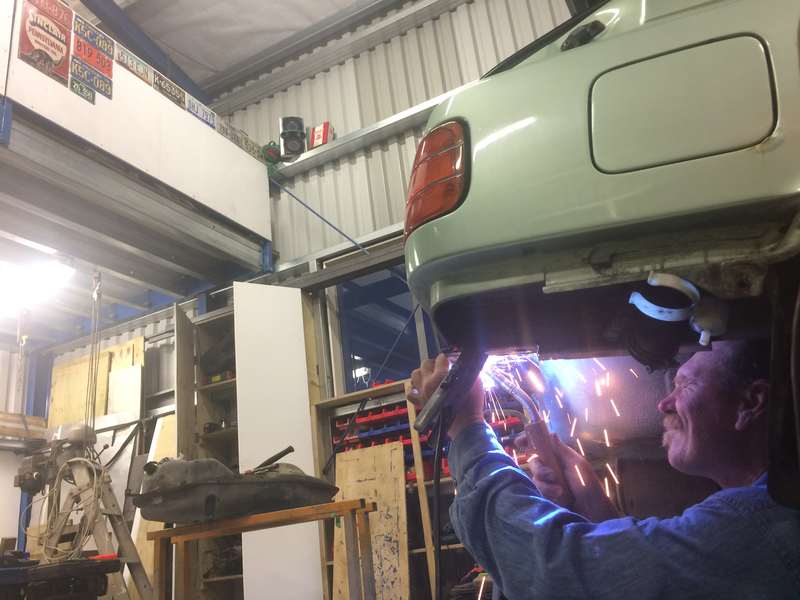
so here's the proof of the rust Then as it turns out the R/H side also has some rust there so now two patches are required so in order for us to cut the old steel out the fuel tank needed to be removed which turned out easier than expected then the old rusty steel had to be cut out so this was the L/H side then R/H sides turn which ended up in this And R/H side I then sprayed some rust converter in the chassis rails to slow down the process of other rust coming through so made up a patch for each side using some thicker panel steel and originally made from i also applied some paint to the inside of the patch panel to pervent that from starting rust also i then cleaned up the edges for the panel to weld in nicely and my old man got his safety gear ready to weld the patches in as i haven't done enough welding to be good enough yet. so with the welding getting done a whole lot of smoking also was created I now suppose you want to see the patches welded in right? well here we go so with that being done we both called it a night. the next day i set about tidying up the patch/welds to make it look less obvious i then mixed up some body filler to tidy the job a bit more as you would notice the patch with just some paint on it i then applied some coats of POR15 over the patches to cover them and pervent rust coming back
-
well ive had this car sitting around since september last year as went overseas etc took it in for a wof in december and upon inspection we found rust in the L/R chassis rail and tyres worn as i haven't replaced them since owning the car so algood with knowing that and still no wof i took it home for it to be repaired. month goes by so i pull the rear bumper off and have a look to find it will need a patch welded in so one long weekend comes and goes then the next i figured i should fix the thing. so in the shed it goes
-
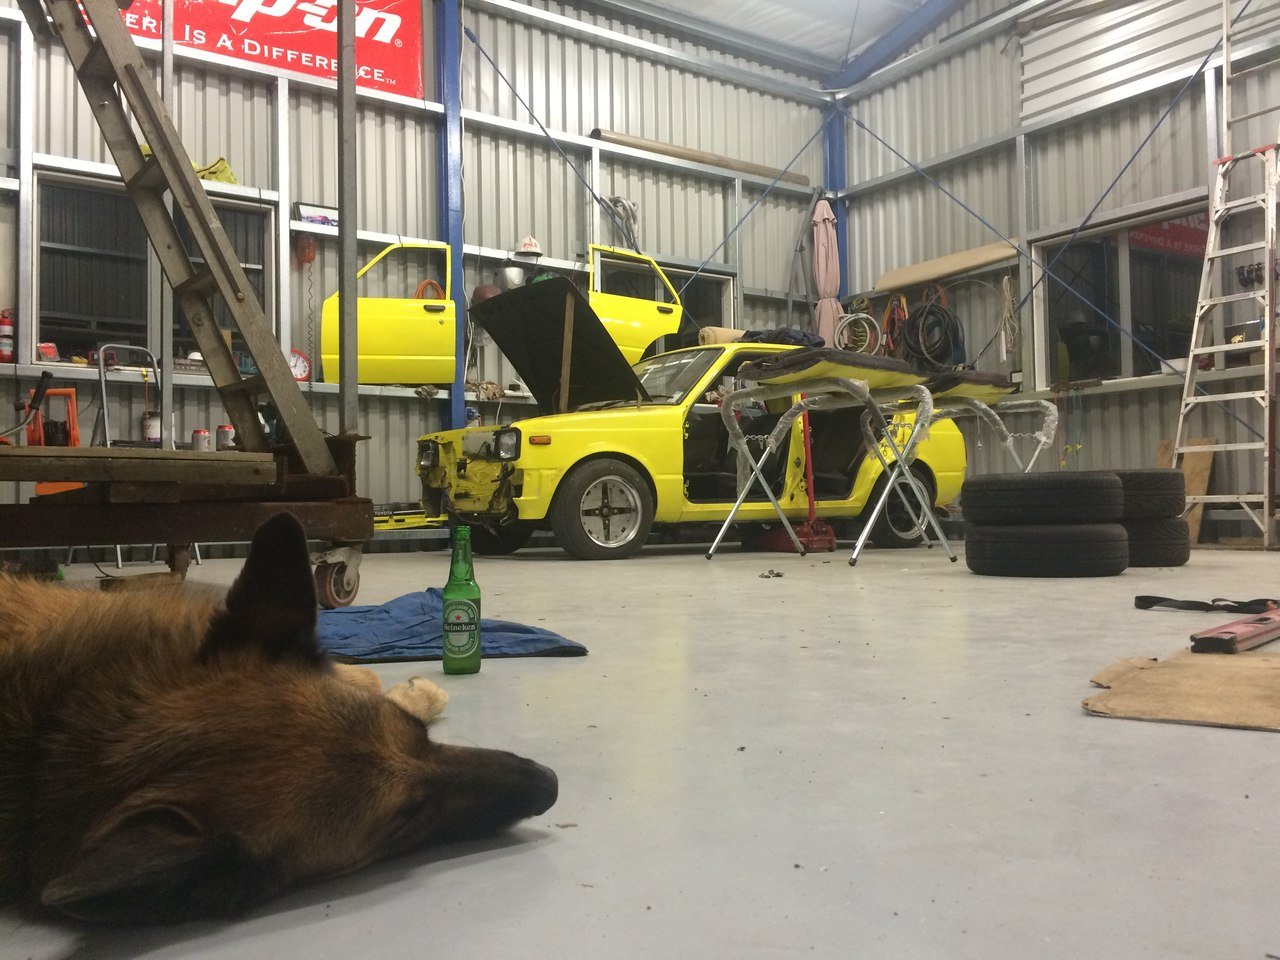
well they did make it onto the car...
-
counting the sleeps till kumeu comes
piazzanoob replied to pusherman's topic in Upper North Island Region
Seen as every joker is excited how about bringing some stuff for the people staying in the camp area we will need the following •BBQ + Cooking and eating materials for the mean feeds bro •Geezebo is a must unless you want to end up like a tomato •Tables And Chairs •chillybin •Radio And yourselves I will be bringing the OS banner to put up also Better living everyone -
count me in as a number also will have a speak to a couple of people that may be worth a tour
-
Cheers mate That's exactly what i need for replacement panels in the starlet doors
-
With much more moving done into the shed i got a chance to move it into a better position and move all the stuff from inside it. manage to do a couple little pieces drilled out rivets in the door etc one door has all the patchs done but just needs a tidy up filling up the holes
-
with the booster mounting area and the lower rusty panel you replaced how did you get a nice bend in the steel? do you have a English wheel?
-
piazzanoob's 1981 Toyota Starlet Discussion
piazzanoob replied to piazzanoob's topic in Project Discussion
fuck no! Not after all that money on paint and the time it took to do it. would look real shit with skid marks through it too the driveway concrete is quite shitty though and will get replaced one day so perfect candidate driveway -
had some trouble uploading the photos the other night due to file sizes too big but algood now after reducing them online photos don't really show how great they came out they have a great sparkle in the right light and best of all they were just painted in a dirty ol container with a cheap spraygun. and you would never of guessed.
-
piazzanoob's 1981 Toyota Starlet Discussion
piazzanoob replied to piazzanoob's topic in Project Discussion
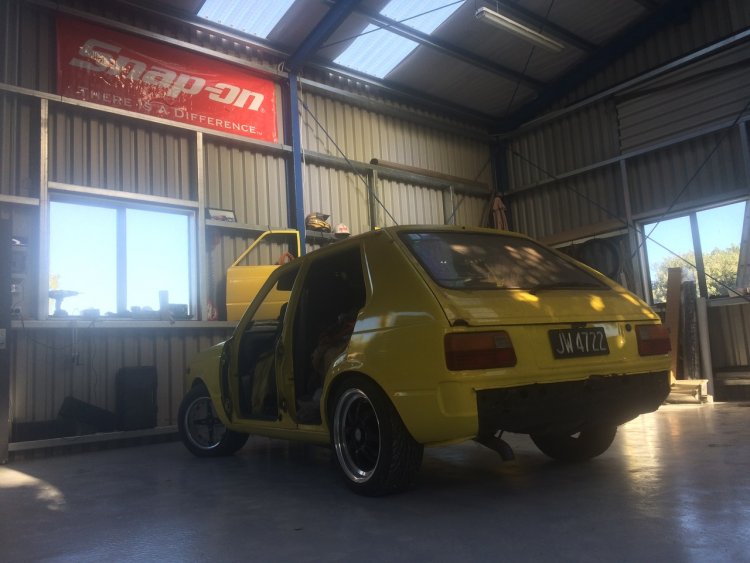
Have had to wait for floor paint to fully cure before placing any sitting items on the floor. has been 6 days since first coat so were good to go. just got to be careful not to scratch/chip it now -
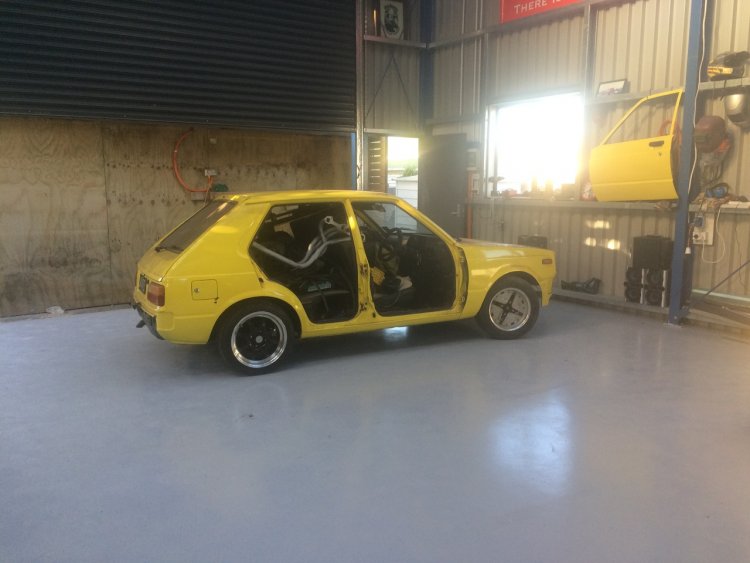
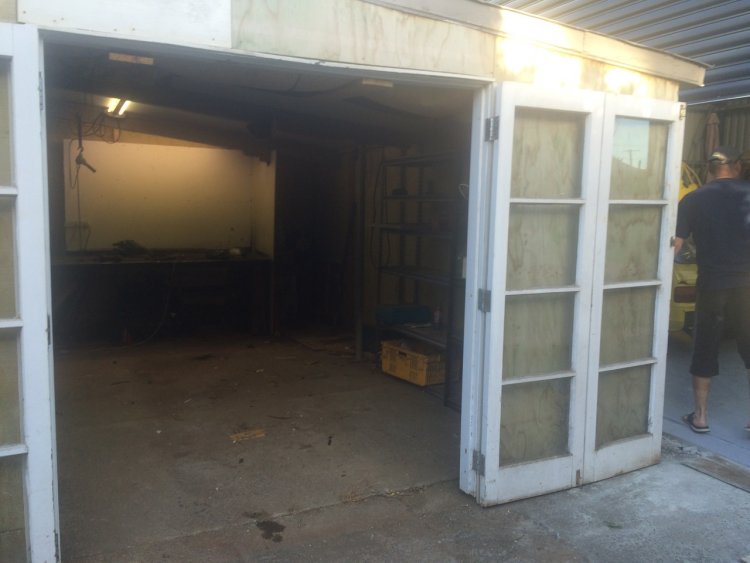
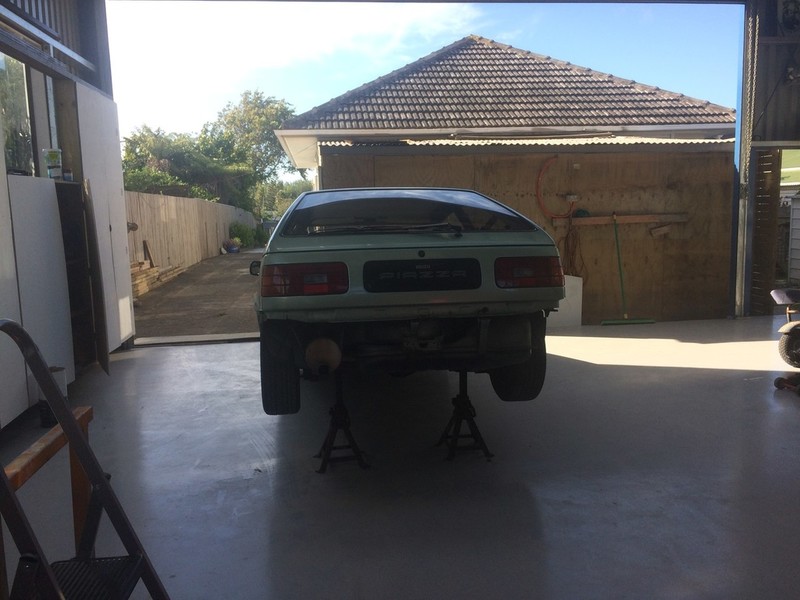
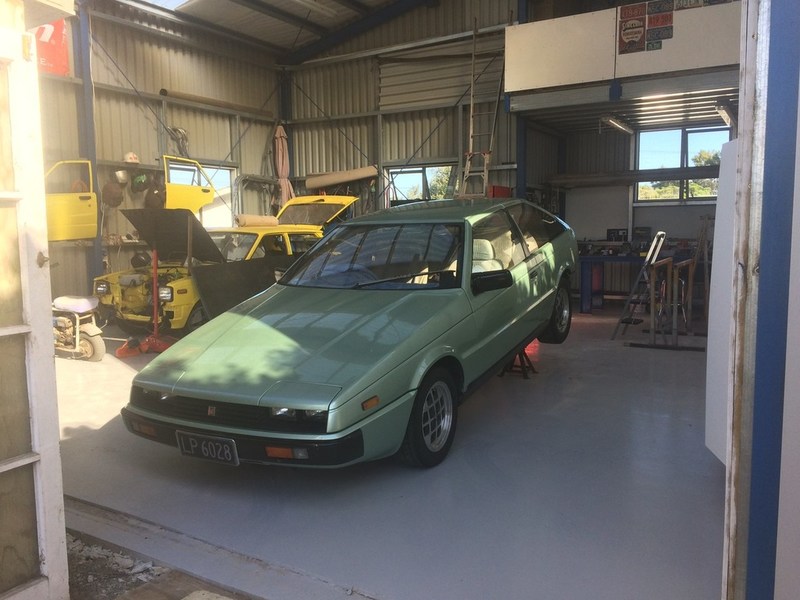
Well the starlet ended up getting the move this evening but not under its own power due to no radiator and a bit of a cunt to get started had to jack the back up and pull it round to get it out as old shed hasn't got wide doors and fence is close by Old shed Into the new shed When we have finished putting everything into and away in the shed the car will be moved into a more suitable loaction in the corner where its rust surgery will go underway
-
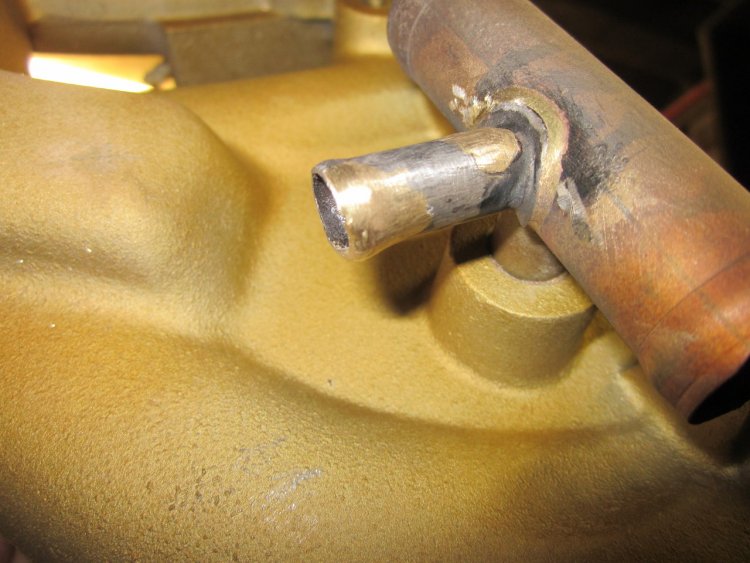
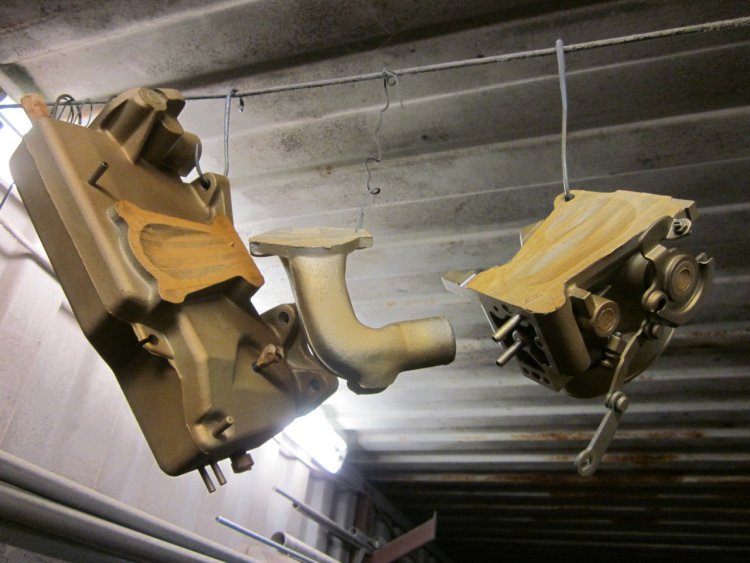
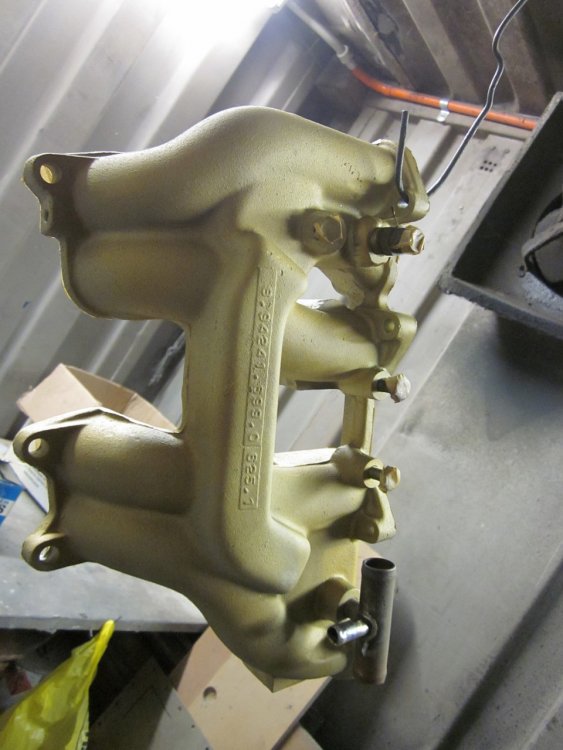
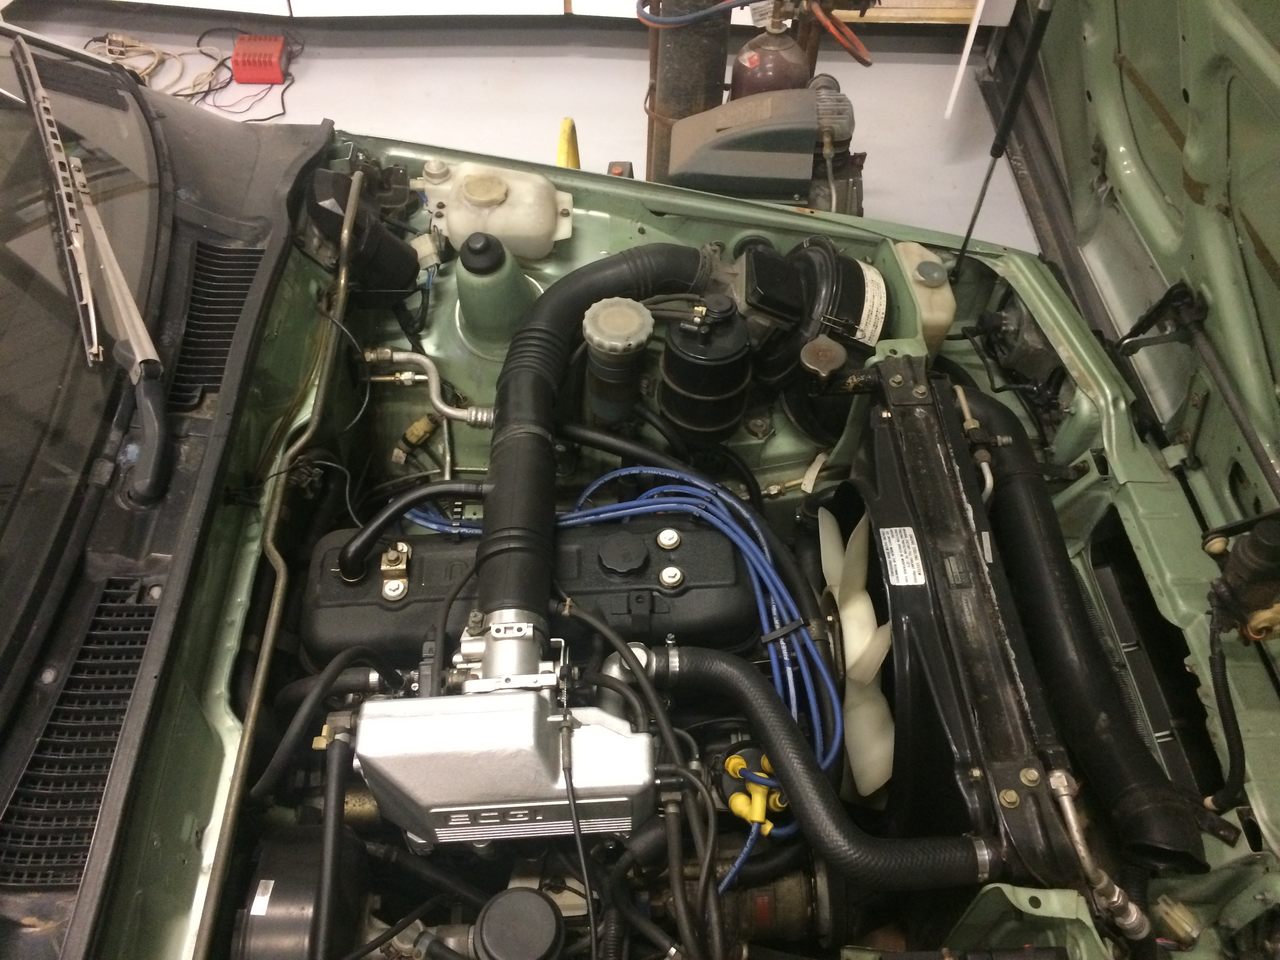
So i then looked at my options to what to do with it. paint it? blast it? polish it? get it done in vht? well so i decided to get it bead blasted. now what next i needed a paint that would stick to cast Aluminum. i thought about vht clear but wanted something that would last the heat and time. so i fucked around and talked to a few people. I then ended up going round to a friends place where he painted all his engines in a caprithane paint. he then offered to do mine free of charge but he would do it when he got time. A week went by so i popped round and spend a few hours masking all the bits up. few weeks later.... I popped round to check for progress He had brazied up a small piece on the water pipe that had a pin hole And........ Applied a primer coat on the intake pieces Mayte check out those masking skills then a couple weeks after that he rung me and told me he had applied the final coat of paint and it was ready for collection. but I had to spend many hours spinning yarns before leaving with the finshed products.
-
So now it was week two And back at work And that continued for quite awhile then i collected the cylinder head and fitted that on one of my days off while still trying to tidy/paint other bits up. ONE MONTH LATER..... I then looked at the intake system on it And while painting and tidying everything else up on the engine side of things it would make the whole thing look bad if i just put it back on.
-
Nothing much on this project car has been done for awhile apart from pull it apart more and use it as shelve and storage cabin inside FT dog telling me to get it done. All of this is because it was stored in the car port then the carport became an enclosed garage so we ended up having no proper space to do welding and grinding without setting fire to stuff. And plus we have been building a new shed to put our shit in mostly mine though so now with our shed pretty much done the car should be making its way into the shed this weekend and i shall get stuck in to finishing this heap but.... on a brighter note all ive done is buy more parts too. so i haven't completely done nothing
-
Thats a good barn find you have there looks like you will have your hands full with that project for some time. keep us updated on the project cheers
-
how short term is this accomodation?
-
Now that this thing is up and running You must come to the OS monthly meet this coming Wednesday!
-
Wanted: Dashboard restoration in Auckland
piazzanoob replied to Threeonthetree's topic in Upper North Island Region
+1 for dashboard restorations Did my one in the piazza that a upholstery shop at the time in onehunga didnt want to touch due to the shape Also not surprised that they are busy due to them making dashes for R/H hook conversions. He should just pull it out and take it down there for a quote. Also just as a note these guys don't just bog and slap some paint on your dash or do a quick recover All their dashes are coated with a paint that is imported from the US that is $200 a litre from what he told me and it also involves them being placed in a oven for proper paint cure plus the use of a vacum of some sort to pervent air bubbles stuck in the dash. so there is a reason they are not cheap they use quality procducts and do top notch work.


.jpg.02619e79ee9573cd1b2017da062586aa.jpg)
_Easy-Resize_com.jpg.94affa78def78fde1c04b9858073fe54.jpg)
_Easy-Resize_com.jpg.f72b629b95cf9900cc1251eba4a5b85c.jpg)


.jpg.1f133782805b83c12d66a90930ff068c.jpg)
.jpg.62c4c57582ed4a2b8f19fa6be372d15e.jpg)
.jpg.aaf6dfe45d5724879eda1a9b6123b376.jpg)