azzurro
-
Posts
2,875 -
Joined
-
Last visited
-
Days Won
4
Everything posted by azzurro
-
Follow the pisScience!
-
Like the BMW high km M10 turned into M12/m13 F1 motors, maybe these are the ones to go for
-
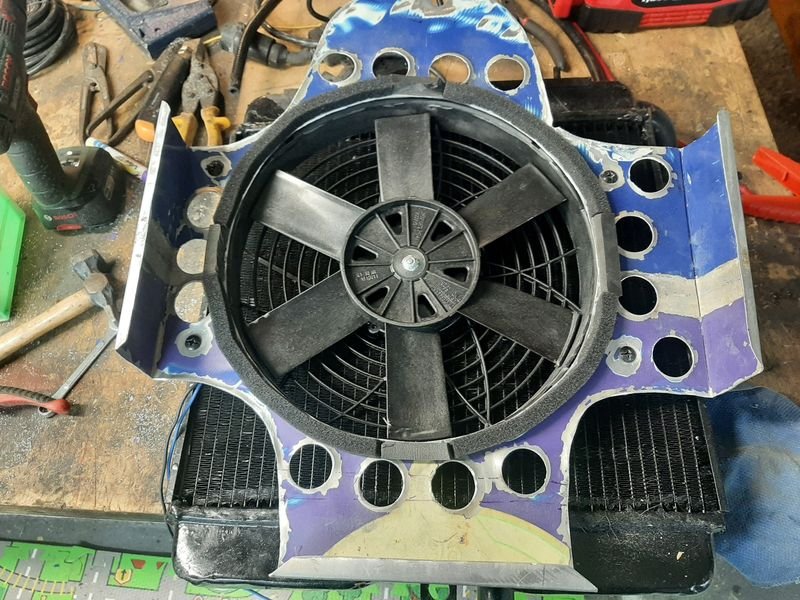
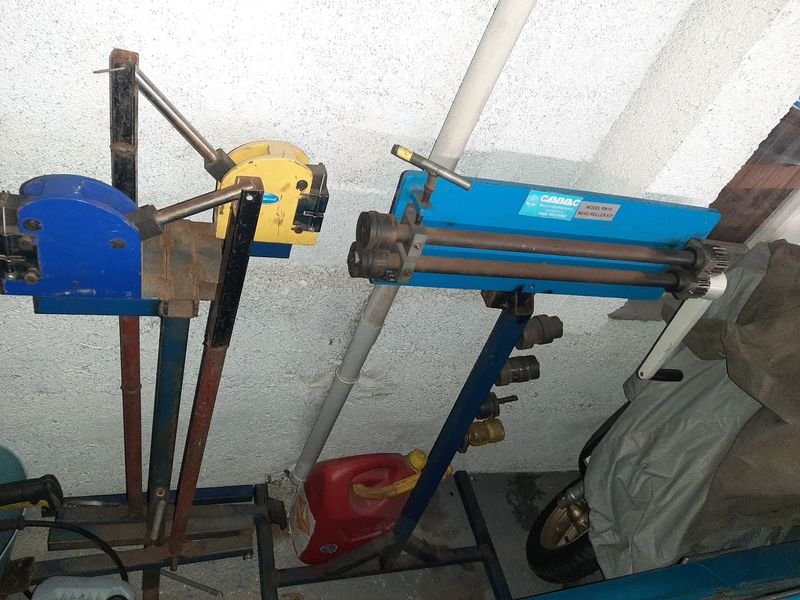
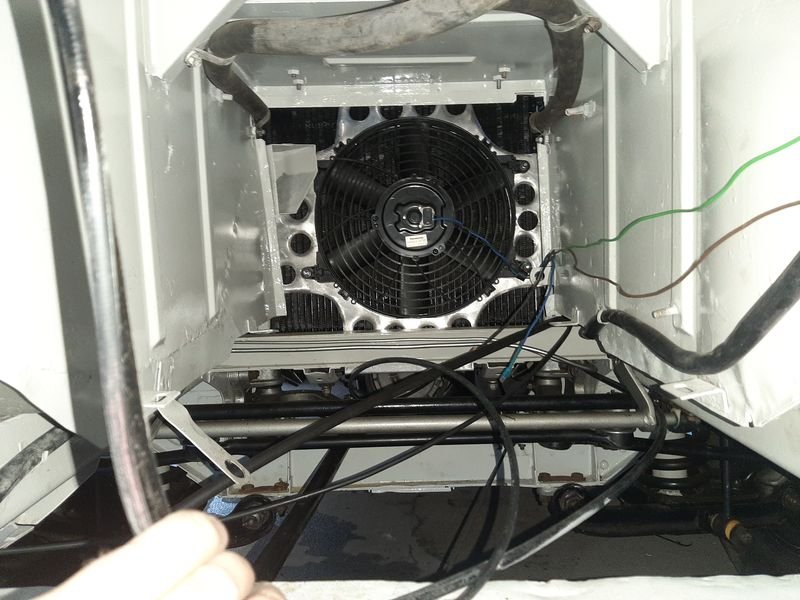
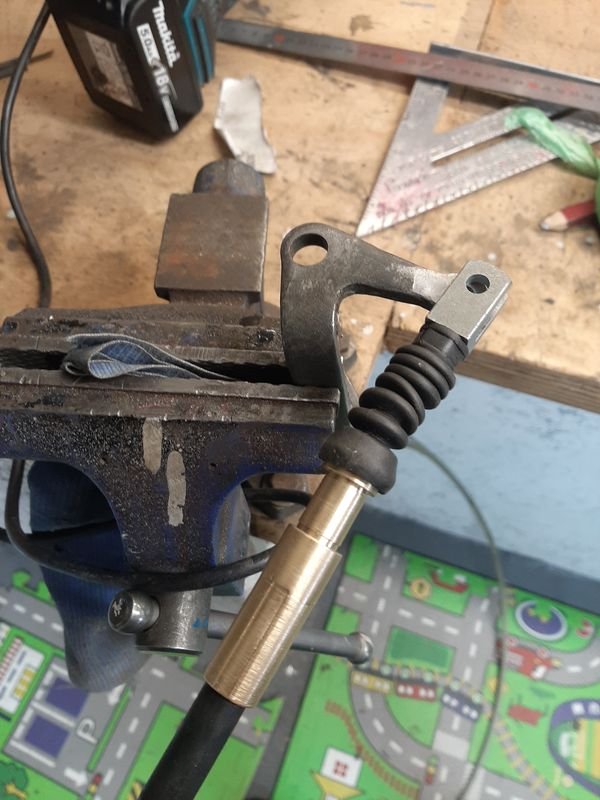
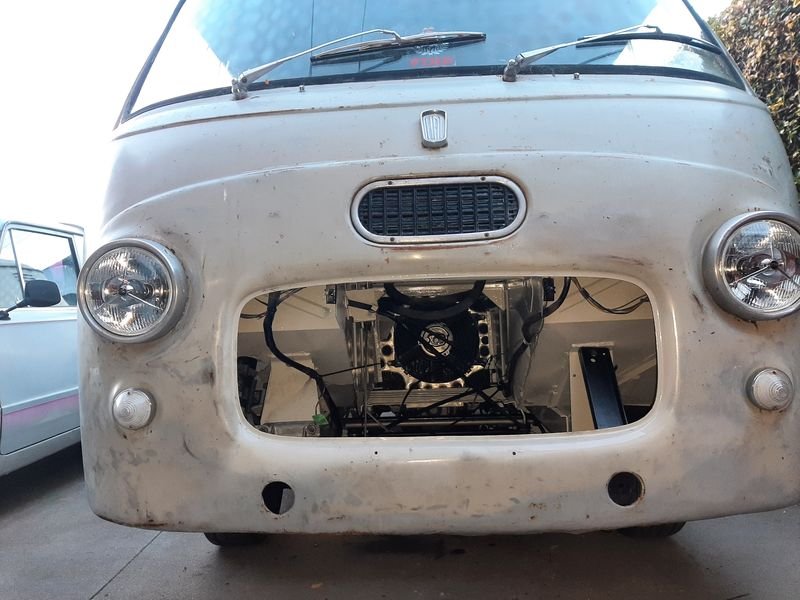
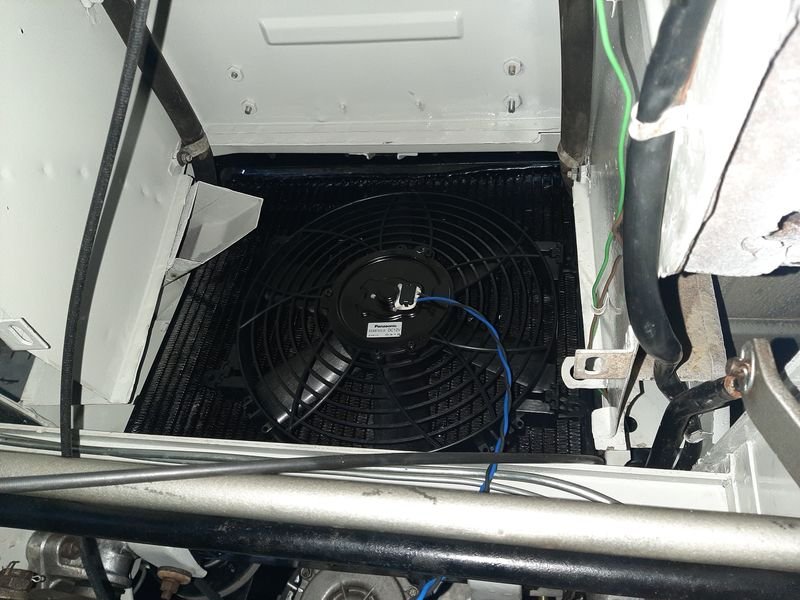
Installing the new gear change cable. In my discussions with Melbar some bits were able to be made to match but some of their standard bits were not exactly the same dimensions as the Fiat original so i asked that they be left oversized and i could smoothing things down as needed, and also accounting for possible wear in the original. This was the tips of both ends Old and bung on the left, new on the right, with the original adjustment nut installed. The tip on this end is the crimp and lives in the hollow end of the gear shift column, i filed that down a wee bit (basically the ridges from crimping) to fit and allow the cable to rotate smoothly with just the right amount of length (rounded the tip a bit more) so that the nut can tighten and the cable can still swivel. That then gets installed in the lock nut and the brass screw and crimp installed in the column change shaft, along with a dampening spring and etc and then that whole lot is attached to the steering column. The Melbar guy said hes never seen such over complicated nonsense. The other (gearbox) end is a bit simpler with a clevis end which they didn't have in a size that suited every dimension required, so went with the one that was right except for didnt fit the 6mm thick stamped pivot arm. I ended up filing the arm down which also lost a fair bit of slop from the slightly rounded top of the arm. I also cut down the boot a bit as it was restricting the throw (as Melbar barry said it would) Thats all back on the van and after a fair bit of adjusting it goes into all the gears again */*/*/*/*/* Next job is to sort out the cooling scenario. Original water pump had fixed fan on its nose, but the Cheap replacement water pump is from a 1500 car that runs an electric fan and a different pulley mounting pattern, so i need to put in an electric fan as well. A 12" pusher is the biggest that i could be sure will fit which isnt that big, but the OEM fan is 10" and doesnt have a shroud so i think it will be OK. Sussing out a layout and attachment Been watching too much Puddin's Fab Shop so had to bust out the 'dimple die' Much better strength and possibly airflow Backside, try to seal off the fan like a reverse shroud so most of teh fans push will go through the rad instead of across it Youmay recognise the alloy sheet from other projects like the sign of the year and the shroud on the 125P ute This is the engine side, with the shroud wrapped around, no screws needed. Had the Radiator shop install a bung for a standard FIAT rad fan temp switch so set up will be the same as the ute (this is the factory set up on it) and as ive retrofitted on the 125 sedan,wagon. Just need to wire it in in yet. Had an overflow knocking around for a while and it will work nicely to replace the factory 'full loss' system (as per pic above) And view from the tunnel - this also has a 'floor' i need to install that basically makes an air ram to the rad and the little carb air box thing as well NOMNOMNOM like a Basking Shark. Will be test driving sooooon and turn it around to make a start on some rust (sliding door to start with) Picked these up from @nzstato (i already have his folder, chur bro!) and ill start making some repair panels like a friken boss while im waiting for paper work etc

- 64 replies
-
- 30
-

-

-
Turbo A series and a 4wd conversion
-
Just had the call from Dave to say it was all done, as well as a wombling conversation about what he did, and why, etc and oh, btw, its on the courier and where should he send the invoice? Total invoice incl Courier and GST is a shade under $450, which isn't too bad for a highly specialized, hand made, one off piece to match a worn out greasy sample, imo. I think he spent about 2 days on it on and off and he mentioned the invoice was probably about $50 light. Im not expecting any dramas with getting to it fit or whatever but was to to ring asap if there were any issues and they would try to sort it out. A+ would trade with Melbar again for all my custom cable requirements. I doubt that's competitive with an off the shelf/generic item, but for custom, you gots to pay the costo to be the capo
- 86 replies
-
- 10
-
-
Tbh, It wasnt discussed, but as the ends will need to be more or less hand made, im assuming not cheap, but probably still a bargain! I think if the ends were 'standard' off the shelf items it would be much cheaper. They have a bit of a catalogue of ends on their site. Ill let you know tho.
-
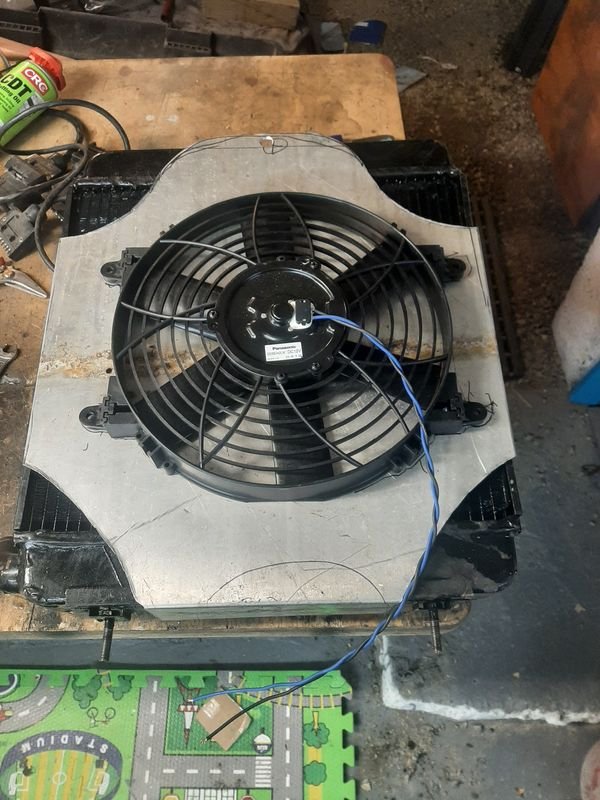
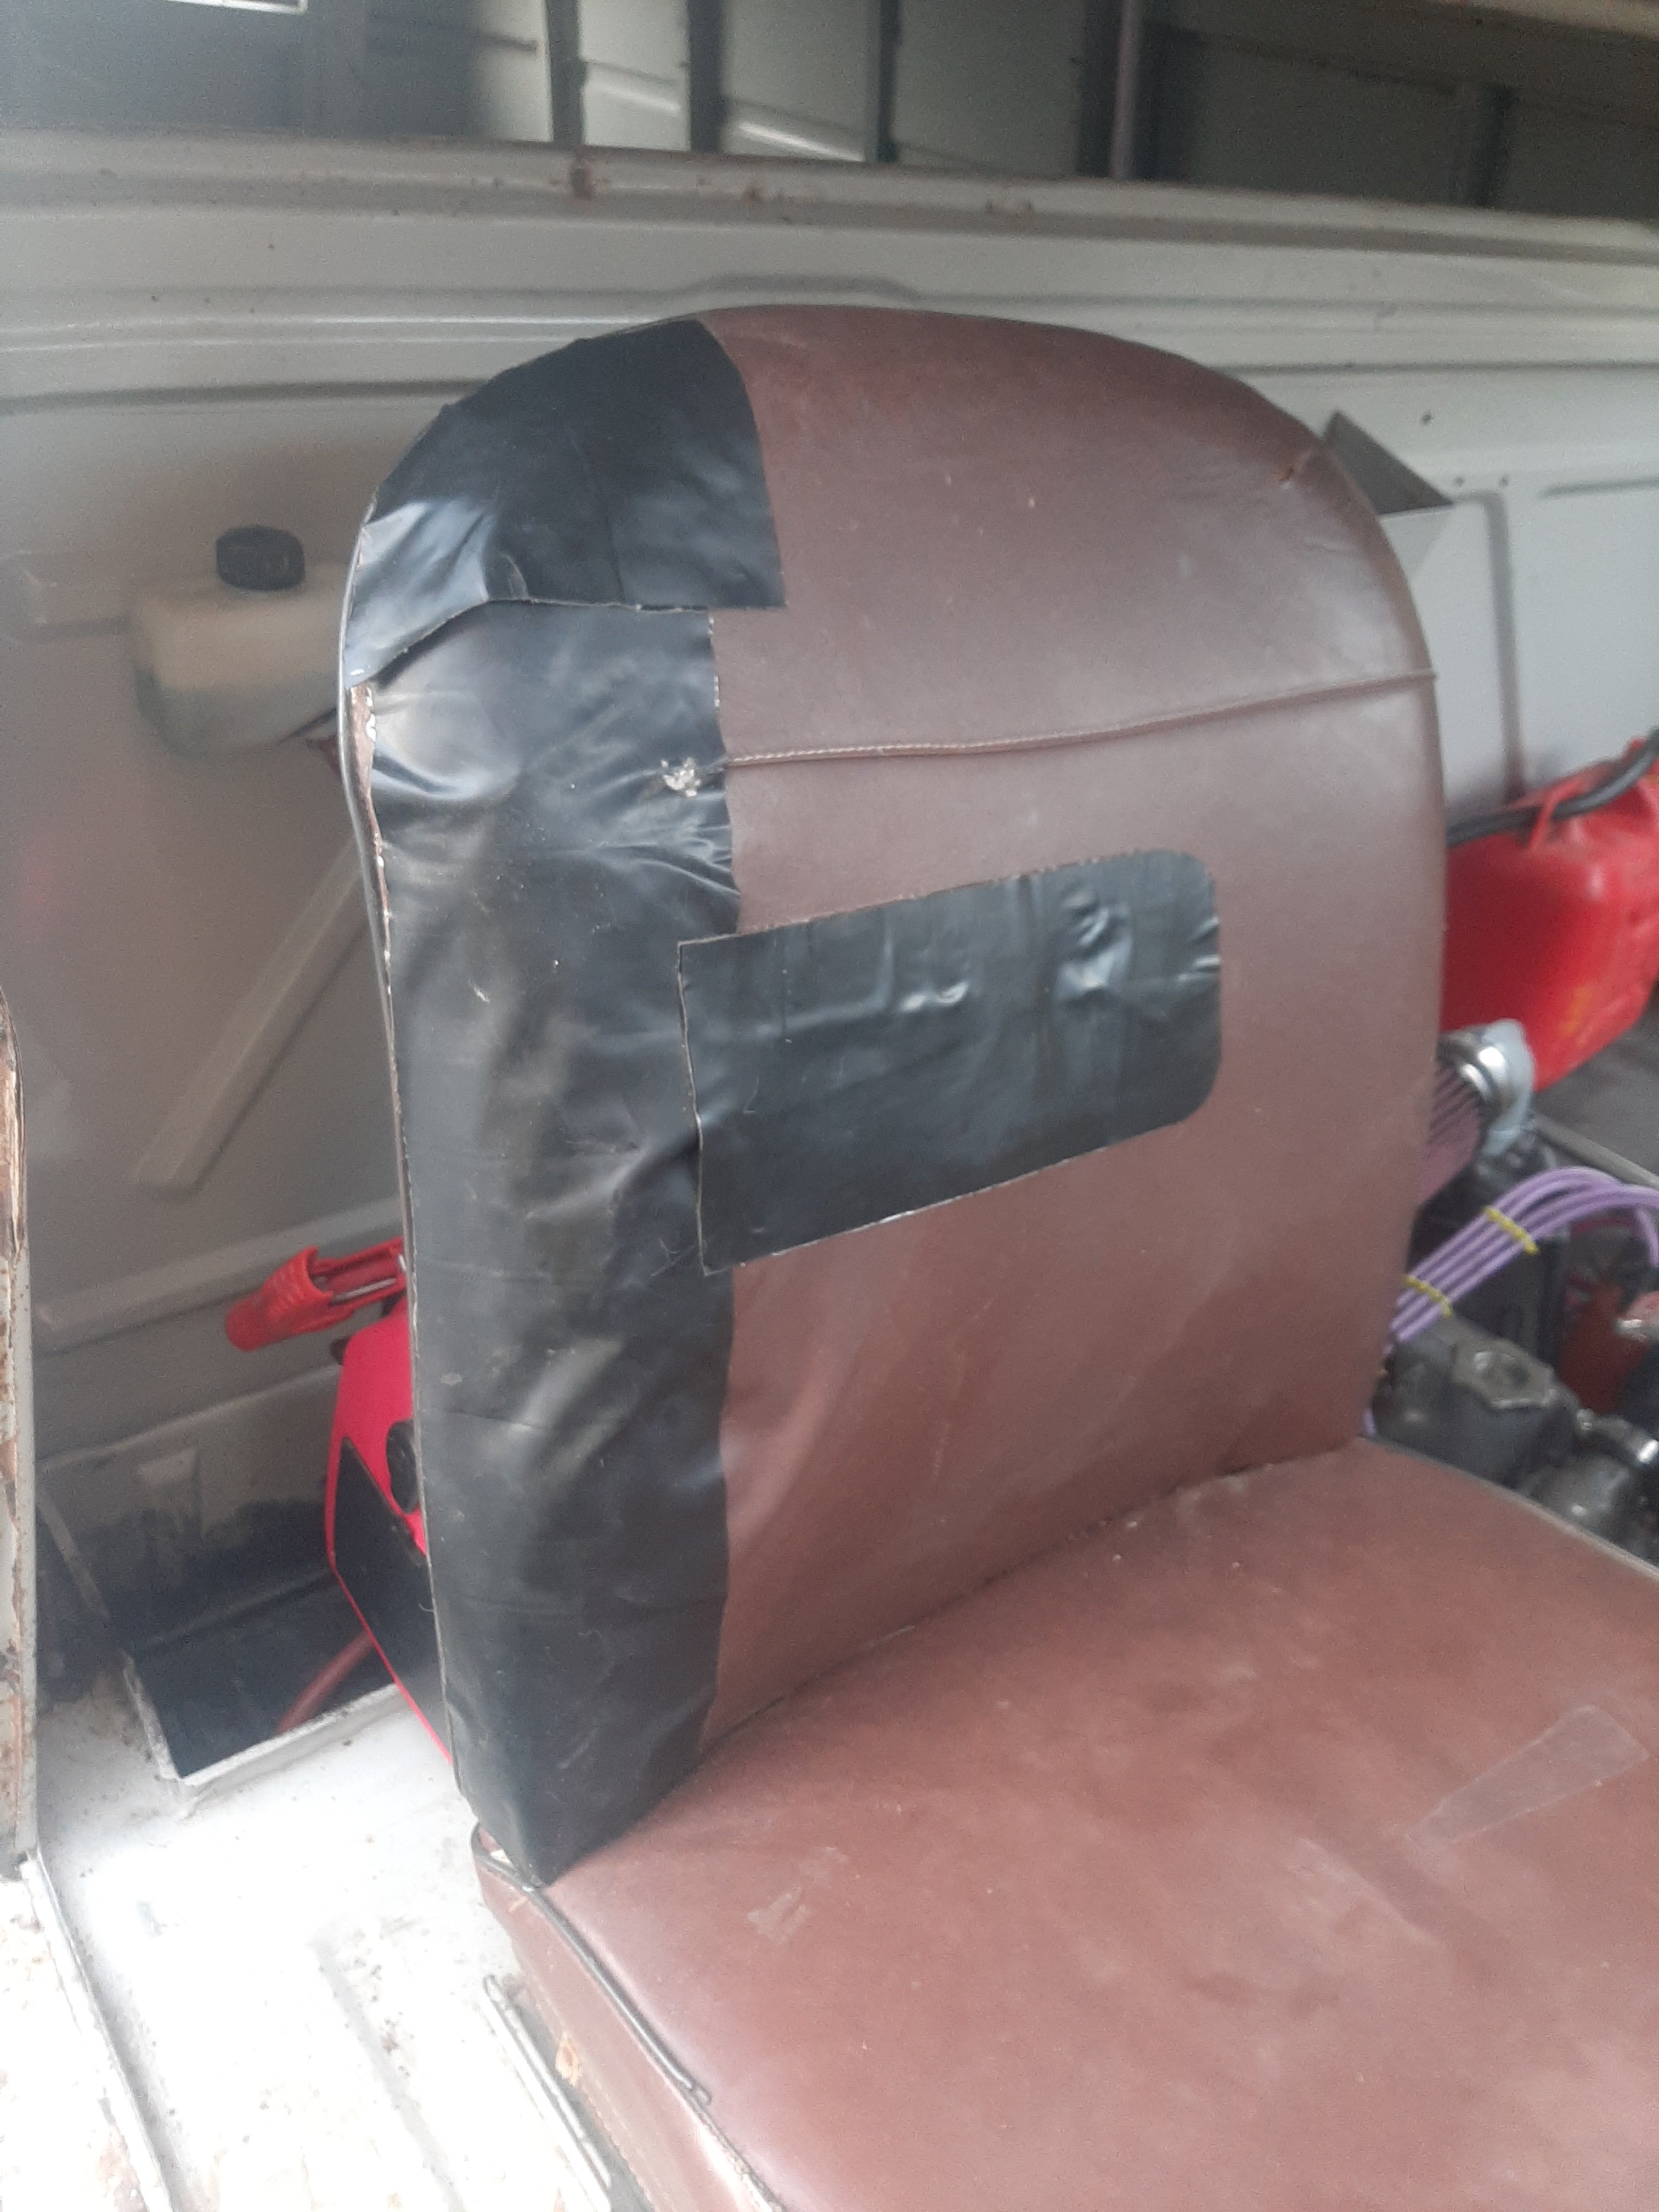
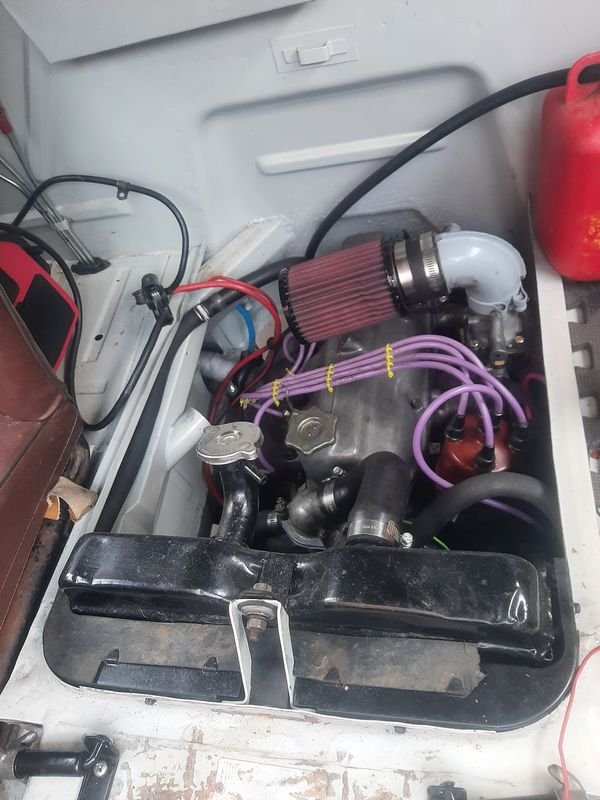
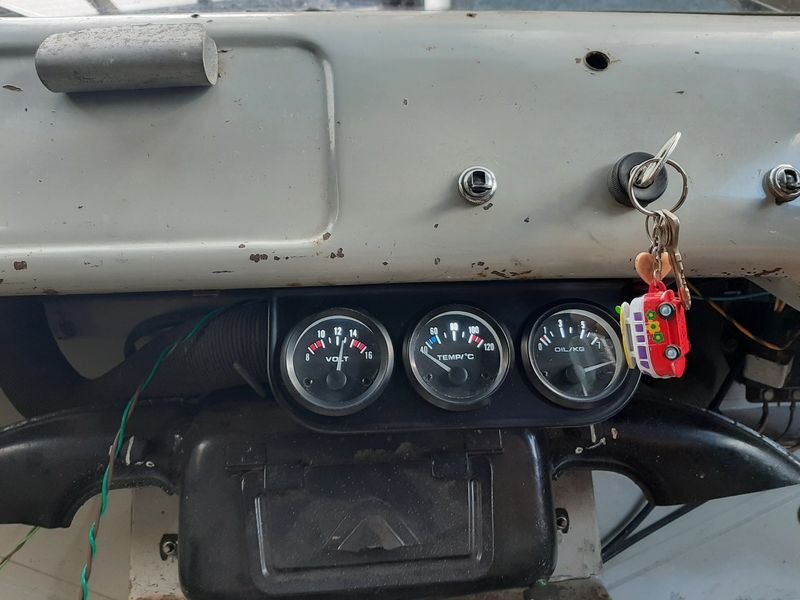
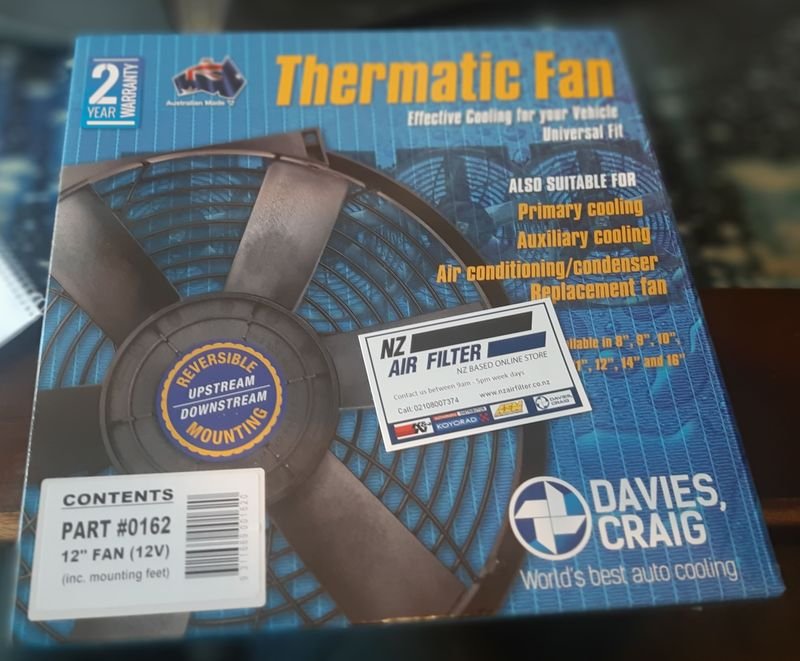
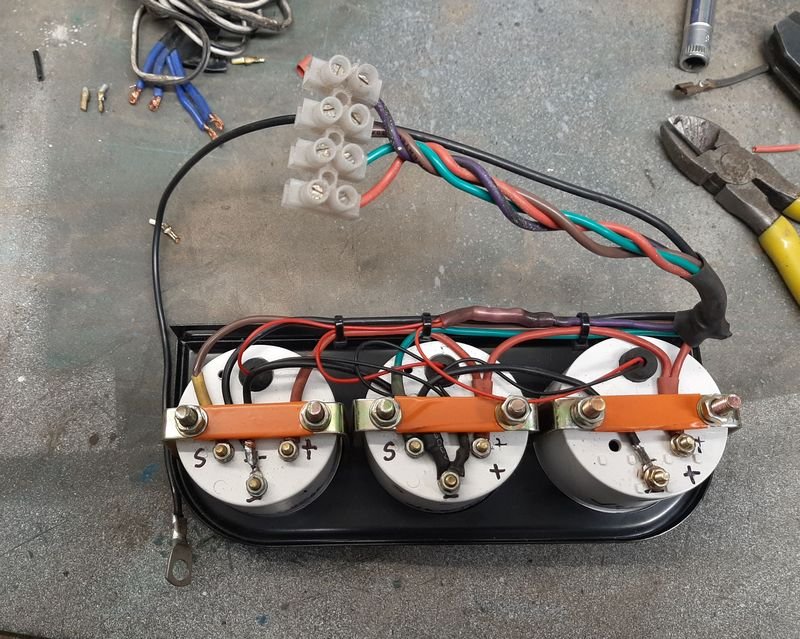
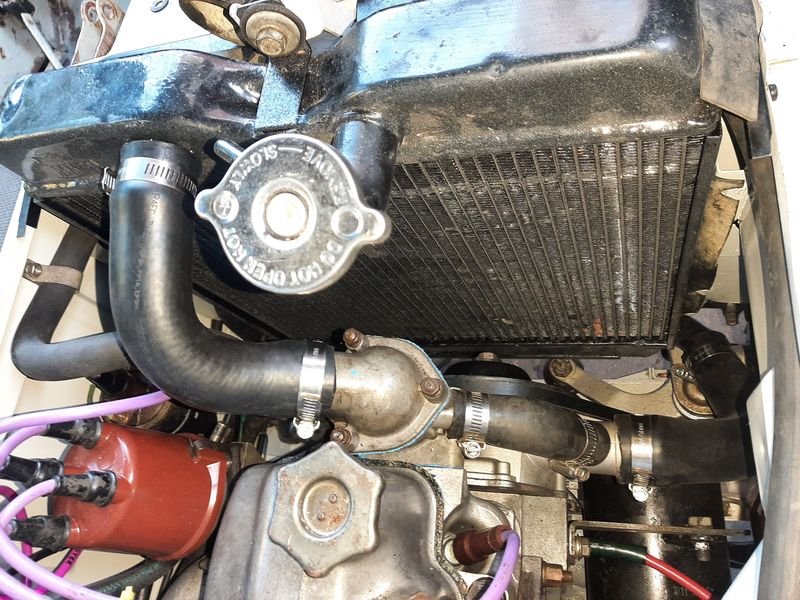
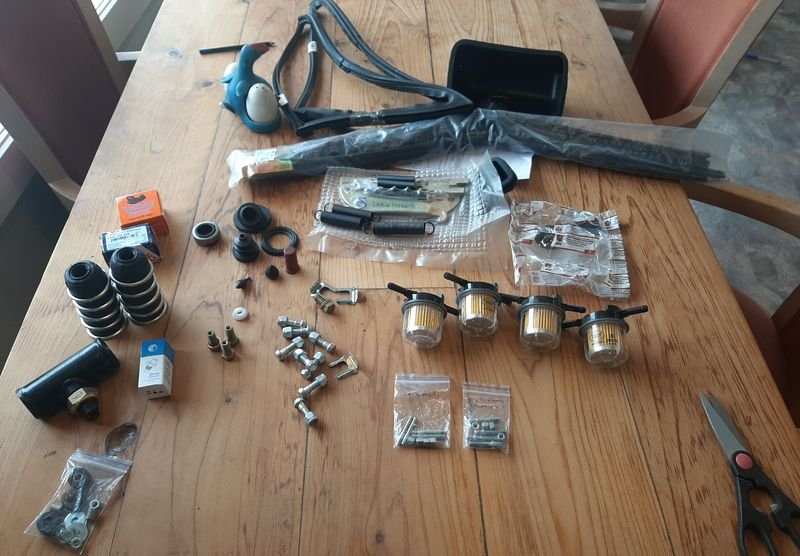
Sent the gear shift cable off to http://www.melbarcables.co.nz/, and have had a couple of chats to Dave already about it along the lines of "so im going to have to use a #4 cable and crimps, so can the diameter of the outer cable be larger?", and "i have these clevis pin mounts, will that work?" so im happy its in good hands and all will eventually be well. Once its back that will mean the mechanicals are as good as they will probably ever be, so get on to applying to reuse the plates, take it down for a VIN check etc, and try jack up some joker to agree to look at/sign off the rust repairs. I also poked around on the internet for a 12" fan and ended up getting a Davies Craig (actually a Panasonic, but not complaining) from https://nzairfilter.co.nz/ and also an K&N filter as the factory one is missing, for all of the HPs. Very happy with their prices and service too. Factory filter housing is MIA but should be able to make some sort of can to give it cold air from the intake on the otherside. Good view of the aliex water temp sender pipe thing for the aliex gauge set I Would have preferred a larger puller set up, but there's just not enough clearance between the rad and the engine (water pump pulley bolts) on that side. 12" was the biggest i could be sure would fit on the front of the rad too, and glad i erred on the smaller side as its pretty tight! Check out that cold air intake for the carb. Ordered in a set of finest chinese gauges, to try triangulate whats going on, i think the oil pressure gauge is DOA, so will steal the one from the ute which doesnt have a sender hooked up yet... Volt meter reads 1v high according to my voltmeter, lol also did some upholstery, and 'fixed' the big hole in the drivers seat Getting there...
- 64 replies
-
- 37
-
-
-
Sir, you are a renaissance man of many facets. Top stuff
-

Sunbeam's FIAT 1500 - chiacchierata un po' sciocca
azzurro replied to azzurro's topic in Project Discussion
Trap sprung! *sports drums -
Slightly foolish chat regarding Sunbeam's absolutely mint Millecinquento Wow! You are broken my friend! Apparently there is (was?) one on the side of the road in Glenavy for sale that might be worth a gander depending on your plans for this. I shall live vicariously through you. For those that dont know, these 1500s (also come out with a 1300 and slightly different trim level) were pretty trick with 4 wheel disc brakes in 1961, and was the basis of the 125, which shares the floorpan and basic suspension design, but with a OHV pushrod engine and column change box.
-
Love this. More pics and datsuns too pls thx
-
Looking nice man! Re rear wheel centering in the arch, could it be an assembly error? Leaf springs in back to front? Have you put the driveshaft in yet? was it 'too long'? Could use it as a spacing check? Lowering changed pinion angle/more weight might centre? Angled shims? spring/diff locating thinger not lined up? Weird angle of the photo?
- 90 replies
-
- 1
-
-
- CorollaCoupe
- SR
- (and 5 more)
-
Awesome, thats 2 from 2 for Melbar. cheers! Will send them a fax or ring their landline Tuesday for cable sharns
-
Thanks mang, they were already at the top of my list, simply based on sensing the cable barry seeping out of their website: http://www.melbarcables.co.nz/
-
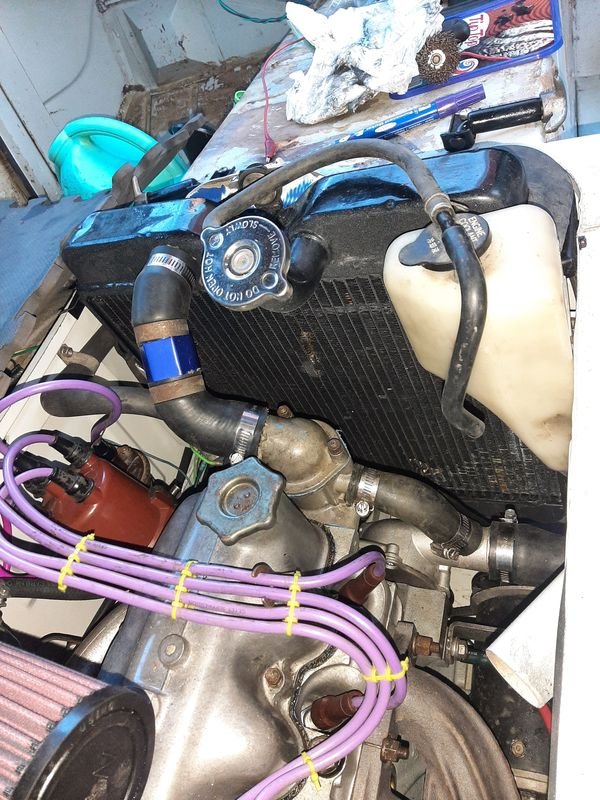
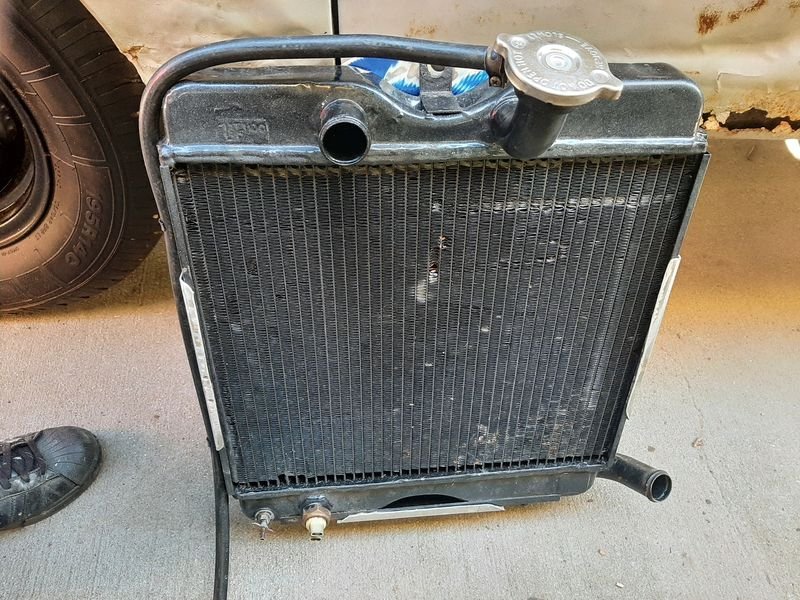
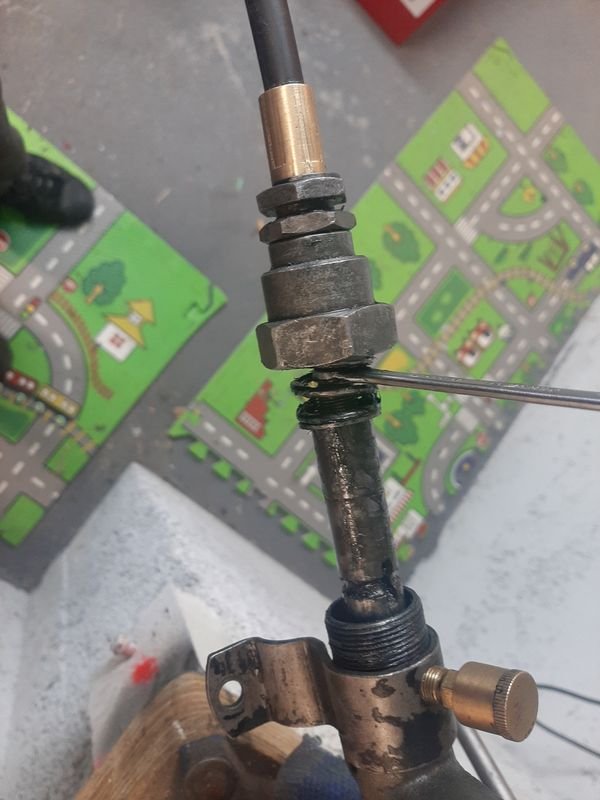
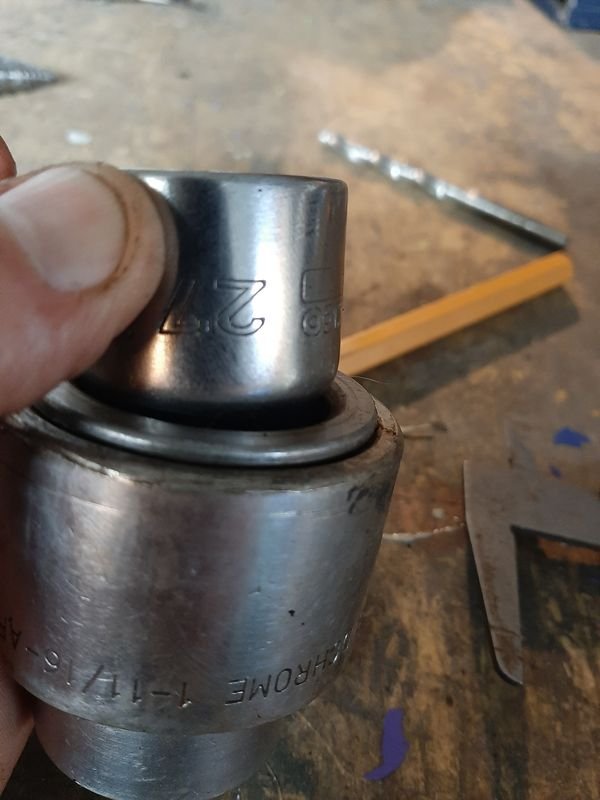
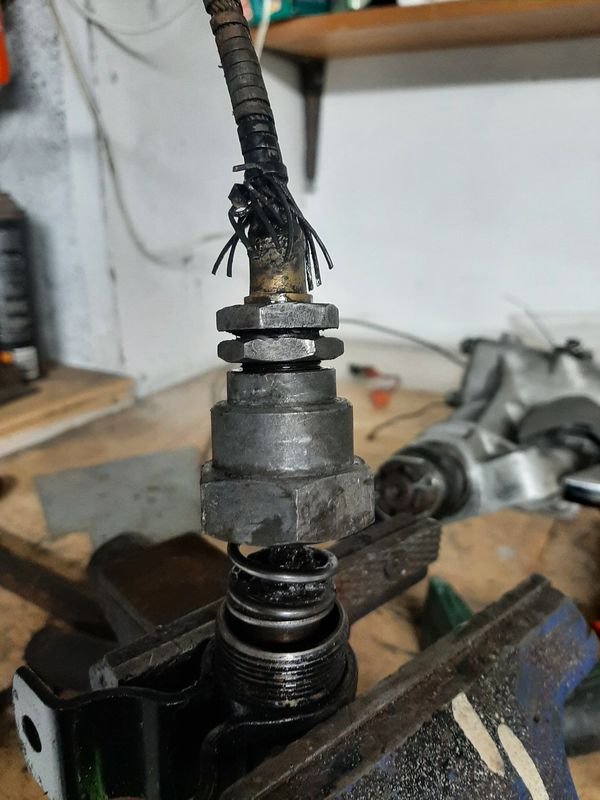
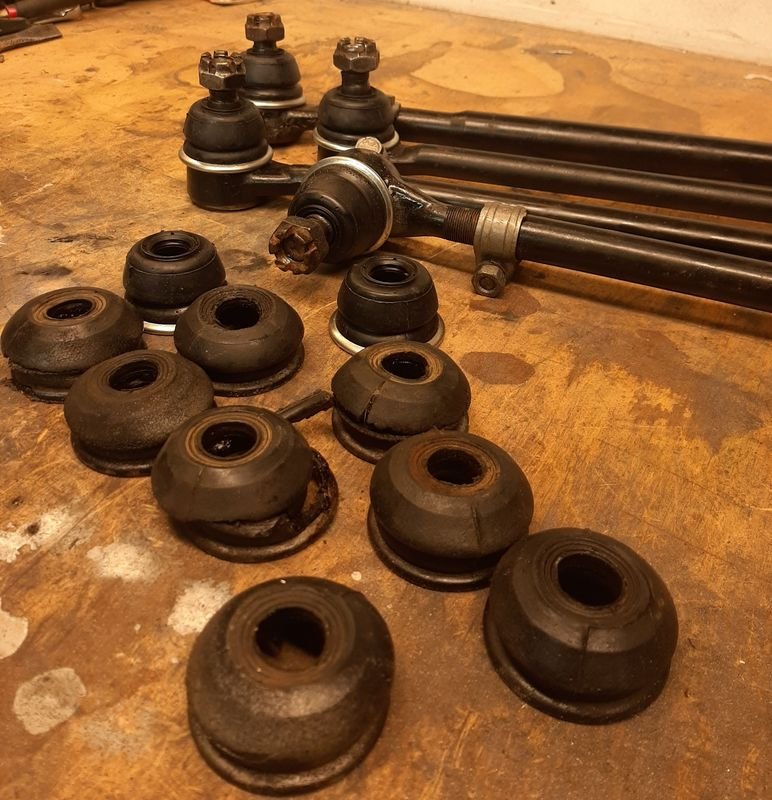
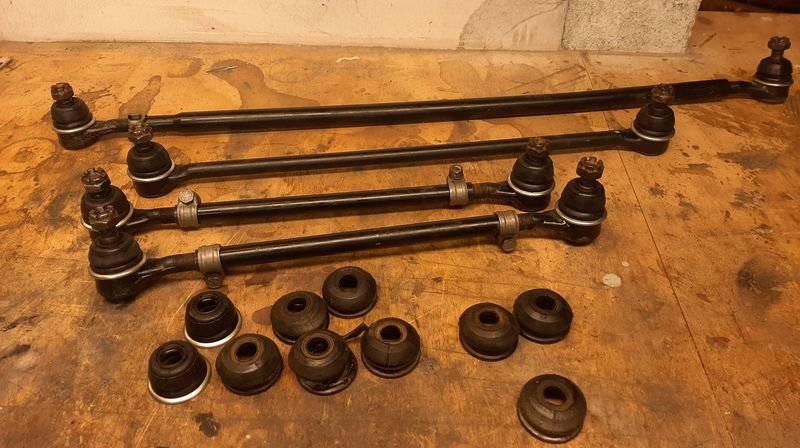
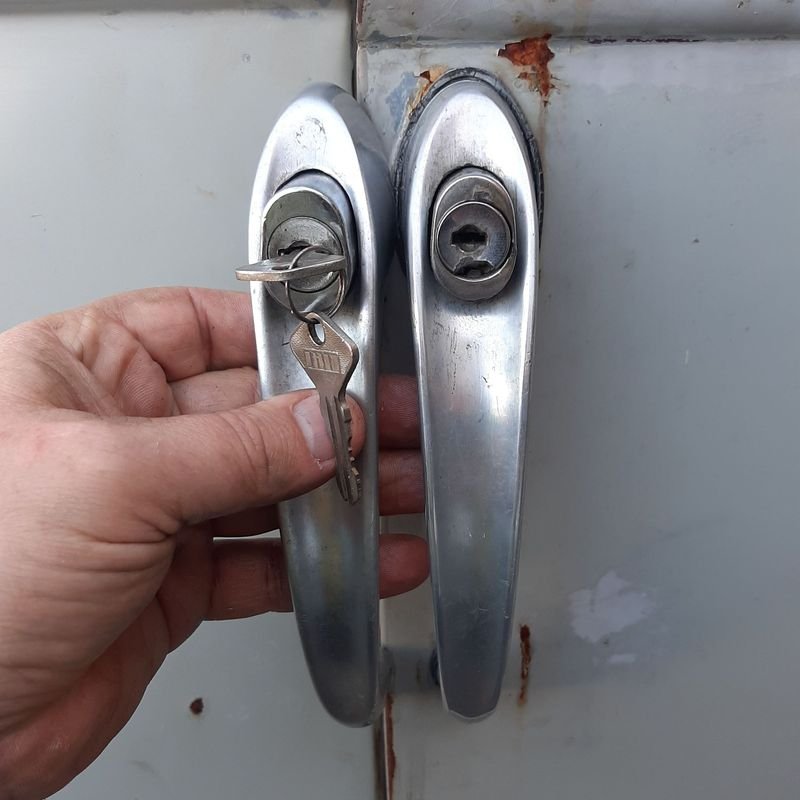
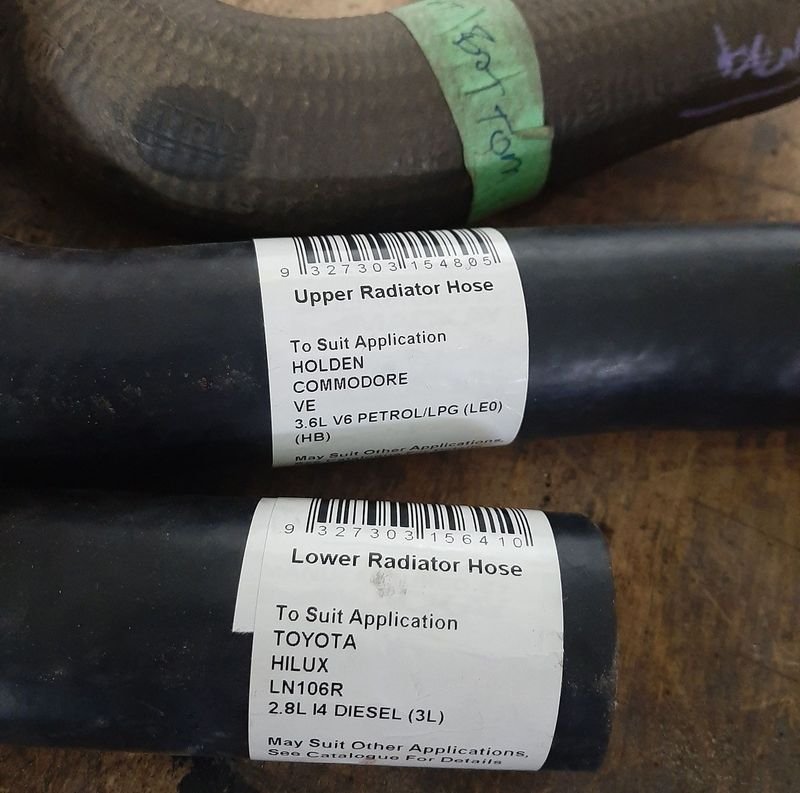
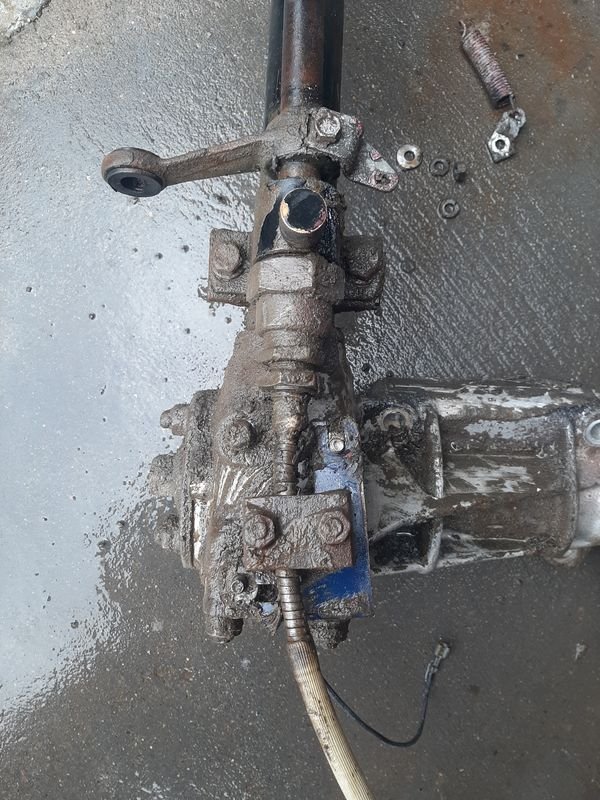
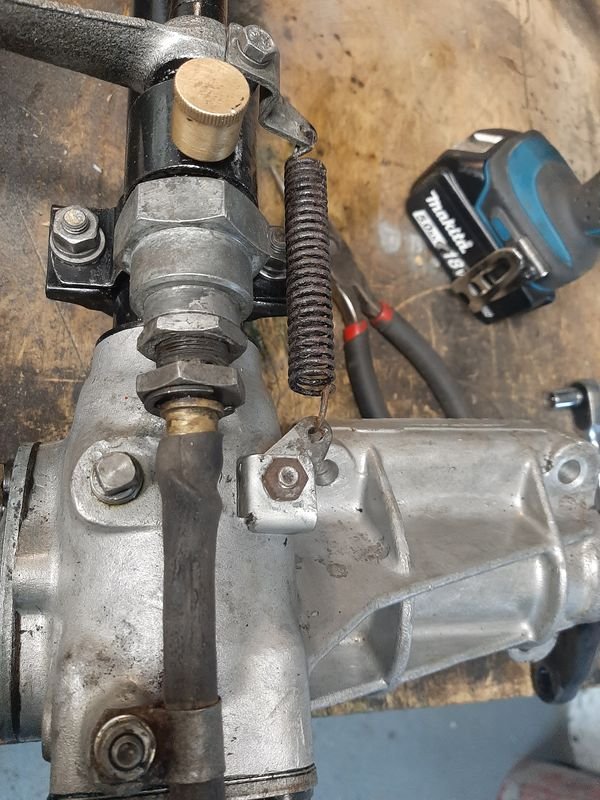
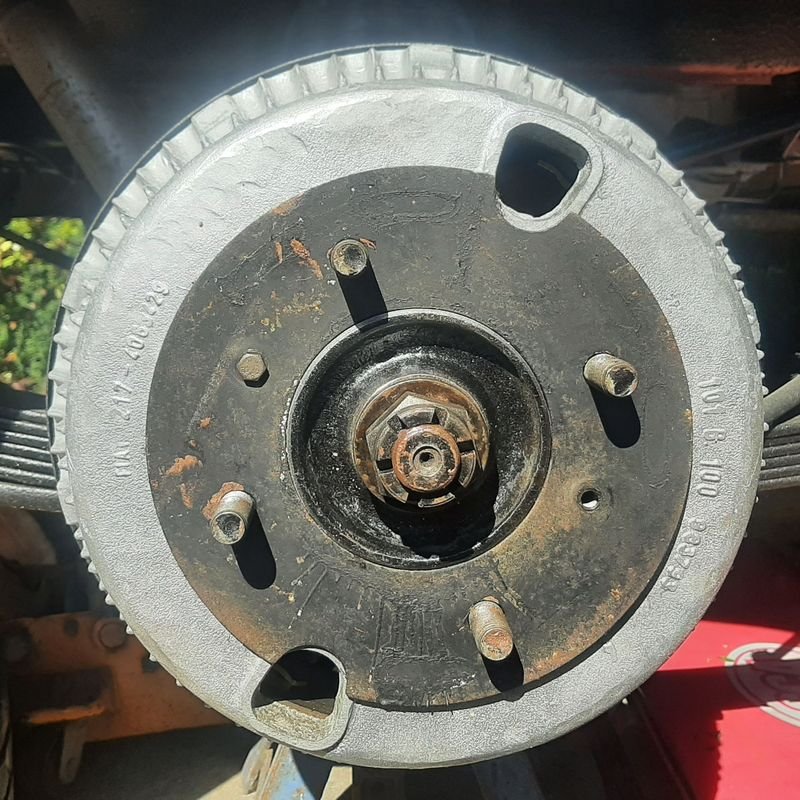
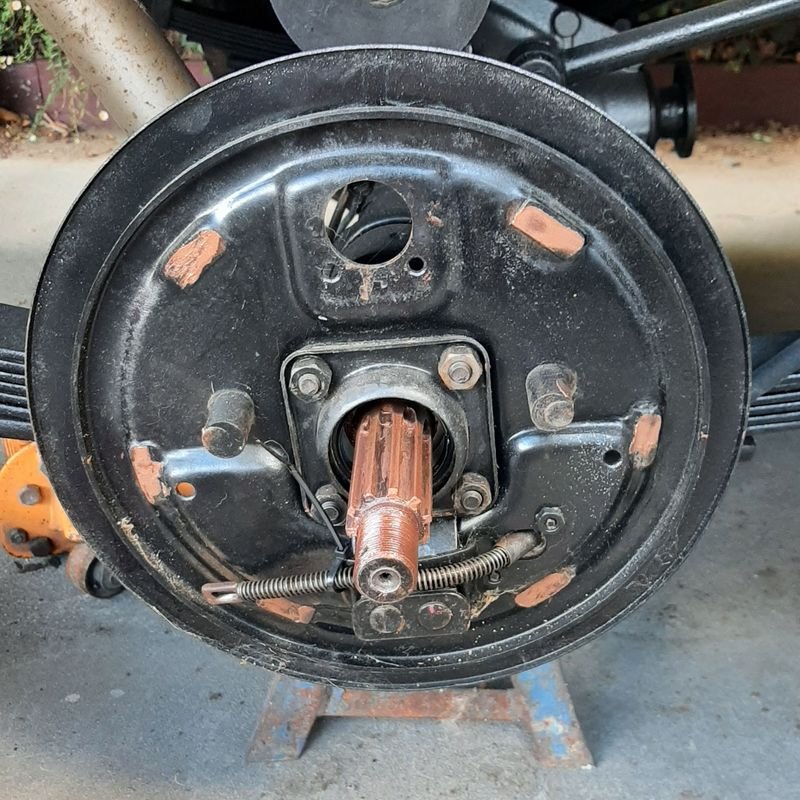
Swapped over the NOS keyed door handle after taking it apart and replacing the dried up 50? yo grease. Minor improvement given the sliding and rear doors dont have keys, but at least the cab can be 'secured' (it has sliding windows, lol) ********** Went down to Supercheap with my old hoses and rummaged up these out of their bins for cutting down to suit. Part numbers CALIBRE CH5225C and CH2010C for future reference. Could then install the refurbished radiator (cut down patrol 3 row core) which really does looks terrible in the photo tbh, but is tested good,, which also meant rerouting a lot of the control cables and wiring properly. Means the engine can run for more than a minute or so at a time. Temp guage even seemed to work, or at least moved a bit However, still need to sort out a fan. I deliberately replaced the original style water pump with its fixed pulley driven fan, with a significantly cheaper 'new' style water pump (Fiat 13/15/18/21/2300 or 125p) and take a lada pulley so belt is only running the pump, not the fan 100% of the time, for those sweet HP and NVH gainz. Does mean i need an electric fan, and add a temp sensor to run it. I previously had the radiator shop install a bung for a standard Fiat fan temp switch and so just need to find/buy a suitable 12" fan, and with only 40 mm of clearance to the engine, probably mount it as a pusher. Temp switch in the rad will be used to trigger the fan relay - i run the same setup in my other cars, and is the factory approach for later cars with electric rad fans. *********** My box of small bits showed up from LadaPower-Europe.com, which is a Belgian based sister site to Ladapower which is based in glorious Ukraine. The main bits i need for the Van are the special diff flange bolts and the big stack of tie rod end boots. The brake springs and shoe spacer kit are for the van too, but the ones in there are fine. Also got some quarter window rubbers and scrapers for the 125 and a few misc parts for the stash to make the shipping worthwhile. ********** Popped out all the steering linkages, that id previously cleaned and loosely installed and swapped over the old and busted boots for new hotness and some fresh grease. All the old boots are the same design so i suspect they are all factory. Other than the boots being split or near to it, and the grease under them being a bit dry they all have a smooth action and are tight (but not too tight), so pretty happy with that, the boots were about $4 each landed with is significantly cheaper than 8 new tie rod ends (they are just standard RH thread fiat/lada style so not particularly expensive or hard to get, but still!) Then installed the diff using the shiney new diff flange bolts (I had to cut all the old ones off except 1) and filled the diff with oil. So now with a running engine, complete with 80% complete cooling system, and that engine now connected to the diff, and even working brakes, must time for a quick test drive??? Off the stands, top up the fuel tank, connect everything up and seemed to be going well, 1st, yep, reverse, uhuh, all 4 forward gears but I couldn't get reverse after the first time, and then the gear change got even worse. Unfortunately the fix i thought i had made to the control cable that controls the shift between the 1-2, 3-4 and reverse gates blew out so most of the columns up down movement is lost to the outer and the cable end at the gearbox is unable to move sufficiently. Ro-row As a reminder this is what it looked like before: Note the homemade cable support over the de-sheathed outer and blobs of braze shining though the muck An this is is after my refurb, i thought this super HD heat shrink might work better than the clamp? Well it looked better, but maybe should have reused the clamp fix as well, but suspect it would have blown out sooner that than later. The other issue i had at the time was i couldn't get the big nut undone, which means I couldn't remove the cable from the column, which may also be why the clamp fix was employed (bracketry alone would have taken some time to design and make!) rather than part replacement (tho to be fair i've been looking for one since i got the van and i'm pretty sure there is no mention of 'gear change cable 1100T' or similar on the history of the internet, so probably have always been NLA?). The difference is now I know its fucked, and i have a blow torch and a 36mm spanner, and im not fucking asking, so get off! I think the heat did most of the work, Nut was basically glued on with old black paint, but now have access to the gland nut thing that connects the cable to the column rod Managed to tidy it up enough to get it looking respectable, but the outer is missing some outer sheath and some inner windings and the previous repairs are pretty poor, so i think this is something ill have to send off somewhere to have remade. I understand these to be 'push/pull' or control cables, common on all sorts of machinery, planes and cars and there are companies who can make anything up if i send them something to copy and maybe reuse at least some of the parts from. Any one have any experience or recommendations of who to use or avoid, and an idea of what sort of price i should expect to pay for something like this? Im sure its not cheap thing to make, I'm more looking for places who can do a good job and wont be dicks about it
- 64 replies
-
- 16
-
-
^ This! Make the bolt size same as the wheel nuts Speaking of...not seeing any sik nasty rim updates!
-
-
can you even find genuine oversize 1608 pistons? I guess thats why they are spendy May be worth exploring other more common alternatives, i think there are much more common Mazda and Honda piston alternatives with very similar dimensions and details that have been used commonly before - the pistons in my 1500cc van engine for eg whcih have the same bore and dims (will have to check my notes for the details). that should save you a few bucks to spend on underfloor neons, 22's and some mad ICE
-
Yeah, i was pretty worried it was going to be terminal, but glad to figure out it was just an assembly error. I managed to convince my chief pedal pumper that i didnt make the van squirt brake fluid on her on purpose and definitely, under no circumstances, never ever, will that happen again*. *on porpoise So yeah, shes a goodun XOXO
-
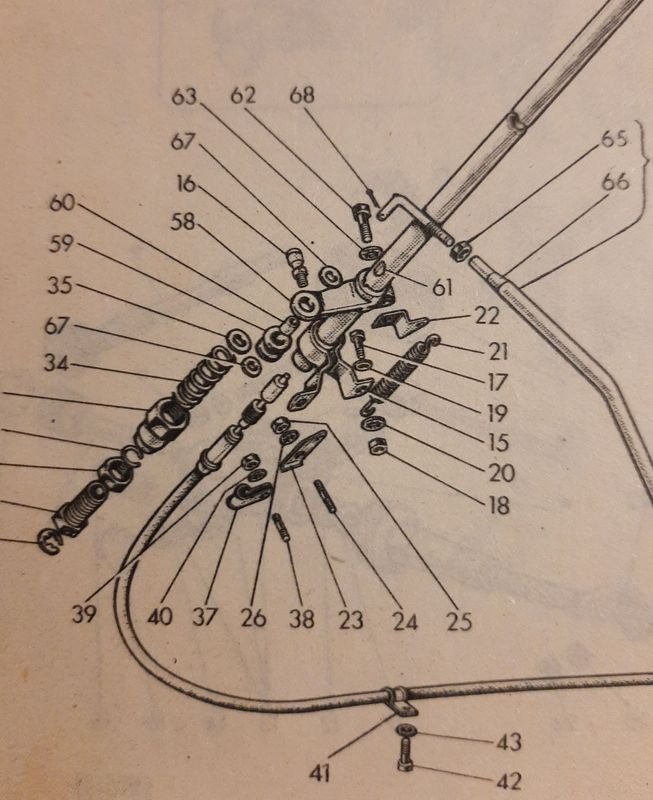
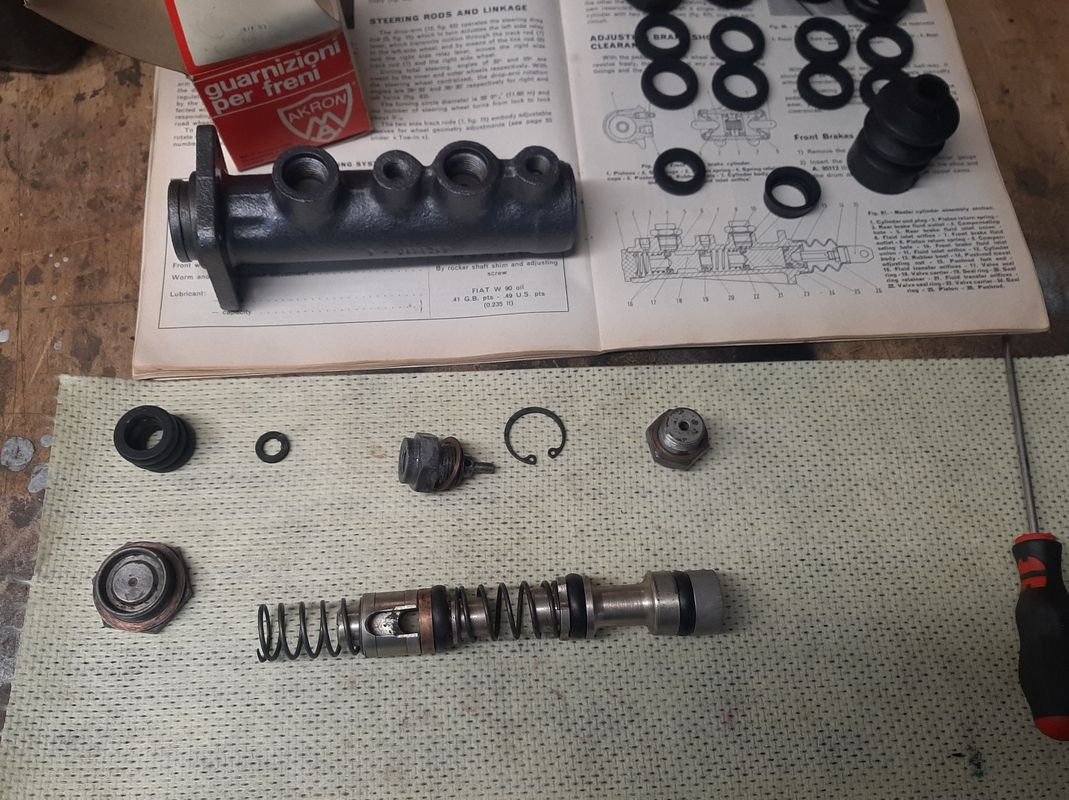
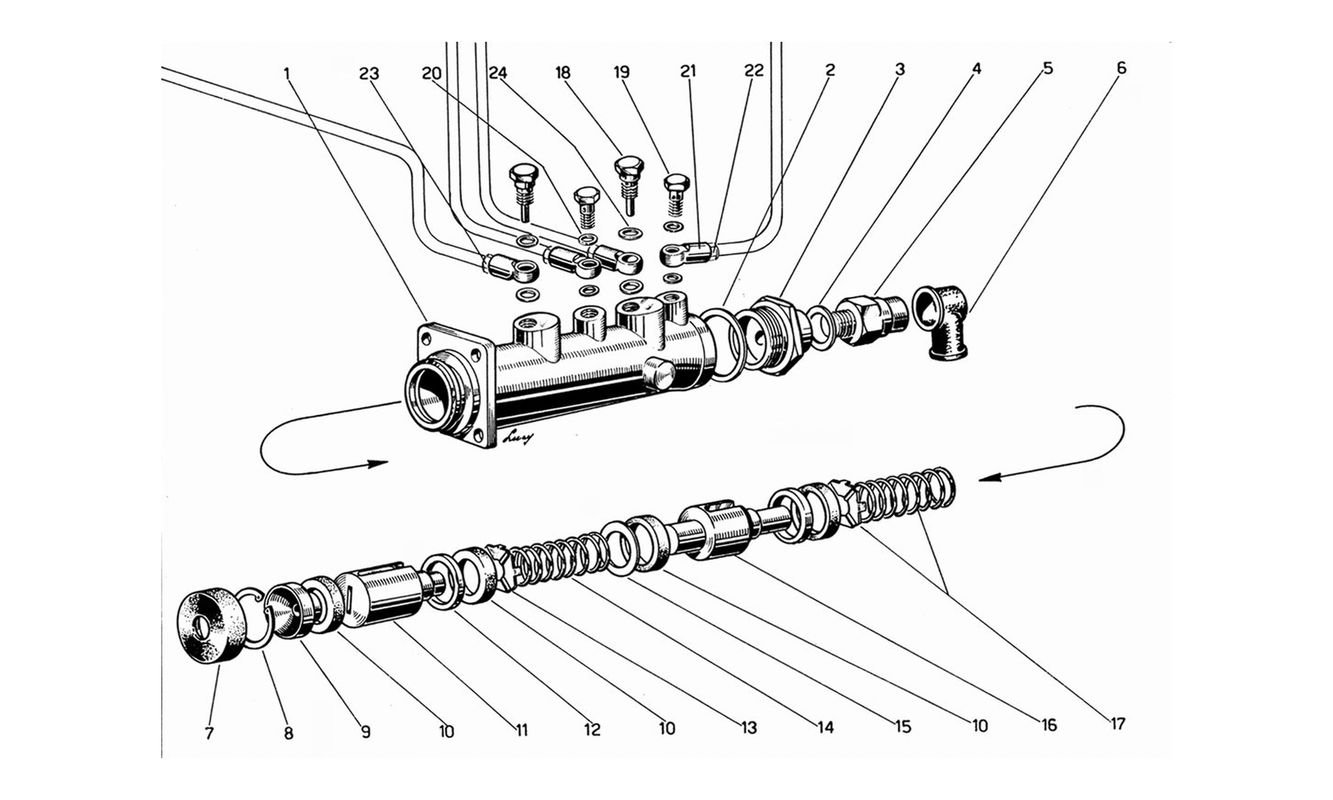
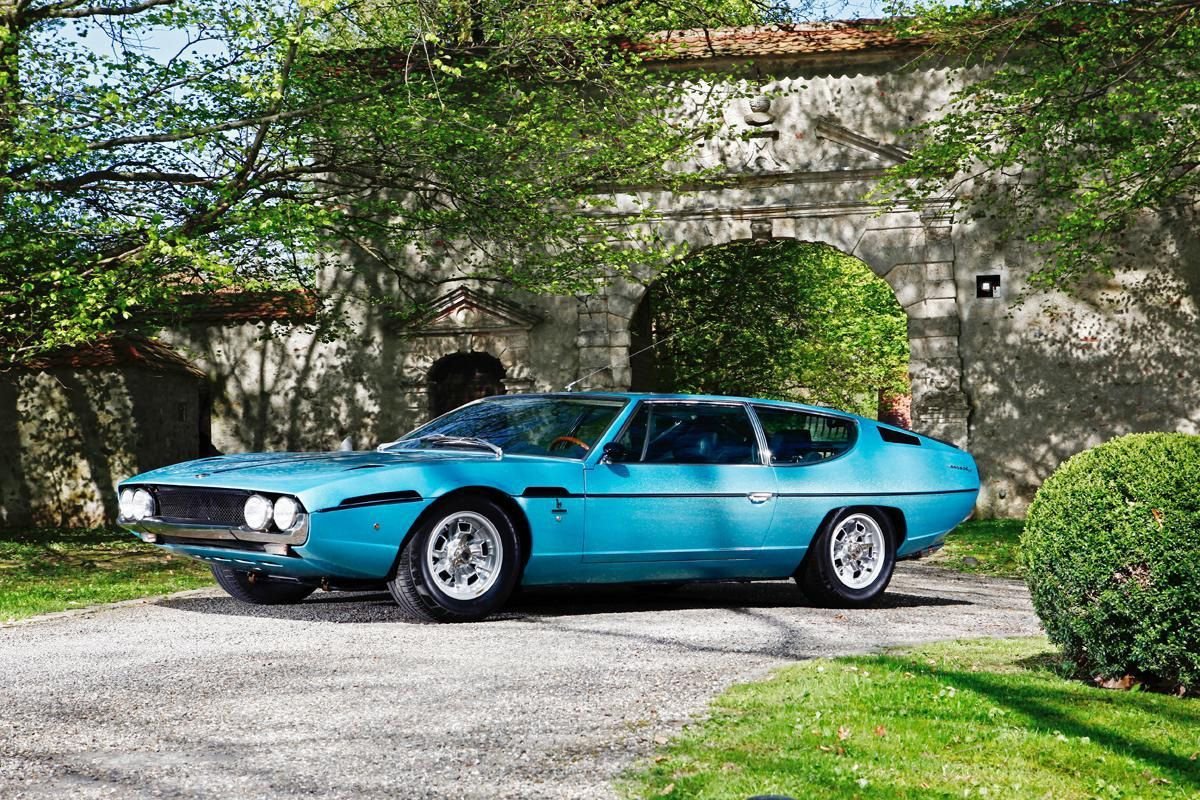
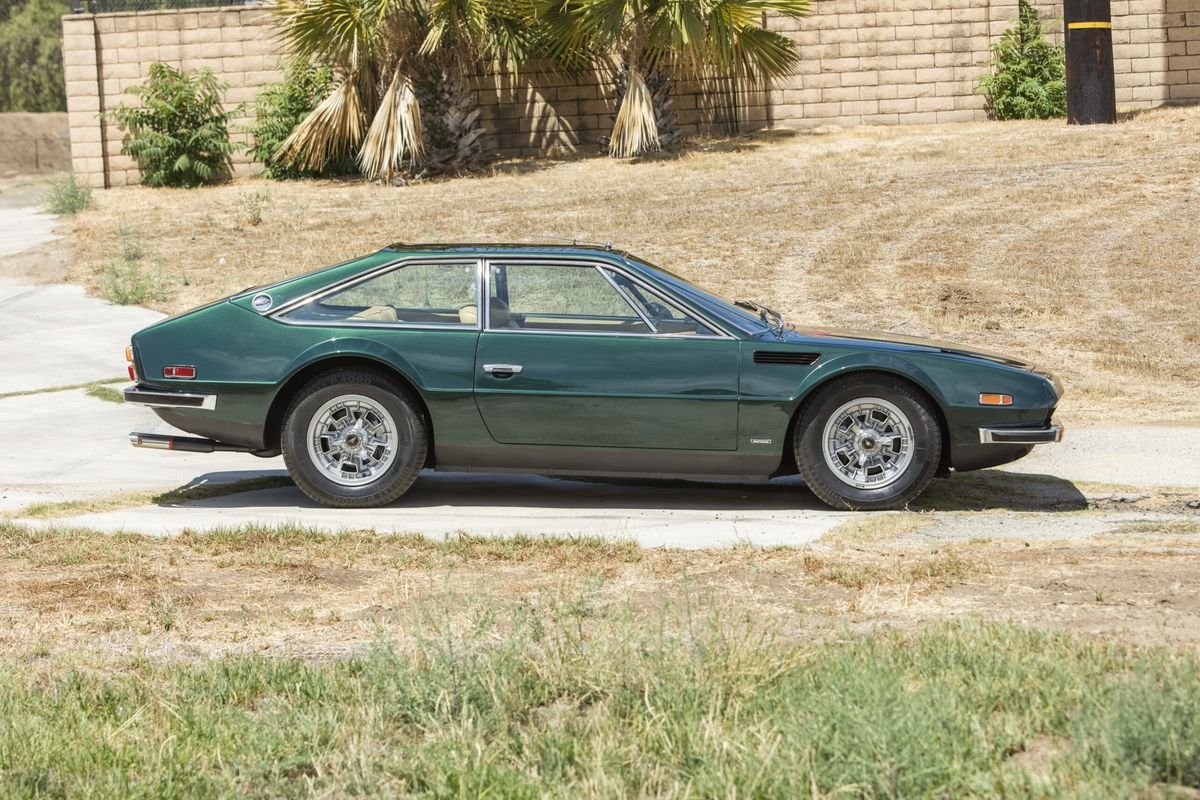
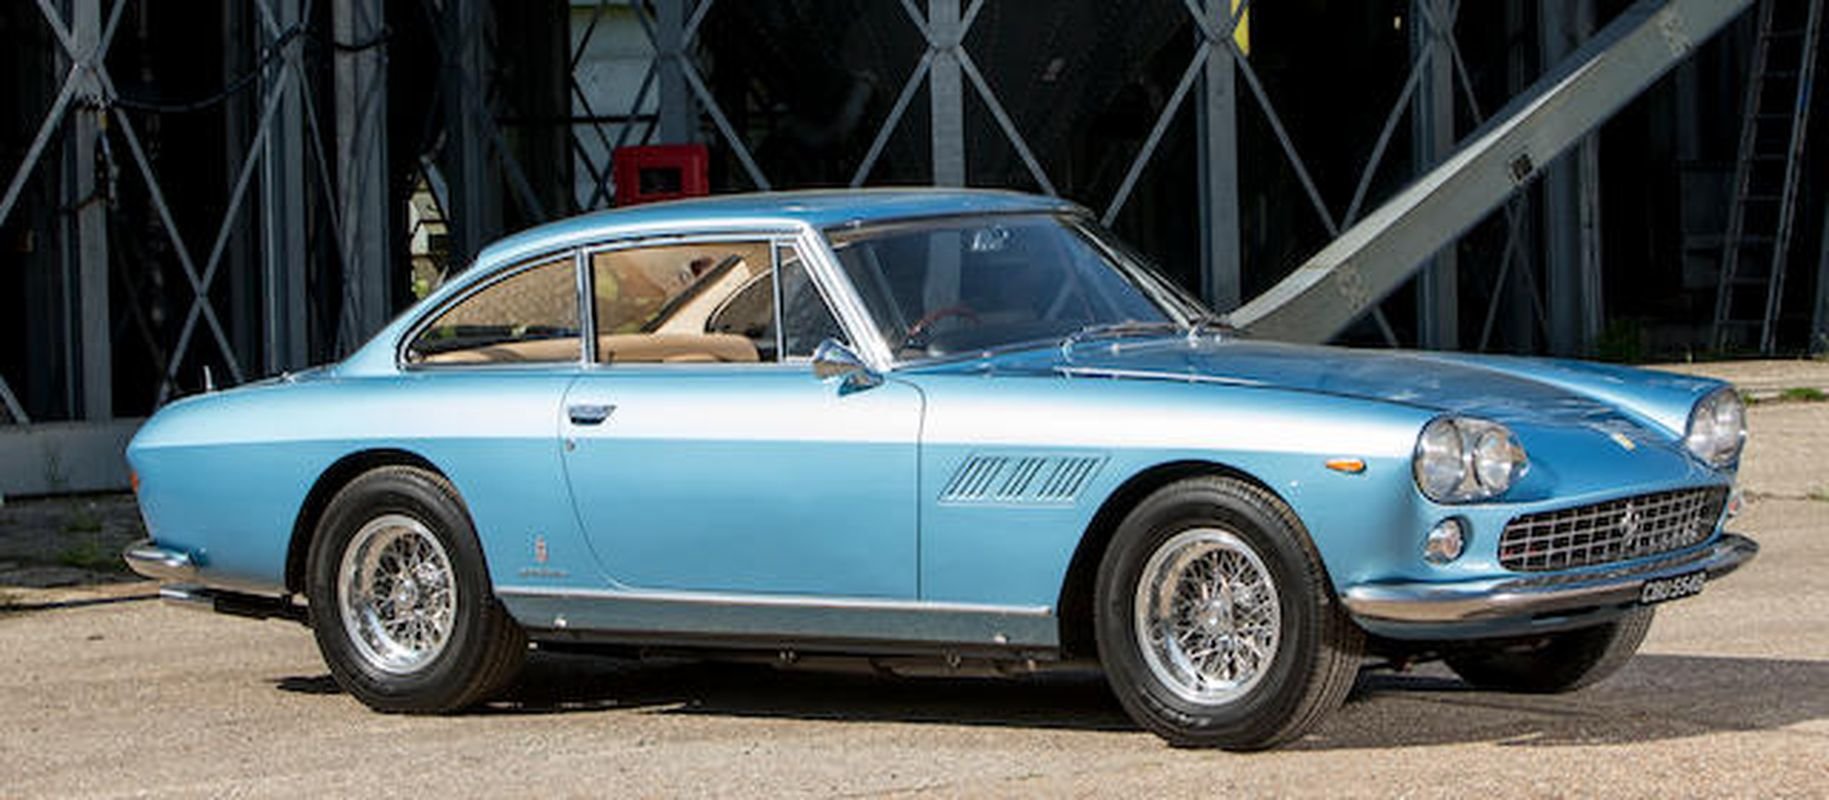
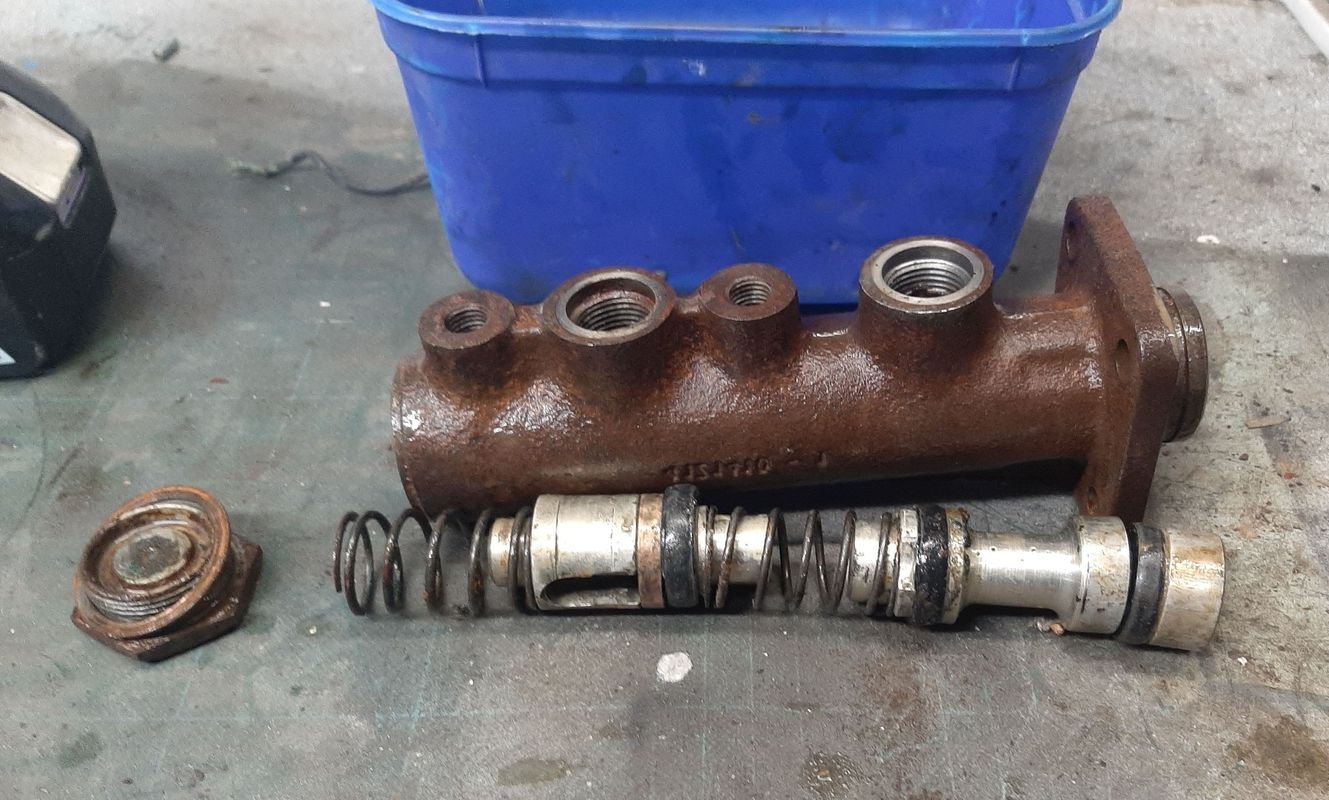
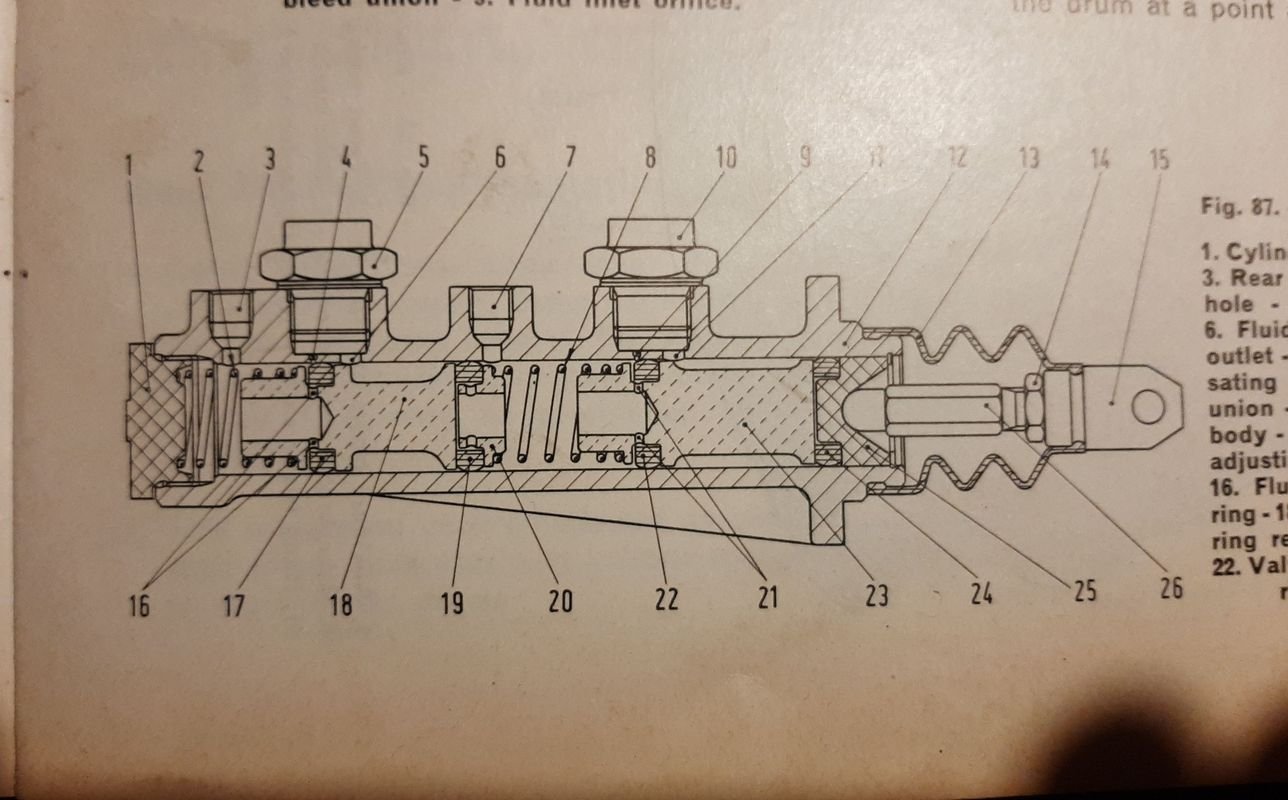
Adding brake fluid went ok, only had to remake 1 flare. Got the mrs to work the pedal we started bleeding ok front went great, but couldnt get any pressure in the rear circuit then noticed the rear reservoir was overflowing and the front was low even tho we aren't bleeding that circuit. Any leaks? No. Weird. Drained a bit off and left the top off this time and tried again, still not really clamping the rear brakes i told the pedal master to give it a good push and it squirted the boss lady and her favourite t-shirt with brake fluid (they are mounted behind the drivers seat). She did not like that! Anyway after much enforced alone time head scratching and pondering figured the rear circuit maybe wasn't sealing the pressure off from the inlet port i pulled the master out and did some research. This is the master cylinder diagram i have in my parts book, which is mostly fine but its for the 217C model ('59 to to about '64) so not everything matches what's actually installed in my late model/runout '66+ NZ assembled 217D. The part number on the master is shared with these bad boys: Ferrari 330GT Serie 1 (the Serie 2 has single headlights and is much prettier, but also has a different master cylinder) Lamborghini Jarama, yes please! Lamborghini Espada, which is probably my favourite, and would be my dream car for driving a rusty dusty example while renovating a rundown italian villa on the coast while using that fat booty as a station wagon/farm truck Aaaaaanyway, because these cars share parts, they are avaliable should one have the appropriate amount of liquidity in euros, but also seems the owners & parts retailers are really into publishing diagrams and stuff, which is useful for people who have a far more modest budget for restoring fine italian automobiles, so i was able to track this down. Note the slots in the pistons and long inlet fittings. My cylinder is pretty much half of both my 1100T book (front piston) and the Ferrari/Lamborghini diagram (rear piston) I also had a closer look at the pics i took while taking it apart And putting it back together: Comparing all that, and having a play with it on the bench i eventually figured out that a/ it was originally missing the rearmost sealing ring, b/ the rear piston was also facing the wrong way c/ I replicated both of these errors This install would also mean pressure from the front cylinder pushing on the rear would just backfeed the rear reservoir as it would never be sealed off. This may also explain why one of the rear brakes was disassembled, and i guessing someone may have put a kit in the master or disassembled it previously and was chasing why the rear brakes didn't work after? Maybe why it seems to be otherwise good nick and low milage, as it was just parked up after a failed but presumably fairly expensive brake job? Anyway, added the missing seal and put the piston in correctly, reinstalled everything, refilled the juice, and NOW everything is bled up nice, with no unpleasant squirts for the driver. Adjusted the handbrake too. A small test roll between the special safety logs shows she stops on a dime now
- 64 replies
-
- 31
-
-
-
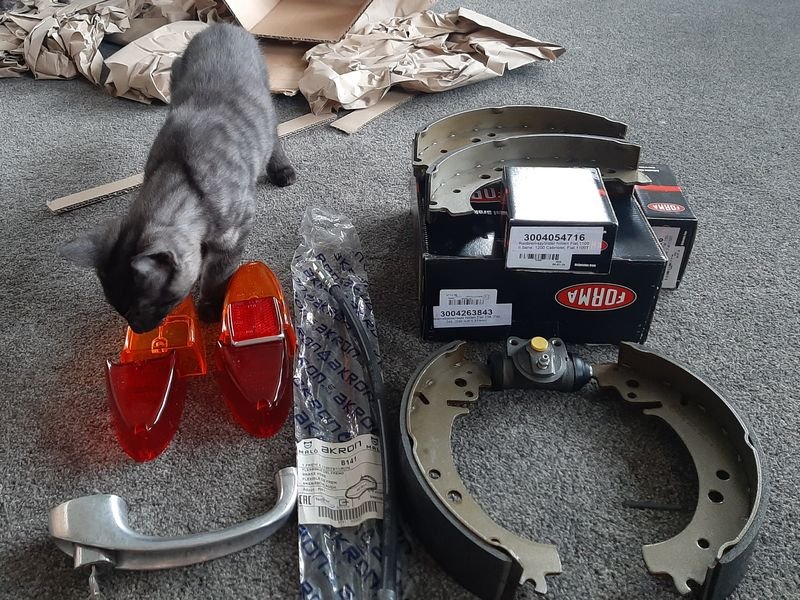
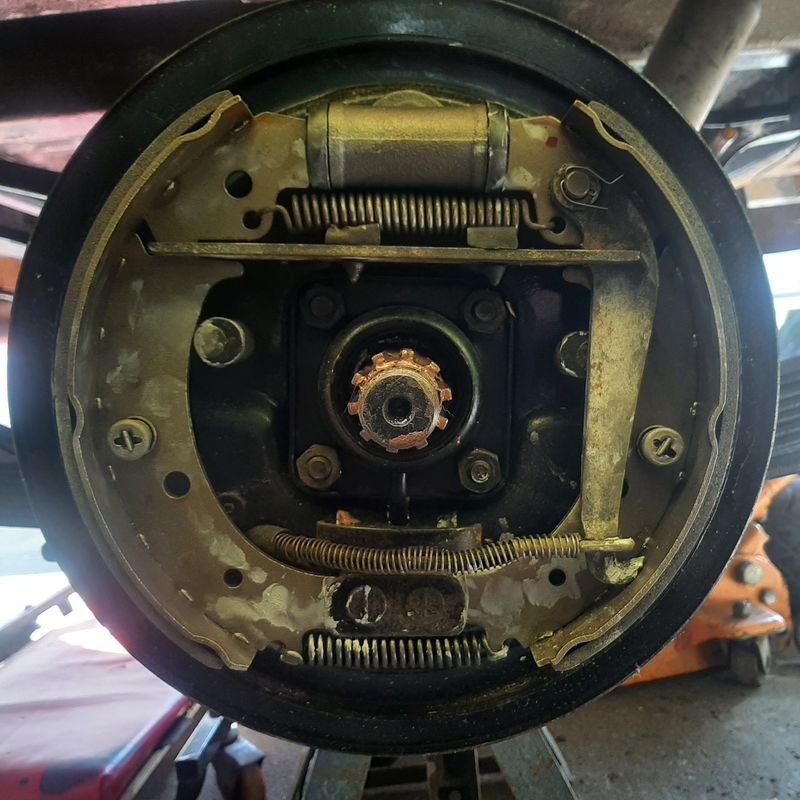
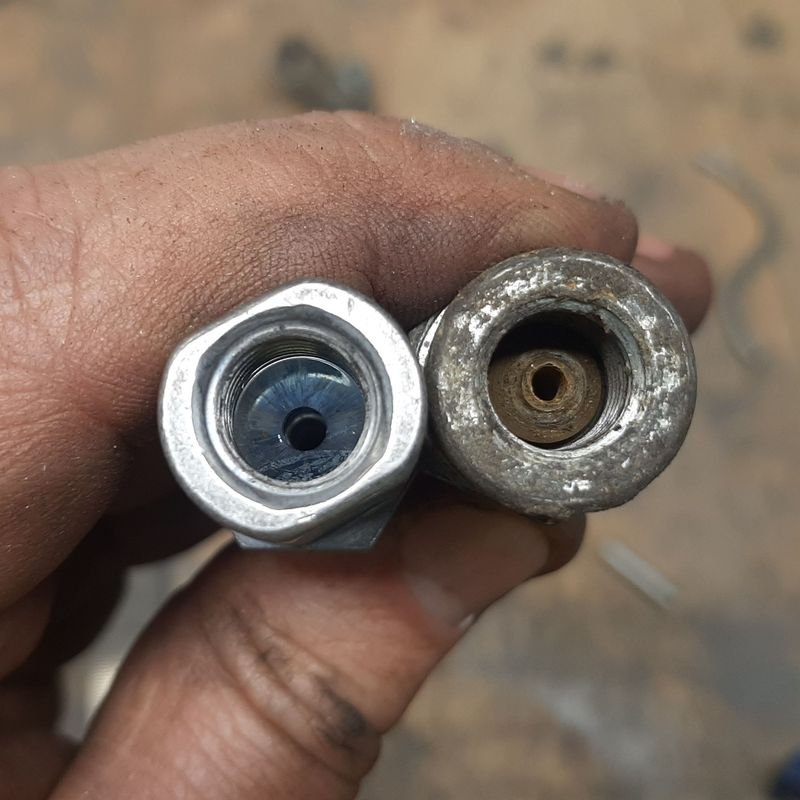
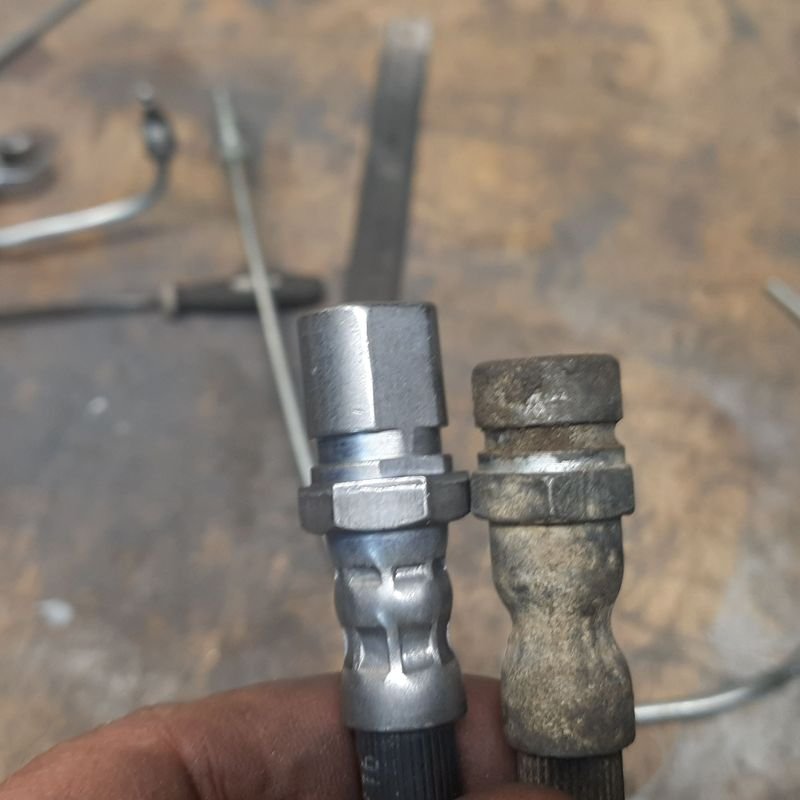
My order from ze germans showed up: Mostly brake parts, rear brake cylinders and shoes and some front brake soft lines, a door handle and some rear light lenses as they were cheap too (bonus new kitteh pic - one of two!) Finally could button up the rear brakes which i had left like this: Mostly new hotness, i have more small hardware coming from Ladapower-Europe.com (they run a parallel site as the ladapower.com main site is in Ukraine ) so im not sure when that will turn up. The shoes and mechanism is shared with Lada rears, but the plate, drum, cylinder and handbrake are Fiat 1100T or 1200 Cabrio Cleanup up the drums Done! Front brakes are already assembled, so i just need to chuck the new lines on, right? Err, no, new ones take a bubble flare vs original double flare The ends are also different length necessitating a different pipe nut So that was good fun cutting off my freshly made flares and nuts and redoing them with the lines installed on the van rather than in the vice! When i got the master cylinder resleeved and the brake line a also bought more line nuts, but they didnt work on the original fittings, but were perfect for the new lines, so not wasted afterall. Once that was all plumed in, i installed the old rear soft line (need to get a HEL one made up eventually) so time to put some brake fluid in and try bleed these suckers.
- 64 replies
-
- 21
-
-
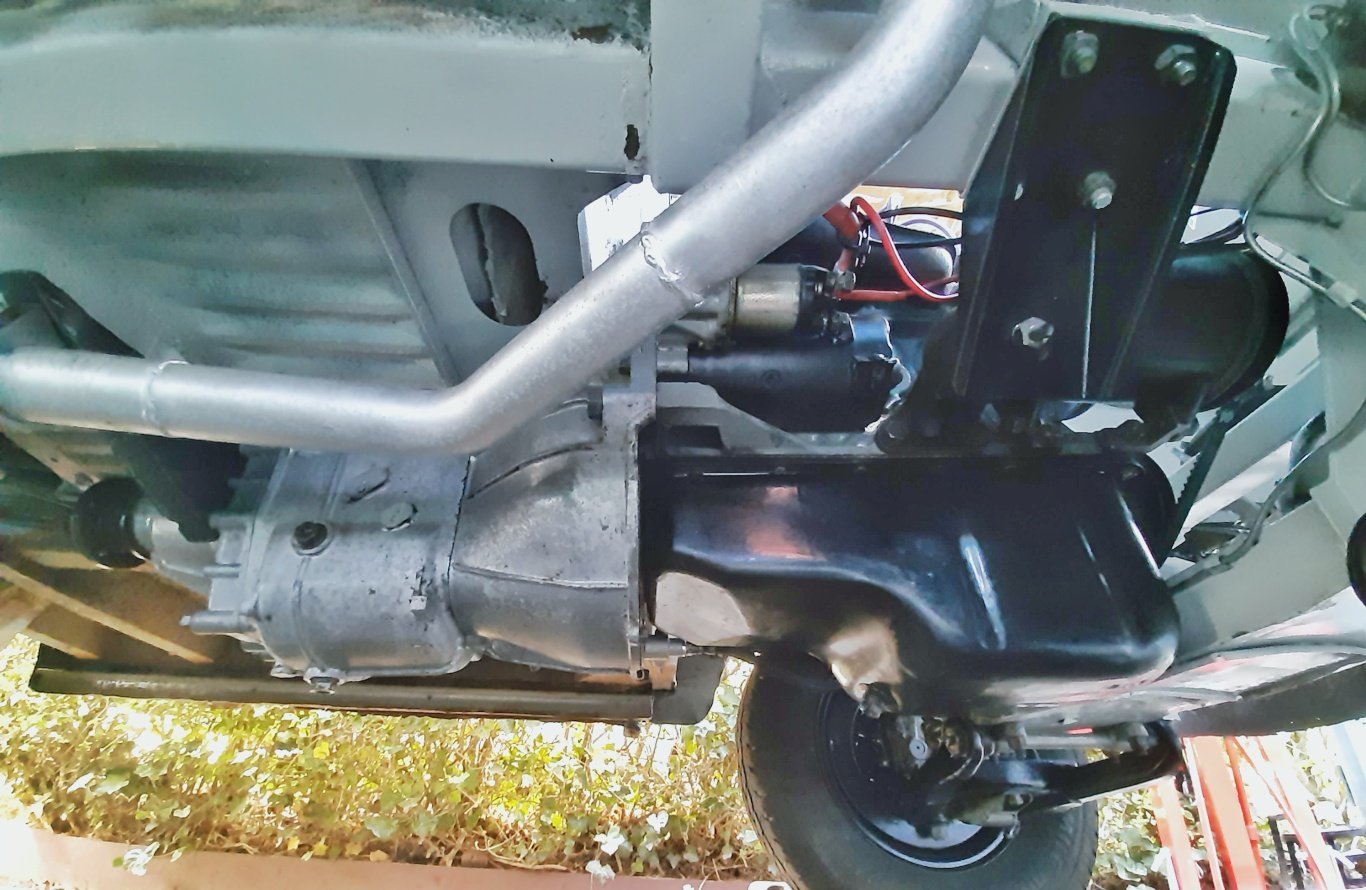
That would be cool! Kinda is working as a tacho at the mo with the gbox free-wheeling. Pretty happy with how the engine sounds/runs for sure. I suspect the carb may be a bit dicky under load tho. Well see. Starter, not sure about type, but its not working so good. The 'solenoid' has a lever in it (electro magnet?) that pushes the teeth on the starter motor shaft forward onto the flywheel. That part also has a clutch/ratchet in it. Im wondering if the magnet is weak, poor electricalconnection internally making the magnet weak, or maybe some mechanical issue (or a little bit of all three) is stopping it engaging reliably. Im gonna push on with other stuff for now (my brake stuff arrived!) as it works well enough for the odd motivational crank up. I have a lead on a spare engine that will hopefully include a starter too so ill swap it out then. Still waiting for a ladapower order which has the special driveshaft bolts in it which is on its way but delayed for obvious reasons
-
Got some more gas, and gave it some jandal!
- 64 replies
-
- 25
-
-
-
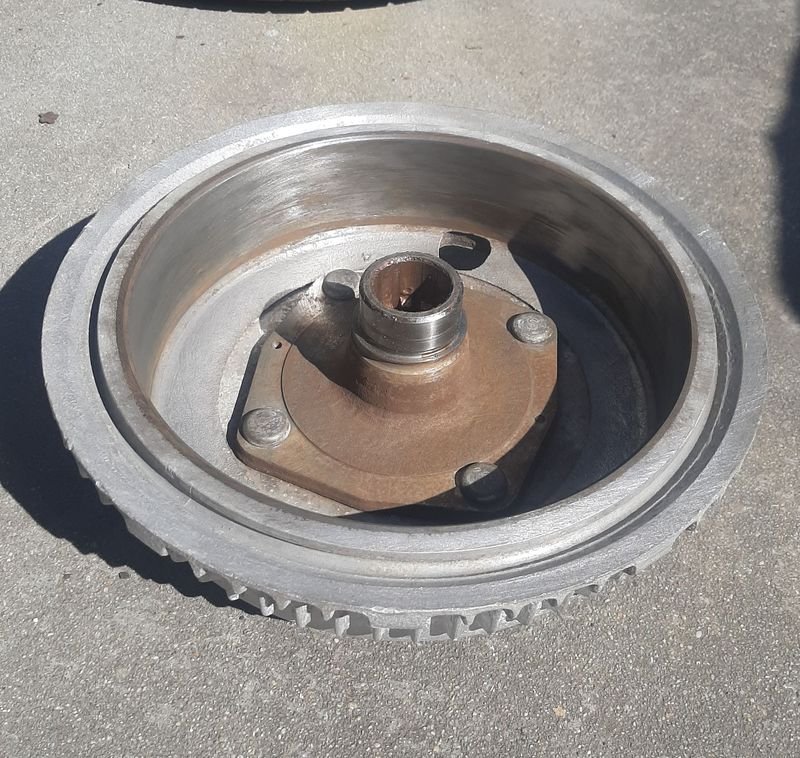
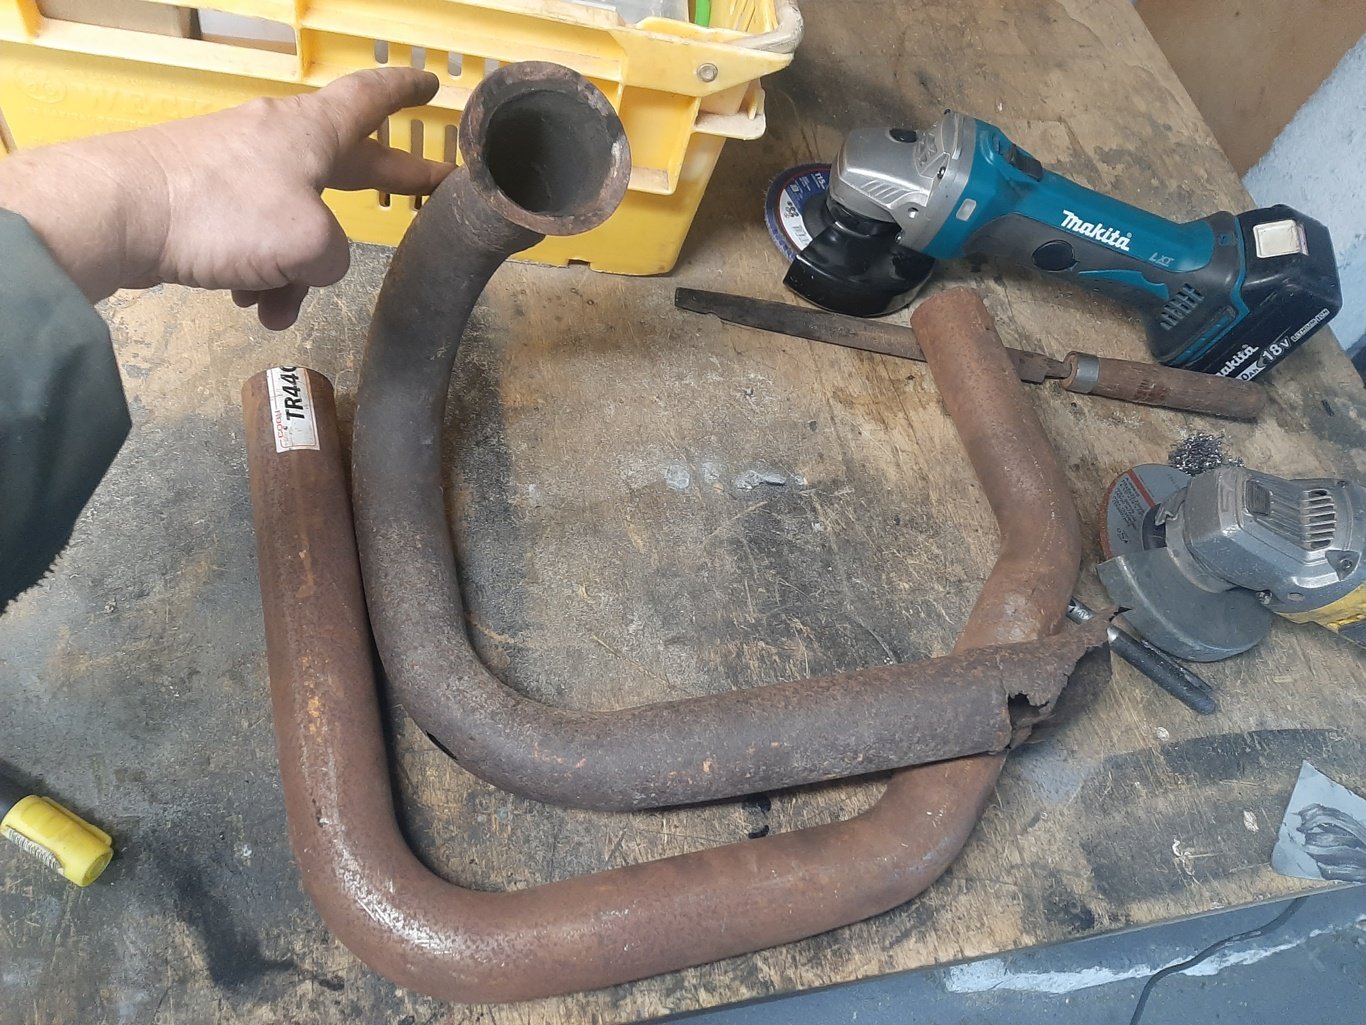
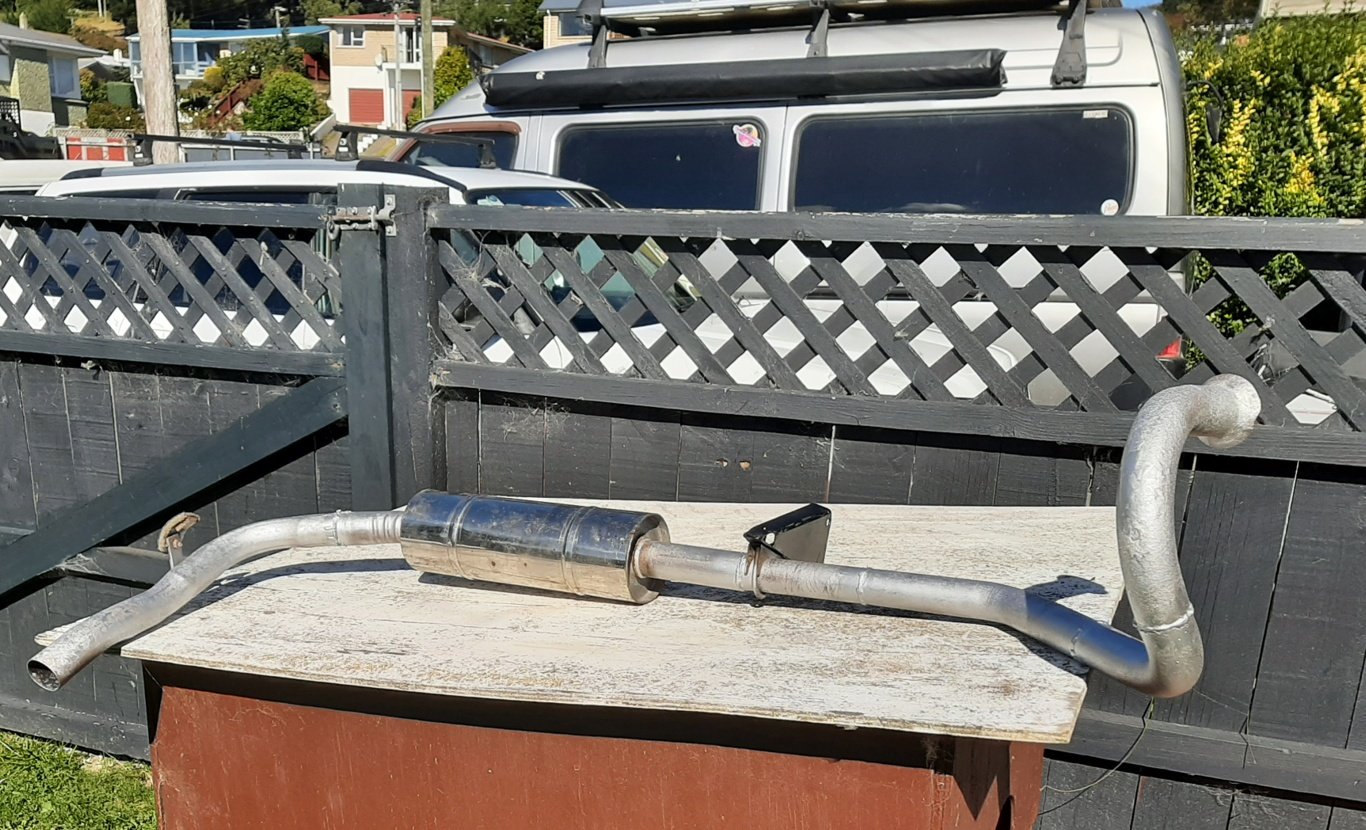
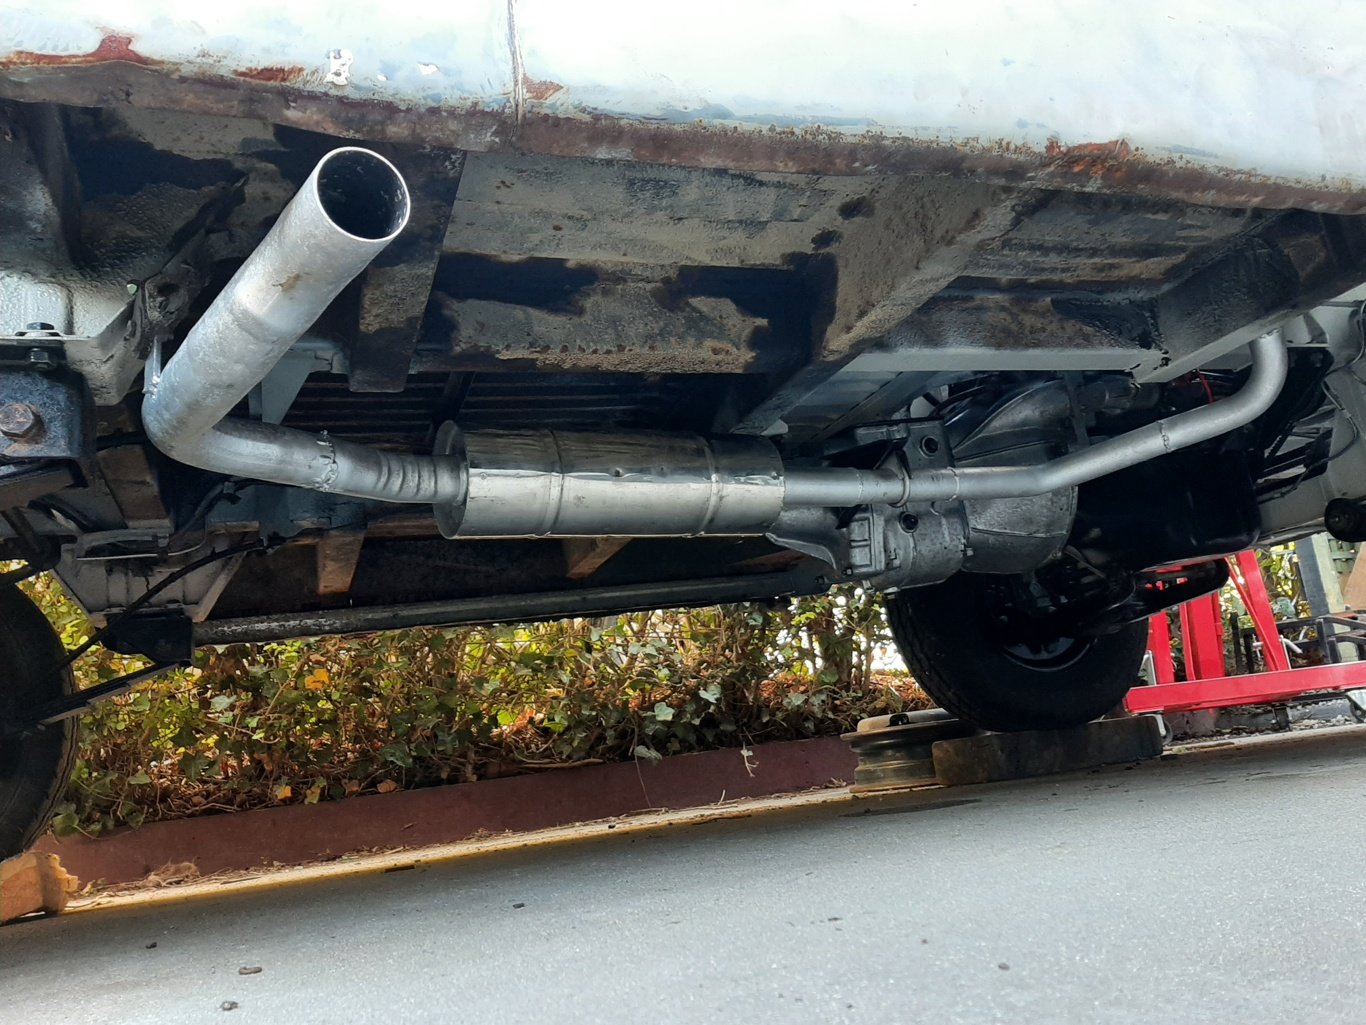
Mrs mentioned it was pretty rowdy when it ran. Time for exhaust. No surprise its noisy, this was the 2ft of curly blunderbus it had. It had a hole in the elbow of the second bend, so not much got reused From the original manifold (that happened to be 44mm) its about 1/3rd 44mm universal bend left over from the 2300 exhaust, into 1/3 maybe 50mm stainless straight through that was on the Croma Turbo and 1/3rd another bit of scrap bend that also happened to be 50mm from the stash. Even managed to reuse the hangers, so zero (extra) dollars spent on the exhaust. Turned out so nice i polished the muffler and put some silver paint on the rest. Tucked up pretty good Side exit like a dragster/old exhaust. Factory would be over the diff and out the back corner, but dont have enough material and i quite like how it looks. No test blast yet as i used the last of the gas for the mower, but i dont think it will be too much quieter than before
- 64 replies
-
- 25
-
-
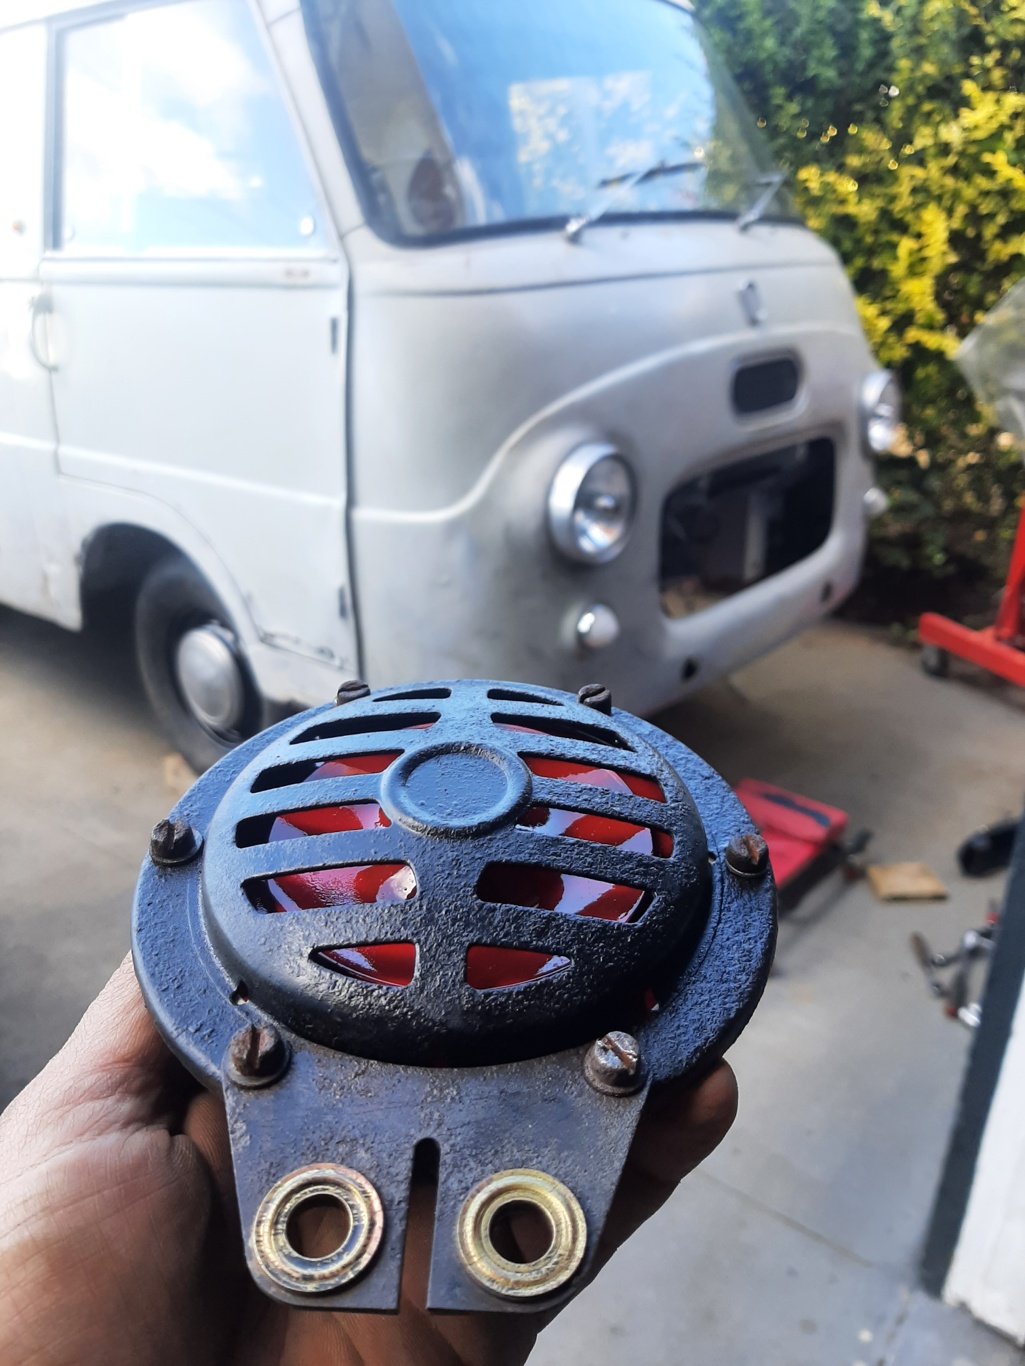
Bit more wombling. Previous starting setup was basically jumper leads and hotwires so wanted to get it wired to run off the key. Done a lot of work already, so i knew everything worked individually but not necessarily all together. Plugged in all the engine bay loom, hooked up the starter and put the alternator in. Chased a few odd faults (back feeding with the key off) to the extent of pulling the dash (nope) and disconnecting things one by one (nope?) and seems to be working now. Ive installed a relay for the headlights and tidied a lot of wiring, this was the state of the (po replaced) flasher unit Looking pretty snazzy under here now Tidied up the horn i got from the Invergargill 127, even the bolt holes lined up worked before and after but now just gets hot. Probably should have just sent it.
- 64 replies
-
- 10
-