azzurro
-
Posts
2,878 -
Joined
-
Last visited
-
Days Won
4
Content Type
Forums
Downloads
Events
Gallery
Everything posted by azzurro
-
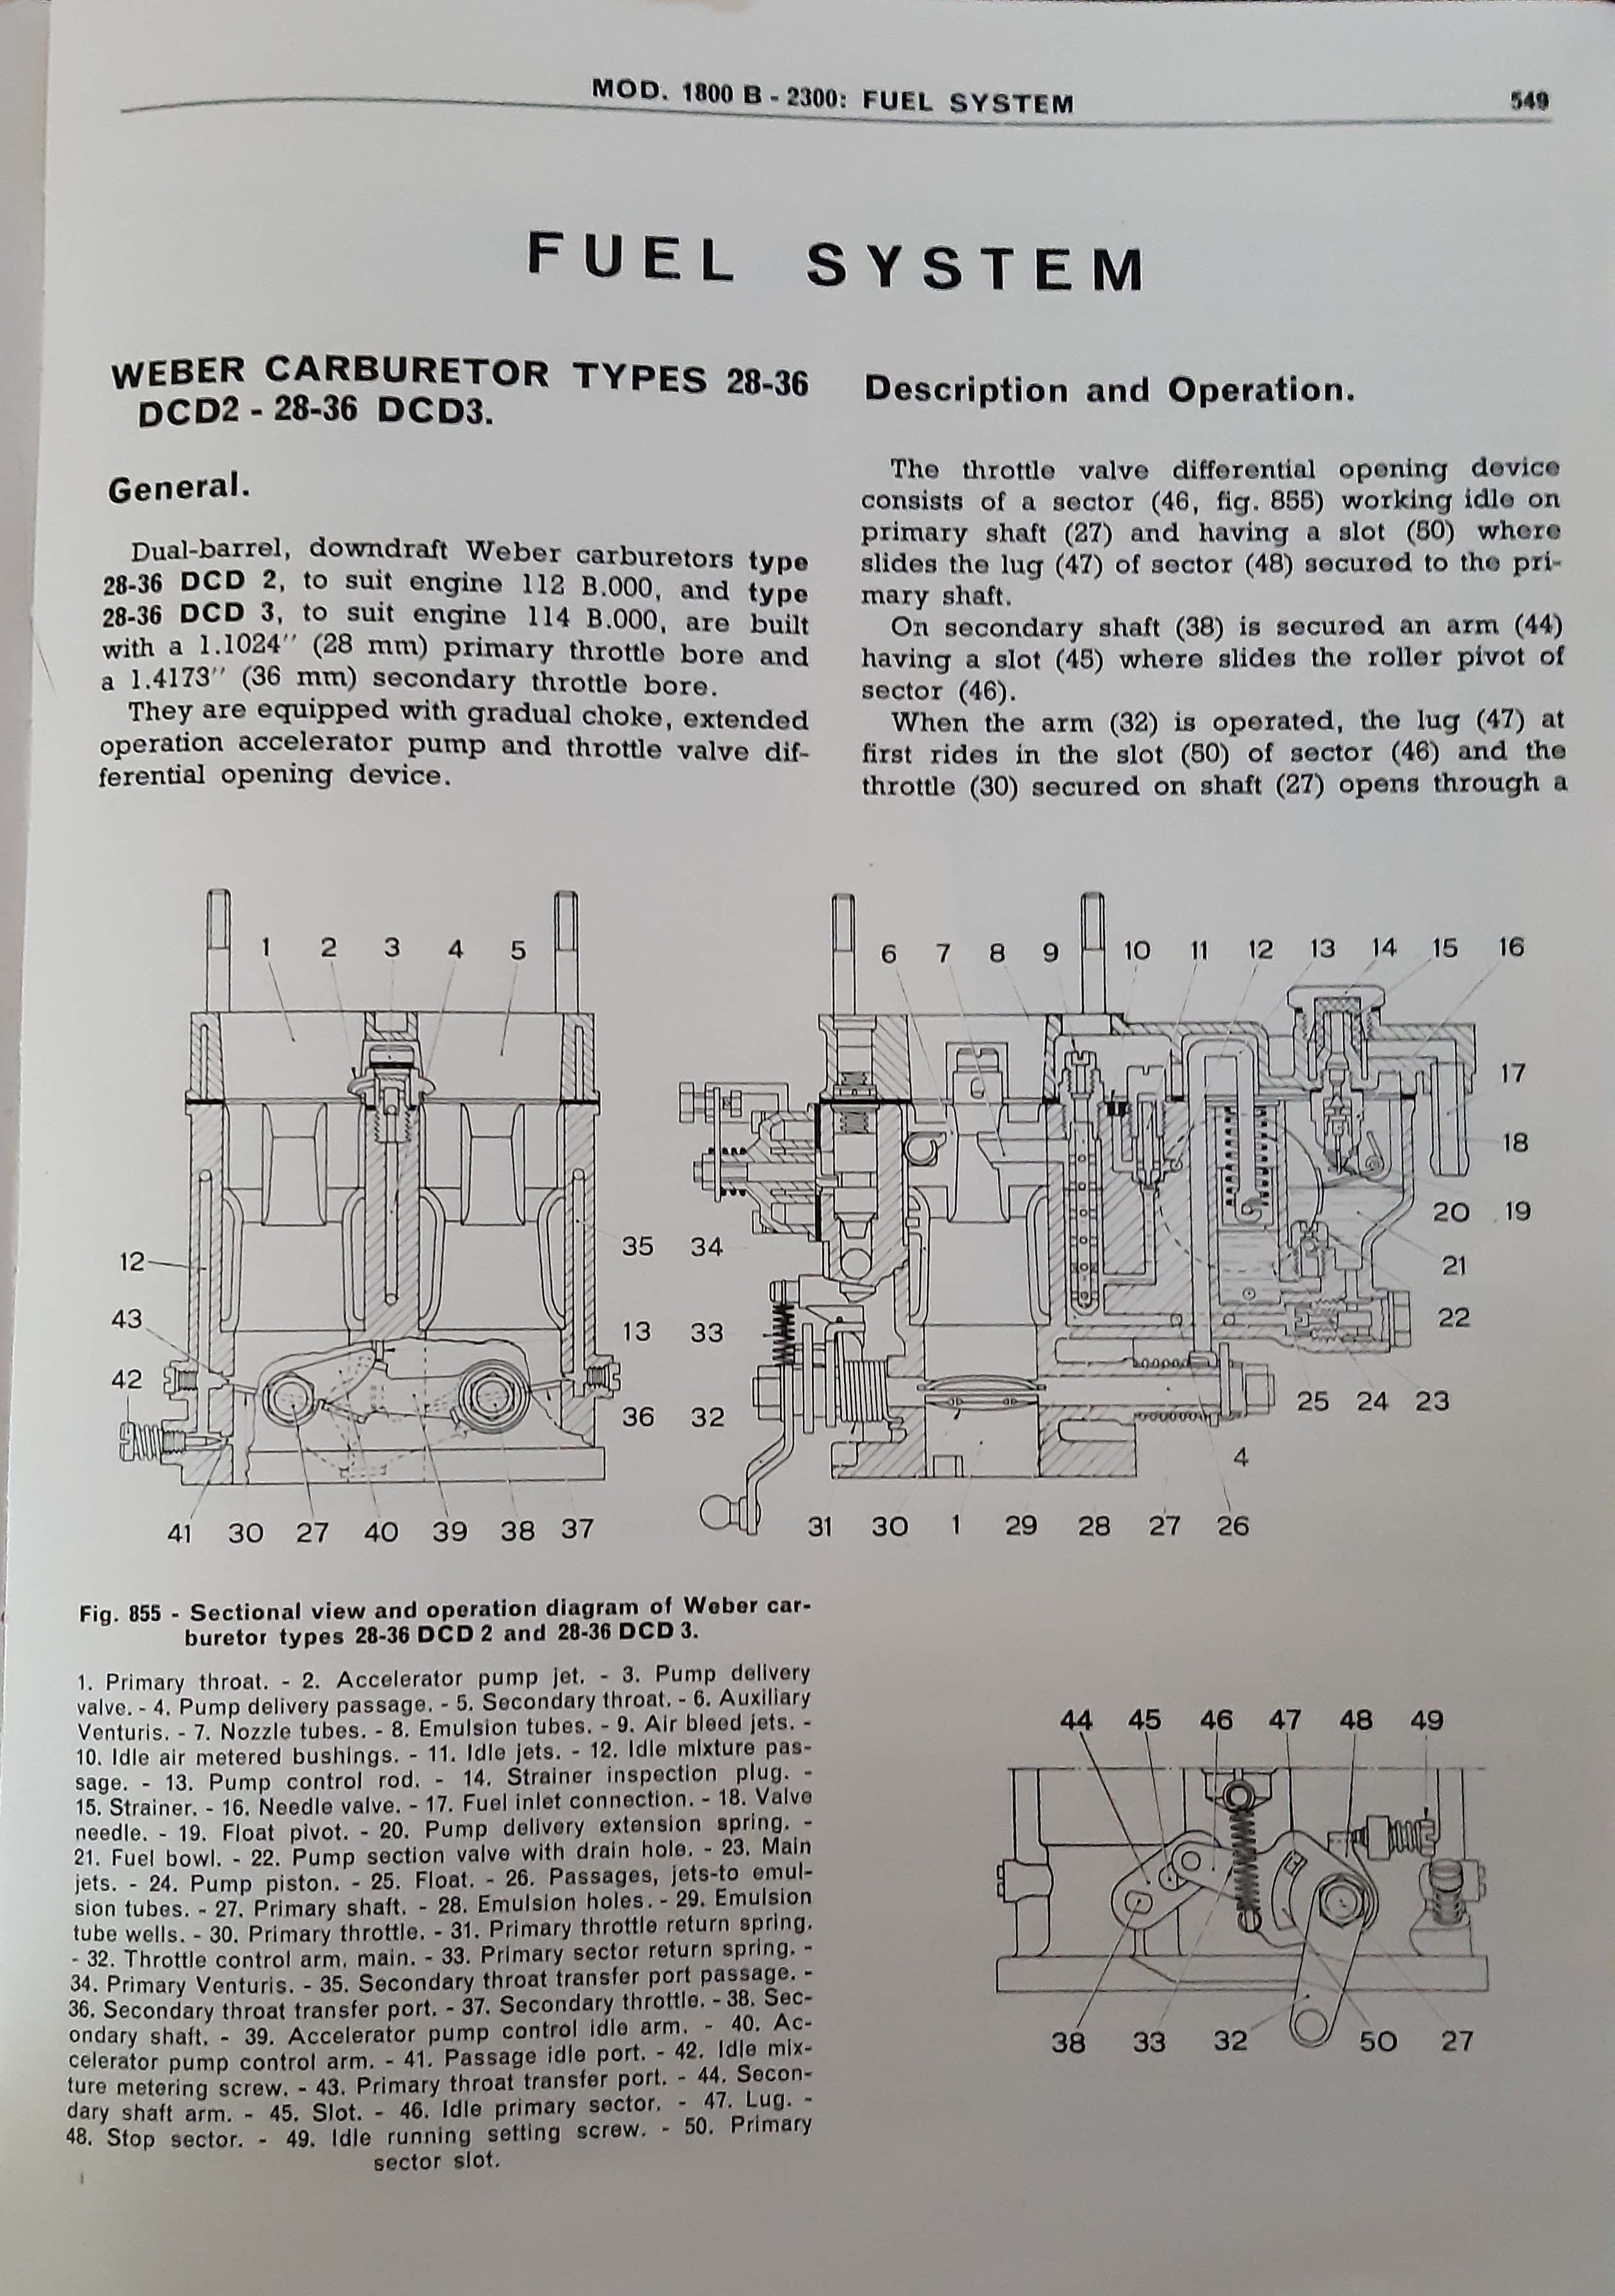
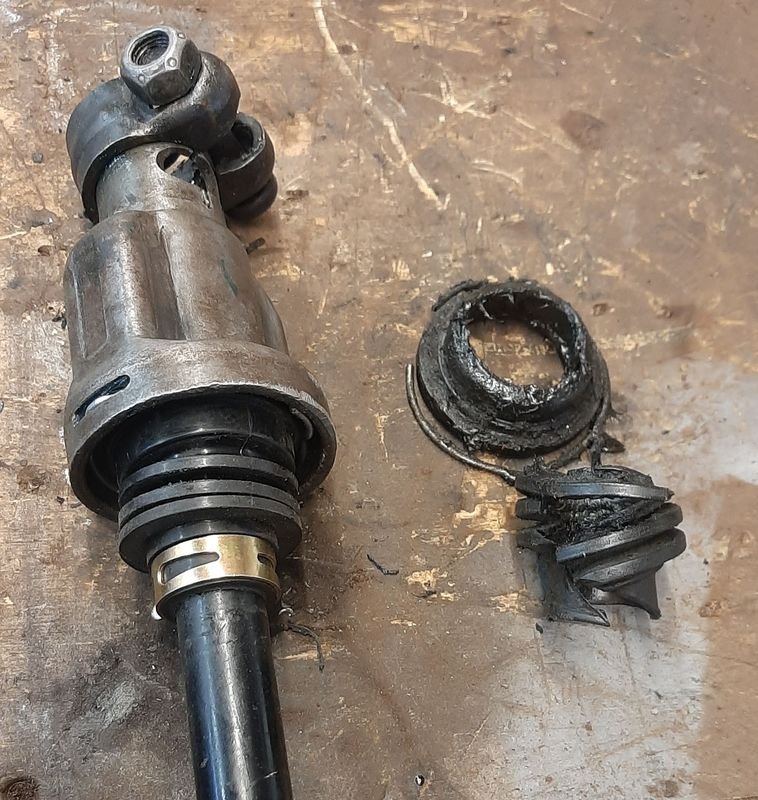
Im sure you can figure out away to block it off if the piston is missing, (remake piston with jbweld?, jam a bolt covered in tape in?) If the piston is in there maybe the choke arm isnt set up quite right and not hooking on the piston properly? By default the spring should be pushing it down (Off) Diagram C on p551 shows how the piston should sit with the choke off (the term in the book is 'out') , basically blocking all the orifices off

-
that hole should have a spring and a piston in it that the choke lever arm acts on, that brass ring on top is the retainer for that stuff
-
Weirdly they were hydraulic till 1500/crusader, my 1100T van and 2300 wagon is hydraulic, lada is too,but the later lampredi engined/waffle gearbox stuff went to cable for some reason, cost probably. Next gen back to hydraulic. It is 'possible' to find and swap bell housings (and starter and clutch fork and pedal and...) for lada or 1500/polonez but the cable setup works fine, usually. I may have an old/spare clutch cable if you super need one, ill have to look tho, could be roached
-
Keen as.
-
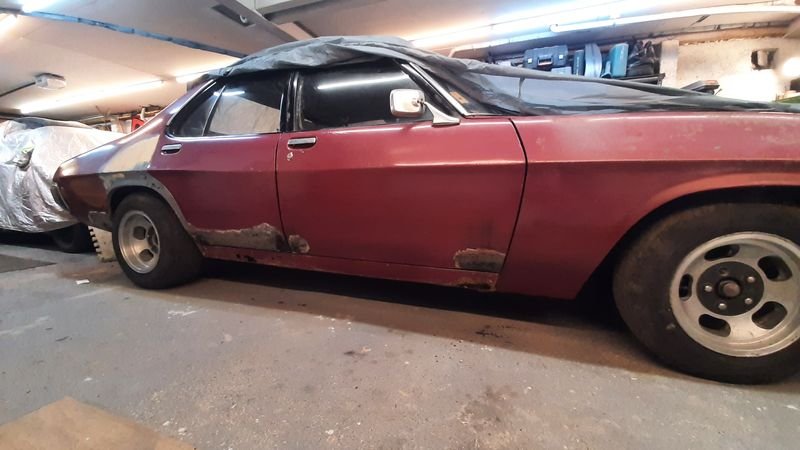
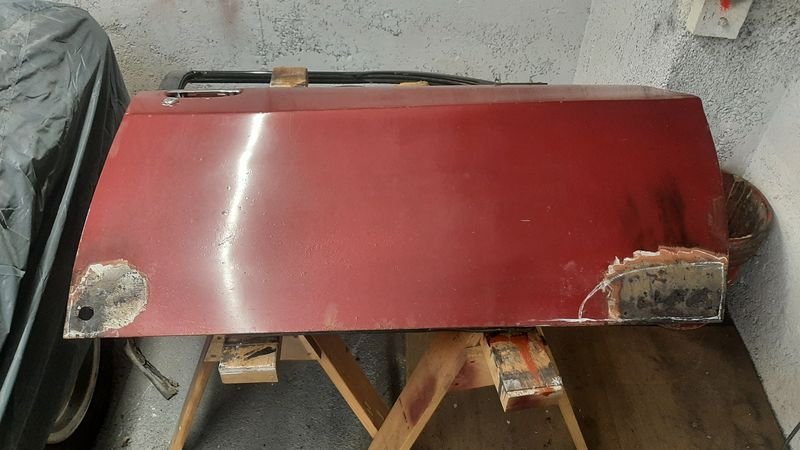
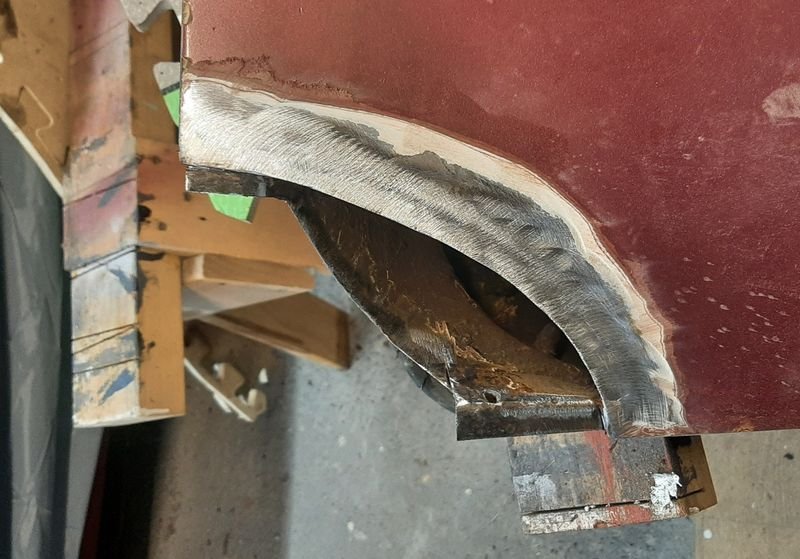
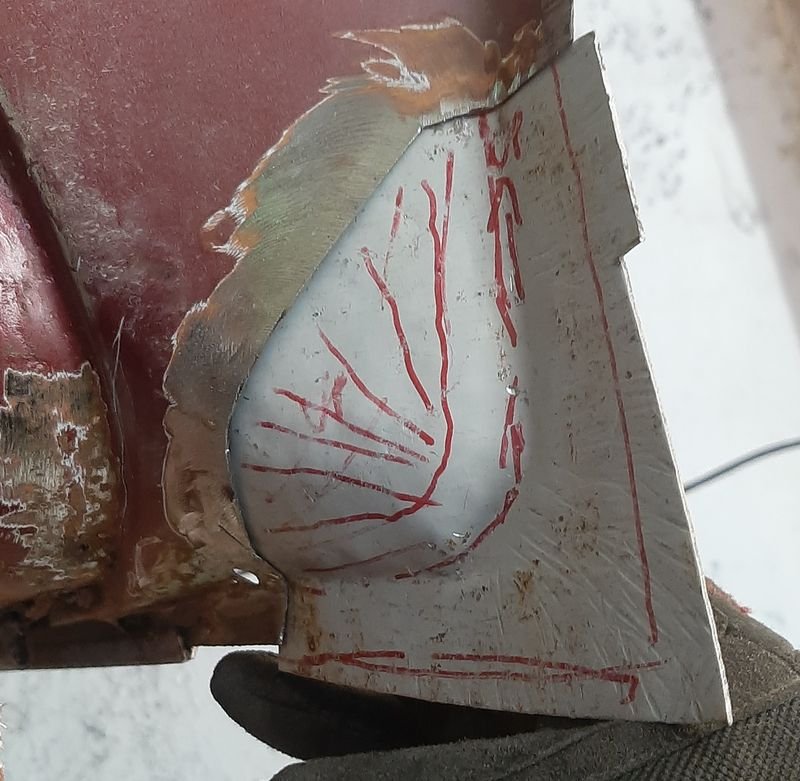
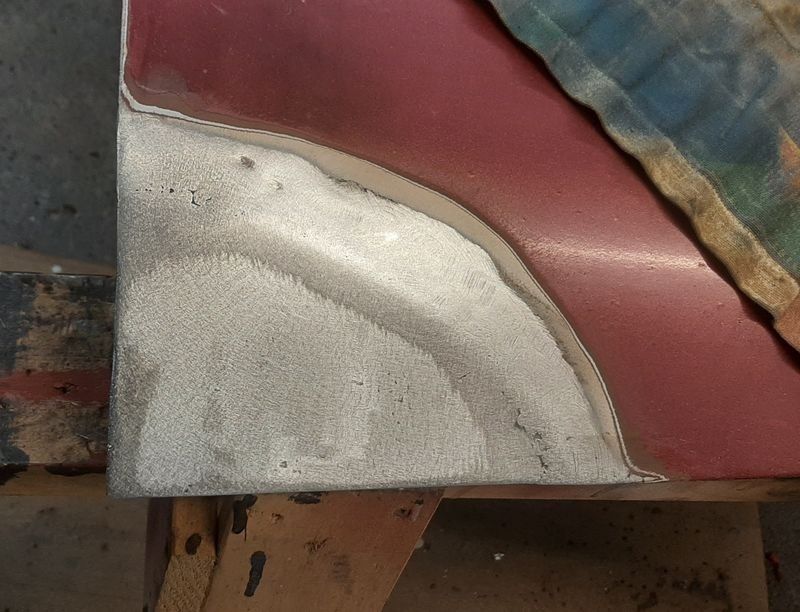
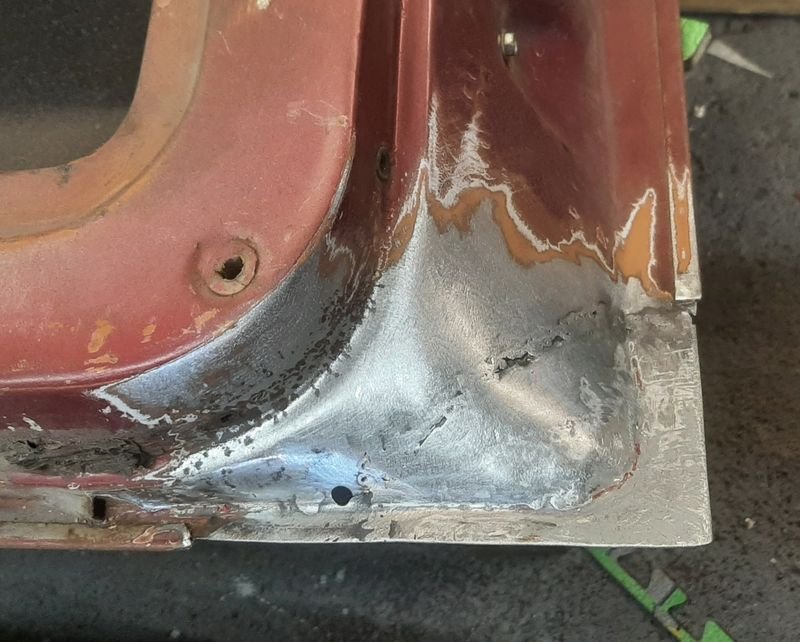
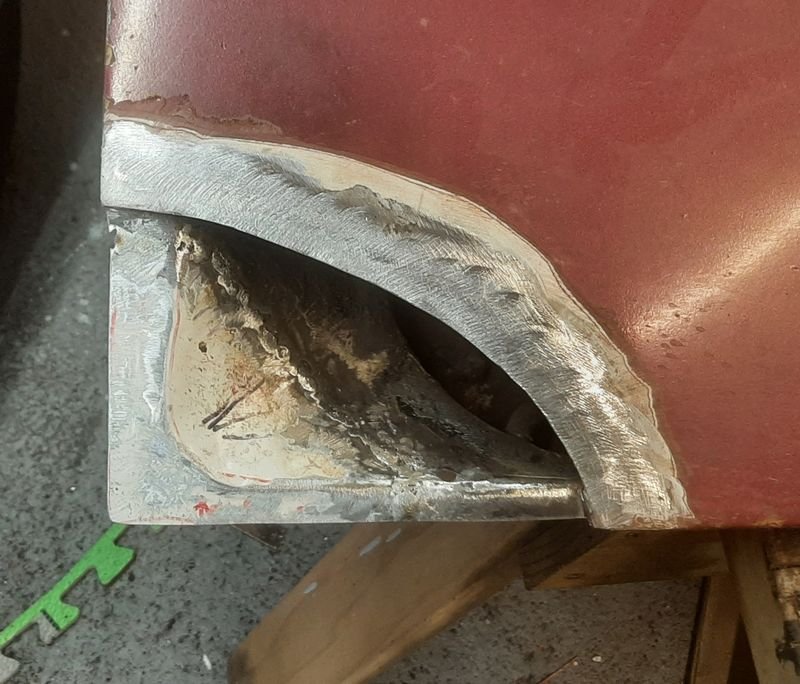
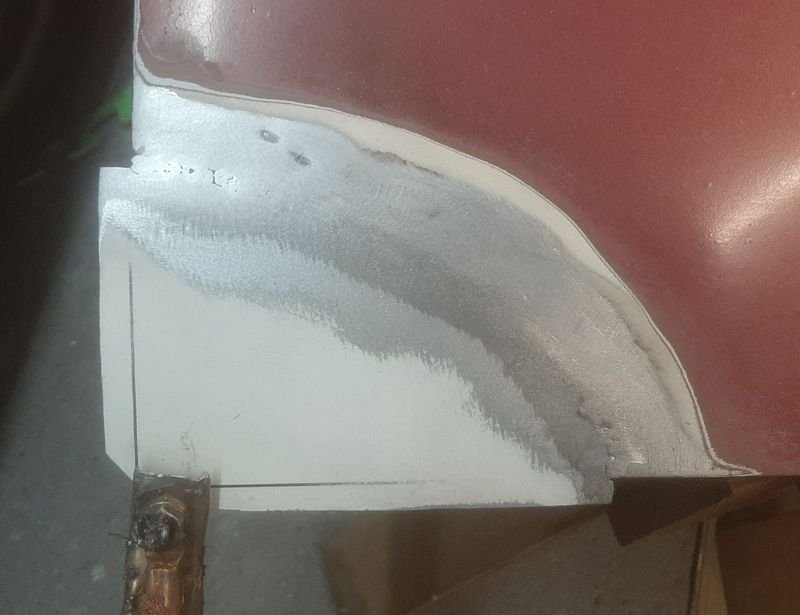
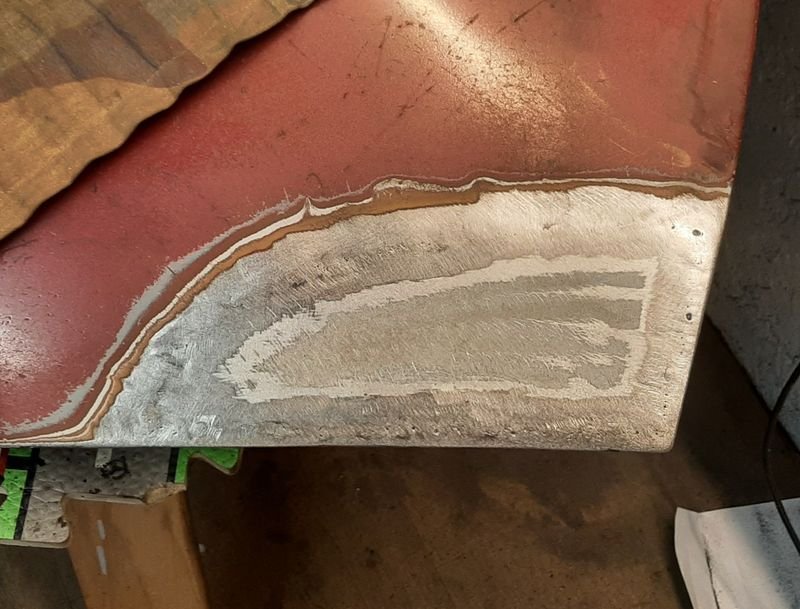
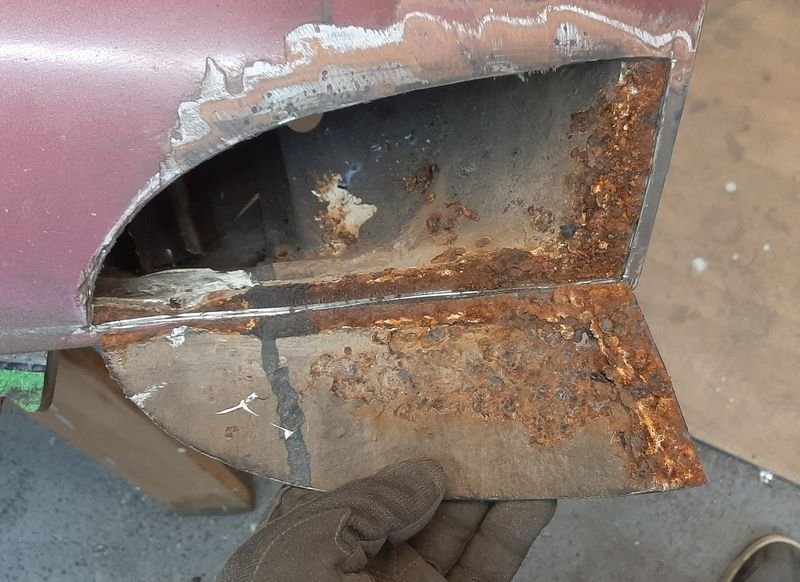
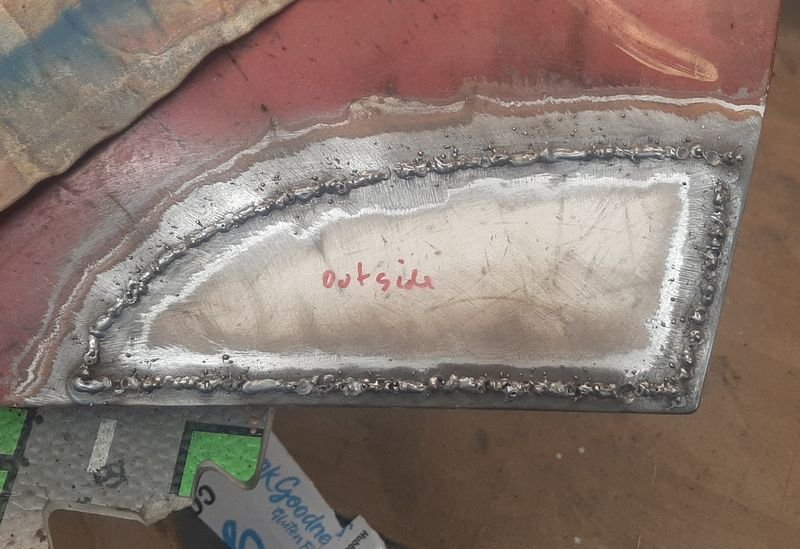
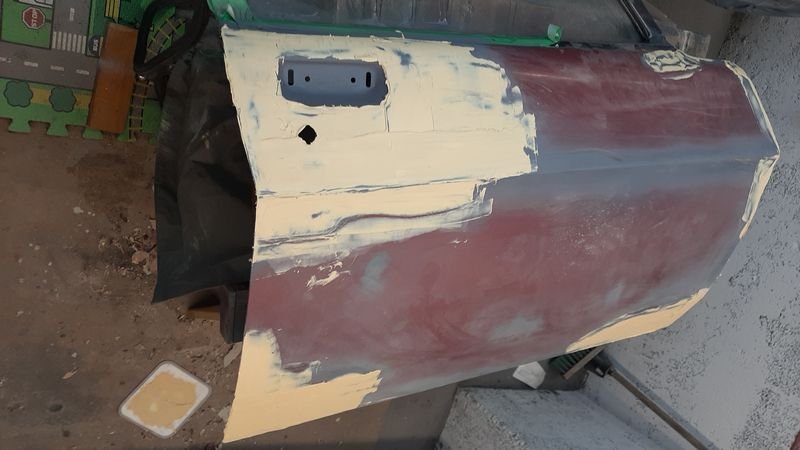
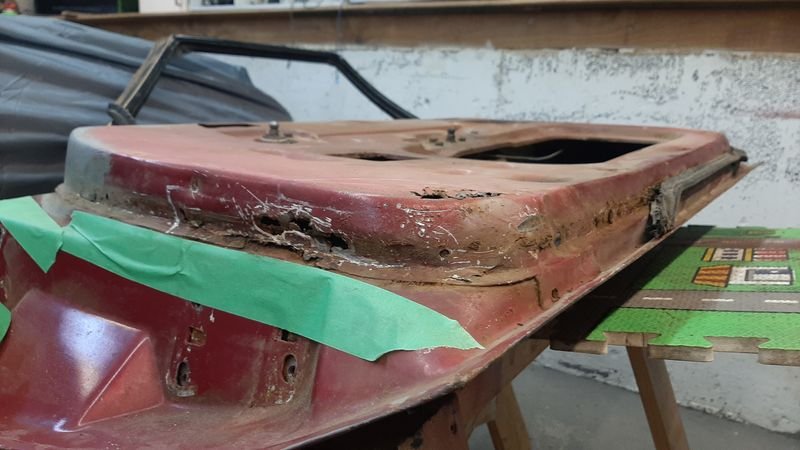
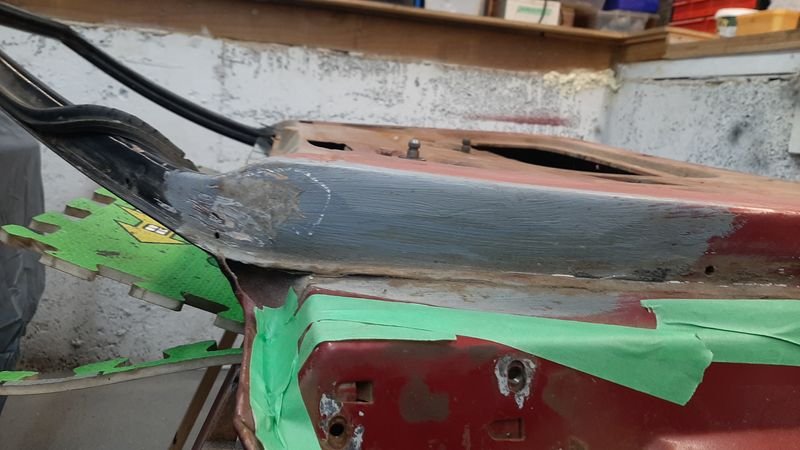
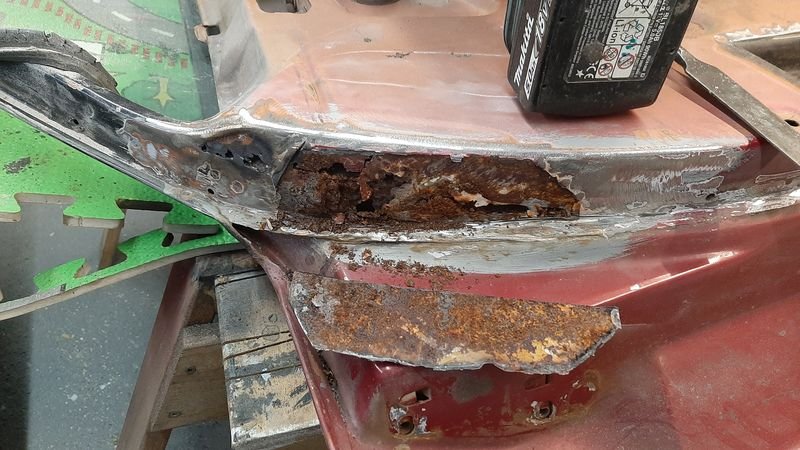
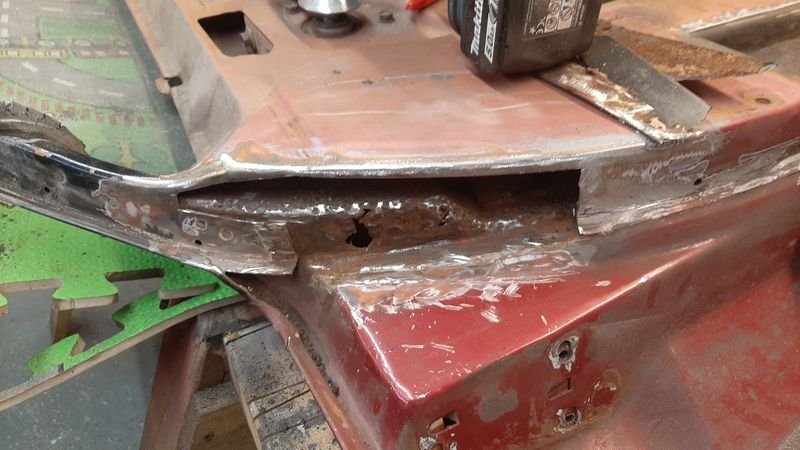
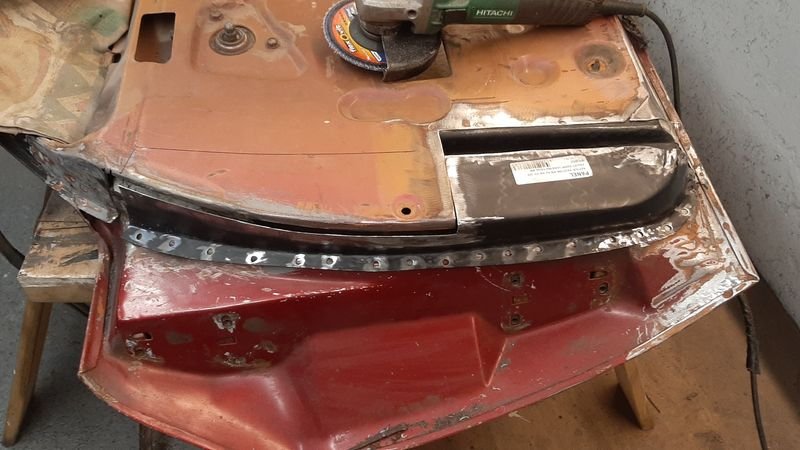
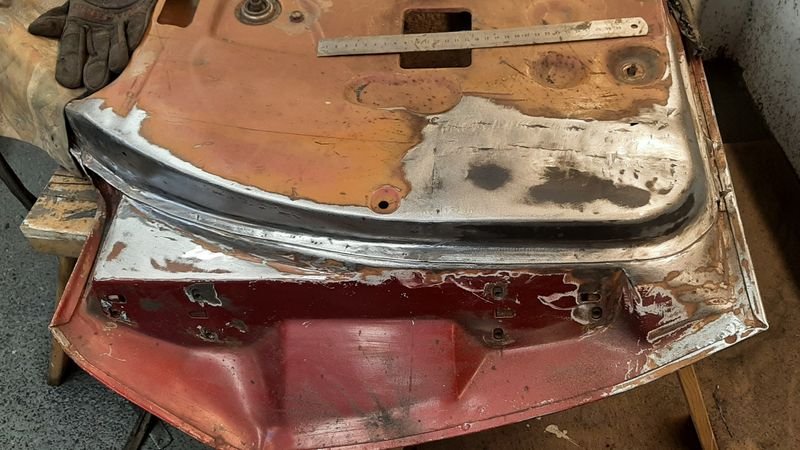
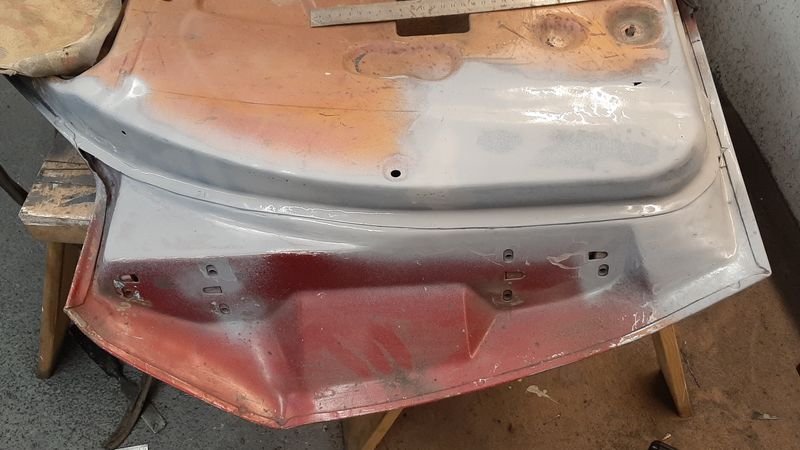
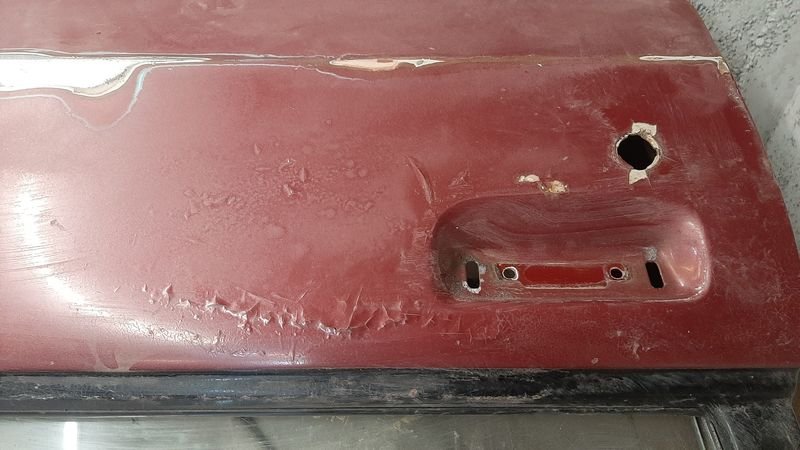
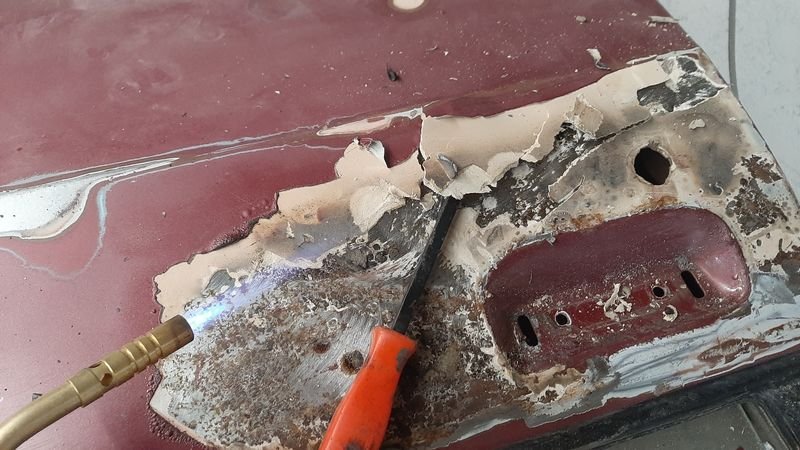
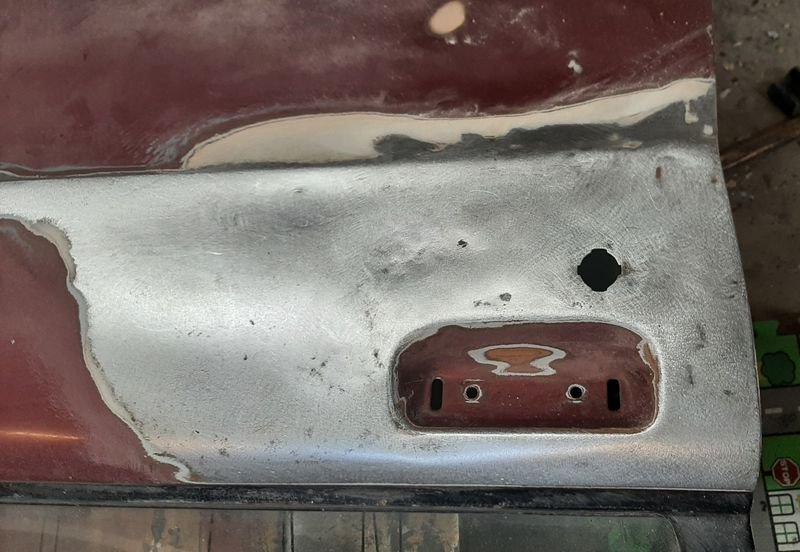
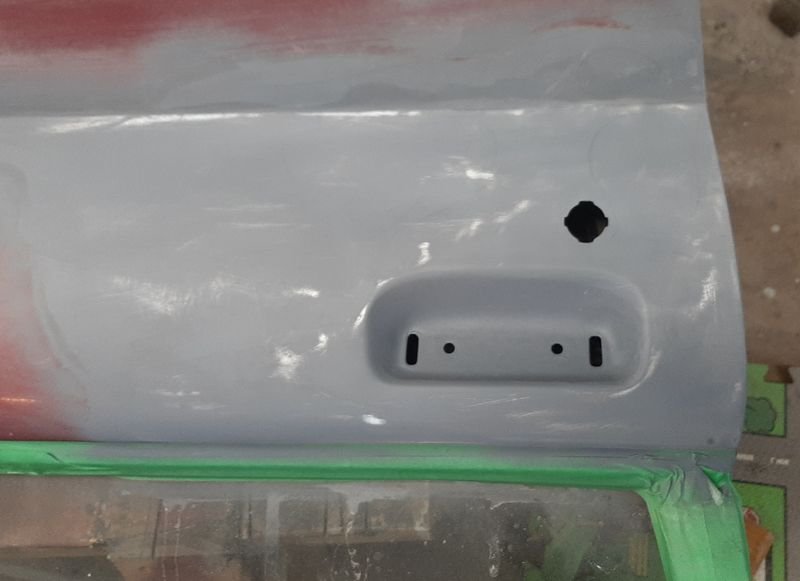
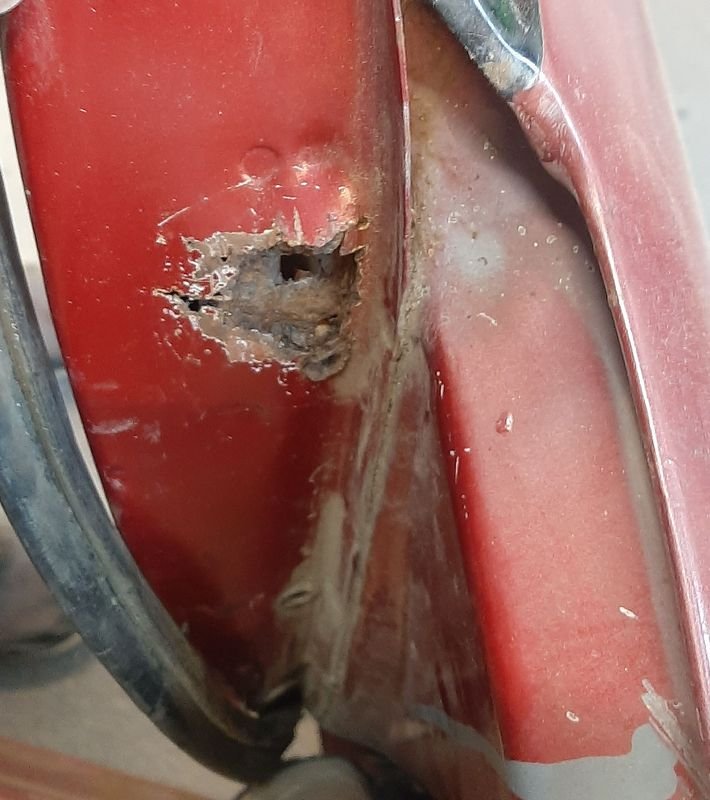
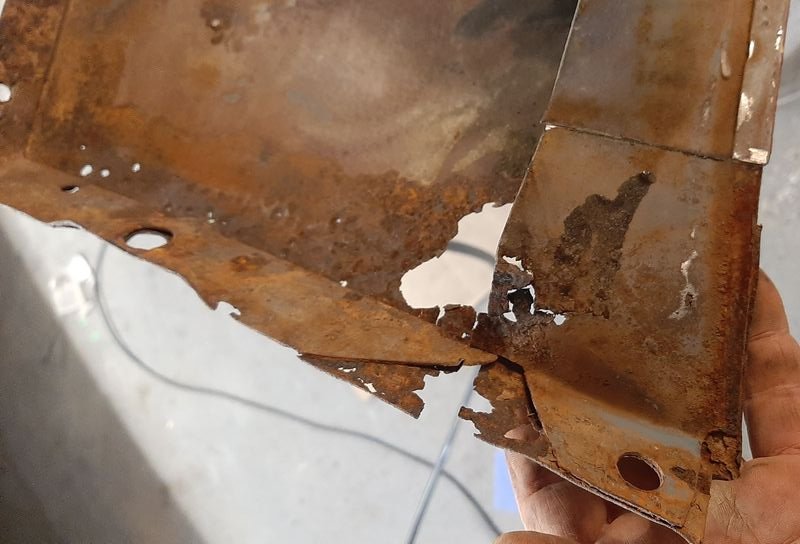
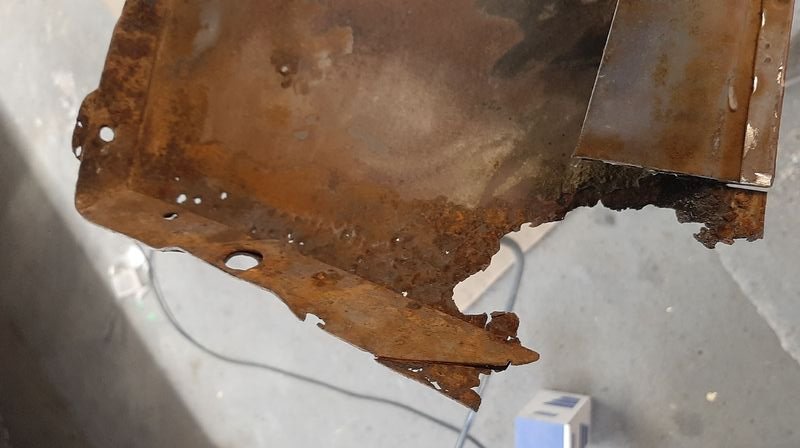
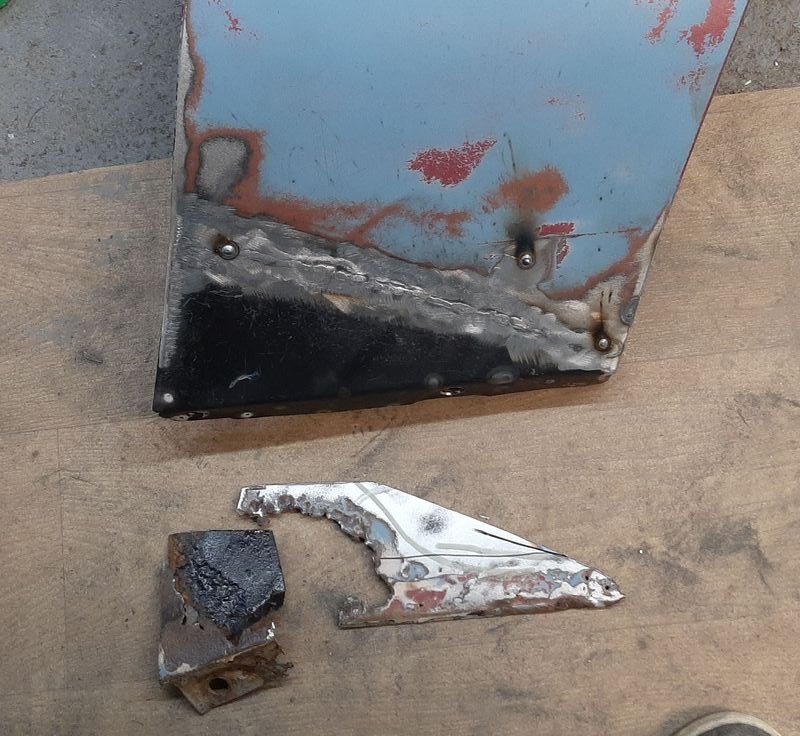
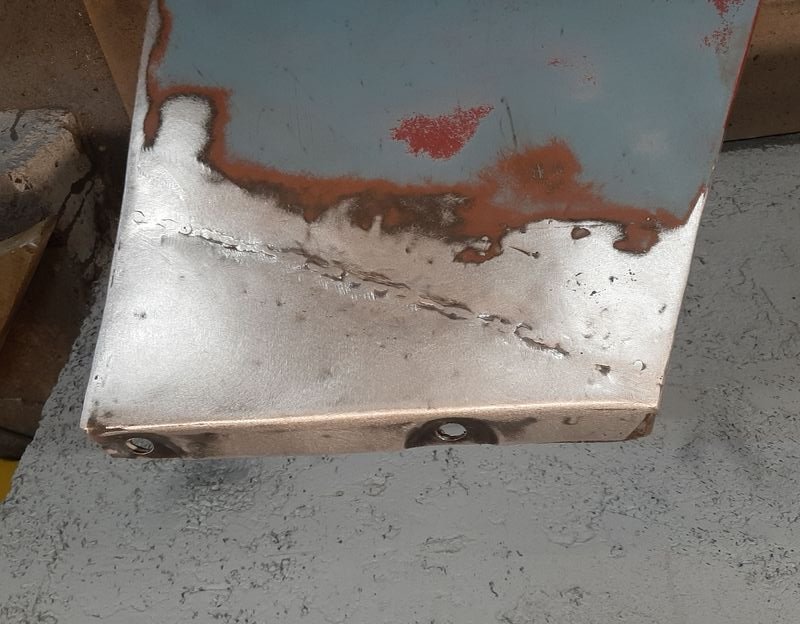
Making a start on the Drivers side rust Starting with the Drivers door. I was thinking it was the best of the 4 doors based on the limited amount of rust that popped though on the outside and all it needed was a couple patches in the outer skin, but jokes on me it turned into a bit of a mission. Took this one off to fix (instead of leaving it on the car) because the hinges are worn out too. Starting with the rear corner. Chop Chop back to good metal bish bash bosh - the annoying hole in my firewood chopping block came in pretty handy for forming this piece, and it turned out pretty good zip zap it in Front side Edges dressed over and tidied up Then the front Corner Crunchy! Left a bit of the outer edge to avoid messing up the door gaps etc. Lots of spitting welds from the rust despite my best efforts to dig it out. Ill be filling the doors with wax etc eventually, it wont last forever but hopefully wont need to dig in again in my lifetime. Next step: The inner leading edge that holds the door rubbers. Its pretty bad and theres a suspicious looking repair at the base of the window. This old primer and bog is hiding something... YUM! An old patch tacked over rust. Ended up chopping a fair bit out, not just the rust but to gain access to the inner skin, as that needed repair too. Patch job was done - while it cant be seen it still needed to be flush for plug welding the outer over it, and strong as its a pretty structural part of the door. At this point I didn't even try to form the edge and bought an 'front door inner repair section' which turned up in two days (its pretty much cheating!) Chopped most of it off except the bits i needed Filled in the missing bits the panel didn't cover and smoothed it out Then chucked some primer over it to show up all the imperfections again! Then flipped it over to address the cracking paint shituation around the door handle. Obviously something is going on under the paint so its all got to come off Little bit of heat to soften up the bog and it just slides off revealing the horrors beneath Did what i could to remove the surface rust and straighten it out, but there is no real access to get a dolly or a hammer in there to dress the metal so it is what it is. You can see the door below the body crease has a generous layer of icing too that im just going to ignore as its not cracking or whatever and has been fine for 30 years So that's all the rust on this door, just need to put a pile of wob back in to build the area i removed it back up to match the rest of the door
- 29 replies
-
- 40
-

-
Oh, shucks. This is Alfa* chat tho, we are well beyond my pay grade. My understanding is those Nord engines do ghfwii Technicality for thread *Fiat bought a majority share of Alfa Romeo from the Italian Government in 1986, so it could still be Fiat chat, technically, and the plastic bits and Fiatish stamping font suggests it could be a later model one? Have enough fiat parts bin here to try connecting it if you do get it.
-
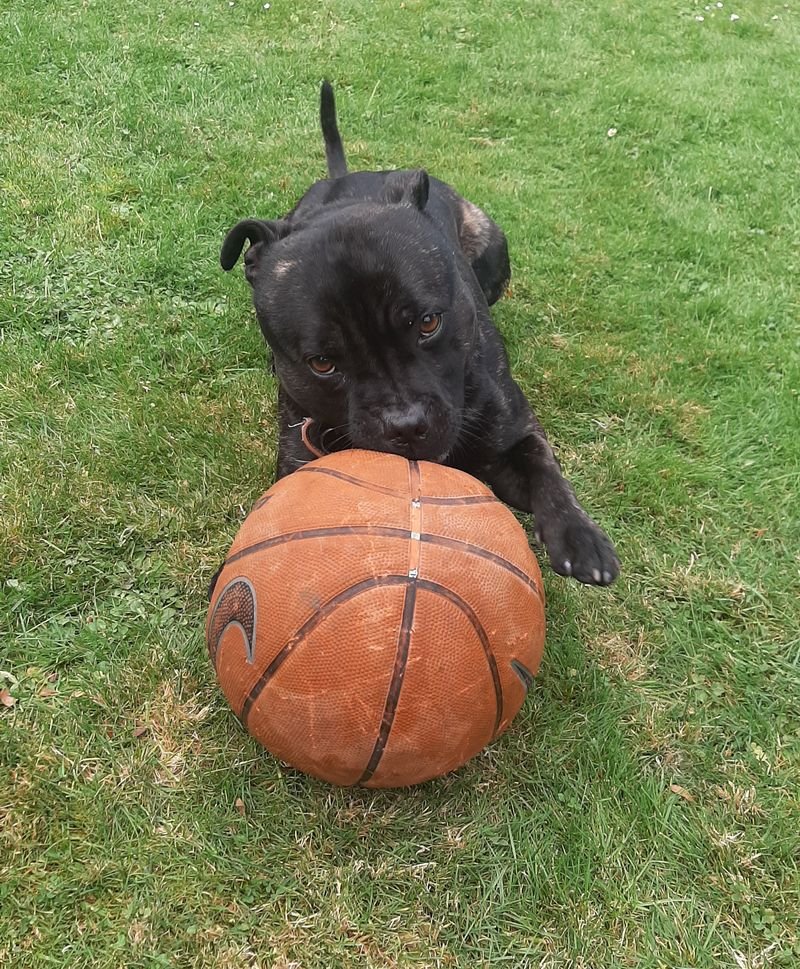
Yeah, possibly engine just needs a few heat cycles and some actual driving to decrud the lifters or something but for now it starts pretty much if you breath on the key and idles nice. (in the video it was first start for weeks and we forgot where the choke pull was) Engine and box will come out for a proper clean and a going over at some point
-
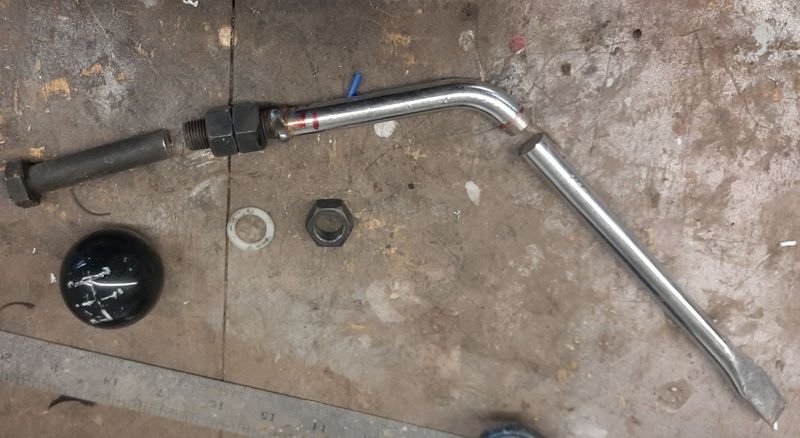
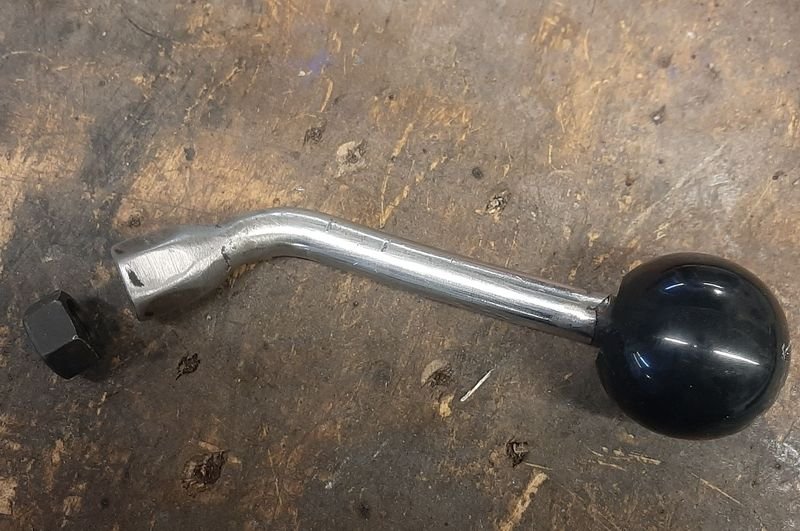
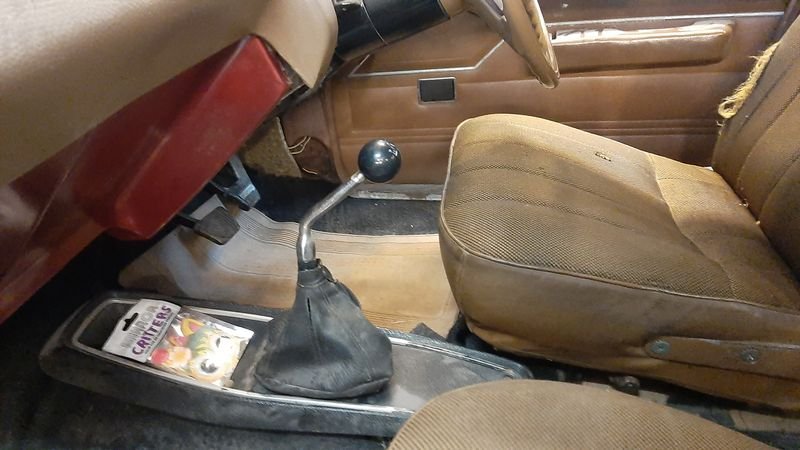
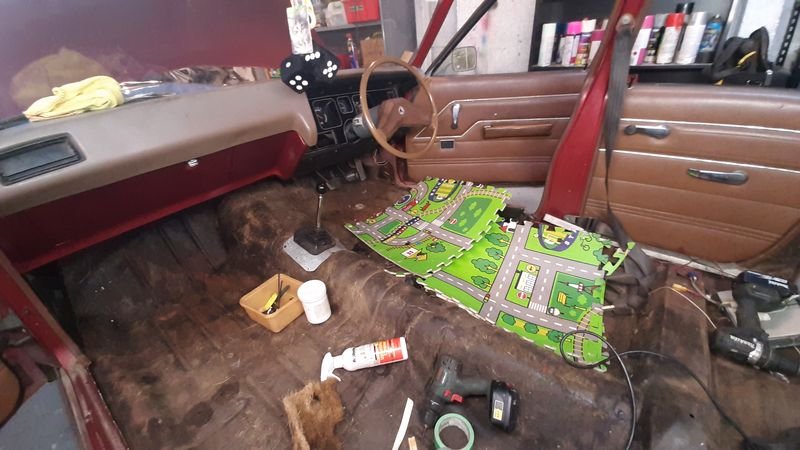
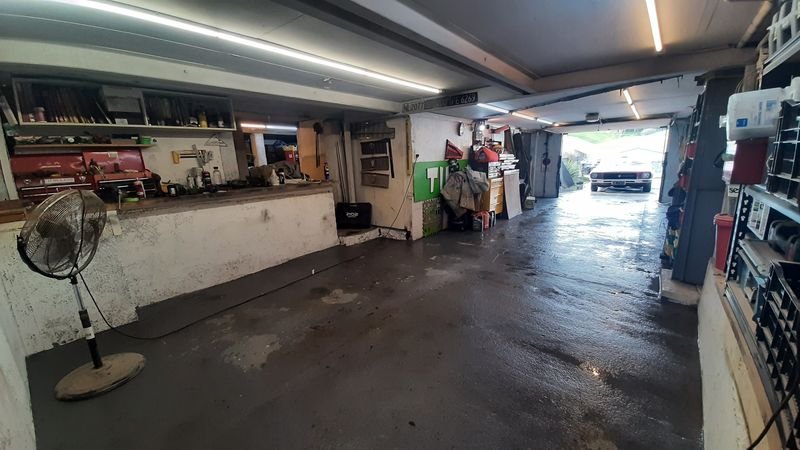
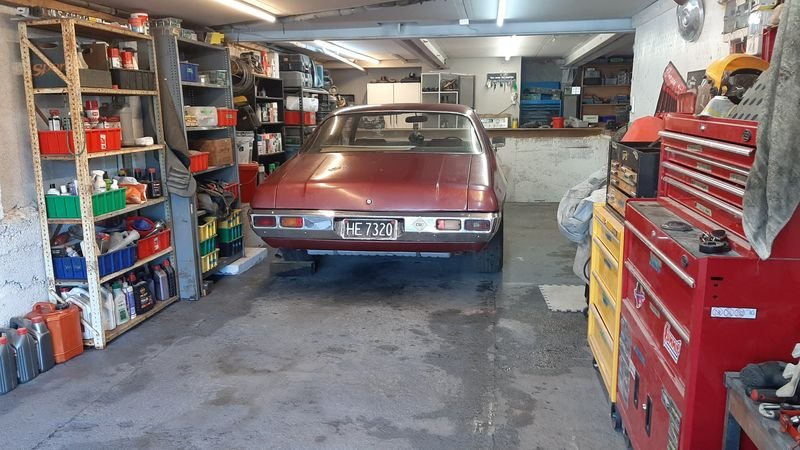
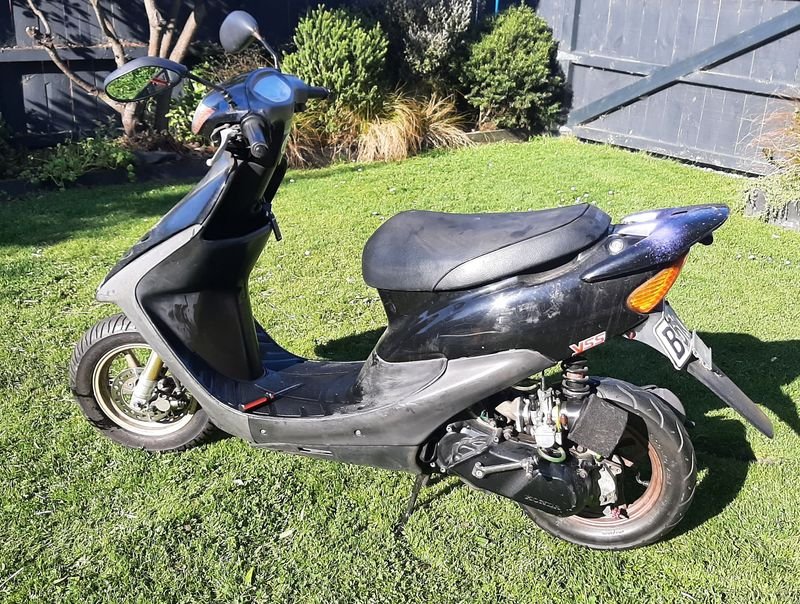
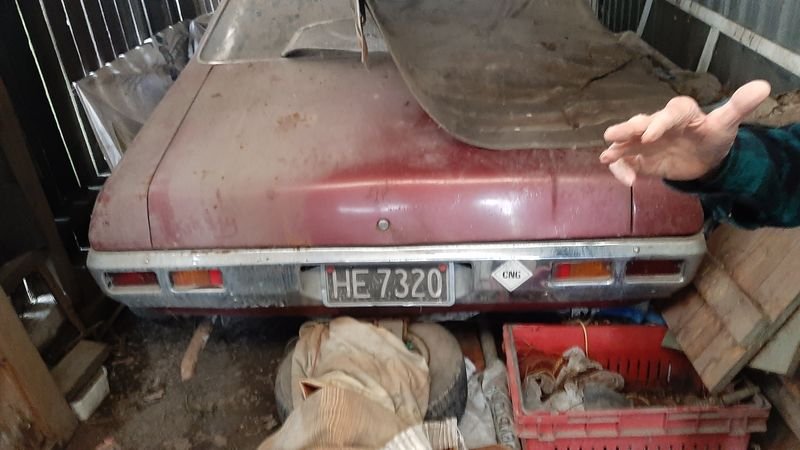
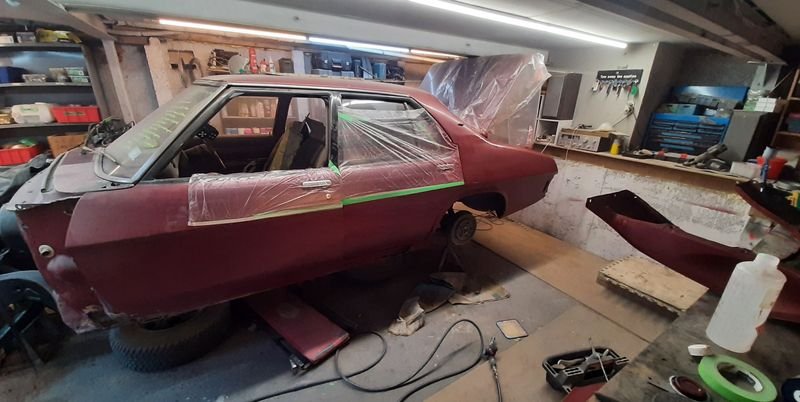
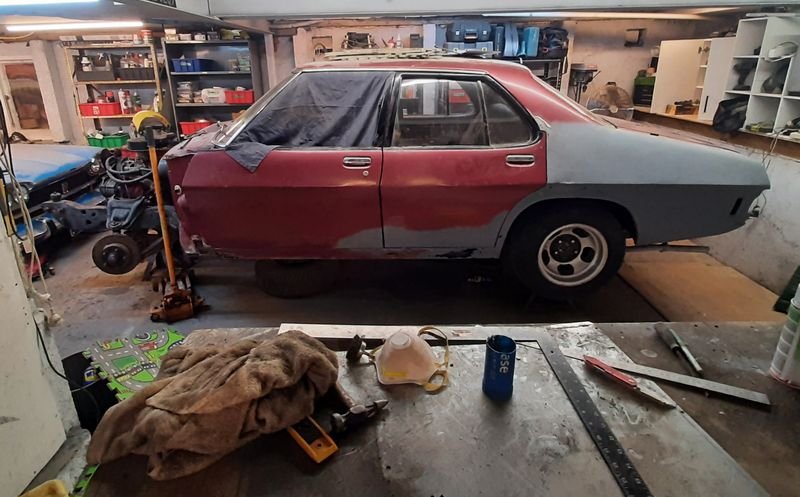
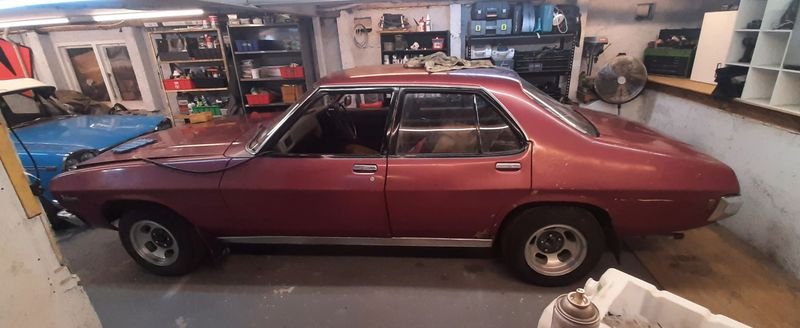
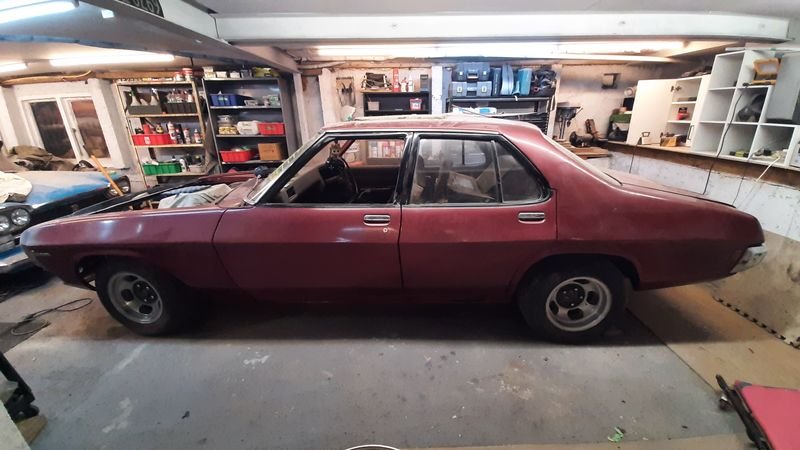
Made a gear stick extension. The Torana box makes it a bit of a reach from the HQ driving position. Shifters are available from Aussie, but for over $1000 bux ill give this a go first. Used a broken chromed tire iron i had been saving for just such an occasion, plus a 1/2"x20 UNF bolt, and 3 matching nuts. Welded the bolt on one end to give the threads for the knob And 2 nuts on the other other end to attach the extension on to the original shifters threads + the last nut threaded onto the shifter as a lock nut to hold it in position. The gear stick falls to hand much nicer now its about 4 inches back and about the same higher. Torana centre console plus the gear stick gaiter from the Croma Turbo i wrecked (still have the engine in the stash for one day) Then moved all the cars. 2300 wagon looked like a barn find Even pushed the Dio ZX out into the light for a hose down! (oil tank had leaked down and hydro locked the cylinder! It was pretty smokey once it fired up!) Then Kisrty fired the old dog up and rolled it into the sun for a wash *Somehow* it got turned around and it now faces the other way. Can confirm the brakes, clutch and gearbox works fine, exhaust is not too loud while driving and she rolls along pretty happily. Back end with the new exhaust and tank looks great! Drivers side, ehhh, not so much, but pretty much the same as the other side, rust in the plenum corners, whole sill front to rear, corners of the doors and rear arches. Took the opportunity to sweep and wash out the garage, lots of rust, mud and old greasy smeg Then poked it back in, this time with the drivers side facing the workbench/welder.
- 29 replies
-
- 40
-
-
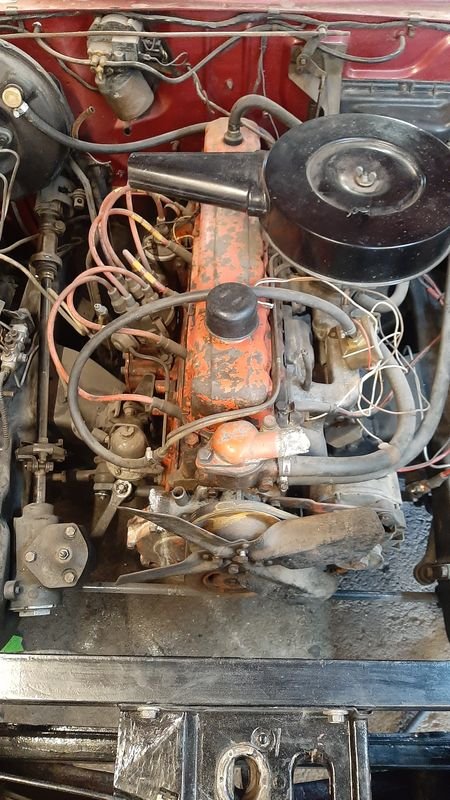
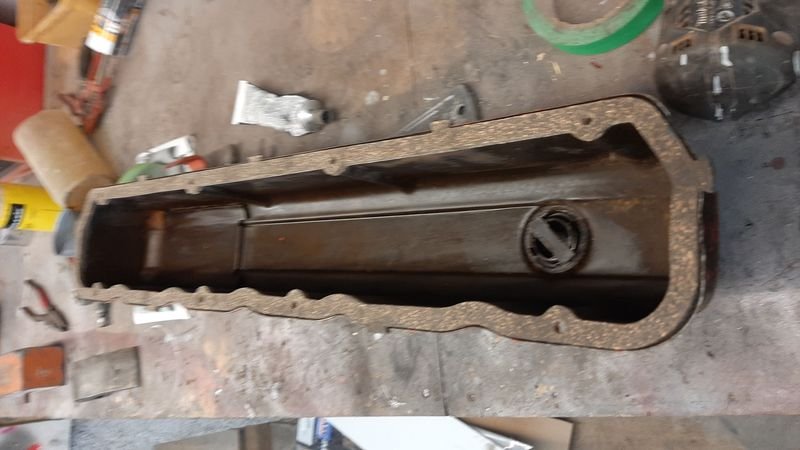
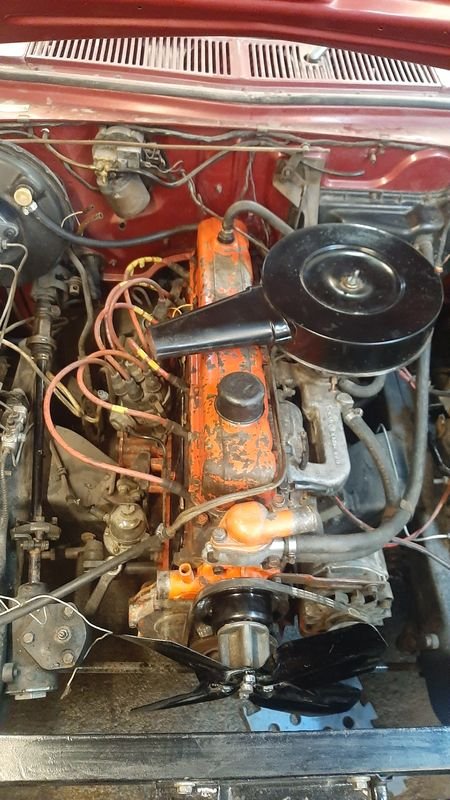
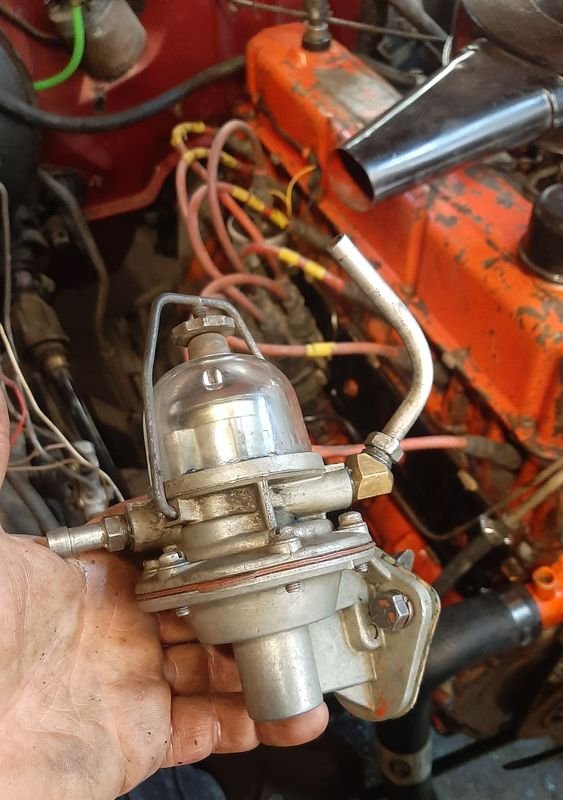
With a known good fuel tank in place time to sort the other end out. Previously we were running the engine off a boat tank in the passenger seat and a clicketyclack electric pump. Dirty ol 173 New valve cover and lifter cover gaskets Water pump replaced with a unused one that came with a $50 FBMP pile of bits (also came with a thermotstat housing that was much better, a fan extension thing that we needed, a valve cover (later model so didnt use), rocker covers and a fan that i painted,, and a sump we will probably use eventually too, so pretty stocked with that score! Cooling system got a wash out too and a new thermostat from my stash (same size as Fiat ) Fuel pump gasket set from Butler Auto Mart, and freshly cleaned Fan pulley, fan extension, fan, and lifter covers And finally new radiator hoses and clamps Unfortunately i had to take the rad out again to solder up a big crack under the top hose but alls well now
- 29 replies
-
- 32
-
-

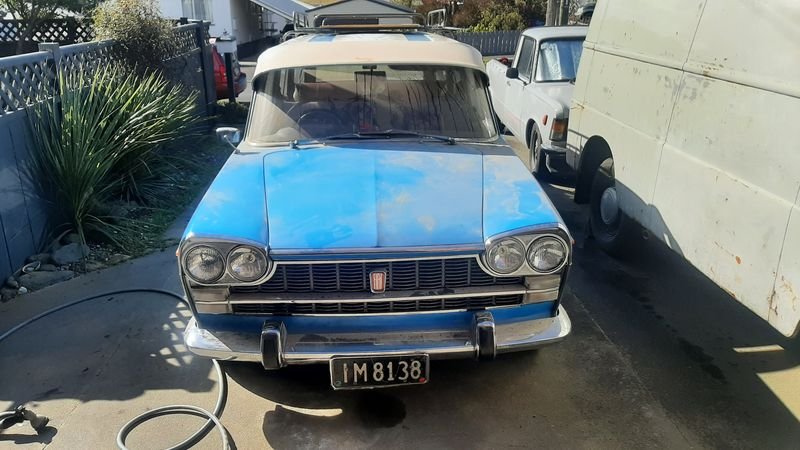
azzurros 1966 FIAT Duemilatrecento Familiare Discussione
azzurro replied to azzurro's topic in Project Discussion
That guy is a hero. But also mental. My van needs the engine pulling out (again) to figure out why it has no oil pressure (probably some shit in the oil passages somewhere) also why its been in the naughty corner for ages + life and other projects etc -
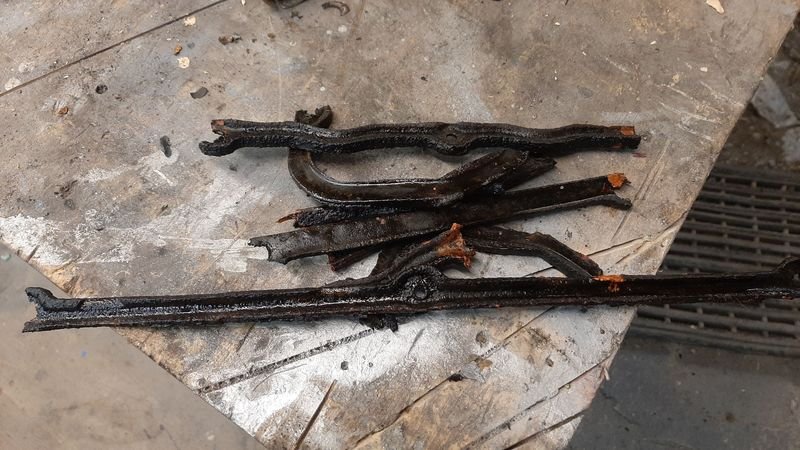
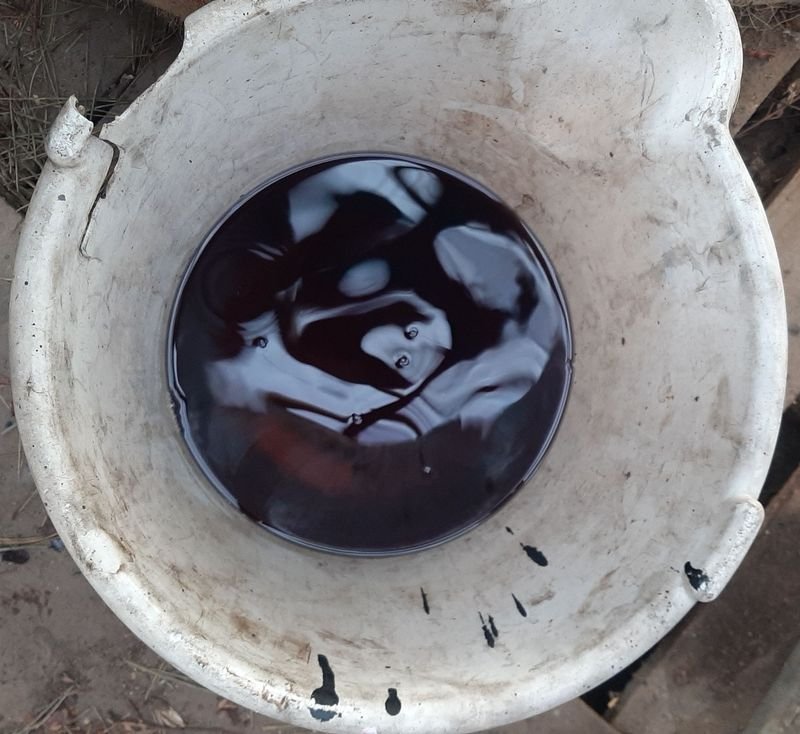
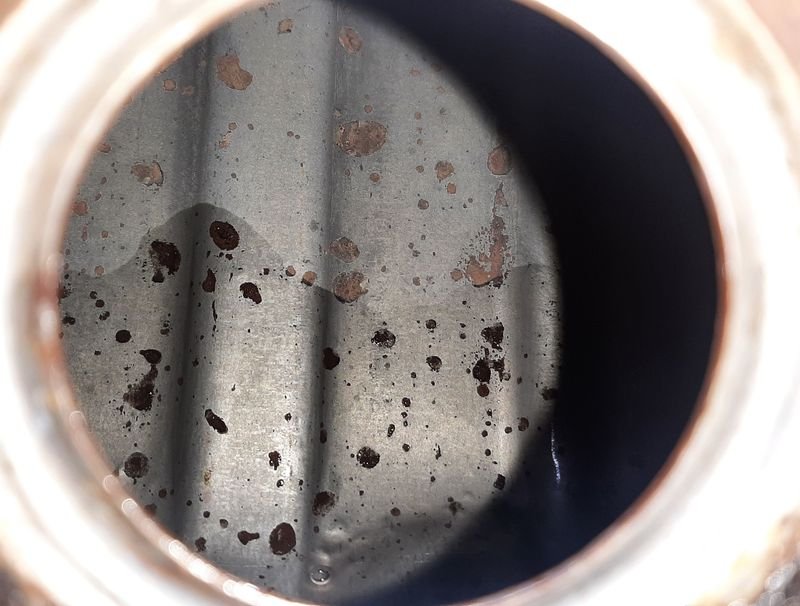
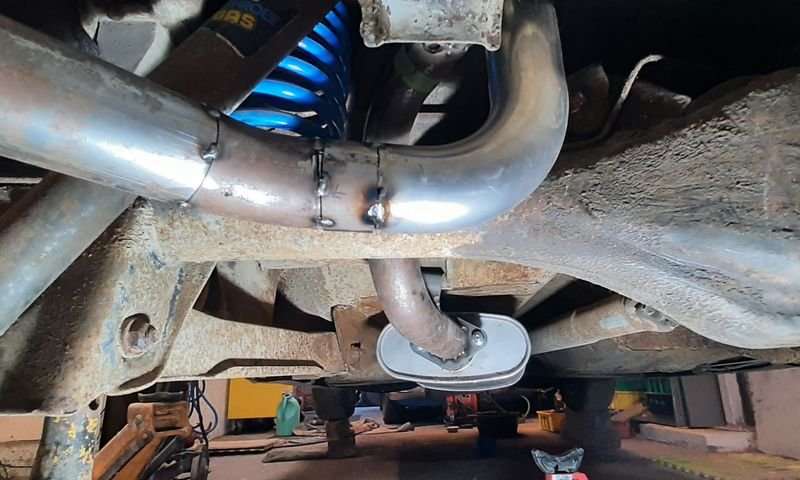
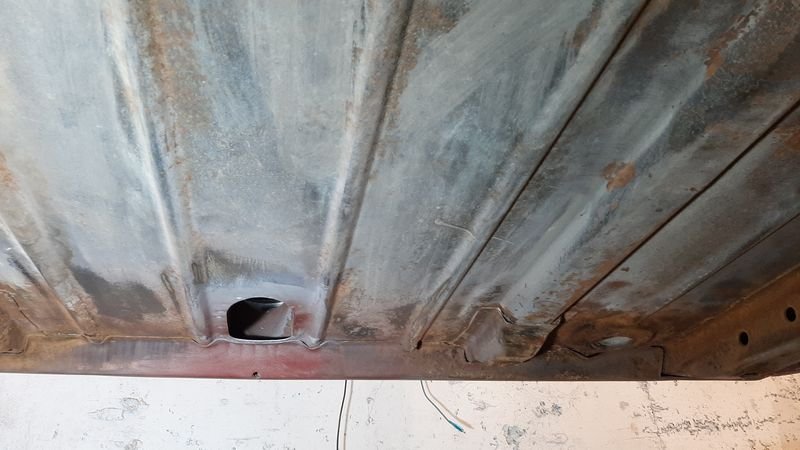
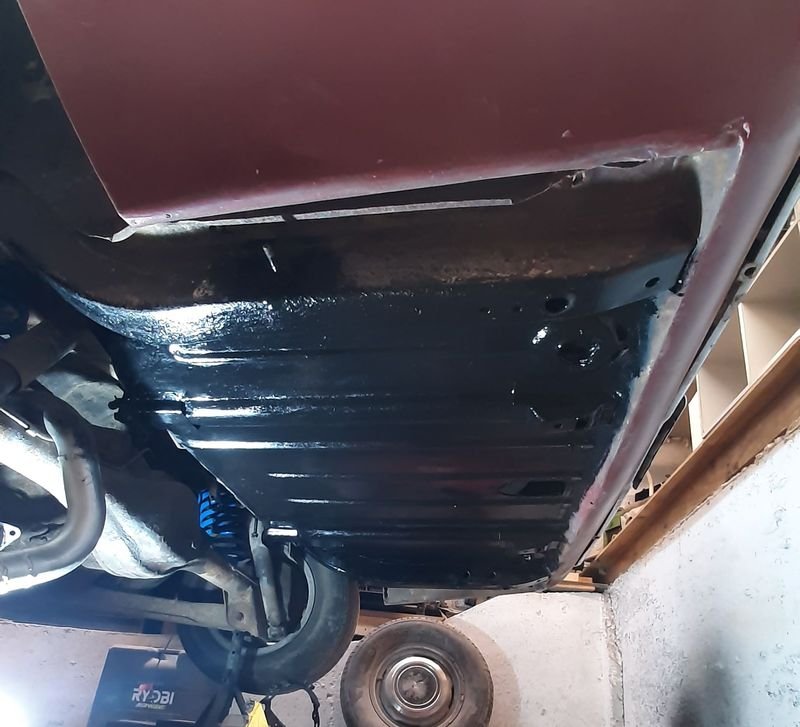
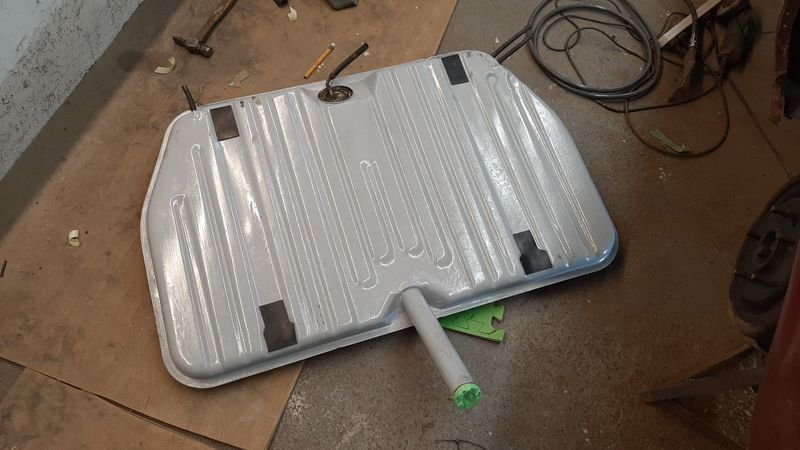
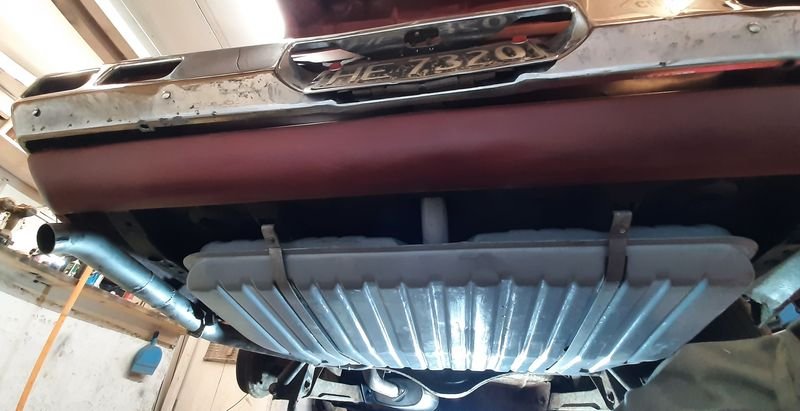
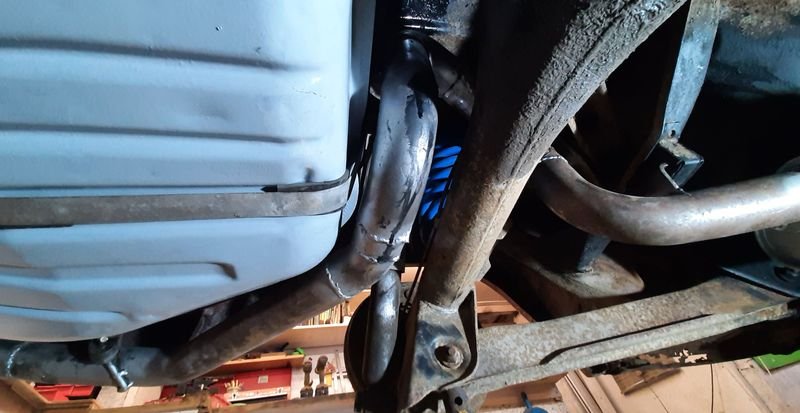
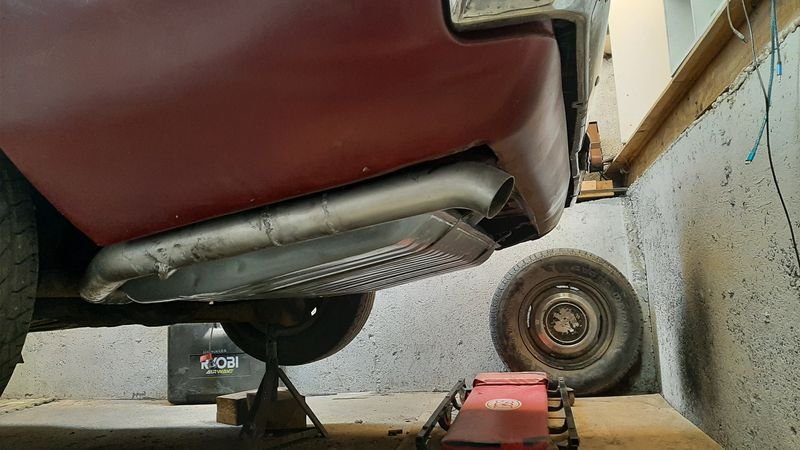
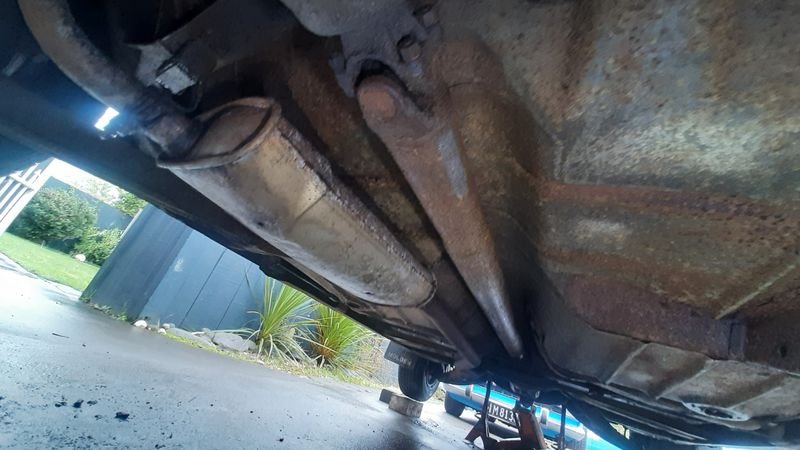
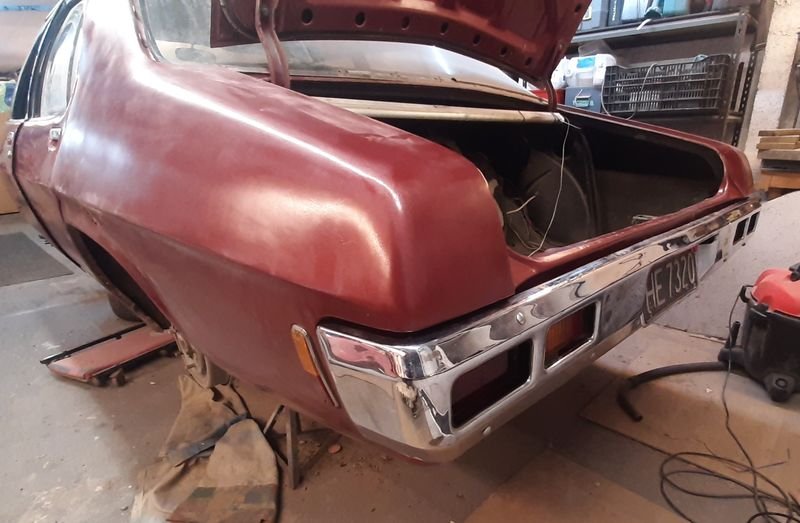
Before we did all that, we had taken the petrol tank out to see inside it and look above it. Despite what came out The inside was really nice. Even the sender works. Great news! For some reason i havnt got any pics of the outside of the tank before tidying it up, but under the mud it was cleanish, but lots of surface rust especially in the low areas and where the anti rattle pads were. A few dents, but nothing major and bst of all no holes. so after some cleaning and de-rusting the outside it got a coat of 2k grey, (125p Ute colour ) again just with a brush. A new seal on the sender and some new rubber pads to replace the old hairy stuff that was on there and cleaned and lubed the cap. Under side of the boot got a tidy up too, pretty nice really, no holes above the tank at all, and the surface rust mostly came off with the sander + phosphoric + converter Tidied up the 3 vent lines (they go up behind the diff, no time like now!) then a coat of rustkill matt black (this is still wet) just to seal everything as hopefully there is no reason to ever be back under the tank again. Before installing the tank, we remade the exhaust. The front pipe is 2inch from the factory log manifold to this muffler which is no good and the tail pipe after it was only inch and half and rusted out anyway. Can see the pea shooter tip sticking out in this pic from when we picked it up, RIP Bill I had a 2 1/4" combo bend and some flanges 'in stock' already left over from the 2300 wagon, and i figure 2 1/4 will be 'fine' for pretty much any engine that ends up going in it including the 173 in it , so thats what we used, Did some thinking and measuring and thinking and looking at the old pipe that came off and dsome more thinking and eventually ordered another combo bend and a clearance s bend/straight through muffler (was only $50 instead of $220+ for what we should have probably got) from autobend. the two combo bends together worked out to be juuuuuuuuuust enough. Immediately after the new muffler i installed new 2 bolt flange, as the old one was fully welded, so i thought id be clever and make this removable, but jokes on me as once it was all tacked i couldn't 'unscrew' the pipe from its loop around the diff/floor anyway, not without letting the diff droop but thats where the jackstands were sooo... Anyway, its got to do a bit of a Raurimu Spiral over the diff Then scoot around the edge of the tank and the back of the diff Then up the channel between the frame and the boot wells. Used the last 45 bend as the tip as a bit of a nod to the peashooter that was on there before. Test run was a success with only a couple of inevitable pinholes found and plugged, It s bit hard to tell if its too loud (it probably is) or just right when its echoing off a concrete wall in a bunker, but, its a much more suitable noise and look than the wet farts that came out of the old rusty muffler and twirly straw.
- 29 replies
-
- 30
-
-
Typically , the issue is that the hole is too big for what im trying to stick in it, not the other way around
-
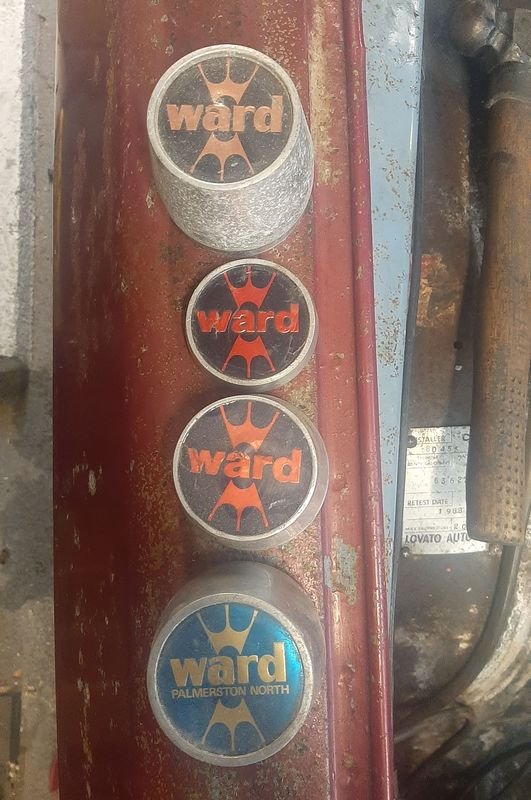
Found my box of centre caps. They dont fit the Cheviots
-
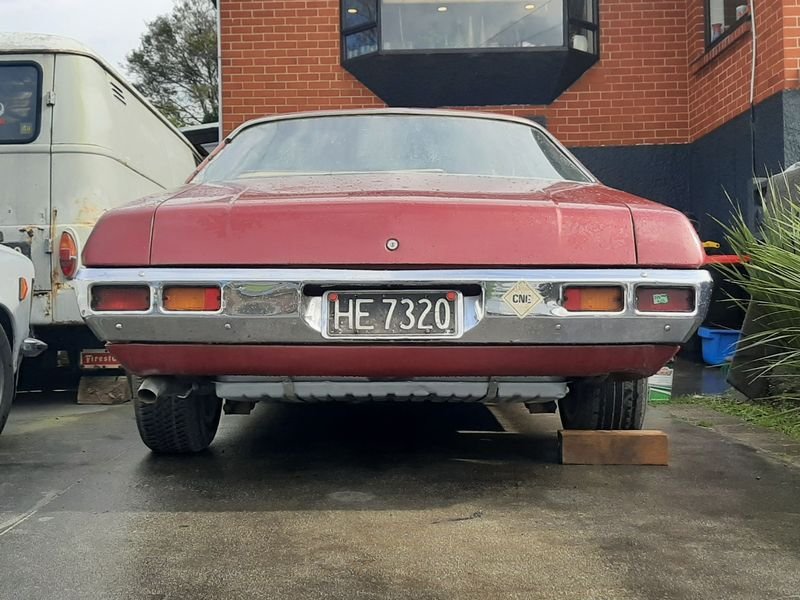
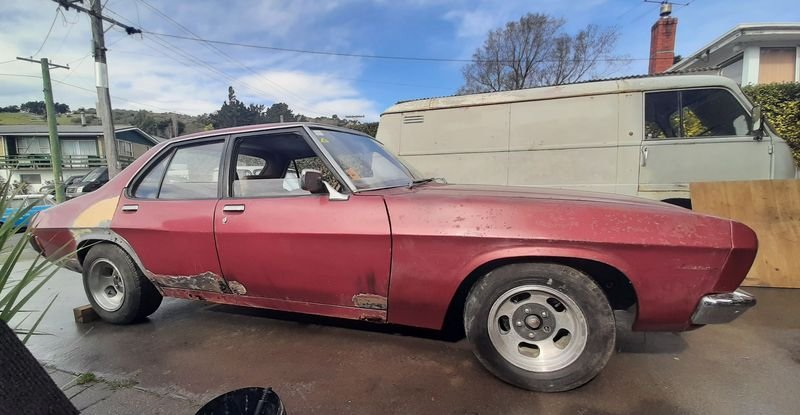
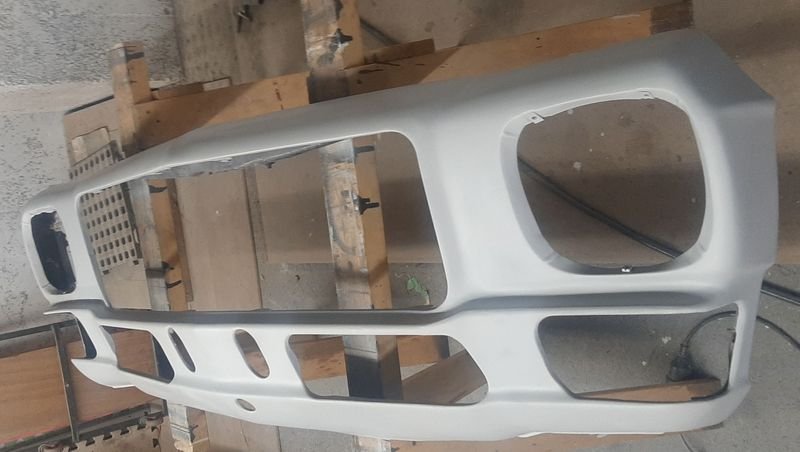
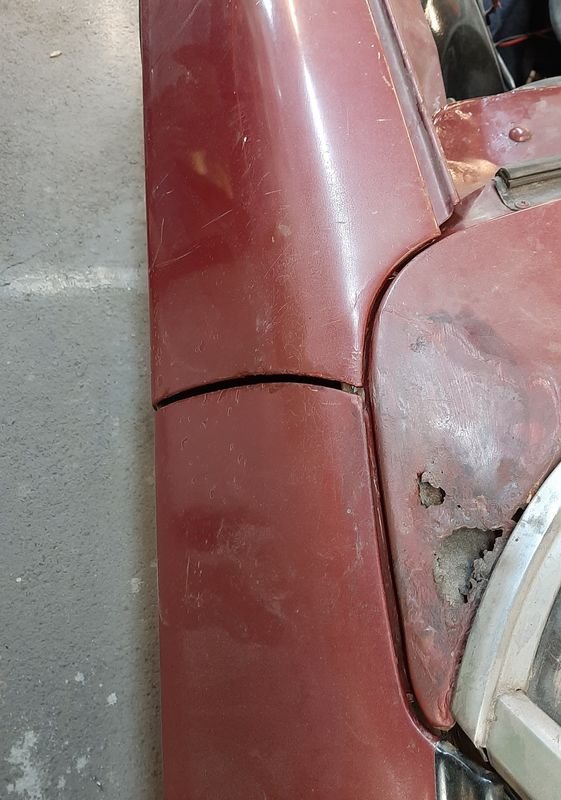
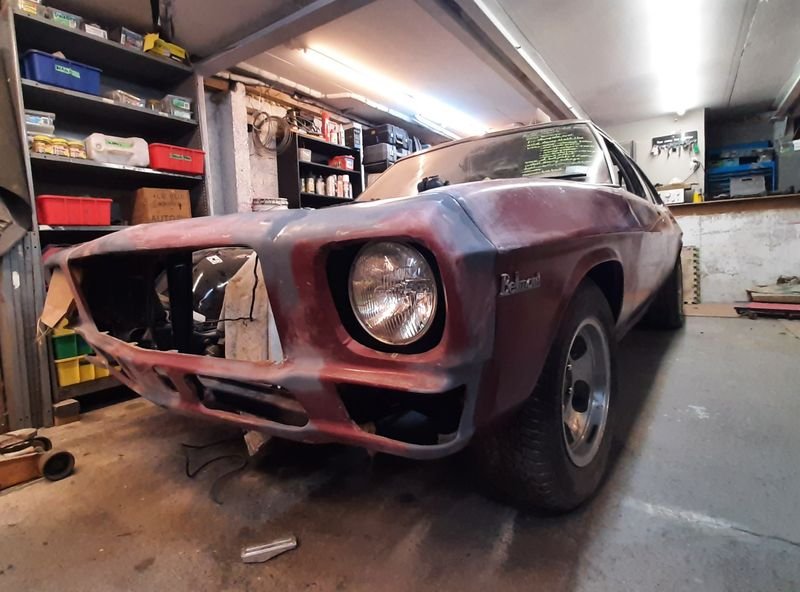
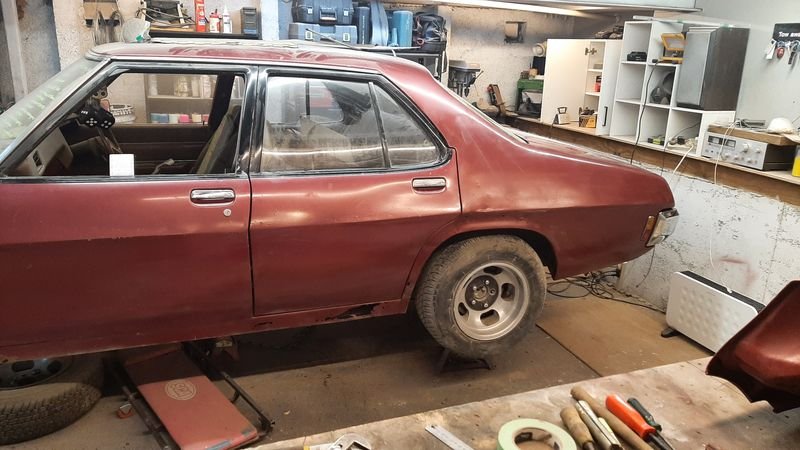
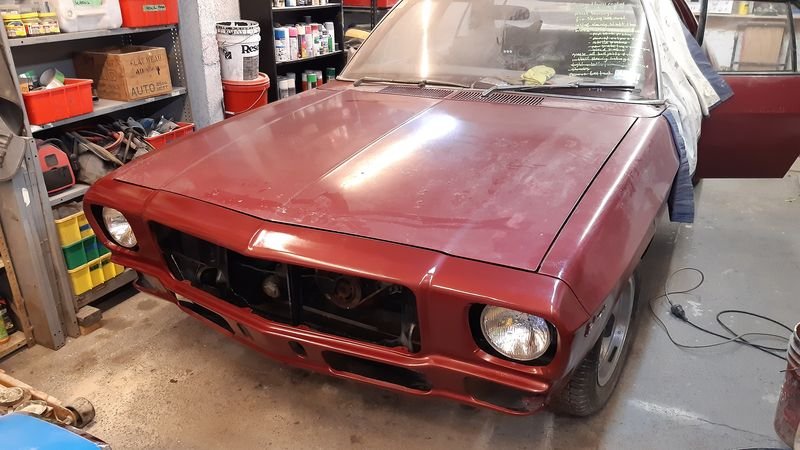
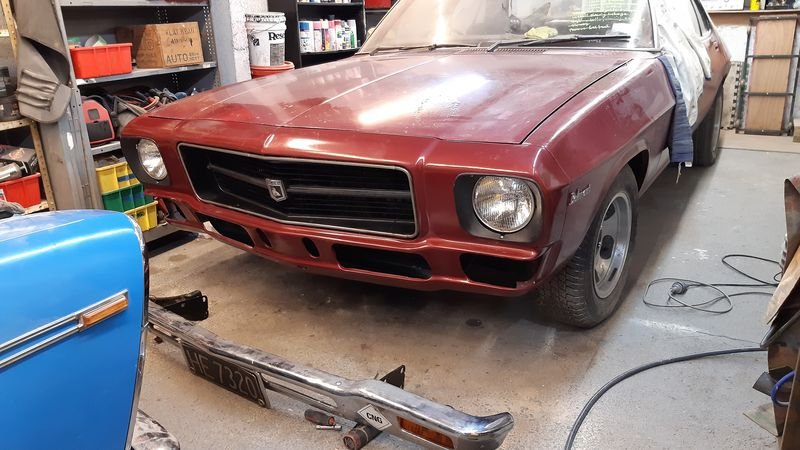
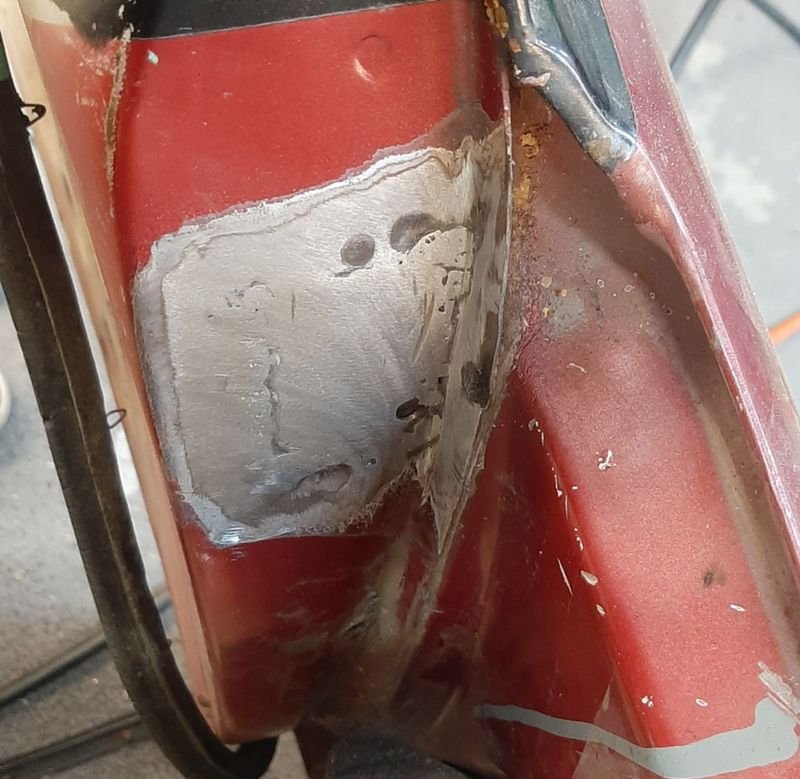
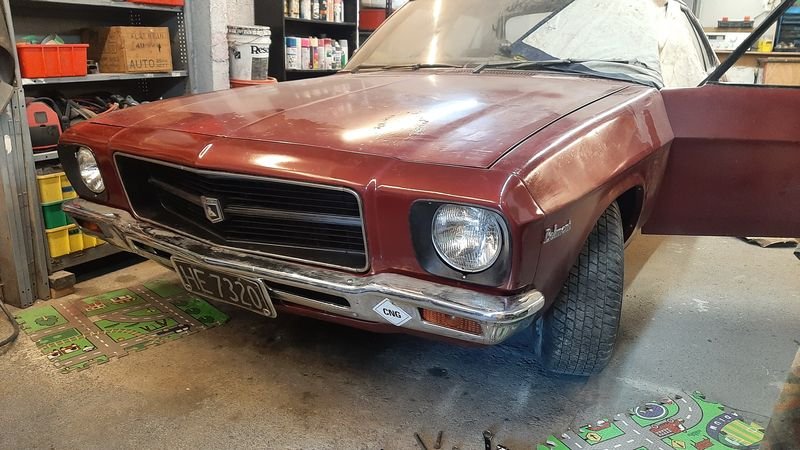
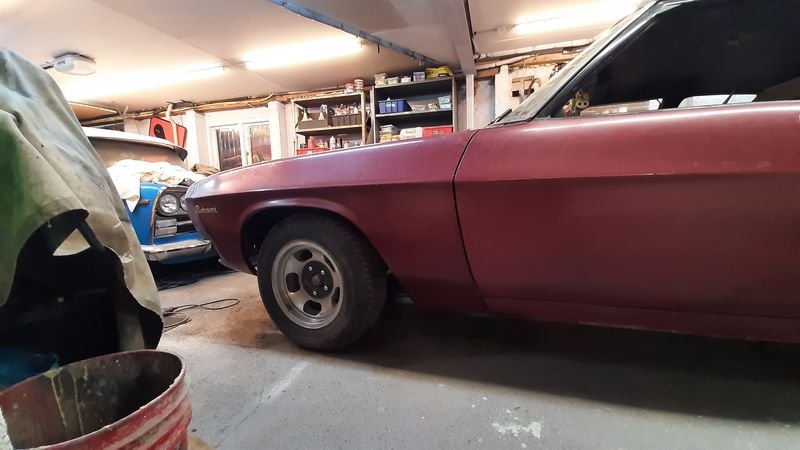
With the front end all together, time to put the front back on BUT! Gotta tidy the all the panels up and fix some rust first Used my first patch panel on the drivers fender, its a bit more extensive than the passenger side Still had to make the inside bit which i did before chopping the outer away to give me something to built to This fender is a replacement, the blue is its original colour. And ready for some hammer and dolly action before filling it with more filler than i would have liked, (i rushed the welding and it sunk a bit), but as its aesthetic filler, not 'structural' its still much better than it was. This weird bit on the top of the passenger door too, seems like the door channel dribbled water to collect into that spot or something, managed to cut right across the hole for the door seal clip thing so had to build half a hole into the patch panel, and the grommet thing popped right back Then time for some paint. Its been looking worse rather than better. How it started, just after we got it running for the first time and cleaned it in the driveway: How its going - immobile, exploded across the garage in 1000 bits and looking like shit. Masked up and the 1k lacquer base we got 'matched' and then some clear. Didnt turn out particularly great especially this first go (i needed more paint flow out of the gun, and i also should have put a coat of 2k hig build primer on to seal the filler an), but neither is the current paint, i dont want to hide anything either, its mainly to seal everything and put things back to no worse than before. The whole car really needs the paint taken right back and redone anyway, which may happen eventually, but not now. As you can tell that rear quarter panel is now better than it was, but still a bit wavey. Thats fine - not really prepped the front half of the panel at all, it still needs around the wheel arch and dog leg cut out and patch panels welded in, so on the front half the paint was just to seal it all up and get it one colour again, The rear 600mm of the back end is all good tho, so we also put the tidied up bumper and lights etc back on, which also covers up 50% of the new paint anyway, so that 'side' (the back end) is DUN as far as panel work etc goes. Front panels got spot painted too, and went on much better than they came off! i suspect the last time these were bolted on they were thrown on and bolts cranked down, not adjusted at all, same goes for the doors so pretty happy that some time spent loosening bolts is working out nicely. Will make it much easier doing the sills and scuttle (eventually) with everything else in the right spot The nose cone i dint paint as i knew this needed some more yanking, hammering and filler work to line up with the fenders nicely, but only doable once the fenders were back on and adjusted to the adjusted doors etc This nose panel is a cut and shut from a yellow one and a blue one joined though the drivers headlight bucket. That all needed about 3mm of filler to get it lining up to the fender and bonnet, whcih was a fair bit less than what came out of the same spot then i took it off. (re) learned my lesson from the rear and entirely primed it properly first Then upped the thinner to increase flow so got a thicker base and lots of clear. Turned out much better, but the colour mismatch is a bit more obvious too, nice colour, but not quite as pink/mauve as the (dusty!) bonnet which is also back on) Grille and buckets in and front bumper - had to give it a tweak in the press to close up the 'V' a bit more/push out the centre point. Its not not perfect, (you can see the bumper is almost touching the grill in the centre but less towards the sides) but much better than it was, and apart from needing to take the outer fenders off when doing the sills eventually, the front end is all done too. Back together and on the ground Body work on this side is done* (for now). *'Only' the entire sill below the doors that needs doing, oh and the other side... Anyway very much looking forwards getting it outside and giving it another wash, cleaning out the shop and to being a passenger when we turn it around to do the other side
- 29 replies
-
- 41
-
-
Im no plumbologist, but Could you coil the pipe in the low spot, run again to purge any air, close the tap then relay in the trench? That highspot would always be where any air in the pipe would accumulate (from Say thd header tank being empty for whatever reason?) so a bleed nipple thing there would be a good plan in the long run. Even a tee to a tap would do it
-
Thousand Dollar Supercar's 1988 Jaguar XJ-S 3.6
azzurro replied to Thousand Dollar Supercar's topic in Project Discussion
Top sleuthing old chap! Fingers crossed that holds 'the american' at bay for a bit longer, eh what?
-
VGs Little FJ40/Off Brand Power Wheels & Trailer
azzurro replied to Vintage Grumble's topic in Other Projects
this is so nice! will the kids be allowed to use it when its done? lol -
Ka te pai, dont be ashamed of being concerned, thanks for looking out for us, yes all there they are installed, they are small diameter and black zinc plated like the nuts so a bit hard to see.
-
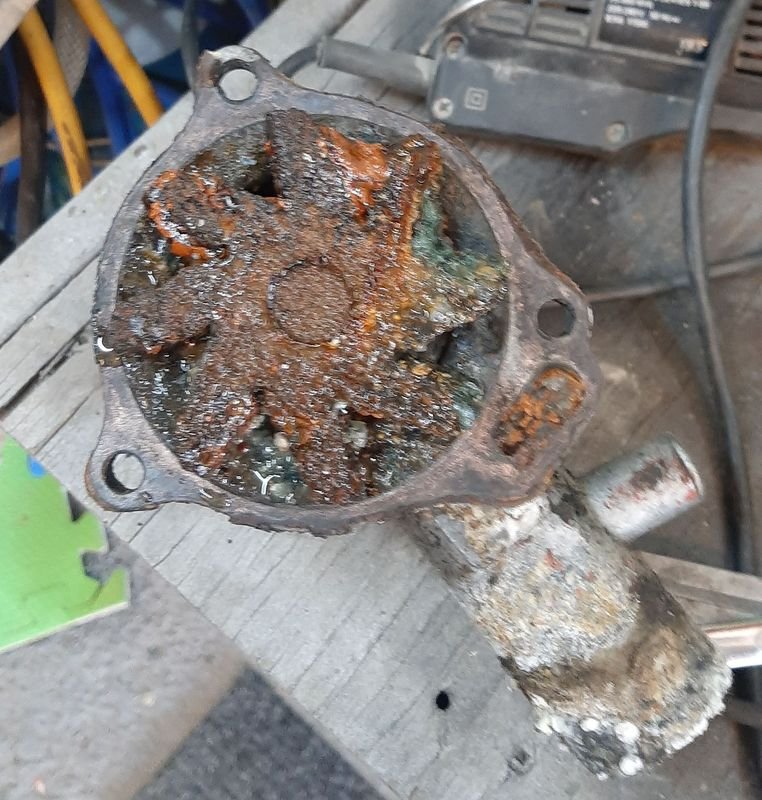
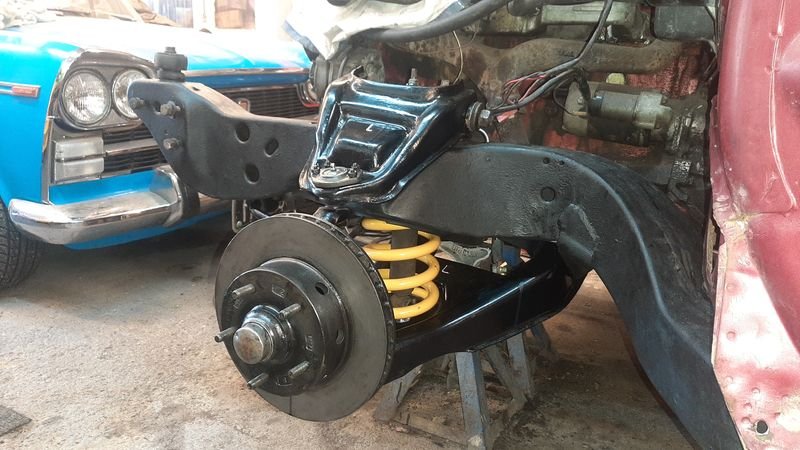
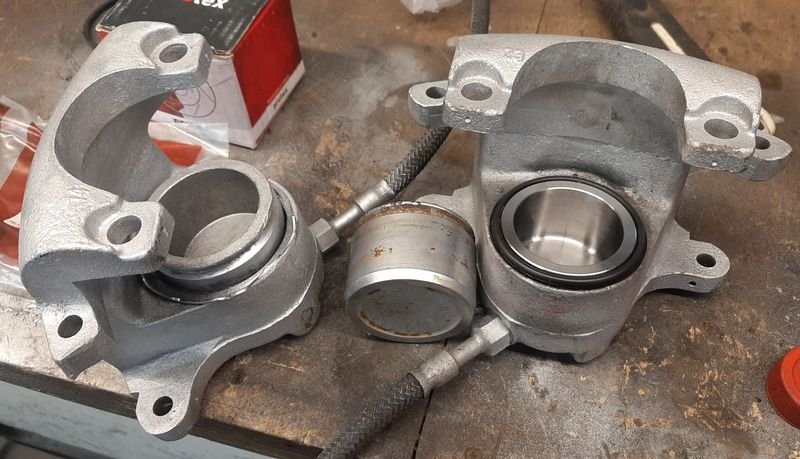
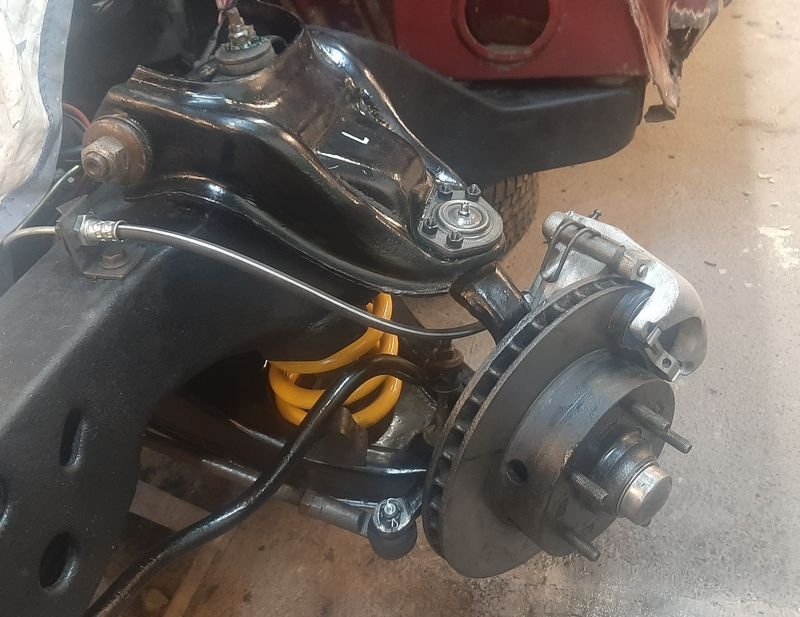
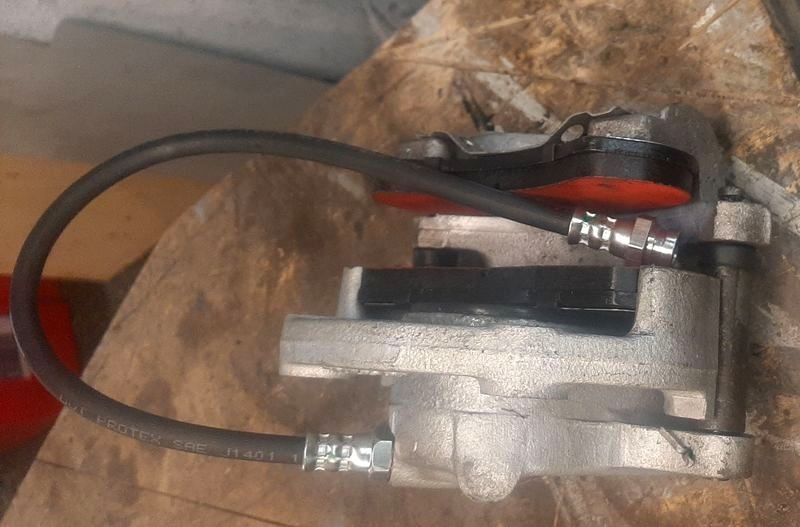
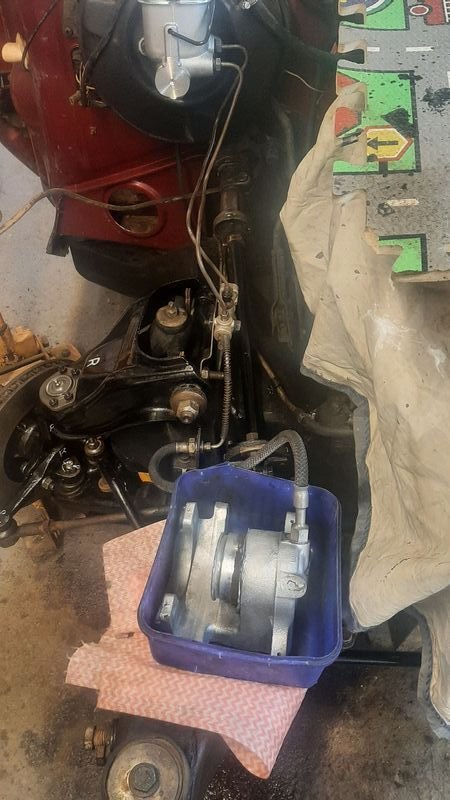
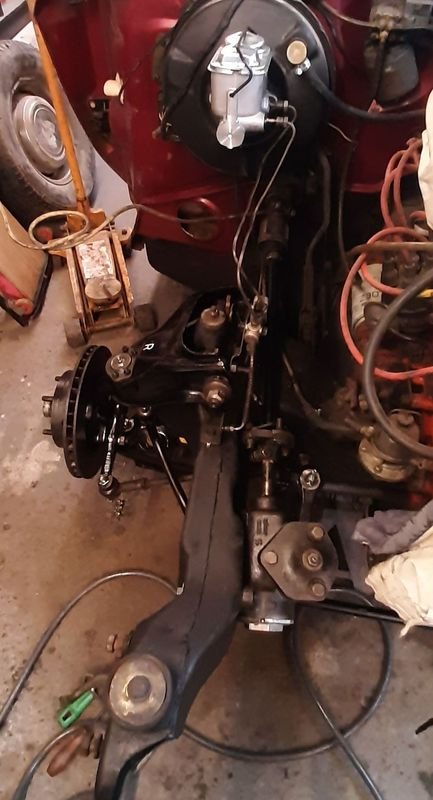
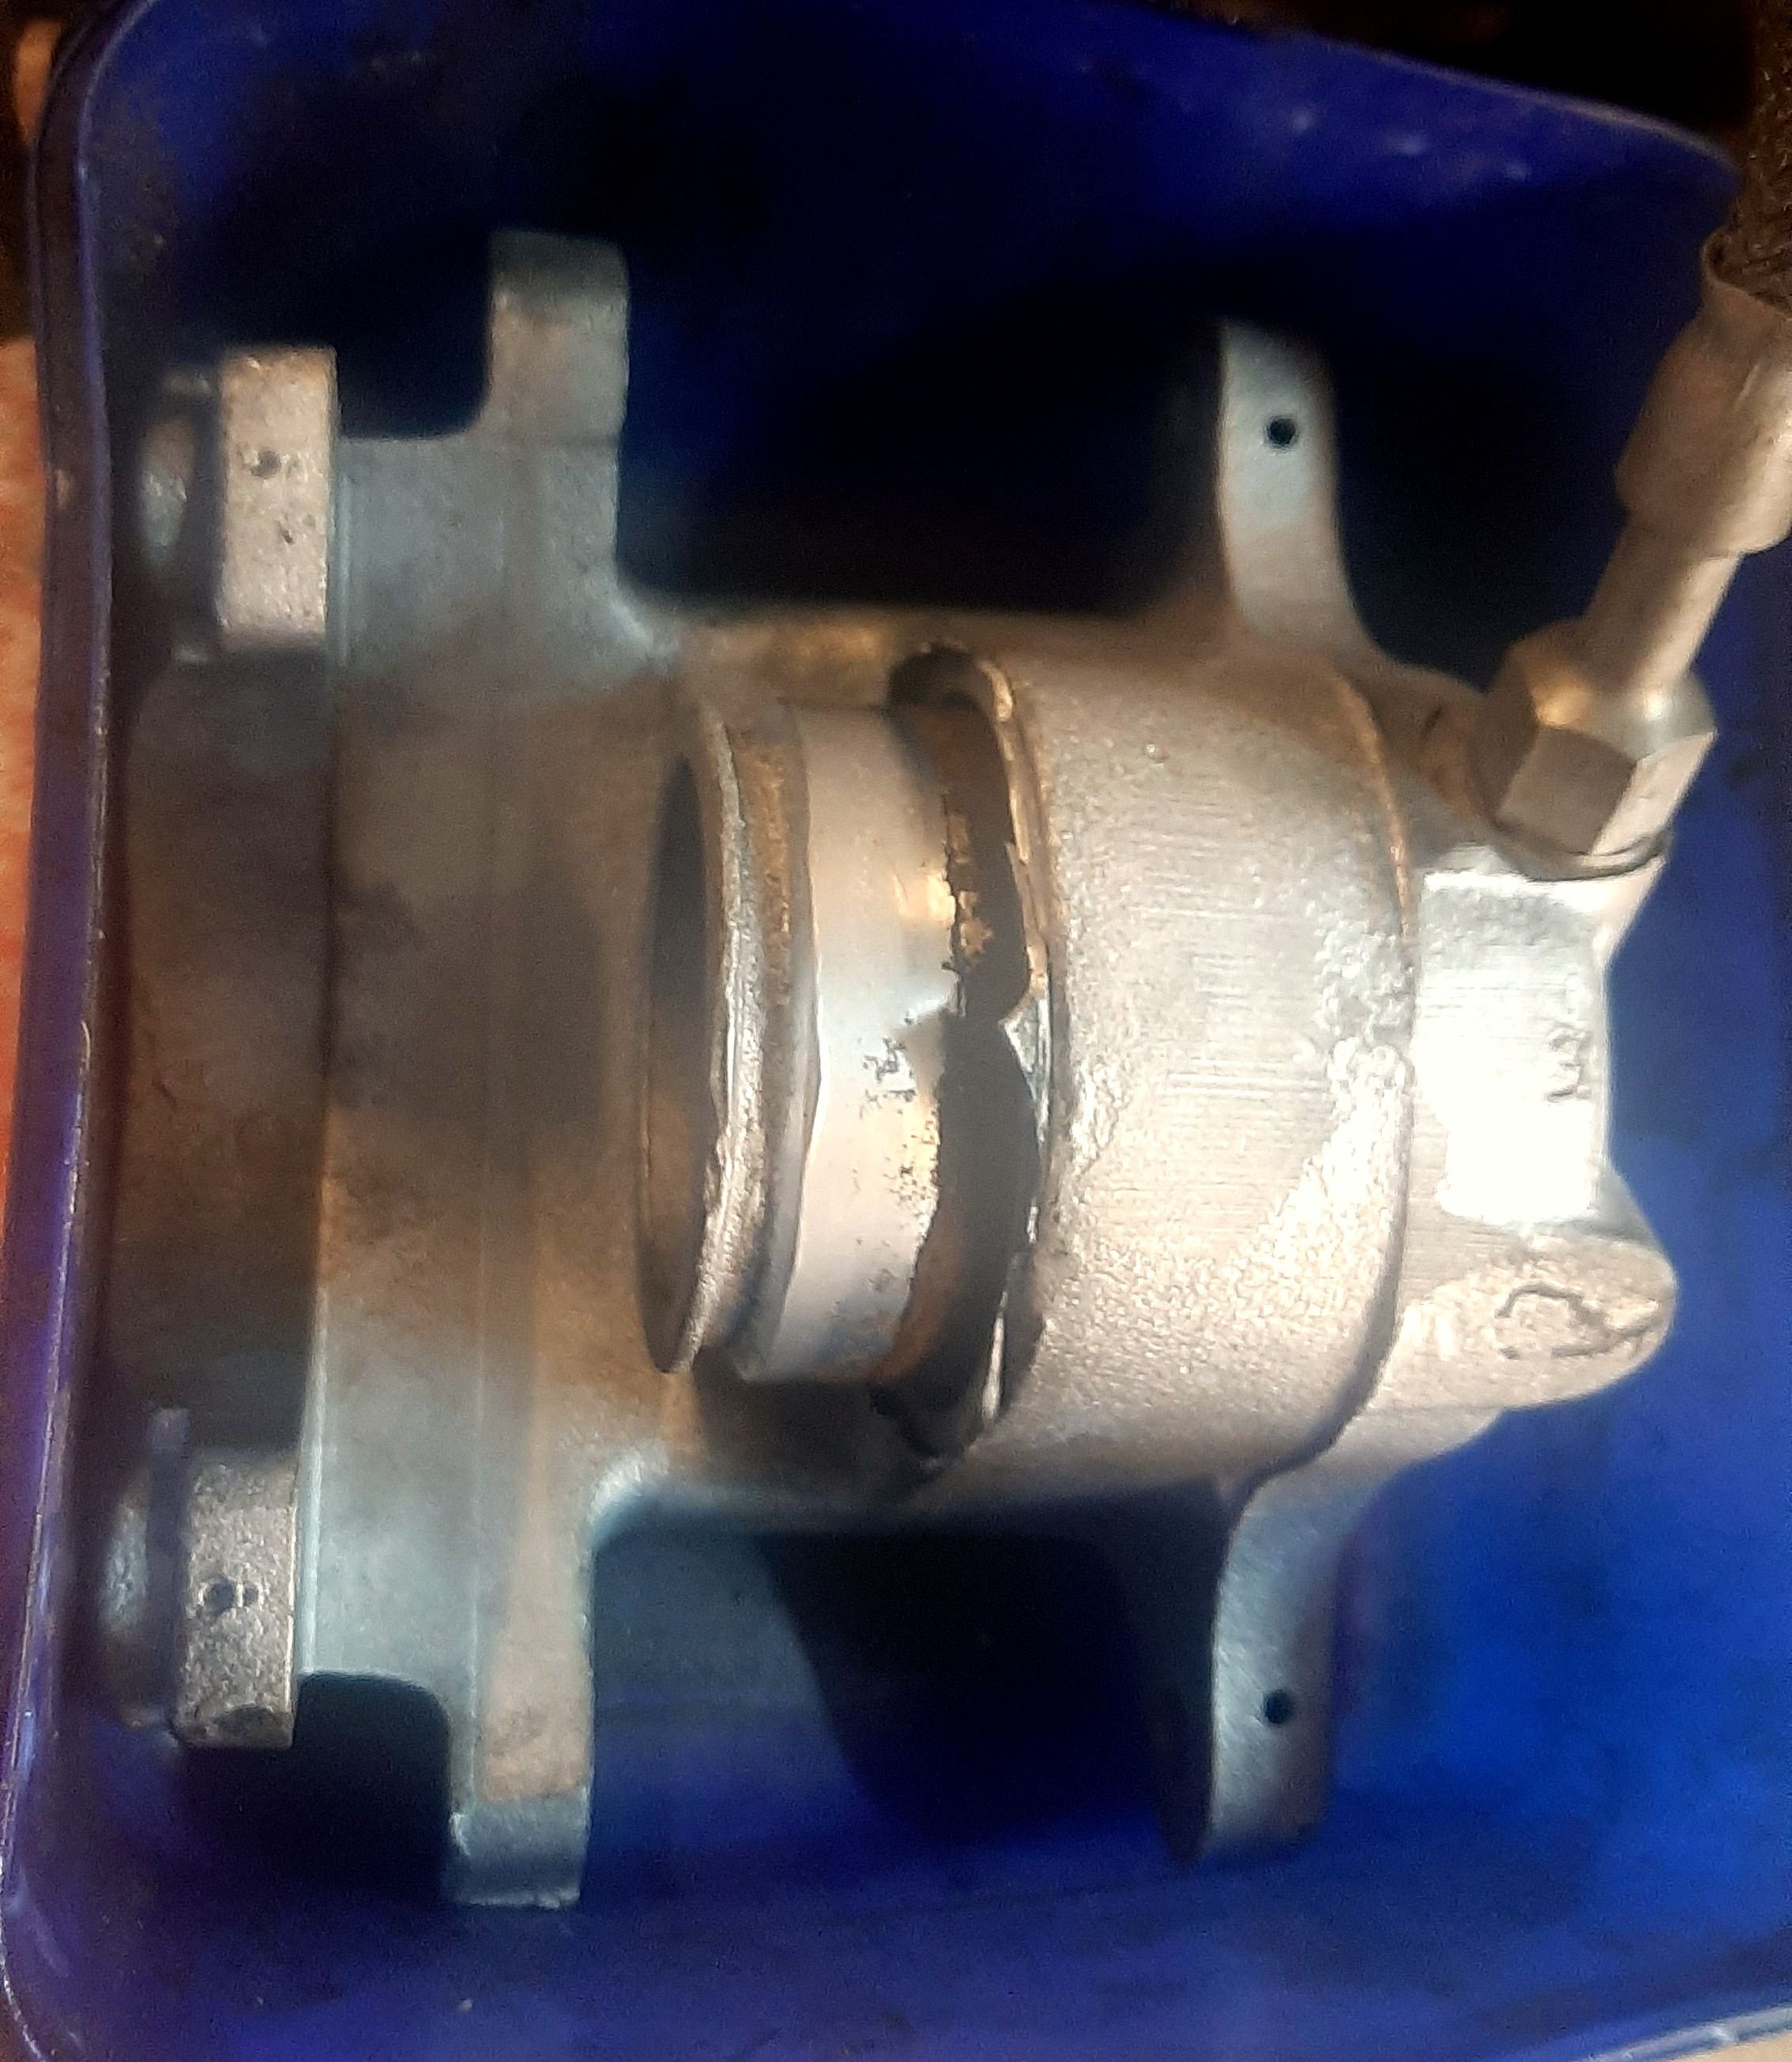
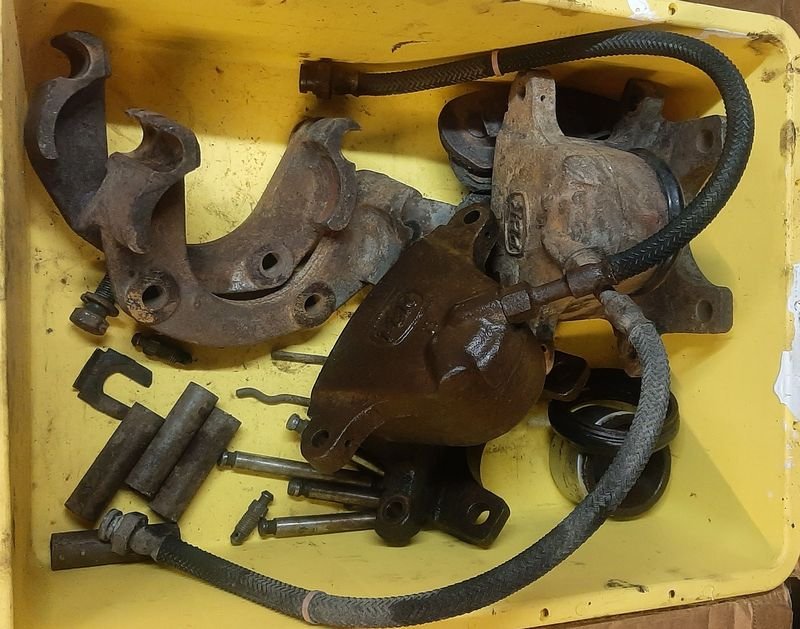
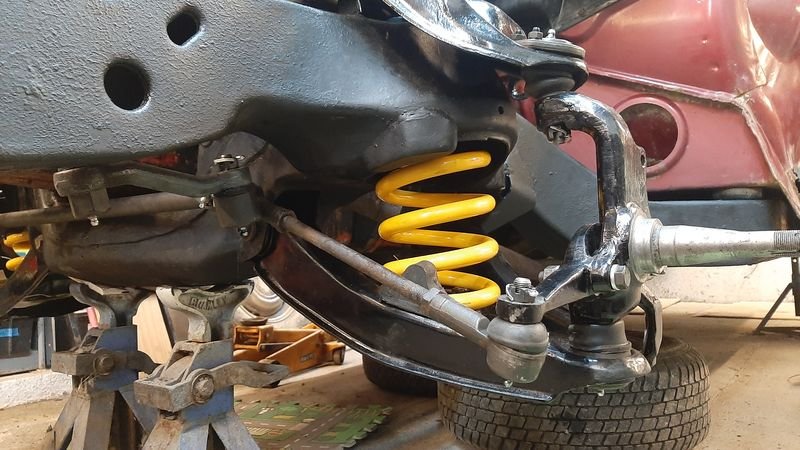
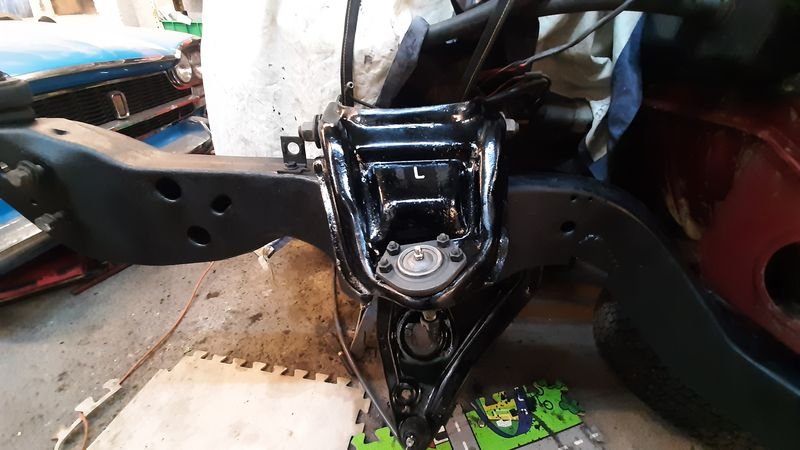
More reassembly and torqueing - its turning out so good! Next was to do much the same to the other side (so we didnt get the parts mixed up) and brakes. Despite the pad wear, the rotors look nearly brand new. I cleaned them up and also regreased the bearings which also seemed fine (made in japan so probably not original) and put new rear bearing seals on that are basically a big shaped o-ring. Not seen that style before. Im assuming they leak grease everywhere, along with the ball joints and tierods. (TADTS) Finally, onto the calipers. PBR, cast iron, single piston. Everything was stuck but after a week in the exoff bath most of it came apart, though not without some persuasion. Much swearing and beating was employed but it all cleaned up nice and went back together smoothly However, both pistons were stuck. One eventually came out with the air hose (always put a block in to catch the piston!), after a week in evaporust. Bore was ok so i rebuilt it, new seals and piston, flexi and pads. One done one to go. The other one wouldn't budge, not even trying to push it in a little bit on the press worked. Basically needed more pressure so we reassembled the brake system, including a new master and i bent a new hard line that goes under the engine. The line looked a bit rusty, but on inspection was probably fine from that perspective but, glad i did anyway as it had been dented and pinched quite badly, but that damage was hidden by grease and grime and the tabs, all on on the back of the crossmember, maybe it had been backed into a log or a plank or something. Anyway, new hard line made reusing the old nuts and line left over from the 1100T van. All the steering bits back in too, hooked everything up on the other side, and half bled the master, then the lines, then the other caliper, and then after a few pumps by the lovely pedal assistant, the piston began to move out! YUS. Yep, that will hold it. Doesn't take much rust in tight tolerance to freeze things, and that's quite a lot more than not much. However most of it wiped off, and didn't look much different from the other old piston above, but all new bits for this side of course as well. And new front springs while we are there, we went with Superlow for 6 cylinder cars, figure we can add spring mount pads to get a bit of lift if we need it, but its a bit harder to go lower if its not low enough... And all new front end. Need to remember to find at least a pair (a top and bottom) of the thick wire caliper slider clip things for the drivers side, (i think they are more anti rattle than structural) and to tighten the control arm bolts once its on the ground.
- 29 replies
-
- 47
-
-

-
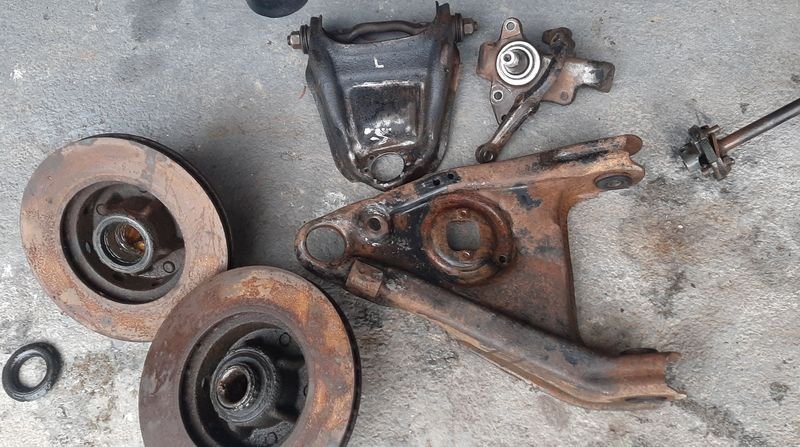
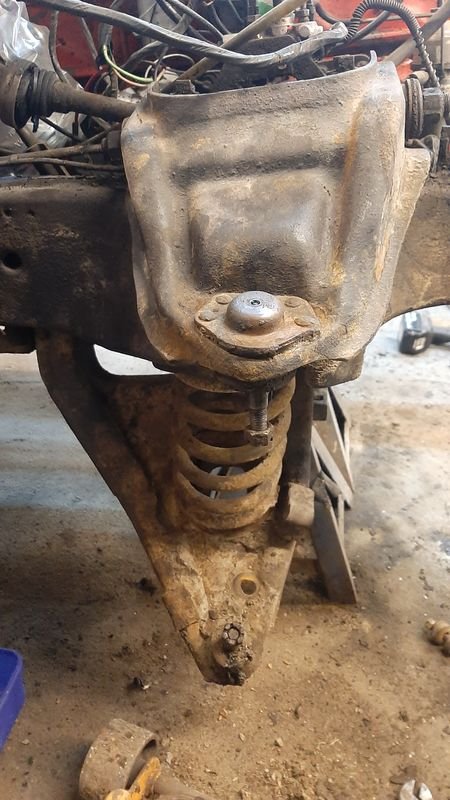
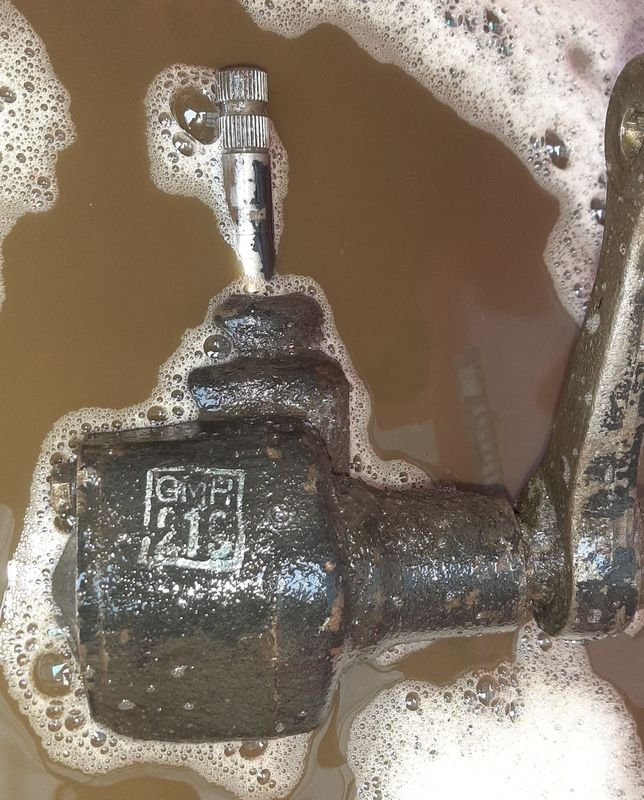
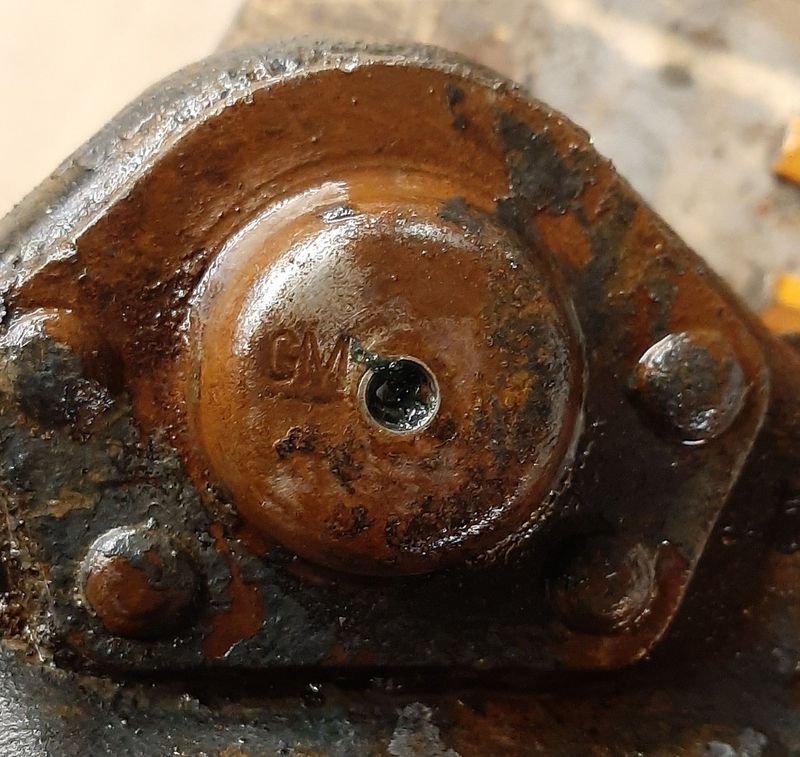
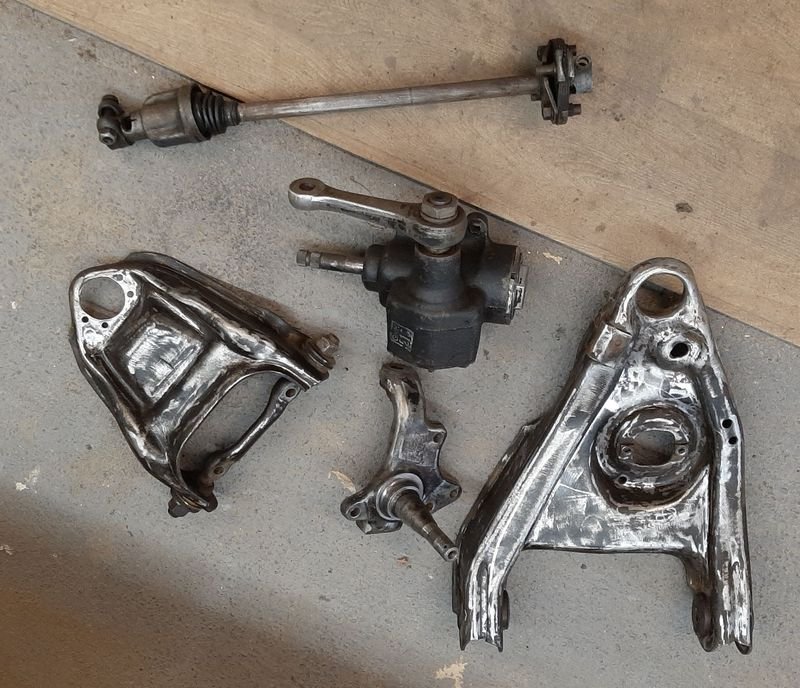
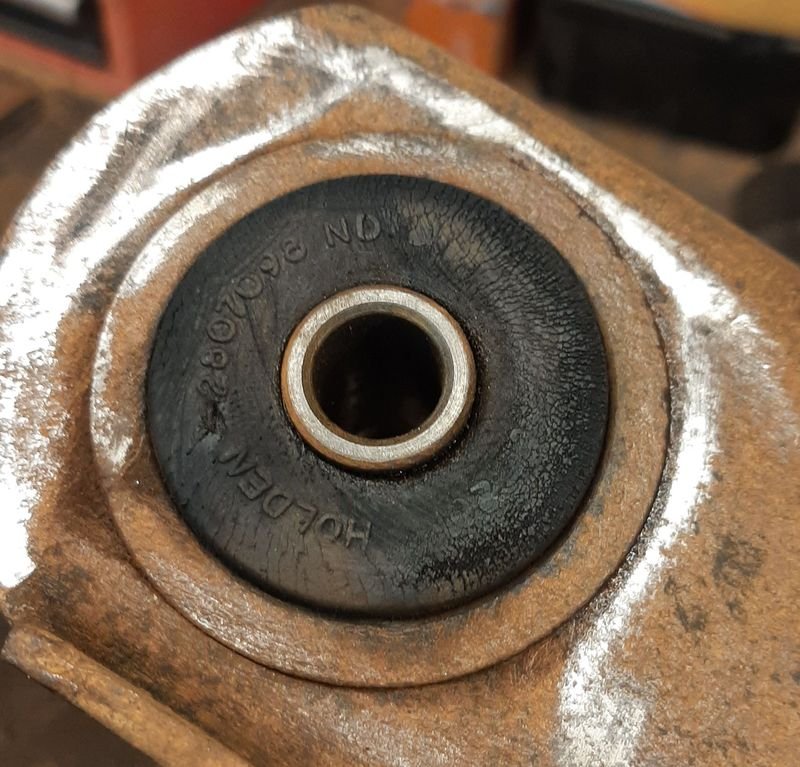
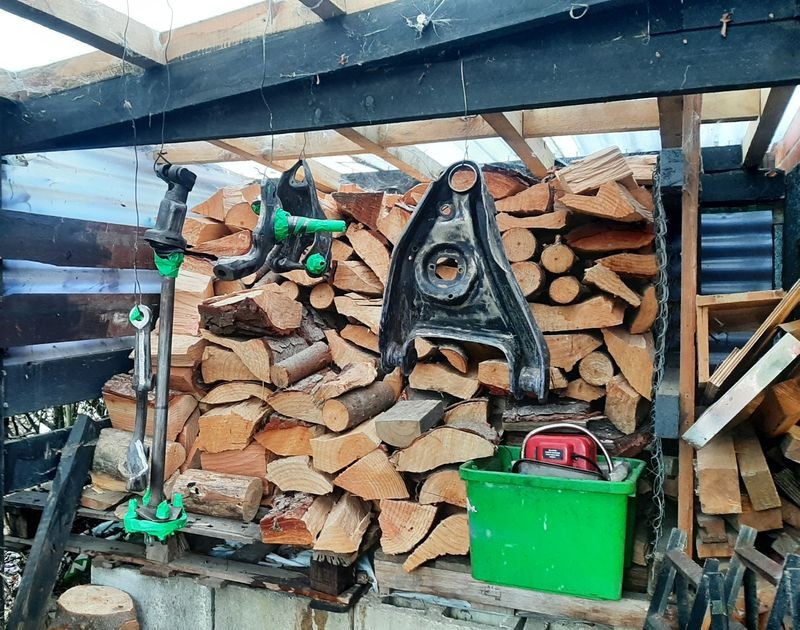
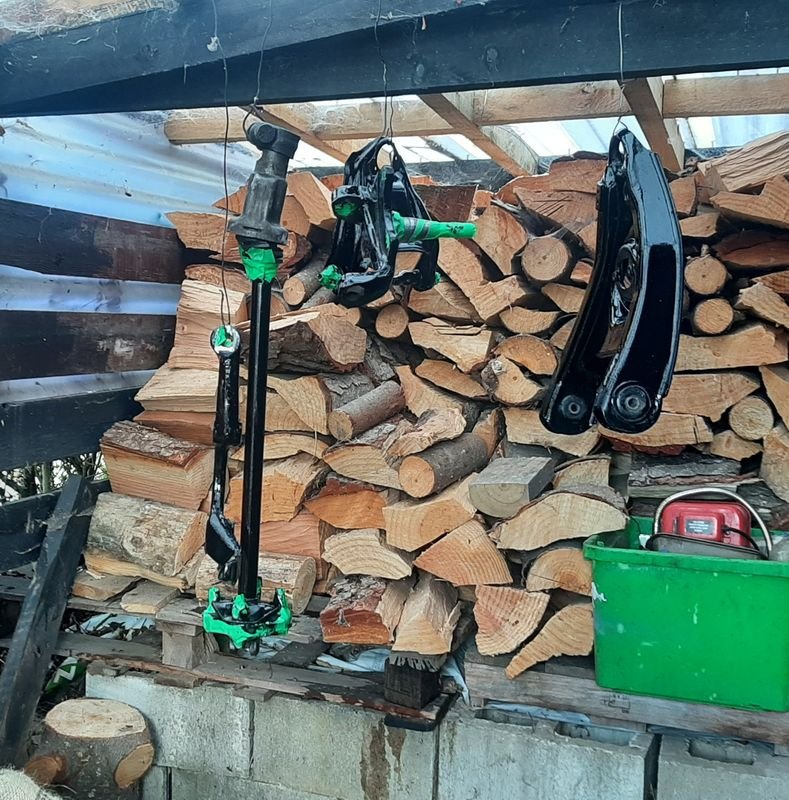
Meanwhile progress on disassembling the front end continued Original riveted GM ball joints still fitted, still moved around ok, but boots were well perished, a bit of a shame but replaced the lot rather than mess about with new boots Bushed original Holden ones too, and still in good condition so while new ones came in the front end kit with the ball joints and stuff (how good is being able to just buy, like everything!) these are best left well alone. Bleh! getting better Factory stamp still on the steering box! nearly Much Better, this is '2k satin chassis black' i got for the 1100T Van, its not very satin, but goes on ok with a brush (cbf with setting up a gun for fiddly bits like this!) New steering column boot fitted up And tidied up the subframe while that was off too, but with time with flat black rustkill with way too much owatrol in it, and started putting new bits back into the freshly painted arms
- 29 replies
-
- 26
-
-
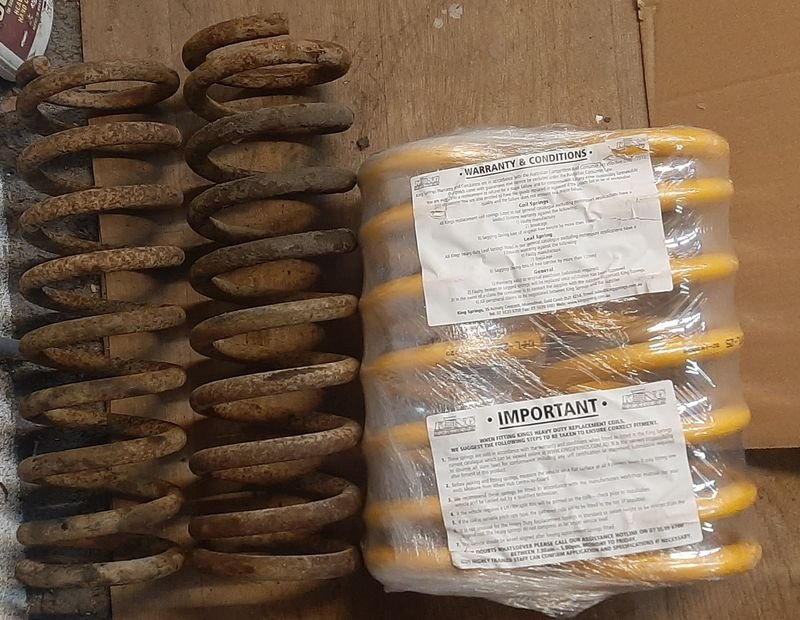
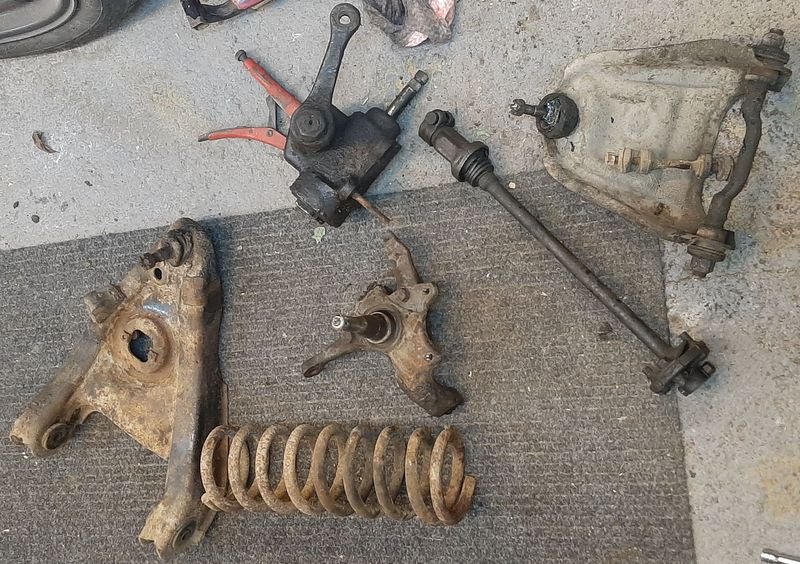
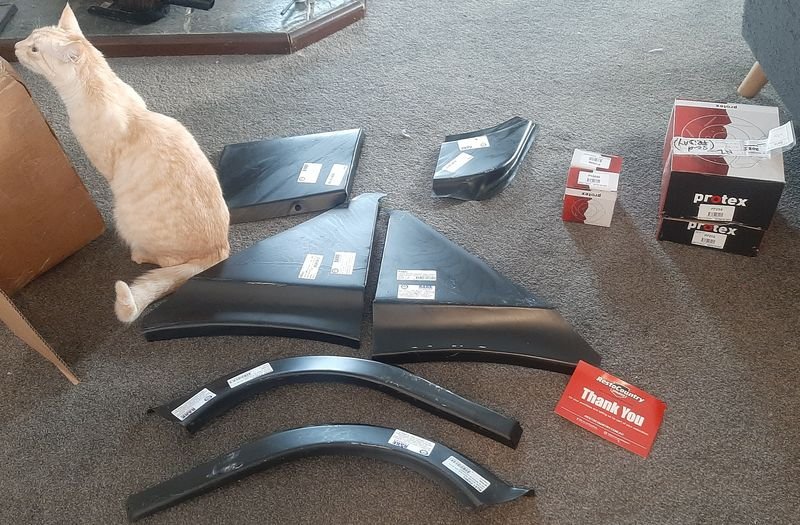
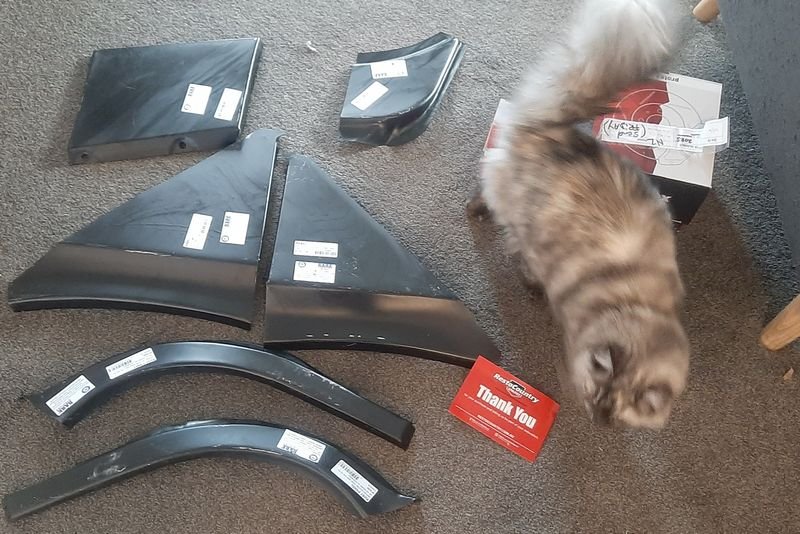
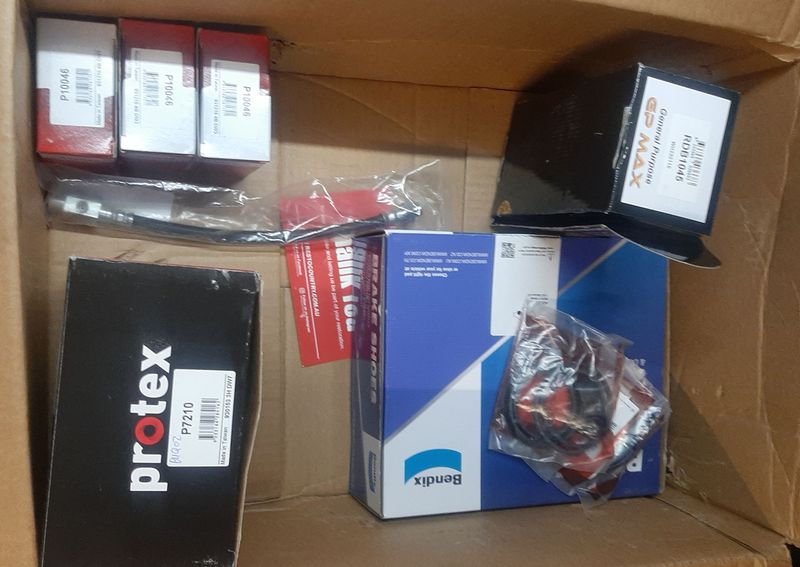
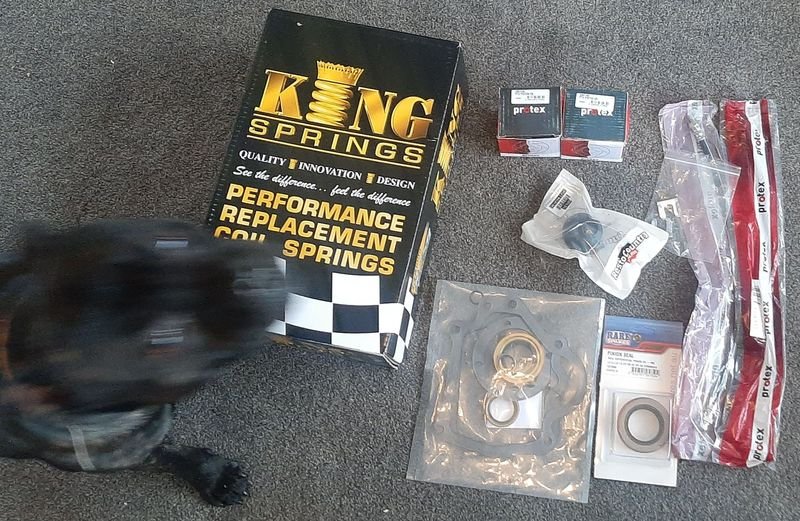
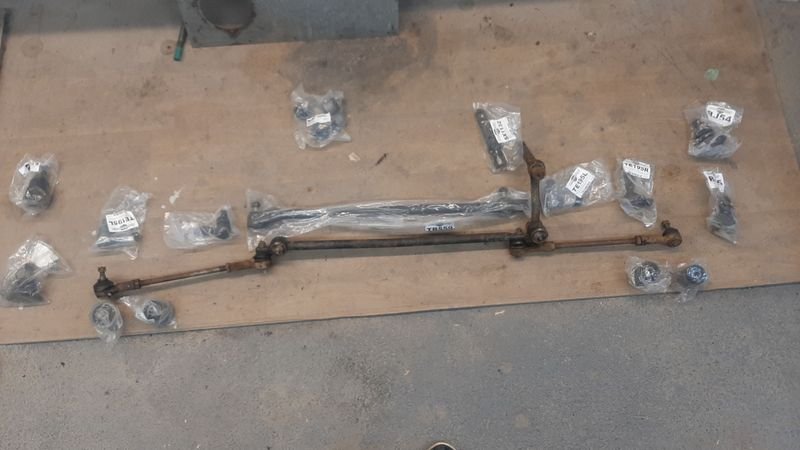
As mentioned upthread, Kirsty had been ordering parts and these had started trickling in, They of course needed to be inspected and signed off before use. A bunch of repair sections A bunch of Brake stuff More Brake stuff and some front lowering springs, some seals for the gearbox and diff Buddy was just staying temporarily, the cats graciously allowed him to think he was capable of signing things off, but to be honest he was more interested in inspecting his ball(s): also got a full front end kit with all the ball joints and tie rods and what not And, cleared out @nzstato back shelf of the last of his HQ bits (chur bo!)
- 29 replies
-
- 23
-
-
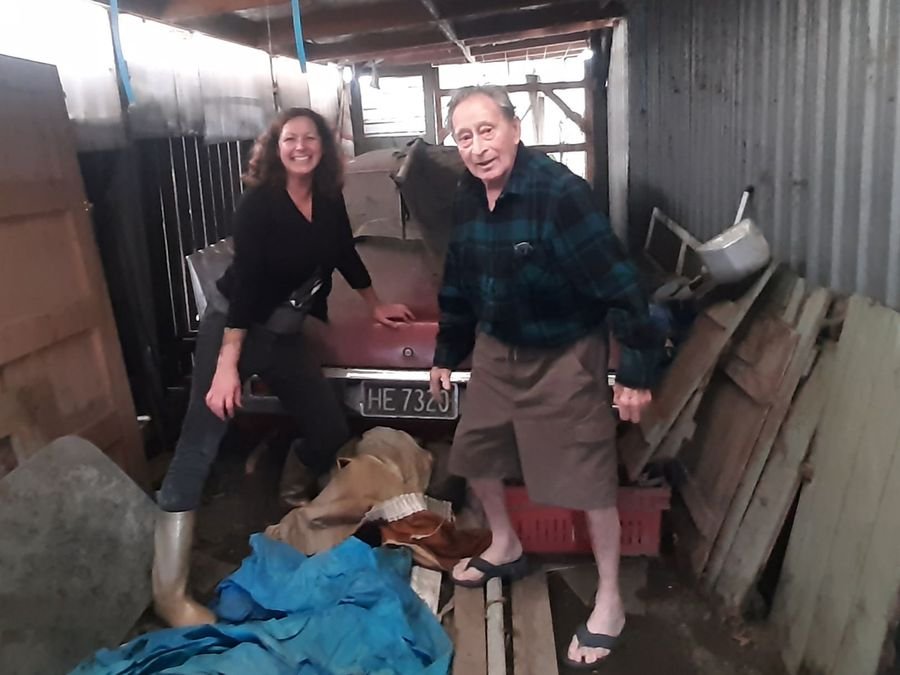
Dear friends of the thread, saddens me to let you know that a few weeks ago, after a nice day surrounded by lots of family and a good feed and a glass of beer, Bill passed away, peacefully in bed at home, 82 years young. Kia ora e hoa, e te matua, e te koroua, kia ora He was a real GC, and a big fan of hearing about our discoveries in and work on the Belmont, so we will keep pushing ahead.
- 29 replies
-
- 56
-

-
-
-
Yeah given it the full 120psi and not a budge Had Fiat pistons ricochet around the garage at my old place! Always used an old brake pad or block o' wood since, or the grease gun if they are super tight. However, the bleeeders on these are just a bit too girthy for my grease gun, i may need to just force it on (oooo eeerr)
-
LOL