dabuzz
-
Posts
1,527 -
Joined
-
Last visited
-
Days Won
5
Content Type
Forums
Downloads
Events
Gallery
Everything posted by dabuzz
-
Azhar runs 8.5 ZS all round on his coupe - so yes they 'will' fit!

-
those 1/4s!!!! am I looking at the same car, earlier pics showed the 1/4s looking pretty much complete in matty B, now they are half gone? hats off to you either way!
-
This! .....Time=money, buy it weld it in, move on. otherwise, great base for a project, good luck!
-
sorry
-
4 ffs
-
WTF -triple
-
Ah man - double post
-
This! .....Time=money, buy it weld it in, move on. otherwise, great base for a project, good luck!
-
I use Terei Brothers platers in West Auckland, but any electroplater can do it, just ask for either gold or silver passivating I just send in a bucket of old dirty rusty parts, and they come back mostly mint, not always though depends on how bad the rust is, pitting etc wont be fixed unless you prep and polish the parts first.
-
man this project is huge - Looking forward to seeing the body resurrection updates, its all way above my skill level, so its going to be cool seeing/learning about the body work as it progresses
-
Gotta say the car looks amazing man - love the hub caps/walls OG look
-
rad looking car - how much was it for all that rusty projectness? Vote buying a wrecked 300c and dropping your body over its chassis
-

DABUZZ'z 1971 Mazda Capella RE + New 74 RX4
dabuzz replied to dabuzz's topic in Projects and Build Ups
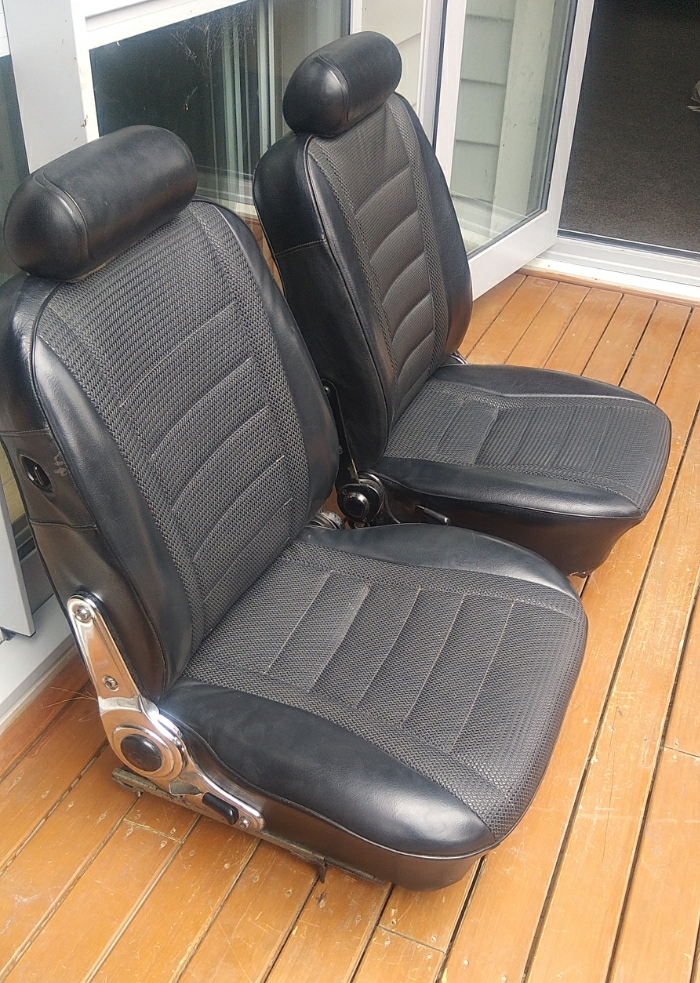
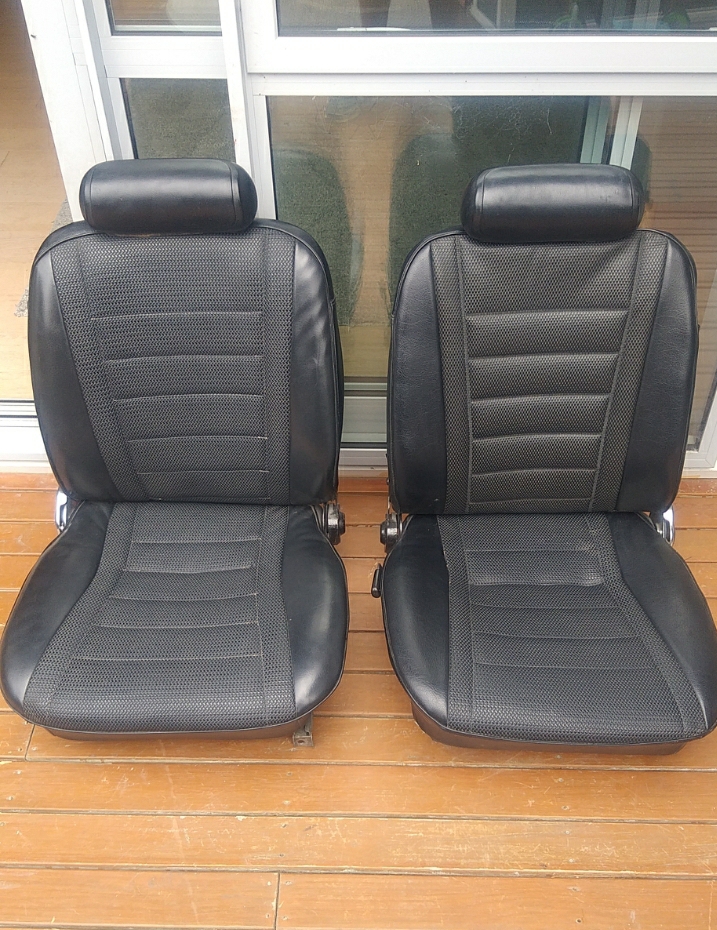
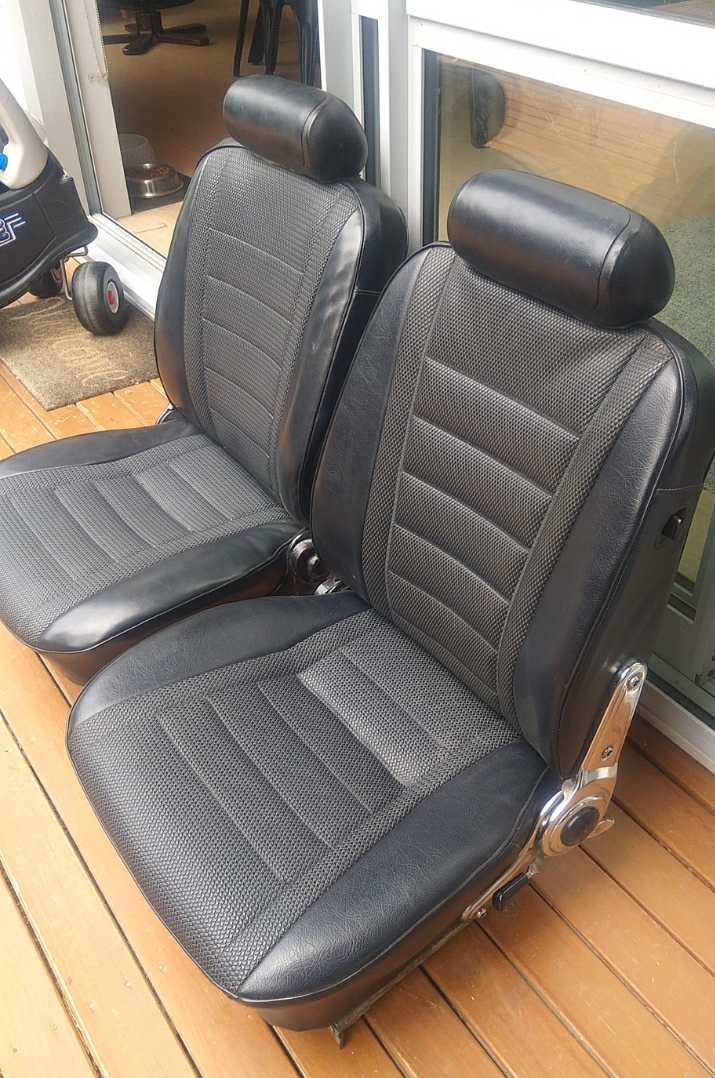
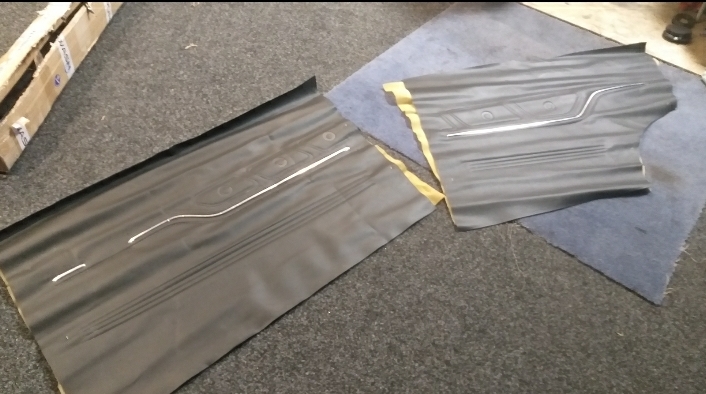
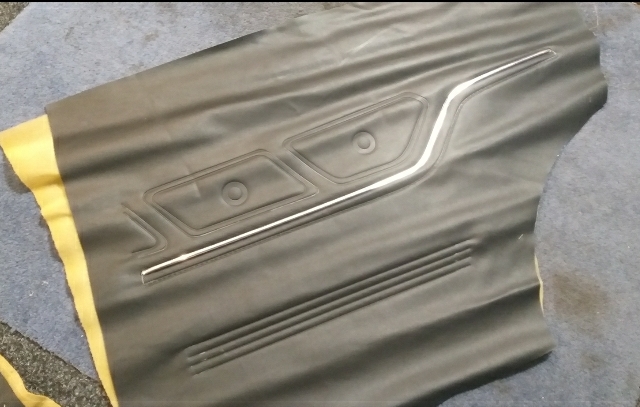
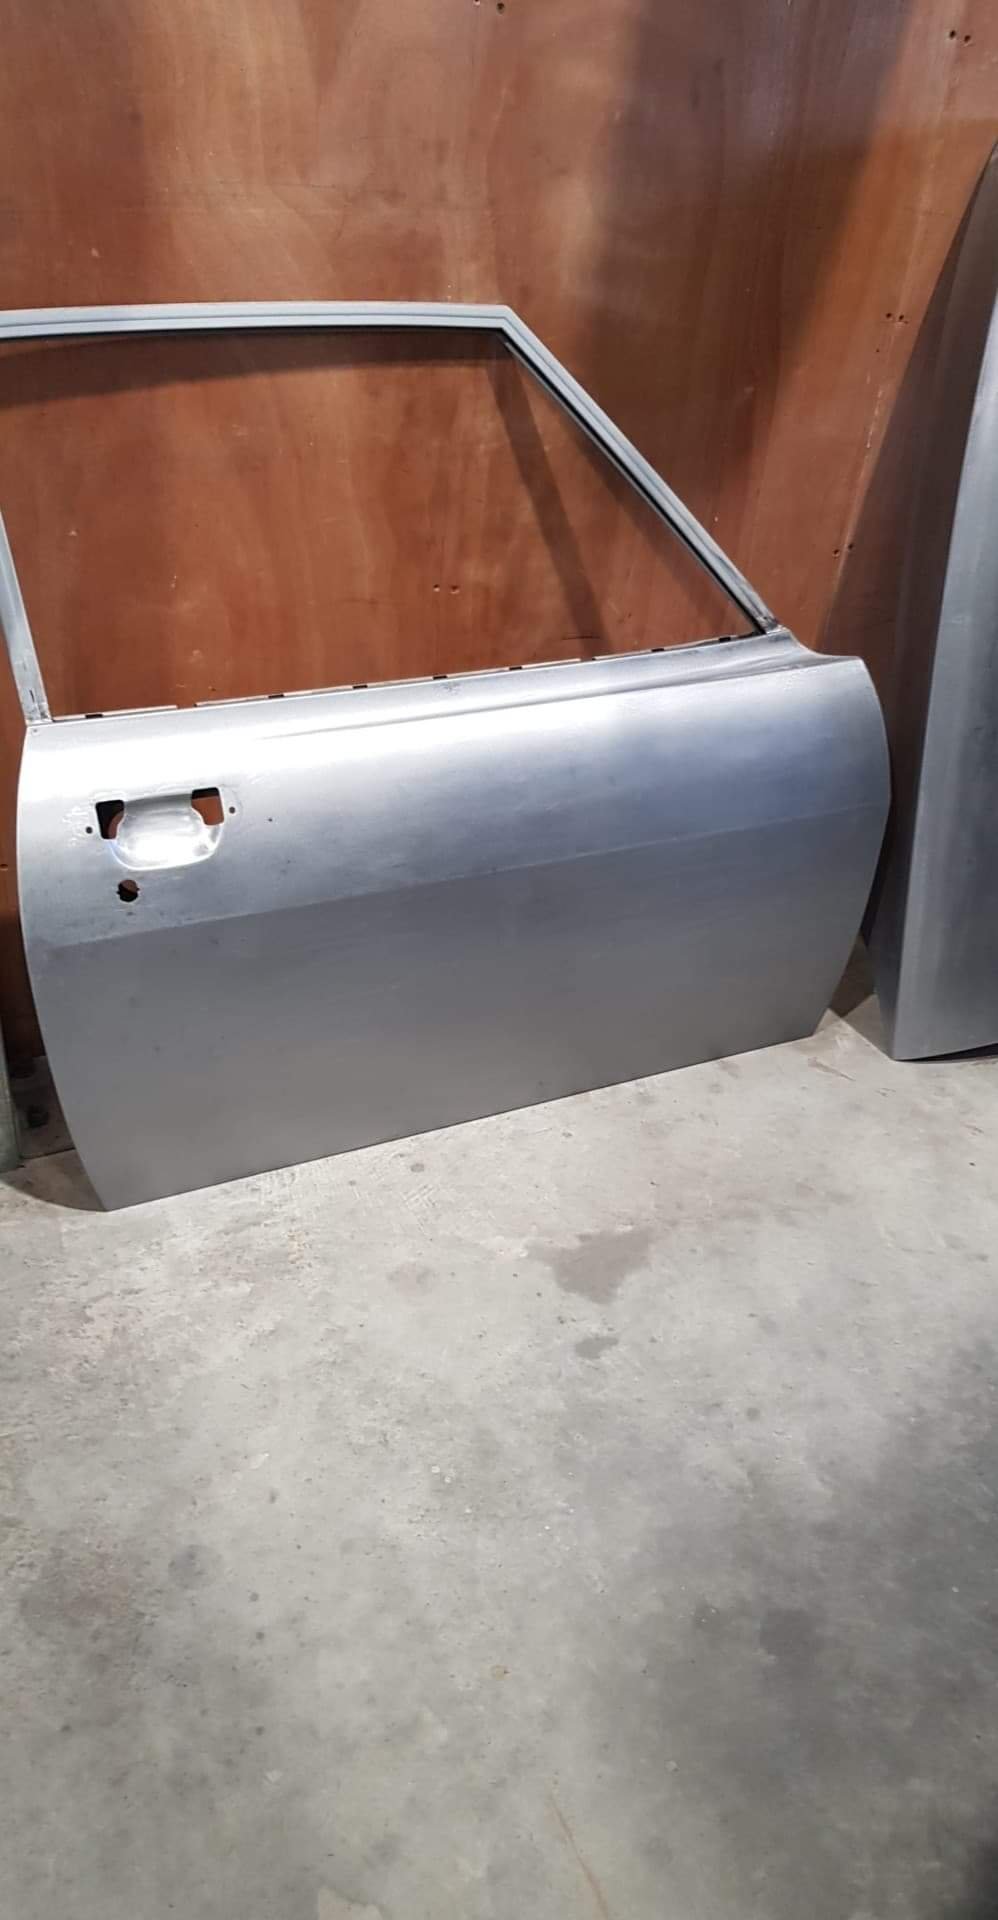
Traded into a set of proper coupe seats, when you hear the term rocking horse shit- this is them. The seats I had were coupe pattern, but had sedan style black(instead of chrome) recliners, which don't include the foot and hand release for rear passengers. They were also ripped and needed repairs, so to score these was a massive bonus. They have been retrimmed by someone who obviously has glaucoma, and not quite the right pattern, but it means I can bolt them in, ill look tidy and will pass any test as long as you aren't a train spotter. Have also bought repro door trim as mine was worn after nearly 50 years, also bought the backing boards to suit, they dont have the carpet at the bottom like factory, I could pay someone to fit that, but meh, got bigger things to spend my money on, will document retrimming them later. Lastly, dash top is away getting restored to original spec, as had a a few cracks in it.
- 119 replies
-
- 23
-

-
was a mint turnout, good to finally get along to one.
-
DABUZZ'z 1971 Mazda Capella RE + New 74 RX4
dabuzz replied to dabuzz's topic in Projects and Build Ups
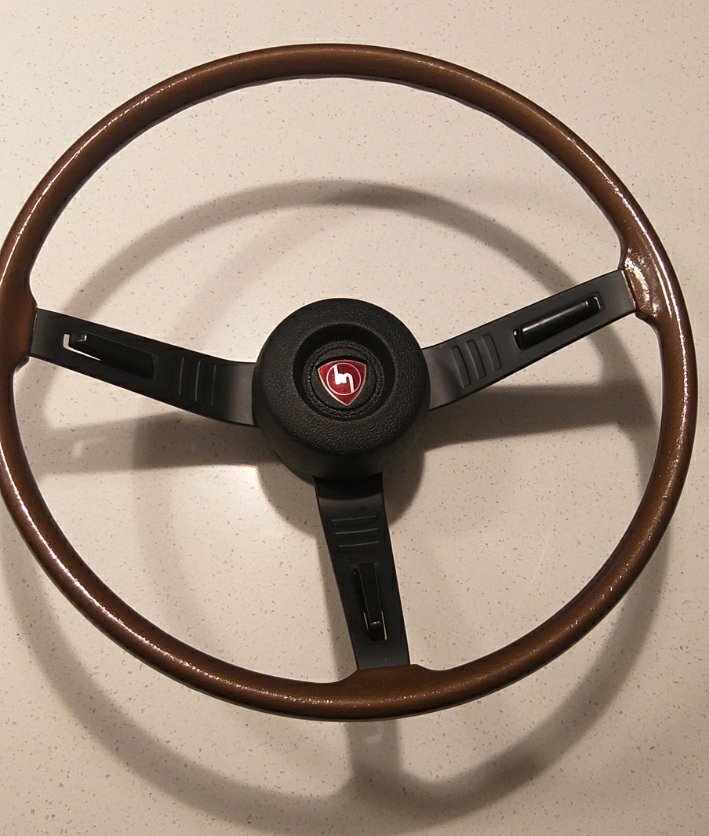
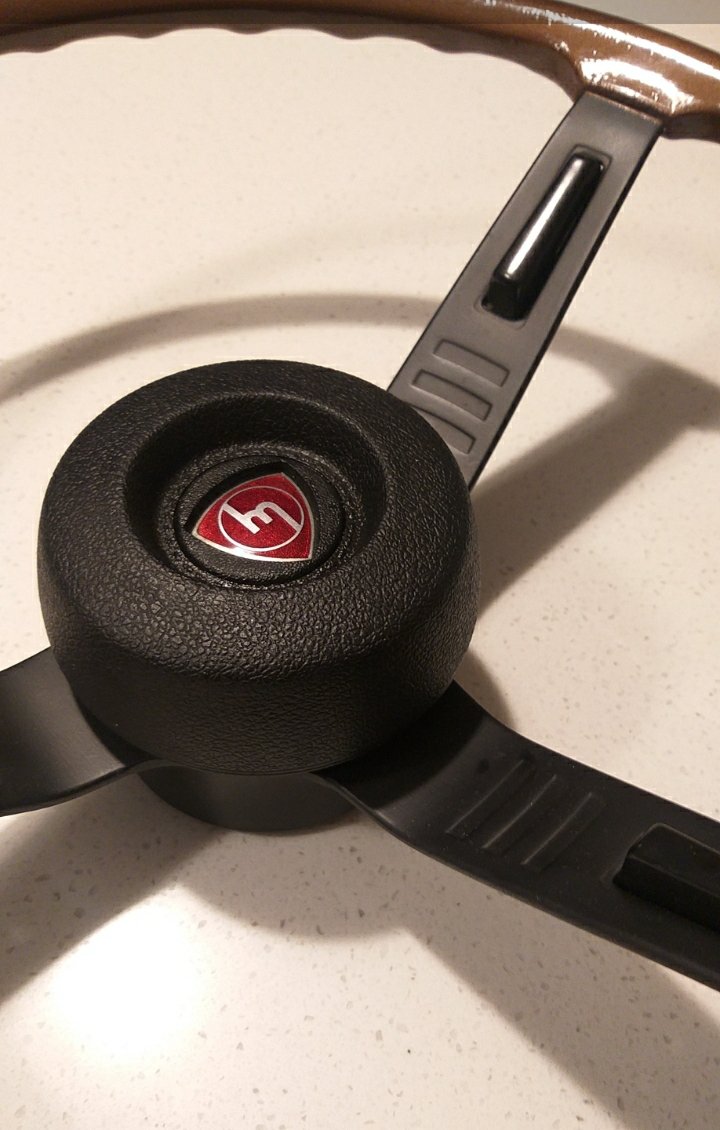
Tiny update, but one nevertheless Painted up my $250 rx2 steering wheel, it was sun faded and cracked, filled the cracks with resin. Colour not quite the same as original, but I dont care, beats paying $2k like others do, painted the gear knob to match, and got a repro shift pattern badge to suit.
- 119 replies
-
- 31
-
-
That yours up for sale on tm?
-
wow, a lot of skill there, looking really good
-
absolutely amazing build love seeing updates
-
did you just buy 1x 36ft 80 mil pack? was it enough to do a car thoroughly?
-
Yeeeooow - haven't seen this thread since the heart transplant! Best decision you ever make - best!
-
DABUZZ'z 1971 Mazda Capella RE + New 74 RX4
dabuzz replied to dabuzz's topic in Projects and Build Ups
More goodness underway!
- 119 replies
-
- 21
-
-
2.5 Manawatu mufflers reso, into AES/PAC rear, both great quality, the rears are really good at keeping noise down, will have to see though, have built exhaust in 4 parts, so can change up sections easily if needed
-
DABUZZ'z 1971 Mazda Capella RE + New 74 RX4
dabuzz replied to dabuzz's topic in Projects and Build Ups
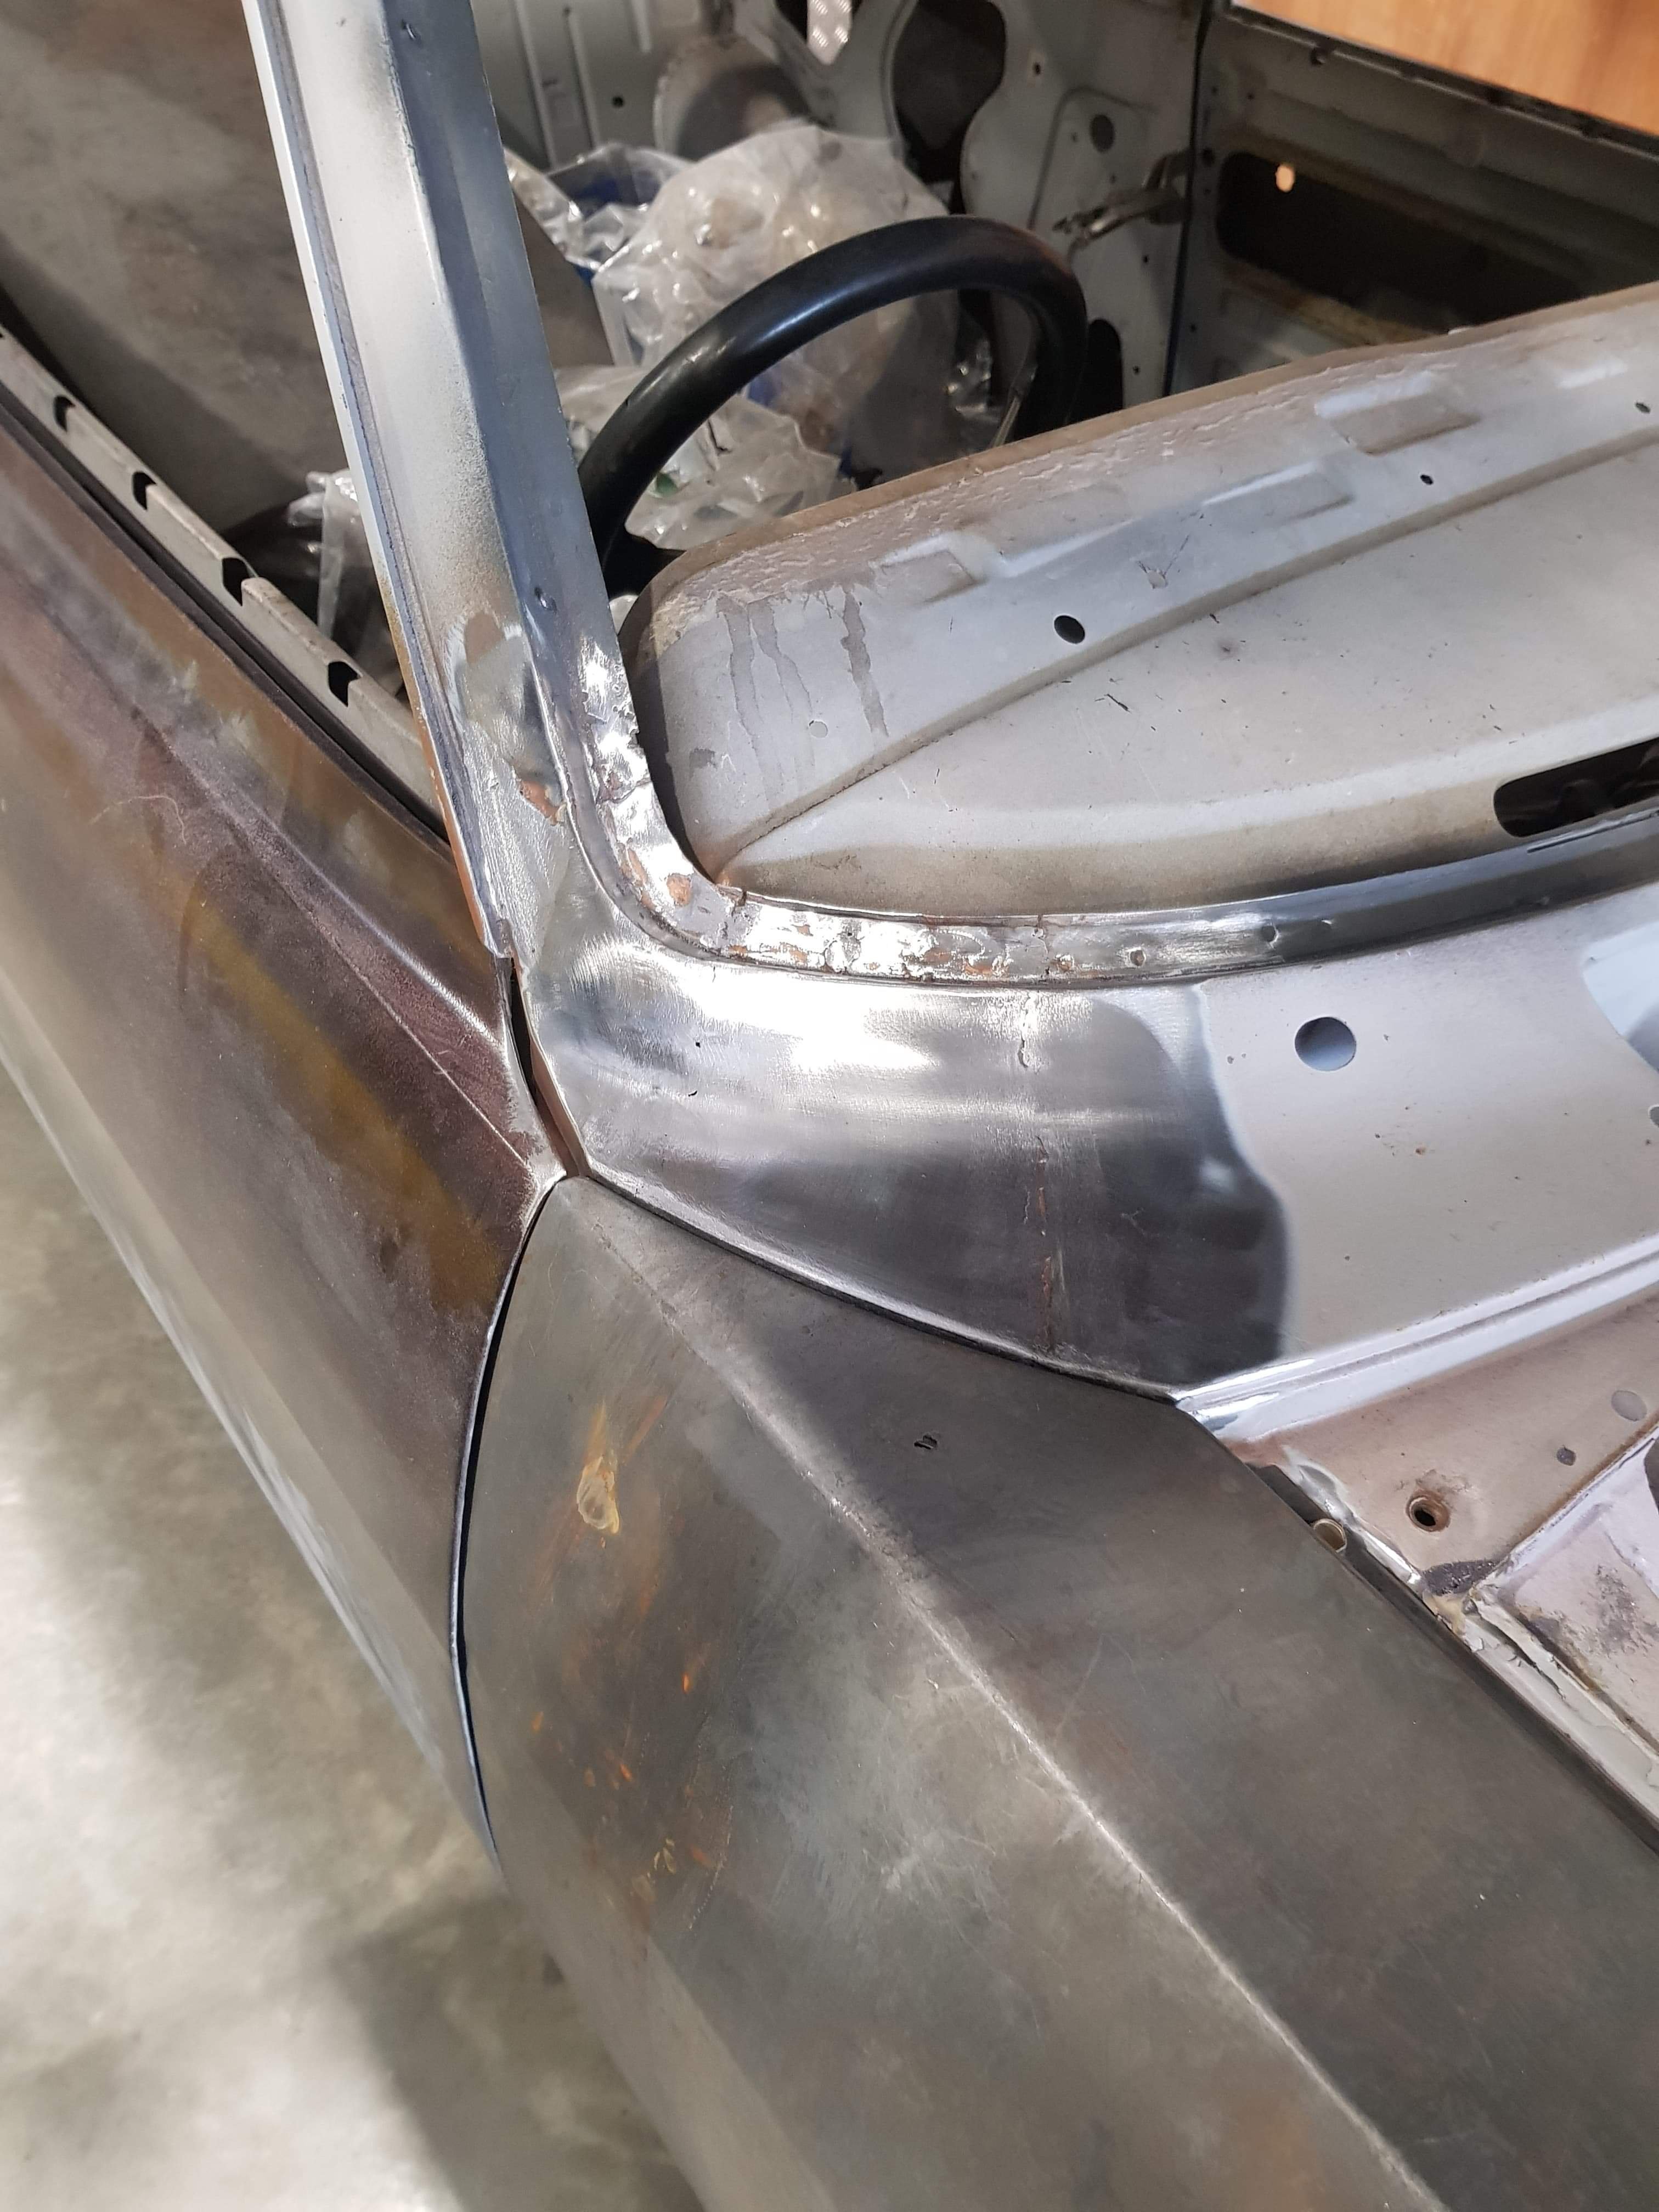
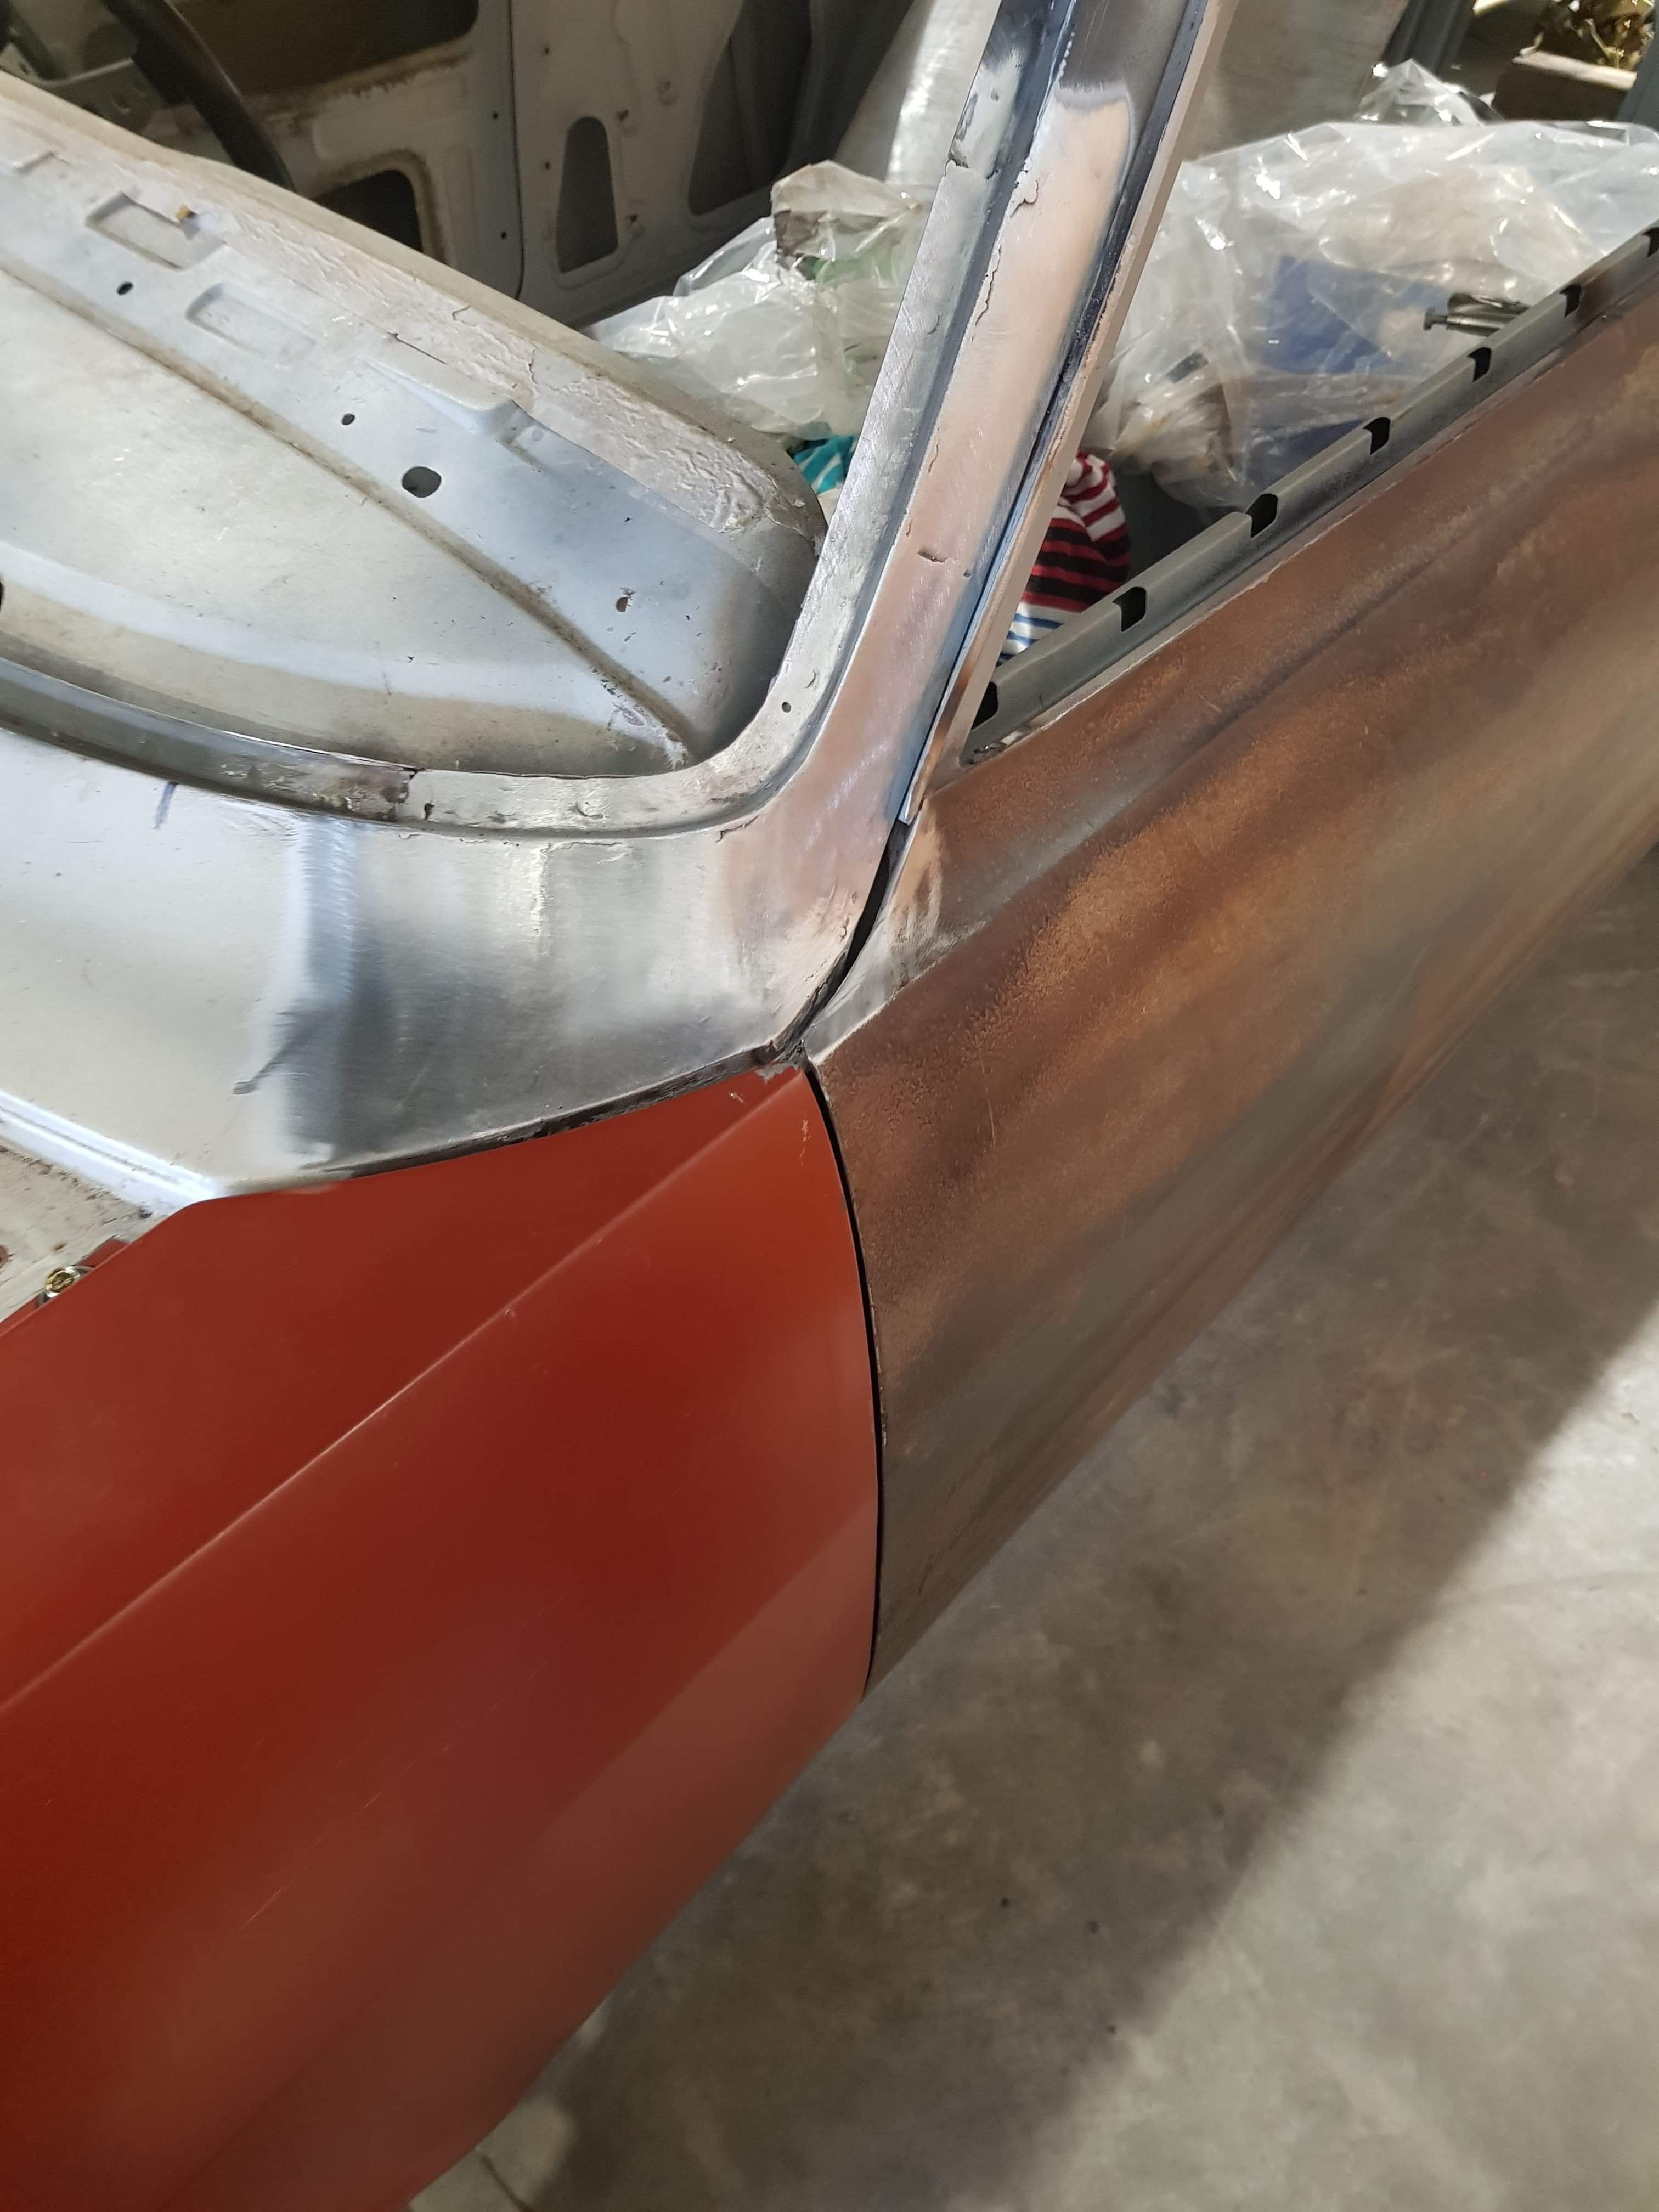
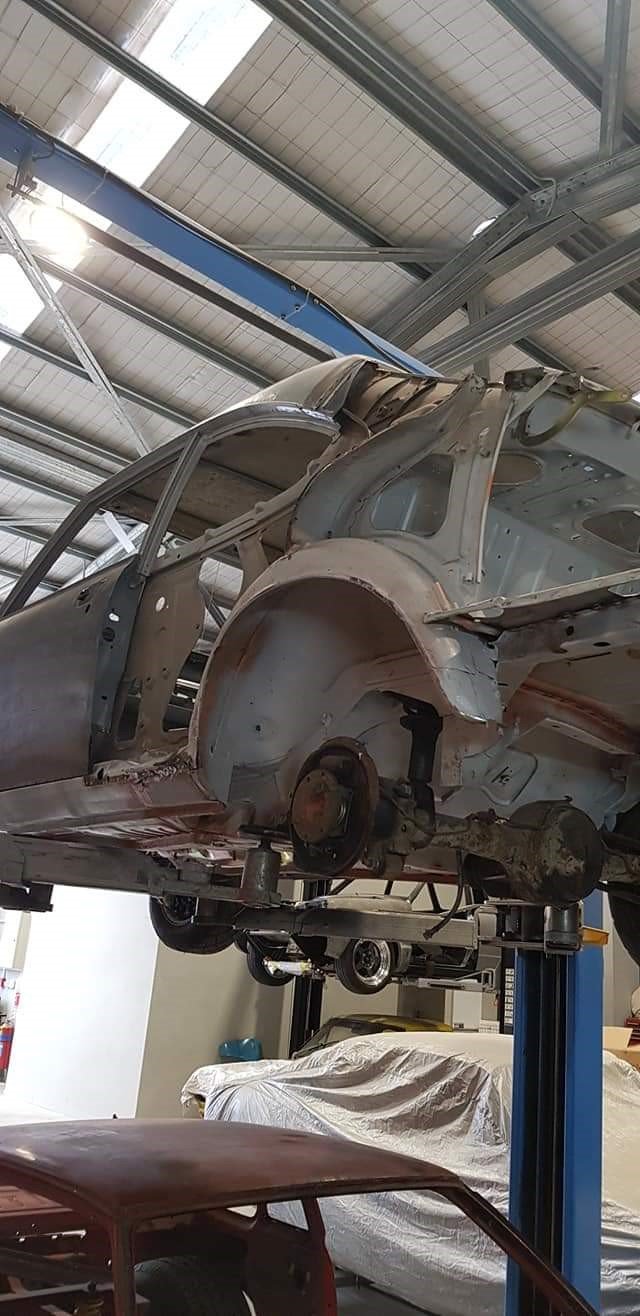
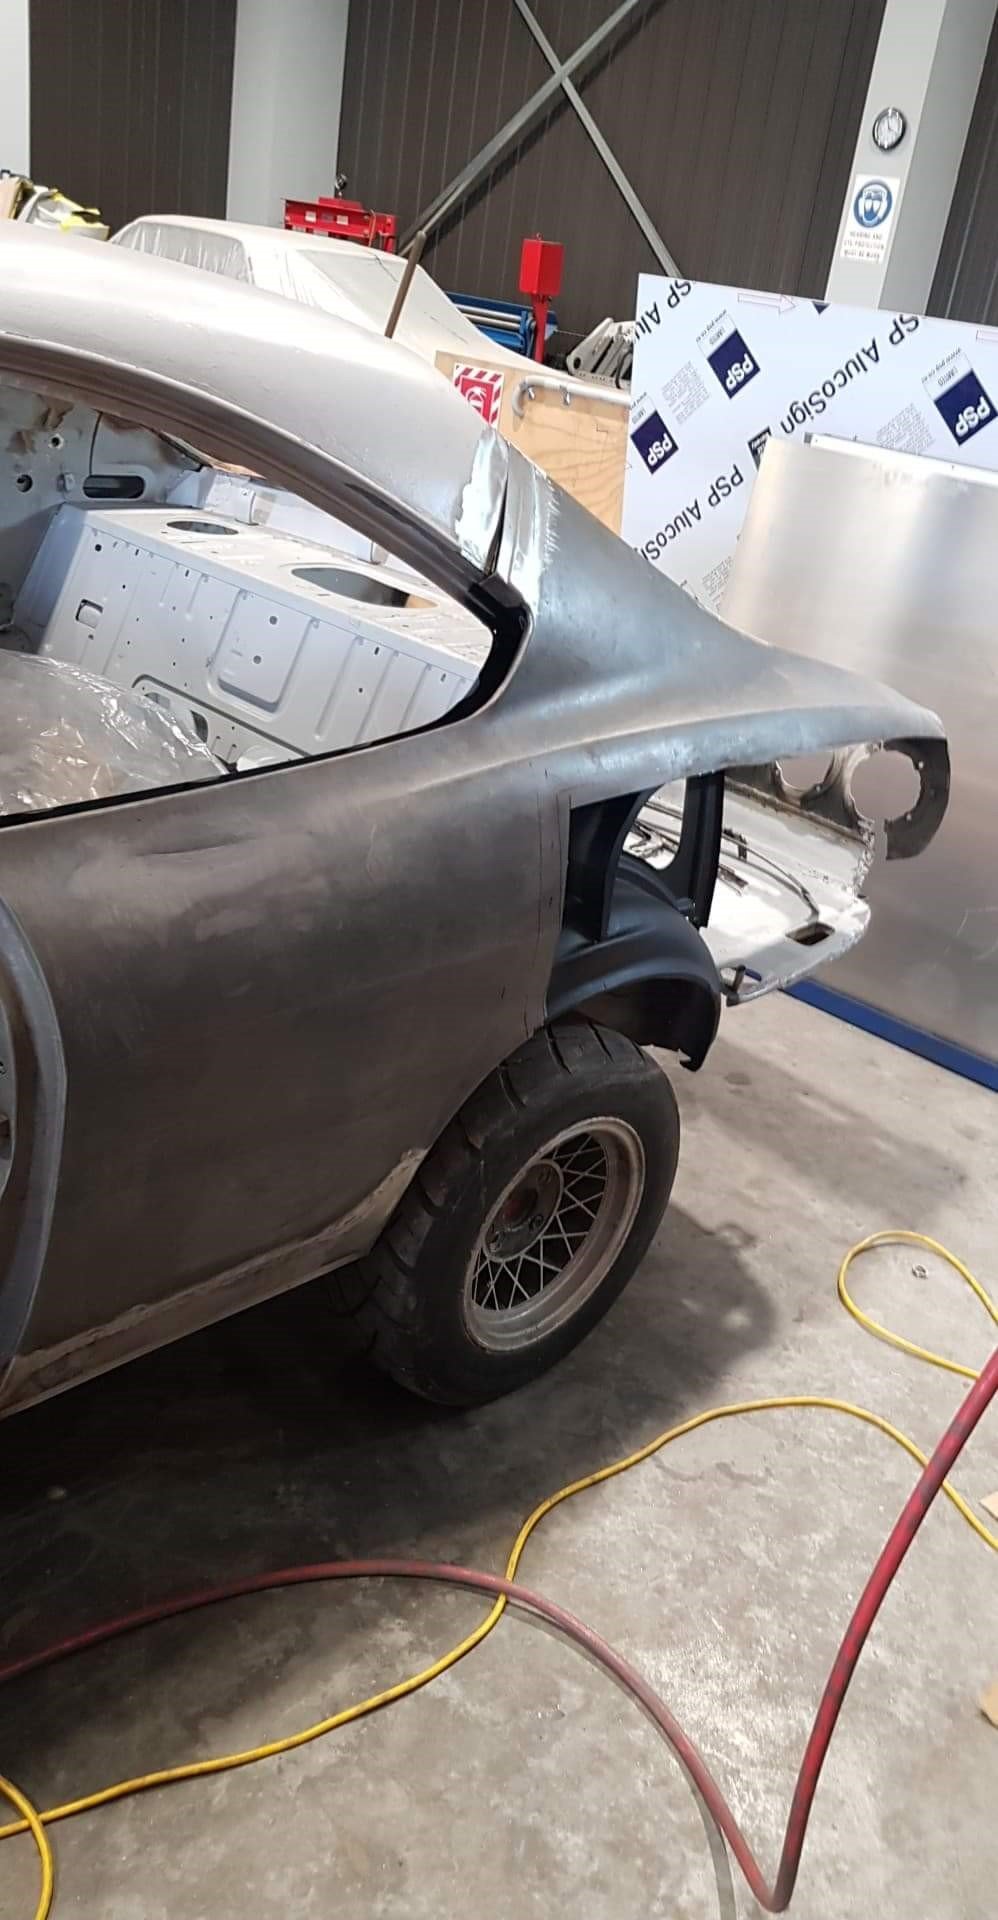
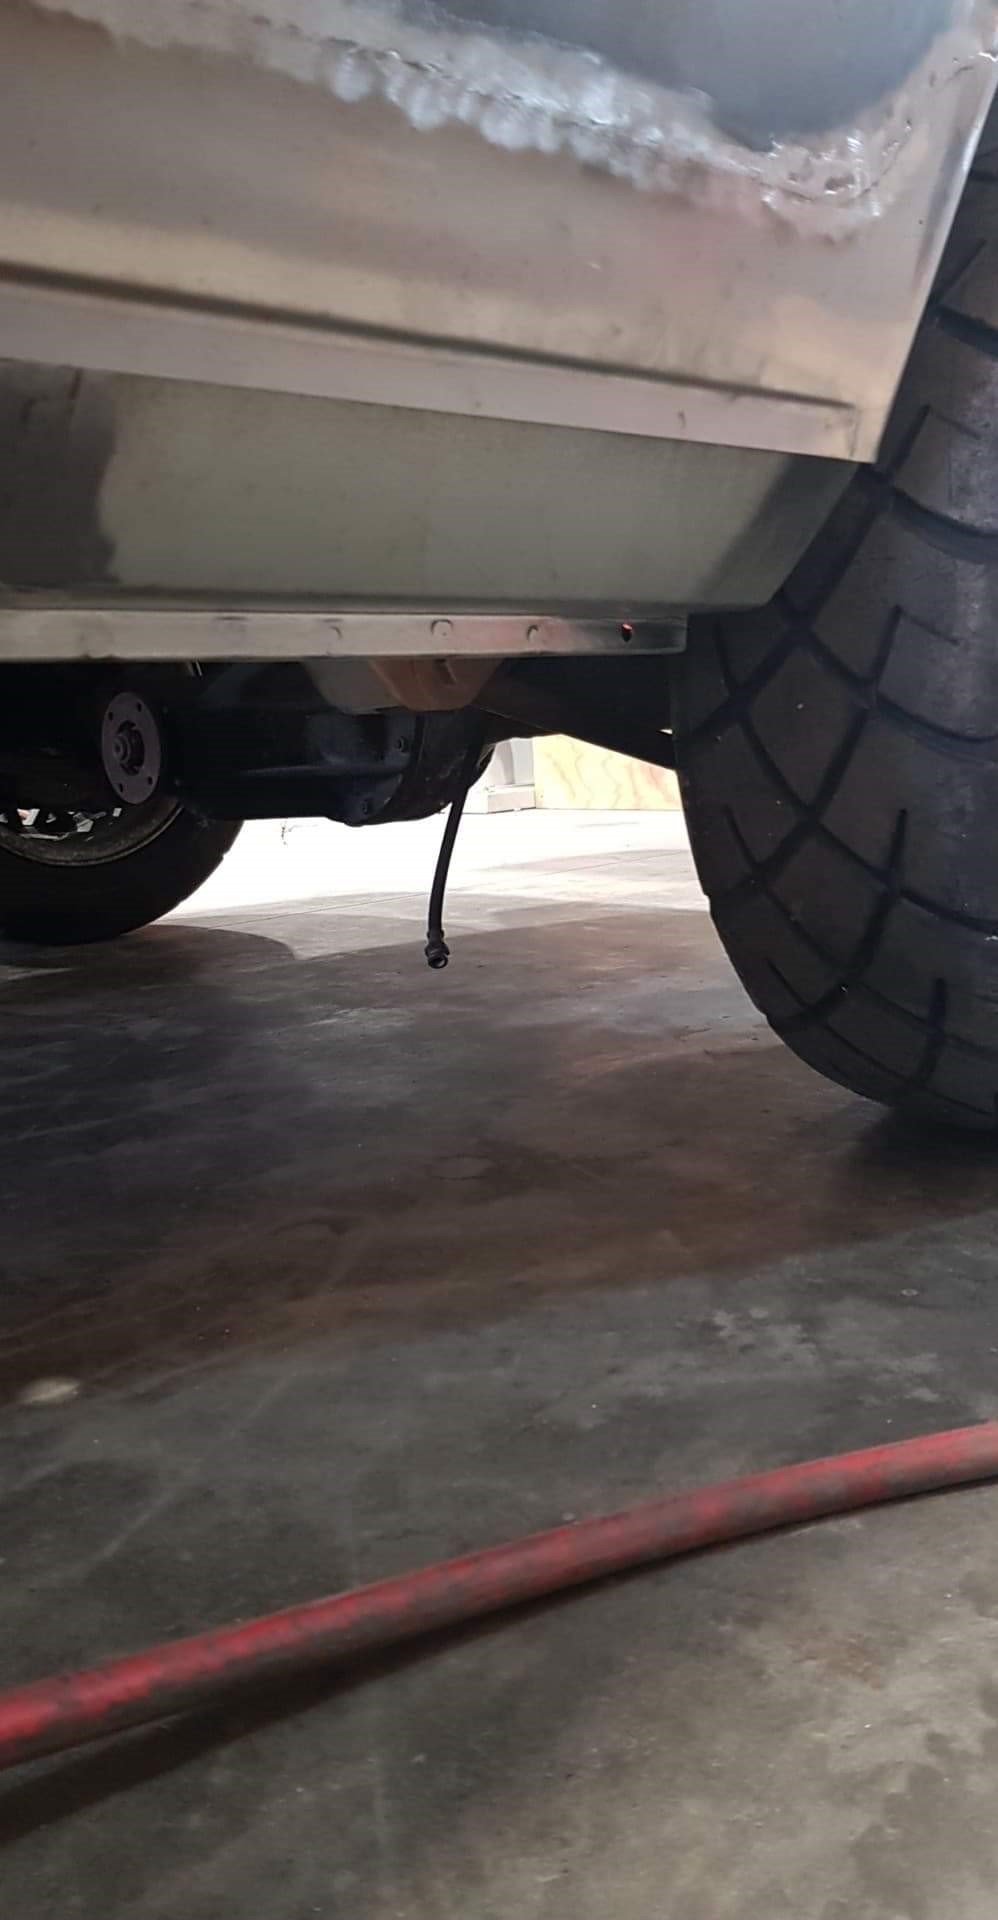
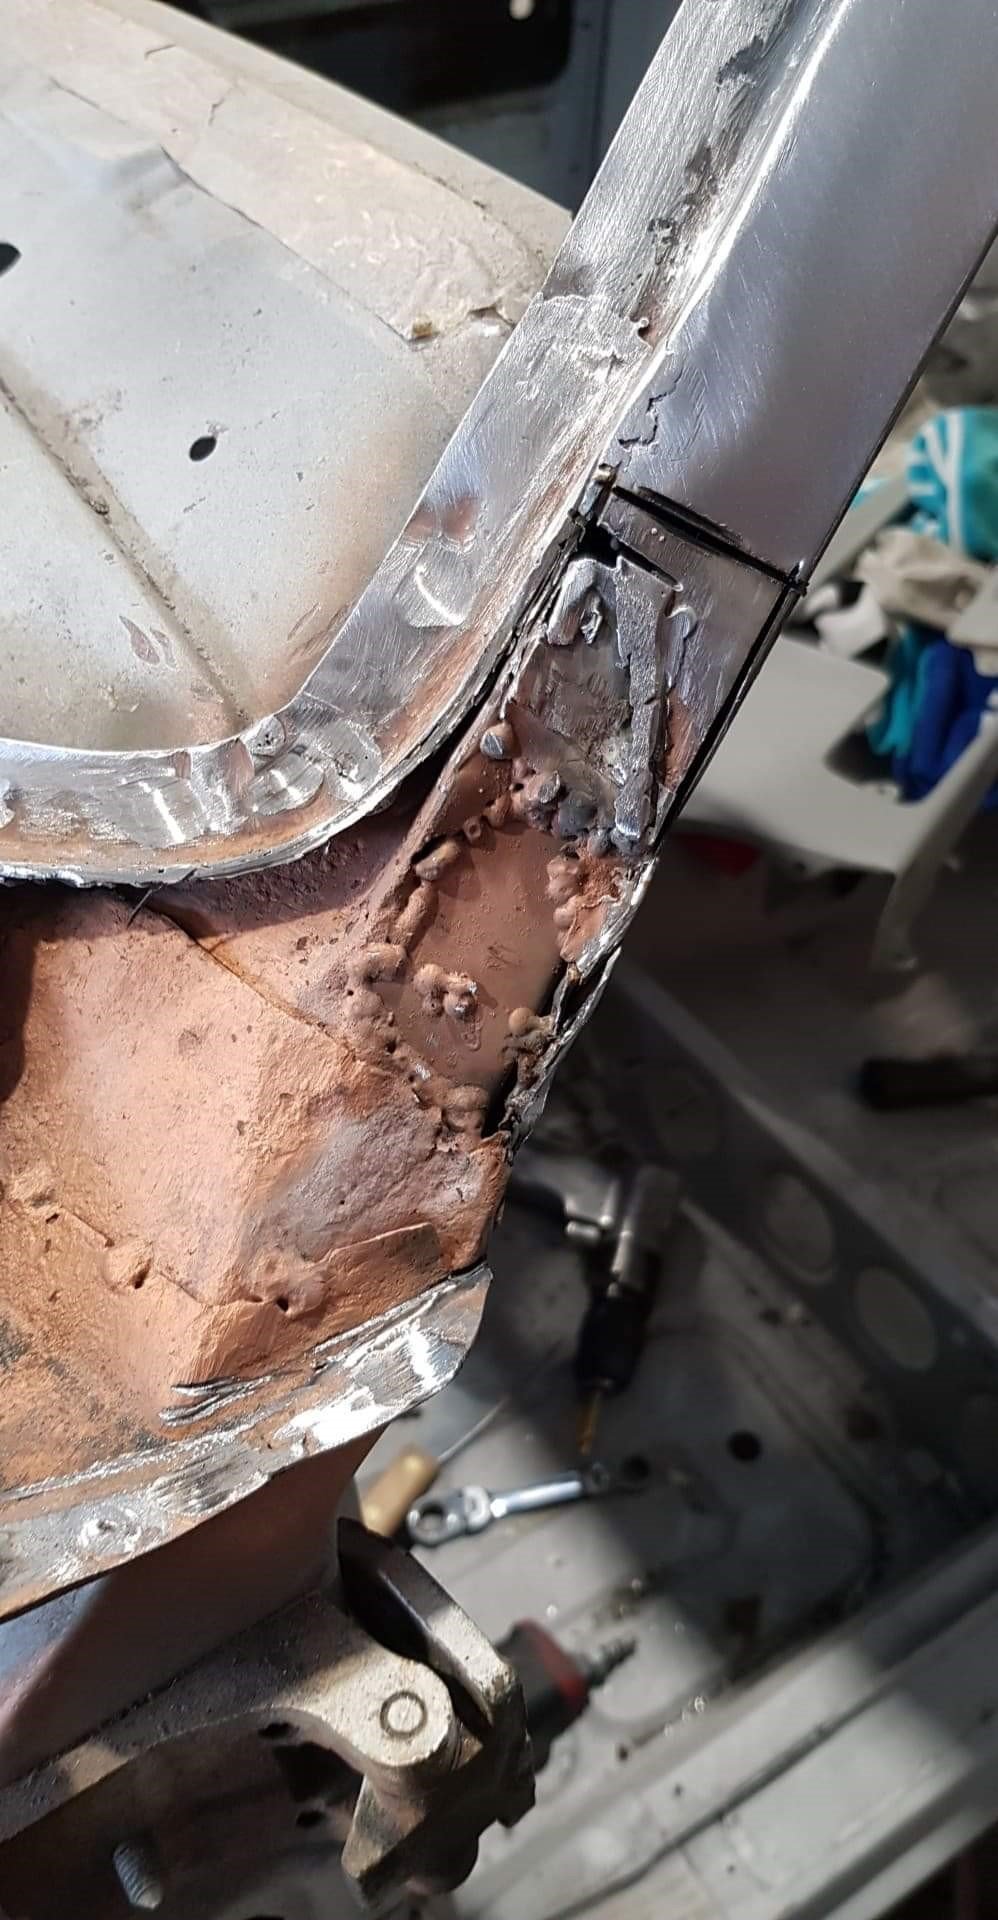
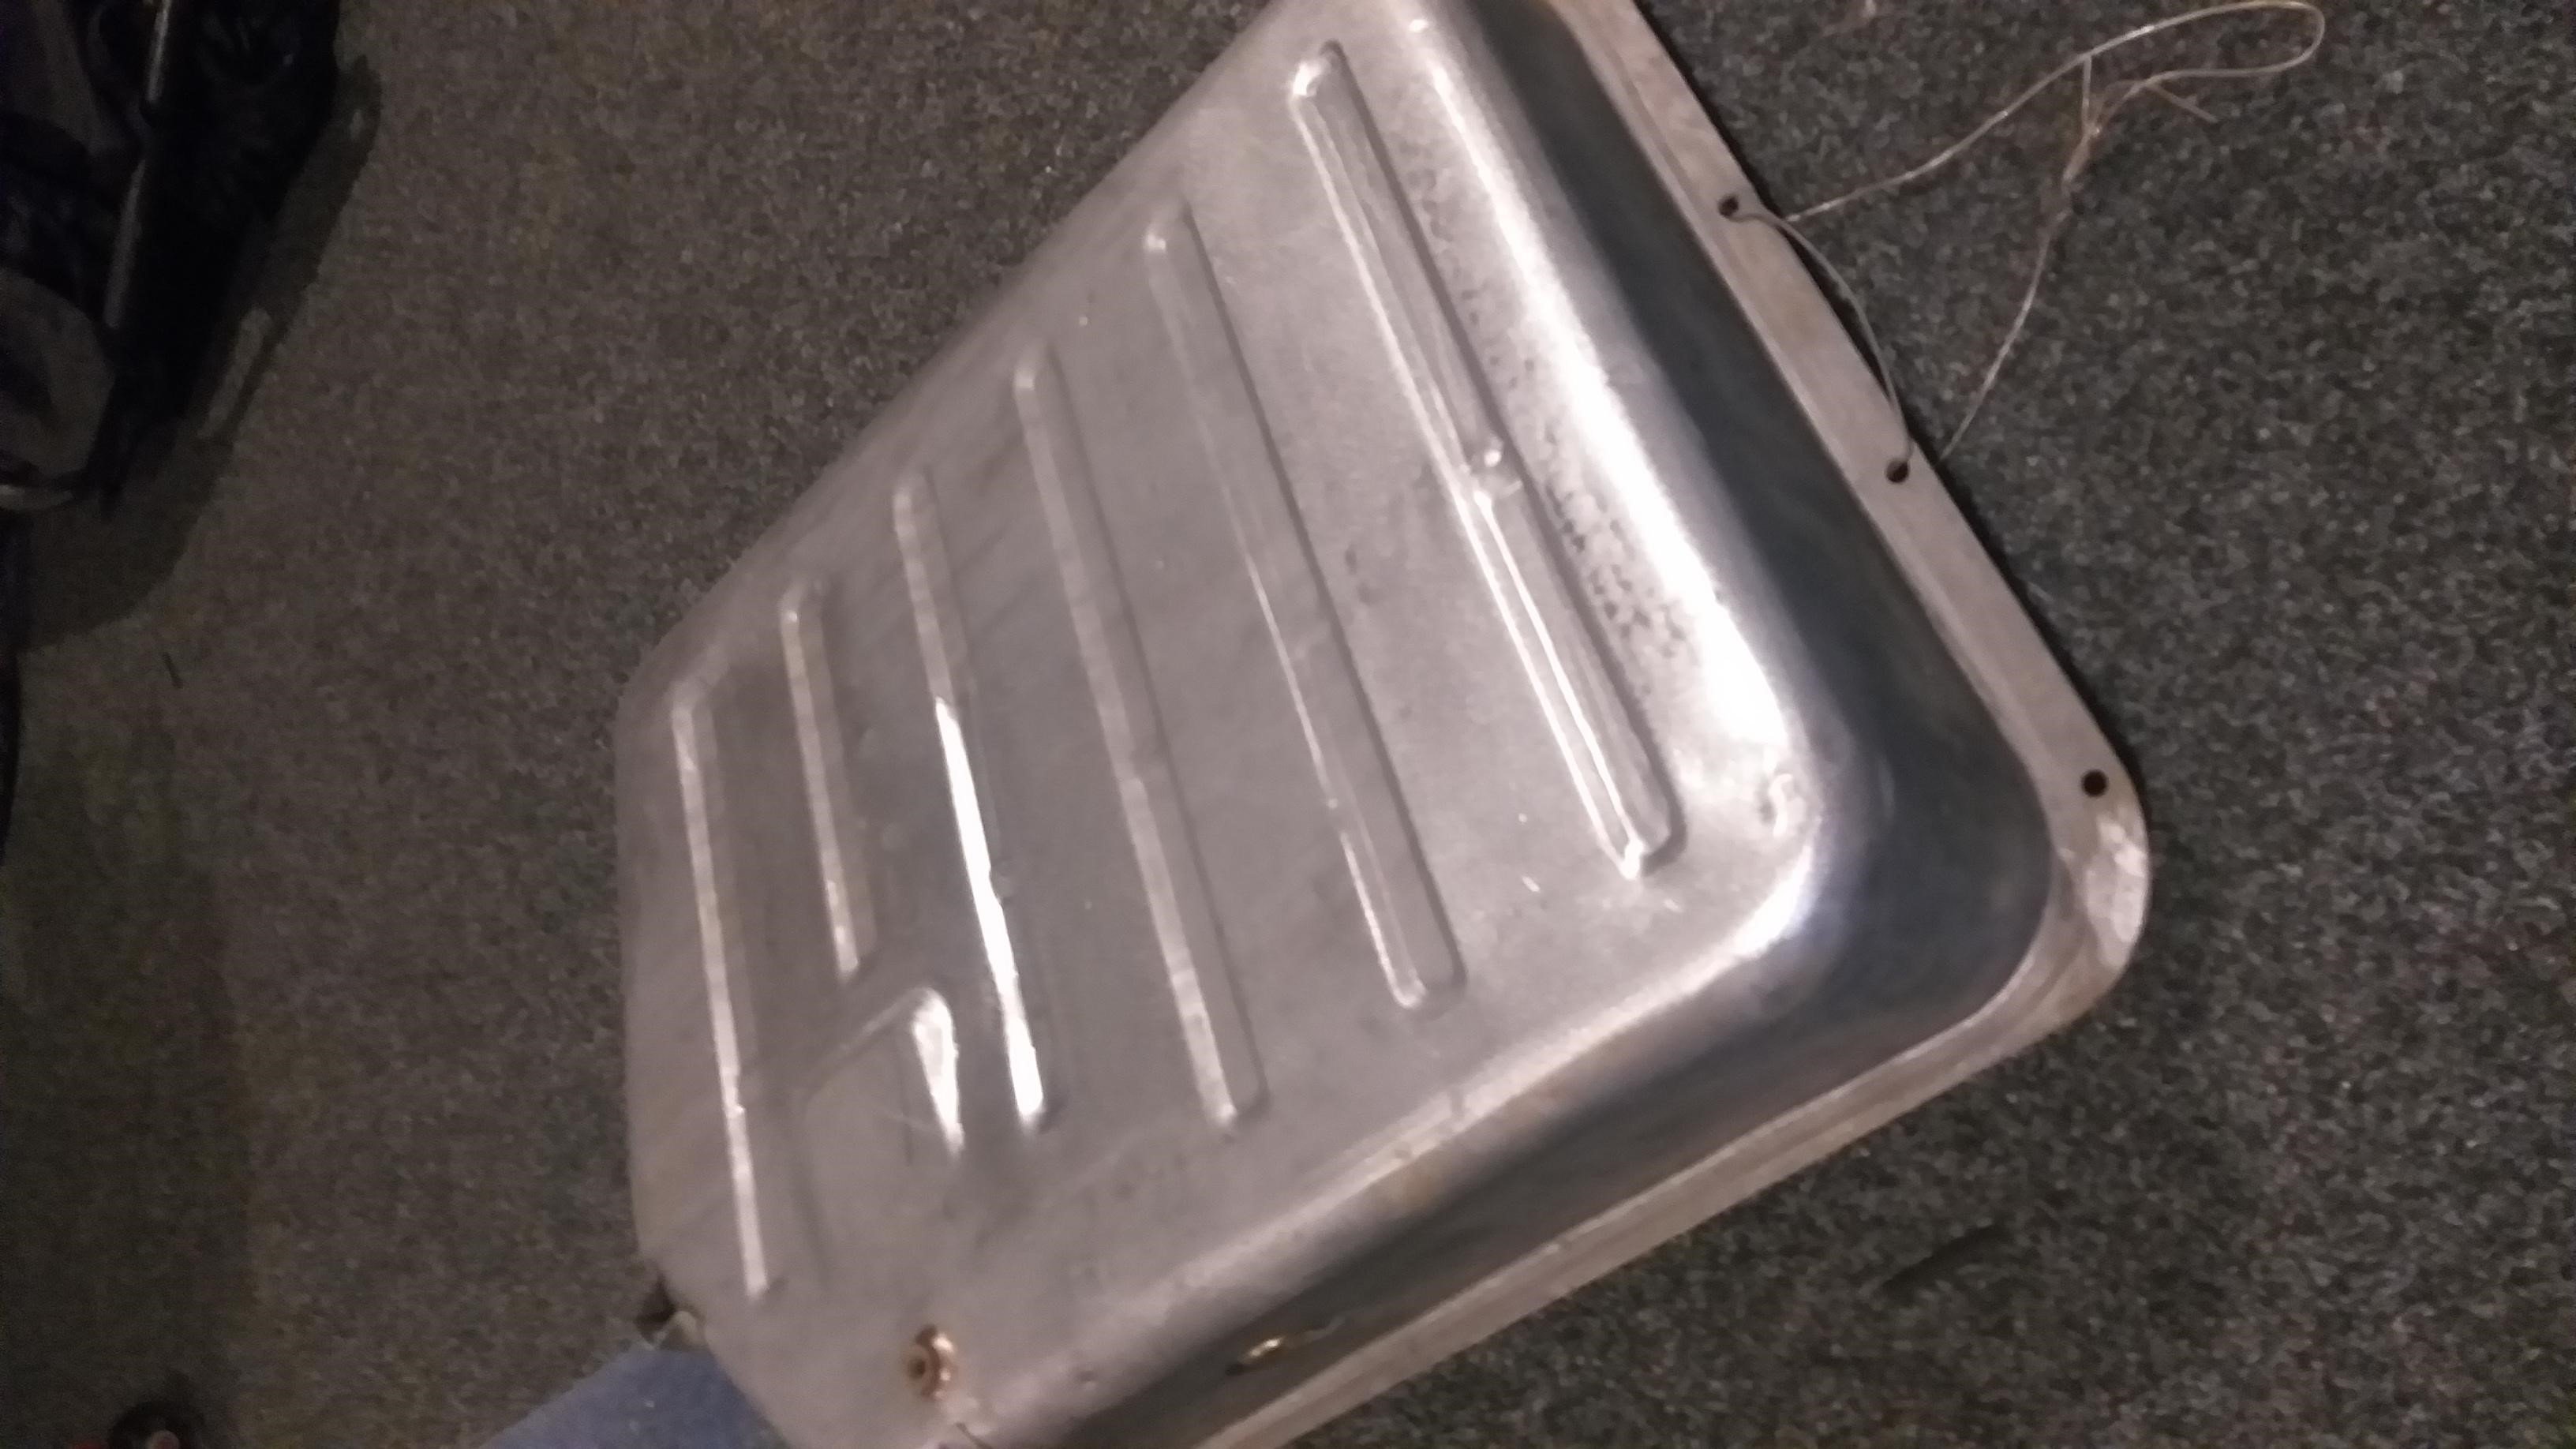
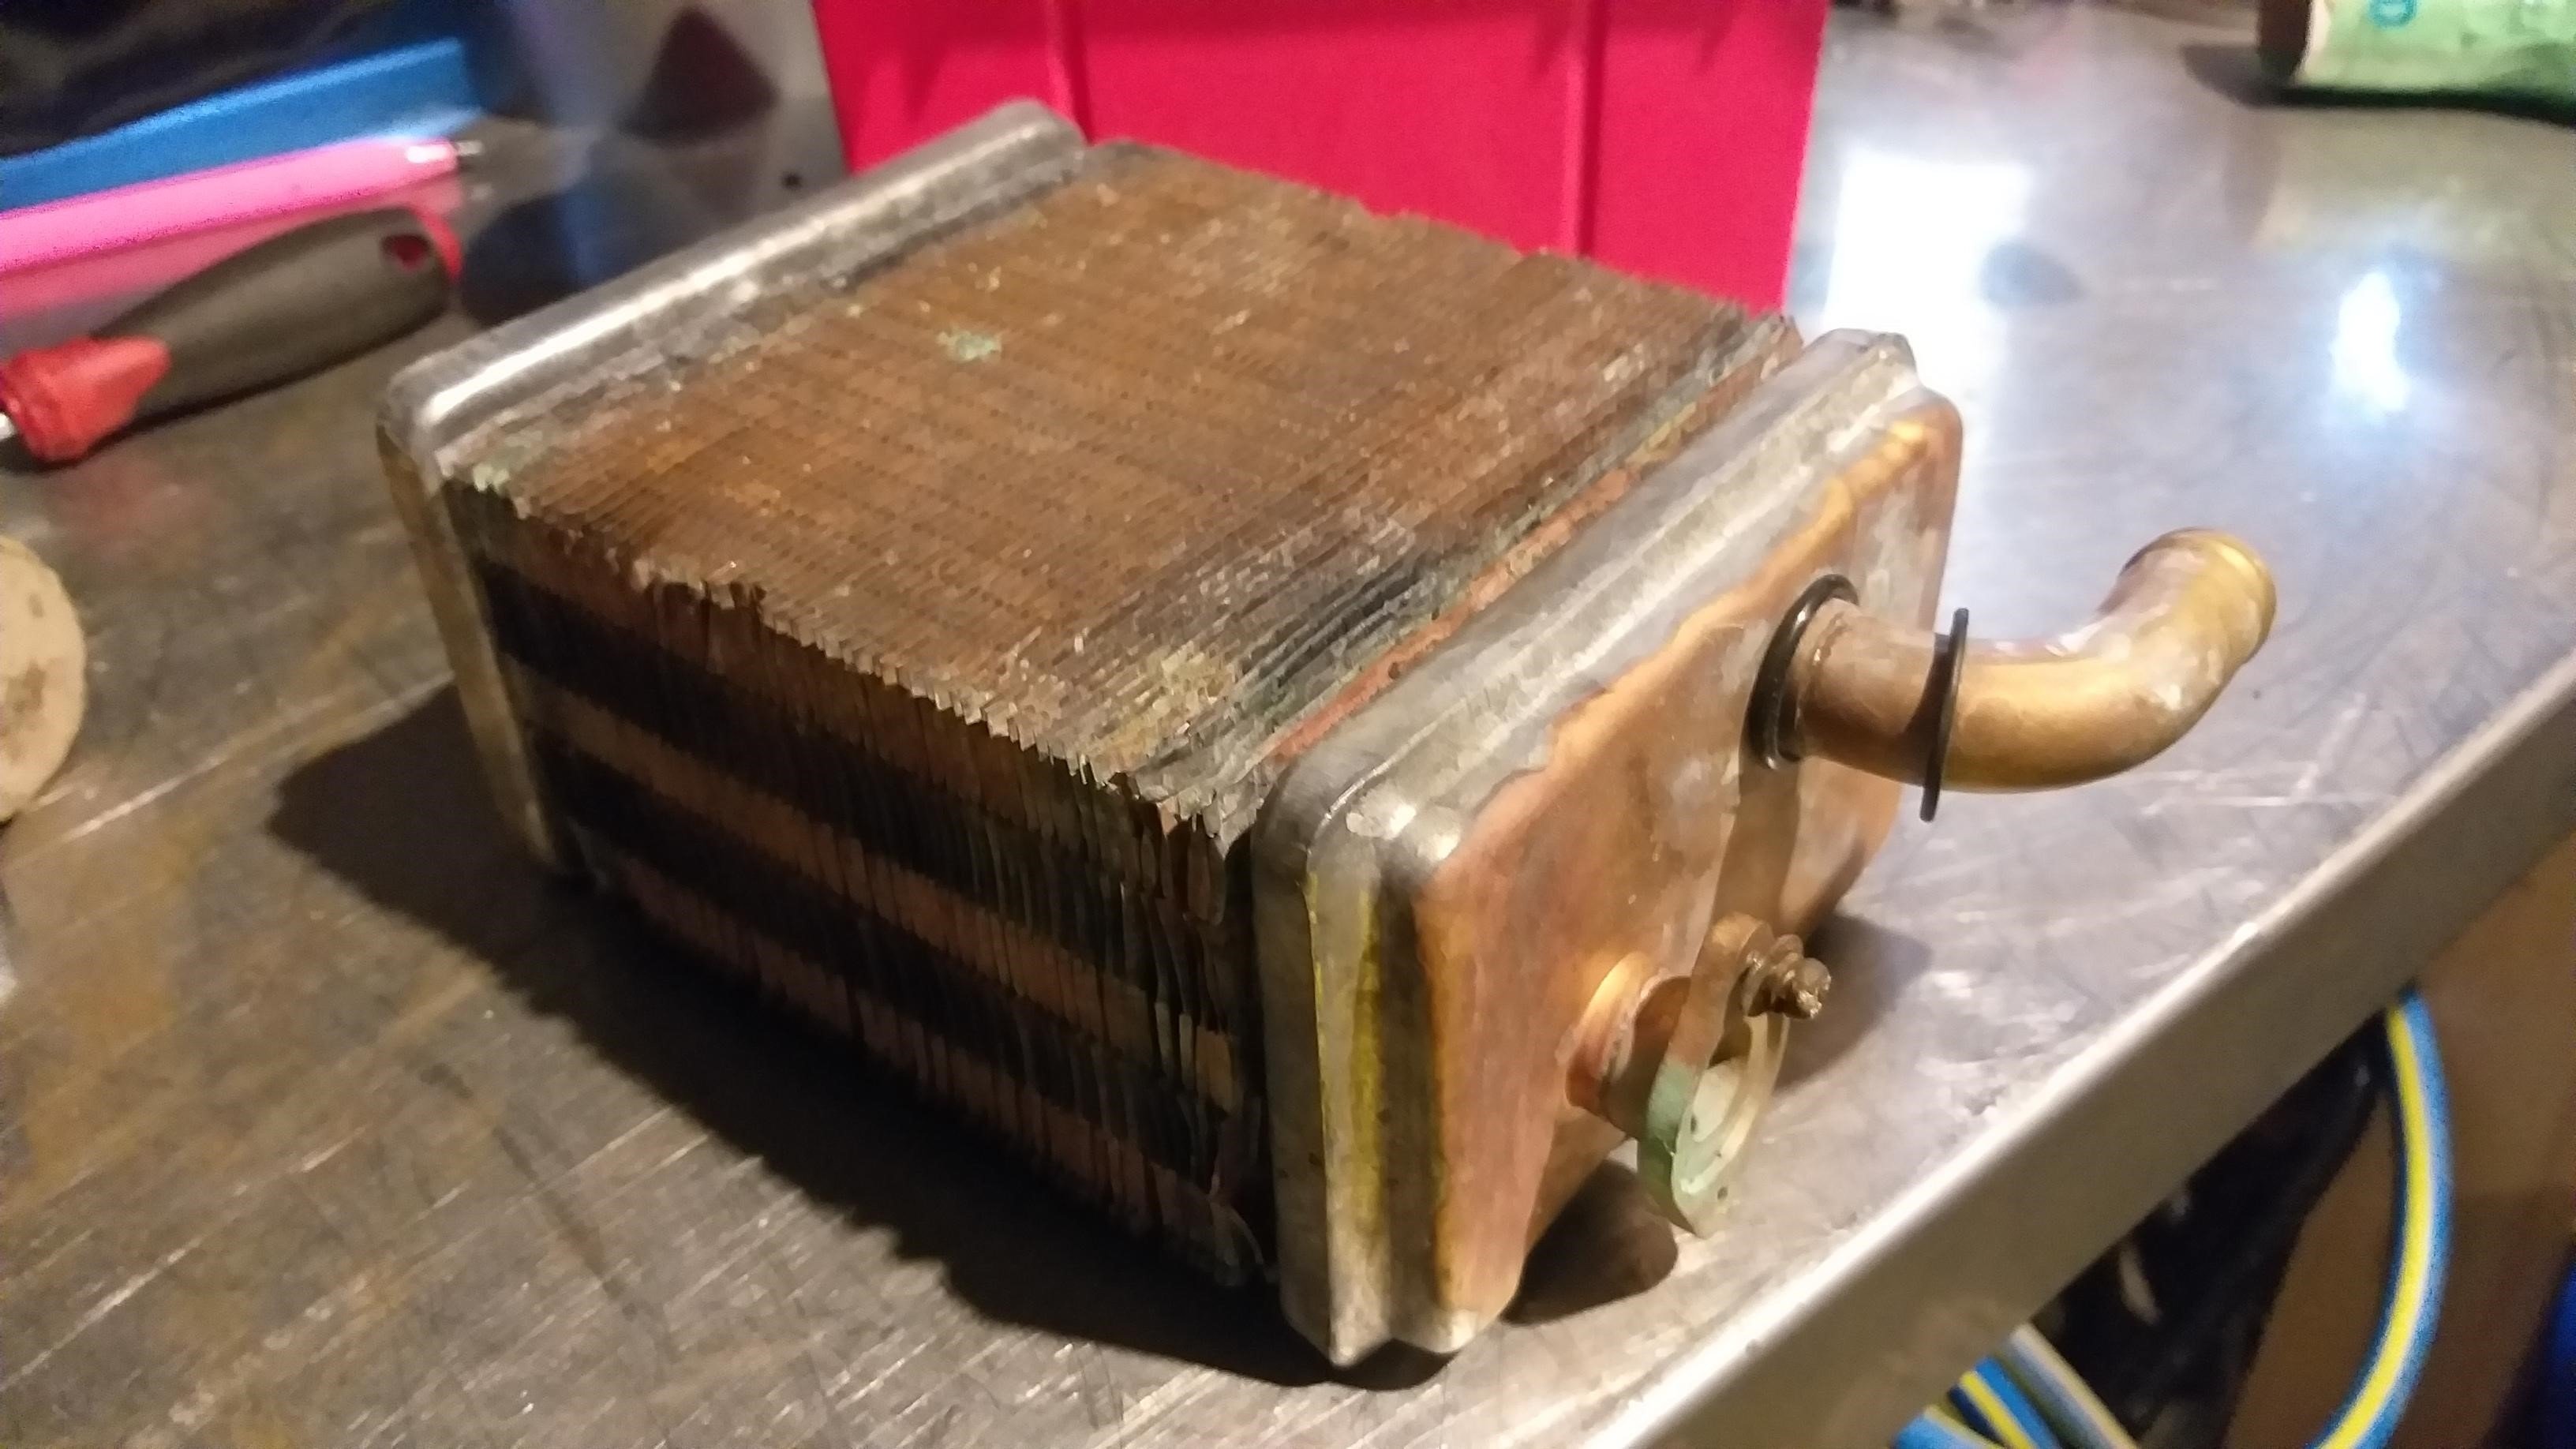
Some big jobs are underway, sills have been repaired. rear 1/4 removed and the fabricated replacement is taking shape. Also another shit attempt by the last panel beater uncovered and had to be rectified on the A pillar/cowl area. Smaller jobs include, Fuel tank has had the dents pulled out. I discovered that while I was looking through my dash parts, (as that will be one of the first areas i will be starting to assemble), I found the heater core was blown out, and leaking. Have had a new core made, and had to locate a NOS heater tap, which I have luckily found but cant be sent to me just yet - lockdown woes.
- 119 replies
-
- 17
-
-
Matt G's 1974 Toyota Celica TA22 & Honda F20c Conversion
dabuzz replied to Matt G's topic in Project Discussion
100% will not hate on a motor swap - if i owned it id have a 13b PP rotary in it before sunset. looks like a great car, your choice of motor will have it singing -
that'll sell in a heart beat - so badass