mjrstar
-
Posts
4062 -
Joined
-
Last visited
-
Days Won
1
Everything posted by mjrstar
-
The correct way to do this is to space the pivot out toward the flywheel. Lengthening the rod is going to put the release fork on a gross angle and most likely affect the pedal engagement window. I had to do this when i put the chromoly flywheel into my hillclimb civic.
-
Not sure if I should get some epoxy or try to rangi up a vacuum system or just carry on as I am.. Did some reading about prepreg but seems like the cost skyrockets / is not really novice spec.

-
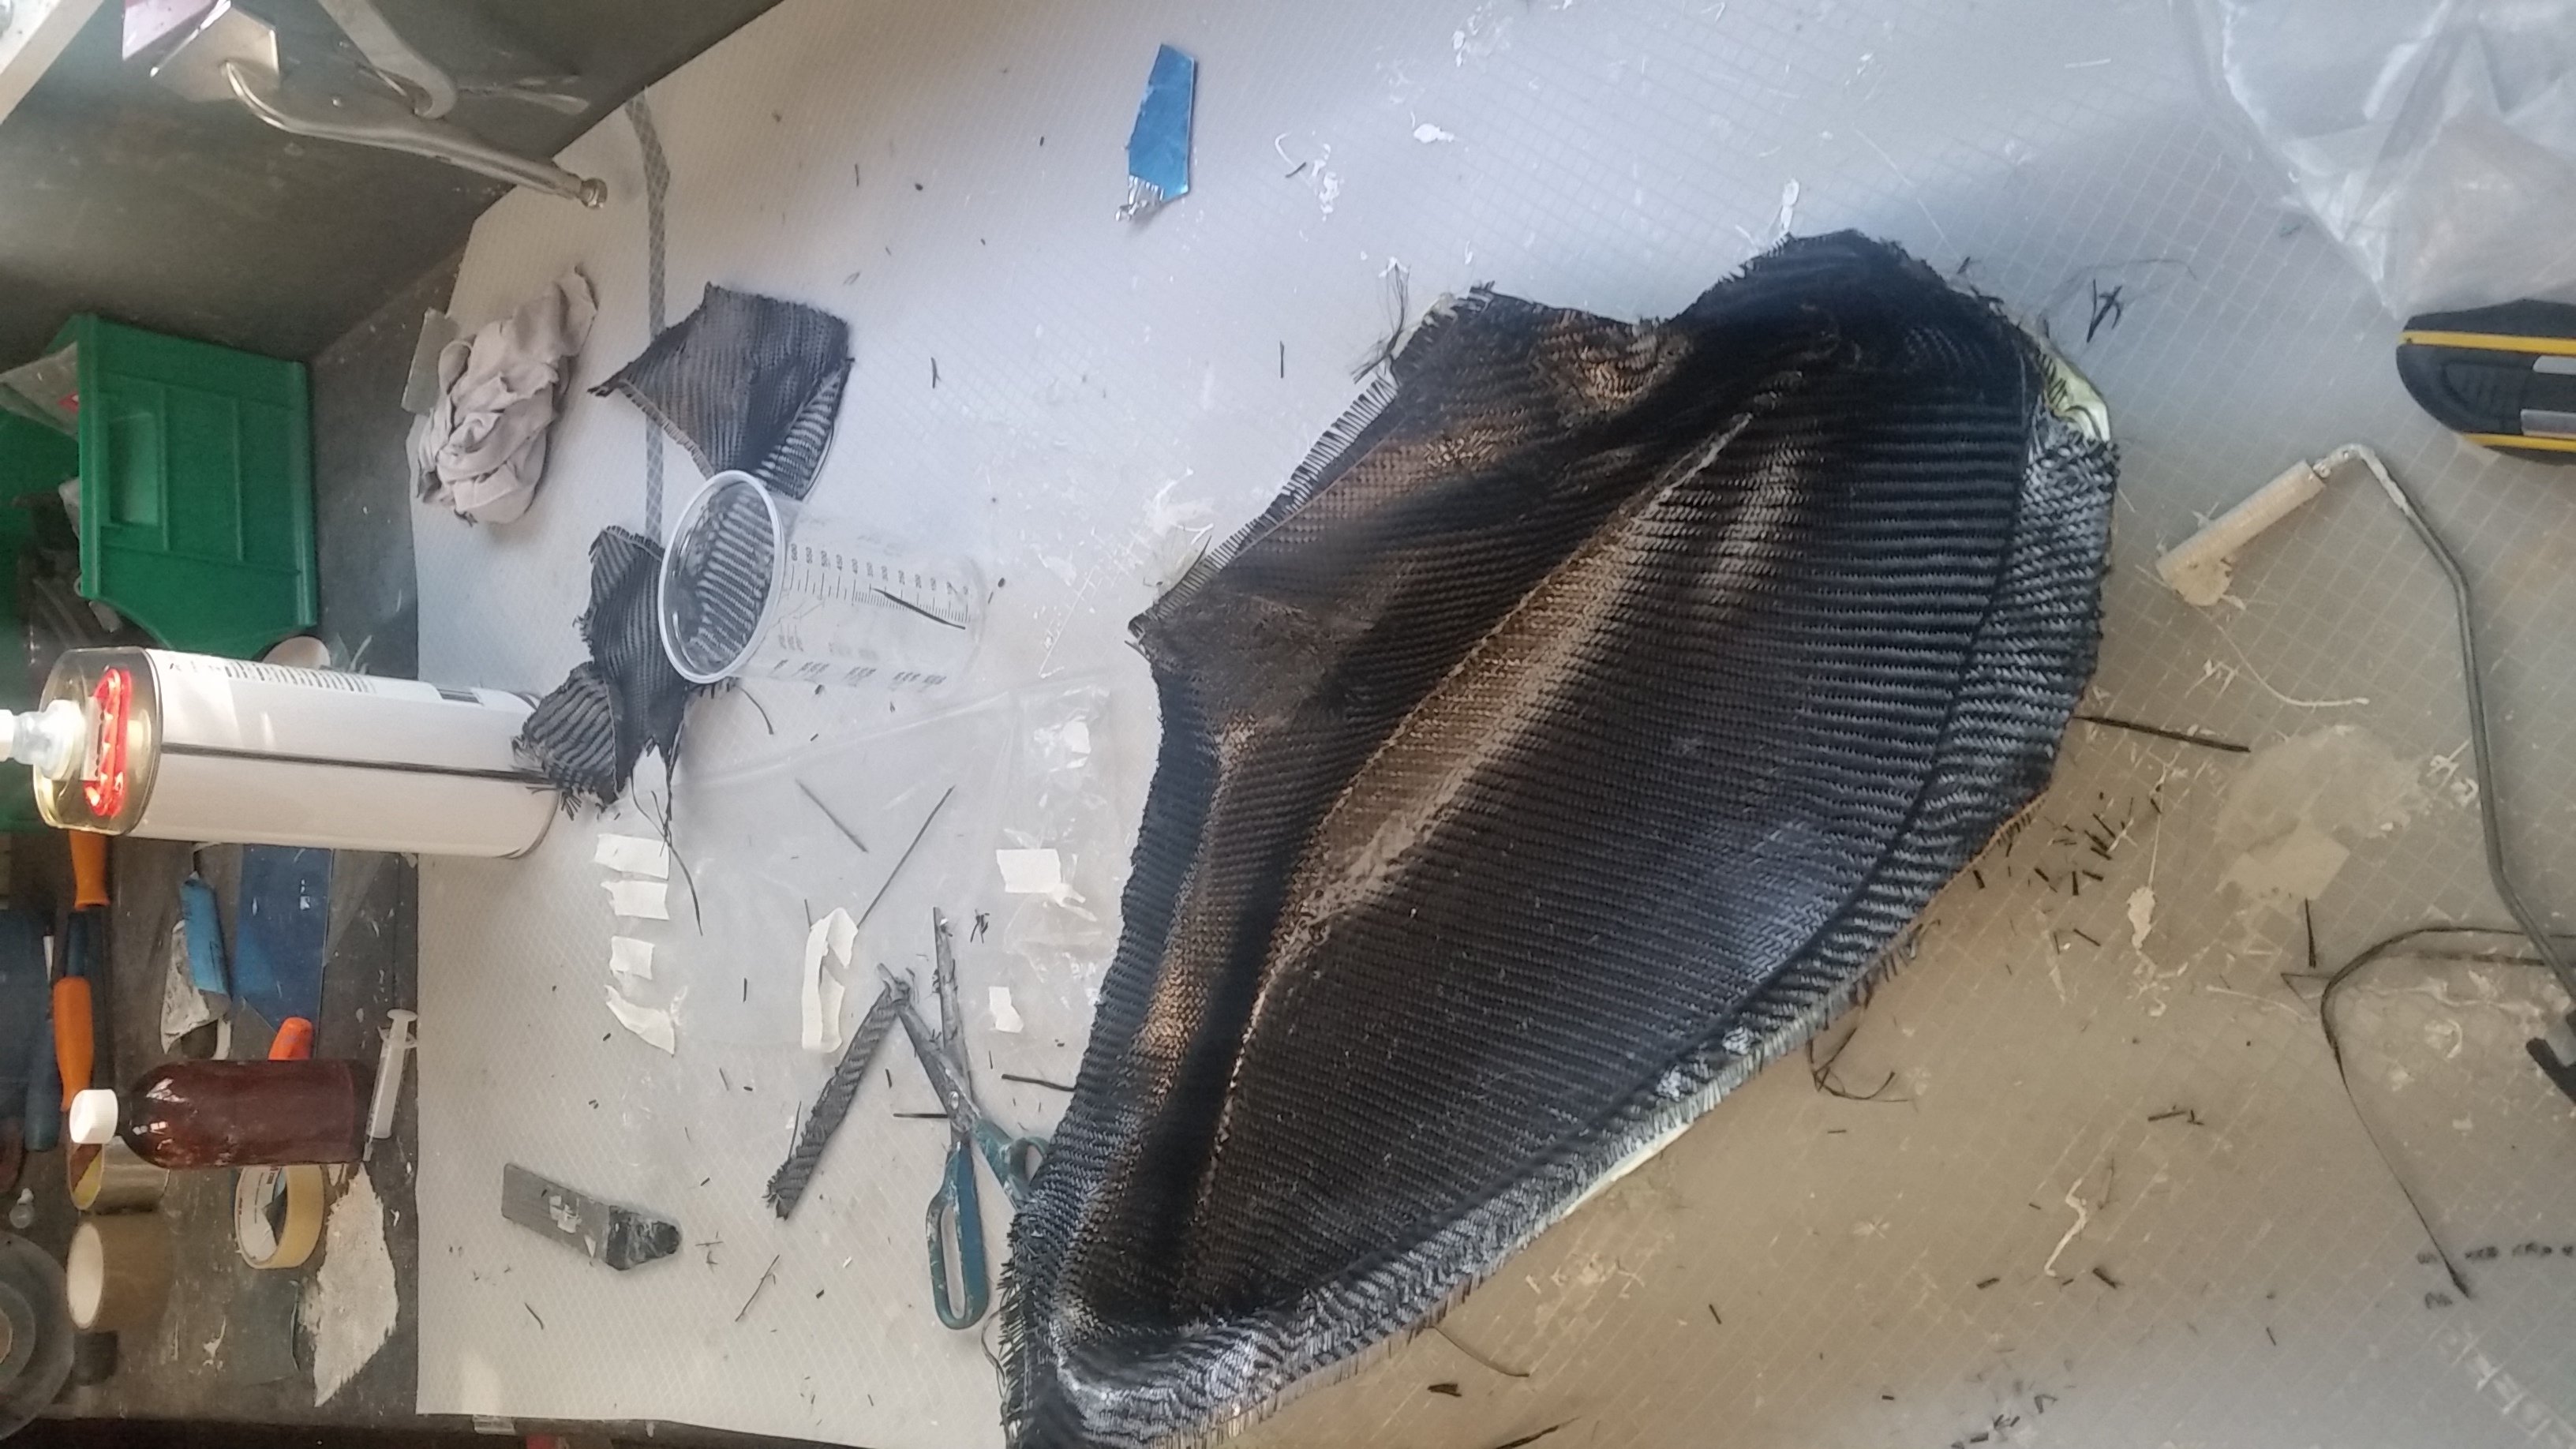
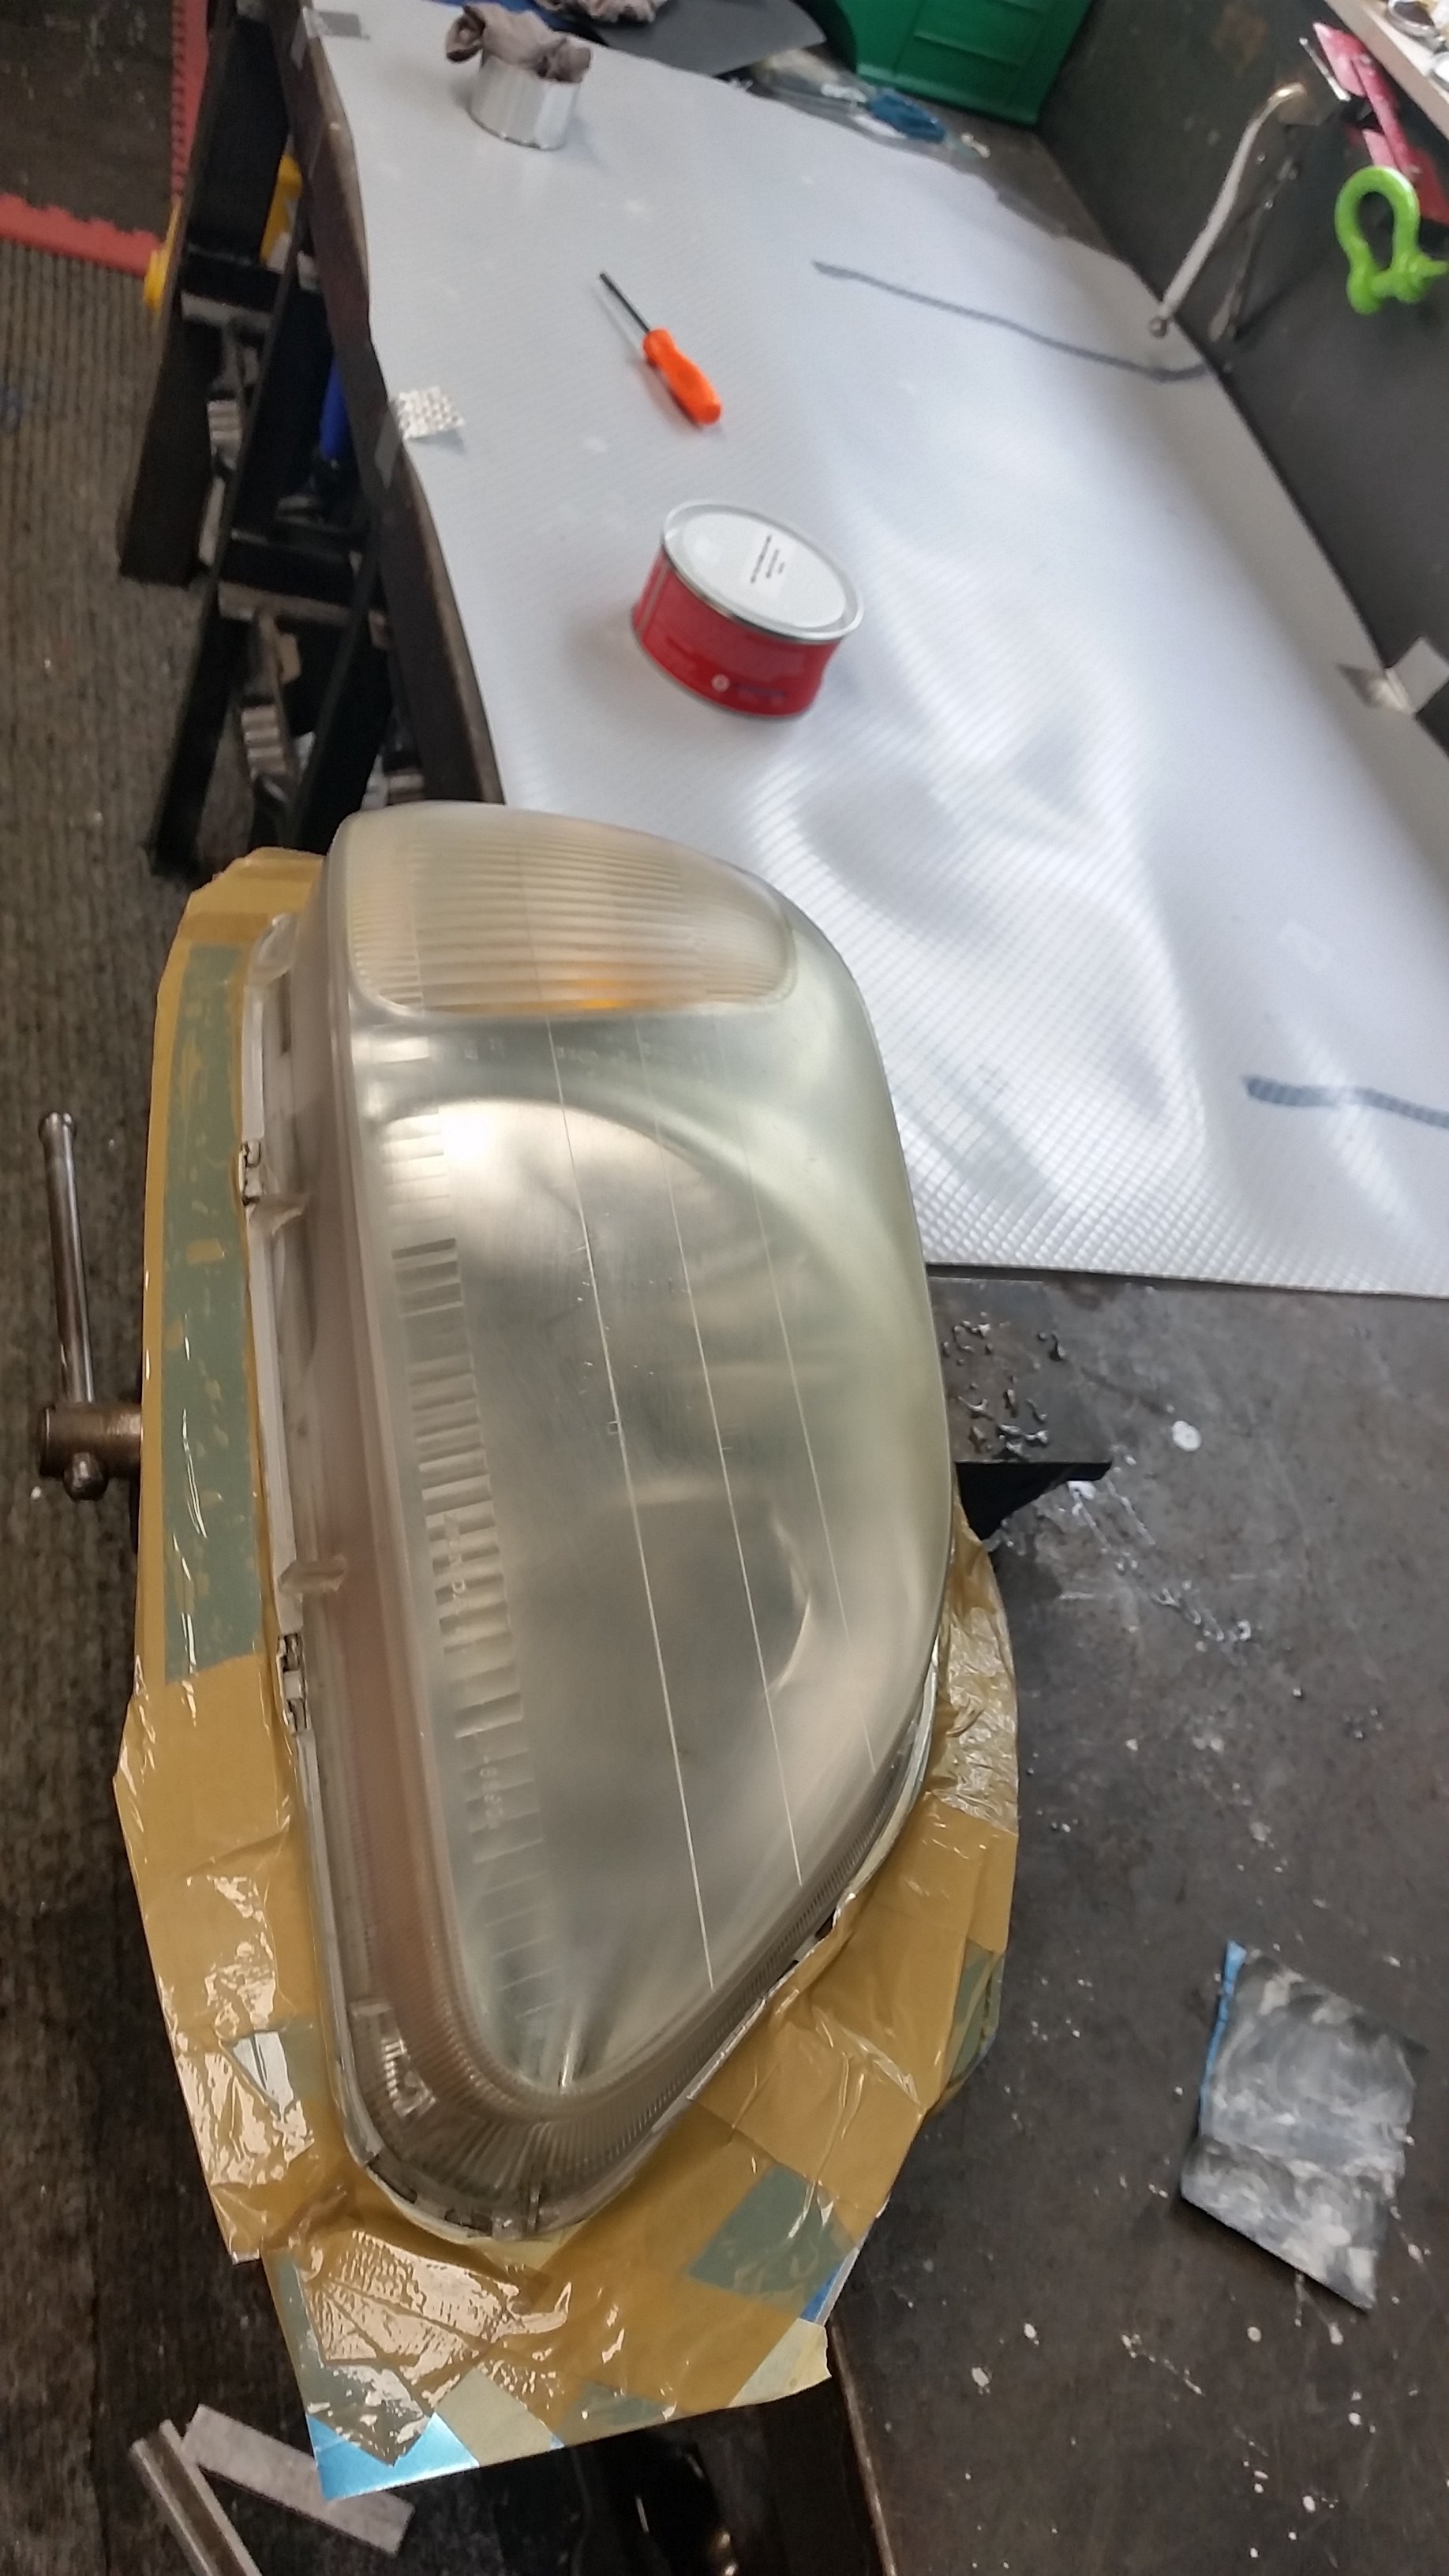
Sanded and polished, finish is a little better but not amazing, the voids are flat now but did leave a visible bubble under the surface for some reason. I think could in part be the difference between cheap polyester resin which is not doing a great job of self levelling when compared to proper epoxy, and leaves a slightly dull finish. Did at least get rid of the pva streaks. Went from 600 wet sanding to polish because I didn't have any 1200. If it turns to crap down the track I will spray on some 2 pot clear.
- 306 replies
-
- 10
-

-
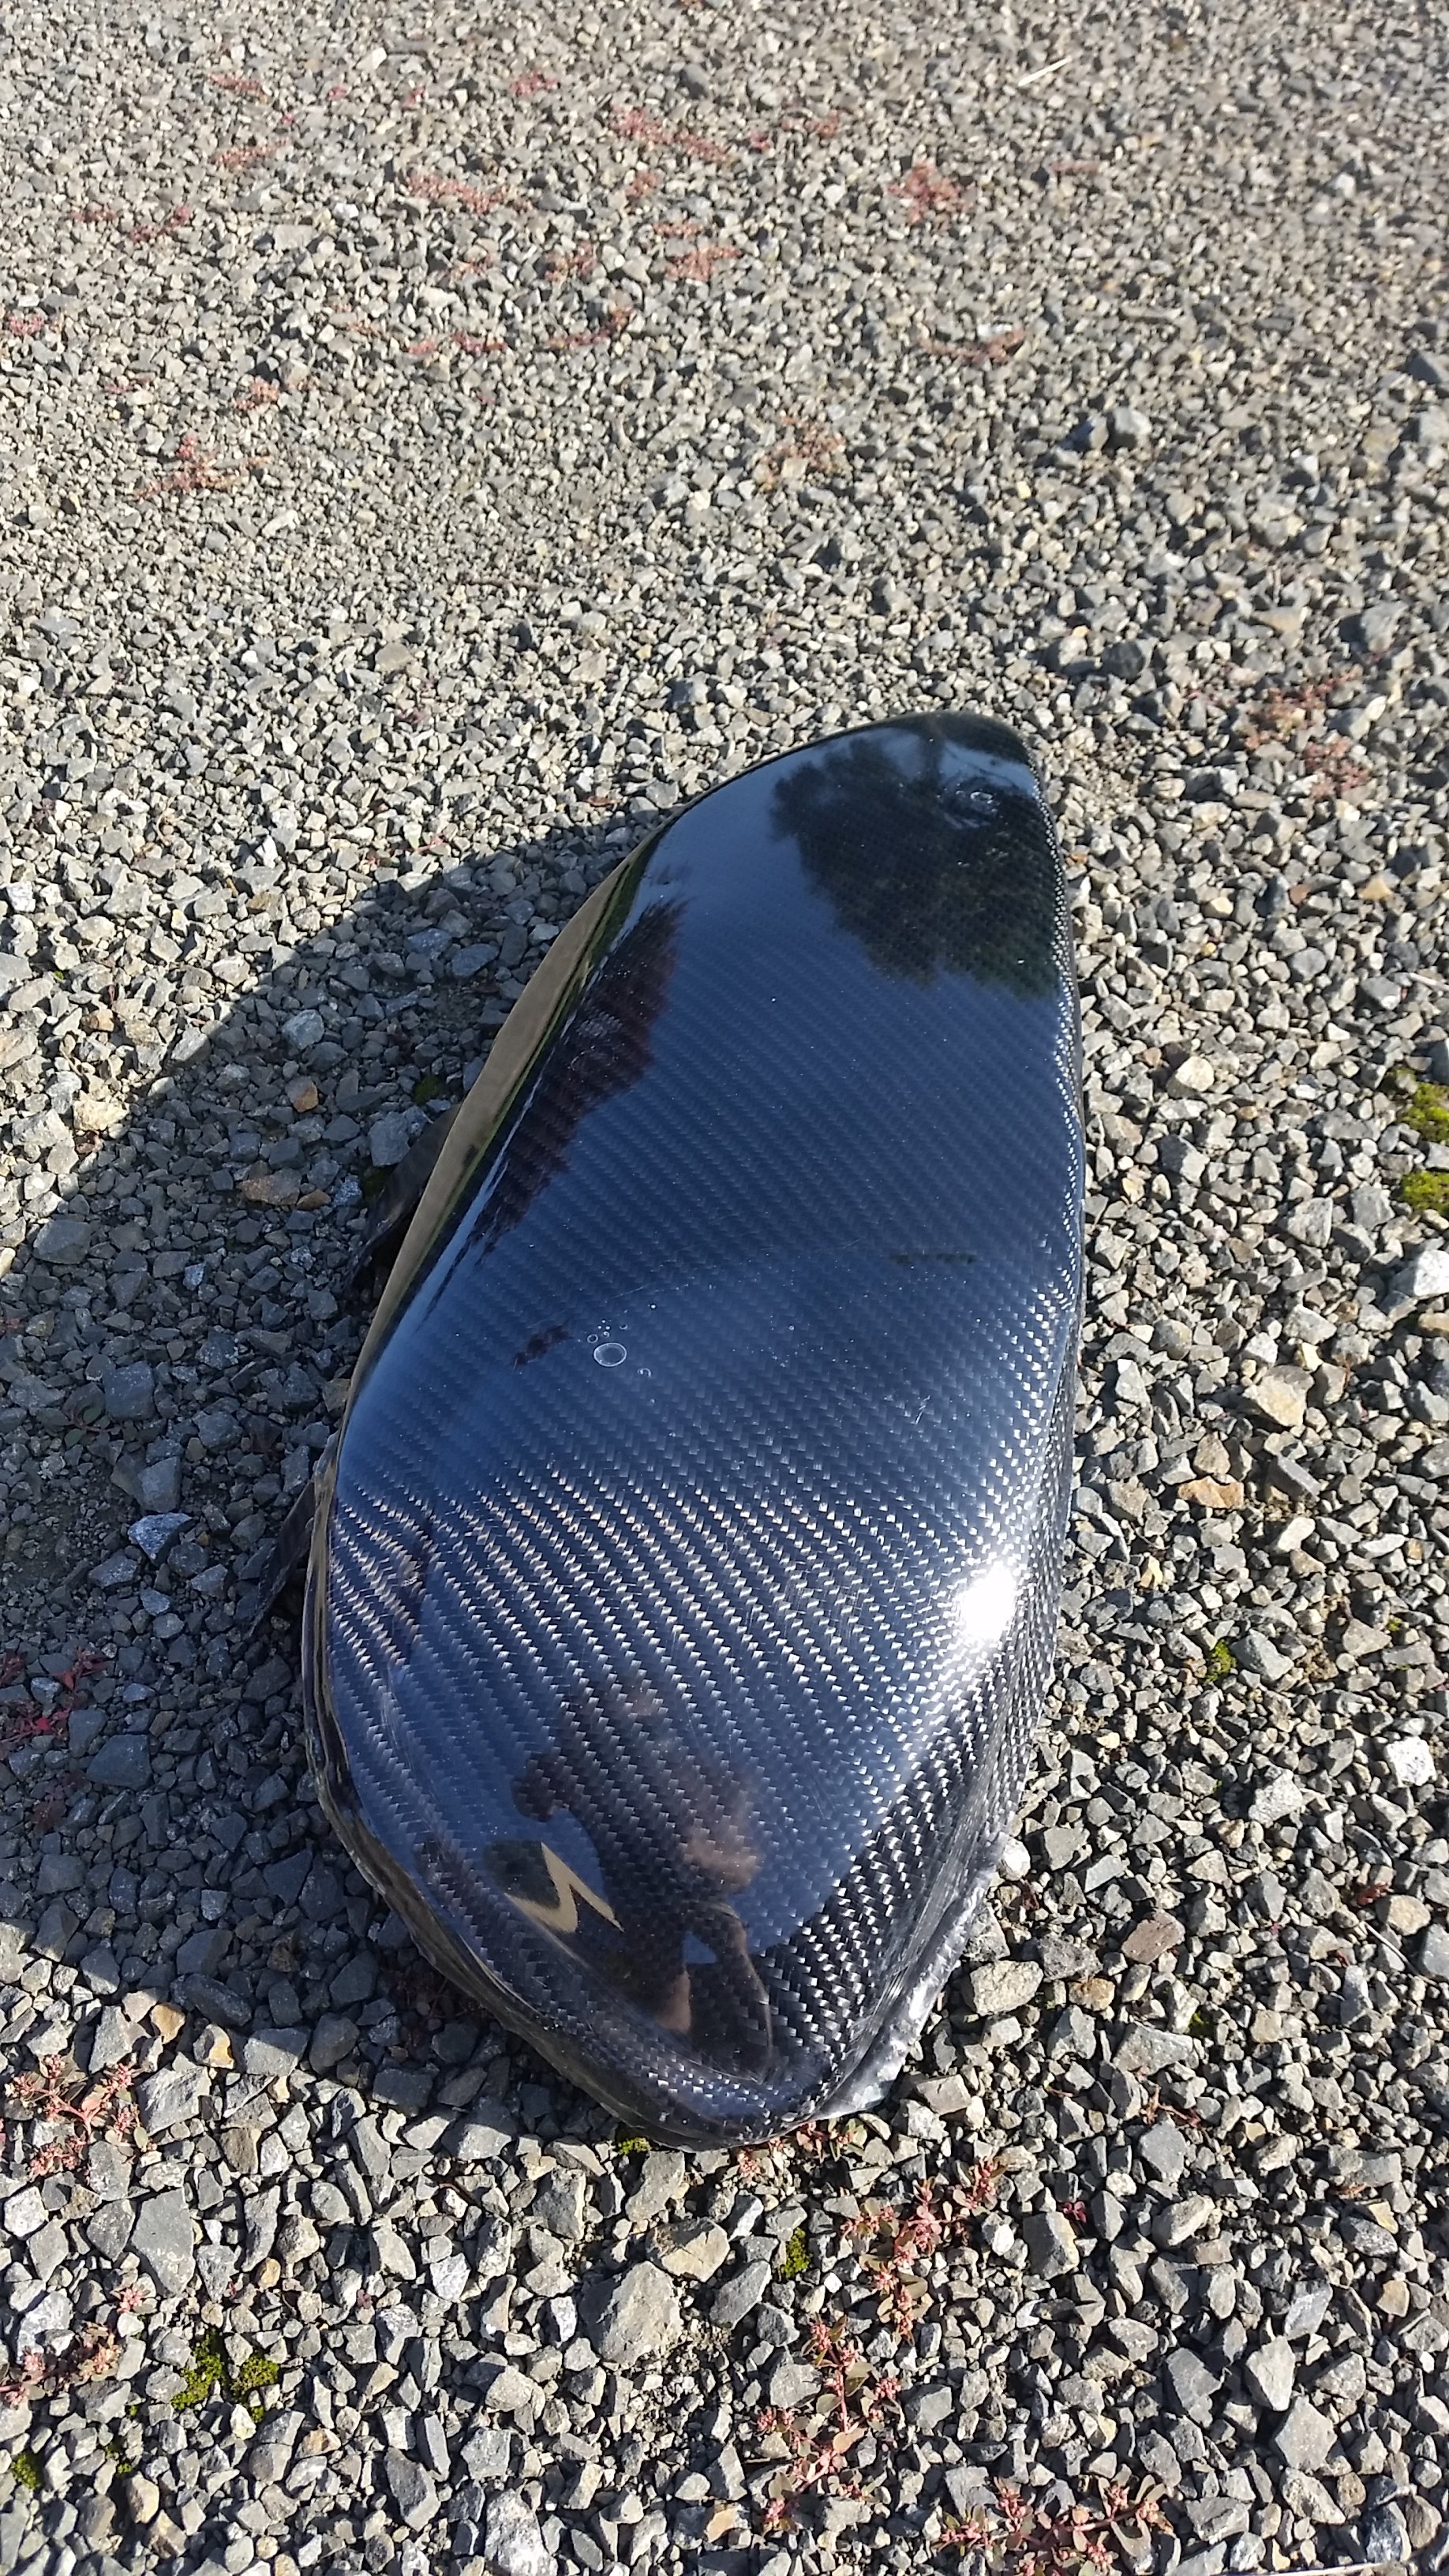
Certainly not perfect, a couple of bubbles on the surface, and spots at the edge where the resin didn't fill right out, but the weave underneath looks better than I anticipated.
-
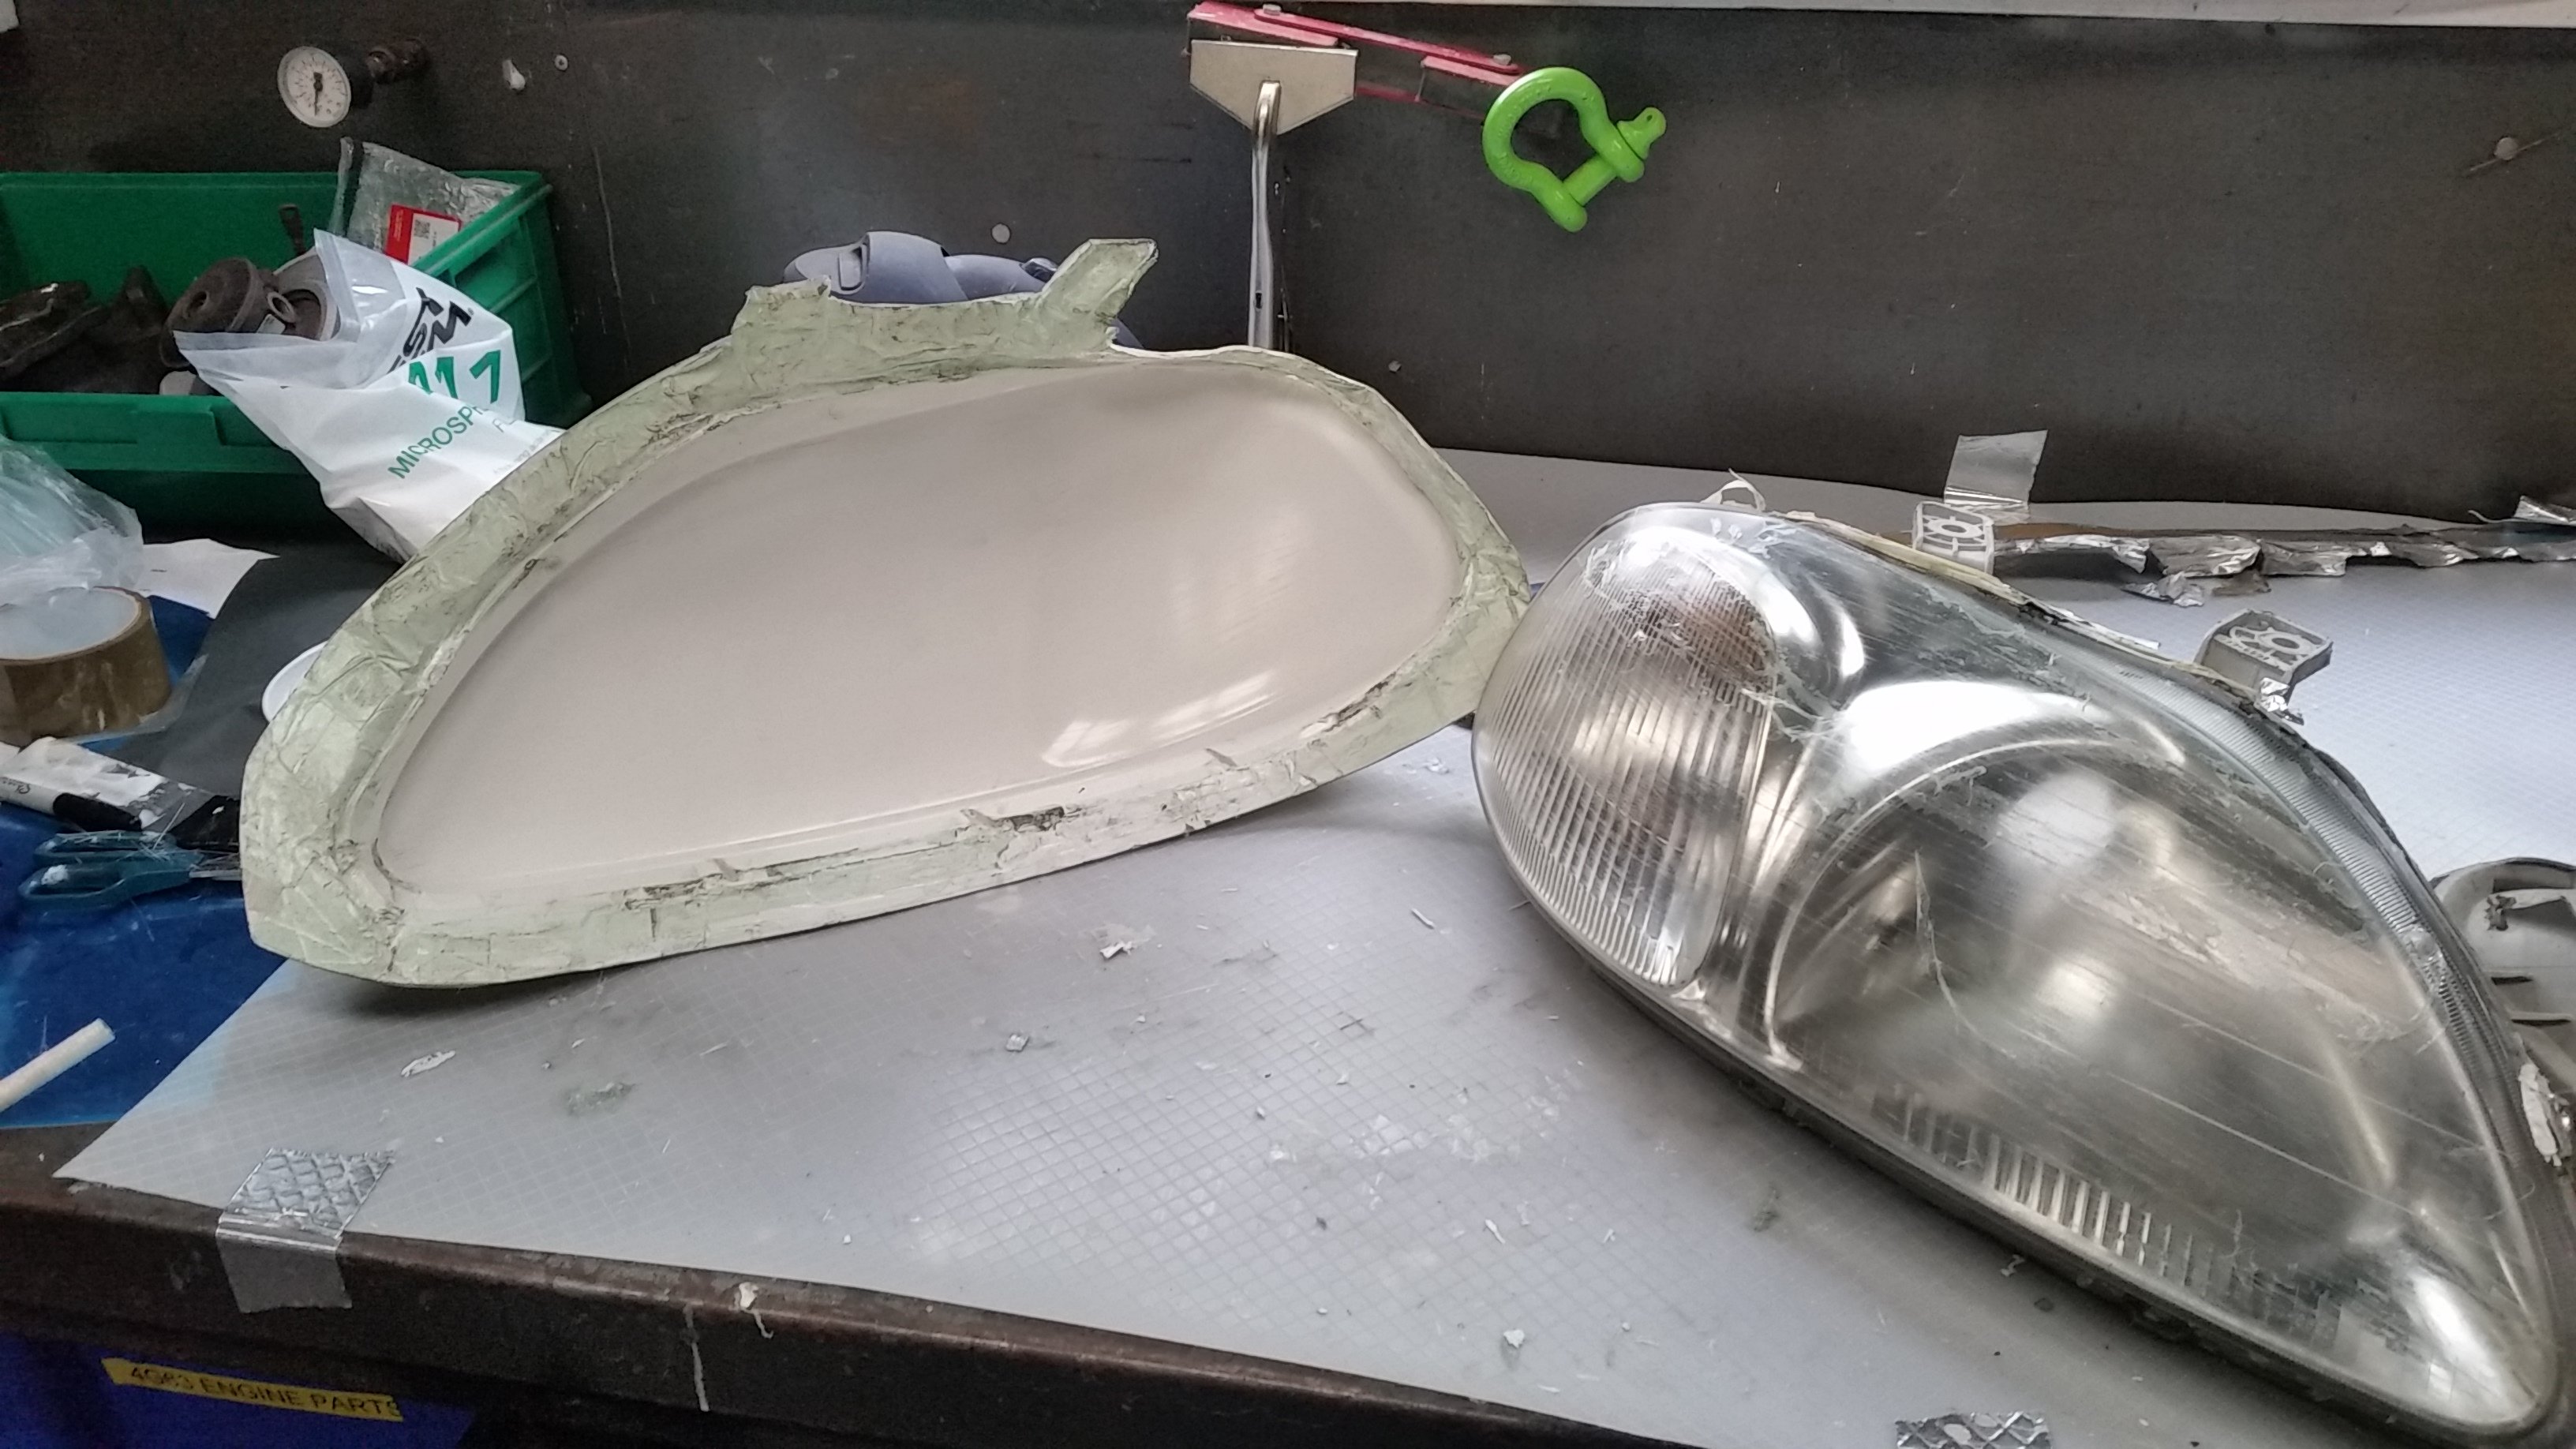
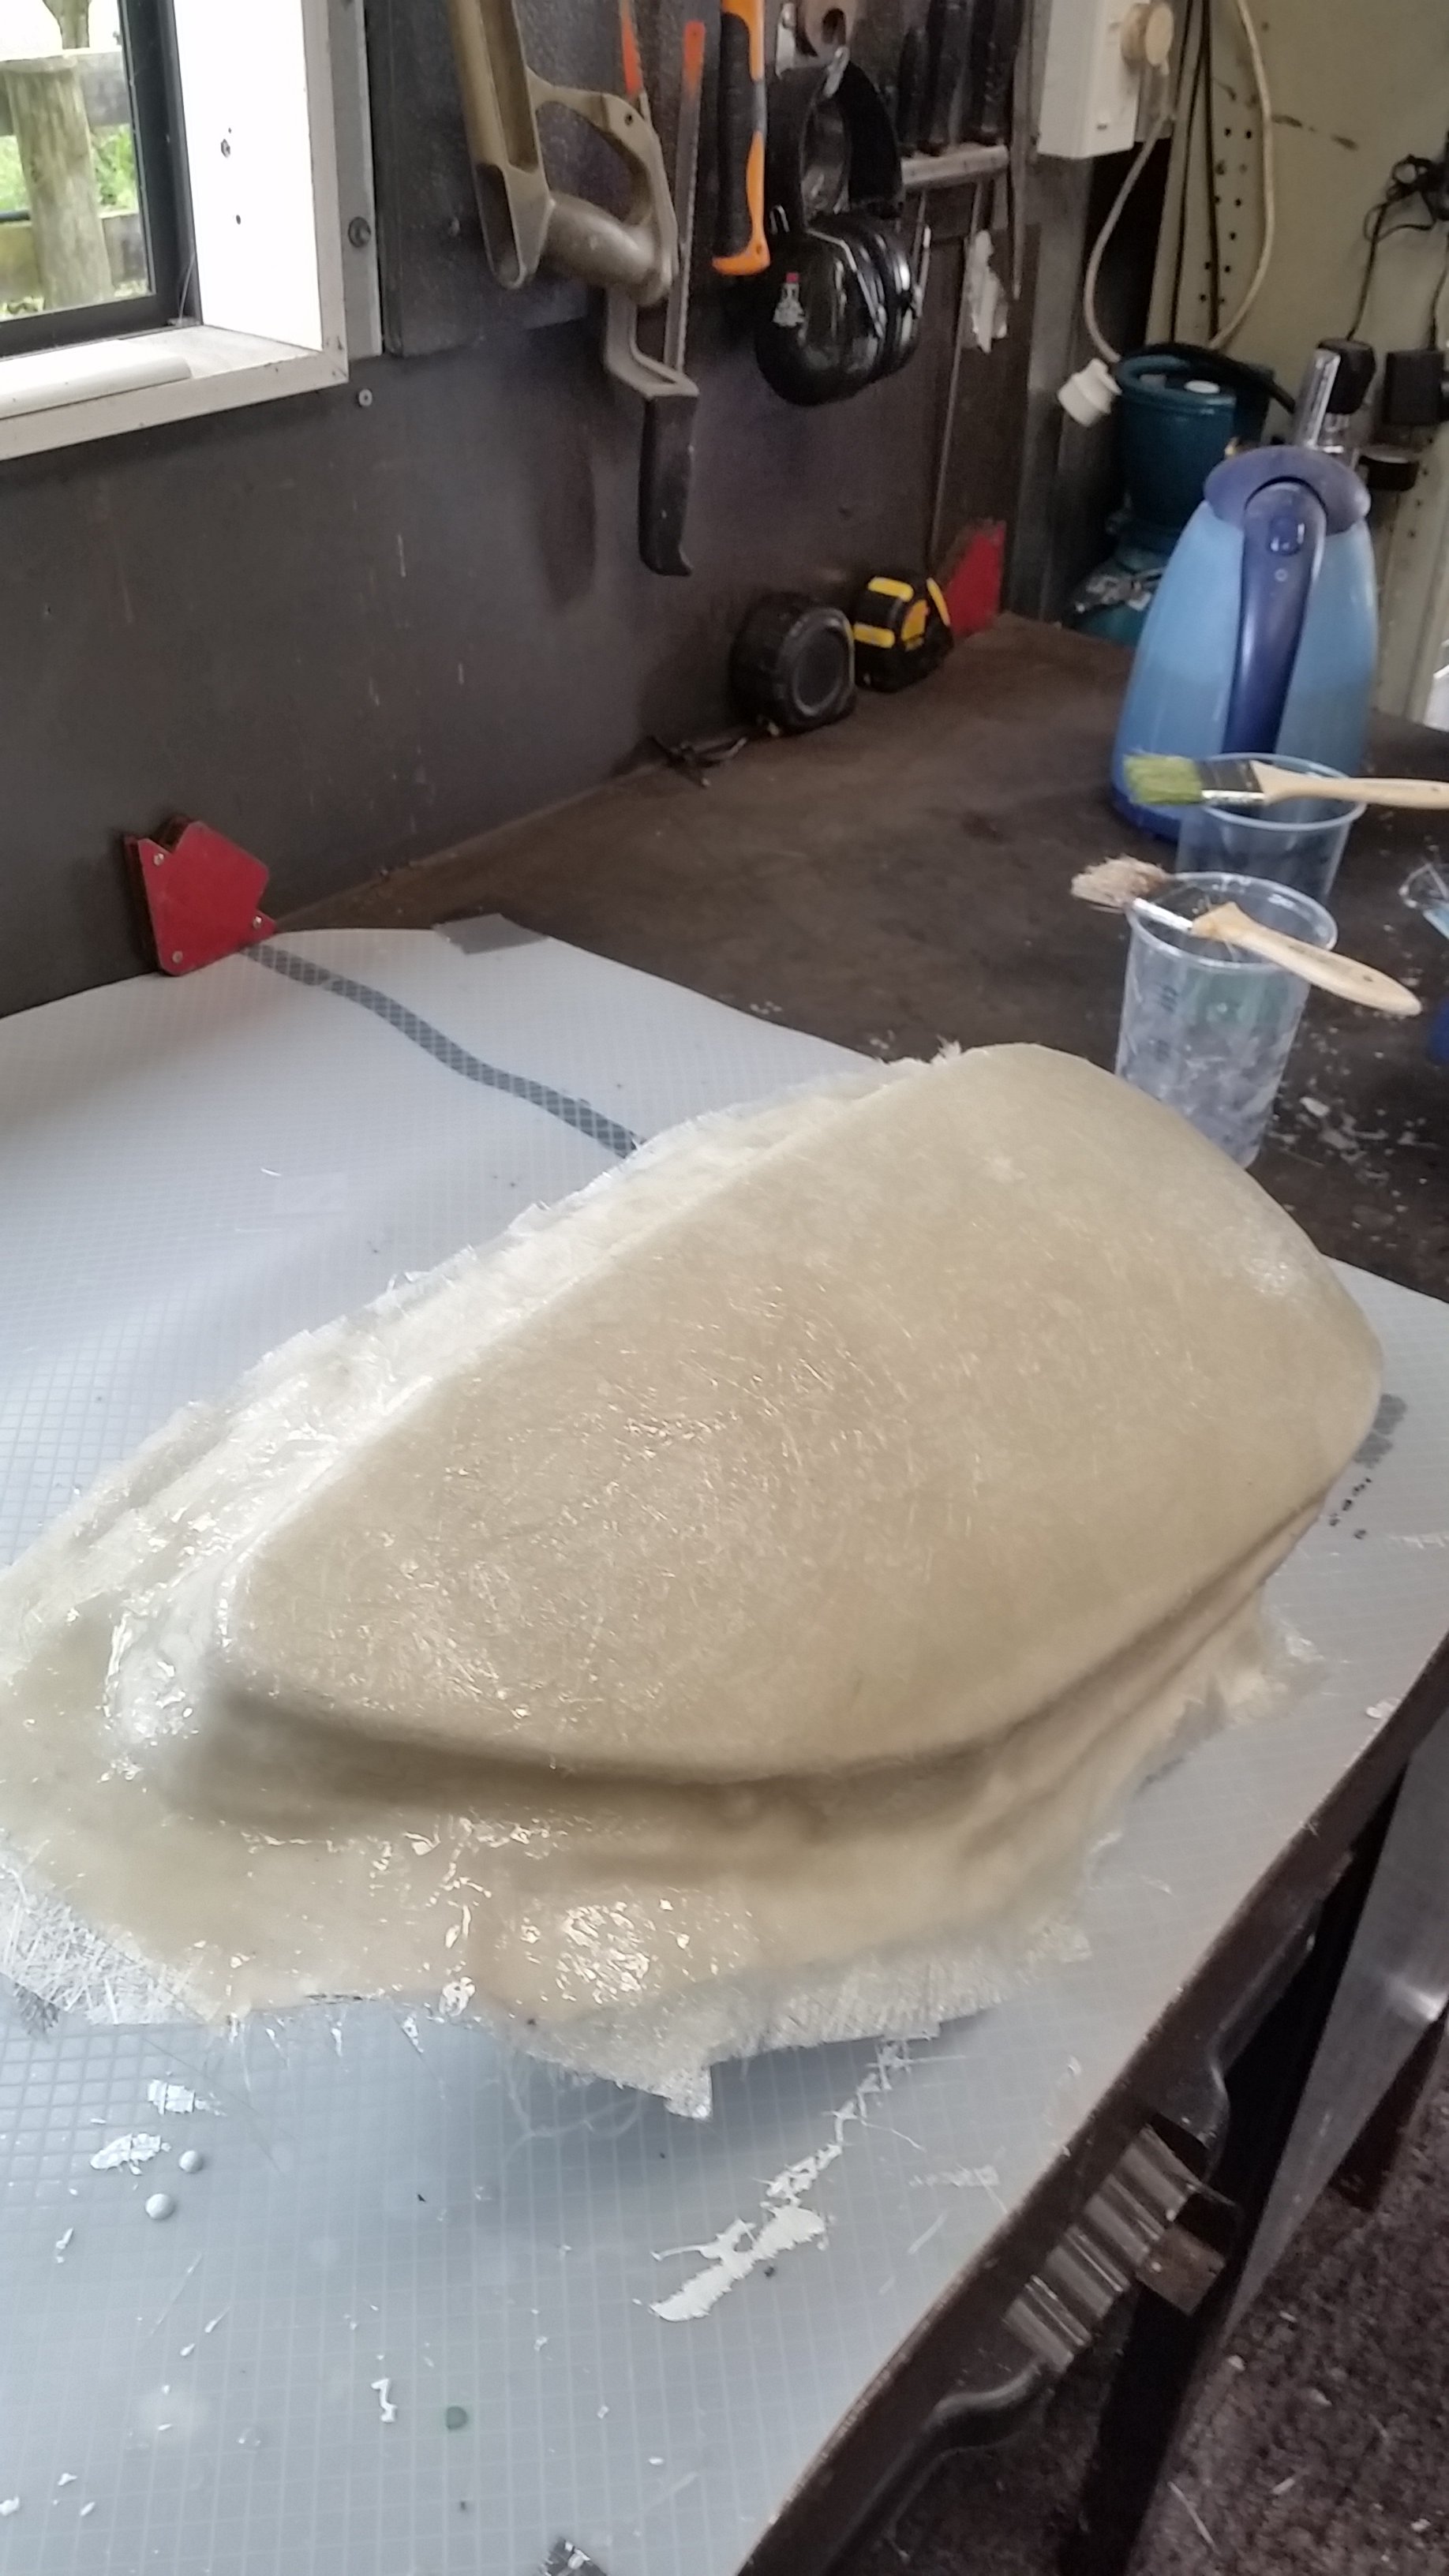
Had to fight for over an hour to get the second light out of the l/h mould. I was willing to sacrifice my $20 light to save the mould. Below is the remains of the light. Also my aliexpress carbor fibre turned up today, man you have to be careful not to open up the weave! Will find out if I have managed to make a thing or if I have wasted a bunch of time and have zero to show for it. this is just 2 layers of cf and budget polyester resin. It went off a bit too quick for my liking probably because it was pretty hot in my shed this afternoon.. I'm pretty confident it won't be great on the finished side but may be salvageable.
-
Please tell me there is something in a spray can I should be using instead of PVA.
-
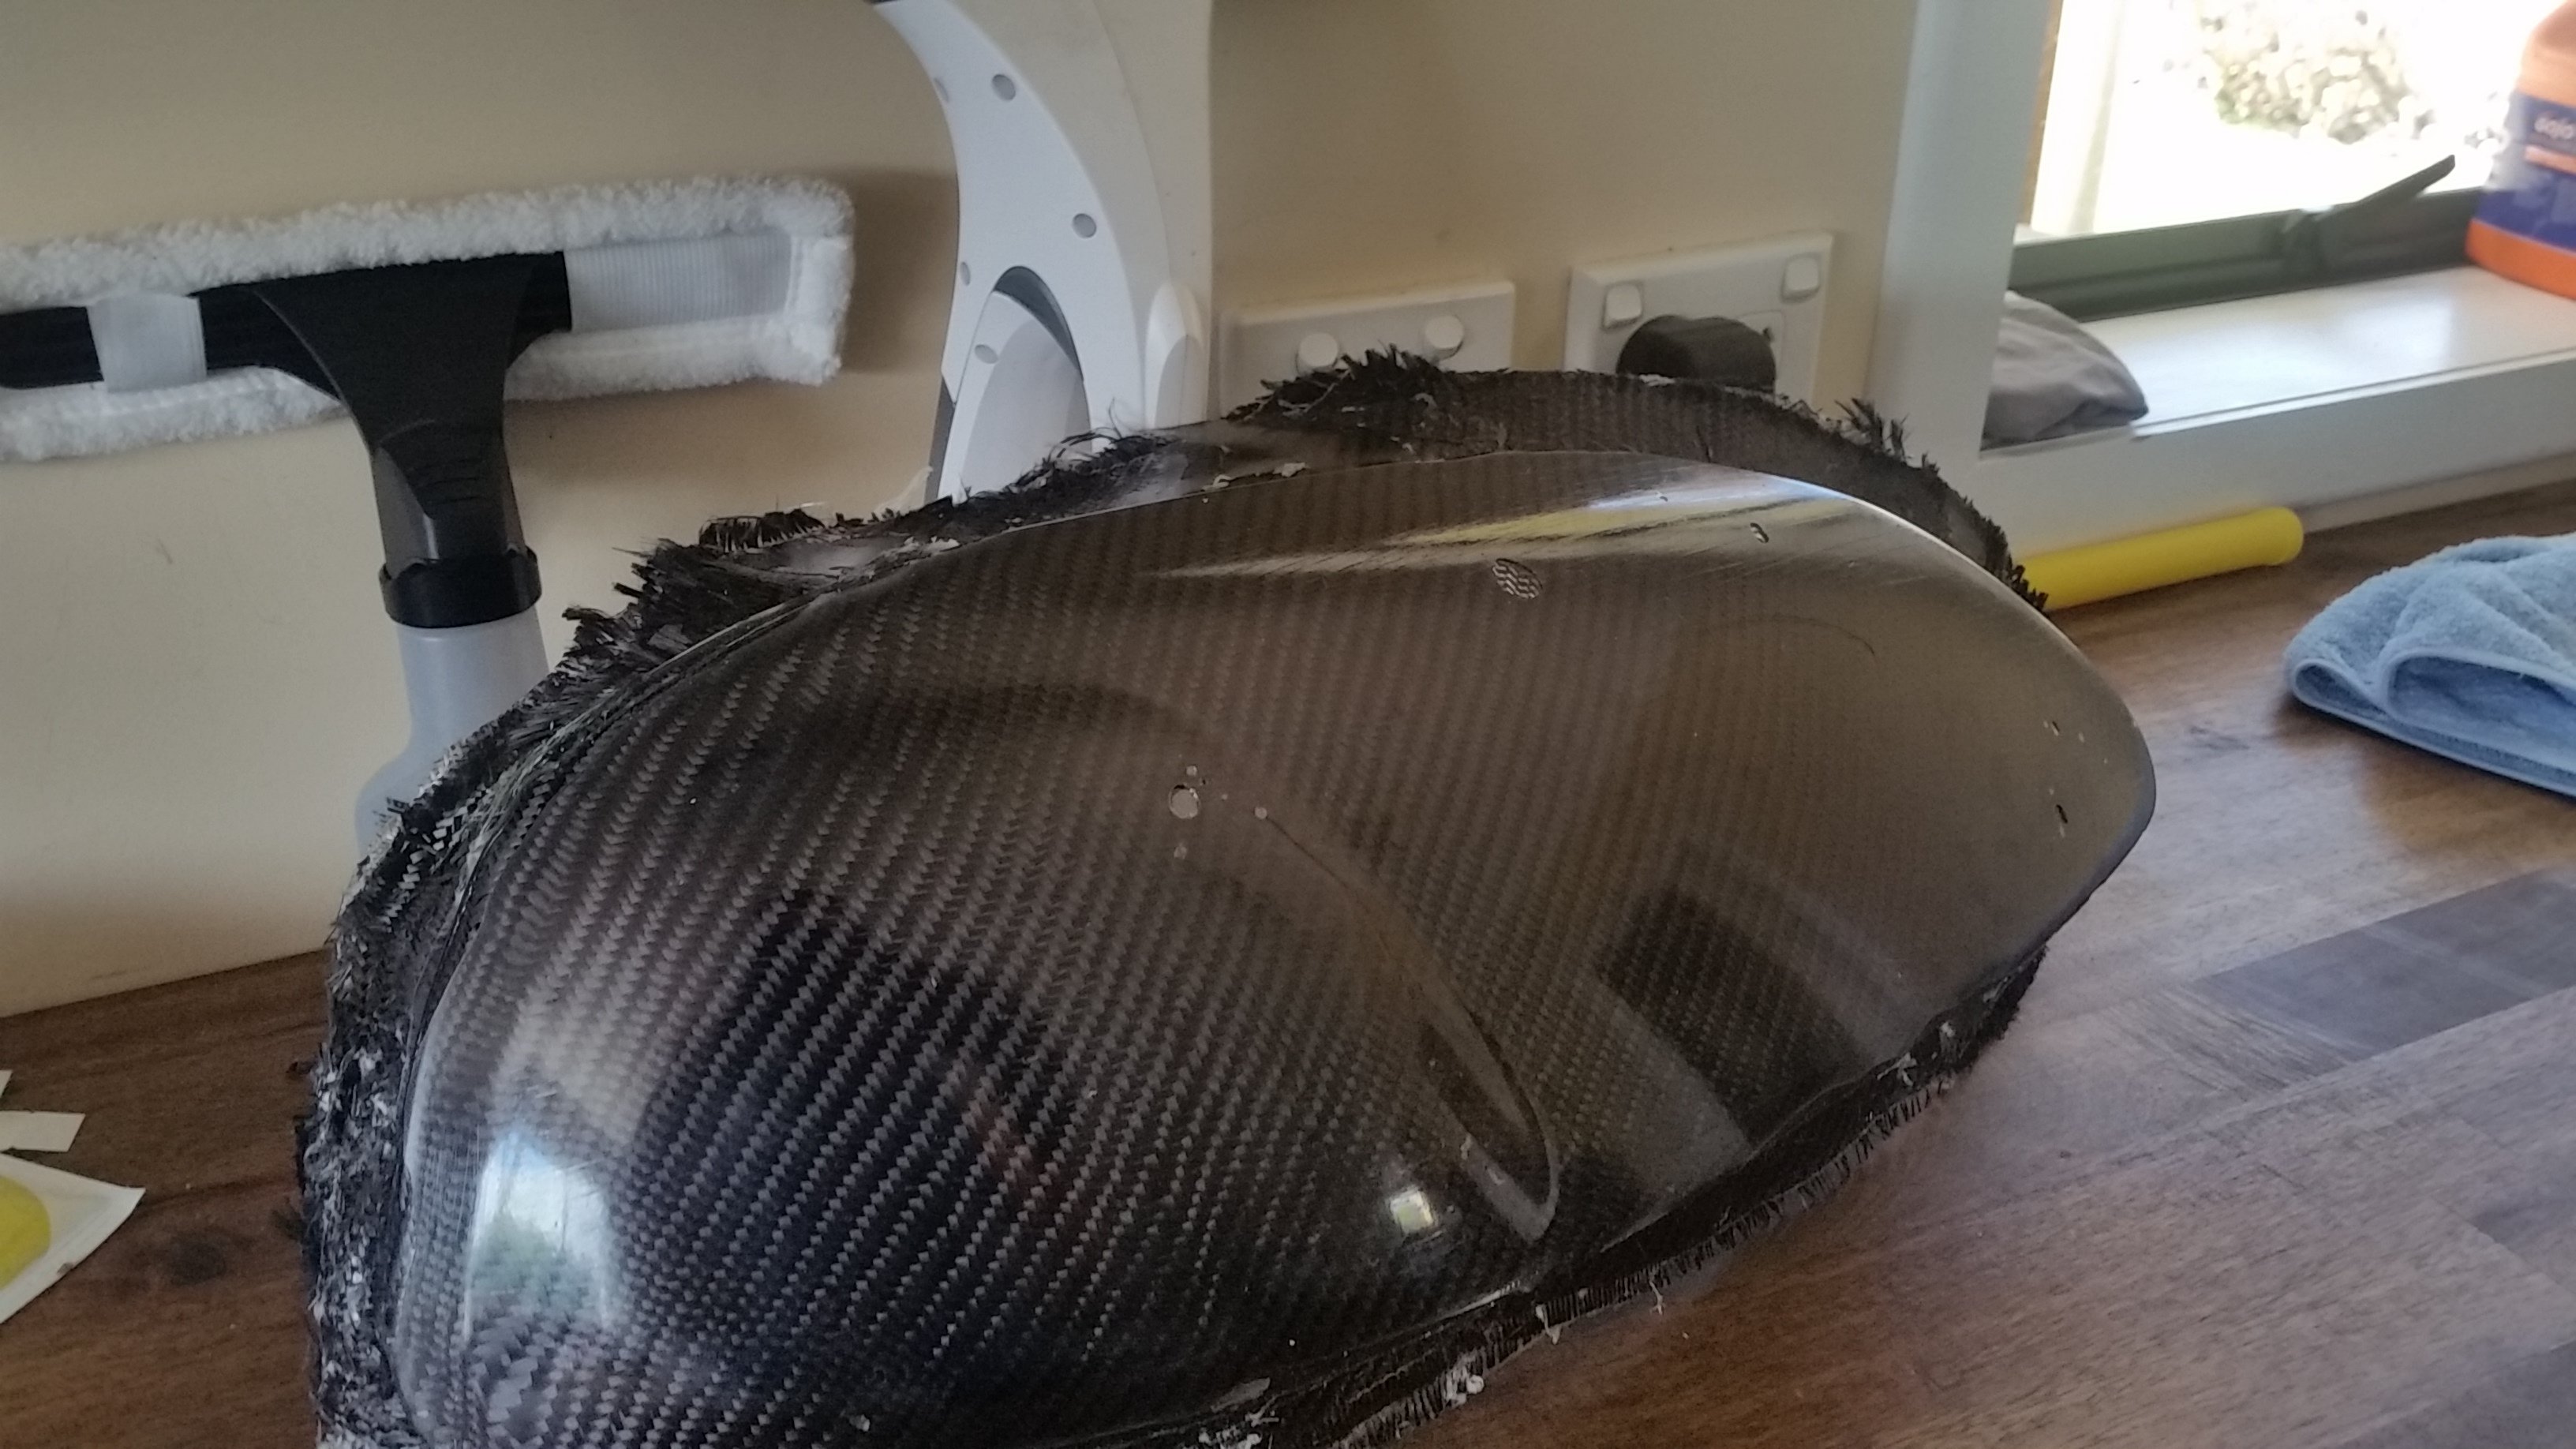
Impatient much.. anyway I decided to get in to it because I wanted a bit of flex to the the light out before the resin had 100% cured, but moreso so i can sleep tonight, lack of draft angle and semi keyed in angle in a couple of places meant it could have been touch and go. surface finish has some light lines from brushing on the pva and a small bubble at the point of the light which is covered by the bumper so no problem. Released easily... I'm calling that a win for a first attempt, hopefully I can now make a usable part! Will have a think about how much of the edge to trim up.
-
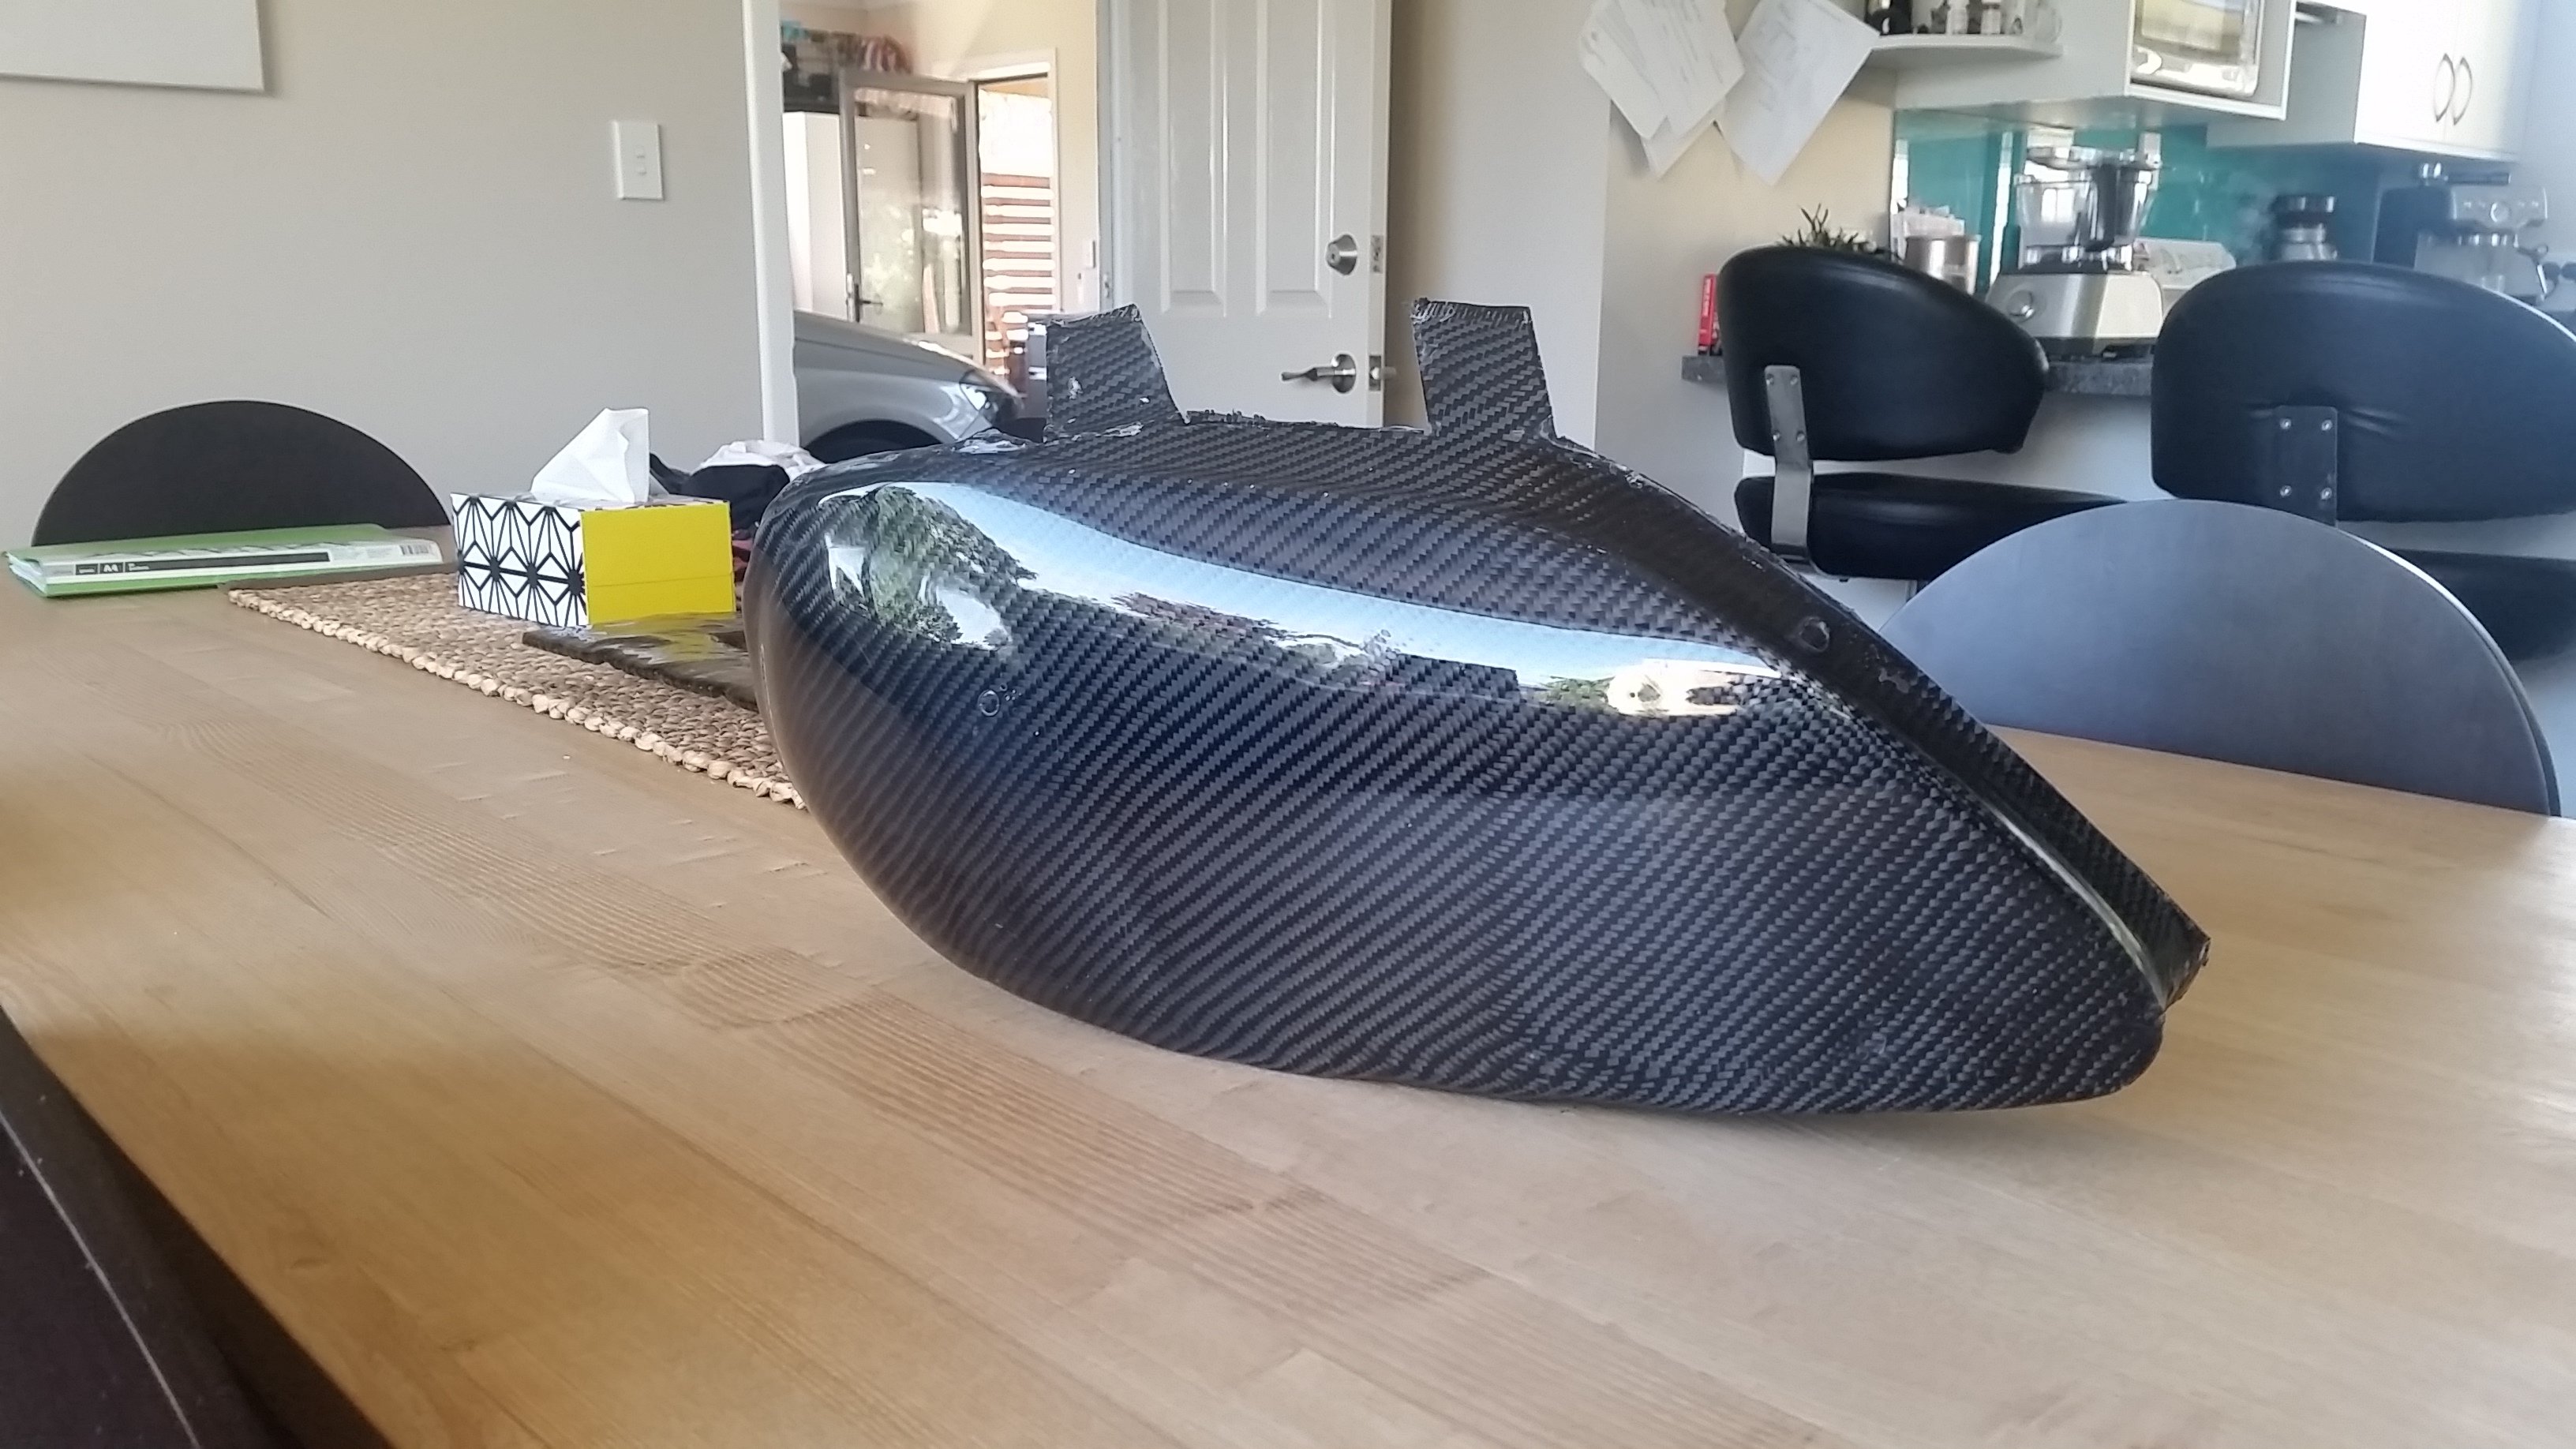
This thread has inspired me to dip my toe into the world of composites.. (please don't use any of the below as advise just observations from a noob) First attempt on a headlight mould to make more headlightly type things for my pos racecar.. no idea if I'm doing it right.. or if it will release properly.. if it does the next step will be to use the mould to produce a headlight blank. If it doesn't I'll need to figure out why and try again. . Made an edge barrier out of junk, cleaned sanded, cleaned etc.. Laid down 7 coats of wax -/ mould release. 2 coats of PVA. 1 coat of moulding Gel coat, next time I will use a bit less than 2% catalyst as even on a small thing like this I ended up in a hurry. 2 layers of 200g cloth. 2 layers of 225 chopped strand 1 layer 450g chopped strand. (No idea if that will be strong enough) What I noted is that working the cloth required scissors to get it to shape nicely whereas the chopped strand behaved better when pulled apart.. When the mat wasn't behaving more resin seemed to help. The little roller thing I purchased isn't much good dabbing with a brush was the successful method. Be prepared to go through a fair few brushes and mixing cups etc and set up a covered area on your workbench. And use disposable gloves etc... It's hard to tell if you are pushing the first layer of mat through the gel coat- I reckon the inside may have signs of this if I get to split the part open. If it turns to shit I will delete this post and deny having done any fibreglass work..
- 306 replies
-
- 10
-
-

-
I had a seized proportioning valve on my kp years ago. I would crack one bleed nipple with the pedal hard down and see if it makes the pedal sink.
-
all good, i'm not looking for someone to learn / have a tinker anyway, i'm really after someone who is already proficient in such activities. If there was no risk of turning my ute into a paperweight (immobilised with no way to rectify) i would find someone to simply swap the EPROM from my working correct cluster into my cool looking FPV cluster wth built in oil temp and boost gauge. this theroetically would drag across the canbus ID for the immobiliser and the mileage in the odometer.
-
Hi, Does anyone on here have experience with Ford IDS. I am looking to get a cluster odometer changed to match actual vehicle mileage and pair with the immobiliser. Both of these things are hidden away in the cluster EEPROM. There is some vague info on how this is done and a few Australia ford dealerships can do it. Ideally looking for someone in nz familiar with this sort of jazz rather than calling a bunch of ford dealerships trying to find the one guy that might know what he is doing. More than happy to pay going rate to get this sorted. Thanks.
-
Aah yes well anything that passes the tennis ball test will be fine for a turbo car. Do all you can do to keep dump pipe size as big as possible out of the turbo(s) to help with spool. You won't need much to quieten it down, one thing that seems to reduce drone is a reasonable length of tip after the rear muffler ( say 300mm will make a dramatic reduction compared to 75mm of the same pipe diameter from what I have found). Also twin tips of maybe 2 1/4 reduces drone compared to single 3 inch tip.
-
If it was mine I would go 2 1/2 inch mandrel Bent, single 18 inch reso, and something like a flowmaster fx. 3 inch on a non turbo 3 litre is probably just making life difficult for minimal gains. Years ago I replaced the rear muffler on my 30m Diamante and ditched the flapper bypass system, it made enough noise with the front section standard. I actually purchased a somewhat expensive coby muffler from coby in hamilton recently for my honda, pretty happy with the build quality and sound. If you don’t mind paying a bit more to support a local company.
-
A lot more than you do running a tig! If you were building a trailer from scratch get a bigger bottle, if doing occasional odds and sods it'll last a decent length of time. Remember to check for leaks and turn gas off at the bottle when not in use.
-
Zf in falcon has no drain plug either so you get covered in oil when you remove the pan.. does at least have fill plug though.
-
You can halve the surface area straight off as 50 % of the bar area has the external cooling air passing through to the radiator. Then take a look inside at the amount of vane material which extends into the airflow, minus this off next. Then take off the bar (or tube) thickness (top, bottom, and side material each bar is made from) as this is another reduction of internal surface area. @Beaveris right though it will work, (so would a straight piece of pipe though) it just may not be optimised. Just to clarify I'm not trying to be negative - just trying to educate from my own experience.
-
Sizing wise it should be ok, if there was any chance of going thicker say 75mm or even better 100mm this would help by reducing pressure drop across the cooler.. If a longer piping solution allowed additional cross sectional area I would look at that, because the pressure drop will be the limiting factor well before the internal volume of the cooler piping will cause you any issues. The 180x65 core may not have much more cross section than the 2.5 inch piping once you do the maths. (The 500 length will only affect cooling capacity not flow rate)
-
I have a remote on my hand piece but I don't really use it as much as I should. I tend to just compensate by going faster when it heats up or by doing a manual pulse by on-off-on the trigger if things are getting too hot. I feel like I have less control when I use 4 step and have my thumb on the adjuster. Other than cleanliness , torch angle and tungsten distance from the work piece are FAR more critical than steel. I find for tacking having the torch square to the work piece and the tungsten very close is netting me pretty decent results- (most of the time) and occasionally it turns to a disaster. The other thing which is handy is Pyrex lens so you can see the weld pool if you can't get your head in the right spot to see what you are doing. Tig is far more about technique and mig is all about machine setup. Link below is handy to think about some variables 5&6 are the ones I struggle with when fillet welding if the access is a bit rubbish. http://www.weldingtipsandtricks.com/welding-aluminum.html
-
If your tack takes more than ~ 2 seconds turn your amps up some more. Cold tacking causes the material to pull away from each other.
-
I reckon that intake shape /path looks spot on - good work! The other thing you can do is a high frequency quick cleaning pass without attempting to weld at all. Then give it a dose of acetone, a scrub ( wire brush scotch brite) , and another dose of acetone. I'm still battling a bit with AC tig. One thing I was doing was dumping my filler wire down on my filthy bench and then introducing crap into my weld next time. Now I acetone my filler rod before welding.
-
My latest cert came with a fresh WOF from the same guy. It will depend on who you use as to the requirement of a pre cert check. Sure they may pick up dumb shit you can rectify prior to cert which would save the certifier time and you some money?
-
16hp is probably single cylinder I would assume...
-
Anywhere that has potential to pool fuel is total poison to tune. I had an encounter with a supercharged pinto which was injected pre supercharger. Could tune it fine on song and at idle but the transition off idle when it gulped the pooling fuel was a disaster and the idea eventually was scrapped. Get those injectors as close to the head as possible...
-
Ability to run a wider valve angle than SOHC. . In reality it probably means they can use the same cylinder head casting and exhaust /intake setup with a number of different engine capacities and hp ratings saving themselves tooling and manufacturing costs.
-
Wilwoods are much better than they were a decade ago, I didn't actually say the were shit, and some people do get an ok run out of them. They were notorious in years gone by for warping the bodies and causing jamming pistons and premature seal failure etc..no doubt the majority of these problems are under control. Are Jeep using them as an OEM part these days? I thought the SRT8 and the likes were on Brembo, admittedly I don't follow Jeep though. My point is if I had two calipers side by side to use on a daily car that i would like 100,000k+ of trouble free motoring and one was a good used brembo, and the other was a brand new willwood I know which one I would use. Horses for courses though I guess.