Roman
-
Posts
7,233 -
Joined
-
Last visited
-
Days Won
39
Content Type
Forums
Downloads
Events
Gallery
Everything posted by Roman
-
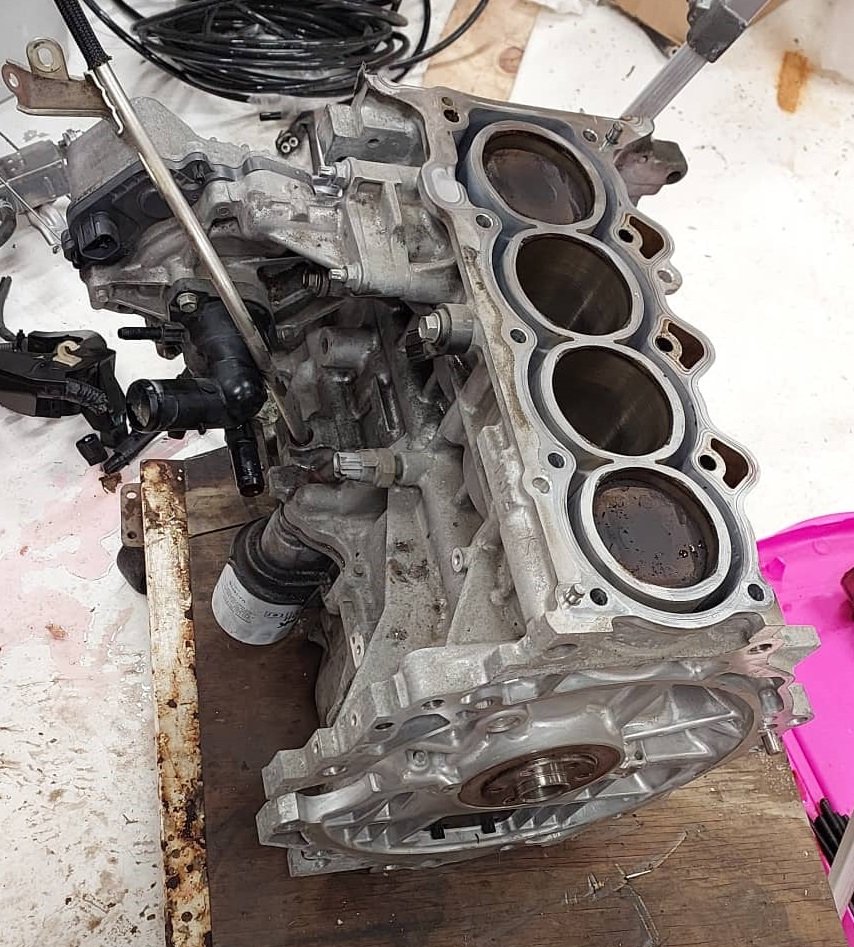
Ahhh not too long, maybe 3-4 hours of mucking around. It's definitely the easiest FWD car I've worked on. The bulk of the work in this case though is other stuff. Need to strip all of the accessories off new motor, swap the head, swap the sump, fit the flywheel and so on. As well as pull all that stuff off the 2NZ. I've just got to swap the sump over then seal up the timing chain cover, then this motor is nearly ready to go in. Oh, and drill the block haha. Will tap a thread into it this time though. I checked the cam timing, and it looked correct which is a little concerning. As it's got me wondering if something else is wrong with the head. I guess I should done a compression test before pulling it out. I had a second look at the head and couldnt see any dislodged valve retainers, or slightly tweaked valves or anything like that. But if necessary I can just put the new 1NZ head on, it's just a bit of a pain swapping the valve springs over and redoing all of the clearances. I'm on a mission to get this back in and running before the weekend, as I have to leave for a few days for a work trip after that.
-
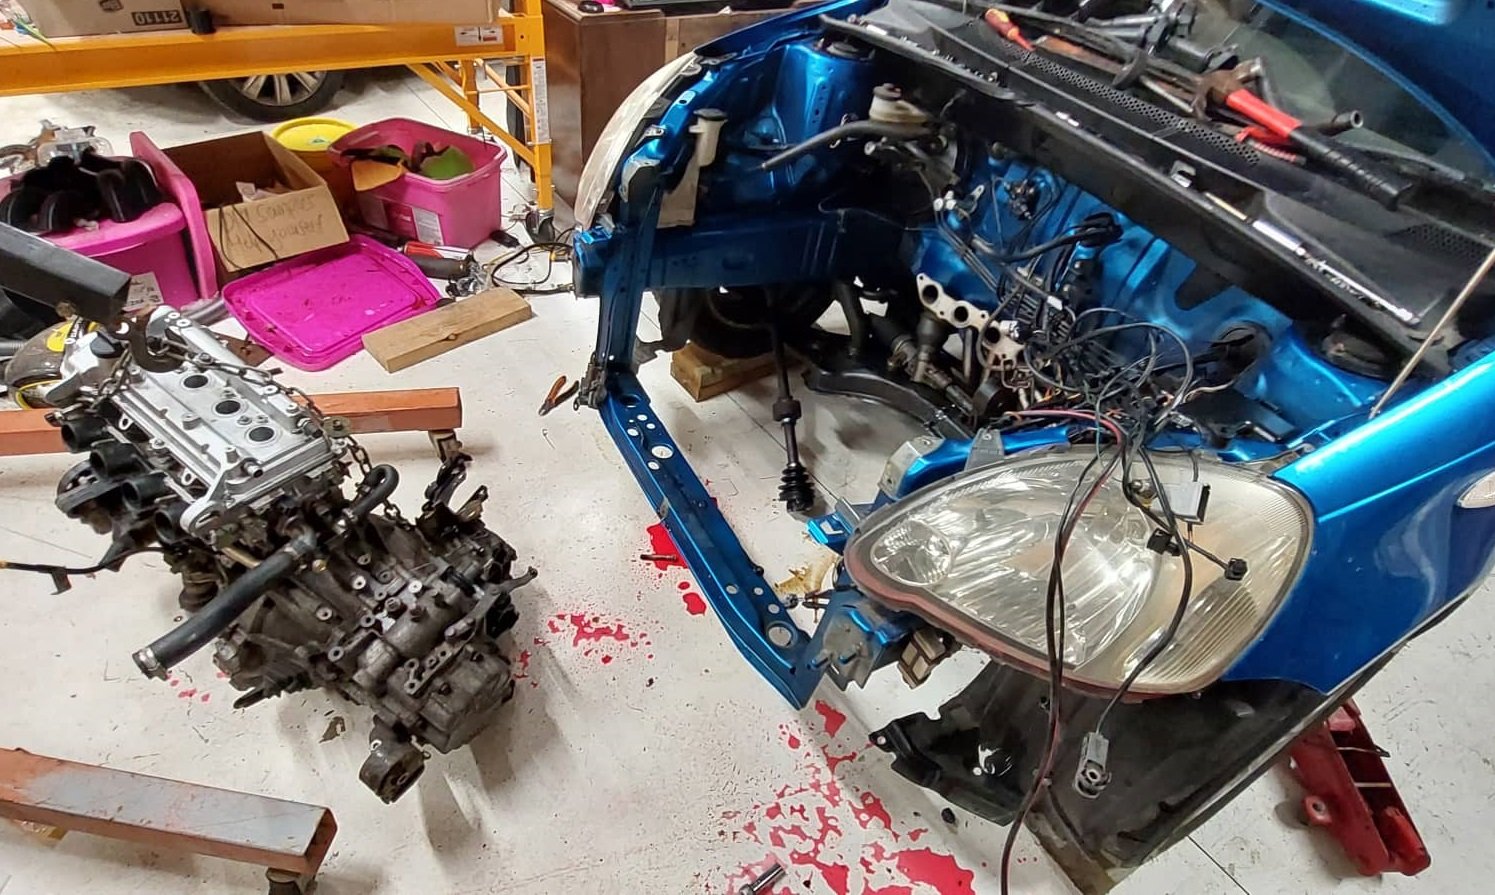
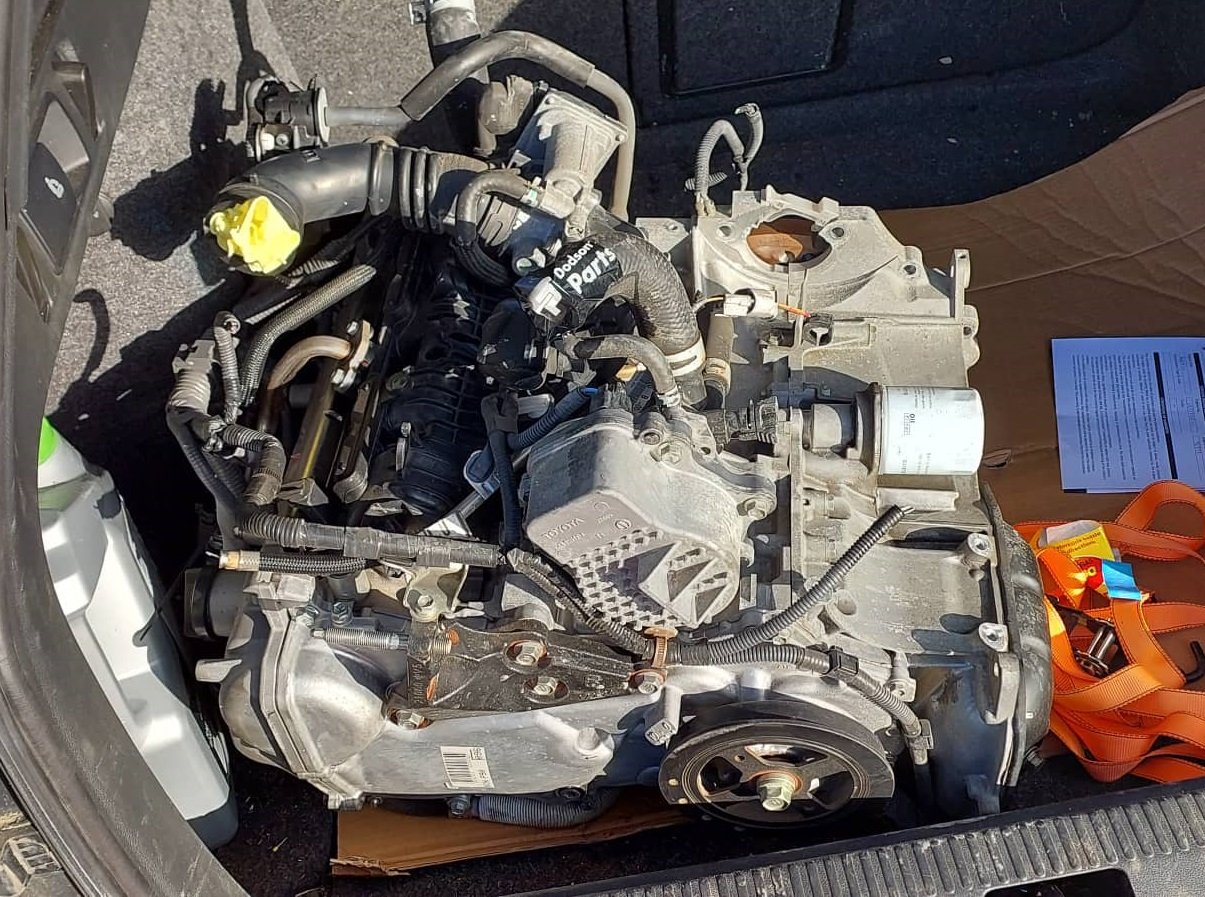
Picked new motor up! At risk of sounding like a broken record, thanks heaps to everyone that has helped. I am amazed and very grateful. So I stripped off all of the hybrid junk, and either way the head needed to come off. As I will either swap the other head onto it, or need to swap the valve springs and cams over. Then proceeded to get the 1300 motor out of there. I need to steal its sump to swap onto this motor. As I've done all these jobs previously it has been fairly smooth sailing this time around!

-
If at all possible I'd opt away from the idea of water meth injection. It's a pain in the ass to keep it topped up, and if it runs out but you dont realize then you are in the poo. It adds an annoying admin and more points of failure that could cause engine loss.
-
Just going to put it in. Because the rods dont work with factory pistons which have press fit pins. They have larger clearance to suit aftermarket pistons with floating pin and circlips. If the piston broke first then theres nothing to be gained with just rods.
-
Loop under the pipe sounds like a good idea, thanks.
-
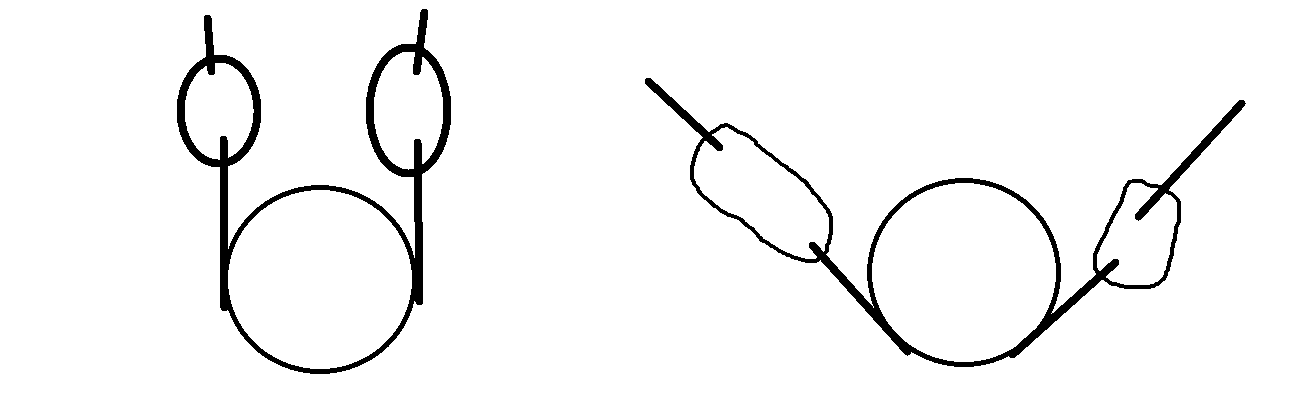
Does anyone have any good advice on how to do exhaust hangers? It seems like a fairly simple task, but I can also see that if I hang the weight incorrectly it could put strain on the extractors, or bang around a lot if the exhaust moves heaps. Is it a good idea to have the rubbers hang at 45 degrees rather than vertically, so it constrains movement both ways? I'm not sure if it's worse to have too few or too many, and what best orientation etc is. Better like this or like this?
-
Yes I havent forgotten about strain gauge @Muncie... thanks for that. Just still trying to find a good application for it. I have indeed just send't'd it, and I've got one or two bits left until it'll be out the back of the car. Then decide where to put a flange and chop it. Hopefully tomorrow I'll get some hangers fitted, and then it's nearly it done. Will try make them a bit adjustable somehow, so I can fiddle with the height if it bangs on stuff. I currently have it jacked it up to max height so that the muffler and everything else hits the body, or very close to. Then following the contours as closely as I can. I've had varying amounts of success with the welding. Welding the pipe onto the back of the muffler was hard because the pipe was a little bent and so there was an air gap. So the upper part just wanted to melt away without reaching the second piece too well. But figured it out. There were a few other areas where I realized a little too late that I need to resharpen the tungsten, or some other similar thing. But thats alright. Learning something from each mistake. Man I am looking forward to getting this going again with 1NZ!
-
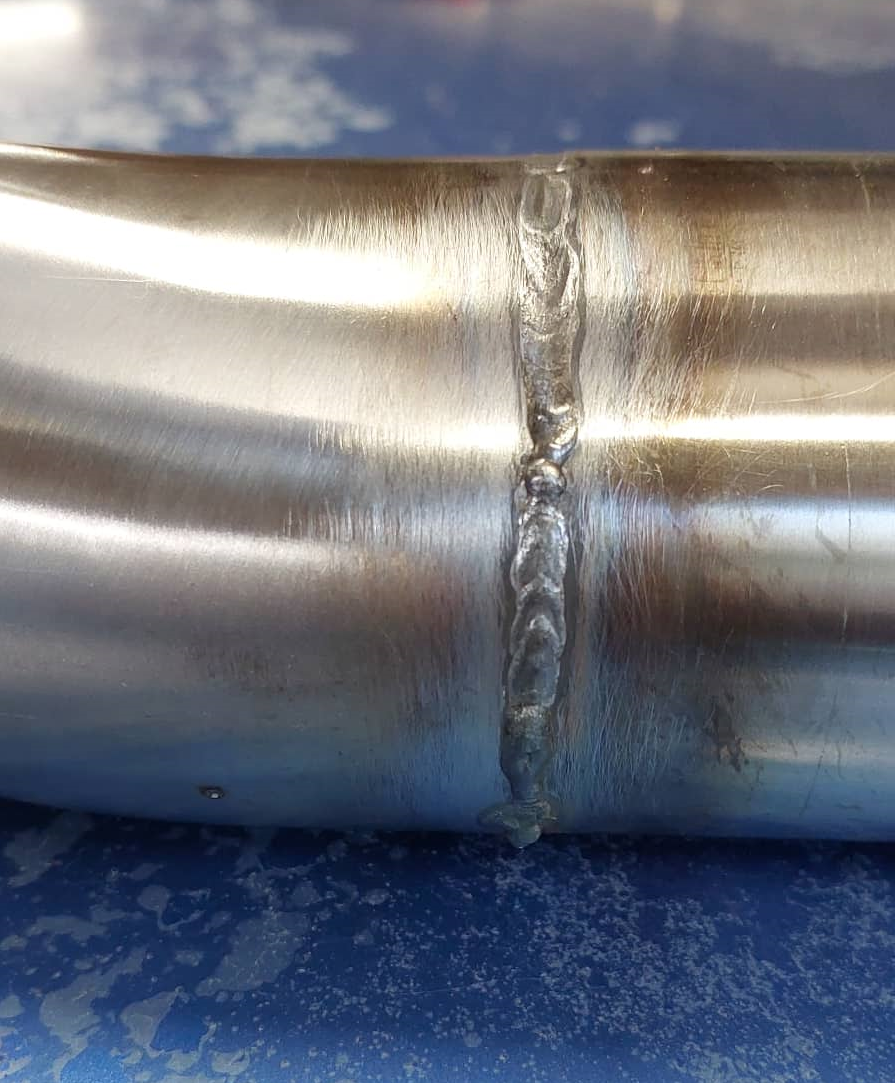
I could, and maybe I still should, buuuutttttttttt, payday arrived! Big thanks to everyone who pitched in for buying another one, amazing. Cant wait to go pick it up, hopefully early next week! Also big thanks to @mjrstar for letting me use his Argon bottle so I could make a start on some welding. A few tacks seemed to go surprisingly well, so thought I'd give it a go welding around some pipe. I've got a lot to learn but I was pretty happy with this for first go. But man, it was real good fun. I will stick to the plan of tacking this together then getting some better help for welding it the rest of the way around. However I'm keen to learn how to improve. I was expecting much worse, starting with stainless which I understand is a bit harder than mild steel. I'll try get some hangers in place and the general layout sorted this weekend hopefully.
-
This would be awesome, thanks. I'll flick you a message. EDIT: TOTP fail
-
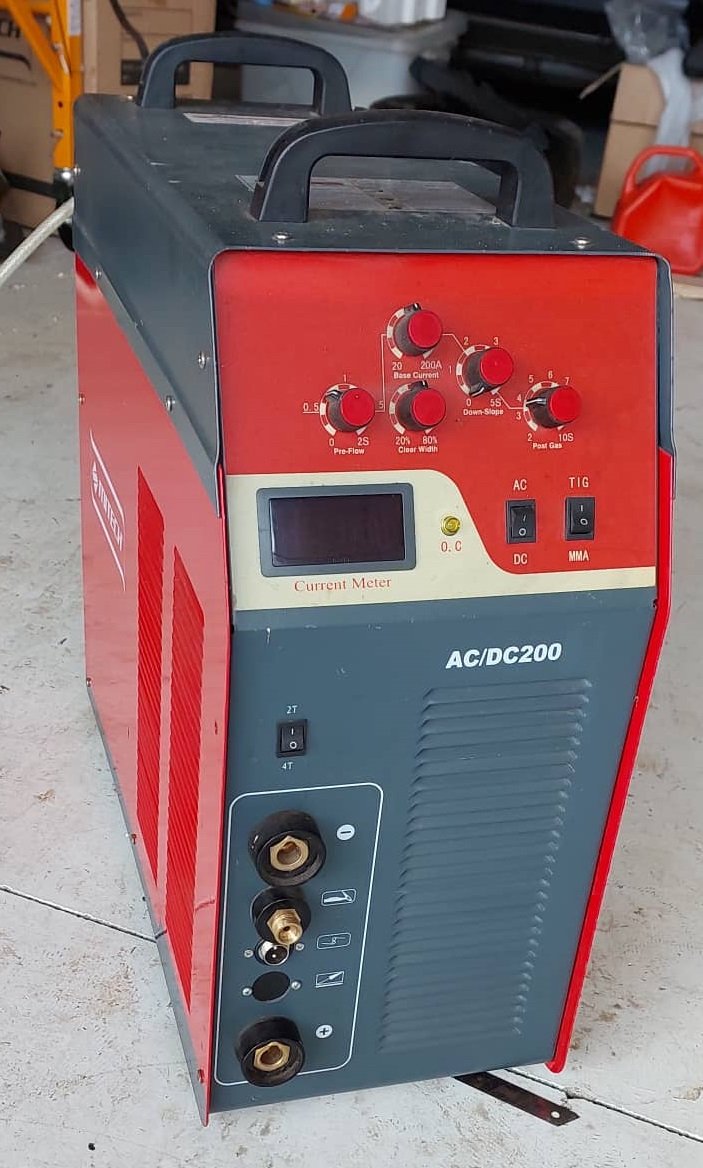
I received a care package from the @StuScience HQ on loan to help me finish the exhaust: Awesome! So now at the least I can tack the remainder of the exhaust together and keep making some meaningful progress. It also came with a box full of things like gloves, helmet, and some mild steel rods, arc welding stuff which I wasnt expecting. Cool. However, since I'm beyond beginner. I figure I should probably give myself the best fighting chance of being able to do what I need to without peripheral issues. I figure it's probably best to start out with some new parts on the torch and a helmet I can see through decently. So I bought some consumables from bunnings, then figured I'd drop it off in the car before going to the trade desk at Bunnings to get an Argon Bottle. So I come back, and... They're all out. Call the other bunnings, and they're all out. So was blackwoods. So is everywhere in the Waikato it seems! Bummer!!!! So I'm not sure when I'll be able to do anything yet which is annoying because I was looking forward to practicing over the next few nights. I did also order some flanges and exhaust hangers which arent here yet. So although I would have been able to make progress on tacking the pipes together. I still wouldnt be able to finish it yet. I will get there, but feels like slow motion at the moment. Still no new motor yet, as havent got the money yet. Should be next few days. Will get there, just going slow at the moment. Fizz level is 99 for taking it back to the dyno with big block back in, and the good exhaust.
-
This is looking incredible. Motor hasnt been fired up yet right? Cant wait to see it in person some time!
-
I'm using the same coilpacks as before, and this head is the same head as before (just different block under it) I pulled spark plugs and had a look, they were all okay, one had a bit shorter gap than the others. So opened it up a bit and swapped coilpacks out. no difference. Will check cam timing tonight.
-
One thing that i would check, is what happens when you try to change gear. As in, from 10,000rpm does the engine decellerate too quickly for next gear, or not enough? (Running g4x ecu? 1000hz Graphs plz) Adding a clutch switch and a gearbox speed sensor would allow you to setup flat shifting. This has a mode where as soon as you hit the clutch while at full throttle. It cuts ignition and or fuel instantly. So this cuts rpm quicker than waiting for throttles to ramp shut. As youre not relying on removing the air supply to drop rpm. So this might help if the motor isnt losing rpm quick enough. Then since it knows the next gear ratio it starts disengaging the cut as soon as you approach the right engine speed for what gearbox speed you need for that gear. The goal being to get the motor at the exact rpm needed. So it also helps if the motor is losing too many rpm. It dynamically adjusts the goal rpm, so even if vehicle speed rises or falls during the shift it gets to the right spot. Its fiddly to get the clutch point to the right spot. But it might help perhaps. Edit: thinking about it more I realize the above stuff might help your clutch but maybe not synchros while the clutch is disengaged. Hmmm. Might still be worth seeing if the rpm goes too high or too low during the shift period though.
-
ahh man this sucks to see. Fingers crossed for you that the block is okay and everything is easily fixable.
-
With a splash of bear grylls... Big thanks to @Geophy today for putting up with my shit stories and lending some expertise to get the next part welded up! I've got the back of the muffler jacked nearly right up, and the clearance everywhere is mega. The front will raise up about another 12mm once the 1500cc motor is in, and I might shim the rear engine mount up a little bit. I could probably mount the whole motor and gearbox a little bit further back without too much trouble. Which would then help my intake situation considerably too. But from here I can probably figure out the exhaust hangers and get an idea for how the next section will work. In the morning I'll give it a hoon and I should be able to get a reasonable feel for how rowdy it is without the exhaust noise just blasting out the front. Maybe that'll provide some enthusiasm for checking the cam timing. Exciting!
-
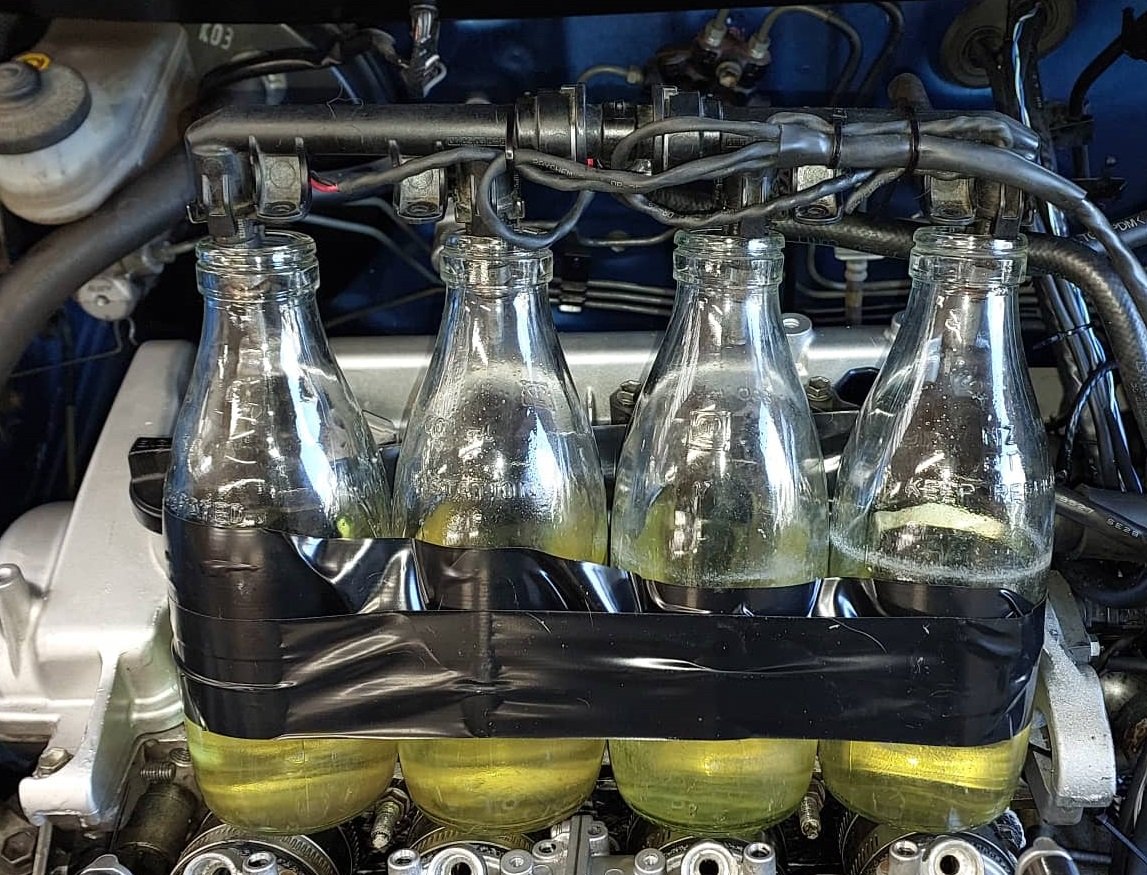
Fine by me as I had a pretty good chuckle at them so far. Maaannnn ages ago I bought a graduated cylinder, exactly for the reason of finding out injector cc, deadtime, and so on. But I cant find the bloody thing. Although, all I'm really wanting to do is find out if I've got an injector that is significantly out of whack to the others. It's not that I dont trust BMW parts... So welcome to the most half assed injector testing known to man. Just using ECU to spray them full blast. So they're pretty damn close, considering some people find some aftermarket injectors can be 5-15% out in a set. If I ever find my graduated cylinder I'll do some more testing in a better manner. But this ticks that problem off the list anyway. Basically, I'm looking for excuses not to pull the timing cover off because it sucks. Will try my other set of coilpacks too. Then probably still end up pulling timing cover off and finding it's what I suspected all along. However it's good to know the injectors are fairly even, anyway.
-
That looks fucking aweseome @sheepers! Well done. It's amazing how lowering it makes the car look so much longer and sleeker.
-
Yeah it cranks over fairly evenly, doesnt seem to be an issue. I might test these injectors as well, maybe one is a bit blocked or something. But what makes me think its cam timing is that when I took it for a drive with standard exhaust on, you go over 50% throttle and it just goes absolutely nowhere and makes this horrid sounding induction noise. On the timing chain for the 1.5 litre motor, its got bright yellow links on the chain to show you which ones to line up to the crank and pulleys. On the old motor they were only slightly different colour to start with, and then after 200,000km they were indistinguishable. So I might have it wrong. However I've since found a picture of a brand new timing chain and counted the number of teeth that the crank is away from the intake pulley. So easy to check
-
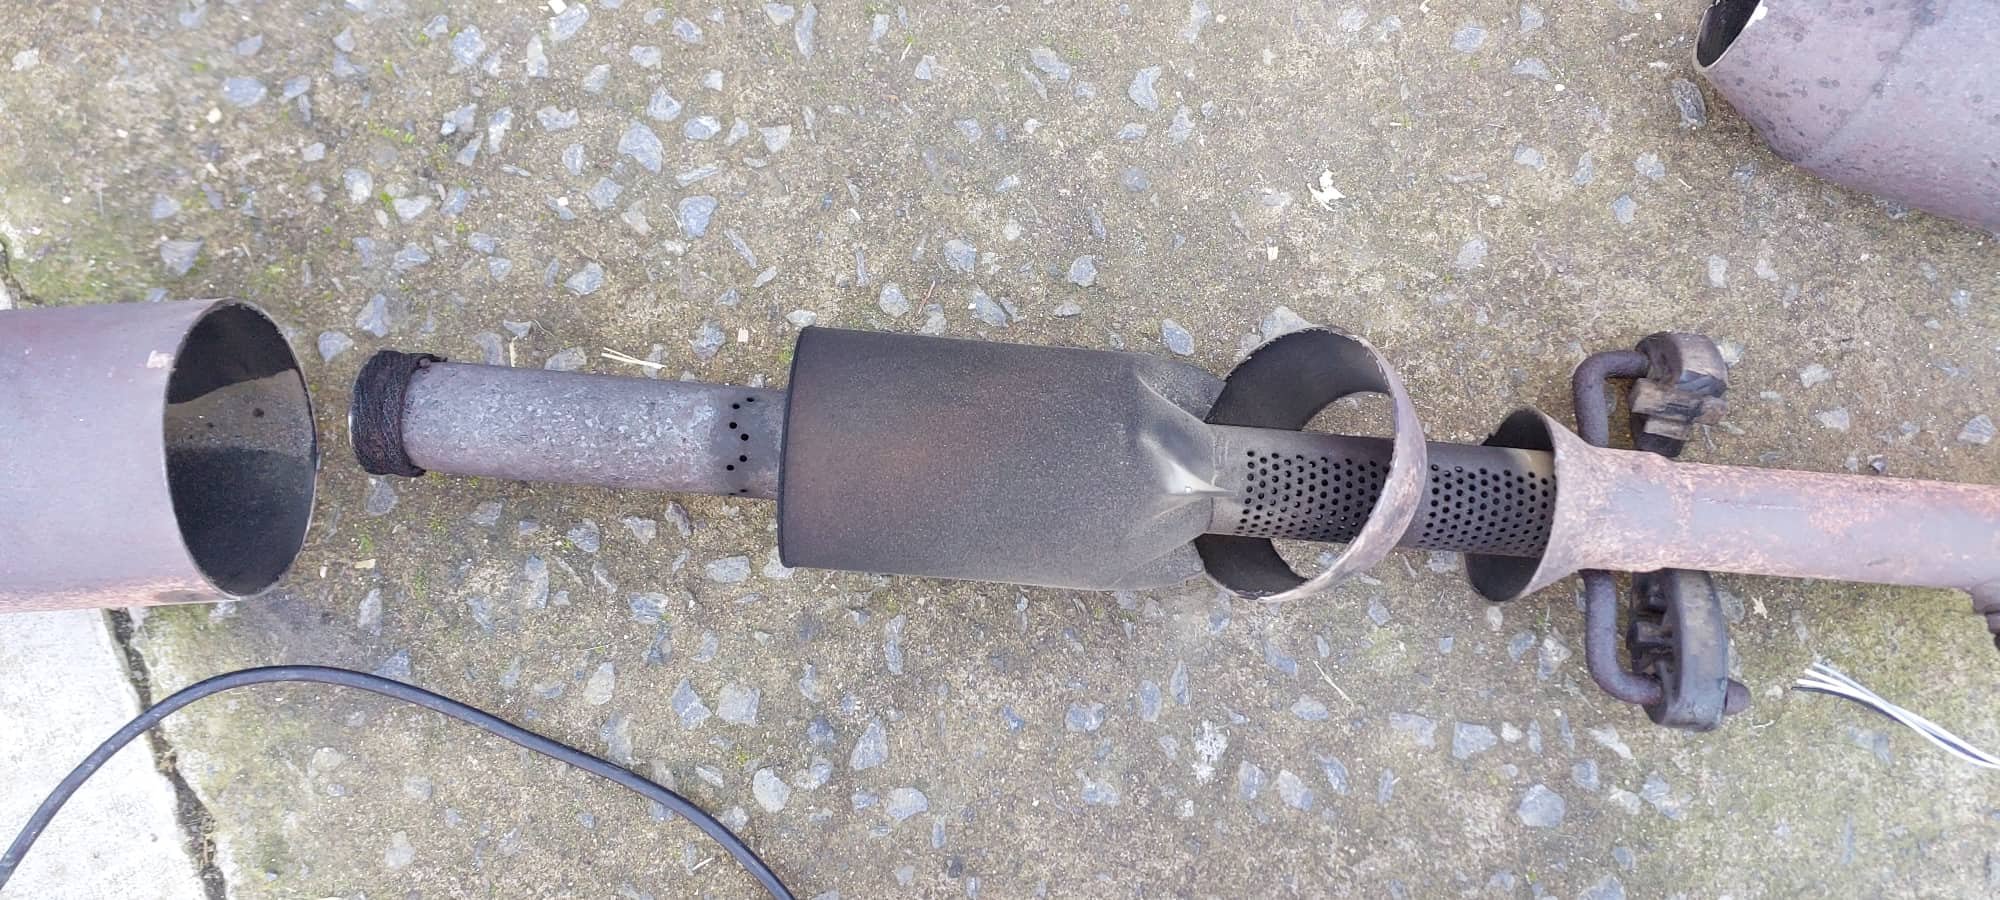
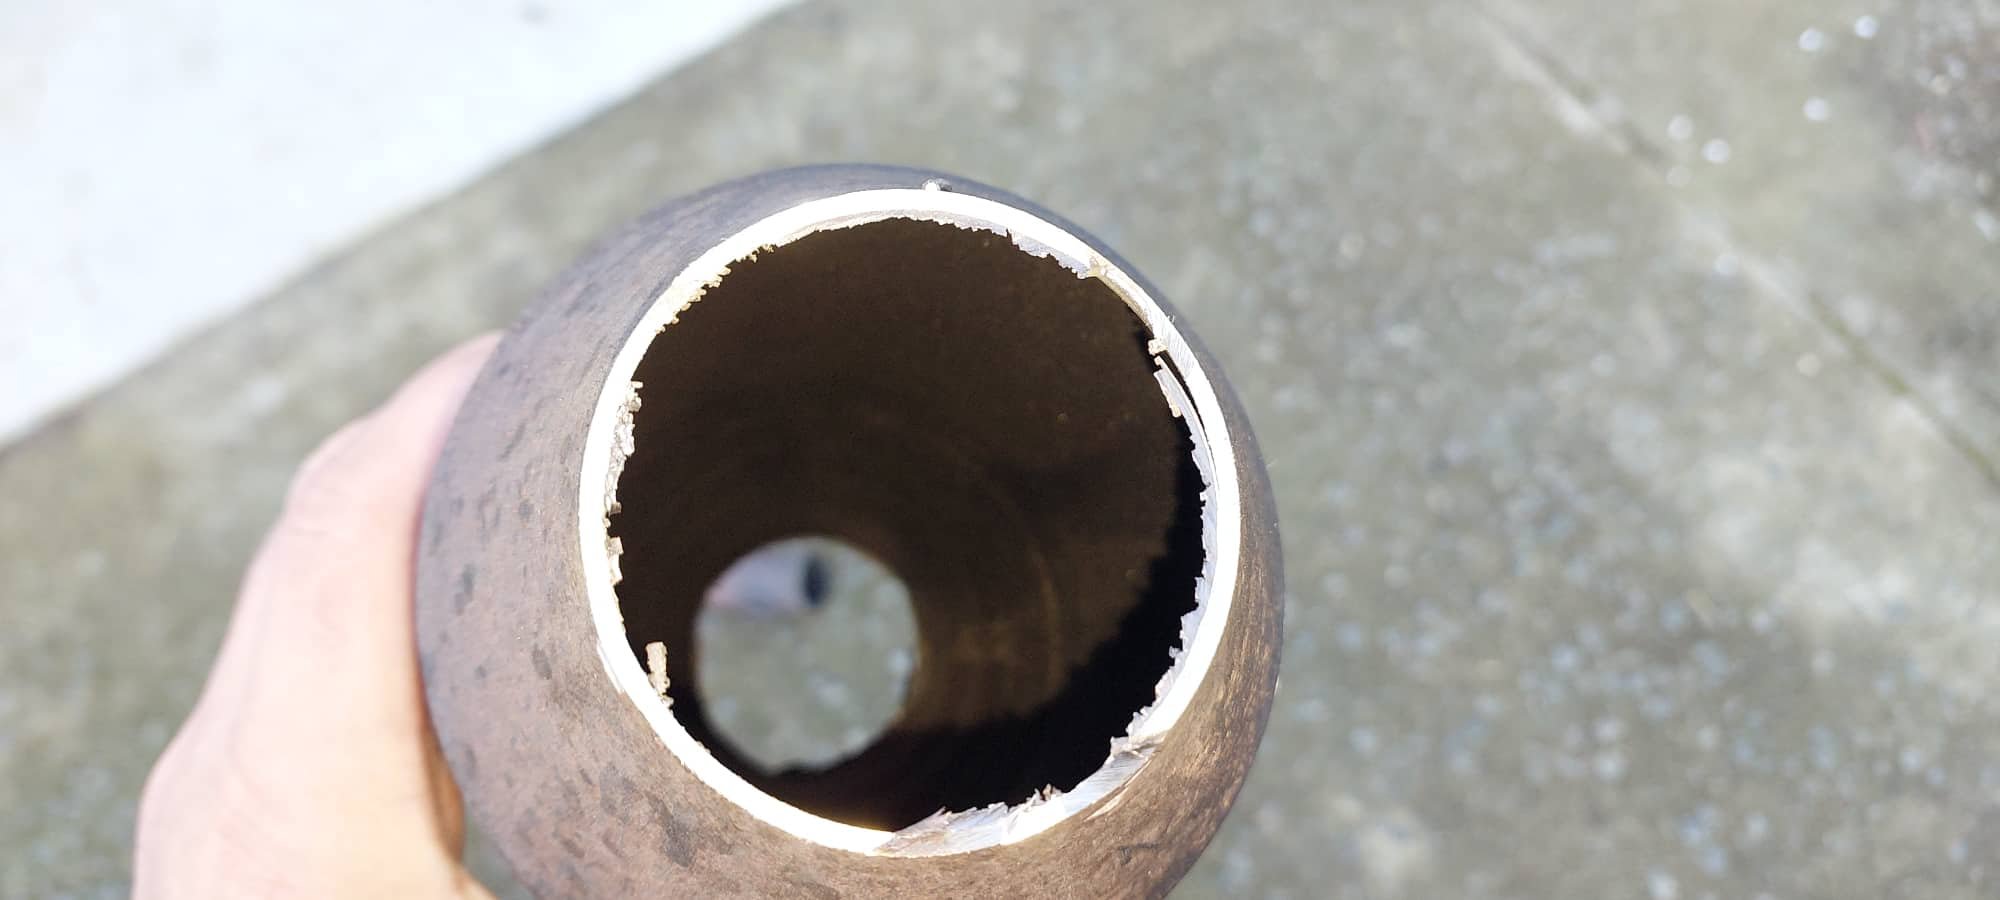
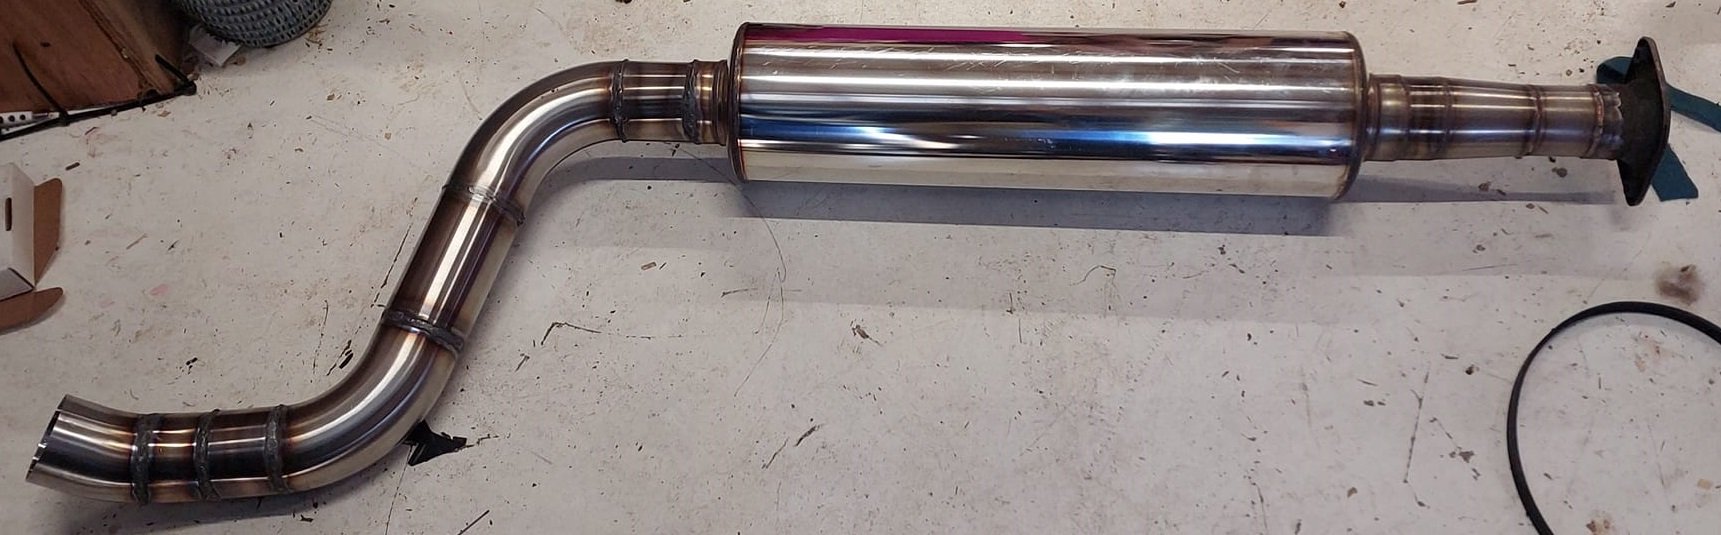
I ordered a 550mm x 6" diameter barrel muffler from Adrenalin R earlier in the week. It turned up today, and I'm glad I didnt try stuff a 7" one in there! It should be pretty good and tuck up nicely, but I need to trim the heat shields a bit where they taper in around the factory muffler. So I'm gonna take this over to @Geophy tomorrow to get welded onto the flange and front piece of pipe. Then during the week next week @Stu has said I can borrow his spare tig setup, so I can tack together the rest from there. However I dont think I'll try fully weld it myself. At the moment with the muffler just stuffed onto the front pipe, so not sealing at all, it sounds remarkably like a VW beetle or something haha. I'll double check the cam timing over the weekend on this 1300 motor, something is seriously wrong with it. It can barely rev out. Hopefully it's the cam timing and not a damaged valve guide or something. Would still like to use that head if it's alright, and would be interesting to see how the 1300 motor goes. Currently it's a bit too loud still, but defnitely a lot better than without it. Also amusing was chopping up the factory pipe to see what's inside - weird stuff, and no packing. Had I just blown all of the packing out of it perhaps? Speaking of such things, this is what the cat converter looked like... Not even any trace of it left haha.
-
Far out, this is shaping up good! Love it.
-
Everyone needs a supertrapp in their life
-
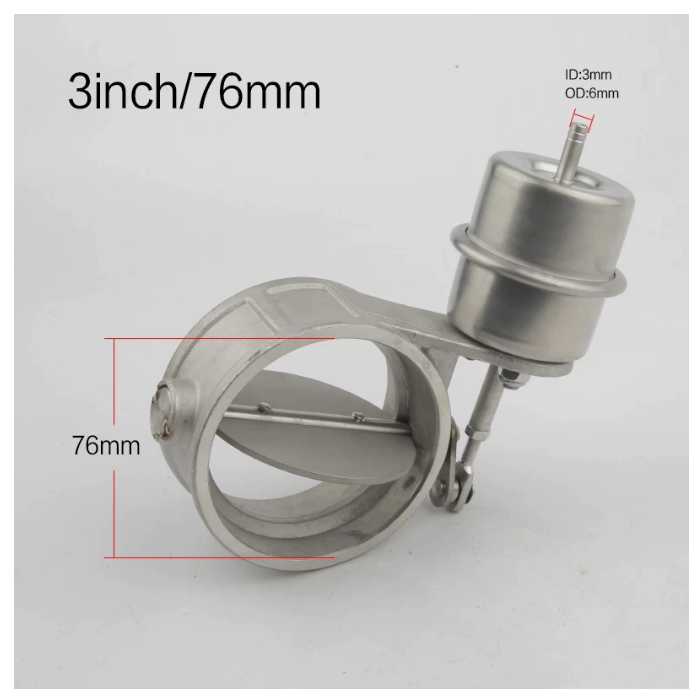
The factory vitz rs rear muffler has a spring loaded flap inside it. So its a triple pass muffler until the pressure gets high enough, then the flap opens making it straight through. Pretty cool. A lot of toyota mufflers do this on later stuff (like altezza, celica etc) You can buy mufflers like this from Chase. But not sure if in 3". Also the available space at the back really needs a circular muffler not an oval one. But yeah, also it might not be even necessary. The carina ended up way quieter than expected with straight through mufflers. EDIT: These are the type I was thinking of, not to spendy or heavy. Looks like this one might even have a position sensor on it? EDIT2: Oh nah, it's just got a 3 wire plug so it can reverse the polarity to open or close it. If I wasnt using e-throttle, and could mount a position sensor. You could control a DC motor like that with the H bridge in the ECU that normally runs e-throttle, to get a variable position on it. But, I guess you only ever really want it open or closed. meh. EDIT 3: Ones like this could be good, just use a VSV to give it vacuum or not. Then no electronics near it to cause issues. EDIT 4: This one specifically could earn its keep, hhmm! Might get one. It's normally open, and only needs around 3-5psi to start shutting. So even with crappy vac source from ITB it will be fine.
-
Oddly any variable/adjustable exhaust like the varex ones are illegal in NZ. Unless factory fitted. At least thats my interpretation of it. It would be a nice solution, you can buy cheaper exhaust throttle type things that just close a butterfly.
-
He looks good out of one too
-
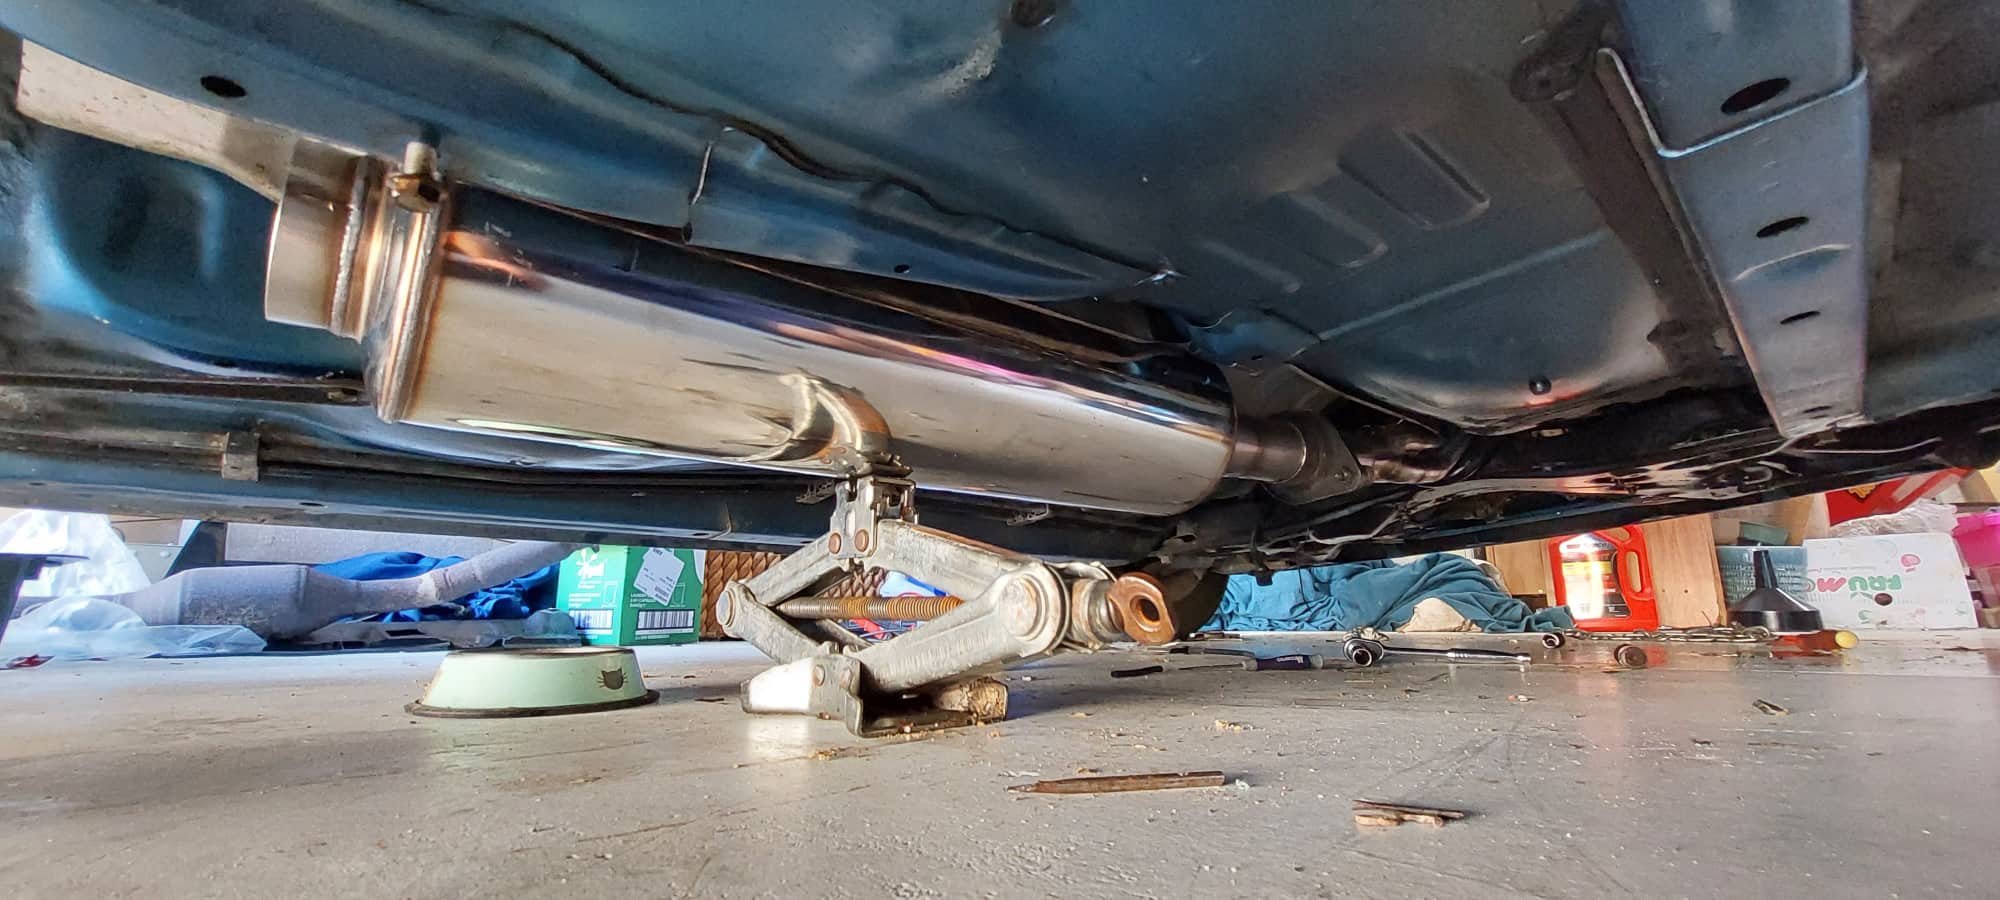
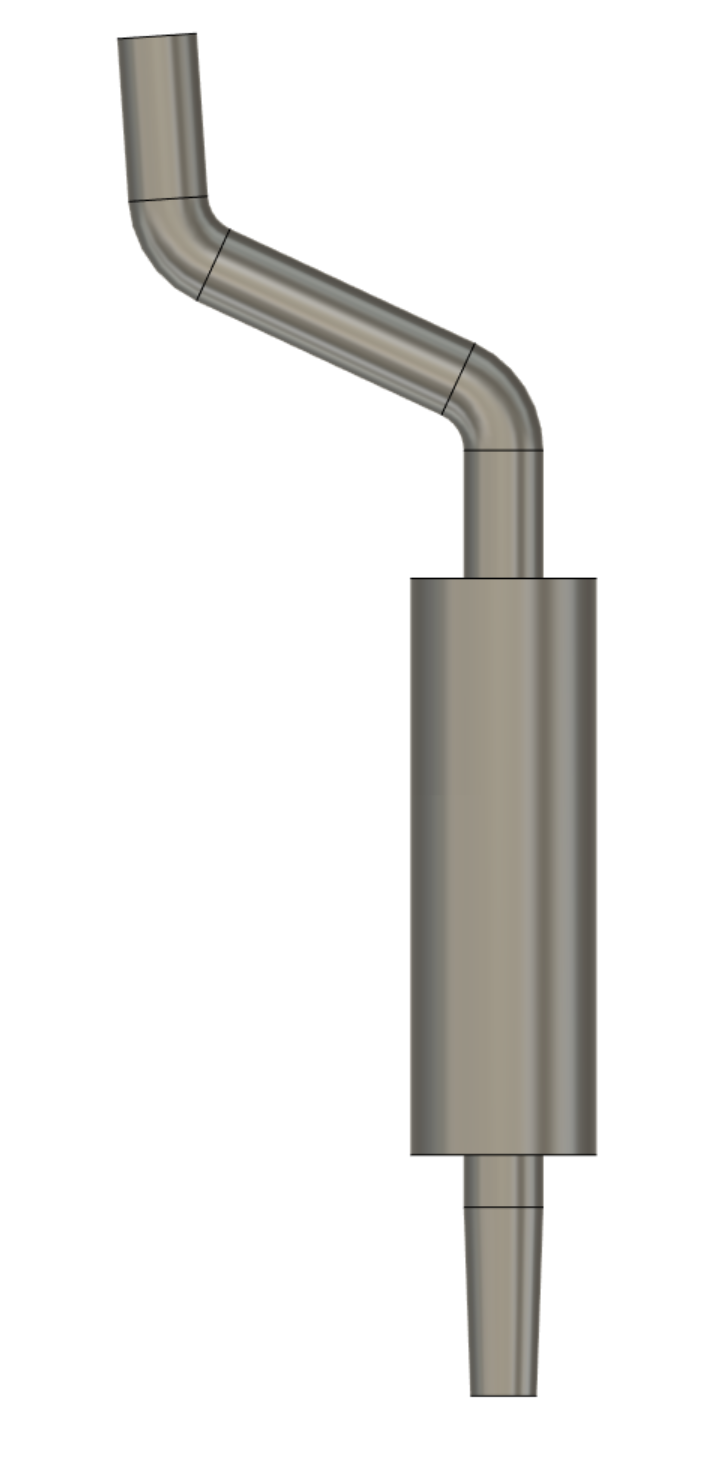
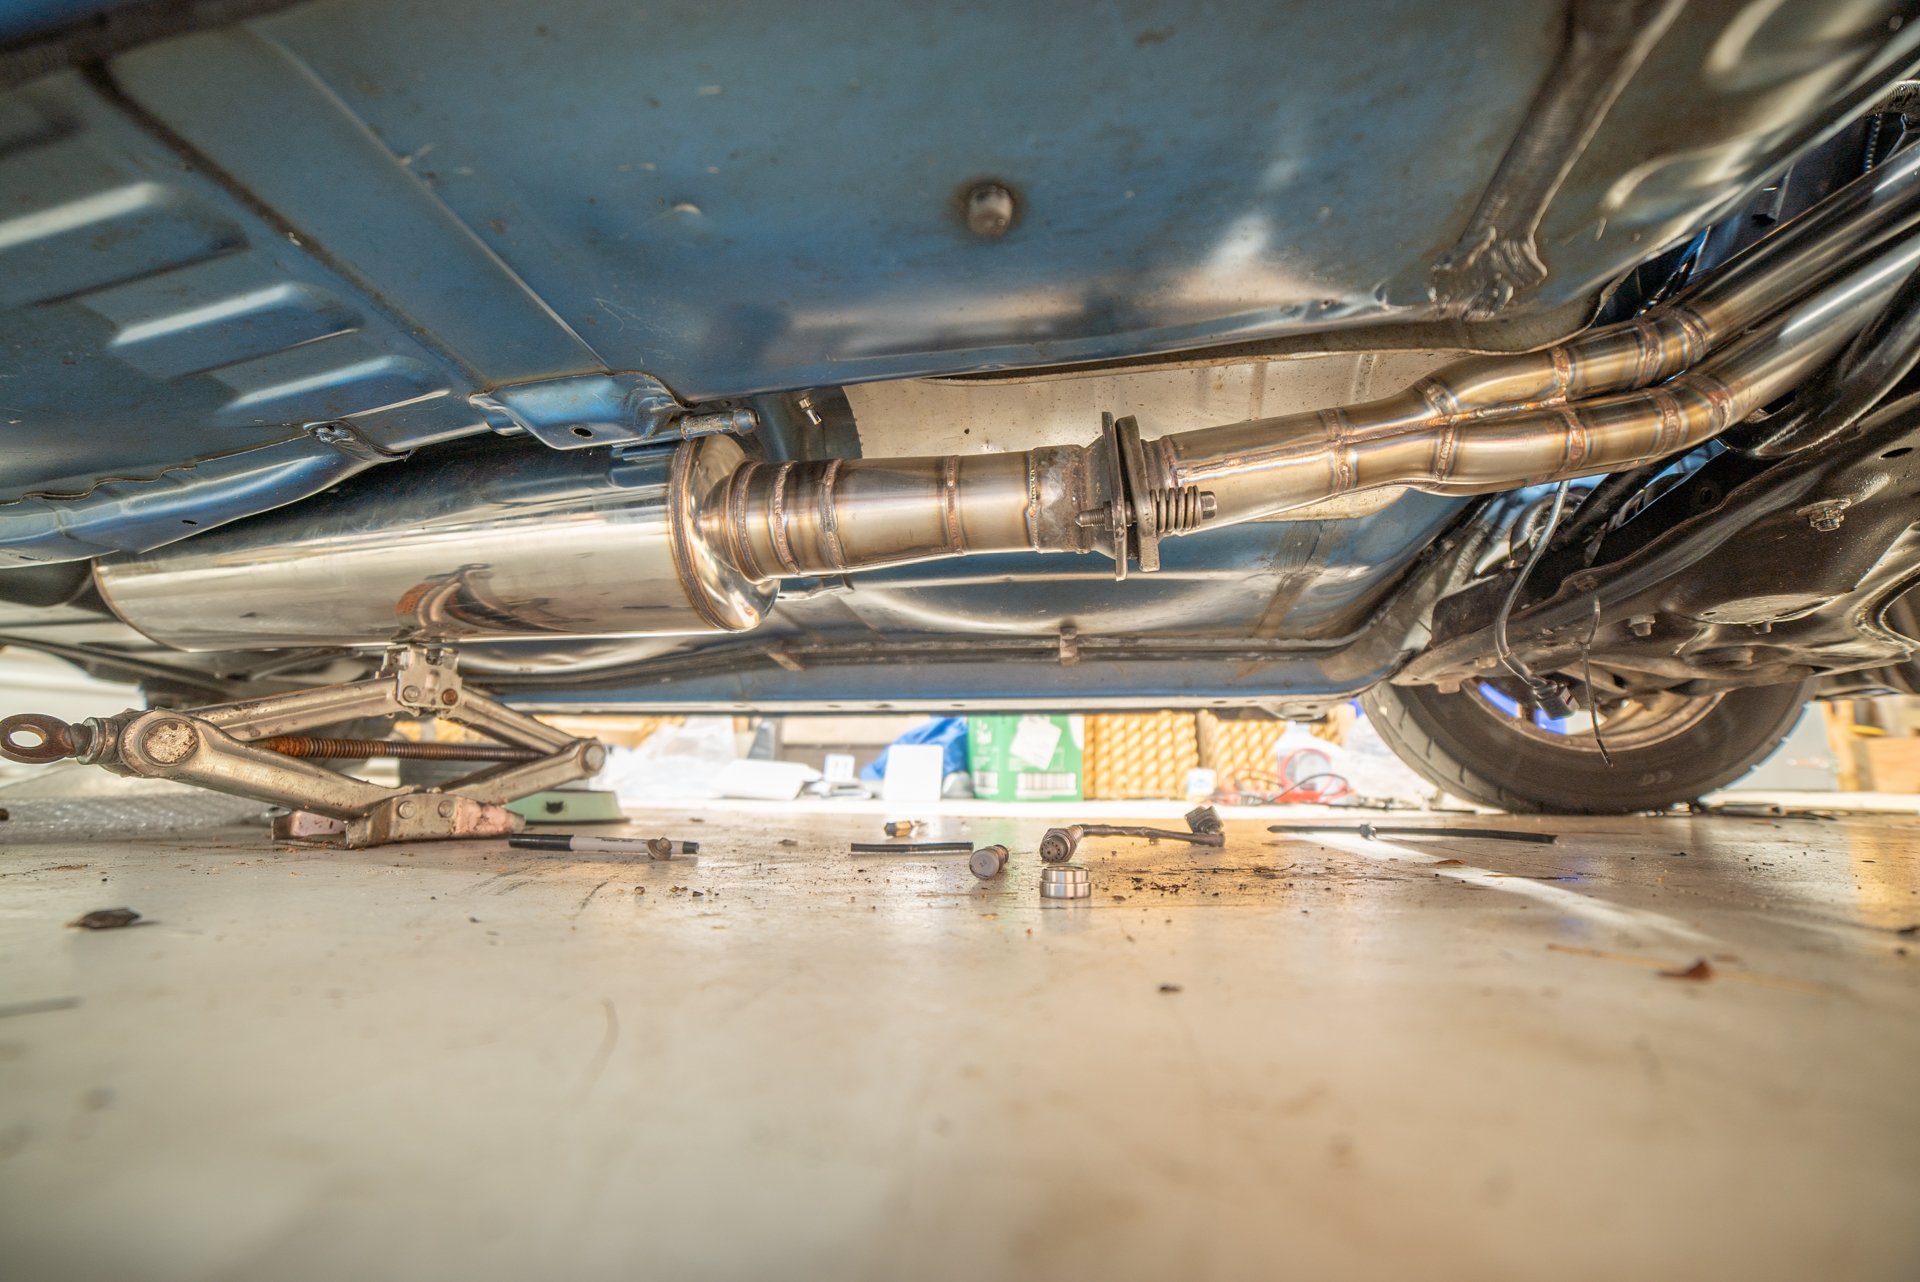
Exhaust investigation. I think this really is one of those scenarios where, if you want a big exhaust that flows good and doesnt make your ears bleed. There's just no way around it. You have to spend the money. I've been tempted to bitch out and just put a 2.5" exhaust on it, or smaller. As smaller pipe is a bit cheaper and it will help keep it quieter. But I think this would be a real disservice to the amazing work KPR has done on the manifold, and others who've contributed to see this project progress! I'd also always be wondering "what if" and I'd hate to save a tiny bit of money and then potentially leave some power on the table. Even if it's not much. Also, this car has an absolutely gigantic amount of room and a super easy exhaust path. So if any of my cars will ever be capable of it, this is it. haha. So, first things first I had a Toyota flexible flange ball joint thingy welded to the 2.5" part of the end of the manifold. All fits up great. (Thanks Rhys) The other half of the flange that I need to weld to the remaining section of the manifold. This was still on the exhaust on the Carina. So I yanked that out, and figured I may as well jam the whole thing on and see how loud it is with a long pipe and a single resonator on it. Answer: still way too loud, haha. I wont be getting invited to any Christmas parties at this rate. This is a fairly flogged out Chase muffler that I've repacked once because all of the innards flew out. So not exactly the pinnacle of muffler performance. However it's also worth noting that it basically sounds the same, but quieter. If it can end up quieter but still sound like this, it's gonna be cool as! So I think the only way I'll manage to get away with anything decent will be to use good mufflers. Adrenalin R seems the option of choice for everyone that ever has trouble keeping the noise down. They are expensive, but so is buying cheaper stuff then having to redo it. So my current plan is to buy the longest straight through muffler, and mount it not far after the extractors. Then see how obnoxious it is. If it's awful, then I can still put another muffler on the back. Even if it's a cheap/shitty/restrictive twin loop one or something. However this leaves the option of being able to easily fit a side pipe for drags and so on, if I put a second flange in a good place. I measured how much space I've got after the extractors, and thankfully I'll easily fit a 550mm long muffler in there. I'll double check that a 7" diameter barrel will fit though, once I've got the taller engine block back in. 8" or 6" diameter barrels are also optional sizes . It would be good if I could fit 8", I'm guessing it would keep the noise down a bit better. The next steps are to get the second half of the flange mounted to the expansion cone, then weld some amount of 3" pipe onto the back of that. Then order a muffler, and get that welded in place. Then work on the next section. Might take a while this way, but will get there. I'm not quite sure what radius the 3" bends will be, but it looks like there's still plenty of allowance anyway. I quickly sketched up the dimensions of everything. Should be sweet. I might actually be able to sneak a second short muffler in that intermediate bend part too, depending on radius of the bends.


.jpg.71f507b658a73e5d328a65019888572a.jpg)


.jpg.697f054f02d9346ade8c17faa8b8d2b8.jpg)