Abarth
-
Posts
886 -
Joined
-
Last visited
Content Type
Forums
Downloads
Events
Gallery
Everything posted by Abarth
-
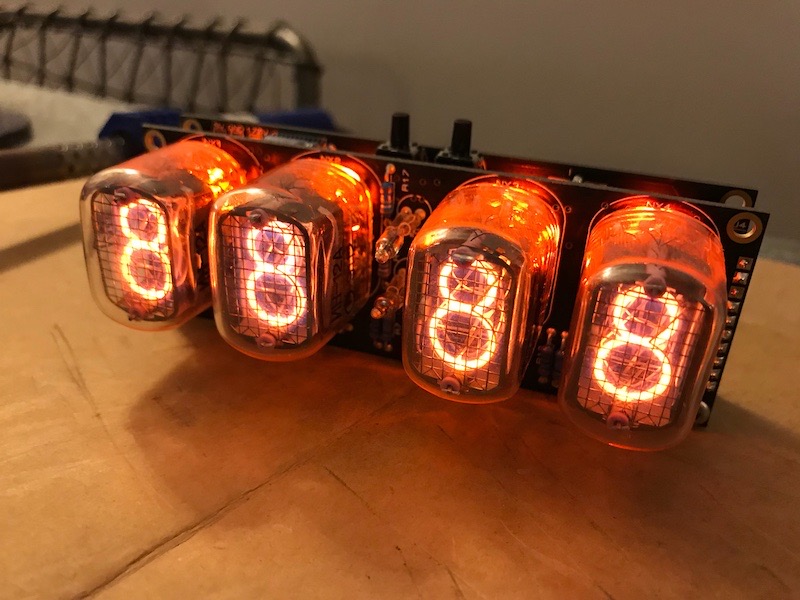
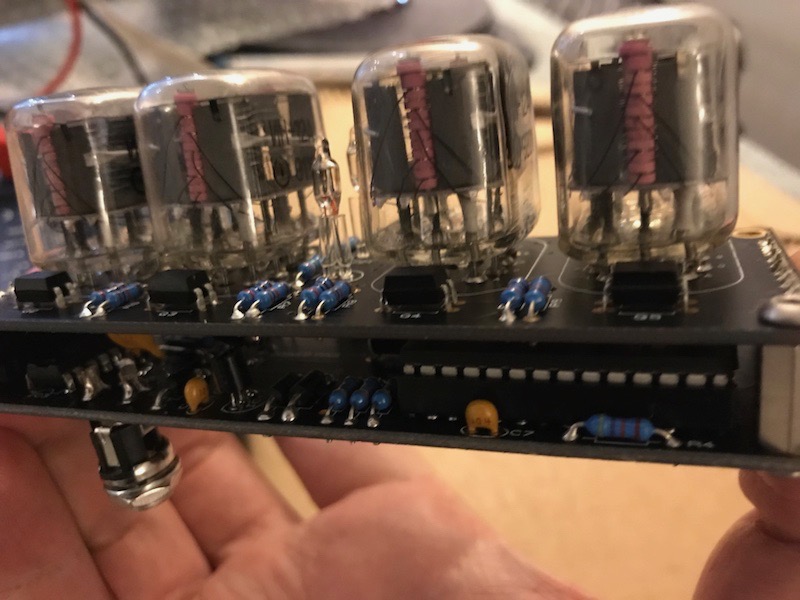
Awesome nixie projects man! Just completed this kit from PV Electronics over here in the UK. First clock build which was good fun, so much soldering but totally worth it as the neon glow from the nixie tube looks epic in real life. I'm hooked! The tubes are IN-12a's which have a 18mm digit height. Its also running orange led's behind the tubes, had the option to run a variety of colours but felt orange suits.

-
Tidy Punto GT build http://forum.wheel-whores.com/viewtopic.php?f=43&t=20879
-
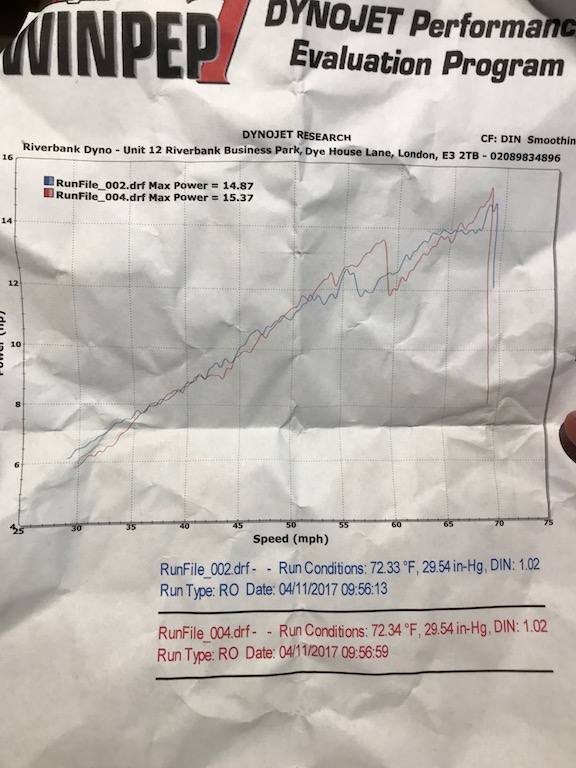
It runs!! Took it for a couple rides to bed the rings in and already it feels like a different machine! Rings must have already been broken before I brought it, probably the reason it was parked up in the first place. Anyways fixed now! Way more torque all round, so much better in traffic. Got it back on the dyno to measure how many horses were added to the stables. Netted almost 22hp up from 15hp so super stoked with that!!! Still needs a final tune, valve clearances, re balance carbs, check torque on headnuts etc. But stoked with 22hp. Happy NY’s OS!!!
-
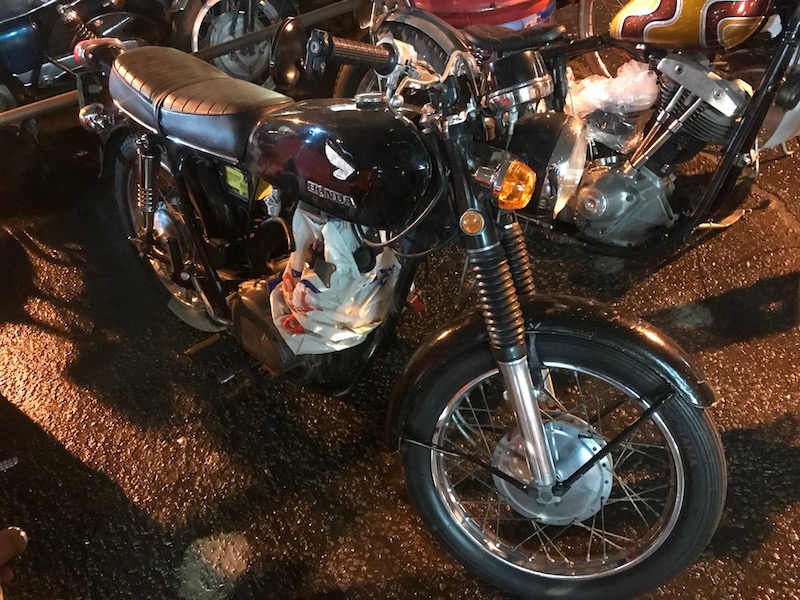
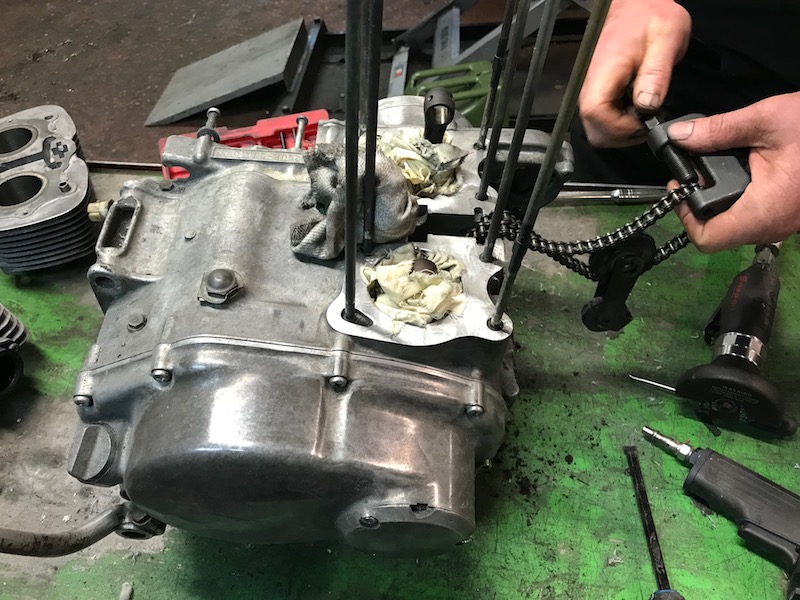
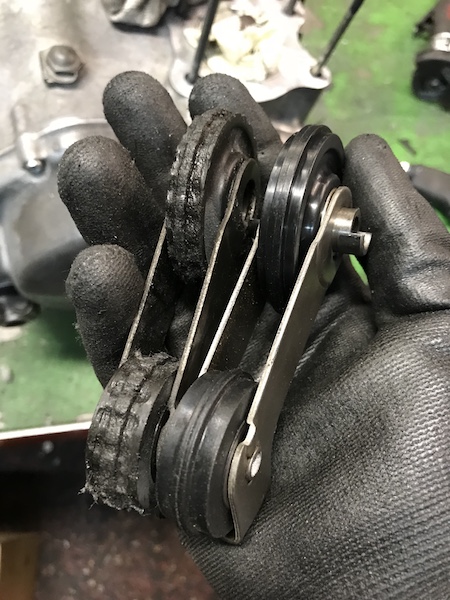
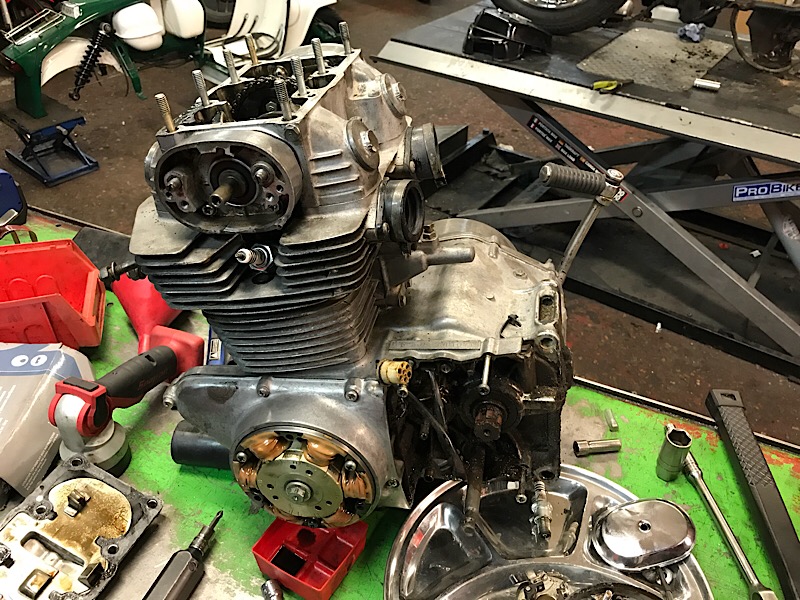
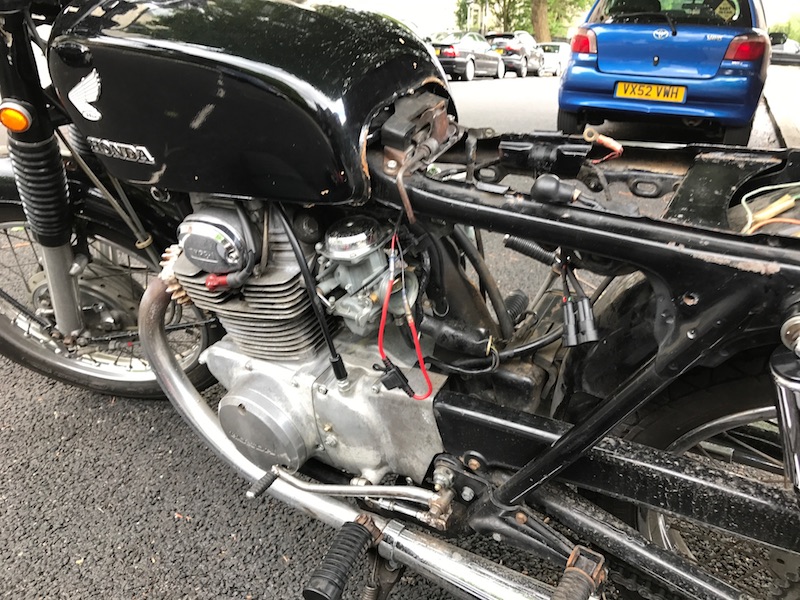
Right o, after a quick visit back to NZ it was time to get stuck back into the Honda. This is sitting at the workshop in a sad state. While I was in NZ the machinist bored the cylinders to match the +1mm oversized pistons, skim the head, cut the valves and valve seats. These Honda motors run a reasonably tight piston to wall clearance of 0.0014 thou which all checked out when we measured the walls, pistons and gapped the rings. Ring gaps are meant to be between 0.015~0.035mm and they measured in at 0.025mm so bang on. Took ages to remove the old gaskets from the faces, even with this nifty air powered tool it still to a good hour of cleaning the surfaces. Added in new timing chain, tensioner etc all Honda OEM stuff Old cam chain tensioner vs new, apparently these tensioners have a bit of a bad rep of coming apart but this one seems to held up alright, yes the rubber wheels are a bit beaten up but 40 years of heat cycles I'm surprised it isn't more. Got it all back together and torqued up, the build had been pretty much to factory spec so everything went back together easily enough. By this time it was almost midnight so now the motor is sitting in the frame waiting to be finished. Next update will hopefully had this motor running!!
-
My Honda has same equally as bad charging system but after changing over to the new reg/rectifier and LEDs (brakes, dials, park light) I can drive round with the headlight on 100% of the time without the battery going flat. Definitely worth doing. Are you running the 35w headlight? Mine still does, its not great, thinking of switching to 55w but again back to power issues.
-
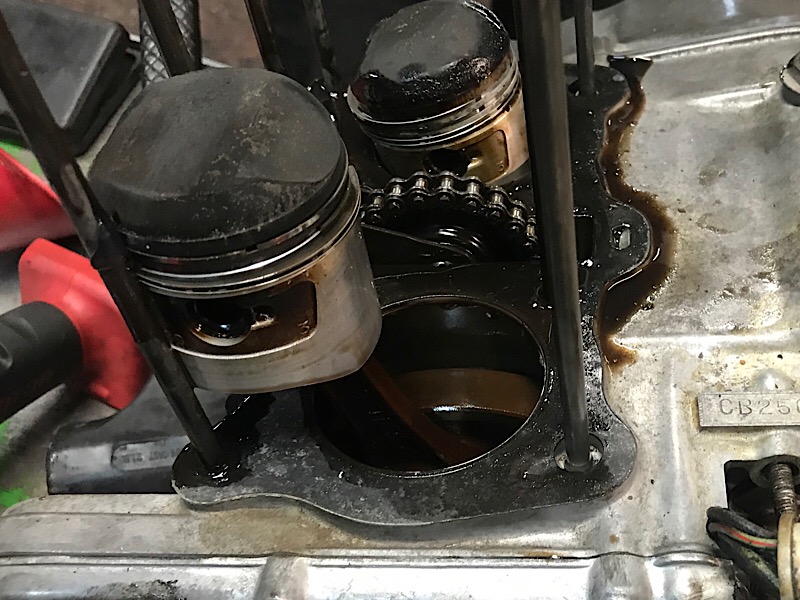
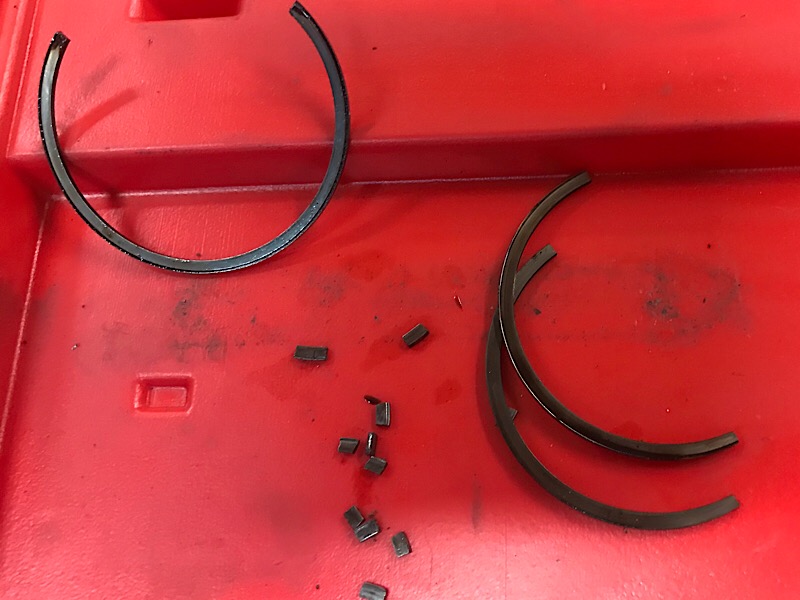
Got the motor out, pulled it down, unsurprisingly the rings were broken. What was surprising was how broken the rings were. Still good for 10k rpm on the dyno haha! There was also a huge amount of slop between the cylinder and piston. Checked over the rest of the engine and everything else looks in good nic. Crank is perfect and the head looks good. So just a case of really worn pistons and rings. Cylinder and head are at the machinists now getting machined to accept the +1mm pistons.
-
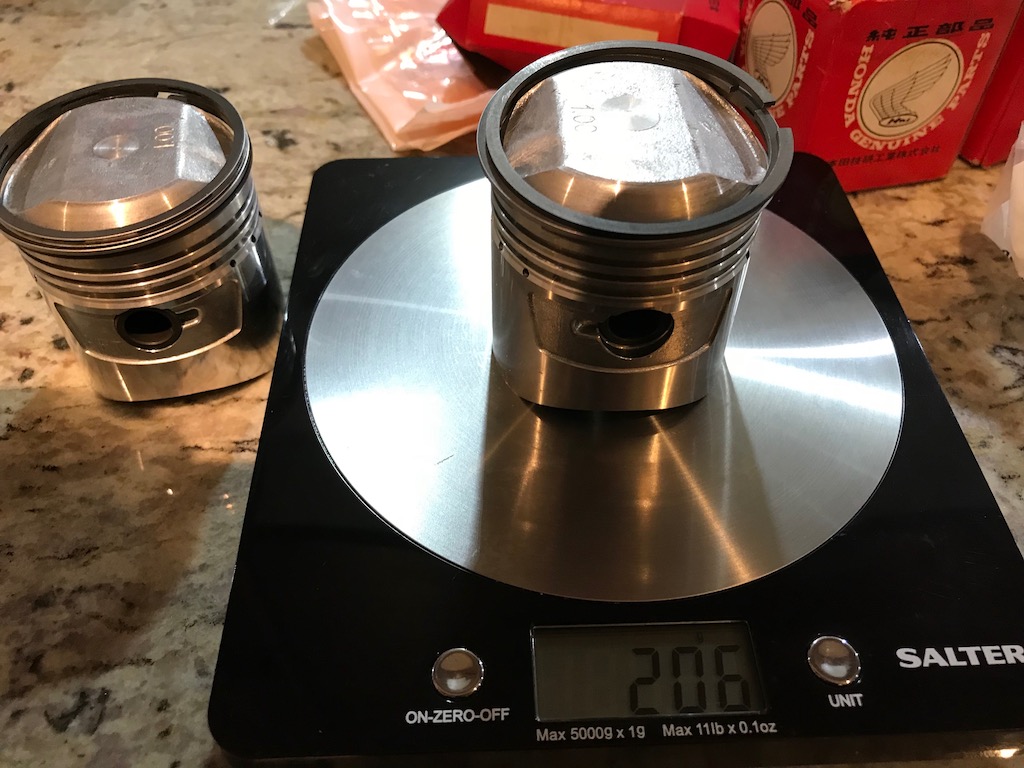
In prep for the rebuild I got measuring some numbers. The digital scales came out to measure the weight of the pistons, rings and pin. Amazingly they all were perfectly equal in weight to the nearest gram, stoked. Next piston to cylinder clearance; its only 0.0008 ~ 0.0019 inch as apparently these ART Honda pistons don't expand much. I'll keep these numbers for the machinist. Lastly these motors run a 9.5:1 compression ratio so there is a bit of room to remove a bit of meat from the head/cylinders. Been reading online guys removing up to 0.02 inch before running into clearance issues, this also increases compression to around 10.3:1ish. Nice to know as I'm 99% sure the head isn't flat anymore.
-
Strapped this onto the dyno and did a couple of runs to see what power its making pre engine rebuild. Only made 15HP and puked a huge puddle of oil from breather pipe at about 10k rpms, far cry from the factory 25 - 30HP. Power delivery is nice and linear with the air/fuel mixtures being spot on, so happy about that. After this we checked compression which was 80psi on the left and 170psi on the right. Also did a leak down test with 40% loss on the left, which again meant oil spewing out the oil breather and making a huge mess. Good basis to start the engine rebuild, we'll get it back on the dyno again after the rebuild. If it does make 25 HP after the freshen up then its going to feel like a rocket ship compared to how it had been running. Just waiting on some cam tensioner parts to arrive then next weekend we'll start pulling this engine down and sending bits off to get machined. Exciting.
-
Added new low rise handle bars, hid all the wiring inside and vintage styled grips. The engine has been suffering from a bit of blowby, white smoke blowing out the crank case breather and generally been down on power. So rebuild time! +1mm oversized pistons to add a little bit more displacement, I think it adds something like 9cc lol. I'll dyno it before and after to see what extra HPs have its making after the freshen up. Got a few other bits and piece to add while I have it apart like cam chain tensioner, cam chain, some new chrome pieces. Looking forward to the rebuild!!
-
You can still get the filters brand new from David Silver spares in the US then YouShop it home. https://www.davidsilverspares.com/parts/by-part-number/partnumber_5985/ $45 usd each still ain’t cheap but I usually order a tone of other small stuff like replacing rusted out bolts and stuff too All the part numbers are listed here: https://www.cmsnl.com/honda-cb175k7-super-sport-1973-usa_model423/partslist/?model_q=cb175 I just put the part numbers in the David silver site and build up a decent shopping basket. Easy to spend way too much lol.
-
Upgraded the Puntos fuel system to a Walbro 255lt pump. It's the standard in tank pump which replaces the factory Bosch one. Everything is sweet but shit is it noisy. Was thinking is there a smaller capacity pump? The Punto is now making round 250hp so I would only need to run something like an Evo or Silvia fuel pump? Does anyone know if all these fuel pumps are the same size?
-
True, I'm sure Bill used to own this for a number of years as I talked to him like ten years ago and he mentioned the motors just been built but their is still the body to go. Anyways looks like the car is being well looked after now. Looking forward to the updates
-
Sweet Spitfire @Rob2180 , looks familiar did the car come from Hawkesbay?
-
Whenever I see these cars it reminds me of this KE20. Good score man, looking forward to the updates.
-

2 Trailer Loads of Death... Mostly Gyro X build thread
Abarth replied to Raizer's topic in Other Projects
That 17.5mm dellorto carb is the standard carb fitted to Vespa ET2 / LX50s. If you do upgrade to a 70cc cylinder the dellorto will run it fine just by increasing the jet sizing. -
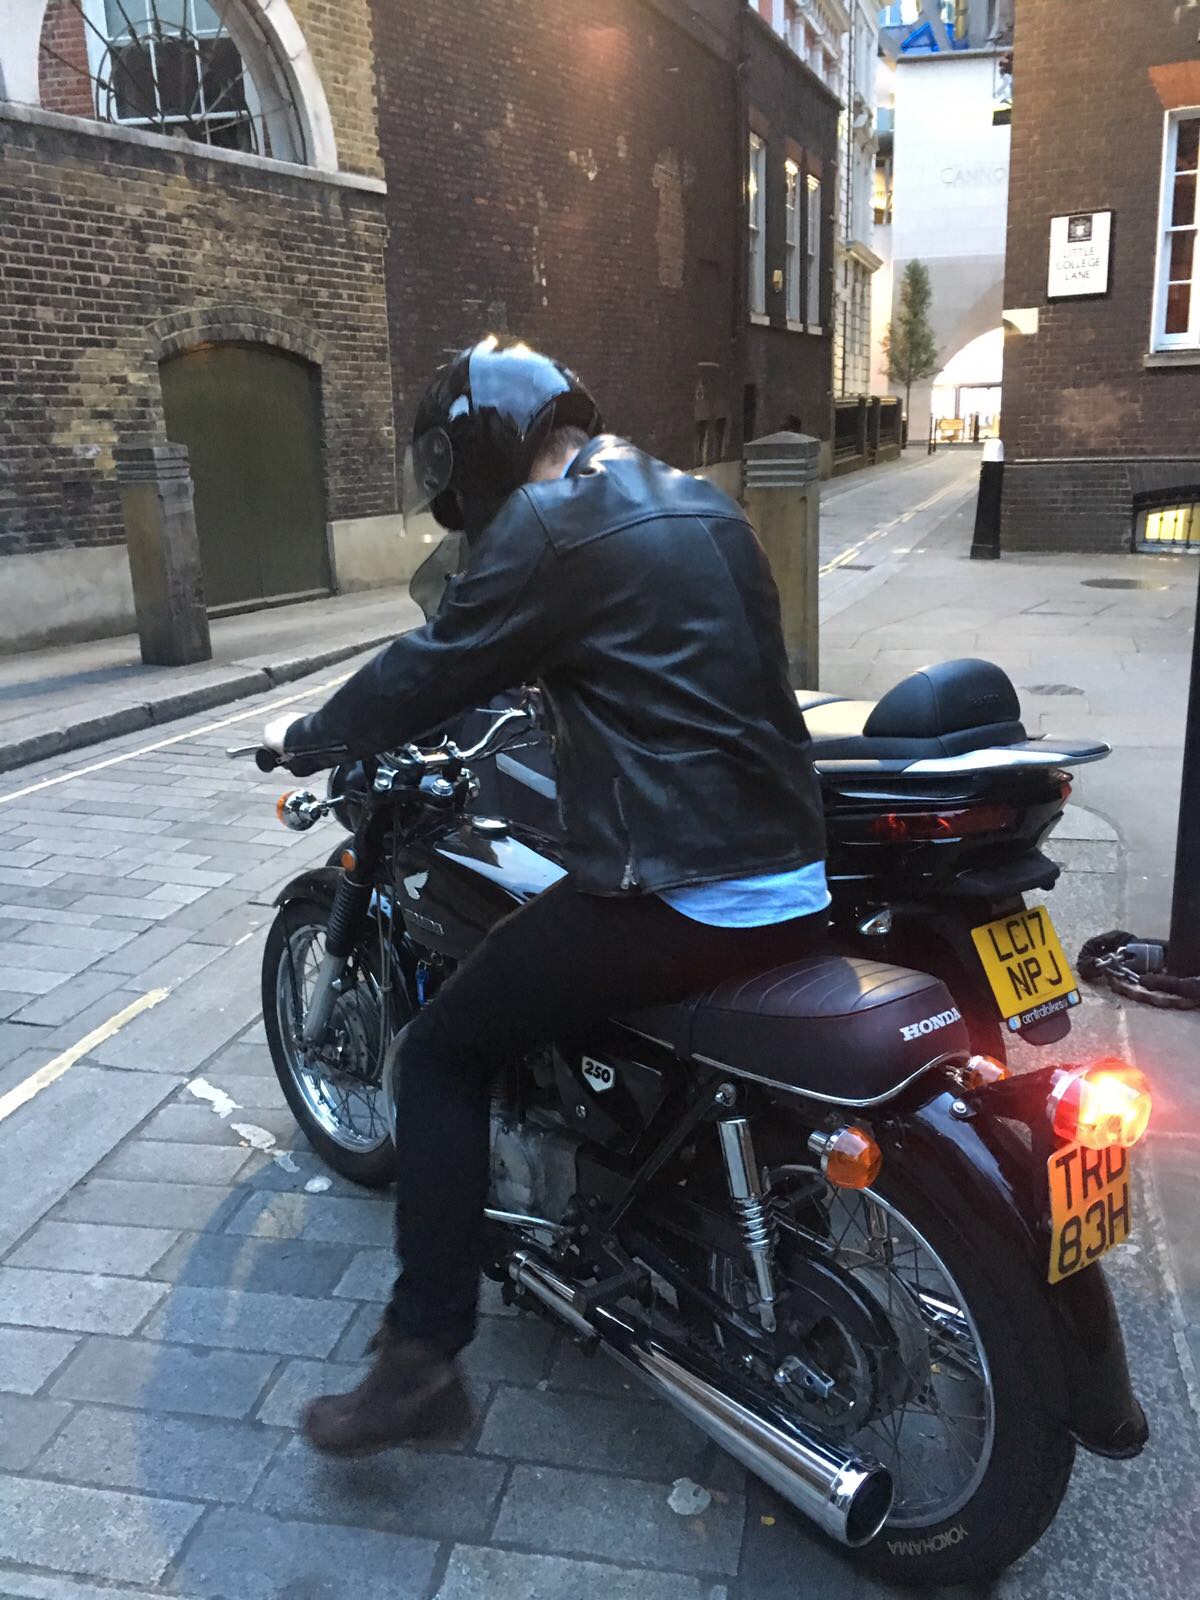
Summer is finally here in London, been mint cruising round decent weather. She's been running good, super reliable. She's getting a bit noisy in the top end so I'll get the cam chain and tensioner replaced for some peace of mind shortly. These motors apparently are notorious for their chewing out their rubber tensioner wheels over time. Got some sweet 78 Sprint glove for summer rides too, they have a lot of cool summer riding gear on this site, check it out: https://www.78motorco.com
-
Yeah that's the balancer I have. $80 seems steep though. They are £20 in the U.K.. Probably cheaper to buy one from the UK and ship it home with NZPosts YouShop if you wanted it.
- 41 replies
-
- 1
-

-
- 18rg toyota celica
- celica
- (and 2 more)
-
Weber Specialties should sell a carb balancer. Gunson make a cheap one, I have his one and tbh it's a bit flakey but works. Wideband certainly has its merits as Spencer noted. Especially under load. However the old side drafts have individual settings for idle mixture on each throttle which adjust themselves. My Abarth actually has the bungs on each extractor for tuning with a wideband or EGT. But yeah for a basic mixture balance the old glass plug works fine.
- 41 replies
-
- 1
-
-
- 18rg toyota celica
- celica
- (and 2 more)
-
Sweet deal!
-
Gunson Colortune plug. I got one over here in London for tuning the carbs on my bike, works mint. https://www.machinemart.co.uk/p/gunson-g4074-colortune-single-plug-kit/
- 41 replies
-
- 3
-
-
- 18rg toyota celica
- celica
- (and 2 more)
-
In addition to everything mentioned above. Make sure the carbs are in balance with each other, both at idle and WOT. They will pop and cracked if ones trailing the other. Best to get a carb balancing tool, however a rough way to balance them is use some hose pipe and listen to the pitch of each throttle when its running. Another rough way is to pull the lead off one cylinder while running and if the motor doesn't stumble that much it means that cylinder isn't doing much work, i.e. give that carb more throttle in the idle speed adjustment. But yeah best to get the basic tools like a carb balancer and a glass spark plug. Both these tools are awesome for on going tuning after its been setup right by someone like Weber Specialties. Edit: if the fuel pressure was to high it would be leaving massive puddles of petrol on the floor from fuel pouring out the front of the carbs. I've made that mistake before lol.
- 41 replies
-
- 1
-
-
- 18rg toyota celica
- celica
- (and 2 more)
-
Weber specialties used to throw in a free manifold if you brought new 40 DCOE's from them and they'd fit the right jets too. Id be heading down this route if I were to start again, expensive initially but way cheaper in the long run. A pair of 40's, a 2.5 inch exhaust and this motor will rev happy. Even just the exhaust, 2.5 inch bends, a large straight through perferated resonator in the centre (not louvred) and a straight through muffler on the end will go well. You'll get all the crackl pop on the overrun too. My mates Strada 130tc made gains of 10% on the dyno with just the exhaust mod.
-
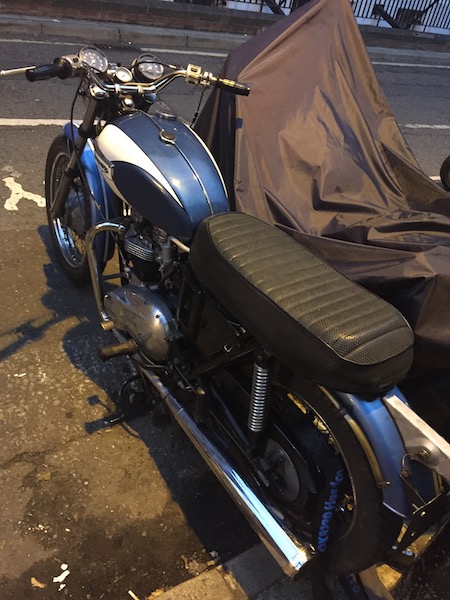
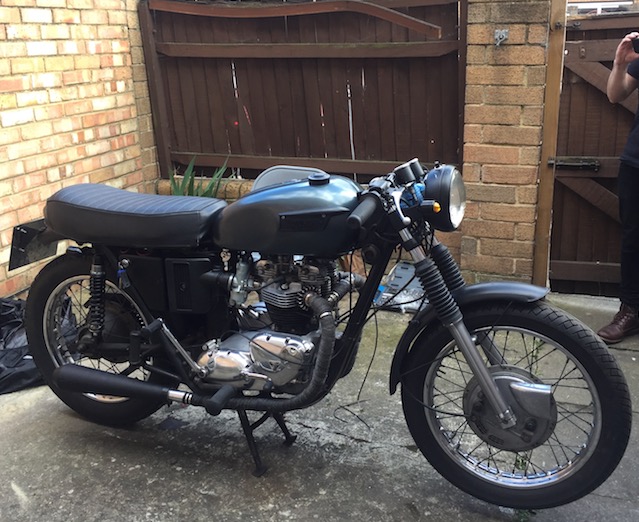
Been working on a couple of my mates bikes over the past year too. Massive amount of effort went into getting this 1971 Triumph running again. Started off life with looking alright with chrome, metallic blue and white scallops. But yikes underneath was a different story, fuel tank was so rusty it leaked fuel on one ride ruining the factory blue paint, cooked no less that two Pazon electronic ignitions before we completely replaced the wiring loom. Positive earth wiring really? New carbs, cables, shocks, tires, etc.... Boom, cafe spec.... runs good now! 650cc 4 speed, but my, such a brut to ride with so much torque on tap. Also did some work on a 250 Honda Superdream, I really like this bike, sits low and has those sweet Comstar wheels.
-
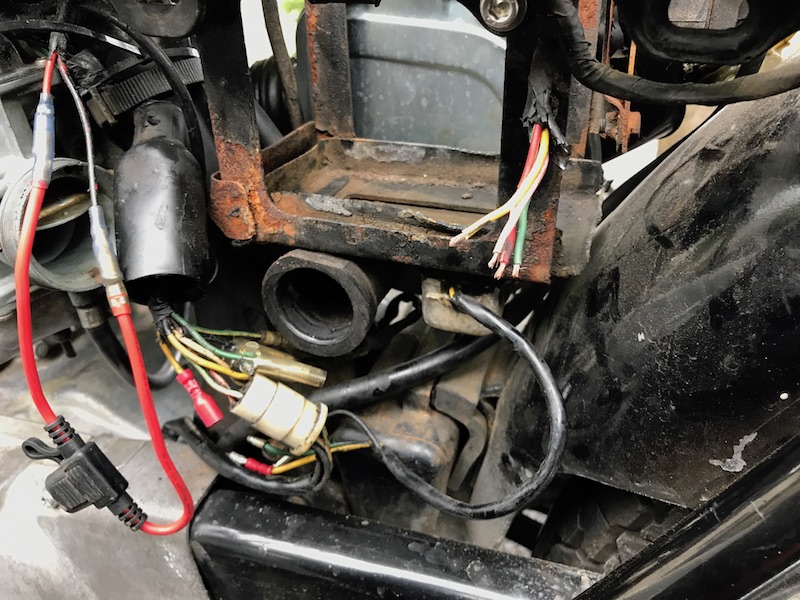
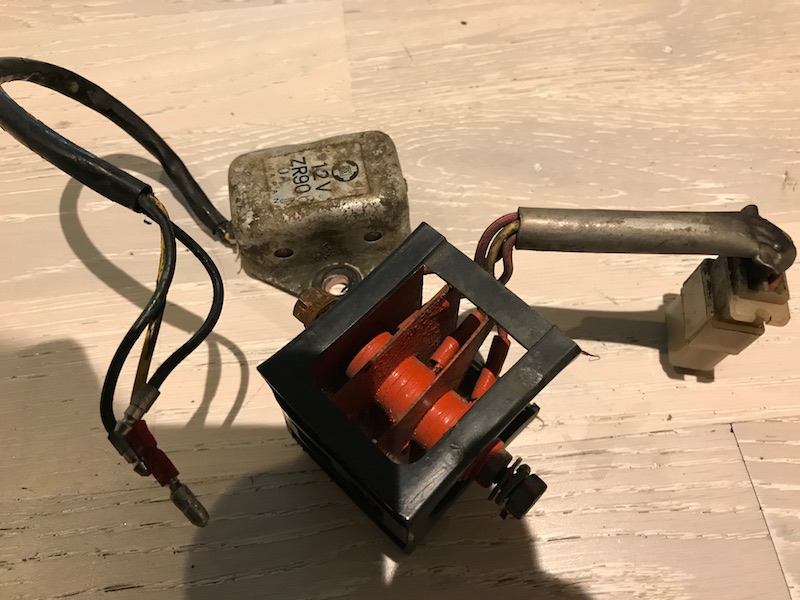
I decided I like the factory chrome look so I added genuine Honda indicators to replace the old rusted out ones. I painted the triple tree and handle bar mounts in VHT Epoxy satin black. Slowly getting this bike tidier. Now these bikes are know for their charging systems being weak, a common mod on these is to remove the old regulator and the rectifier and replace it with a modern 2 in 1 regulator/recifiter unit. Got started pulling out the wiring and noticed it was pretty rusty round the battery holder so that all came out for a freshen up. Can see the factory regulator tucked under the bottom of the battery tray. All removed The original regulator wiring is left disconnected in the loom. The original rectifier (orange fins) is removed and the wiring for this is used for the new regulator/rectifier unit. Yellow and Pink wires are from the alternator, green is earth and red is positive. Cleaned up the battery holder, stripped to bare metal and gave it a couple of coats of epoxy paint. Luckily the new regulator/rectifier bolt holes almost lined up to the original regulator holes on the bottom of the battery holder. A quick file to slot the holes and bam fits mint. Added some super seal connectors for reliability and bolted it all back together. Gave it a polish, as it stands now:
-
Sweet 125, are those 125T spec seats up front? Future engine plans?