

sheepers
-
Posts
8,767 -
Joined
-
Last visited
-
Days Won
45
Everything posted by sheepers
-
went to a freinds wedding on the weekend. i had the Honor of driving the groom to his doom. total round trip of 320K's. averaged 7.5L per 100 for the trip which i think is pretty fucking good. it was such a good trip. both trips, down and back up, were a little bit cloudy so it wasn't to hot, the roads were pretty empty and we just cruised, all 4 windows down rollin like dice. sweet. I'm racing at Taupo this Friday. ill leave on Thursday night and drive down straight from work, race Friday then drive back on Saturday. ive ordered some T3 camber tops and if I'm lucky they will arrive in time to put them in. i reckon with a bit more camber on the outside wheel i could get round the track a bit quicker. i hope to find out........... sheepers.
-
i think its safe to say that the rule was written so any cop can look at a tyre, and if its not bulging out from the rim then they get to write a ticket. its pretty simple, make it easy for the single celled law enforcement idiots to generate more revenue. but you have to admit, putting a 185 40 on a 12" wide rim looks suss as. there are plenty of examples of why its safe (like the drift fraternity who regularly go sideways over ripple strips/ditches/walls etc with stretched tyres) but the law needs to write tickets so they can make yet more money. when was the last time you heard a story on the news about police fighting for more funding to employ more bobbies? good thing im not fucked off about this/spent the best part of a year making something that is now having to be severely compromised due to an idiotic law change..........
-
don't think i hadn't considered it.............. been doing some measuring, no conclusion as yet but its not looking good.
-
ill have to have a think about what i want to do then ill find out about the new wheel width and tyre regs. if you want to know you could find out from the LTSA your self, or ask a bloke down the pub?
-
i did talk to the cert guy. thats where the info came from, a place i like to visit when i want to know the truth. tyre manufacturers can say what they want. the law in New Zealand has just changed, 255 is min width for a 10" rim in this country. no one is aware of this new law and the cert people are trying to put together a case to get the law relaxed slightly but they aren't hopeful. its guys running 204 45 15's on a 10" rim that have caused this law change in the first place. good work guys.
-
FUCK SHIT PISS CUNT FUCK ARSE!!! i am 99% through setting up my rear subframe for the last time, ive been using a 9 1/2" rim with a 245 40 17 tyre to set it up. i was planing on using a 17 x 10 with a 245 40 17 on the back, it all looks good. it real tight and there is fuck all room, like 2mm at its closest point on each side as it goes up and down. no problem, except they have just changed the rules and now the minimum tyre width you can run on a 10" rim is 255. everything is fucked. i think ill have to cert it with 9" rims then change it after the cert. whos got some 8 and 9 x 17 rims they want to lend me???? (5 x 114, 15 - 38 offset will do) fuck.
-
first place i would check is make sure your getting 12V to the B+ pin in the diagnostic plug. that will tell you if the main EFI relay has power and from that the igniters and injectors should be powered. on my one i pulled all the auto wires out of the loom, didn't need to connect anything or "trick" the computer into thinking it was in park. after that your in a bit of a spot because who knows how the shop wired the computer and auto...........
-
got a mates stag do this weeekend. then his wedding next weekend. then nats the weekend after. then away round the east cape for a week. could do the 13th of march???
-
jah, i work with a company just down said road, usual traffic at that point requires some celeryation but yesterday was all sweetness and light......... also, why did you slow that footage down? makes my car look slow as.
-
the motorway is not a play pen, especially when there is an undercover cop 3 cars behind. also, you body kit is coming off just behind the left rear wheel. flapping around like a dunny door in the wind.
-
will be out of service this weekend. nights next week ill be in the shed mostly.
-
do you even have a dizzy? cant see video.
-
you locked the mechanical advance in your dizzy?
-
you had better come round and have a good hard look at how much room i dont have for zorst and steering before you weld those new inner guards of yours in.... i reckon its going to be tighter than a nuns nasty, worse than mine, and i have to take the engine out to change a steering shaft.
-
is it a 50? the last plates i got for a scooter they gave me on the spot, but that was a 50. not sure about non moped.
-
arrow wheels = 4.5k. unless i win lotto tomorrow im going to have to stick some generic made in china shit on it until i can afford something decent (at least 2 years from now). also, just put my brand new windscreen in, was a bit tight with the brand new genuine toyota rubber but it went in eventually. was giving it a wipe and then fucking with one of the chrome clips, not touching the window at all and it cracked in half. sweet, so now i need another windscreen. fucked off much?? yes.
-
if you get this car ready and bring it to the nats then you will defiantly receive an award for most amount of shit done in a short time frame!! you've got a bit to get through but i do hope you make it. will be sweet when its finished. keep on keeping on............... sheepers.
-
the diff is out of my other car at the mo so i thought id have a play with wheels. it looks really good with these on it. pity they wont fit over the brakes, are the wrong stud pattern, they don't make them any more and even if they did i couldn't afford them. but apart from that they are sweet as. the wheels are 15 x 8's with a 12mm+ offset after a bit of measuring i think it would be very do-able to fit 10" wide rims on the back of the 28. has anyone seen or done this?? sheepers.
-

New Zealand Festival of Motor Racing 22-24 and 29-31 Jan
sheepers replied to V8Pete's topic in Upper North Island Region
ill be at hampton on the sunday. not cheep to get in though........ -
the best thing about the Mercedes based burnout was how close the black line is to the parked car that was on the side of the road. mad skilzz
-
quite looking forward to a burger. we got a few people coming tonight or is it just going to be me for a quiet corner table? sparky? me and you, candle flickering gently on the table, maybe some wine and.......who knows?? teabaging. im just putting it out there.
-
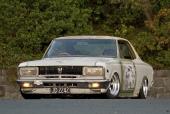
aaaaaaaannnddddd, were back, better pics tomorrow but you get the idea. she's all back together and straight. sheepers
-
well. the car is back to looking straight and true. its all painted and back together. ill get some pics tomorrow at the classic Jap meet. my diff is completely fucked, the center Carrier has about 10 degrees of play on the axles, no idea whats caused this but the only way to fix it is full re-build. I'm in debt up to my (eye)balls at the mo so don't ask me how the fuck I'm going to pay for this but it has to be done. and soon. so no new wheel shells or tints for me........ good to have the car straight and looking good though. will post some pics after Jap meet/Kumeu. sheepers.
-
na man its not. as good as this paint is for just about everything else it wont stick to smooth surfaces. the steel has to be rough as fuck before it will stick. sheepers
-
New Year Classic Jap n Oldschool Meet - 16th Jan 2010
sheepers replied to AE25's topic in Upper North Island Region
you can park at the back. waaaaaay at the back.
