yoeddynz
-
Posts
19,547 -
Joined
-
Last visited
-
Days Won
159
Content Type
Forums
Downloads
Events
Gallery
Everything posted by yoeddynz
-
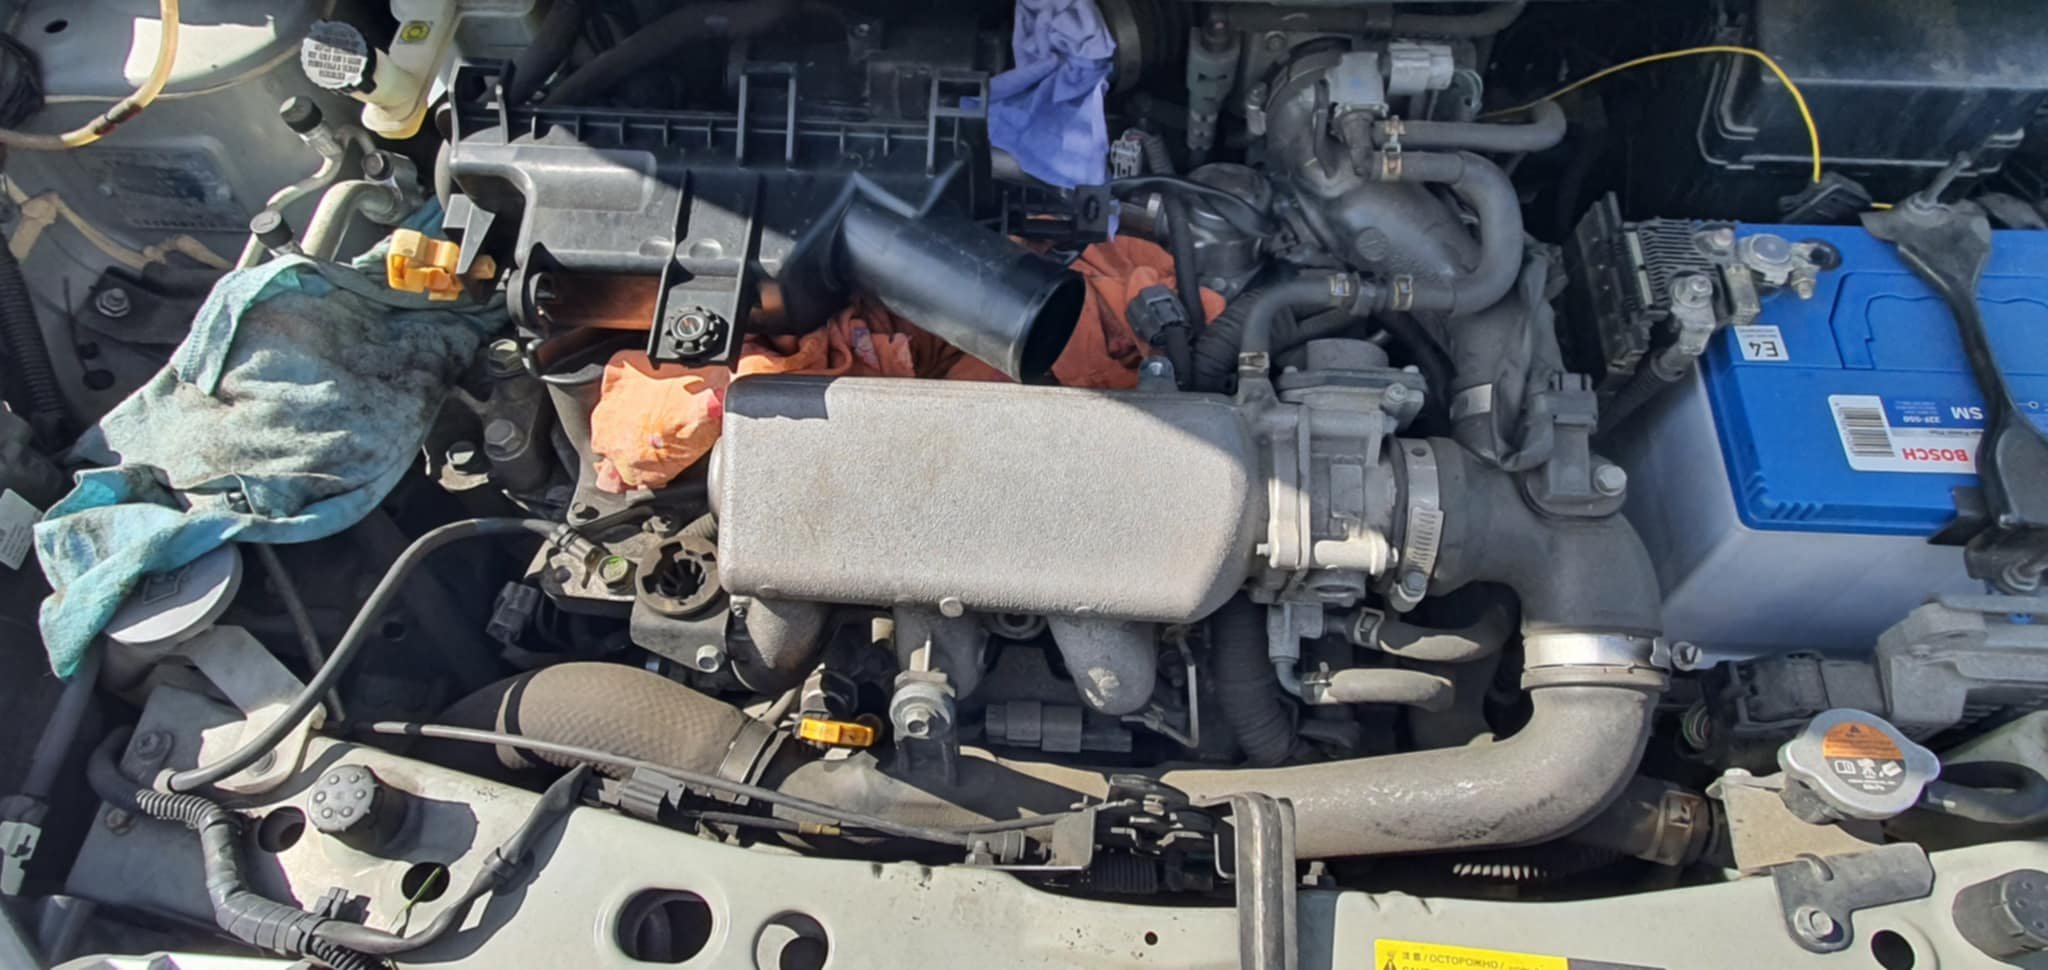
Also - while I was at the wreckers yesterday they told me about a Note they had in for a repair. It has 3 cylinder engine and a supercharger! I never knew such things existed. I've heard of the impulse cubes that have a charger but I didn't know of a 3 cylinder HR engine.

-
I didn't know what they were off until @xsspeed told me (on one of our late night nissan chats)
-
Never. I've enough other projects to finish.
-
Mr18 I think they have. Can be easily swapped into the 1.4 models with minimum work..
-
We spent ages looking at various Cubes online and it seemed most on offer were in the north island. Gets expensive trying to look at one before purchase and then factoring in the costs to get it south. We had a few checkboxes to tick. Ideally light blue, green or white. Has to have the original Cube waffle alloys. We were not sure on 1400 or 1500 but 1500 was preferable. There were some cheap ones ticking the correct boxes that popped up. We avoided a potential nightmare with one when @cletus gave it a quick once over - declaring it a health risk. I was pencilled in to head all the way south to Dunedin to help my brother move north to Greymouth. It turned out that there were two Cubes of potential for sale in Dunedin. Not listed trademe etc so I never knew of them until @a.craw4d told me about them. A plan was hatched. I drove south with my brother girlfriend in her surprisingly capable Nissan X trail. Once down there I checked out both Cubes. This cute little blue 1.4 cvt on waffle wheels that had been lowered extensively. They wanted $5000 I took it for a decent drive involving some proper good hills. It was pretty slow, the cvt didn't quite feel right. Certainly nothing as nice as my mates one we had borrowed. I did a 0-100 test and it was about 14.5 seconds. The engine was also idling at 1500 and the aircon didn't work. Bodywork was pretty tidy although it had been given a fresh coat of paint at the rear with some filler evident from what I suspect was a small accident repair. They didn't want to go less than $4500 so I left to try the next one... This. An Autech edition. The facebook listing photos showed it to be a pretty messy state of affairs as it was being used by a building apprentice. But it ticked a few boxes and had a cool front end with a built in bib spoiler plus side skirts that I liked. I had arranged a week in advance to check it out and they had given it a basic clean. I picked it up and took it out for the same test route since it was handily only 5km from the blue cube. 2006 1500cc 109bhp. Fitted with 17" Nismo wheels from a Nismo Note and some Tein lowering springs. It drove so well. Night and day difference. Cruised up the hills. 0-100 in 12 seconds ! (no chuckling at the back you- look at it. Its a box!) Suspension a bit crashy but he'd said they still have the original springs. $4000 When I returned it and he mentioned it also comes with the original waffle alloys I was sold! Did a video call with Hannah and although a bit unsure about its dirty state she eventually caved in to my excitement. We paid the man and I'd pick it up when next down after I'd done a round trip to Greymouth driving a truck for my brothers move. His new 11acre bushblock place is so cool. I love the shed with house attached. So much retro stuff kicking about too. So a few days later we were back in Dunedin and picked the cube up. Here it is outside his sold Dunedin house. Looks quite tiny.. The following day between moving stuff I visited @a.craw4dAdrians workplace and stripped out a spare door the Cube had come with. He gave me some headlight polish to try out. Worked a treat.. My brother and I loaded the car up with as much of his stuff we could. It was sitting comically low now. Next morning it was up early for the long day mission north to home. Here's some pics.. Finally back home and little Cube was parked up inside.. It ran faultlessly! I was worried about the hills and the climb over the main divide but it romped up every hill with no stress and kept up with all traffic no probs. The cvt makes for really capable quick passing moves. I was also fearing that the boxy shape would lead to pretty poor economy but it returned 6.9l/100kms over the whole trip. Happy with that. Didn't seem to make much difference between open road or in town either (I'd driven about Christchurch to meet a friend for lunch etc) I have never owned a car that collects so many bugs though! The windscreen was covered and had to be cleaned several times. Following morning after a good sleep in I unloaded it. Because my bro and I had been slowly filling the car I sort of had no idea how much we had crammed in the back. Holyshit!.... Apart from all that timber, the wheels and a worm farm there's also a lawnmower in that lot. I'm truly impressed ! This lot in a platform that shares the same footprint as our K11. Hannah and I then gave it a thorough wash. There was green algae in the door jams and it was covered in tar spots from the road works I'd been through. Its come up very nice. Much better than I expected. I've removed the seats and cleaned out the interior. The carpet came up really good with a bit of vacuuming. The seats have gone to a mate who runs a local car valet business because I know he'll do a good job on them and I don't want to risk discolouring those Autech spec seat covers. I've been to the local wreakers and picked up a set of dark grey floor mats from a Cube they have there. Lucky because they seem to get snapped up pretty quick. Next step is a proper full service on the cvt. Drop the sump, replace the 2 filters and fresh fluid. From what I have learned, both online and from a cvt workshop up north the biggest killer of these is lack of proper servicing. The prescribed interval is far too long and most garages just replace the oil, ignoring the filters and sludge that collects in the sump. The stock bearings that jatco fit in the cvts are also of cheap quality, with poor hardening and they can start breaking up. Replacing them with decent Japanese items is the way to go and something I'll look at doing on this in the future (or to a spare box would be ideal)
- 86 replies
-
- 19
-

-

-
Somemost of you probably know that I quite like the little Nissan Cube Z11s. Both Hannah and I have been spotting them about, checking out various listings for sale and pondering whether a Z11 might be a better more useful car for trips away with bikes than our existing K11 Micra. But we'd never driven one and had no real idea on how much they could carry. So we borrowed a mates Z11... and tried it out for interior size.. It could easily fit two full size 29" mtbs with the wheels removed and just about squeeze one cyclocross bikes in with just the front wheel removed, set at an angle. I quickly sussed out a mounting system I could fabricate that would utilise the rear headrest holes. We parked it in the covered K11 parking bay. Being only a smidge longer and an inch wider than the K11 it was a breeze in. We took it for a decent drive too and it was actually way peppier than we both expected. Its the 1500cc version. Now since there's a couple of engine/transmission options available for Z11s plus other options I think I'll give a quick run down on Cubes for those of you still interested enough that you've not left the party yet. Z10 - the ugly one. 1998 to 2002. I'd never even contemplate one but they do have some fans out there. Imo its a pretty bland looking small car with no interesting features. Powered by the same CG13 engines as seen in K11s. CVT box. Z11 - 2002 to 2008. A complete style change from the Z10. Based on the K12 platform. New CA14de engine and either 4 speed auto or cvt option. No manual option. 2 facelifts. From facelift 1 in 2005 they introduced the HR15 engine and a refined CVT as used in the Tiida platform. There was a 170mm longer wheelbase option with 2 extra seats. badged a Cube3 - referred to as a Cubic. Definitely more usable but a little bit awkward looking imo. There is also an E 4wd version that has an electric motor driven differential under the back and applies drive to the rear wheels when the front wheels slip. Z12 - 2009 to 2019. Similar platform although now shared with Renault. A more bulbous exterior design and interior completely changed. Started with 1500cc and for a short period sold outside of Japan. America (possibly Europe) even got a the 1800cc 6 speed manual version, as per the later Tiidas. Also diesel options in Europe. Loads more Z12s available and while I think they are still neat cars they just don't have the same appeal as the Z11s. Z11s there are numerous styling options with several different grills. The grills are how one can tell the model. original grill from 2002.. Facelift grill from around 2005 when the 1500 engine option came in. Probably my favourite standard grill. Facelift 2 grill on the last Z11s.. So yeah. Both Hannah and I were becoming Z11 nerds and now the hunt for the right car was underway....
- 86 replies
-
- 12
-
-
-

Discuss here about Yoeddynz's little Imp project...
yoeddynz replied to yoeddynz's topic in Project Discussion
..and that was without any bags of cement in the front too. -
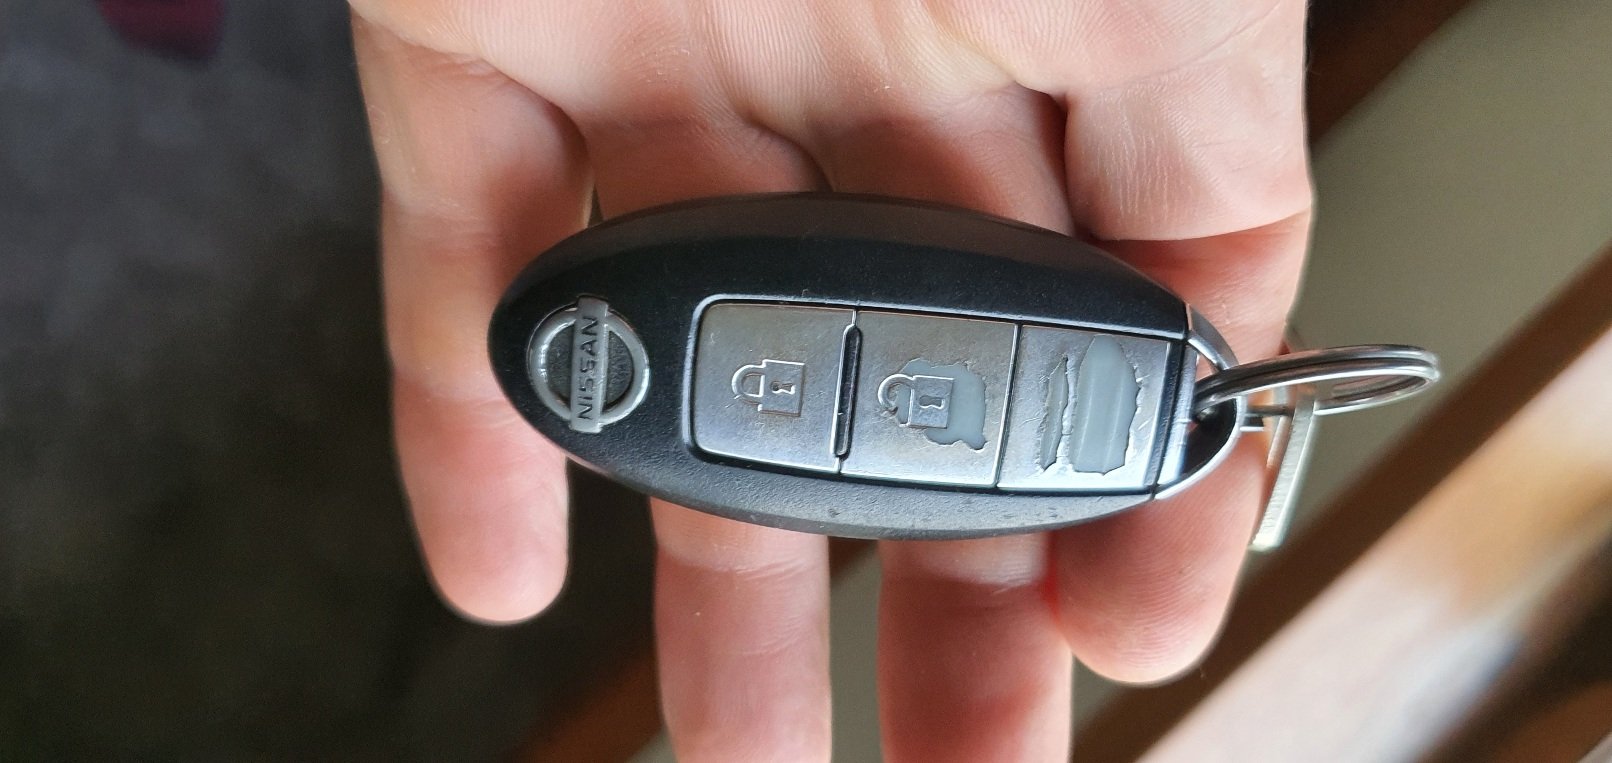
What's the deal with getting spare key remote fobs that have a chip in them. Can I get one from the same make/model car at a wreckers and get it re-programmed at a key place? Or do I have to buy a new one and if so is there a recommendation on cheaper places to get them?
-
VGs Little FJ40/Off Brand Power Wheels & Trailer
yoeddynz replied to Vintage Grumble's topic in Other Projects
Wow. Fuck this is cool. Congrats on an awesome build. -
Speak to @nick_m and see what he could make you?
-
@Bling your 18kg package of sound deadening failed to destroy our tough little post girl...
-
I'll pm ya now.
-
Yeah go on.... I'm totally happy to extract you from your bitumas trap and allow you to run free again... Then I can do a review for all.... "So I received Blings 18kg of sound deadening from a very pissed off looking mailman. I then carefully layered it up on top of the fuel tank in the front of my imp and my god- this car has NEVER FUCKING HANDLED AS WELL AS THIS BEFORE!!! "
-
"The power of oldschool is strong in this one"
-
How's that finger pulling going? I'm in the market for some sound deadening and Amazon keeps telling me they wont ship to my address ? (because rural?) So the stuff you bought has me intrigued.
-
I play the exact same music whenever I'm out racing the gringo tourists in their Tiidas here.
-
How did you get on with this @zep ? Do 100 series 4wd hiaces with the lsd rear end have the correct axles you need?
-
Oh and there are other cams available. I was going to get some. I can't remember who/what brand but it was via the mx6 forums I'd found them.
-
I'd be keeping it simple too and just enjoy getting it on the road. It's pretty impressive how fast a lightweight car (like my viva which was around 1 ton iirc) can feel with circa 200bhp the KLZE engines put out. Get your itbs and exhaust sorted and you may well be looking at a bit more. I'll just put this video here. I imagine he's running some high compression and it has itbs etc but certainly no variable valve timing or other alien magic Just pretty oldschool tuning on a fantastic base engine design.
-
Tomble's adorable go cart / distraction / Alto Works
yoeddynz replied to tomble's topic in Other Projects
Just catching up on this thread. Did you actually clock up that amount of kms in such a short space of time or is that a typo? -
Is that factory fitted fake carbon on the dash or added by a po? Damn I wish I'd bought one of these and bunged it in the container (we had the room) when we moved home from blighty. They were stupidly cheap because not fashionable at the time and very few decent outfits with real experience in the uk. In the early 2000s when we had our FBs you could pick up many rx7s series 1 through to 6 for beer money if you looked about - especially if not running. It's different now and cheap ones there are hard to come by.
-
Yoeddynzs 1965 Hillman Imp. Dashing about with cowskin.
yoeddynz replied to yoeddynz's topic in Projects and Build Ups
Because I'm such a hardcore party animal on new years eve here I am doing an update. The imp needs more fresh air via face vents. See this grill here.. Removed there's this... Air inlet for main ventilation system is here in the left.. I wanted more air. So on this side here... I cut a hole.. Filed it smooth, painted the edges and moved on up to the passenger side bulkhead where another hole appeared.. From the inside, once cleaned up, matching hole in bulkhead cover and fire extinguisher moved below the shelf.. I'll connect these holes with more 2" alloy flexy tube and create some sort of scoop/nasa style duct to help channel air at entry point. Moving to the back. I have never really fully clicked with the look of the all black leather covered rear bulkhead garnish that I'd made to hide the access cover above the engine. Its a bit too much black which makes the bay feel smaller and darker.. So I removed the lower half of the leather right below the bottom alloy strip... It was stuck on harder than I expected. Then spent ages cleaning off the contact adhesive residue left.. Prepped it for paint, masked it up and set up the paint shop.. Sprayed lots of blue about with most of it hitting the target and leaving my characteristically custom 'leather pattern paint finish.tm' ..... Once set hard enough enthusiastic me could remove the masking tape and fit it in place. It looks much better me thinks! ... There's a side panel I want to make next to tidy up the drivers side inner bay and I'll be pretty happy with the bay then.- 121 replies
-
- 38
-
-
Yoeddynz's 1985 Hino N0915 housetruck build.
yoeddynz replied to yoeddynz's topic in Project Discussion
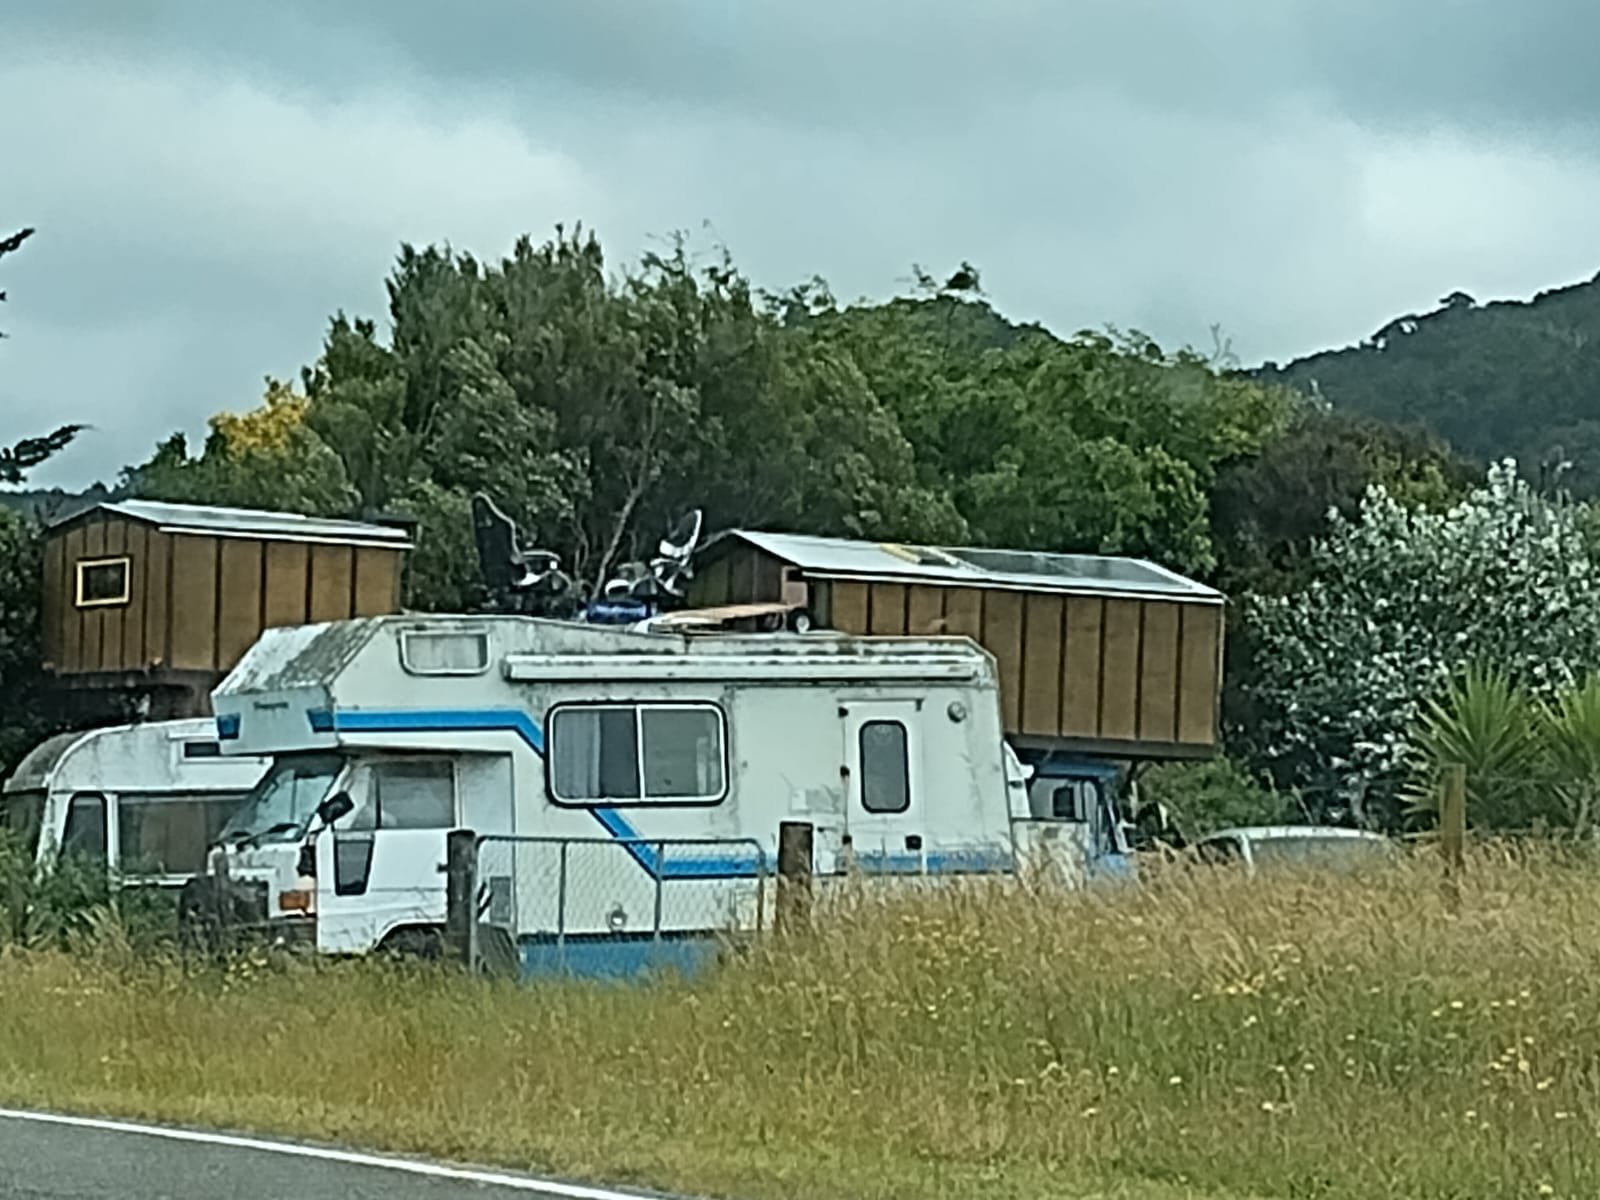
Thread Dredge.. Our old house was spotted yesterday over in Puponga by a friend of hannahs family. Now with added chairs on roof.
-
Discuss here about Yoeddynz's little Imp project...
yoeddynz replied to yoeddynz's topic in Project Discussion
The vast amount of energy AI just used to create those yet still got some spelling wrong I'll post one up on the mybookspaceface hillman imp page and report back with responses. -
Discuss here about Yoeddynz's little Imp project...
yoeddynz replied to yoeddynz's topic in Project Discussion
I roll my eyes often.