yoeddynz
-
Posts
19,468 -
Joined
-
Last visited
-
Days Won
158
Everything posted by yoeddynz
-

Discuss here about Yoeddynz's little Imp project...
yoeddynz replied to yoeddynz's topic in Project Discussion
Yep for sure. It's getting close! All the little bits left to assemble, modify or build now are fun easy ones too. -
Yoeddynzs 1965 Hillman Imp. Chasing Flappy whirrs
yoeddynz replied to yoeddynz's topic in Projects and Build Ups
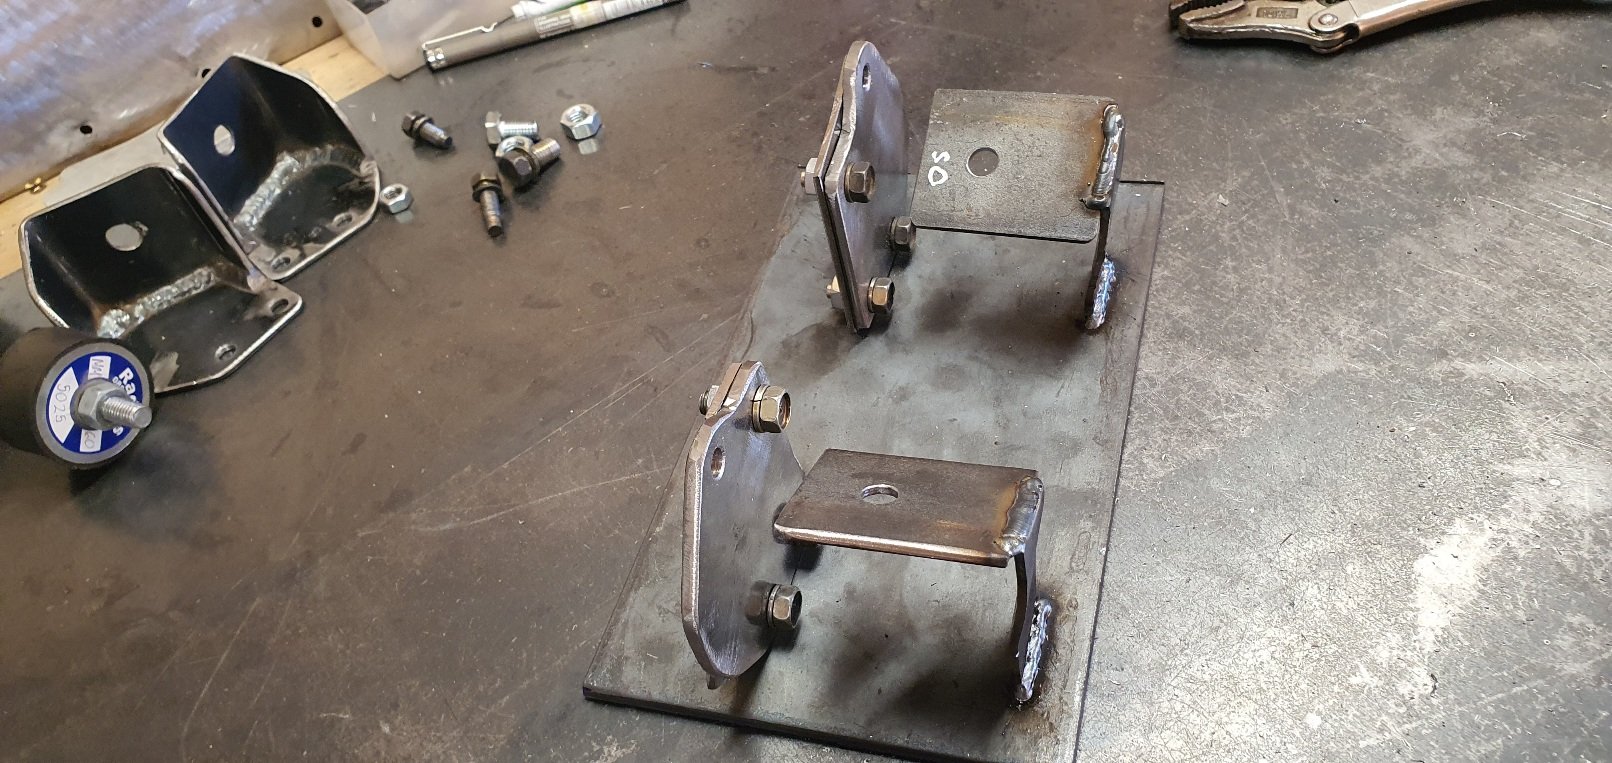
Sealing up the cut out tunnel top and under the rear seat was to be the next stage but first I decided to make some new beefed up engine mounts. The originals I had made from a mixture of 3 and 4mm steel were probably fine but i wanted to move the crossmember backwards away from the engine for a little bit more clearance. So while I was at it I thought it best to use thicker steel. To start with I made a jig based off the original mounts. Now there were datum points to build to, allowing for extra clearance while I was at it. I popped into G3 engineering where I get a lot of my steel offcuts from and grabbed some 4mm plate. I had 5mm at home for the main backing plates. Used the hefty steel bender.. Tigged the majority of the welds except the inside ones I couldn't reach which got mig welded. Plenty of heat. These wont fail. Added gussets just to be sure... The new mounts now set the crossmember further back by about 5mm. I could now drill the holes through the chassis rails. I made up a new pair of backing plates with extra holes and captive nuts. The plates extend further forwards to line up with the holes that Datsun crossmember bolts through. I can now easily bolt in either crossmember. I was super happy to discover that due to the flat six being only 3 cylinders long I have enough room to pull the engine back so its gearbox bobbins are clear of the gearbox crossmember. I can then raise the car up and away from the engine, all without having to remove the rear bumper and valance. Now the engine was in its final position I could replace the lid on the tunnel, now 50mm higher. I started with this bit and had to cut out a section to allow for access to the toyota spec gearbox speedo sensor plug... Making sure there was ample clearance all round so the box cant knock the tinwork on rough roads I proceeded to box the tunnel back in... Kneeling down on folded up bits of foam and towels was my home for the next few hours... Cardboard trials, then steel, cut, trim, tack, check, weld... Finally boxed in. Another access hole let in so I can get to the top universal joint and lube the gearbox selector shaft. It was a very good part of the build to finish. Seeing it all sealed up, strong again. I have yet to check the rear seat squab but I feel confident it'll fit with some modifications to the wire frame within. Underneath looked neat... Hannah has now painted the tunnel inside and out with Epoxy paint. After I have finished any other little fabrication bits or hole filling/drilling in the engine bay I'll give it a flick of blue paint (hopefully not making everything else in the workshop blue like the first time) Now it was onto the rear suspension arms. I am using the set that came on the green imp 2. Surface rust needed wire brushing off outside... Painted with KBS rust seal (Aussie por 15 clone).. Another bit I could have got away without doing but I thought best to make while I'm under the car was this brace... Pulling up tight to the floor via spreader plates under the seat base... I have added it to brace the floor halves inline to help keep the suspension mounts inline during hard corning. Like said, I'm not sure if its essential but it might just help avoid any weird effects like rear steering. I know its a bit ugly but hey, at least its hidden under the car. On the subject of bracing I also made this little brace... To help stiffen the top of the tunnel near the shifter so it doesn't flex. again, not really needed but I do want a really positive shift action without an excess movement. So now my next job is to run out the brake/clutch/fuel pipes back along the tunnel and then reassemble the rear suspension so I can setup the handbrake cables. I'll have to paint some bits too. The crossmember, mounts, fuel tank etc. The work area looks like this with bits everywhere... In other news we had these treats turn up in the mail, a surprise present from my brother in Wales... He had gone to a big collectables/toy and model show local to him where he then spent a good amount of time asking at the various collectors stalls for any Hillman Imp models and found what is quite a rare and sought after Dinky toy car... Plus a cool little Imp police car .. They turned up in the post yesterday as a surprise and made our evening. Very cool. Thanks bro!- 120 replies
-
- 67
-

-

-
That's pretty much what I'll do I think. Just try the one I've got and go from there.
-
What's the most common issues with these. Is it just the gearbox or the transfer case etc? A friend had one in blenheim and we had some good fun ragging about in it. He got more stupid with his speed though until his meagre levels of talent finally ran out one day and he wrote it off in a spectacular crash near seddon. I suspect these cars saw many a similar fate as just so easy to go very very quick in.
-
What size clutch master cylinder bore are you using with your concentric slave? It looks like I much get away with my stock 5/8 imp item according to this.. https://www.rwdmotorsport.com/product/slave-cylinder-for-duratec-engine-to-ford-gearbox-hydraulic-clutch/ Although it depends on my pedal ratio too.
-
Discuss here about Yoeddynz's little Imp project...
yoeddynz replied to yoeddynz's topic in Project Discussion
Radical cars make an especially nice V8 with busa heads. -
Discuss here about Yoeddynz's little Imp project...
yoeddynz replied to yoeddynz's topic in Project Discussion
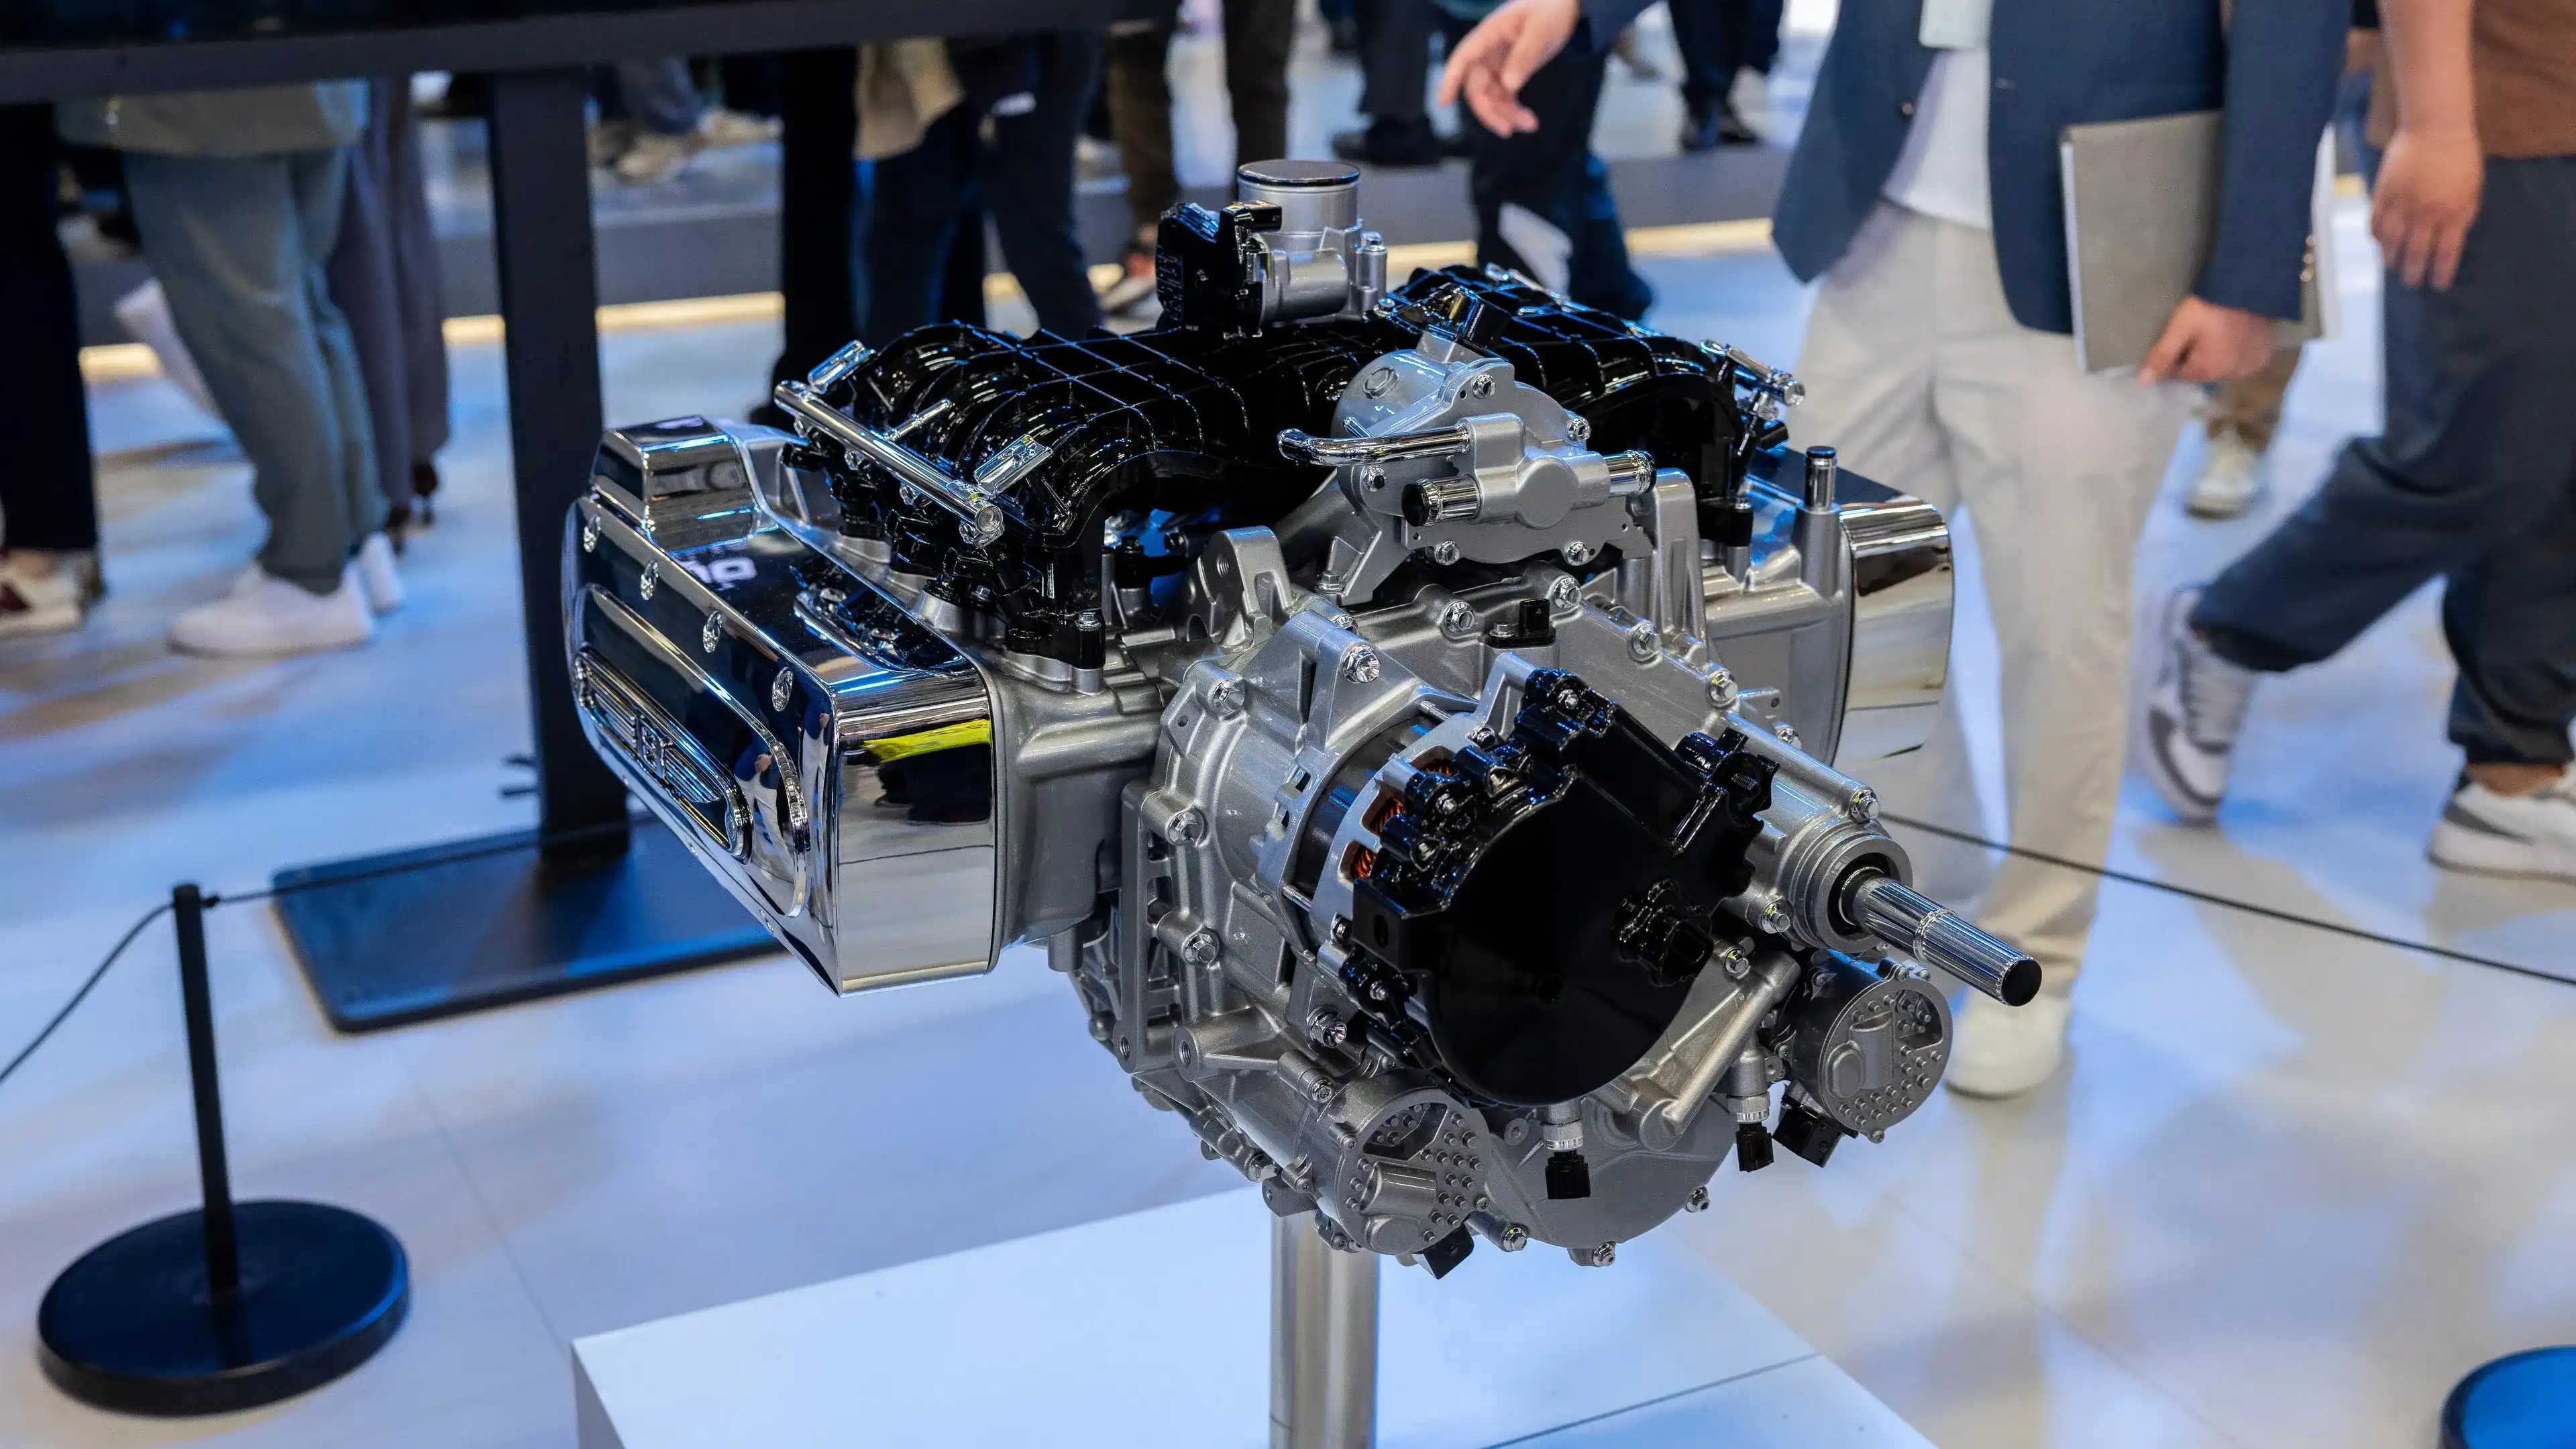
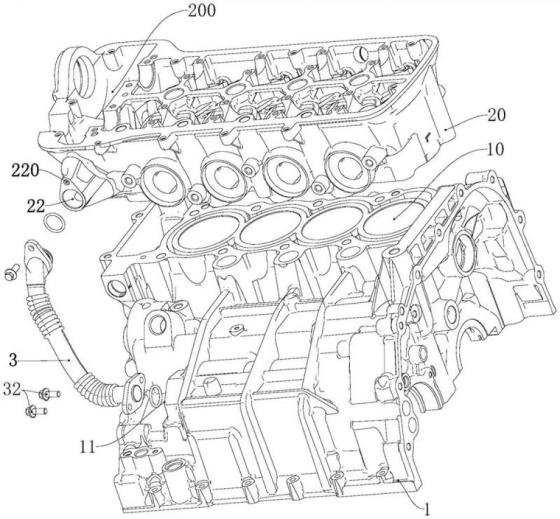
In other news. More pics I've found of that chinese flat 8..
-
Discuss here about Yoeddynz's little Imp project...
yoeddynz replied to yoeddynz's topic in Project Discussion
Yeah it's got baffles and a high oil line. The cylinder bores extend in quite a long way toward the centre line too so the oil can't 'ride up the walls'. I think it'll be OK but time will tell for many of the aspects within this build. Otherwise it becomes the world's longest coffee table build... -
Cool. I've just made a 'acme mount jig 2000', got my 5mm base plates bolted in and will pop to town for some 4mm plate.
-
@cletus Is there a minimum thickness of steel required for engine mounts - the parts that bolt to the engine. I've made mine from 3mm steel and but for adding an extra gusset they are finished. I don't see them failing (each one carries circa 50kg static weight) However I have started making a new pair, mainly so I can move the bobbins and cross member away from the engine by another 5mm so avoiding any chance of annoying knocks on bumpy roads. The base that bolts to the engine is 5mm. But to build the rest in 5mm will be tricky and I feel total over kill. Will 4mm be OK. It's thicker steel than I've seen on most oem mounts. Ive looked on the lvvta site and can only find this.. Nothing about minimum thickness? An engine-mounting system in a low volume vehicle must be of good design and construction, must position and support the engine correctly, and must be securely attached.
-
Mr.mk1's Mopar or No Car '70 Dodge Coronet
yoeddynz replied to RUNAMUCK's topic in Project Discussion
what does your boss drive? -
Yoeddynzs 1965 Hillman Imp. Chasing Flappy whirrs
yoeddynz replied to yoeddynz's topic in Projects and Build Ups
Flat six in Cut away under the seat base and the tunnel as per on the green imp. The air saw was so perfect for much of this job which means much less grinding dust everywhere. I've marked out where I'll cut away a little bit more. I'd rather give it extra clearance now than ending up with it potentially knocking against the steel on a bumpy road etc later. Cut off a couple of superfluous tabs sticking up on the transmission for the same reasons as above. Oh I also couldn't resist a photo of the two power plants next to each other. It's hard to gauge sizes from the pic though as the Datsuns wheely stand 2000 is much lower.- 120 replies
-
- 81
-
-
-
Yoeddynzs 1965 Hillman Imp. Chasing Flappy whirrs
yoeddynz replied to yoeddynz's topic in Projects and Build Ups
Getting closer!!! Next job was to strengthen and close up the rear valance. Pics.. Added internal bracing. I probably didn't need to. Its not really under much stress now without an engine hanging on it as per on an original imp setup. Just closes off the back end, gives something to hang an exhaust on and something for the fiberglass engine cover to latch onto. But hey, I'm only adding a little bit of extra weight... Gave the inside an extra layer of zinc rich paint .. Closed it up.. Flap disc on the welds and trial fitted it. I won't yet fit any exhaust mounts. i want to weld those on when the engine is sat in the blue Imp so its all done to suit its home as no two imps are exactly the same. It looks neat in place though. Speaking of exhausts. I needed a bit of rod for a customers job and went searching through the steel rack... ..and I found this bit of stainless rod with an eye pressed in at one end. Its perfect for the valve actuation rod that'll run along the exhaust box.. I've been having a little browse at various actuators on Ali express and I think one of these could do the job well... https://vi.aliexpress.com/item/1005003796596080.html?spm=a2g0o.cart.0.0.148738damrmWCz&mp=1&gatewayAdapt=glo2vnm With the valance sorted and covered in some epoxy paint ready for a skim of filler I could now remove the engine from rusty green imp. That's the last time it'll be sat in there. Not sure what will become of that shell. Maybe garden art? Maybe just chop it up and keep any useful repair panels in case I have a whoopsie with Blue imp? Its not too rusty and could be saved but it would take another fella like me to do such a silly thing to a car where you can buy better shells, rego on hold, for not much money. British imp fans would probably save it though as its a good solid base compared to what I have seen on offer in the UK. Green imp was then pushed outside into the cold and I sat in front of the wood burner, warm and cosy. I cut the main engine loom in half and let in a big multi plug. I'd been contemplating whether I'd be bothered to do this for some time now and I'm really glad I did for it didn't actually take very long to do. It'll make removing the engine even easier with no need to disturb the ecu wiring under the rear seat. I then removed the gearbox and made a cover plate for the gap located below the flywheel. The bellhousing opening it covers faces forwards and I don't want to fill it with stones, dirt, dead possums etc. Removed the flywheel and carefully ground a lead onto each tooth on the Subaru ring gear. Its designed for a different rotation on the starter and in use the starter would sometimes not mesh properly and make a horrible loud 'gnashing of metallic teeth' sound. Not keen on that. I'd also given the pinion a similar grind so hopefully they'll slide in nicer. Time will tell. I then machined up a basic clutch disc alignment tool.. I refitted the valance and exhaust to the blue imp, drove it into the workshop and then removed the lovely comfy, but not exactly period correct (like as if that's an issue with me....) Tomei steering wheel which will now be fitted into our Nissan Micra. I then cleaned up the lovely Moto-lita steering wheel that has been hanging on the wall for years since I sold my Viva HB. My Uncle in the UK worked for a short time at Moto-lita many moons ago and got this wheel then. He'd fitted it in several cars including a few Morris Minors. When he died my cousins gave it to me after his funeral. I'm very happy to be fitting it in the Imp. It's more in keeping and looks great. I was also happy to discover that Imps and Vivas share the same spline pattern so I was able to use the original nicely made boss. I also removed the stereo, speakers and parcel shelves. The speakers were always in the way and getting knocked by my feet when I entered the car so they won't be going back. Then all the blankets and other stuff that's accumulated in the imp. Lol at the several British airways blankets that had found their way into the imp... Next up were the Recaro seats. Out they came. Definitely going back in though. Might not be period correct but they are lovely. In the future, once I've won lotto I'll get them recovered in a more suitable style. Looking quite bare inside now.. I do love the two tone red/black colour scheme on the door cards and the red rear seat. But I don't love the super sticky flashing tape I'd used to hold down the loom under the rear seat. This stuff is great if you don't want things to move or you desire tired hands trying to remove it. Now it was finally time to remove the Datsun engine. Actually now it was time to make a 'Datsun 1200 wheely stand 2000'. I want to have an easier system to remove/refit the Datsun lump without having to use a top mounted engine cradle and sling - a setup that was due to the centre mounted engine cross member. So I made this.. Yes, a bit over built, but it'll find other handy workshop carting uses in the future if the flat six proves itself and the Datsun setup gets sold on. Fitted sturdy wheels, painted it workshop grey and whipped up a plywood engine cradle with room in the centre to drop the cross member down into. Now in action. Much easier and way faster!!! Engine out... Still a neat little engine. If I was to keep it in the Imp (like said above, the flat six has to prove itself) I'd rebuild it, balanced properly, fit my oval port head, sporty cam, itbs and full engine management. Then promptly destroy the Imp transmission... Arty shot... I stripped out the remaining bits from the engine bay, the rear suspension and cross member. Drained the fuel tank, luckily only 5 litres to bother with, removed it and stashed it away in the garage which is now filling up with imp parts. Brought the green imp back in from the chill so I use it to take measurements from. Measured and marked out the cut lines where I need to chop out under the rear seat base for the taller Subaru transmission. Covered the inside glass surfaces with paper. I'll get Hannah to block grinding sparks when I'm doing any cutting from under the car. So that's where I'm at now. Next job is cutty cutty time.- 120 replies
-
- 52
-
-
Discuss here about Yoeddynz's little Imp project...
yoeddynz replied to yoeddynz's topic in Project Discussion
Some automotive giant just has to go two better than me ... https://www.drive.com.au/news/new-eight-cylinder-engine-unveiled-by-gwm/?fbclid=IwZXh0bgNhZW0CMTEAAR1aiB3PXuiLRd9ukNk_ucsvESzdzwxU9-_stypa2F3u6aTlry_BaVBOc8A_aem_AcchXiUEBUlrG8C2lcTfmSXIf_SOxeiKhKhFSjGGpB7CQ0ORNZUjLV_zXG-FUCh7Tkzl9RHVbHNFSWTX_L7cJHTY 'It's understood GWM is looking to enter the motorcycle market, with the flat-eight a good indication the company will be targeting large touring bikes such as the Honda Goldwing and BMW K1600. However, some industry pundits have already begun speculating which classic cars would be best suited for the eight-cylinder motorcycle engine'
-
Discuss here about Yoeddynz's little Imp project...
yoeddynz replied to yoeddynz's topic in Project Discussion
Cheers Chris. Interestingly the other chris @chris r recons he's got some for me too I'll be able to fill the whole cabin at this rate. It'll be one super quiet, slightly itchy ride. -
Tomble's adorable go cart / distraction / Alto Works
yoeddynz replied to tomble's topic in Other Projects
The other day I was removing the gearbox and a big bellhousing bolt dropped to the floor. I heard it ding. I looked for it and couldn't not find it anywhere. I kept going back to the same spots to look, even though I knew I'd looked before, just in case I'd missed it. I had a spare bolt but I was getting so annoyed at not being able to find this one. It just had to be found. I called upon hannah to help look. Vacuumed under benches, shone lights everywhere. Fuck. How could it have gone far. In the end hannah found it. It had bounced off the floor and into a shelf area at the bottom of the wheelie tool box nearby. It was just sitting there, on the edge of the shelf, laughing at me the whole time.- 87 replies
-
- 10
-
-

-
Tomble's adorable go cart / distraction / Alto Works
yoeddynz replied to tomble's topic in Other Projects
You could be on to something there... -
Max's Ke70 Wagon 2TGEU Speeduino Discussion
yoeddynz replied to GARDRB's topic in Project Discussion
Those speeduinos offered by kiwi efi are a bloody bargain for a built up ecu with a decent plug. -
It's such a noble old beast. Gonna be super cool to cruise in.
-
Discuss here about Yoeddynz's little Imp project...
yoeddynz replied to yoeddynz's topic in Project Discussion
Oh its totally an experiment and for sure there's a chance it might not make a huge difference. It's quite a big shortening of the route though so I feel ill see a fair bit more noise when they are open. I'm excited to find out. -
Tomble's adorable go cart / distraction / Alto Works
yoeddynz replied to tomble's topic in Other Projects
Have your looked under the sofa or behind the fridge? That's where stuff often goes to hide. -
Because me and hannah are broke after a summer dealing with you know what. I want to come along and hopefully it might happen but right now it's not the most important thing in our lives. I am however superstoked for everyone that its going ahead.
-
Max's Ke70 Wagon 2TGEU Speeduino Discussion
yoeddynz replied to GARDRB's topic in Project Discussion
You'll be fine using the dizzy triggers. So many Japanese cars did just that with no worries. Are you going to run full sequential injection? -
Fuck yeah. Cool story and neat beetle. Looks like you've been bitten by the bug.....
.jpeg.5aac7ffd55904278a626c9e09ad1426e.jpeg)