Lord Gruntfuttock
-
Posts
13097 -
Joined
-
Last visited
-
Days Won
27
Everything posted by Lord Gruntfuttock
-
I just ride the Vespa in arseless leather chaps...
-
Jeez, got a Harley and a Vespa. So confused...
-

Lord Gruntfuttock's 1971 XY Fairmont
Lord Gruntfuttock replied to Lord Gruntfuttock's topic in Projects and Build Ups
Rigged up a trial run last night, looks like it will go ok, lots of clearance for the window and nice straight line operation with a simple bend in the connecting rod. The supplied bracket was too flimsy though and bent at the indentations of the door panel when I tightened the screws, meaning the plunger fouled against the edge... So made up a sturdier alloy bracket to fix that at lunchtime today, bar was thick enough to tap the csk mounting scews. Tried operating it with a small 12V battery from one of the kids toys, but didn't have enough grunt to lock/unlock. Hopefully a better test supply will fix that... Next problem will be how do I get wiring into the doors, would like a neat solution that doesn't stress any wires, so looked at flexible rubber boots. Thought it'd be a doddle to find some common Ford part that would be a couple of bucks, but apparently not. Obviously these things don't fail enough for pattern parts to be a thing. Also don't want a big fat tube from modern cars as there's only a couple of wires. Disappointed the smallish Fox-body 'stang boots aren't readily available, but found a universal set that should do the job, and ordered... But how to drill the holes? Rear door 'should' be do-able, if a bit fiddly, but the front looked impossible to get at, even with my Ali-spec 90 deg drill adapter... Solution? Drill from inside the door, gotta love fat old car doors at times. There's a moulded dimple on the door I'd like to use so it's the same each side, so wrangled the drill inside and pilot hole is drilled ok... Will wait till the boots arrive before completing the job so the sizes are right. Hopefully can drill the body side from inside the car, will have to remove the speaker to see if it's possible, otherwise it's a doors off job... [Edit] found my old 'dumb' battery charger and touched terminals, satisfying clunk and it works...- 149 replies
-
- 11
-

-
Lord Gruntfuttock's 1971 XY Fairmont
Lord Gruntfuttock replied to Lord Gruntfuttock's topic in Projects and Build Ups
Been using the car a bit and one of the few modern things I miss is central locking. I'd bought a kit years ago but never put it in as it was a bit cheap looking, so shouted myself a new high-torque kit from Bluewire (Aus) that is supposed to be great for classic cars... And pulled a rear door card off, looks like back in the day I'd used masking/insul tape and almost gladwrap-spec plastic sheet as a moisture/dust barrier... So thought I'd do it properly, scraping off all the old mastic and cleaning things up first... And pulled the door mechanism out. Also wanted to free things up a bit as kids struggle to operate the doors, pretty much just 50 yr old car life... Plus the latch mech had been painted at some stage, which bothered me... Gummed up... Chucked the bits in my Ultrasonic cleaner, so good for things like this, came out mint... And door all cleaned up and mech temporarily put back in, operates much better now, solid clunk and noticeably easier to operate. Will grab some lithium grease and lube things properly before final install, should probably clean and lube the window mech as well. The central locking motor will have to push-pull the horizontal rod covered in fibreglass tape, looks do-able by mounting it left of the central vertical section of door... And latch looks better cleaned of paint, prob need new rubbers as well. You can see the new polythene sheet I will use on the back seat, all of $4.98/m from the Mitre 10 garden centre... And the lever arm contact part of the internal handle is quite worn (seen here from inside of door). Operates ok, but it's around AU$26 for a new one so have ordered some. Prob should have ordered new chrome knobs and rubbers at same time but can do that later. Have also ordered some butyl sealant that stays plastic, not sure what tape to use on edges, will look into it. Next update after fitting motor unit and testing...- 149 replies
-
- 21
-
-
Really enjoyed seeing the startup vids, must be so encouraging. Loving the detailed progress updates, good to see an unloved old car being saved, watching with interest...
-
Lord Gruntfuttock's 1973 Honda Trail 90 (CT90)
Lord Gruntfuttock replied to Lord Gruntfuttock's topic in Two Wheels
So still looking at getting the old 90 legal, not sure I actually need indicators given the year, but it has front ones fitted and a switch on the bars so thought I'd fit rears to avoid any arguments. There's some holes in the rear guard so I sketched up a cardboard template and pressed it in place to get locations... And cut a couple of plates out of scrap metal, stacked them to drill holes then bolted together to shape so they were the same... And I'd joined the Barrys poking around the recycling centre to find a bit of scrap tube to use as a stand-off. Found some machined plungers that I suspect were drawer soft closers or similar that were the perfect size when I pulled out the inners. Chucked them in the lathe to machine down the fat end though and tool just skipped across the surface, they were very hard metal, file wouldn't mark them at all. Looked into softening hardened steel and seems you just heat orange-red and cool very slowly, LPG bottle torch managed the first stage nicely... And I had the oven cranked as hot as possible, carried these inside, put them on a tray and turned oven off and let it cool over a few hours. Success, they machined nicely... One done, cut a small 12mm step to fit in the plates I'd drilled out to suit... I was going to weld them up, but have always liked brazing, and I had the torch out so silver soldered them together... And in place, wire just goes through to under the guard, there are captive nuts behind the 2 holes on the right so easy to install. Quite pleased with the shape, shame about the rust hole in front of it tho... (patina M8)... And how they'll look... I've painted them black after this trial fit, masking off the bit that goes inside the lamp as that is the earth contact. Pretty happy with how they came out, plus learned some metallurgy. Think I've got a 6V flasher unit somewhere, so will wire them up at some stage...- 58 replies
-
- 15
-
-
Molesworth Moped Melee, 5th, 6th. 7th march 2021
Lord Gruntfuttock replied to RUNAMUCK's topic in South Island Region
Yeah sounds superb, but can't see it happening cos: Munro week next week Work commitments, bad time of year Too gay Mate I was thinking of going with is doing the same run a couple of weeks before (not on small pest bikes tho) Not gay enough Family holiday just after Haven't tested the CT more than round the block What is the right amount of gay for this anyway...? -
Screenshot of Ali, should be able to find from description... Seller was Autofly store, arrived pretty quickly...
-
Lord Gruntfuttock's 1971 XY Fairmont
Lord Gruntfuttock replied to Lord Gruntfuttock's topic in Projects and Build Ups
Still tidying things up, sadly my old sanyo tape deck had failed, couldn't change stations and wouldn't play tapes. That saddened me cos I have boxes of old tapes I was gonna punish the kids with... So pulled it out, was impressed with the stainless mounting plate I'd made yrs ago, all perfectly square, scribed lines, chassis punched holes... And putting in a cheap Ali stereo, taking the opportunity to tidy up some old wiring... There were also no front speakers under the speaker covers. Obviously nobody had taken any care in cutting holes in the kick panels... Chucked in some JVCs that fitted the space available on mdf spacers... And put the old covers back on for old school feel. You can get repro kick panels but not overly fussed on these details... And new sounds in and working... Quite nice having a stereo that works, also has bluetooth, usb port, aux and memory card input. All for around $26 delivered, unreal really... I've toyed with the idea of installing a retro-looking push button radio but they're spendy, esp with bluetooth, and lots of them have usb ports at the rear which would suck. Pretty happy with the cheap retro-look job, and sound is great for what I spent... Will do for a while anyway.- 149 replies
-
- 20
-
-
Loving it. Sweet bikes once you sort the electrics. Bloke here has a Jota...
-
Generally ignition, lights and accessories have their own circuits. So you could lose lights (for example) but still ride in daytime to get home. Idea is to segregate sections so a wiring fault doesn't trip everything. My accessories are only the horn and a 12v power socket... Can't remember what sizes I put in but every bike will be different anyway (LED lamps vs H4 etc). Think I asked forums what current draw was for ironhead igntn cct and went from that. 10 - 15A rings a bell? You don't want nuisance fuse operation, it's only for short circuit type protection to prevent sparks/fires. Prob best to look at similar bike's wiring diagrams to get an idea. Always good to print them and follow circuits with a highlighter to see how things work...
-
Sound plan. No harm in having an inline fuse. Little bit of extra work and cost but far cheaper than an electrical fire...
-
Had a quick look. Seems there are inbuilt circuit breakers that will reset themselves, and led indication of status. Shit information from website tho, had to dig thru a few HD forums... HD seems to favour CBs that reset, I prefer fuses that let you know you have a problem until you fix it. When I wired the cafe' I just used a 4 fuse block with a main fuse to the key then back to separate fused circuits for ignition, lights and accessories. Then you either lose everything with a big fault, or the problem cct is isolated. Sorry I really don't know enough about that harness/system to advise, but it should be ok to wire as per instructions...
-
I'd be surprised if there wasn't some electronic protection inbuilt, so I'd research that as a starter. Maybe look at the part number and include forum as a search term. I'm sure others have asked...
-
Lord Gruntfuttock's 1971 XY Fairmont
Lord Gruntfuttock replied to Lord Gruntfuttock's topic in Projects and Build Ups
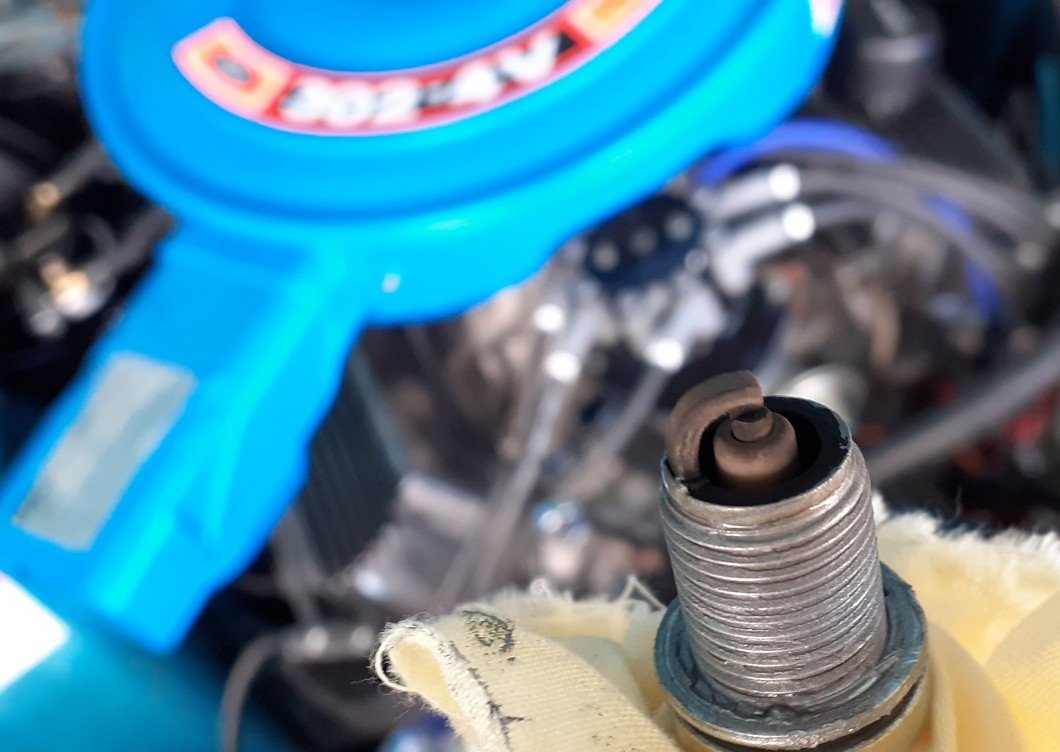
Car going great, gave her a slight tune (timing and setting idle via vacuum) and seems to be running well. It's never had a choke and doesn't really need one, always starts and a few applications of the loud pedal warms her up enough to start driving. Now it's in the house garage though and I start work early I thought a working choke might be more considerate. The cable clamp on my quick-change spring housing had broke yrs ago, so I bought a Holley manual clamp... I know this wouldn't fit as it was for mechanical secondary carbs, so cut and welded some extra metal in to clear the vacuum gubbins... And made up a bracket for the knob under the dash... Paint still wet here... And voila, working choke... Also put my xmas presents on, a new boot carpet to replace the split original rubber mat... And a shiny new spoiler to replace the faithful old alloy job that's been on there for decades... Turns out the old one just bent to fit but the new straight one looks wonky, so will have to adjust brackets to get it looking right, looks good though... Quite nice doing cosmetic things for a change Next is replacing the headlight chrome and reinstalling the driving lights, then replacing the old tape deck as it refuses to play tapes any more...- 149 replies
-
- 21
-
-
Quick Google search says the Ultima 18-533 has protection built into the circuitry, which you'd expect for the money, but can't guarantee for Merican stuff...
-
Yeah make sure you have some sort of fuse/breaker protection. Don't know if you are running a battery or not but there's a lot of potential for fire there without something to break a fault circuit. Happy to look over your diagram if you can post it up? Won't be till next week though as still on holiday and will have no reception soon...
-
You do have a fuse block yeah...?
-
That's my favourite bit. Prob cos I'm so mechanically inept, but understand sparks...
-
Got one. On project waiting list...
-
MACKAZs elcheapo boat/tightwad other projects
Lord Gruntfuttock replied to MACKAZ's topic in Other Projects
Ahem. Seagull... -
Wow, sweet. Cheers for that... (Thank Lisa for me)
-
Lord Gruntfuttock's 1971 XY Fairmont
Lord Gruntfuttock replied to Lord Gruntfuttock's topic in Projects and Build Ups
About a quarter of a teaspoon of oil in the separator can after a good hoon on the way home, so relieved, used to fill up in a very short time. Great feeling of accomplishment, tempered by the fact the whole reason I pulled the engine 3 yrs ago was cos it was oily. Could've fixed baffle and been using it... Then again, the compression was wonky and I've replaced all the front suspension, so not a wasted exercise. It should be good for a while now though. Time to look at tidying up the appearance and wiring etc after a tune...- 149 replies
-
- 15
-
-
Lord Gruntfuttock's 1971 XY Fairmont
Lord Gruntfuttock replied to Lord Gruntfuttock's topic in Projects and Build Ups
Oh fuck yes. I'm a wizard, Barry...
- 149 replies
-
- 11
-
-