Kiwibirdman
-
Posts
1005 -
Joined
-
Last visited
Everything posted by Kiwibirdman
-

Kiwibirdmans 1962 EJ Holden Wagon
Kiwibirdman replied to Kiwibirdman's topic in Projects and Build Ups
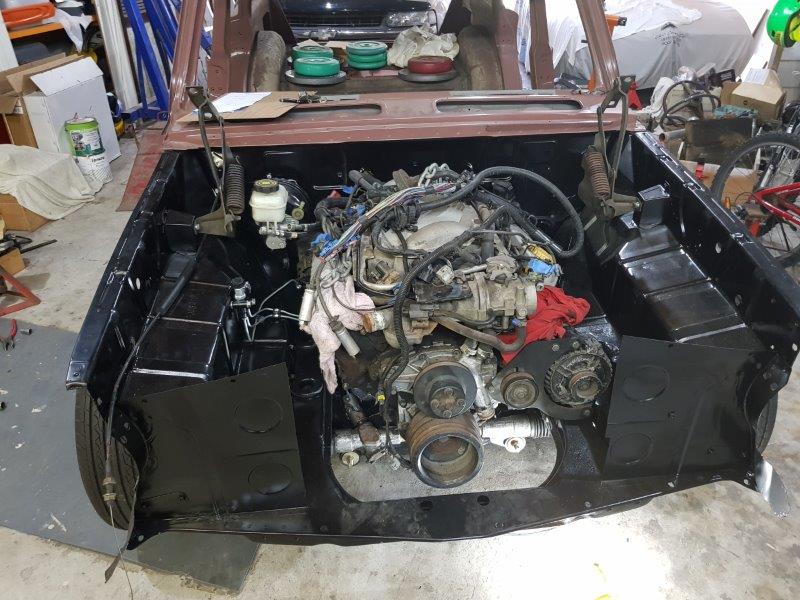
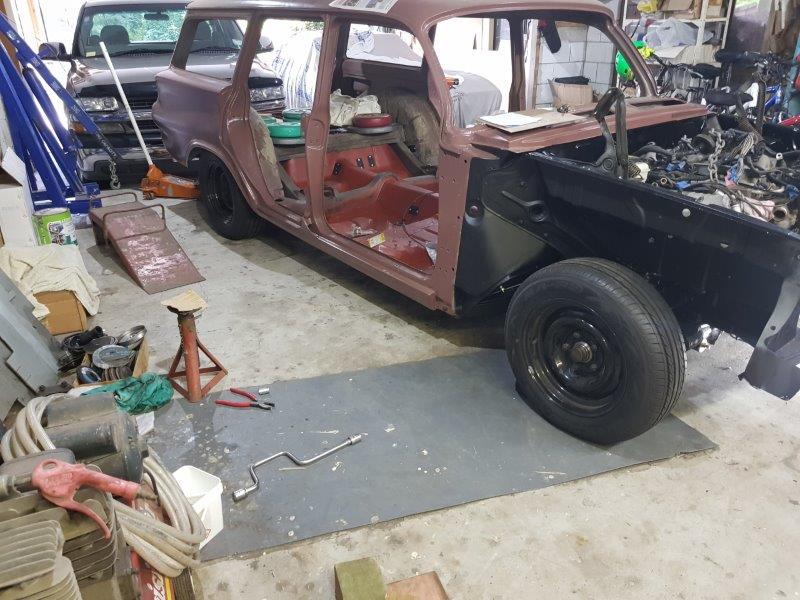
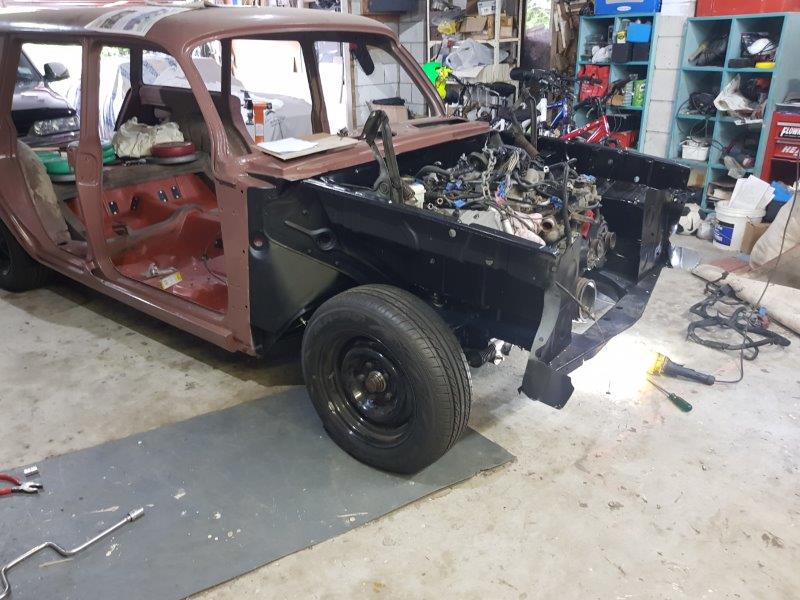
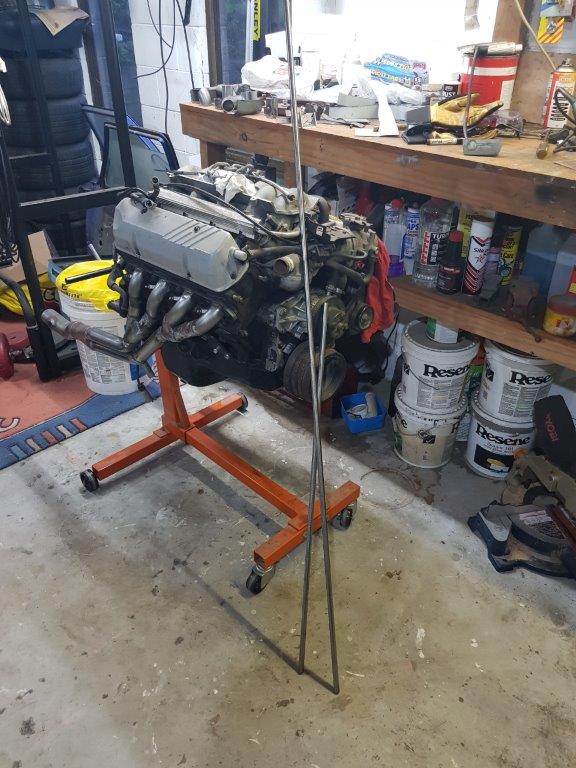
Here are the photos Engine ready to go in Hole for engine Engine in Hole Stance of car, should be about right. And another one just to be sure.
-
Kiwibirdmans 1962 EJ Holden Wagon
Kiwibirdman replied to Kiwibirdman's topic in Projects and Build Ups
Engine went in on Saturday. I attached the wiring loom to the trans and draped the rest of it over the motor. The engine went in ok. I was using an engine crane and really needed an extra set of hands. Rang a few people but no one wad around. Decided to go for it and all went well. After fitting the engine i decided that the drivers side exhaust should go on. Used a block of wood on the jack to lift the engine. The jack decided to move which kicked the block of wood out. That jammed my ring finger against the chassis and mage a nice mess of my finger. Many bad words yelled and blood on the floor. I have photos that i will put up once my pc has finished updating. -
Kiwibirdmans 1962 EJ Holden Wagon
Kiwibirdman replied to Kiwibirdman's topic in Projects and Build Ups
Monthly meet was 2 weeks ago and engine is still on the stand. I started the brake lines in the engine bay. It was a good move as it took all the space I had to get them routed around all thr obstacles. I only stopped tonight beacause I ran out of P clamps. I'll buy some more tomorrow and finish it off Friday. As long as the wife lets me get on with it engine in this weekend. -
You are on the slippery slope. Next is carby then extractors. Followed by some head work, then................
-
Is it getting a standard grind or something a little better. Also do you need longer pushrods with a reground cam?
-
Kiwibirdmans 1962 EJ Holden Wagon
Kiwibirdman replied to Kiwibirdman's topic in Projects and Build Ups
Last weekend I got some decent time in the garage. The rear suspension got put together completely. I had bought a new set of shocks and finished painting the floor over the diff before they went in. The shocks are KYB so they should be OK. I didn't take any photos along the way, her is the car on the floor, there is 135kg sitting above the diff to simulate the weight of the interior, windows, fuel tank etc. I added the weight and had the wheels sitting on ramps before I did all the bolts up tight. I did jump up and down on the tail gate opening to help it settle. Once it was back on the floor after everything was done up I tried sitting in the tailgate opening. the back of the car drops 10mm with my 100kgs sitting in the back. I'm pretty happy with how stiff it is. Spent some time tonight sorting out the brake lines and making sure that the front hoses didn't hit the tires on full lock. The brake line to the back of the car is in and distribution block with proportioning valve mounted. Monthly meet tomorrow so engine will go back in Thursday. I cant wait to see how low the front sits. The springs are a pair that I have had sitting round in the garage for a long time and don't know where they came from. They are fairly short and didn't drop far when 2 of us, about 190 kg stood on the front of the car. Time will tell.
- 129 replies
-
- 12
-

-
Kiwibirdmans 1962 EJ Holden Wagon
Kiwibirdman replied to Kiwibirdman's topic in Projects and Build Ups
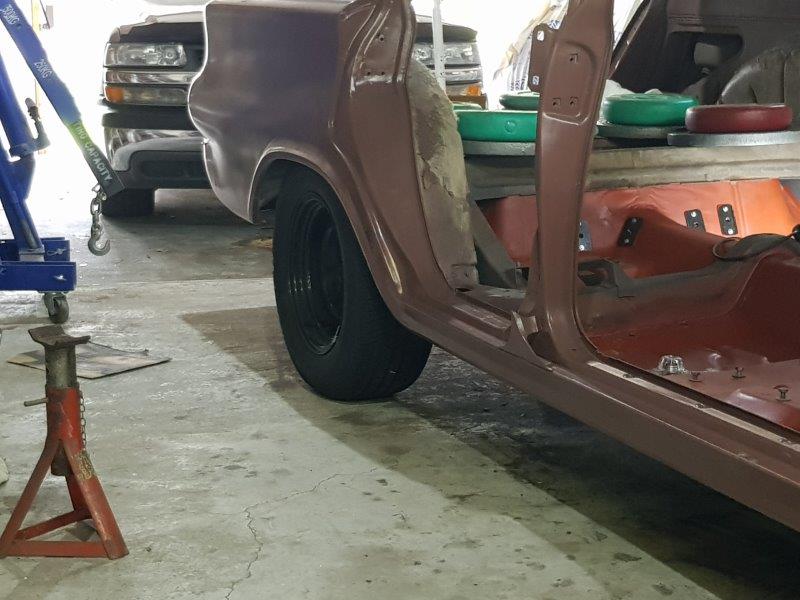
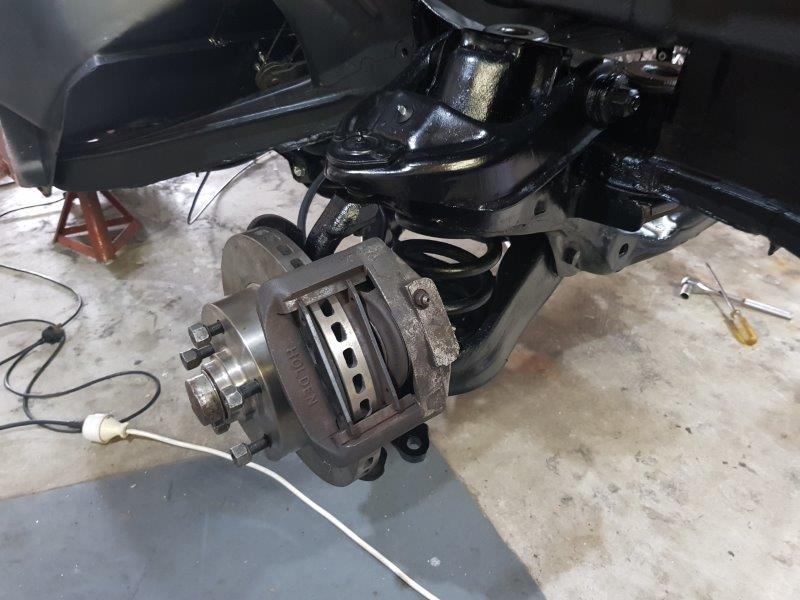
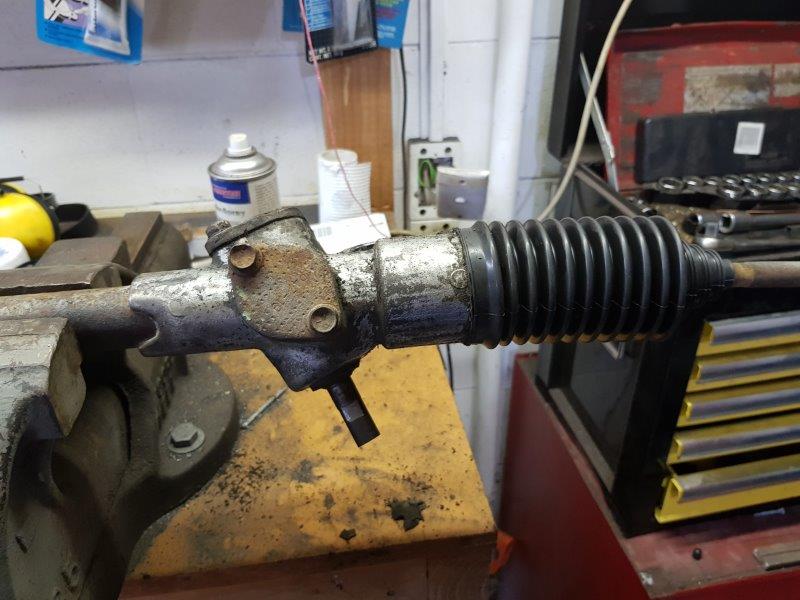
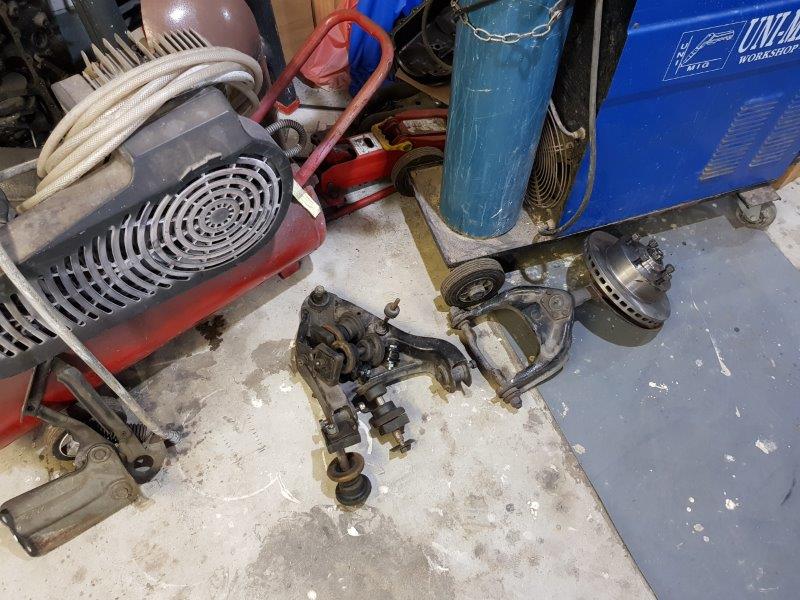
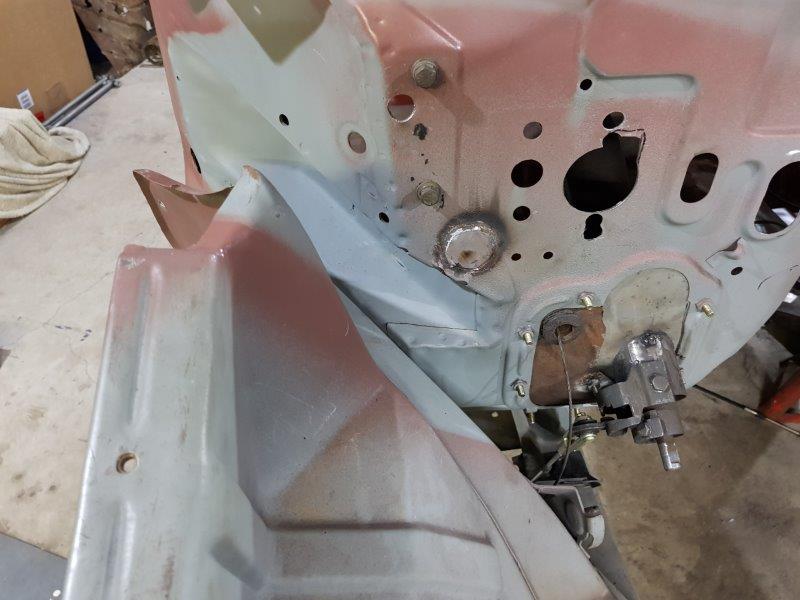
Here is some proof that work has been done. Front suspension together, HZ Calipers on HQ disc's milled down 12 mm Front back on the car and painted Strong back added to engine mount adapter plates on the advice of @cletus. New boots on the steering rack. I will clean up and paint with the same black that everything else is getting. The inside of the rack looked to be in pretty good condition.
-
Deceased is the right description for that cam.
-
Remember that the lifter is off set against the cam so the lifter spins. Looks like the hardening is going, not unusual on holden motors, especially with modern oil that has bugger all zinc additive. How many miles on the engine?
-
Kiwibirdmans 1962 EJ Holden Wagon
Kiwibirdman replied to Kiwibirdman's topic in Projects and Build Ups
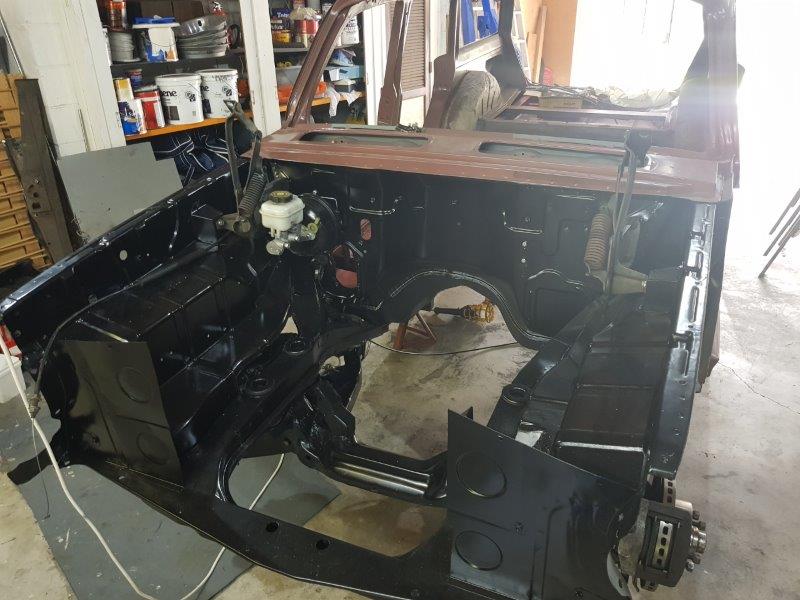
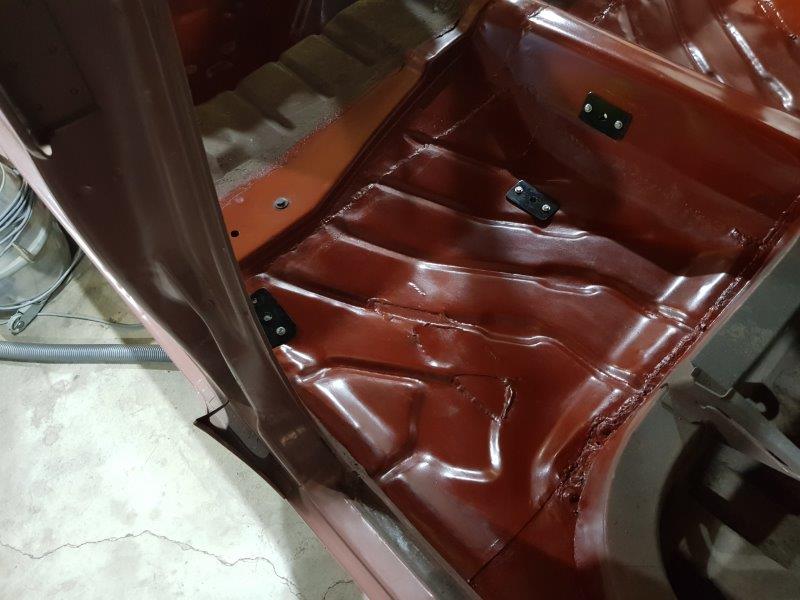
I am giving myself a kick in the backside for not updating this thread, 4 months is way too long. There has been much work done on the car as well as a job, kids, wife, holidays and all the other stuff that gets in the way. After putting most things together the car got pulled apart again for lots of painting. The floor got every seam sealed then painted with 2 coats of a water proof product from a crowd called Duram. This was then covered by underseal from a bunch of rattle cans. I'm pretty happy the way it has turned out. The front has been painted and all put together, front suspension installed. I had a pair of springs that have been sitting in the garage for a very long time. Not sure what they came out of but the dimension is GM and they went in. They are fairly low so hopefully will work out OK. I fitted the hand brake cables yesterday, The EJ rear cable got put into the HZ drums all appears to be good. I now a brakes that work on the back wheels. Engine should be going back in this week then let the wiring begin. I want to get the car mobile before painting and get the OK from @cletus . Photos to follow. -
That looks like a lot of fun. Would it work to have the chain wheel on the pedals (up top) go down to the original front then a second chain to the rear sprockets. This would give at least 5 gears. It looked pretty high geared to me.
-
If you paint the head light bezels leave the shiny edge polished. Matches the grill and looks so much better (and factory).
-
piazzanoob's 1964 ford Galaxie 500 seeedaan
Kiwibirdman replied to piazzanoob's topic in Project Discussion
How are you getting. Rapidly running out of year. -
The Barter Barber 1971 Bedford discussion
Kiwibirdman replied to TheBarterBarber's topic in Project Discussion
So many options for a Beddy van. Just about anything you do will make it go faster and fair number of options will make it use less juice. Back in the day a Holden 6 was the go if you wanted cheap and reliable, and Chev V8 for fast and reliable. PC Cresta diff head to get the gearing up and later model bedford brakes to make it stop. Today I would be going for something like a commodore V6 and auto or a diesel option. Cool van. -
Kiwibirdmans 1962 EJ Holden Wagon
Kiwibirdman replied to Kiwibirdman's topic in Projects and Build Ups
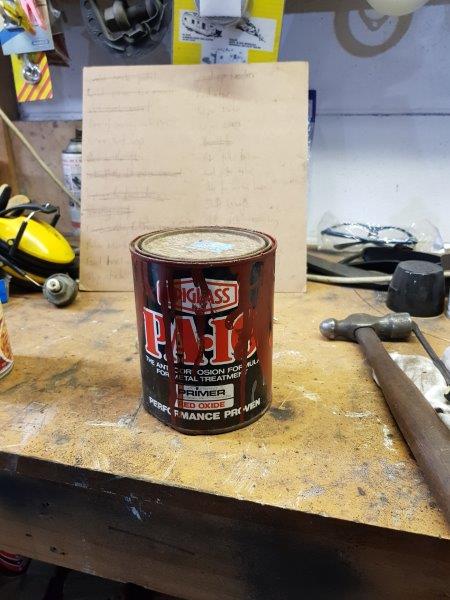
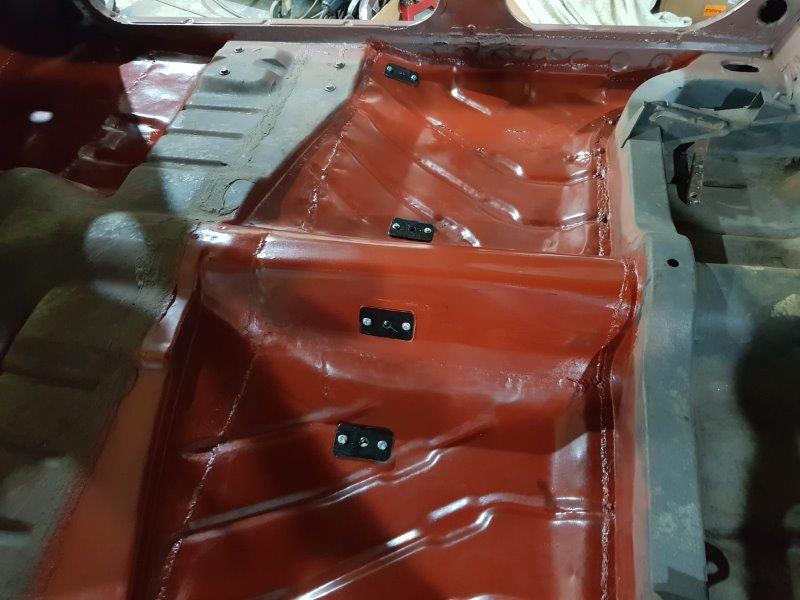
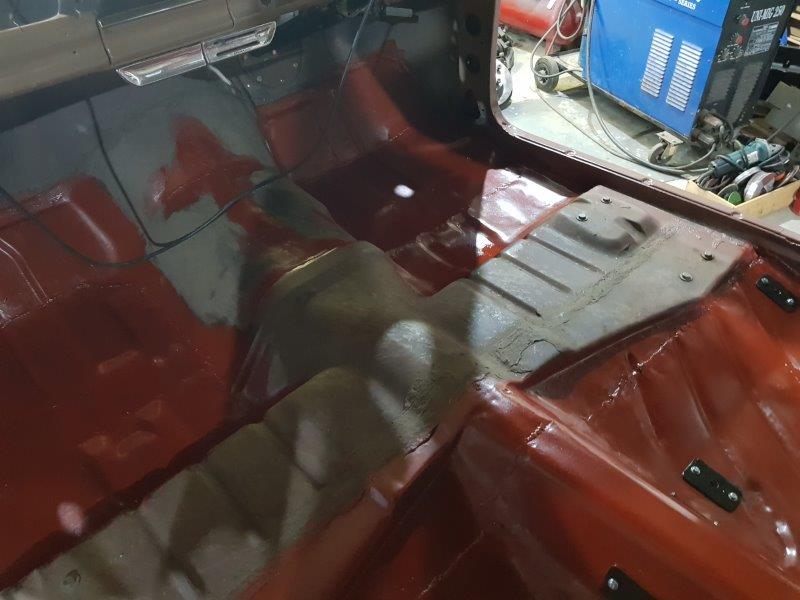
I decided to finish work a bit early today and painted the floor. The tin of PA10 I had I think I bought in 1992. It only took about half an hour to mix in all the hard stuff from the bottom of the can. It feels good to have paint on something. I will clean up the rest of the floor and make it all nice and red.
-
Kiwibirdmans 1962 EJ Holden Wagon
Kiwibirdman replied to Kiwibirdman's topic in Projects and Build Ups
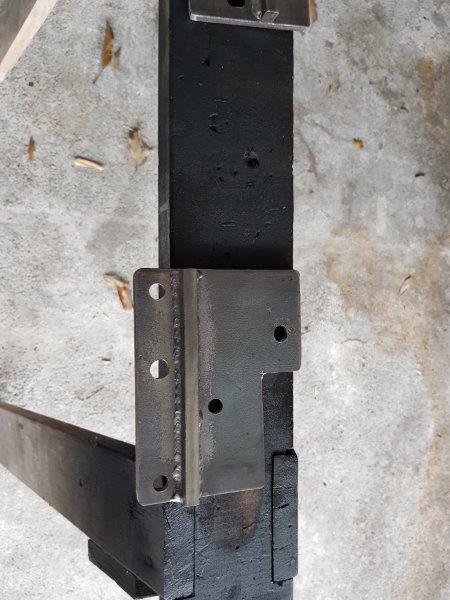
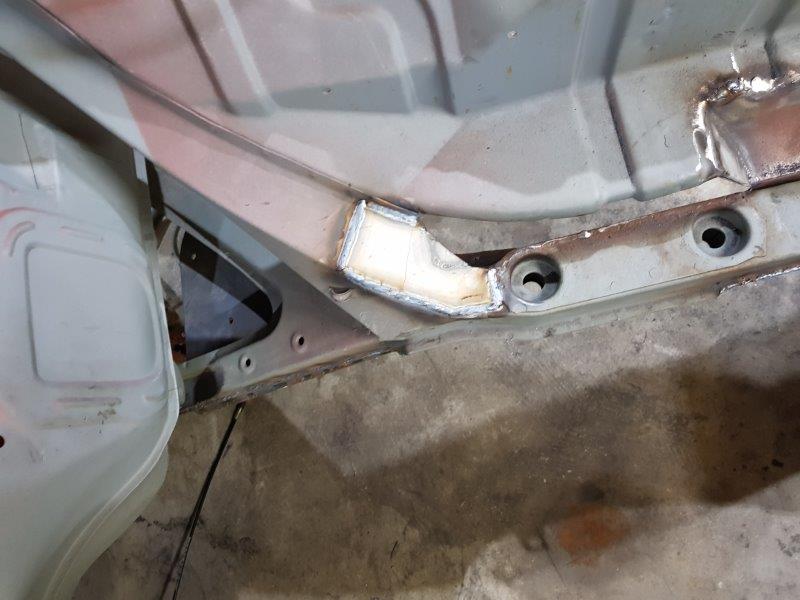
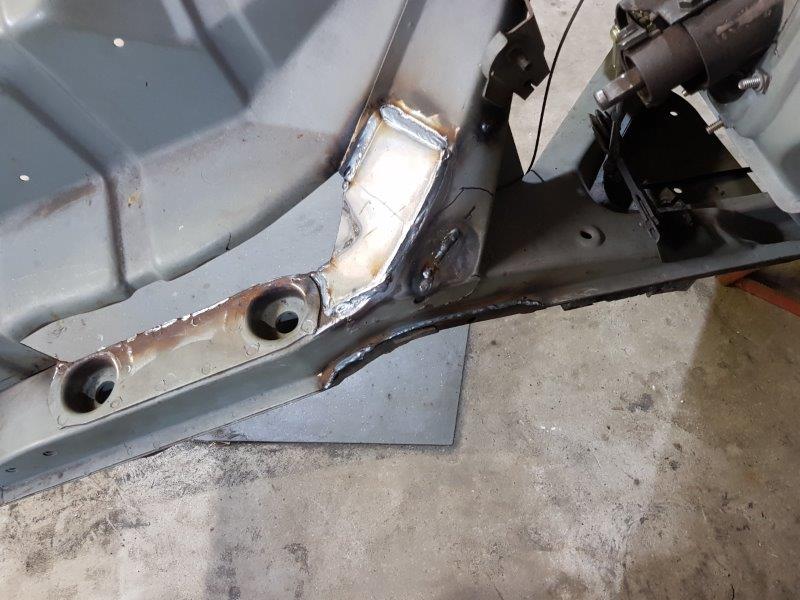
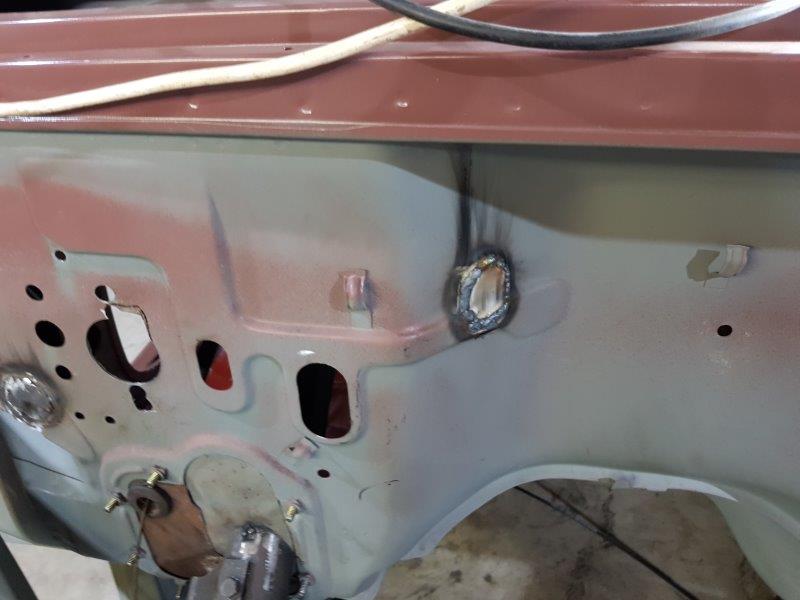
Here are the photos. RH suspension. Back to the future. This was the view for so long, nothing forward of the firewall Front on saw horse ready for welding Gussets as suggested by @cletus And the other side, also with the rebate in the joint to clear the steering. Here is where some space was made for the exhaust. Still a touch with the grinder to knock off the high spots Got rid of the hole for the throttle linkage And the one for the choke cable
-
Kiwibirdmans 1962 EJ Holden Wagon
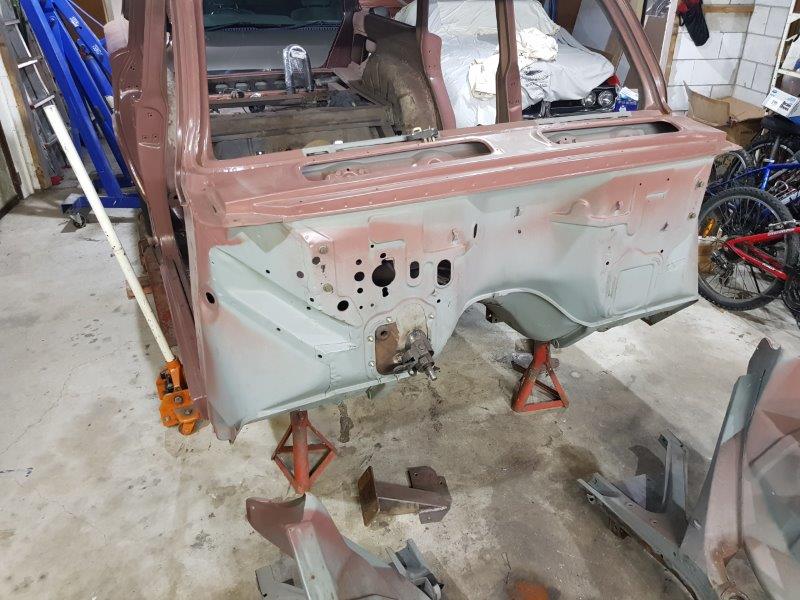
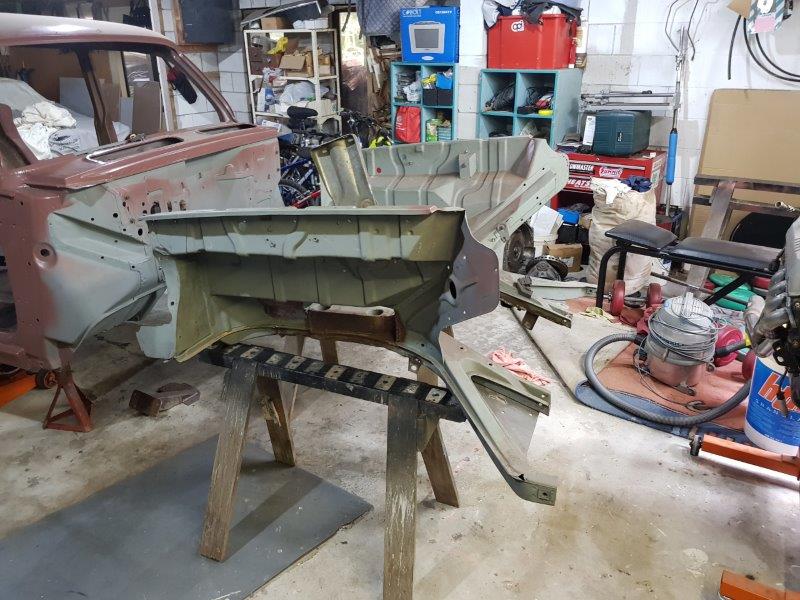
Kiwibirdman replied to Kiwibirdman's topic in Projects and Build Ups
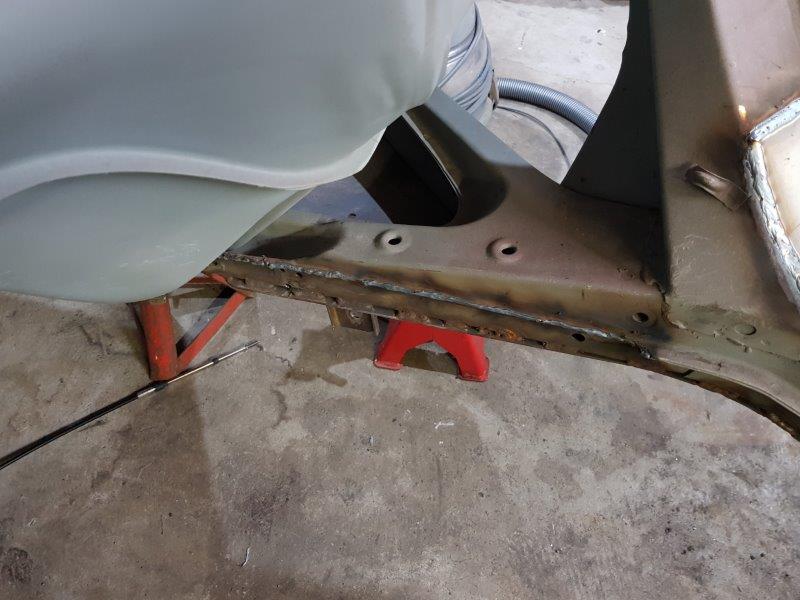
Over the weekend I pulled the front of the car apart. Front suspension is spread around to fallen over, front chassis/inner guards are up on saw horses. Tonight we finished off all the welding on the front section. Ready for paint over the next few days. I feel like real progress is being made, looking forward to painting stuff and final assembly. I went to see the painter and got the "realistically I can't do your car this side of Christmas". I not too bent out of shape, it gives me time to paint the underneath, engine bay etc and assemble the car to the point where it will be driveable. There are lots of small but time consuming jobs to do, like make a mount for the wiper motor and fix the linkages, sort out the handbrake cables. It is probably better the car has the engine in before painting so it is all good. If there is anyone out there who is familiar with injected Holden V8's especially the VT version, I have some questions. -
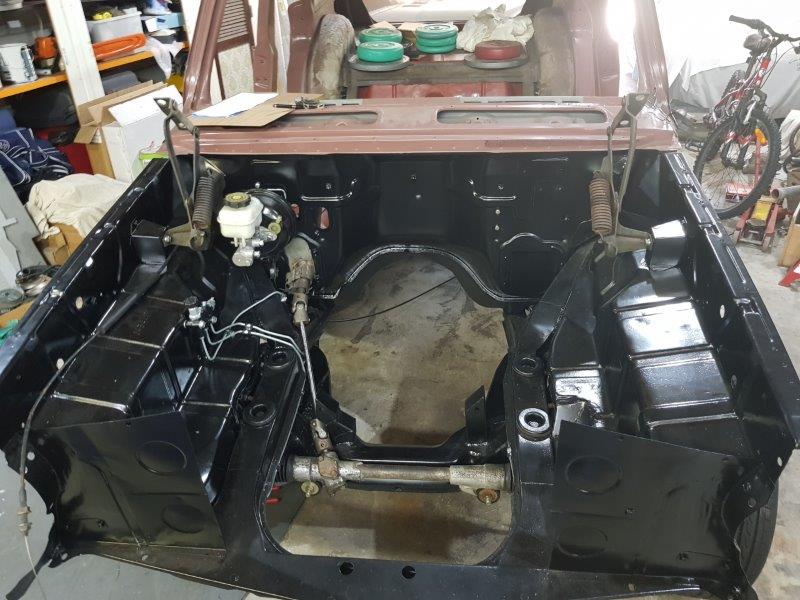
Kiwibirdmans 1962 EJ Holden Wagon
Kiwibirdman replied to Kiwibirdman's topic in Projects and Build Ups
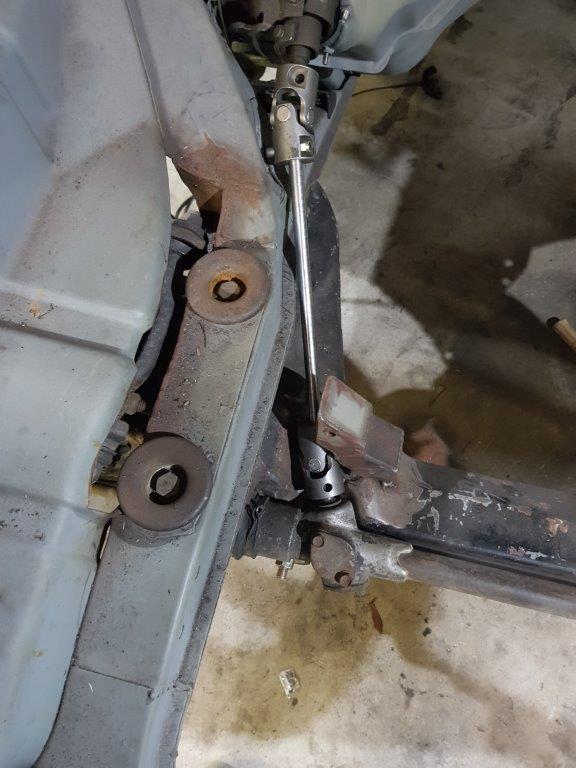
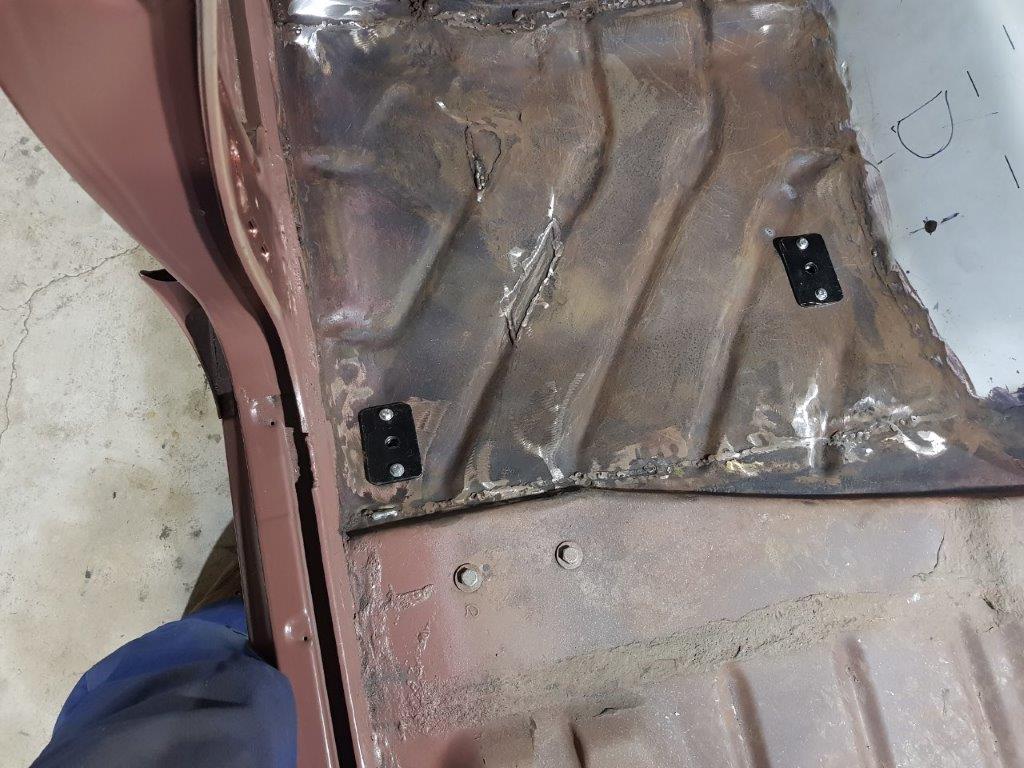
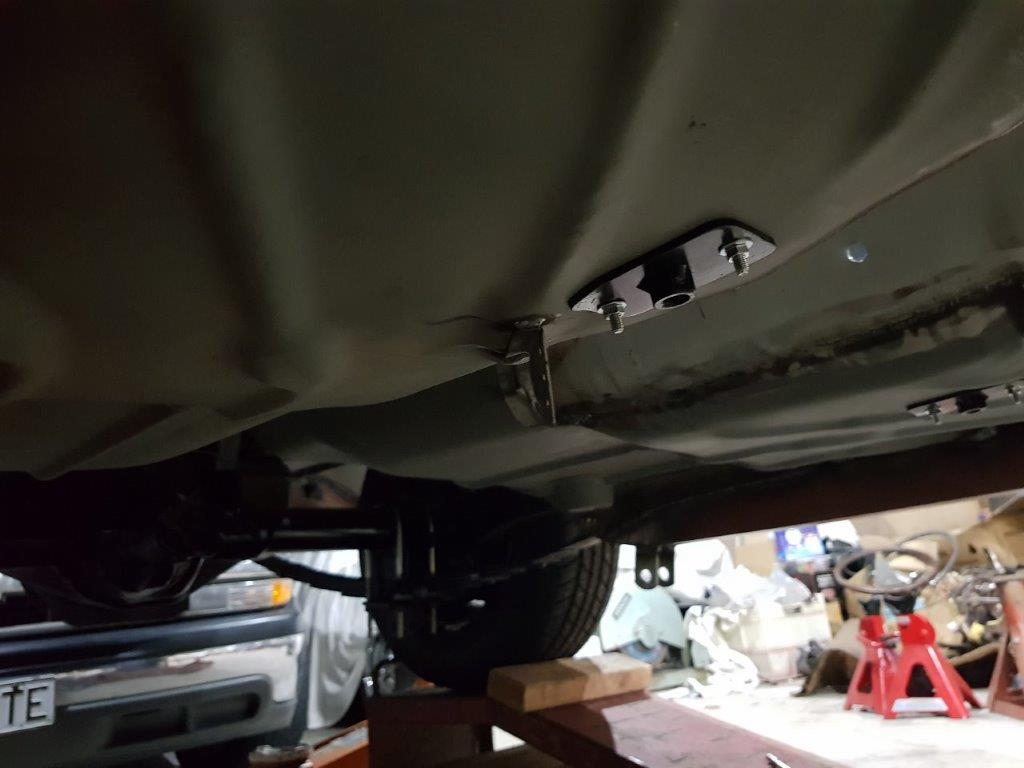
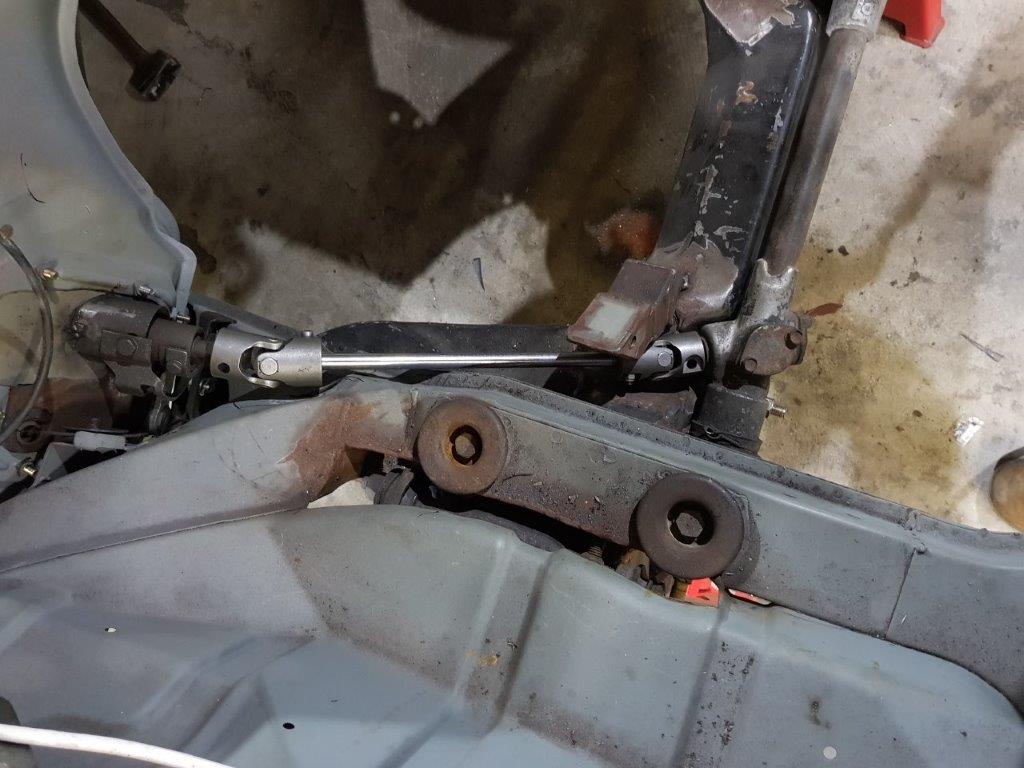
Here is another view of the steering shaft A photo of my extra length of 9/16 bar if anyone needs some. Engine is back on the stand waiting for wiring, sorting out fuel lines, dip stick......... First seatbelt mounts installed. The one by the door way and the hole in the trans tunnel are in the original places, The plate on the floor is for the centre belt. And the other side. I used bolts on the plates as per the lvvta manual and they pulled up nice and tight to the floor. The thing that looks like a a shark fin is the mount for the handbrake return spring. Originally it was a tab off the floor. I'm worried about drive shaft clearance to mad it longer Another job ticked of the list was welding the pad to the brake pedal. Comments and ideas welcome as always
-
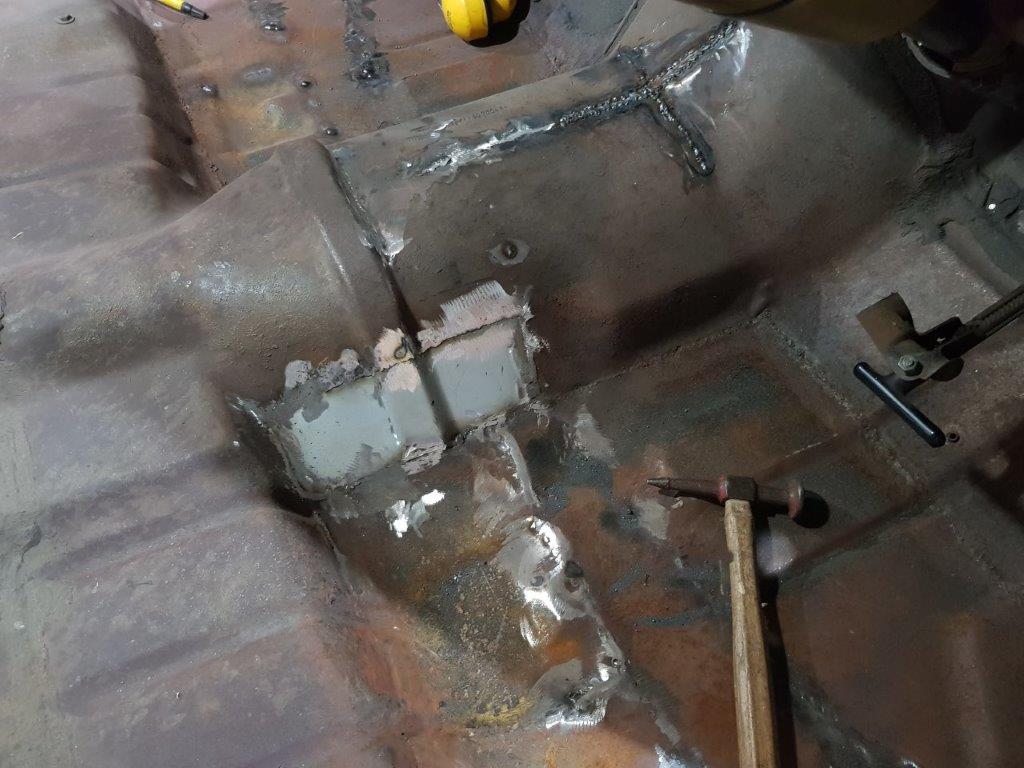
Kiwibirdmans 1962 EJ Holden Wagon
Kiwibirdman replied to Kiwibirdman's topic in Projects and Build Ups
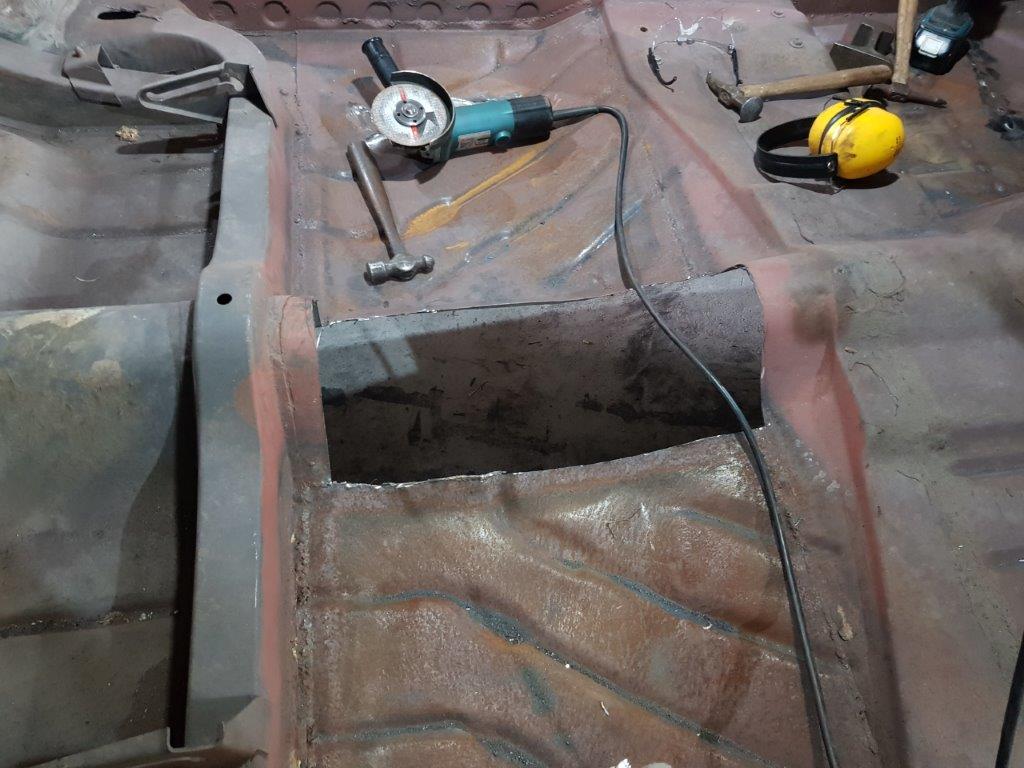
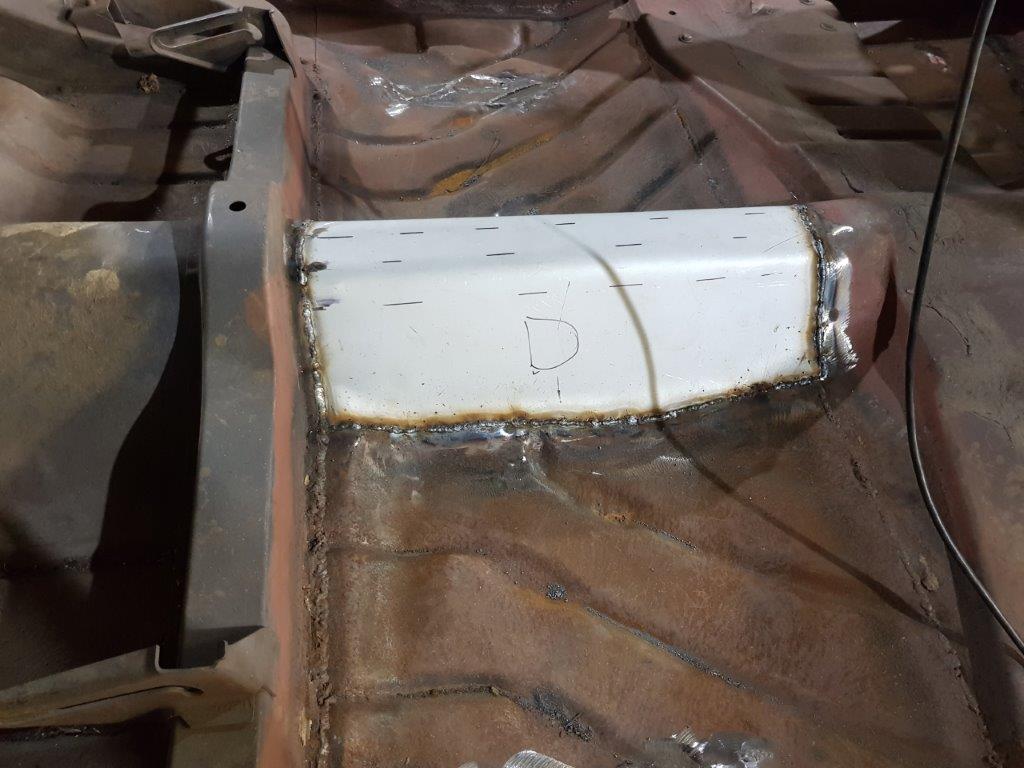
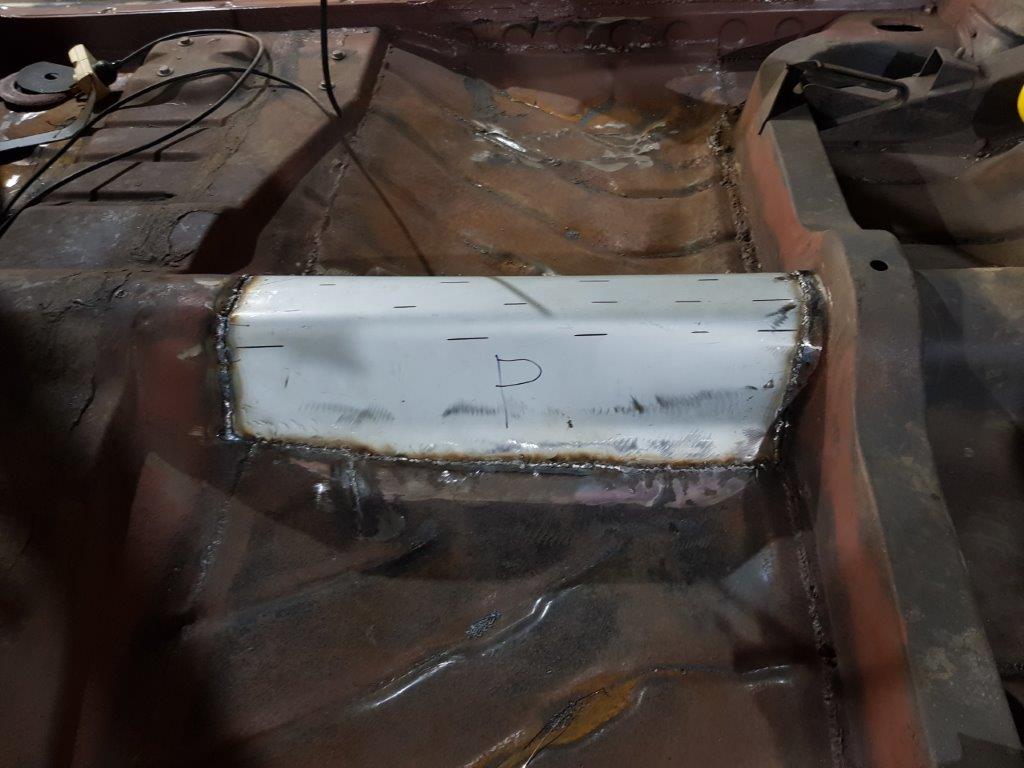
At the last monthly meeting I got told off for not putting up photos. Here are some updates. Section of the trans tunnel that looked like swiss cheese cut out New section welded in. Sounds really easy in 2 pictures but took about 4 hours to get right And some more swiss cheese gone as well as the big cut I put into the tunnel to make the trans fit welded up. Here is the steering shaft. With universals fitted. Amazingly enough nothing touches. The lip on the chassis rail will get removed beside the shaft as a precaution.
-
Kiwibirdmans 1962 EJ Holden Wagon
Kiwibirdman replied to Kiwibirdman's topic in Projects and Build Ups
I called in to the painters to see how busy he is. They have 59 caddie, mid 60s VW, and a why would you bother rusty 57 Chev on top of a heap of Jucy rental vans. I'm booked in for 2 weeks away to bring the car in. Because mine is easy and I have money I get the jump on the others. Now I have a dead line to work to things will get done. -
This new spot has my vote. Good to see everyone last night.
-
Kiwibirdmans 1962 EJ Holden Wagon
Kiwibirdman replied to Kiwibirdman's topic in Projects and Build Ups
Still no photos, must work out how to get them off the new flash phone. Replaced the rotten section of the trans tunnel over the weekend, a big chunk more of the rust done. I bought a length of 9/16 High tensile steel bar to replace the wooden intermediate steering shaft. I needed a 320mm length and the standard length was 3.7 meters. It did only cost $40. After 2 goes I got the the flats for the cotter pins in the universals in the right place. Steering shaft has been trial fitted and everything clears...........just. If anyone needs 9/16 round bar I have 3 meters looking for a home. I pulled the engine out last night to get some space to finish off the trans tunnel final rust by the gearbox and sort out the gear shift. New morse type cable and fitting are turning up at the end of the week. Also turned up is a Aliexpress cone type air filter. Getting dangerously close to sending the car off for some paint. -
Cool little car. Mate of mine had one last century that started out the same colour. He pulled it apart, did all the rust and gave the motor a rebuild. The rebuild of the motor included a 650 big bore kit, dual throat webber carb with proper manifold and a better flowing exhaust. Two main problems, first was it ran hot and would only run cooler with super expensive fully synthetic oil, the other was the rubber inserts in the axles that act like a CV joint lasted a matter of weeks with the extra HP. It got modified to take proper UJ's and no more issues. Good little car that got dailyed for many years. Was still in really good shape when he sold it for a lot of money about 10 years ago.
-
Cool truck
-
Looking good.