Evan
-
Posts
4,153 -
Joined
-
Last visited
Everything posted by Evan
-
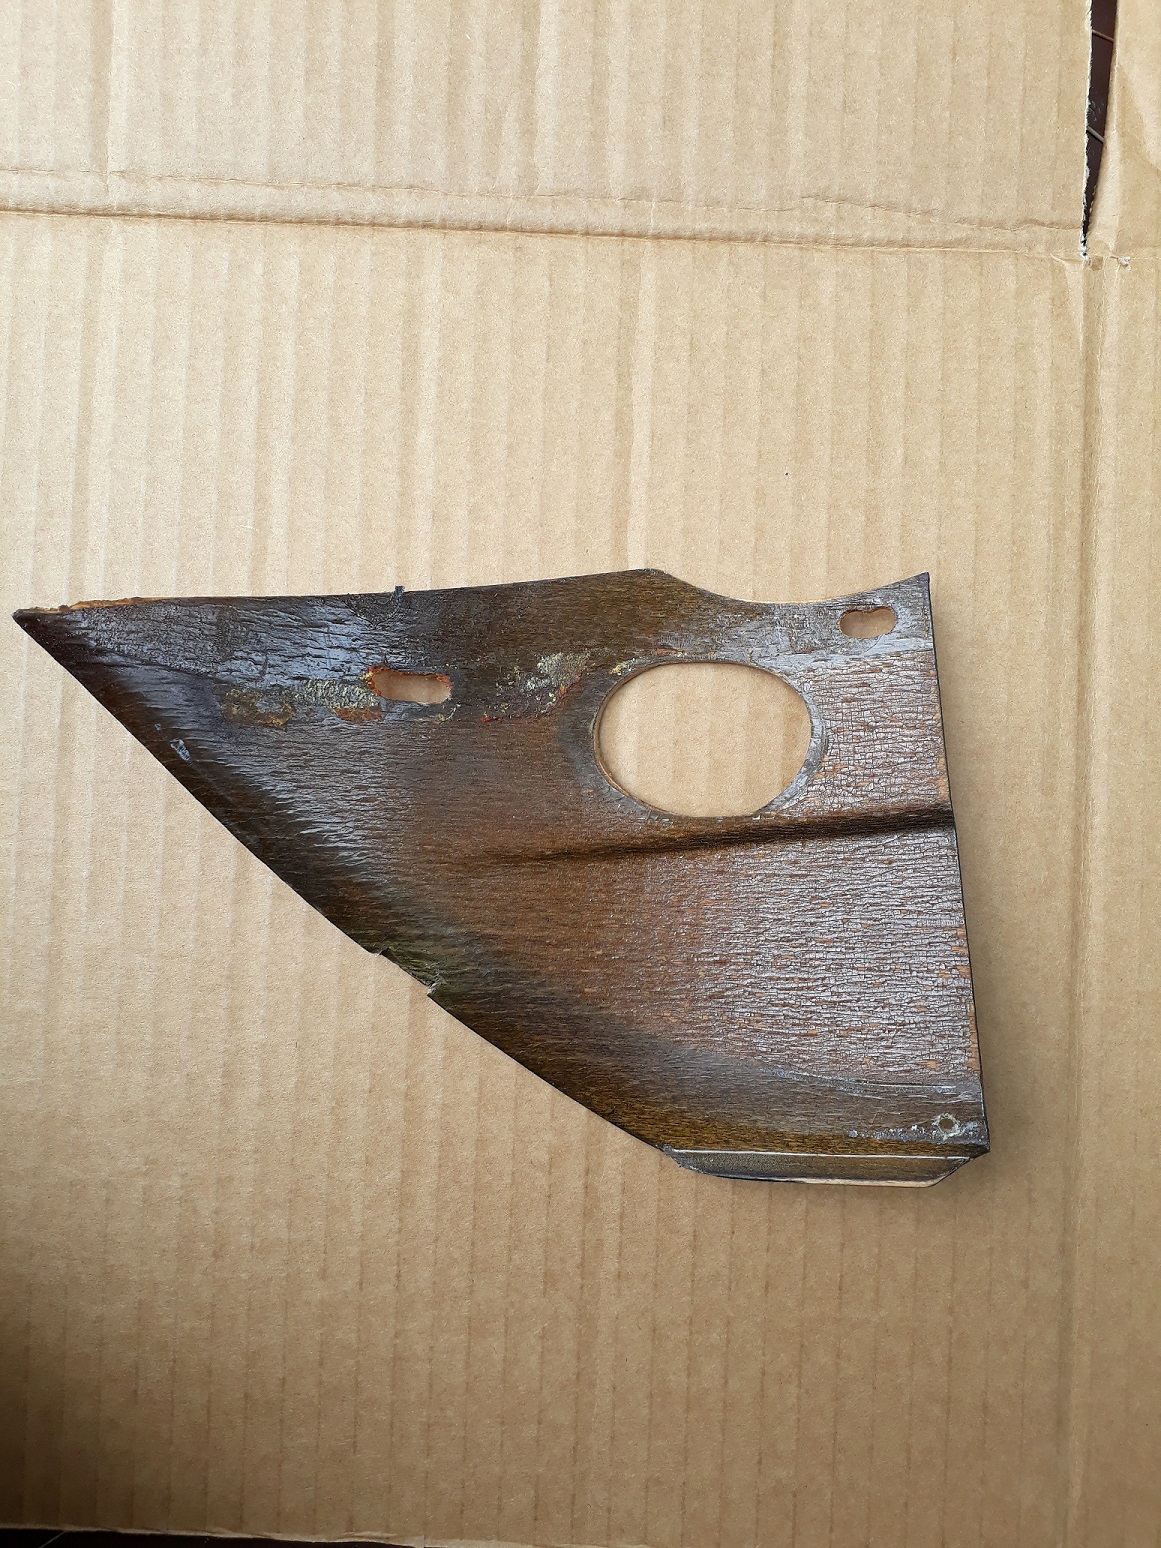
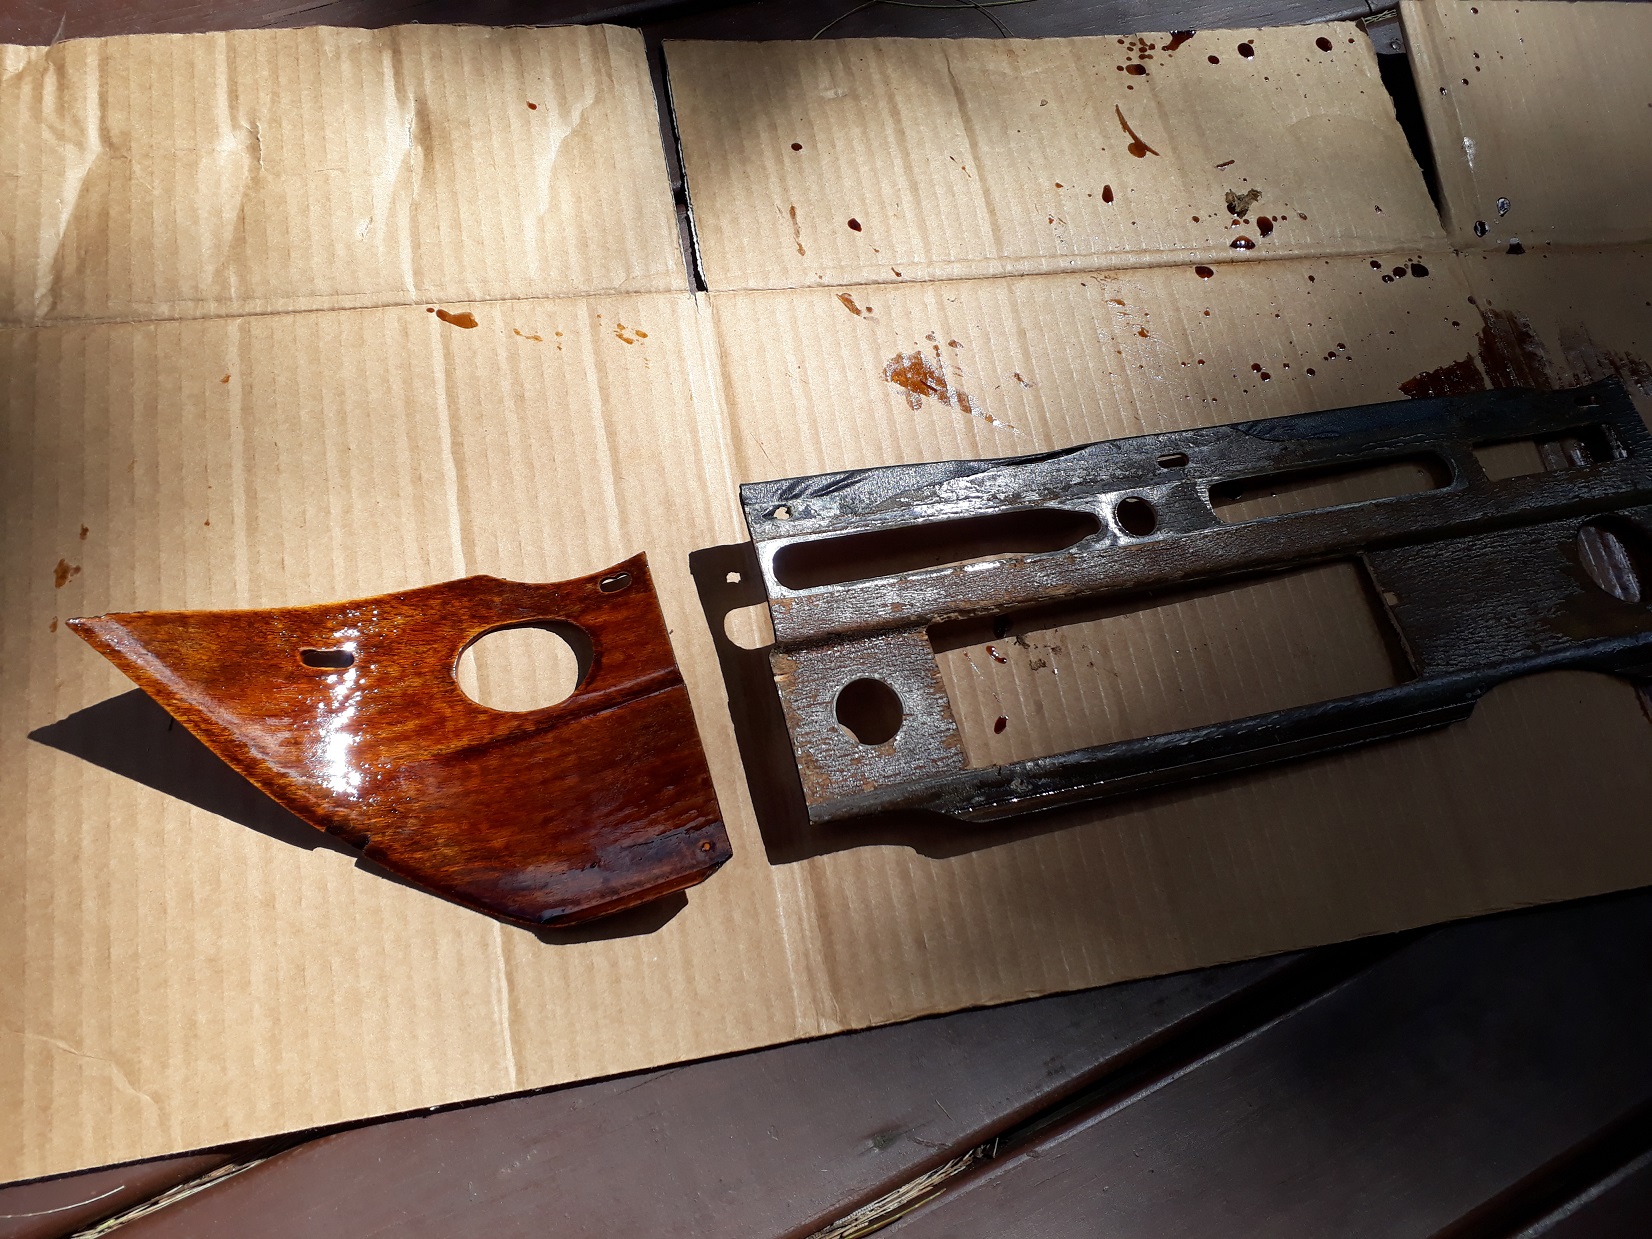
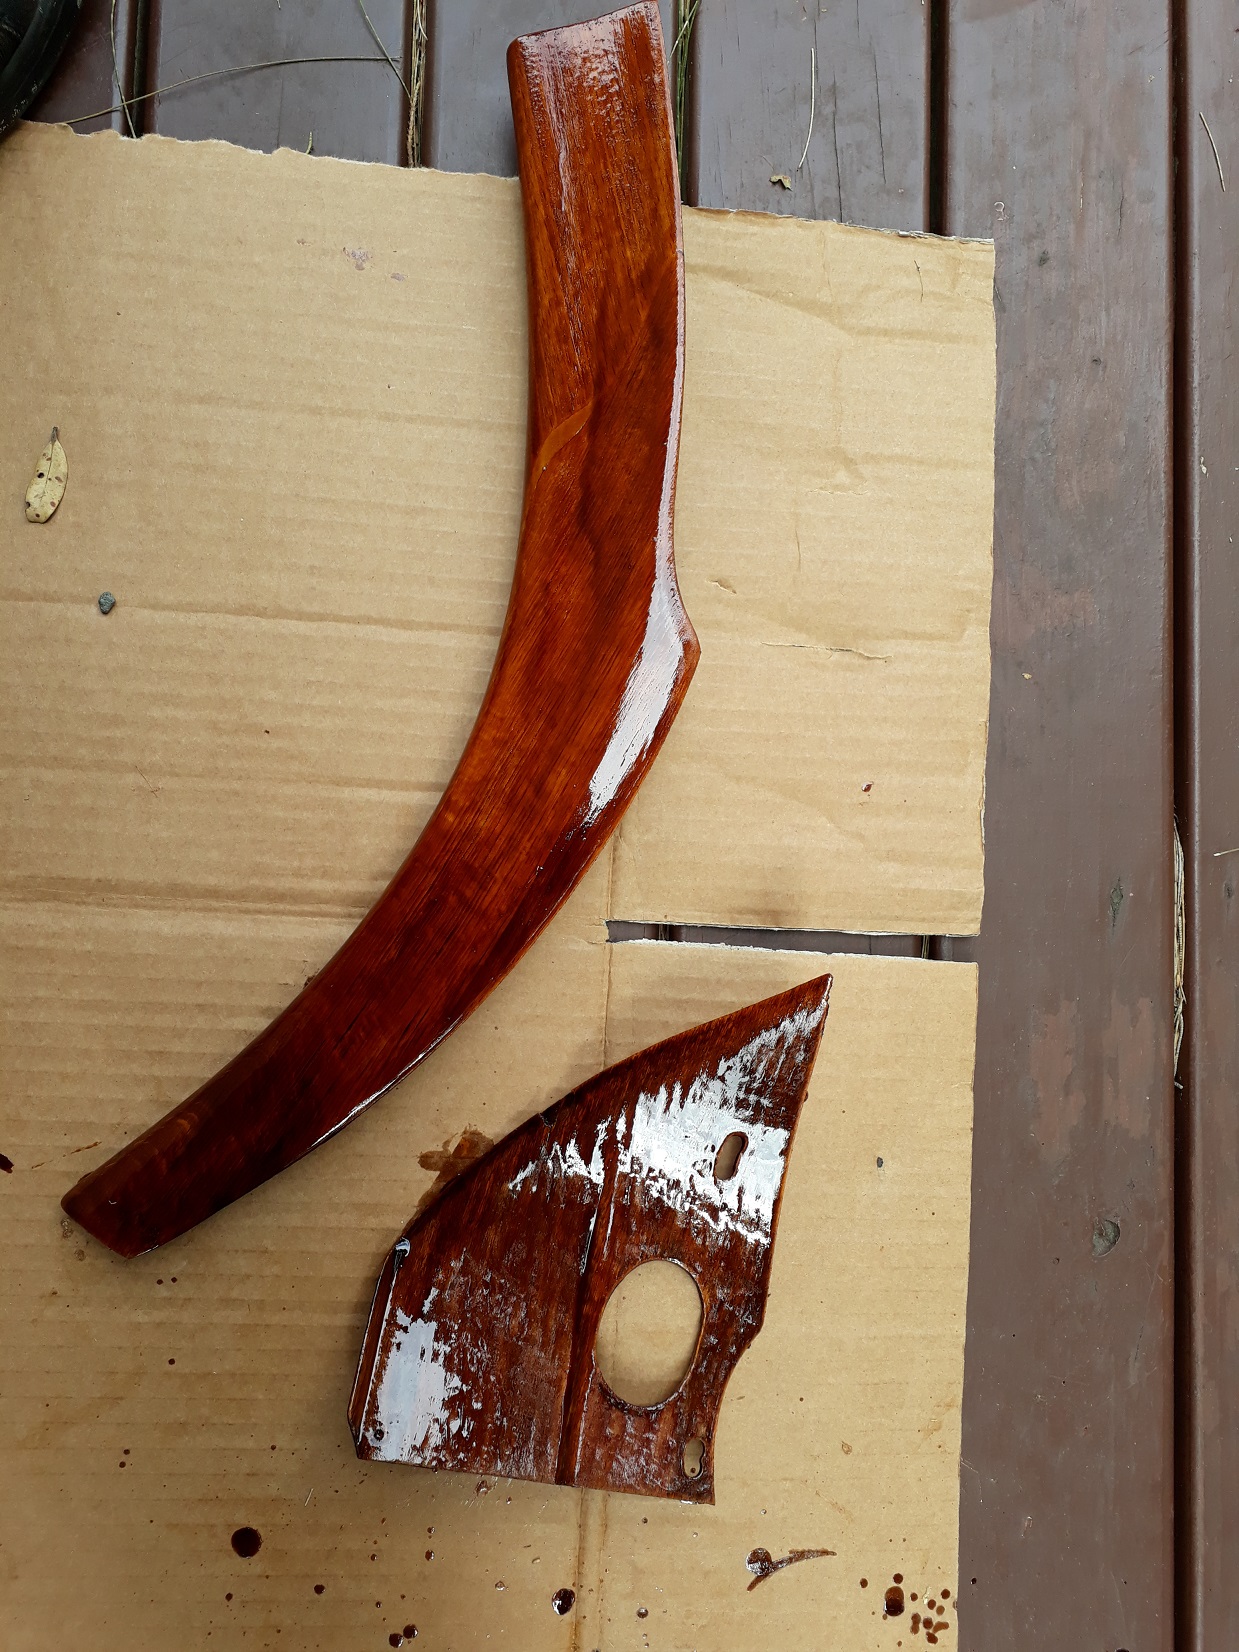
Hello, Have skipped forward 756 steps and made a start on tarting up the wood interior pieces (wood interior, daaaaaaaamn). The original varnish has faded/cracked/gone yuck after 50+ years so I thought we can't have that. These photos are a bit out of whack but give a comparison: Before, as you can see - yuck. After 3 applications of paint stripper/scrapping parts came out like so: I took a trip to Bunnings to find some new varnish/stain. After 10 minutes staring at the shelf wondering 'do you get interior stain because it's for inside the car, or exterior stain because the car is outside in the sun...????' I walked out with a pot of Cabots interior stain and proceeded to throw 3 coats on things New vs OG: Ta da, photos are a bit weird, they make the pieces look like they're rough textured or has a bit of grit in the stain, but they don't they're smooth and look choice in person. Have a couple more pieces to do then that's done.

- 26 replies
-
- 12
-

-
I've watched a few of those vids of that CF 240z. It's a bit of a balls up how all he is doing is laying carbon over the factory panel to make the new panel, then removing the original panel to attach the new CF panel. The whole car is going to end up fractionally larger that it should be, curious to see how it affects panel gaps and things like tail light fitment. Also the nice smooth finish ends up being on the inside of the panel, which you don't see...
-
I've considered that, could make some additional moulds to work with what I've got and give that a go too, I just don't know if it would be runny enough to get into all the spots.
-
Yeah from what I've read it depends on the resin and what temp you cure it at, some are 70 C, some are 90 C some are 140 C. Don't know until you try, if it doesn't work out no harm done etc.
-
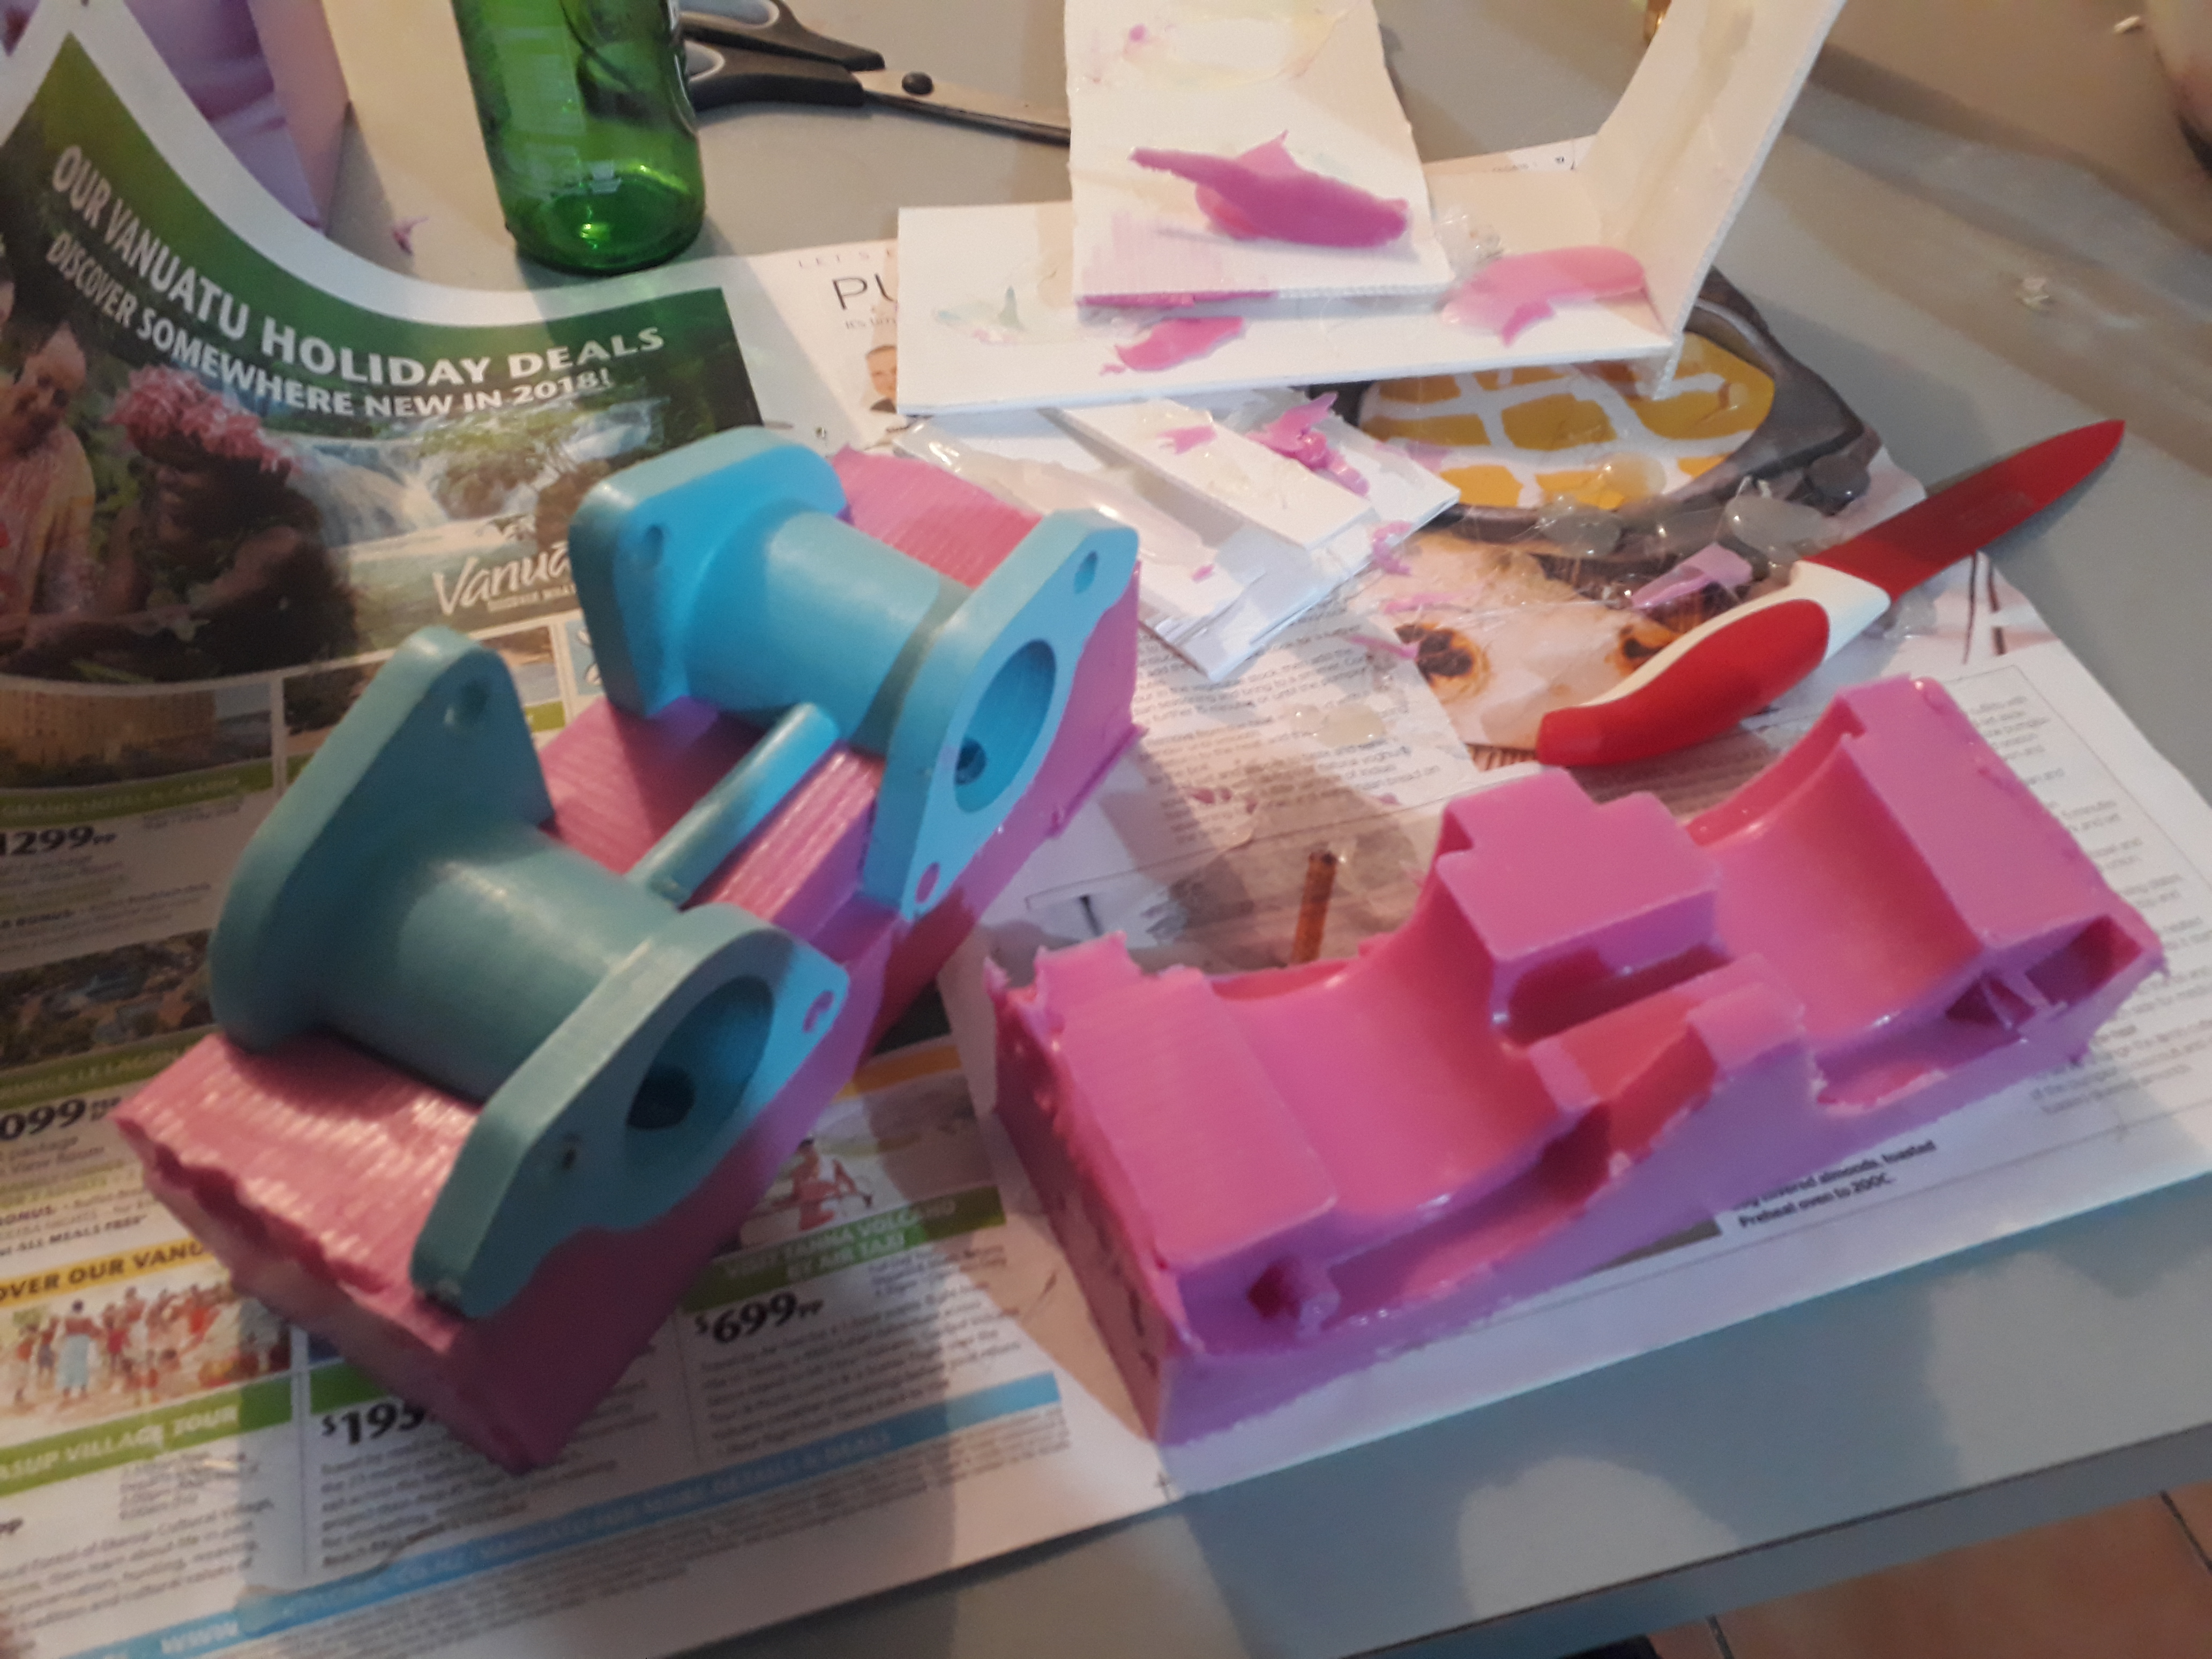
Has anyone here done anything with prepreg carbon fibre? I've been umming and ahhing over what to do with respect to the intake manifolds I've printed for the v12 Jag engine I have. The obvious thing to do would be lost wax casting but I'm not really interested in that. After watching those easy composites videos approx 18 months ago I've wanted to try and make something out of prepreg carbon ever since so thought I'd try and make these manifolds out of carbon. I sprayed the print with some high build primer and sanded it back to smooth it out. So far the biggest decision has been what to make the mould out of, have decided to give silicone a go as it's supposedly temperature stable to like 220 degrees Celsius. Will put a box of some description around the mould for support and hopefully be able to out-of-autoclave bake it in the oven to cure the carbon. Plan to import one of the easy composites starter kits with the vacummn pump etc and have a play. Hope to report back with how I get on. I stuffed up when i poured the first half of the mould and forgot to put locating dowels in to align the 2 halves, should be able to wing it though. I should really start with a simpler shape haha...
-
You didn't used to work with an Aussie guy called Julian did You?
-
 You get this sorted?
 -
A+
-
Bags, 1GZ and brown paint That is all.
-
Yeah would do an m117
-
You're all wrong OM606 or bust
-
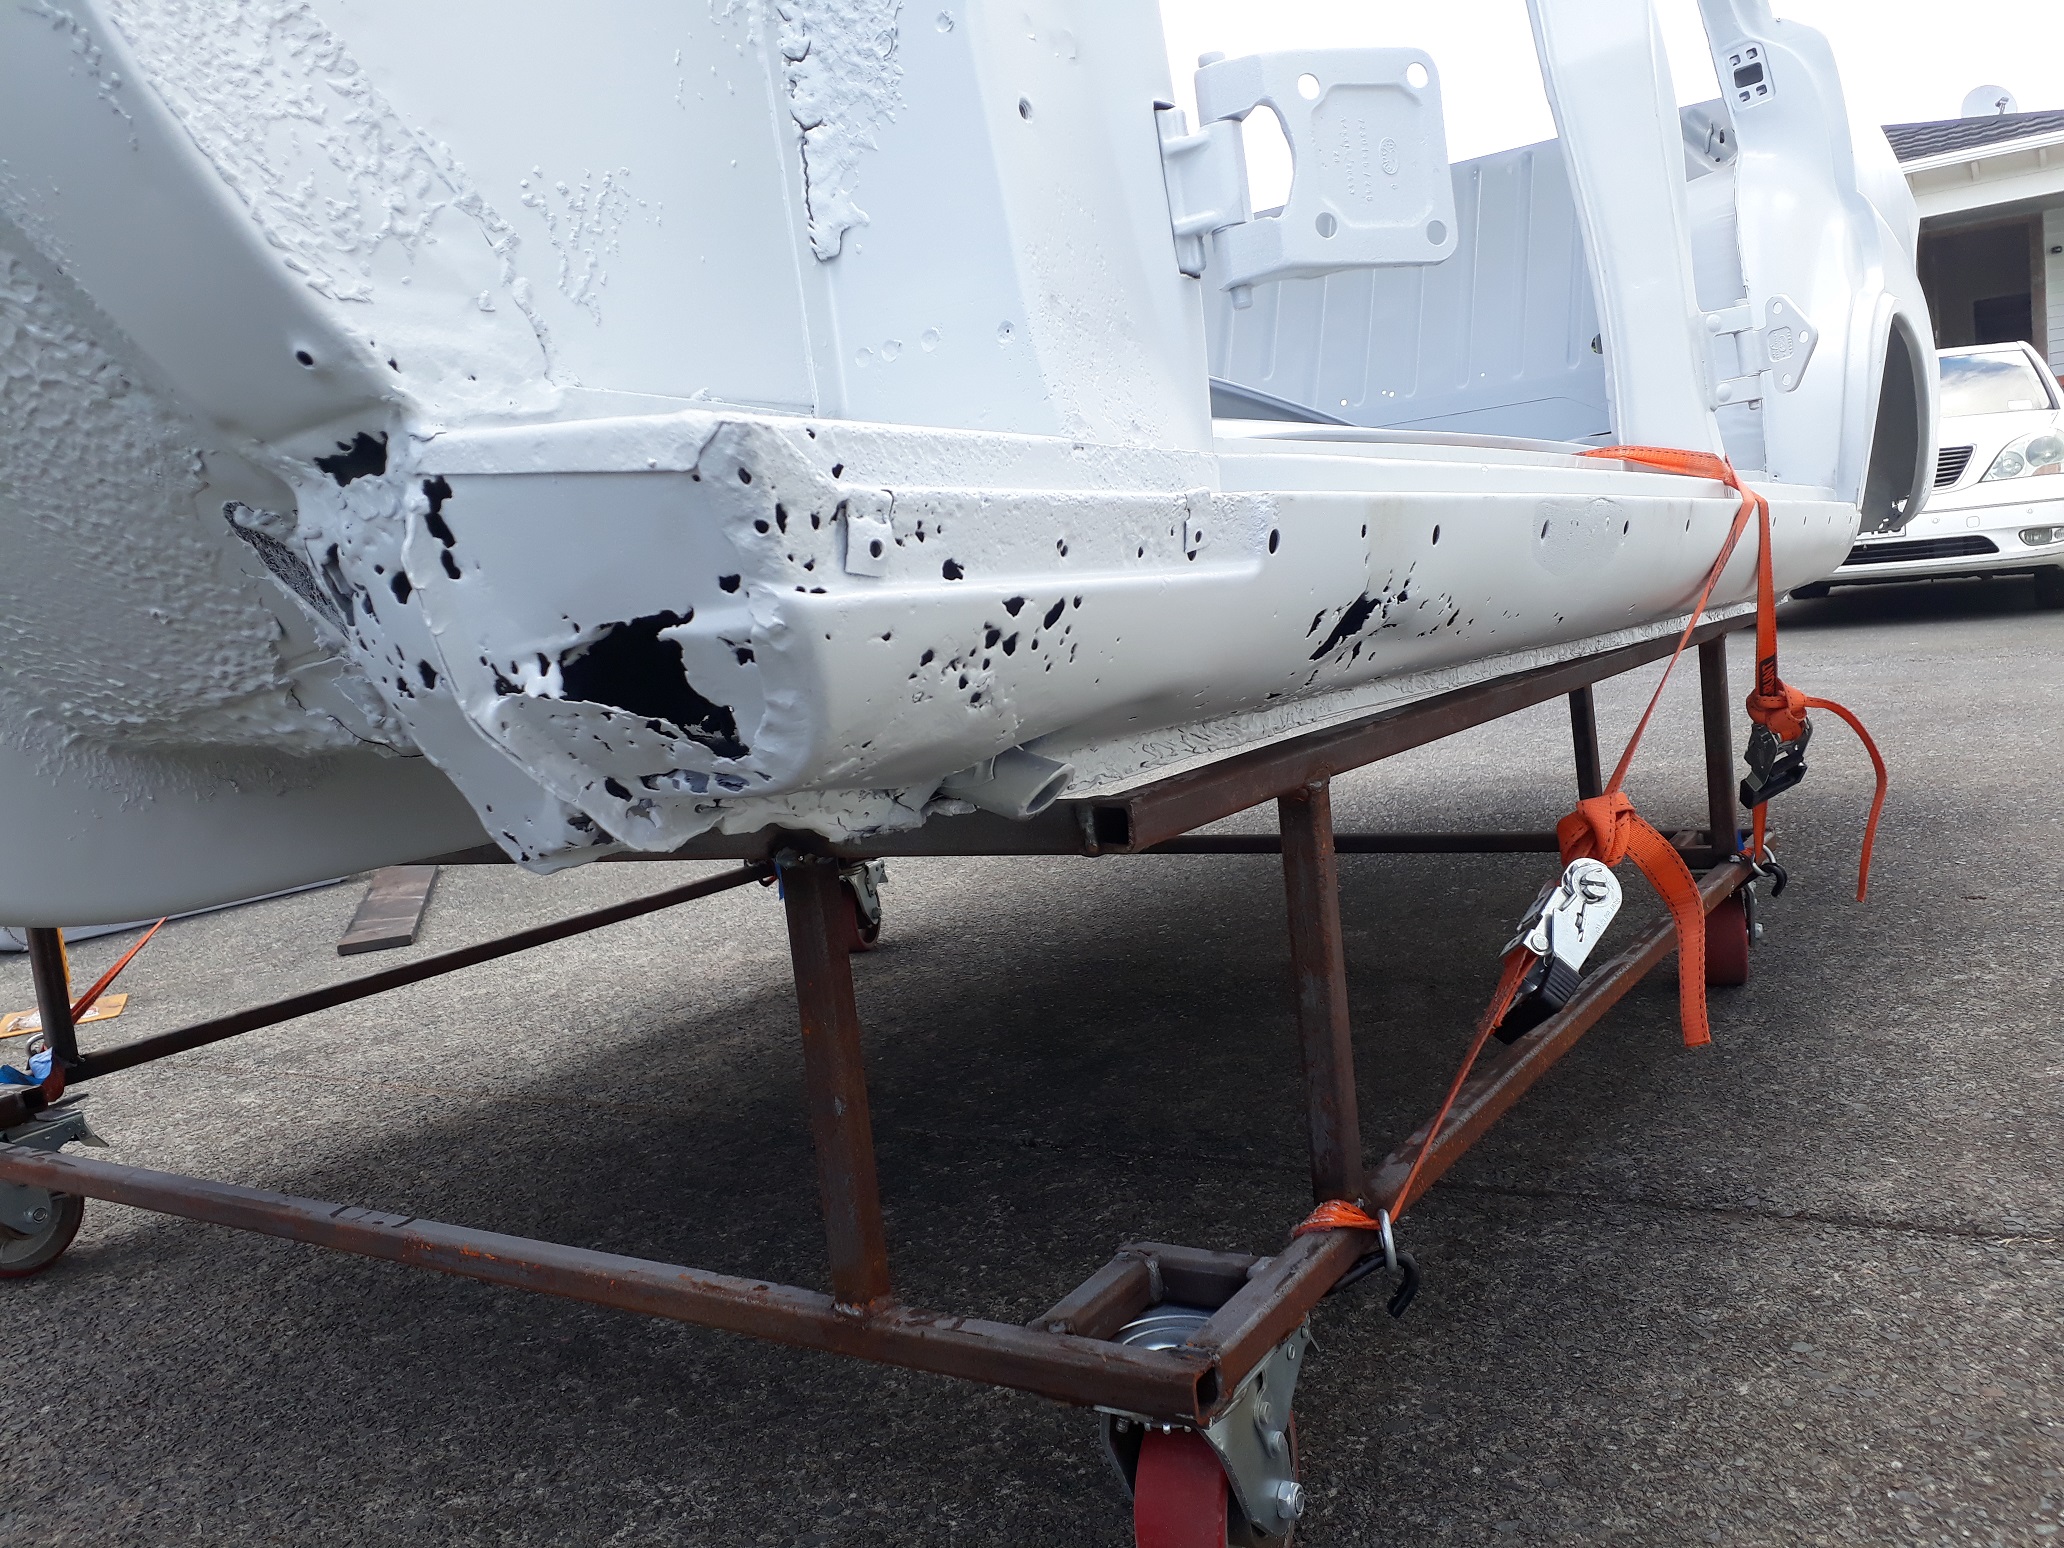
Check again for rust updates. you got any photos of yours pre-paint for a comparison? RE Lexus, those photos are taken at Neds, where it's being stored for the next couple of months while it waits for a panel beater, it's his Lexus
-
And the LHS shown here There's other bits an pieces (holes) all over but that's the worst of it. I'm not sure if it has had work done in the past or whether it could be from the factory but there are a number of parts on the car that are lead filled/patched (how bad ass is that!?) Anyway, I've been trawling Ebay.de and niemoeller.de ordering repair panels, still need to get the big ones through (left sill and boot floor). You can get quite a lot for these cars from Germany which is good. Standby for more. Shoulda just bought UJs one.
- 26 replies
-
- 27
-
-
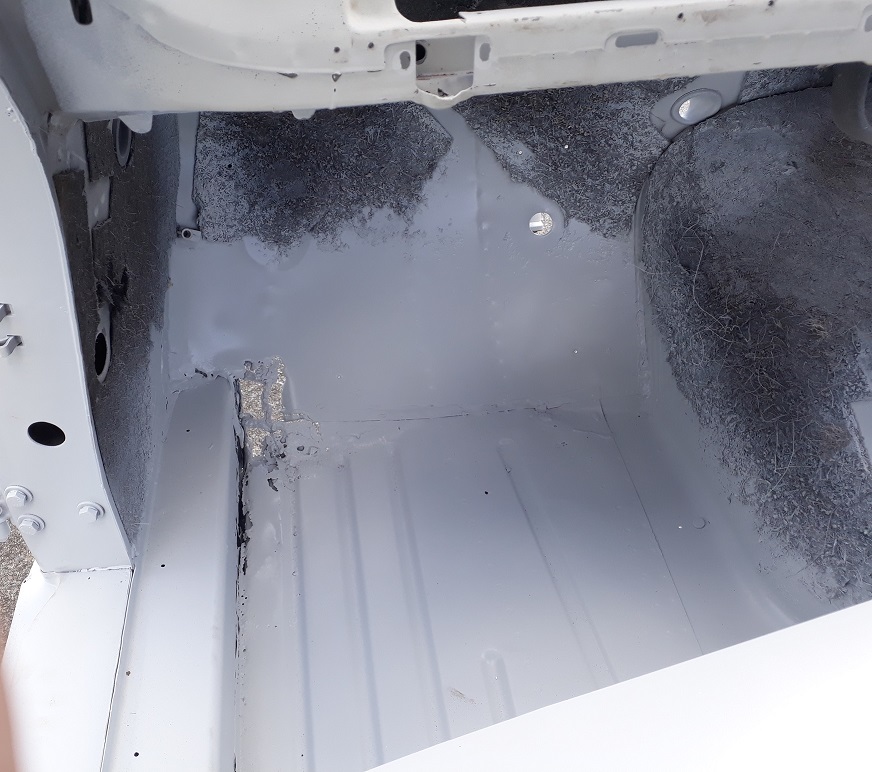
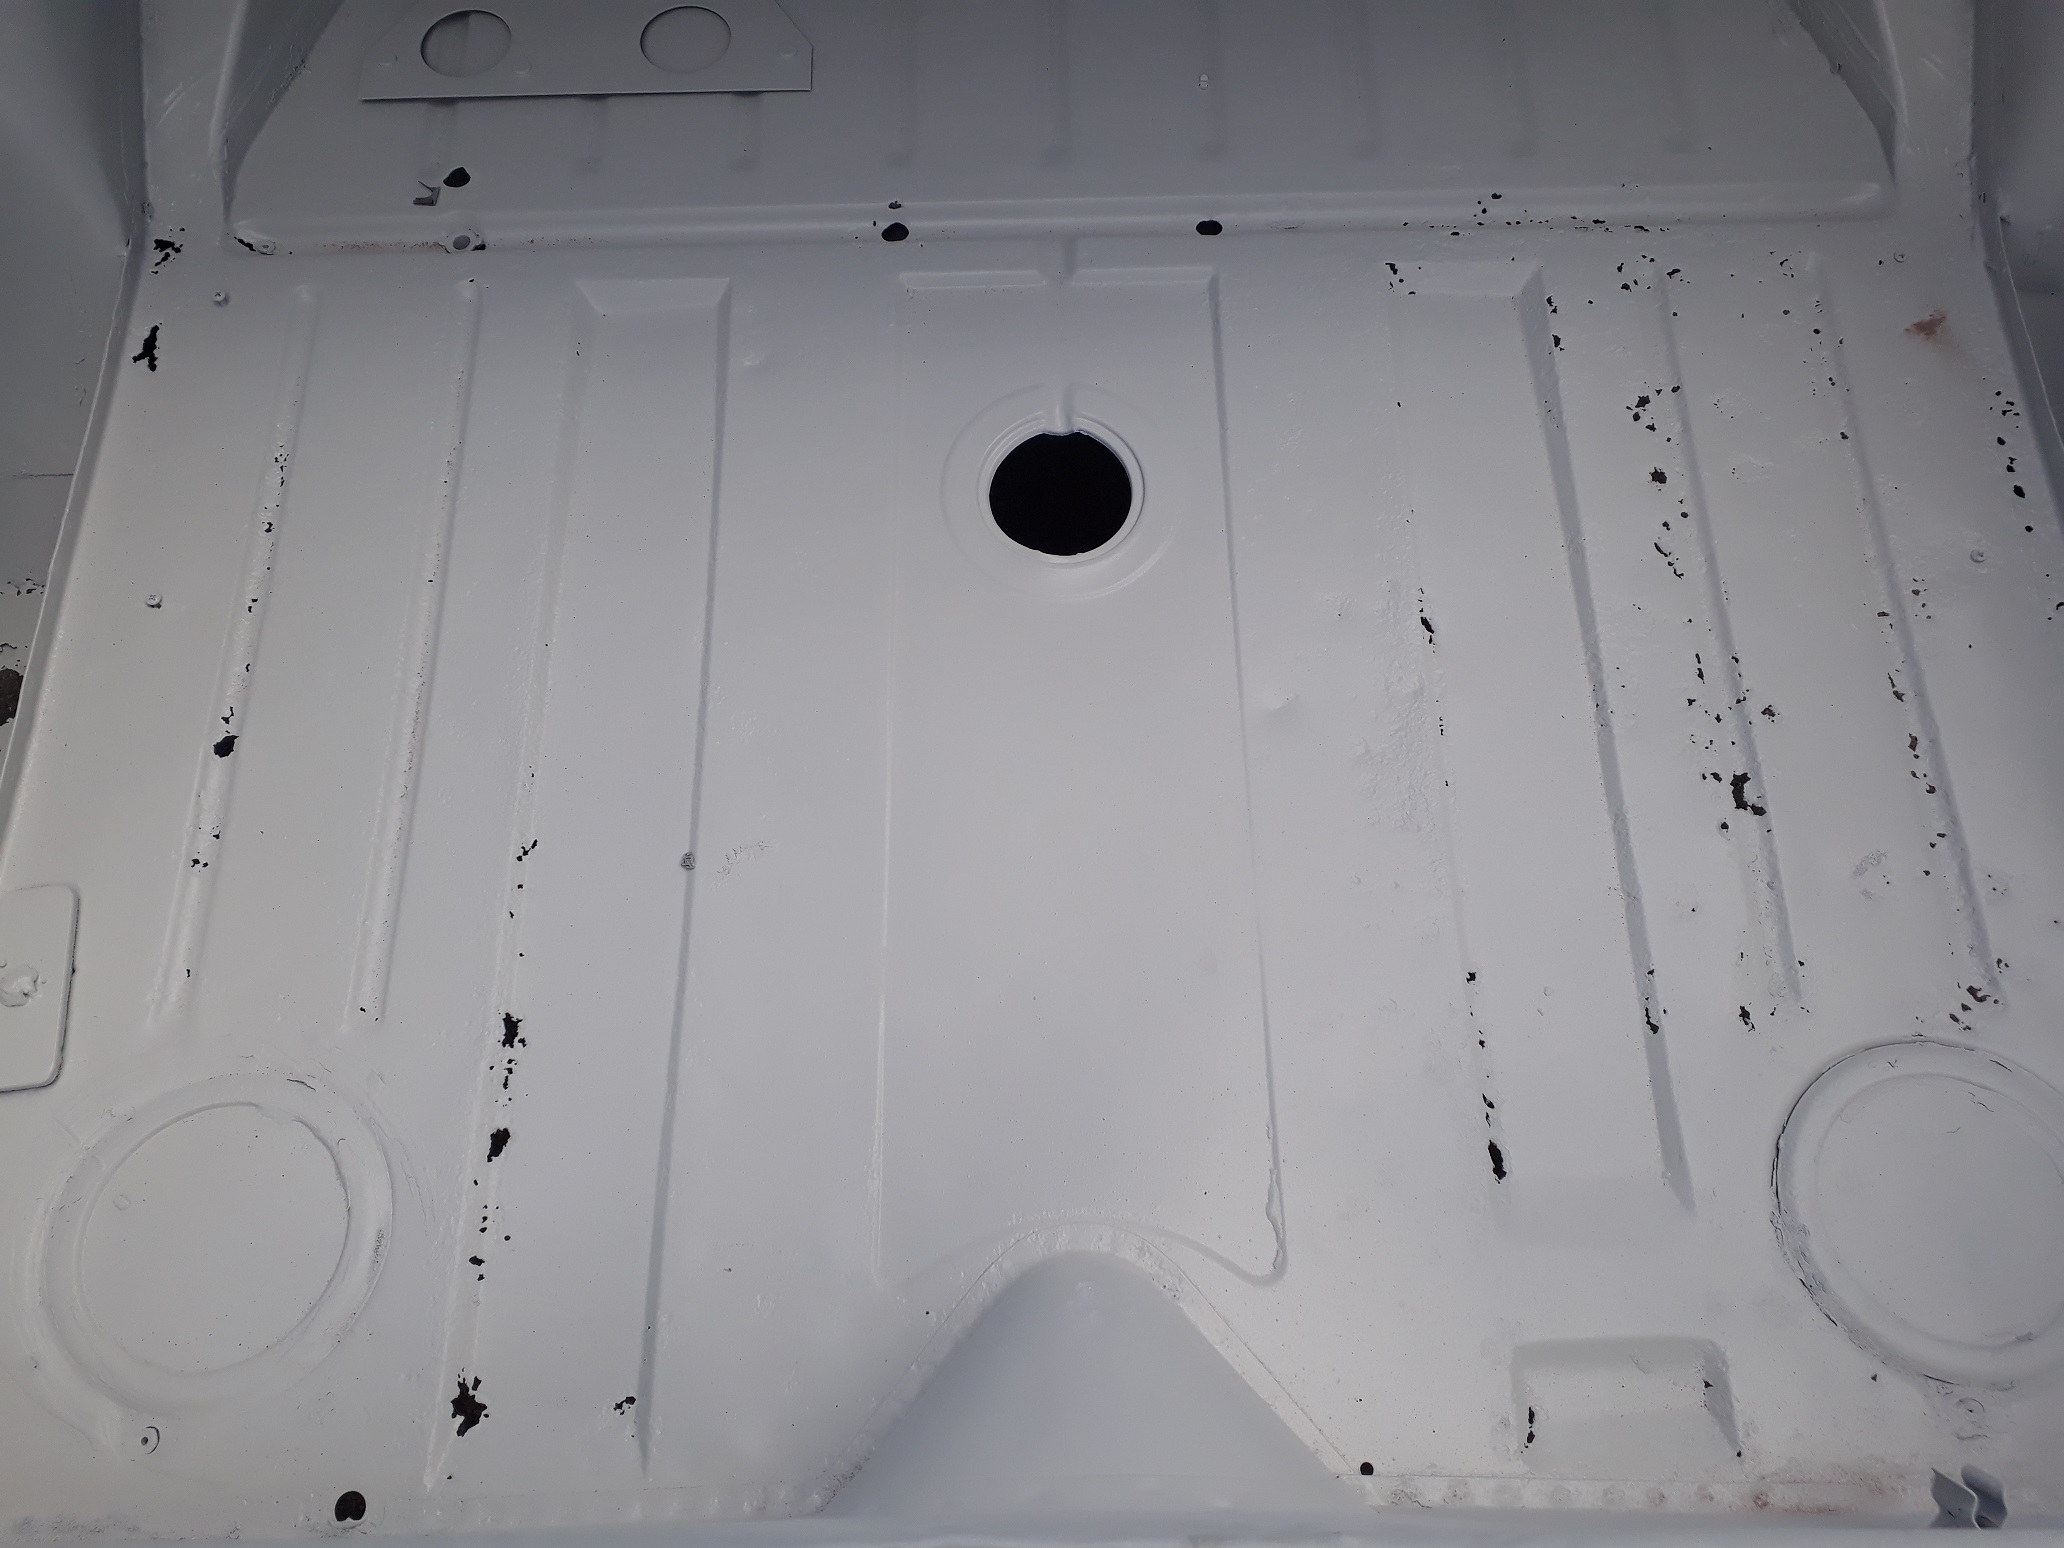
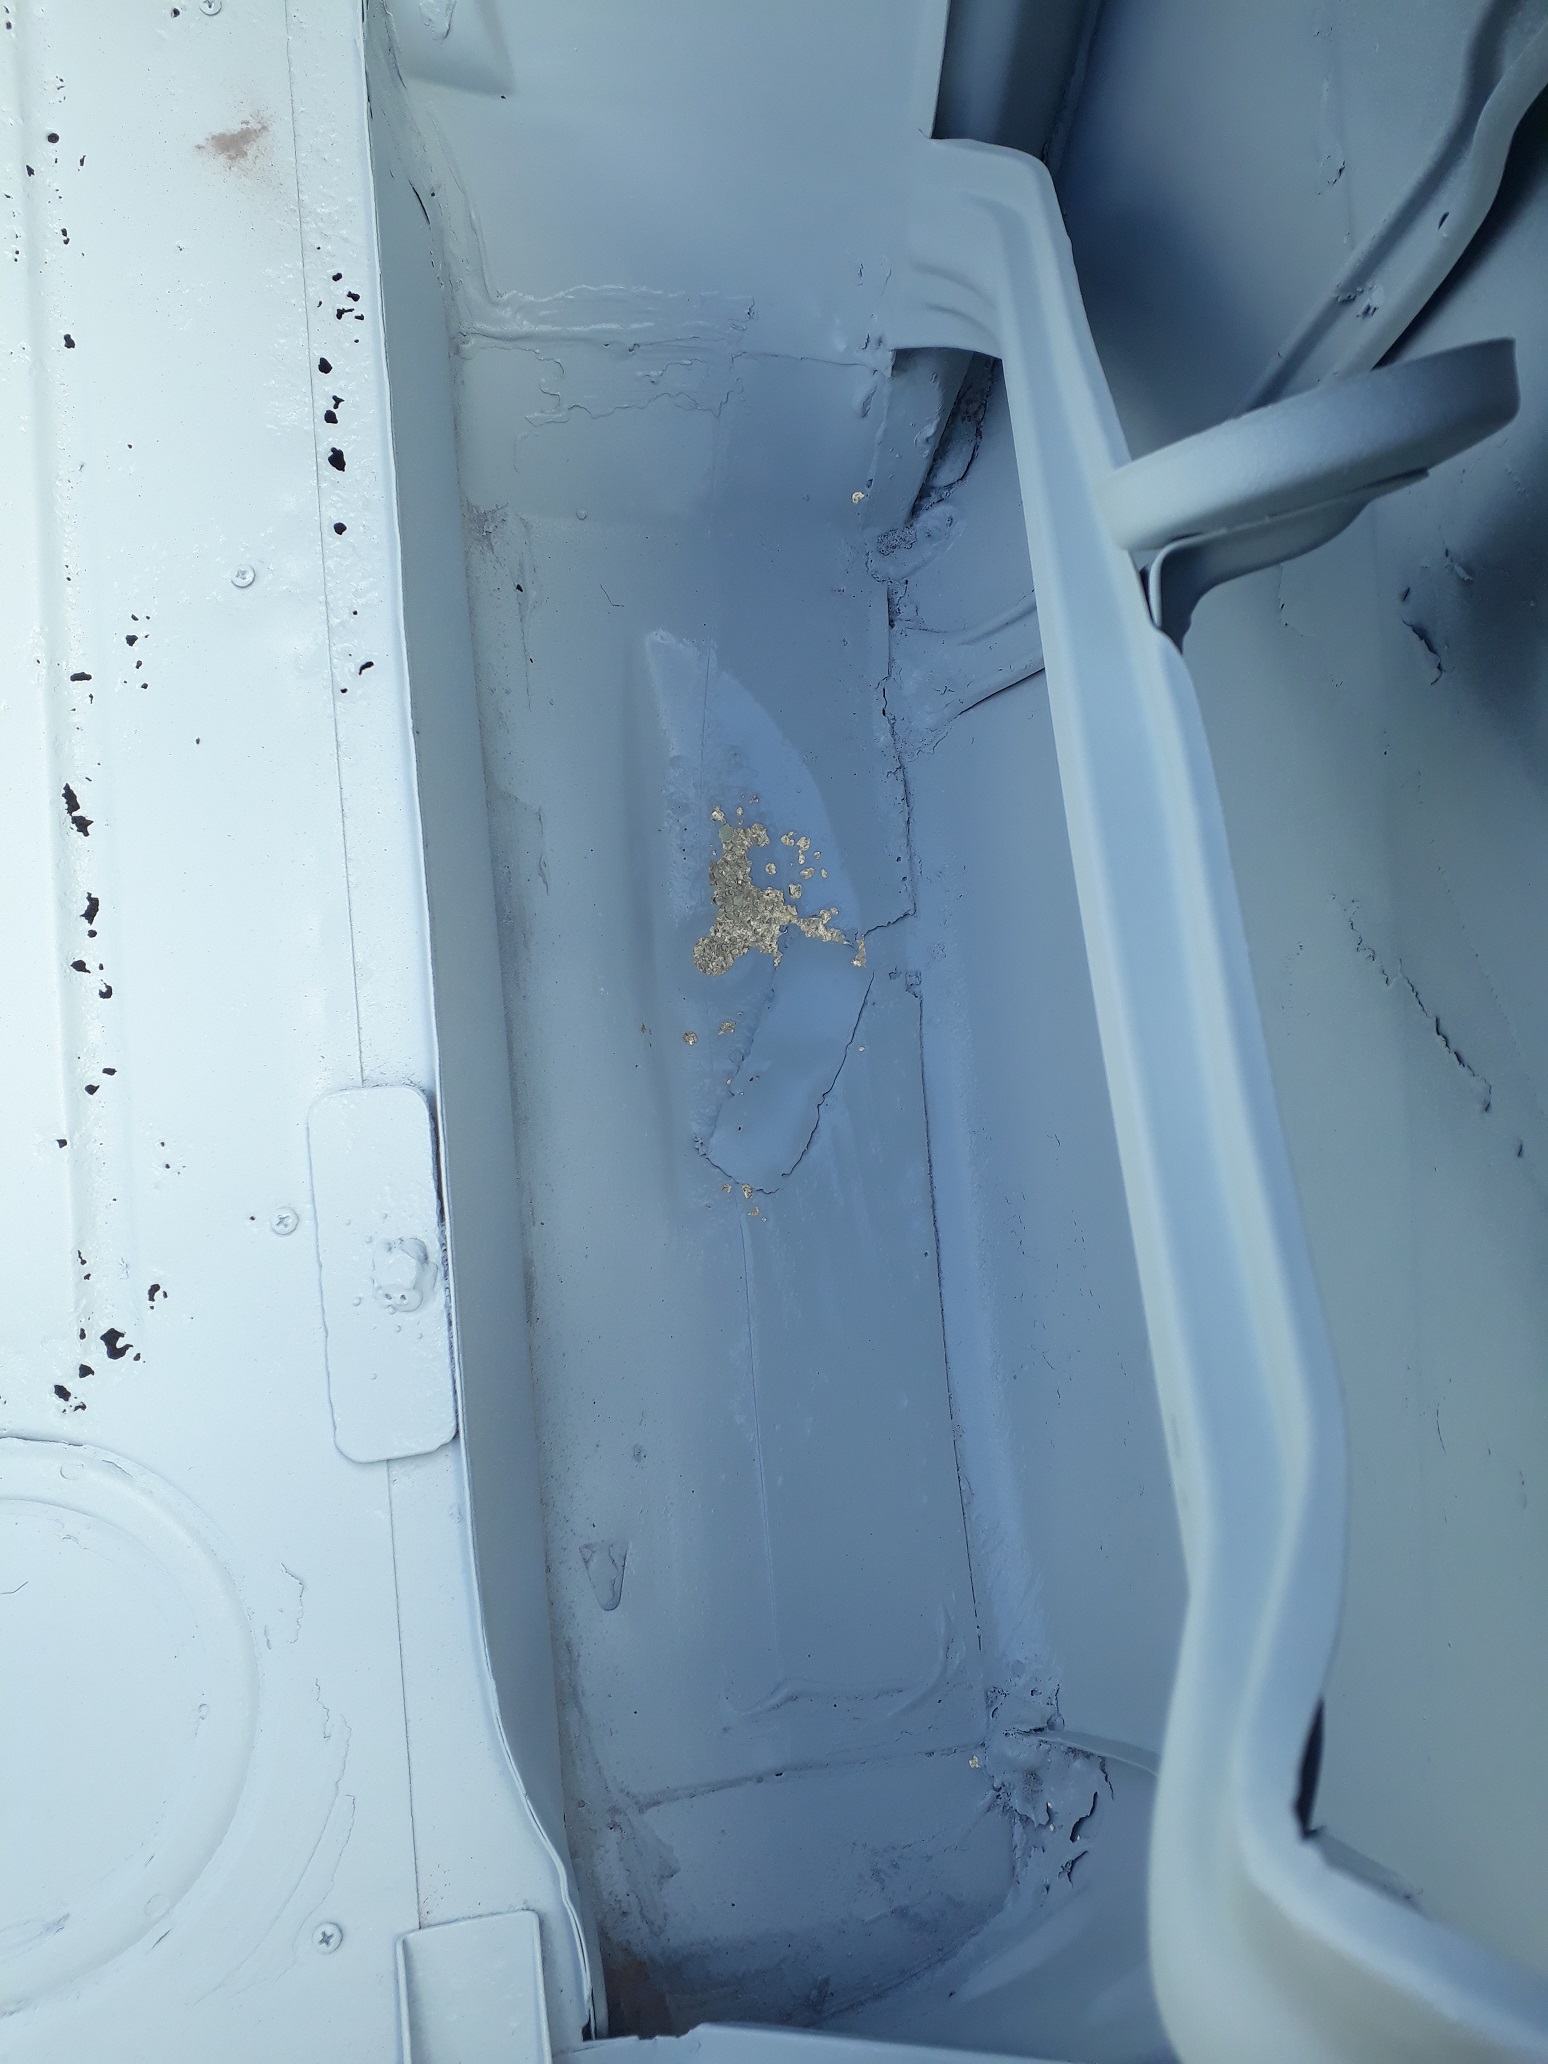
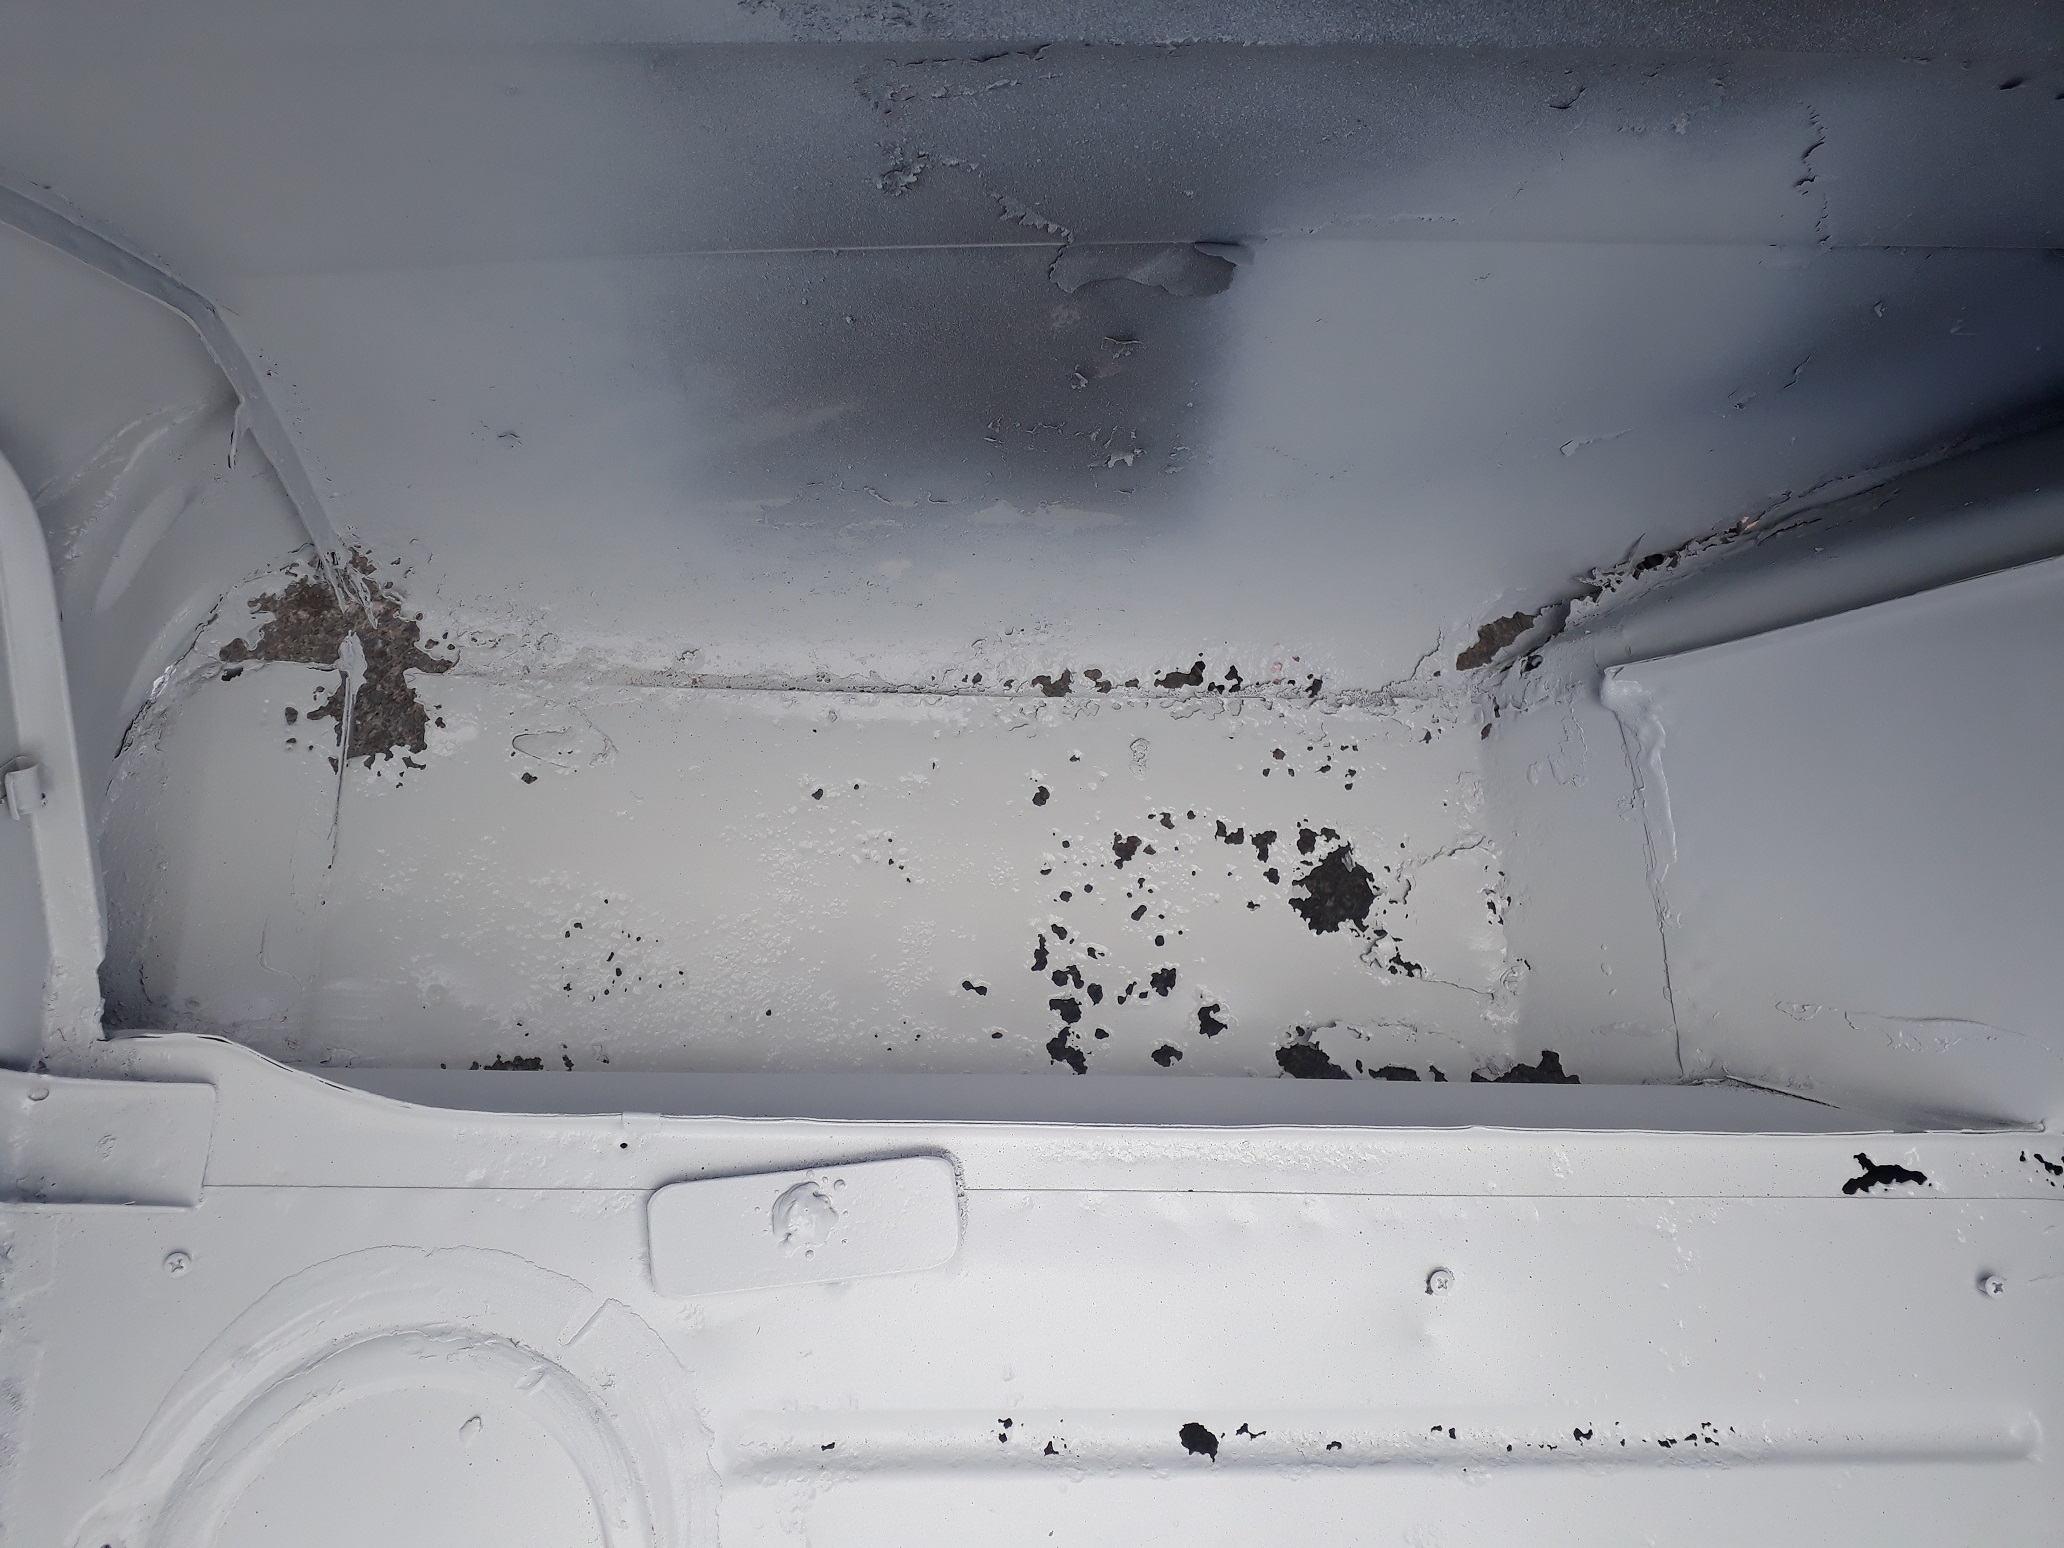
The not so good: mainly seems to be contained in the LHS and boot, with the boot and spare wheel wells shown here:
-
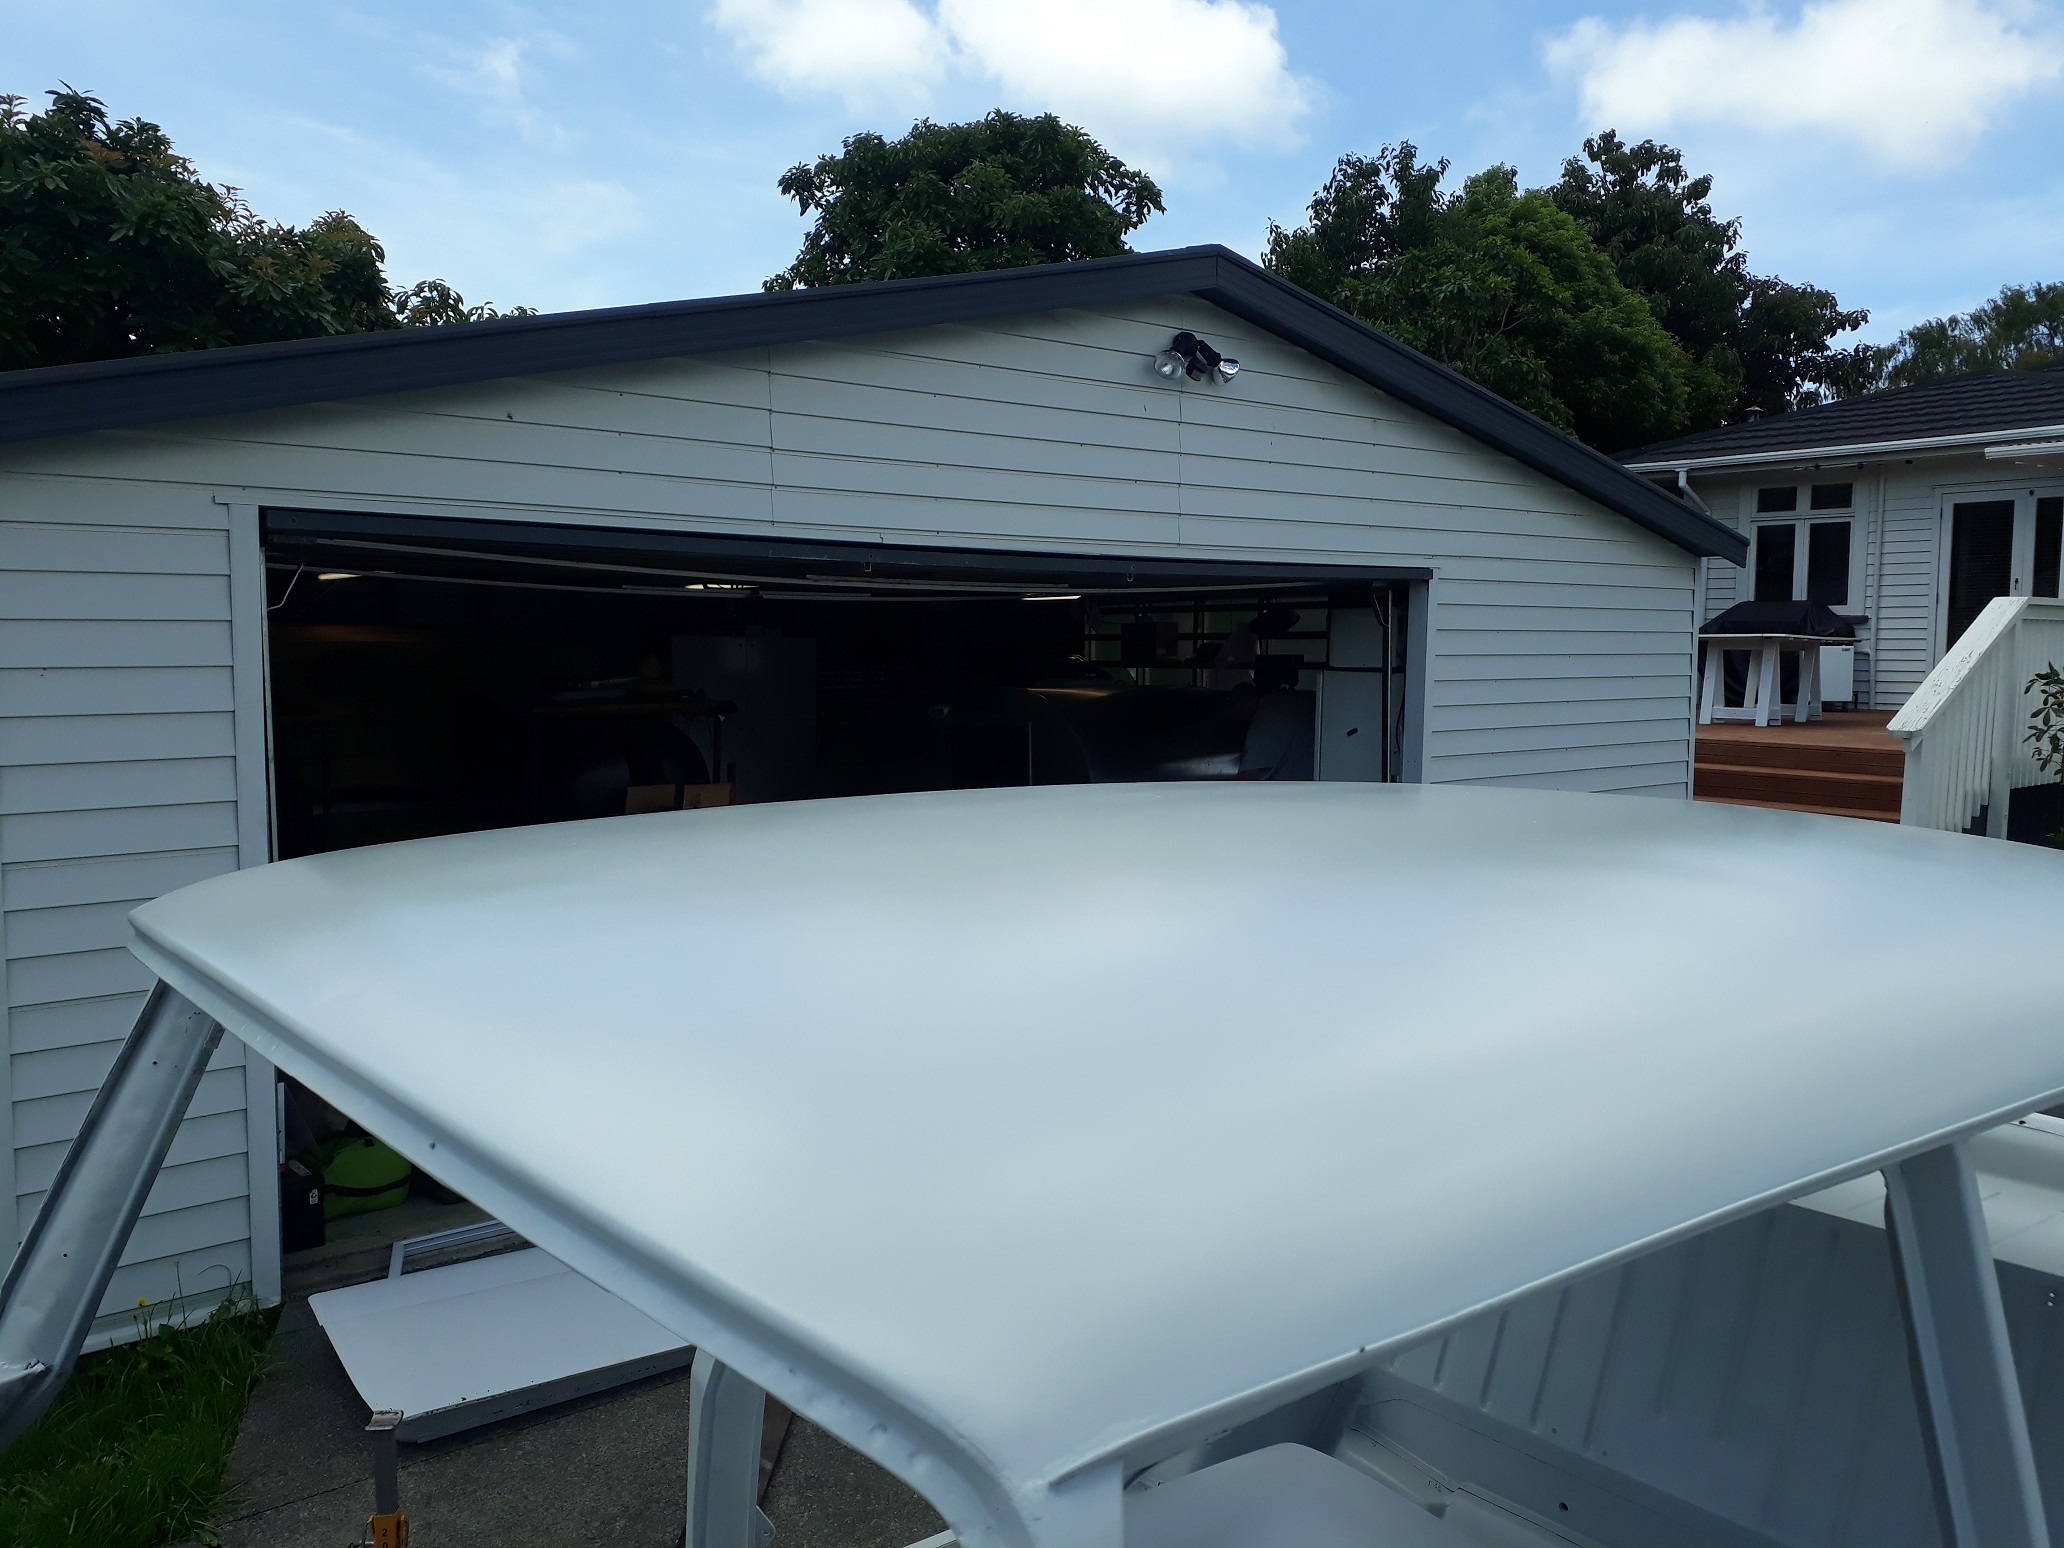
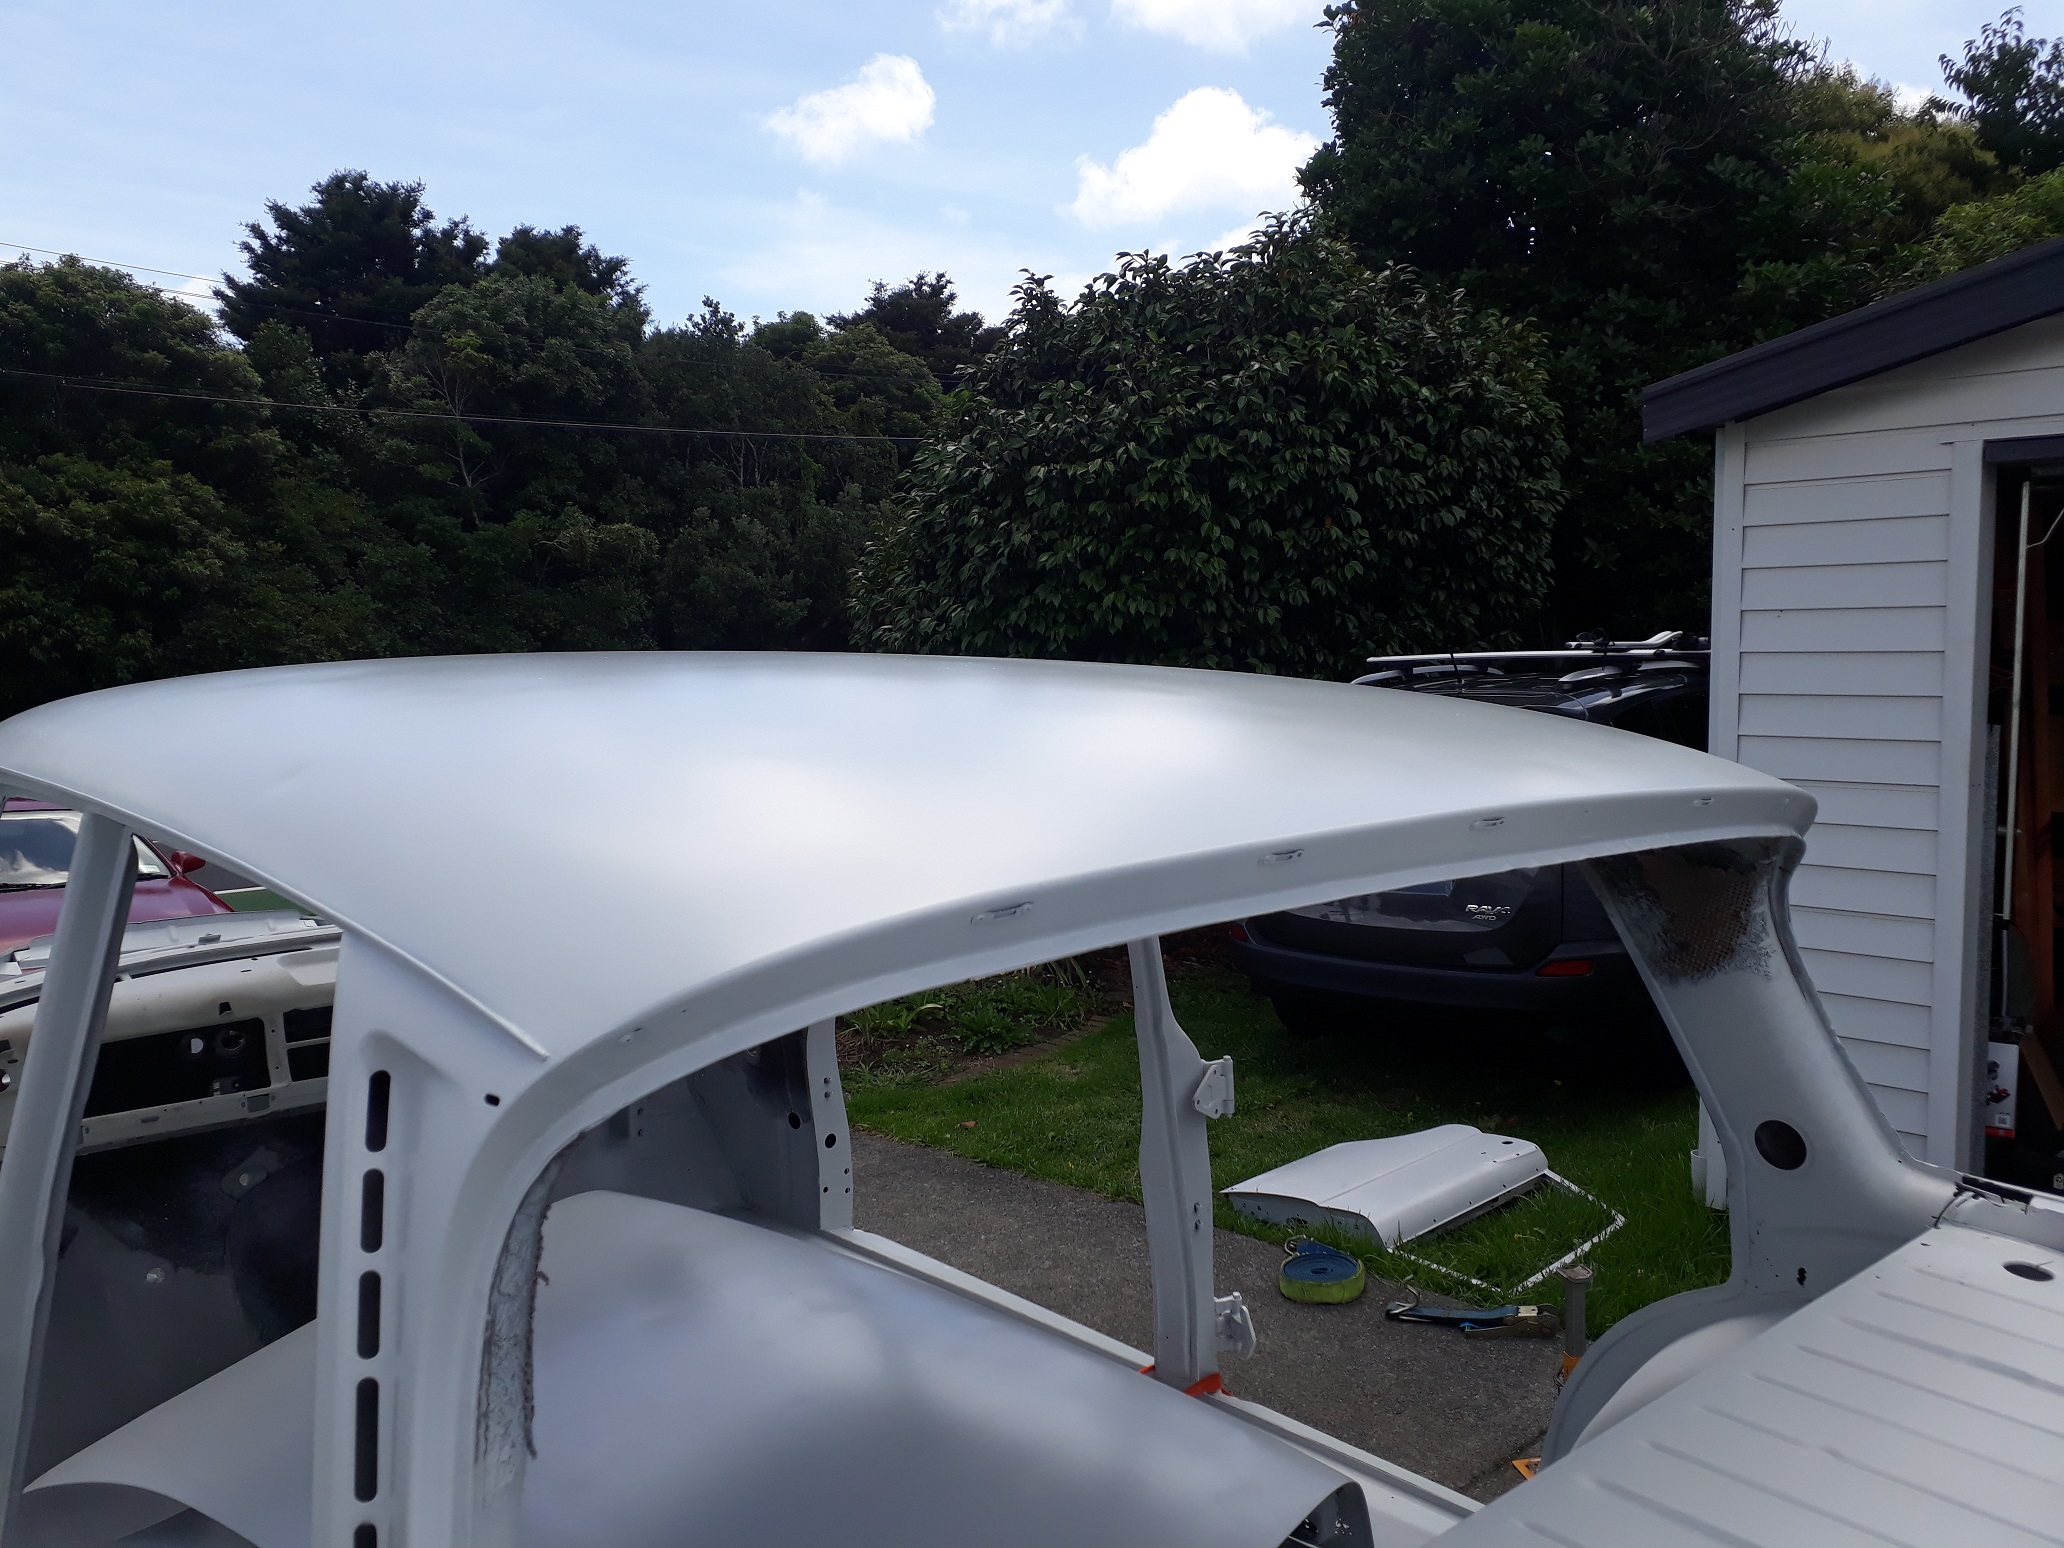
It turned out to be a bit holy-er than I thought it was. We will start with the Good - the roof! Apart from a small dent above the right rear door it might as well be brand new! You can semi make out in the bottom right corner of that second photo and the top of the next photo some cut marks around the upper lip of the parcel shelf. The previous owner has cut chunks out of that entire lip all the way around, which is going to be a pain to correct The Engine bay isn't bad either, a few pin holes around where the brake master cylinder bolts up, but no rust under the battery mount.
-
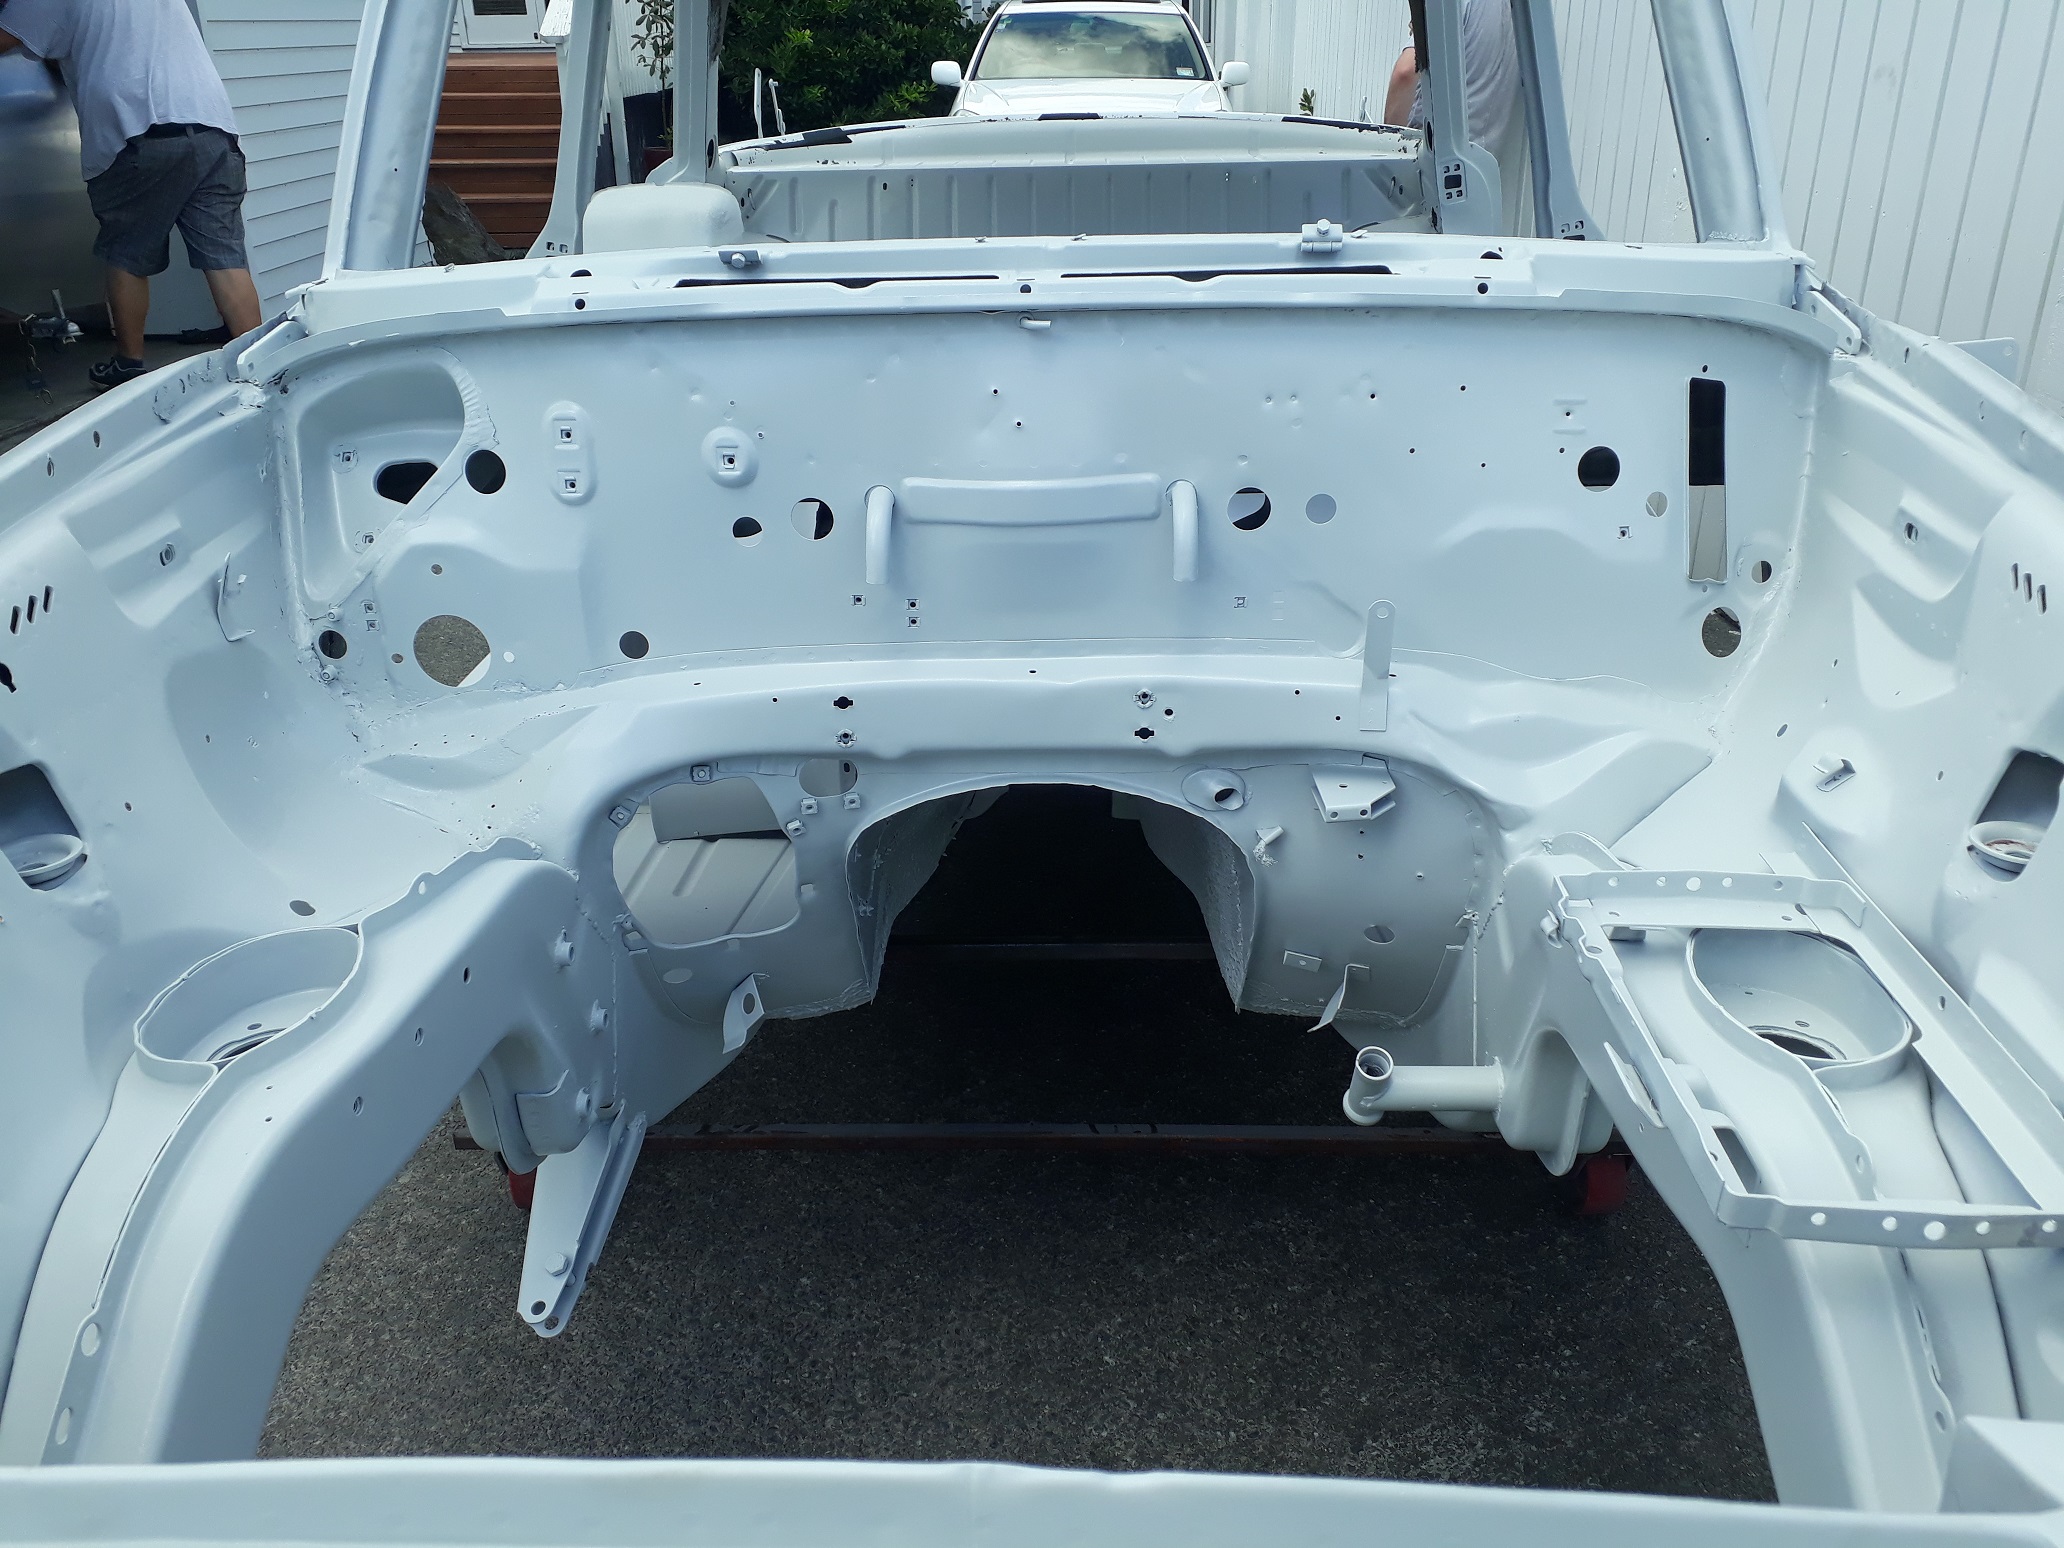
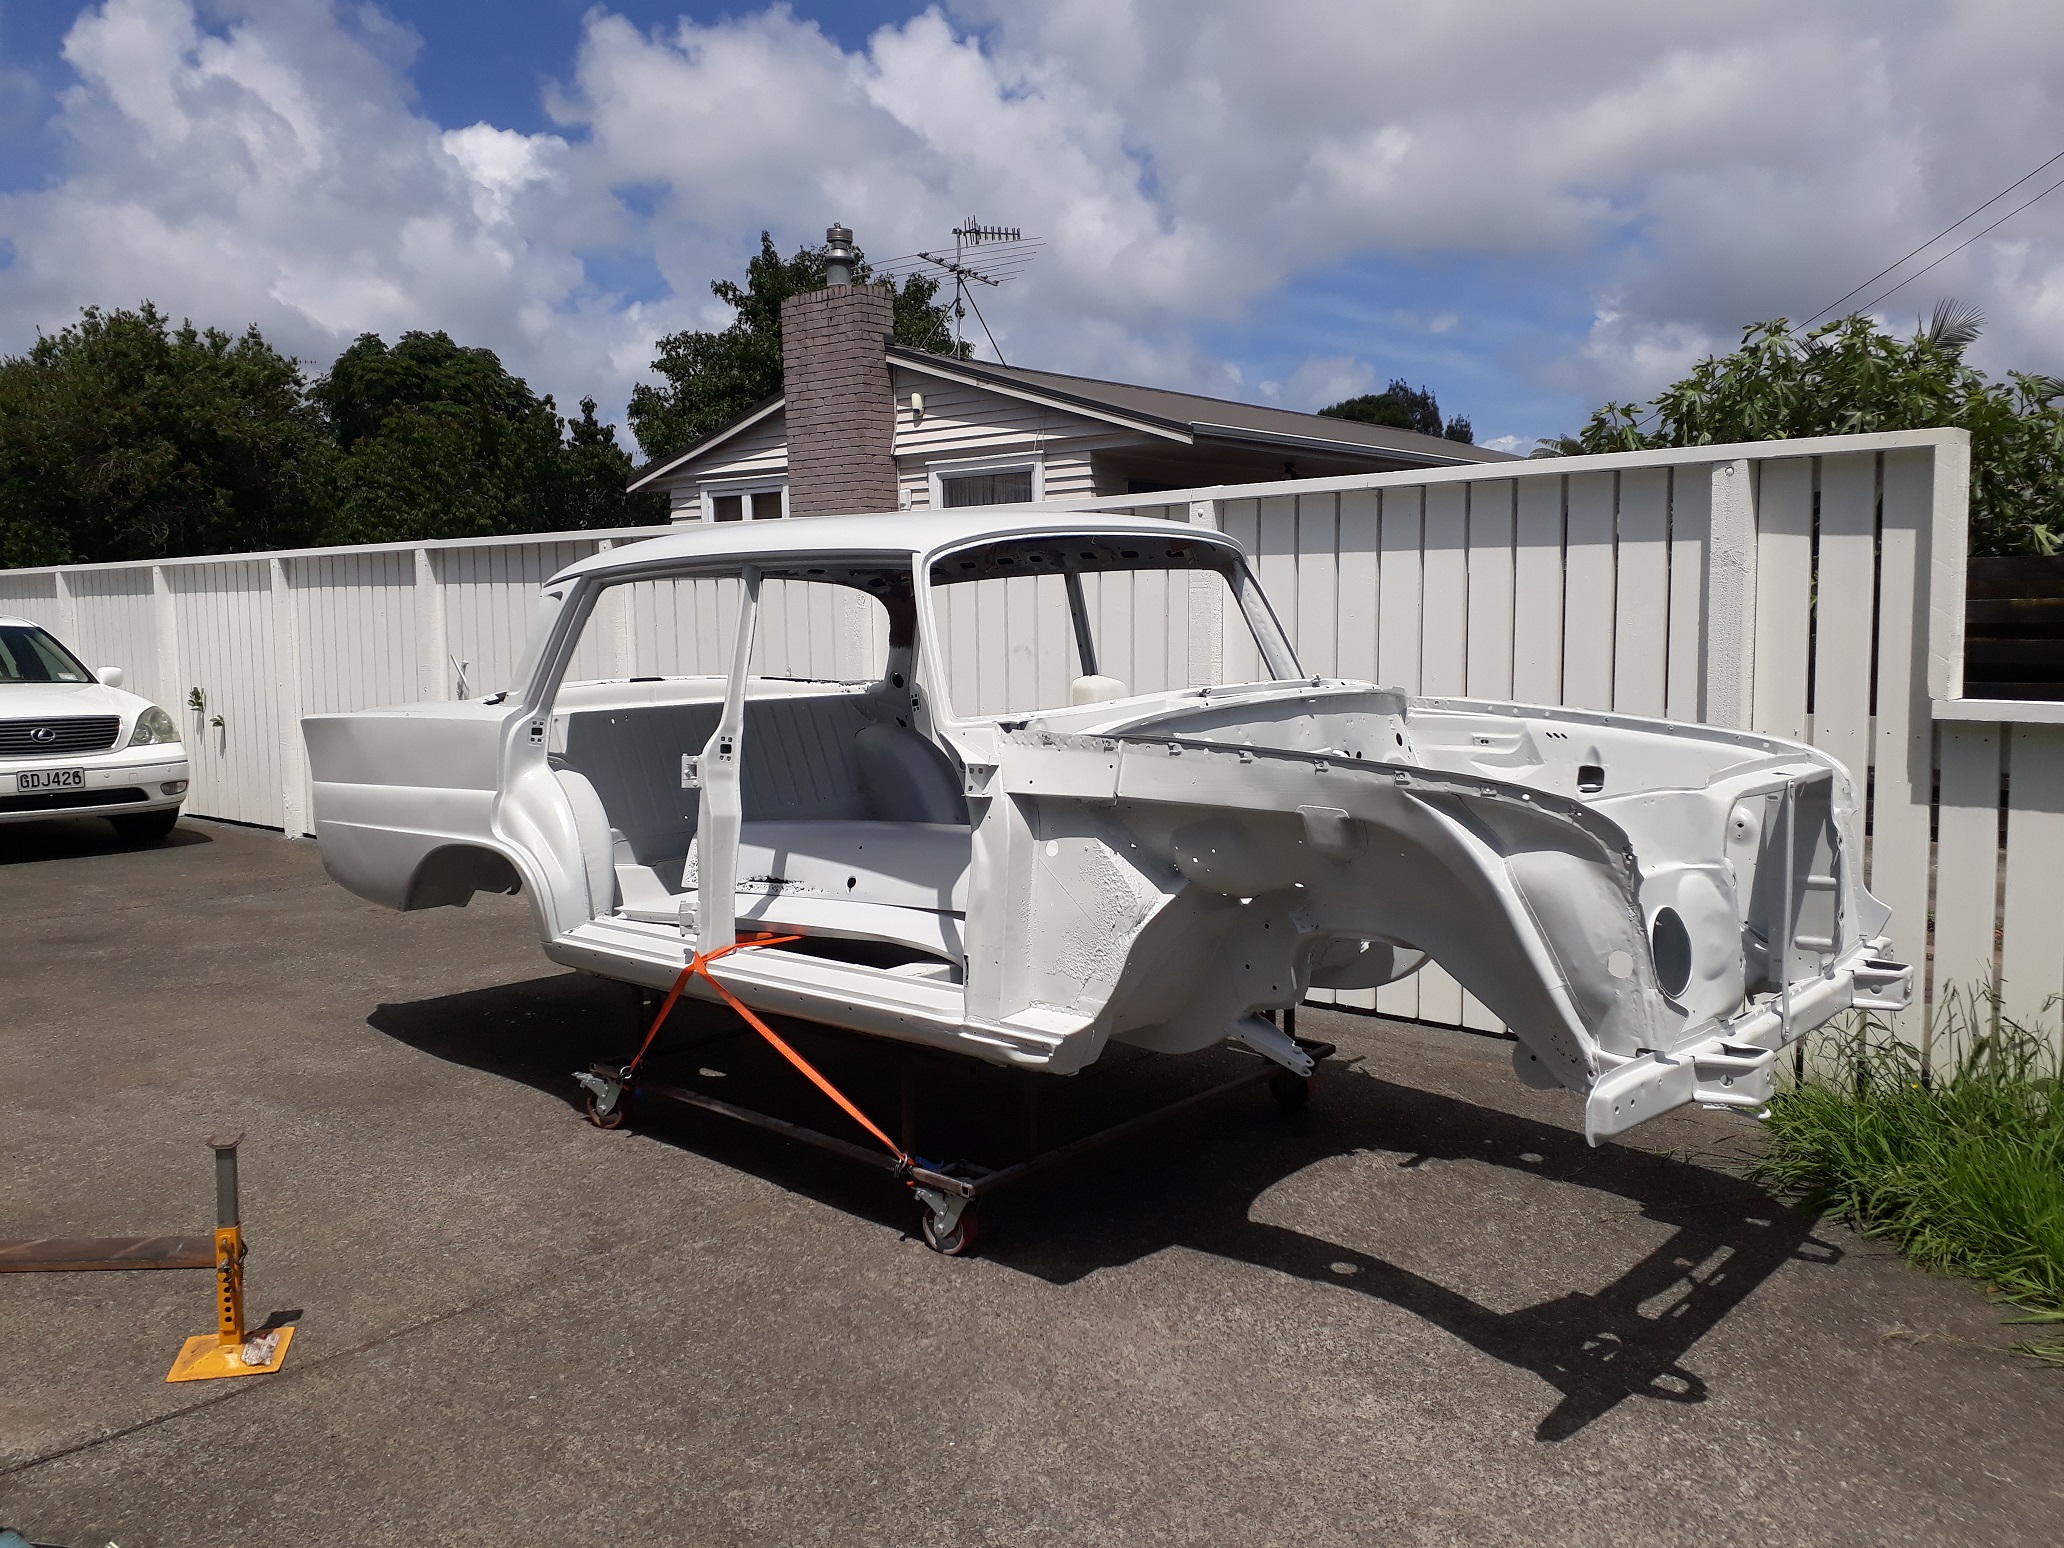
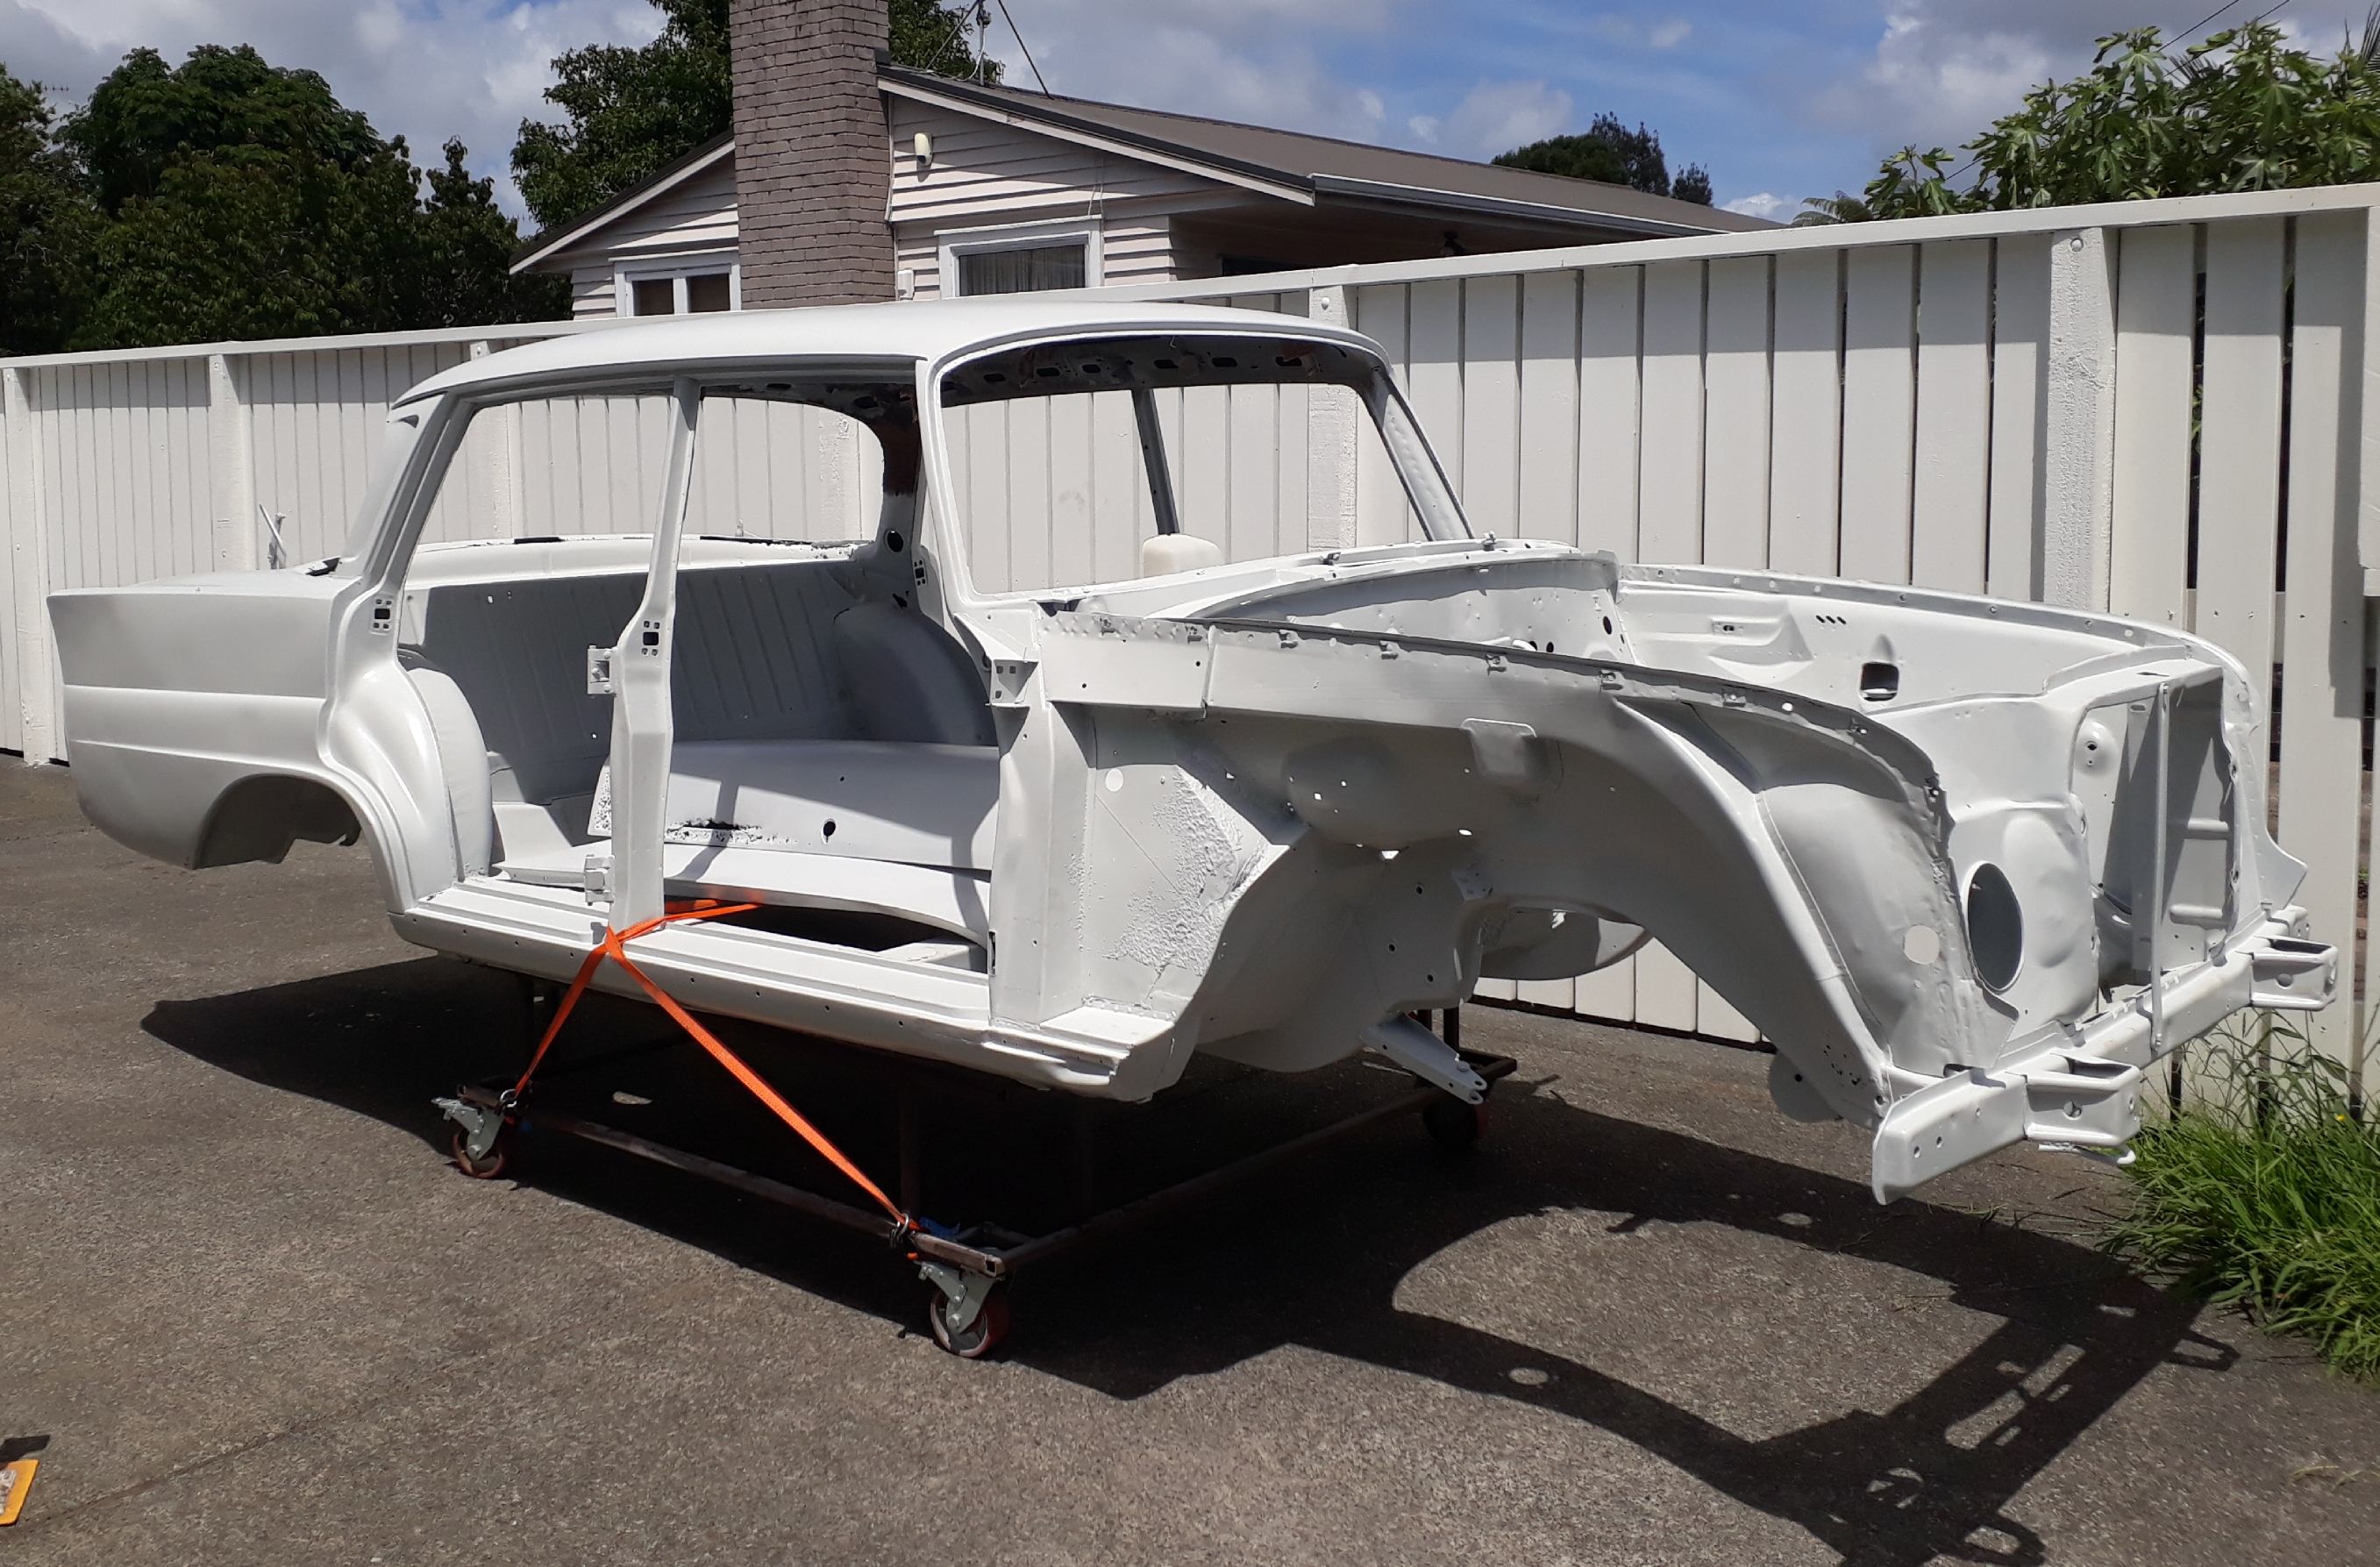
It spent a week at Autoblast getting blasted all over with the exception of the underside of the roof, dash, and trans tunnel. before being coated in primer. I definitely recommend the service Dave and his guys at Autoblast do and the care they take not to warp anything. Came back looking like this: Originally I was going to scrape what underseal was on it off before sending it to be blasted. However I ran out of time/CBF with it any more so sent it out as it was, giving them the instructions to hit it and if it doesn't come off with 260PSI of air/garnet attacking it, it can stay, which is why you can see some primered over underseal in the wheel arch area.
- 26 replies
-
- 11
-
-
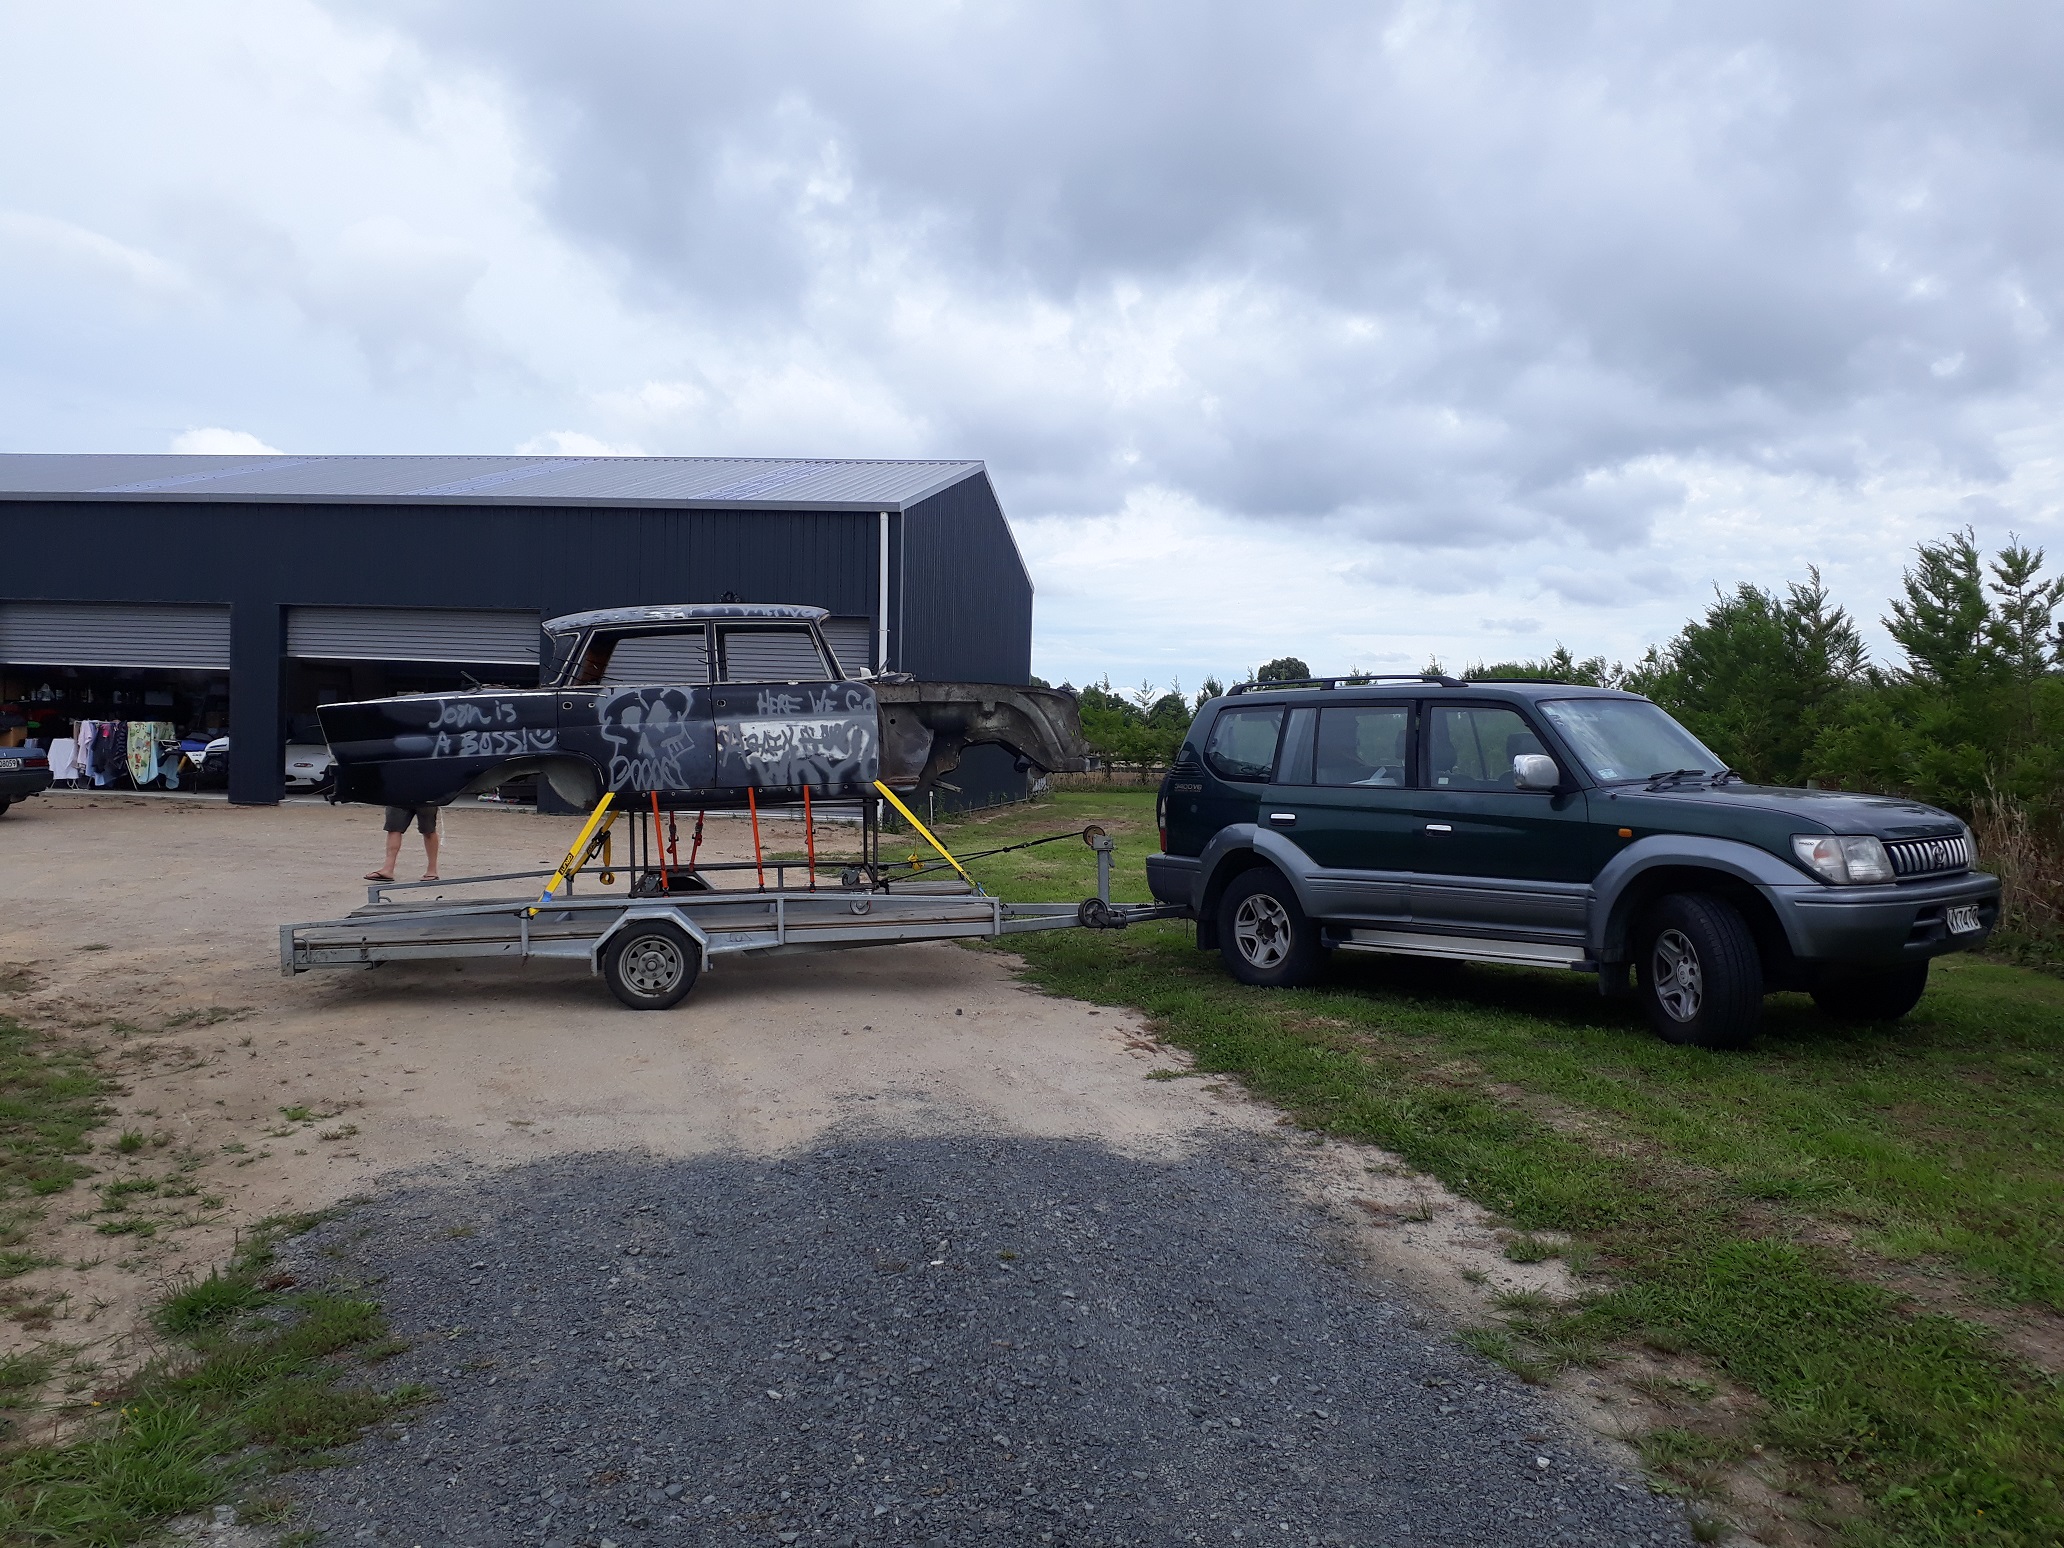
The big push for it to all be apart in a week was because it had a booking with Autoblast in Glenfield to get blasted and primed. after 6 months sitting and a week of bashing away on it, it left Brents.
-
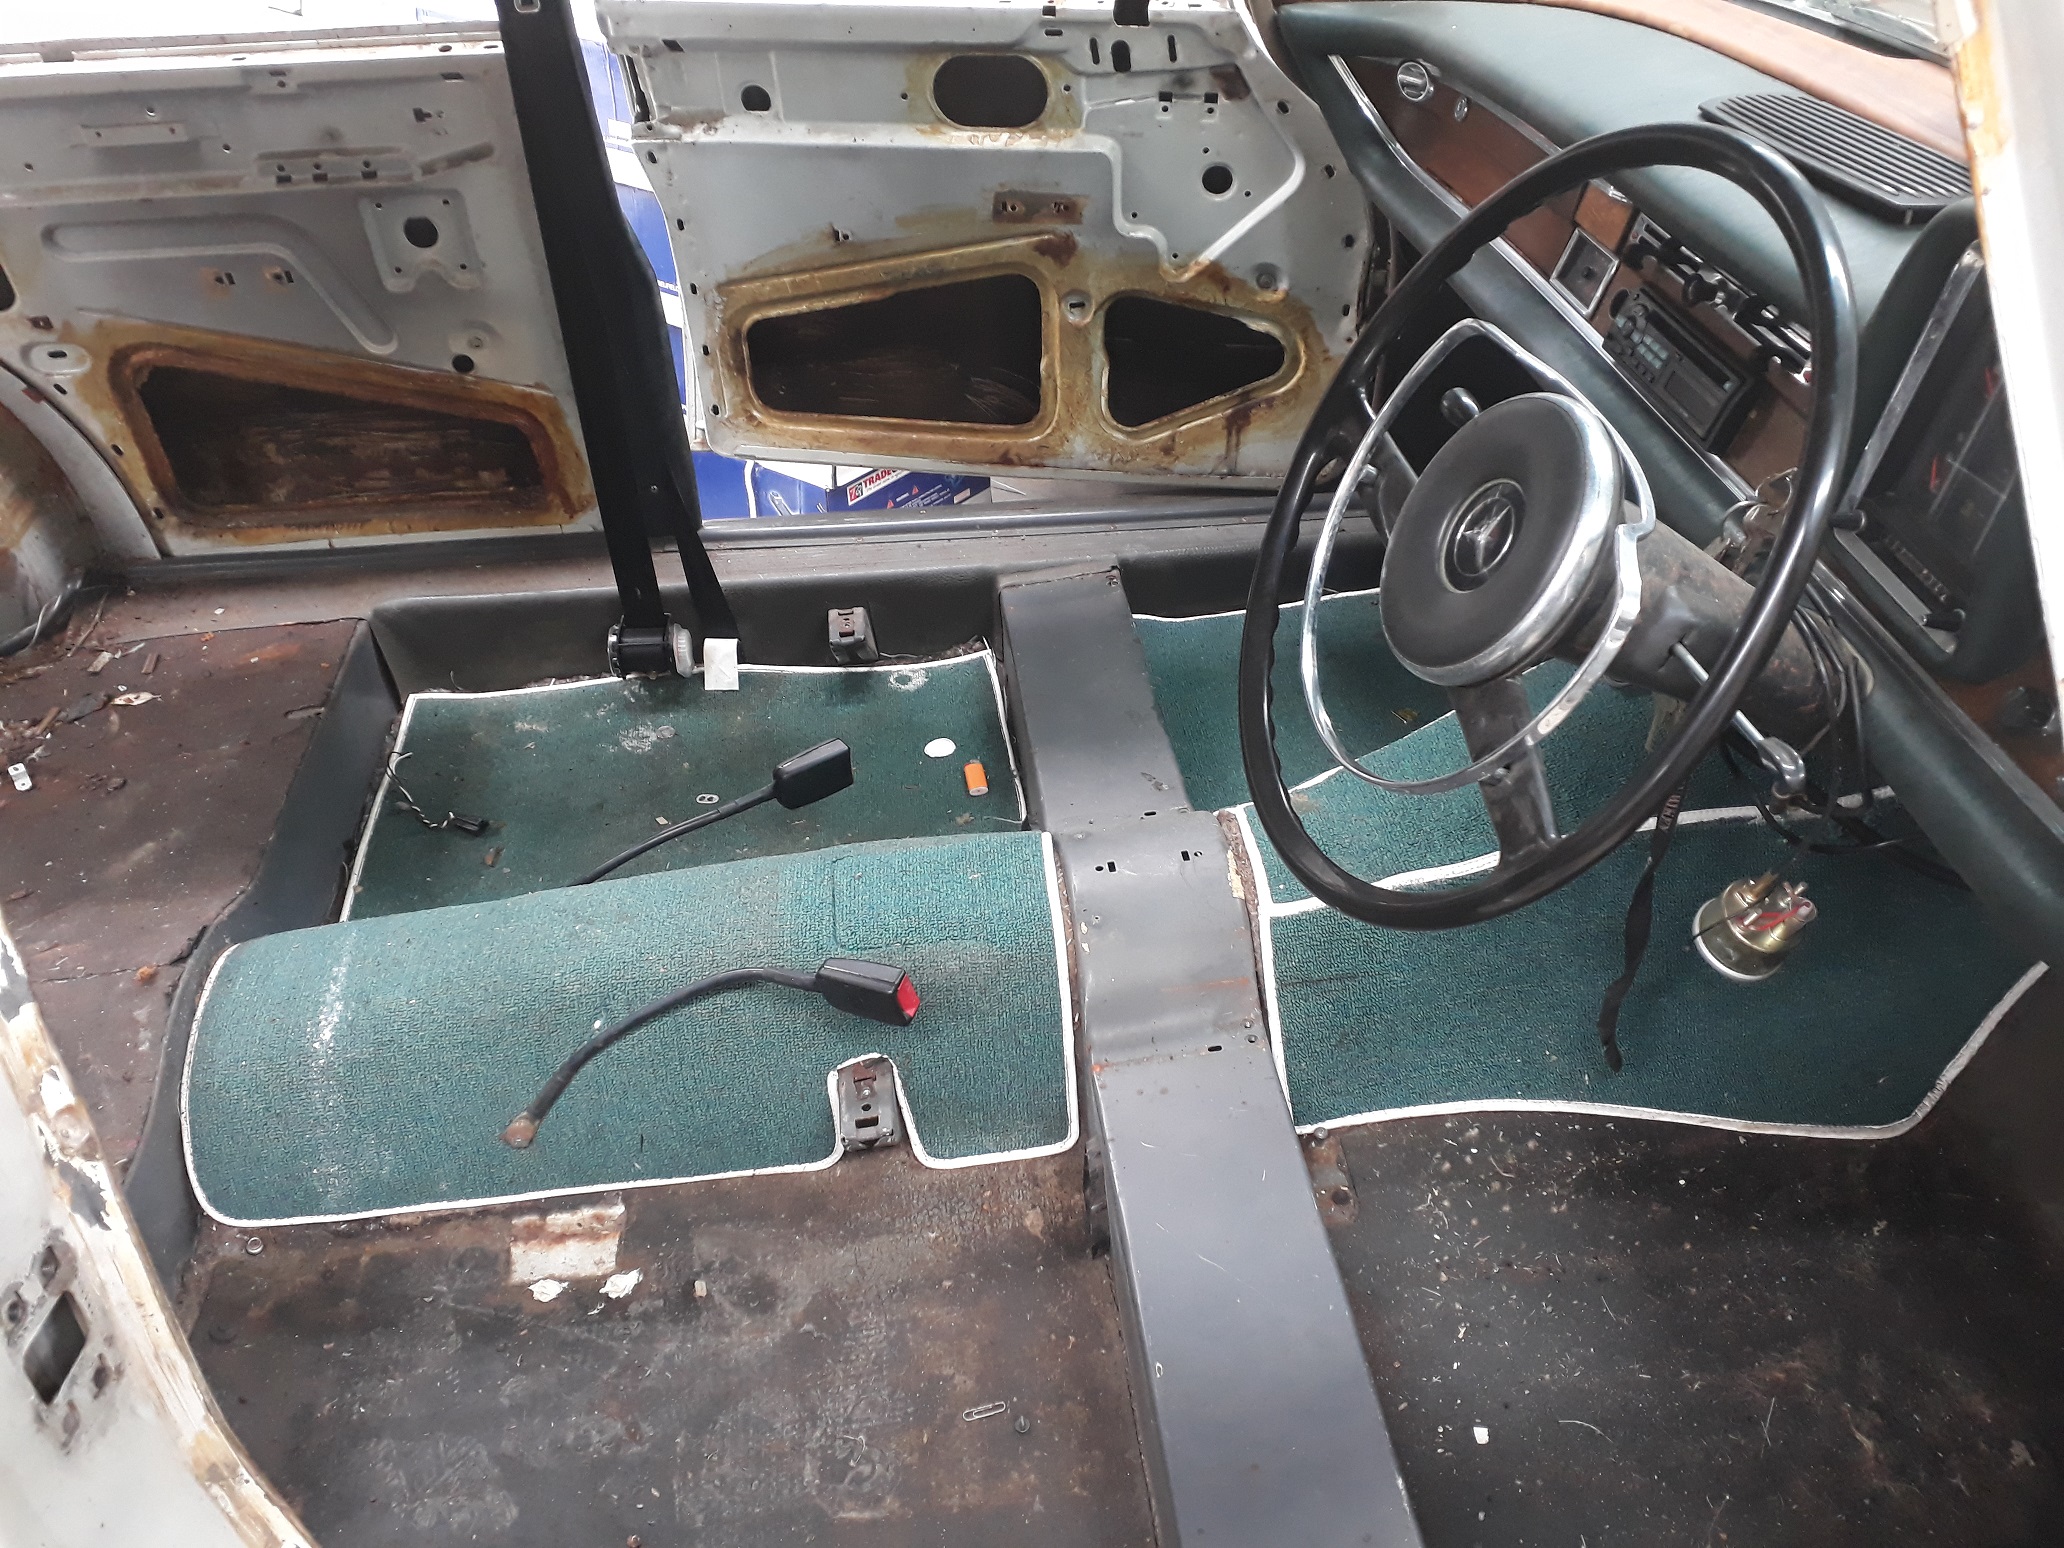
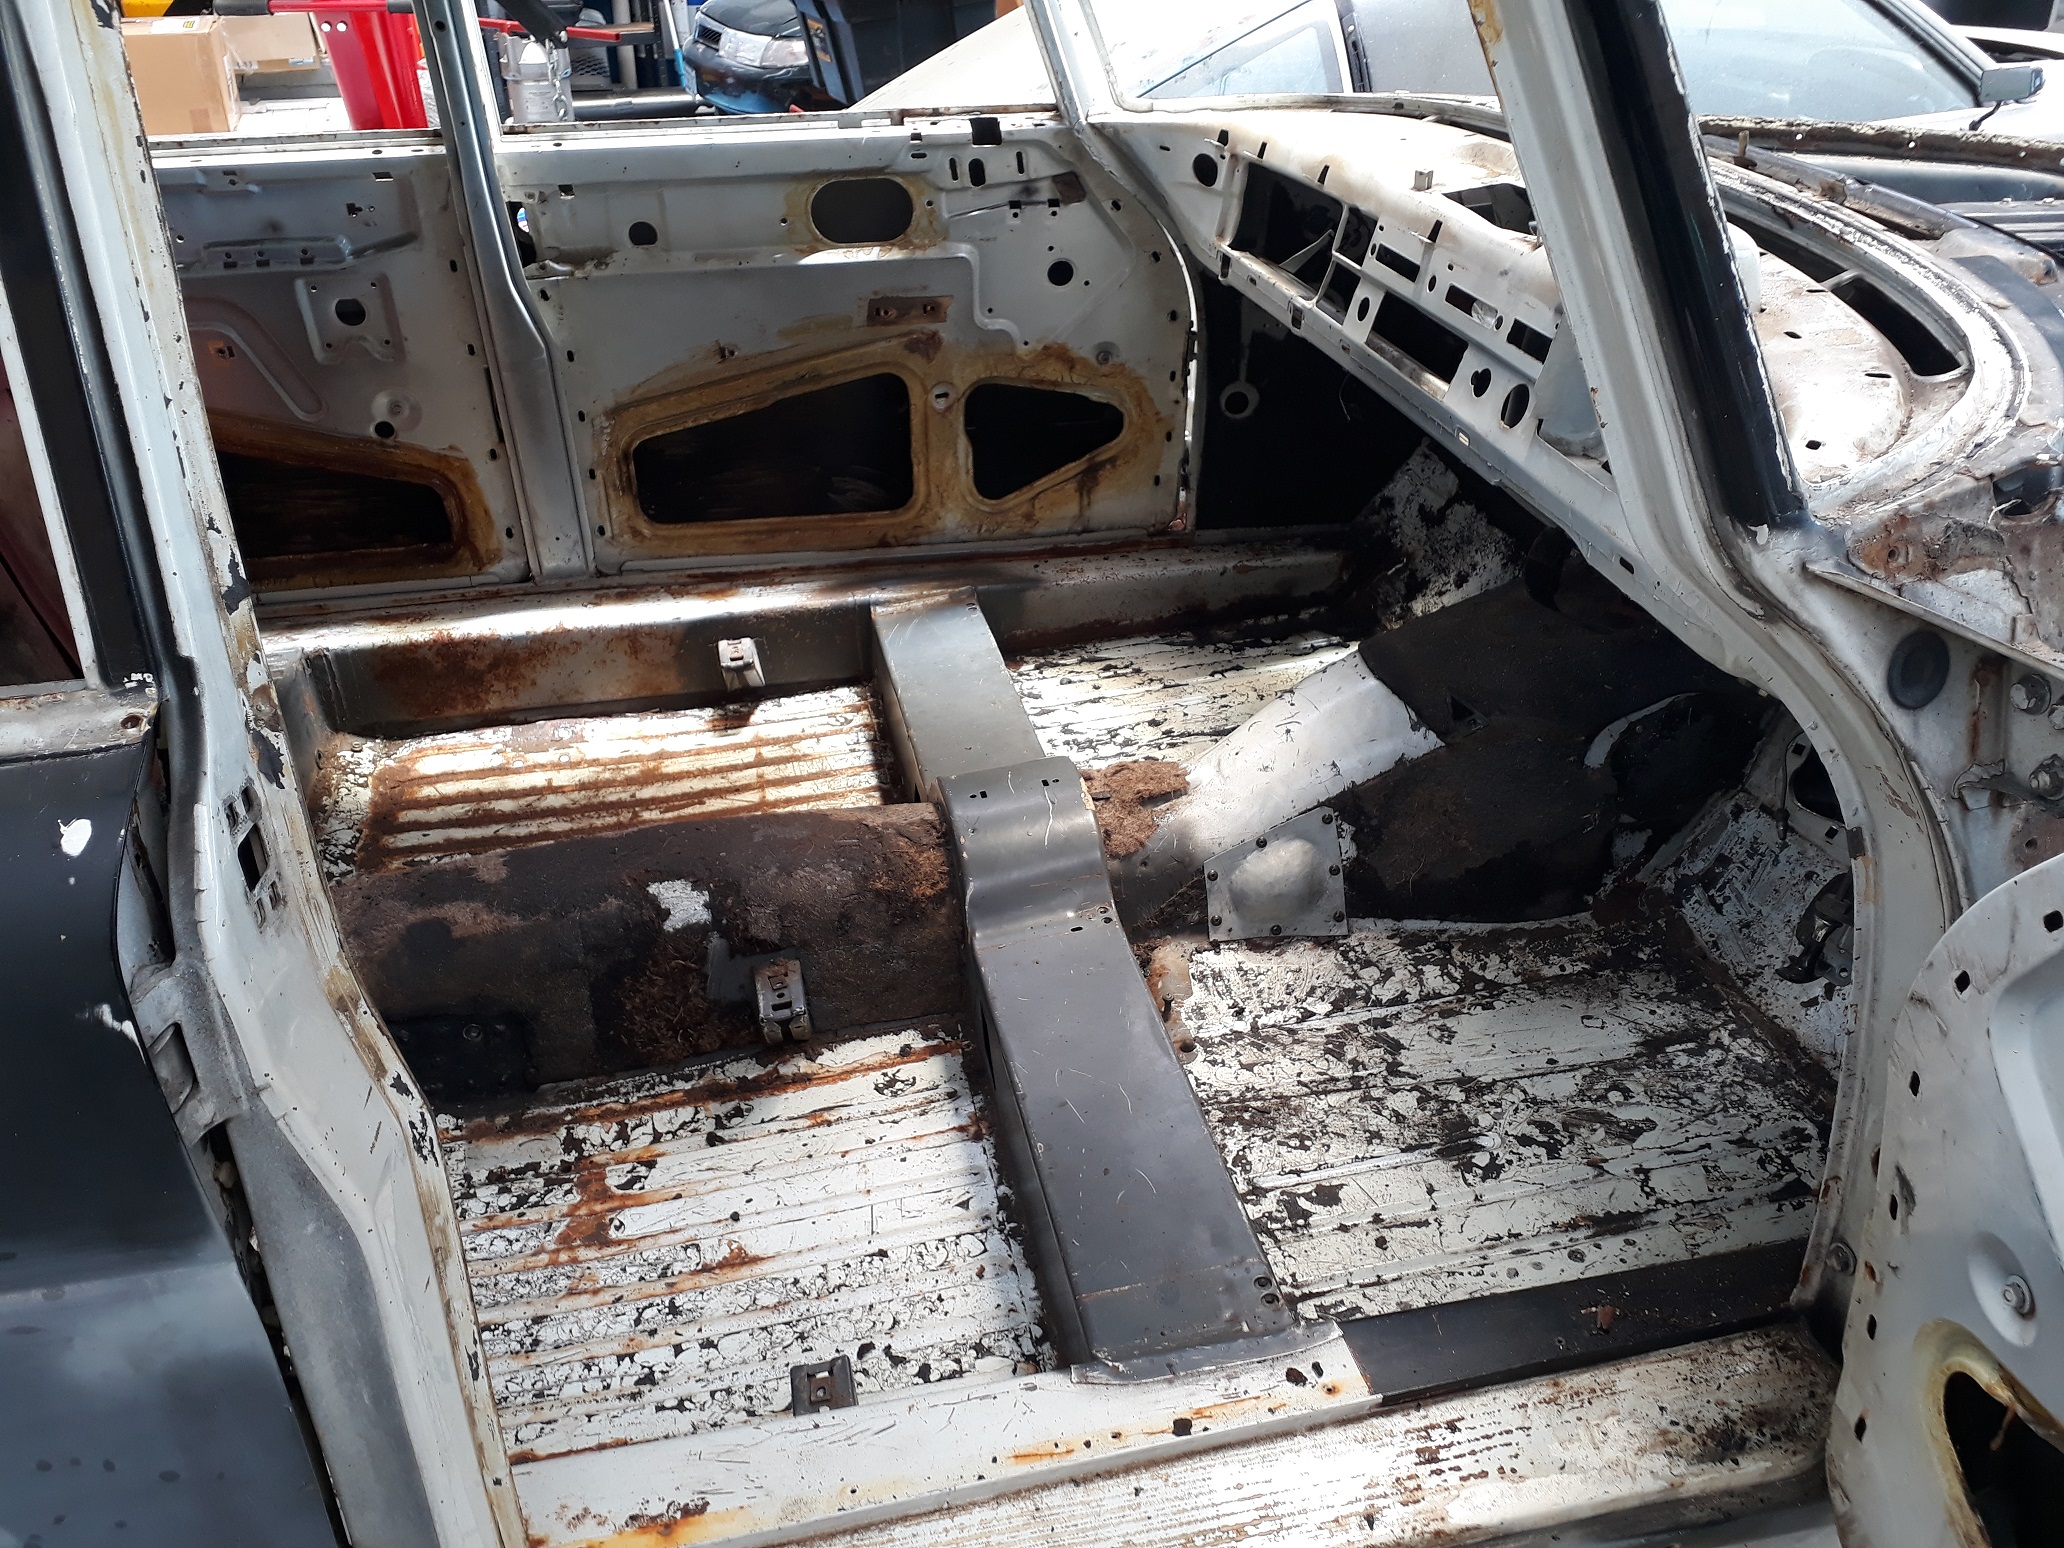
So that was roughtly June/July last year, the car sat in Archetype shed until the new year where I spent a week commuting back and forth to his house to pull it apart over the xmas break. I don't understand how some people can live in Hamilton and commute to Auckland for work - it's the worst drive in the world. It all came apart reasonably easy except for a bit of dicking around with the heater core and a bit of lost sweat trying to get the dash pad out. The floors got the dry ice and hammer treatment to get the sound deadening out. This revealed what I suspected when I pick up the car originally, that the front left floor pan/sill area was junk. The front left door flexed a bit when the strop was slammed in it when it was on the trailer, which suggested the area was a bit soft. you can kind of make out a bit of daylight through the passenger floorwell in the above photo.
-
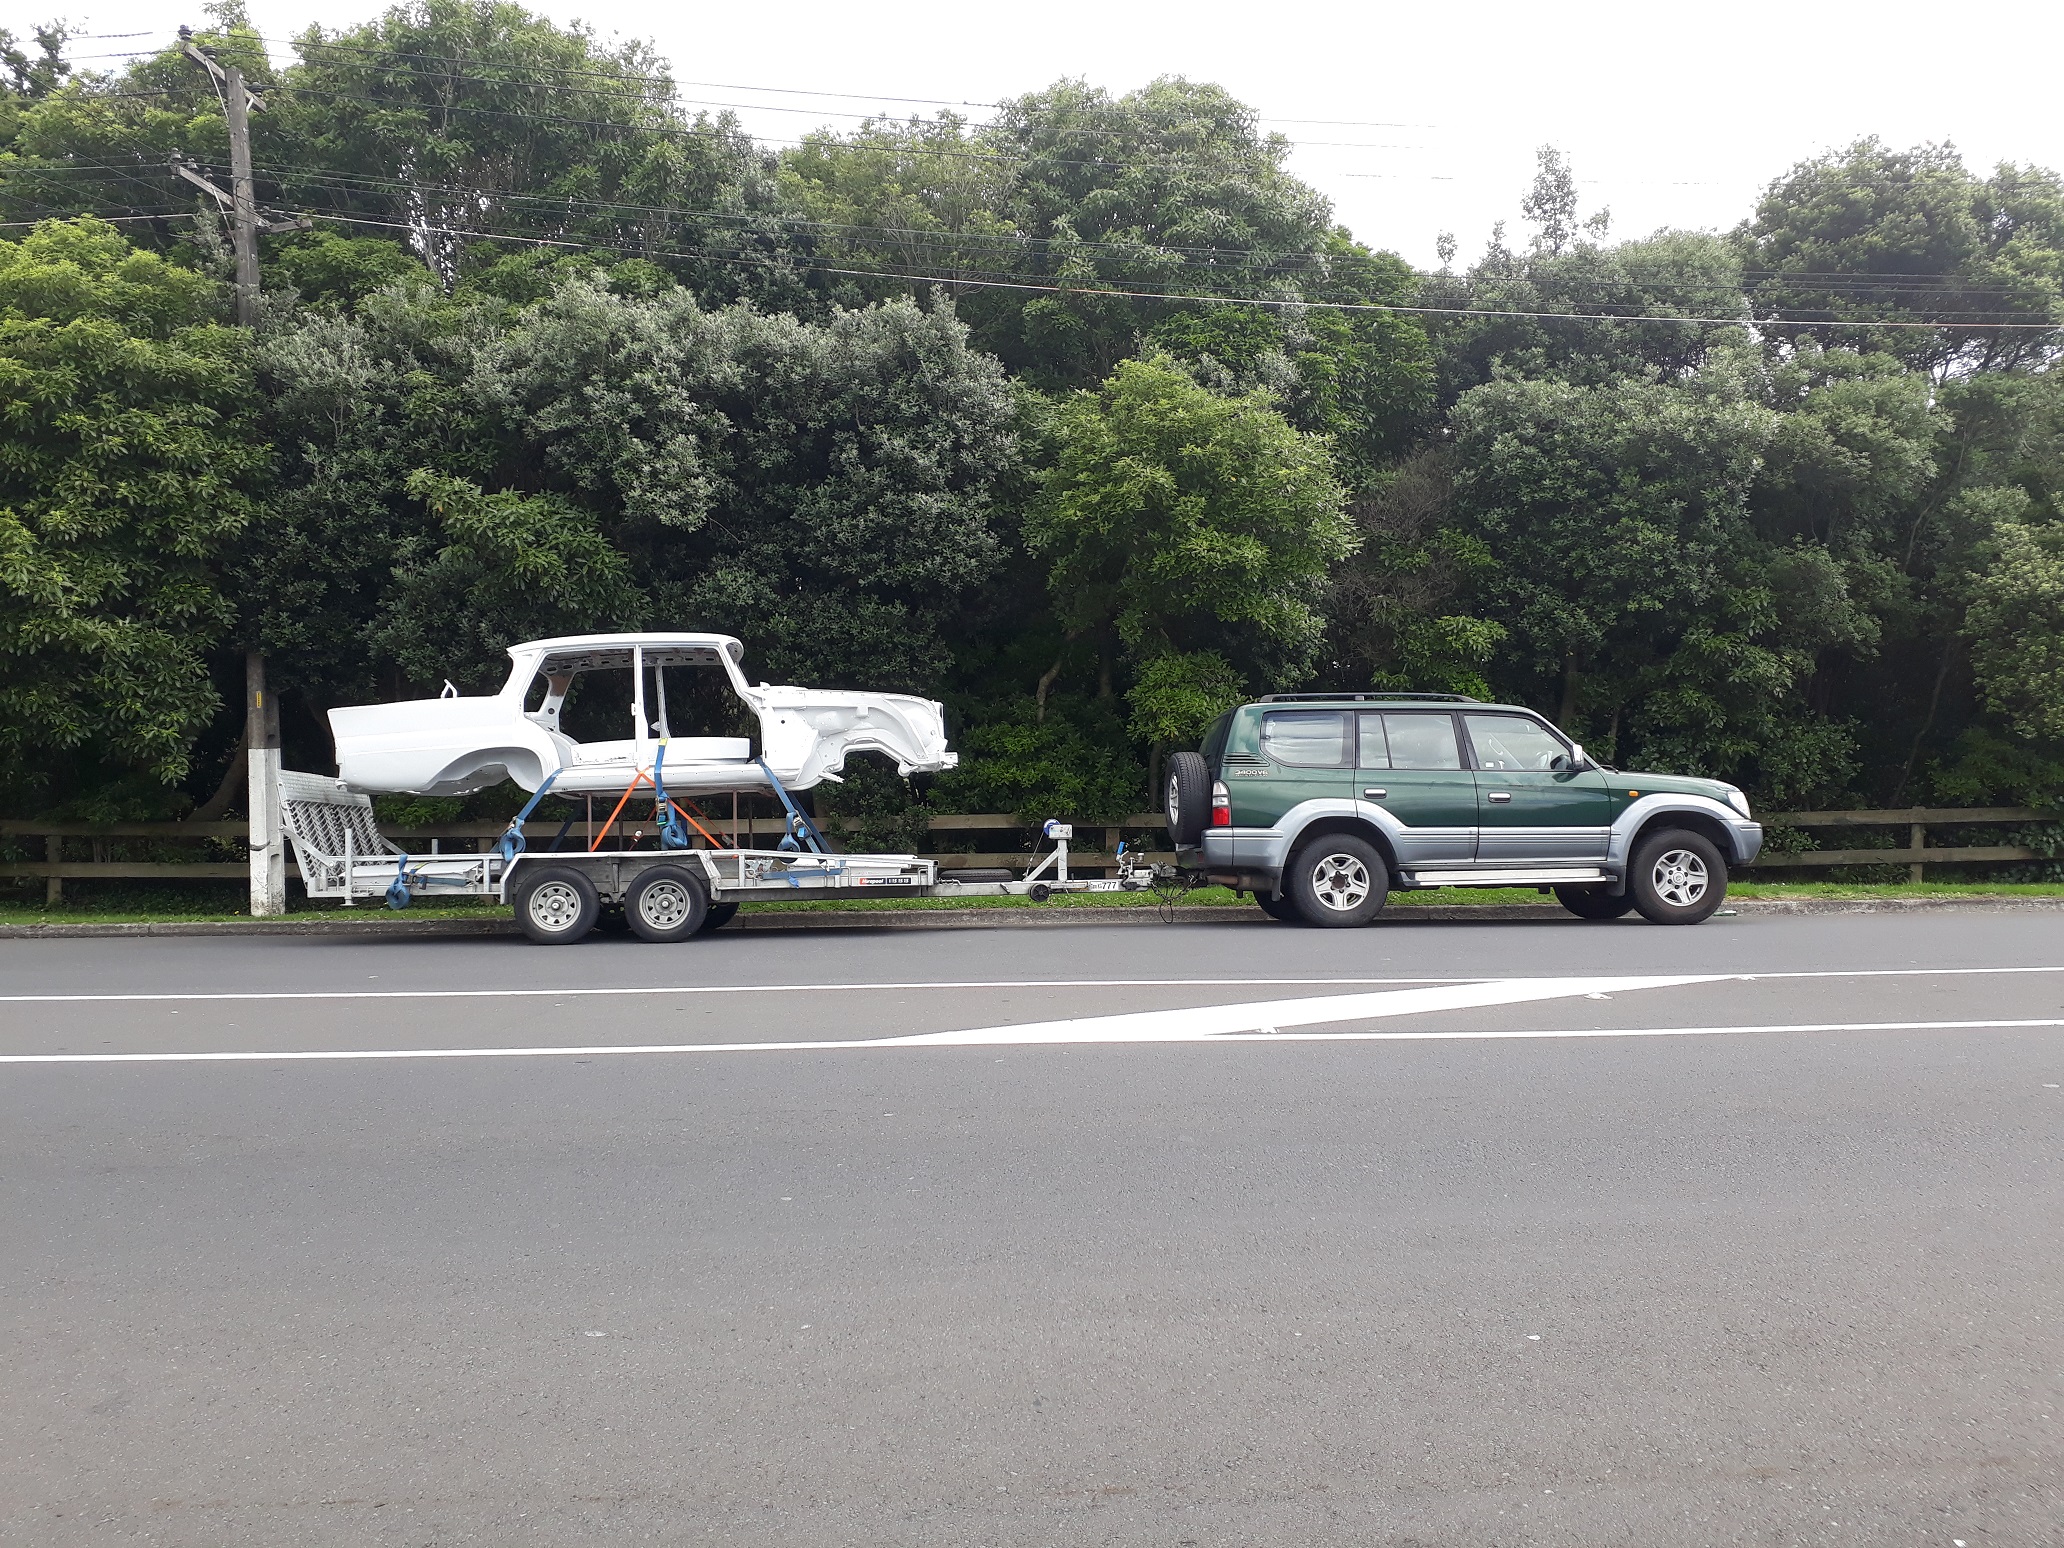
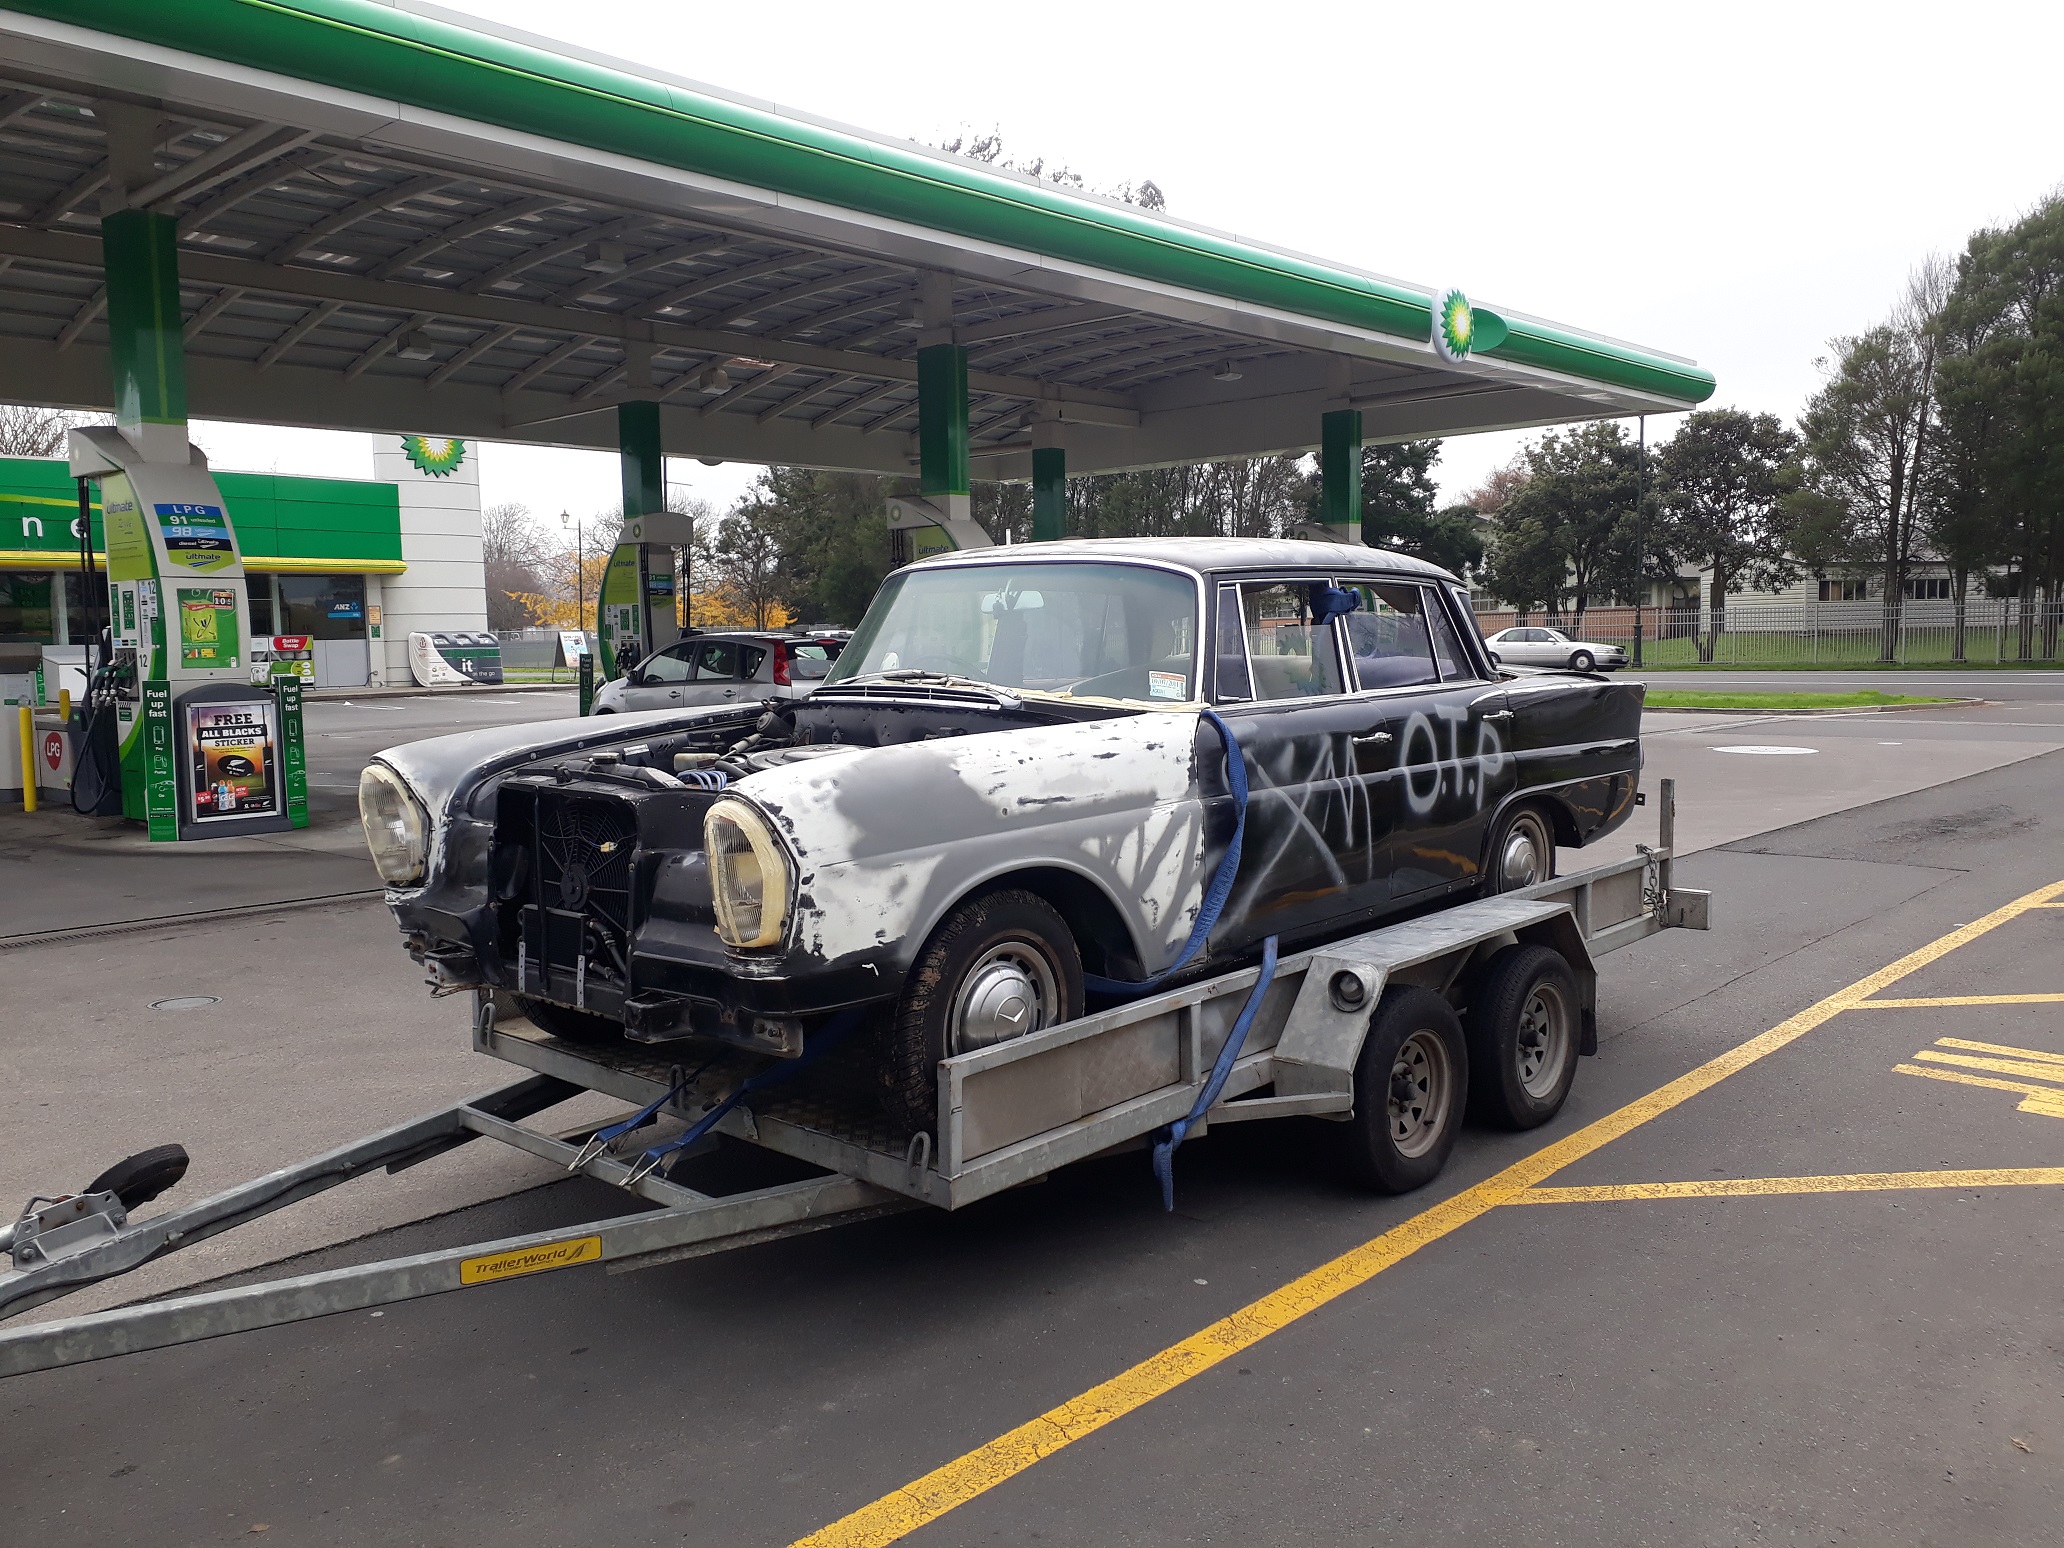
Kia Ora A couple of people have asked where the build thread for my car is because they want to watch, there hasn't been much building - mainly de-building up to this stage but here goes. As part of my daily quest to be more like UJ about 6, 8 or 10 months back I was trawling trademe as I regularly do, seeing what's new.There was a fresh ad up for a Fintail Mercedes Sedan with the usual 3 shitty photos.This was right around the time I brought the v12 Jag motor discussed elsewhere, I mean one hobby is good but twos better right? This thing is also the reason progress on the V12 has stopped because I've been spending spare time swimming and getting the ball rolling on this. Anyway the ad as mentioned had 3 shitty photos on it, one of which was of a grainy pic of a not-so-Mercedes Falcon motor that it was fitted with. As a result of the Falcon motor the guy who owned it was getting all sorts of grief about it not having a Merc motor. Bugger that I thought, I'll go have a look. Long story short the guy wanted rid of it as it was a project he and his Son who's since left home had that never got anywhere and he just wanted the shed space, he didn't care what he got for it and couldn't be bothered dealing with the whinging people on trademe. So I bought it then and there. This is what it looked like when I got it, forever known as the OTP mobile. It's a 1965 Mercedes Benz 220Seb (W111 Chassis for those that care) in black, just like UJ, sort of. From what I understand 220 is the engine size (pretty obvious 2.2 litre), S is the bling model, b means its a fintail (the predecessor to this shape was also called a 220), and E, I believe, means it was a factory injected car but I'm probably wrong on that. It doesn't matter as it has the aforementioned Falcon 6 weighing the front down now. It appears to be complete, everything that is missing in the above photos is in the boot. When it was listed it was listed the guy said it was deregistered, a quick carjam report said that it wasn't deregistered, that it had simply lapsed and was due to deregister 2 weeks after I brought it, so I quickly put it back on hold after I picked it up. Live reg = Whoop. Props go to Sentra for tow car supply and Archetype for Storage.
- 26 replies
-
- 23
-
-
I've watched the easy composites videos myself and it looks like they will ship prepreg to your door (they're in the UK), think the stuff has about a months shelf life once thawed.
-
Autoblast in Glenfield
-
Have you sent it in for a simple-ish underbody blast and now it's going to come out looking like this?
-
Discussion thread for:
-
That distributor is the size of a dinner plate, the only reason that it hasn't gone in the bin yet is because it's doing a good job filling that hole. Can't say I've looks at Mega/micro squirts, in my mind they were shit 10 years ago and therefore still are but I imagine that has changed.
-
1GZ's run 2 ECUs standard from memory, so might have been modified Toyota units?