nzstato
-
Posts
2008 -
Joined
-
Last visited
-
Days Won
1
Everything posted by nzstato
-
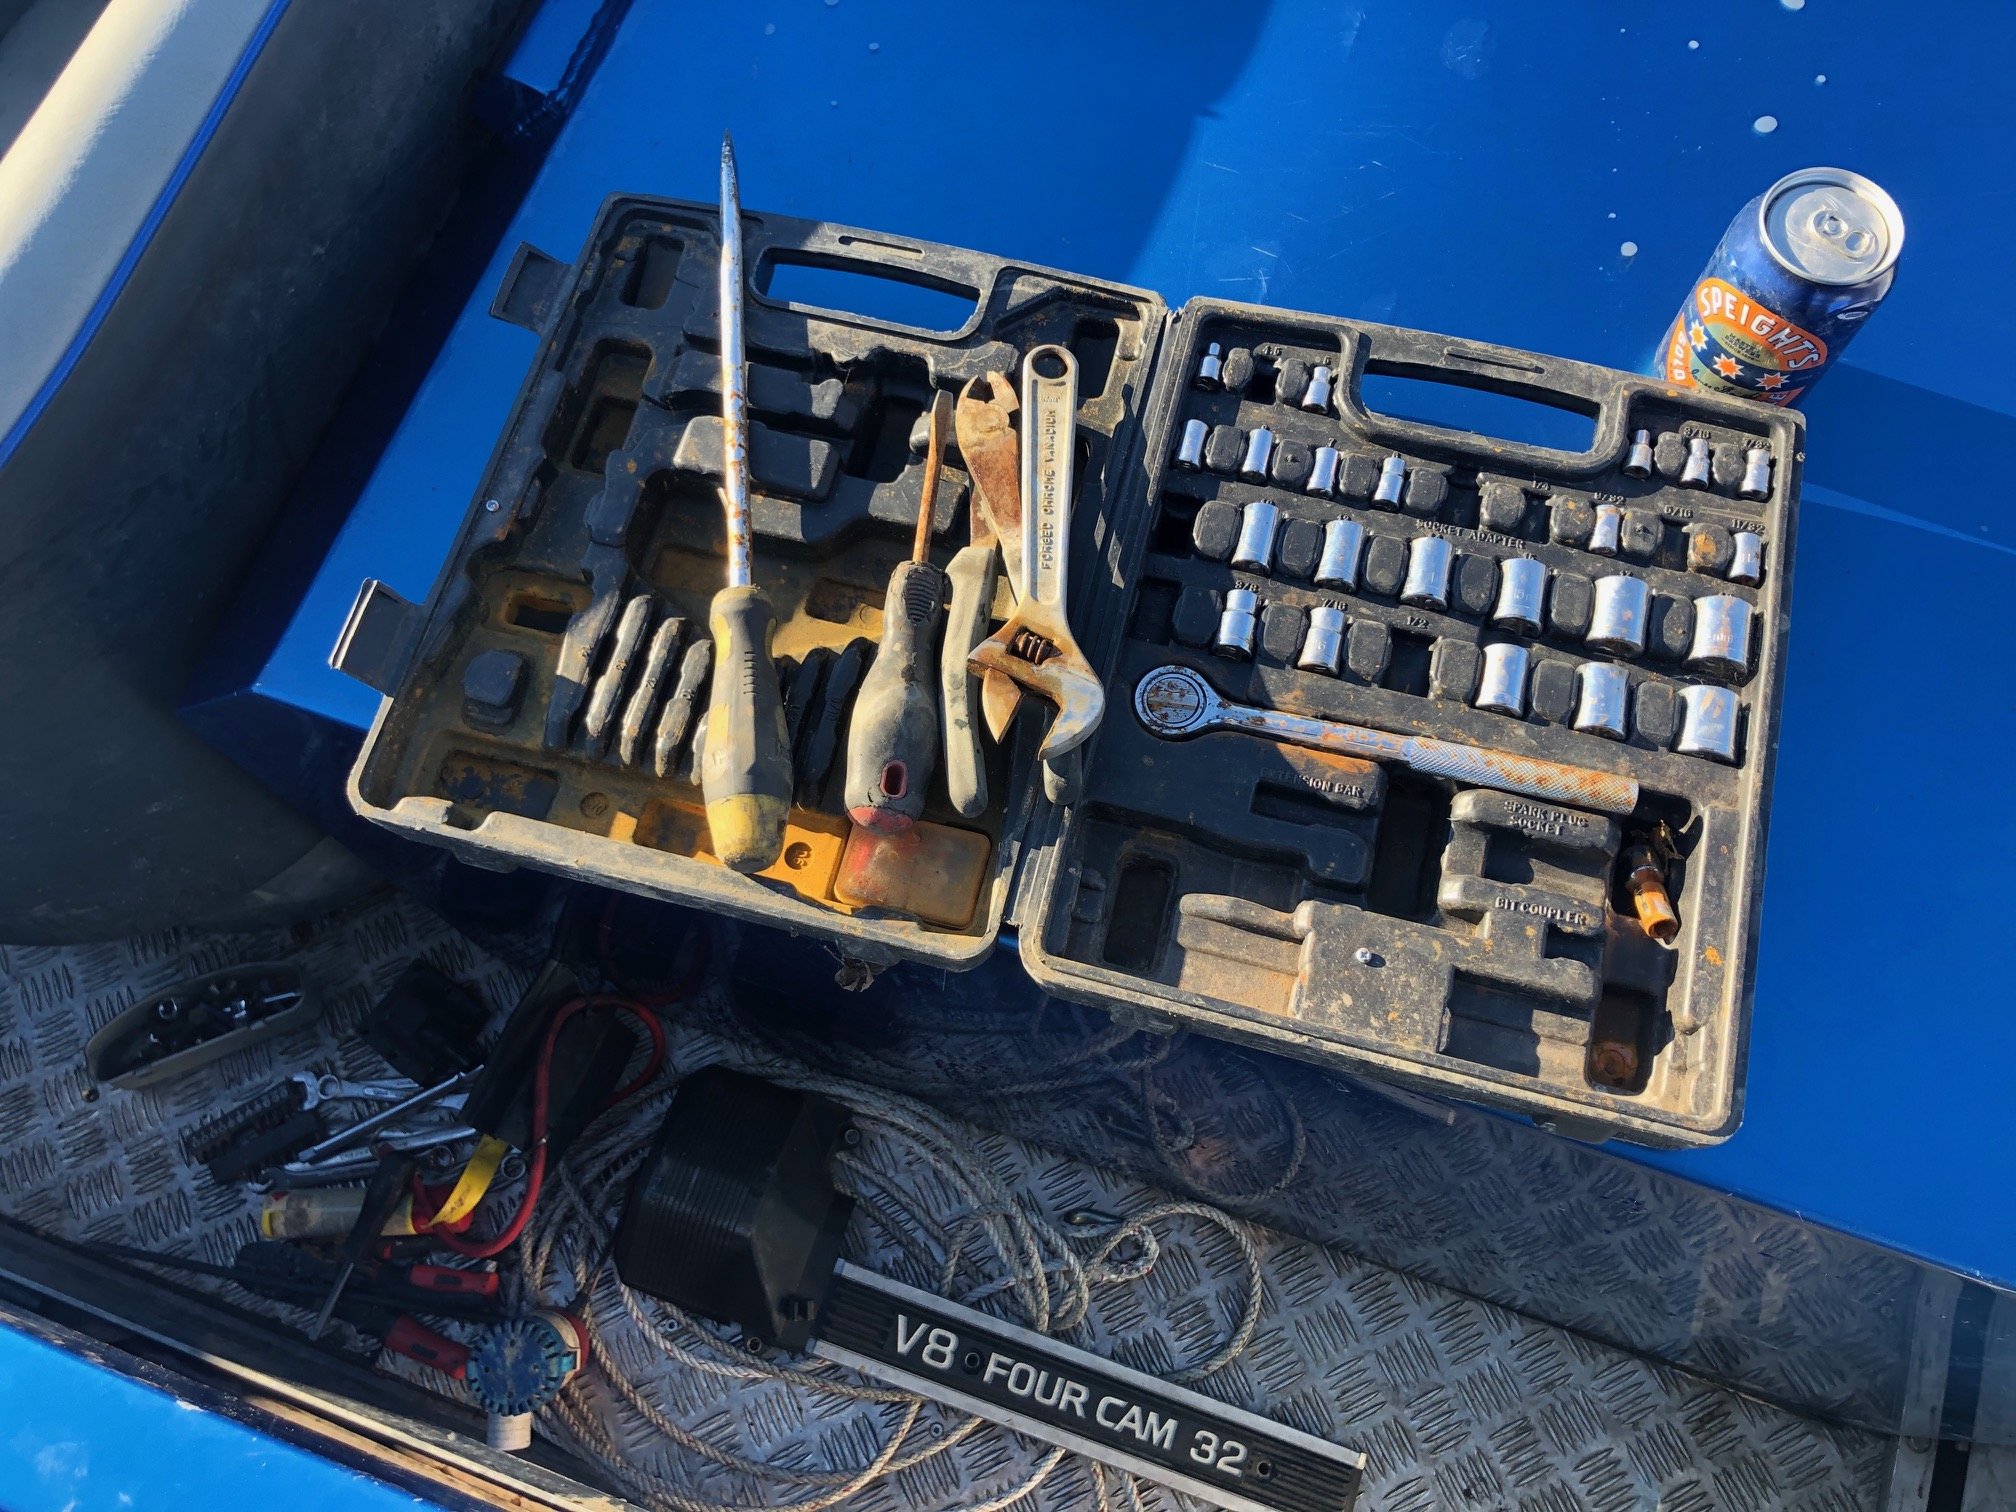
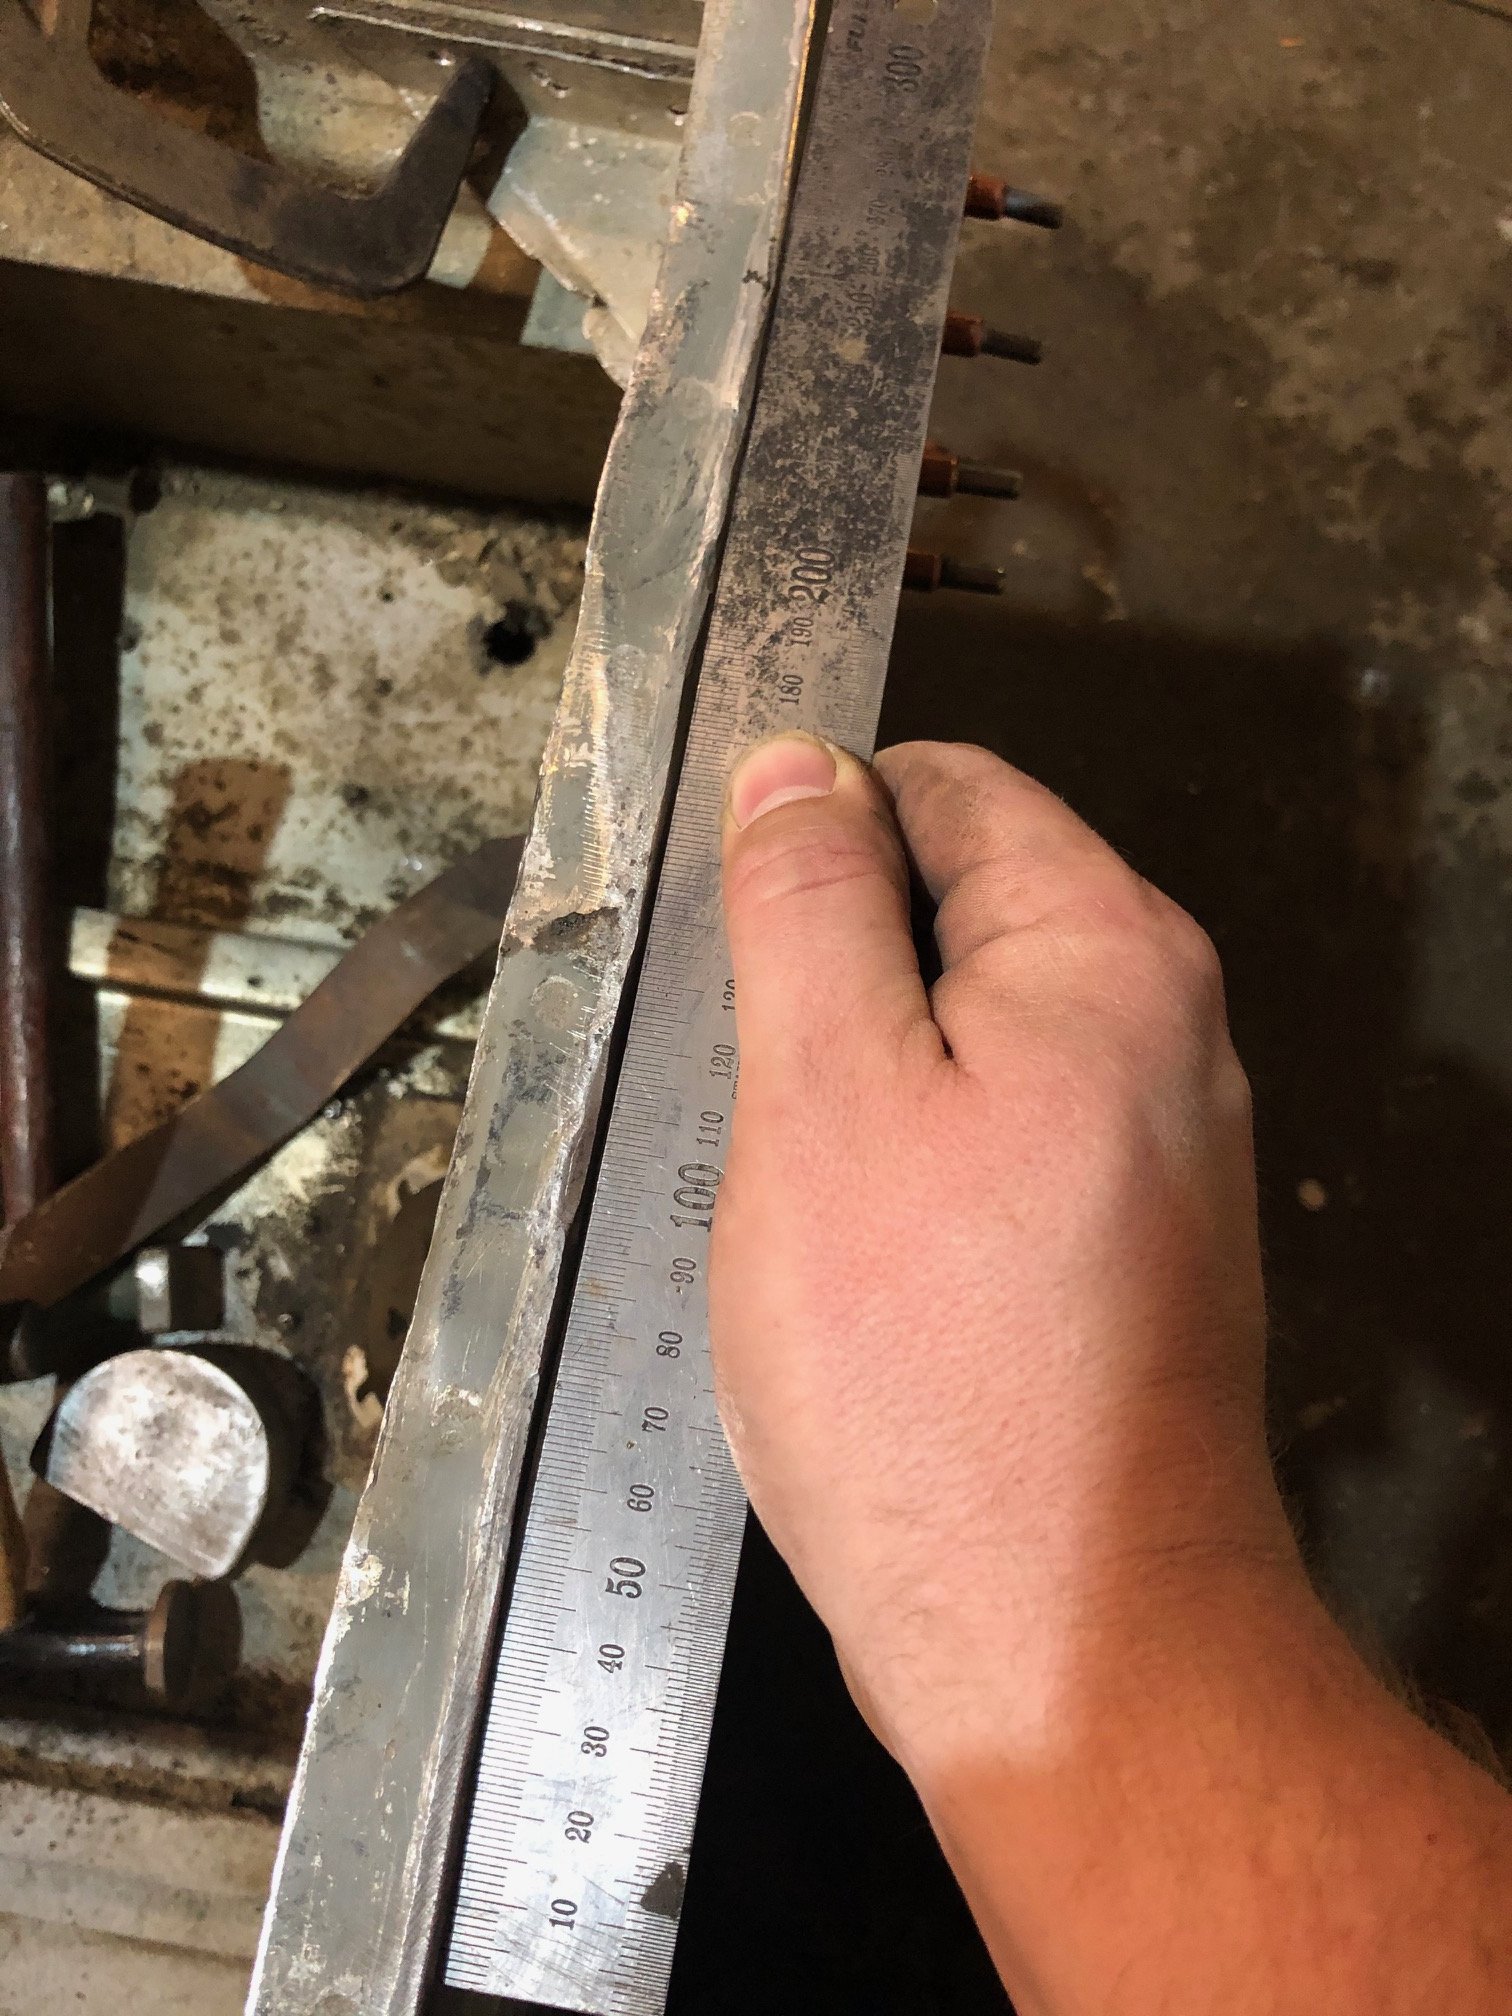
Getting it home I cut/polished out some of the marks across the hull. Did a bit of digging and found some tools, spares, etc. and since it came from southland there was a can of Speights in one of the seat pockets.... Wasnt happy with how the accel pedal was set up, the throttle isnt returning after you take your foot off which not only is a massive pain but also a safety issue.... The morse cable is old, probably gummed up. When to take the front assembly off and some bright spark has welded it to the floor.... I cut the welds and will bolt it back once I figure out the issue.... Don't have any EFI experience but this presents an opportunity to learn.... bought a serial cable and read all of the main manuals online so I could plug it in a see what kind of tune was on it.... Doesnt look like anyone has gone to much effort with the tune, also there is no startup enrichment setup on it, likewise someones taken out the idle speed control (since the MS wont run the stock 6 wire unit). I know as much as the internet/youtube is telling me so any advice is welcome... WIth the heat exchanger setup I can uncouple the jet unit and use the garden hose as the water source to run it up in the drive.... the neighbors are going to love me...

-
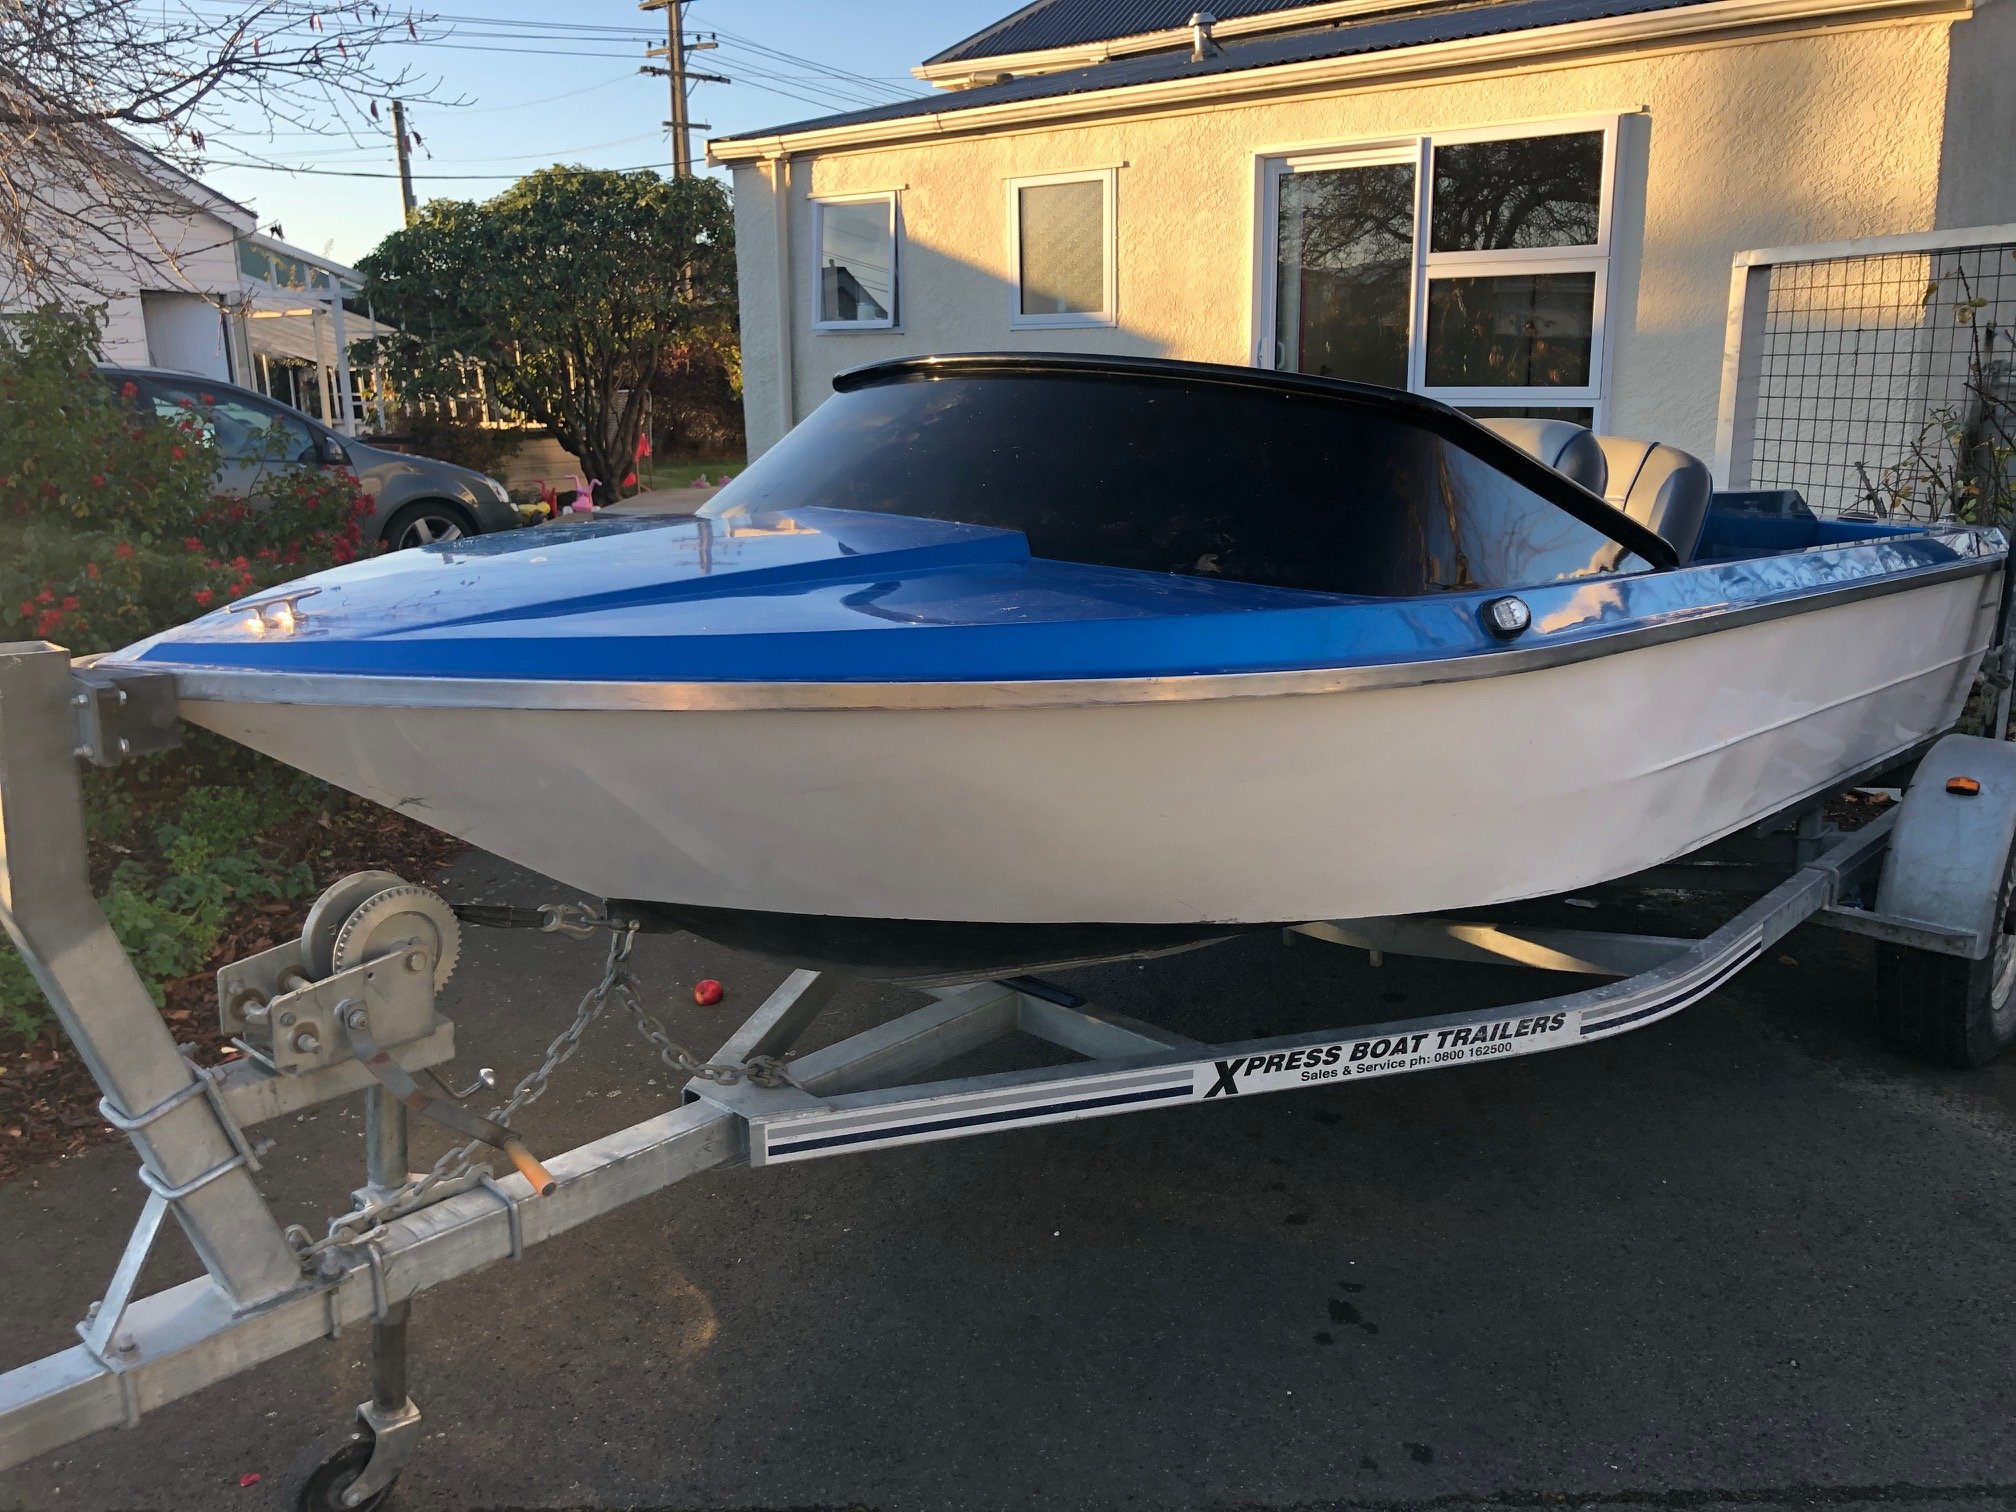
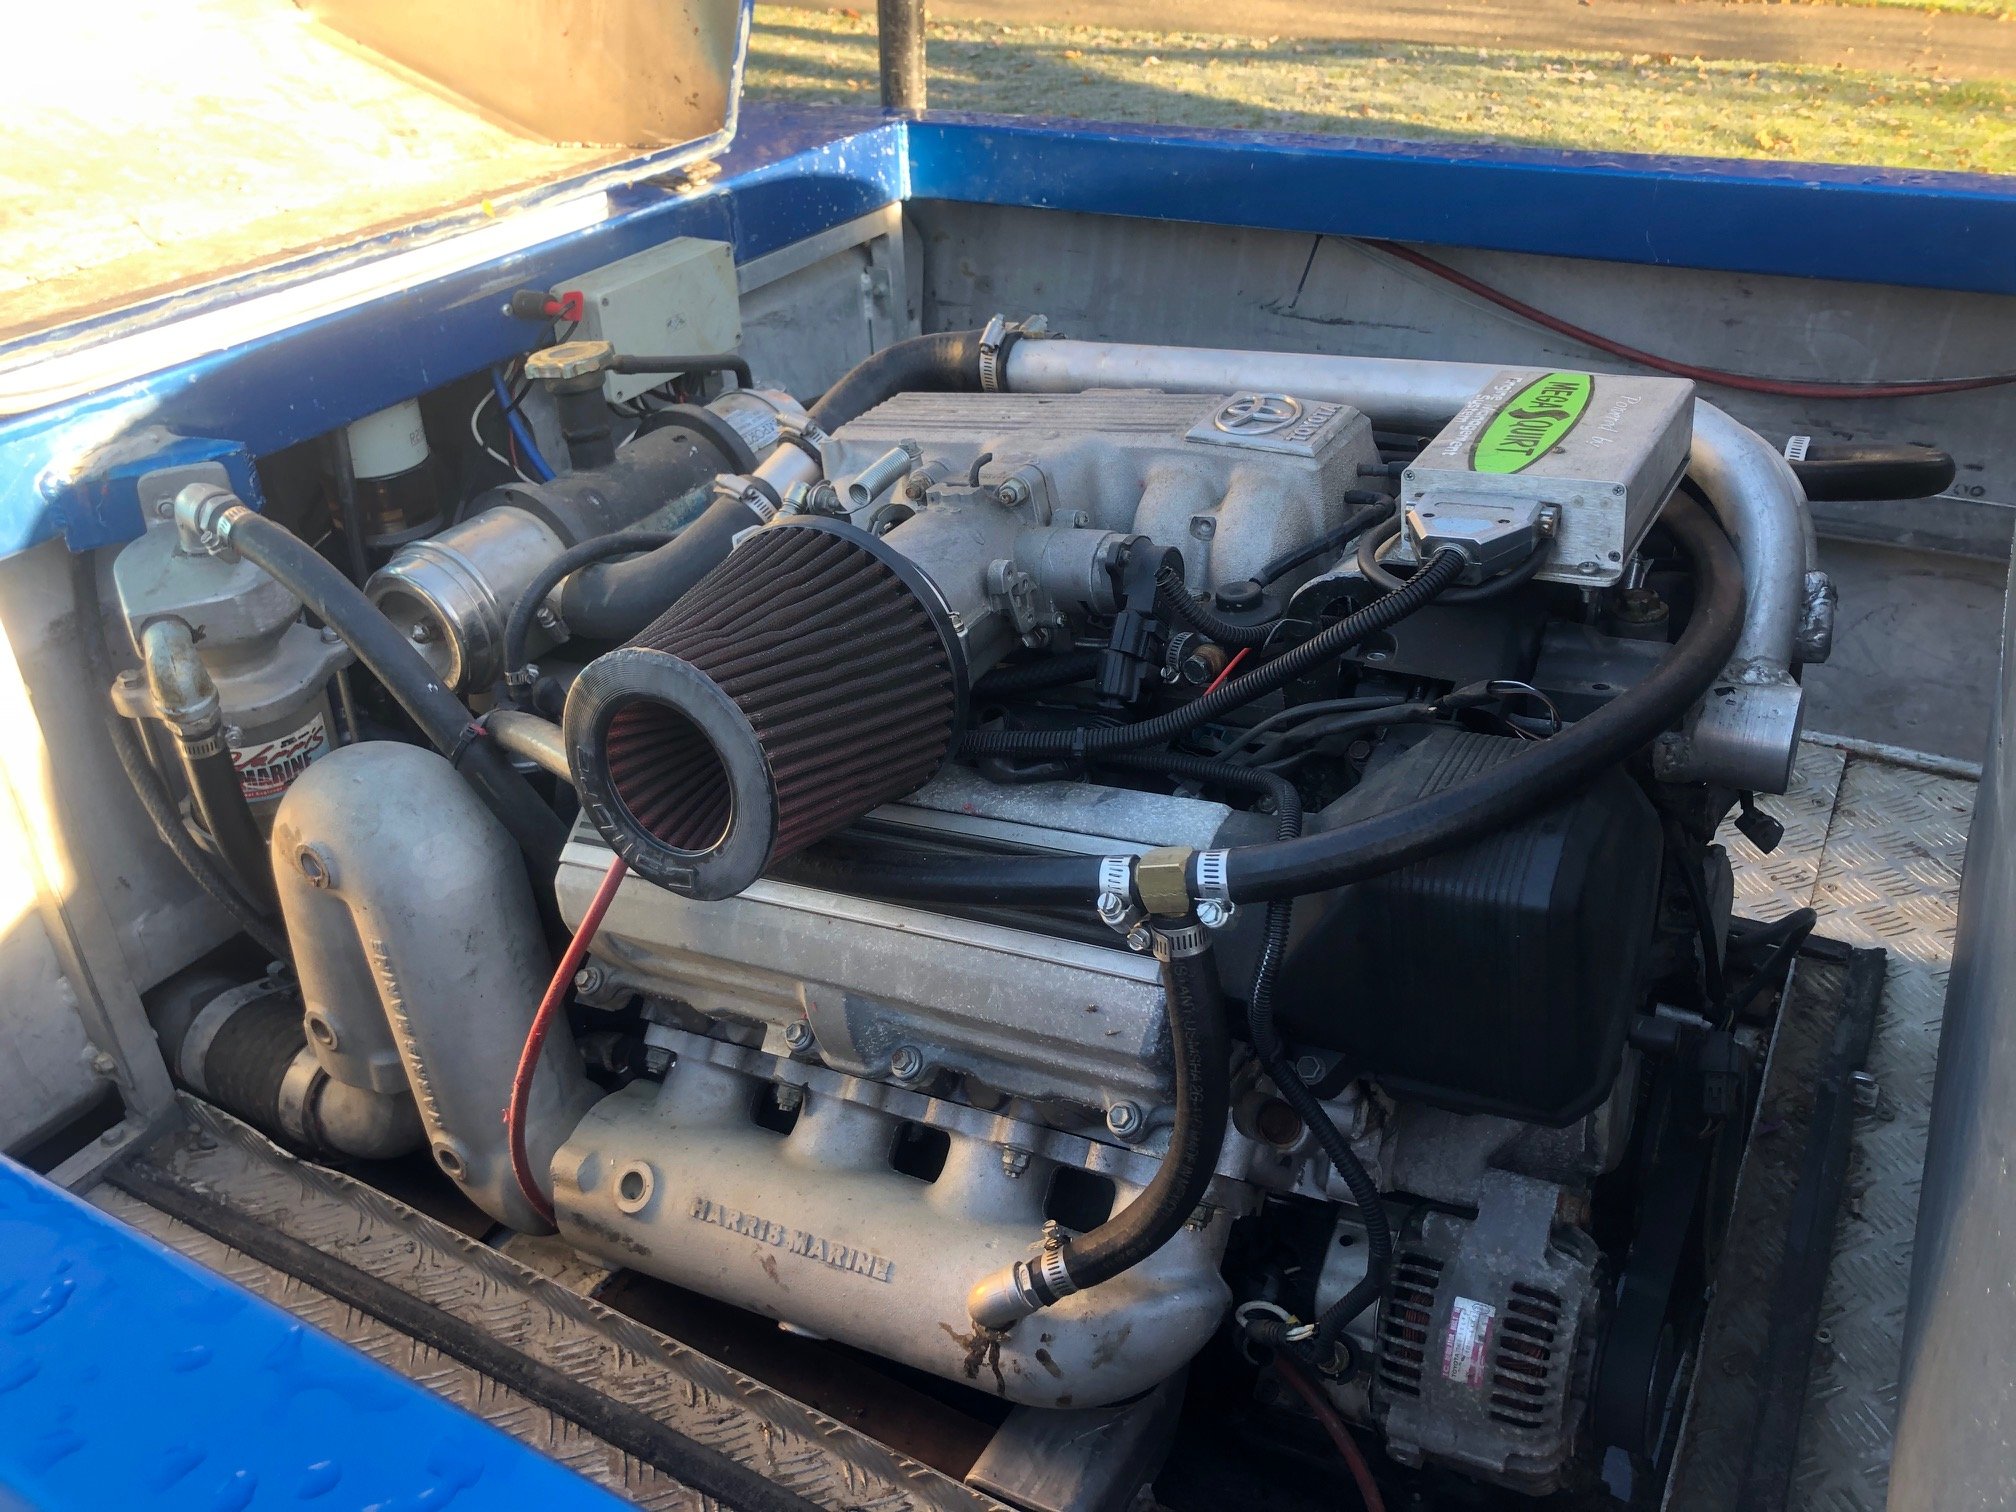
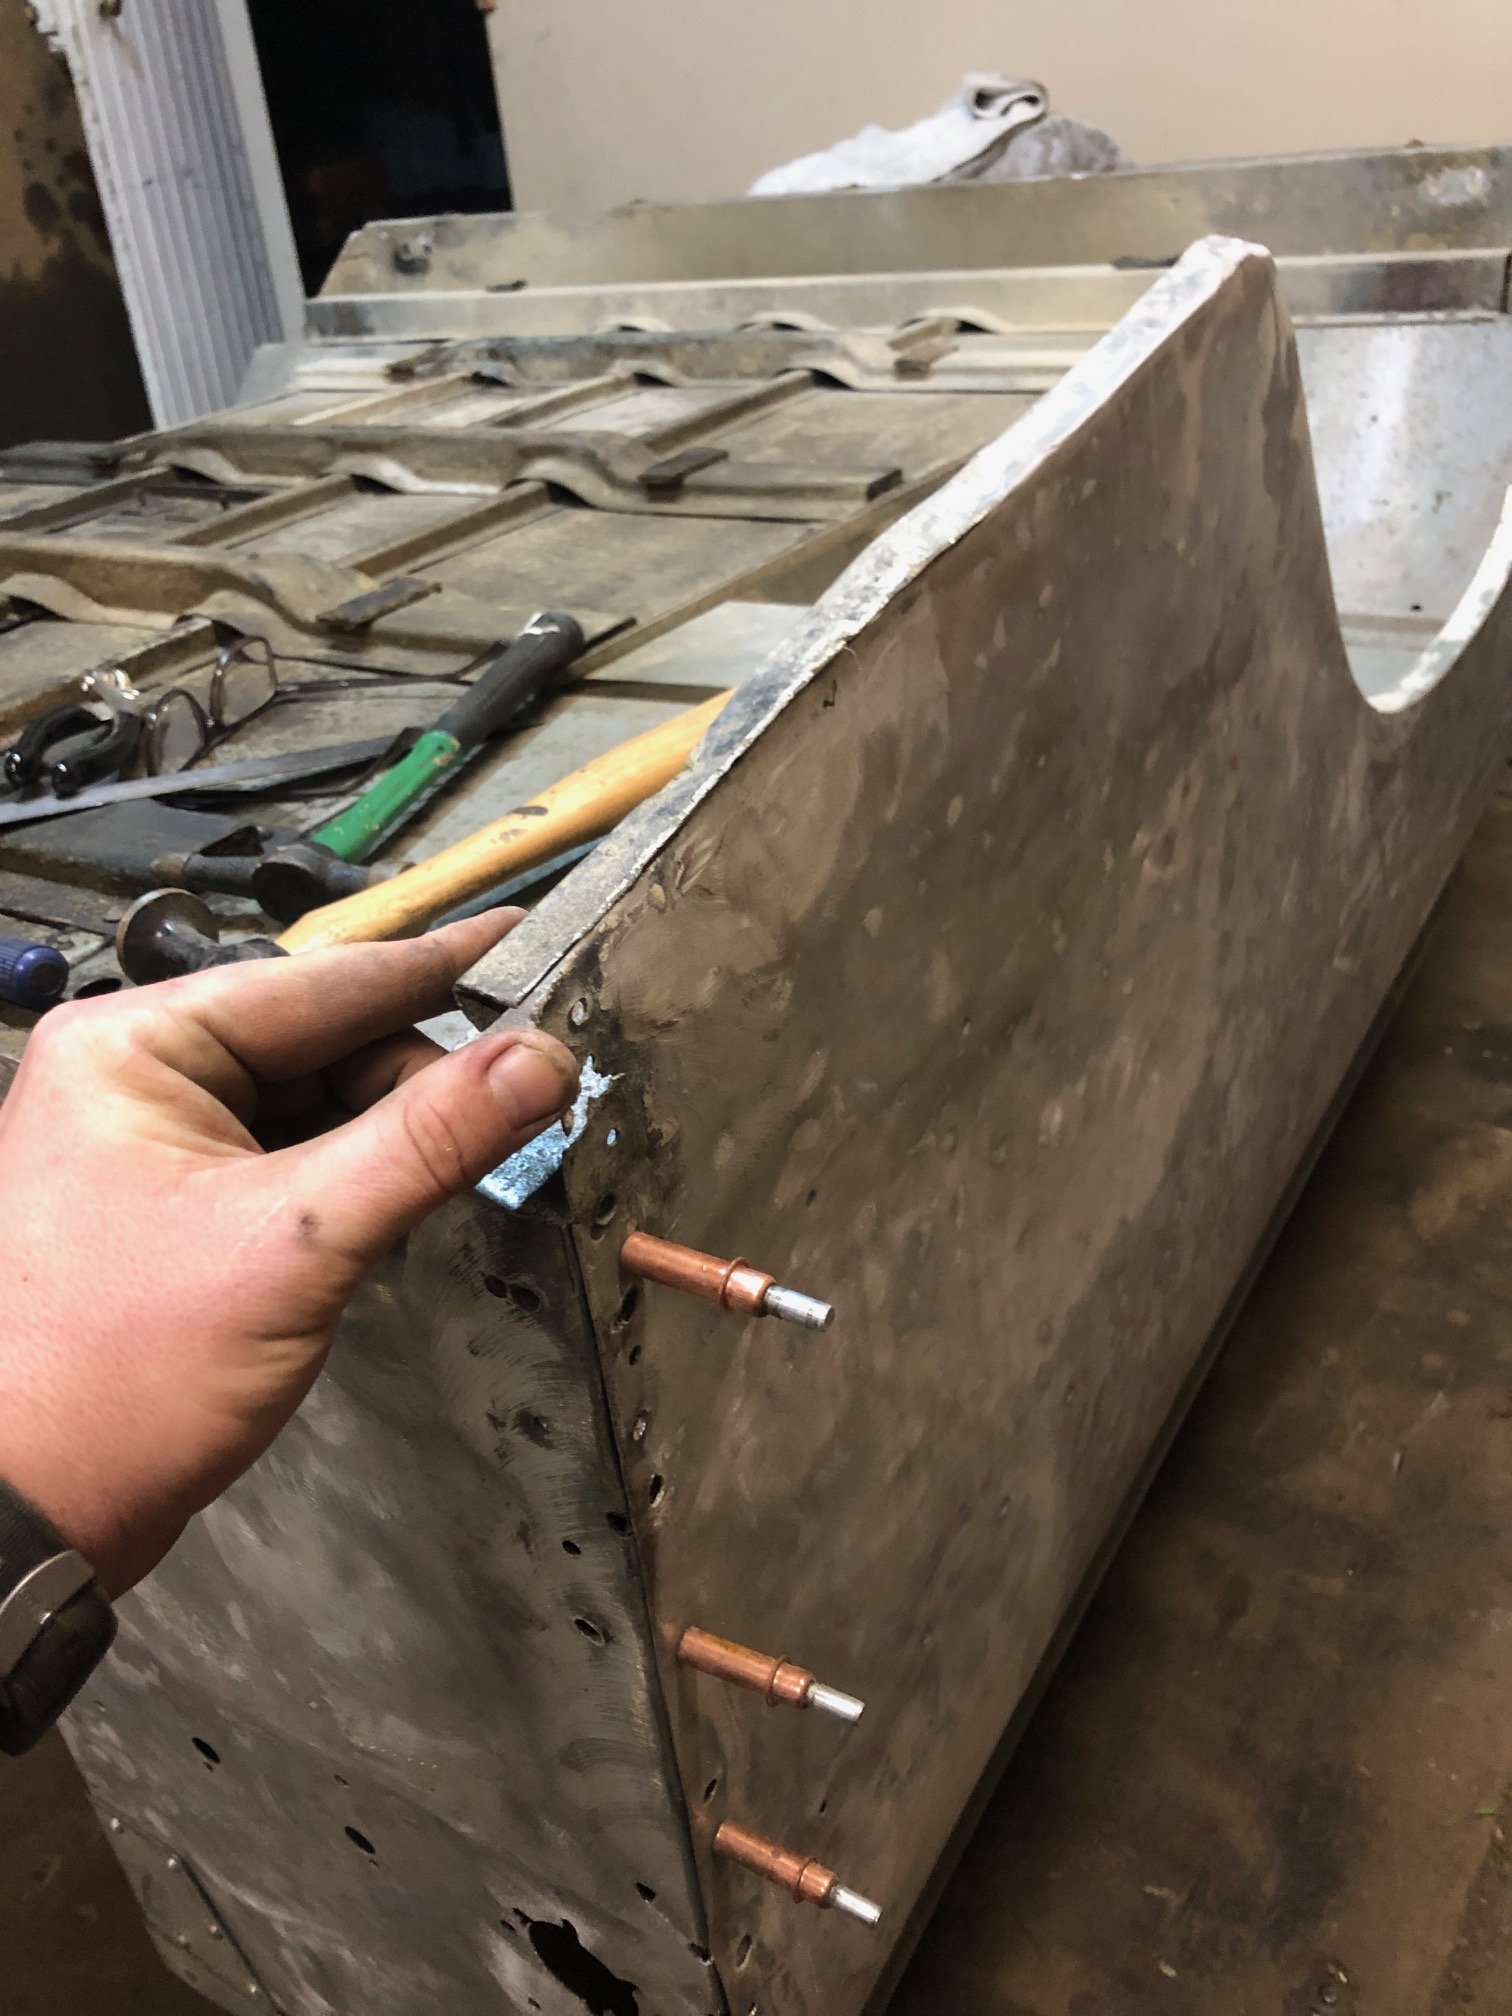
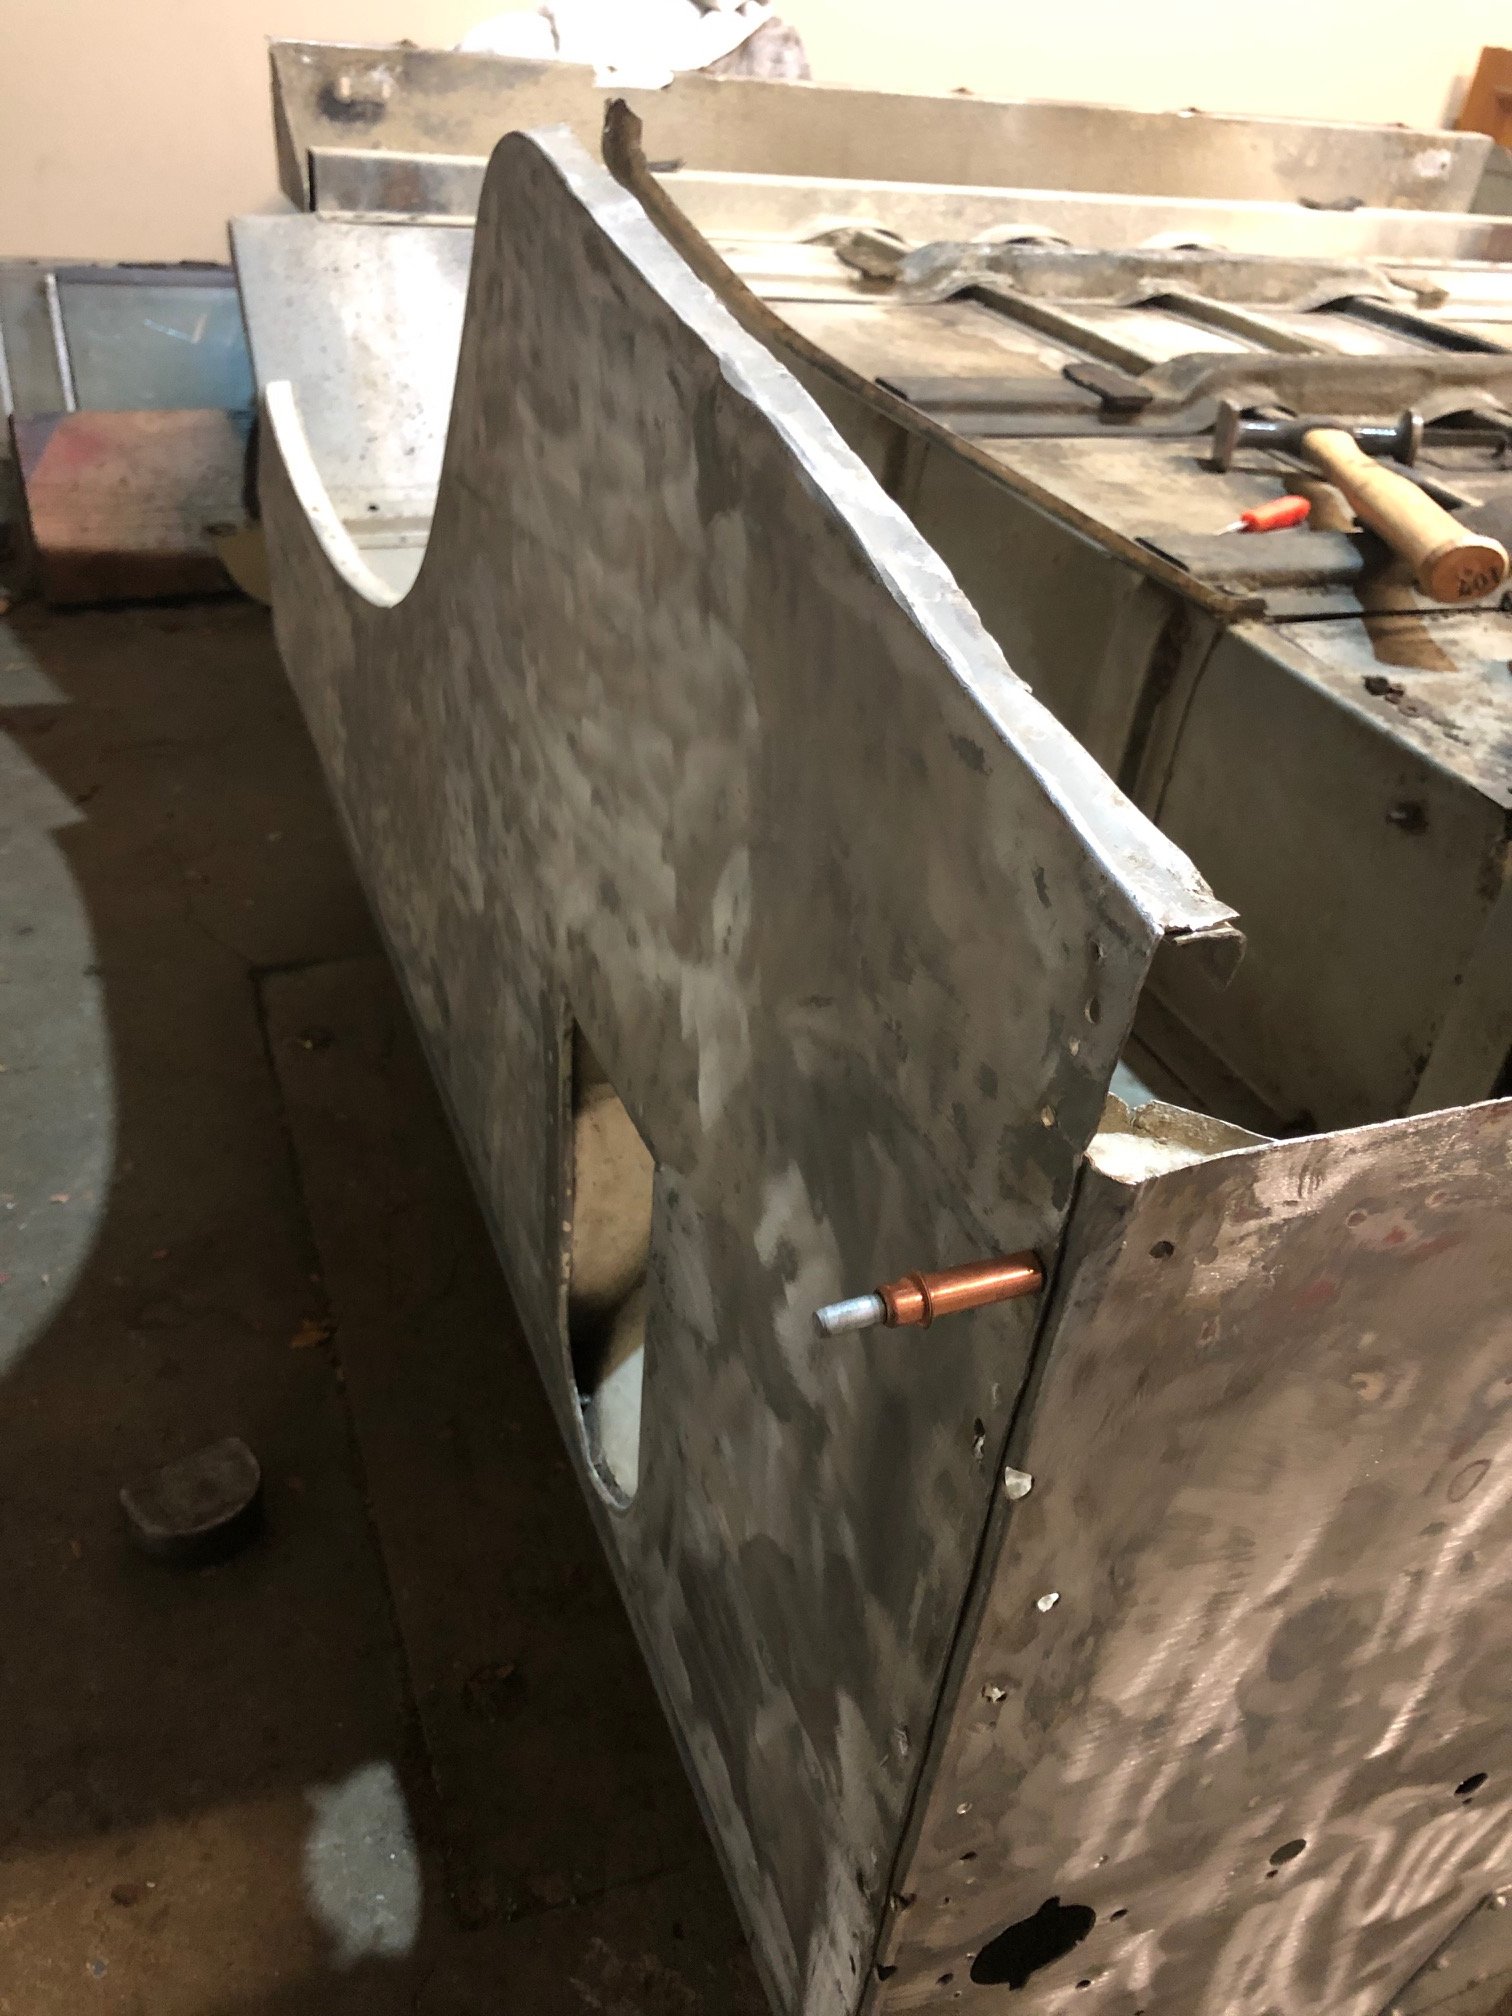
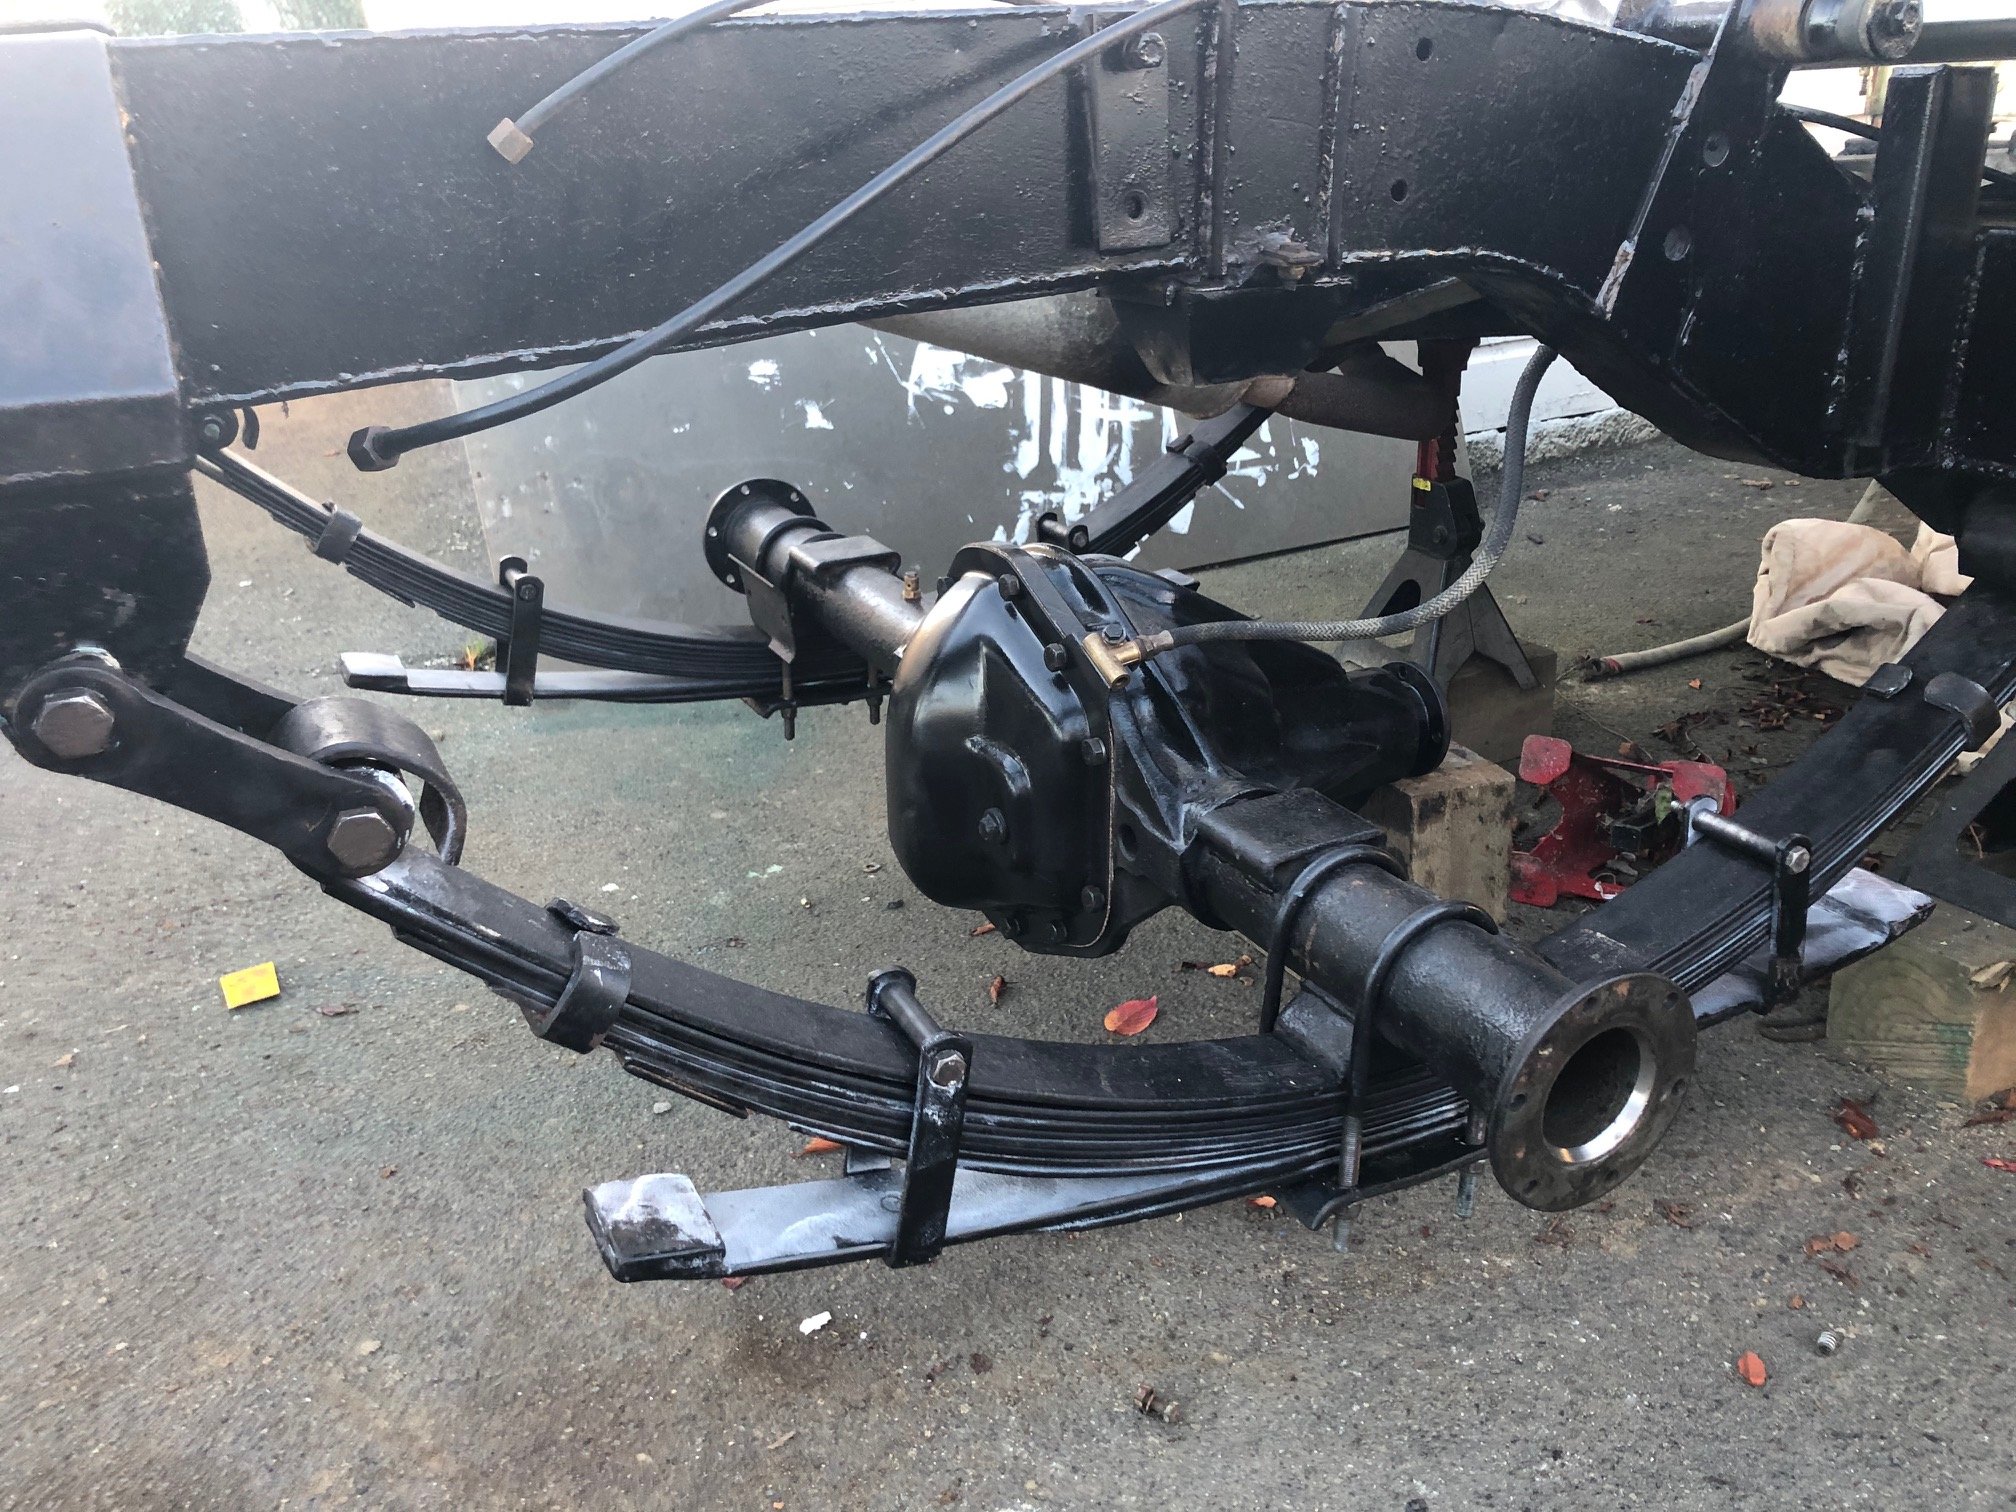
Since I cant help my self and started pulling it to bits within 20min of having it home, this is going to have its own built thread.... I don't yet know who built the hull, the design/manufacture of it makes me think it was done by a firm rather than at home (unless that builder was quite good at alloy). Its got quite a unique dash layout so hopefully if I post it a few other places then someone will ID it... Either way this thing has done some work... plenty of gravel rash and quite a few hits in the hull. It has plastic covering the centre keel but it ripped around the intake so that will need to be done in time.... Running gear wise we have gen1 1UZ with an old MS1 running it (more on that later...), the jet unit is a 2 stage 'ProFlo' which is essentially a modern remake of the Hamilton 770. Someone has run some of the cooling pipes wrong. It has a heat exchanger so the exit water needs to only flow out of the risers, someone has added a 'tee' for it to go into the front of the manifold heater, with no where to go that water is going to get very hot after a while.... Found out that the fuel pump is wired directly to the key (not happy about that), but it has some other pluses.... two ~45L tanks into a centre filter/sight bowl and a decent gravel trap so someone knew enough how to set it up.
- 19 replies
-
- 16
-

-
And then the bottom and close to done... I have a friend who runs a profile cutting business, I'm going to get them to cut a shape out in 1/4" steel for me to use as a hammerform to bend the flange around the door handle correctly. Had a bit of a play with the profile to make the side doors. The 'hip' line profile is pretty straight forward, I'm going to use the cut tubing from the bullbar I took off this thing to make a pipe anvil. Plus think I'll make a wider panbrake out of angle, it will make this all alot easier. I posted on one of the FB pages that I was making these and if anyone wanted some if I made extras. Got responses totalling ~20 skins (way more than I expected) so it looks like I may end up being in the repro business....
- 70 replies
-
- 14
-
-
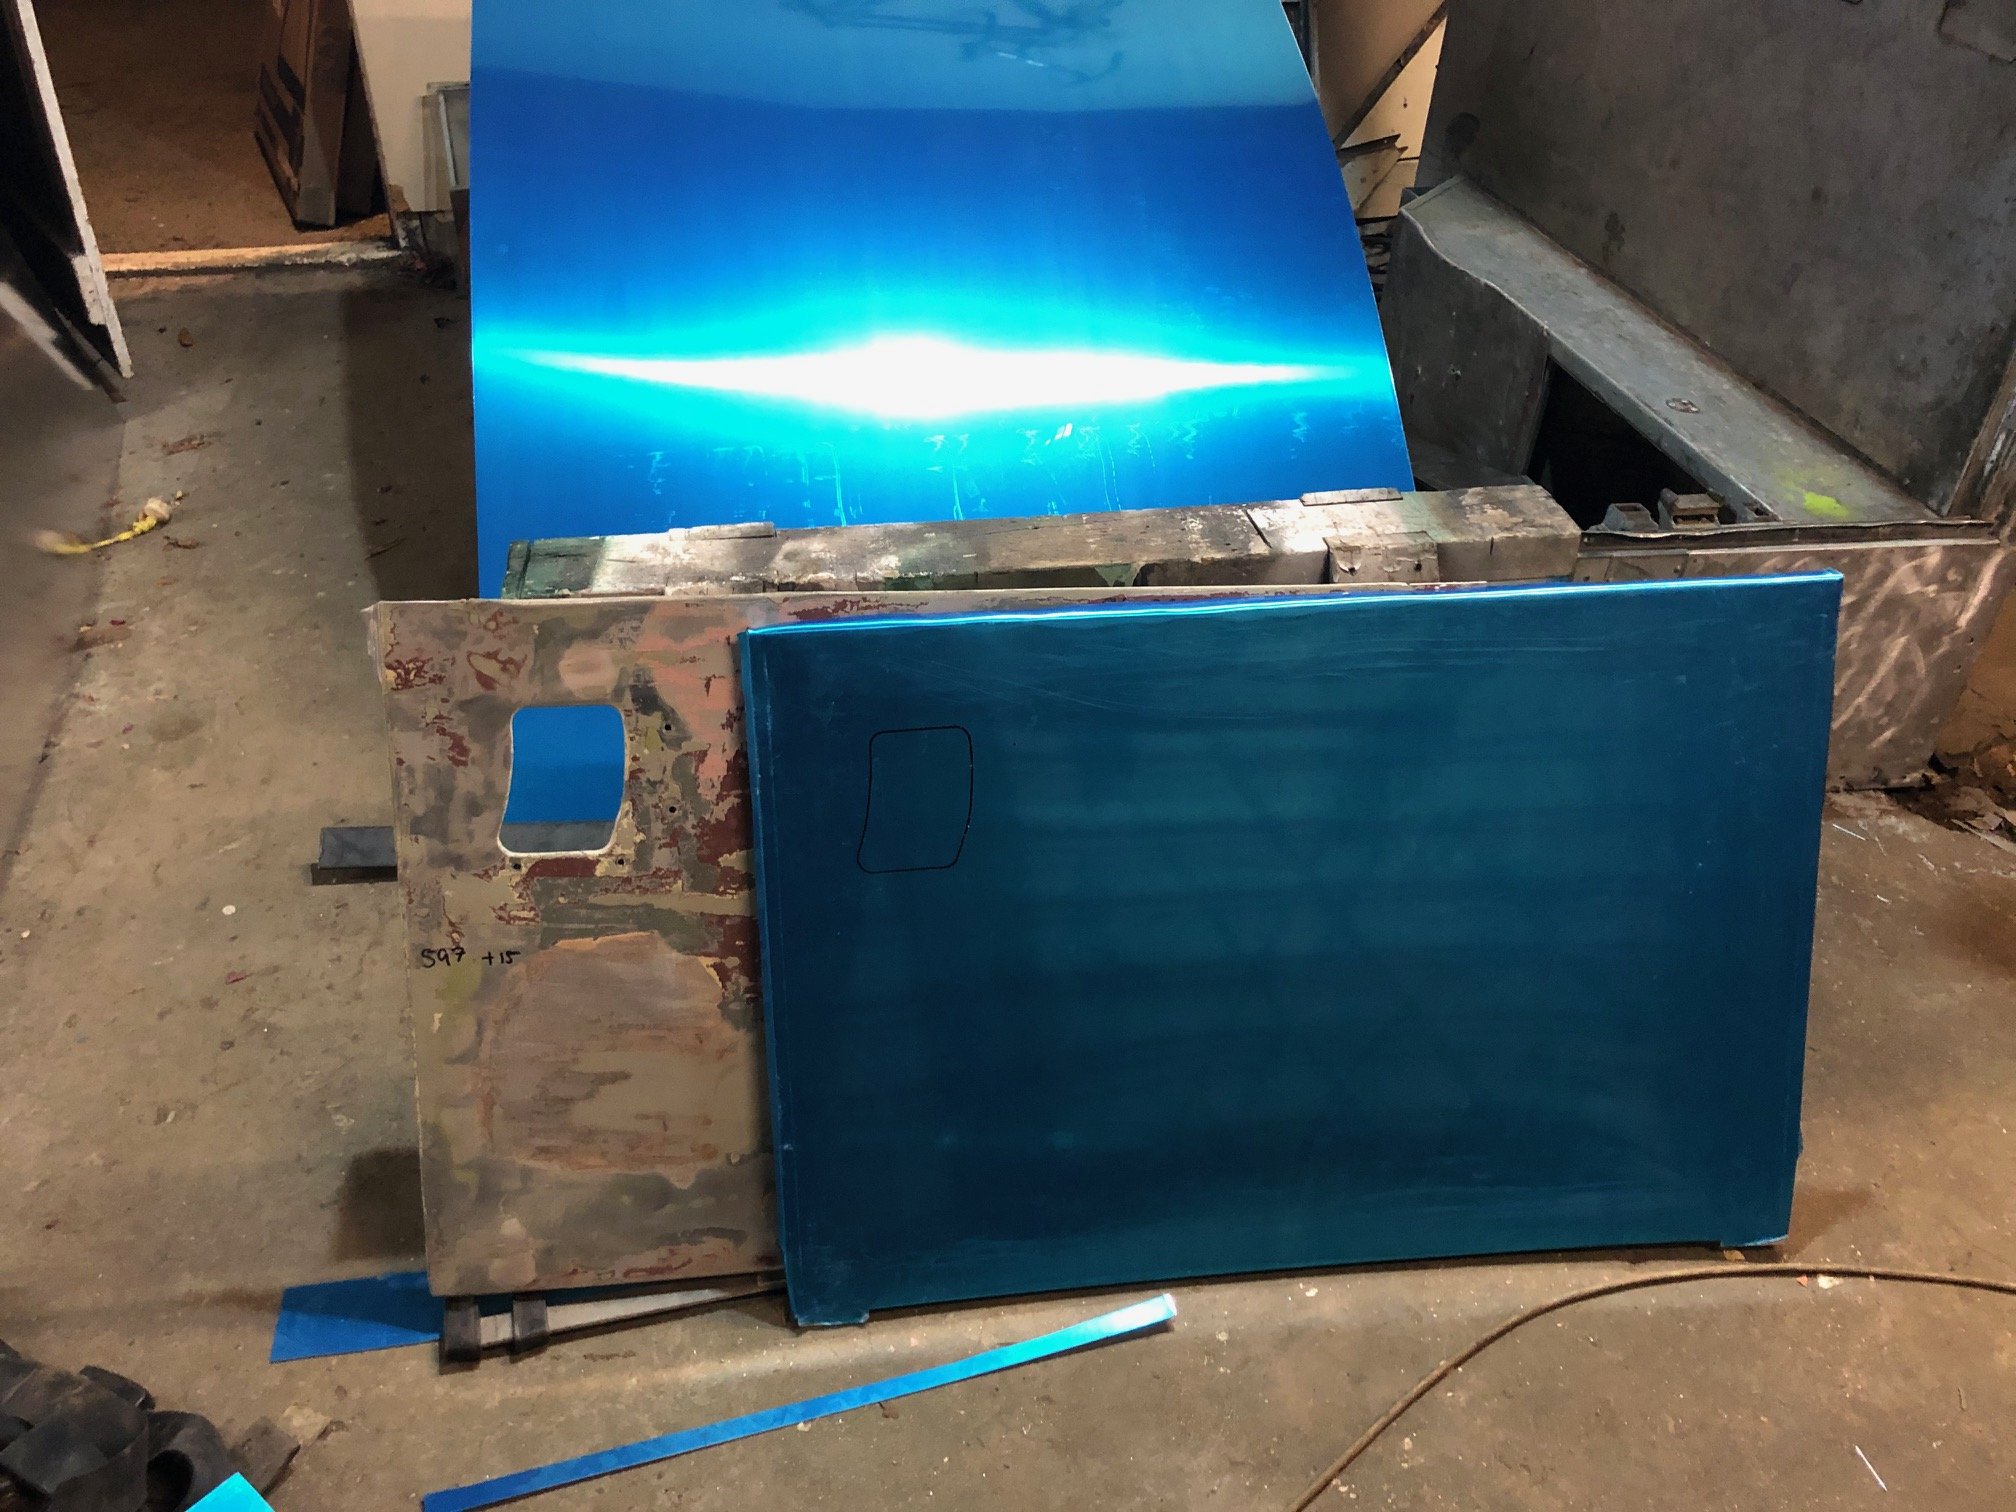
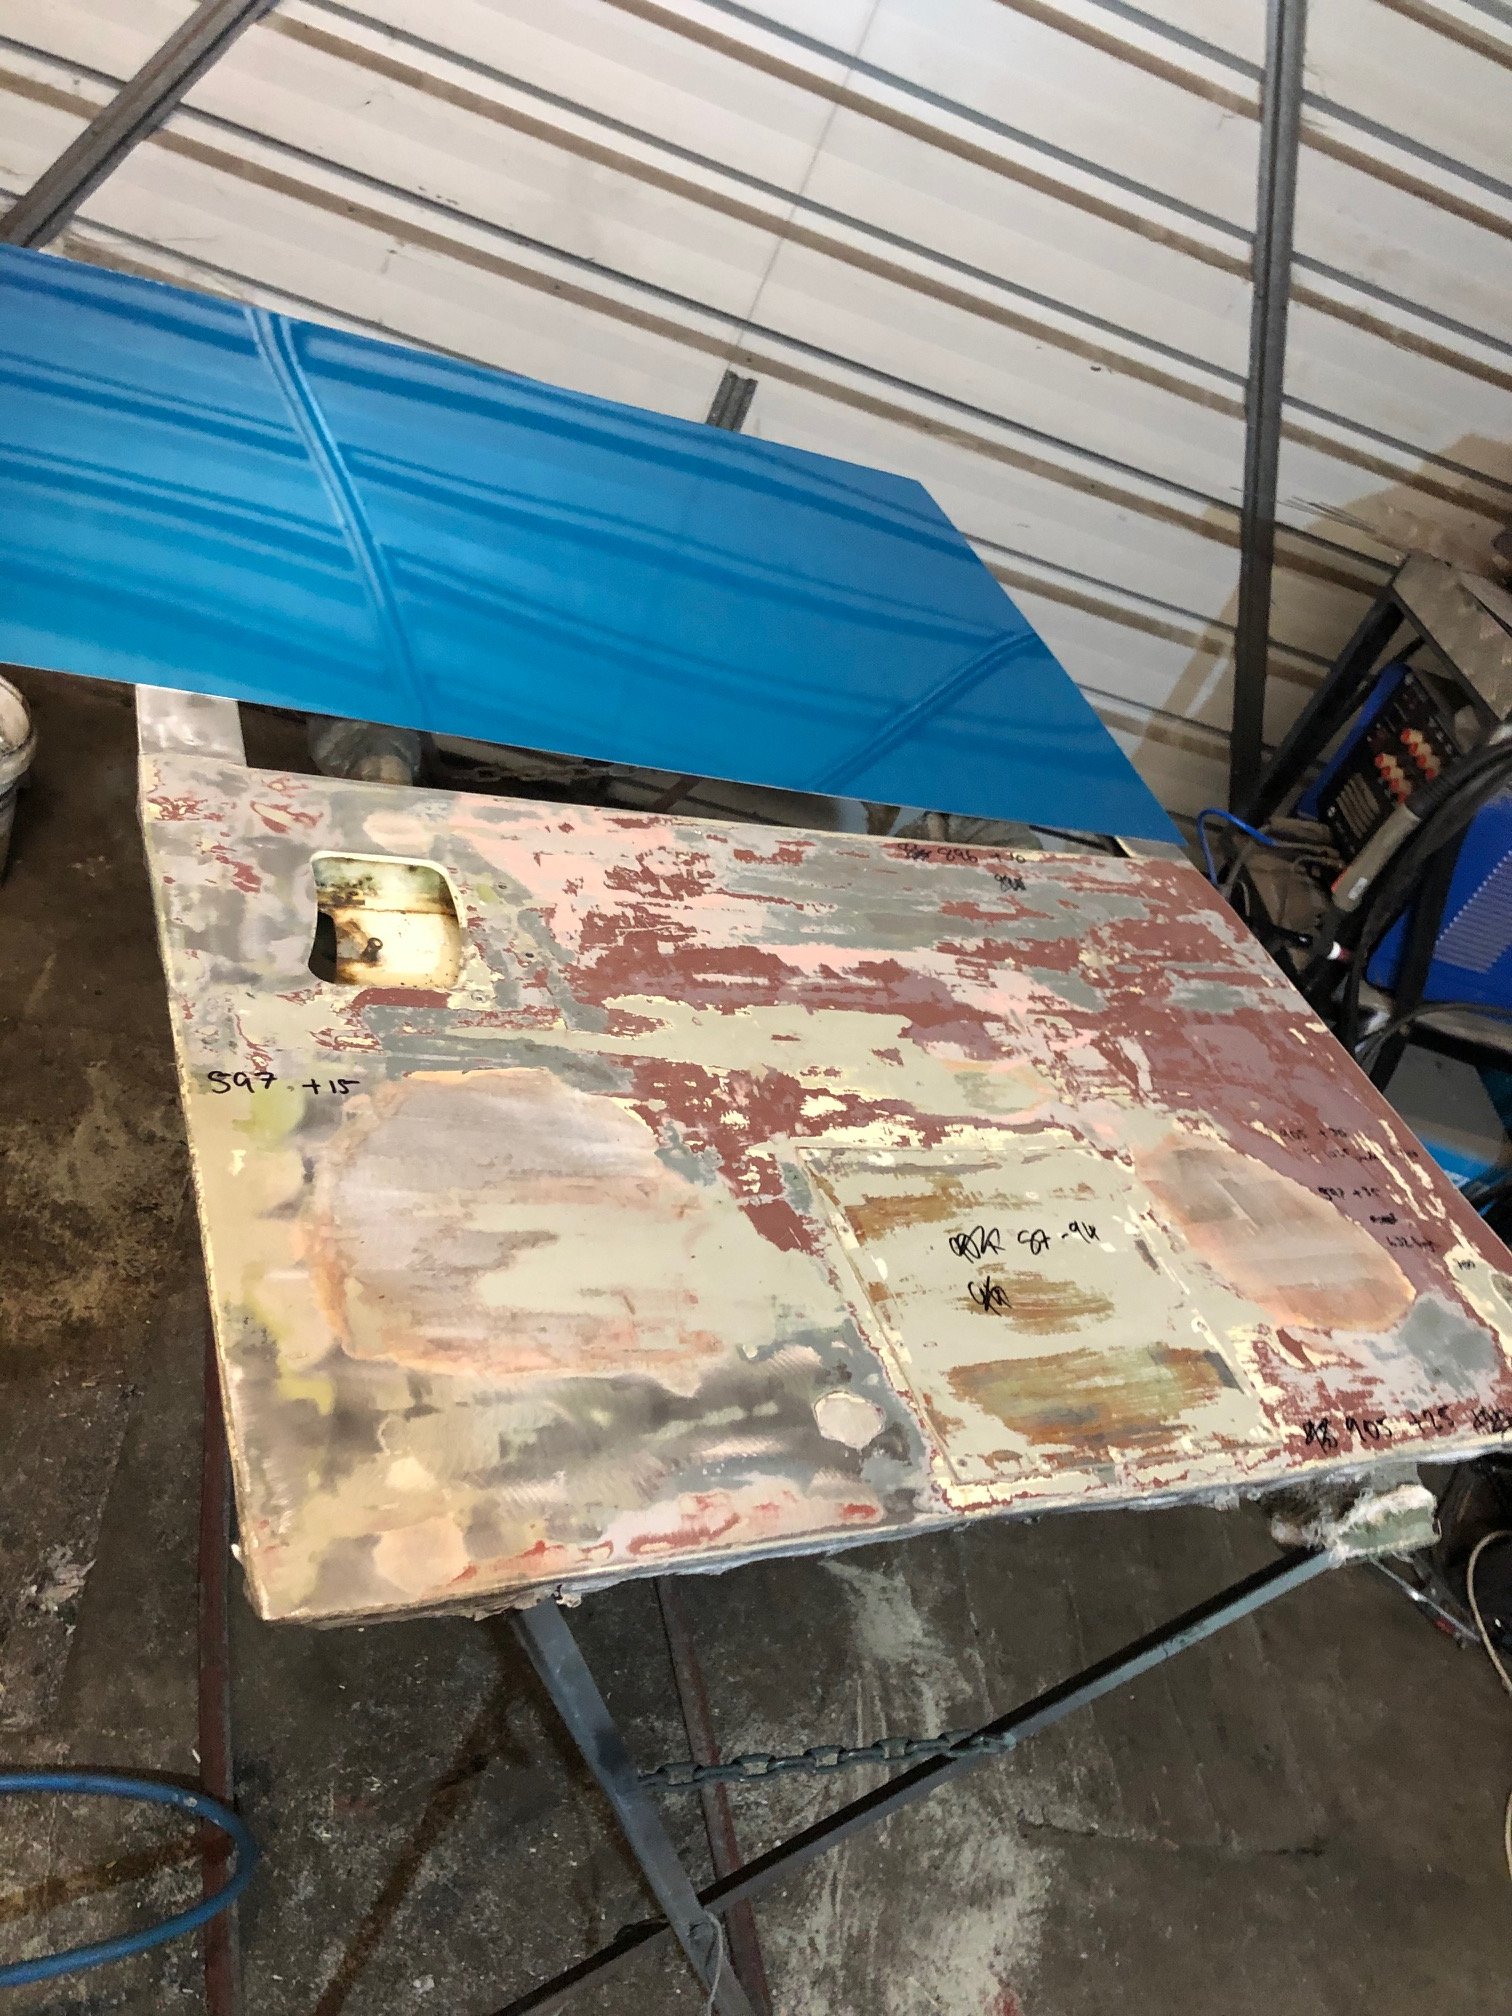
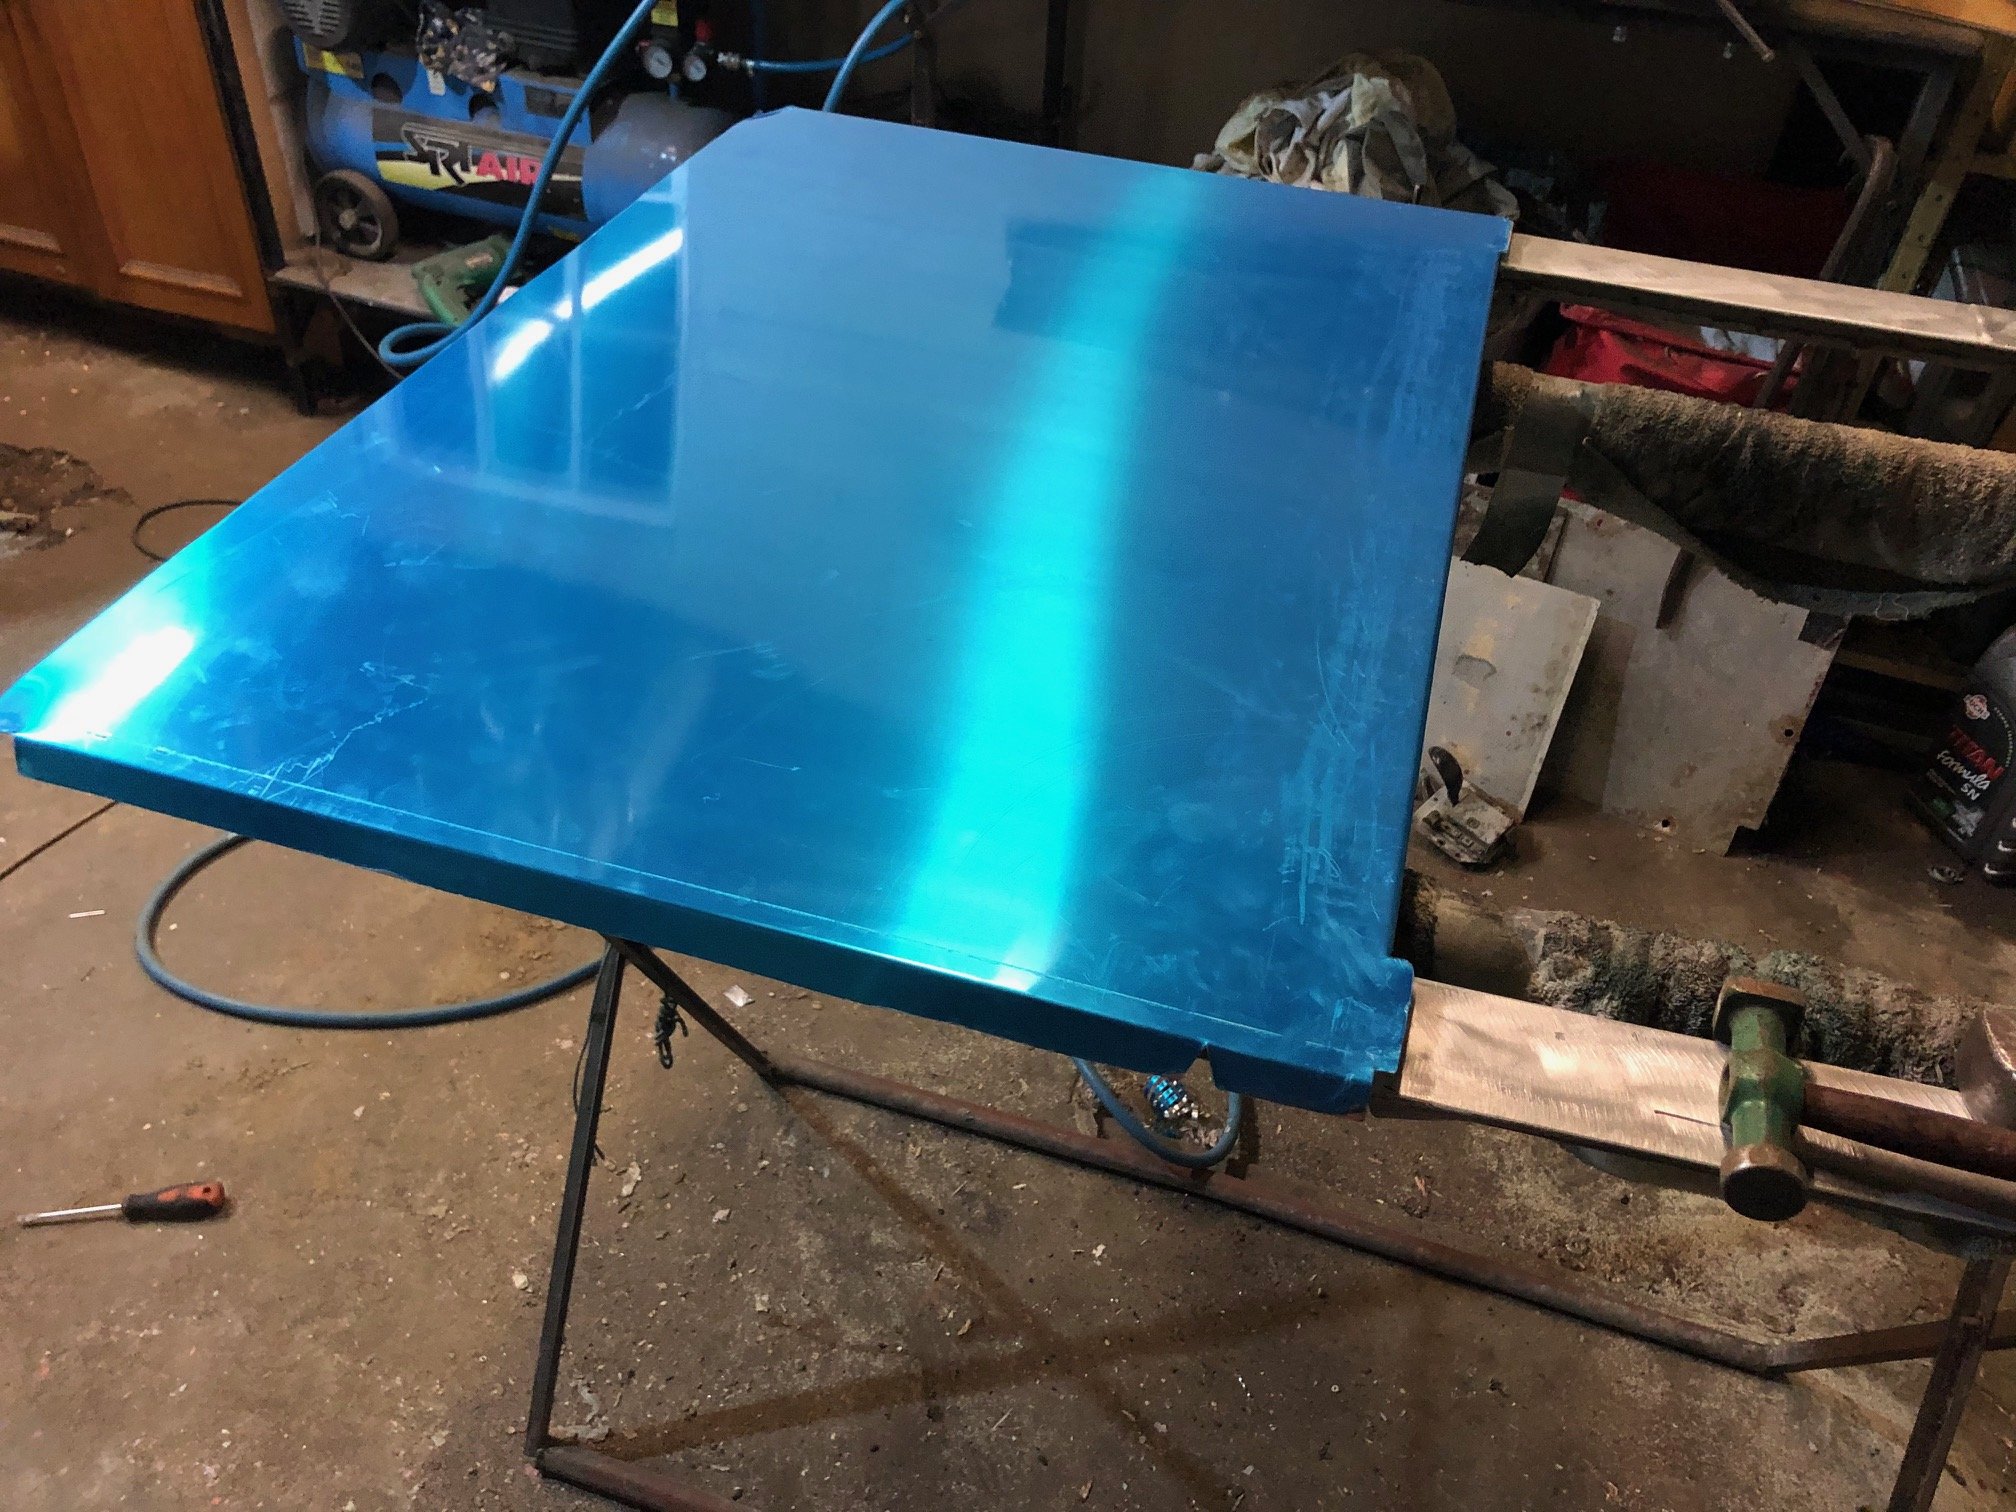
Been starting on these door skins. Went down to Paynes Alluminium to buy a few sheets and met the absolute GC of an owner. When he learnt I was making door skins for a LR he personally went out to the warehouse and got about 3 of his guys to scurry around looking for what I needed. When the sheets werent going to fit into my truck he got another one of the guys in the yarn to put them on their shop truck and drop them to my house. They've got 4 depots across the country and national accounts, and they did that for 2x sheets of a cash sale..... Anywho, back to making these skins, I'm doing the rear 'barn' door first..... Peeled the original back to the frame... Then after a bunch of measuring (there is a slight taper/narrowing to the top of this skin) I folded the edges over. This is me doing the top edge, my folder isnt quite long enough to do this length but it will do the sides. The cheap alternative is to line your fold up with a straight piece of steel, clamp it to that and then form the break with a soft hammer and a dolly to stop the rest of the sheet curving back. In doing this I did stretch the fold a bit in the middle which caused a curve (this alloy moves really quick), no problem as will use my kick shrinker to bring it back straight Fold the side edges down on my panbrake and a quick test fit...
-
Decided to have a go at reskinning all of the doors for a few reasons.... - The rear ones are dented and too far gone to repair - I've been quoted ~$700 ea for reproduction doors ex UK - It takes AGES to strip the paint off (and I tend to use alot of stripper) without overheating the alloy - The skins themselves look easy enough to make - a roll and some folded edges, my pan brake is just big enough - There is quite a bit of alloy corrosion on the lower sections (alot of LR doors do this) - I have a super friendly alloy supply shop 5 min from my house who have 1200-H14 1.2 mm sheets in stock at (what I think) a very reasonable price. Will report back....
-
Nah I don’t..... Away south on Sunday
-
Going to put this here, its not very interesting but it might help someone. This is the same picture as above, it 'looks' good but has alot of problems. In below, the red circles highlight some massive hollows (1") in the panels. You would think the solution is to get a hammer and bash them out but those hollows are a symptom of the problems.... The blue section is massively stretched and it has a brace behind it which is bent, the green shows the lower edge which is bent into a curve. With flat panels like this I need to sort the edges first and the rest should follow.... Here I've drilled the spot weld of the brace out (the clecos are holding it in) and using a leather sandbag with heat and the hammer have shrunk the green section back in, it has pulled alot of that lower hollow flat. Straightening this flange was a right pain. I ended up heating the edge and got medieval with the hammer and dolly. It doesnt look pretty but its now straight across the panel which is most important. Its still hollow below this, but thats due to some stretched ridges which continue from the green section, I'll planish the fold out and then shrink them down....
- 70 replies
-
- 13
-
-
You can leave it in my warehouse if you are lacking for space. PM me if you want a hand
-
Yep, drill them out That guy is great, you can spend hours on his content (and it is all gold). He has shrinking disc videos from years ago and you can buy them from his ebay store. I run on on a variable speed 9". Just bought a small leather sandbag to try the other method with.
-
Those should be easy enough to get out but will stretch as they are quite deep. Take the capping off first, if the internal bracing/edges are bent focus on pulling them out straight first before hammering the skin. Learnt most from this guy.... https://www.youtube.com/channel/UCU4f0UCOfiB32Lo4Z6NDghA
-
I'm going to look at a new project in the weekend which has a 1UZ running off a early Megasquirt ECU. Not knowing much at all about either is there anything specific I need to look out for? Basic stuff given, the internet tells me 1UZ are pretty reliable but are there any traps for young players?
-
I have the gear and have been thinking that. Also seen a method with heat, a hammer and a lead shot bag which looks quick effective on alloy...
-
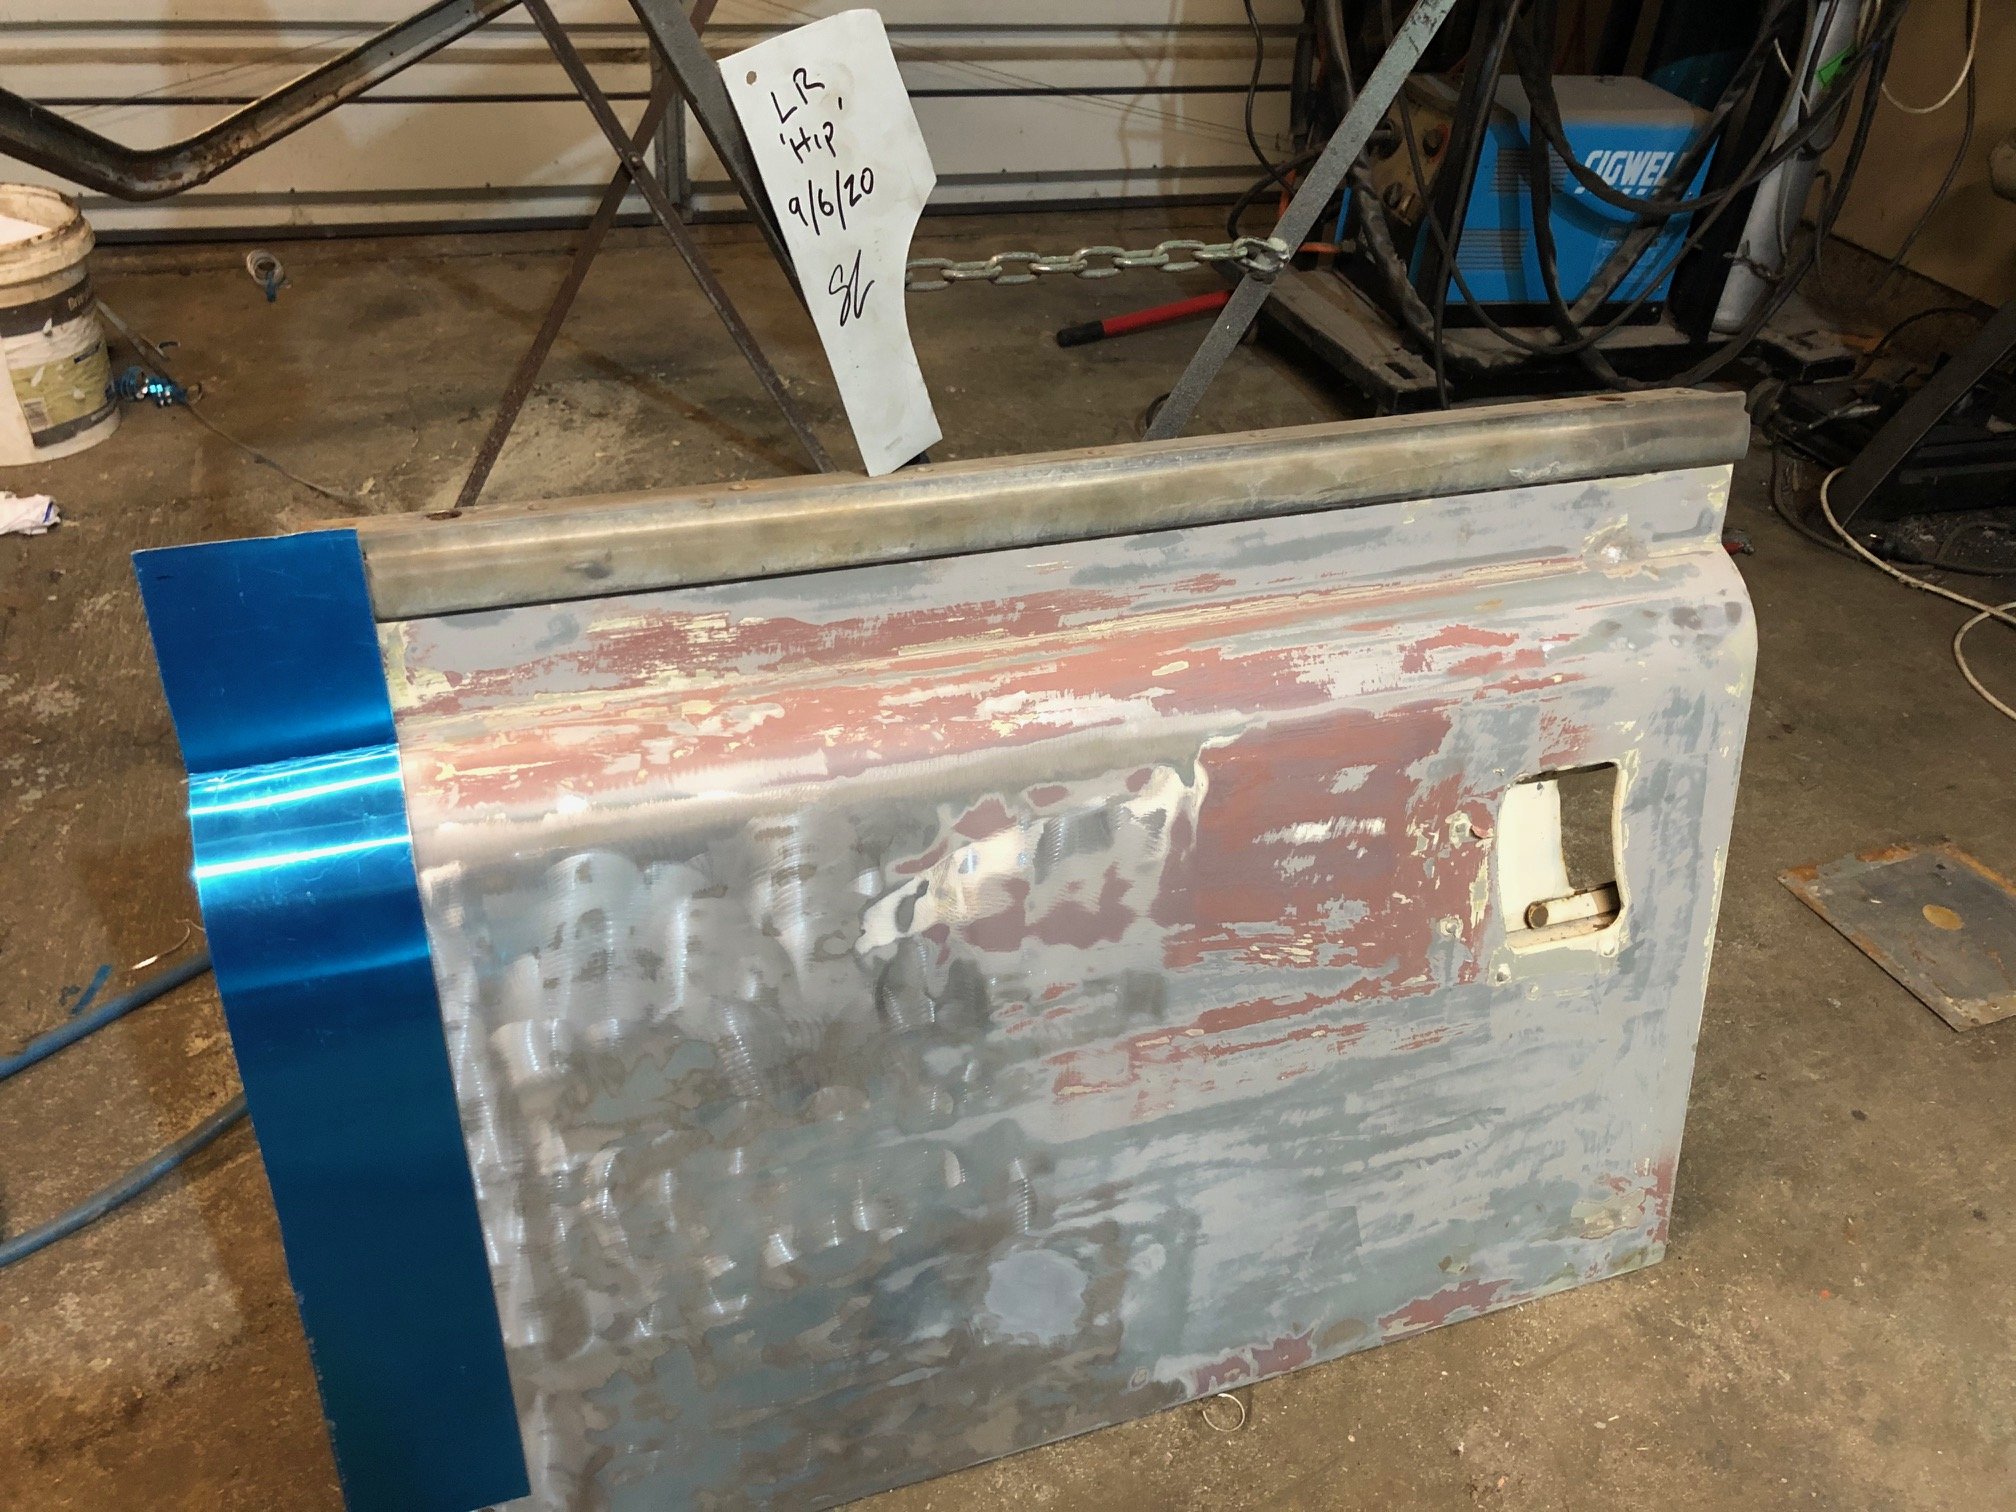
^ So the repair-the-shaft trick didnt work out, still trying to track a decent one down. More body work... Finally done with the B-pillars, pain of a job but I couldnt justify the cost of repros. Still need to do the back doglegs but that can wait till I can align them with the tub. Got all of the paint off the tub (I prefer to use lots of stripper and minimal abbrasives), fliped it over and put it in the shed to work on. The bottom corners are pretty beat up and require some welding repairs. The alloy is nice to work with but it stretches so easily.... Really hate and dont want to do bog work. Will see what its like in epoxy and decide what I'm happy to accept.
- 70 replies
-
- 10
-
-
Phosphoric acid, 'deoxidine' brand is fine
-
I'm not sure if I've posted this previously... Its a T35 'replica', one of 3? Acorn Schroeder here in NZ, is actually a monocoque body an has alfa running gear. There are 'cappings' on the boat tail which you can remove to bolt in a roll cage https://www.allcarindex.com/production/new-zealand/acorn/schroeder/ A writeup on one of the other chassis https://drivetribe.com/p/kiwi-built-bugatti-is-art-on-wheels-ZU4S4mJsR8GBAFx-wDniiA?iid=FdBMFnhvT0KY6pfZnwkOQw Owned by a friend of mine, its an absolute blast to drive...
-
Cheers, Pyrex = borosilicate glass = what I sell
-
To add my spam... I run one of these TiGs (bought from local welding shop), owner there said they've always been popular and ended up reviving the model (was planed to stop) due to demand https://www.machineryhouse.co.nz/W1103 Also, does anyone use glass TIG cup? Seeing as a run a glass company I'm thinking of starting to manufacture them.... $30 from the shop for a few cents of glass and an oring seems just silly to me....
-
I'm really not sure If I'm having too much of a Barry bodge moment but I have a problem I need to solve.... The transfer case parts I sourced has a shaft with really mint splines on it but has had the nose busted off it where the output shaft bolt threads on.... So I now have two shafts which are not good in different spots. I've managed to turn the end of the broken one down to accept a press fit threaded nose which I could TIG in... Still following up for replacement shafts but failing that I do have enough bits now to build up two transfer boxes. Anyone done something like this and lived to tell the tale....?
-
Following, keen for one for a project I have in the back of his head. Workmate is having a 'my long time GF and I separated' crisis and went out and bought one...
-
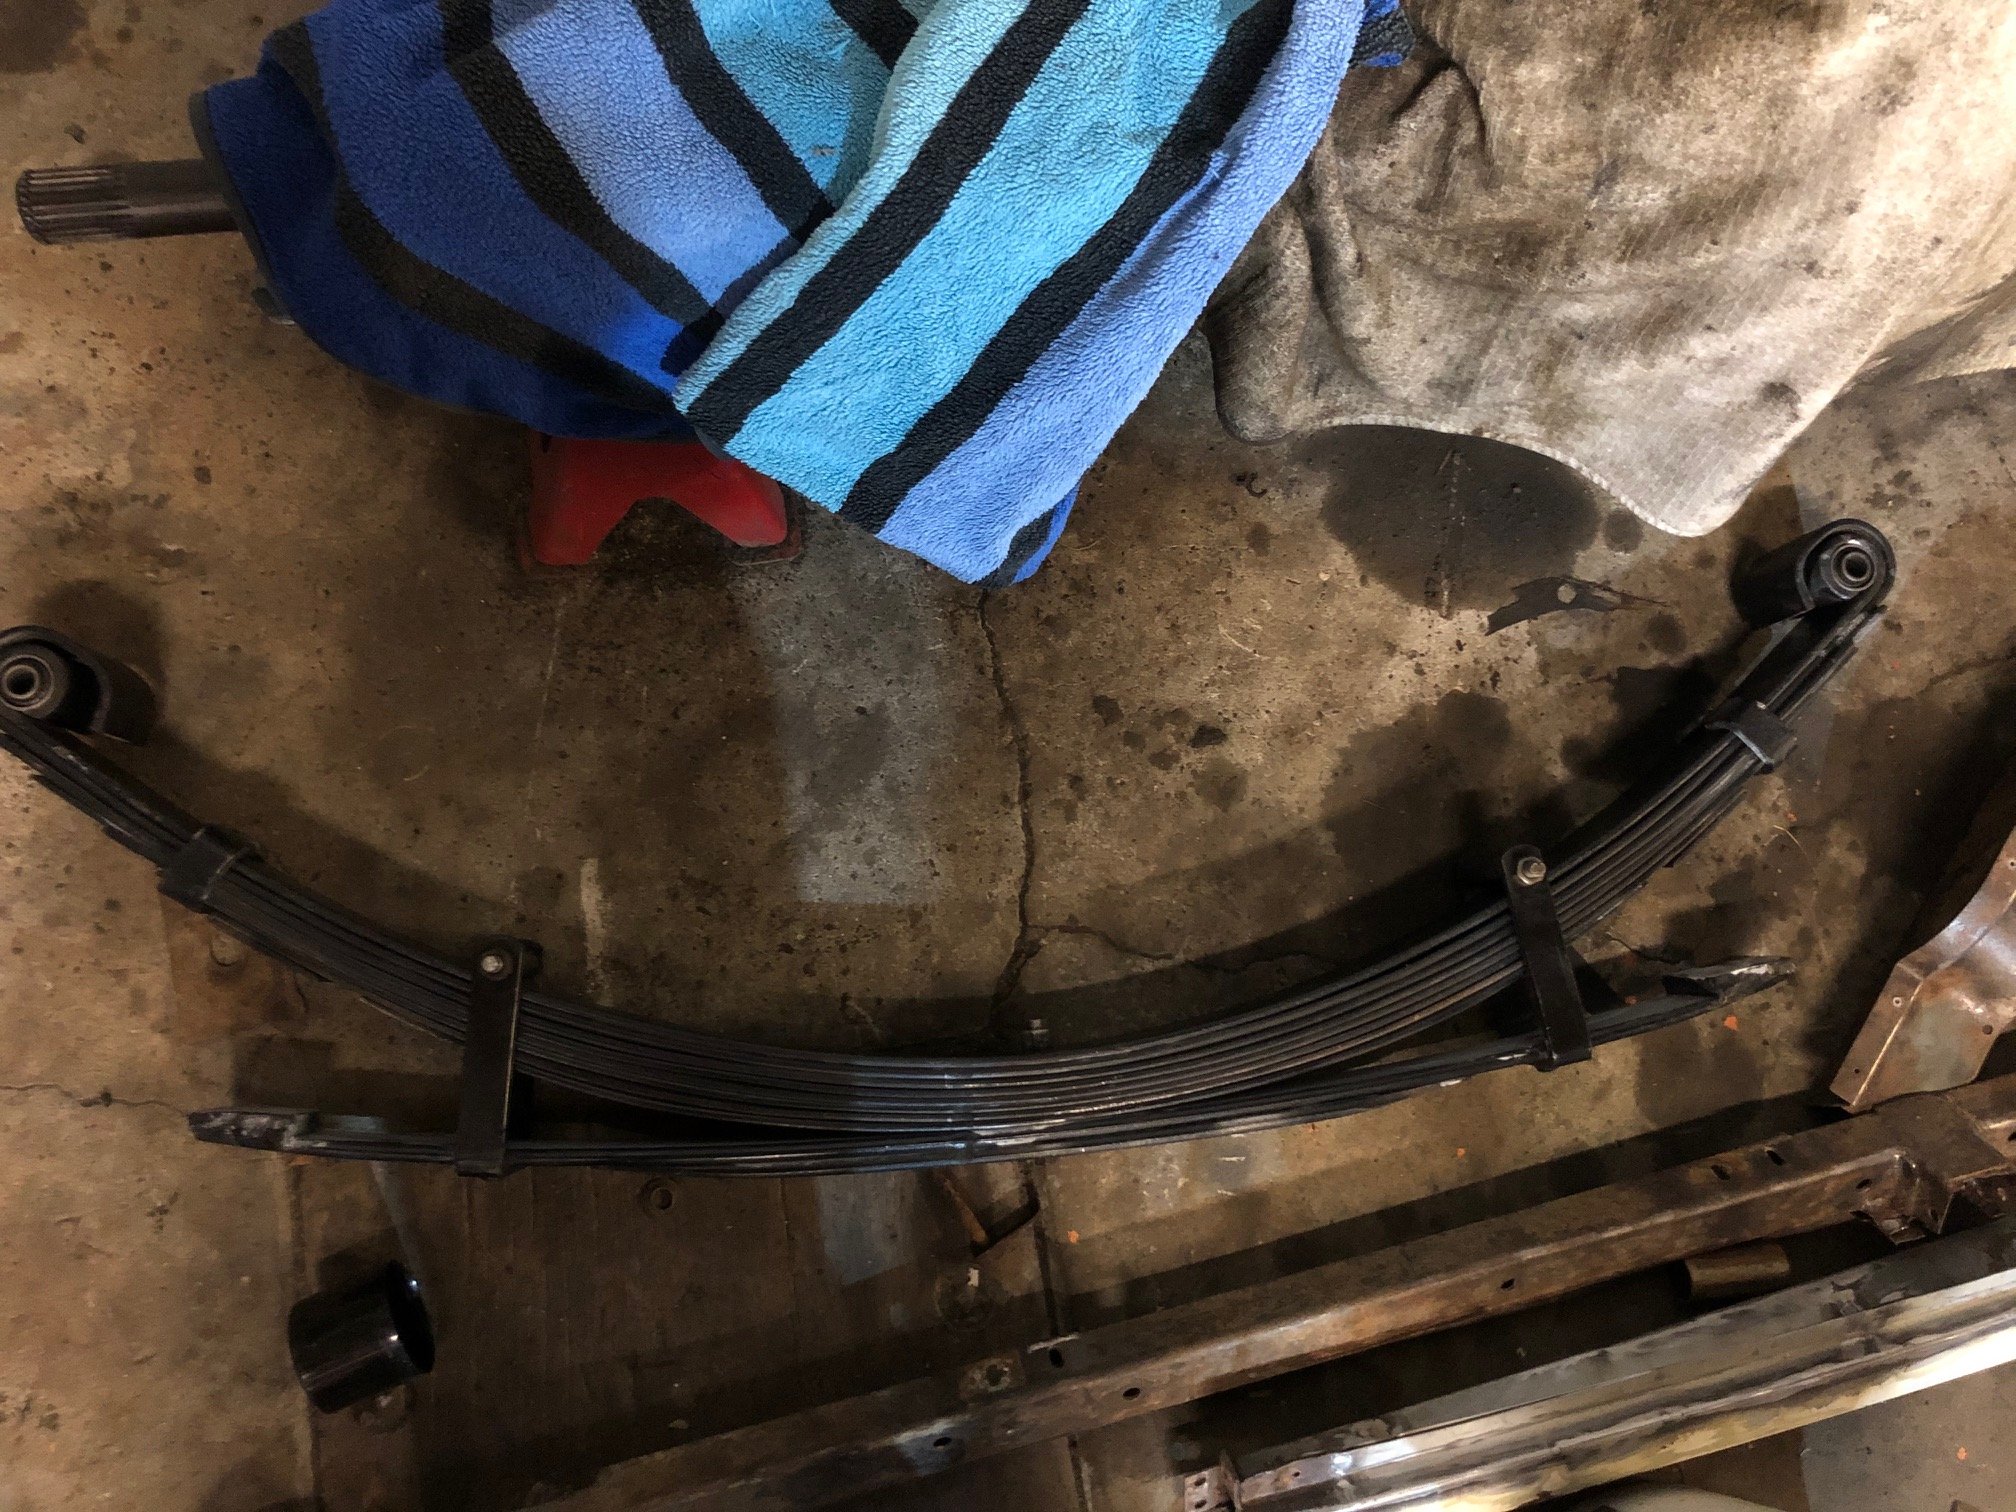
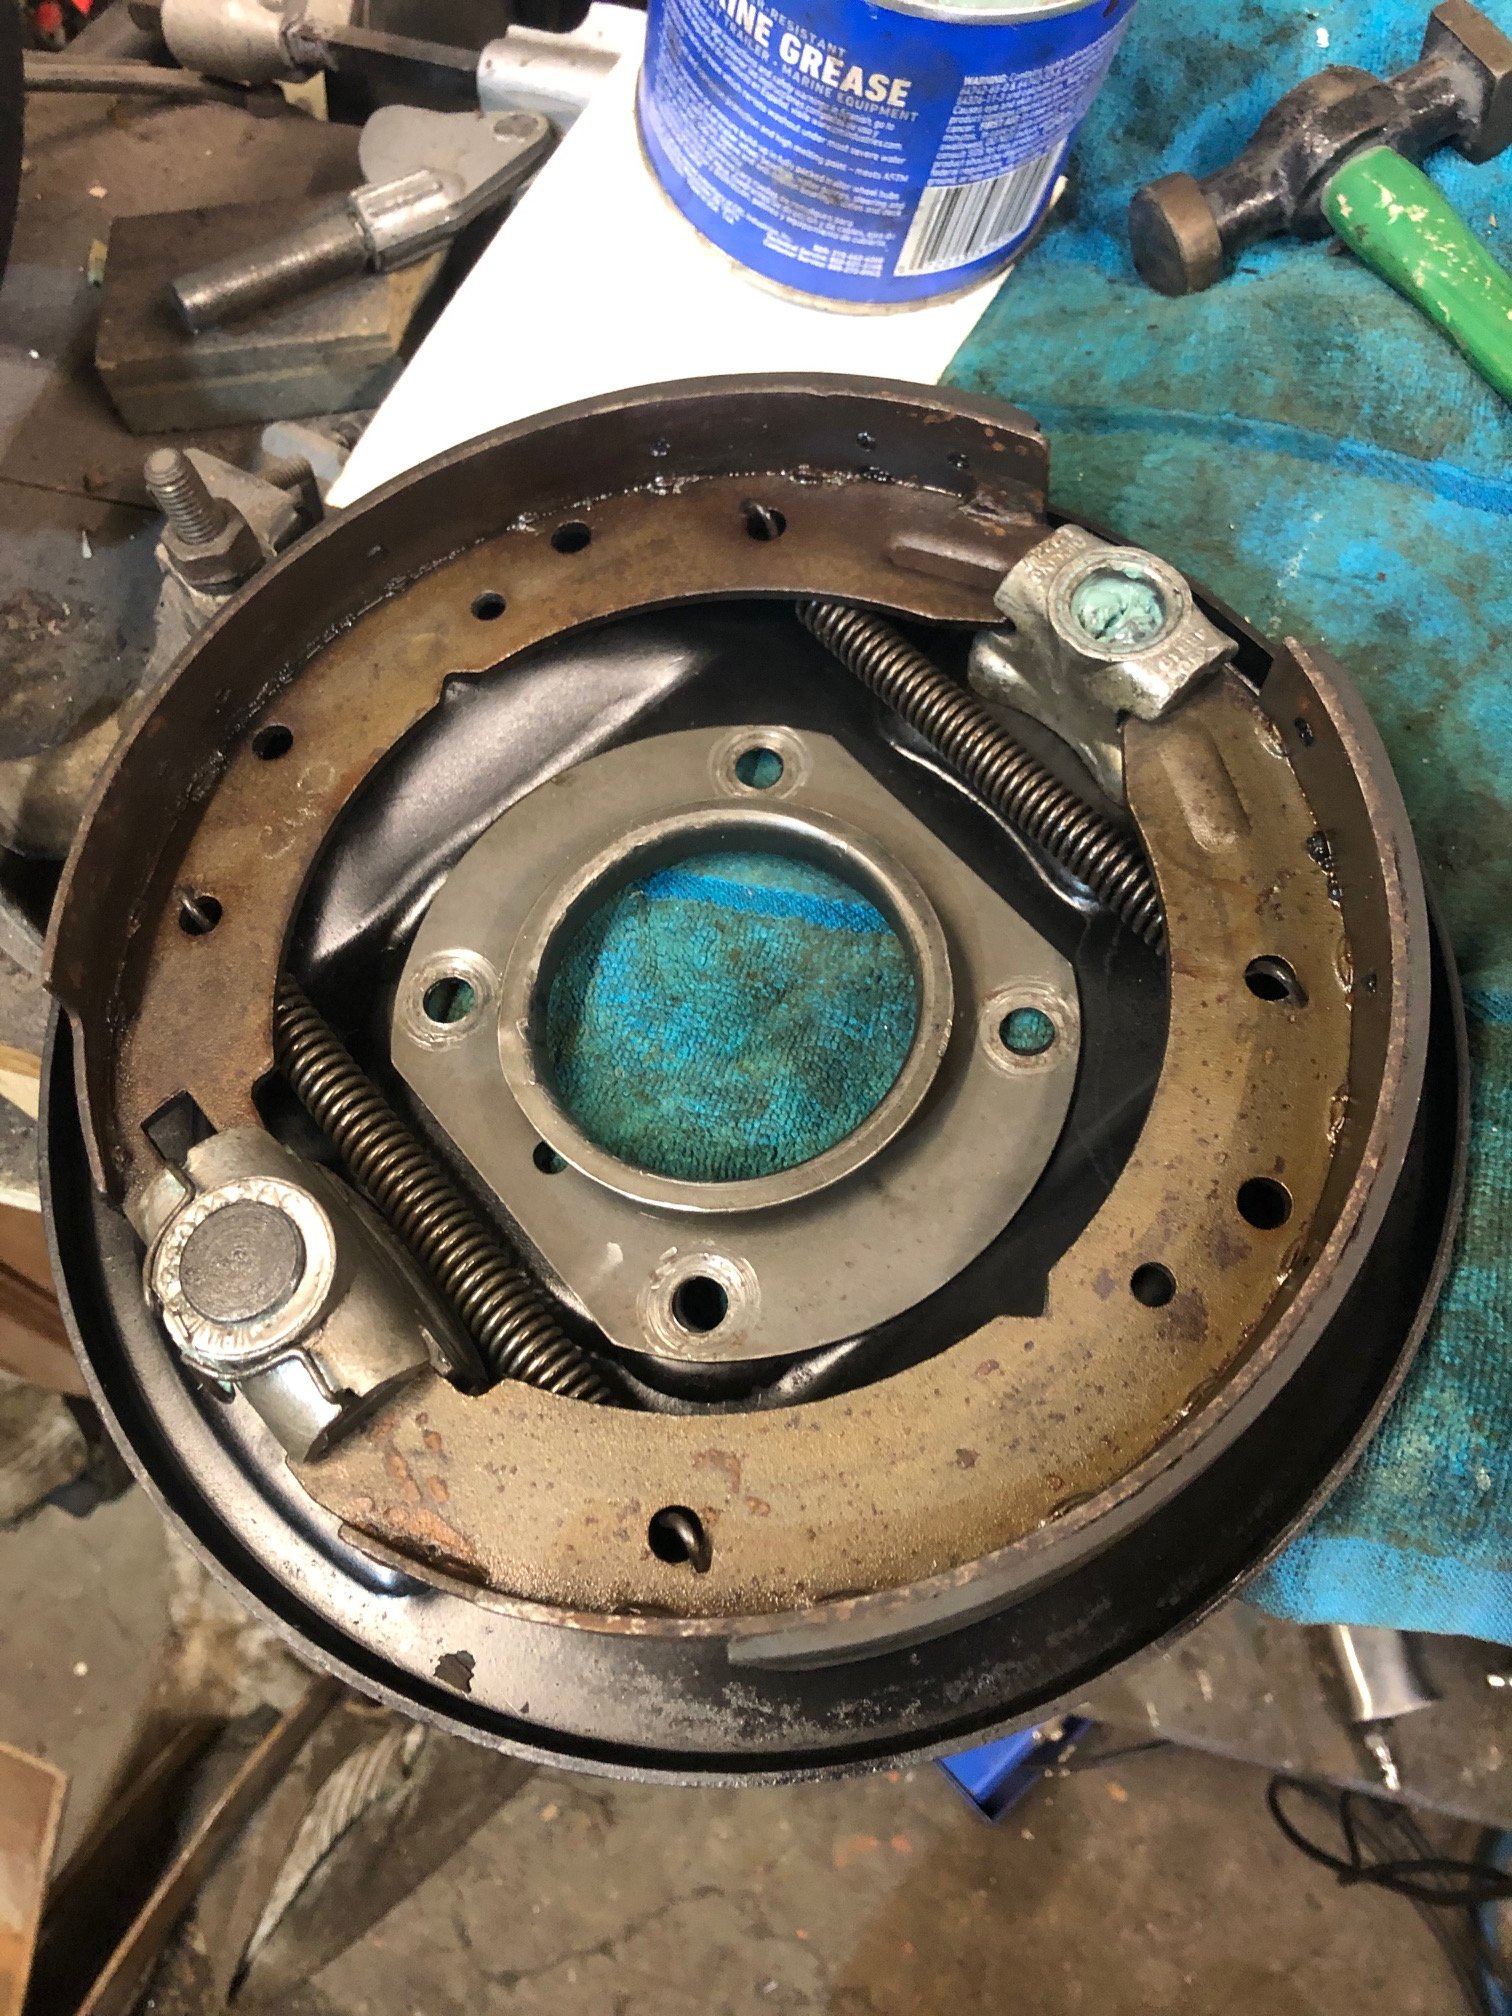
Not a terribly interesting update, and its a prick of a job.... I've been giving the springs a bit of a refresh, grind off all the rust and dirt. A quick zinc black and I used dry spray lubricant between the leaves (internet tells me this is the preferred approach. Also replaced all of the bushes, the spring eye ones I can do in the press. Anyone whose done them knows the chassis bushes are an absolute pain. I made up a DIY screw press but it didn't really help. Had to burn out the rubber then hacksaw the outer casing to get them out - were rusted in there tight. Already thinking about future upgrades, ultimate would be to replace with parabolics and do a disc brake conversion. Yes I know the shackles are the wrong way, will move it about when I can mount the wheels.
-
I get what you are trying to say here.... Early corollas sprayed with orange 2k come to mind...
-
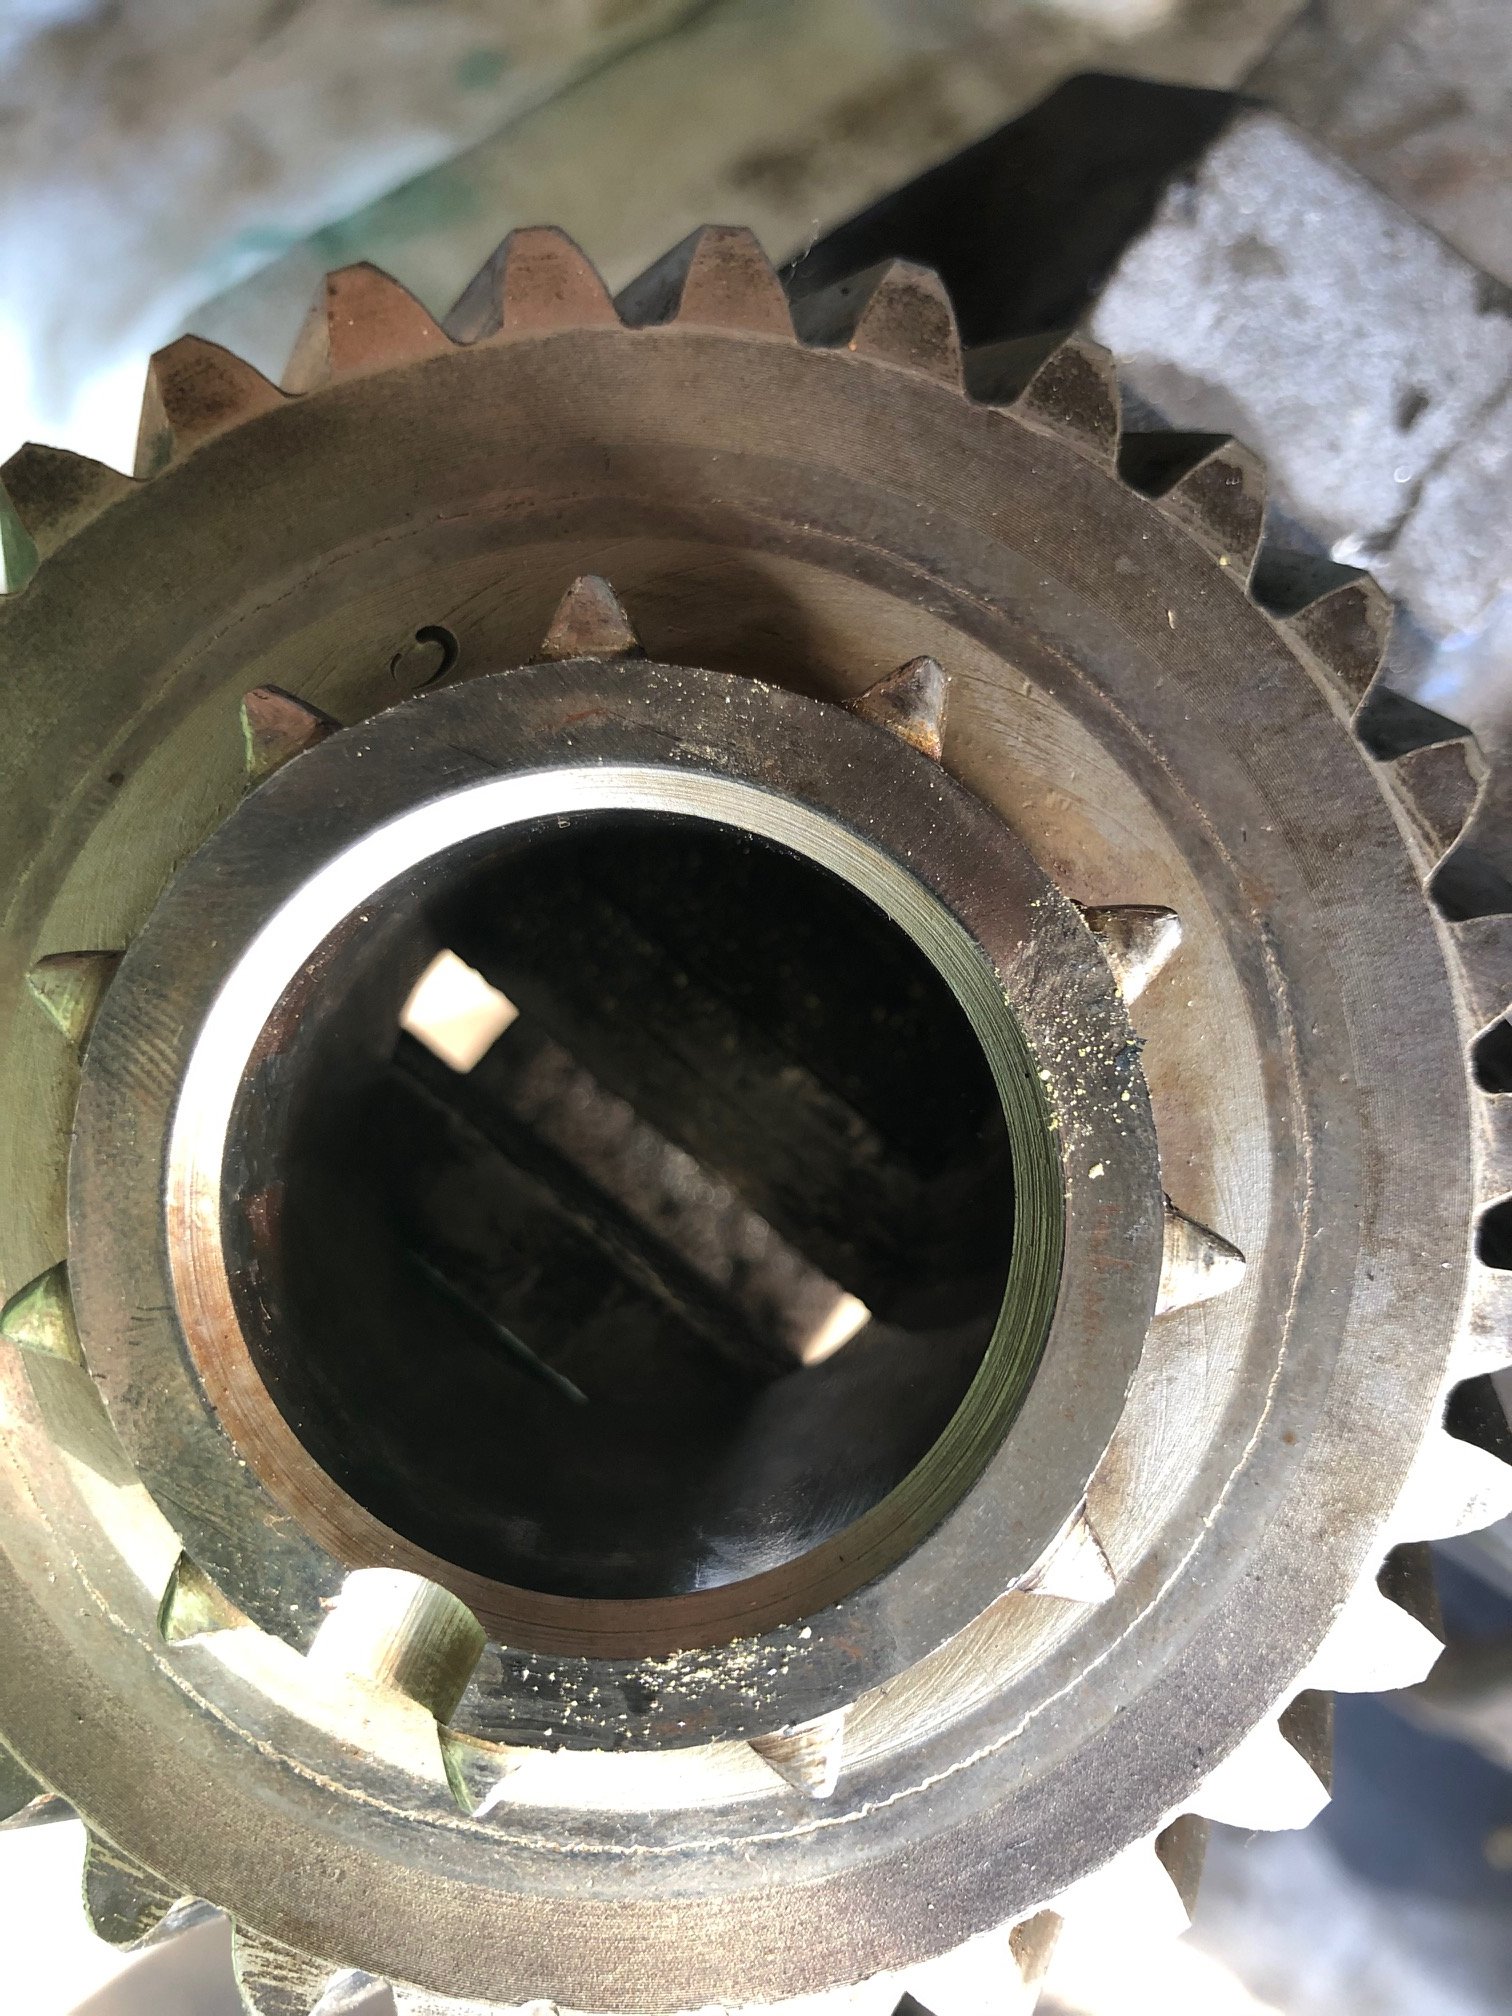
My grinder broke so have resorted to filing out my welds... Did a quick clean/paint/grease on the handbrake... Think I've sorted out a replacement transfer box but decided to pull it down. The splines on the shaft and where the high speed gear runs is worn so that is junk, the low speed gear is hogged out where the dogs engage (most likely when shifting into low while moving) so that is too. But what takes the cake is the high speed gear.... Yes that is a crack the whole way around.... whats more interesting is that its been pinned as a repair some time in the past. These boxes are built pretty tough (and usually the gearboxes would lunch themselves long before the transfer gears) so it would have been quite a situation to do this kind of damage...
-
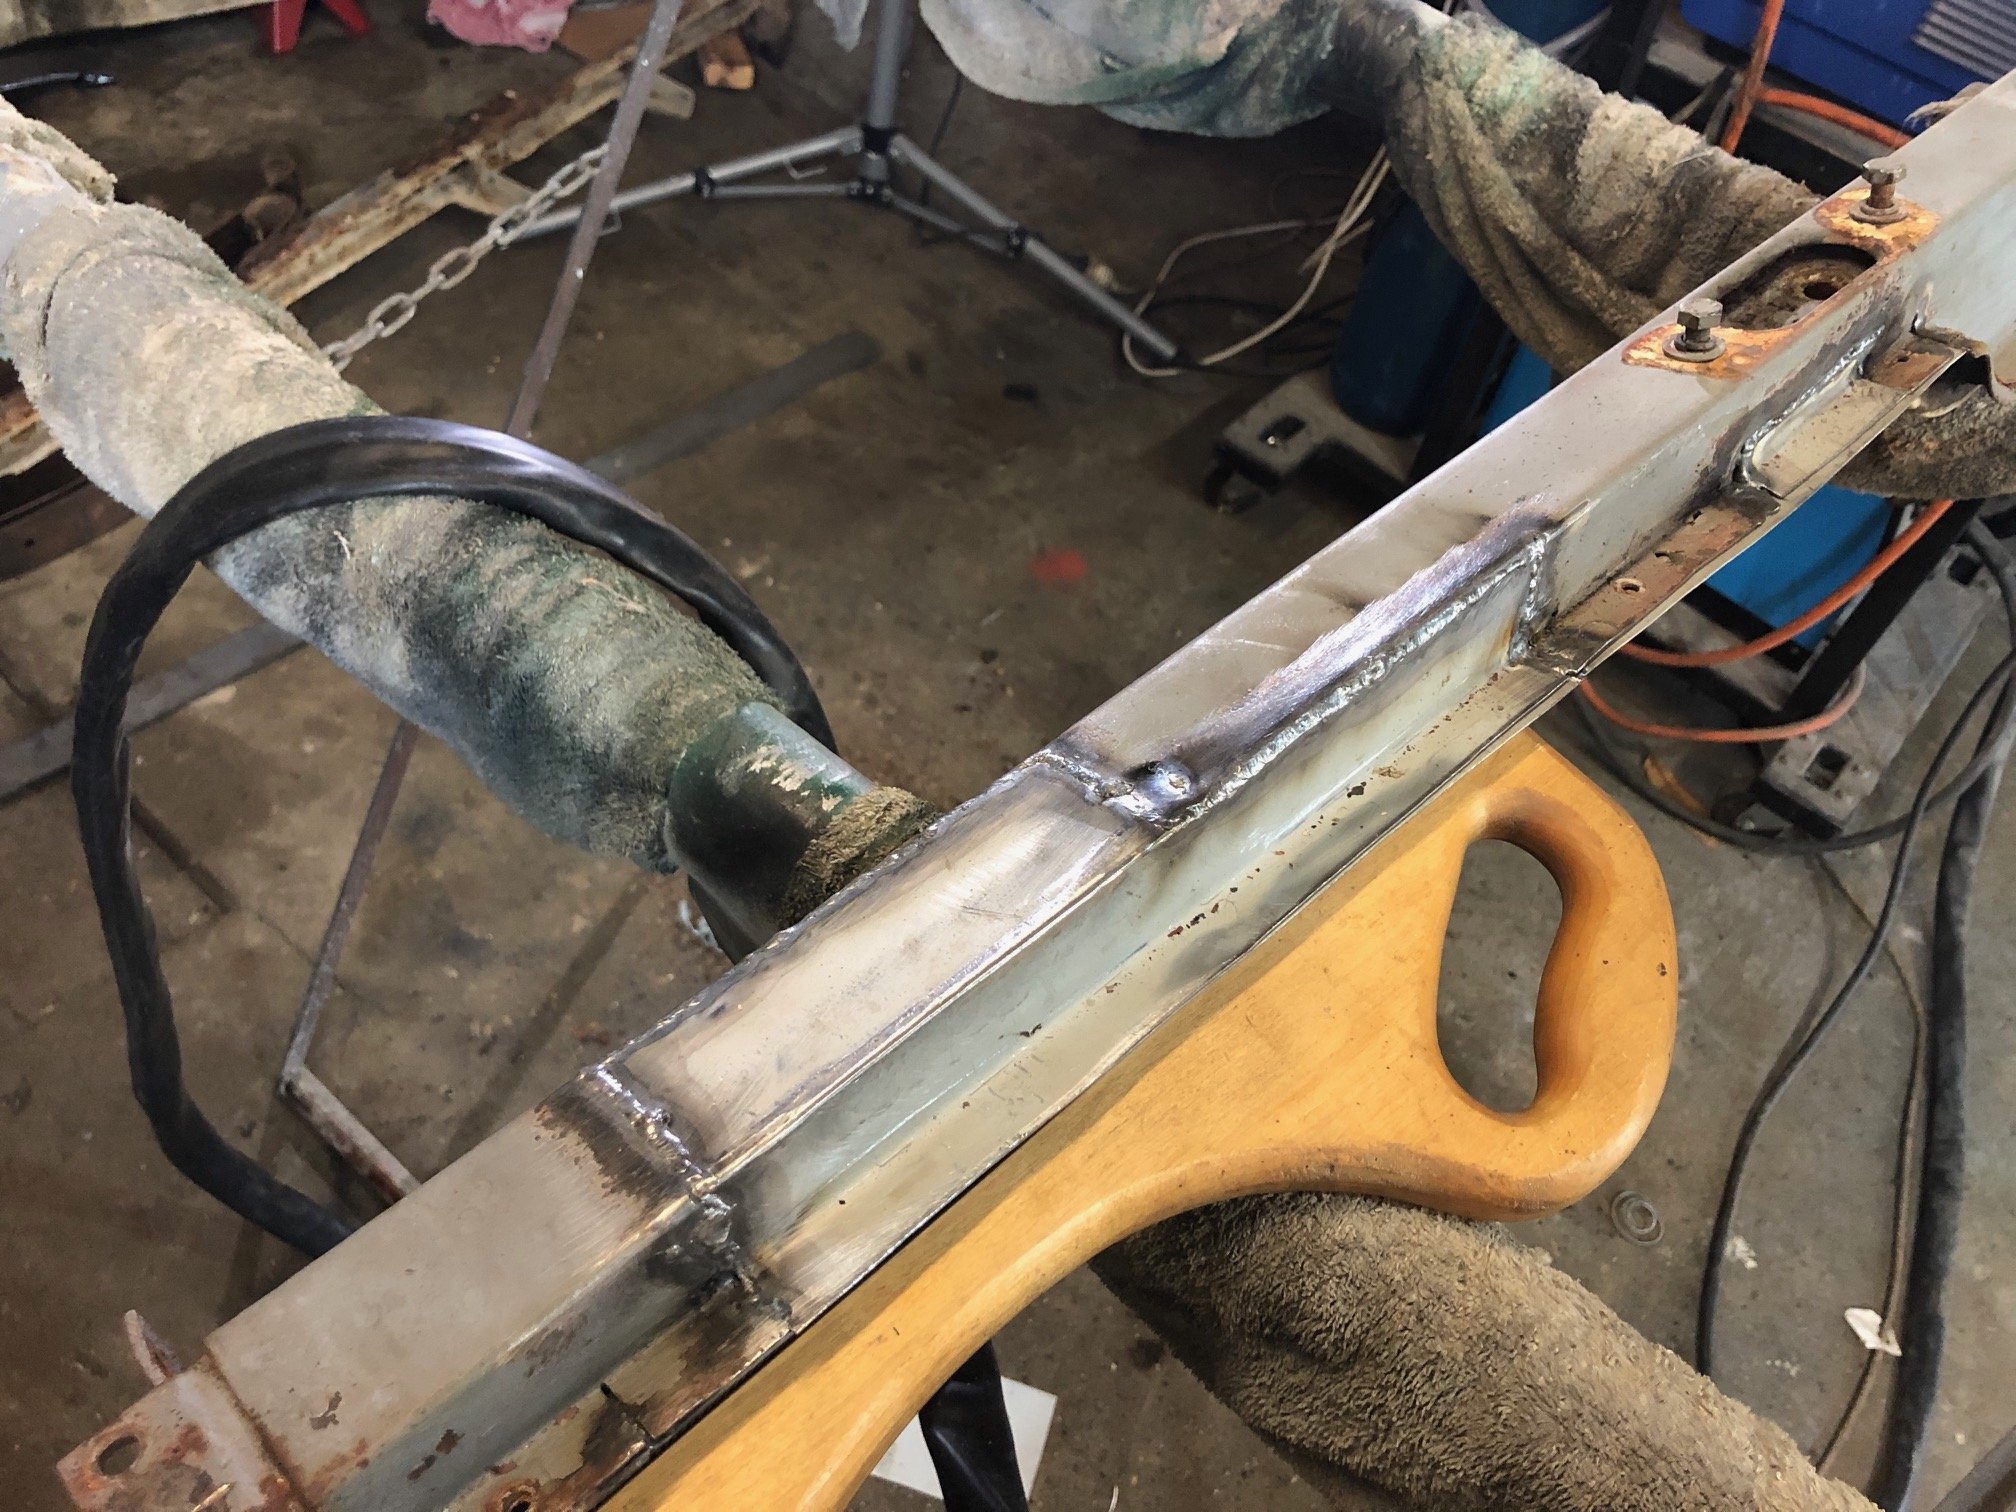
Because this area can be seen I've decided to TIG it all. Finally getting my head around how to do it with pulse on panel steel, really enjoying it to be honest, very controllable and I can just knock it all down with my body file to leave a good finish. I've yet to decide what my plan of attack is going to be here....
- 70 replies
-
- 11
-
-
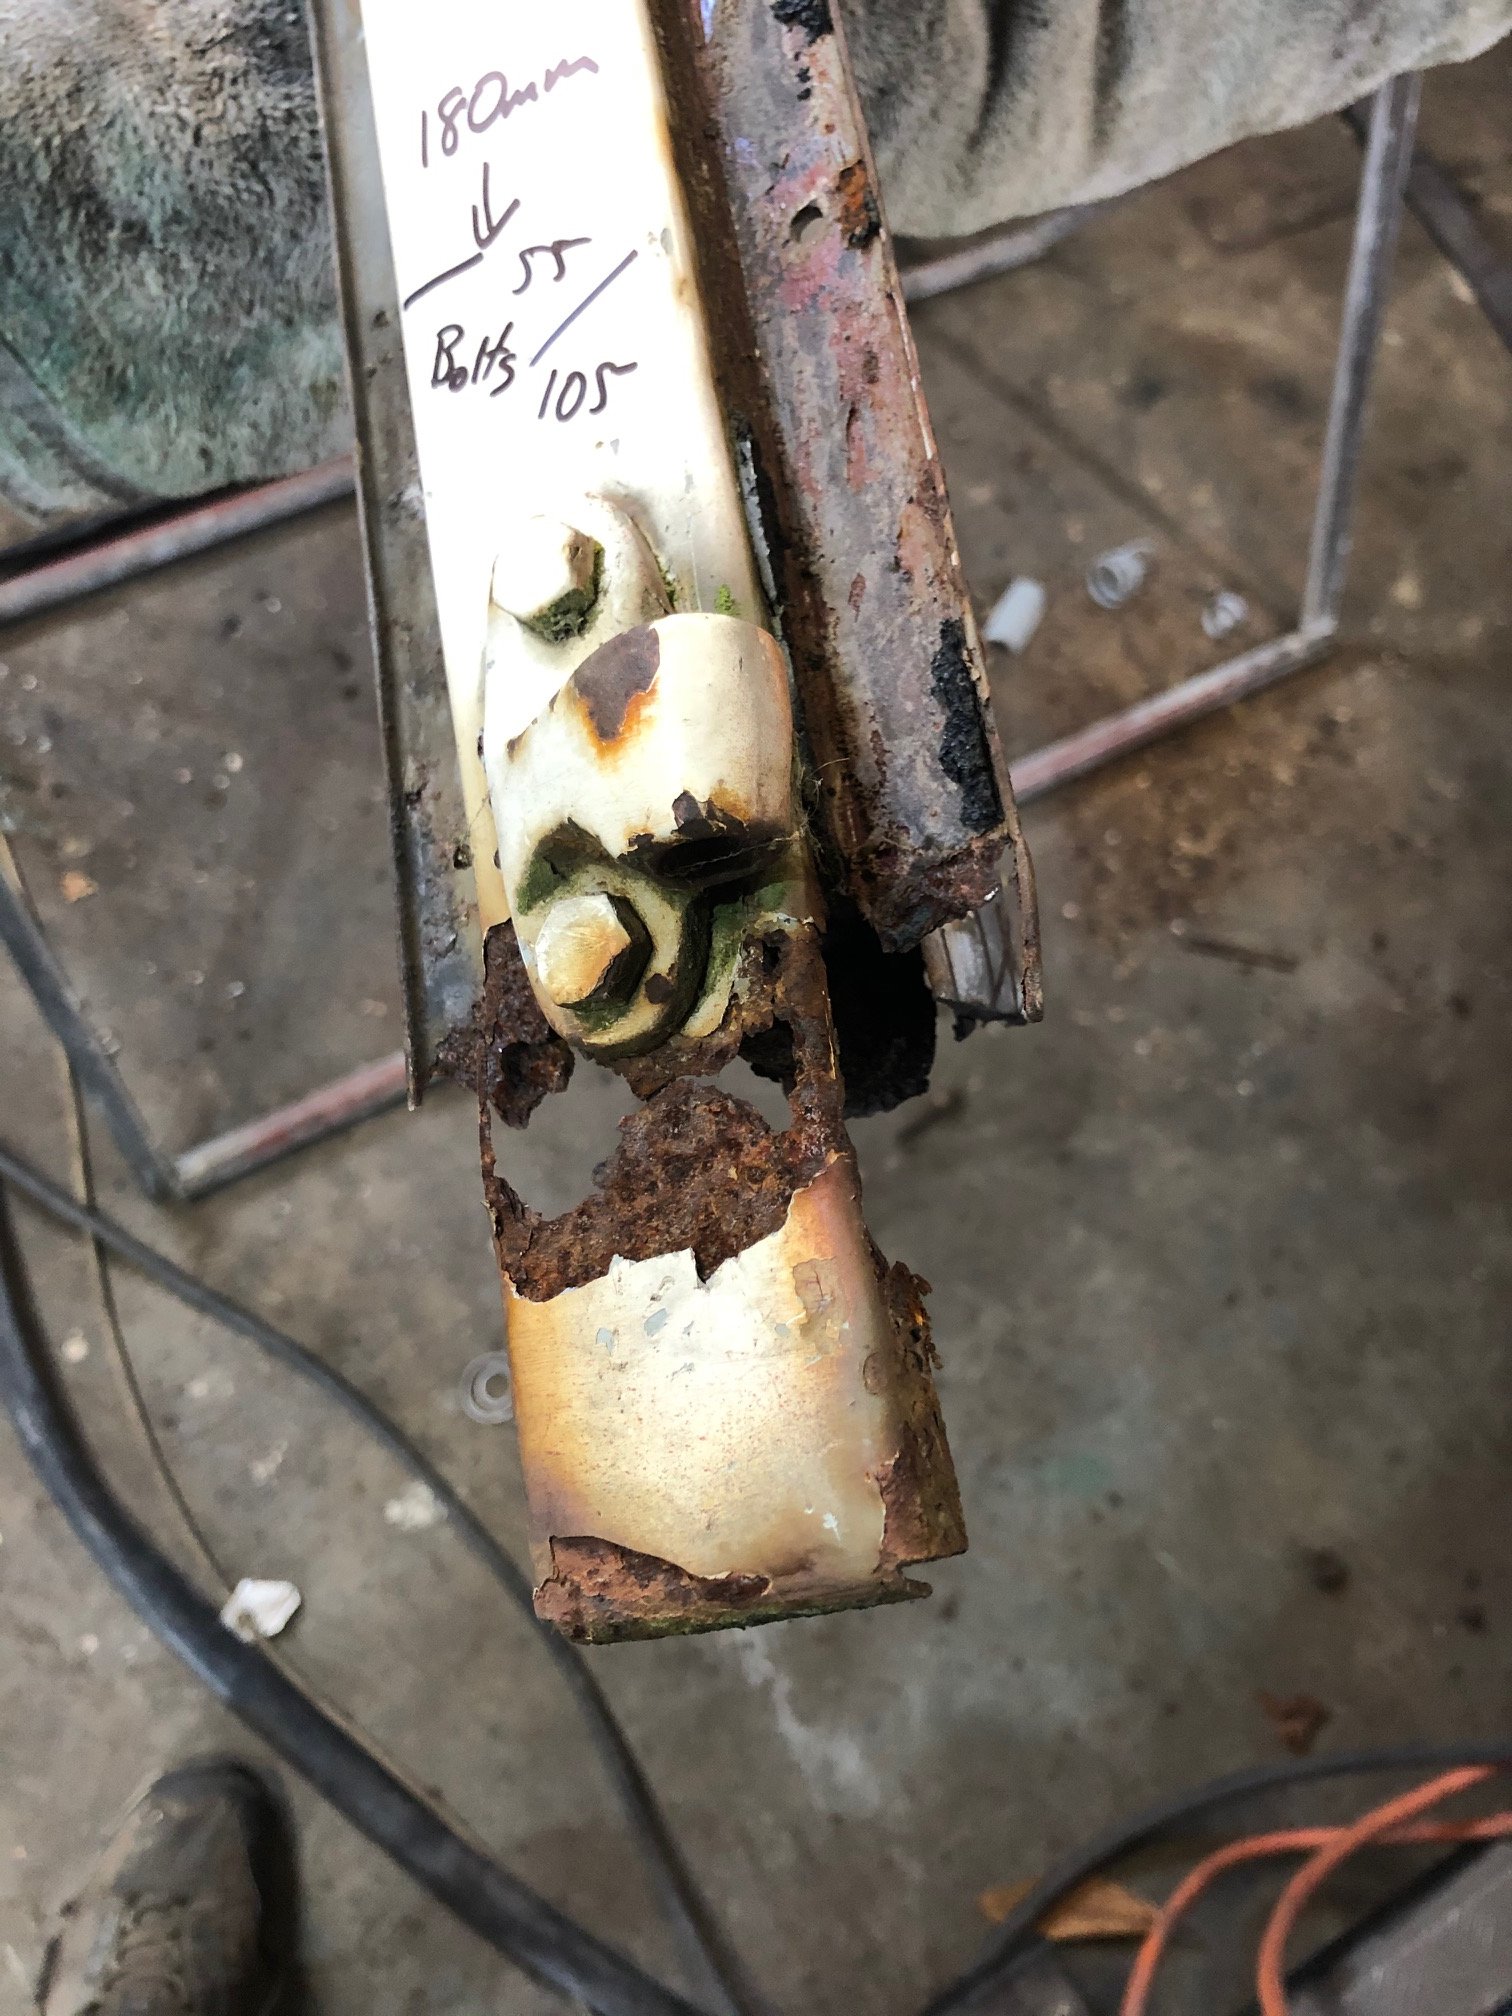
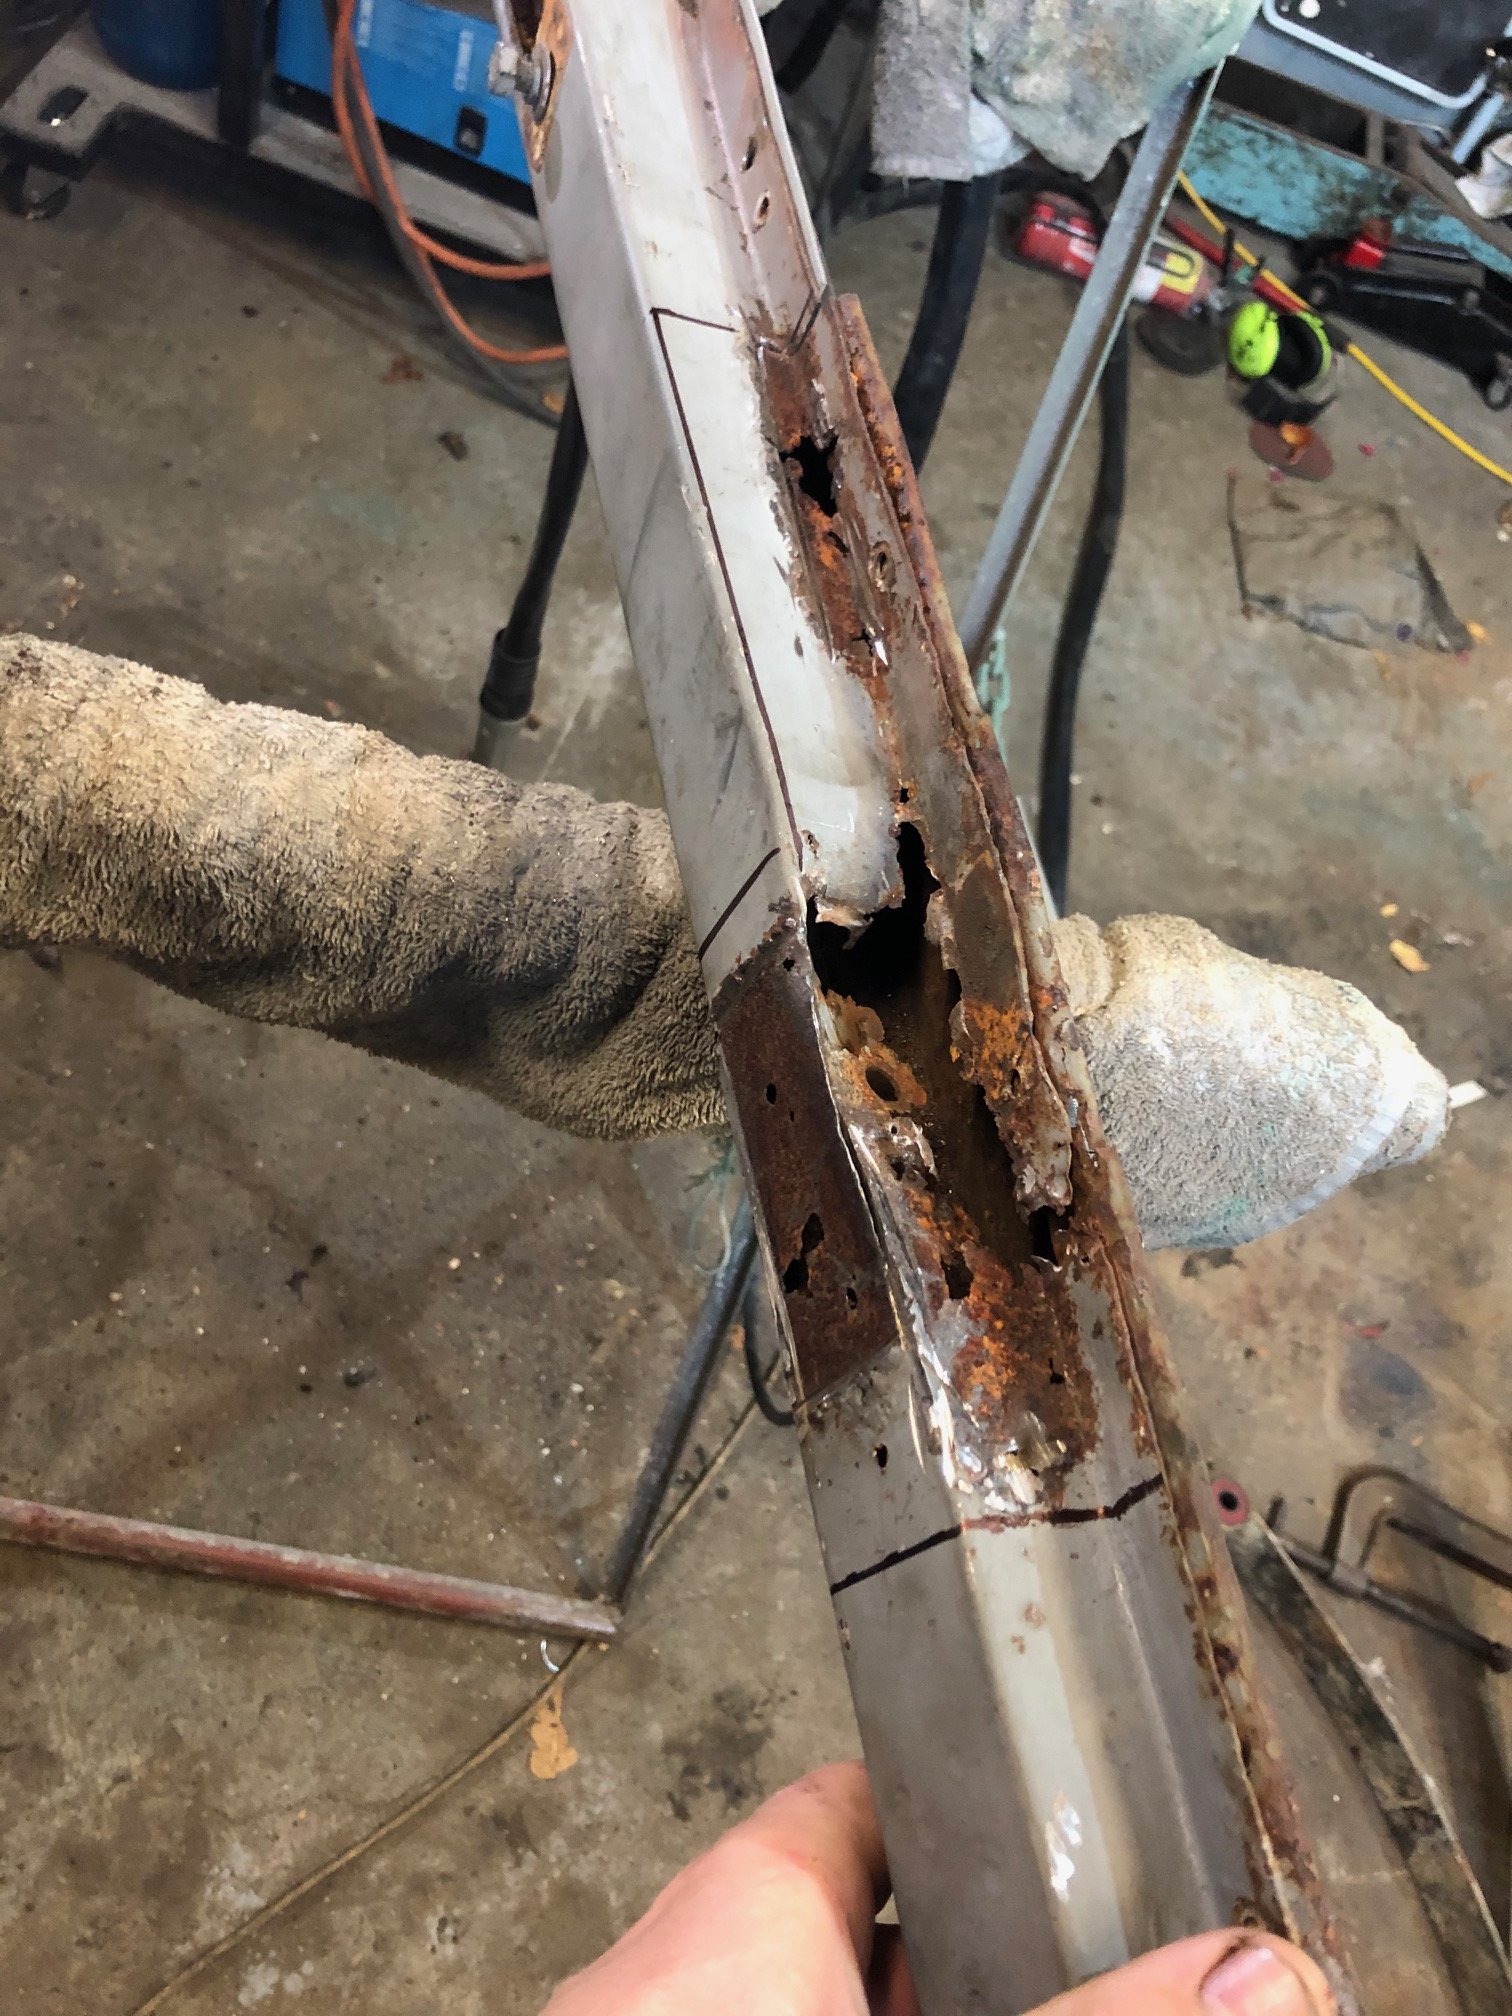
Back on some steel... These B pillars are pretty bad (this one has separated from its sill and both sides of the top of the door frame are rusted through. Cutty cutty, foldy foldy.... Weldy weldy..
-
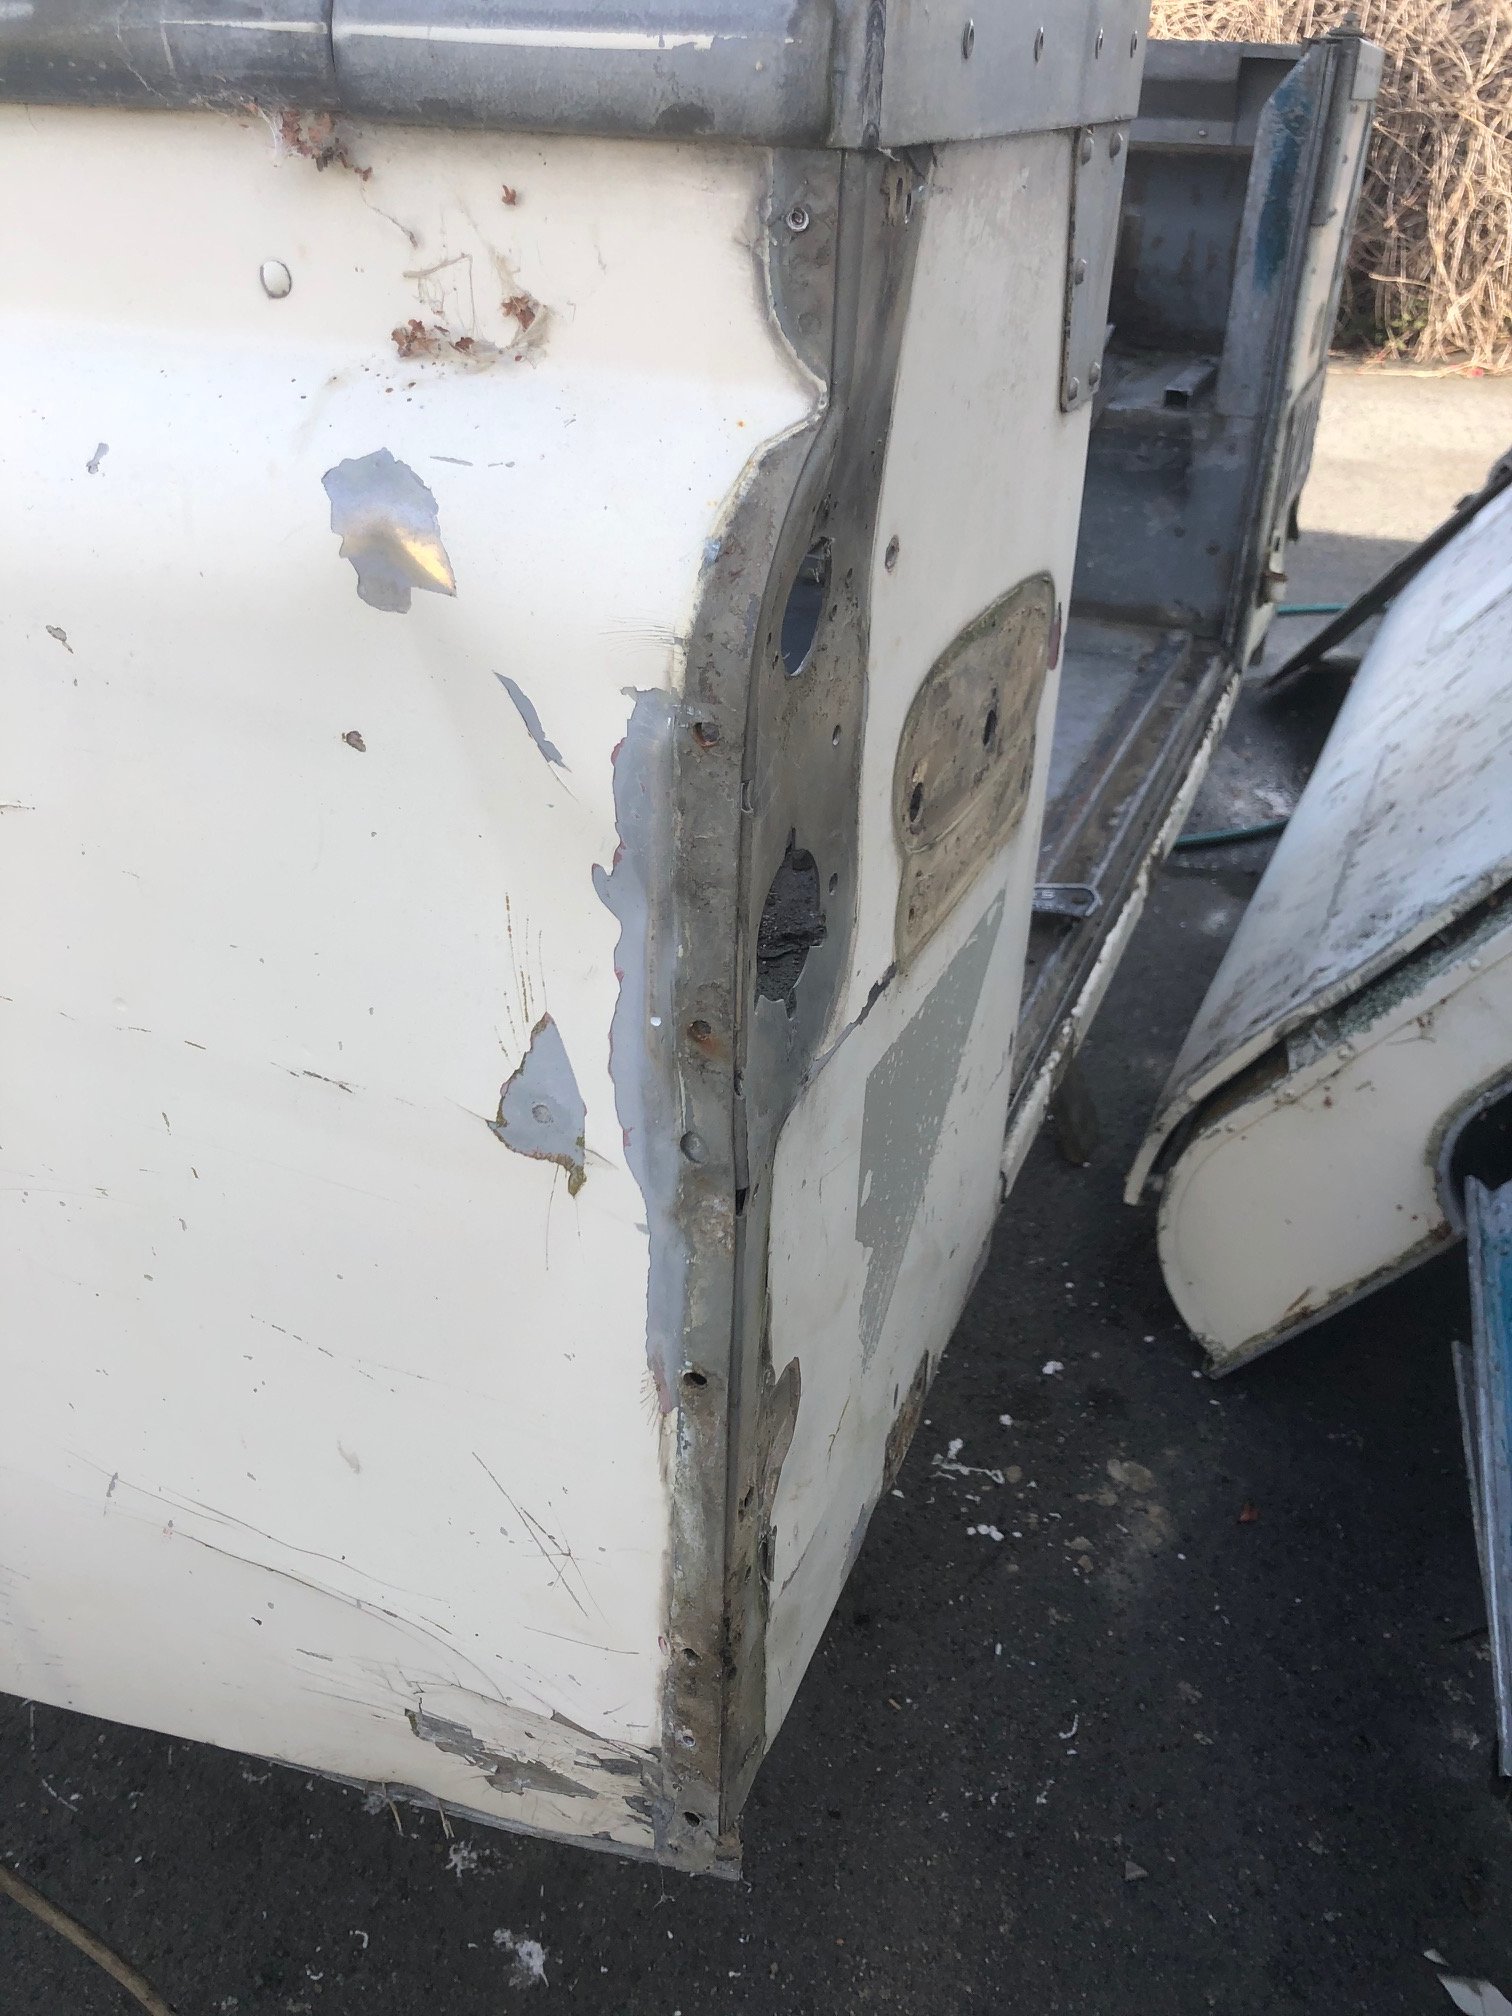
Swapping back to a bit of bodywork now.... This corner of the tub has number of hits, the rear is quite stoved in and it has made quite a bit crease in the side where it joins up to the galve capping. Not to mention a dent across the body line. When I started stripping it I found a ton more bog from older repairs. I loathe doing bog work so will be attempting to get the panels back as good as I can get them using metal work. This old girl will wear its body scars with pride, likewise its going to be used and if I do (when?) I hit something in the bush there's no point having all your filler crack down.... First time I've panel worked alloy. Trying to be super careful not to stretch it more than it is already. Got all of the areas which are braced square first. Then I had to take out the spot welds to shift the fold in the rear section to pull the stretched areas tight. Not perfect but better.... Will do the bottom section when I tip it upside down in the shed.