Adoom
-
Posts
2189 -
Joined
-
Last visited
Everything posted by Adoom
-
Got some more 2.5mm. Zip zap building a box.

- 191 replies
-
- 14
-

-
Yeh, the exhaust smell thing. My bag and jacket would reek of fumes. With STRONG tailwinds over the Remutakas the stinky fumes catch up. I don't think it uses lots of fuel. Less than the 2zzge.
-
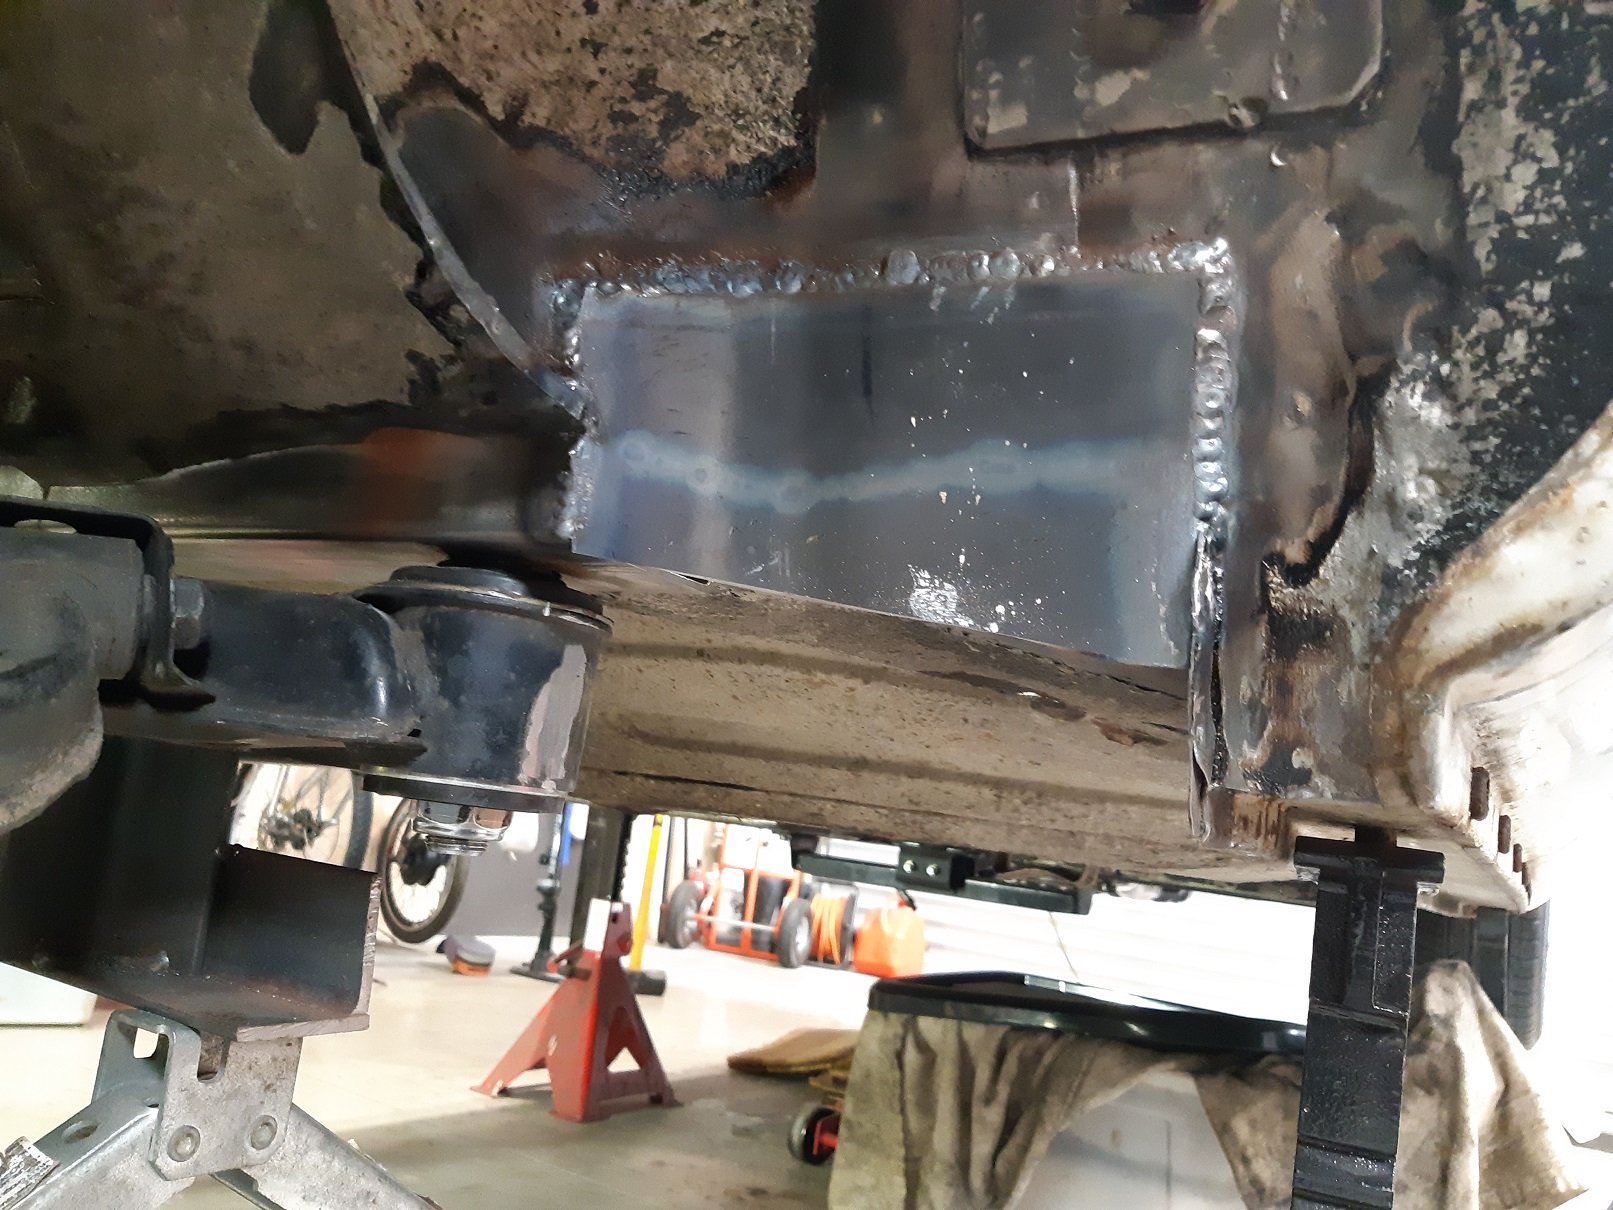
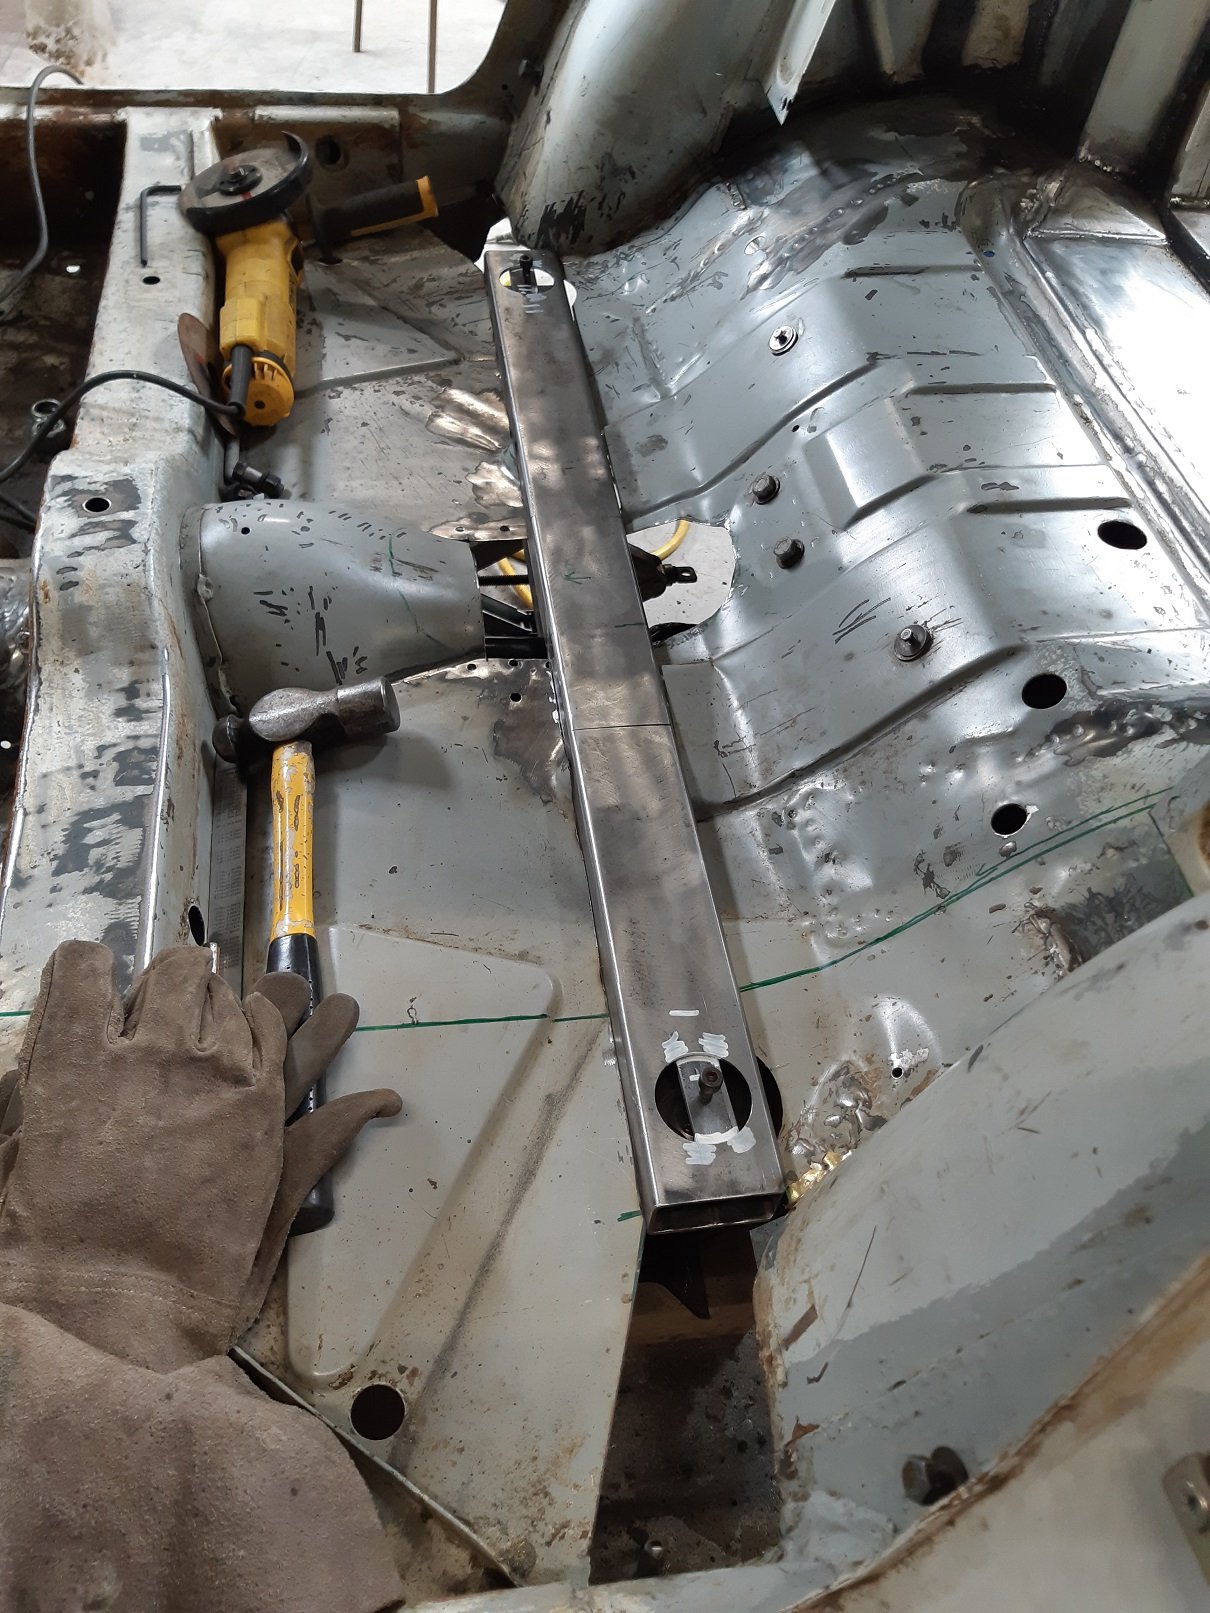
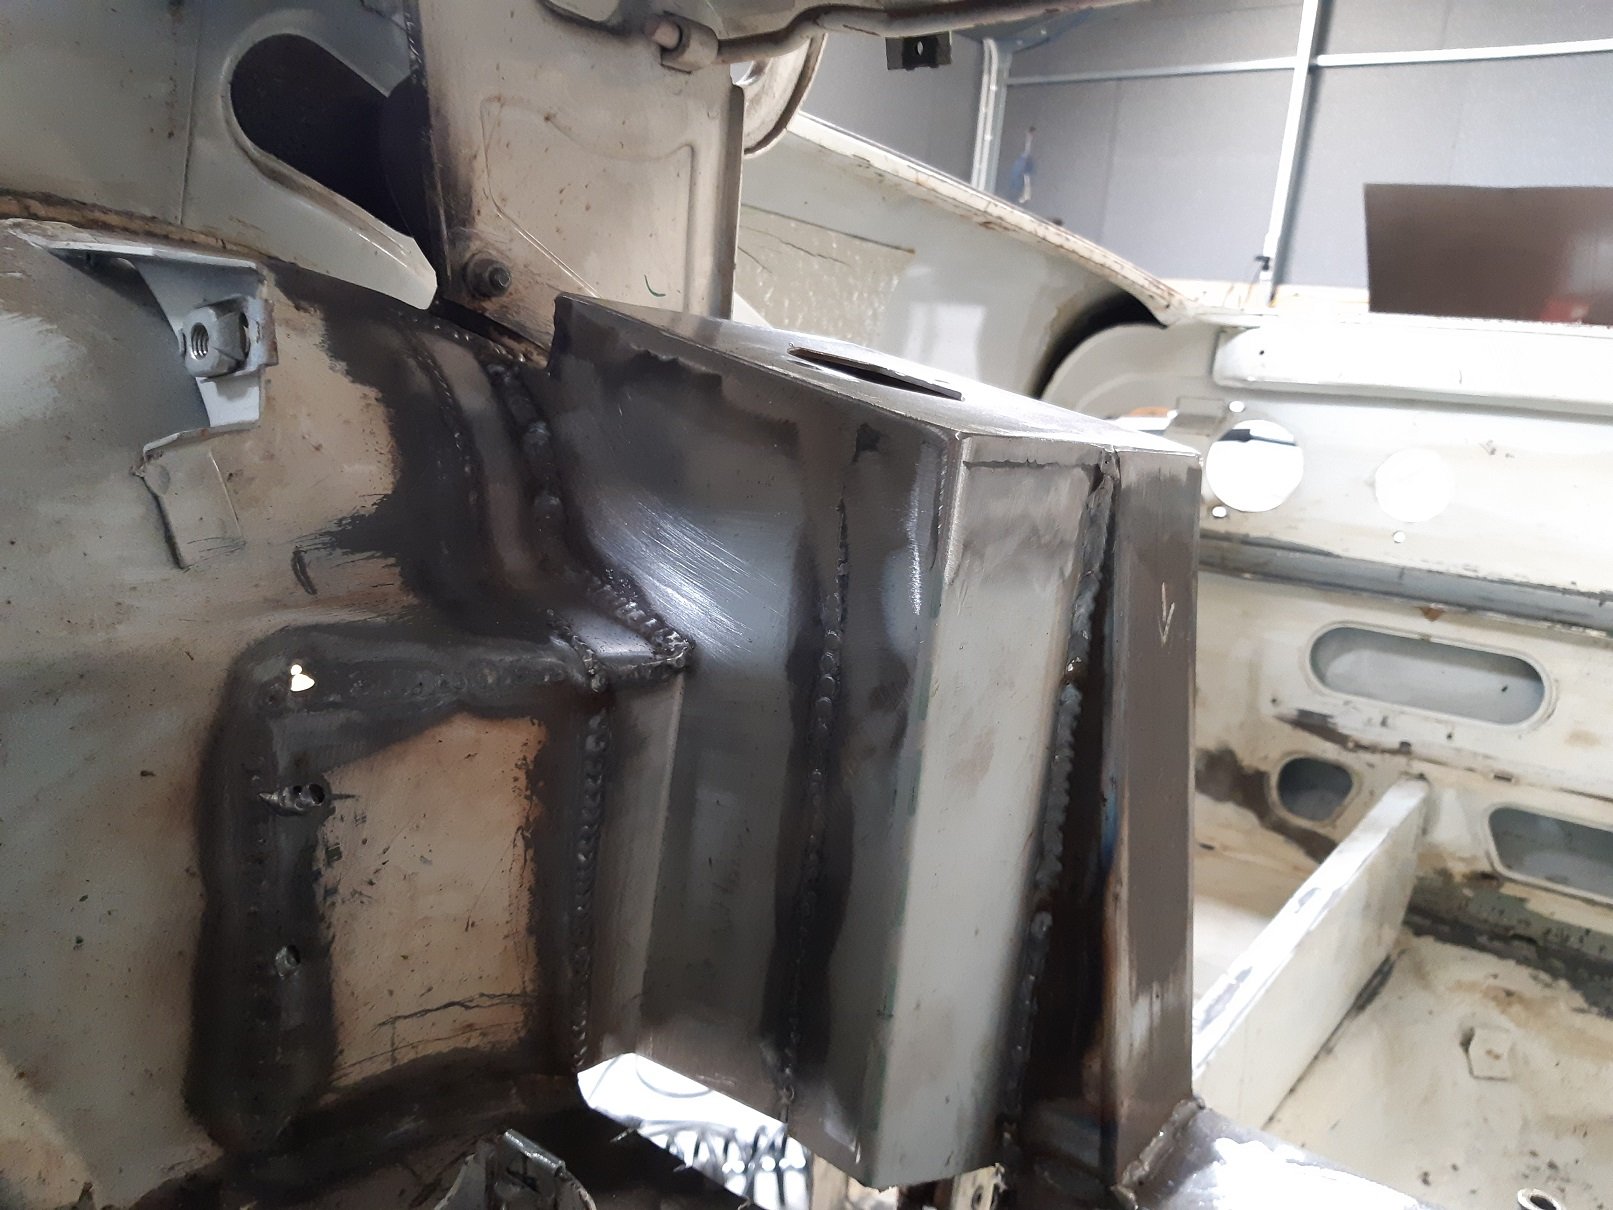
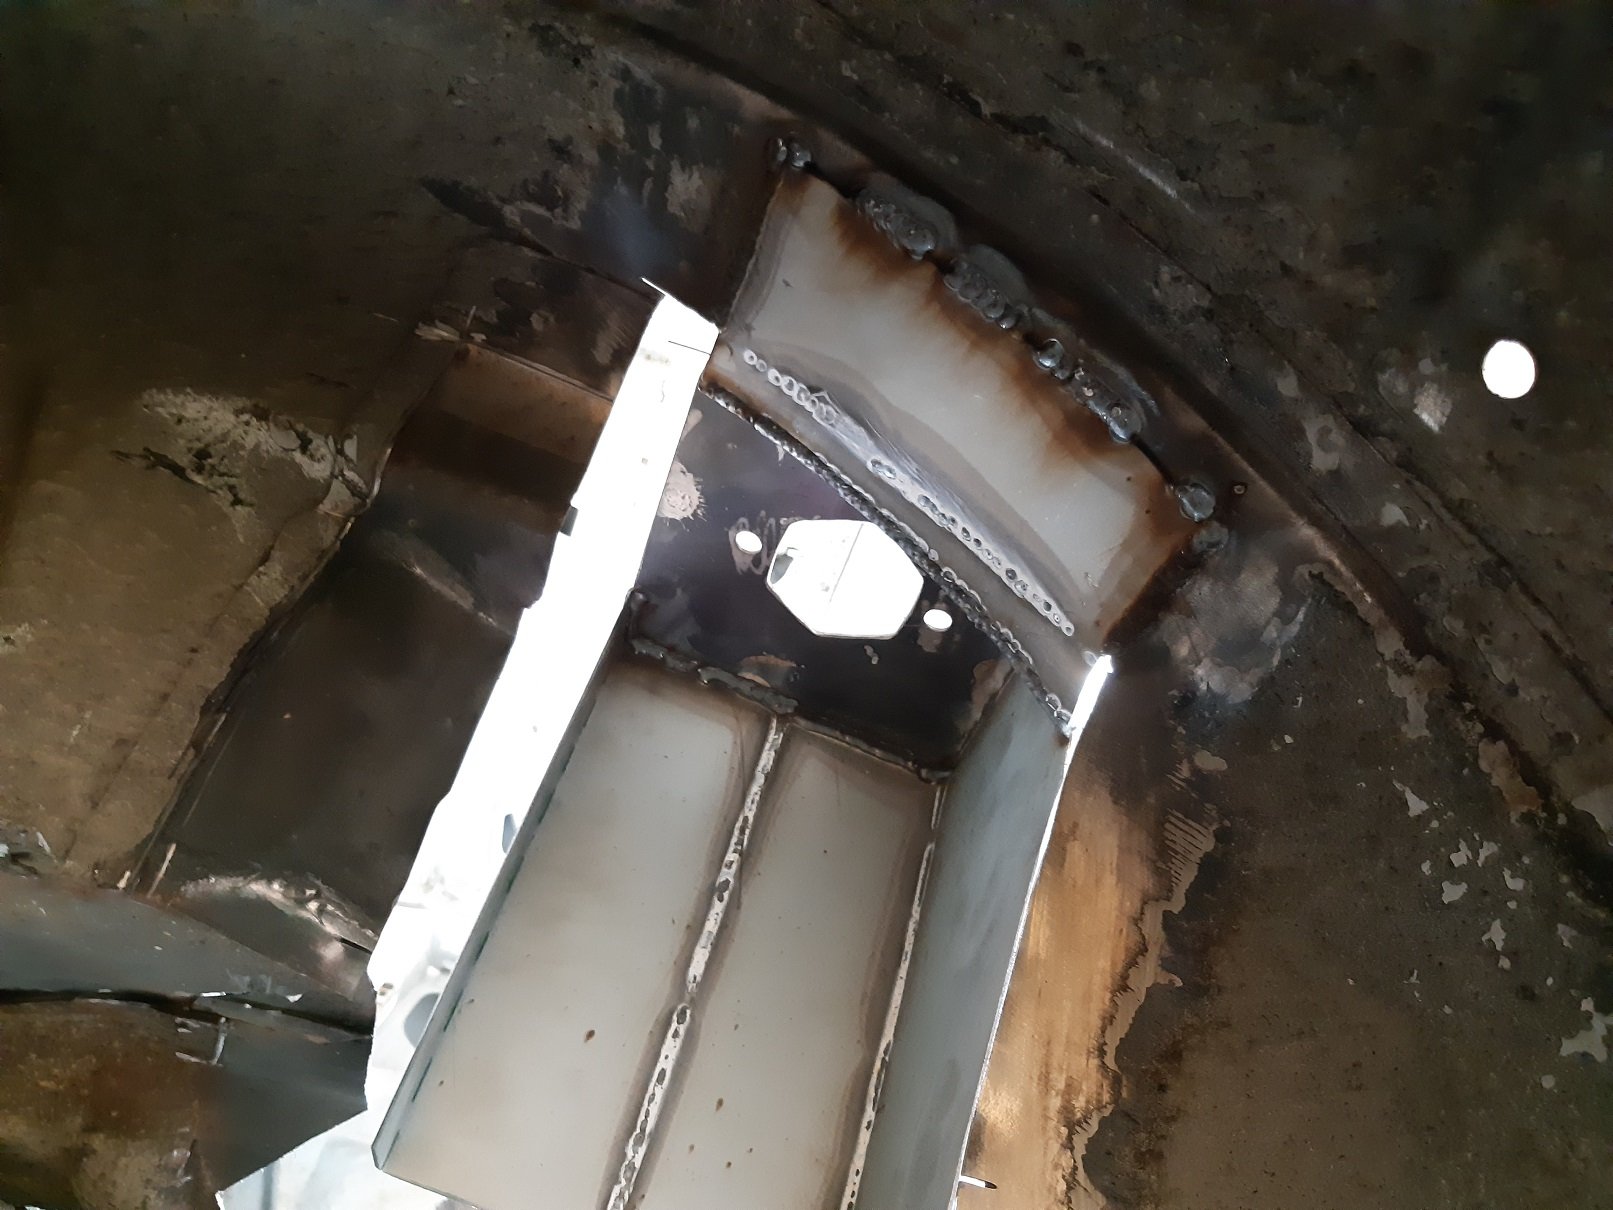
Building the cross member out to the sills. I'm using 2.5mm to match the wall thickness of the cross member. Possibly overkill... The floor is a little lower where it meets the sill, so the ends of the cross member needed to angle down a little.
- 191 replies
-
- 11
-
-
Is your gas turned up too high? Have you tried turning it down?
-
Brakekleen is not recommended for degreasing prior to welding because Tetrachloroethylene, when heated to temperatures you get in welding creates Phosgene gas. Phosgene gas is really not good for you... it was used as a chemical weapon.
-
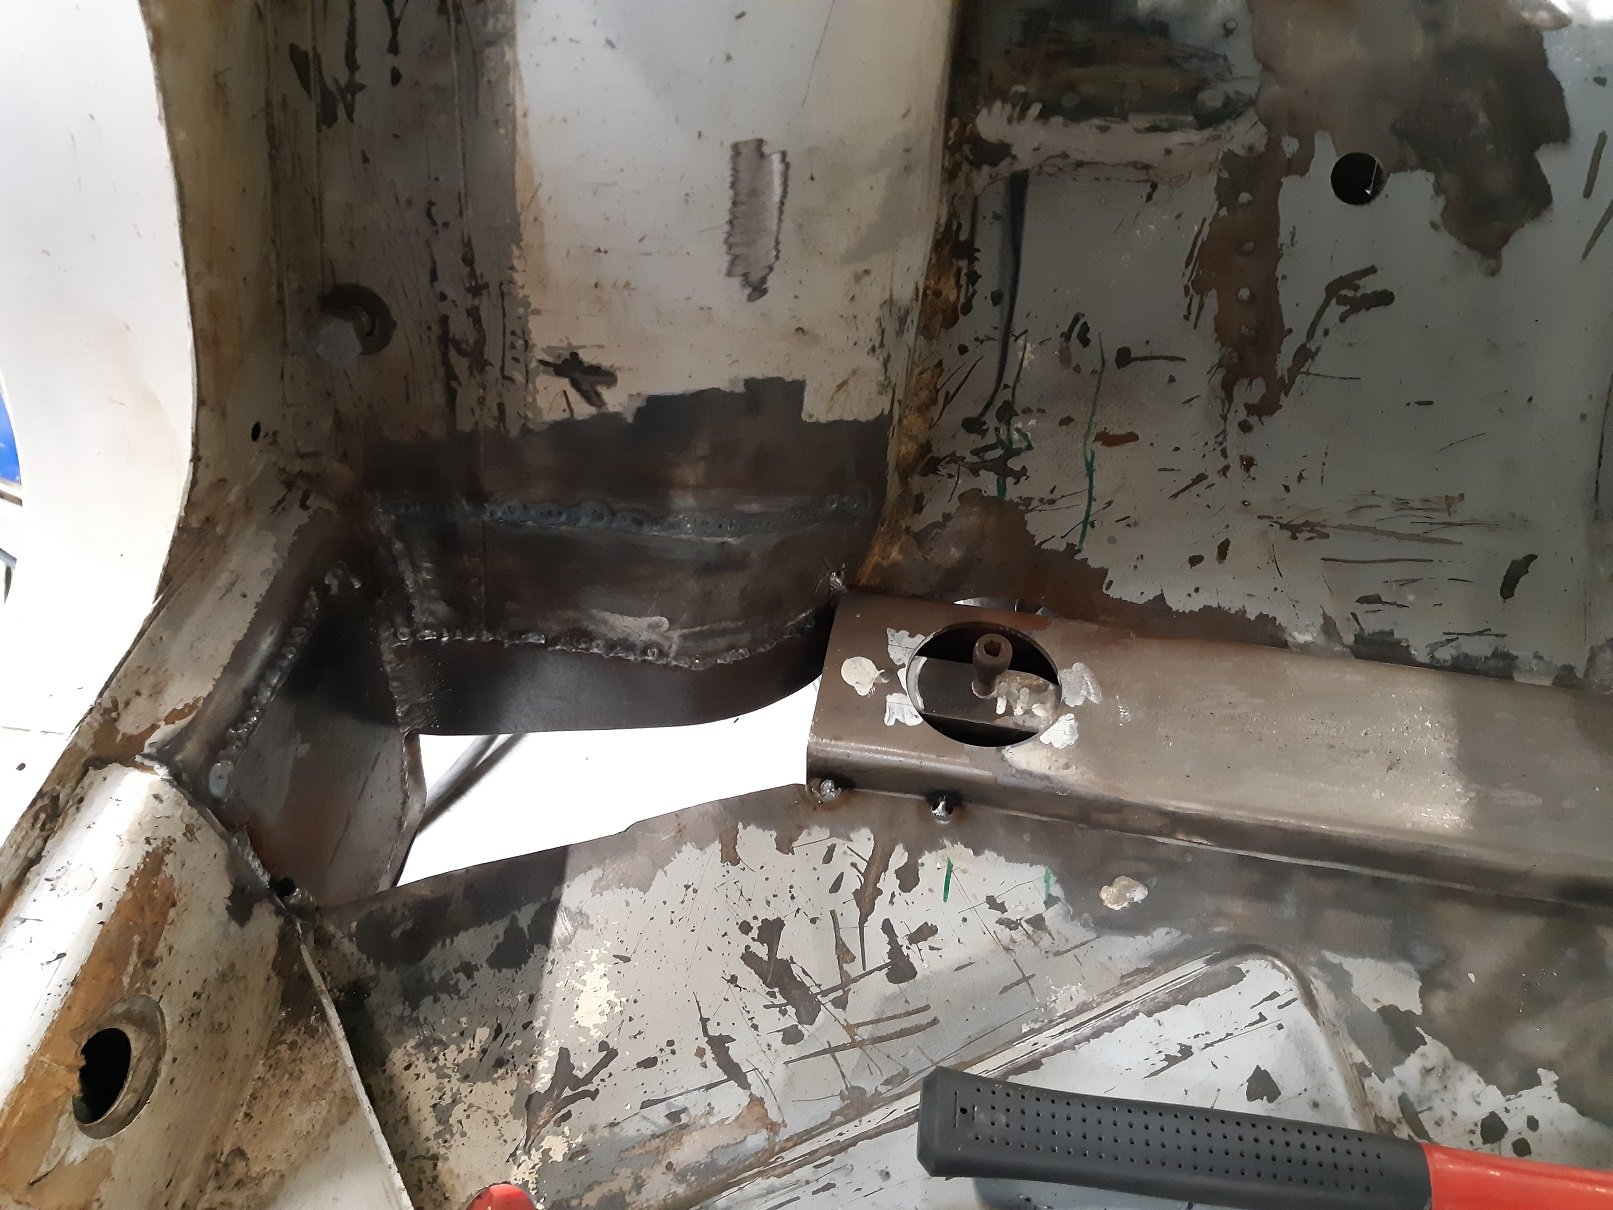
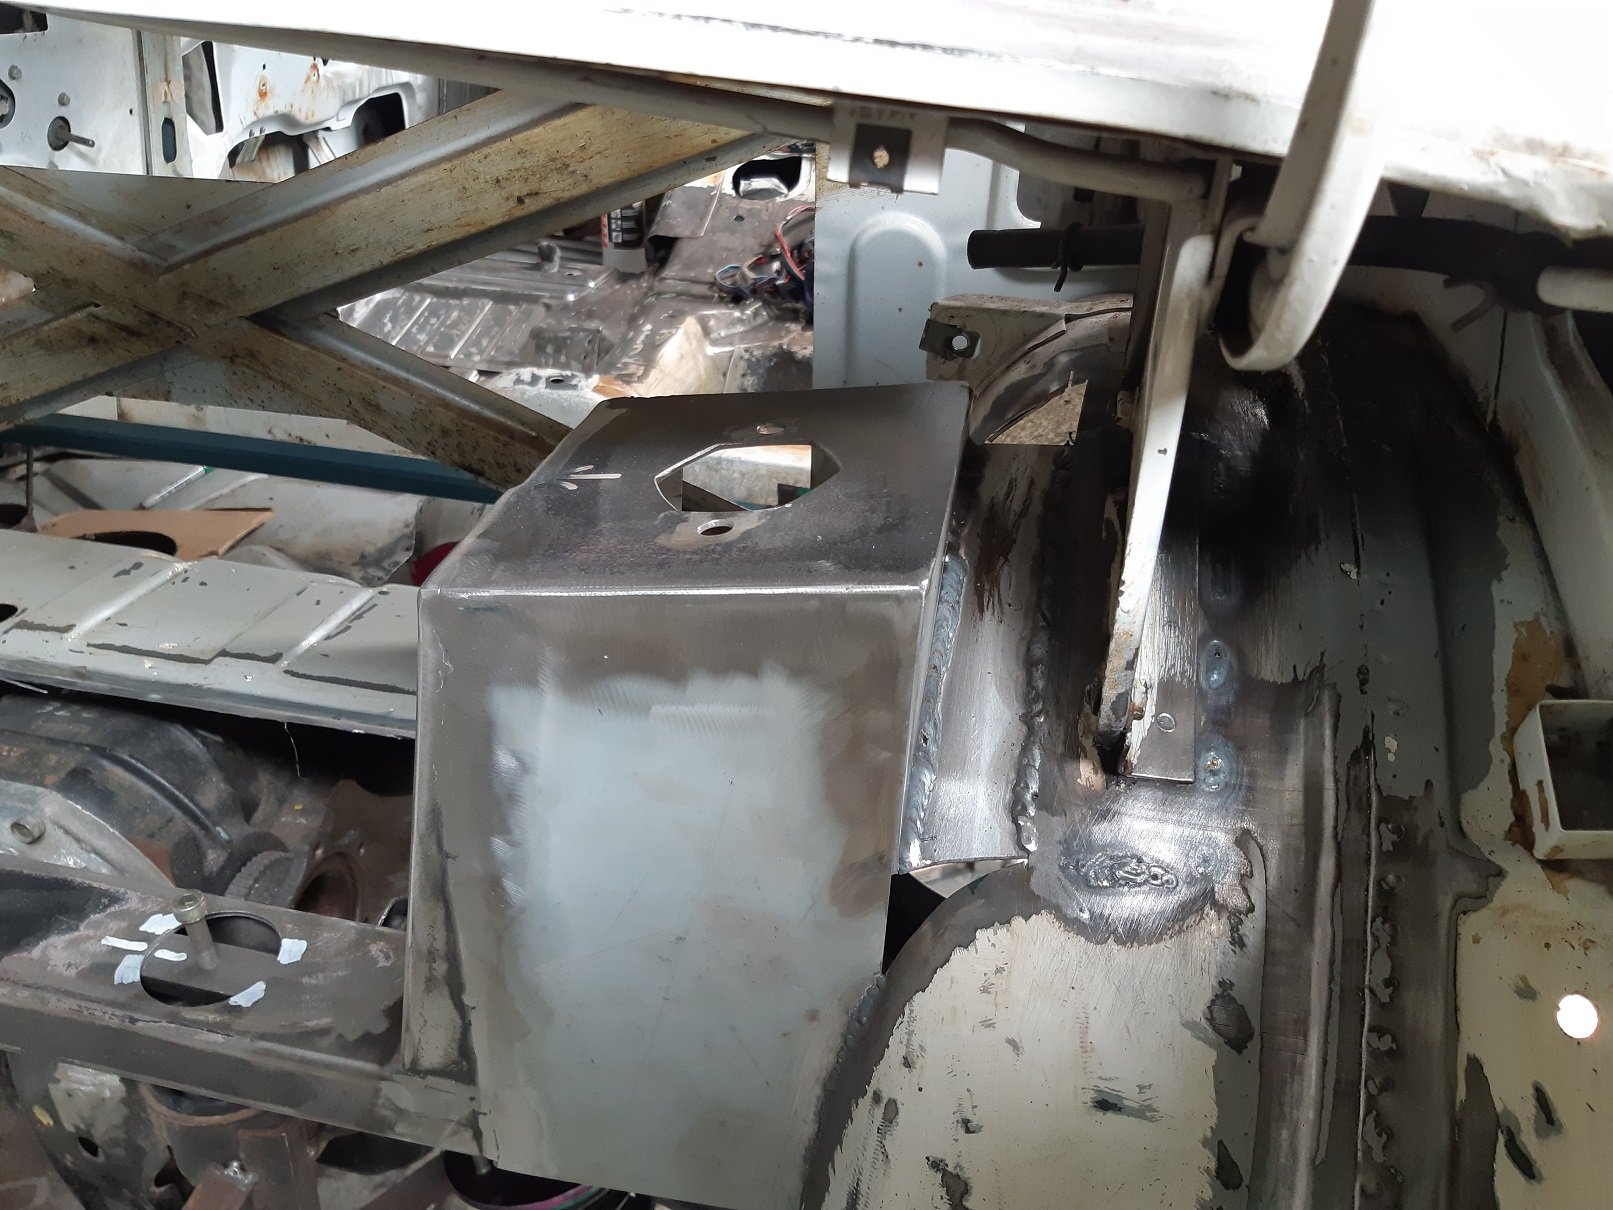
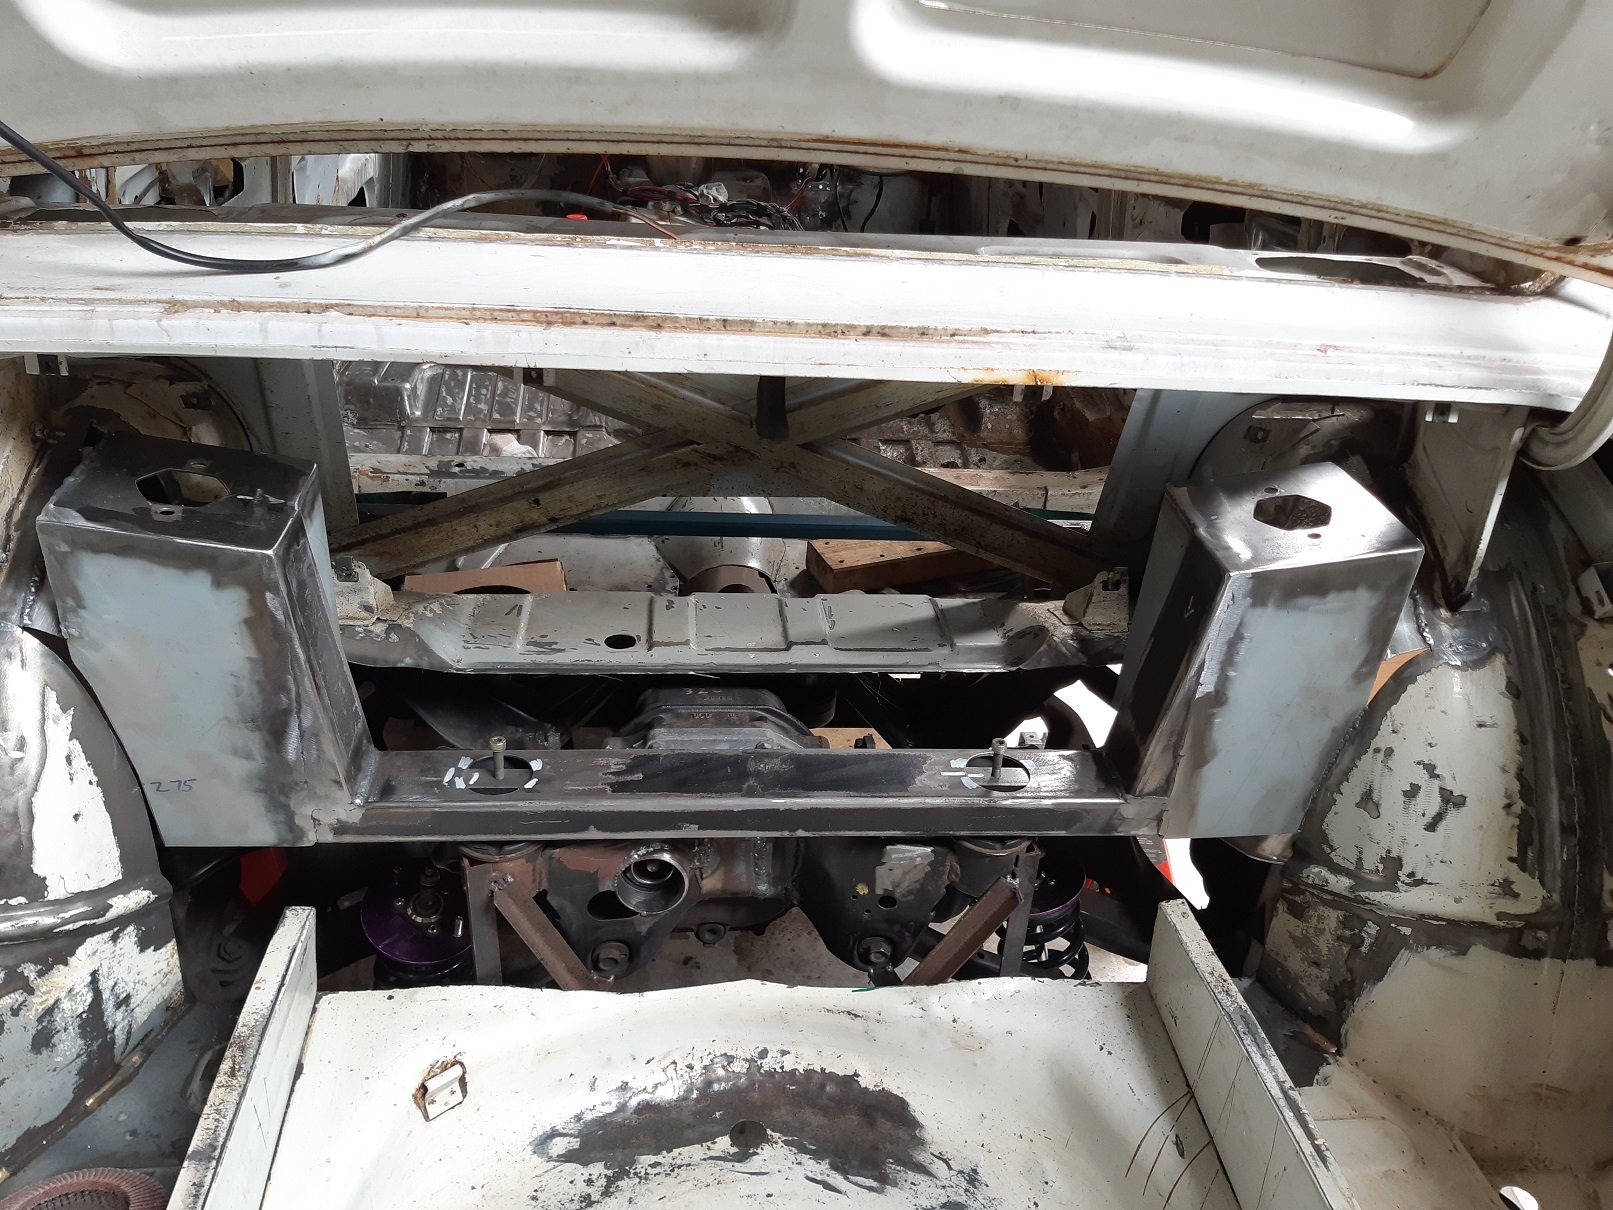
I discovered that my original plan to create internal chassis rails to support the front subframe mounts was going to intrude far too much into the seat base. New plan is to make another cross member that ties in with the sills and leading edge of the wheel well. There will be a hump in it for the driveshaft. Oh yeh. I got a driveshaft made.
- 191 replies
-
- 16
-
-
Does your Hornet smell like it runs really rich? Mine does. Apparently it's fairly common in the CB900.
-
Both sides done now. I also removed the brackets for the fuel tank. I'll use straps for the new tank. Old one won't fit anymore. New one will be about 65L, hopefully big enough.
- 191 replies
-
- 11
-
-
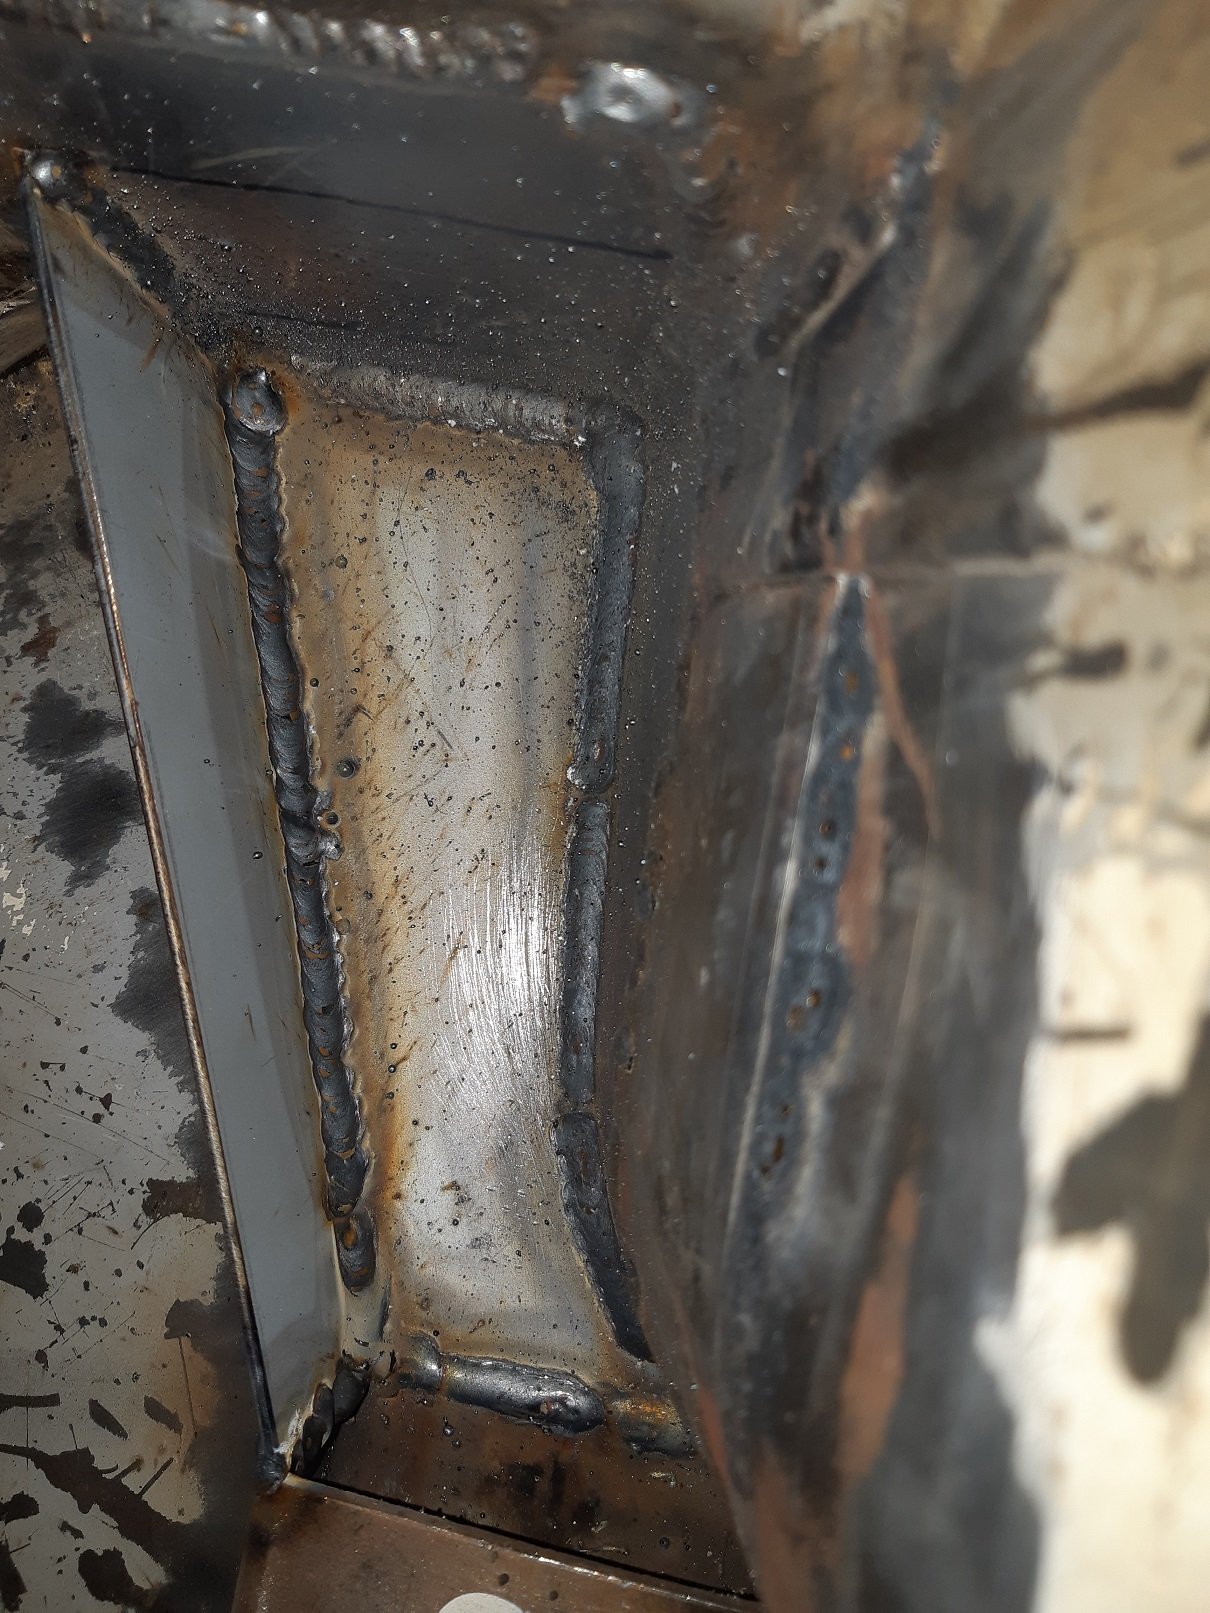
Took a bit of thinking to work out a neat way to fill the last hole on this side. I'll linish back some of these welds, they are welded both sides. S Still got this side to do.
-
For peace of mind, I got the plum bob and long straight edges out and did some measuring. The subframe is centered left/right across the car measuring from the wheel arch. Yay. And, since there is no suspension at the front, I used the front cross member mounting holes to make two points on the floor and draw a line through them, then measure back to the spots I made for each rear wheel center. Only 5mm difference side to side. Which I think is about 0.05 degrees. The two points I took from the front were not very far apart, so drawing a line through them would have exaggerated any errors, so I think 5mm is not bad. It is a 70's triumph after all.
- 191 replies
-
- 10
-
-
Cut cut bend bend weld weld. And filled some holes.
- 191 replies
-
- 13
-
-
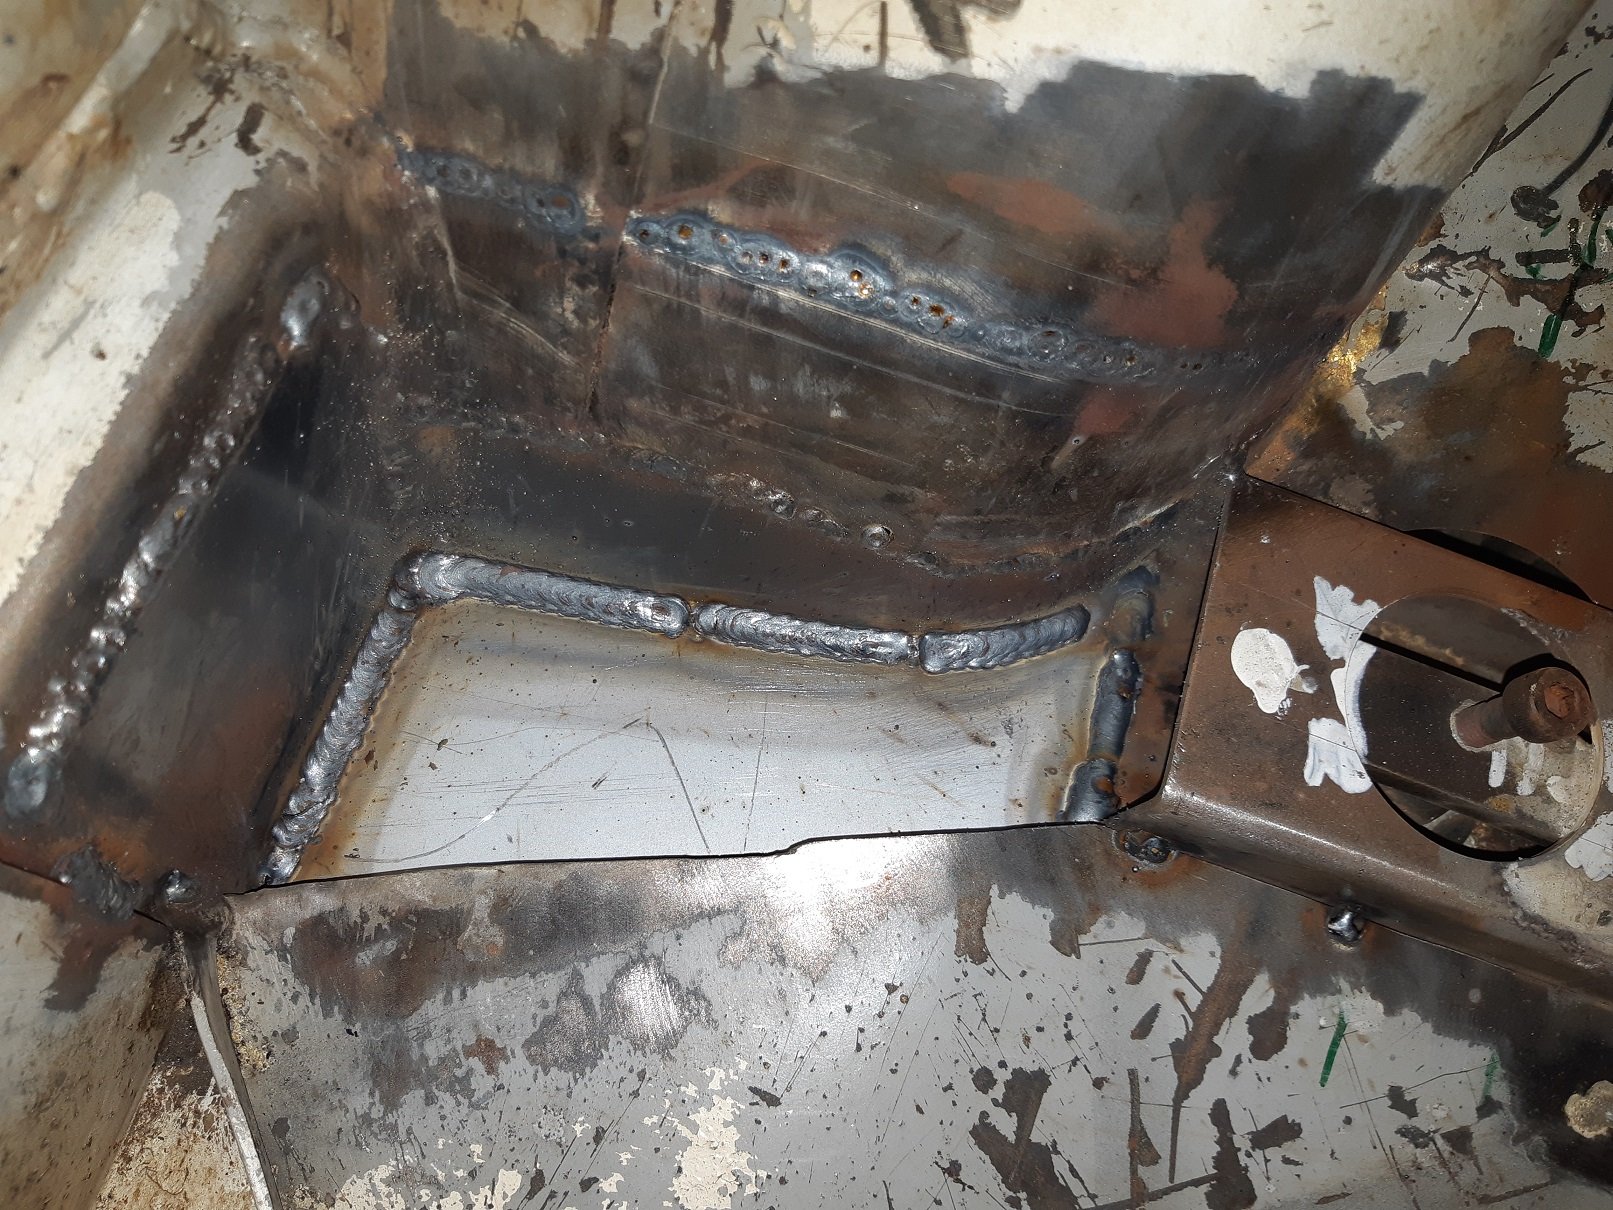
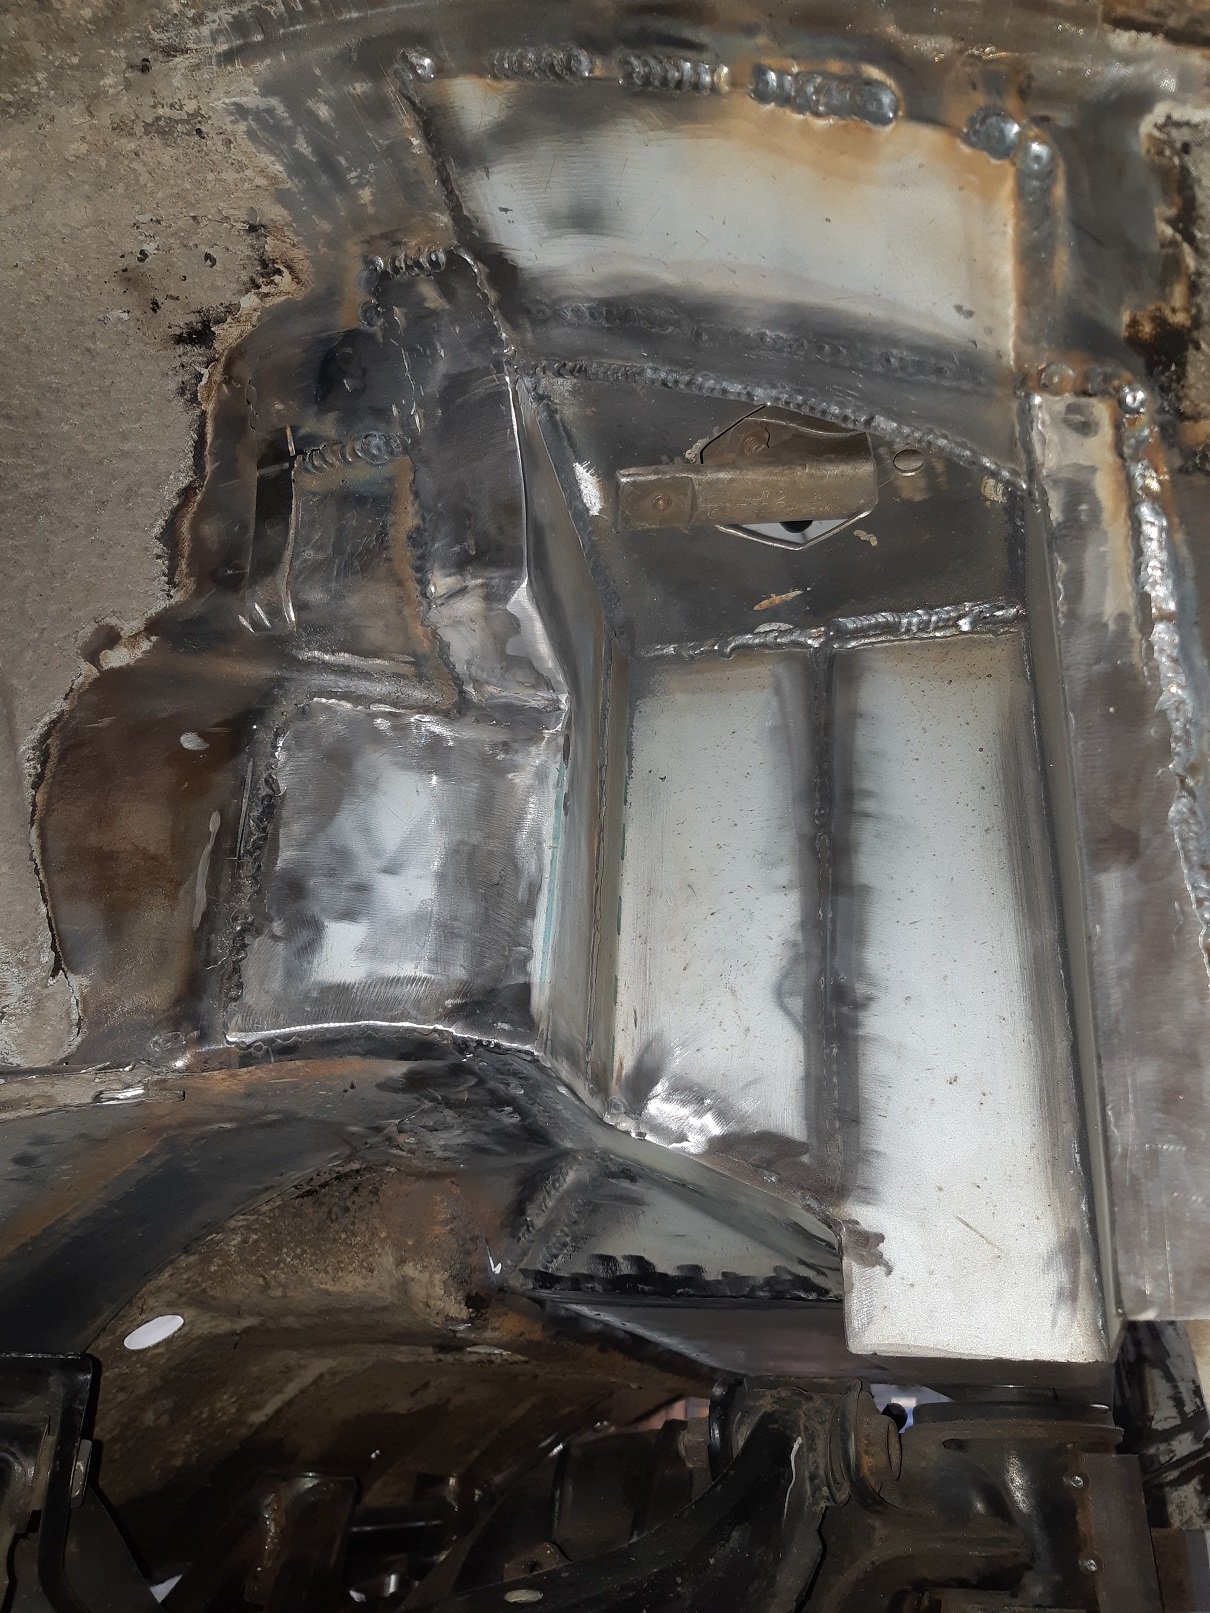
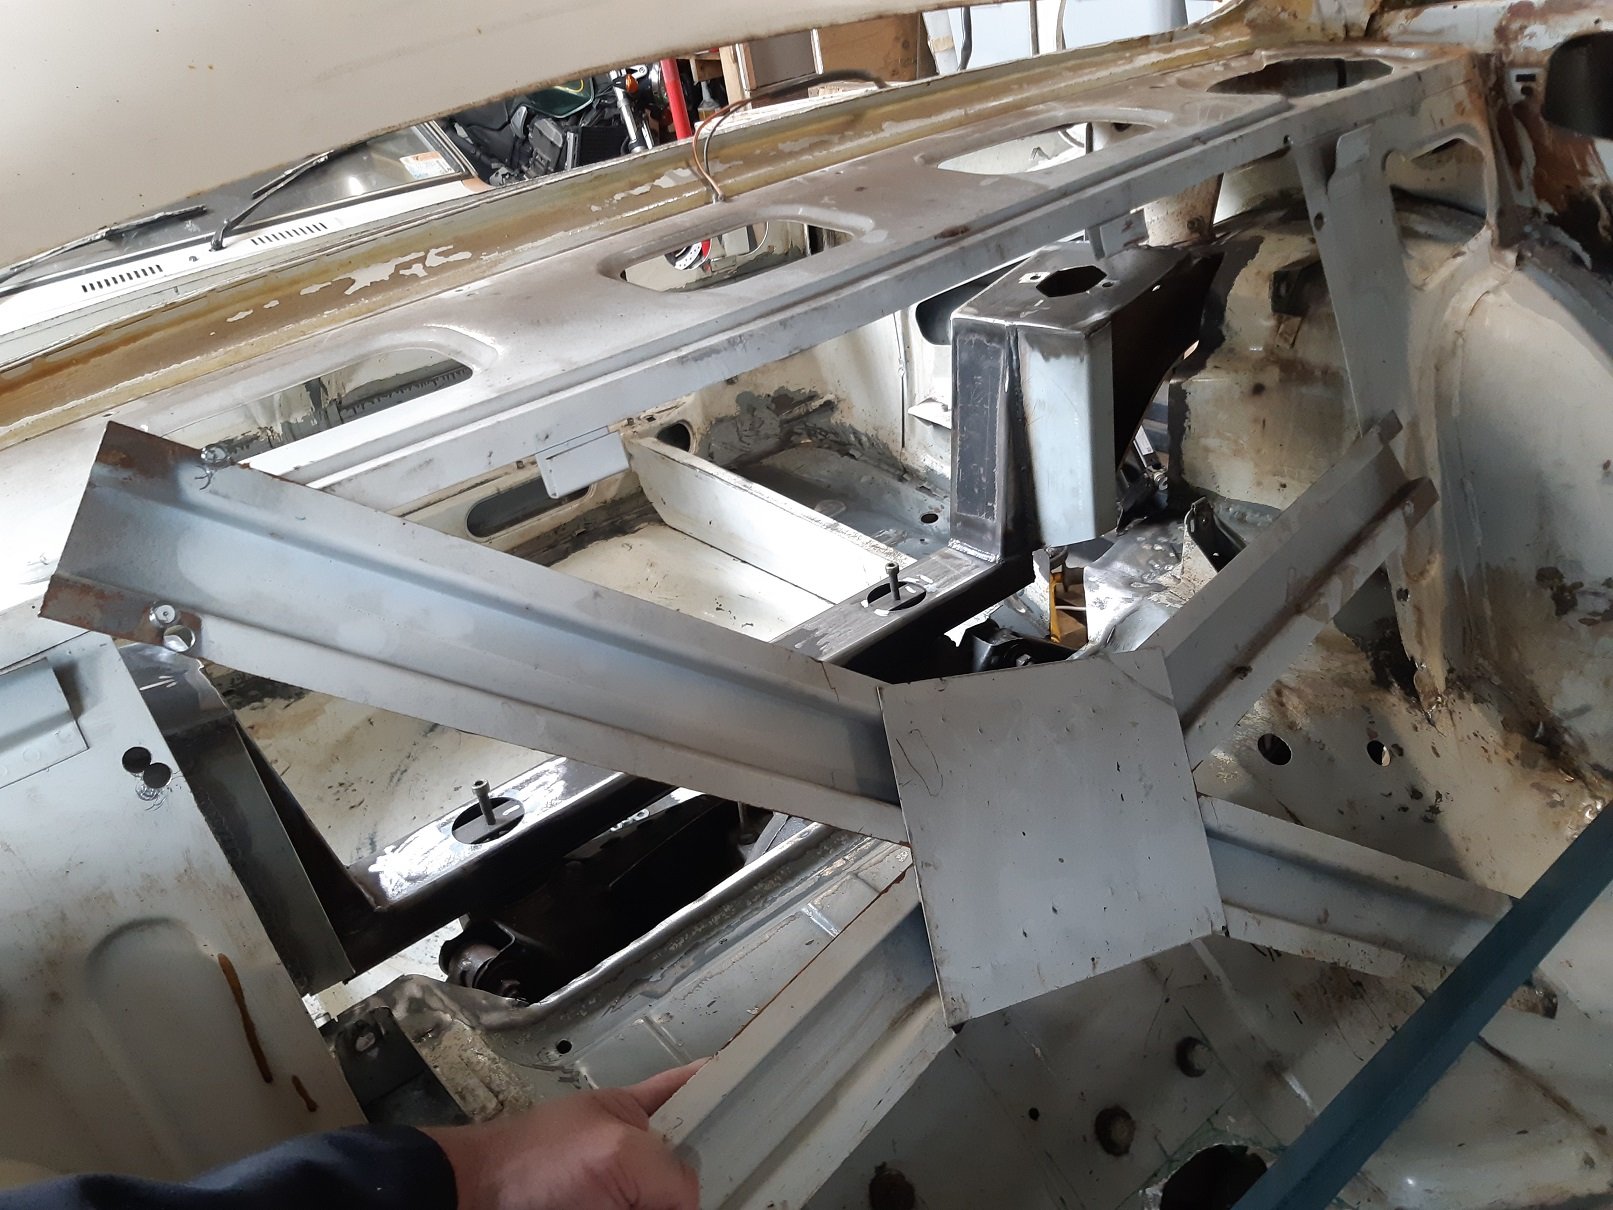
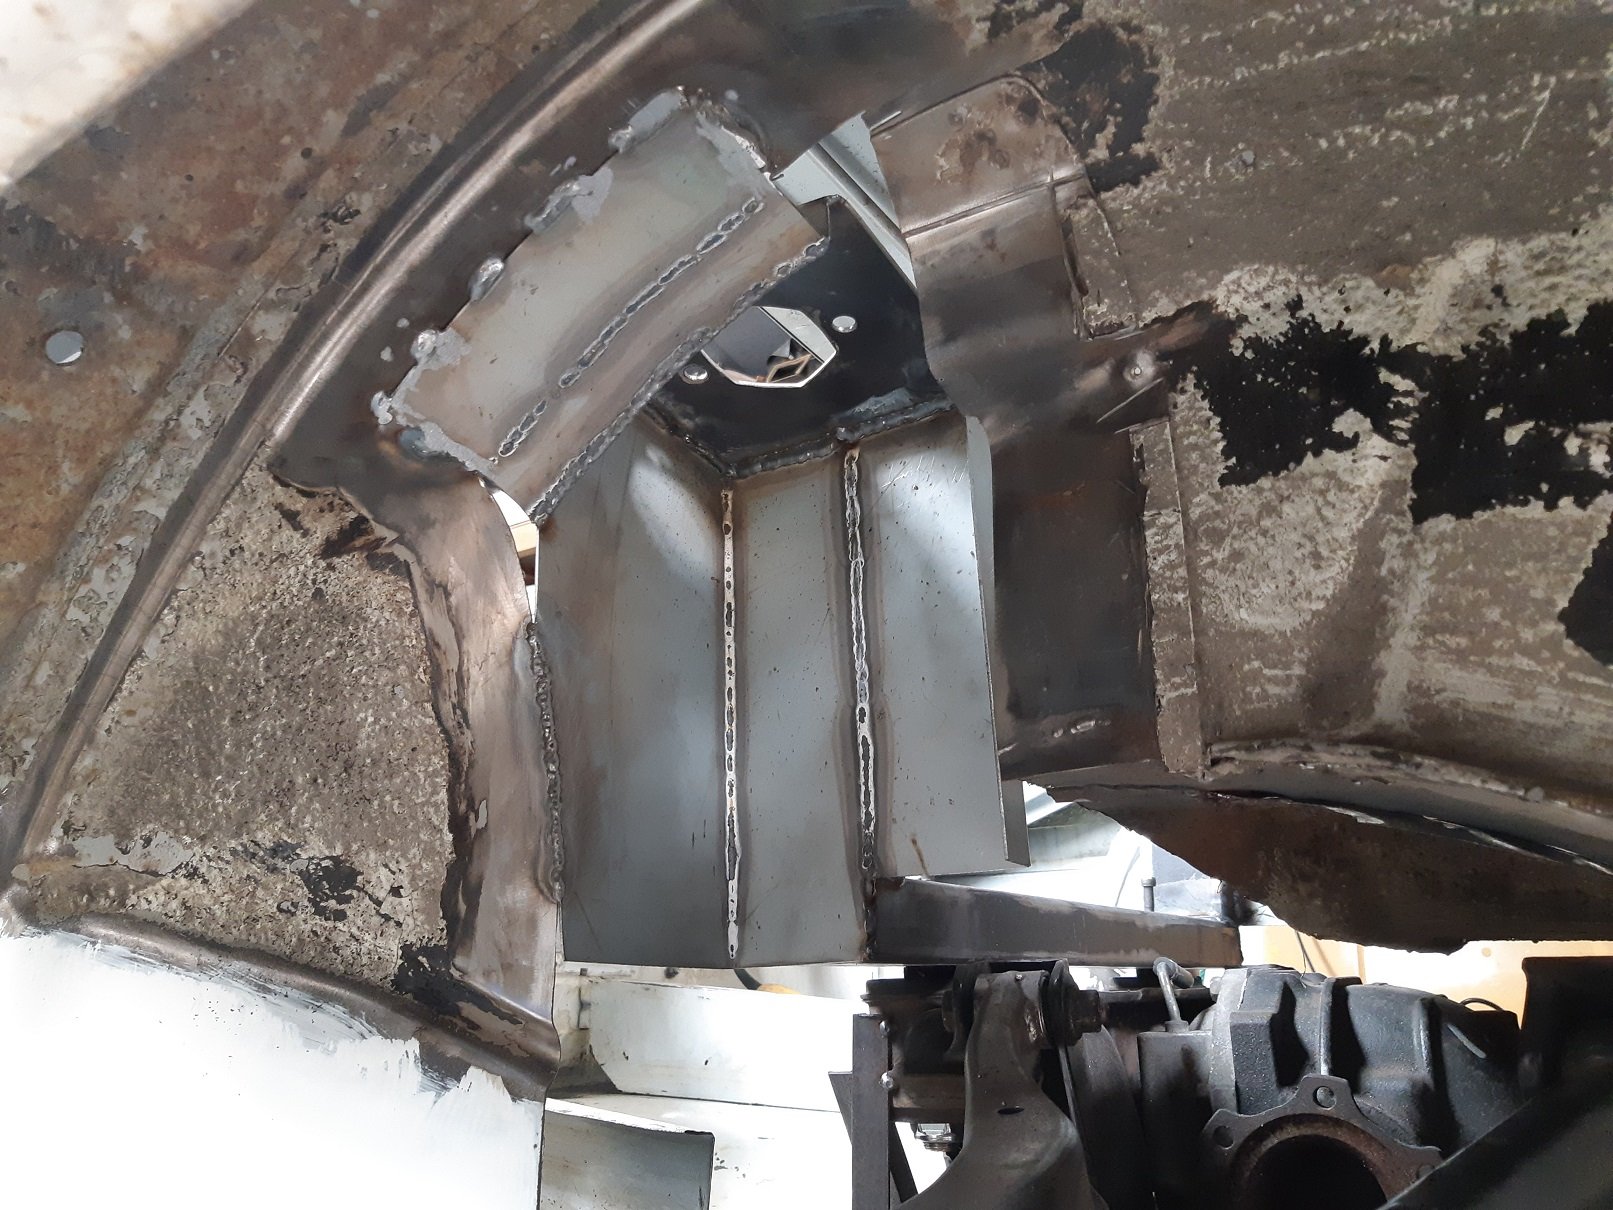
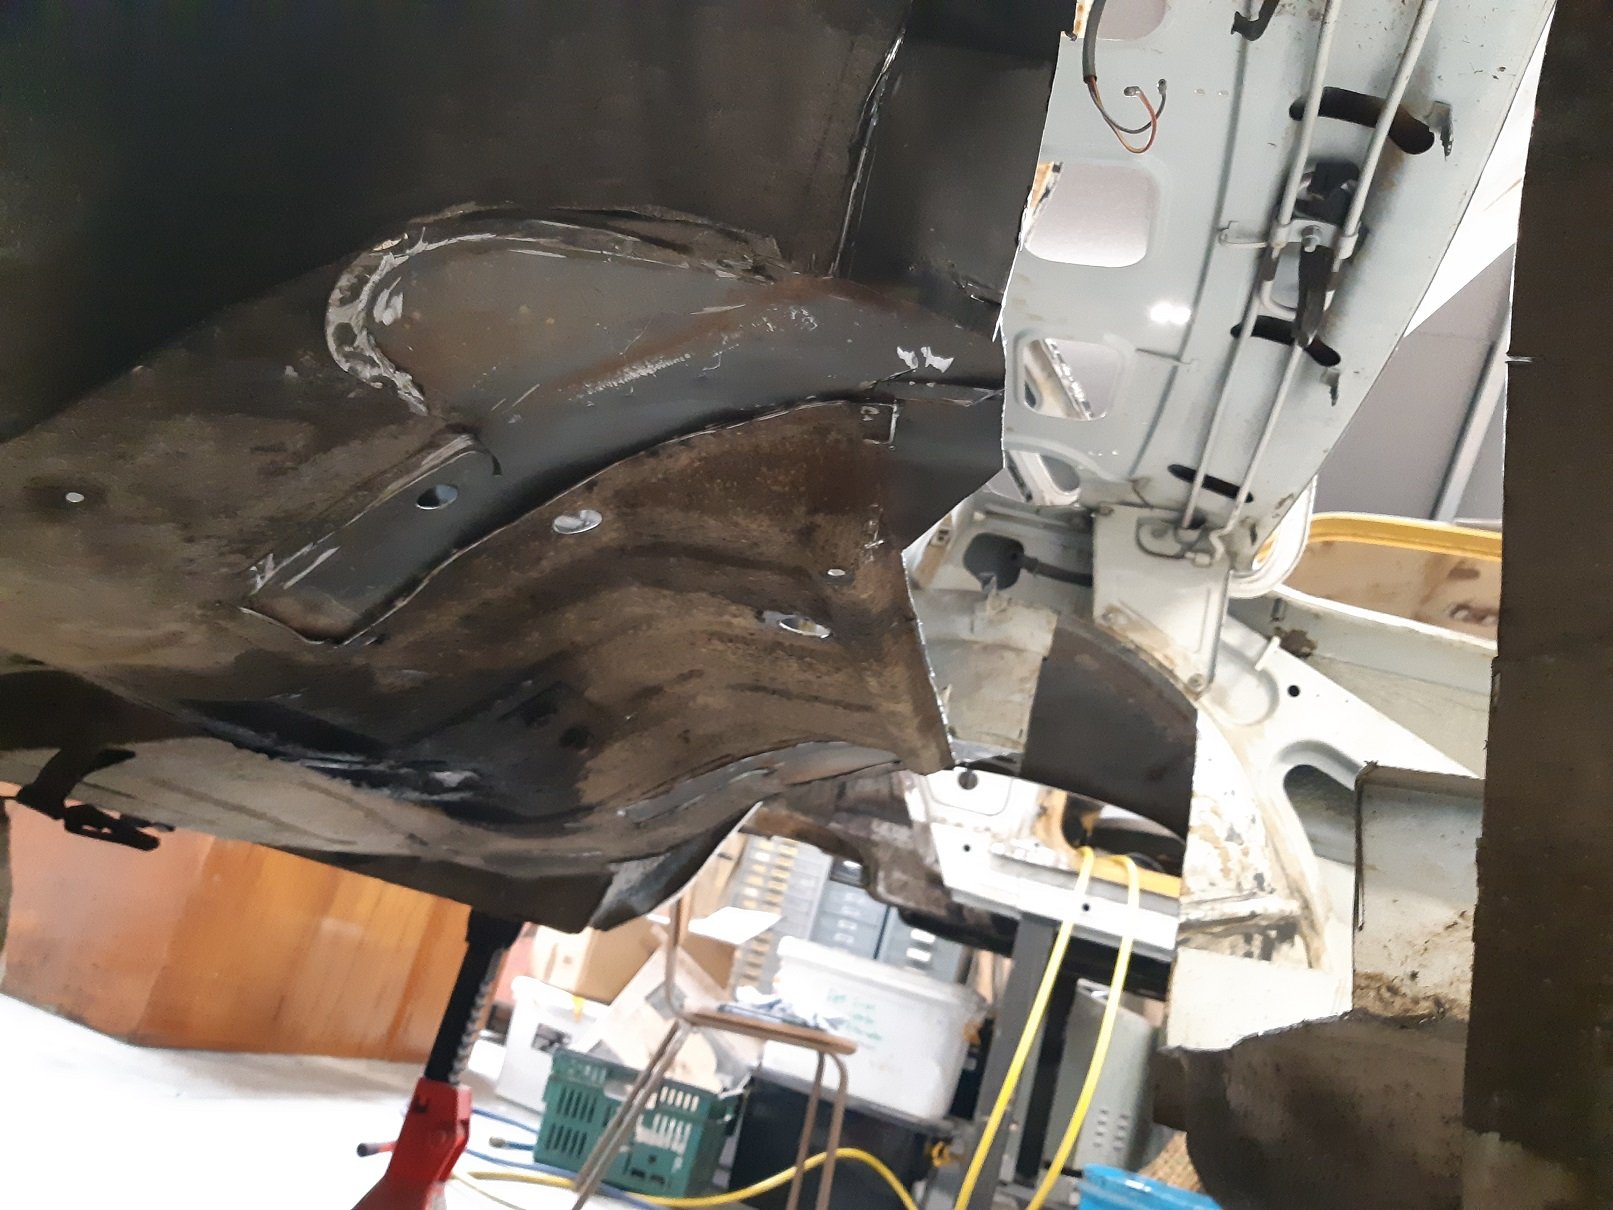
SO much more access to weld the back of the strut towers now. It will go back in later, but trying to contort my arms through it to get good welding angles was a bitch. I also needed to make some space for the propshaft universal.
-
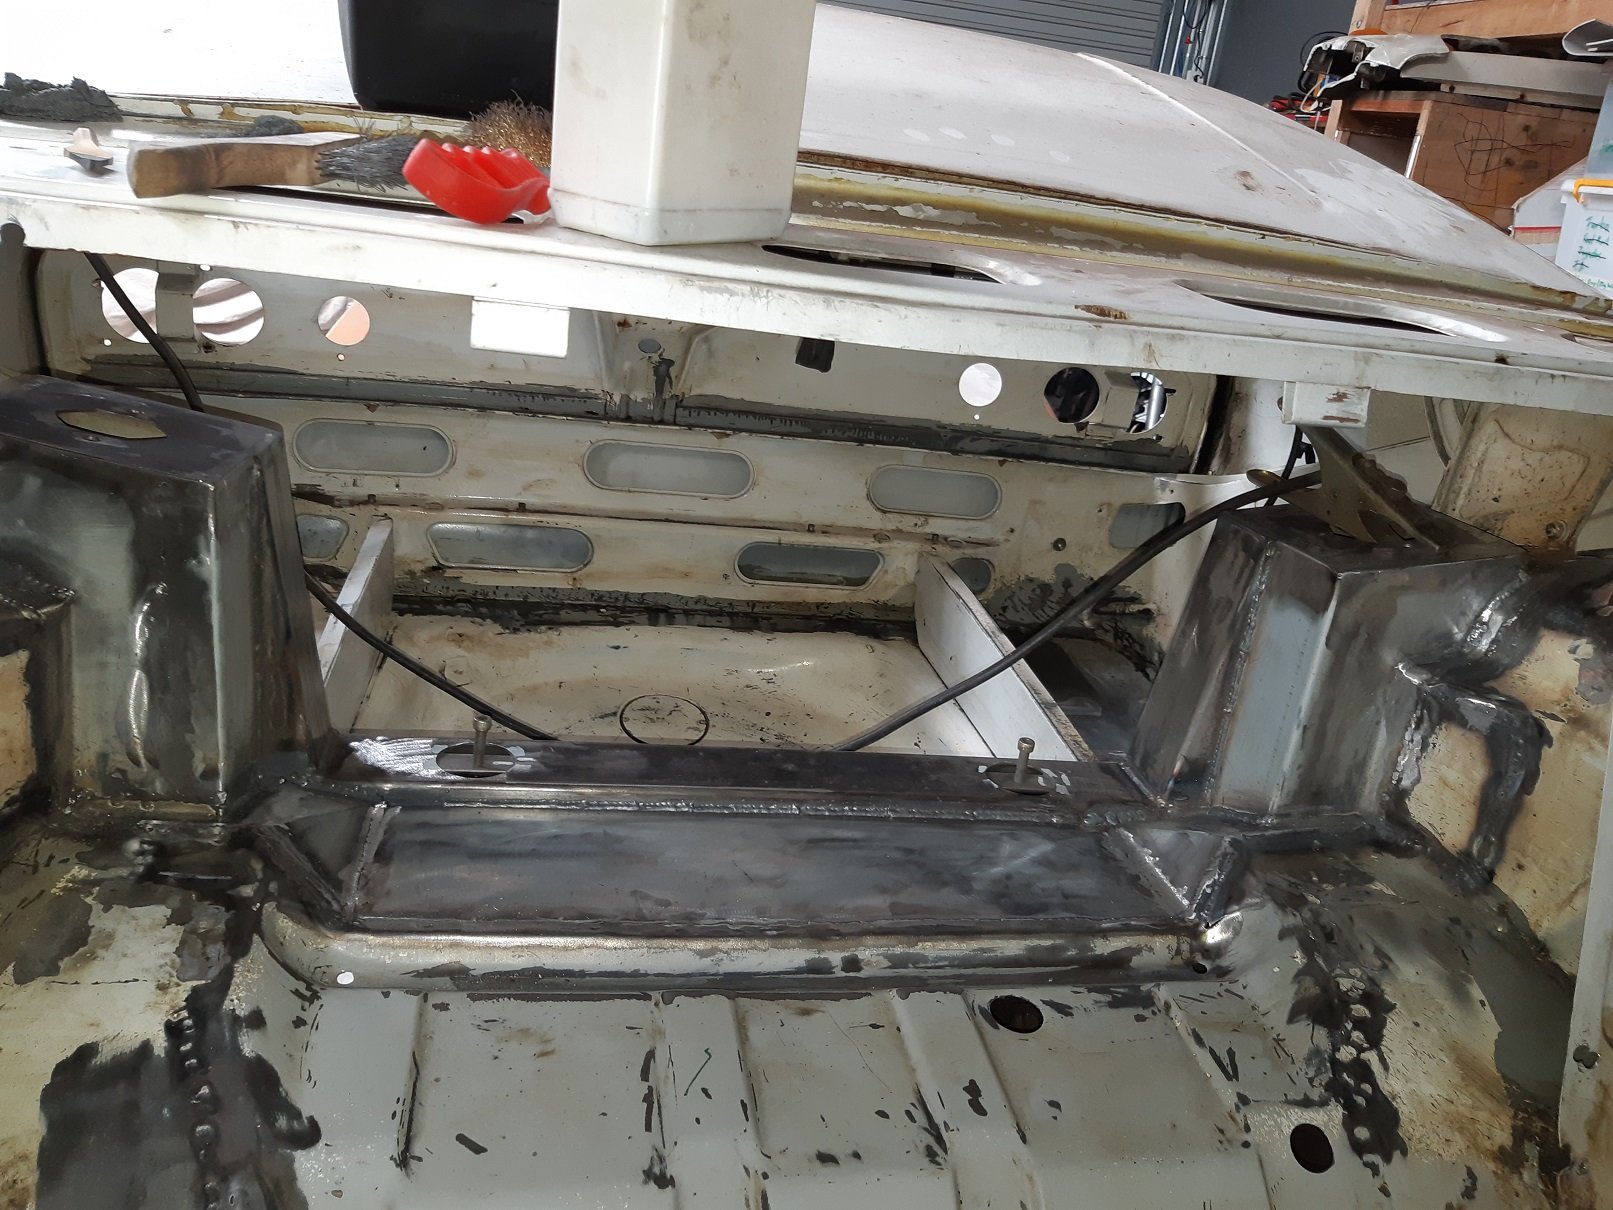
Well, the rear mounts are in. Already feels pretty solid. The boot hinge brackets are probably helping too since they tie the top of the wheel well to the boxed in section of the parcel tray. Still some more welding to do here, I haven't finished welding the back side of the corners, which I'm doing so I can linish back the weld on the visible side. Then all the big gaps to span and some plating. I'm using 1.6mm for both.
- 191 replies
-
- 19
-
-
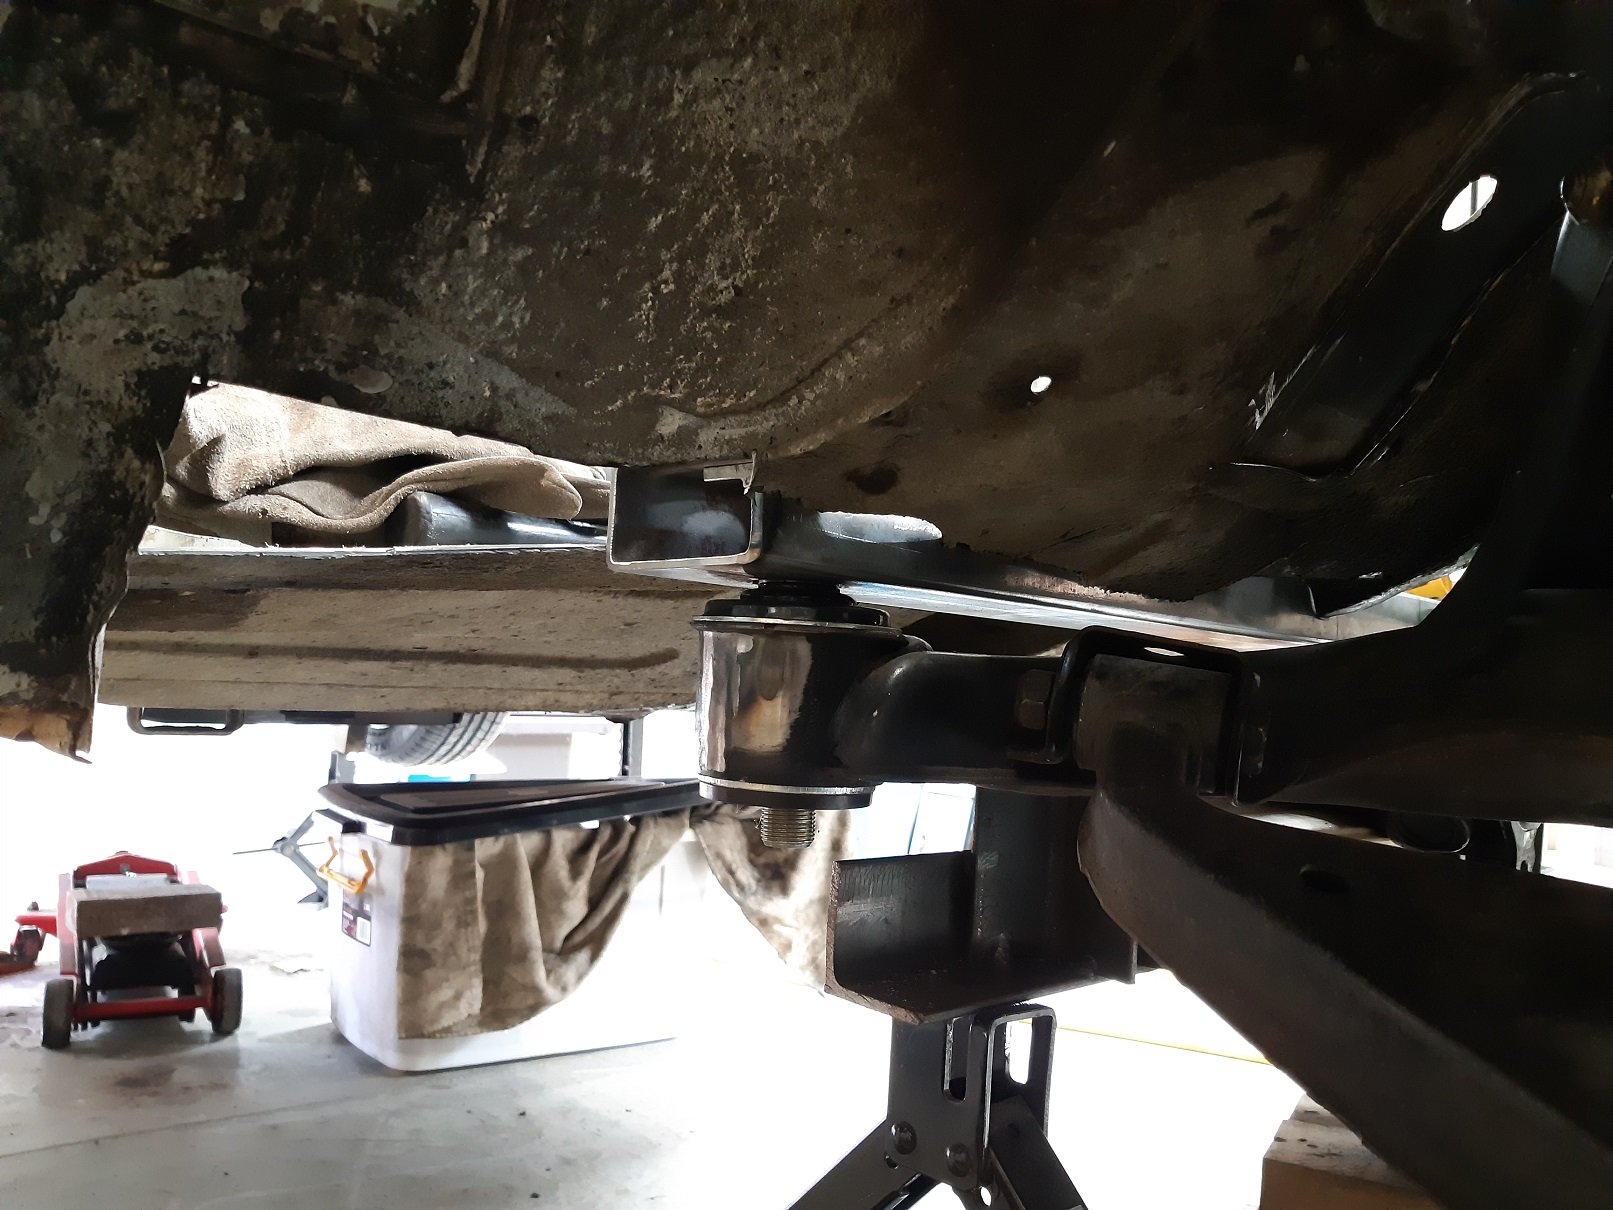
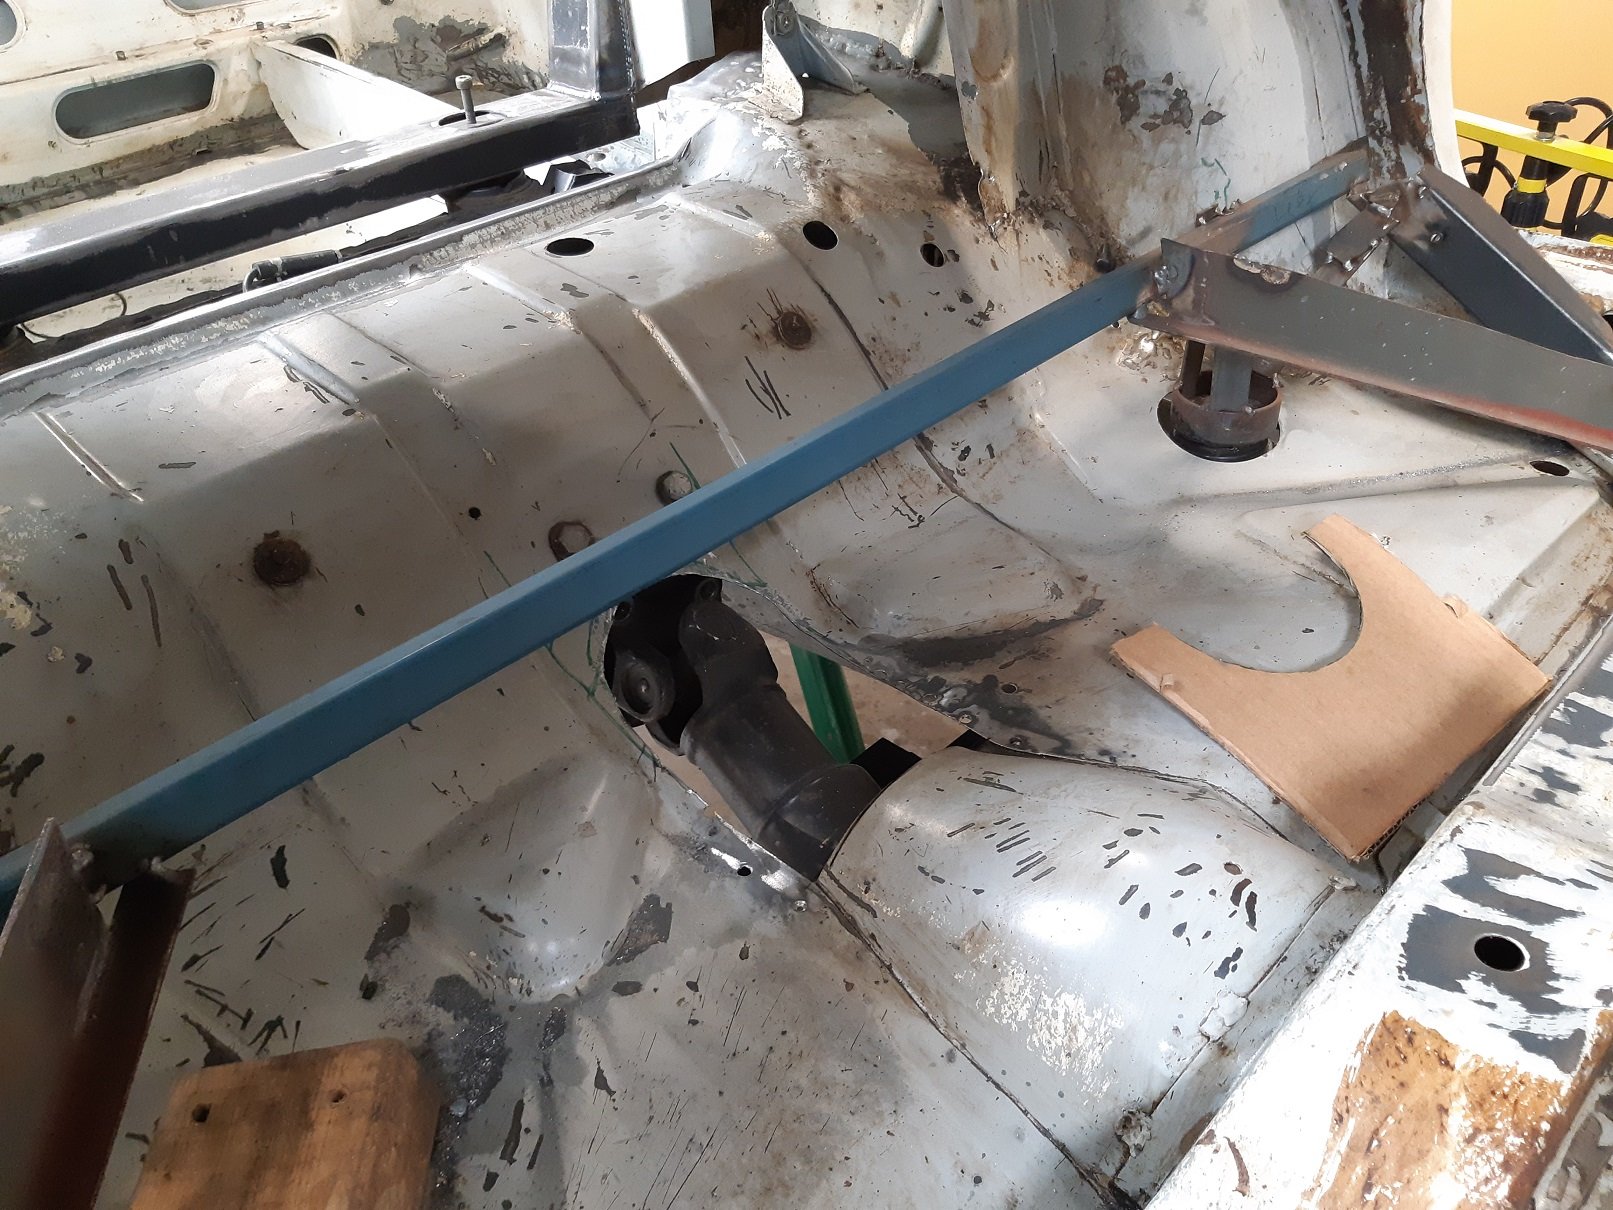
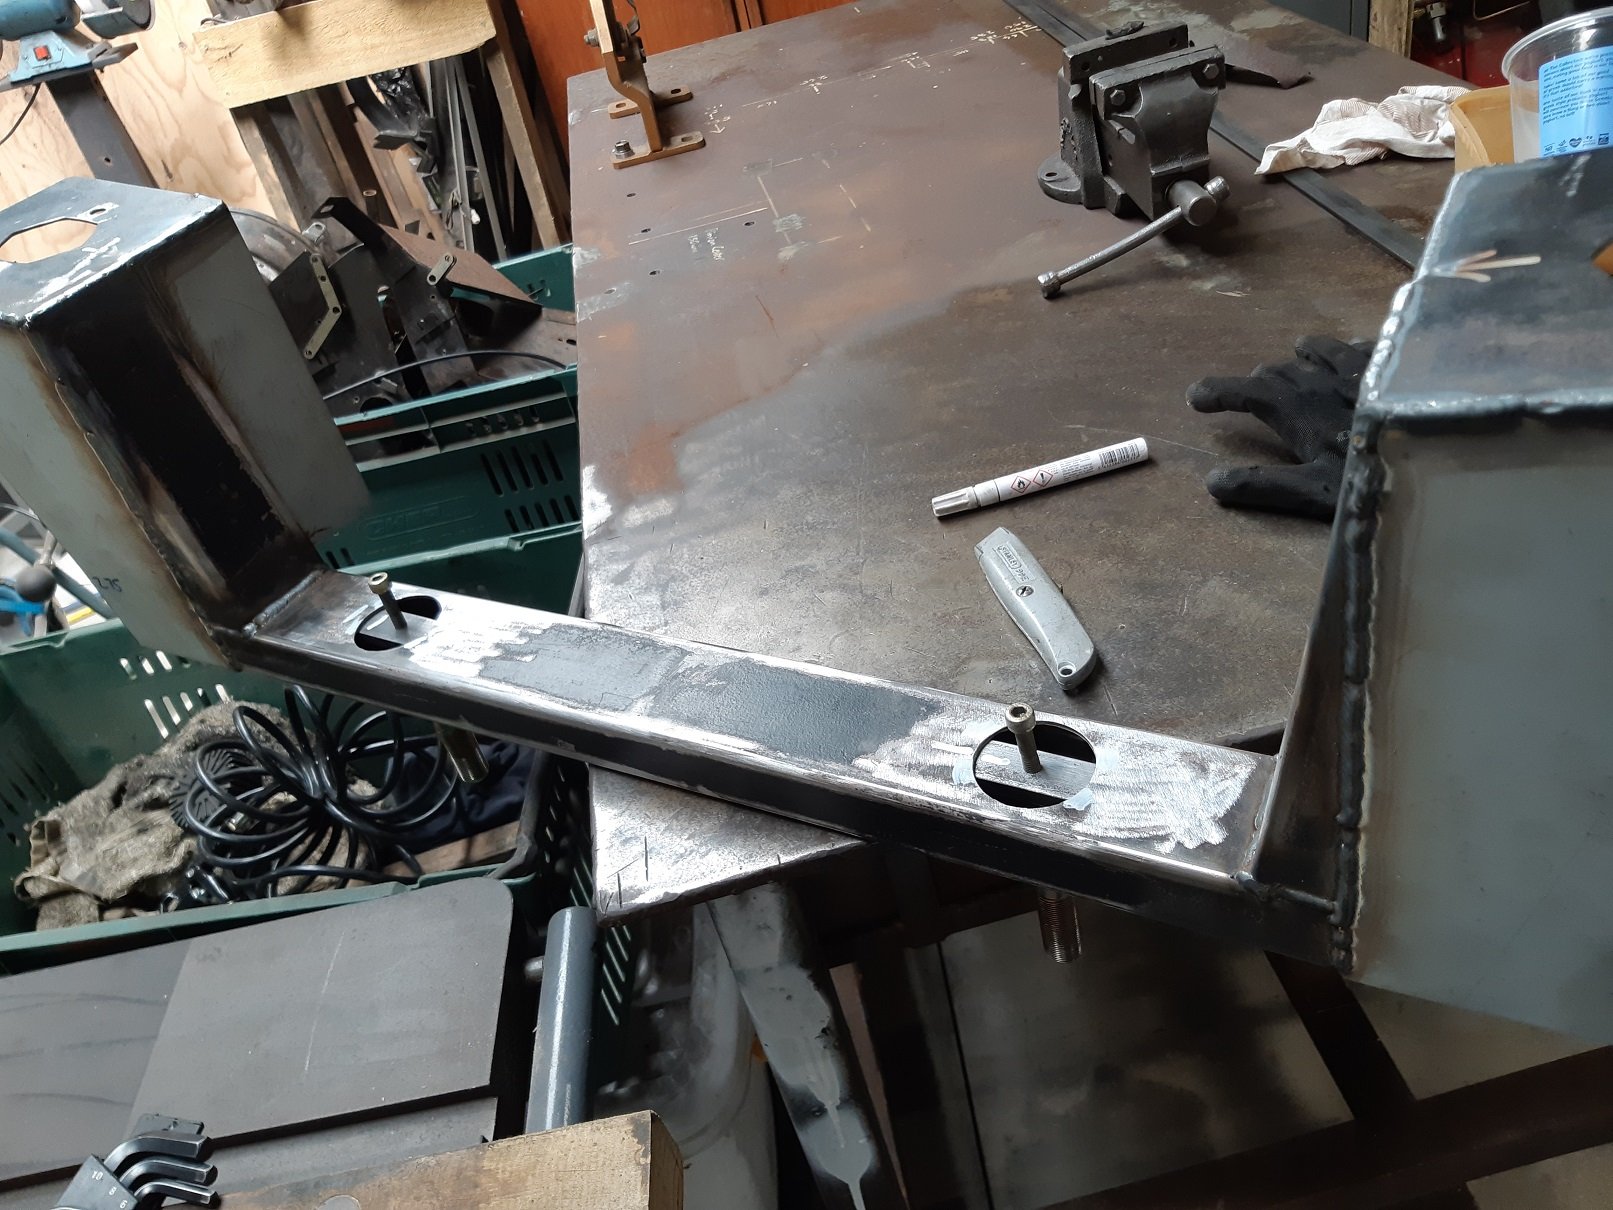
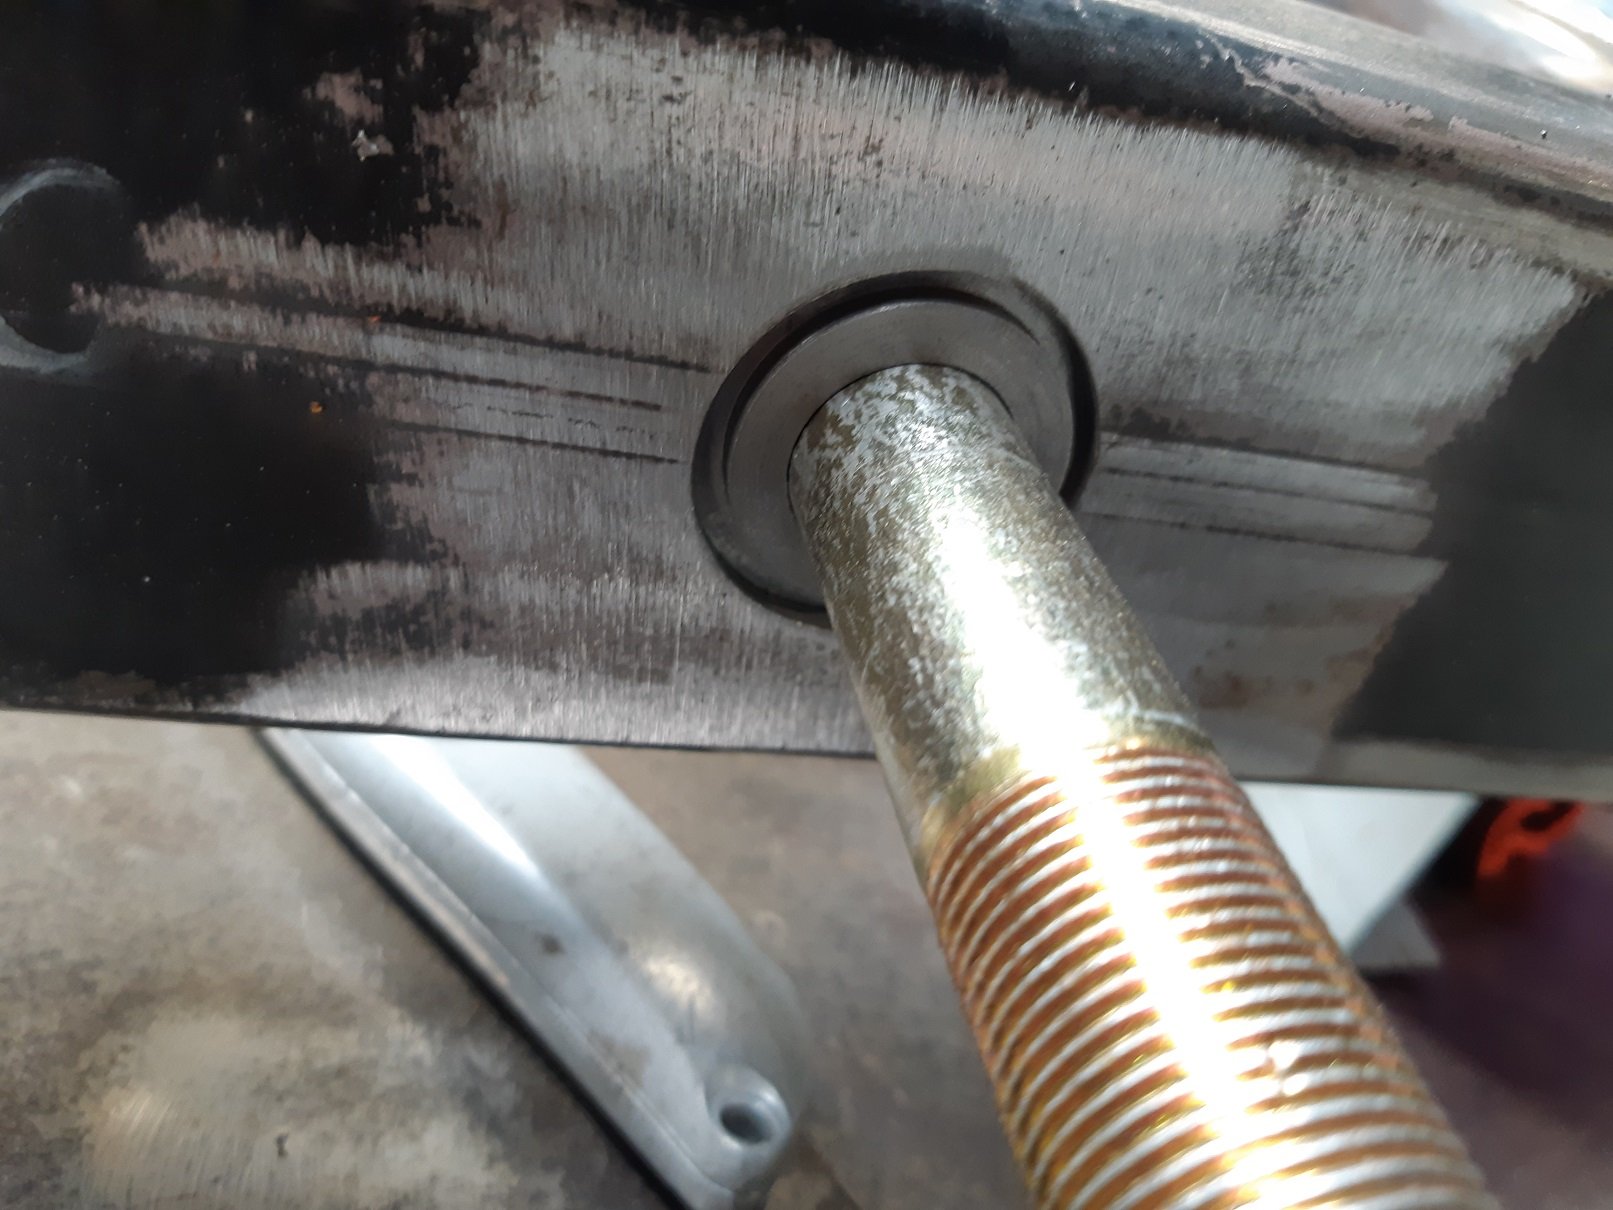
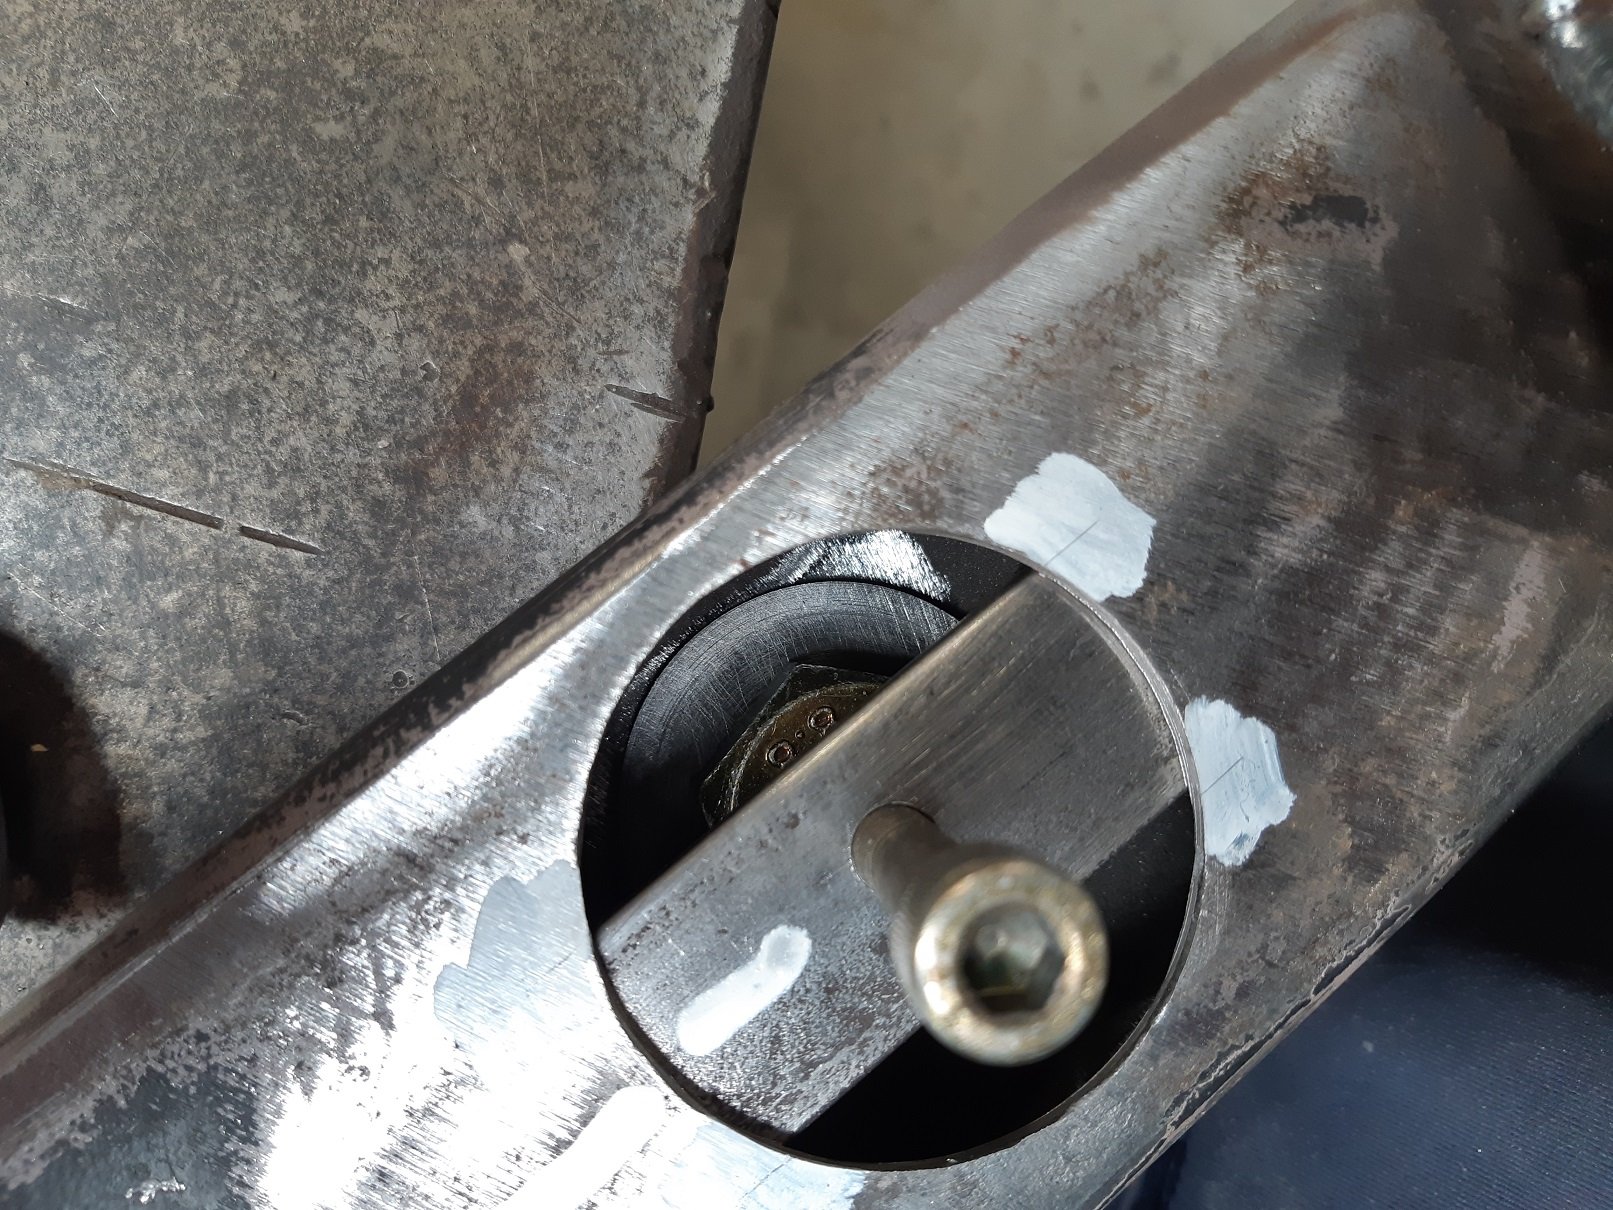
So I'm reasonably sure the subframe is aligned correctly. But just in case, I have given myself some wiggle room. These big washers will allow me to move the mounts around a few mm. And a bit of plate with a threaded hole and a pointy bolt that fits into a corresponding hole in the big bolt to temporarily 'lock' it into position. I'll leave it like this until I can get it on a wheel alignment machine. Once I confirm that the subframe is straight, I'll weld it all solid. I still need to make a plan for the front mounts. I don't have any flat surface there, so I need to create a temporary one.
-
I second it being legit. Uses a chemical process called chelation. So no acid. There are several products that are all the same shiz. Metal rescue is another one. It eventually does stop working because the active ingredient is used up in the chelation reaction and it gets real dark brown.
-
Stop crying guys, it was full of rust and bog.
-
Like a glove.
- 191 replies
-
- 12
-
-
It evaporates fairly fast.
-
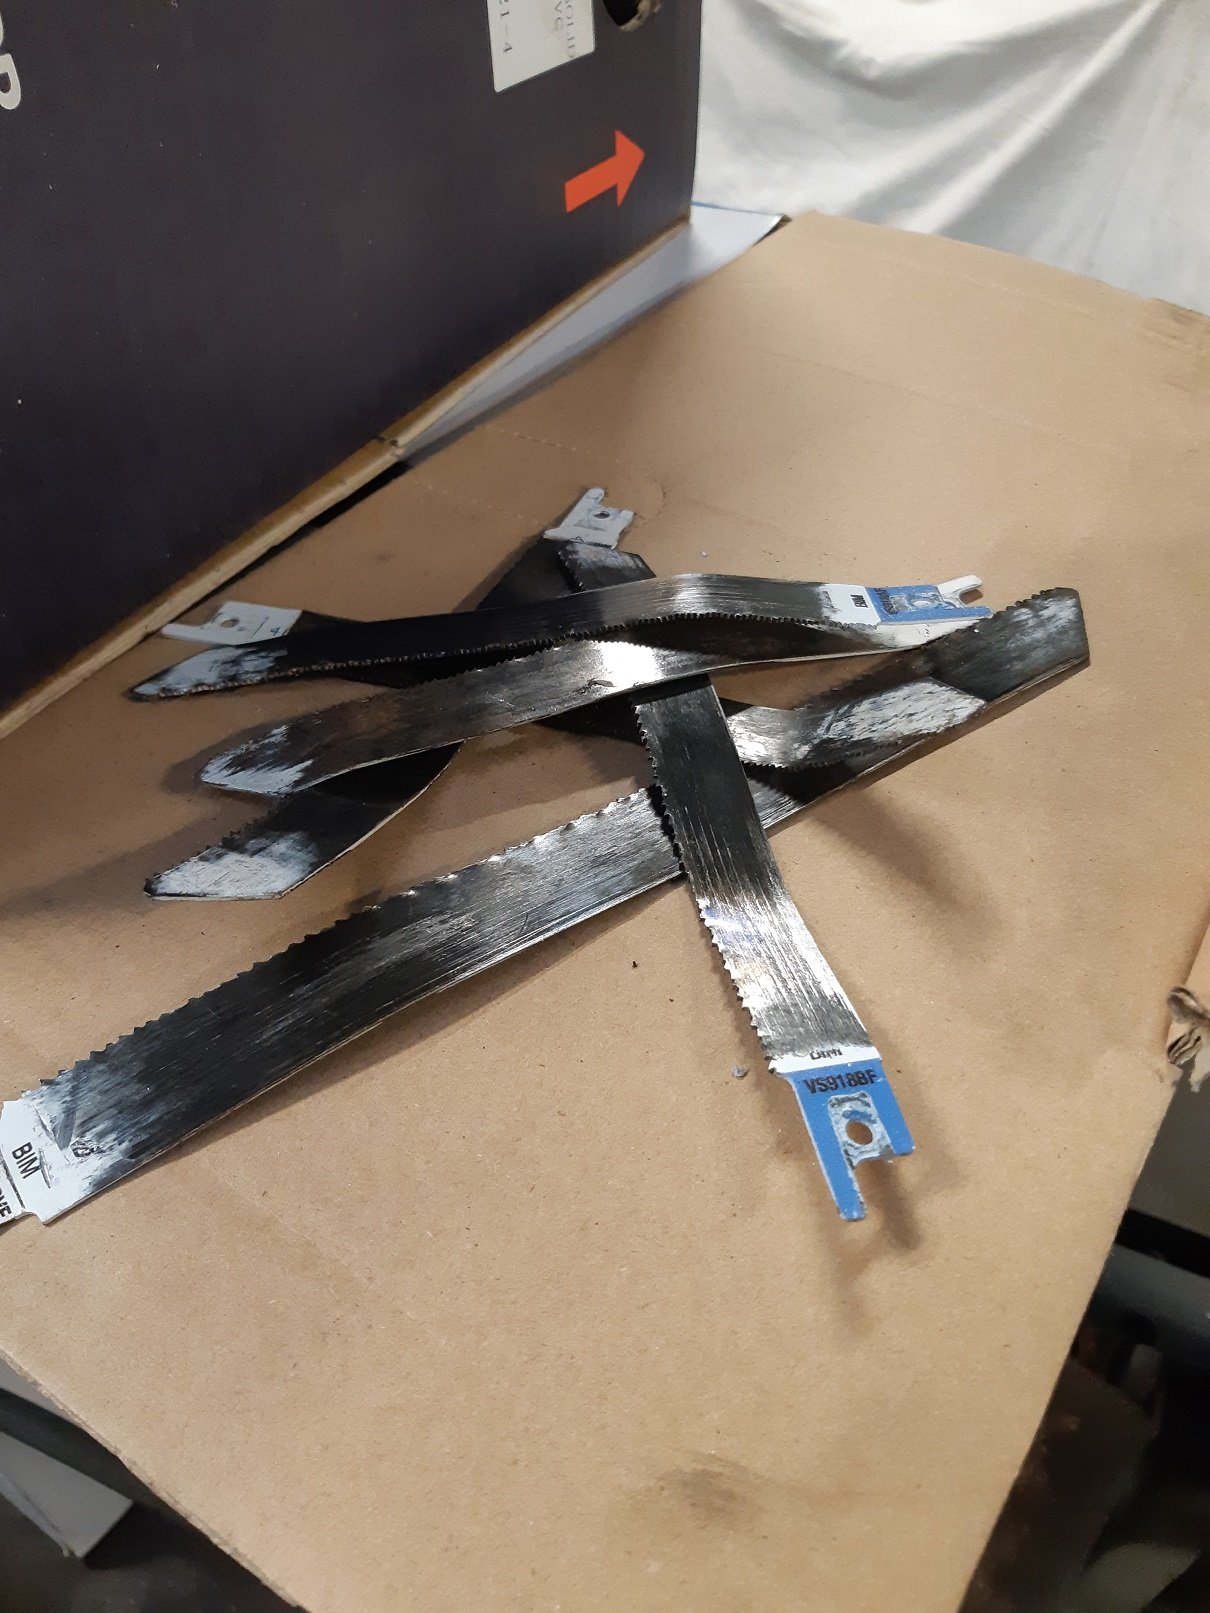
I do indeed have a decent reciprocating saw. I sacrificed all of my blades. I did bend them back straight a few times, but once all the teeth have ripped off, they don't do much anymore. Hopefully this will now fit into the trailer, it fortunately has a cage.
- 191 replies
-
- 16
-
-

-

-

-
Fuuuuuuuuuuuuuu. You animal.
-
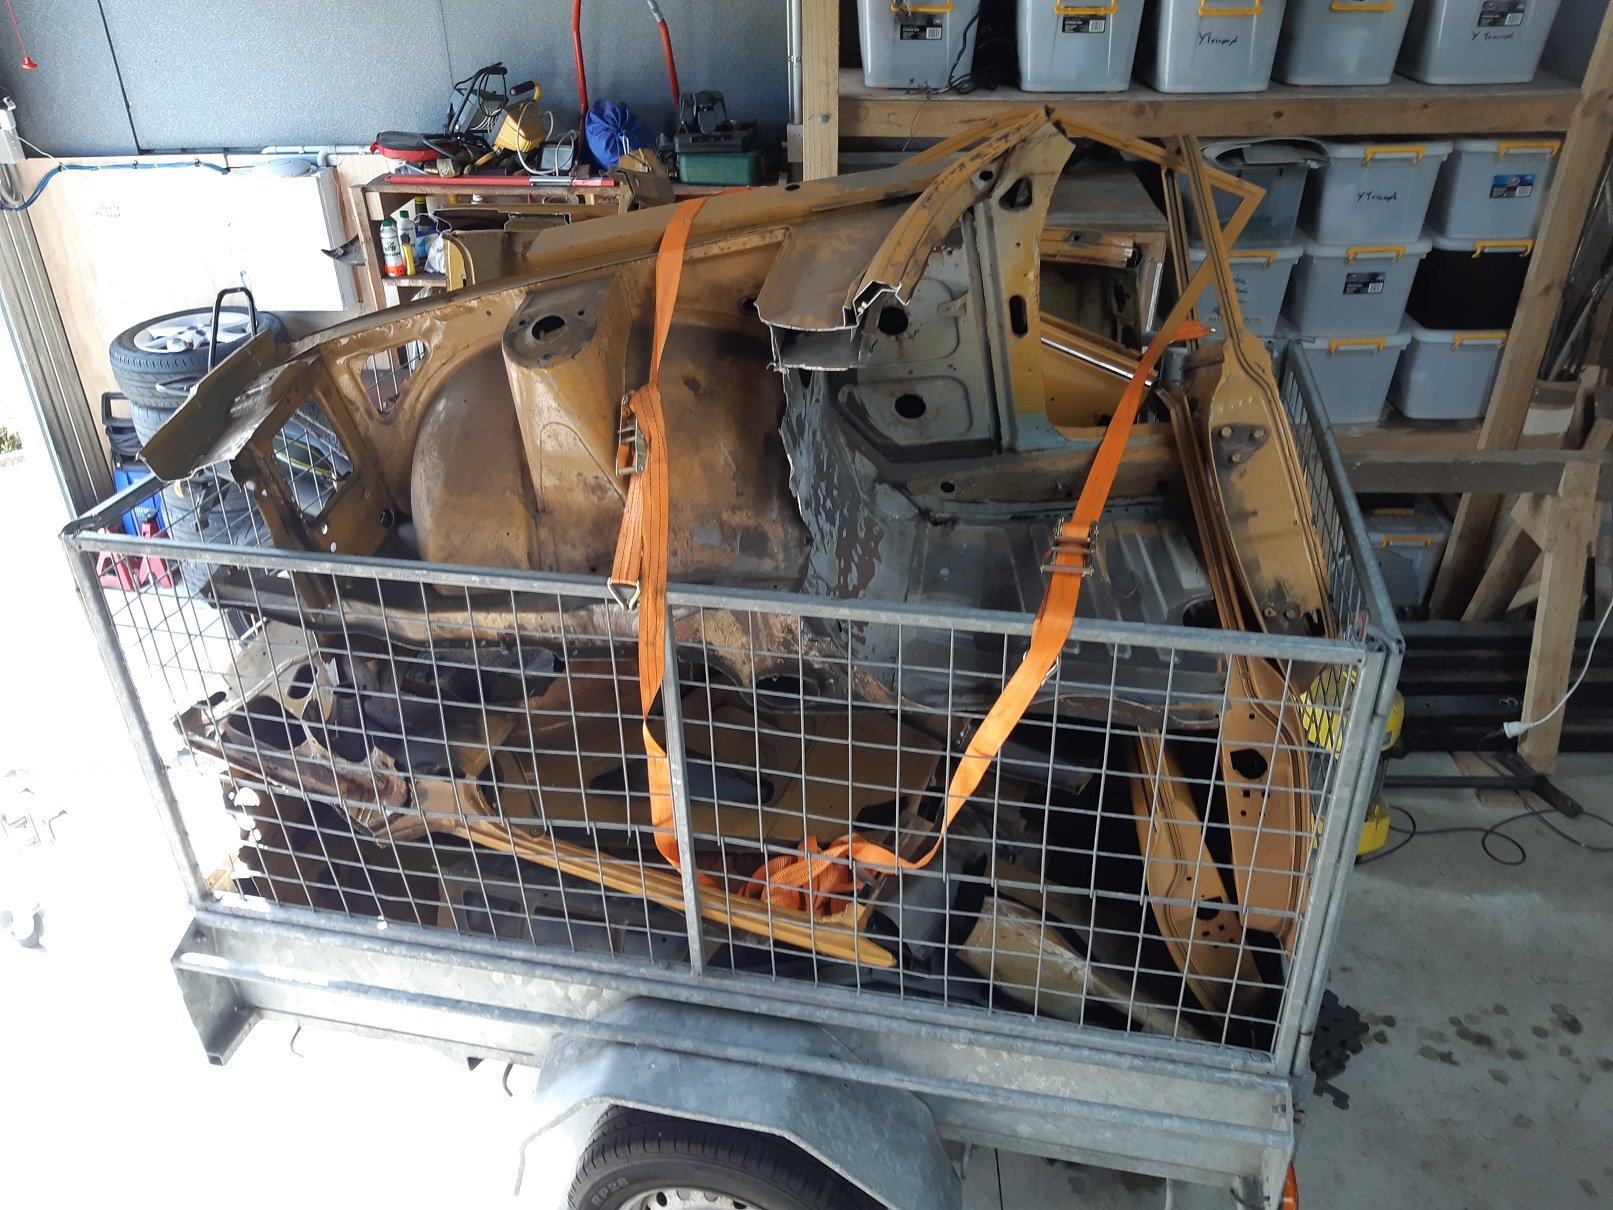
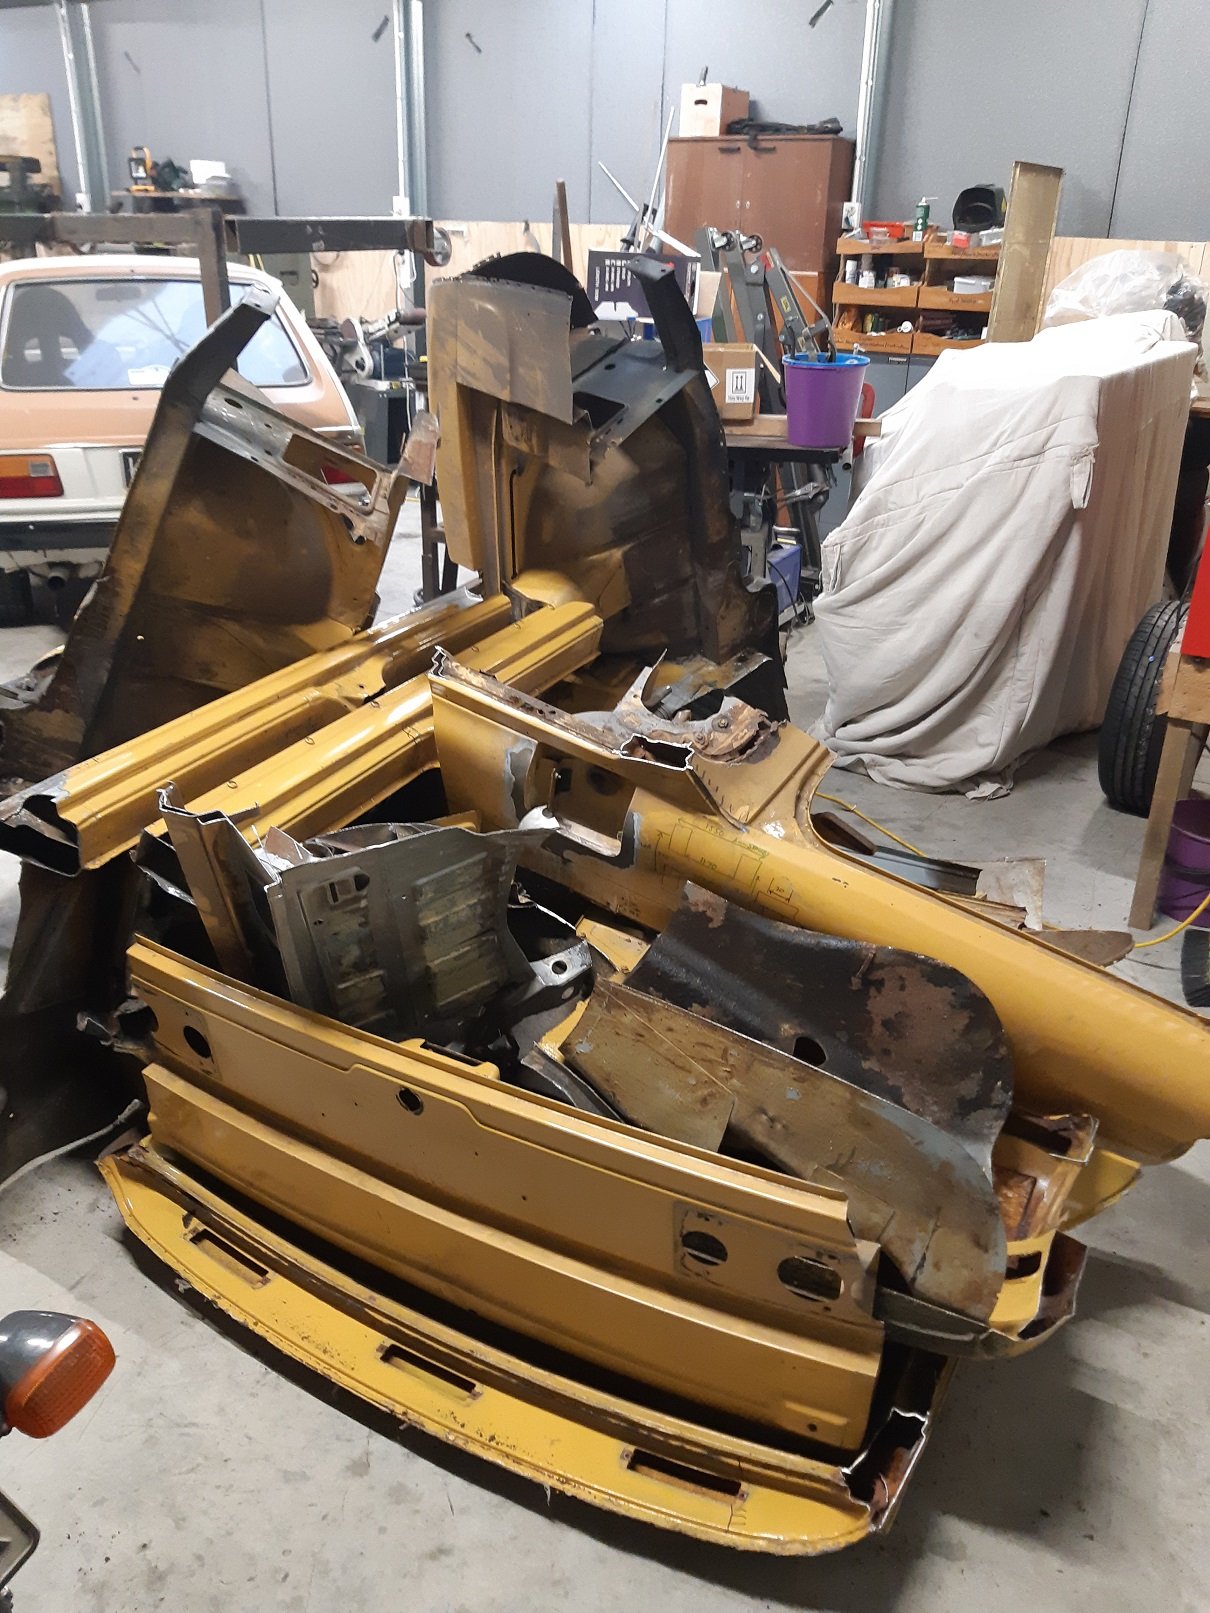
Dang it. Scrap metal place only has big trucks, so it will cost them more than the shell is worth to collect it. But mate next door is cool with me chopping it into bits to fit in his small trailer and taking it in that. On a positive note, I did get $52 for the two stuffed copper radiators I dropped off.
-
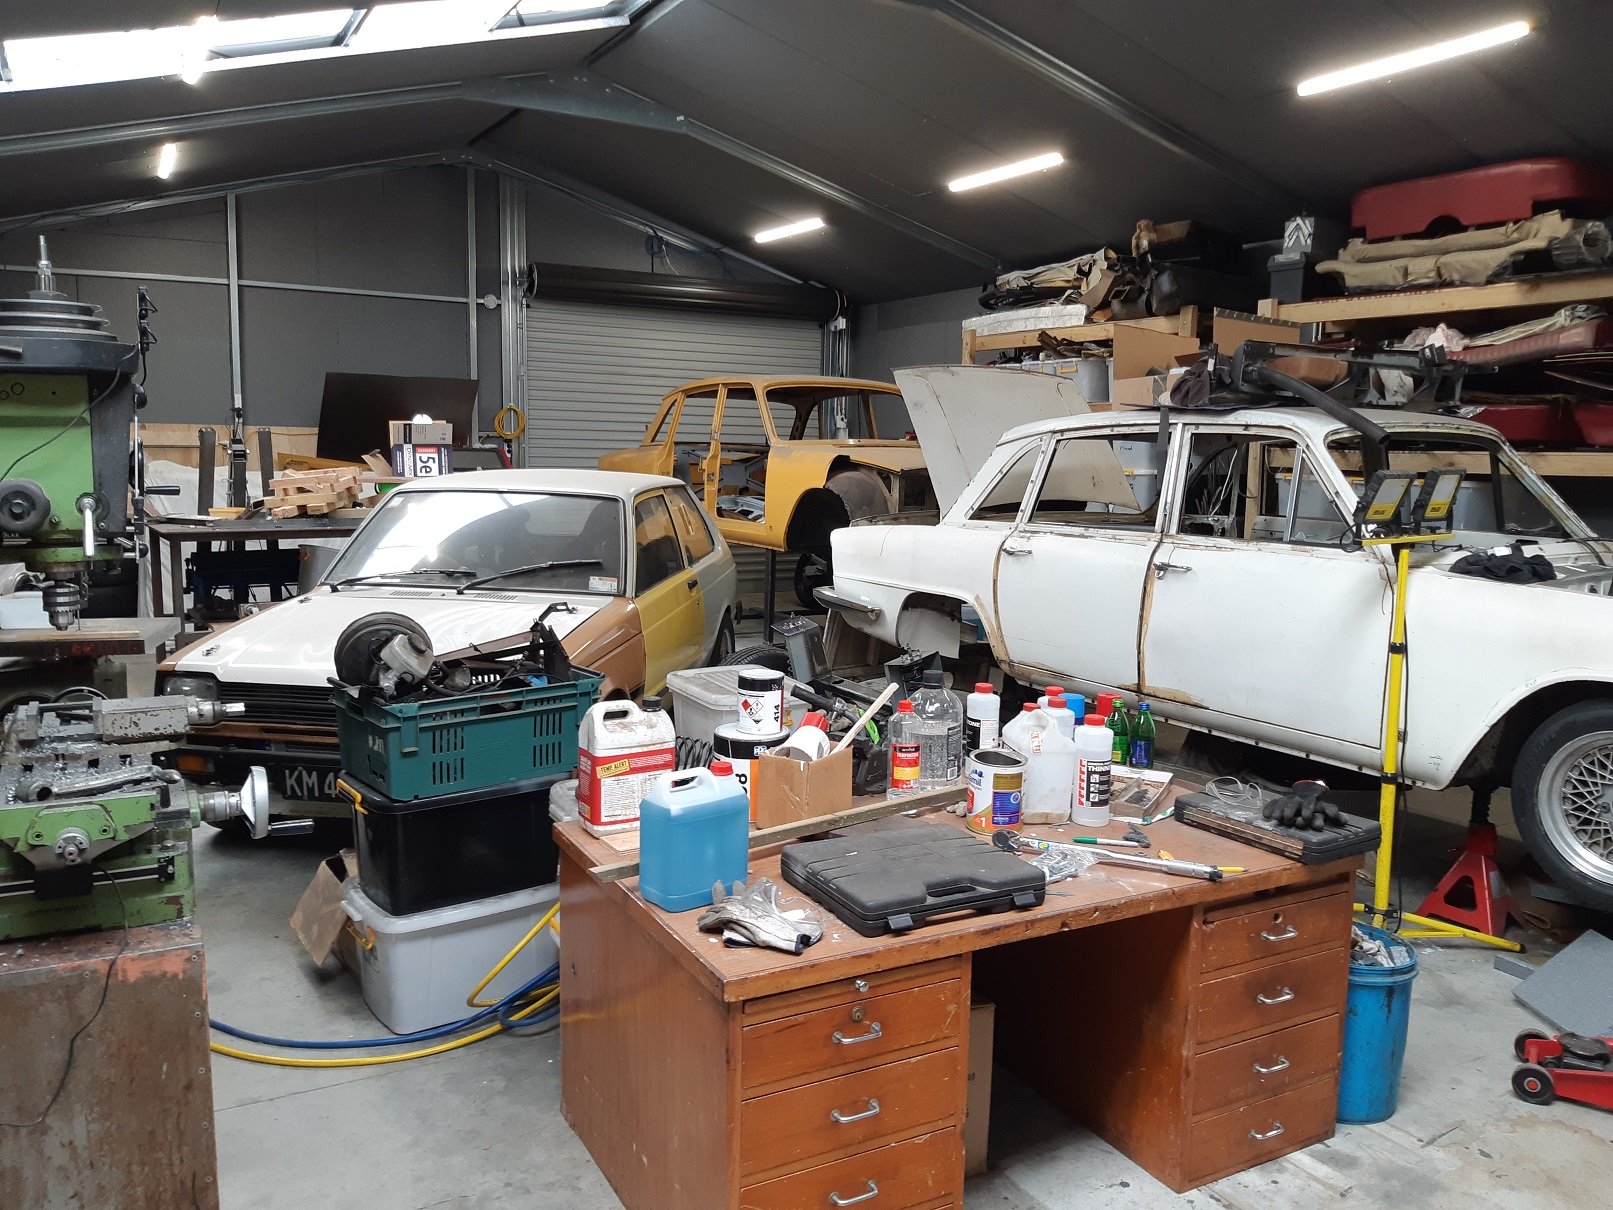
I'm pretty sure I'm done with the rusty yellow shell and it can go to the metal recycler. So I've re-tetrised the shed to put it at the door. Now I can easily push it out once I've arranged for the man to come pick it up.
- 191 replies
-
- 16
-
-
Thread hijack. Does that Carina speedo that you can control with the ECU live on its own circuit board, so that it could be relatively easily transplanted into an old smiths gauge?
-
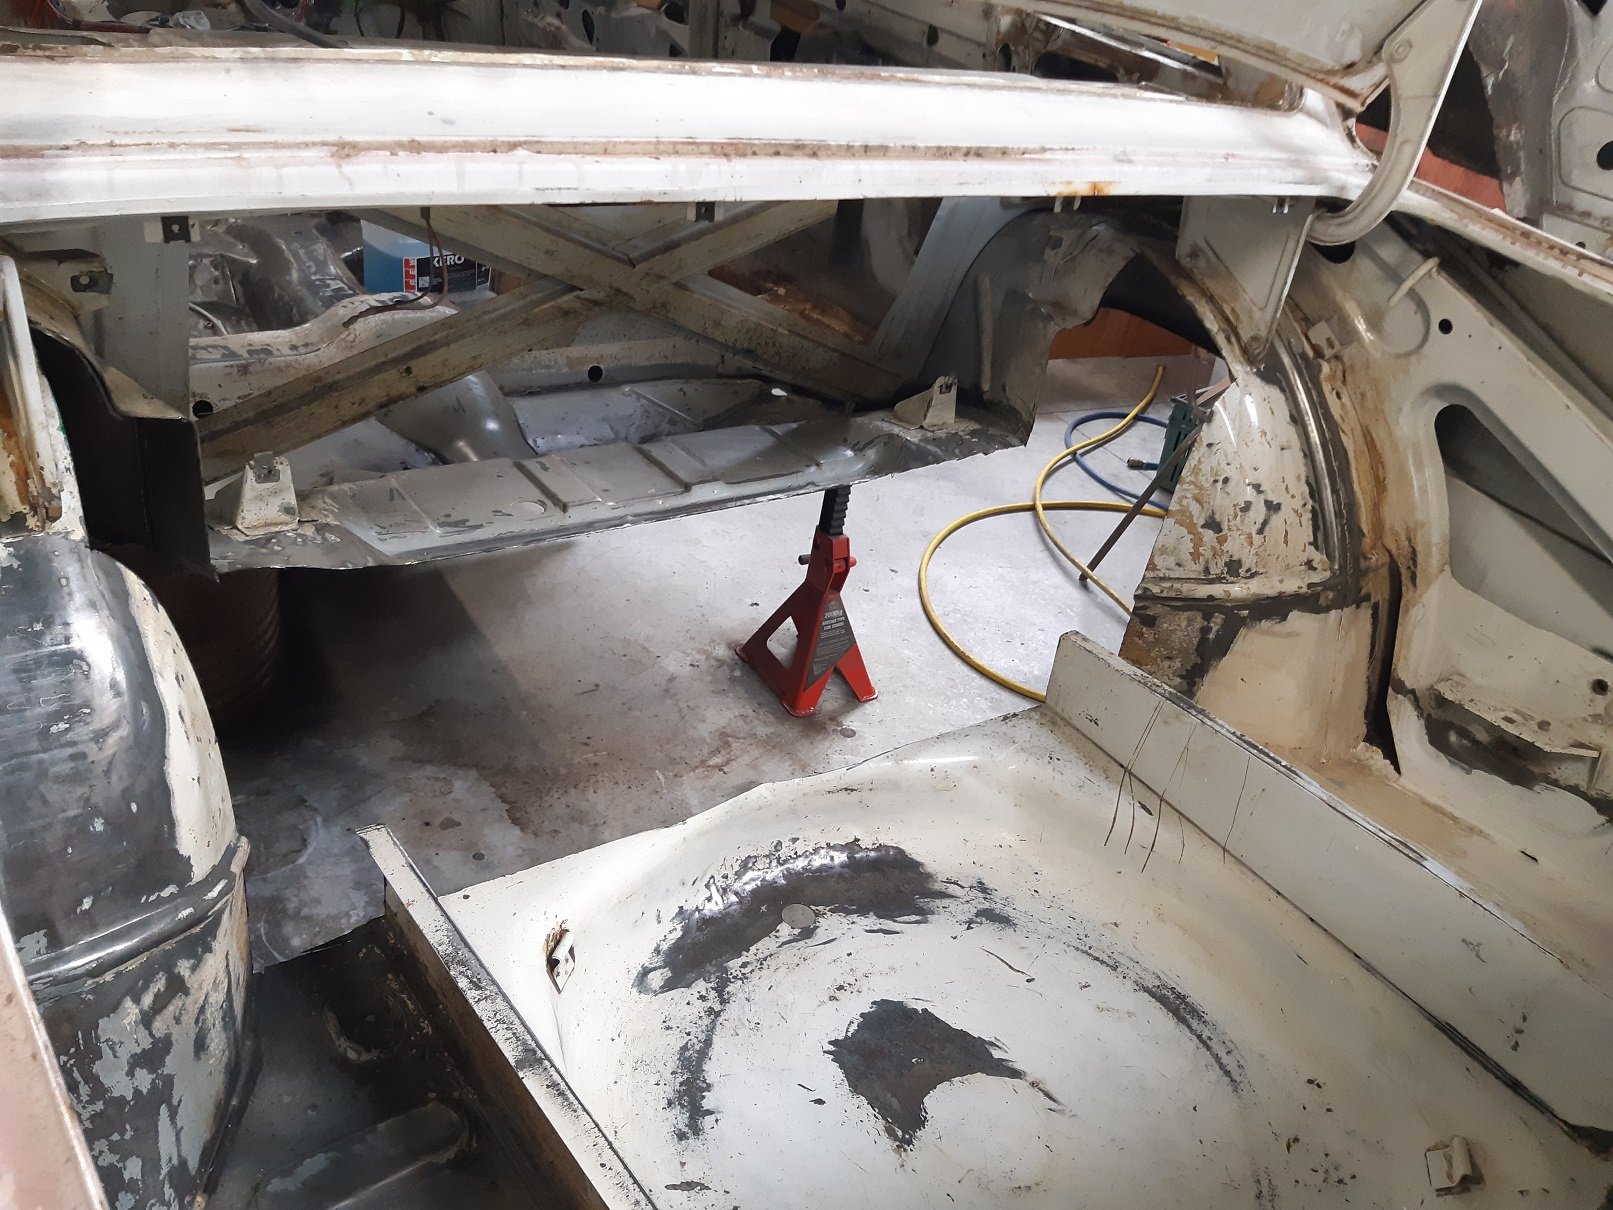
Can't change my mind now... I also removed the spring mount and chassis rail as it gets in the way of one of suspension mounts. I'll be making a new chassis rail on the inside, that boxes in the corner between the floor and the wheel well which will wrap around to join to the sill. That will tie into the new box section between the towers and the new front subframe mounts. Those two panels either side of the spare wheel well will become chassis rails to tie the framing at the rear of the boot with the strut tower box section and have plates inside with captive nuts for towbar mounts.
- 191 replies
-
- 16
-