63Ragtop
-
Posts
17,985 -
Joined
-
Last visited
-
Days Won
93
Content Type
Forums
Downloads
Events
Gallery
Everything posted by 63Ragtop
-
OMG! That 90s grey tweed interior, always thought that would be sweet, until I actually felt tweed.
-
Great work sir! I think body color rims would look sweet, but not original.
-
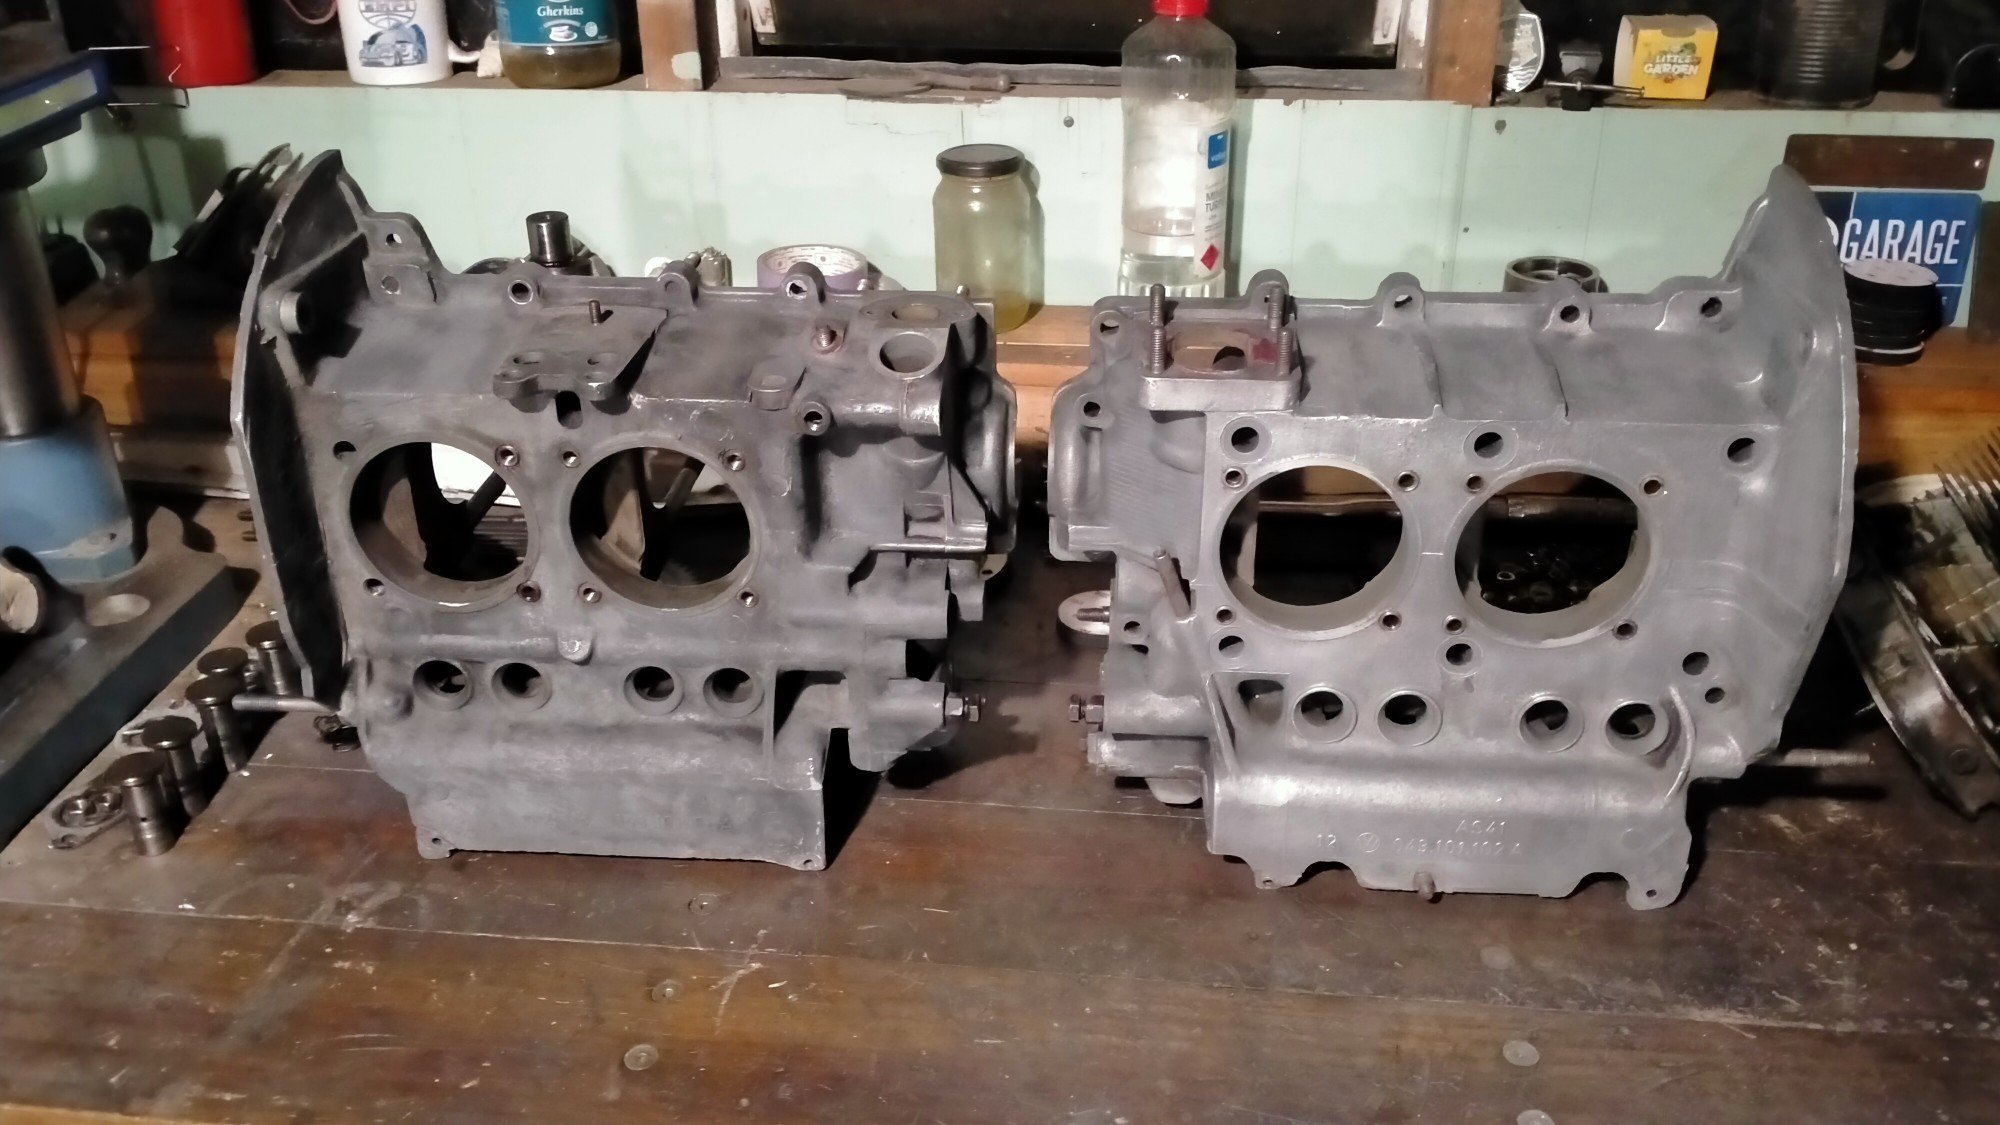
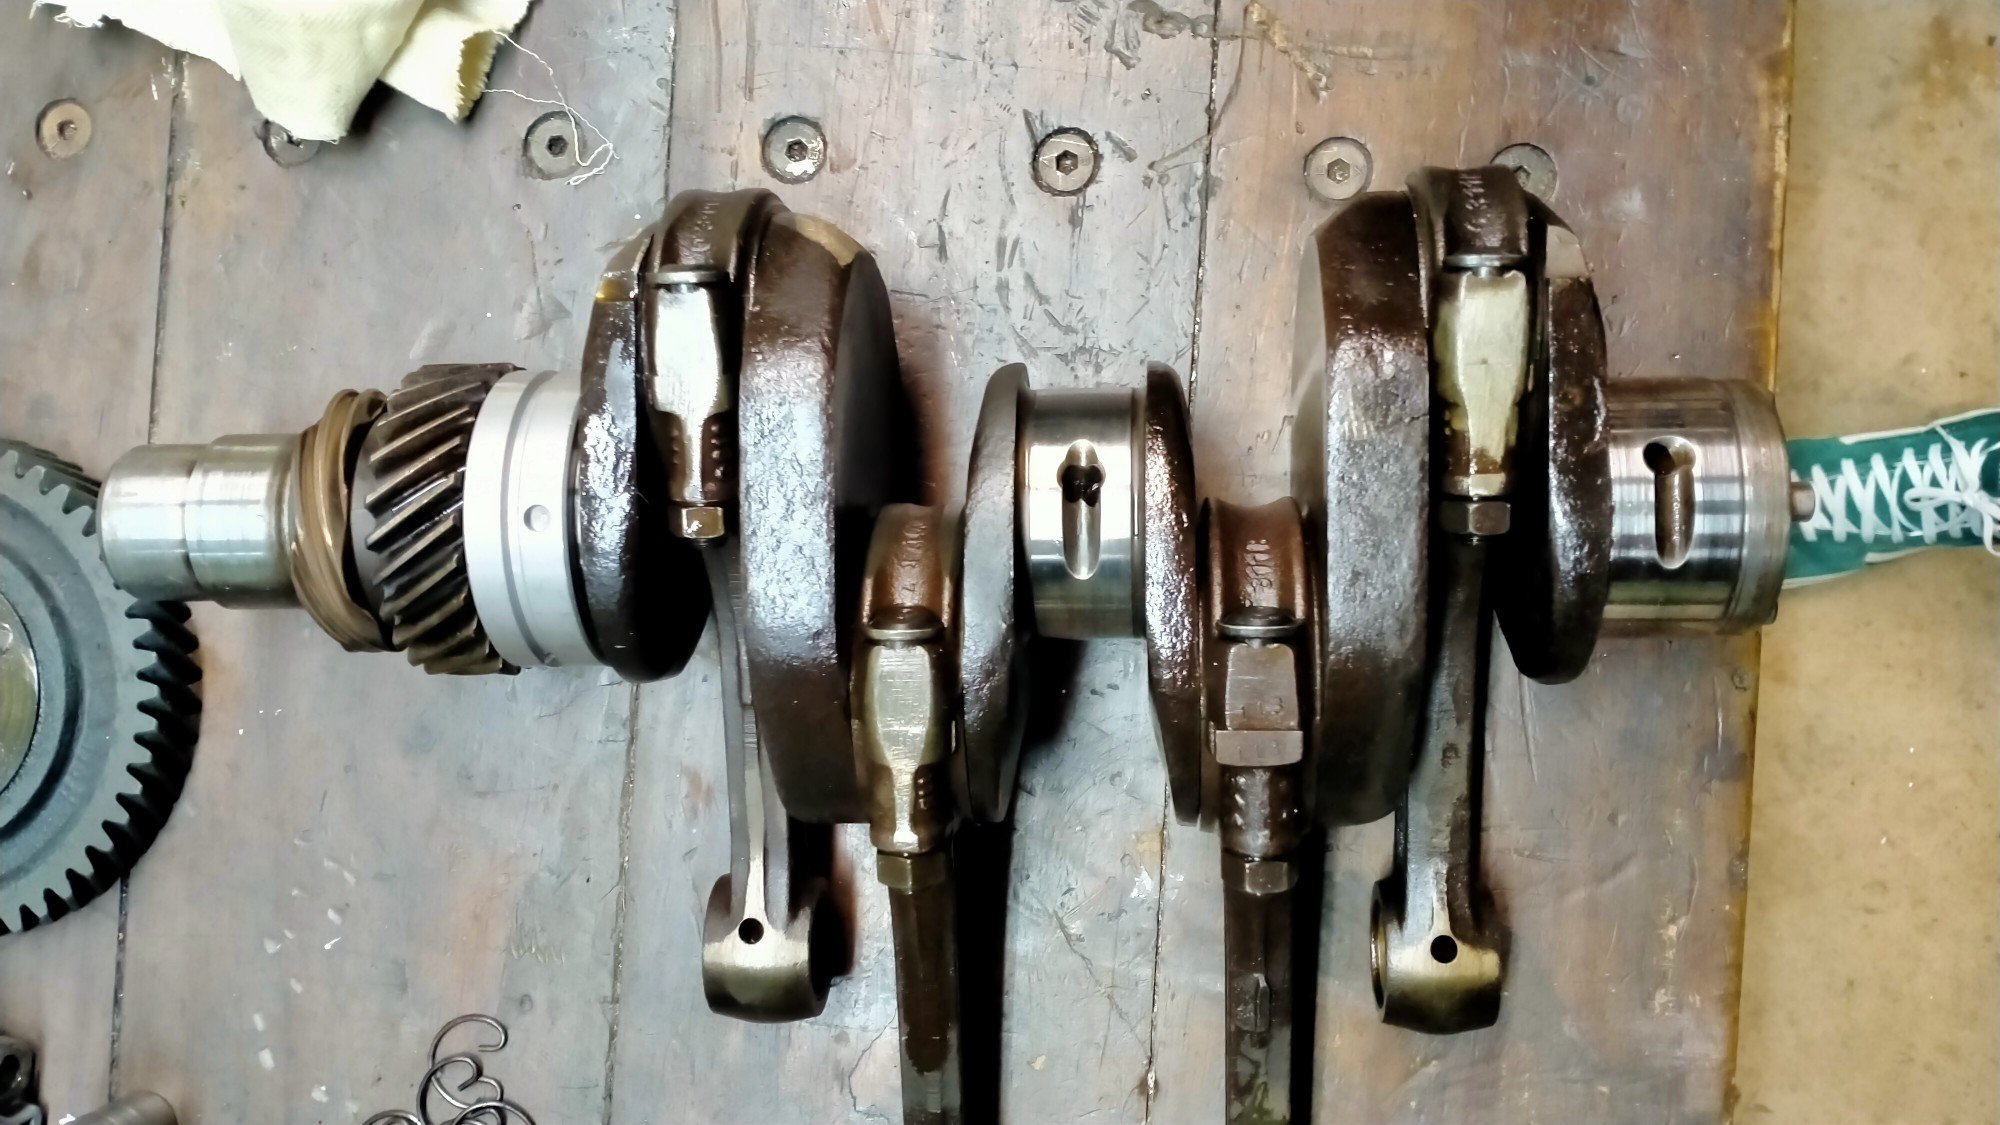
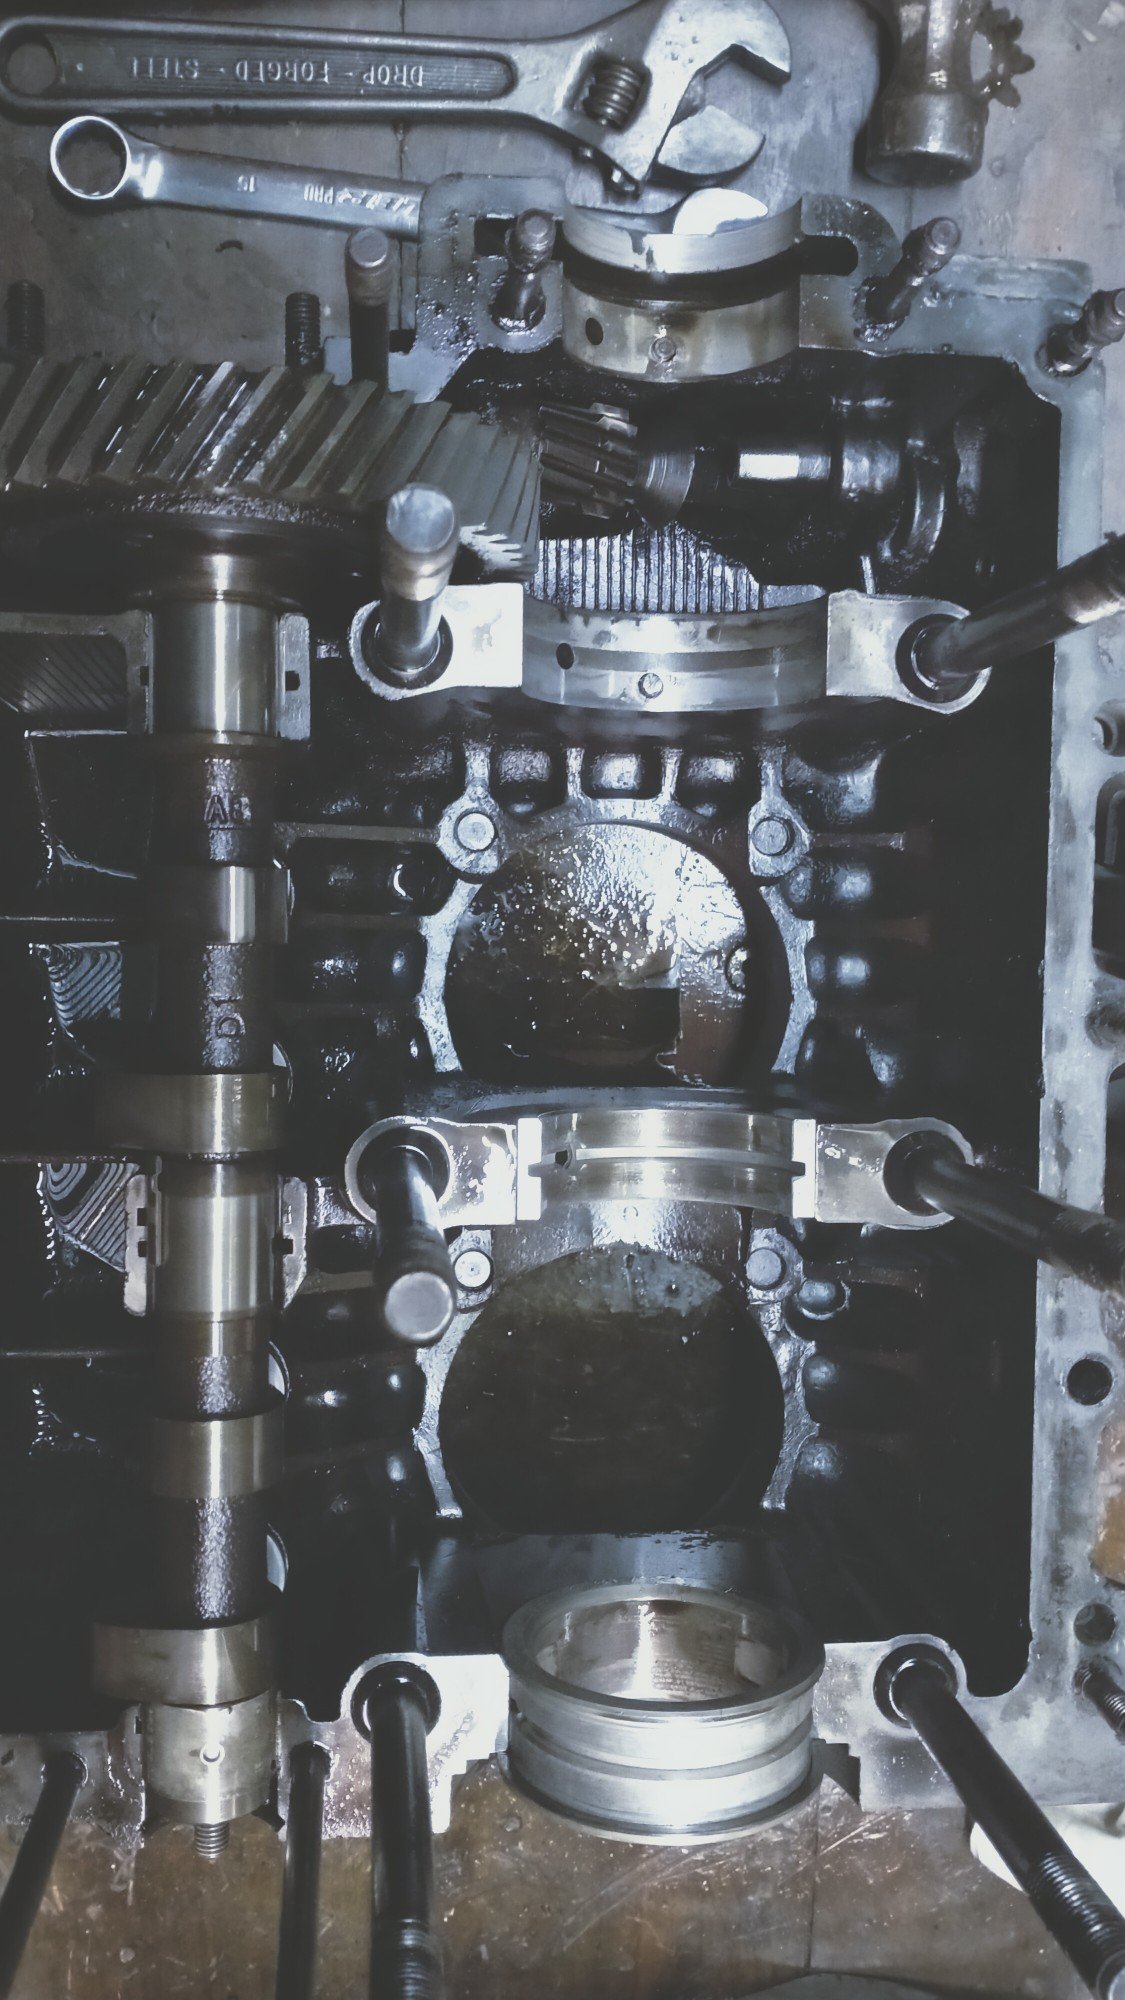
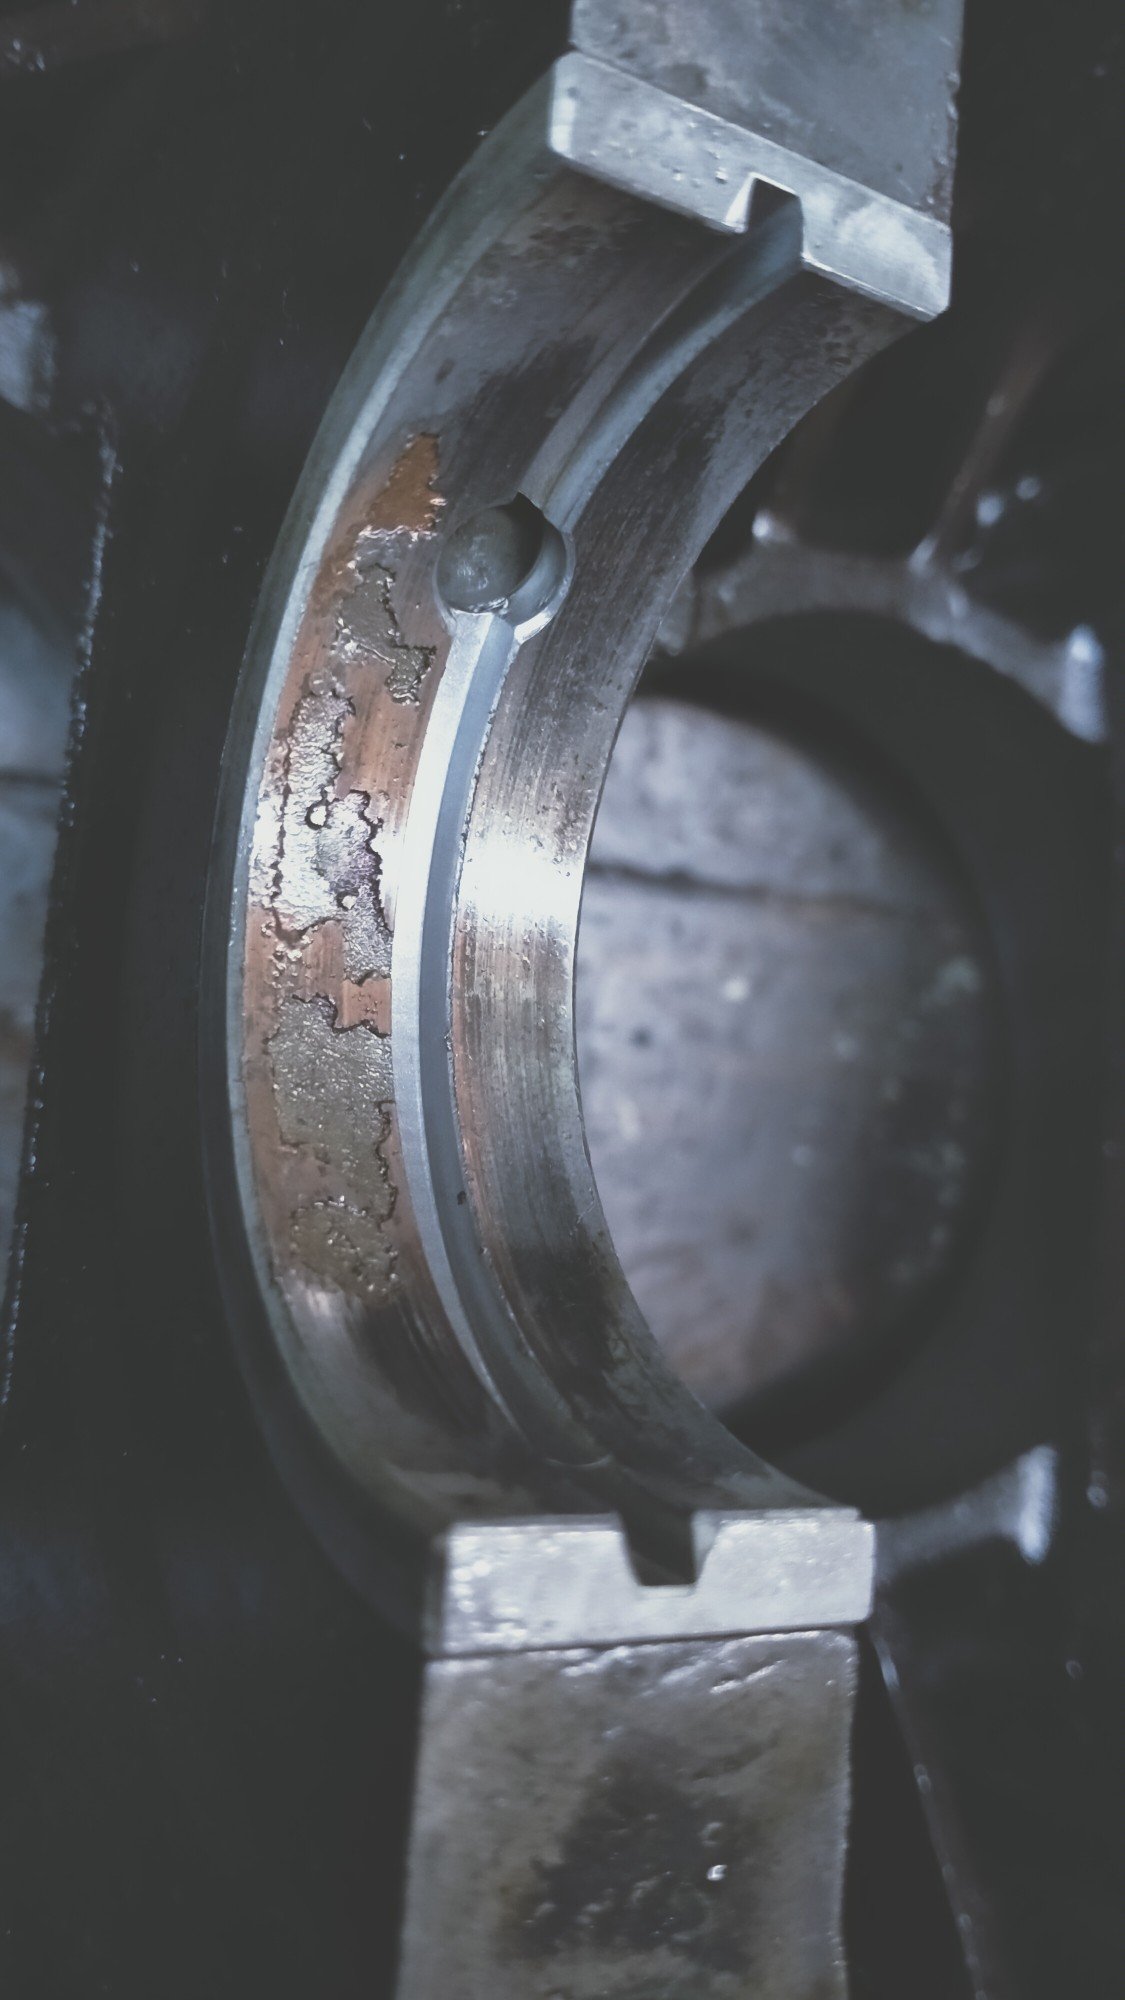
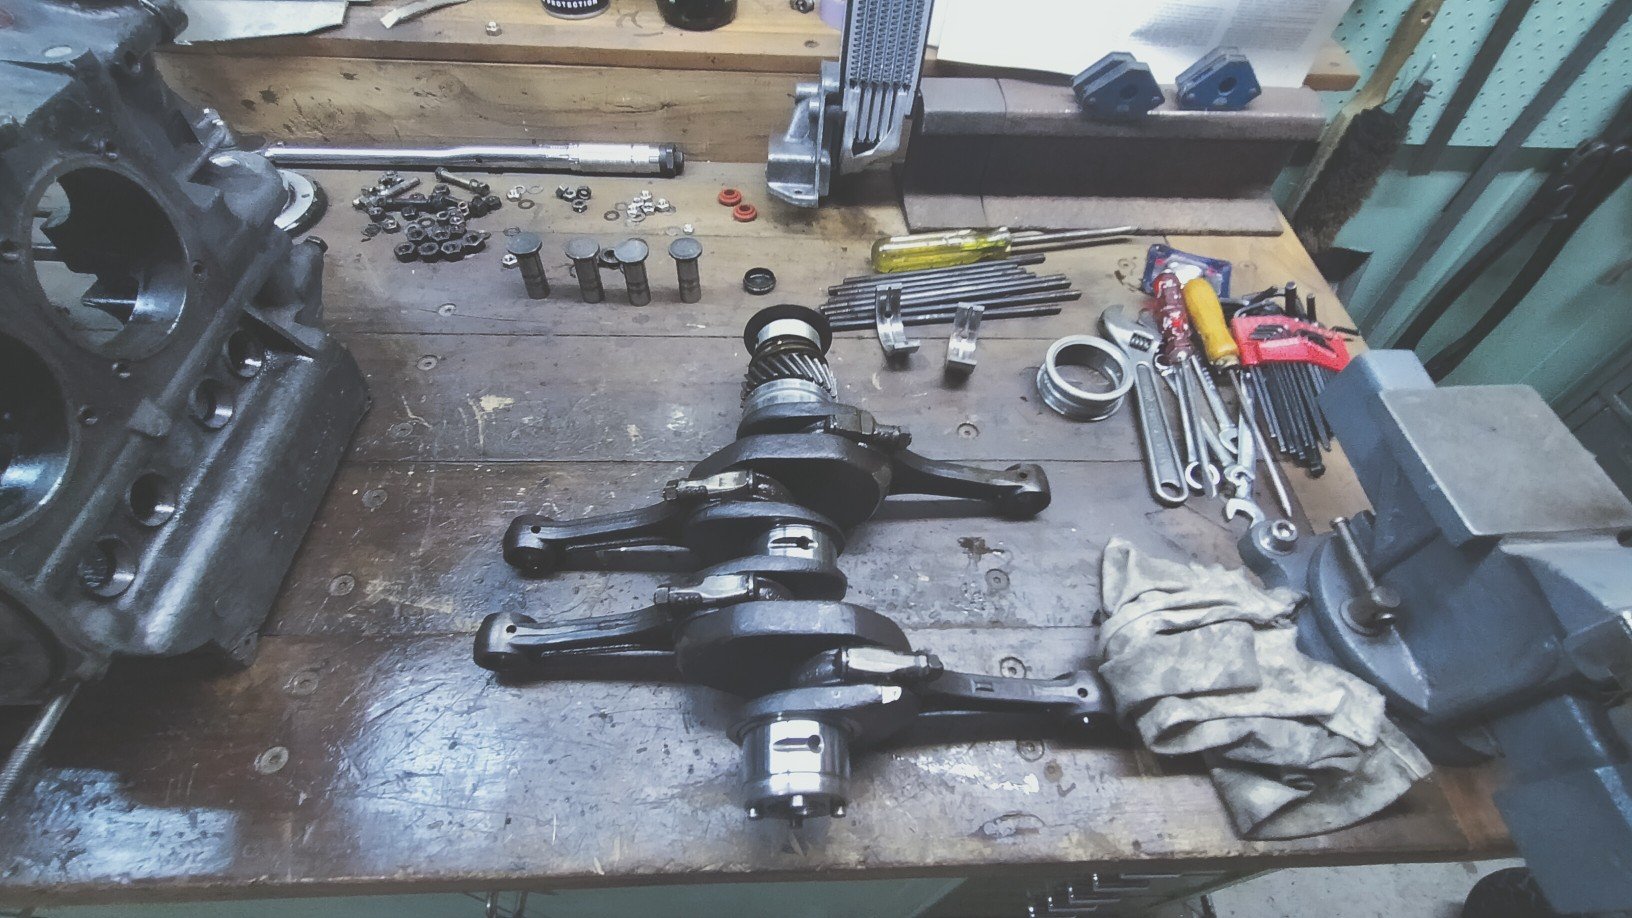
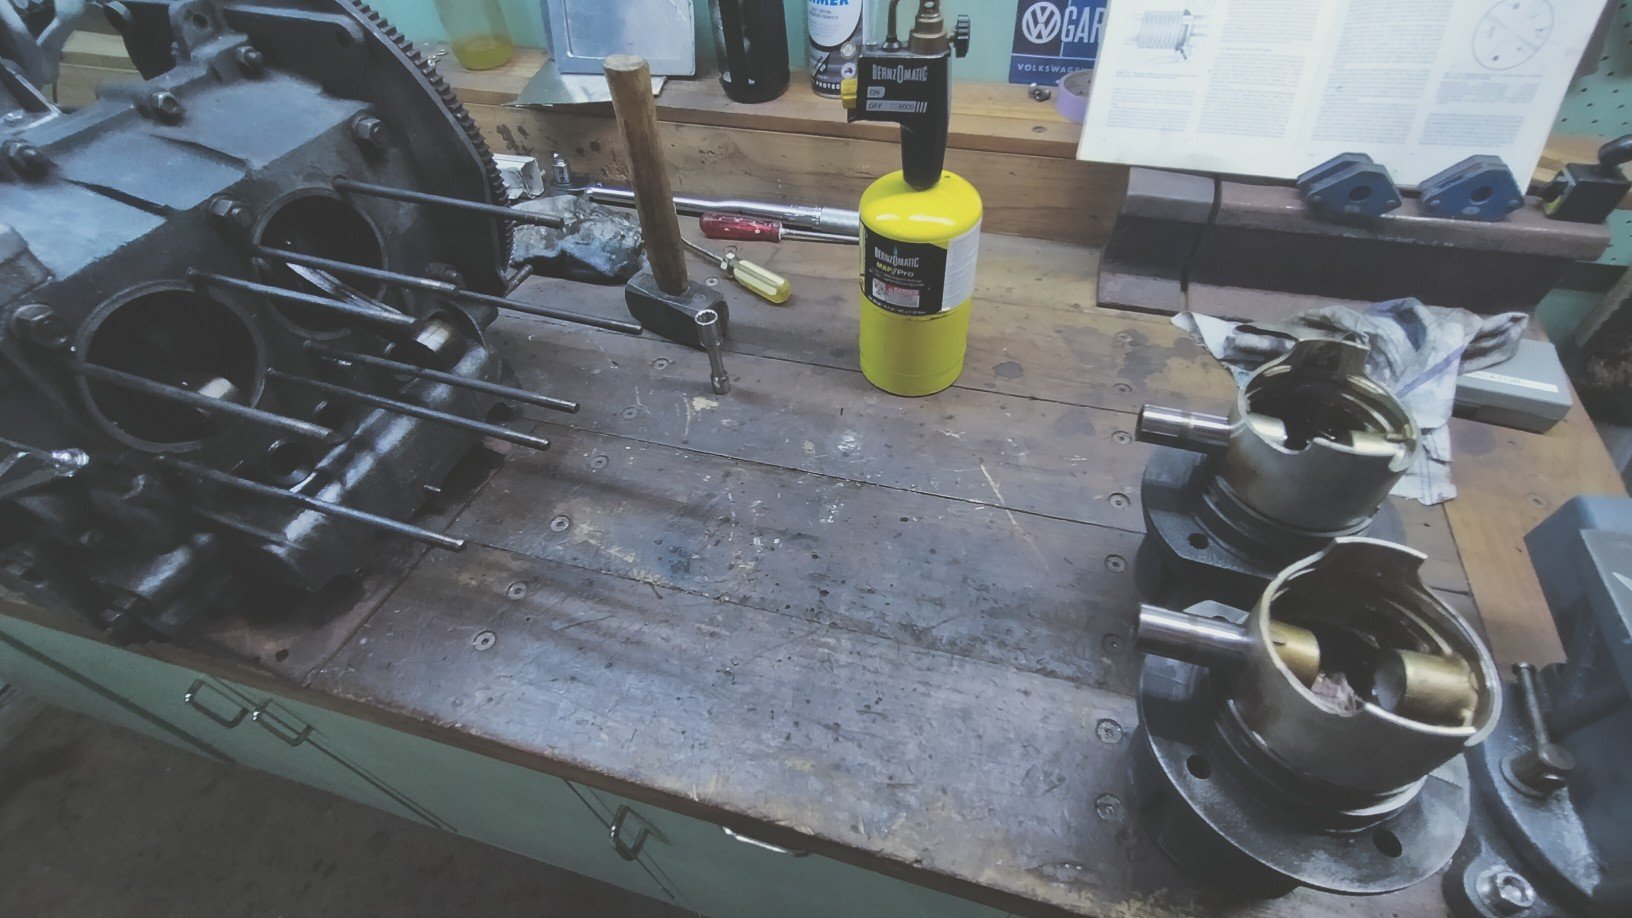
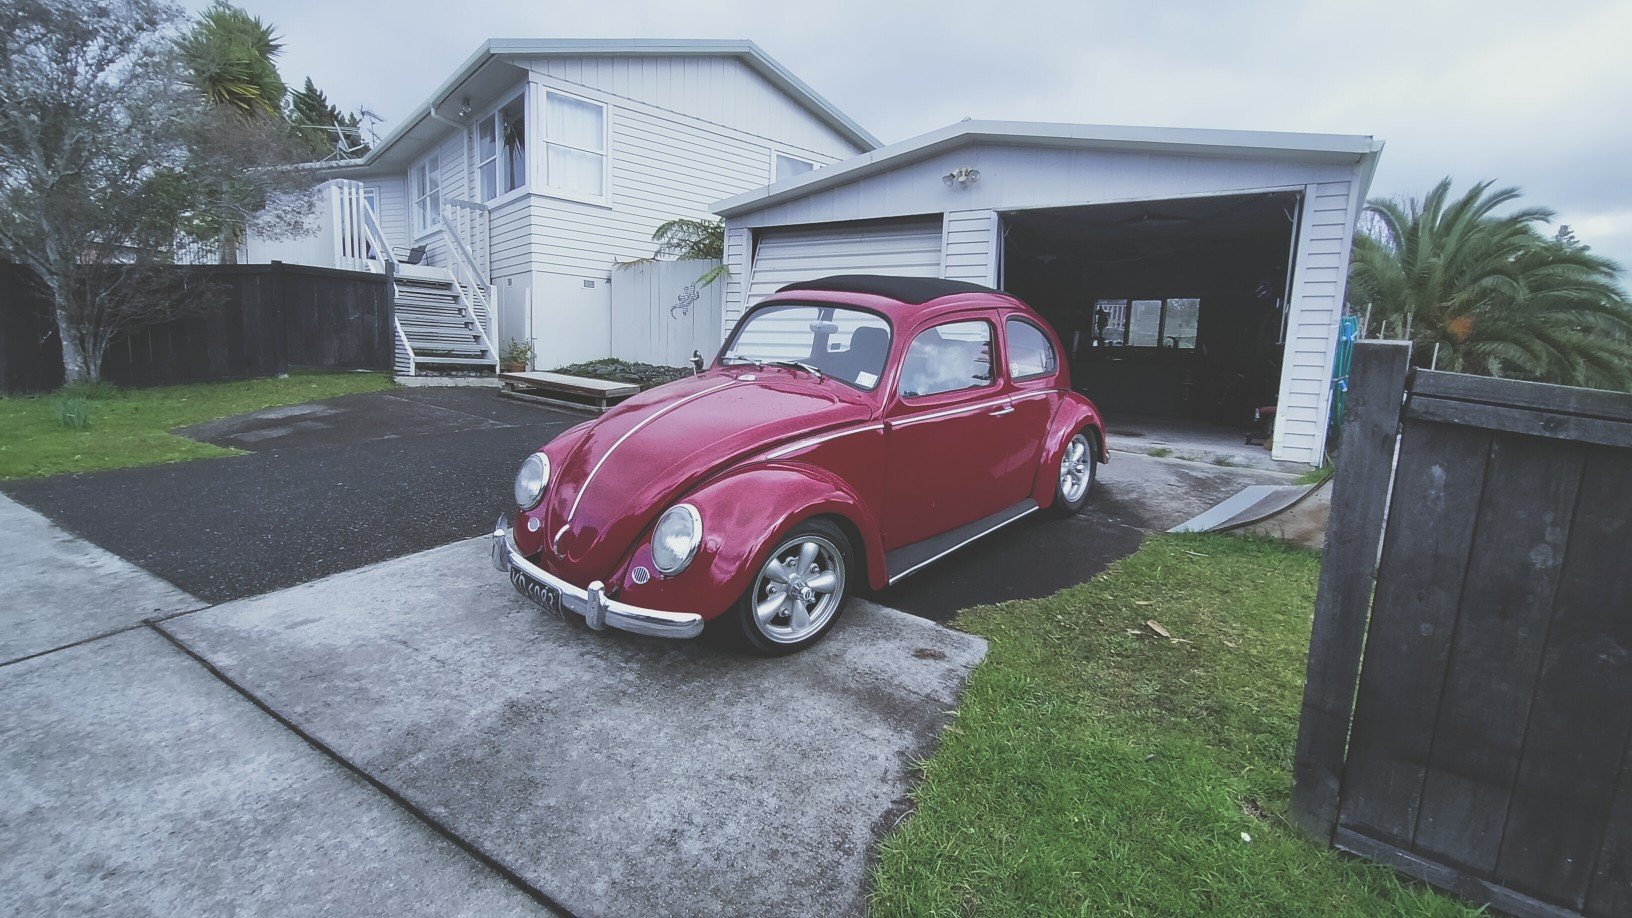
Two weeks I waited to hear the verdict on the case. Before I took the car off the road for the rust and paint mission, the oil leaks had pissed me off enough to pull the engine out and take it to a local mechanic for new pushrod tubes and any other seal he could bung up. I remember him telling me the case was cracked behind number 3, the thinnest part and hottest running cylinder, and the heads were toast. We he was fuckin wrong about the case! Unbelievably it's only on its second over size now, so happy as finding a good base to build is getting hard these days. Even more amazingly, the crank is still within standard spec and even the center journal with the munted bearing only needed a light polish. The dude even said " he can't remember the last time a crank came in,that didn't need machining" guessing lucky! But I do always change my oil regularly, every 3000miles or six months as you should on these old clankers. I set about cleaning up the case. Using a small brass wire brush and turps. Will need to make sure all the galleries and shit are clean before it goes back together. Also go as well as the crank bearings, which are machined to fit, new big end bearing in the rods, new cam bearings and a full engine seal kit. These however, have been quietly waiting their turn under the bench for a long time. Soon my pretty, soon.

- 261 replies
-
- 23
-

-
It's spending other people's money the best! Haha, as much as I would like to, this thing can already out drive is terrible drum brakes.
-
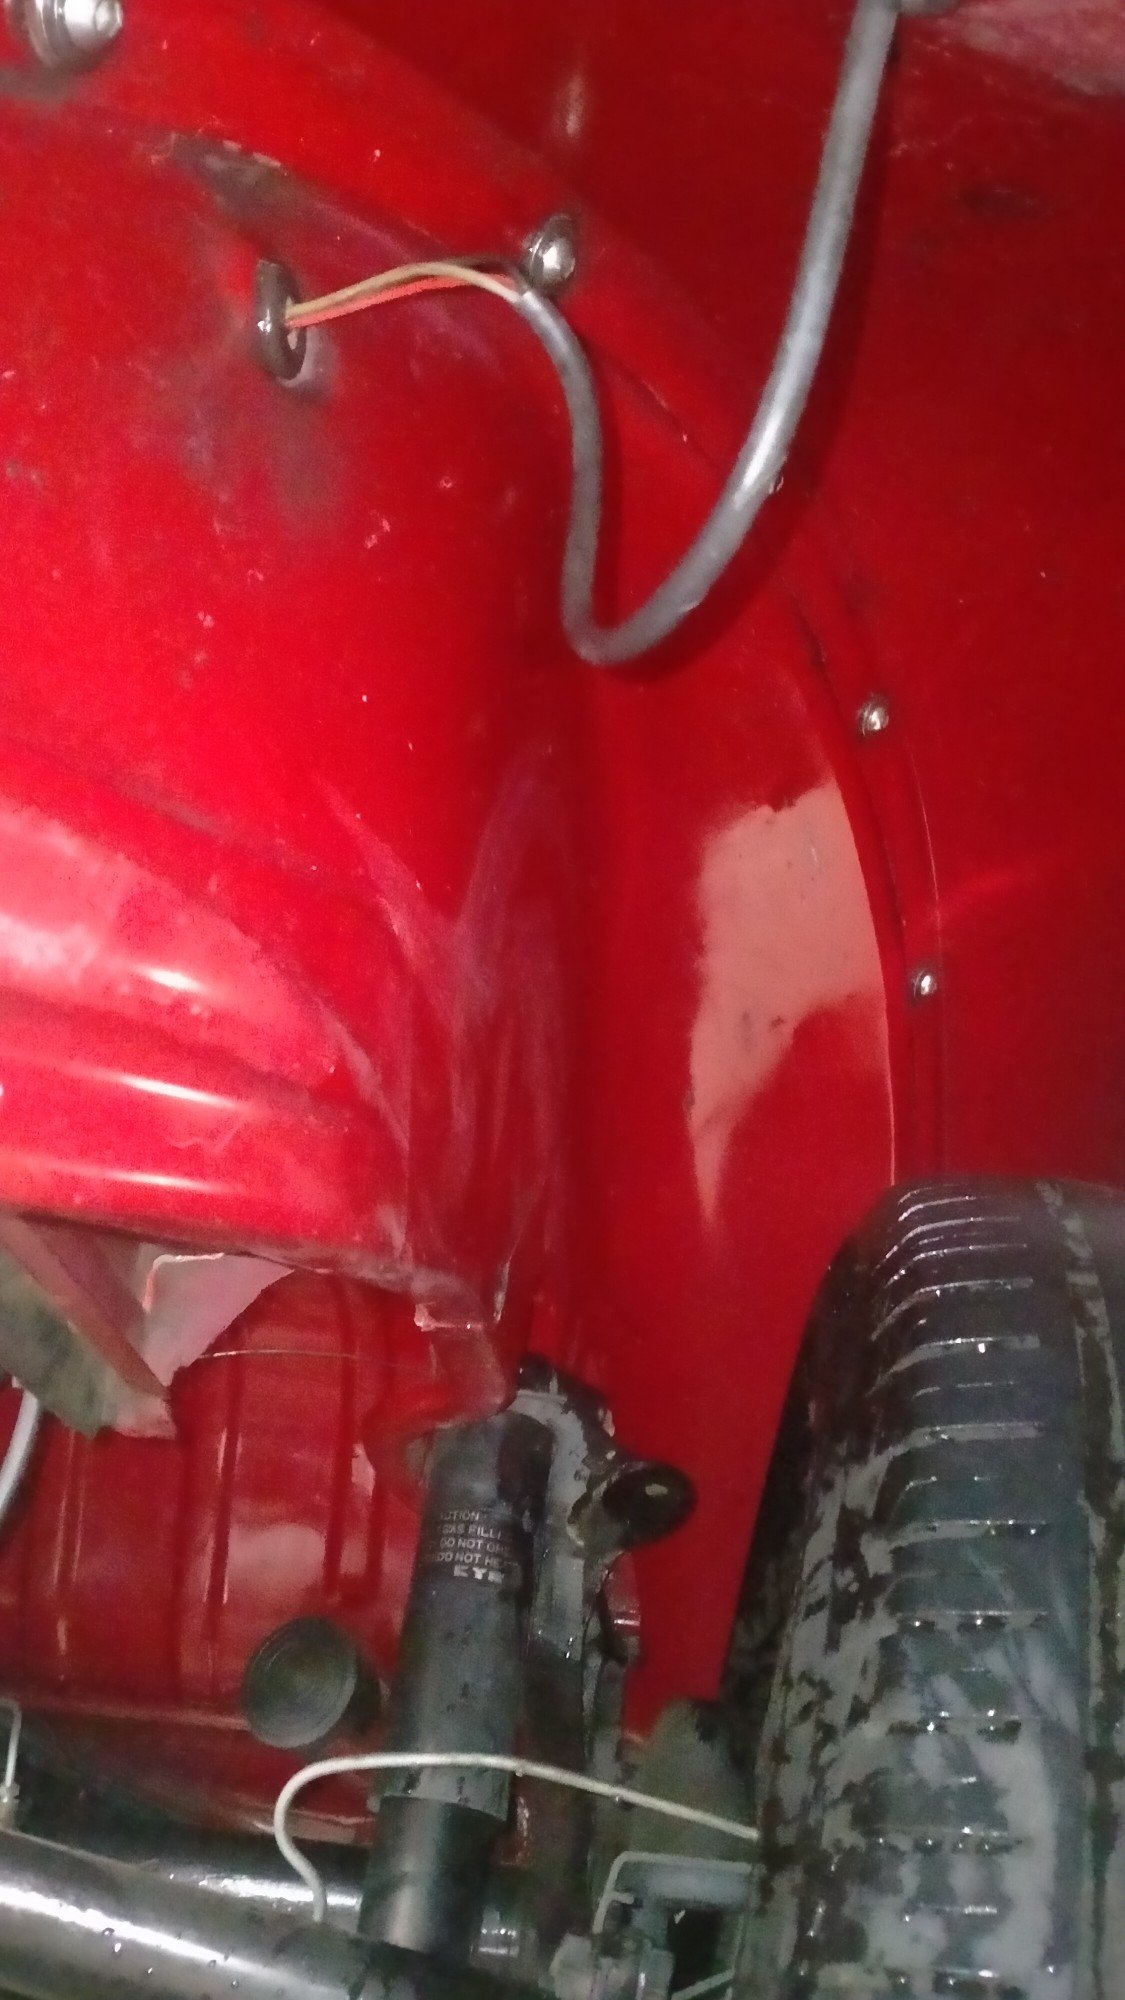
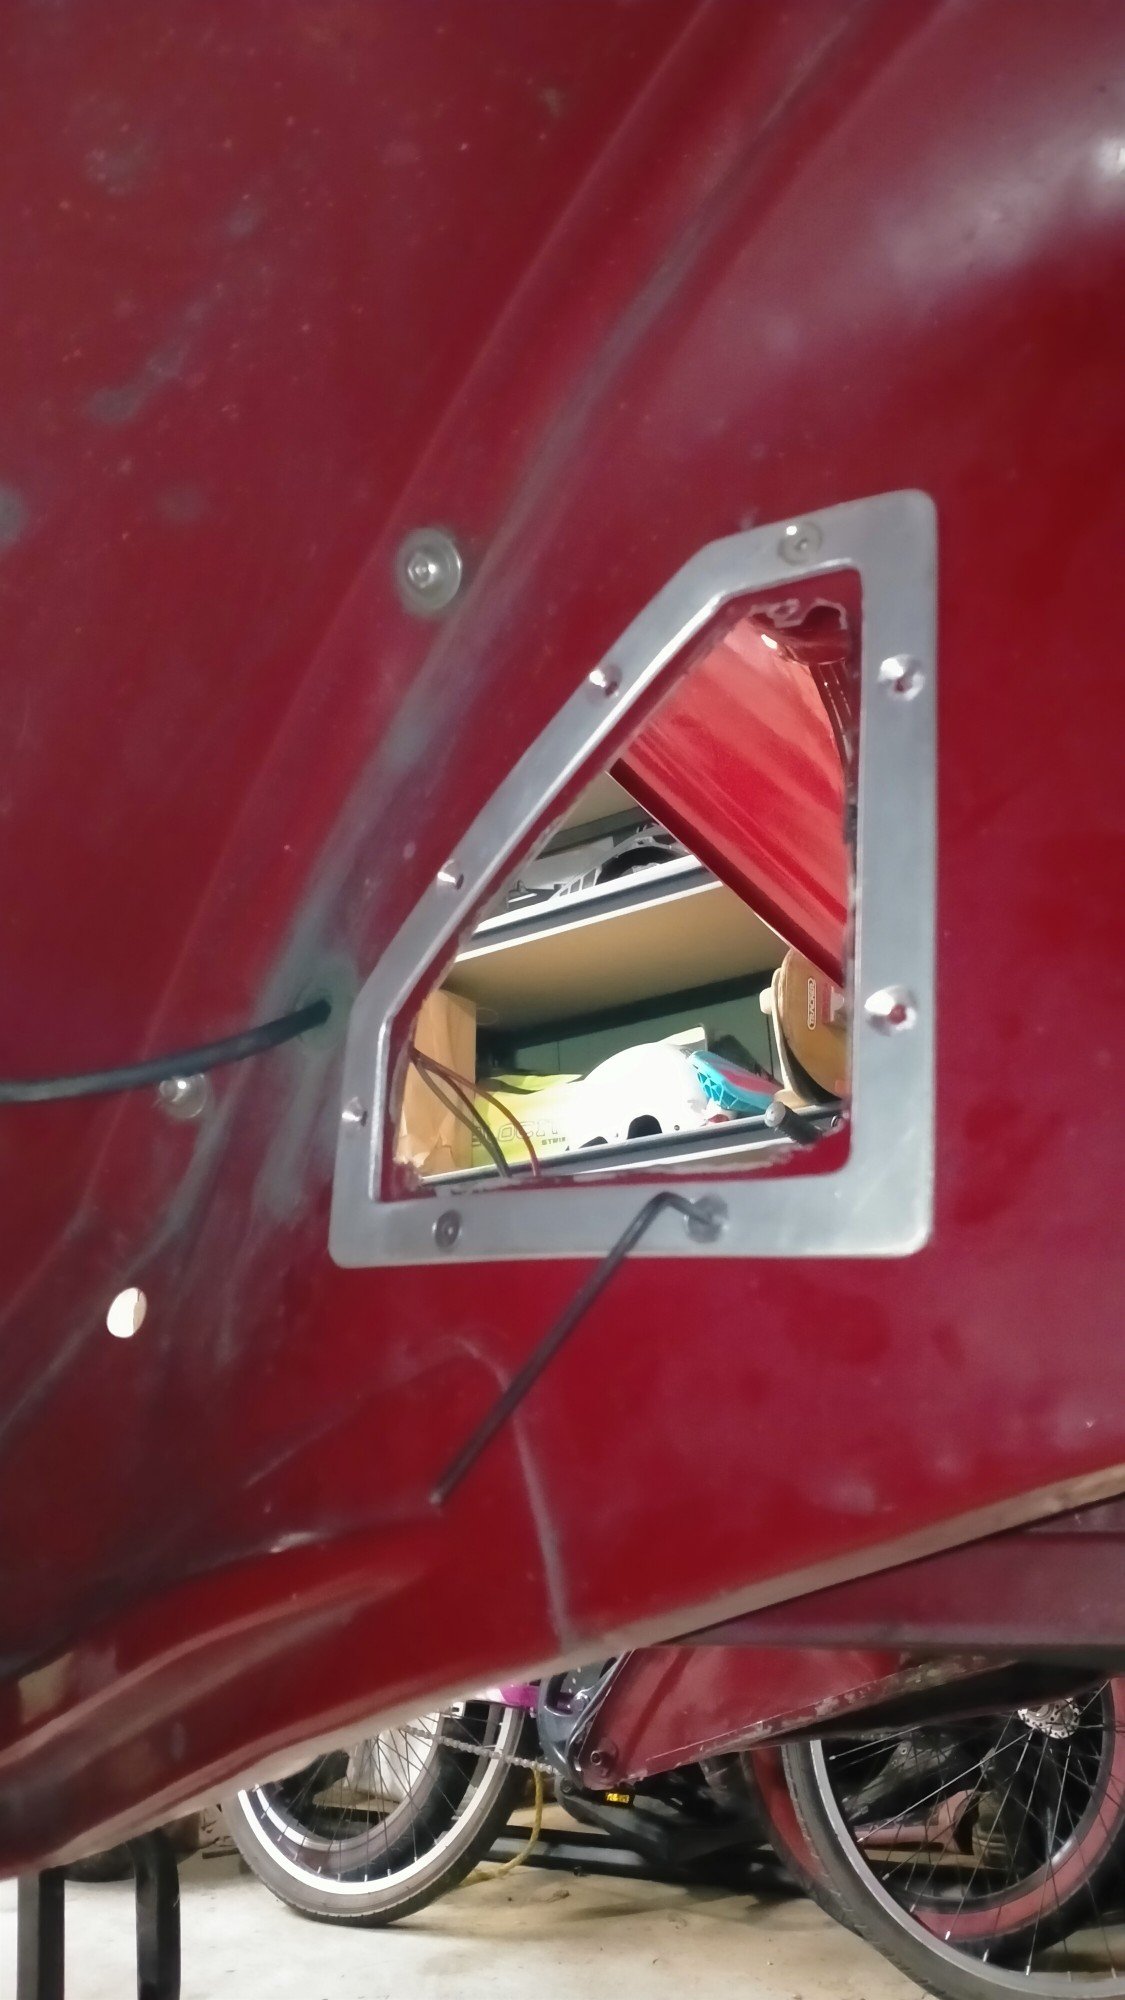
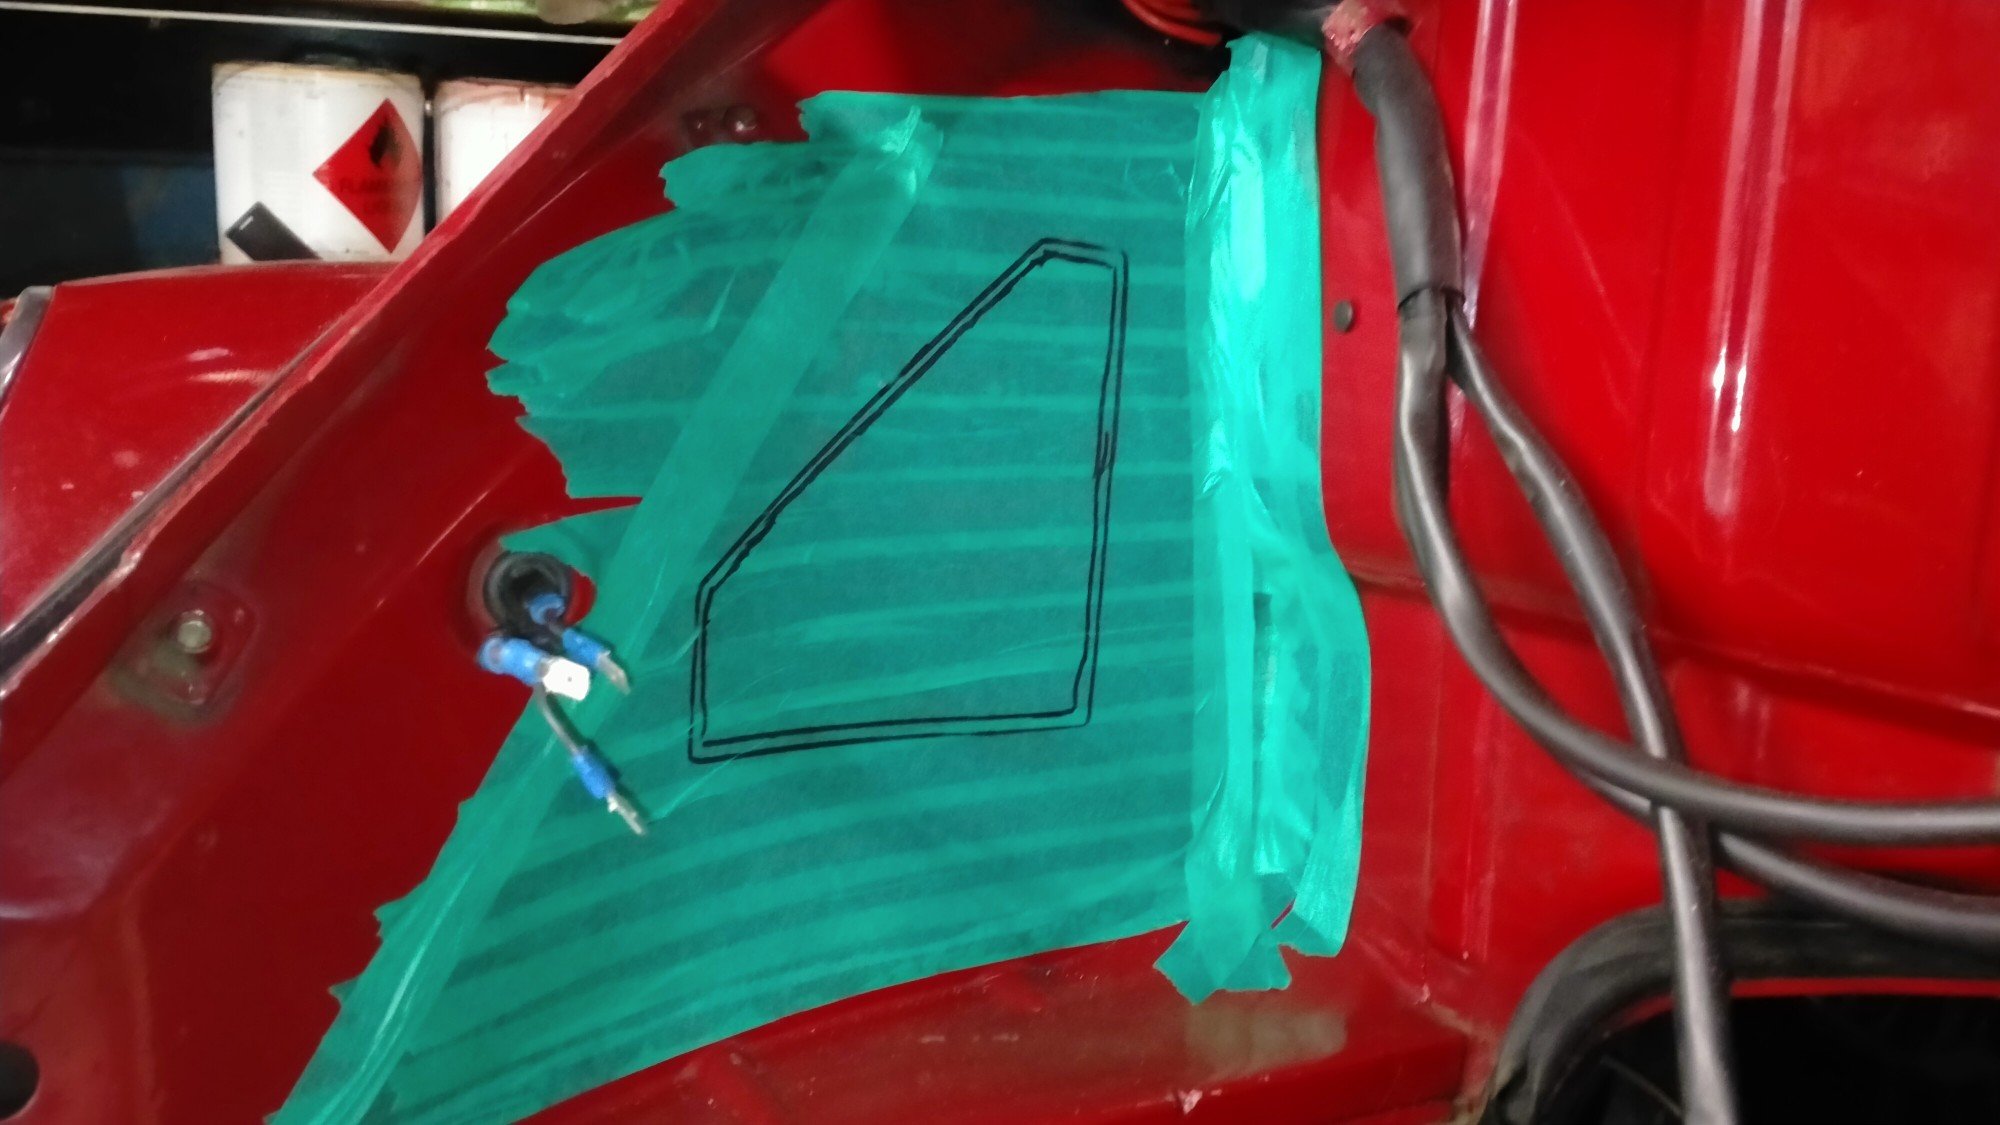
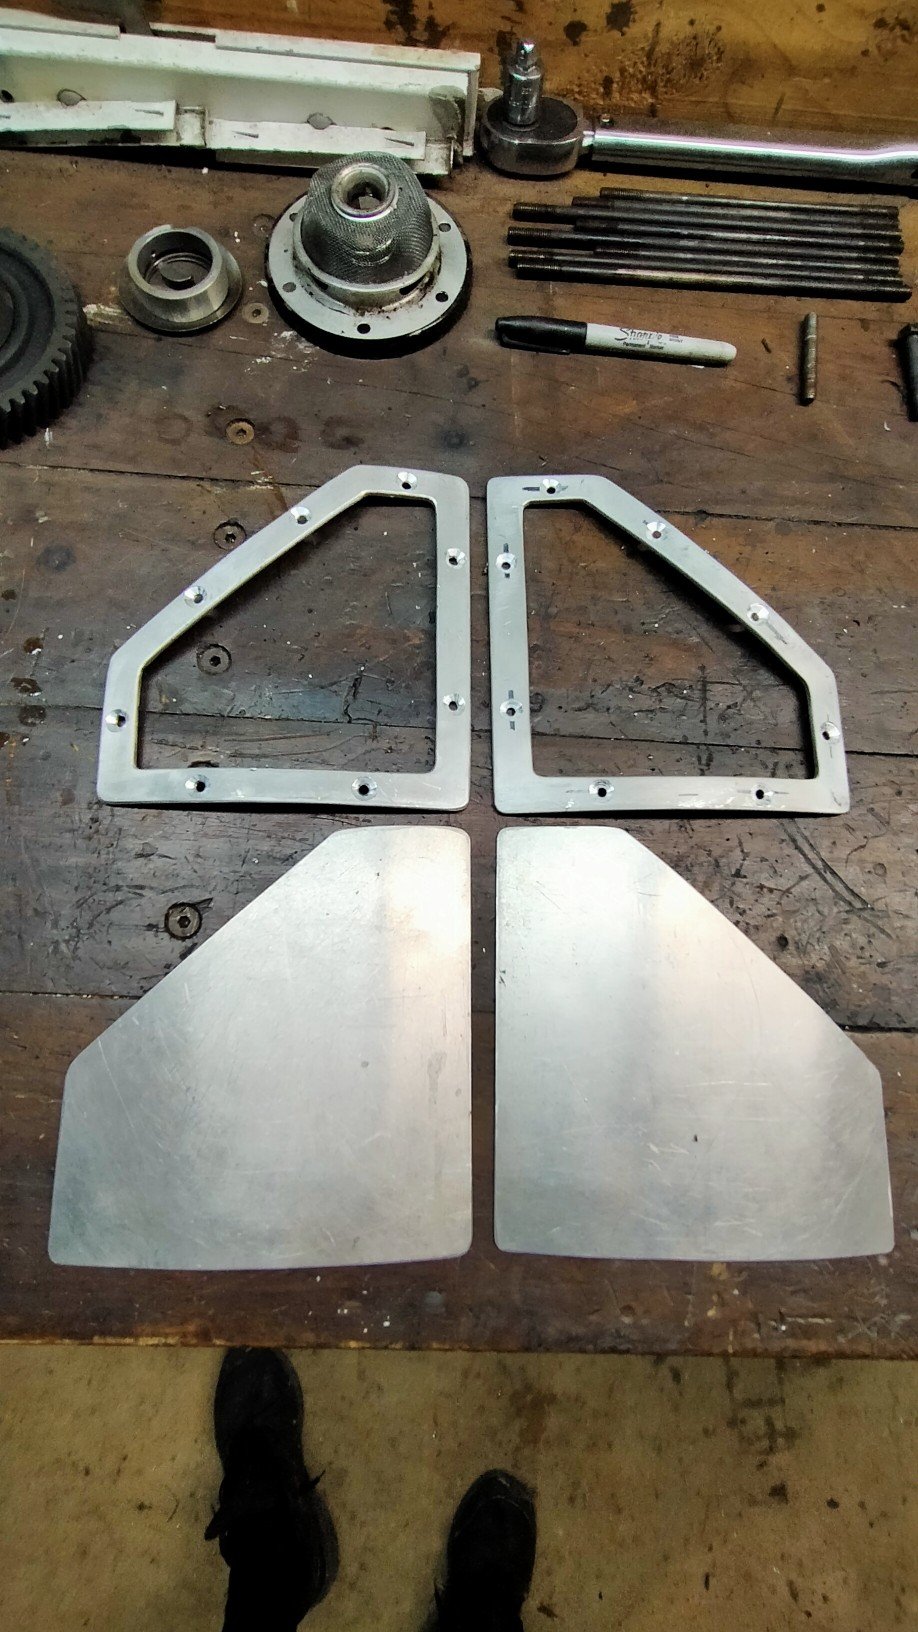
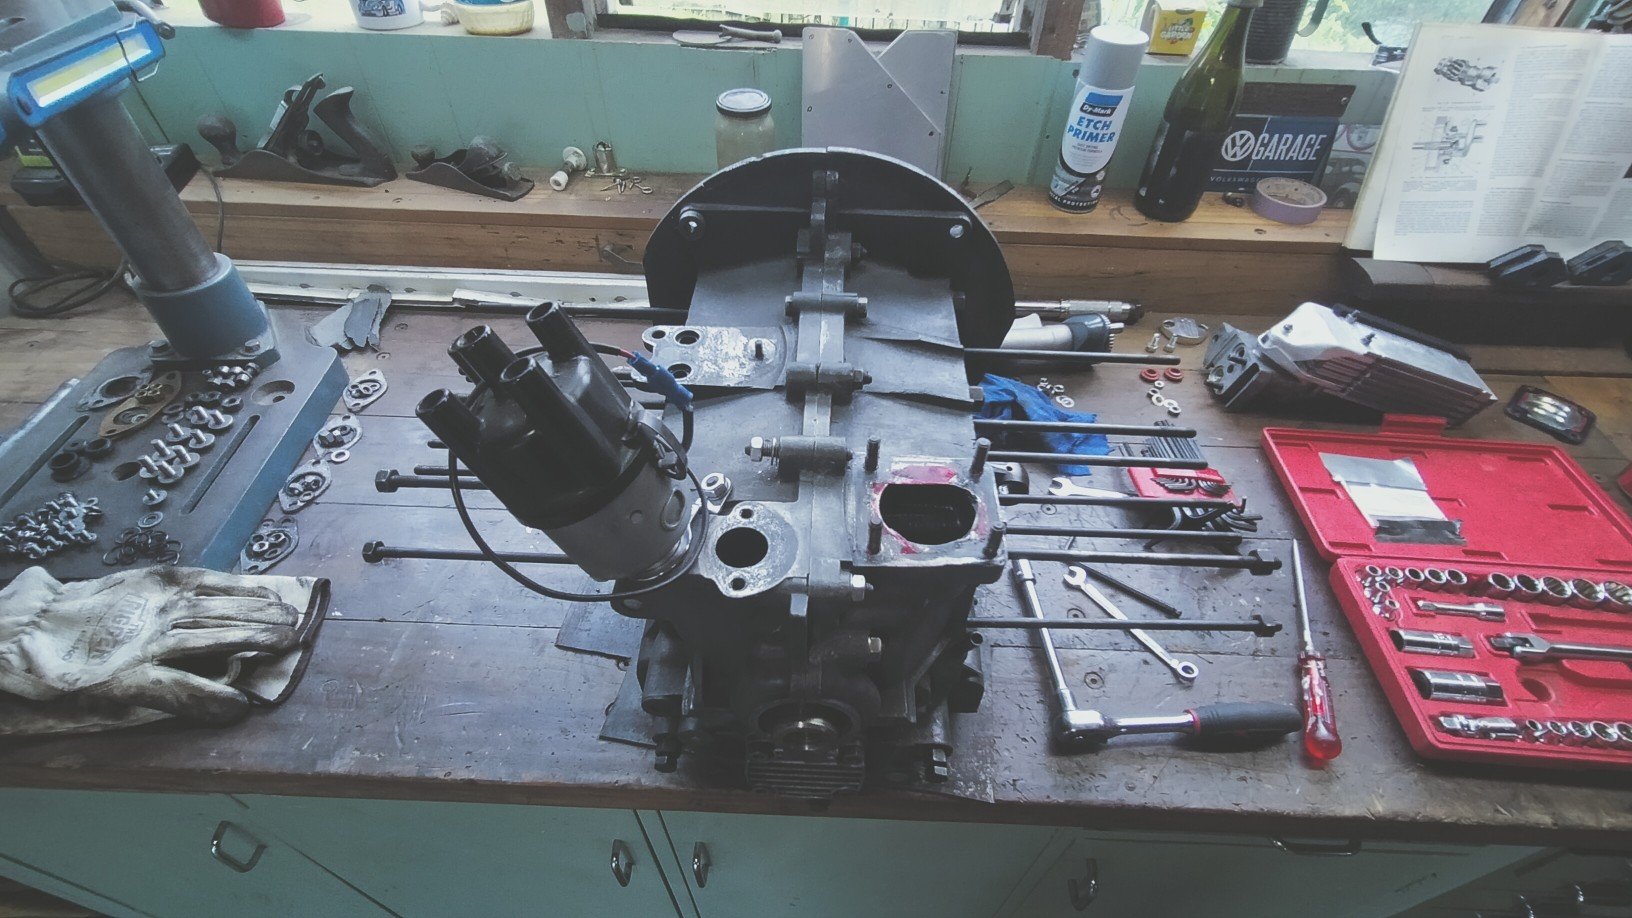
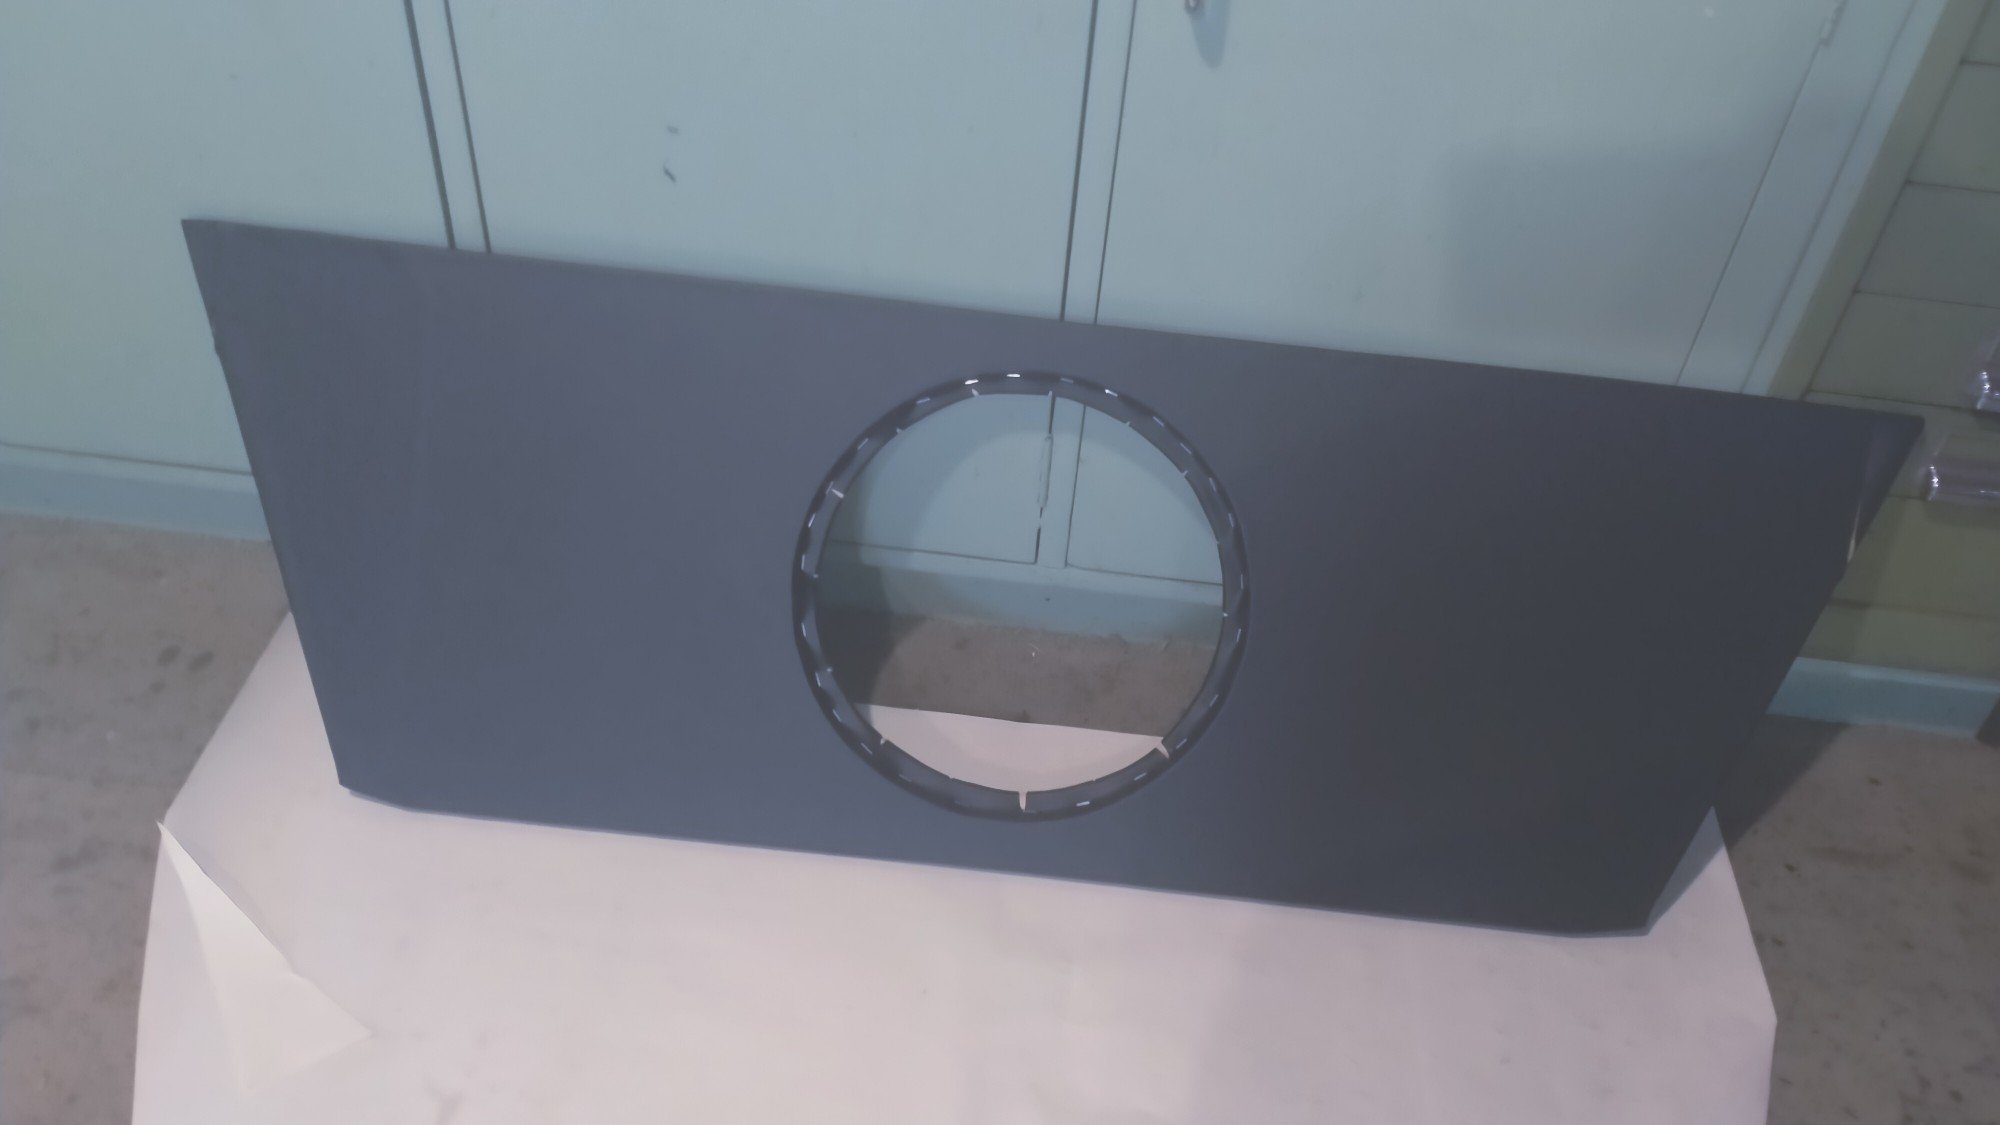
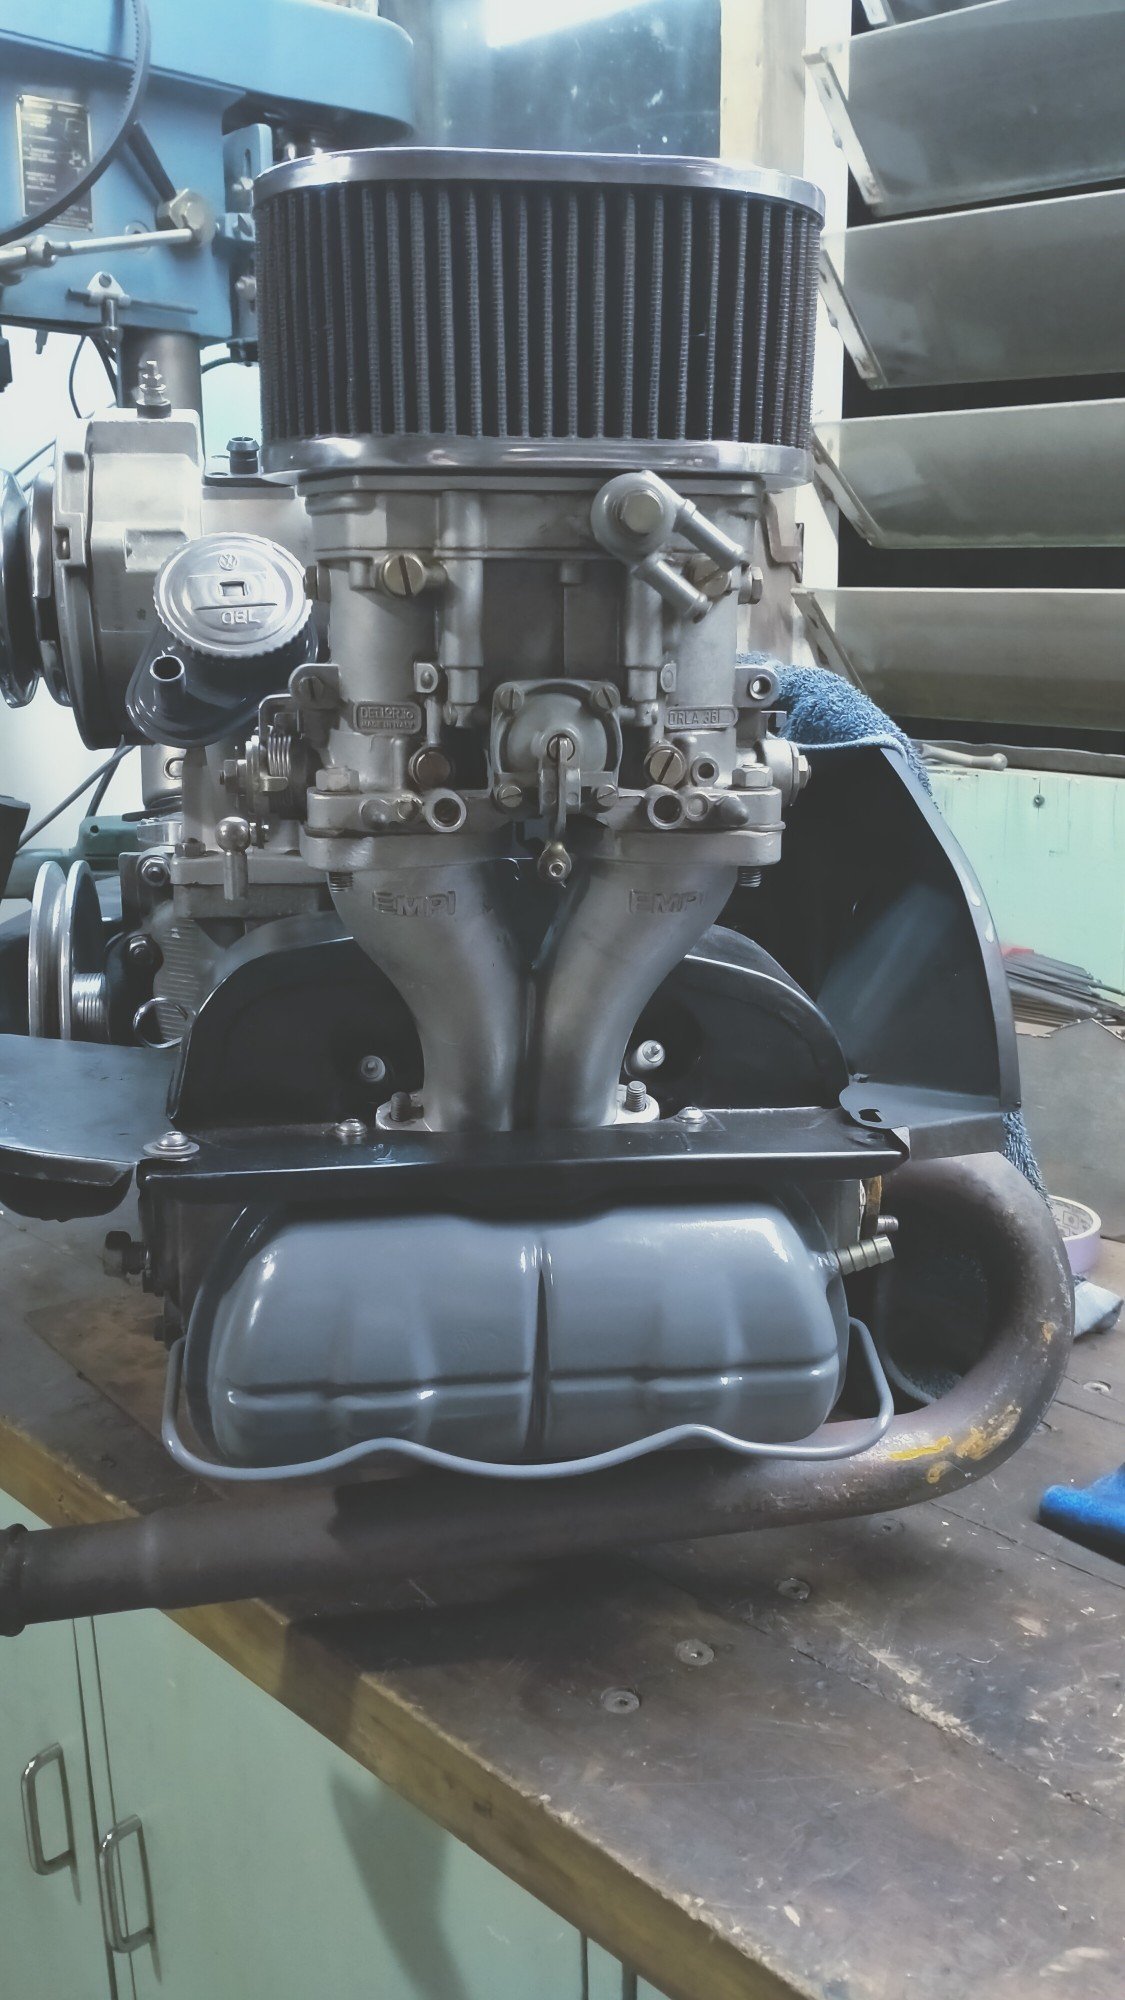
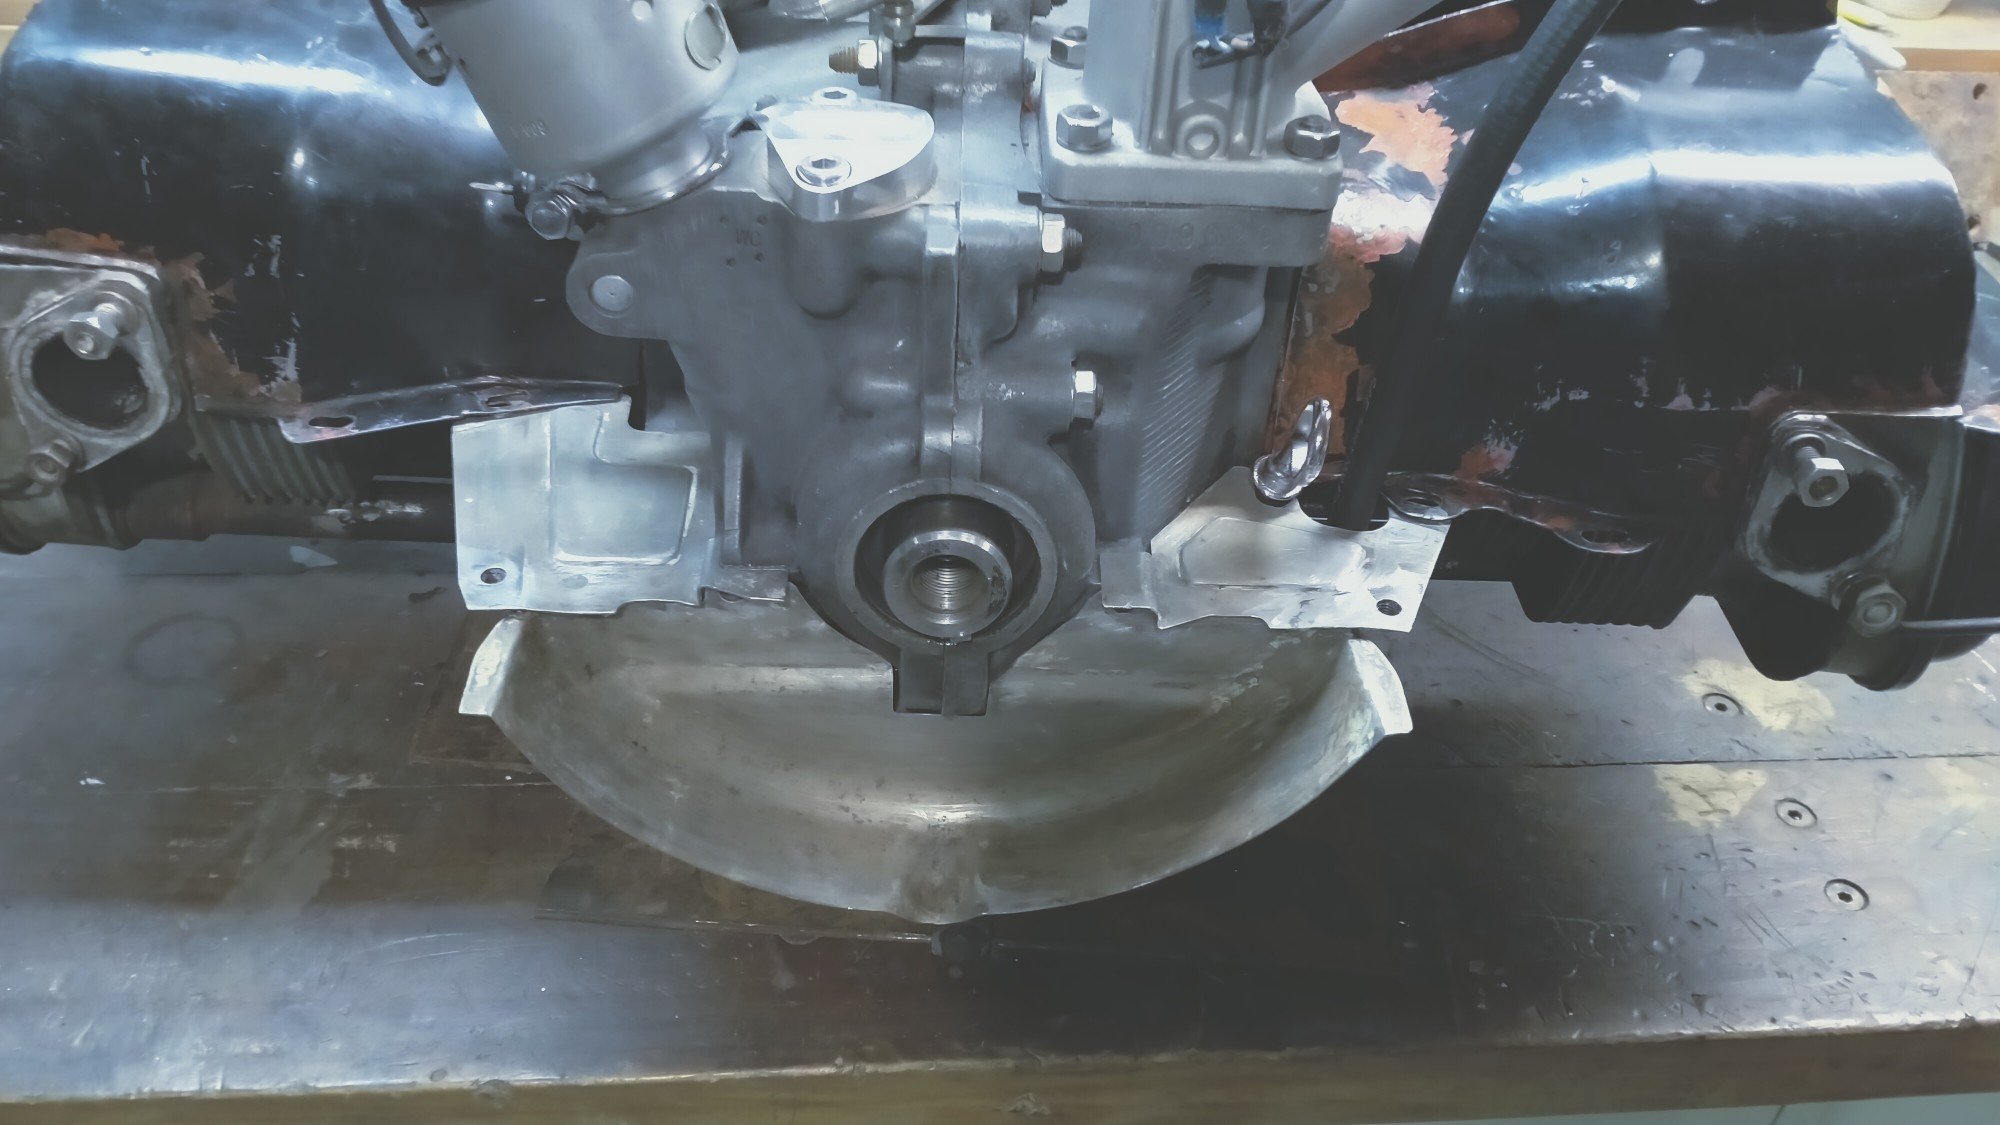
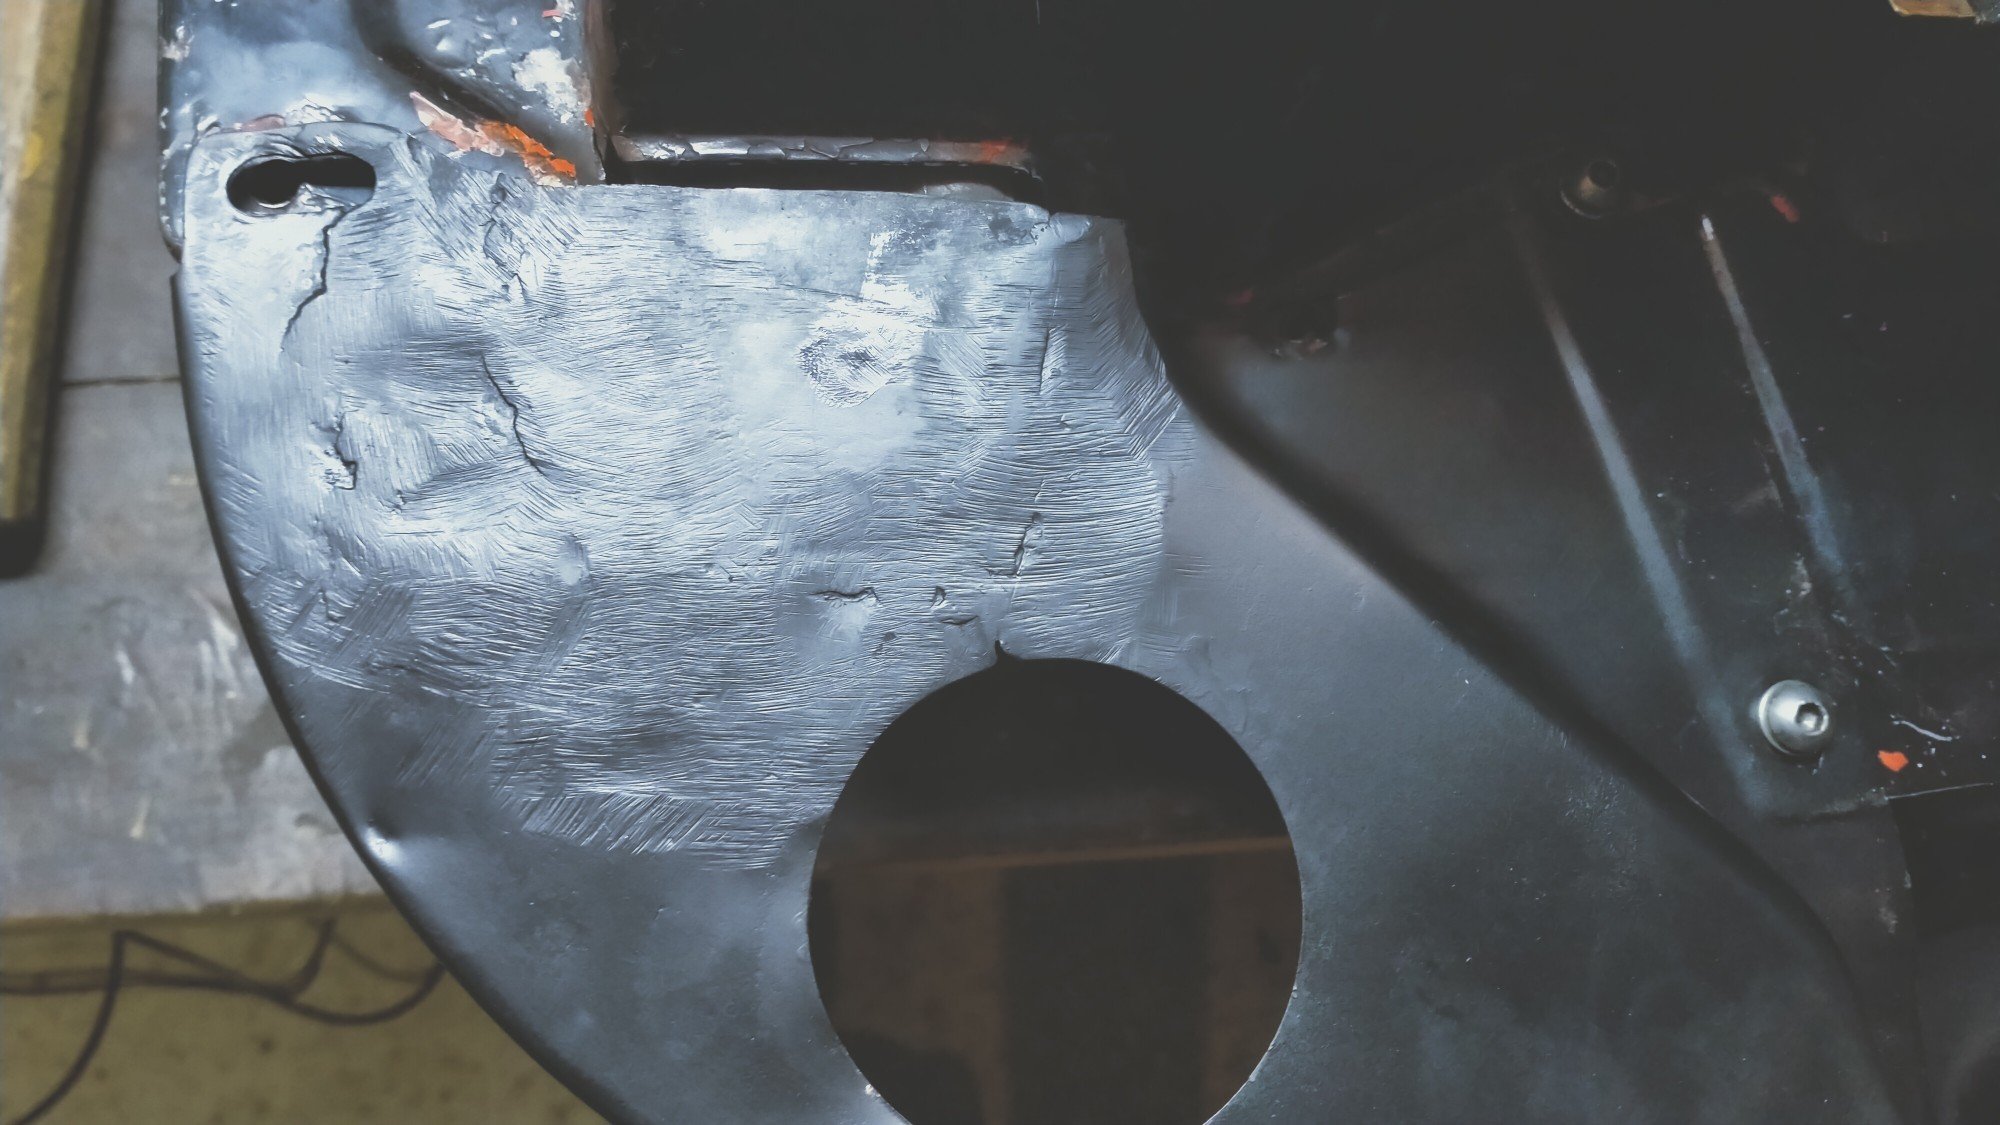
So I took the case and crank over to Qualitat for their air-cooled guy to check if the it was viable to rebuild. Wasn't holding out much hope as this is 40-50 year old chunk of alloy that I abused on a daily basis. Took the opportunity to clean up the rear wheel well. Made these from some scrap alloy I had. Marked up a that's about right spot. And cut some massive triangles out of my nicely painted engine bay. Drilled hole and popped rivnuts in. Left the edge rough to hammer over the frame to strengthen the panel up. Both bent to shape and countersunk for mounting, the plan was to drill and tap the frame for the covers to attach with but was thinking about using VHB tape. All this work is to make installing the carbs and manifolds easier, it to about 10 minutes to put the engine in last time, and two hours to tighten the four nuts that hold the manifolds on.
- 261 replies
-
- 19
-
-
Goldwing owners and a ulissan membership, congratulations.
-
Okay I guess will have to see what the expert says. I had this engine built for my 21st back in the year 2000. It's a 1600 twin oil relief case from the early 70s
-
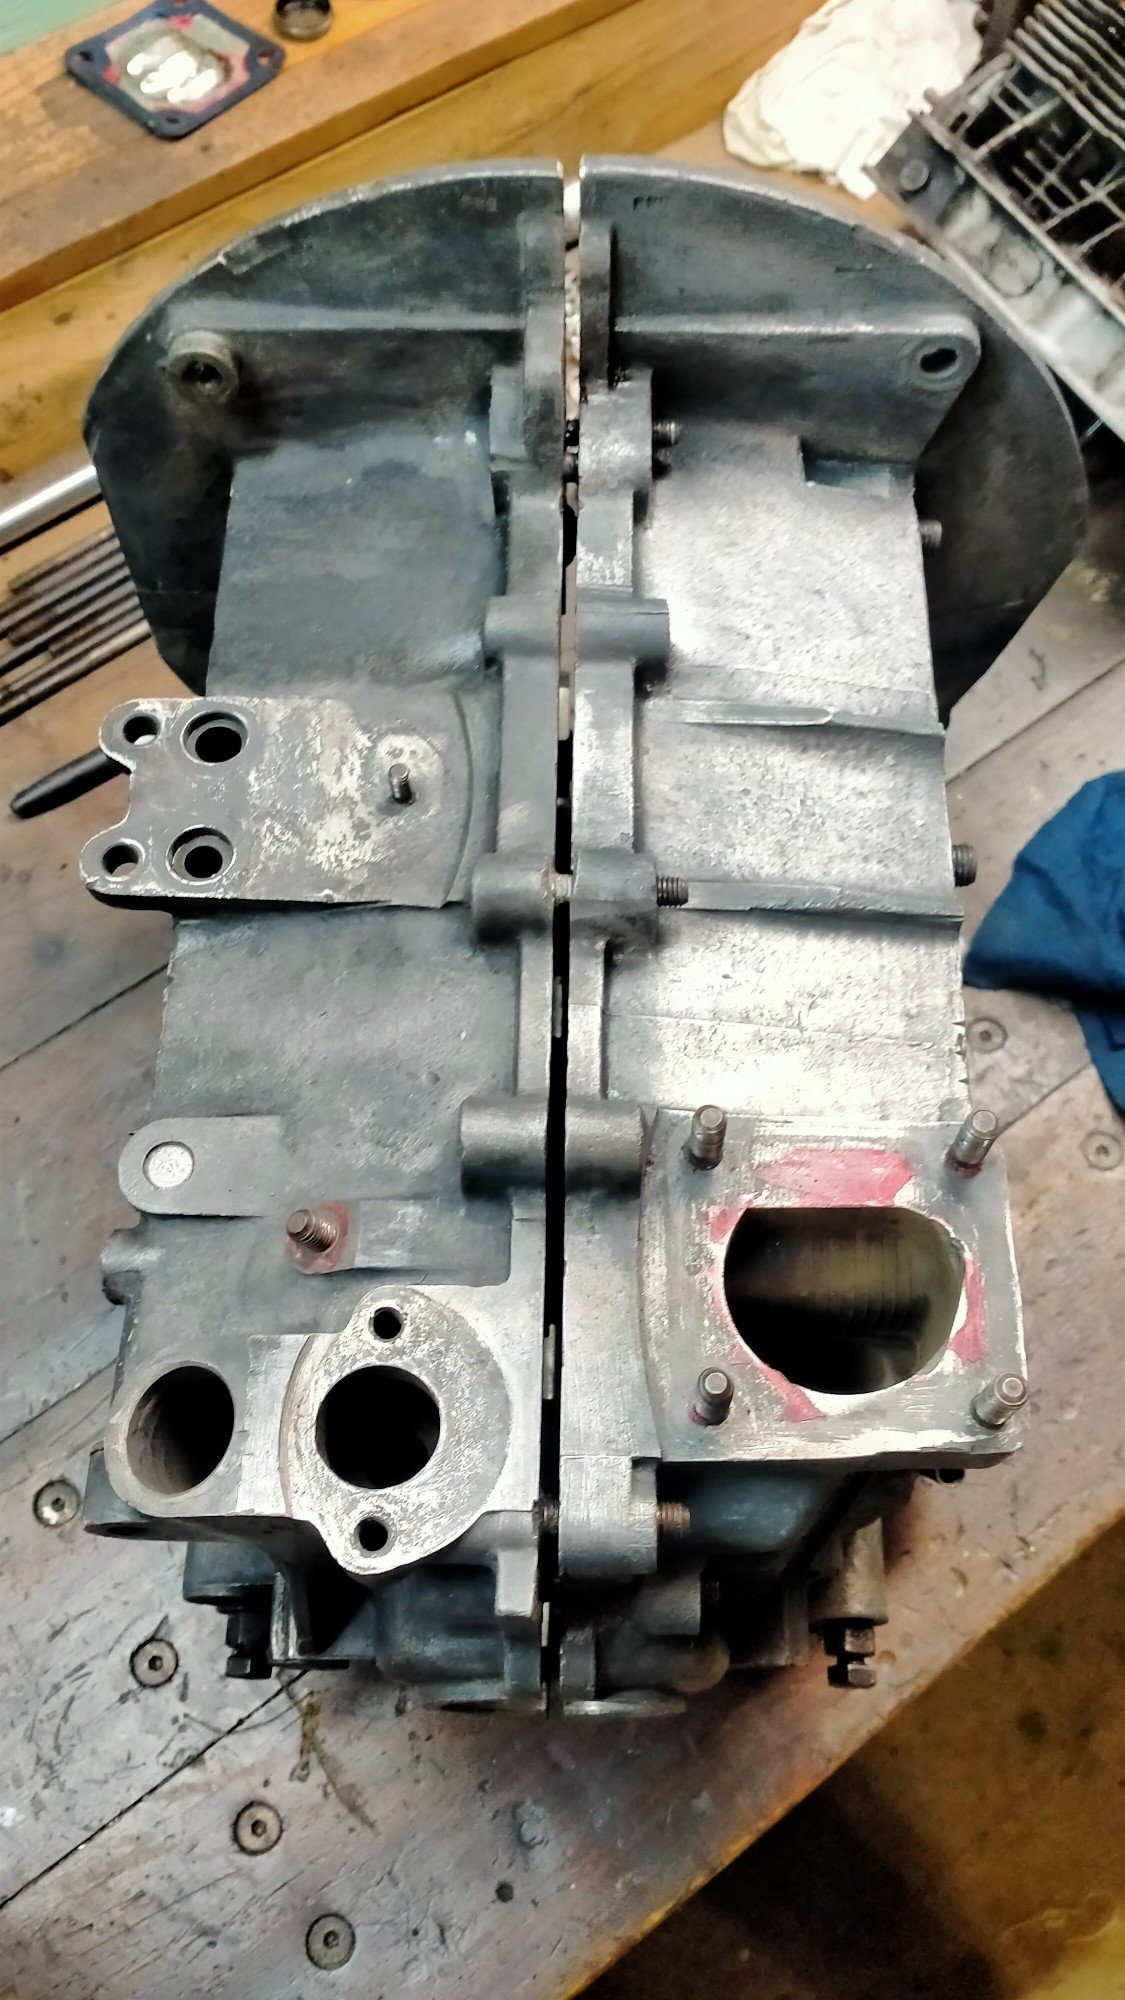
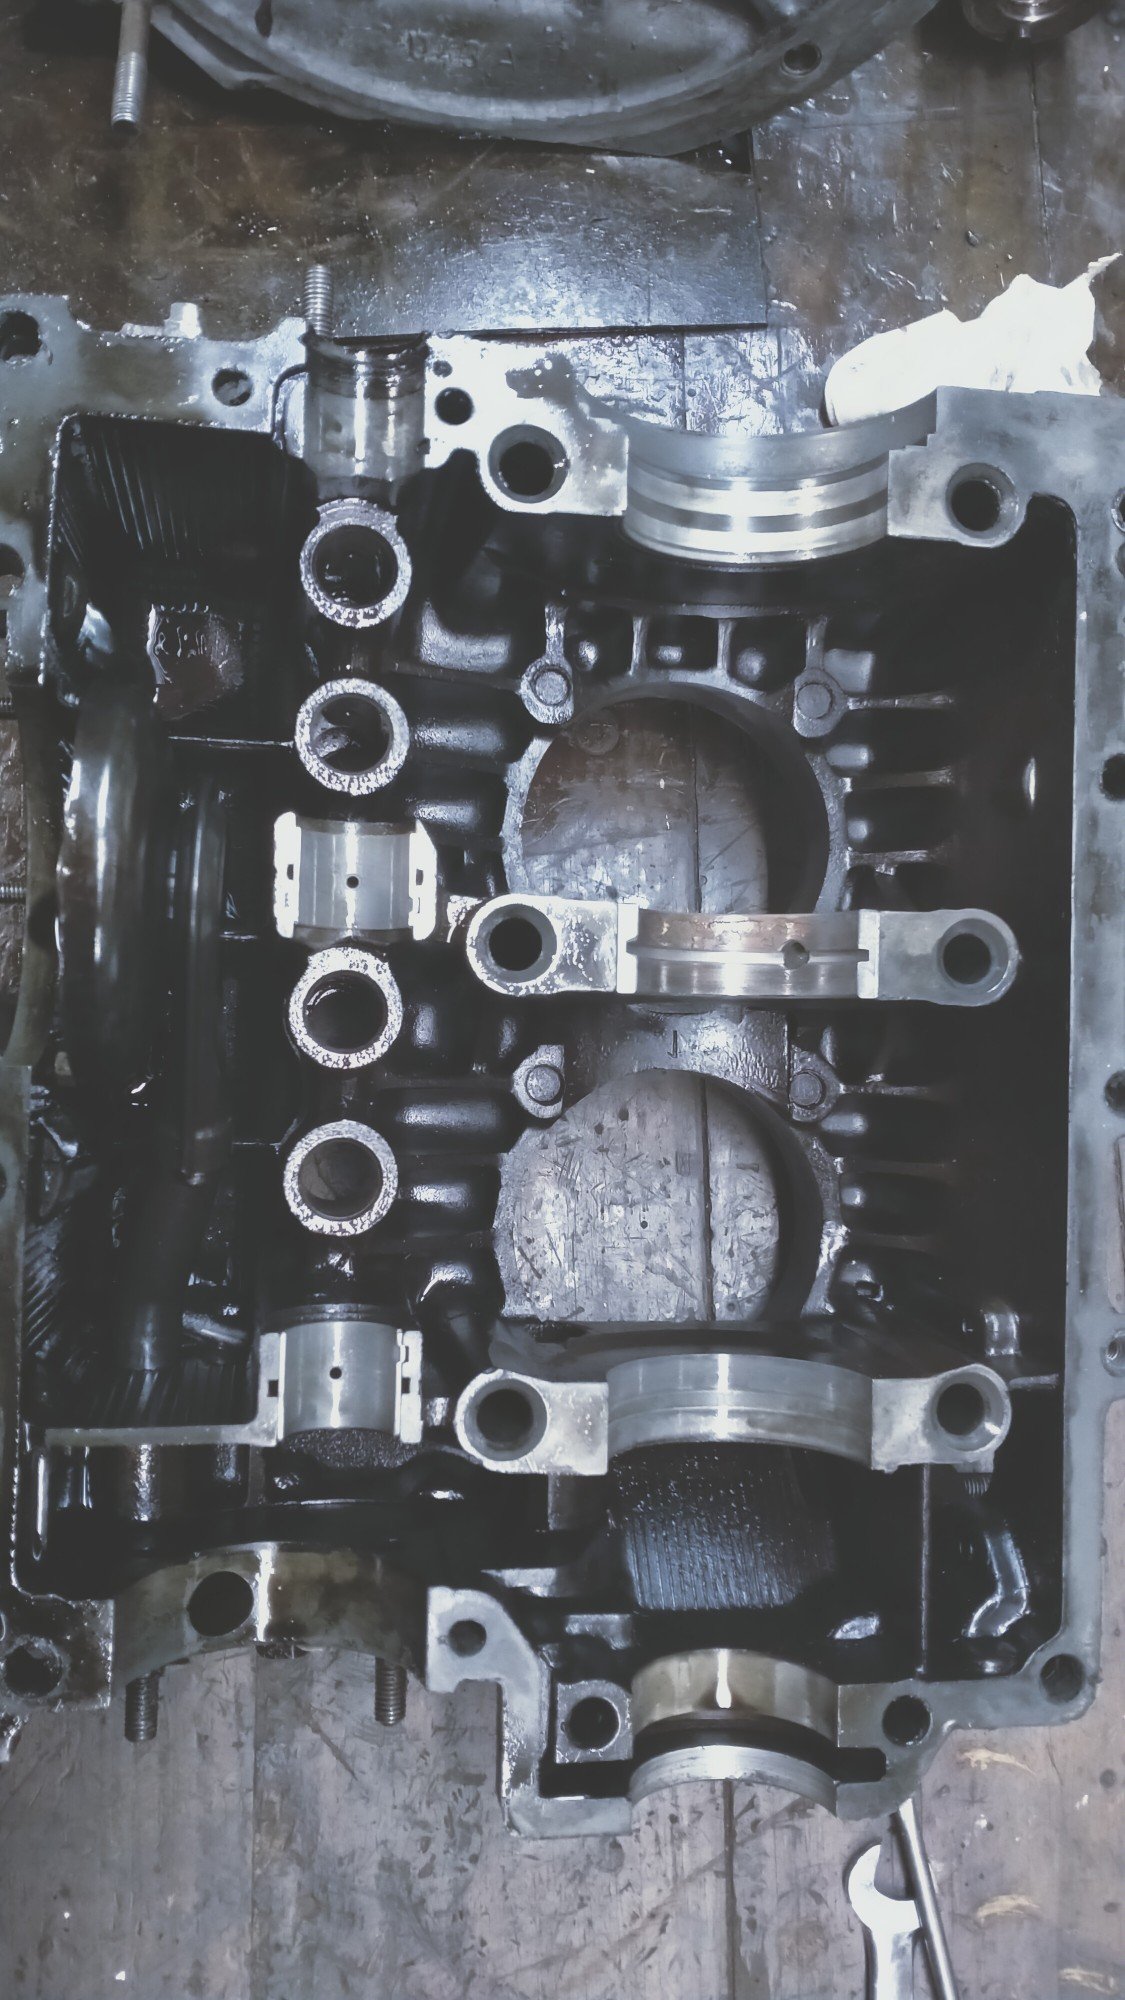
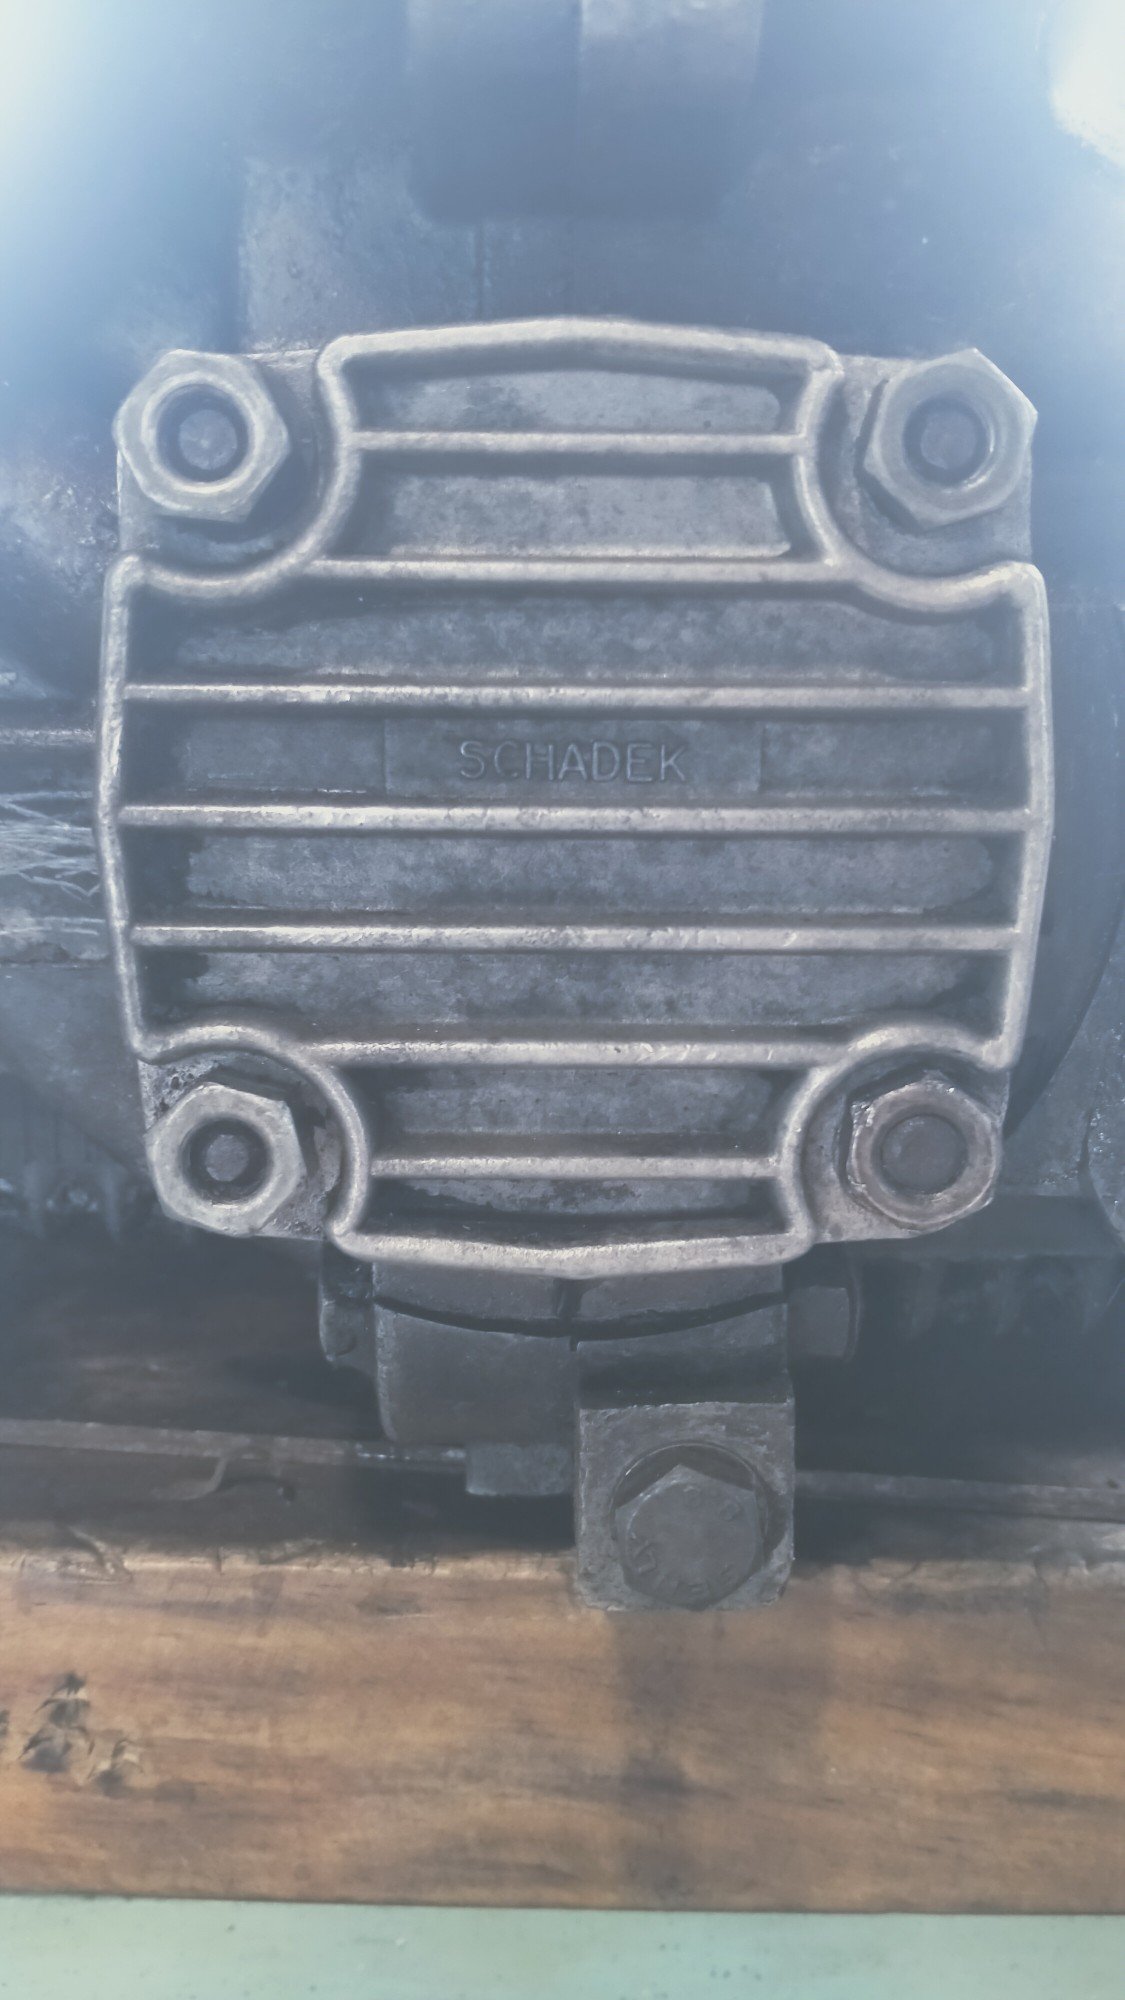
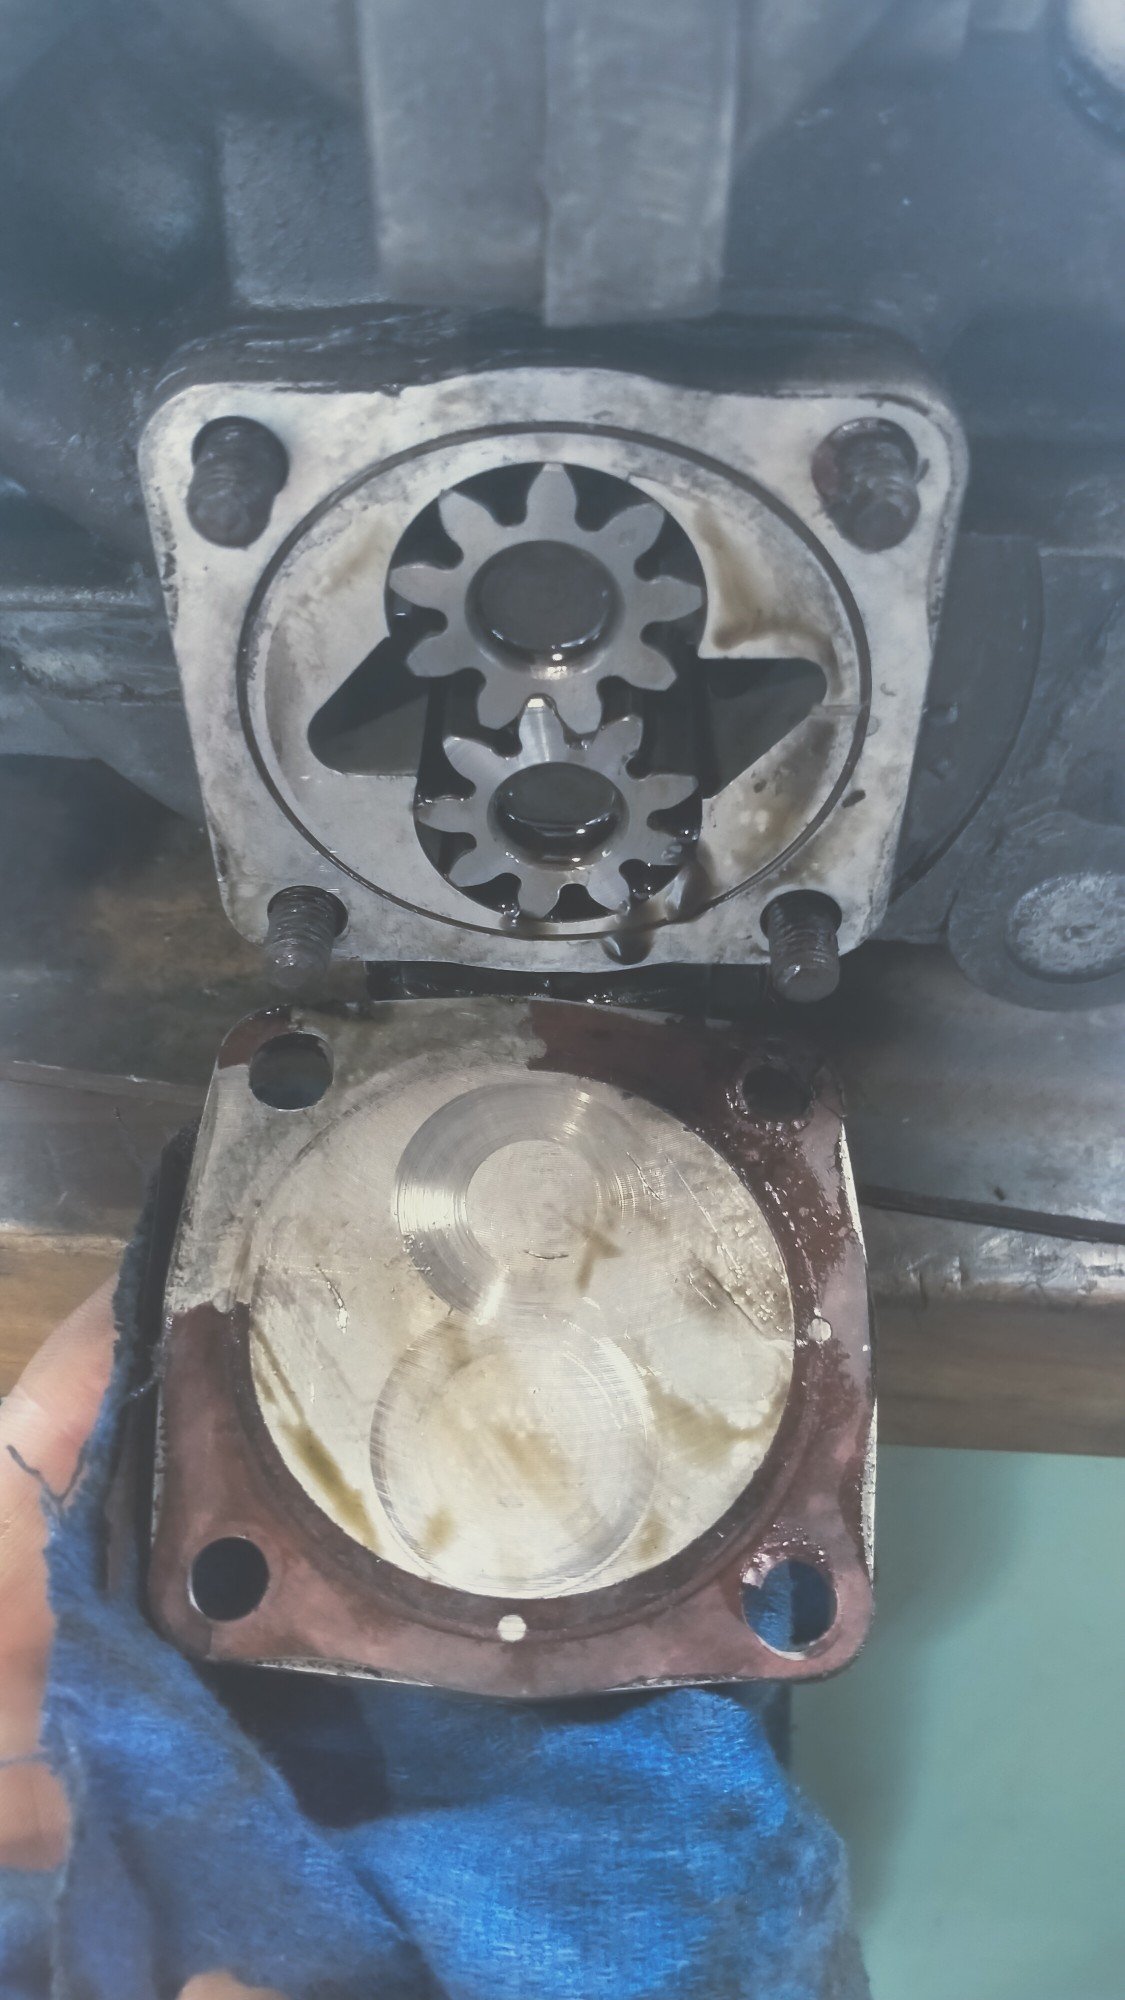
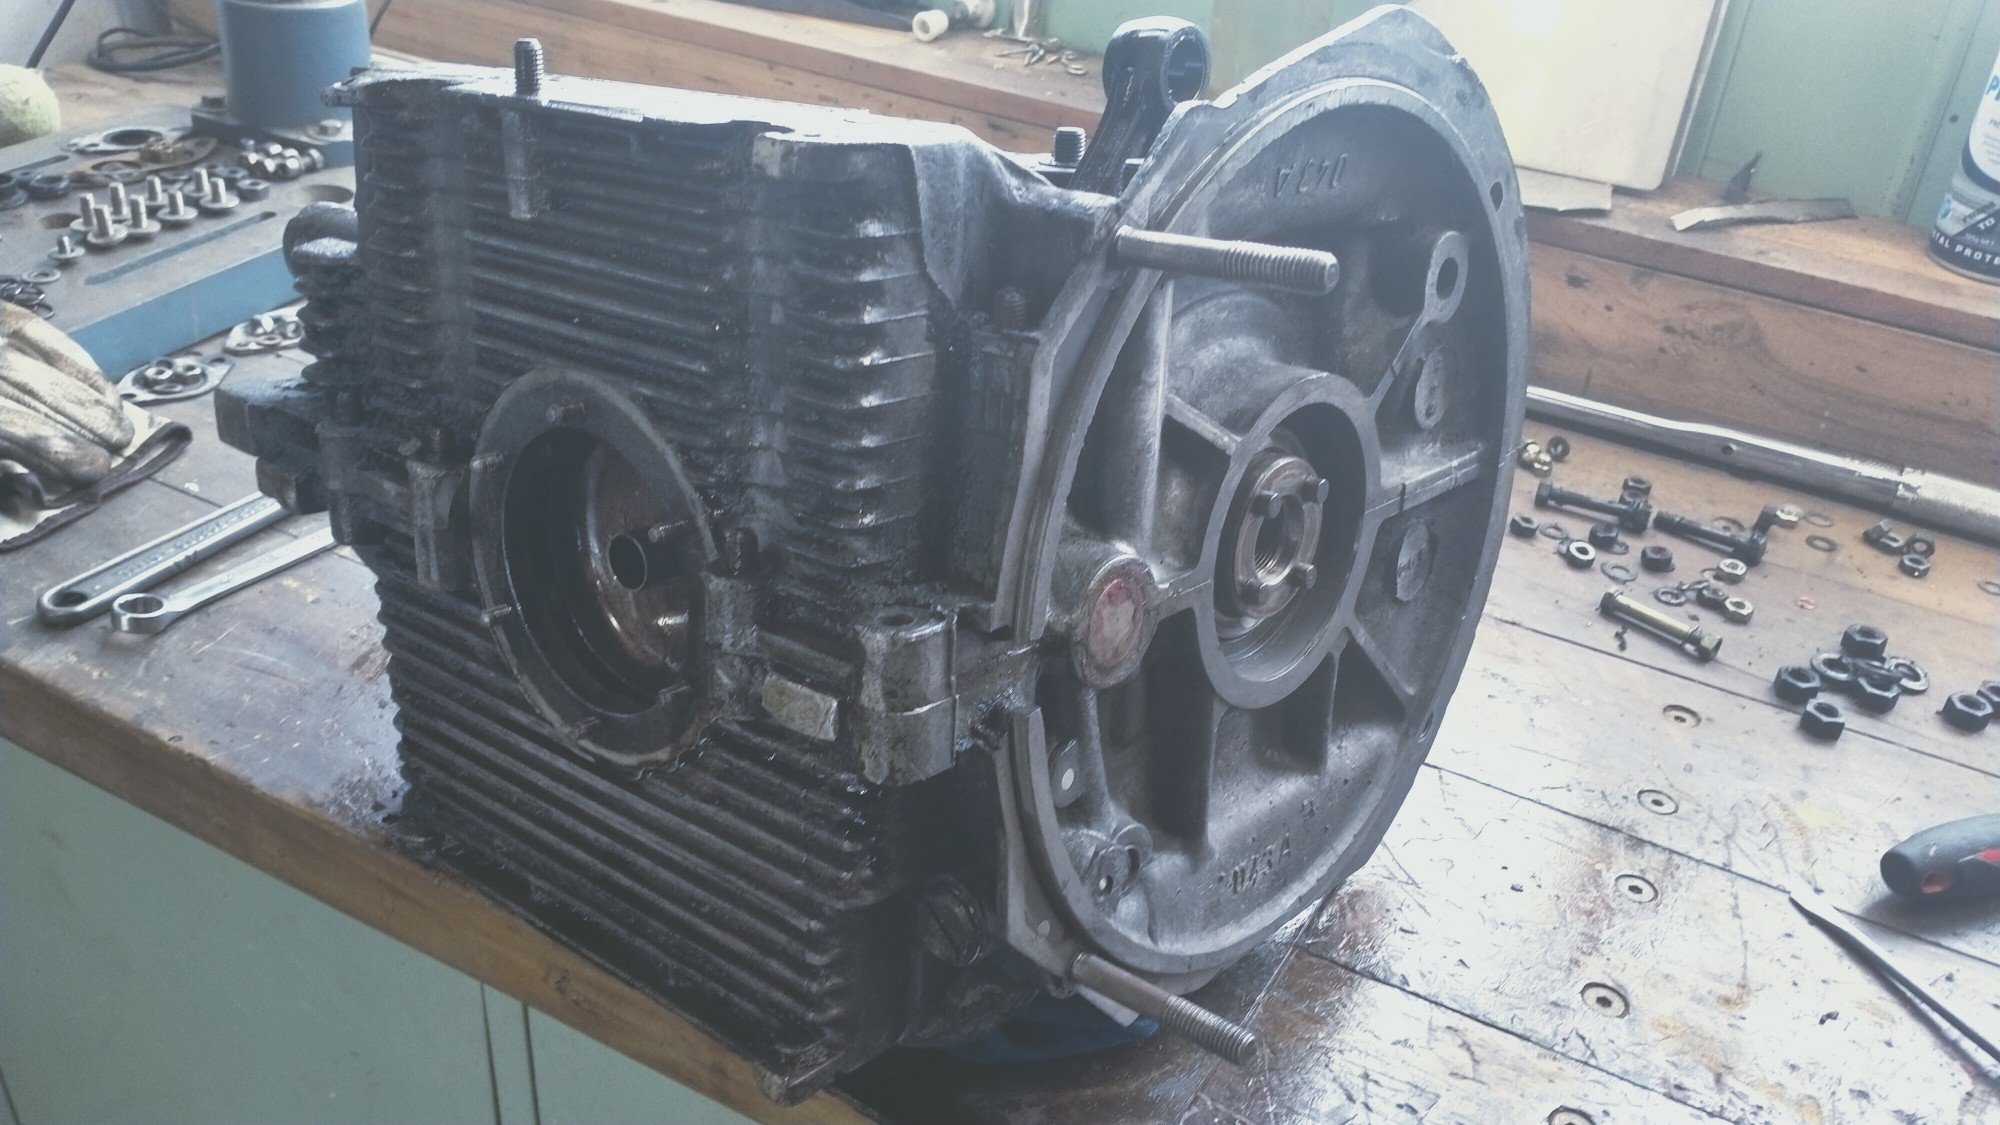
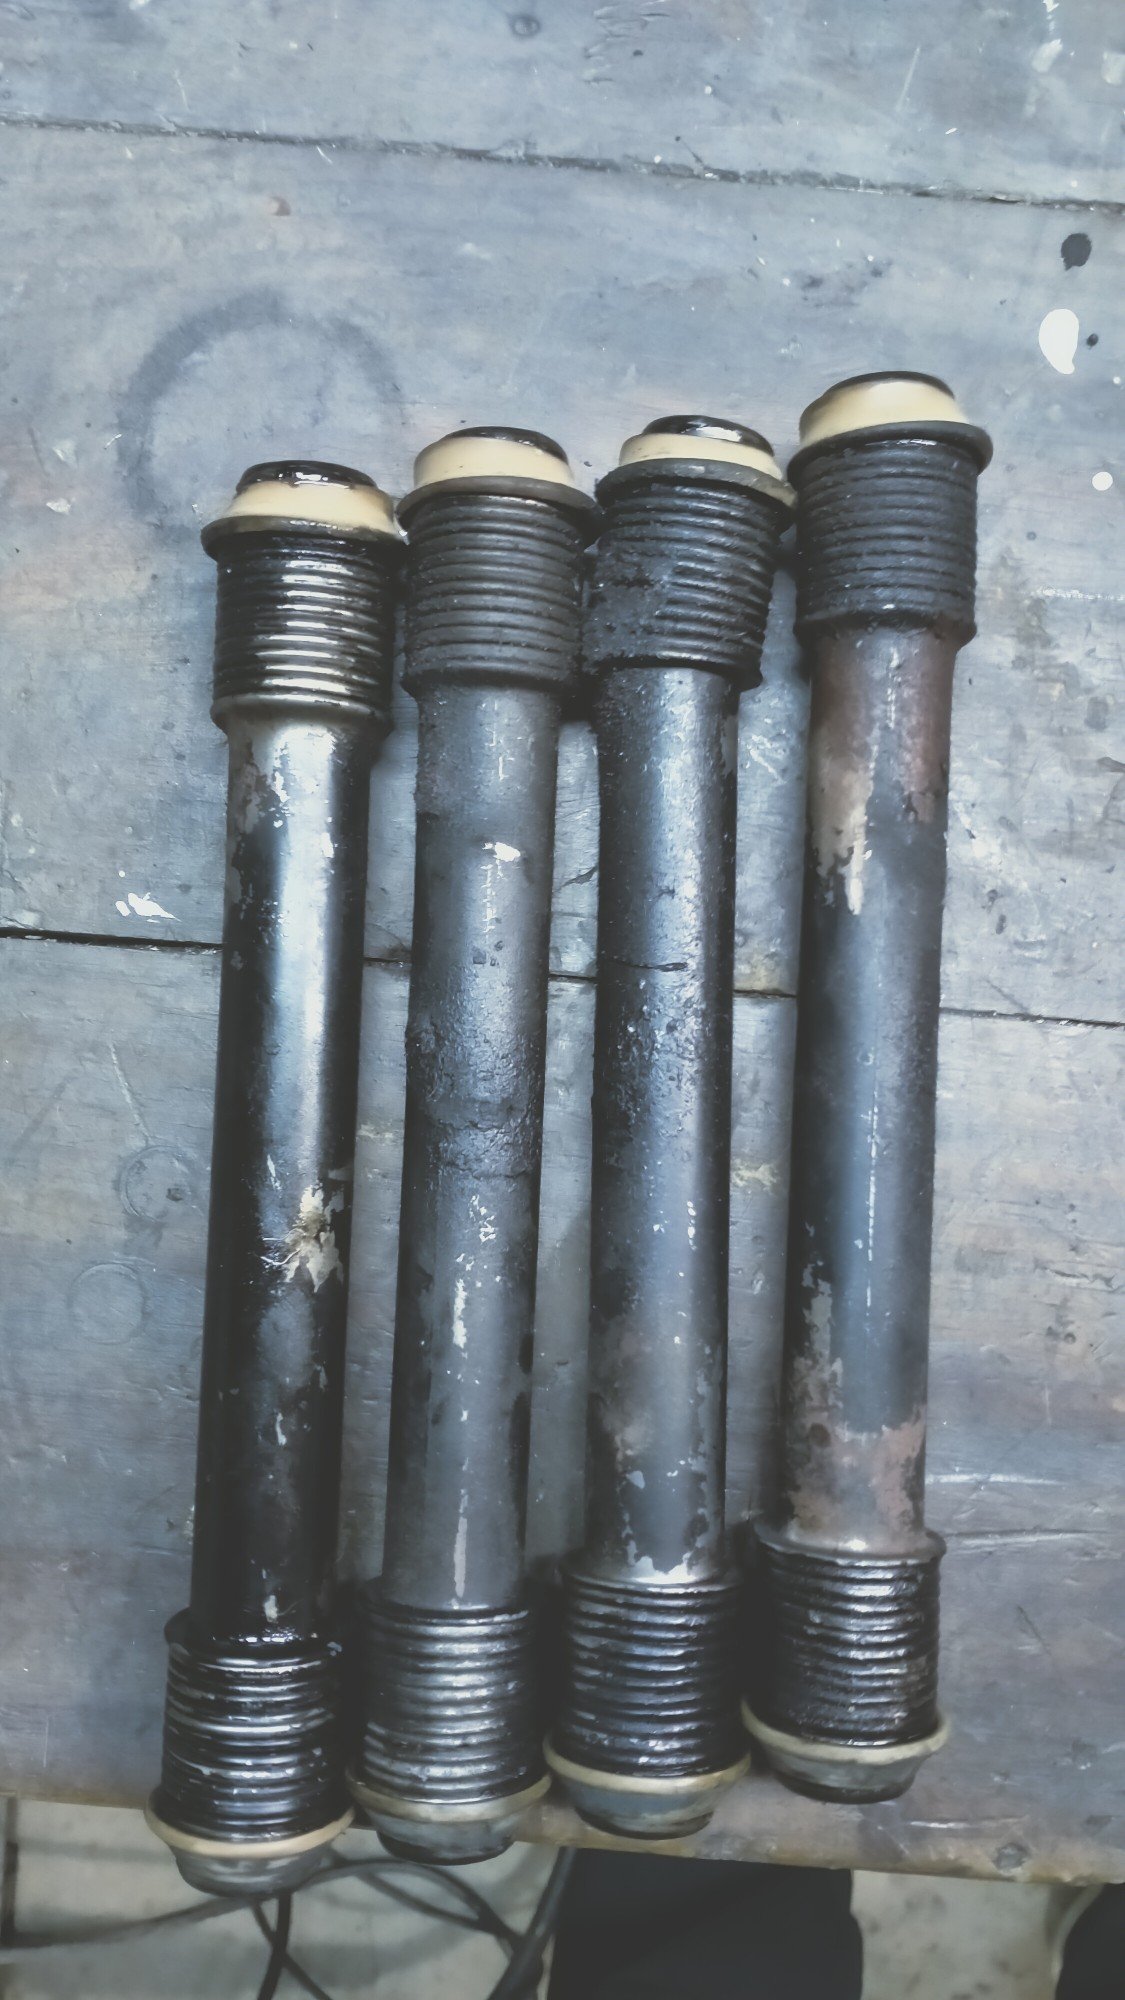
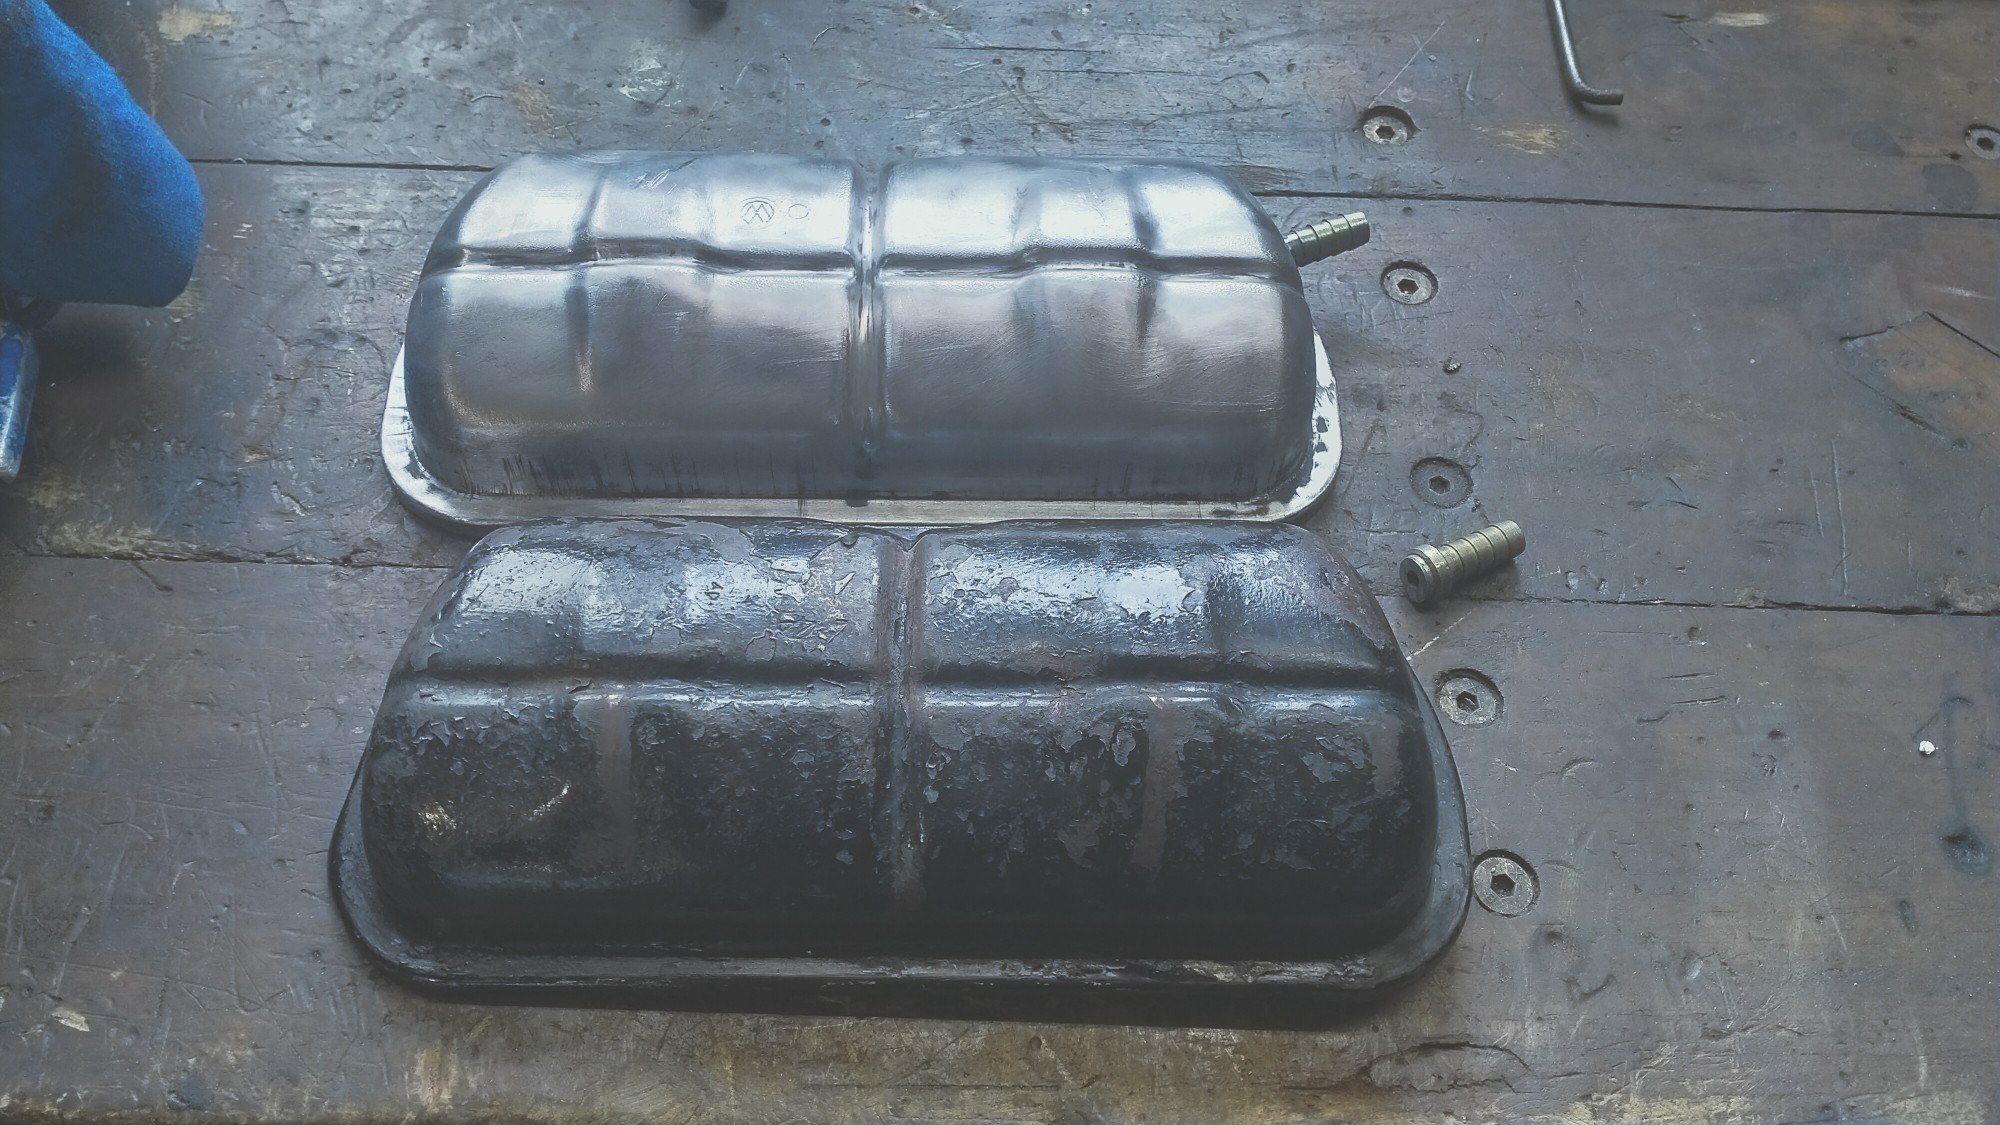
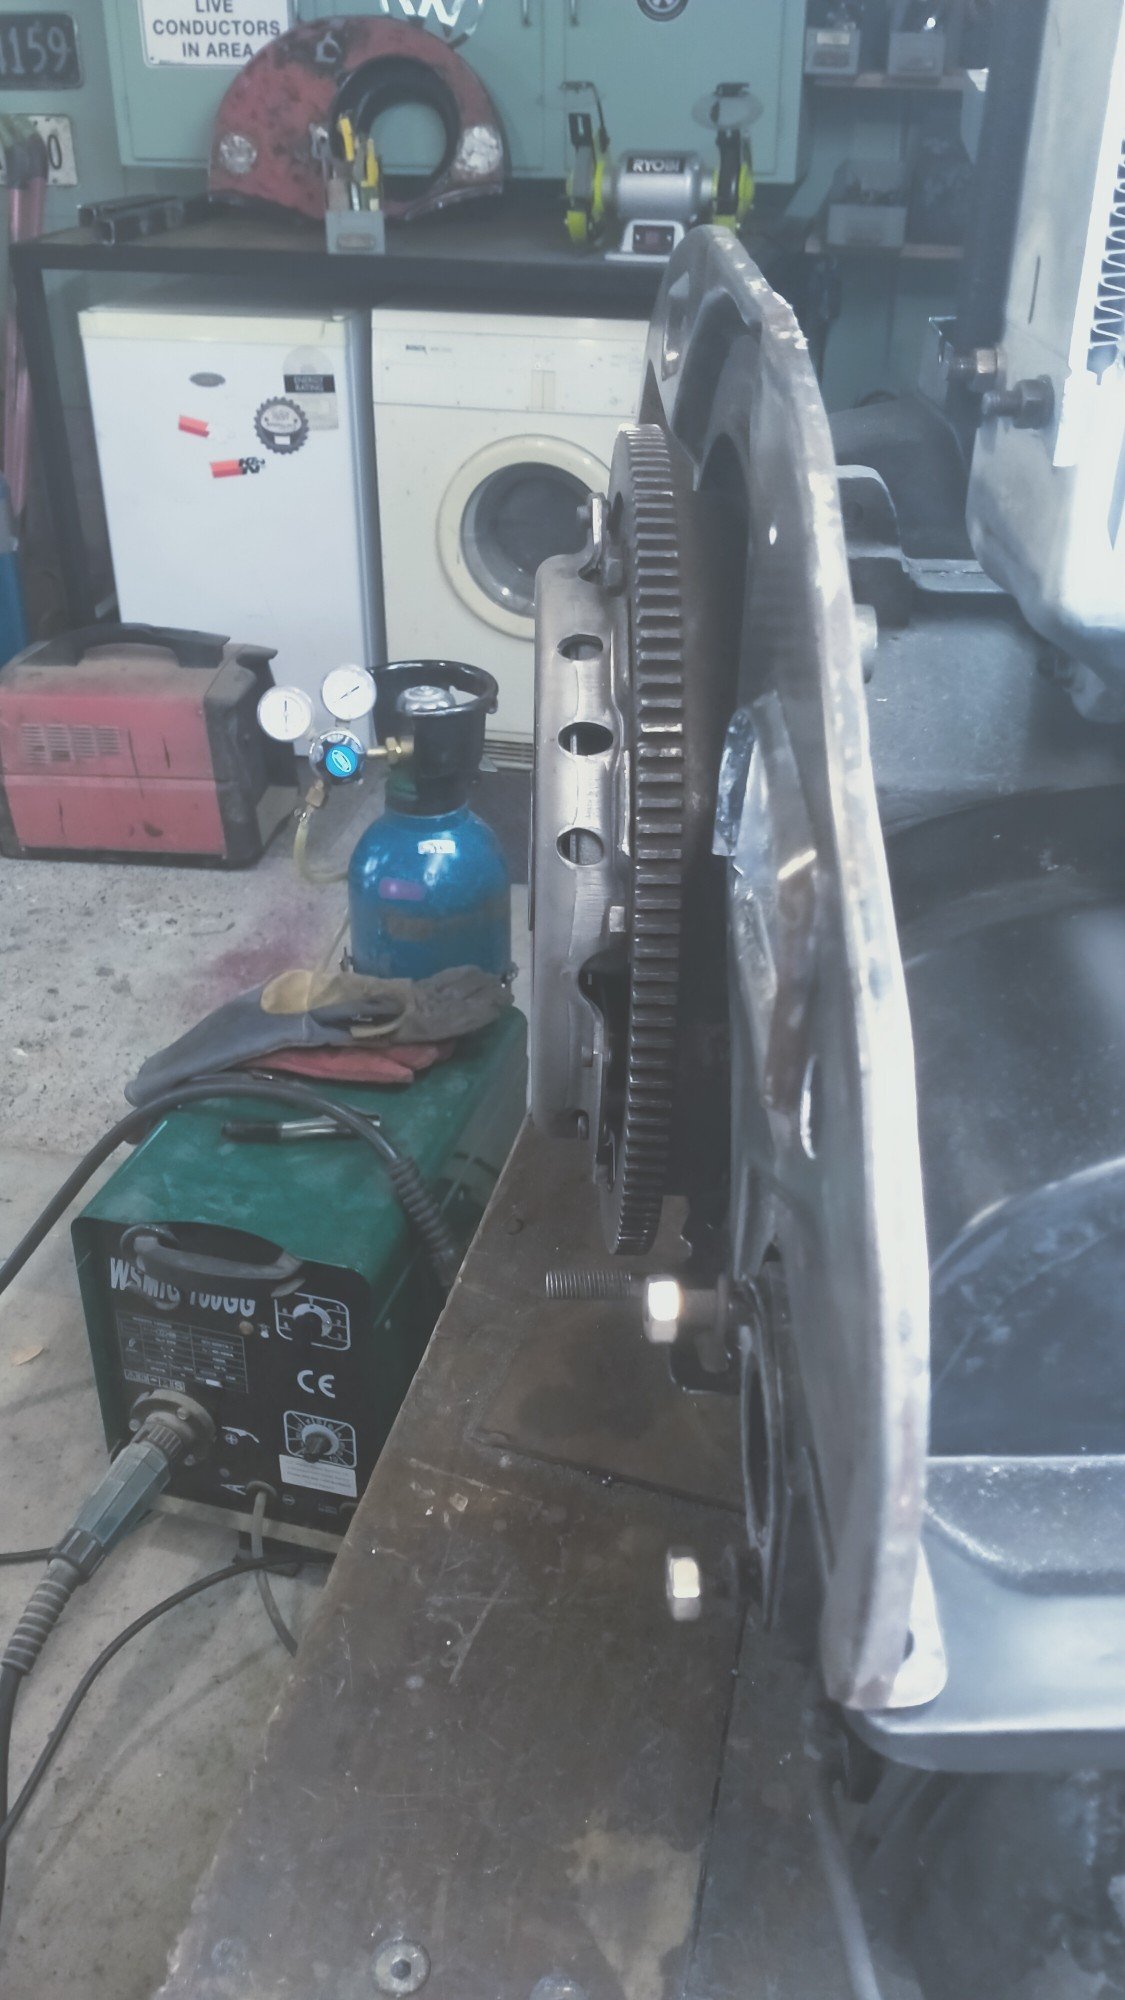
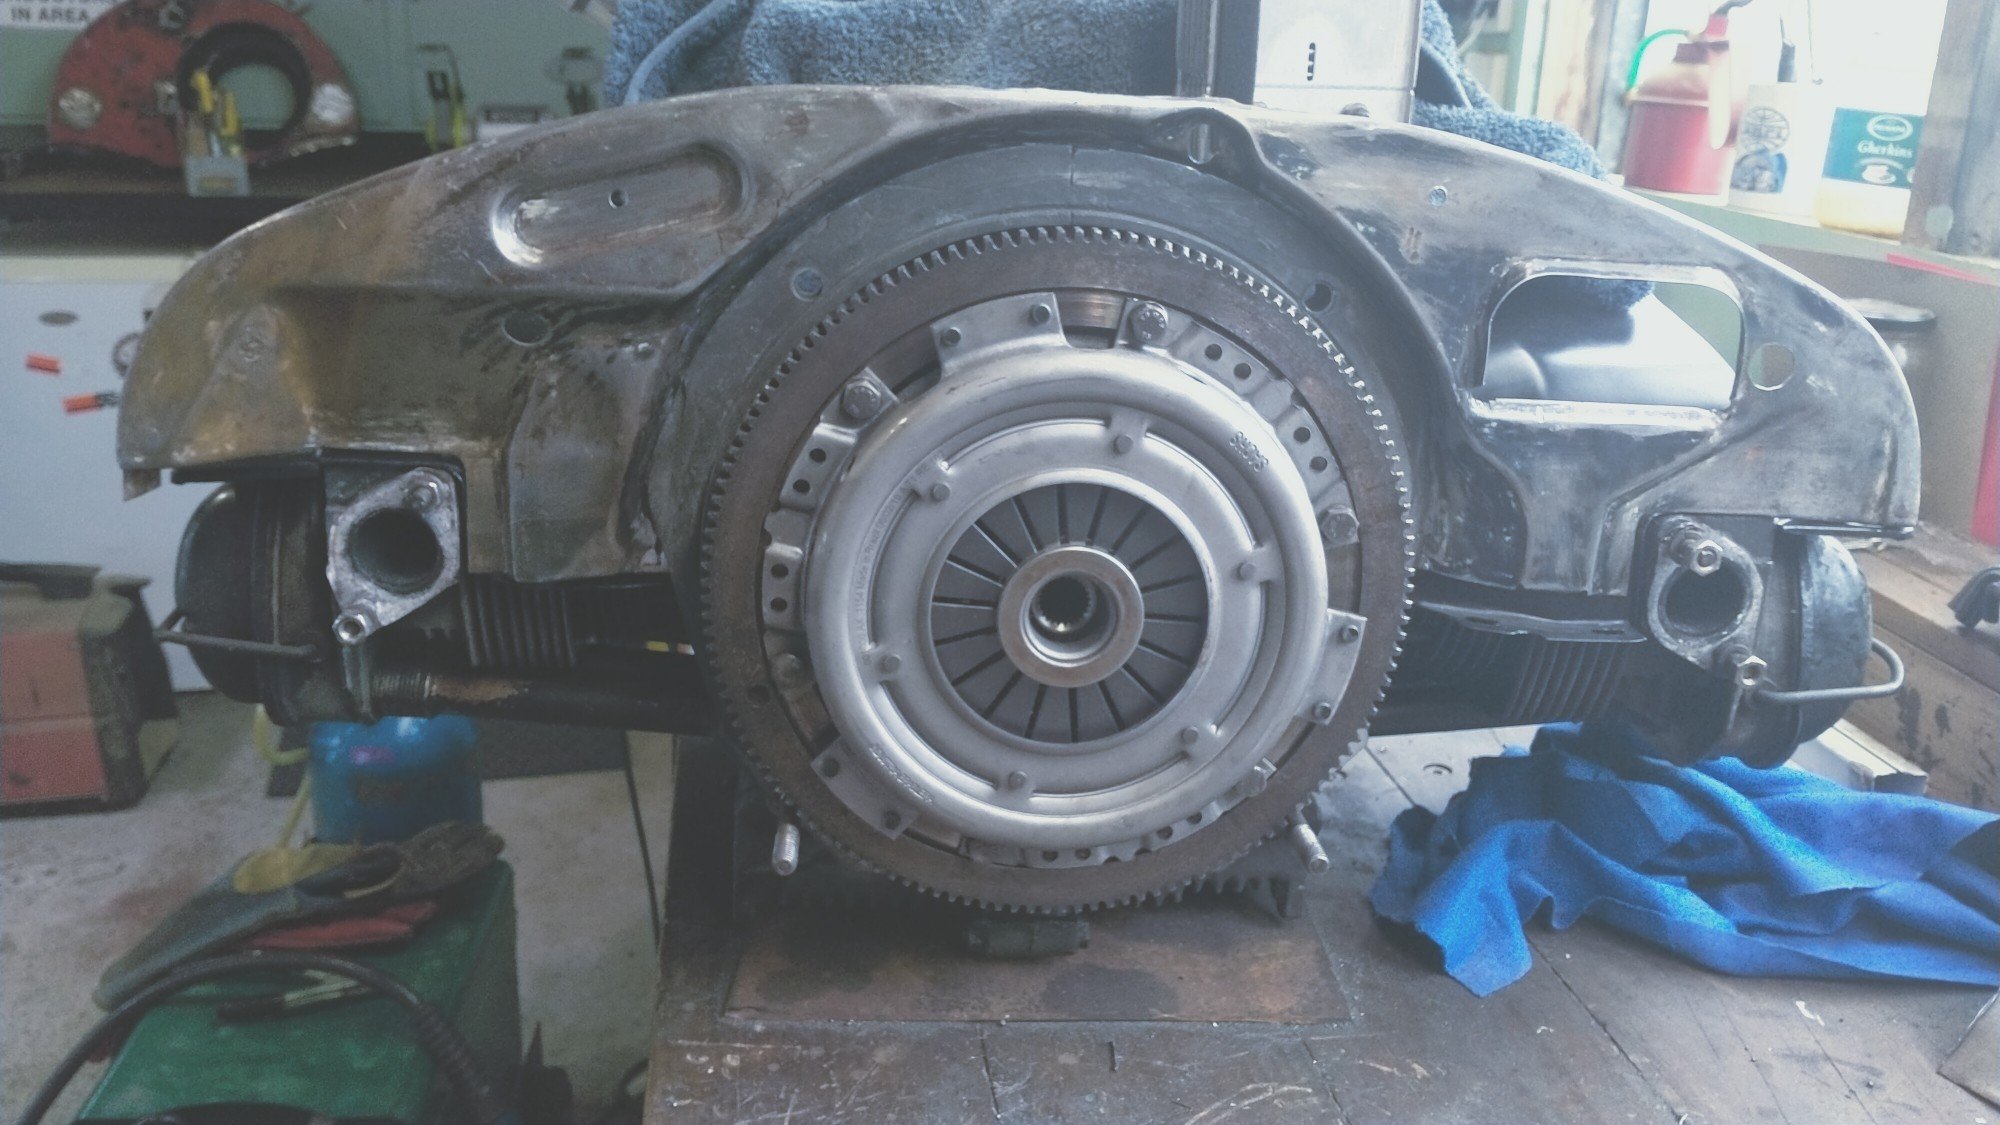
Having never done this before, I took it easy and did my best not to damage any mating surfaces. My vintage schadek oil pump cover. And 26mm heavy duty pump, which needs to be pulled out as it bolts to both half's of the case. All the bolts, nuts, seals removed. Amazing there isn't a rubber seal of anything between the half's or even any sealant I could see. The middle bearing has seen better days. Crank it.
- 261 replies
-
- 22
-
-
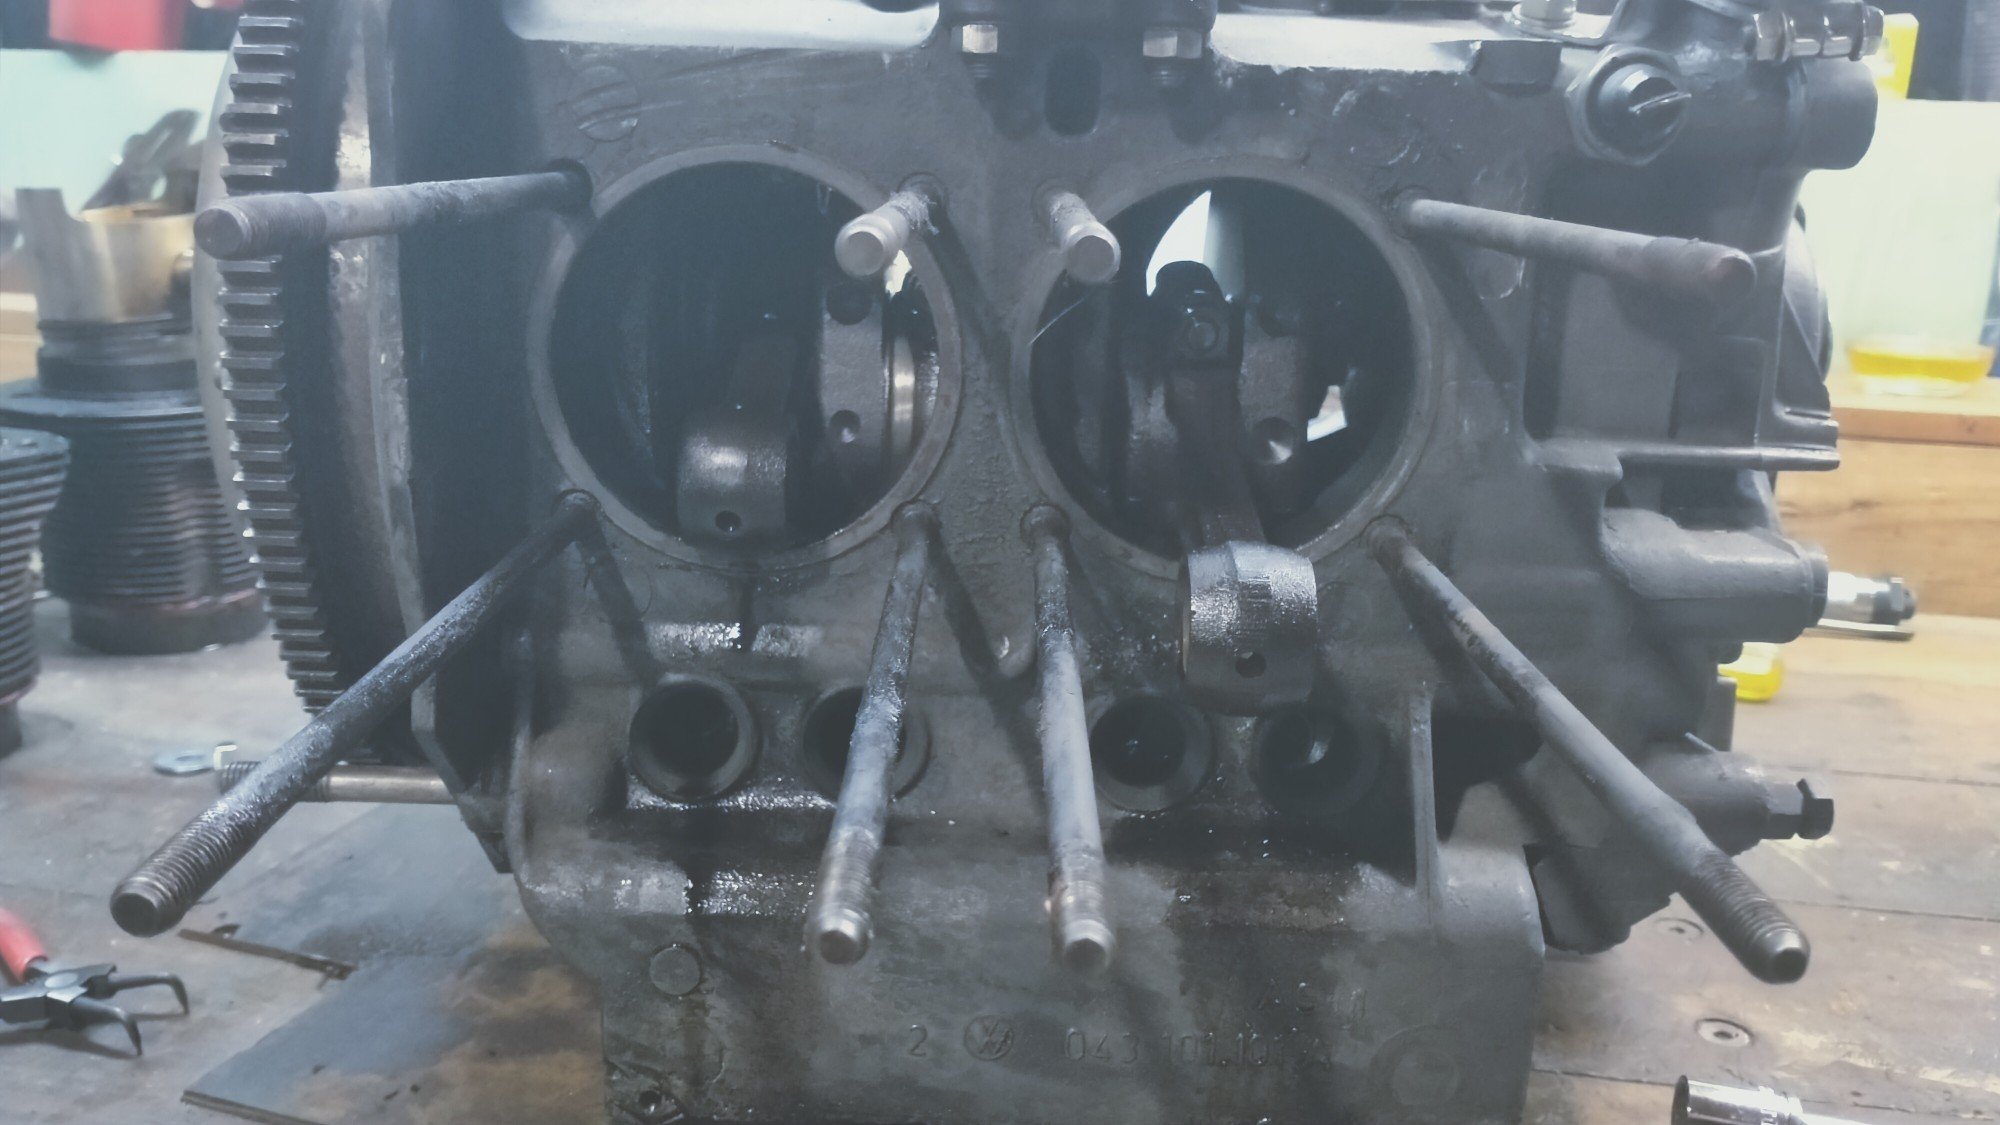
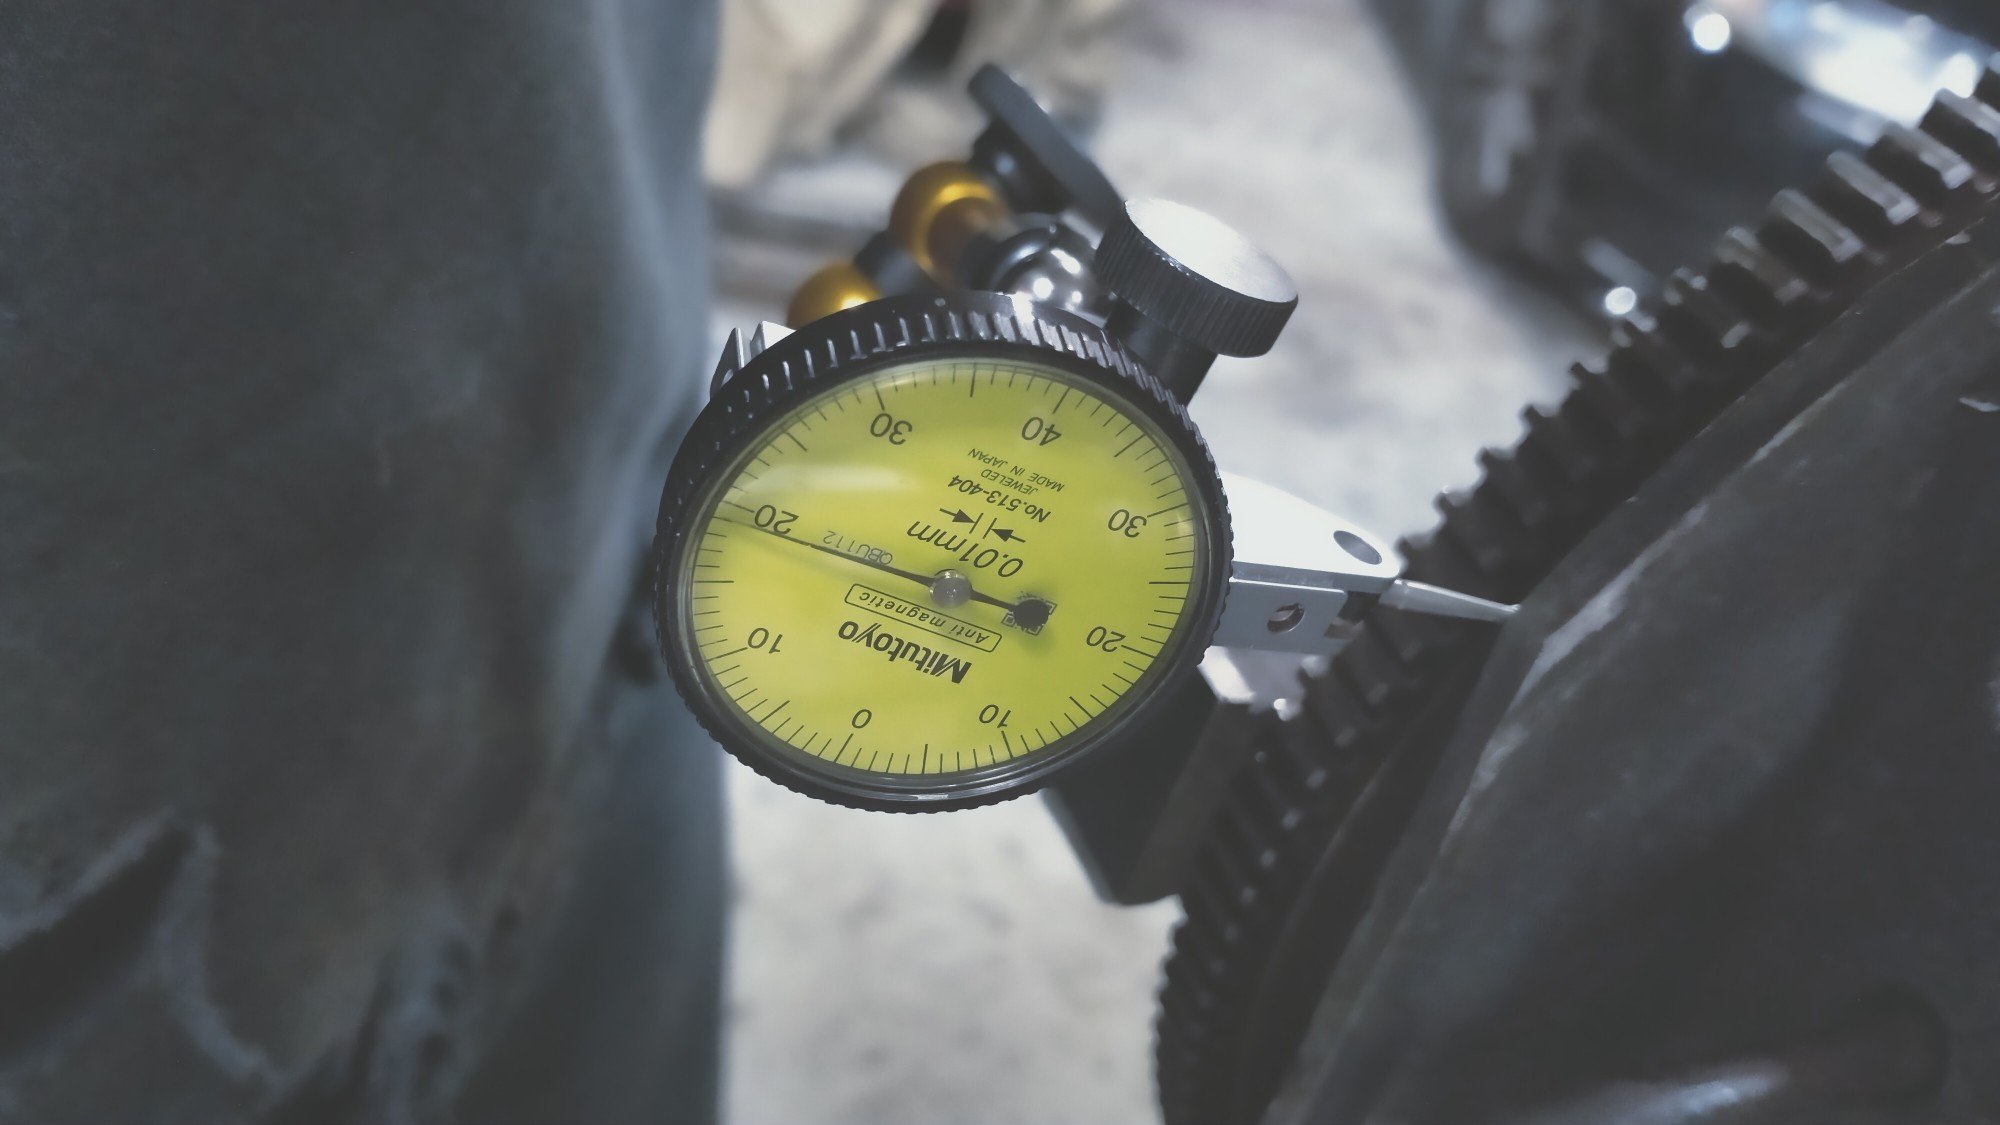
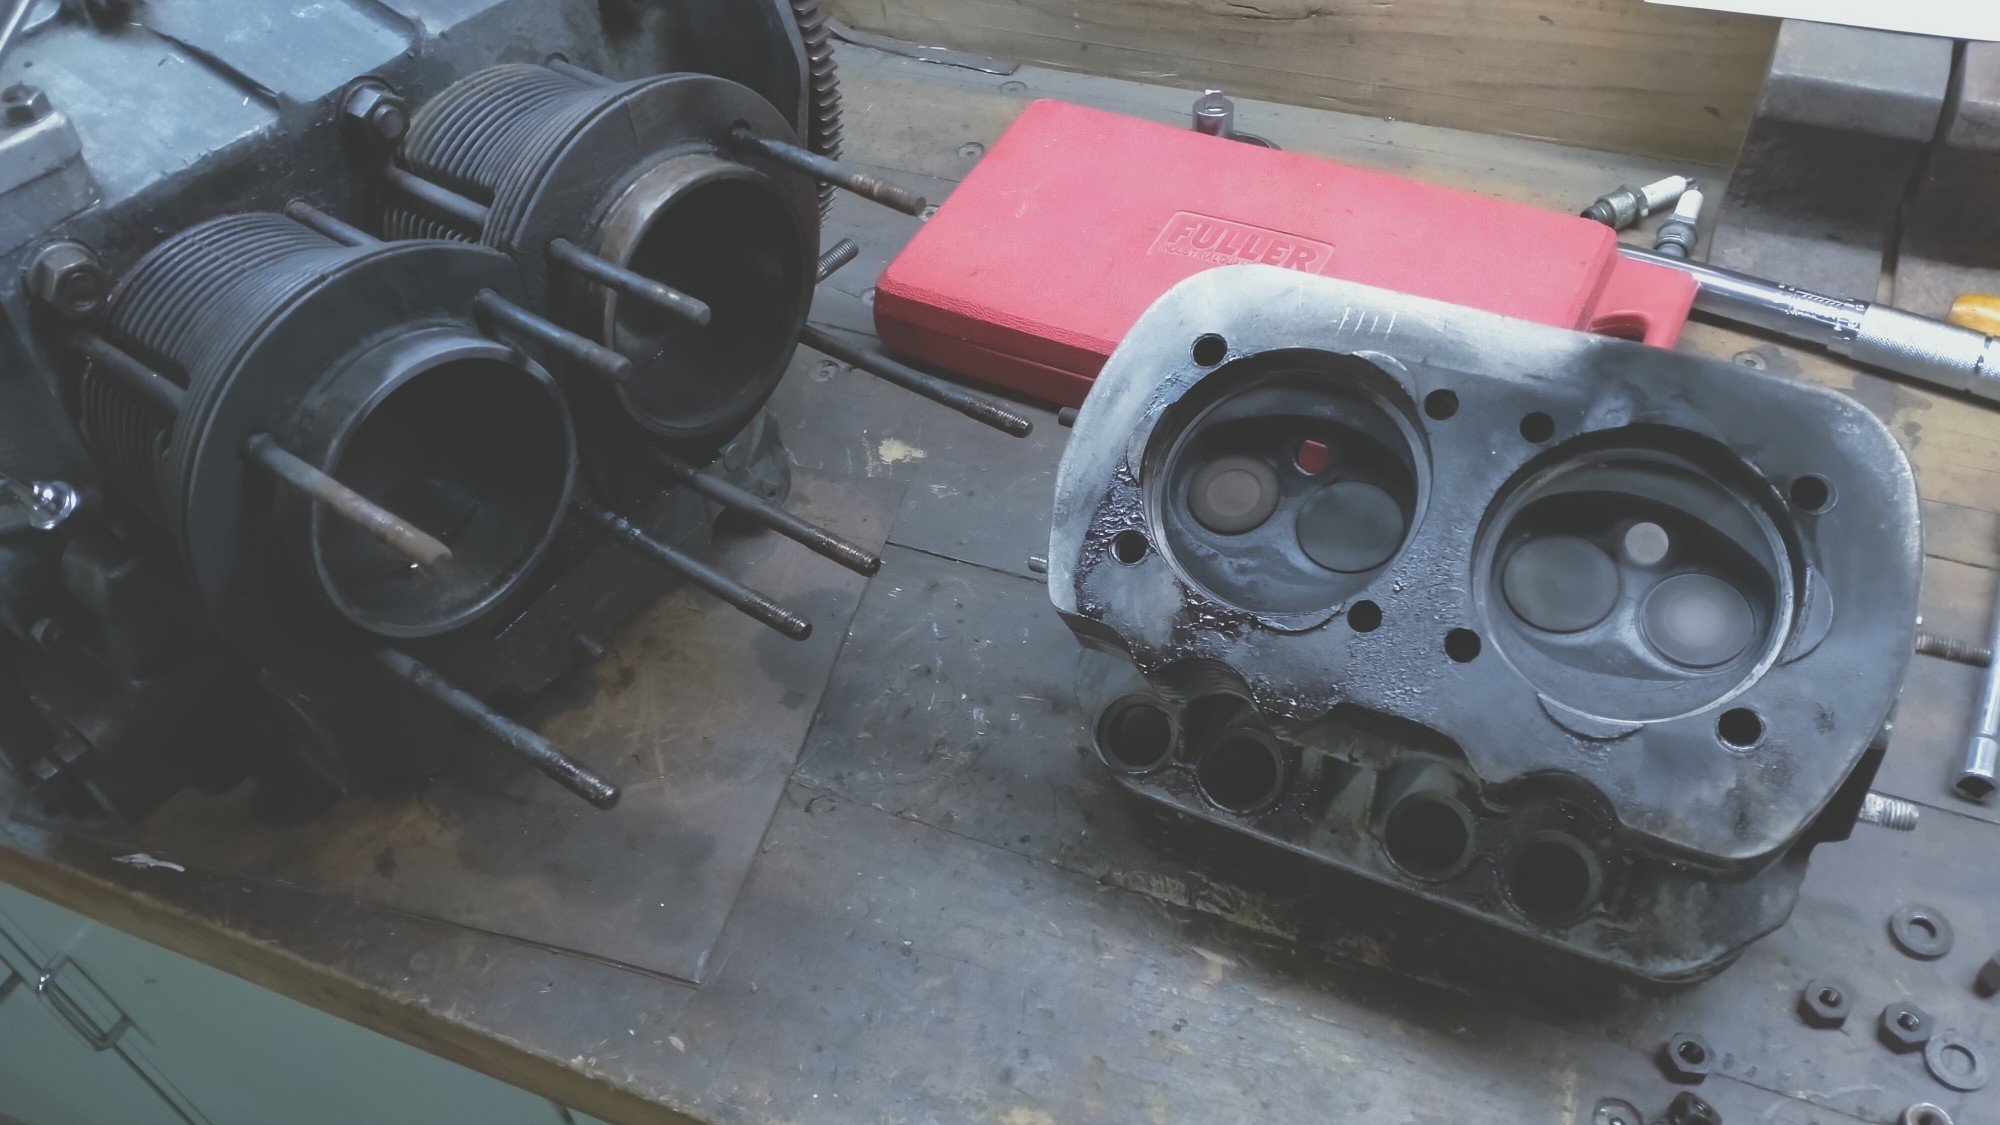
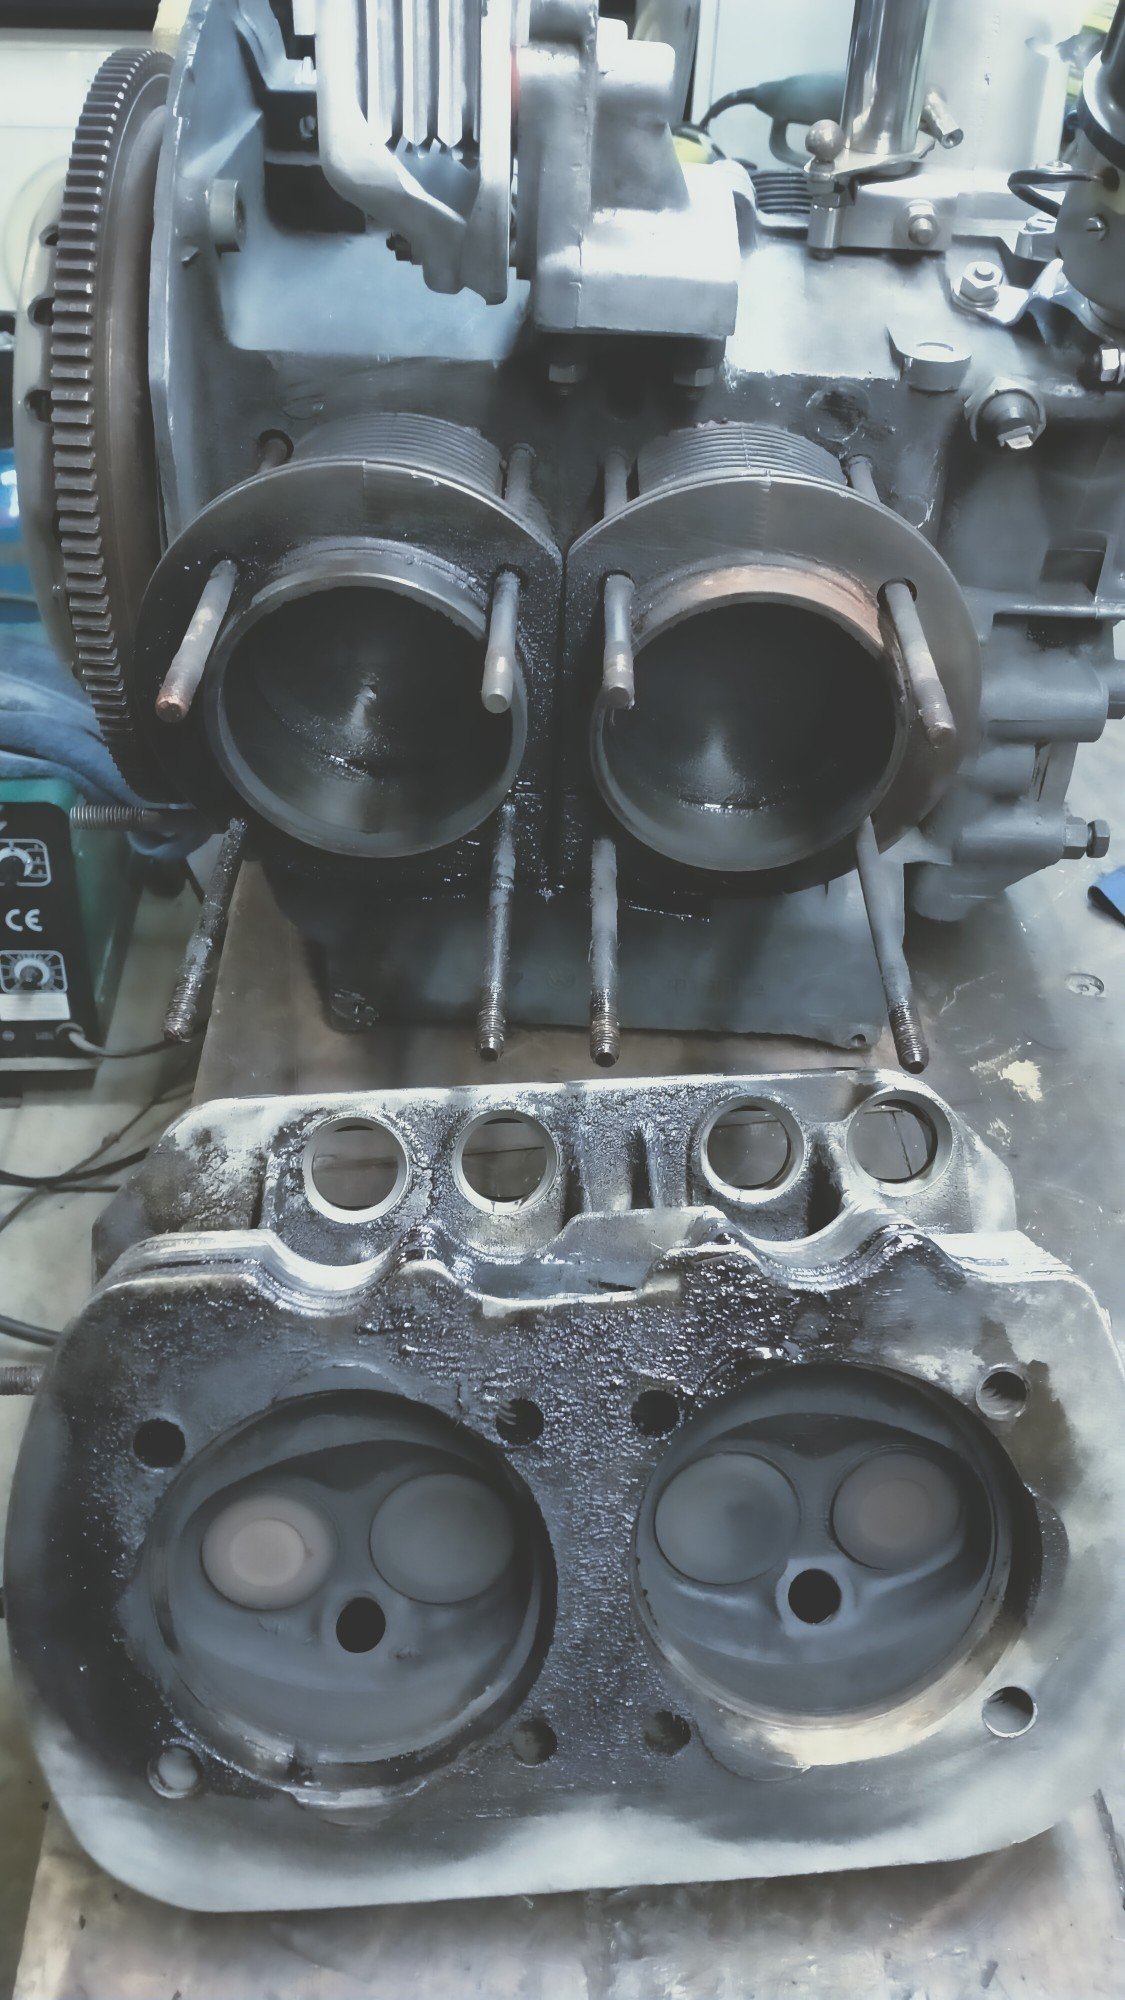
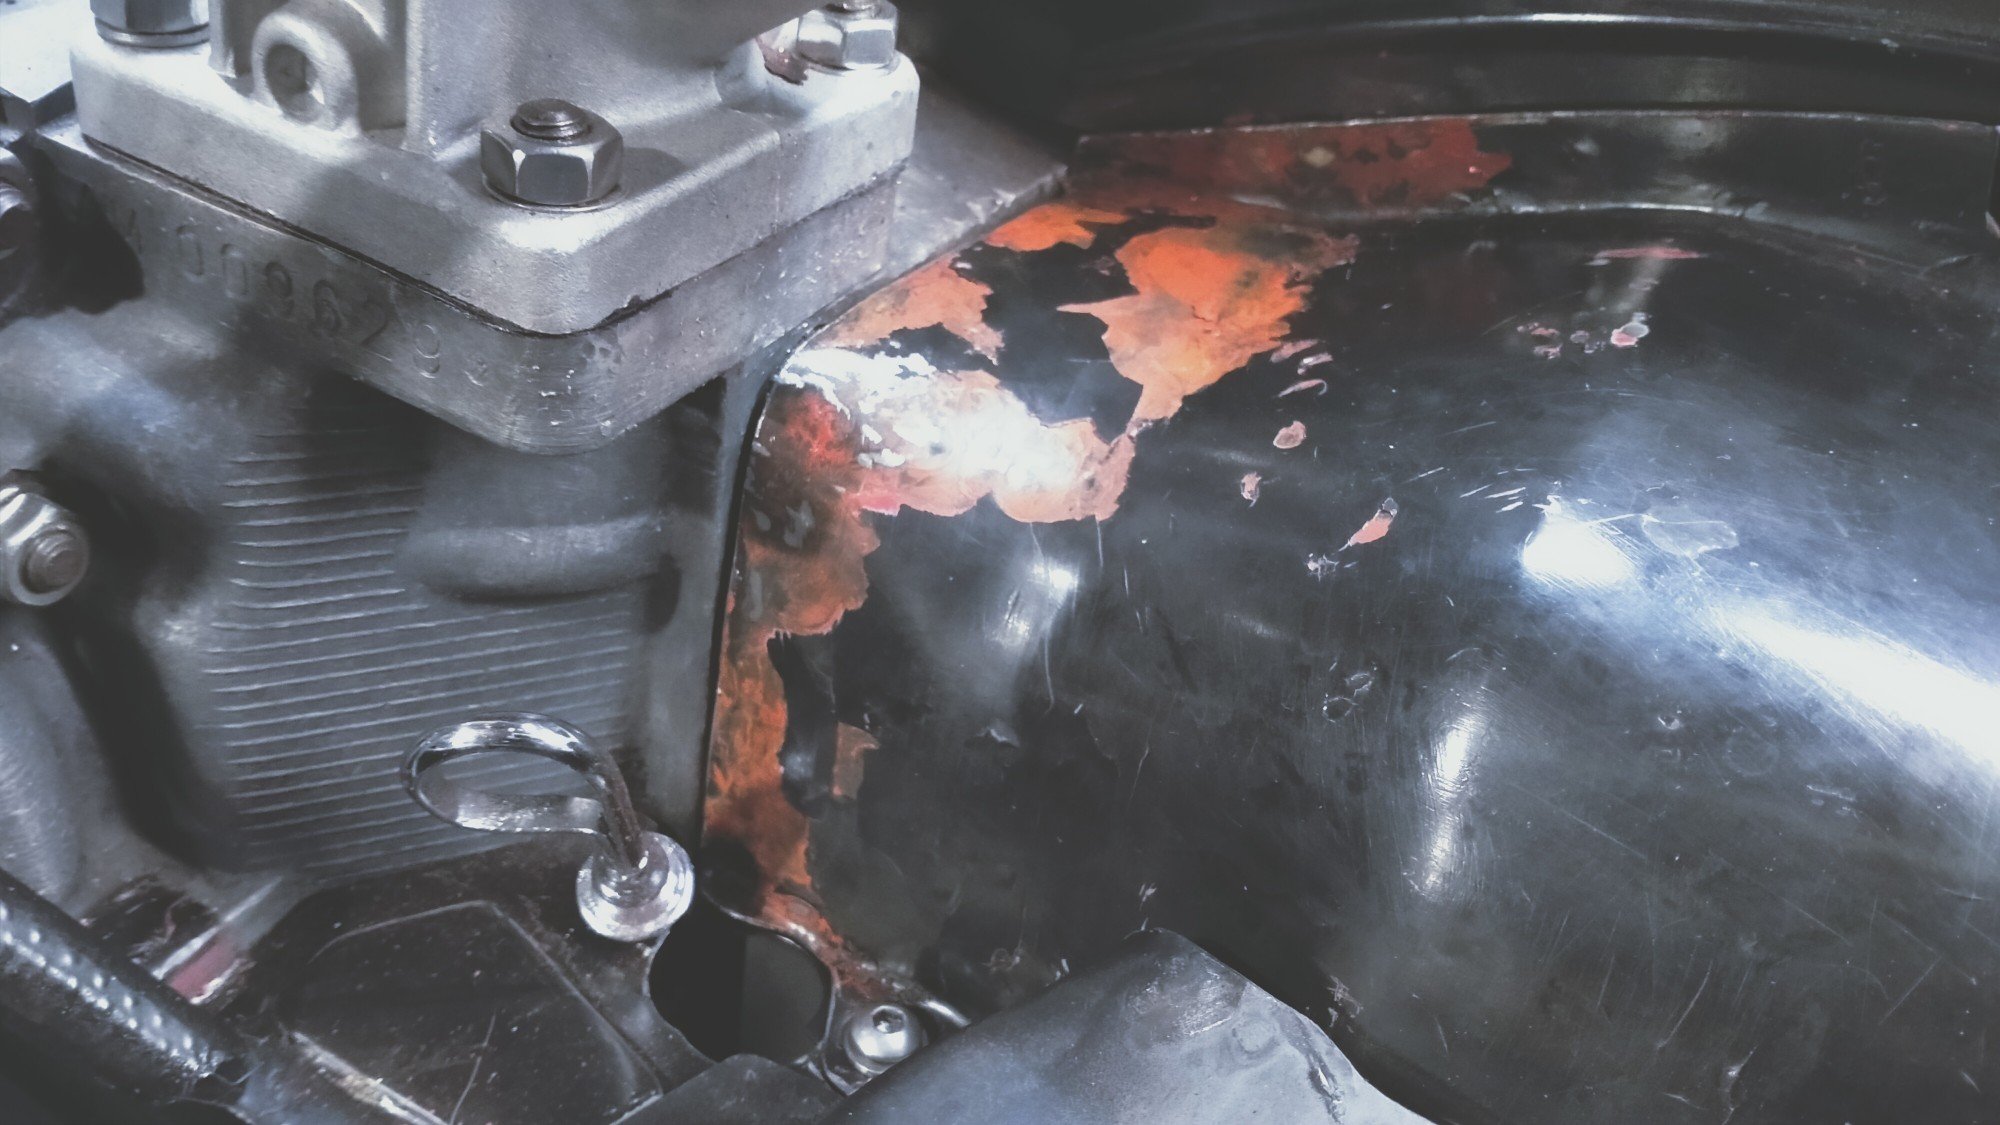
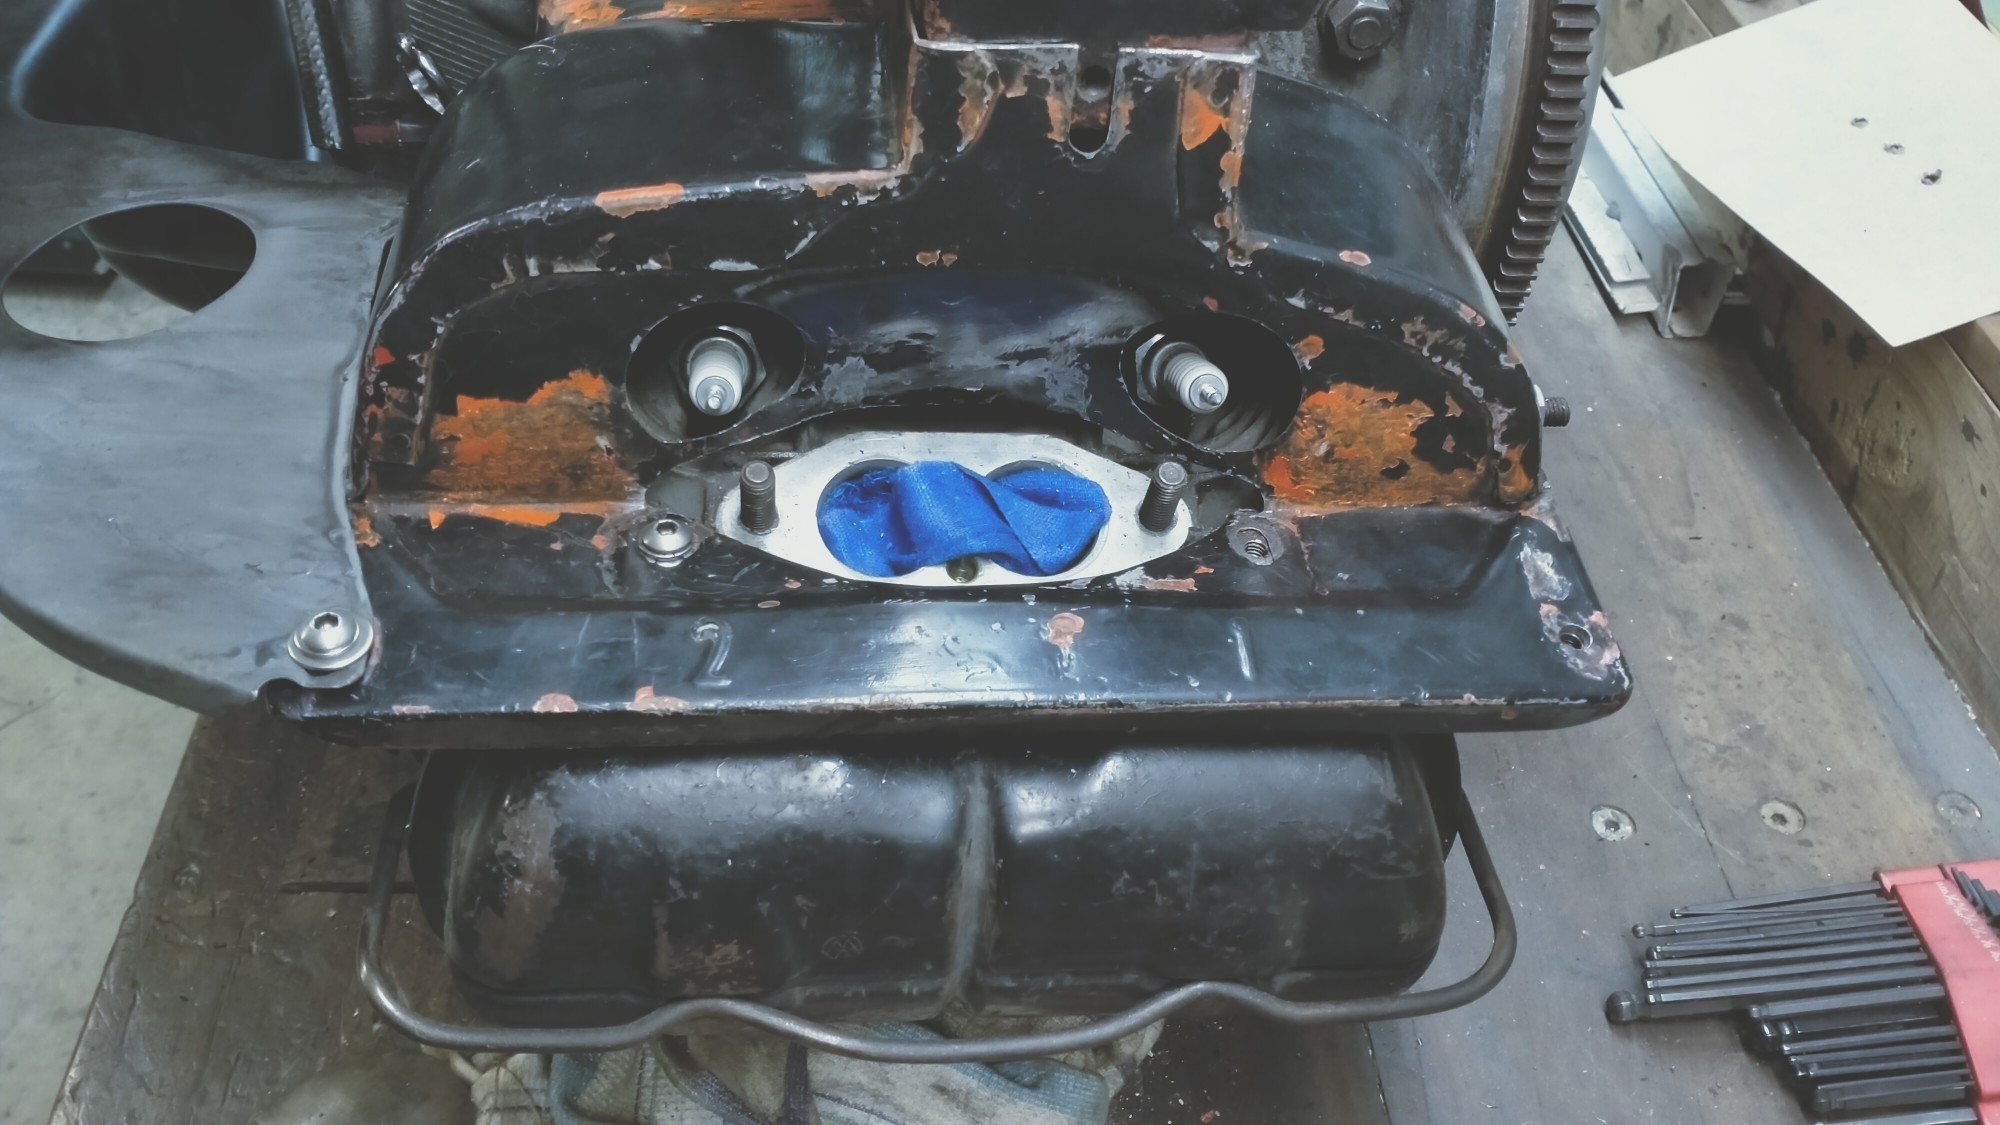
So as well as the fucked spark plugs threads and cracks between valves and the obvious oil leaks, the heads had been leaking compression from the joint between the heads and cylinders. Vws don't have head gaskets, the top of the cylinder sit inside the head. If you look at the above photos you can see the exhaust carbon blasting out some areas of the head. Also, interesting to see how well the pushrod tubes are sealed and clean, which was the head end. And dirty and leaking at block end. I decided to dig a little deeper. So much oil on the outside of the engine. Doing my research I measured the end float of the crank assembly. Converting .006inches to microns revealed shits fucked. So there goes my idea of a top end rebuild.
-
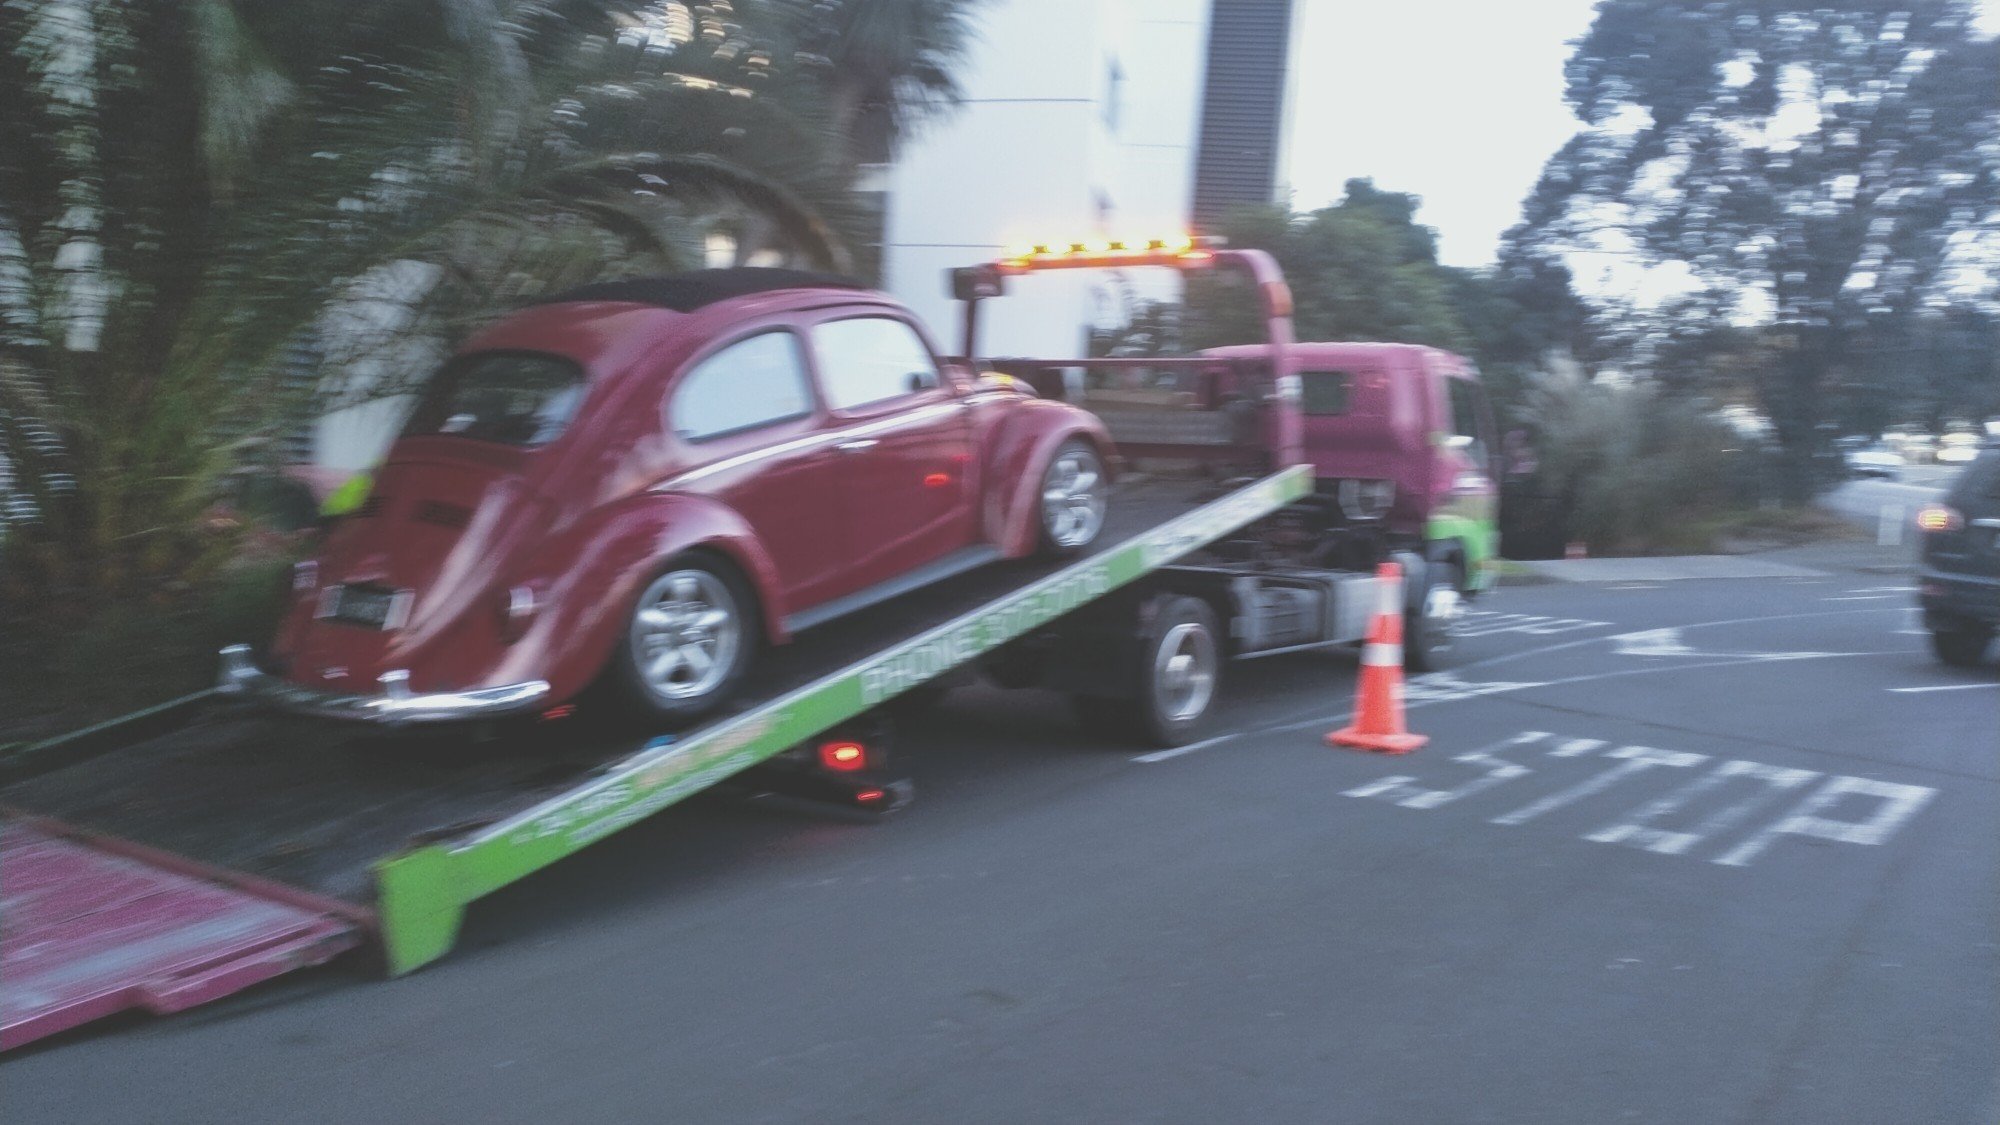
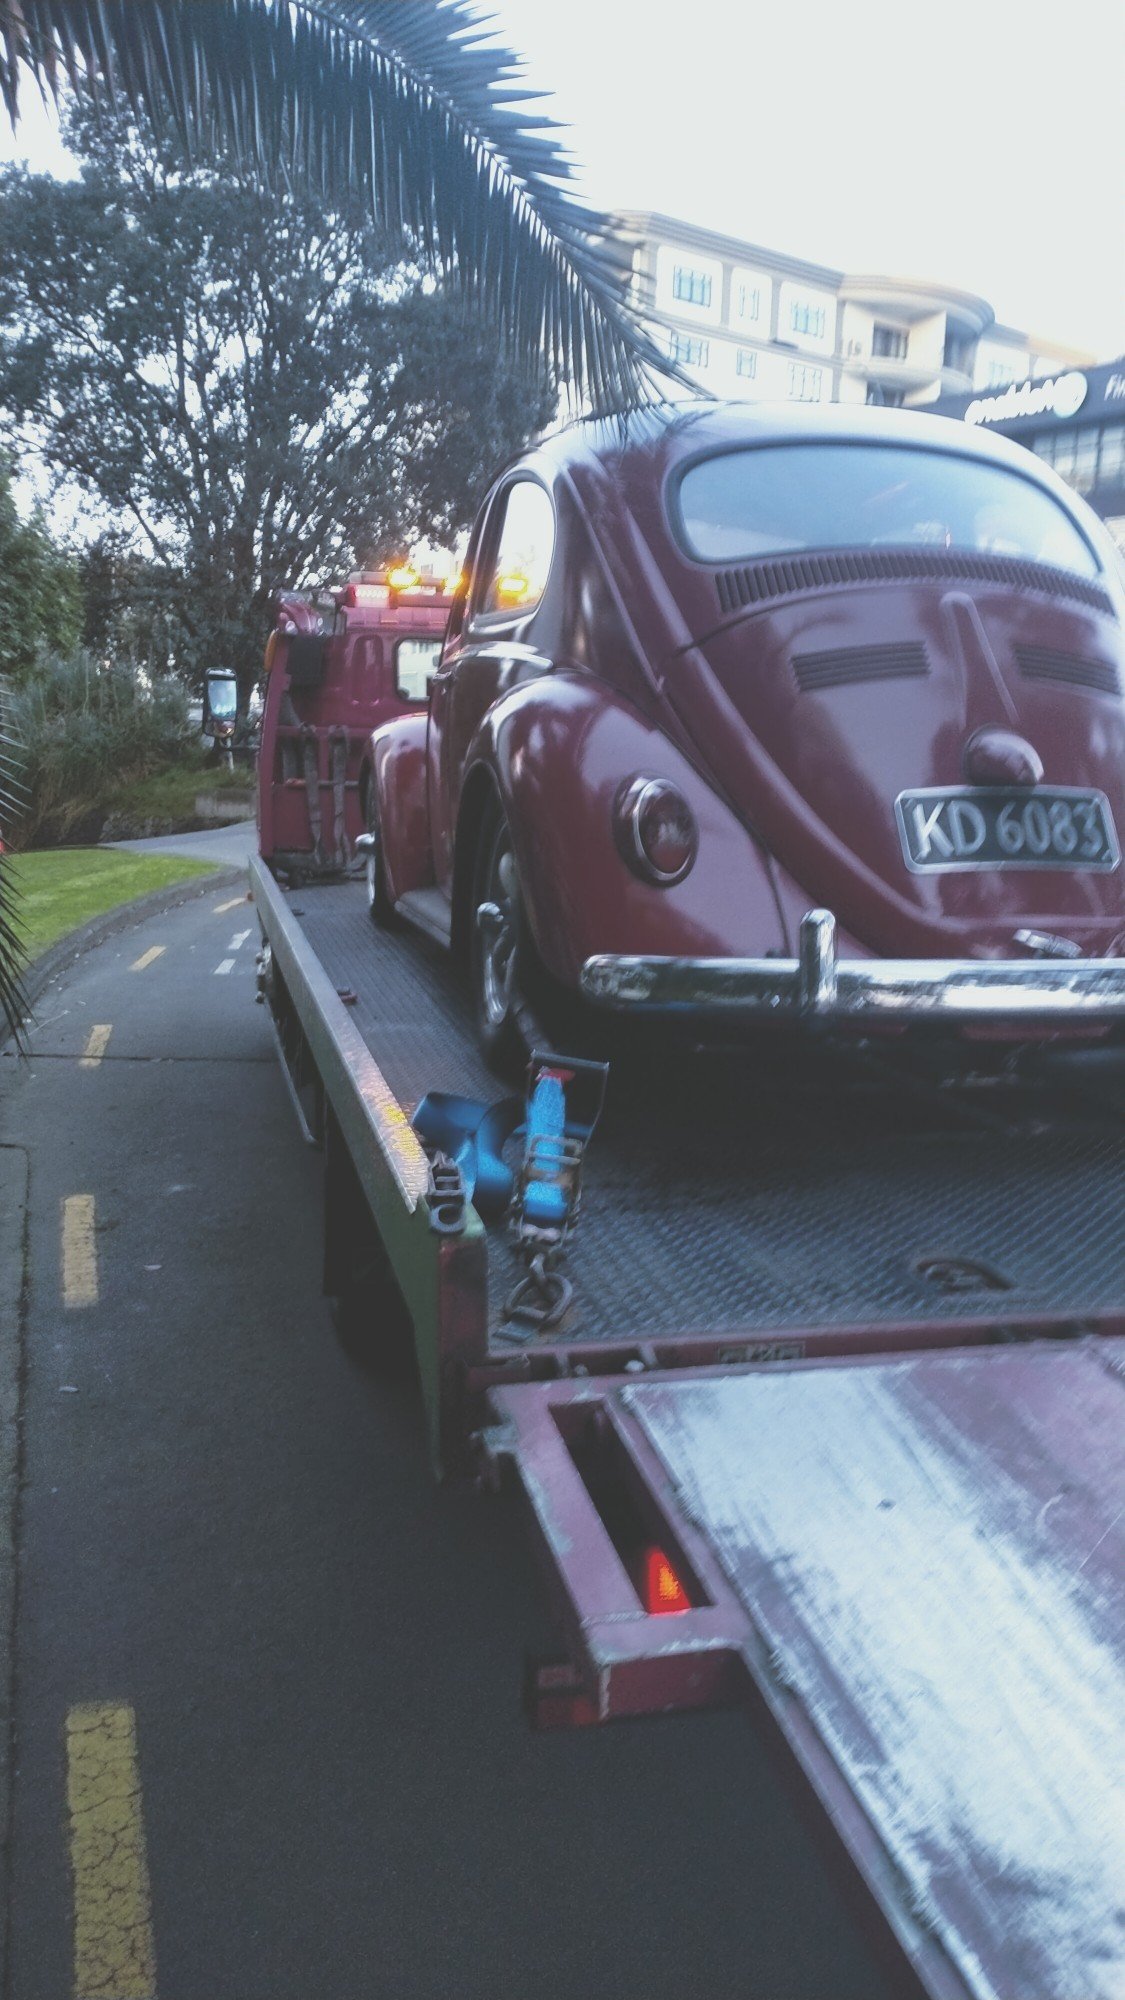
So I didn't really said why I've pulled the motor again, but as I'm sure you've assumed from the tow truck photo, it wasn't good. When I last had it out to replace the clutch and oil cooler, I noticed that no1 spark plug was lose, it tightened back up fine so thought nothing of it. Then down the bottom of town, after we got off the motorway, bang! Bang bang bang like the whole exhaust system had fallen off. But it was just old number 1 spark plug going number 2s. So one of two things happened. Either thread stripped out of the head or the head is cracked between the valves and the plug hole.
-
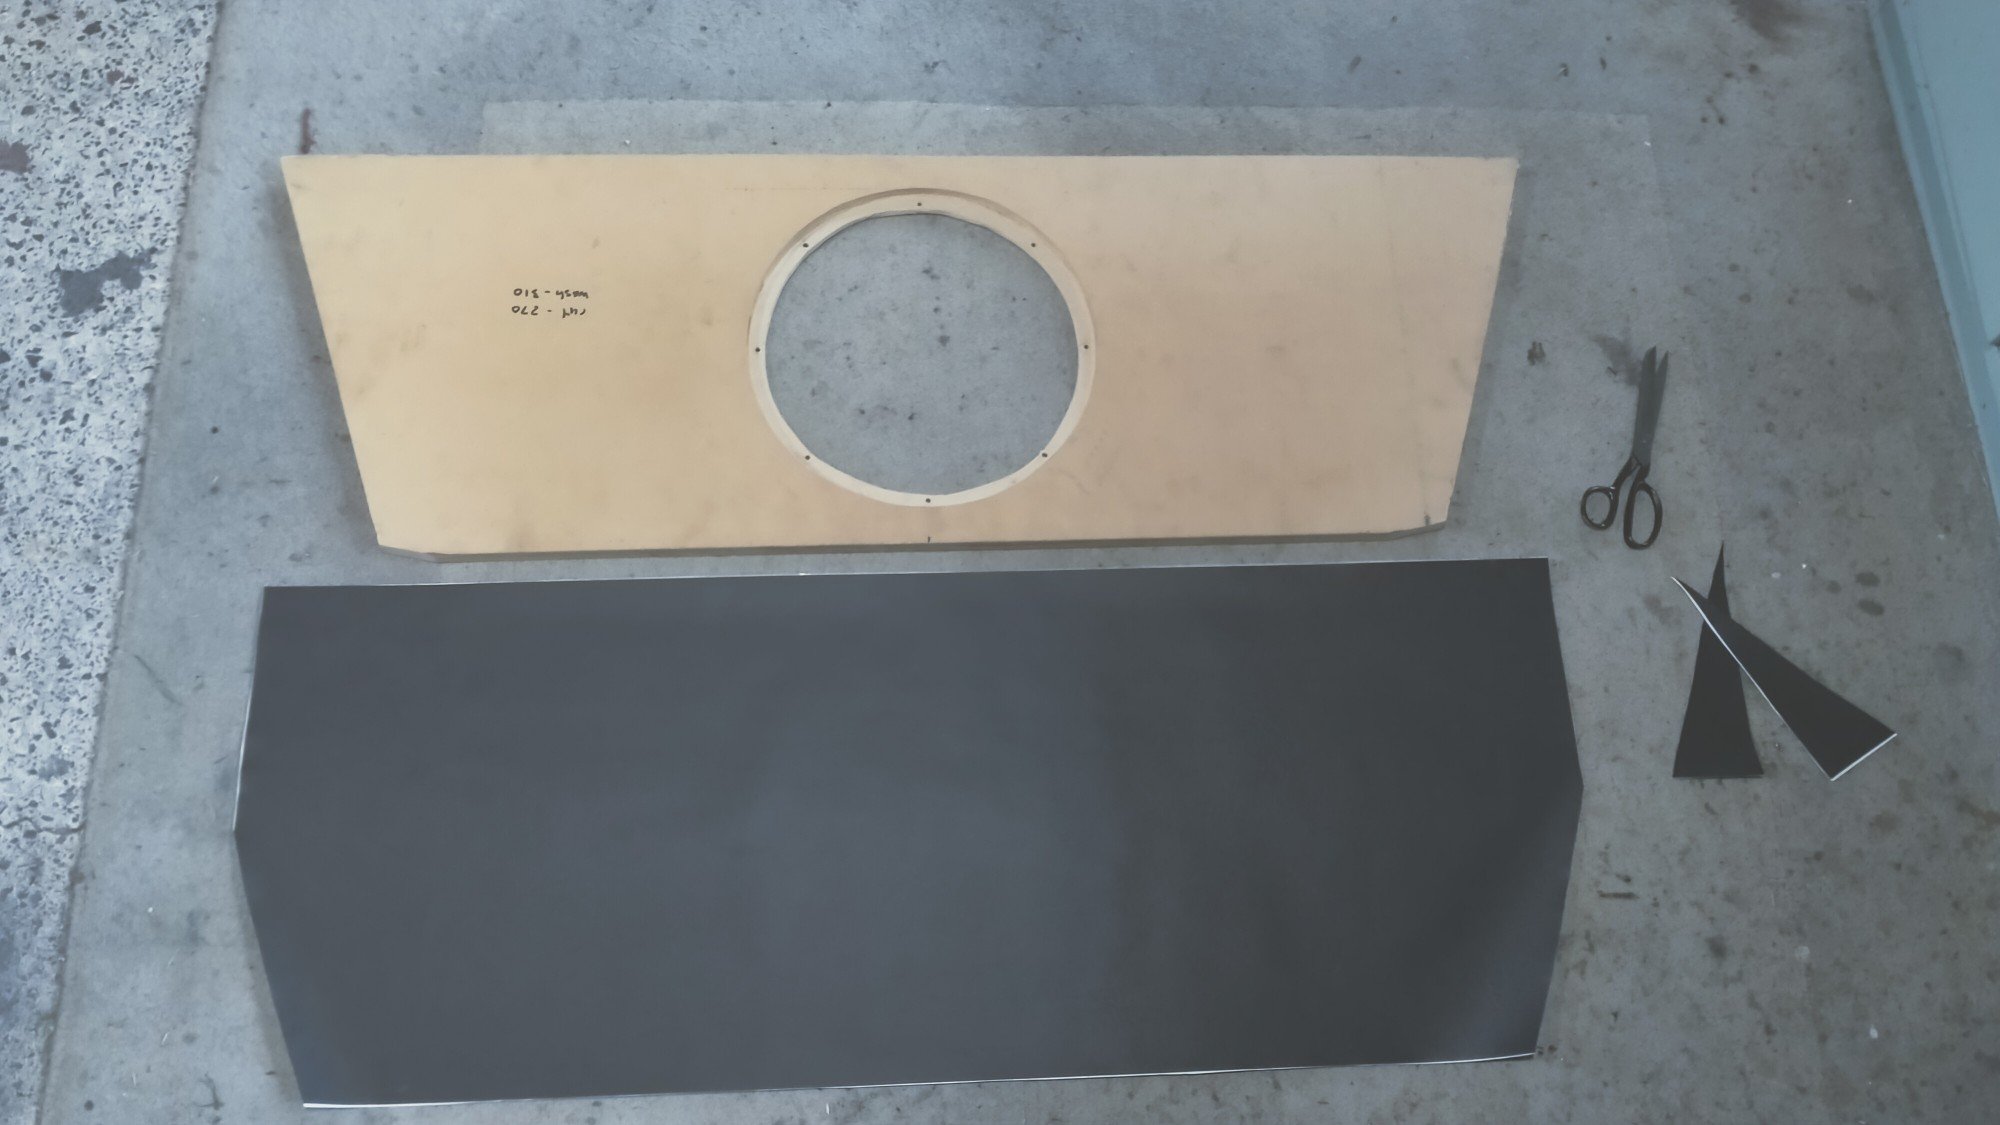
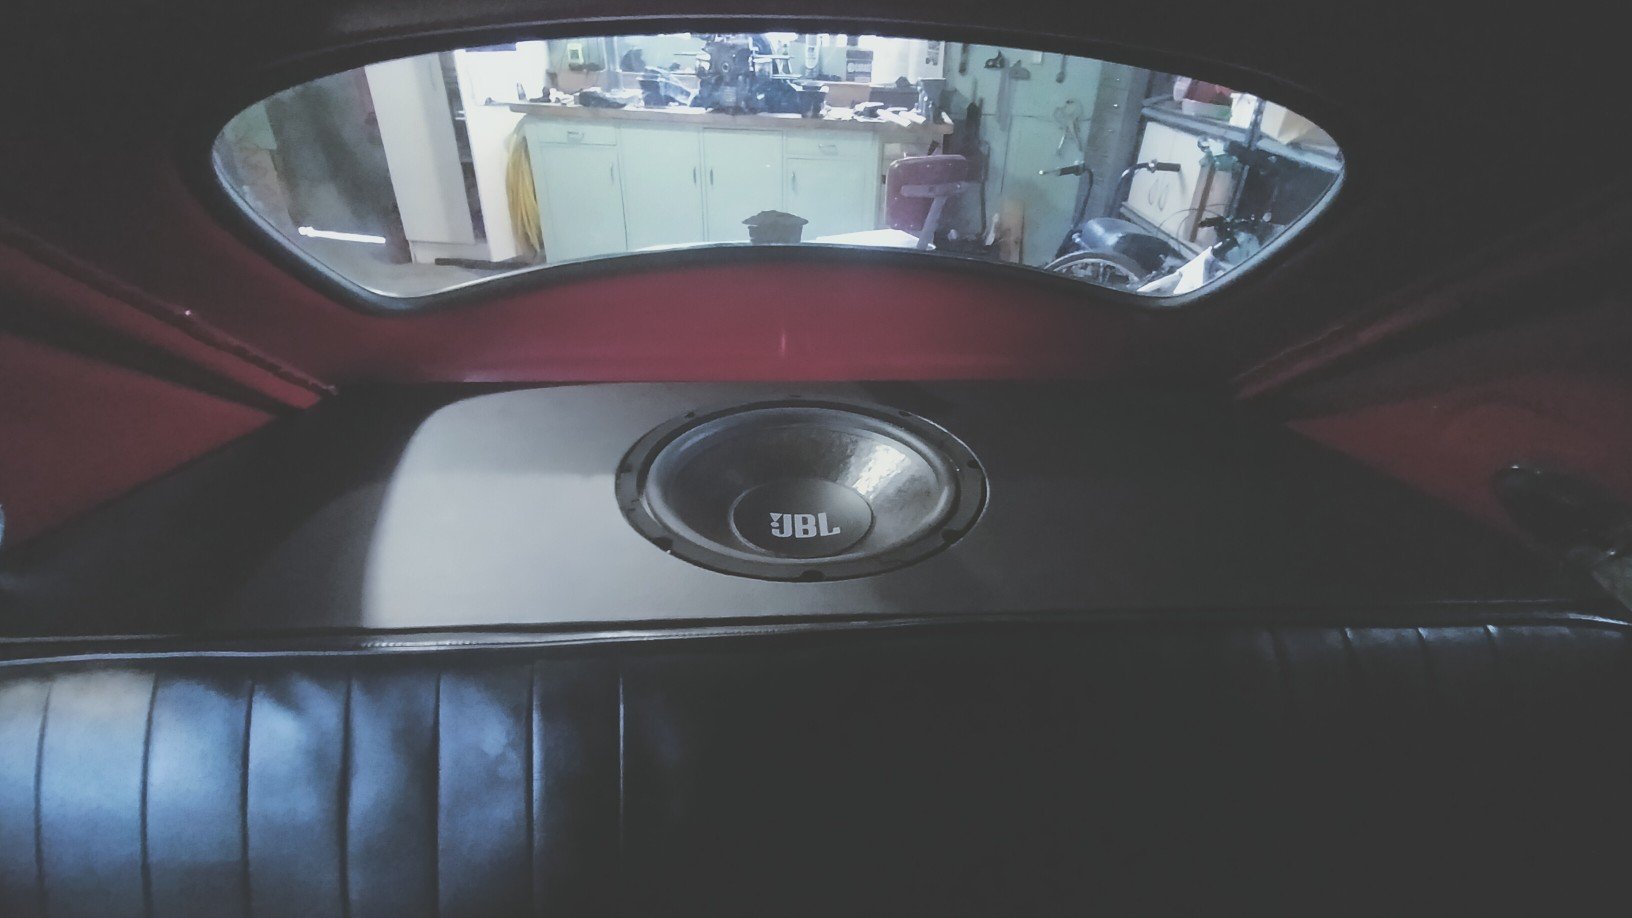
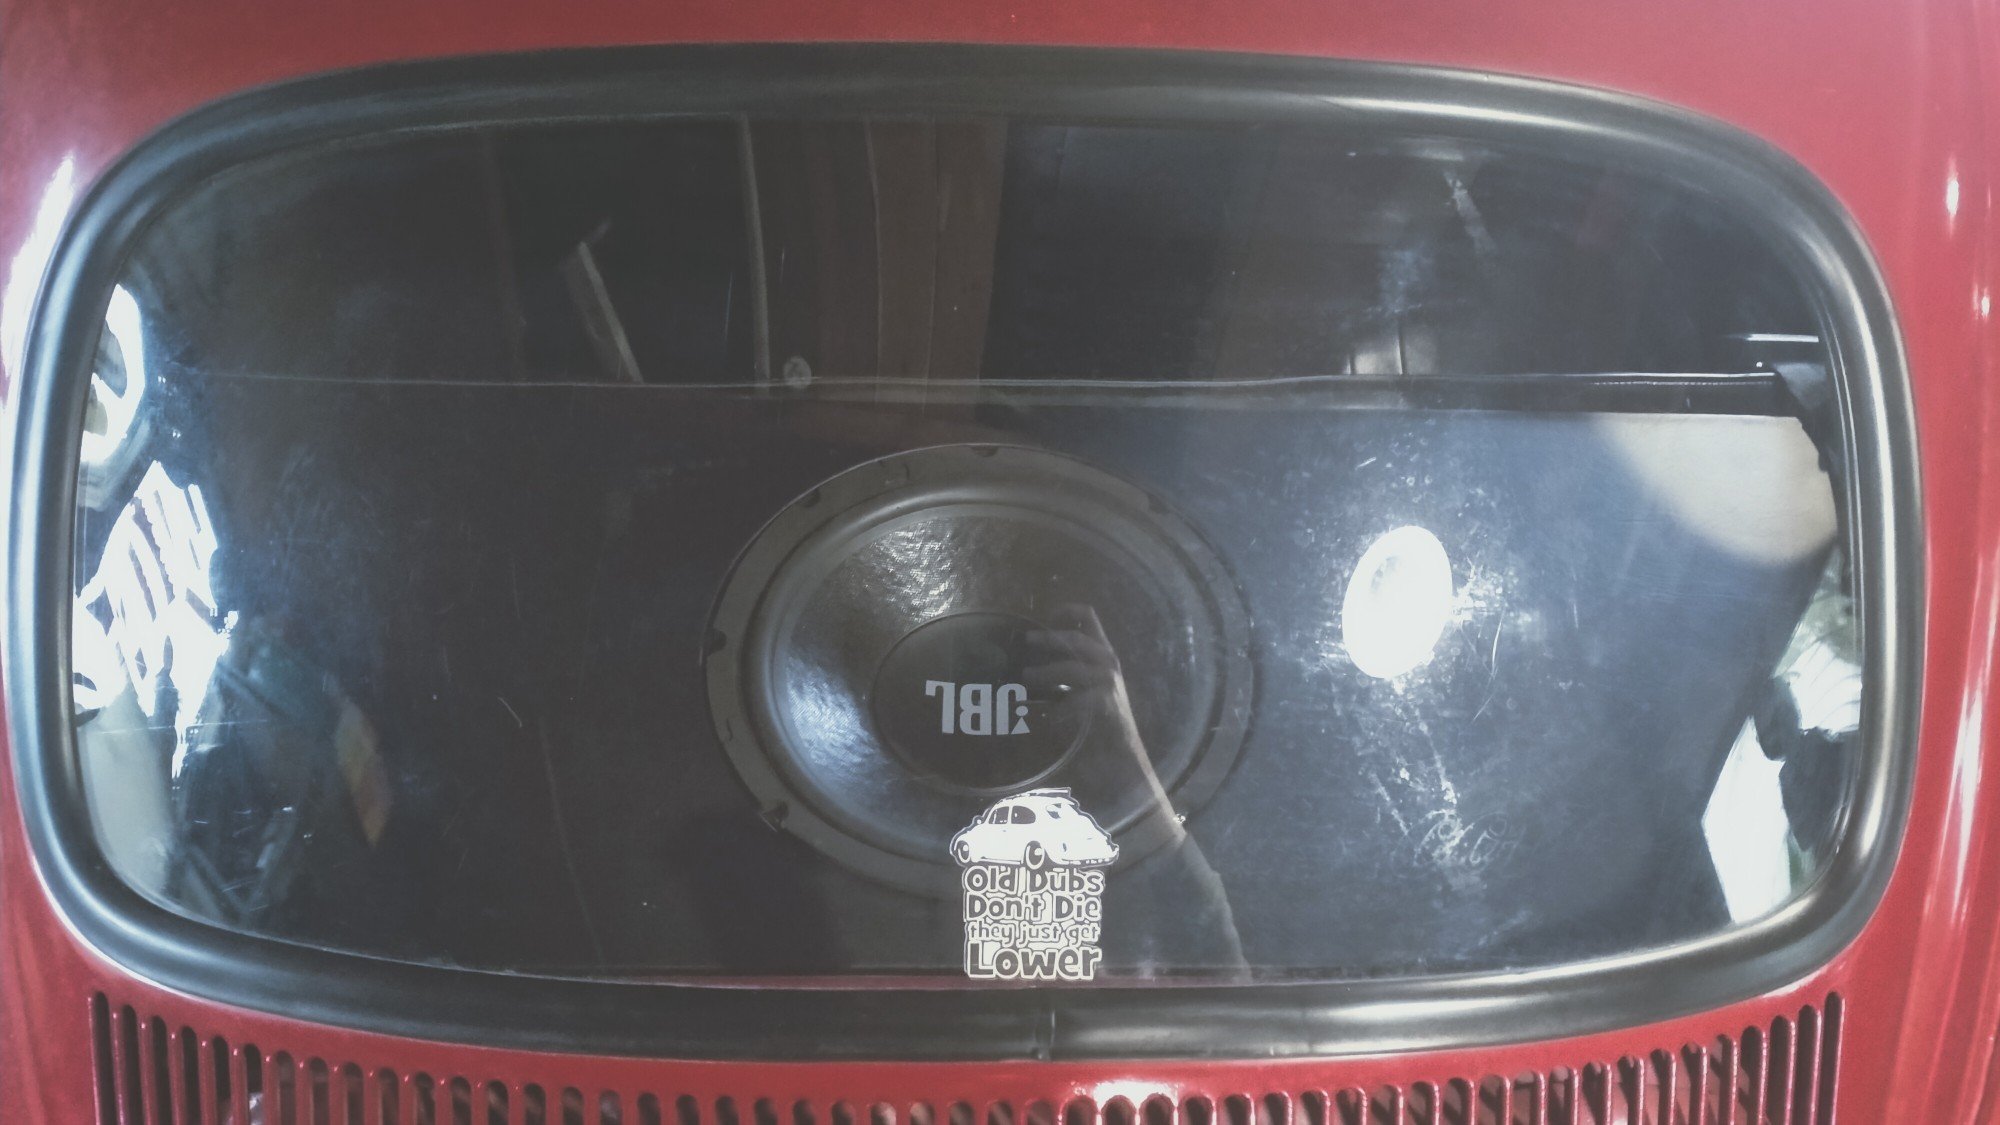
Turns out I've been driving around for over a year(when it runs) with a ugly mdf parcel shelf. Fixed that a couple weeks back. This was a second from work, it's just black vinyl from para rubber. Very happy as now the whole interior is black. Maybe one day it will get a headliner.
- 261 replies
-
- 18
-
-
I learnt a long time ago that nothing beats good German valve covers and bale's. I once thought chrome covers looked cool, wholey puck they leaked like shit, the cork gaskets would slip off the edge inside the cover, halfway to Waihi in the middle of the night as it happened. but getting back to your question, I don't use anything on the seals, I think it's the only place that doesn't leak.
-
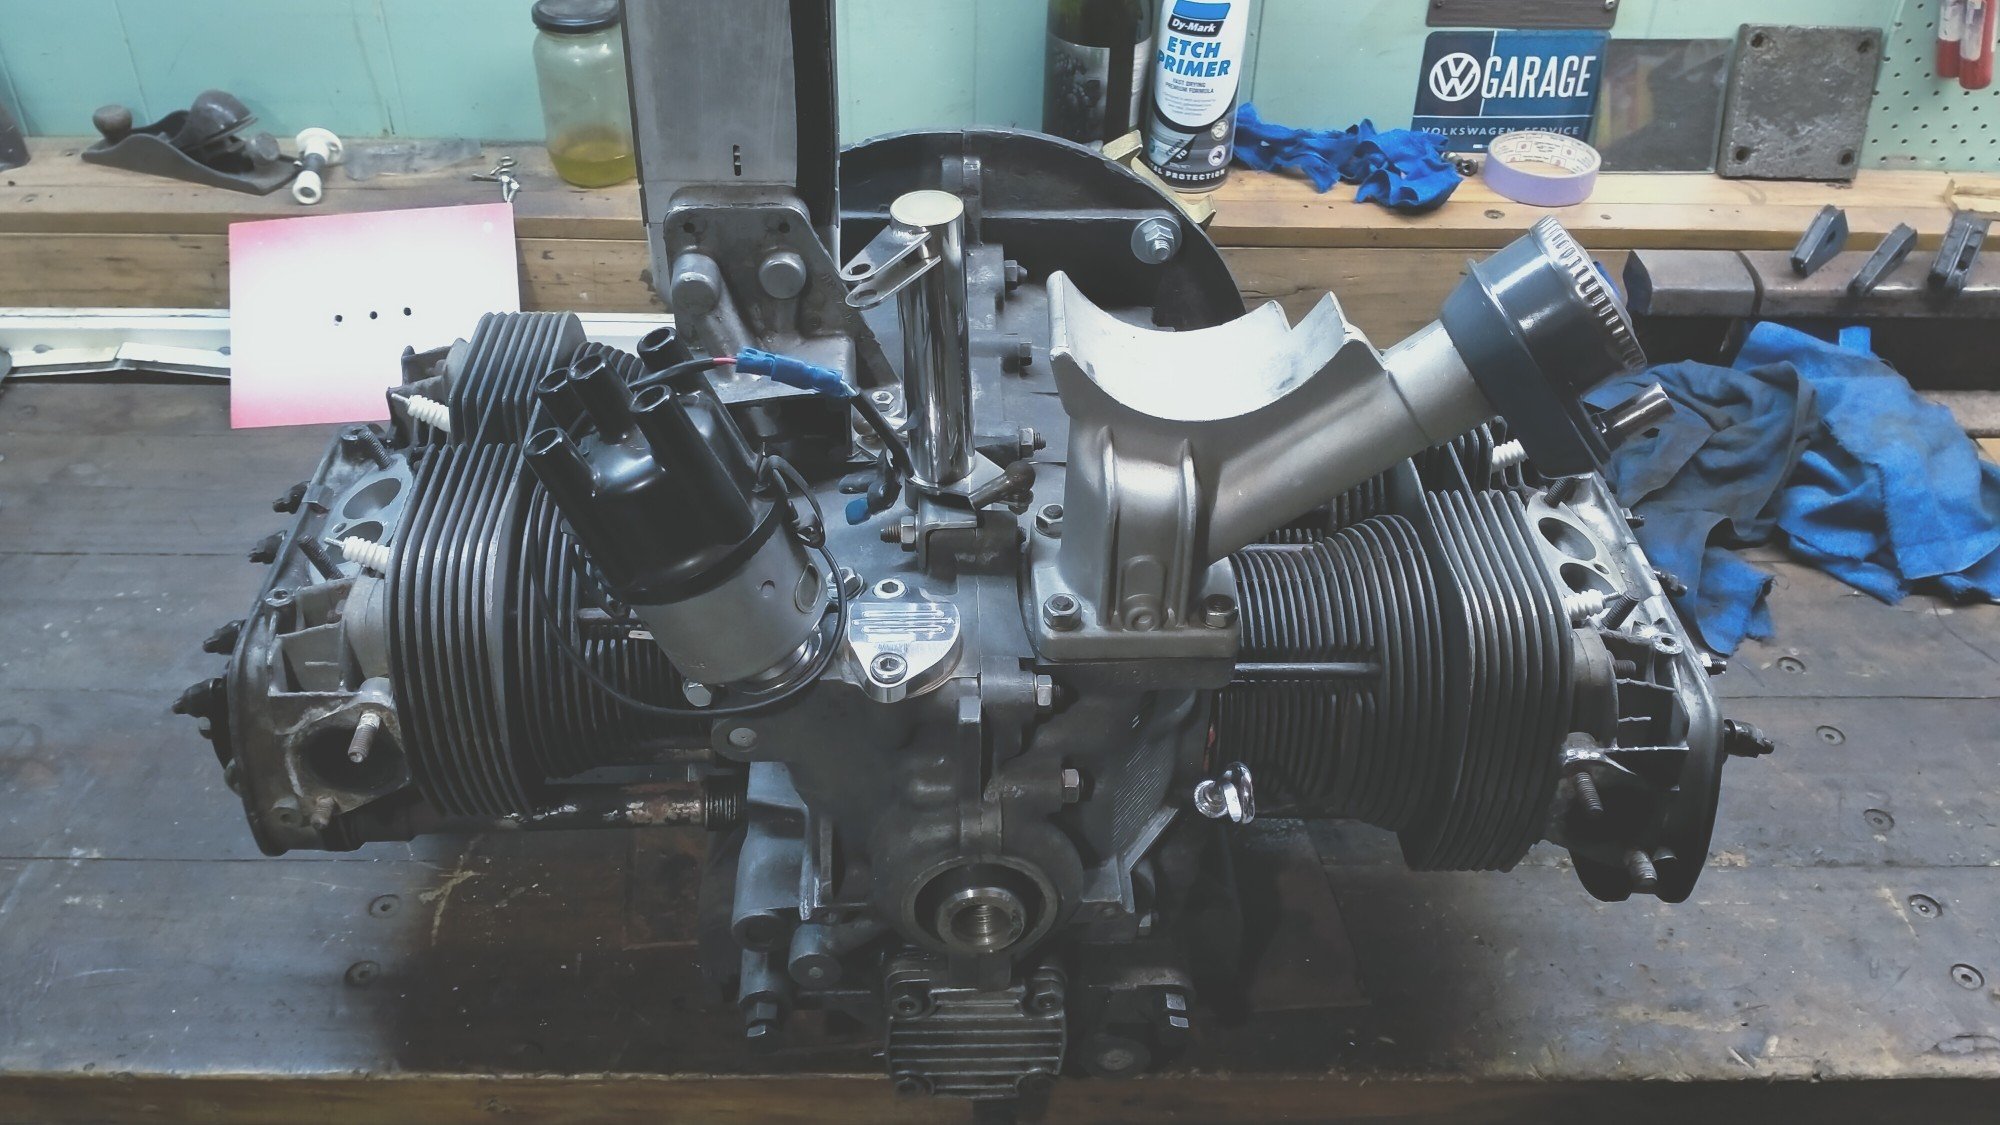
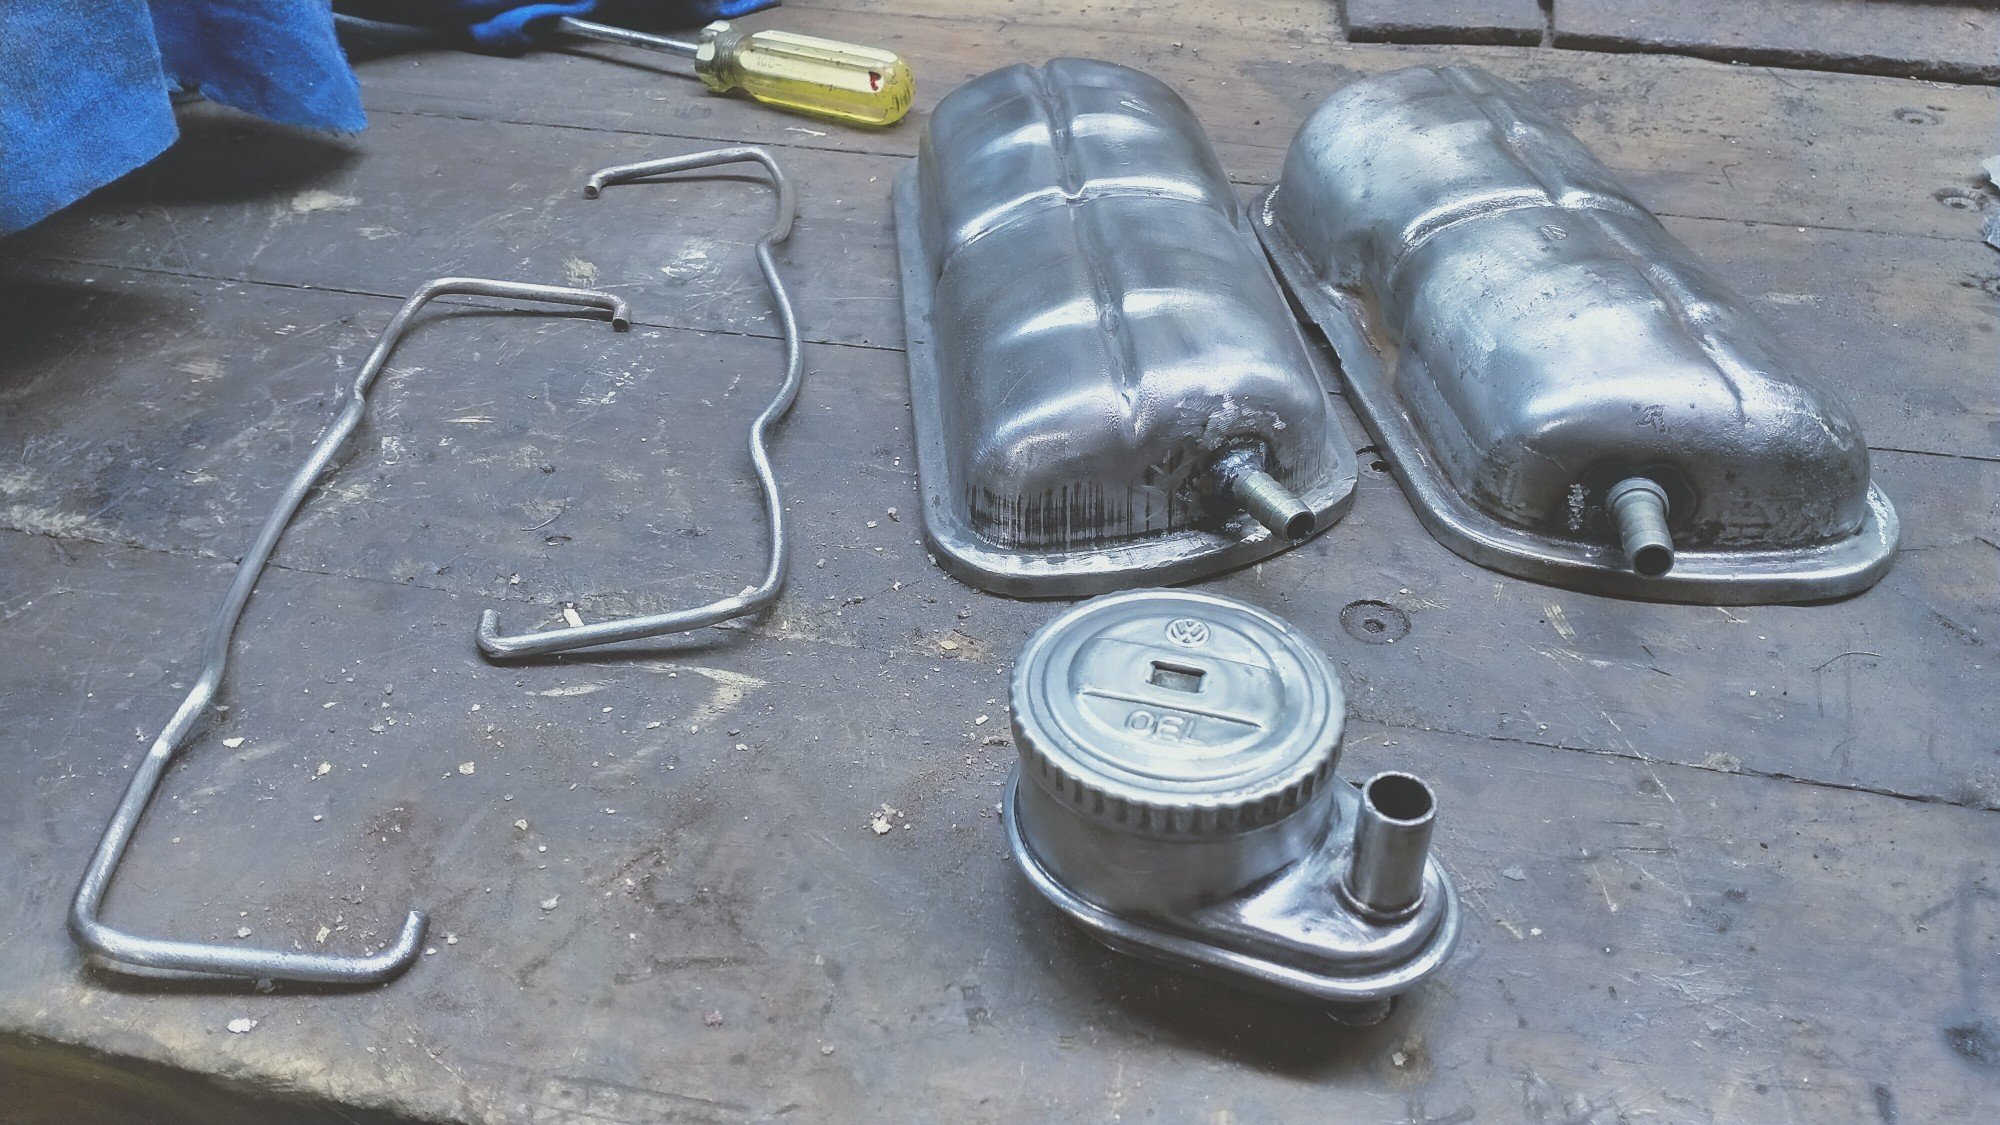
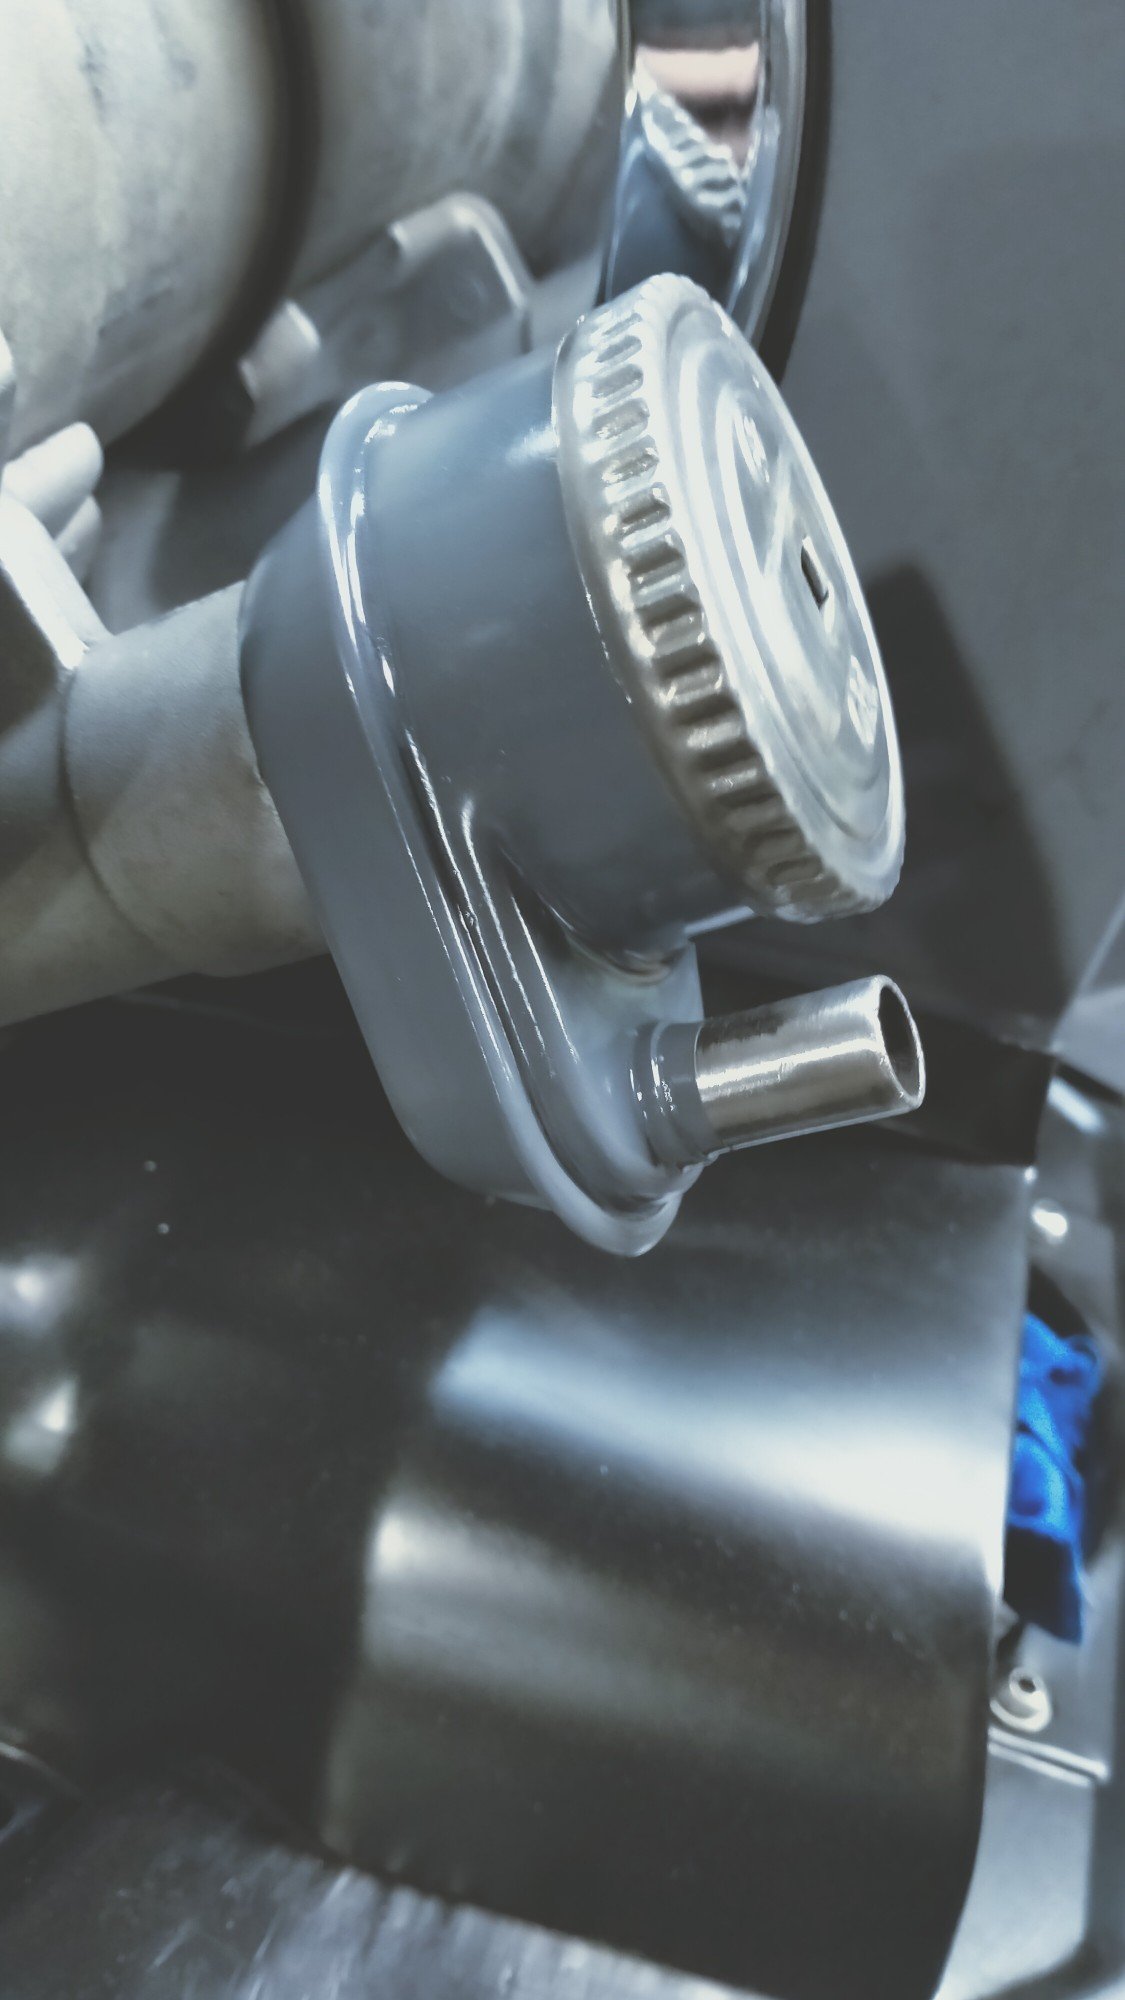
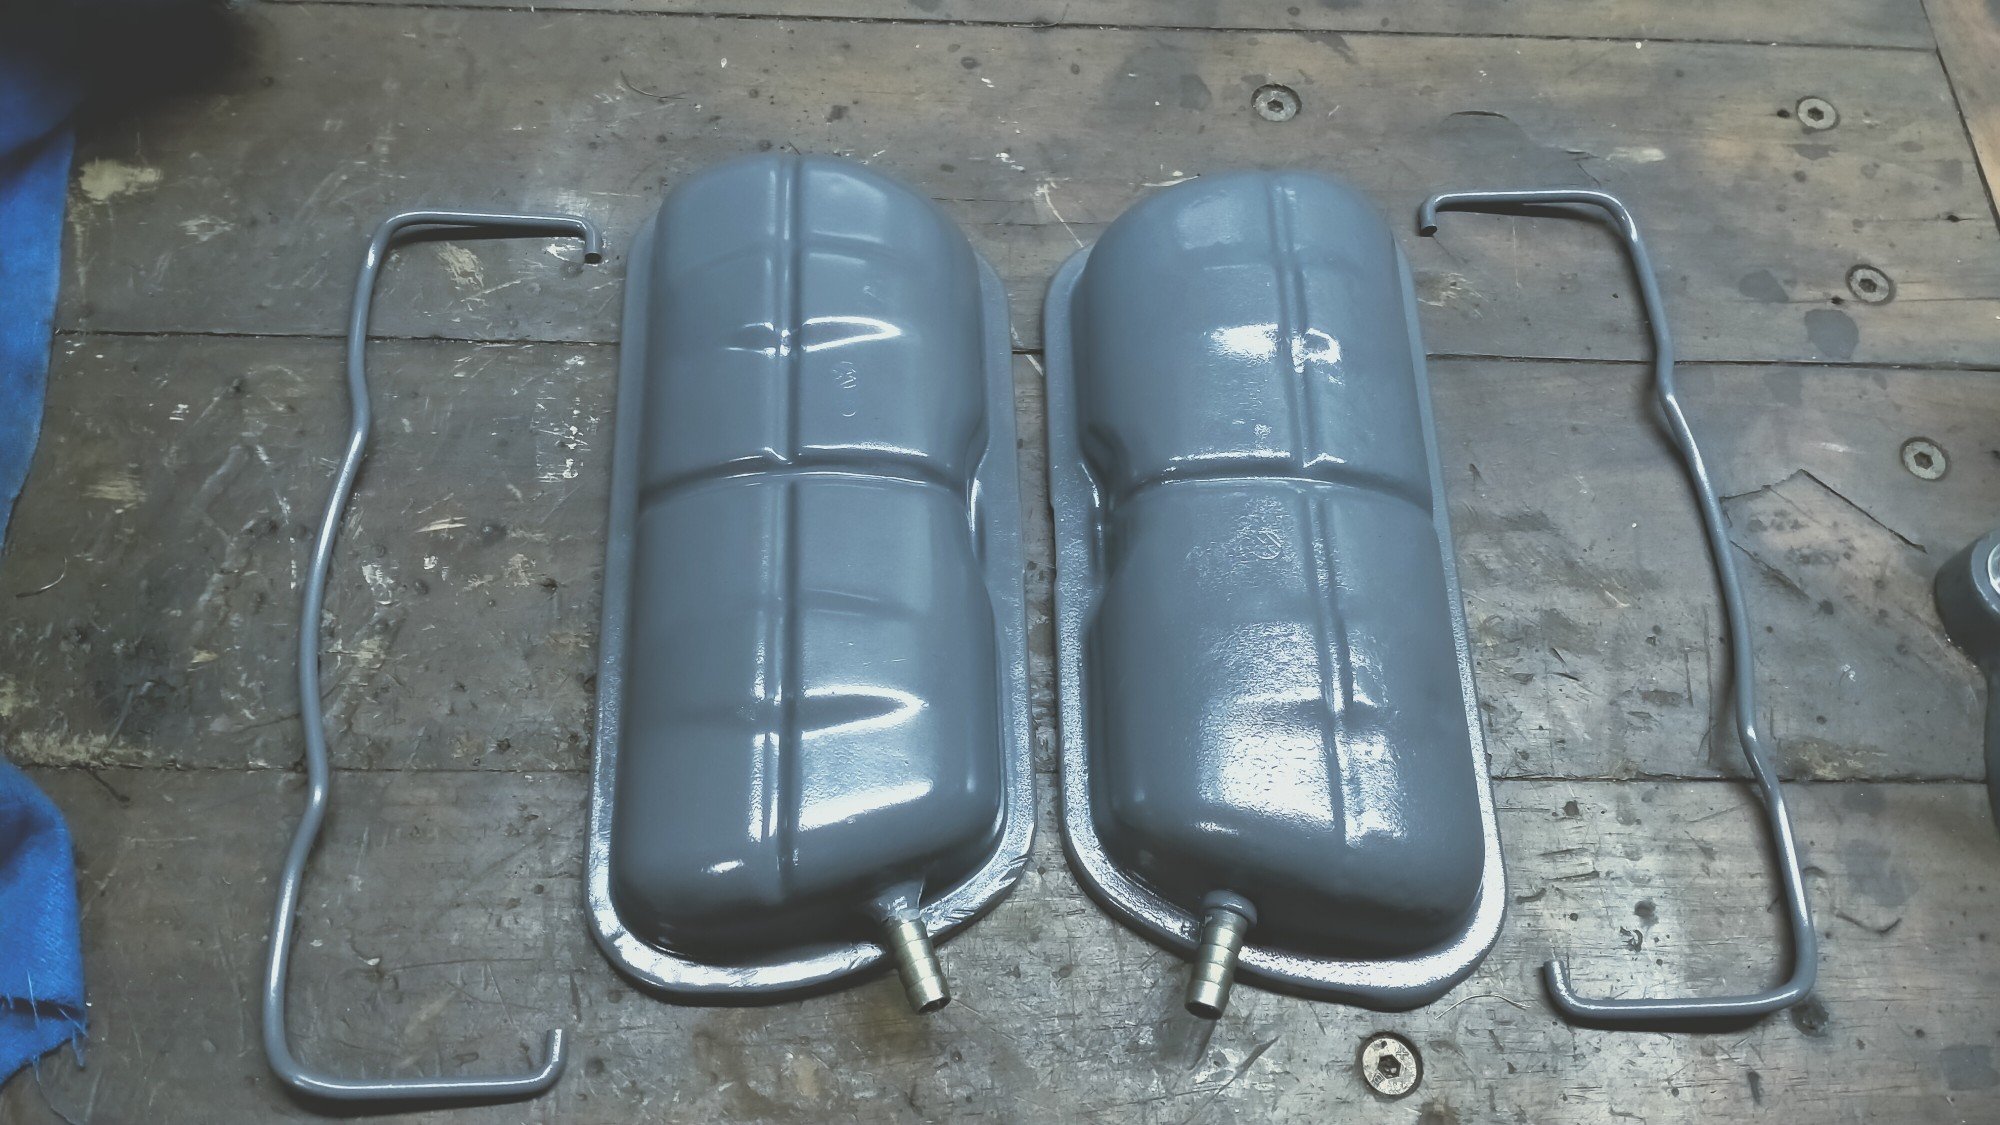
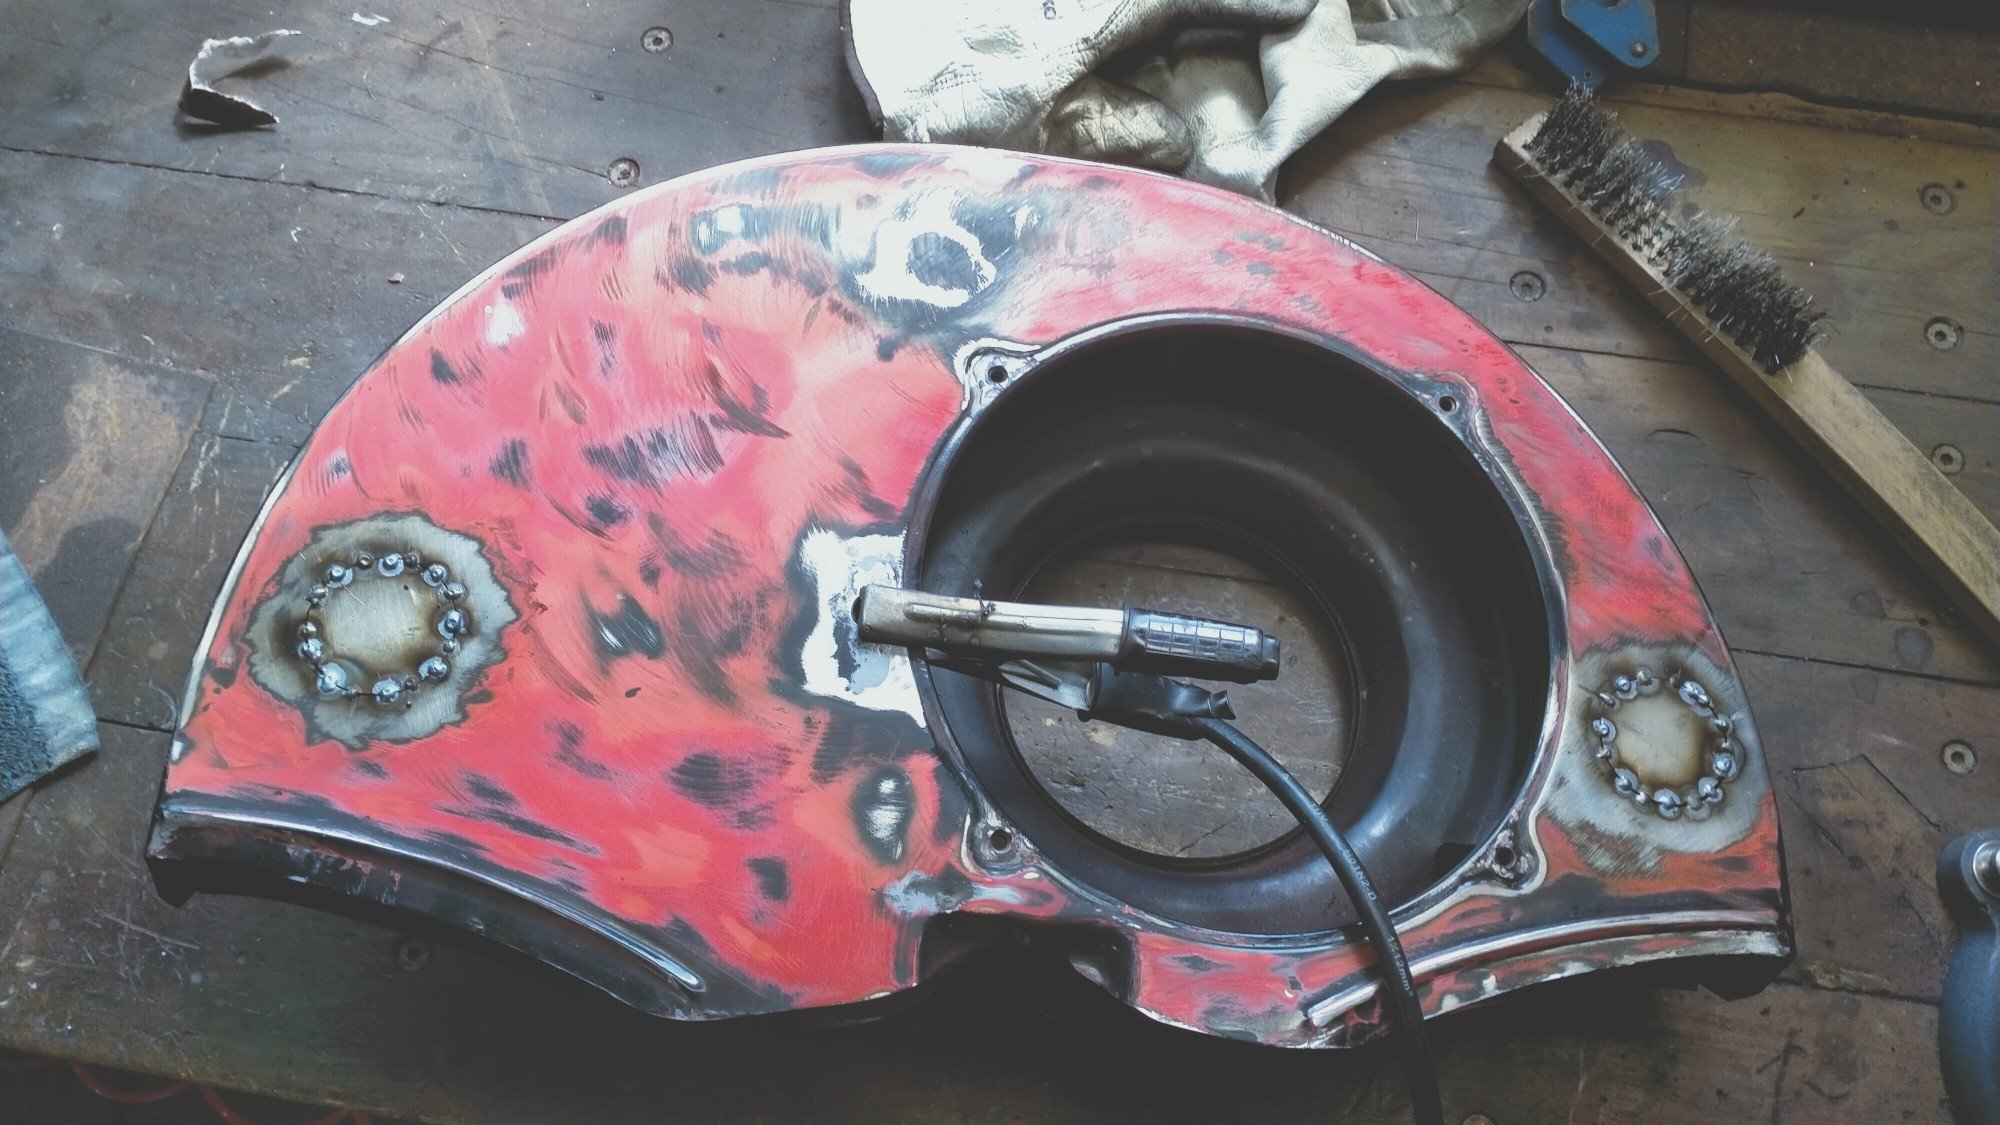
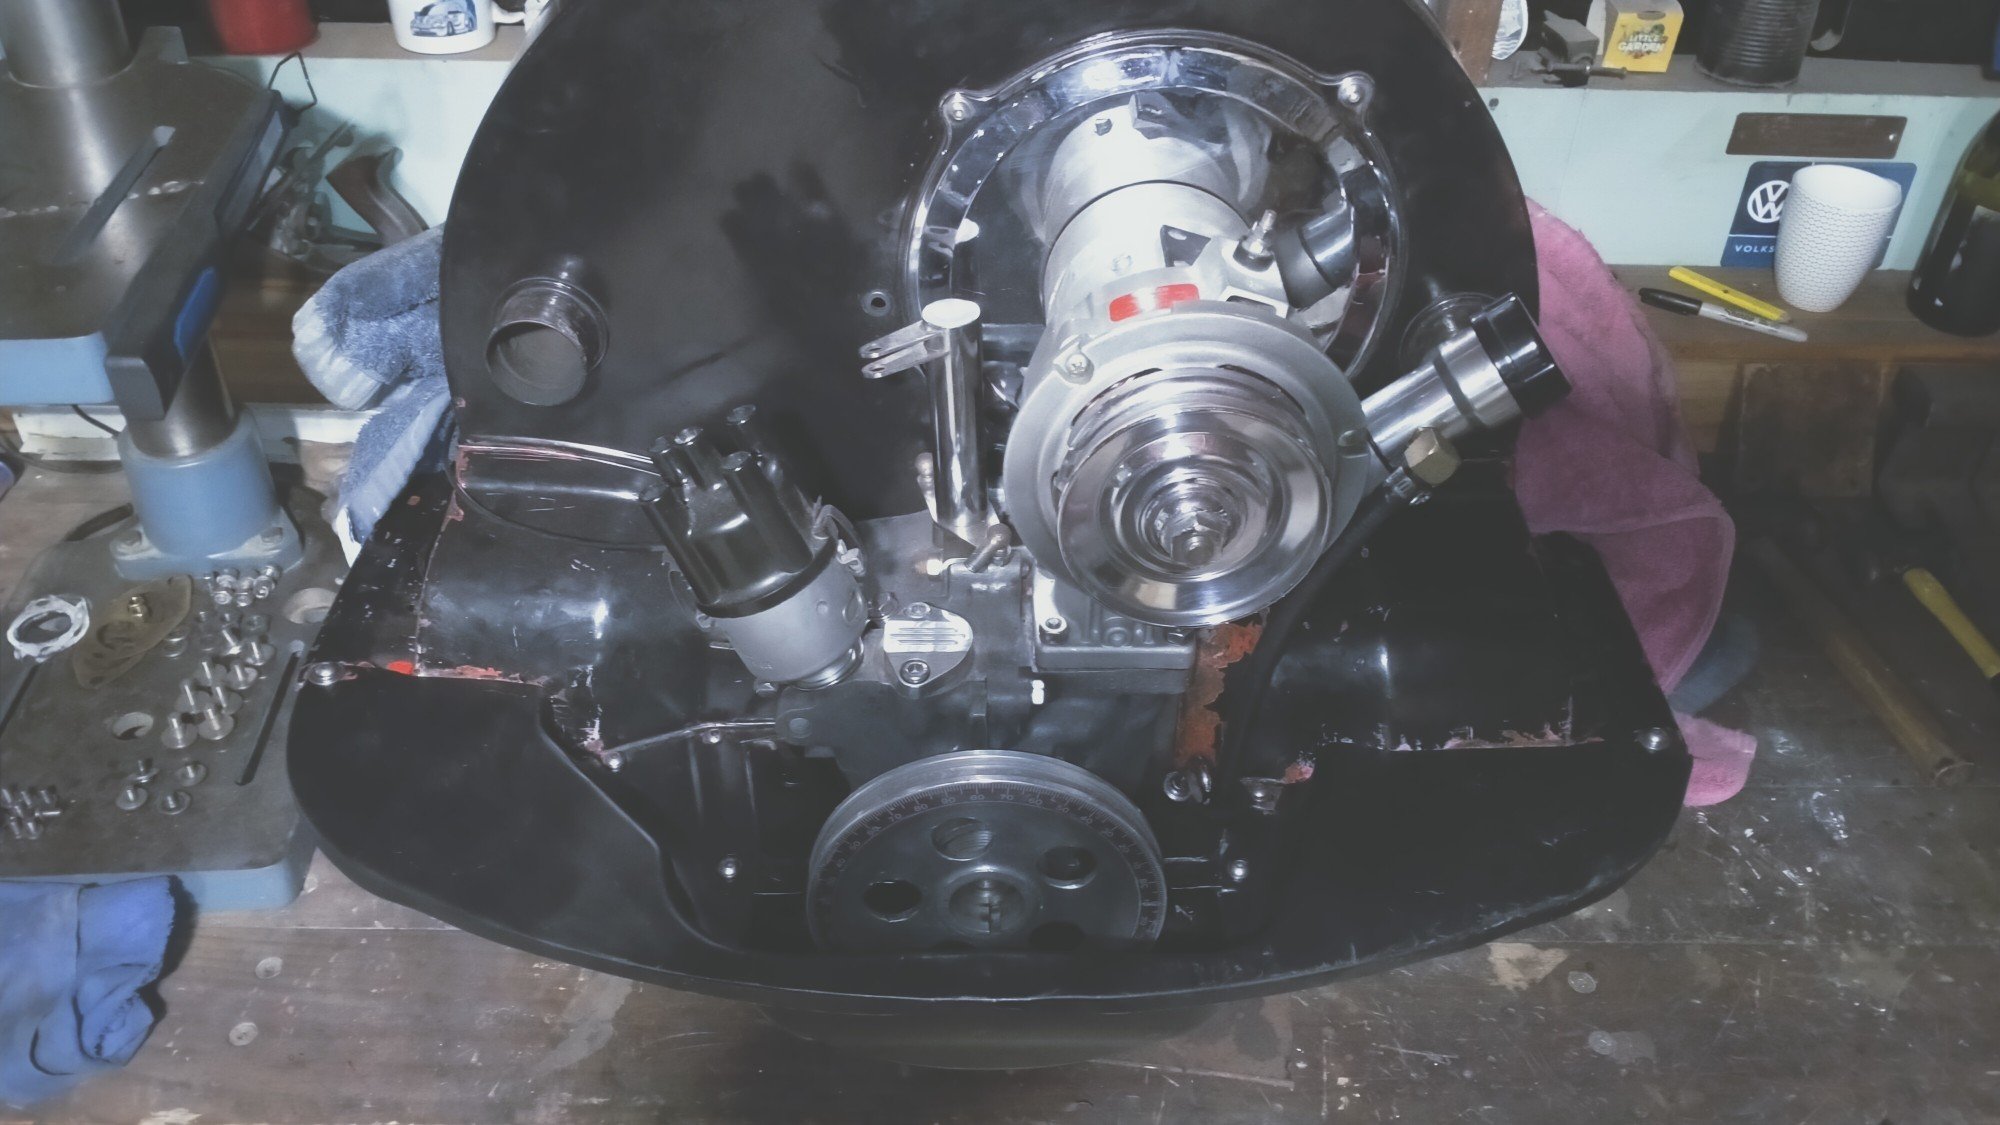
In a effort to reduce future oil leaks, I wanted to improve the crankcase ventilation. There are a million opinions on this, so I've pretty much gone with the old school factory baffled oil filler and vented valve covers, which will be plumbed up to a catch can. Found some old air connecters, cut them up and welded them in. Had been wanting to do this forever. Unsure of the grey. Had to make this to screw in the big interior nut that holds the filler on. gunna kill me the first time I slide the bale's up and scratch that paint!
- 261 replies
-
- 14
-
-
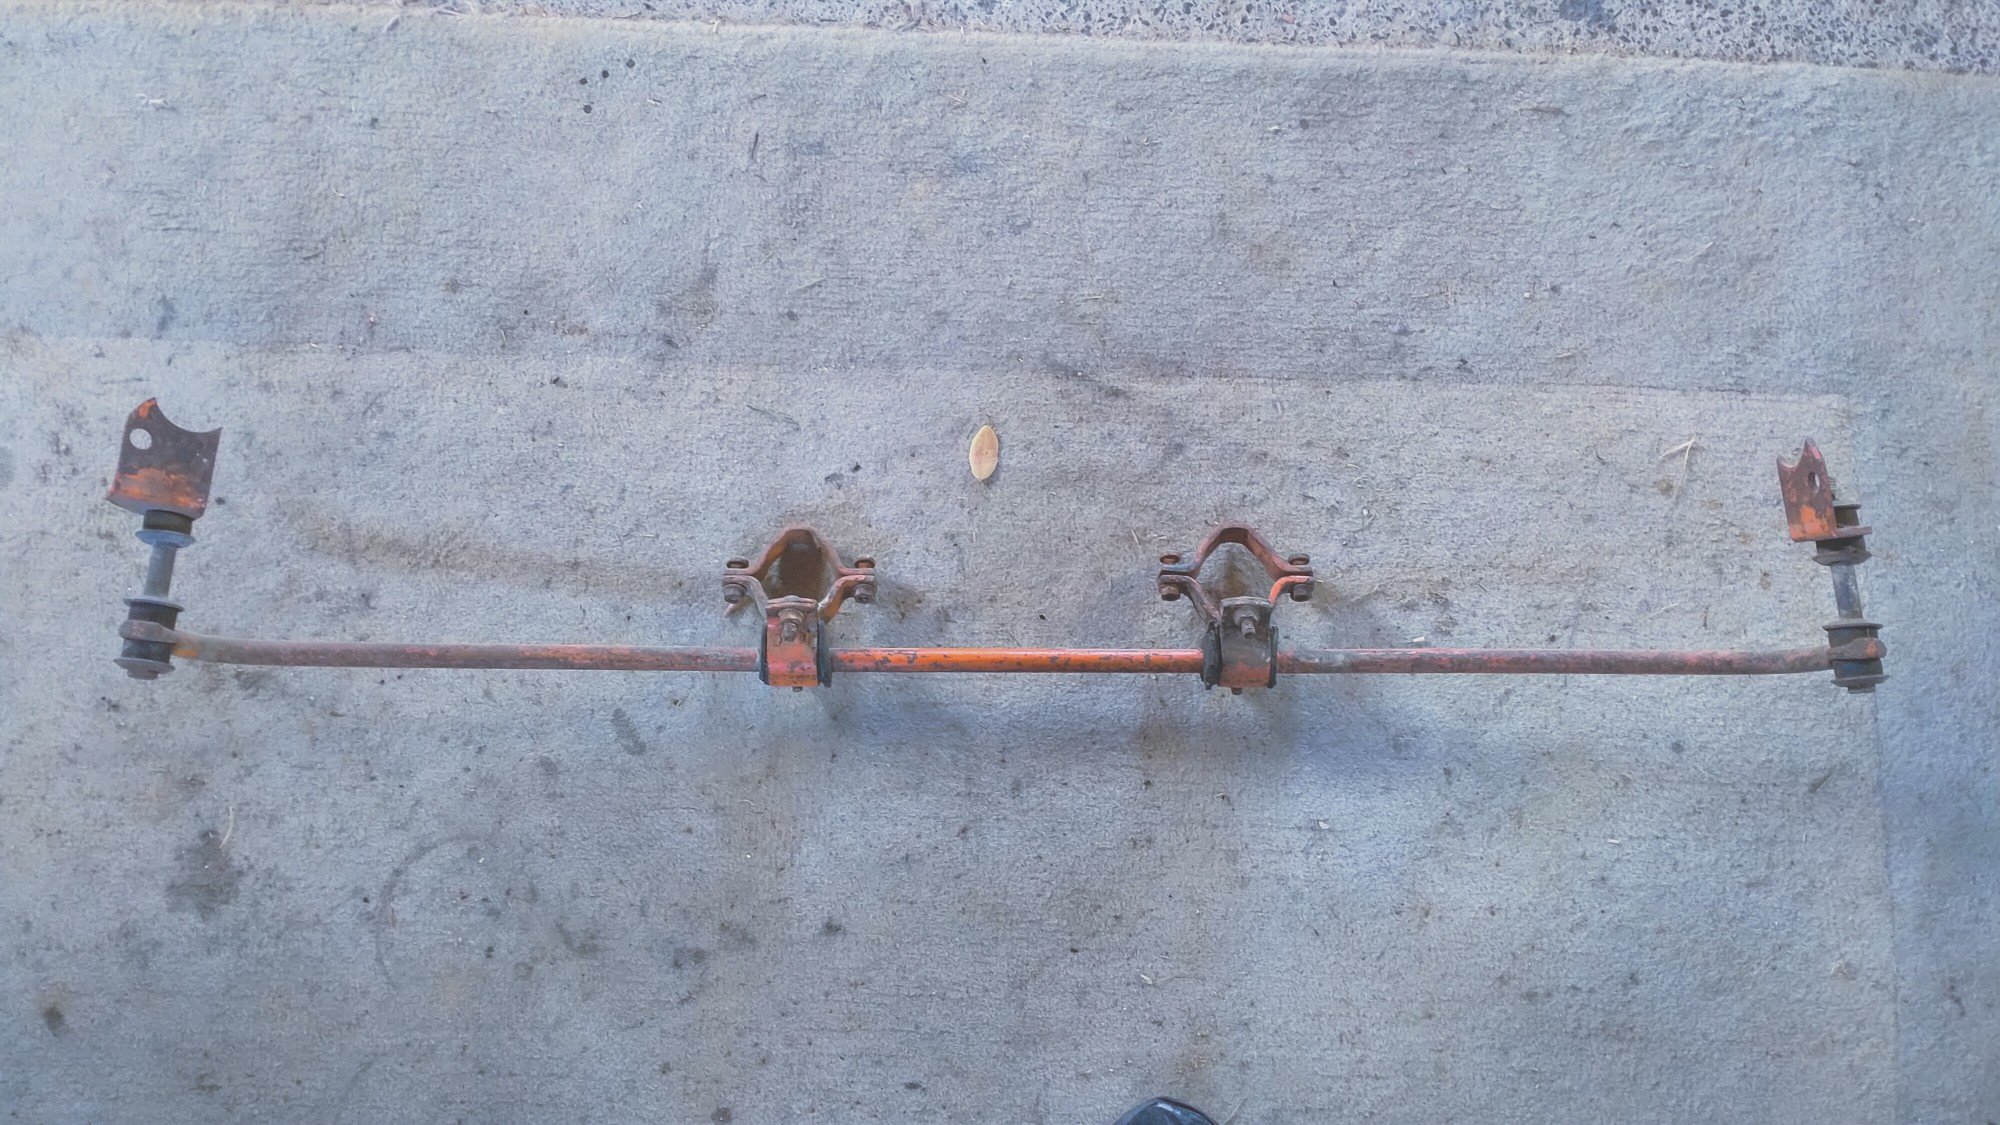
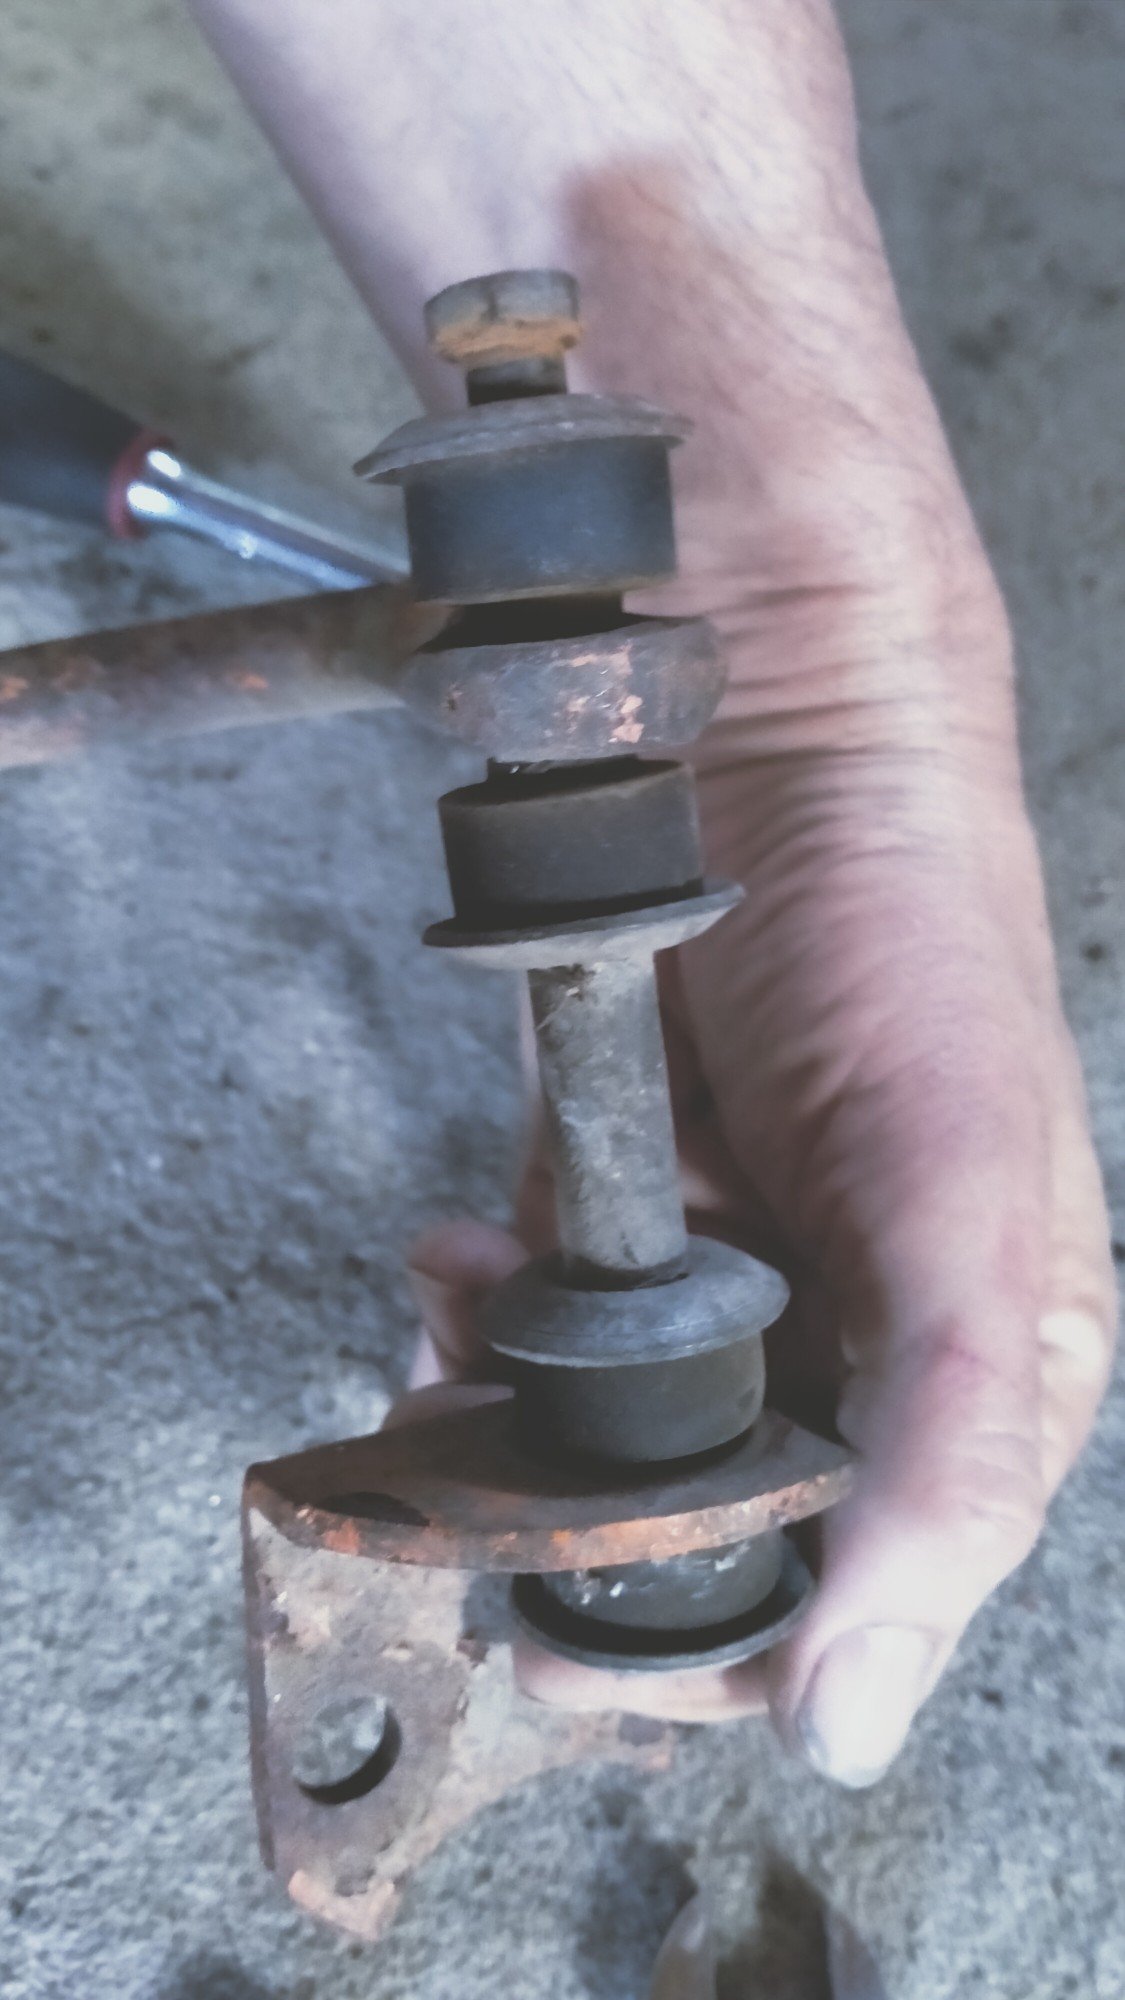
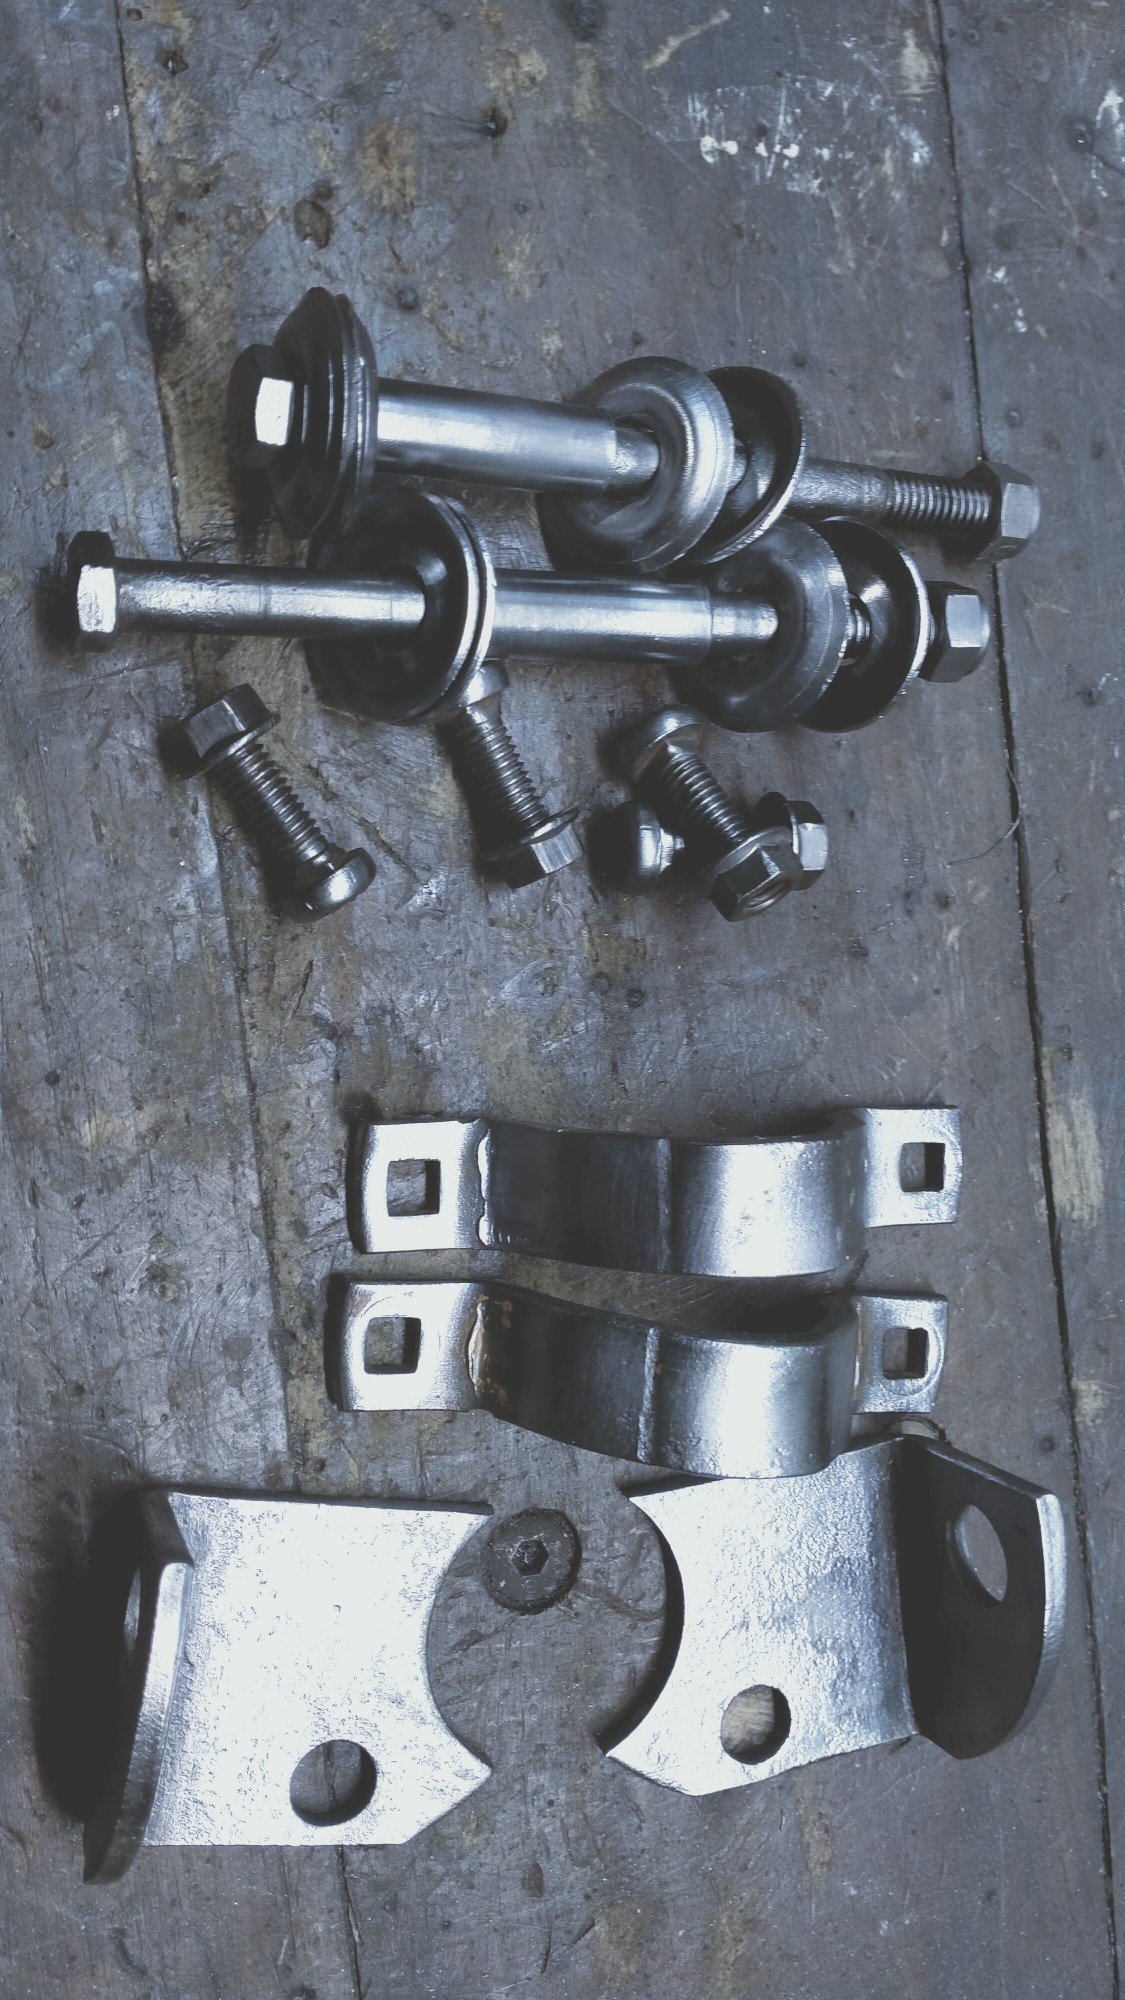
Found this rear sway bar on trade me. Vw never had a sway bar on the early cars. By 63 mine at least came with a front bar, but with little weight on the front, and all the weight in the ass, I always felt the car cornered better without it, sure it rolled more, in any case I still don't have one. This is a K-Mak vintage thing. It clamps onto the rear chassis frame horns and the ends mount to the lower shock bolts. All the fiddly bits went for a swim in the viniger.
- 261 replies
-
- 21
-
-
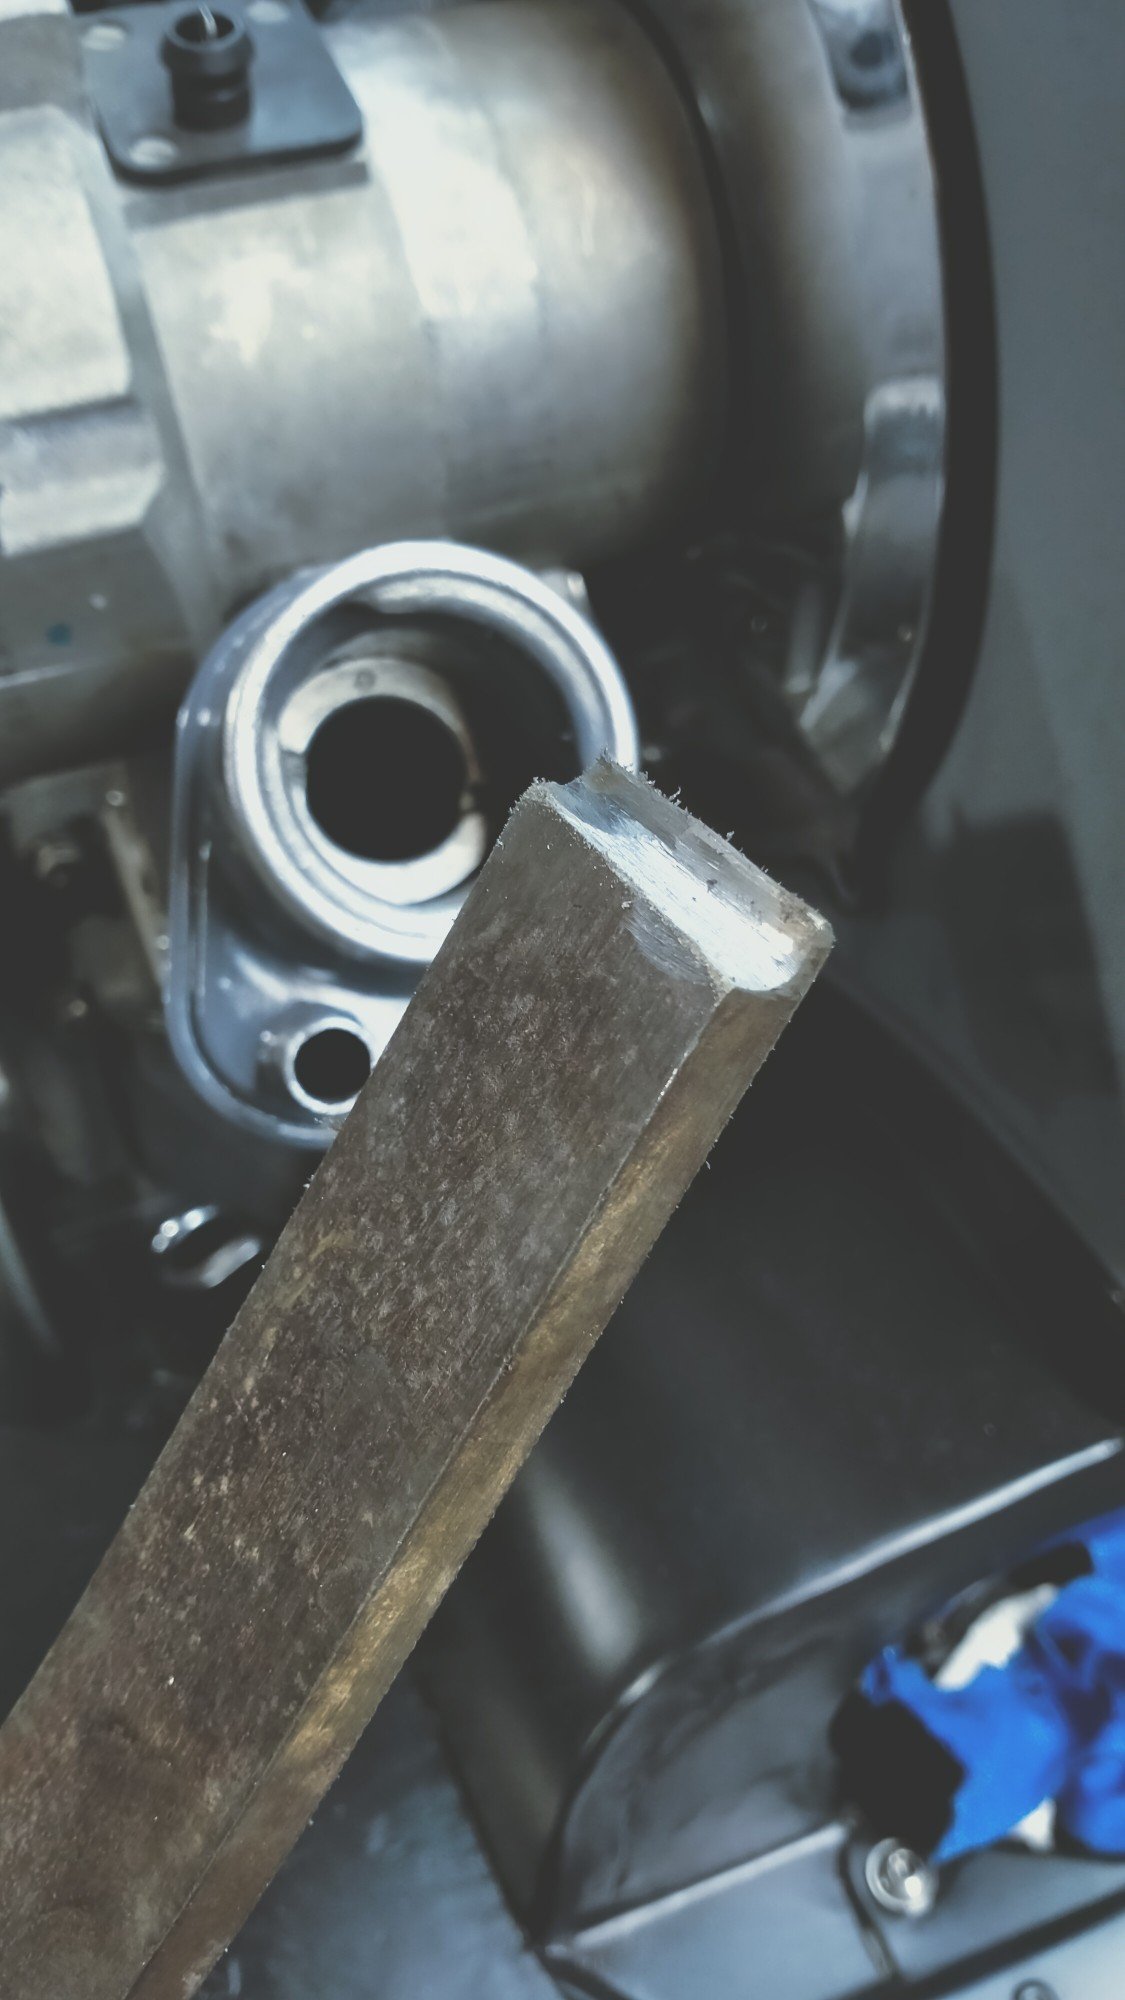
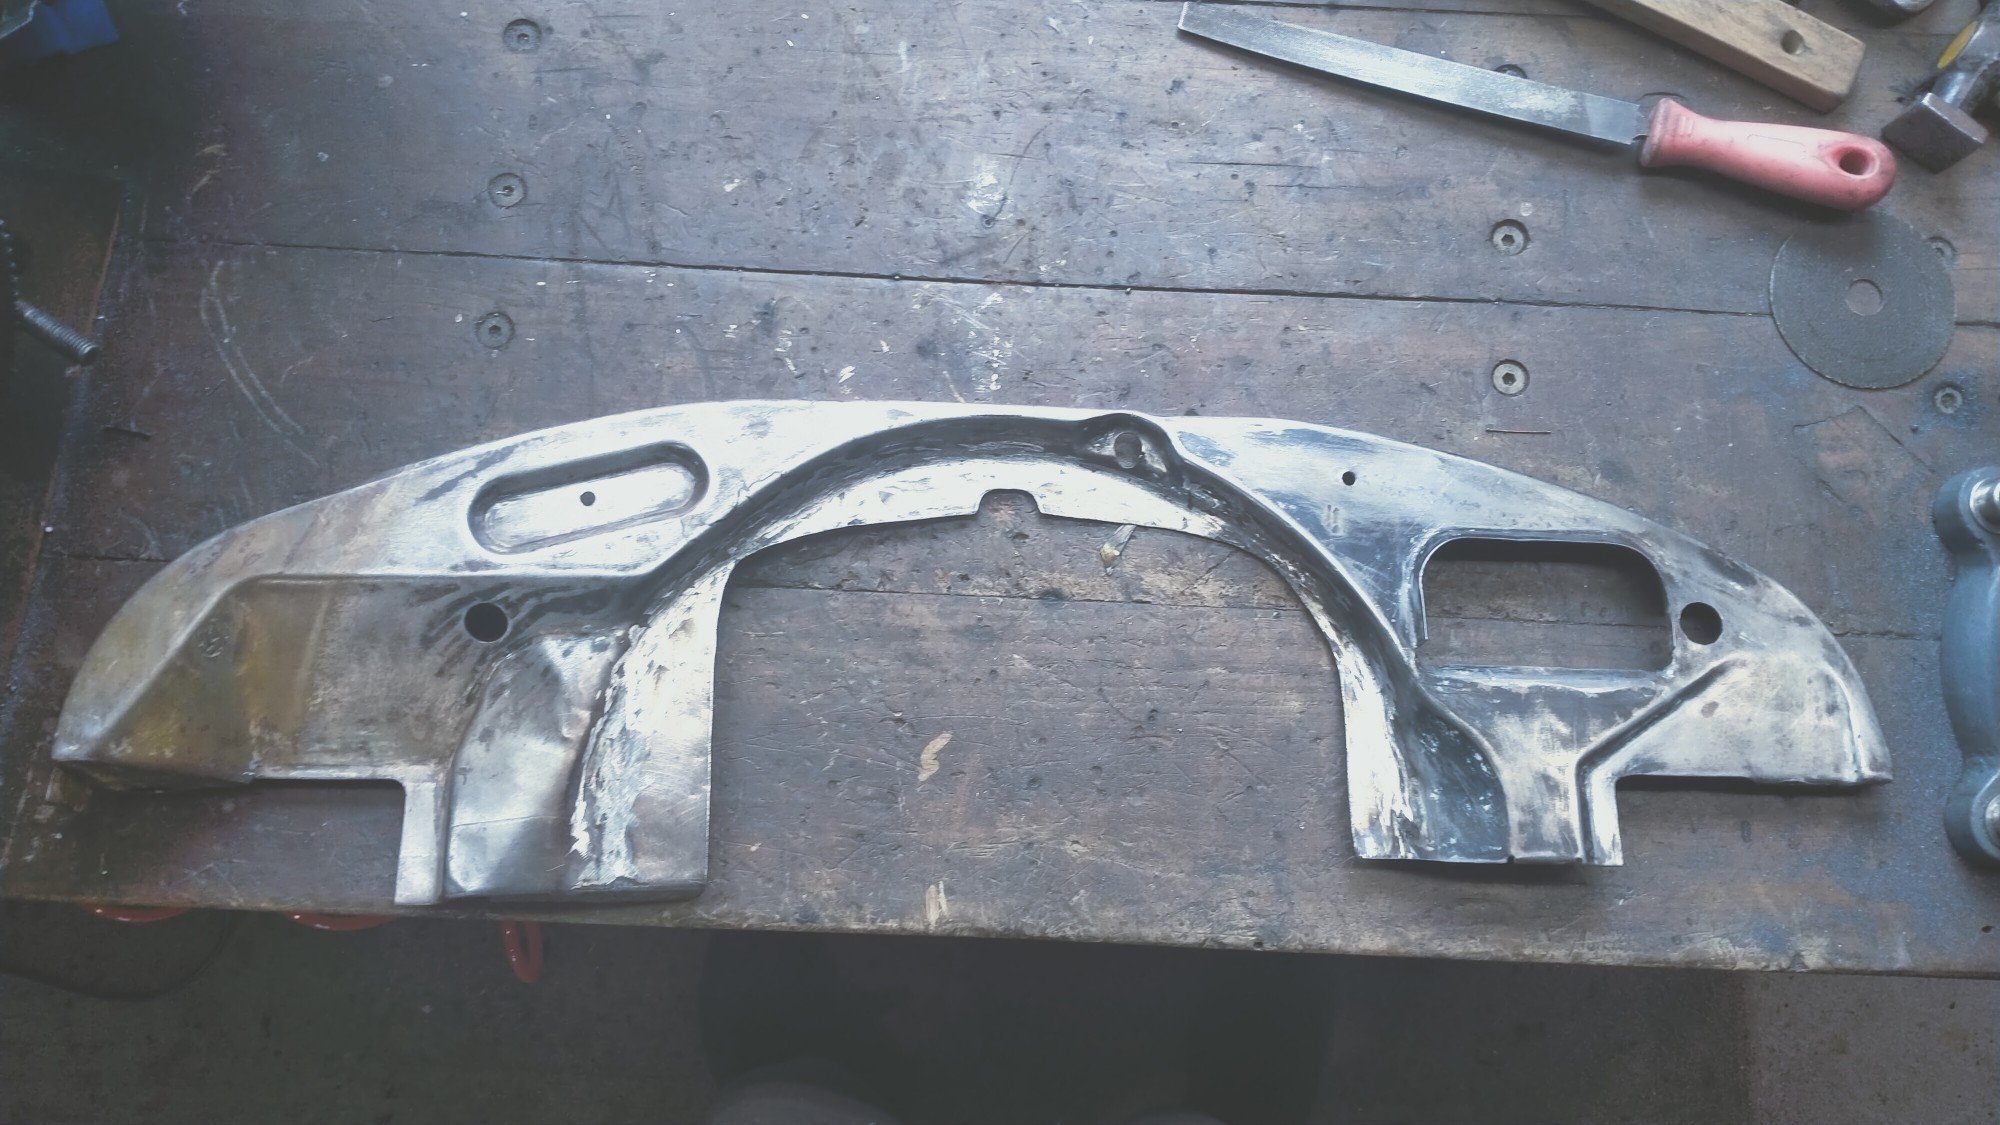
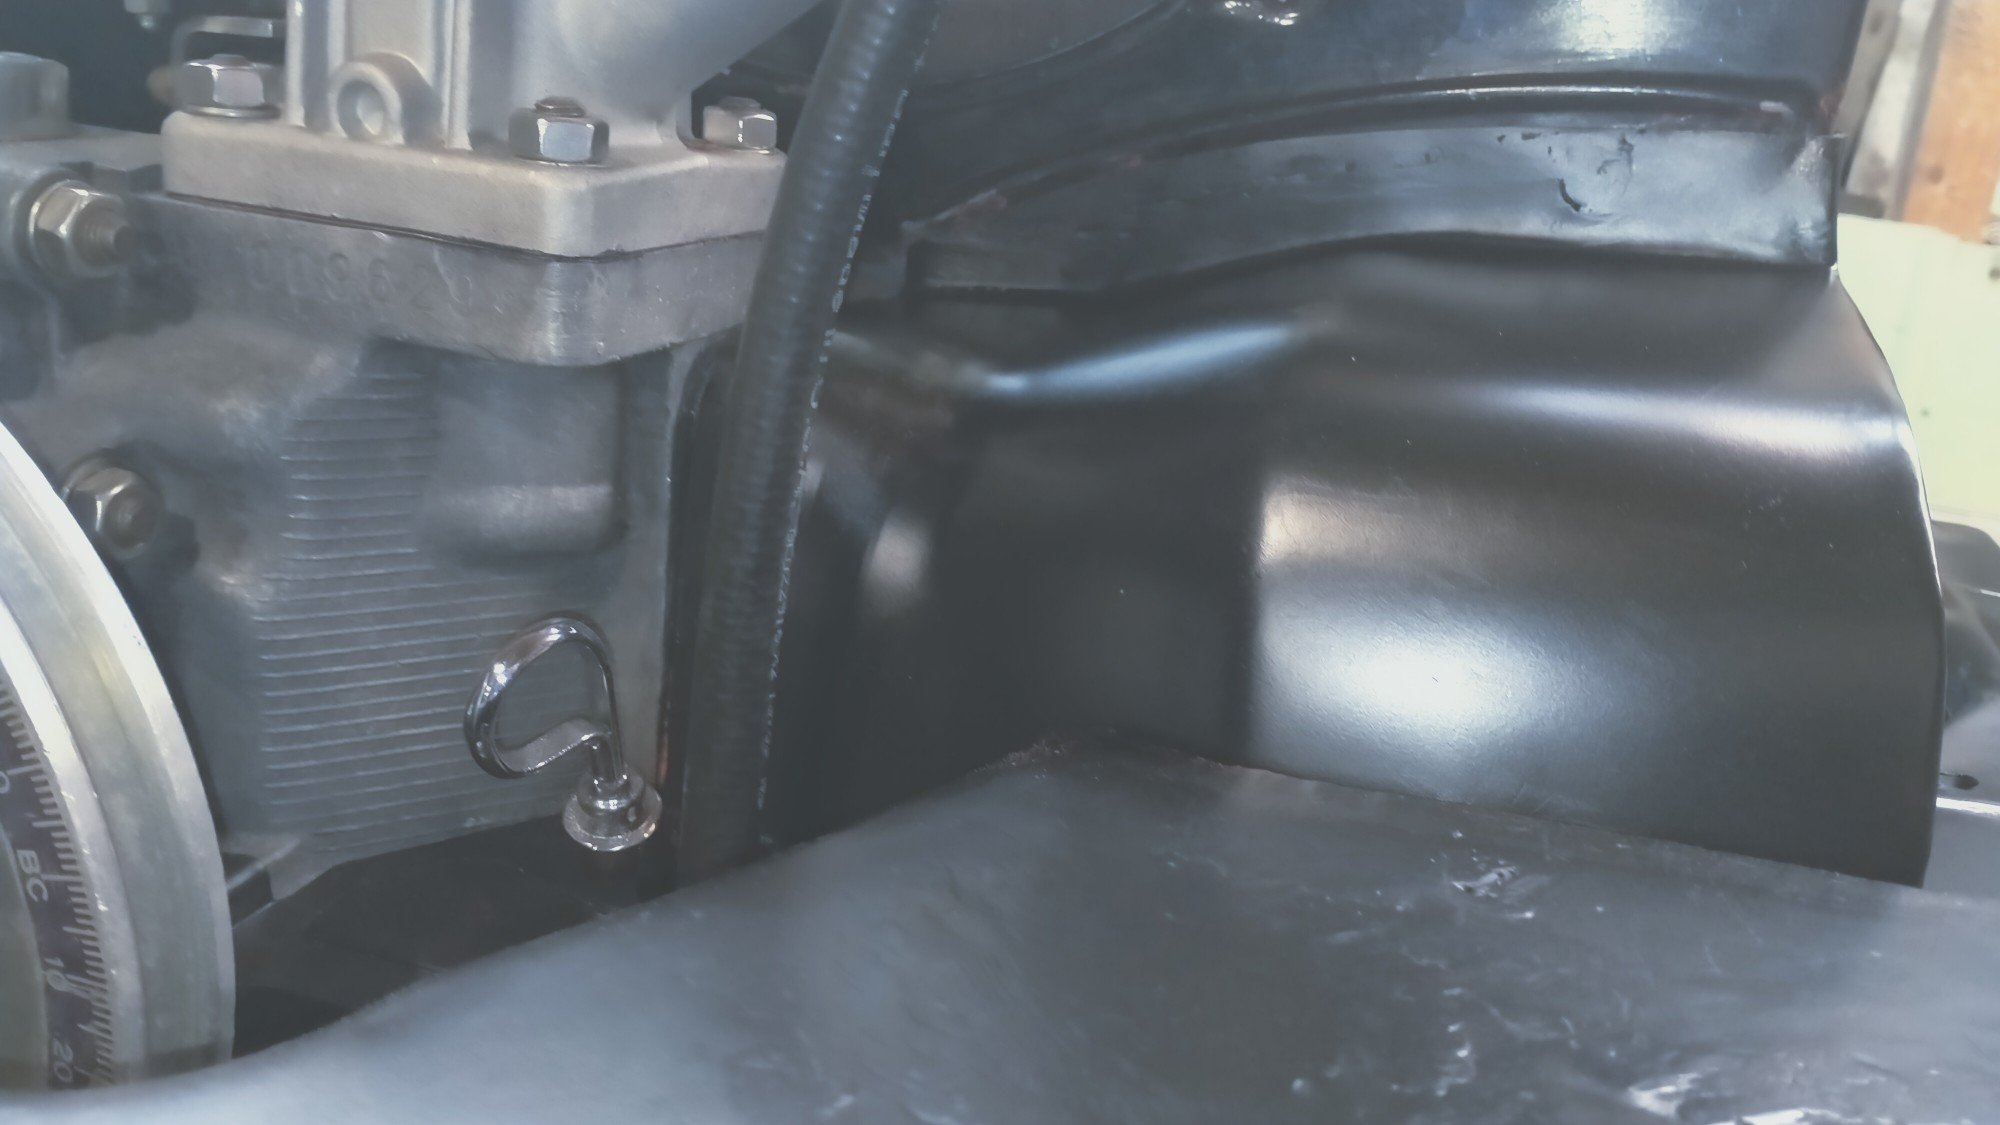
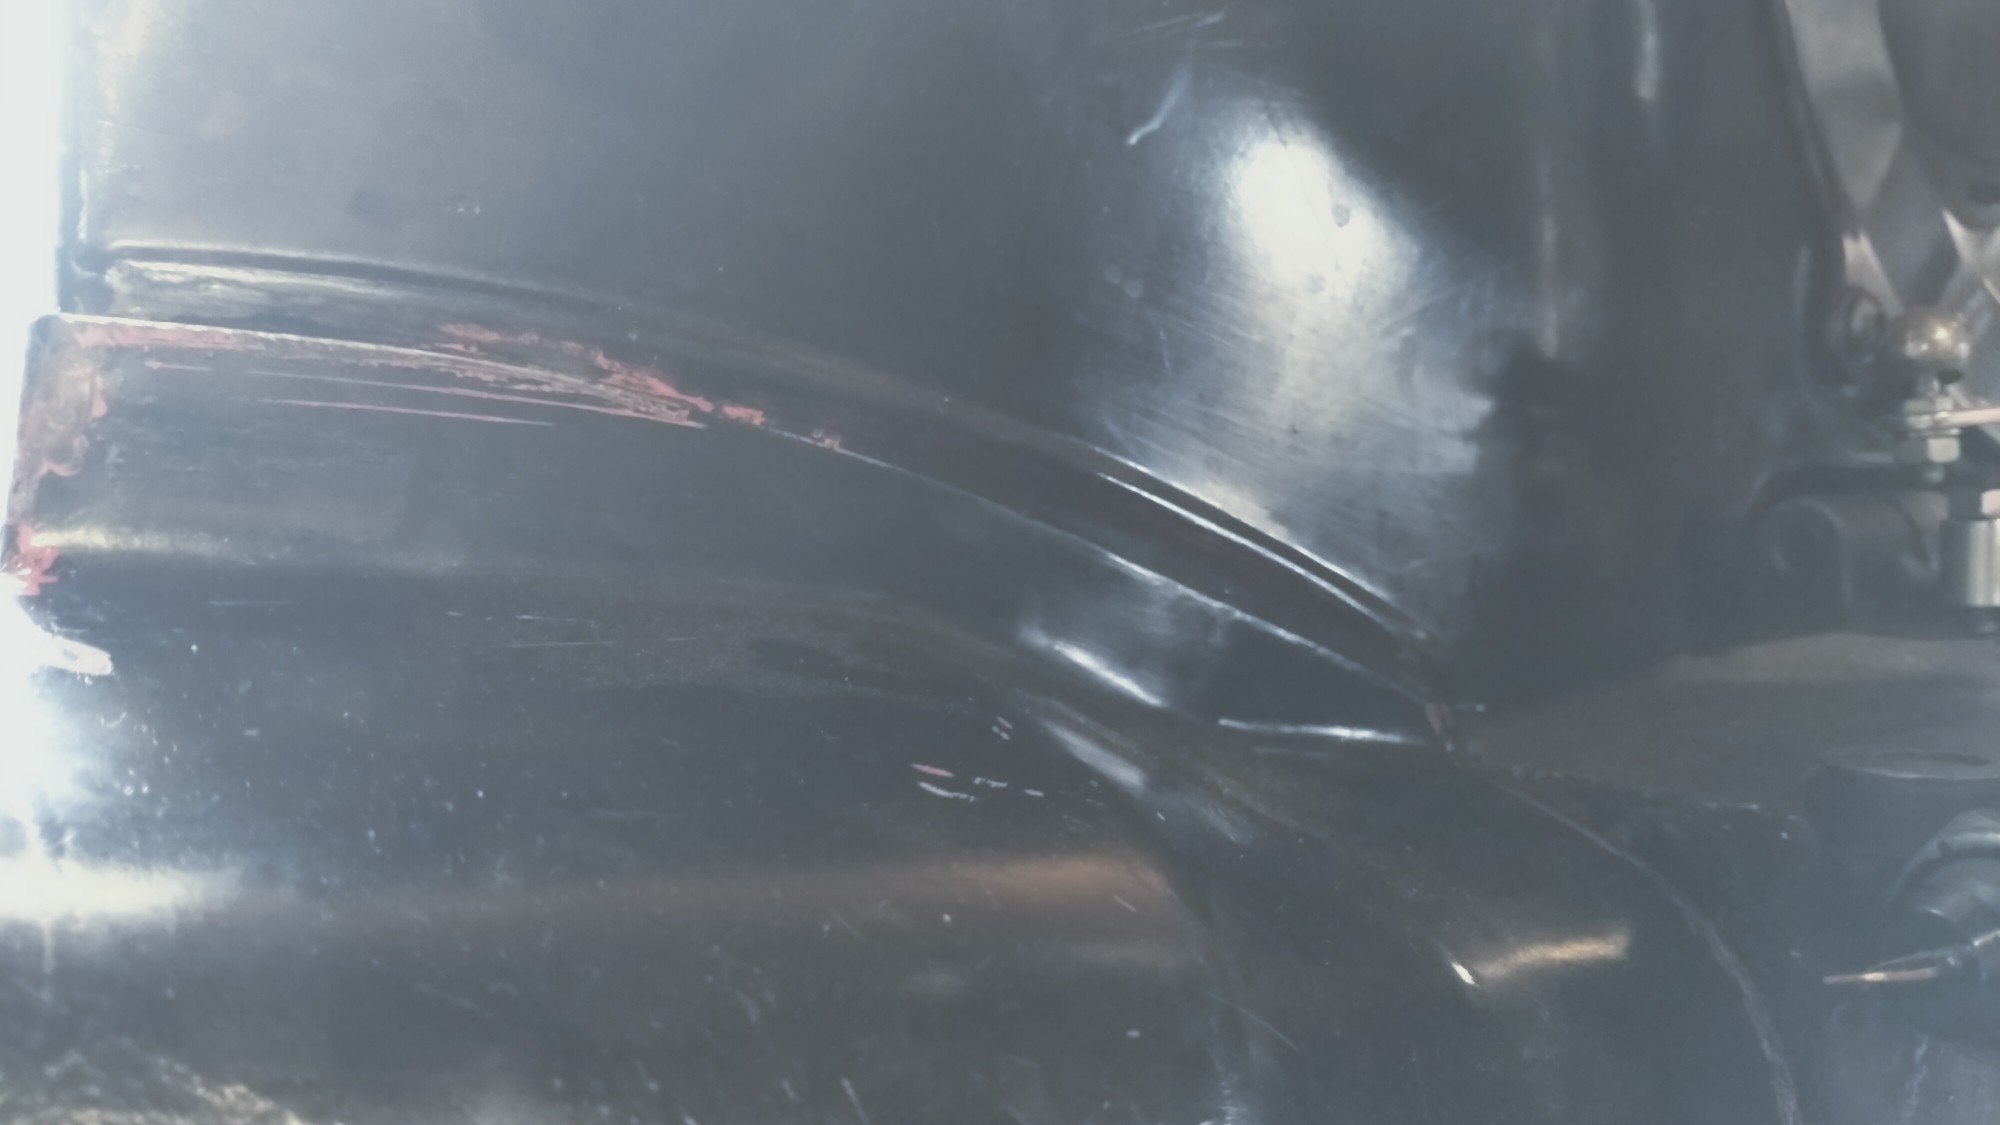
As with the other tin, the front plate.(in a vw the flywheel is at the front of the engine) didn't fit for shit either. A critical part as when sitting in traffic, all the hot air exhaust can rush up and the plate isn't sealed to the firewall rubber the cooling fan will recirculate the hot air, which is bad. It needed to move forward about 15-20mm Mustve spent at least a good couple days solid welding, bending, cutting, refitting, checking, grinding. The plan is to test fit everything in the car before paint, just in case.
- 261 replies
-
- 11
-
-
Fan shrouds turn. Noice.
- 261 replies
-
- 13
-
-
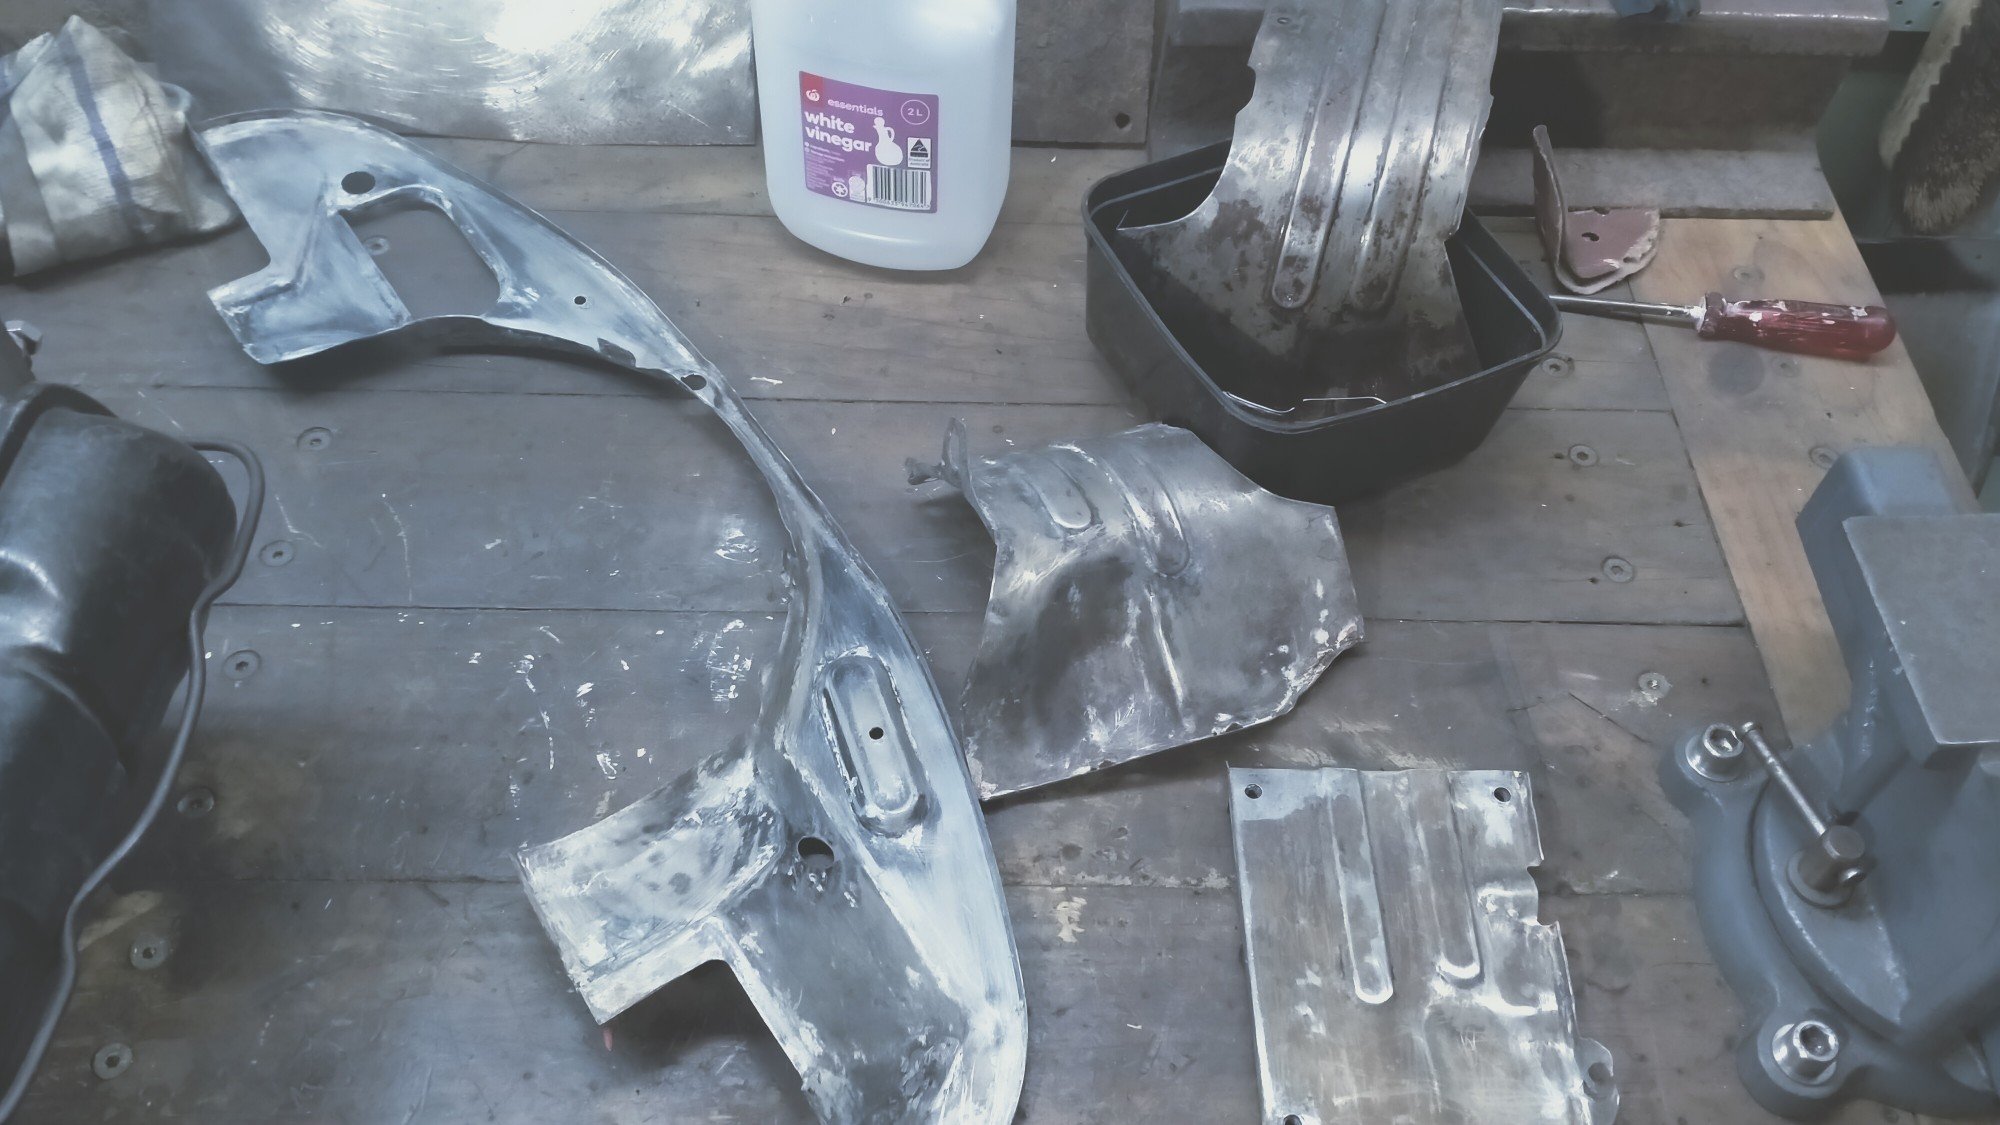
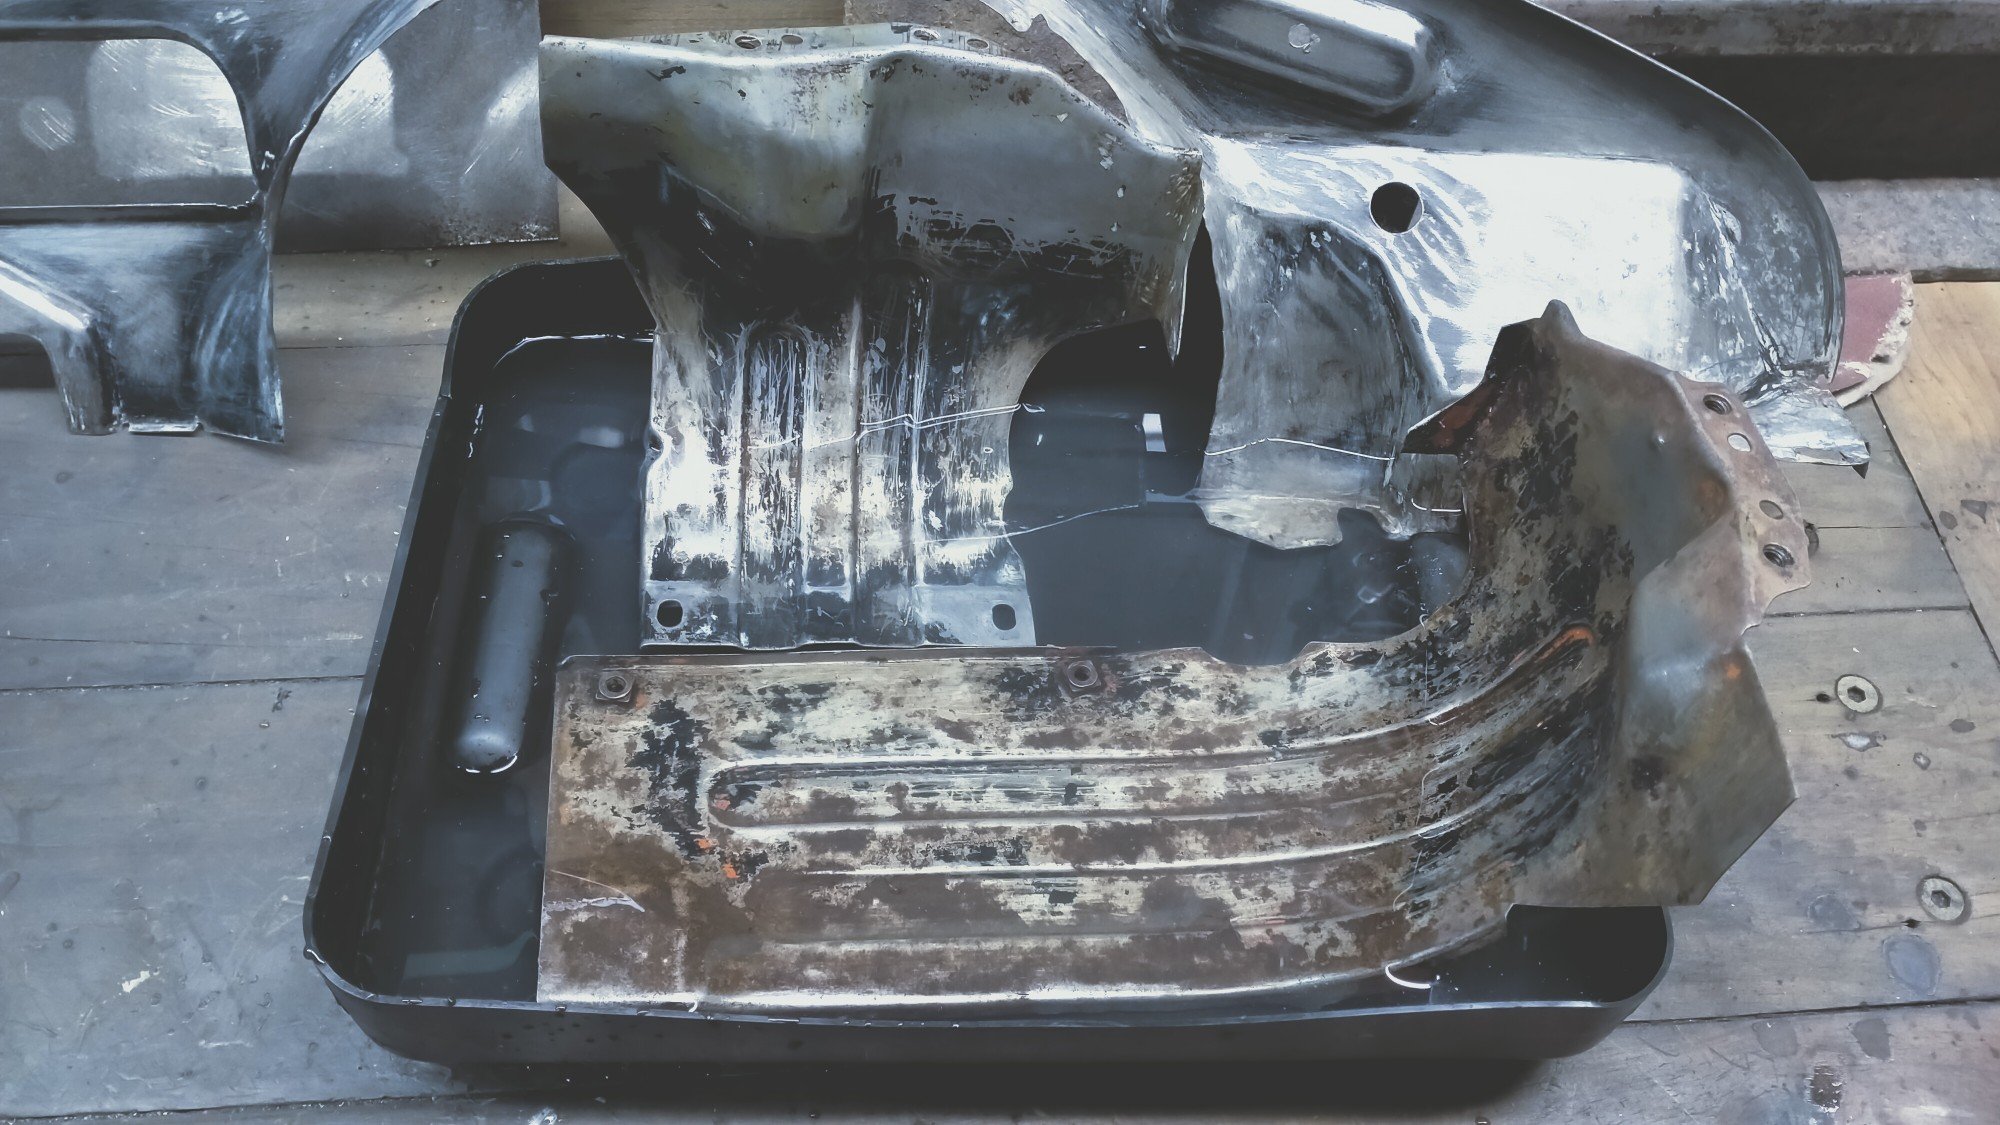
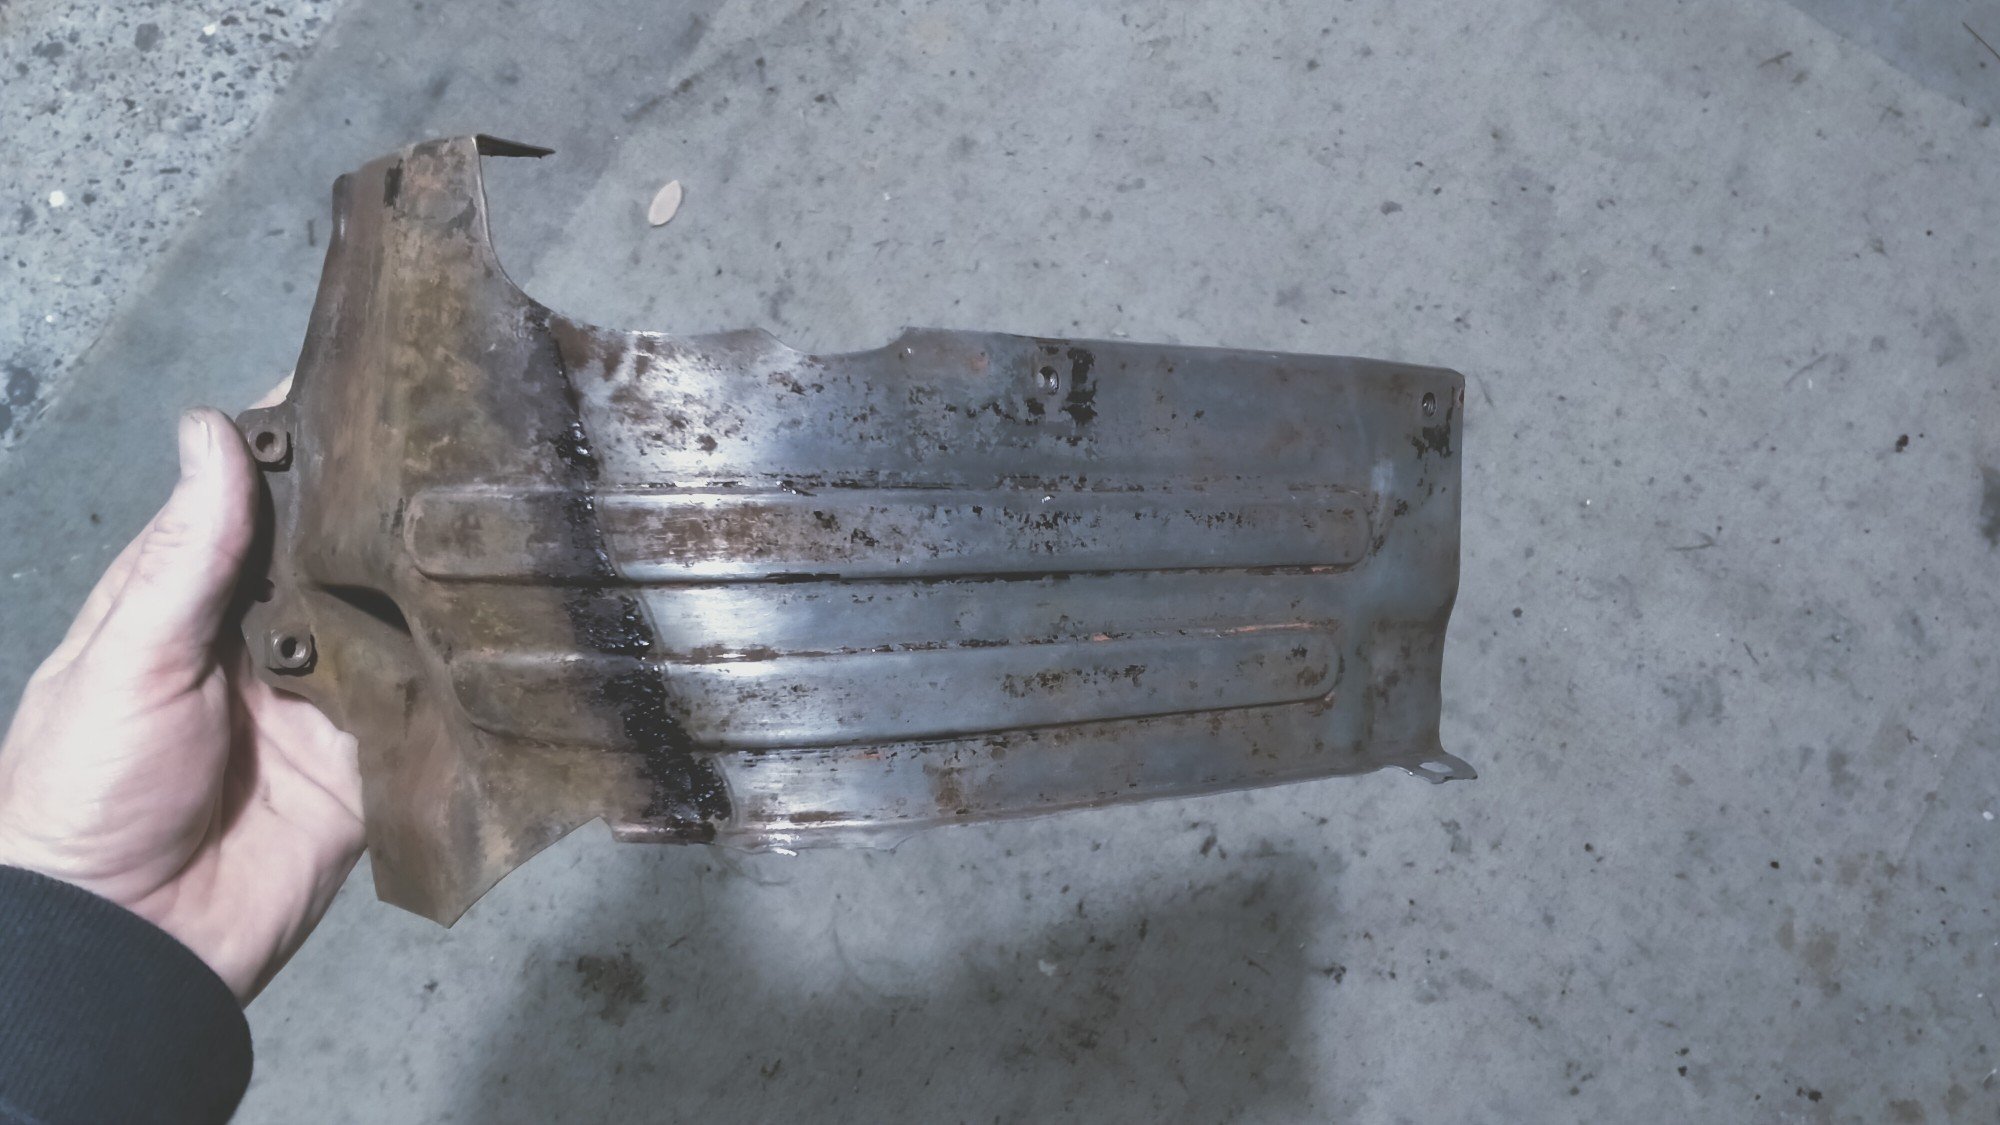
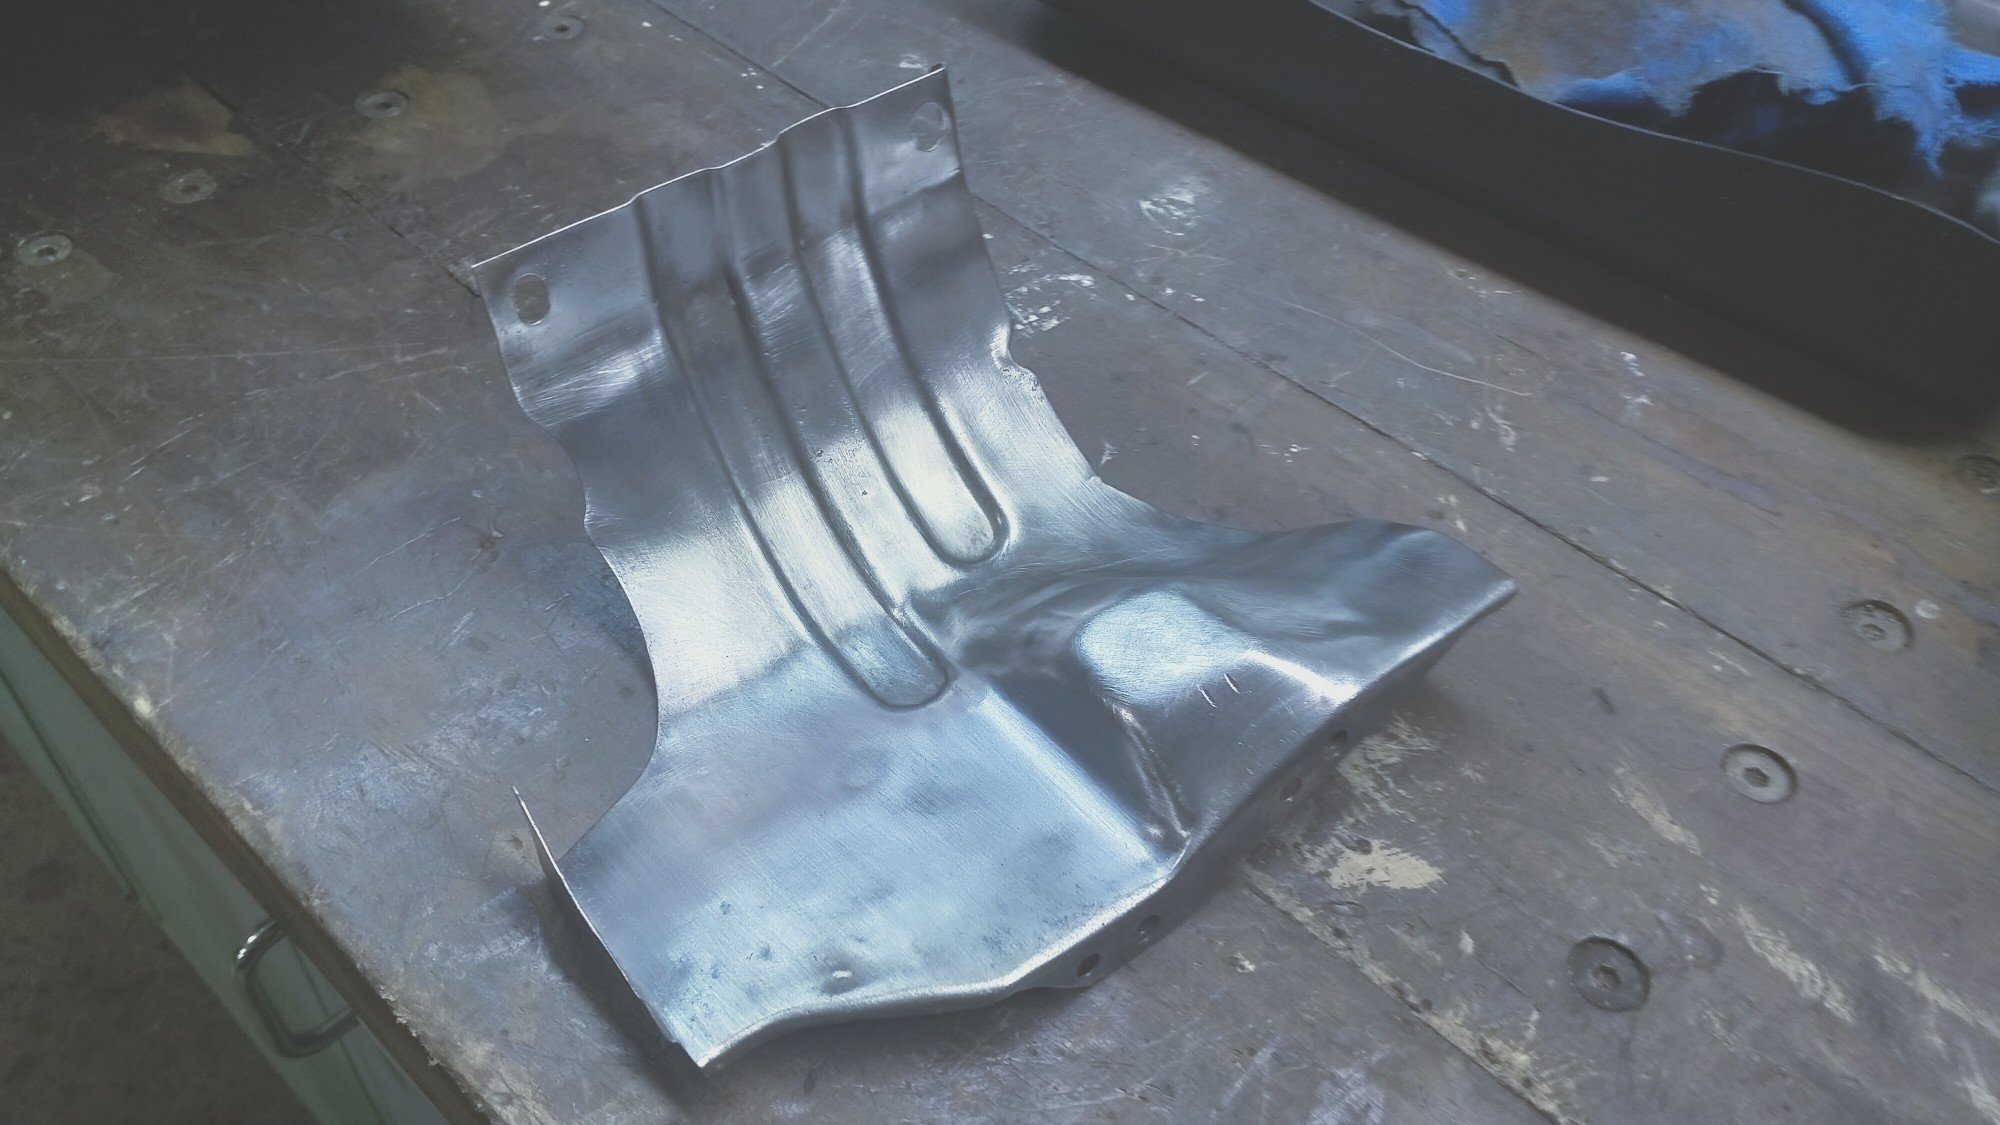
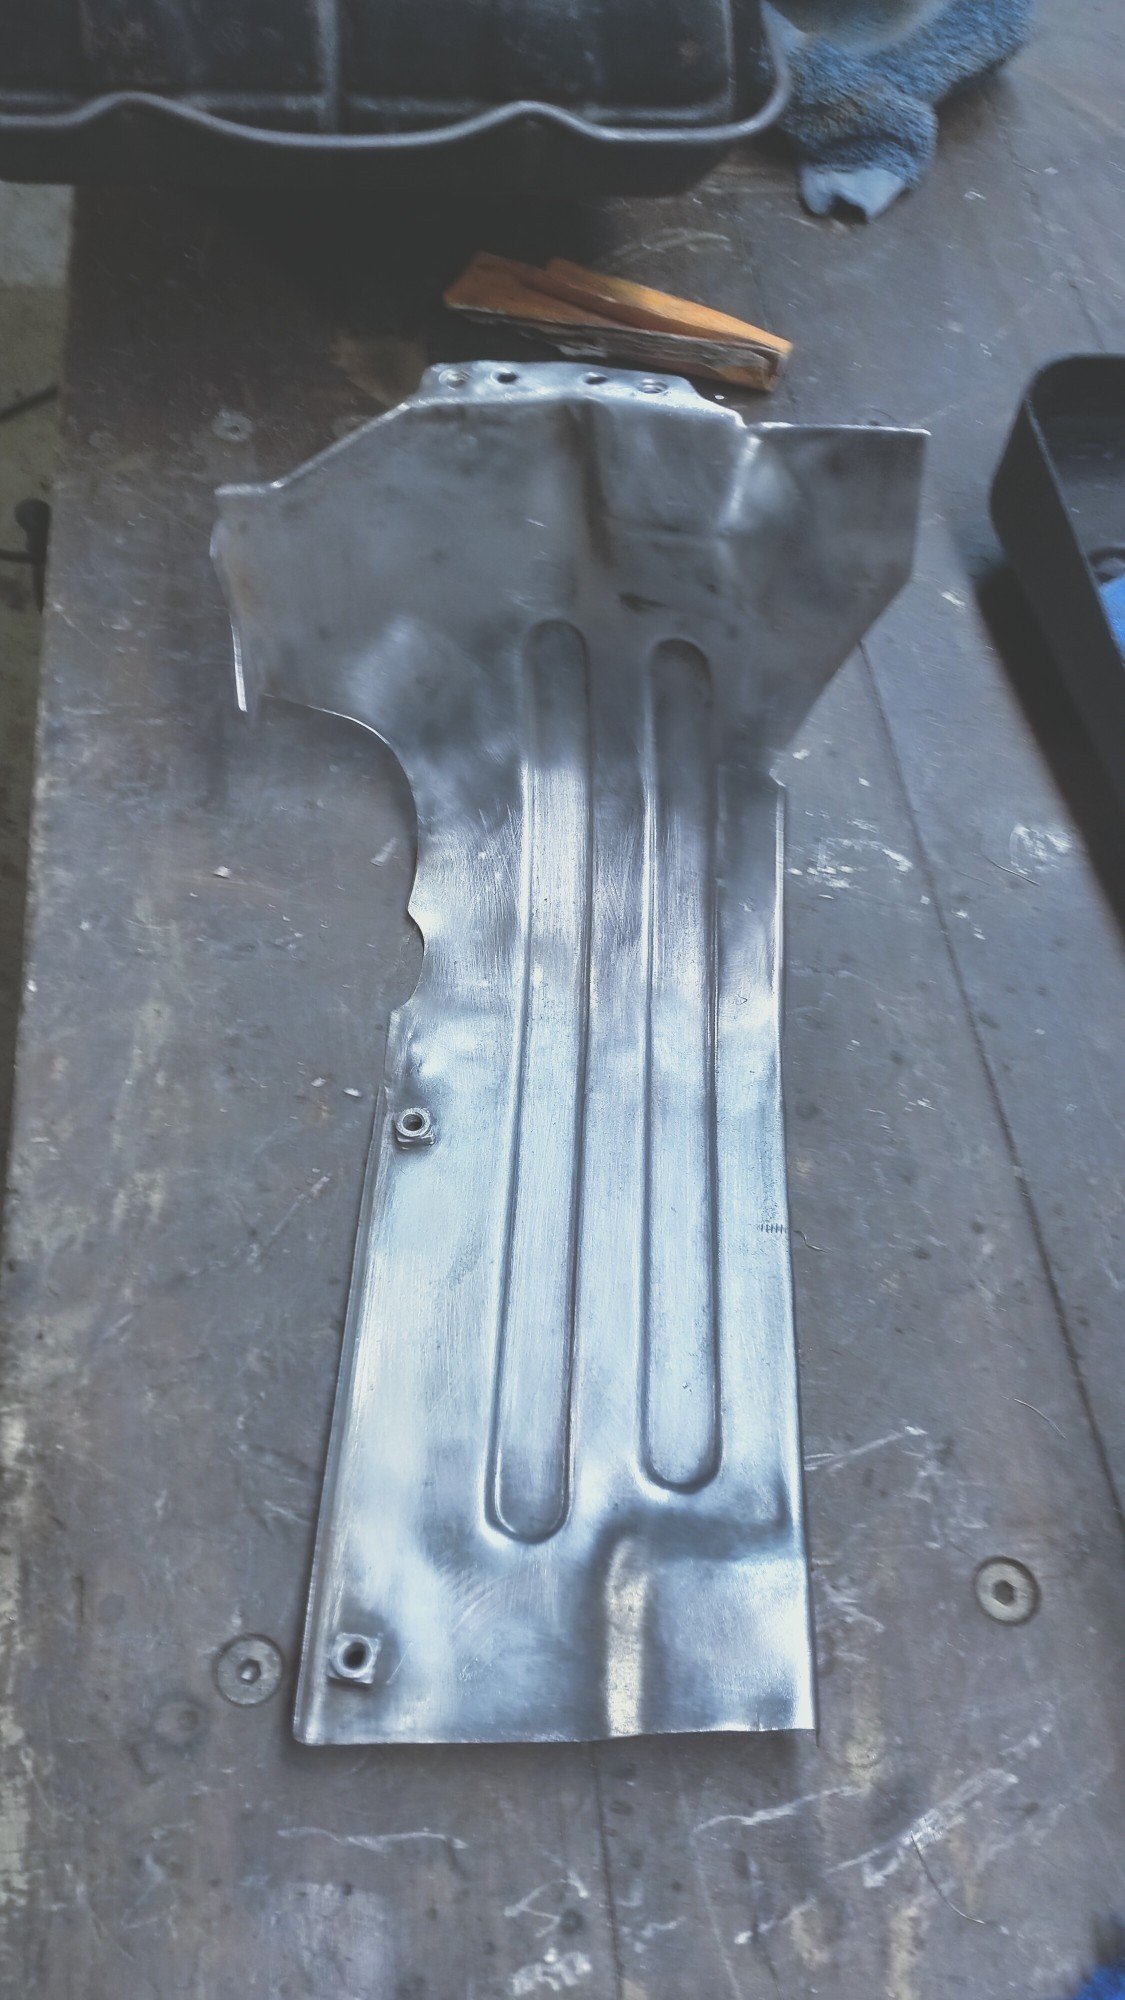
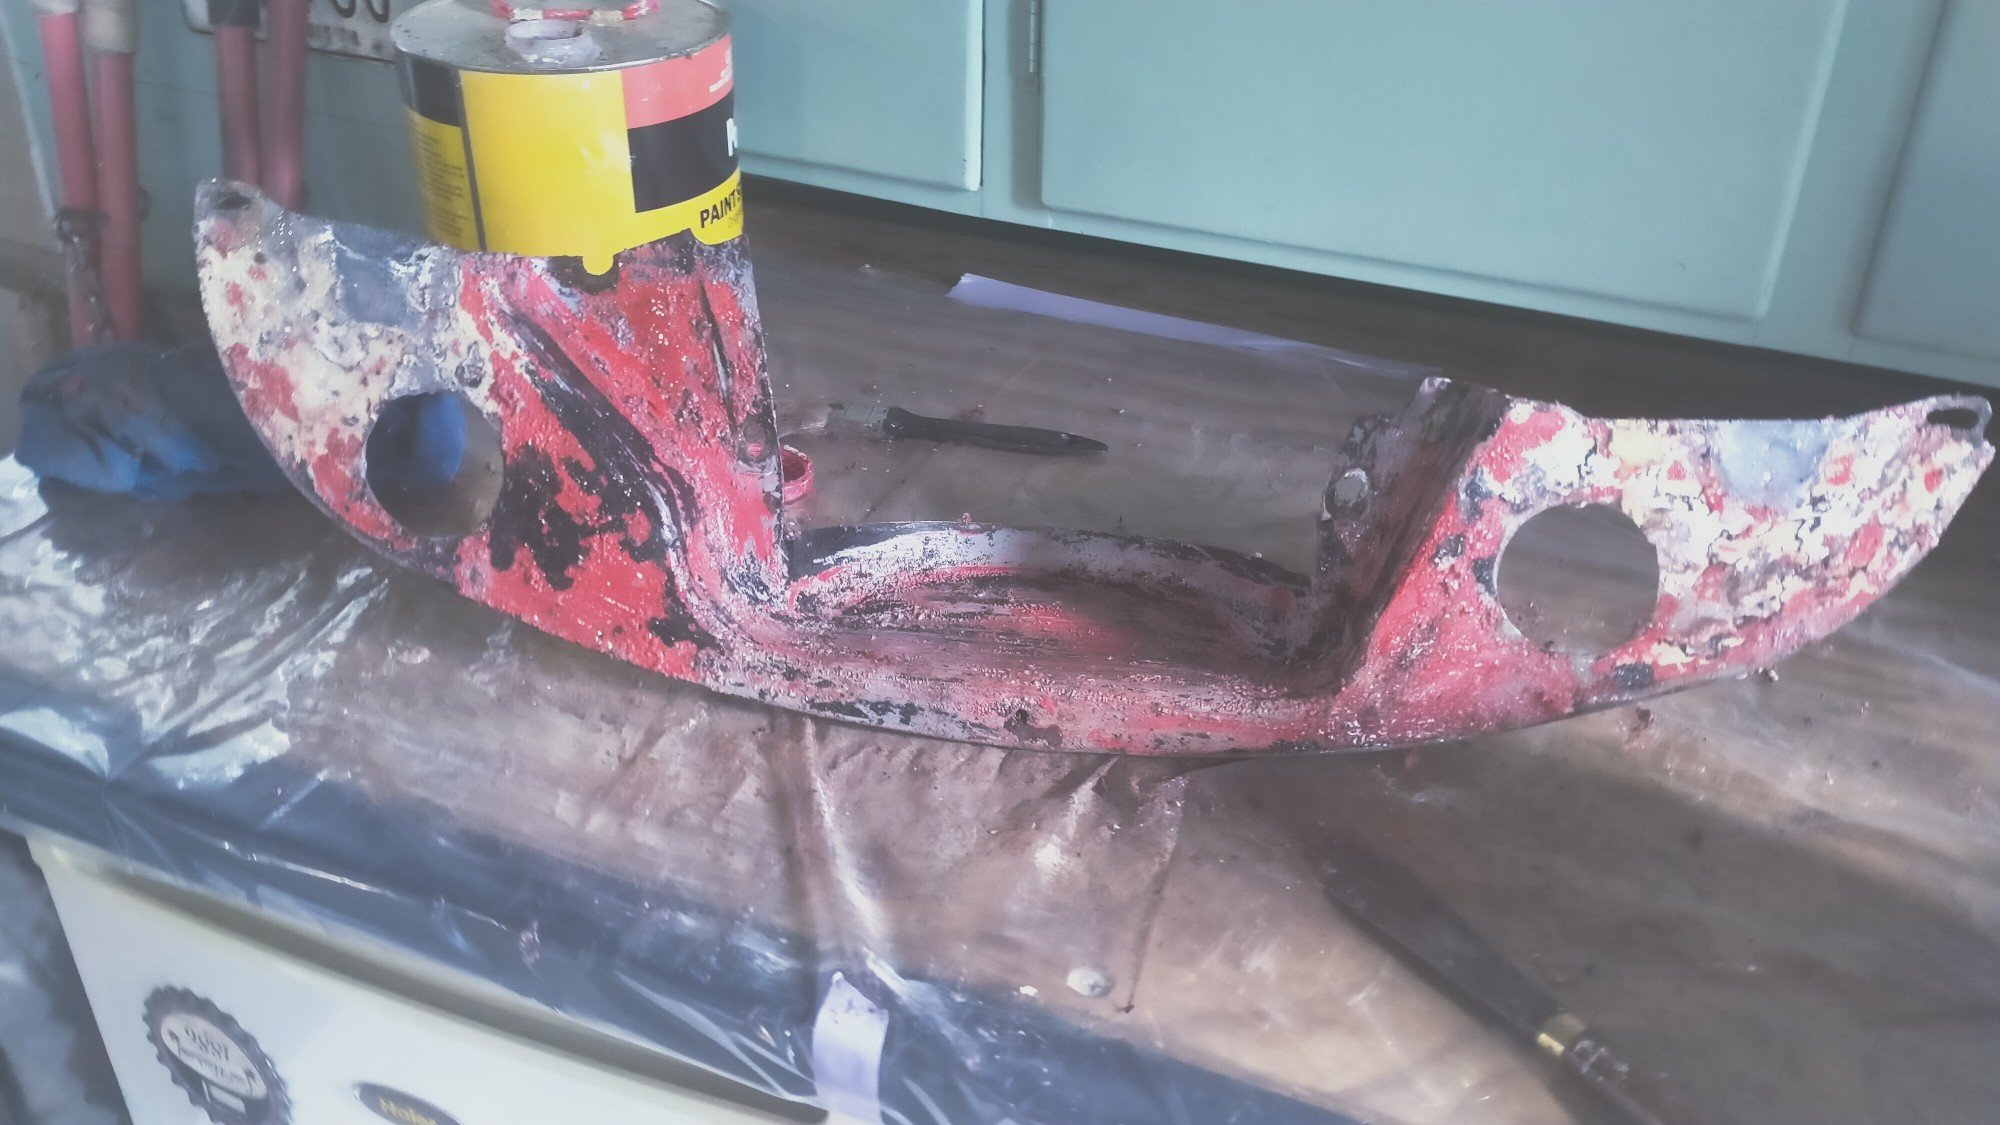
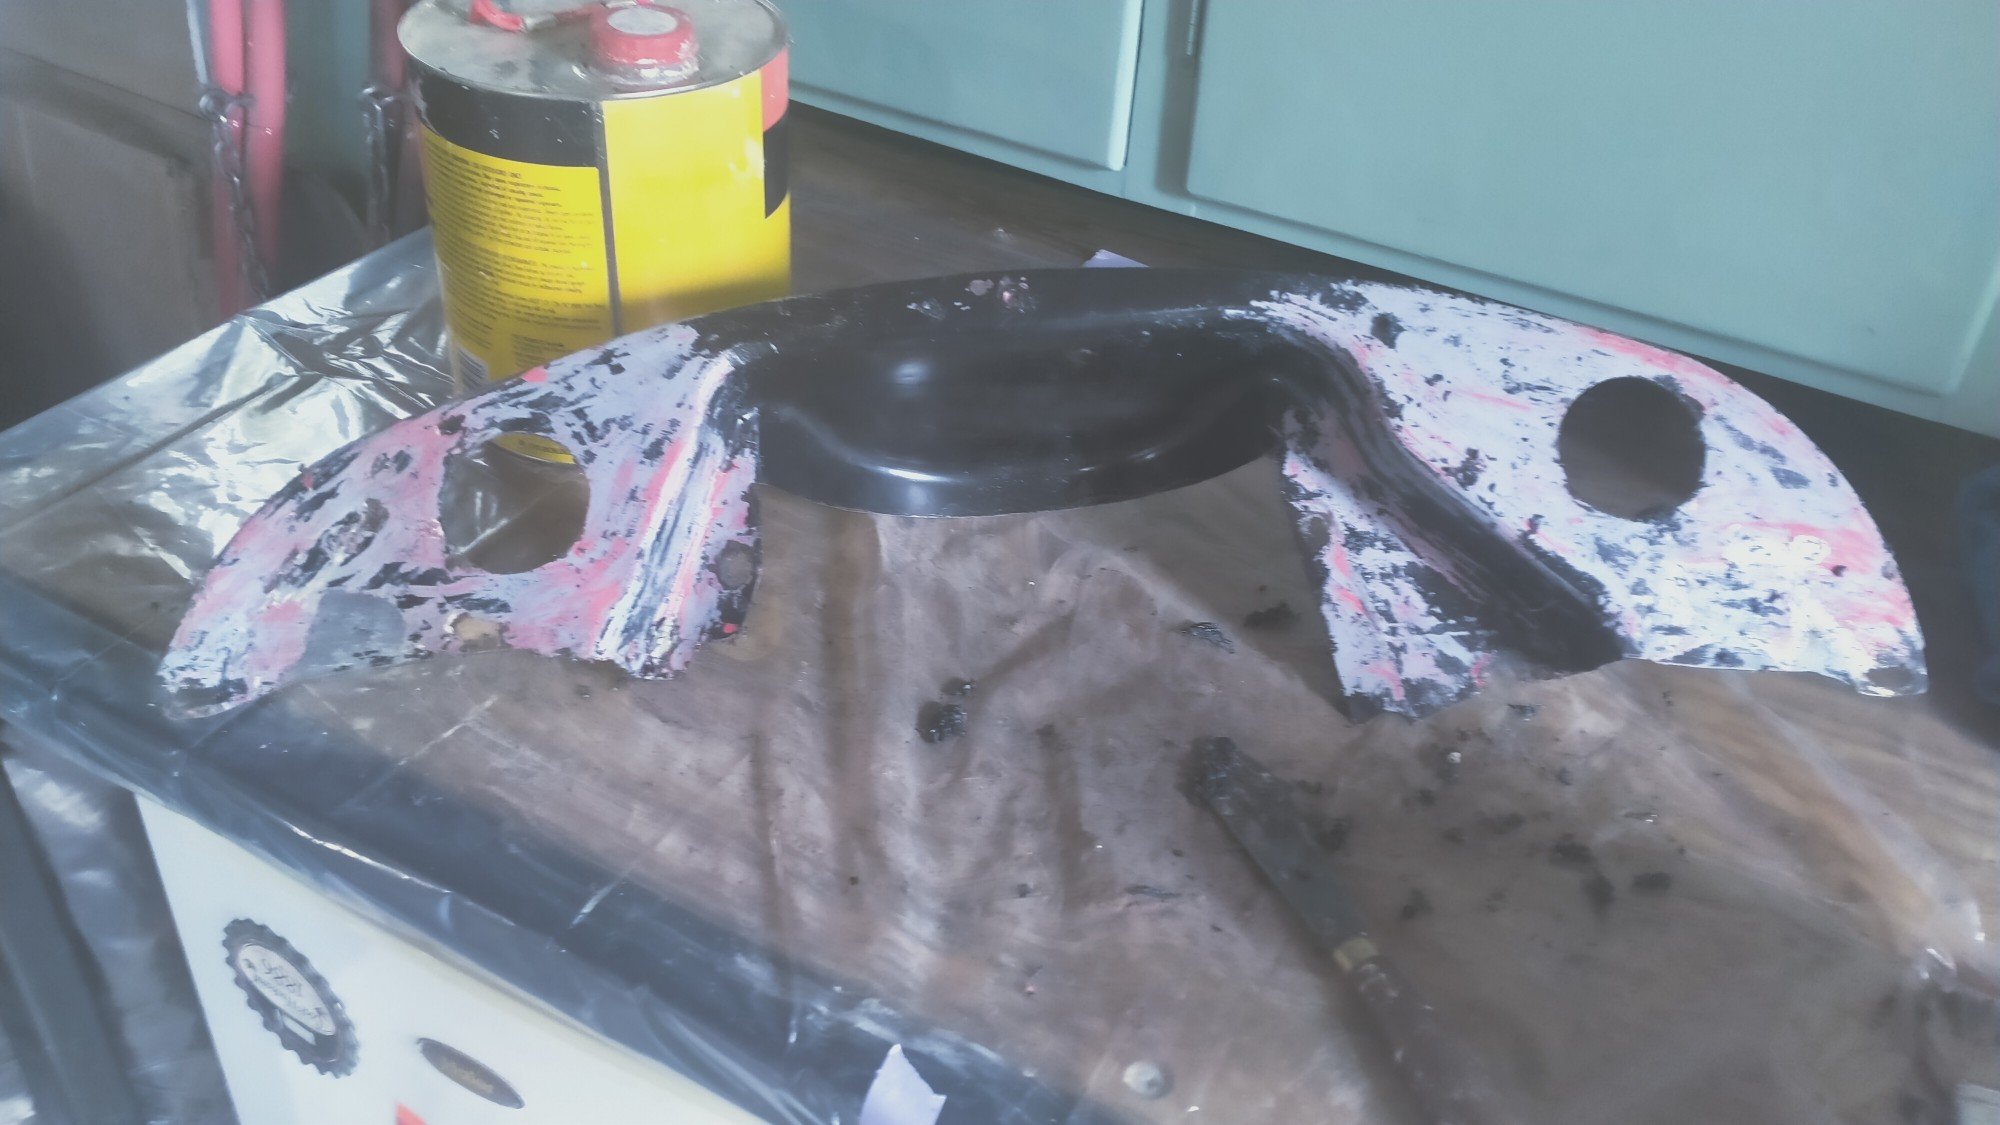
Now these are the lower tins that wrap under the engine and direct the air under and out the rear of the car. These are OG old-school vw parts. After paint stripping, they had a lot of bad surface rust, cracks and thing broken off. One of my favorite things about this never ending project is learning and trying new things. So the tin got a couple days soaking in white vinegar. Did my best with what I had to hand, check out the high tide line. And then after a wee swim in a baking powder solution to neutralise the acidic vinegar, gave them a good hoon on the wire wheel, shit looks good as new!
-
Possible better than sanding, but still very messy and time consuming. Lucky I built that extra bench, so good having another work area. Stripping the pulley tin, poor old thing was so bent by being forced to fit the other crap. Gaps looking saaweeet! Mock up for inspiration. Removed the pipe fittings from the fan shroud.
-
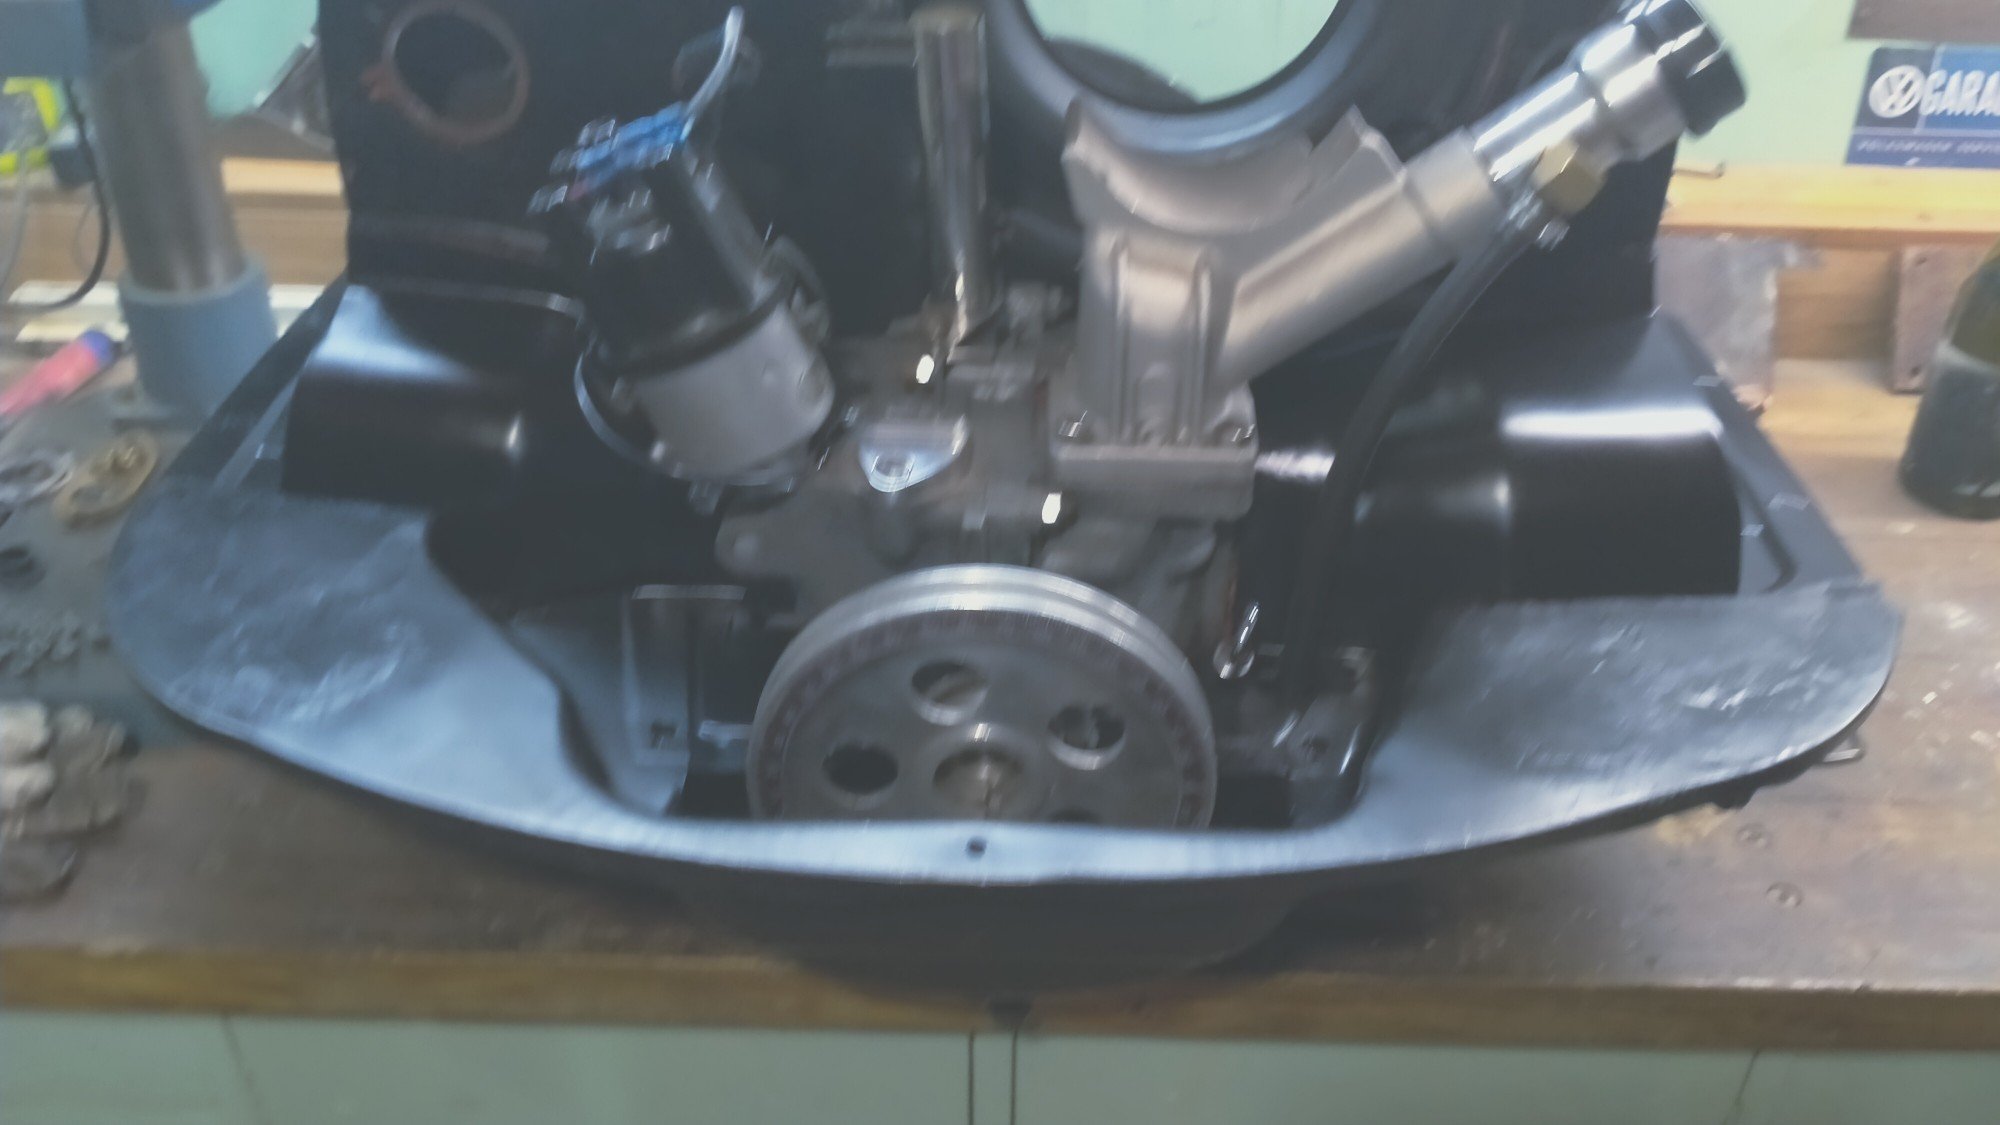
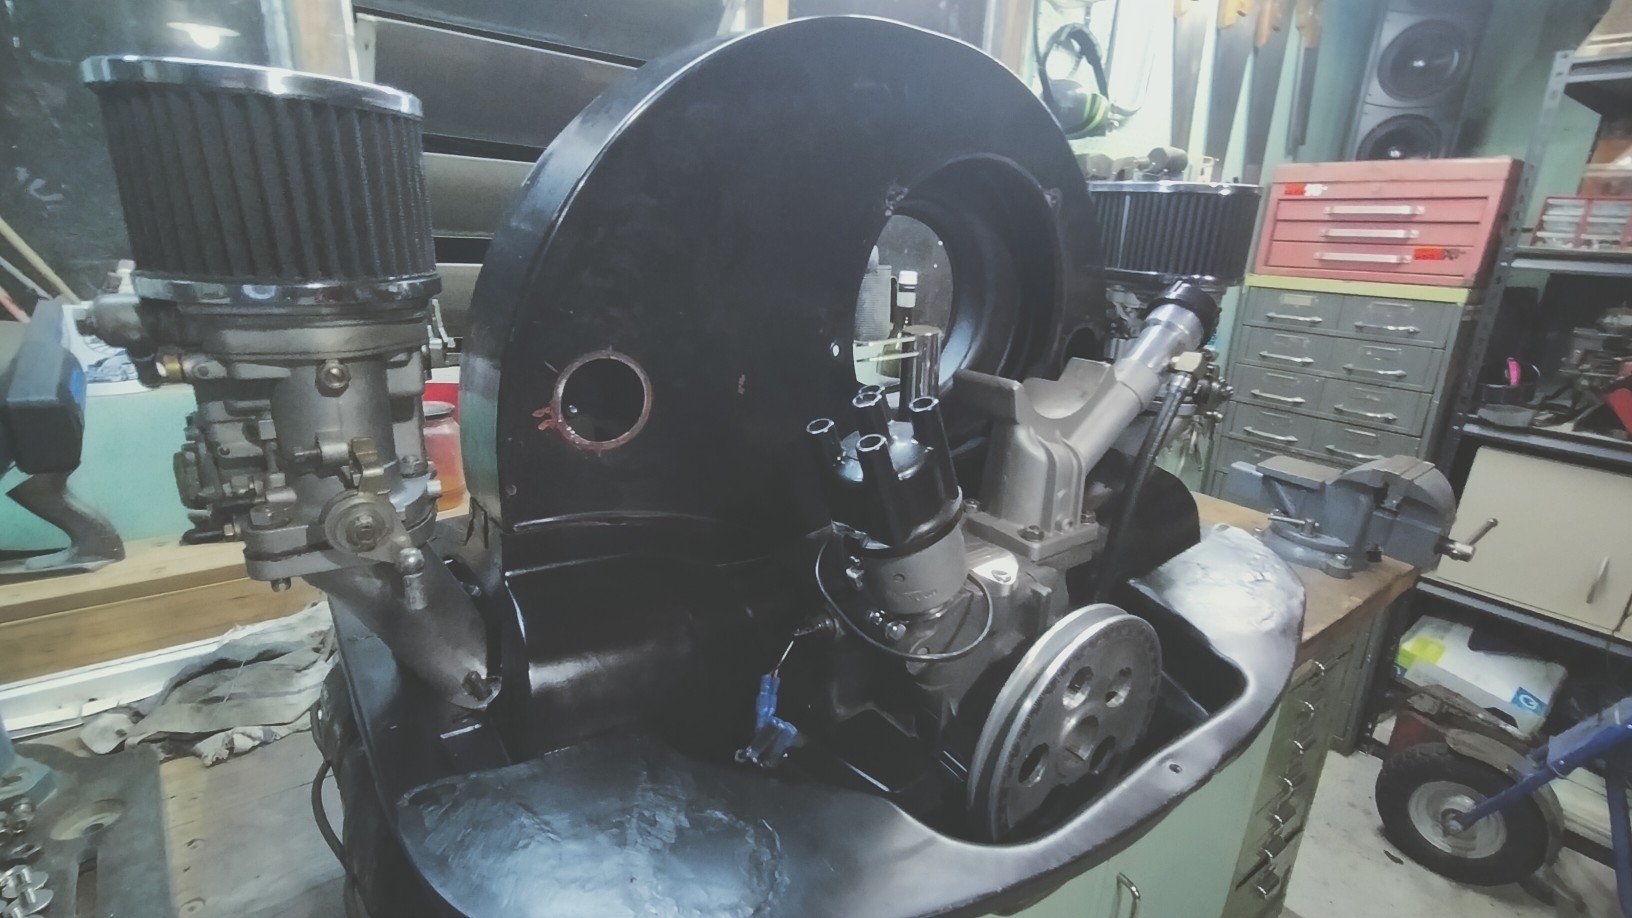
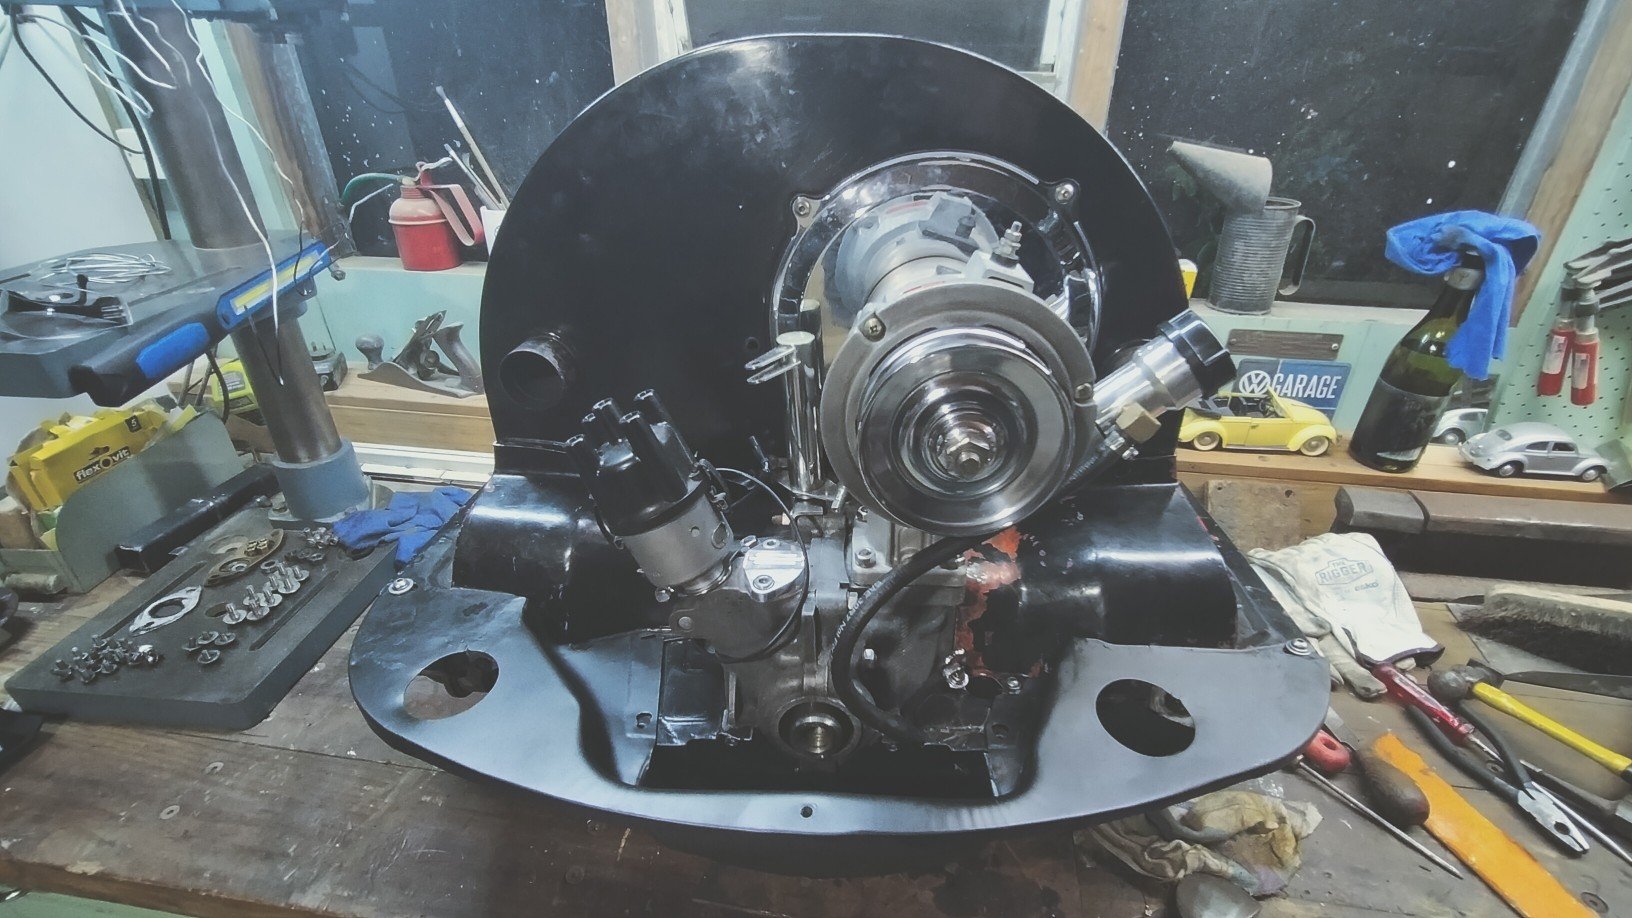
Spent an inordinate amount of time fettling the cylinder tin. These are shitty aftermarket parts like the fan shroud, and have never fitted anything very well. The tin on a vw engine is ducting for the cooling system. So poorly fitted tin is like having heaps of water leaking out of a engine. The big manifolds were always a struggle to fit, more fettling. The factory manifold preheating pipe holes were welded up years ago, Made a start on deleting the last remnant of the heater system as well as adding 5mm hear and there to close up the gaps between the cylinder tin and the rear plate. For some reason the 1-2 side tin doesn't even closely follow the shape of the fan shroud, But 3-4 was almost perfect? Removing the heater pipes is going to declutter the engine bay so much, love a nice simple looking motor.
-
And then the dreaded delta lockdown of 2021 happened a few days later. Dun dun duuuuun. I've gotten pretty good at removing the engine now, super glad I made that rear valance removable! Decided as I couldn't do much else, I'll use the time in lockdown to tidy up the old tinwear. The layer of black came off easy, but the 20 year old vht engine enamel, not so much. Got through in the end, nothing but time and pressure, just like Andy Dufresne. Sprayed it satin black to stop it rusting, kinda like it, might satin the tin instead of gloss black, that's how they were factory.
-
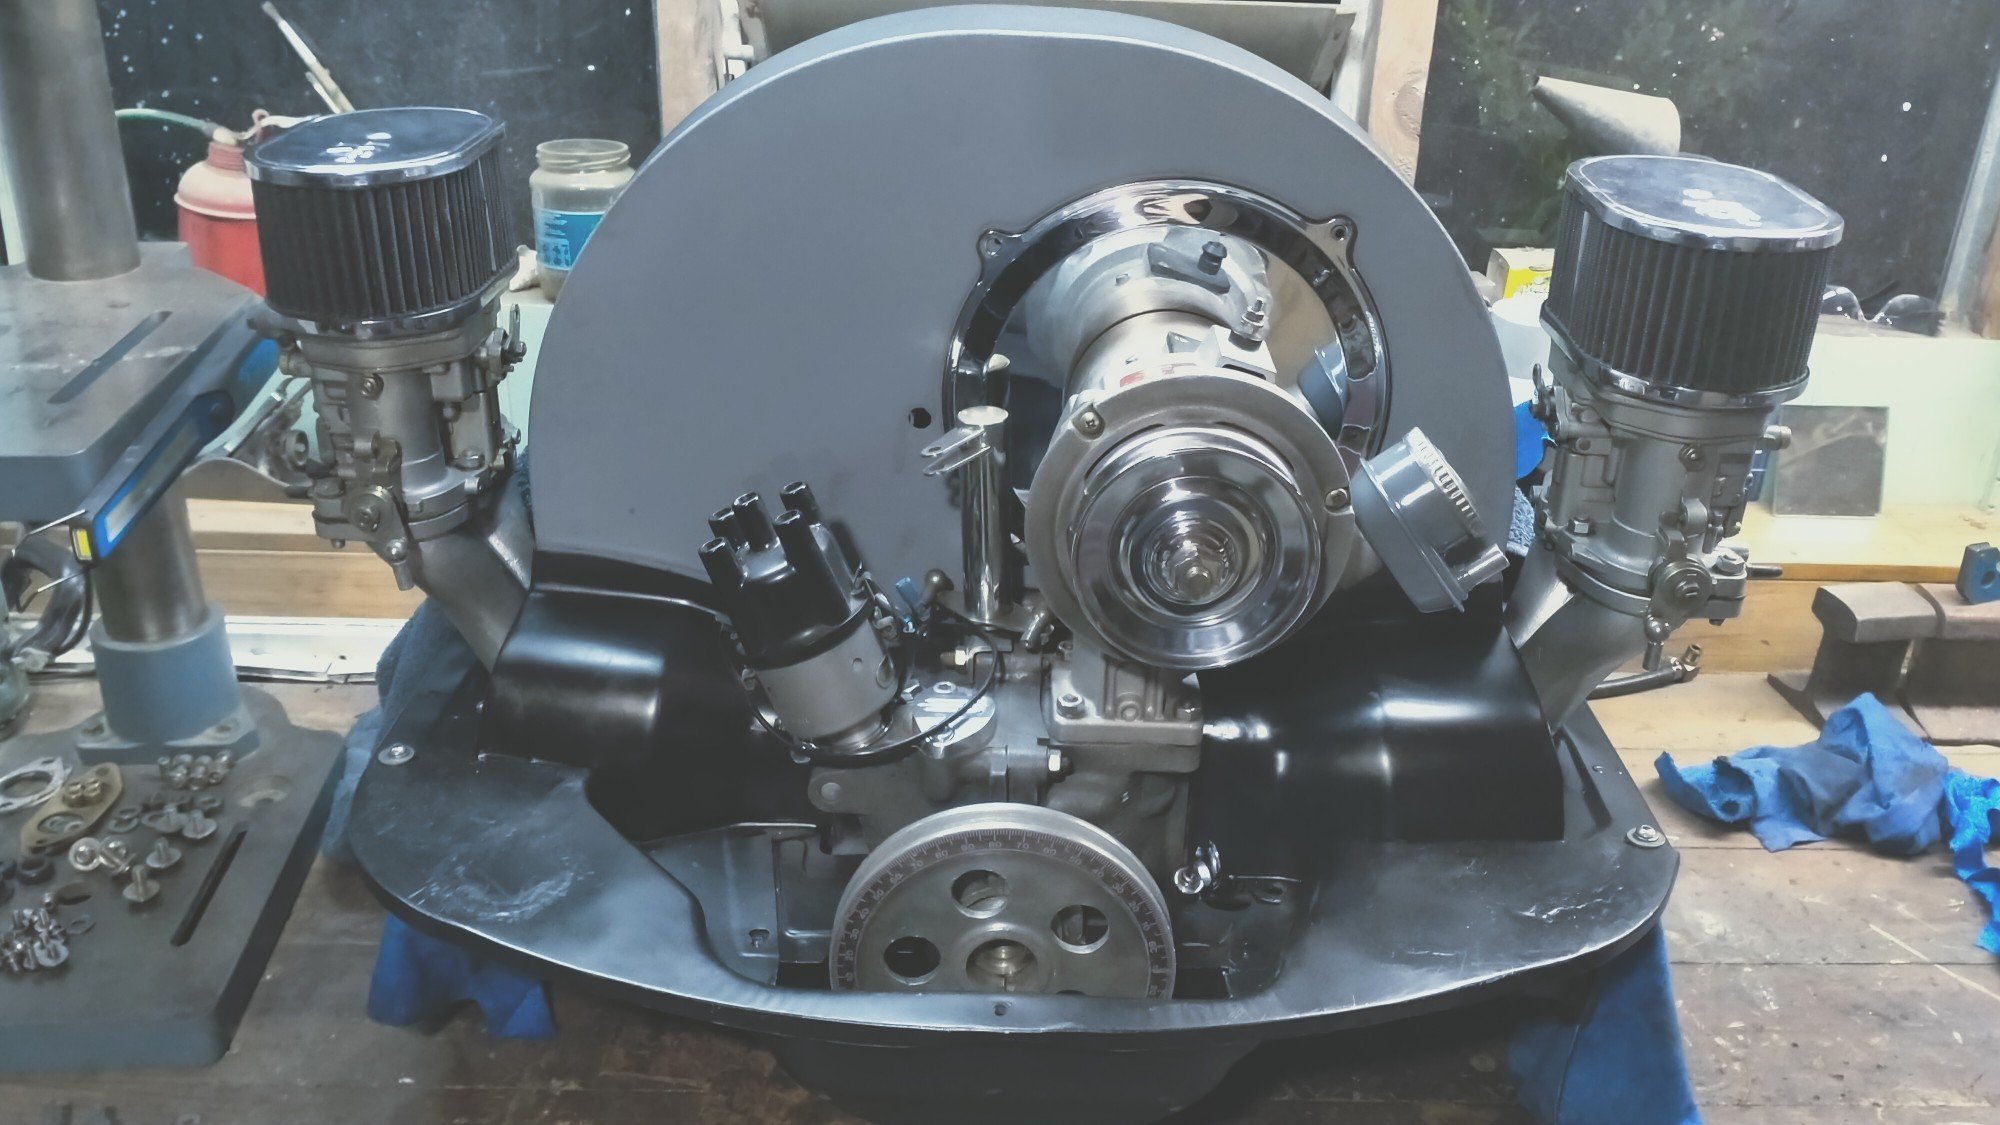
How it started. How it ended.
-
seems appropriate.
-
Minitruck minitruck minitruck! You know you want to.
-

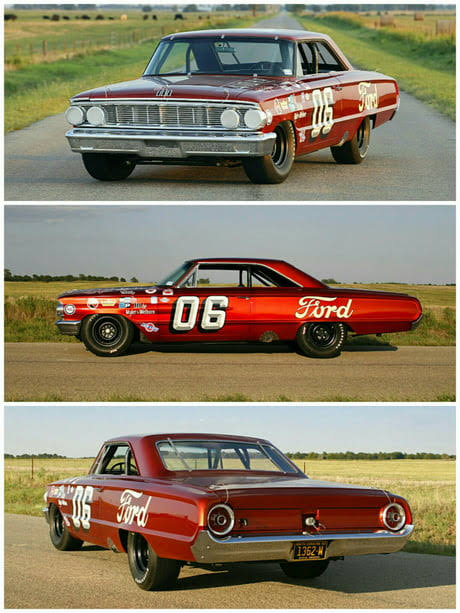
piazzanoob's 1964 ford Galaxie 500 seeedaan
63Ragtop replied to piazzanoob's topic in Project Discussion
Reminds me of this. Great look for the ol girl them wheels.