Bling
-
Posts
24,254 -
Joined
-
Last visited
-
Days Won
3
Everything posted by Bling
-
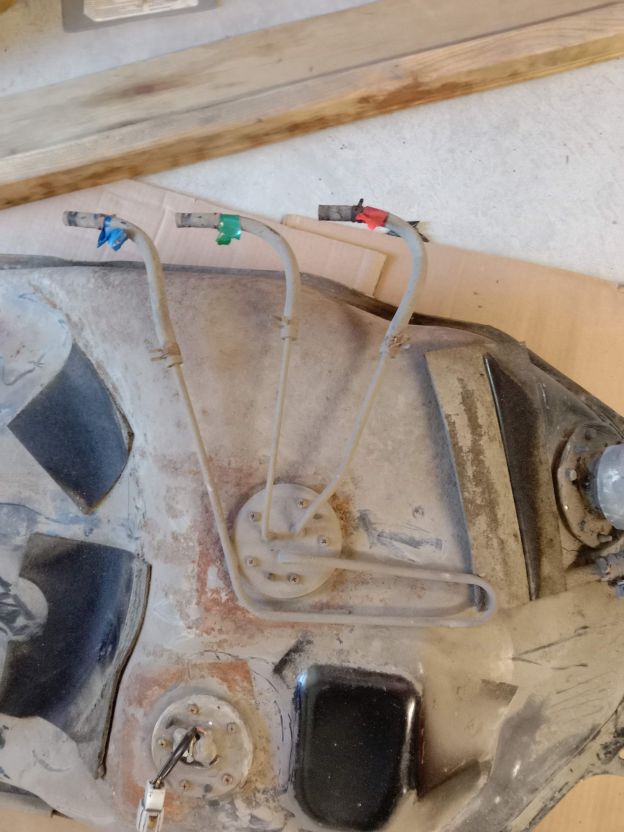
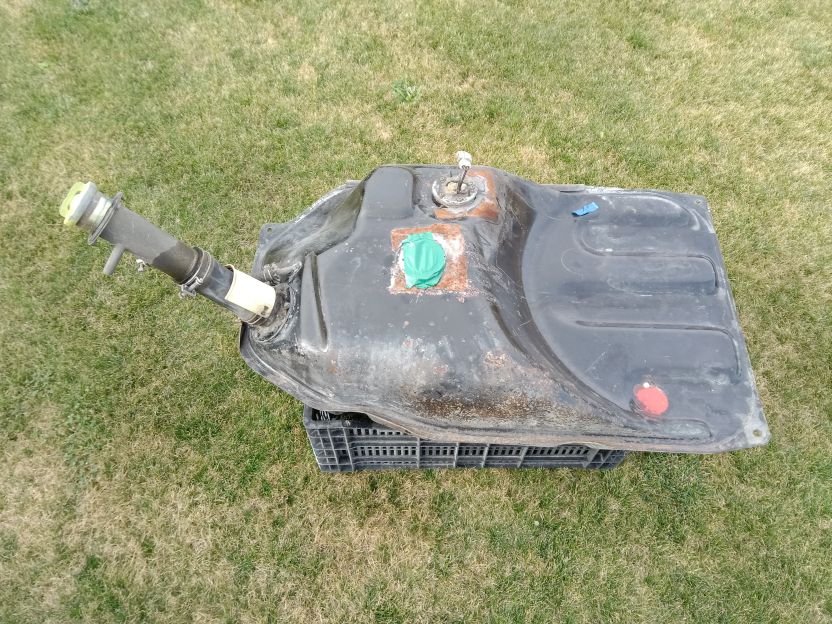
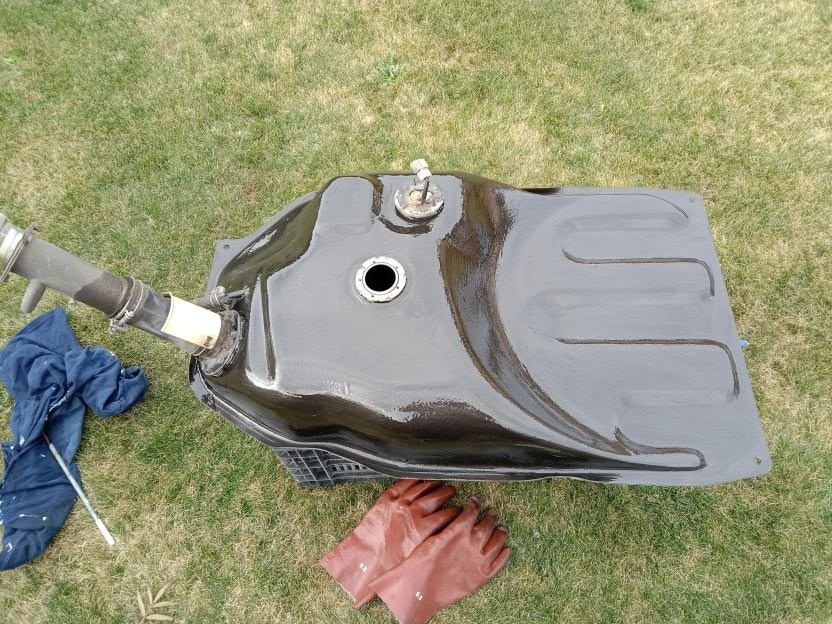
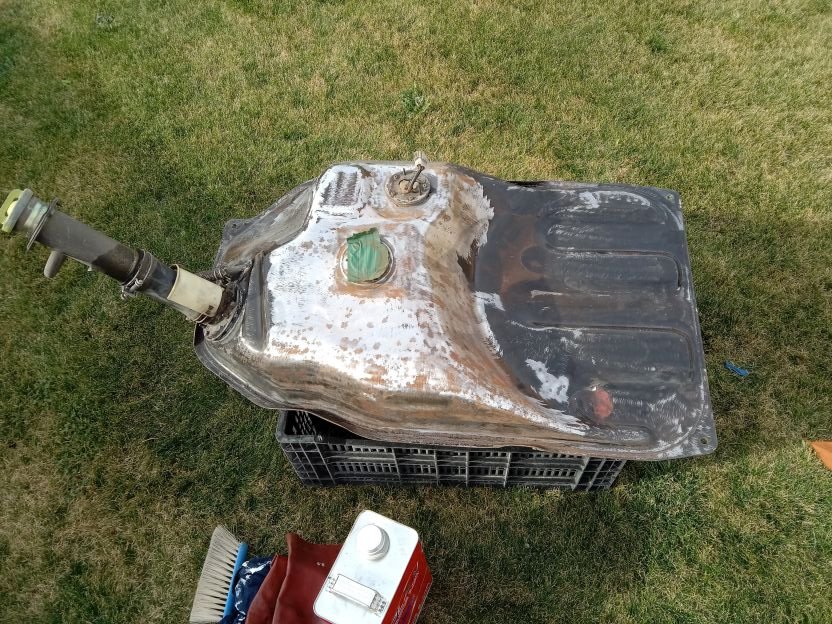
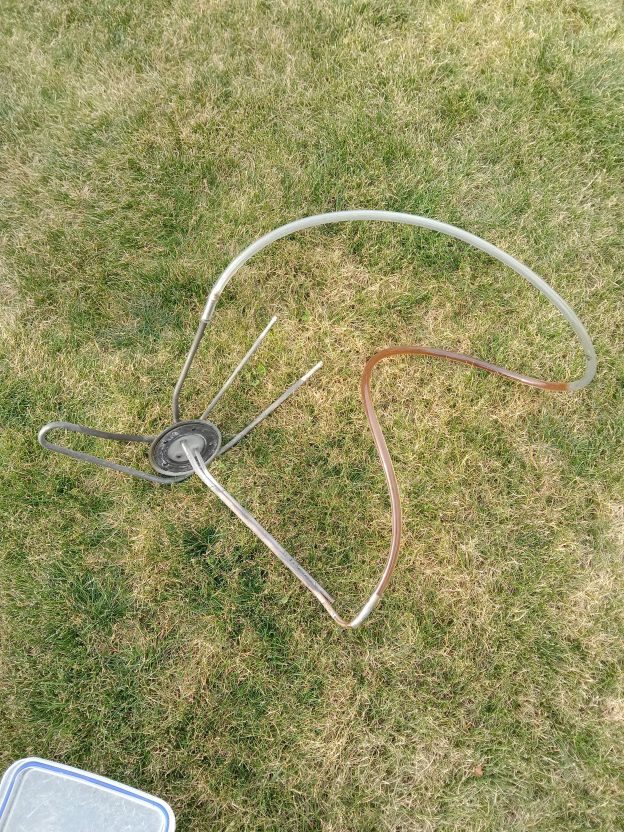
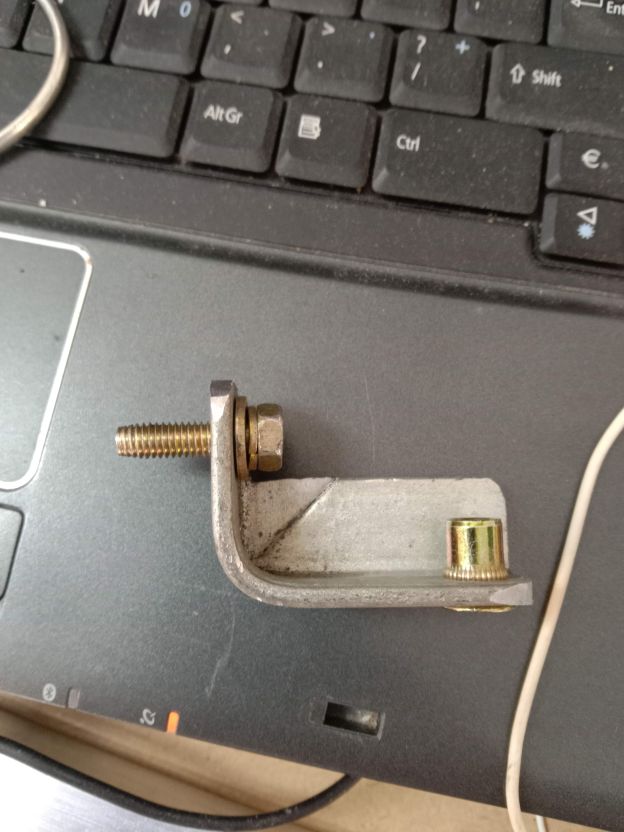
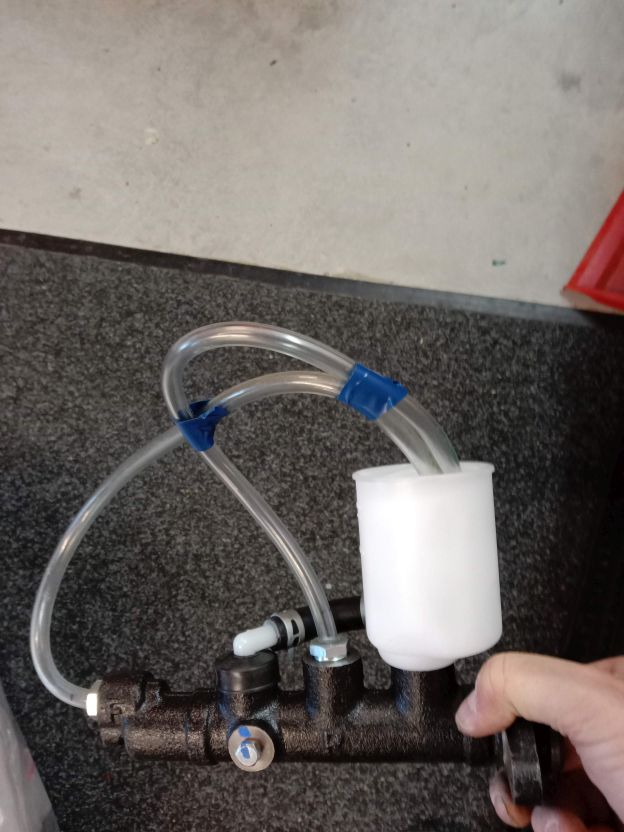
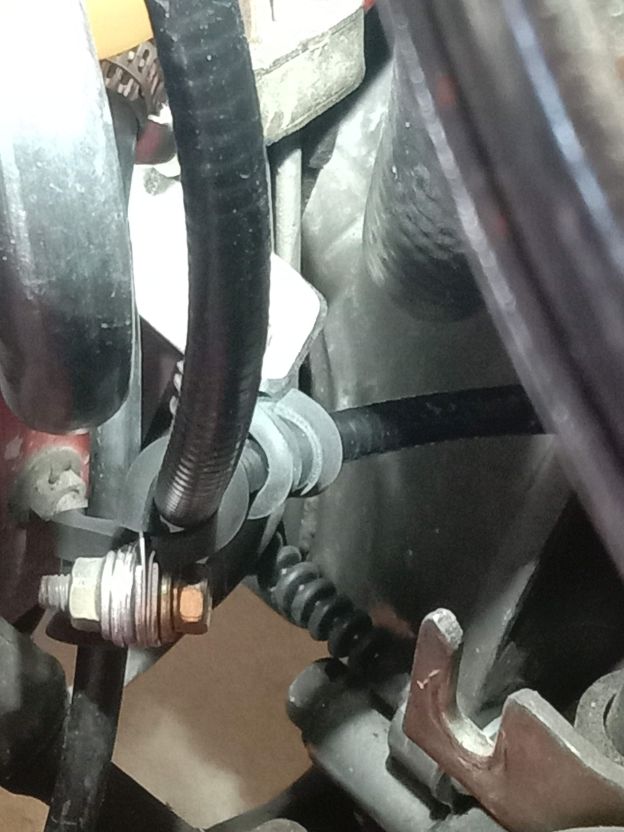
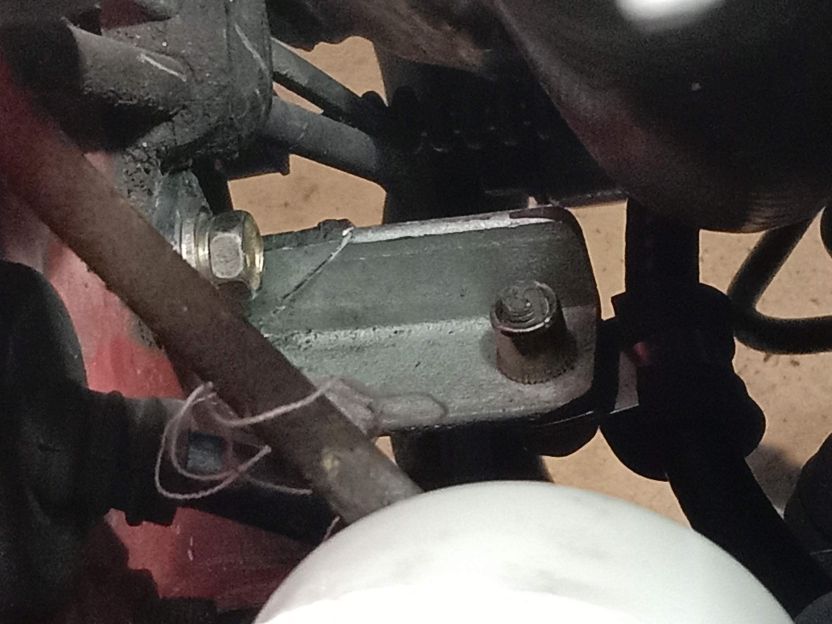
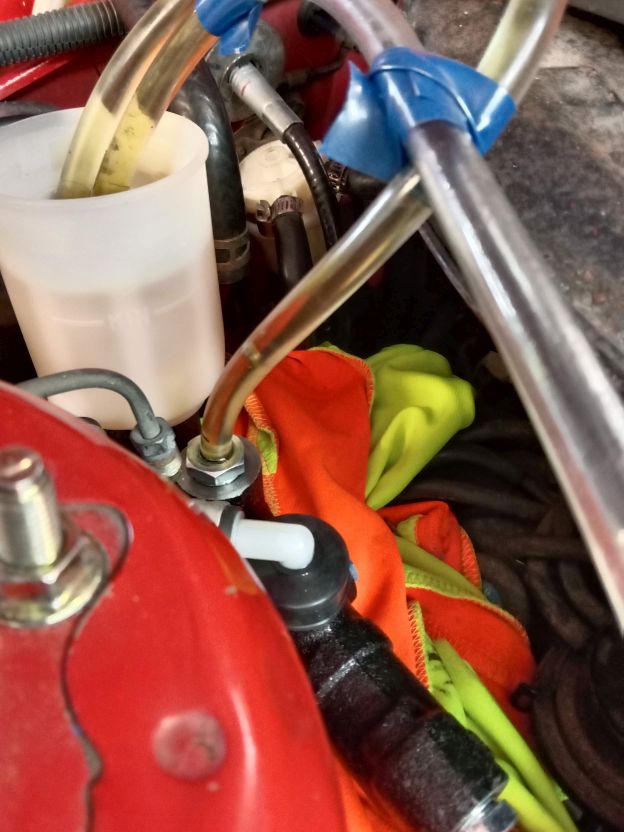
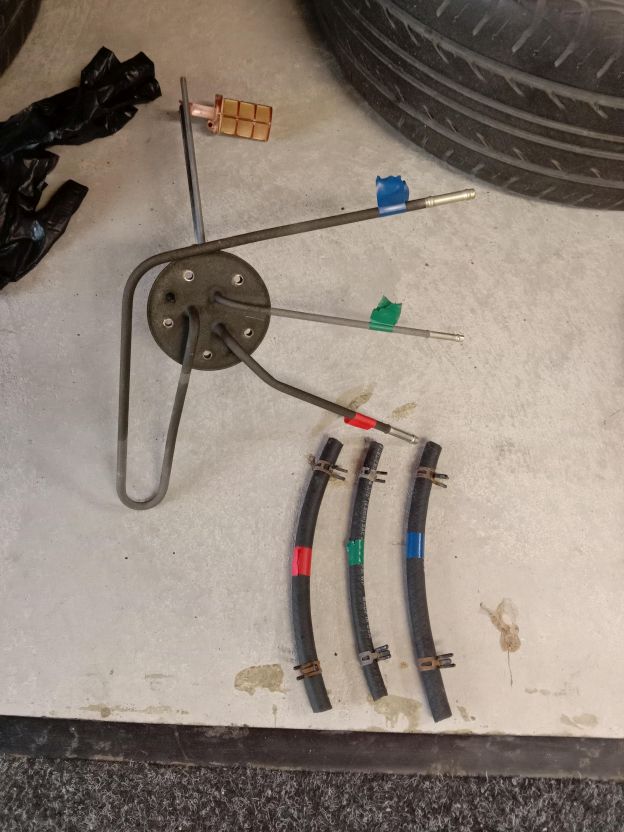
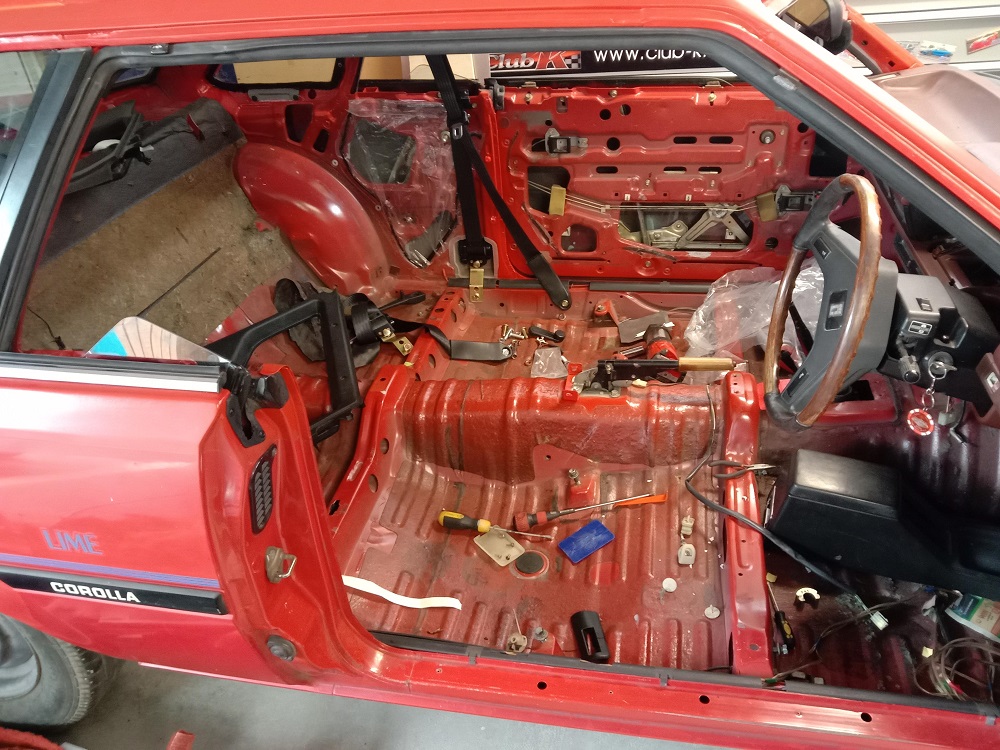
Still chipping away, have had a few jobs that held up other jobs, so progress hasn't been as quick as i'd like. Couldn't put brake master cylinder in till I sorted the clutch and couldn't put fuel tank back in till i'd sorted the brakes... Anyway, a quick run down below. Tried to start it the other week to make sure it still runs, it doesn't. Figured it was probably fuel as it will have been sitting for a while. So I dropped the fuel tank out to find the tube pretty blocked, so that hopefully answers that. Drained the fuel tank, turns out I put quite a bit more fuel in over time than I thought, fill the mower container and any lose containers I had. Took the worst to the dump eco area. Dropped the tank in to Hornby Radiators and they gave it a good clean inside. I grabbed some new hose while that was being done. Got fuel tank back and gave it a quick paint on the top half, only surface rust, but some was a bit pitted so worthwhile doing. Fuel tank. Hoses labelled for future reference, also labelled on car. After getting the insides cleaned. quick tickle up Then a coat of whatever rust paint was lying around. Was blowing a gale, can't beat a brush on product sometimes. Engine fuel supply pipe with some meths in it, sloshed it around a bit and left it overnight. Grabbed some pipe cleaners and it's good as now. Getting a new intank filter thing was too hard basket with my time frame, so I gave it a good clean and chucked it back on. Oh yeah and the new hose: While that was being done I went down to CBC in town and they made me a new clutch cable. The old one had been resting on the exhaust so the cover was pretty toast. No pics because I just wanted it installed. But it was a pretty sweet cable. I had it made 50mm shorter than the one I had, as I couldn't route the one in the car without it hitting exhaust and steering. So with the new cable made I made a bracket to hold it clear of everything. Factory they have a bracket, but it's NLA so I had to just guess it. Asked on a FB group dedicated to these cars but no one could be bothered taking a photo for me of how it's run factory, boo. Anyway, the bracket, which is part of a realtor sign I chopped up. Gave it another tweak with the rivnut tool after this photo and got it compressed a bit more, shes solid as fuck. Bolted to the firewall and installed a P-clip on it to hold the cable. Bolted two clips together to keep the clutch and speedo cable apart and keeps it off the fuel line on firewall from filter. No idea how much of this junk is legit, but none of it's under pressure, it's just done to keep things apart so nothing can rub through. Seems legit enough to me, guess i'll find out soon enough when it gets checked. Just need it together for now and worry about the details later. For those that don't frequent the spam tech thread, I asked about bleeding my new master cylinder and went with this solution. Which when installed worked like this. Didn't leak bugger all when being bled, and I just clamped the pipes with vice grips when done so brake fluid didn't go everywhere. So then I bled the rest of the car, gave up doing it by myself and installed someone in the car to pump for me. It was after I had done this, I realised I had fucked up... I pulled the pads out as I was getting a bit of fluid leaking while trying to bleed the nipples myself (no euphemism). So I thought rather than potentially fuck the pads i'll remove them. I'm sure you can work out the rest... thankfully the pistons are long enough for this rookie mistake to not be an issue. They pushed back in fine with a nipple released. Was going to rebleed the whole system again tomorrow anyway with new fluid. But that is a must now as i'll have air in one side of each caliper. No biggie. Next time I'll have brake pad shaped bits of wood to install. Quake safe on axle stands with enough junk underneath to stop it being able to fall on me. Next up will be work out why the dash sits too high to where the windscreen will struggle to fit on one side. Then book in a windscreen install. Then do my own alignment to the point I can get the brakes bed in a bit. Then book proper alignment. Then not sure... i'll worry about that another day, getting close.

- 23 replies
-
- 22
-

-
Not the jacking point is it?
-
Saw this on its way south, didn't recognise the passengers but figured you'd just aged a lot working on this.
-
So much hate in here, I can't even tune a carb, let alone tune an engine with EFI that wasn't setup for it. Go work on your cars, the lot of ya.
-
Nevermind, realised it was a slightly different shape.
-
You got me there.
-
Good success with Amayama too, hit and miss with what is available, but to be expected with ~40 year old cars. Have got some oddball parts in the past. Pretty sure they have to contact other warehouses / suppliers for some items. Rockauto is better in that it's all in one site with no need for that. Amayama is genuine parts though only IME, which is nice. That part shows as not available though, so not much use. I can get one for my car off rockauto, so that's certainly worth a look. It's not worth the nearly $300 at this point though, i'll just use the trip meter for free.
-

Fuel tank cleaning/restoring recommendations Christchurch
Bling replied to 4dori's topic in South Island Region
Yeah got mine back from them today, dropped it off Friday, it stewed over the long weekend with the cleaner. Only had the rust zapped as money running low lol. Came up good though, just need to clear the pipes and give it a lick of paint. Replacing the hoses with Continental stuff from Blackwoods. That's a good price for all that work! Saw it on the bench while I was having a yarn. -
You realise no one is ever going to plate and tag a Wolseley right? Yeah that's why they didn't look too hard. They only do it to desirable cars.
-
Just get good at masking and save the hassle I masked mine up and it came up fine, just spent my time making sure the tape was perfect, and also thin stuff.
-
What did the van do with the seats disconnected?
-
Didn't get to the brakes today, got busy with the "rear end". Anyway, made this as I found my hose stash. Tube is a tight fit and given it shouldn't really be under any pressure due to open end i'm hoping it doesn't leak. Will bleed it in car and just rag underneath it.
-
Fuel tank cleaning/restoring recommendations Christchurch
Bling replied to 4dori's topic in South Island Region
Ah bugger, that's less than ideal. -
Fuel tank cleaning/restoring recommendations Christchurch
Bling replied to 4dori's topic in South Island Region
Got it back yet? Tempted to get mine done, but wondering what it cost / timeframe? -
Also interested to know that one. I've done it many times in the past in cars that are well worn in, never had a problem.
-
I think i'll go with a combo of jizzing fluid all over my bench, then putting it in under vacuum bleed. I still need to fabricate some brackets, but i'm being optimistic at getting the master in tomorrow. Thanks for all the tips gents.
-
Thanks for that, will chuck it in and try with bleeder first. A good plan A, and leaves a plan B as you say. Really don't want brake fluid everywhere as it's a tight spot to try clean up.
-
Haven't started with a dry system before, was just going off what was recommended. Something about having "fun" getting the air out when not bench bled. I have a vacuum bleeder, would that negate the need to bench bleed do you think?
-
Yeah watched a youtube video where they used some kit with fittings and hose to do that. I have bugger all bits lying around to achieve that. Seemed like a good method though as could do it in car. Wonder what pick-a-fart might have. Thanks its on the potential plans list.
-
Bench bleeding a master cylinder, what do I need to have in the ports for it to work? Plastic plugs (not threaded just dust things) that come with the unit or will there be shitloads of pressure when pumping it. Keen to get on to this tomorrow so just seeing if I need to plug it properly or not.
-
Seems safe enough to work with, lol... GHS Classification: H272 May intensify fire; oxidiser. H300 Fatal if swallowed. H310 Fatal in contact with skin. H314 Causes severe skin burns and eye damage. H330 Fatal if inhaled. H334 May cause allergy or asthma symptoms or breathing difficulties if inhaled.
-
Was minimum fee of $50inc
-
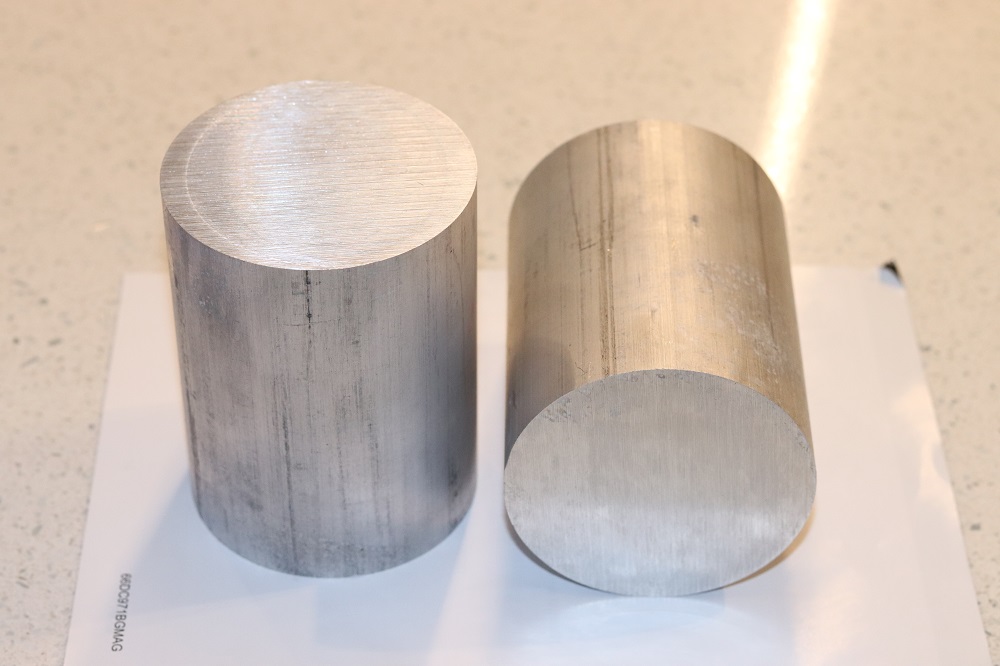
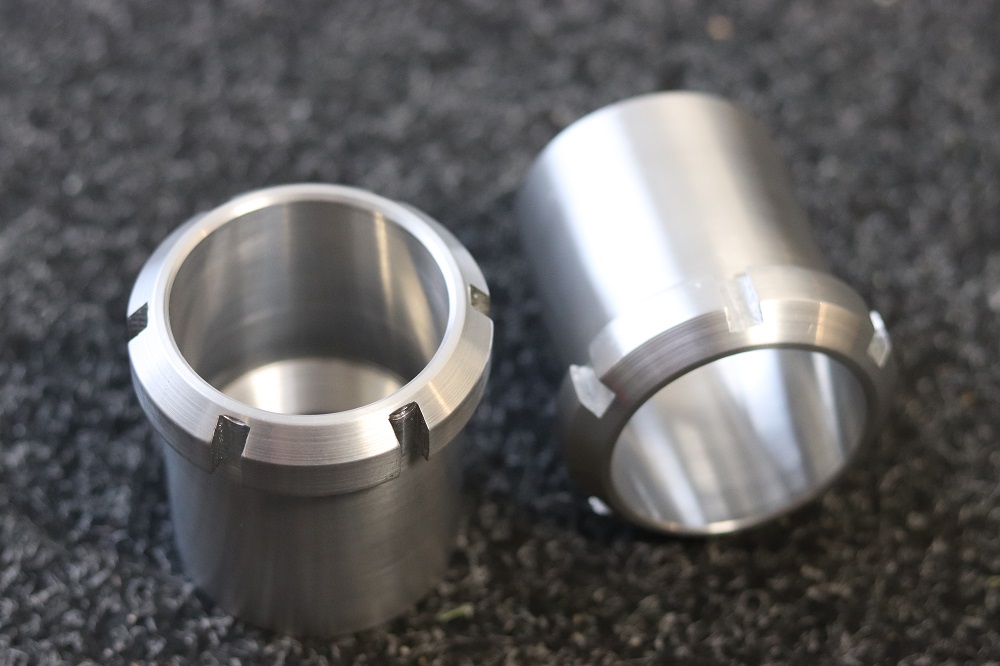
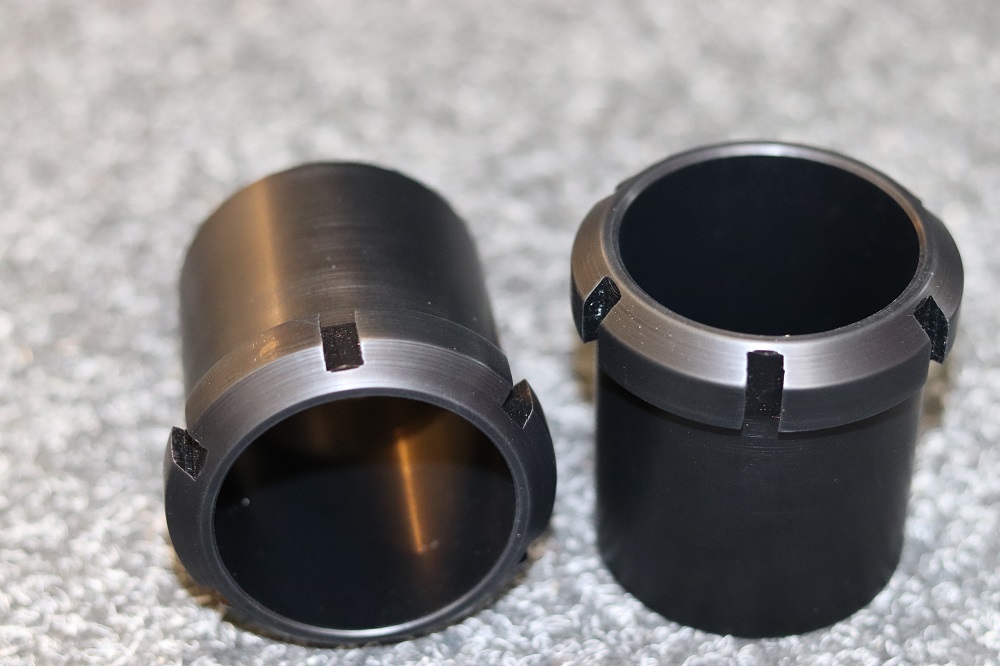
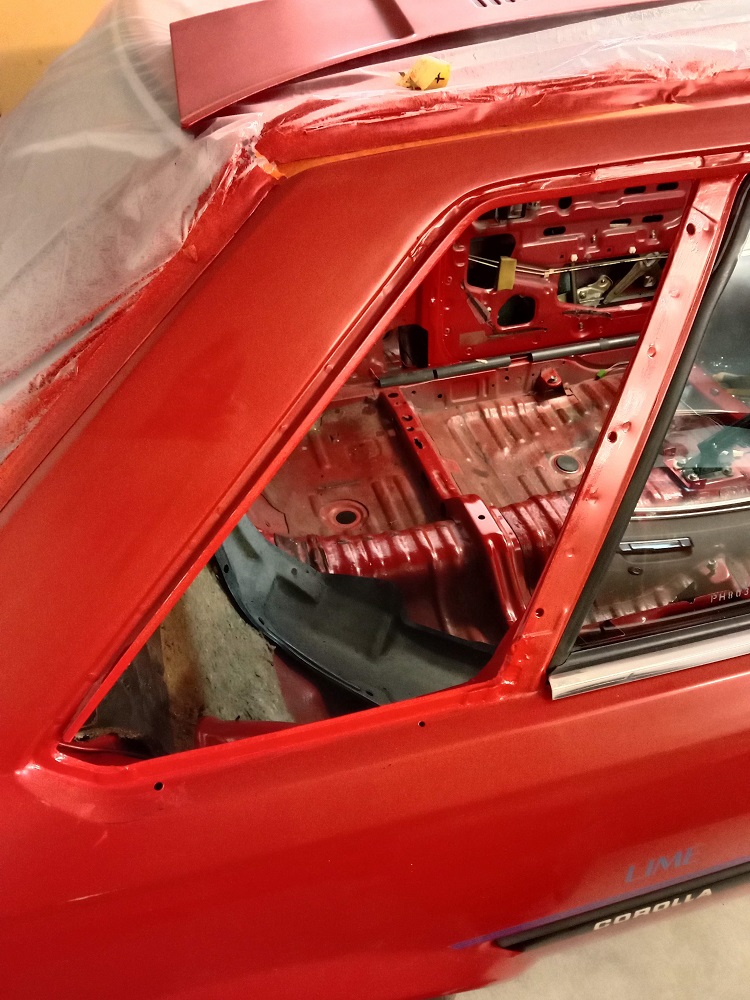
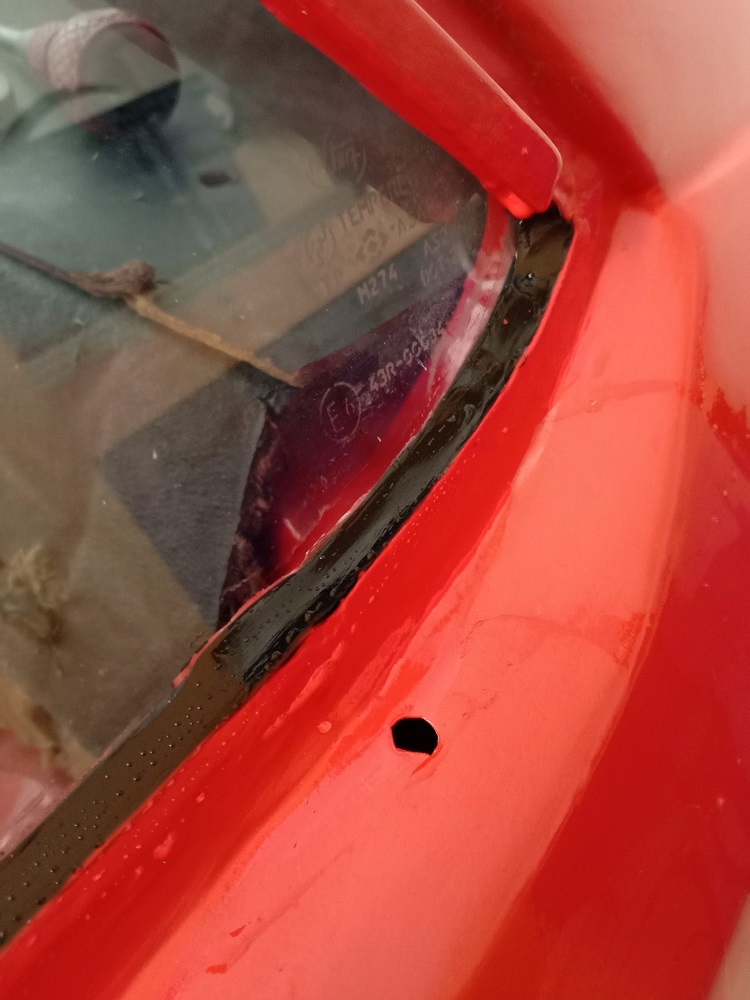
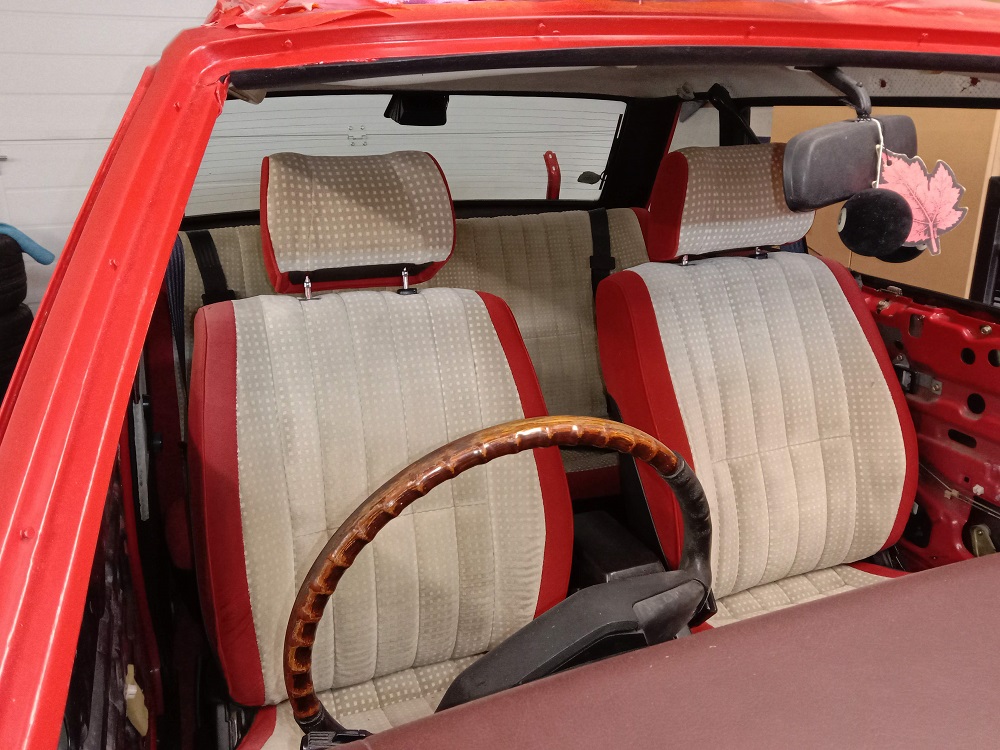
Six months since last update, feels like a year... Spent the last four months with a new member in the family so car time has suffered accordingly. Will keep it brief with a few pics. Have been working my arse off the last week or so to get the car back together. Lots to still do, but I finally have a window of time to get things done, so I have to get it done. Last update ended with lack of clearance between strut and wheel. It was the locking nut to be exact. I spent a long time working out spacer requirements and longer wheel studs needed etc. Problem with spacers is that it shifts the wheel closer to the guard, which I can't afford to do, so I had to come up with another solution. I worked out a design and showed cert man and got the green light. Had a word with Anton @ajg193 and he did a proper drawing of it. He then set about filling his garage with aluminium swarf and made me the parts. I then had them anodised as per @mjrstar's recommendation. The whole design was focused around moving the locking ring further up the strut as due to being angled inward, this would provide the clearance needed without shifting the wheel with spacers. Bottom section has internal thread to match the shock body, Anton did a great job. Installed Gave the rear 1/4 frames another lick of paint or two where the trims will be, to offer a bit more protection. Removed all of the sticky shit off the frame and windows and glued them back in. Then it was time to start putting the interior back in with the new belts. Previous to that though, I spent give or take a day installing all the moving windows in the car, aligning the doors and then adjusting the windows till they operated correctly. I've got them pretty good, but I just don't have the time to get them perfect right now. If they even can be given the seals are all poo and the panels don't line up due to a hit. Happy with the end result though, even if it's not close to waterproof lol. Thursday: Friday Saturday That's where I am at for now. Some up and coming jobs: Install brake master cylinder, make brackets for front hoses, diddle with the handbrake cables, eyecrometer the alignment, organise windscreen install, fit plastics / door cards up front blah blah, too many other things. Thanks for playing.
- 23 replies
-
- 44
-
-

-
I prefer castles so have a split pin assortment in stock. /Ling
-
Thanks for the info. Will stick with the current setup up in that case. If the underside of the parcel tray was flush i'd put in the required plates, but it's not close to being flush so easier option is to just leave as is. If I get time I may template it and see what the seatbelt shop have in stock.