Bling
-
Posts
24,242 -
Joined
-
Last visited
-
Days Won
3
Everything posted by Bling
-
Nice and flat for orbital sander to whip it off. If going chemical make sure it won't react with the cladding which I assume is aluminum.
-
Why shouldn't you be adjusting the height by moving the whole body? Seems like the logical way to me. Spring perch is only useful to setting preload and the likes.
-
If matching existing the code will be pointless really, you should have started with that info lol. As for getting paint made, not terrible expensive no. Pay a bit more for them to fart around mixing the paint to match what you have though. They have to mix it, test it and dry it, change the mix a bit, rinse and repeat. So take them the fuel filler door and see what they say. I don't recall exact pricing, but it wasn't bad. I was just doing small areas so cheapest option for me was to get a tin of paint made, might have been 1L. Then have the put it in some spray cans. Rather than buying the paint in colour matched spray cans. Same result but they said cheaper (at my local anyway) to do it that way. Not a painter, but you'll never get it bang on, so will need to blend it into the other panels if wanting a good job. I didn't care about my car so just painted it without that worry. I still have paint left over for future repairs too. So best value is probably getting more paint made than you need. Then you have the option to get more put into spray cans if going that way. If using a proper sprayer obviously don't have to worry about that step. Oh and my paint was just basic bitch stuff, single stage so not sure on 2k base + clear pricing, but wouldn't surprise me if still reasonable.
-
Maybe try that road first then. They will know what is and isn't in their system. When I got paint made they could use the paint code or match off my car. No point getting it made off the code unless doing a full respray, due to years of fading. No idea what you need it for so that's all I can add really.
-
Any decent automotive paint shop can match off something you have, fuel door etc. Has your local paint shop said they can't knock something up for that colour?
-
I always used sheet that was treated in some form (zinc) as my repairs took months / years. Was mostly new gas fire panels because free. Could sit around in the garage and not deteriorate, unlike my untreated stuff. Can't go too far wrong really, just stay away from galv stuff and remove coatings where you are welding.
-
It's empty at the moment so that won't be helping things, probably less than half a tank of fuel. So half of the problem will probably be gone by the time I add a spare wheel, jack etc, fill the fuel tank (haven't dared yet as no fuel close to home). I do have a sub and was considering putting a floor in it to help secure that. With a lid to get to spare wheel. I'm not too worried about the adding of weight from a performance point of view, because it doesn't have performance. I need to actually source a spare wheel as I don't have one. Other than the Hoshino wheels on it now. I'll do my homework on the droop rules / regs in the meantime. But yeah adding sounds I have sitting here would help the situation, if it came to it.
-
https://www.autorepairsdirect.com.au/blog/differences-between-epoxy-primer-and-self-etch-primer-for-bare-metal Pretty sure this threads consensus is epoxy primer the world.
-
Would probably need an example. But often things bubbling up, started corroding on the other side of the panel. If it's 100% just on the front side of a panel, then what i've done is wirewheel, then metal prep with an acid product to get in the pits, then clean, clean, clean, then epoxy prime.
-
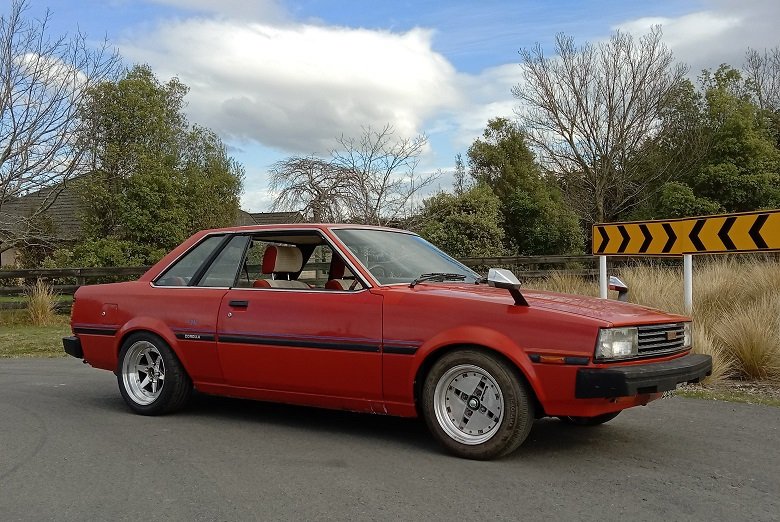
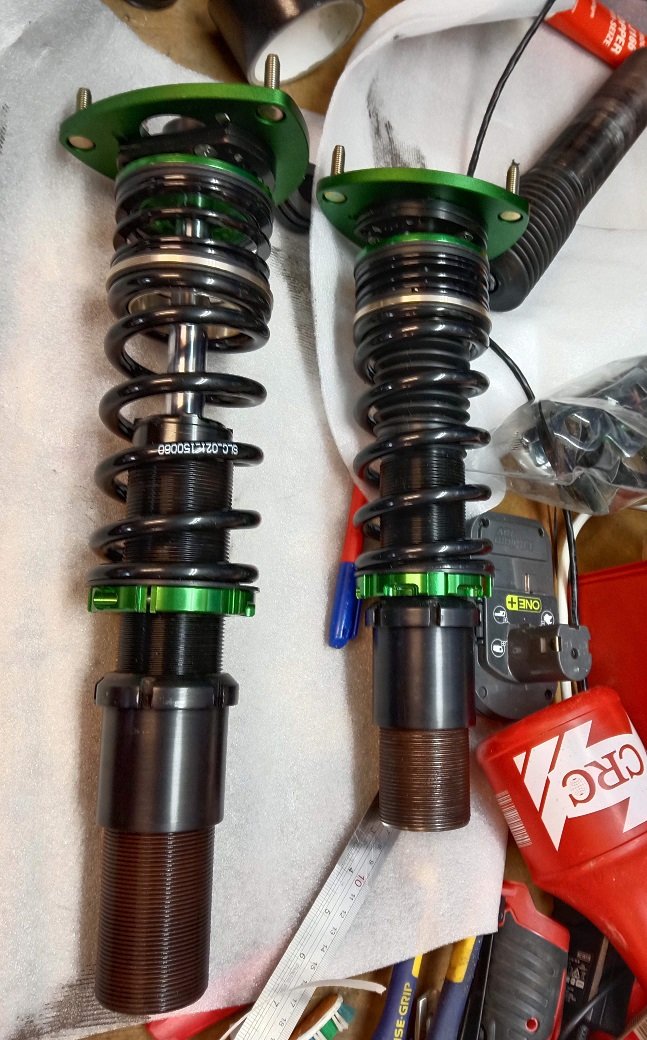
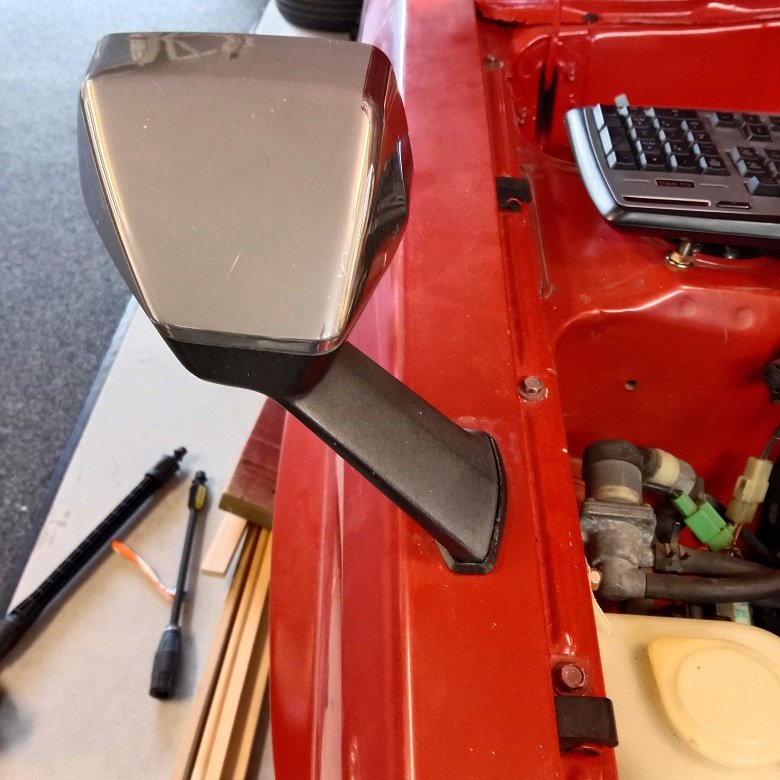
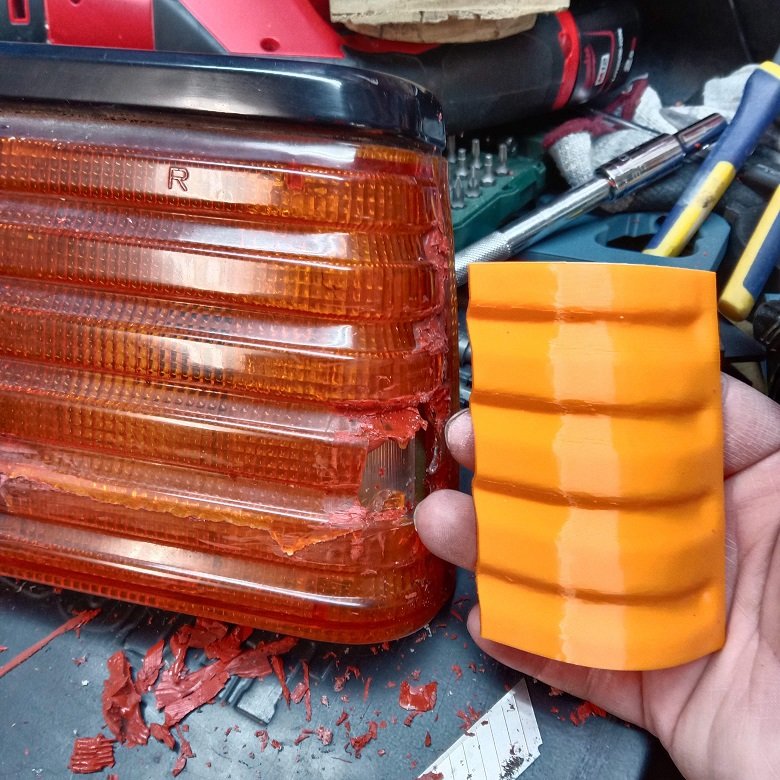
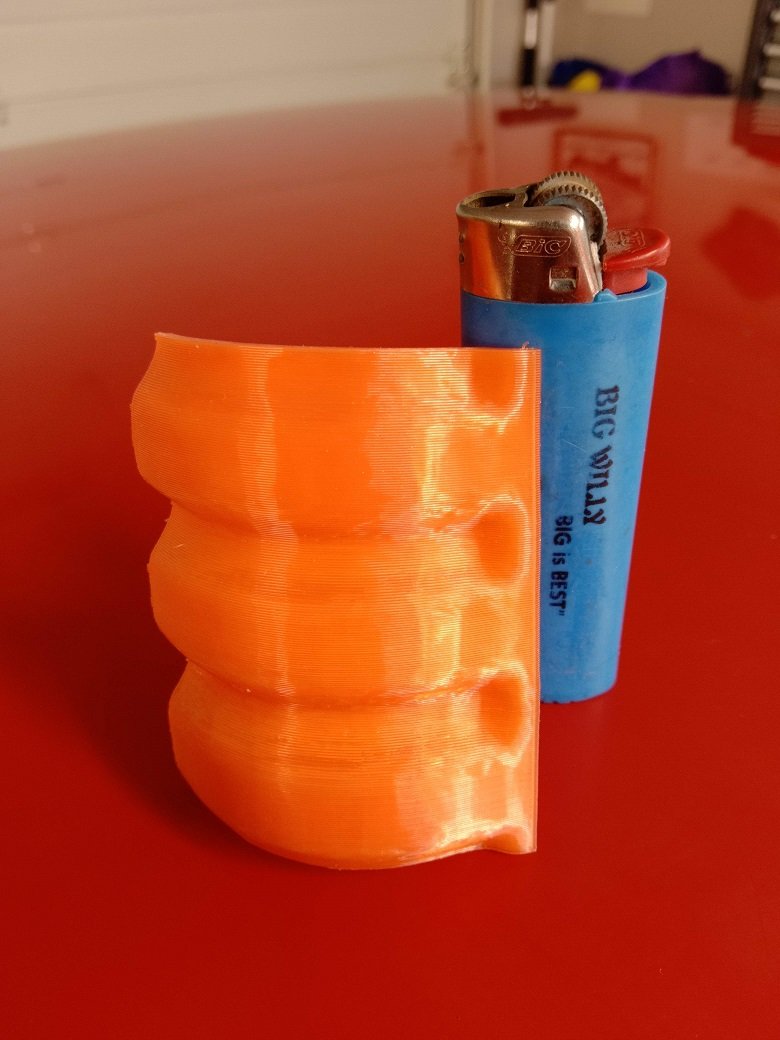
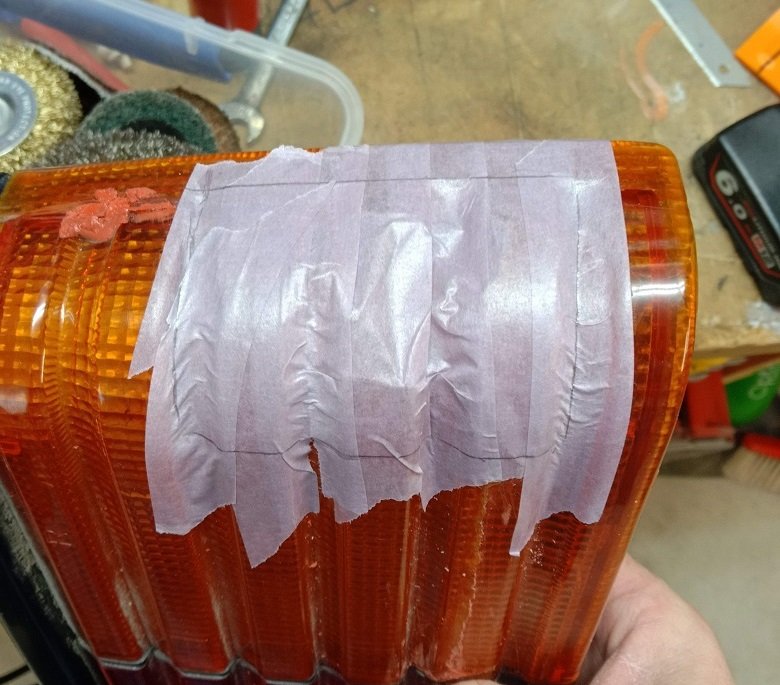
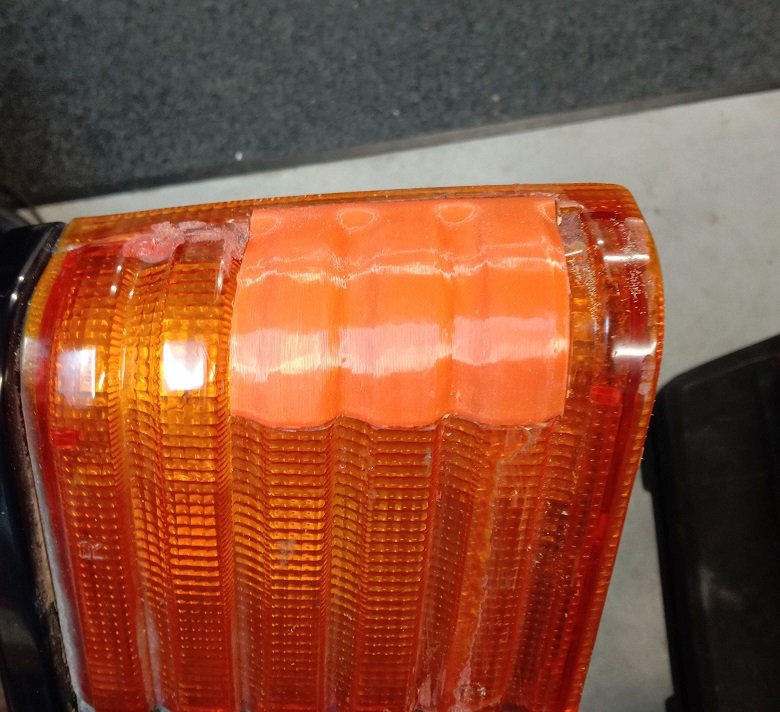
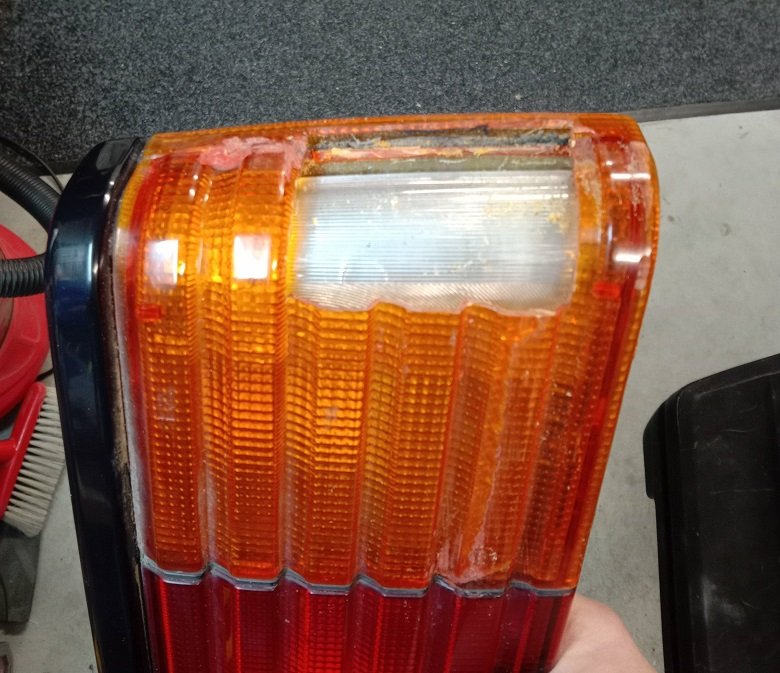
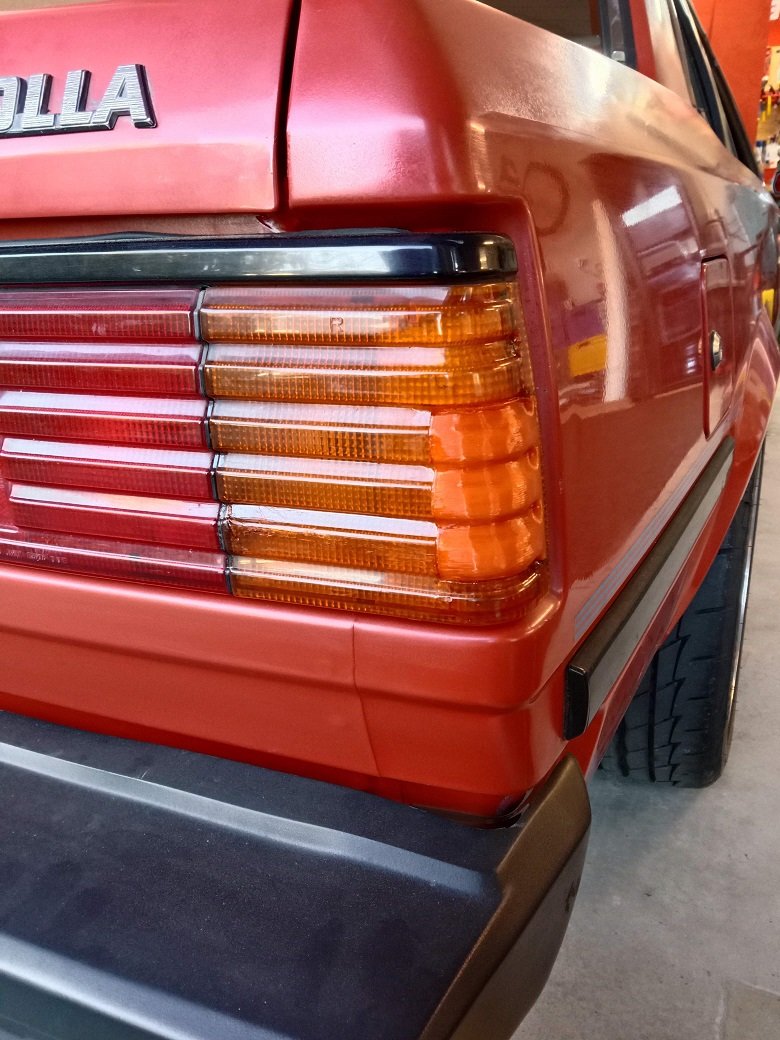
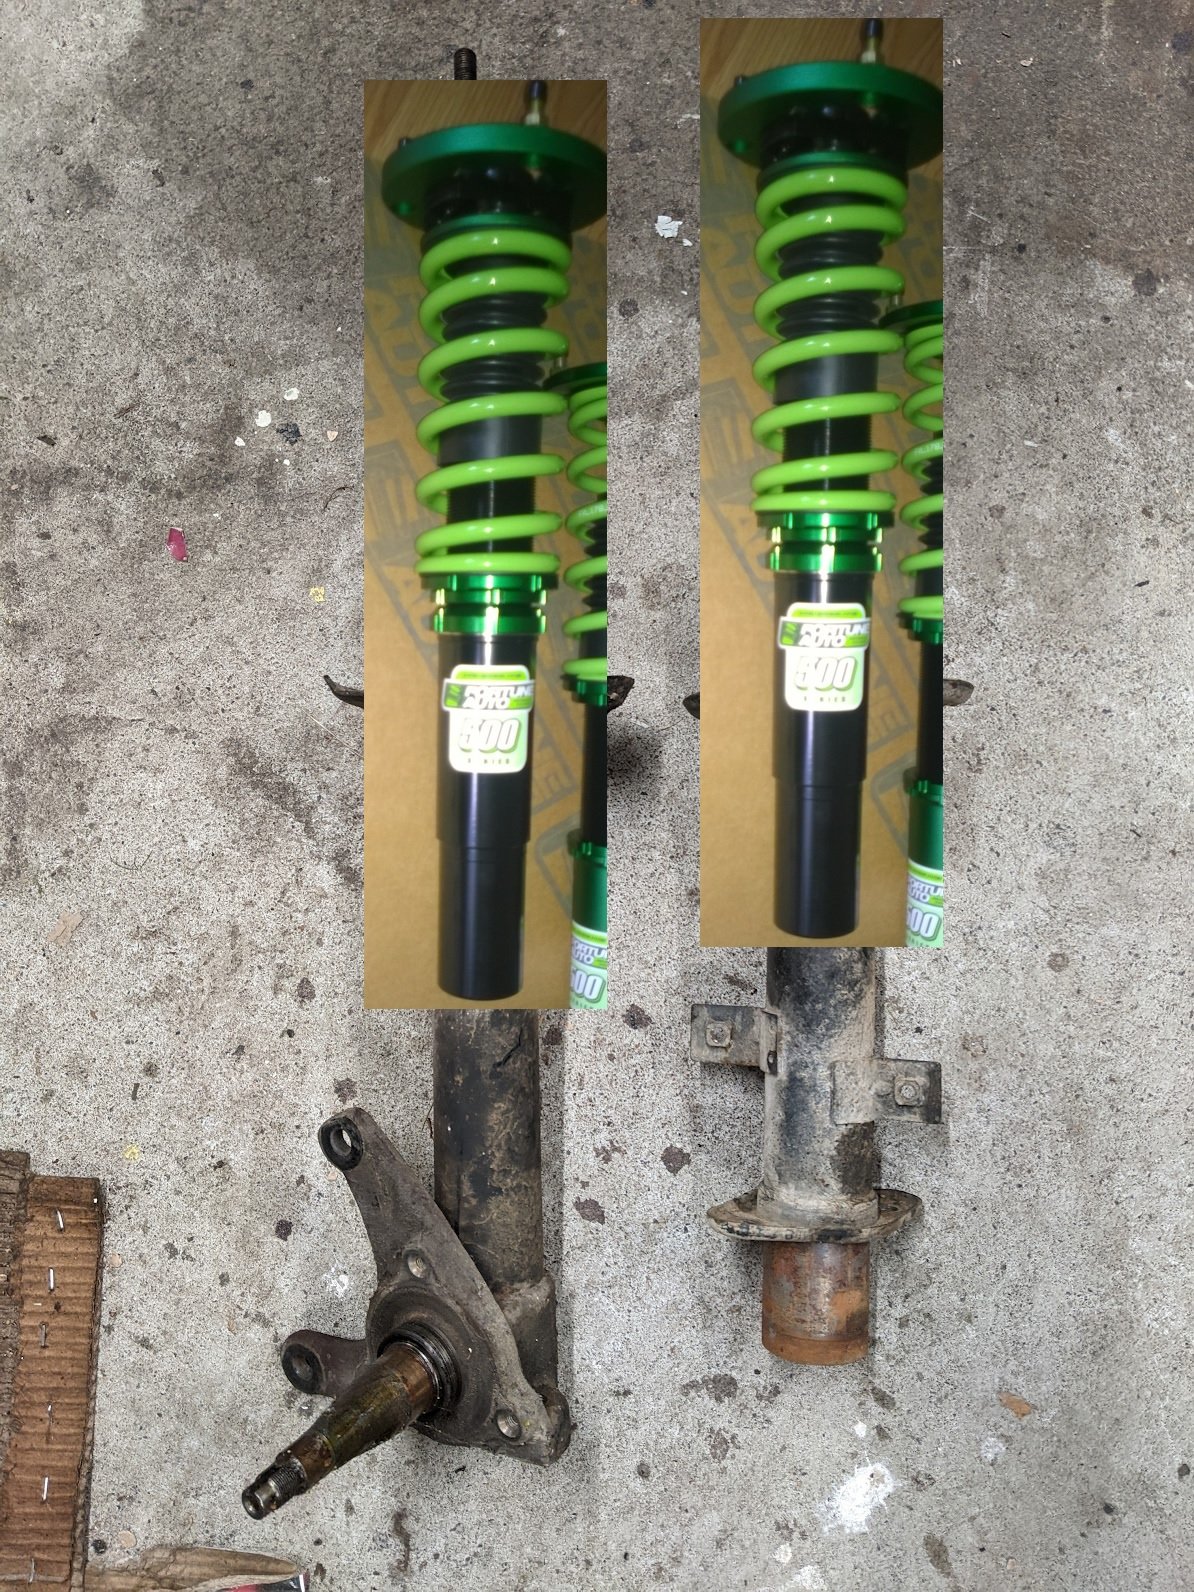
Shit a brick, over a year since last update... So believe it or not, this thing is still progressing. I'll try remember what i've done while I write this update. I have taken it to my local garage to get some jobs done. Jobs I can mostly do, but I want it in for cert this year not next year, so gotta be done. Had the carb checked over with some work done to get things running a bit nicer. It starts easily now and runs fine, just needs a bit more work when coming to a stop. I'll probably fiddle with the idle a bit and see if that sorts the stalling. If not i'll get garage to take another look. I got some longer shocks for the front coilovers as I was sitting a bit low (impossibru). Wanting to keep the fenders factory so that coupled with pretty square tyres on much wider than factory wheels, means they are close to rubbing it too low. So the shock bodies are 50mm longer, which gives me the option to keep it as low as it is now and also lift it 50mm while still having enough of the shock captive in the sleeve on the hub. I also installed some keeper springs up front as I only had 30mm of droop from memory, so now I can have 30mm up to quite a lot. So i'll set it at 40mm potentially for now. But may change that to 50mm if it isn't going change my bump steer enough to cause issue, I have no idea on that stuff. Rear suspension is unchanged, but I still have some work to do in that area as I don't think I have enough droop there. So may need to look into the 1/3 droop rule. There is only so much weight in the rear once you take the diff and wheels out of the equation. And the springs I have were developed specifically for AE86 and are progressive 4.5kg. Worst case would be having Cobra make me some springs of lower rate, but that is last resort as they will not compare to the springs I have ride wise. Can only fill the fuel tank so much, so i'm a bit stuck as to how to add some more weight without it being super obvious that's what i've done. Anyone with ideas around this problem please let me know. Interior is complete now, all belts installed, plastic trims and the likes. Have swapped out the dash cluster as the temperature gauge wasn't working. Asked in spam about diagnosing things and found the sender on the block is working fine, the wiring was fine, which only left the cluster. So i've swapped in another one, thanks Goat for including all of the spares with the car! So I now have a fancy as fuck analog clock and no tacho, but a working temperature gauge, so i'm happy with that for now. Don't have the money to pay someone to fix the other one at the moment, but i'm sure it's something I can swap back later. So now I have a working gauge I could see that the engine seemed to be staying cool enough. I'm not 100% convinced the thermostat is working correctly. So I may swap that out when I have a bit more motivation, just to be sure. So that's where it is for now, fine tuning the running of it, then i'll book cert and alignment. Still haven't set the final height yet, but that will happen. Excuse the wall of text, there will be lots of missed, but no point making the wall longer, so here are some pics. Fred for discussion etc Oh yeah forgot I 3D printed a few bits for the car, very rough and ready, but I have a better 3D scanner now so plan to make some better parts when time allows. Longer shock body comparison Printed bases for my mirrors, only have one good one with car so 3d scanned it and mirrored for other side. Came out ok, but will improve on it when I have time. Had a taillight to fix as well. Replacement lights are just not a thing here. I spent a very long time watching Japan auctions but any I found went for (to me) silly money. Think the last pair was north of $500. So I printed my own repair as I don't care what it looks like, so long as it's functional. Before: Printed a test section out of plain orange filament I already had. This was after scanning the taillight on my other Corolla. I could have just as easily scanned the passenger taillight of this car which isn't damaged and mirrored it. But since I had a drivers side to scan, I did that instead. Didn't take too much work to turn it from a scan into a printable object. Print new piece out of transparent orange filament. Trimmed the original print down till it just covered the damage, before printing the final version below. Sitting in place Glued in place and painted over the whole thing a few time with transparent modelling paint. Got it closer to original shade and tinted all the clear glue I had used to fill the gaps. It's no piece of art, but it sure beats the before version.

- 23 replies
-
- 23
-

-
I used to do batch work, so would cut a bunch of rust out, then spend the time making all the panels to replace it. Then paint as above. Saved getting all the tools out each time I was doing the next repair. I don't have the space to spray so I used to just make up a mixing pot of epoxy primer and brush it over all the repairs. Bad memory meant I had a list of repair locations written down , so whenever I had some primer mixed up i'd give them all their next coat. Areas inside often got 3-4 coats as if I mixed up too much primer.
-
Used to use a cheap aliexpress one at work, seemed reliable and accurate enough. Will be the same as above, there will be a million of the same thing on ali.
-
I just have screw on ones on the project as it's what I had in the garage. If the pressure in the system is enough to blow those off I probably have bigger problems. That's my theory anyway. The other car still has all of these on it:
-

Tomble's 1983 Starion GSR-X fumbling / hand-holding / discussion
Bling replied to tomble's topic in Project Discussion
Ah right, carry on then lol. Those rear setups look good. Keep us posted anyway. -
Tomble's 1983 Mitsubishi Starion GSR-X fumbling
Bling replied to tomble's topic in Projects and Build Ups
NaN Admin delete please, posted in wrong fred. -
Good end result
-
Just don't forget to count the engine on hours, that is the main thing to look for remember. Check the gloveboxes for Barries 3B1 book with all that data recorded.
-
Yeah obviously engine hours matter. I regret even suggesting now that higher mileage equals higher wear. Thus why lower mileage cars are worth more as a rule. Which was not considered in the post I quoted. It's being nit picked to death. As you were chaps.
-
I think you'll find the engine has in fact travelled just as far as the rest of the car. Unless it has been replaced. As for the traffic comment, bit pointless since we don't know either cars driving habits over it's life. A service history at least lets you know how well it's been maintained. I wasn't referring to specifically engine wear, but car wear in general.
-
I don't think you understand how mileage works. Cars that are driven wear down over time. One that has done more miles is likely to be more worn. Thus, one with less wear is worth more money in general. As for picking between, how much is 3k in relation to car cost? I'm assuming they aren't costing much so 3k could be a bit steep. That said, service history if any would sway me given the choice. I'd also be checking if the 2015 got any cool features the 2012 didn't etc. I paid more for a facelift model (not swift) as the changes made, made it a worthwhile extra expense.
-
Who is going to replace then engine? Would think mechanics would have decent networks for engines. (I only say this as when I had one rebuilt they sourced all sorts of 2nd hand bits for it) A bunch on trademe but to keep it simple you'd probably want to go for one from same chassis. You haven't said it's a hybrid so that should narrow it down a bit. 2az come in many models so as mentioned above should be a few around. https://www.trademe.co.nz/a/motors/car-parts-accessories/toyota/engines/listing/3722217987?bof=sylVzUUc Getting up there price wise + shipping, but could be same chassis. Bit hard to know with no info though.
-
Just bookmarked that site funnily enough. Looks like you can pay with CC so not too much risk really. I'd lean towards legit till proven otherwise. Can ship a bit for $10 if using the right company. What are you after?
-
How I see it: Maybe i'm missing a trick if no one wants to take your money to sort the rears though...
-
Well I feel like you could get a sleeve welded on the rears the same as front. If Fortune Auto (MRP I assume?) can't get sleeves to fit the rear struts you could potentially (i'm not a certifier, just a spitballer) get sleeves made from the right material and get them welded on appropriately. Then put in the same threaded shocks design wise as front. Should be certifiable in my mind as it's the same thing as front, just a bit more work. Since it's already a coilover type suspension in the rear, might just all bolt in and job done. Just have the top mounting point left to sort out. Not sure if that's a top hat in those cars, but assume it is. Pick spring rates and have the shocks built to suit that. I've had custom parts made to work with my Fortune Auto coilovers. Just have to have local certifier onboard with your plans from the start to save problems later. If going low, with IRS, keeping it within the tolerances of factory camber may be fun?
-
How much you wanting to spend as well? I'm sure you could coilover the rear as well, but you may need to get the bottom section of the coilover machined up to suit the strut. Rear looks a bit larger diameter? It won't be a cheap option, so you'd have to be happy to bleed money to get it done. The above idea with Autolign would be my first port of call. It's a slippery slope once you go coilovers. Cletus does the certs for a living so will know the best options.